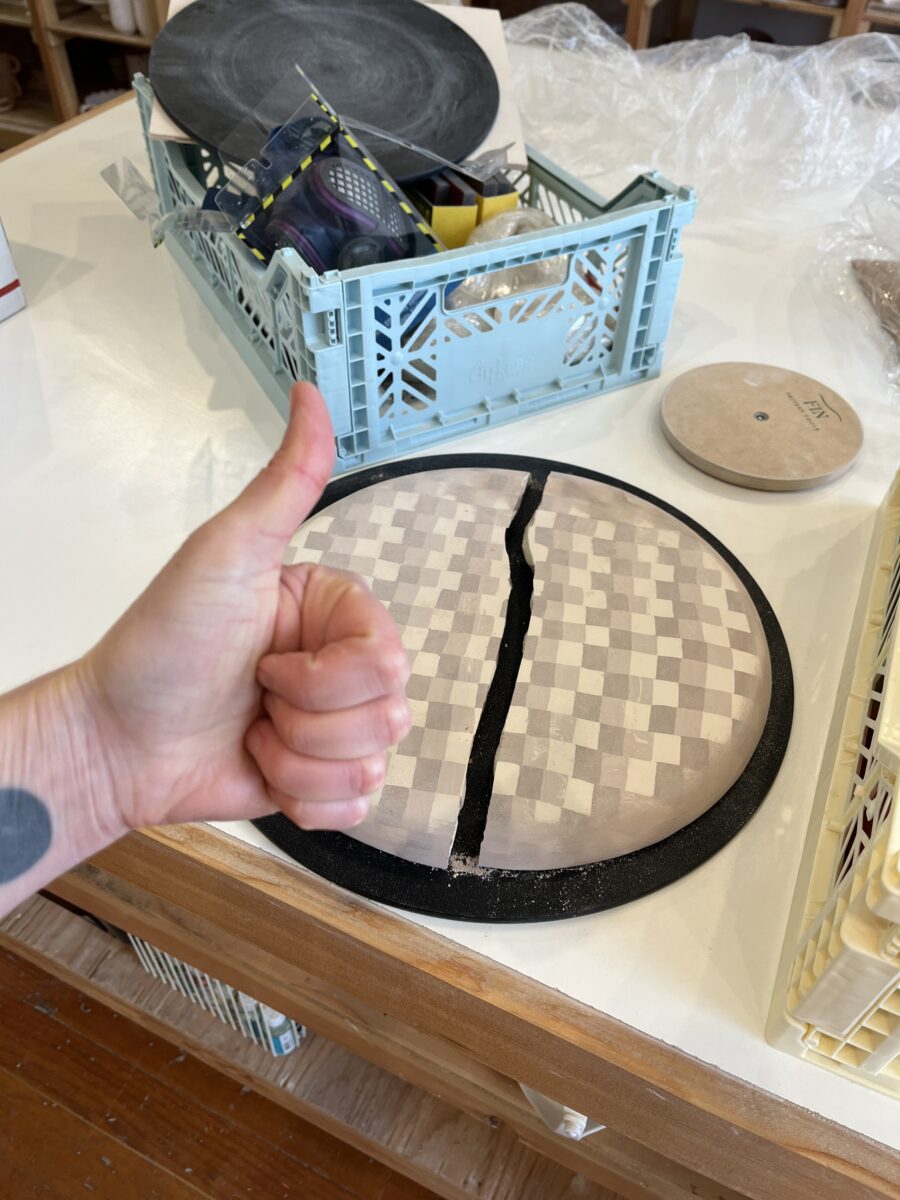
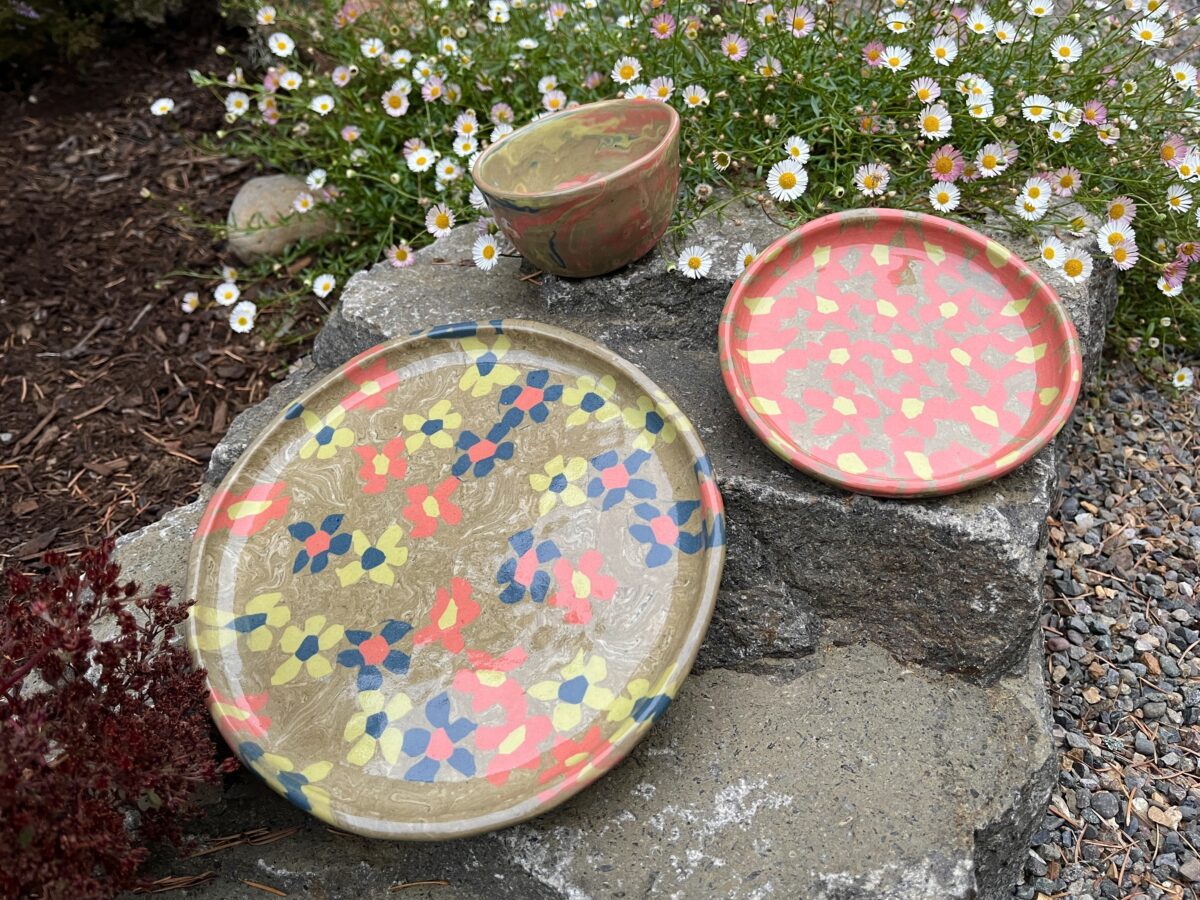
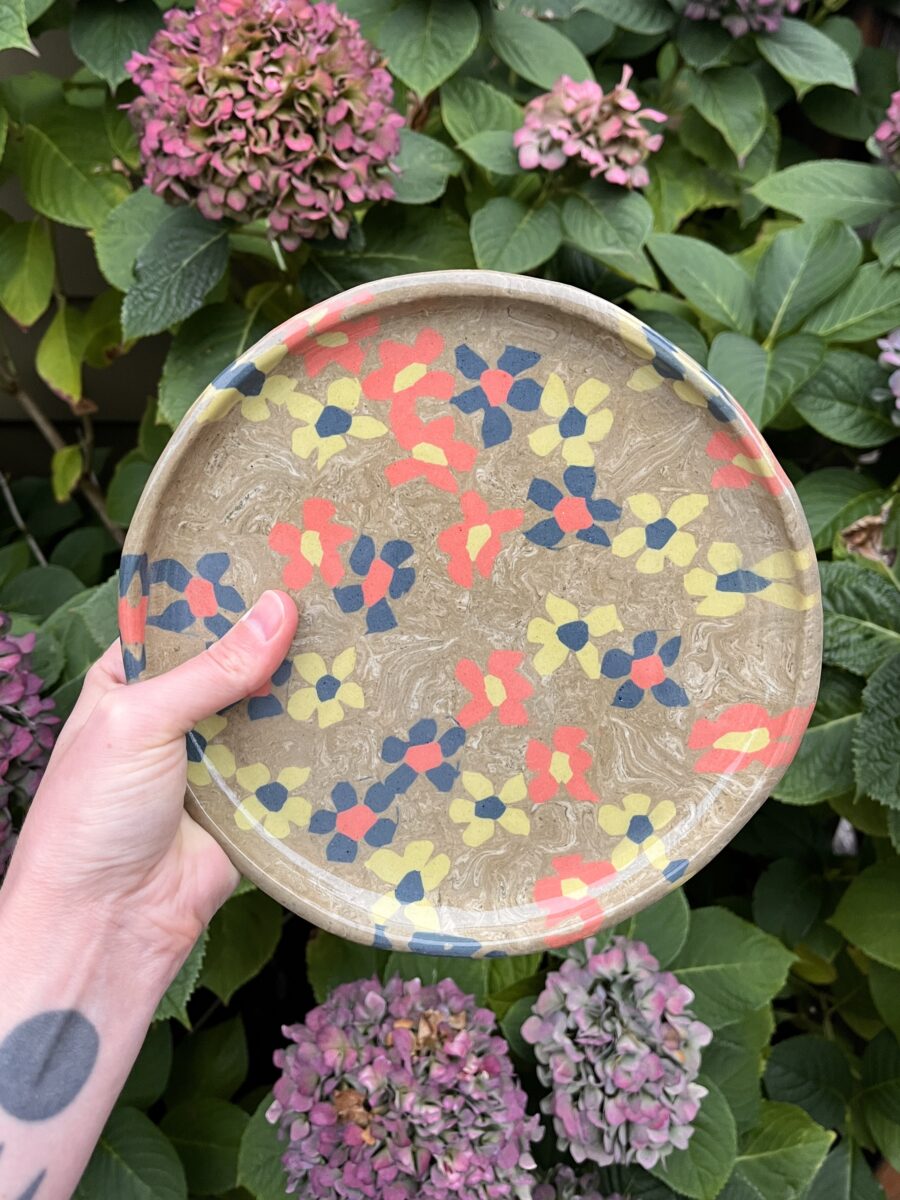
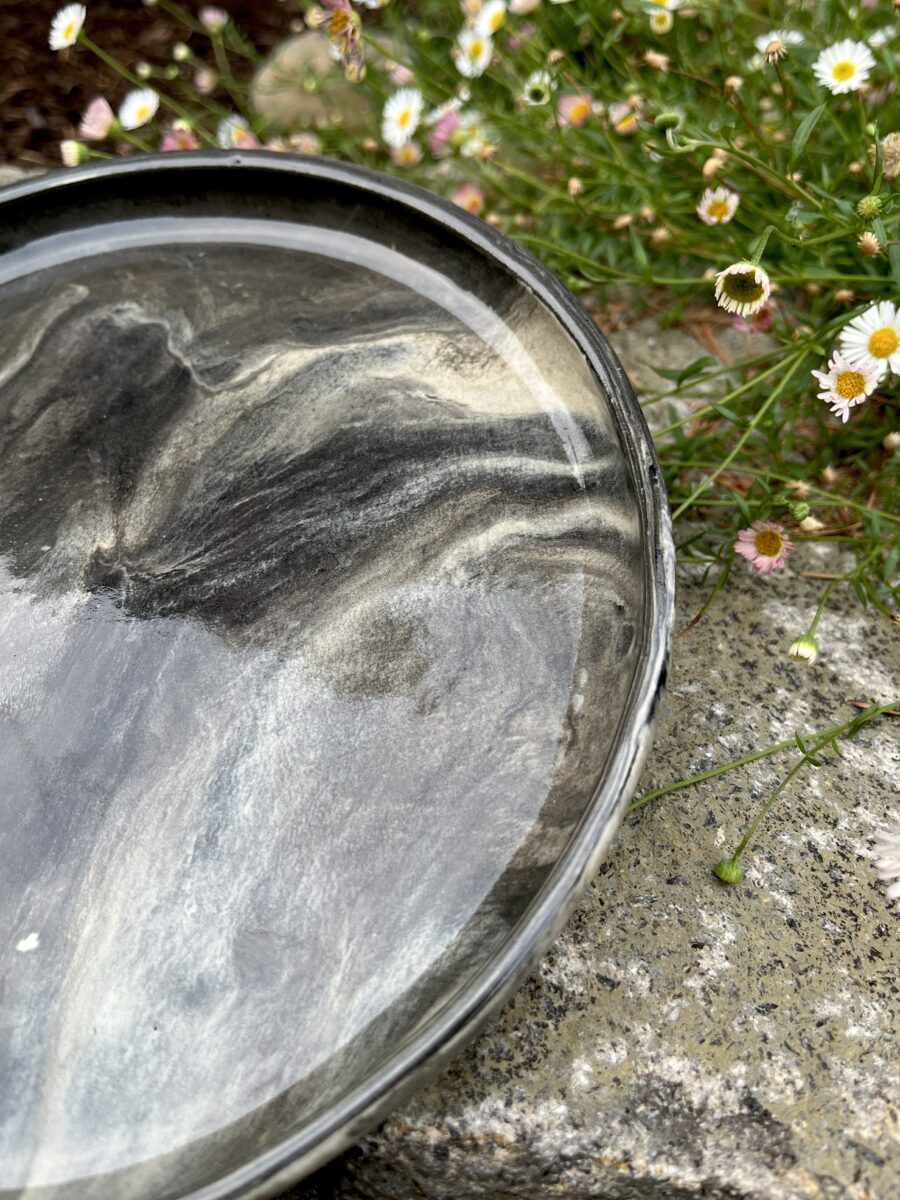
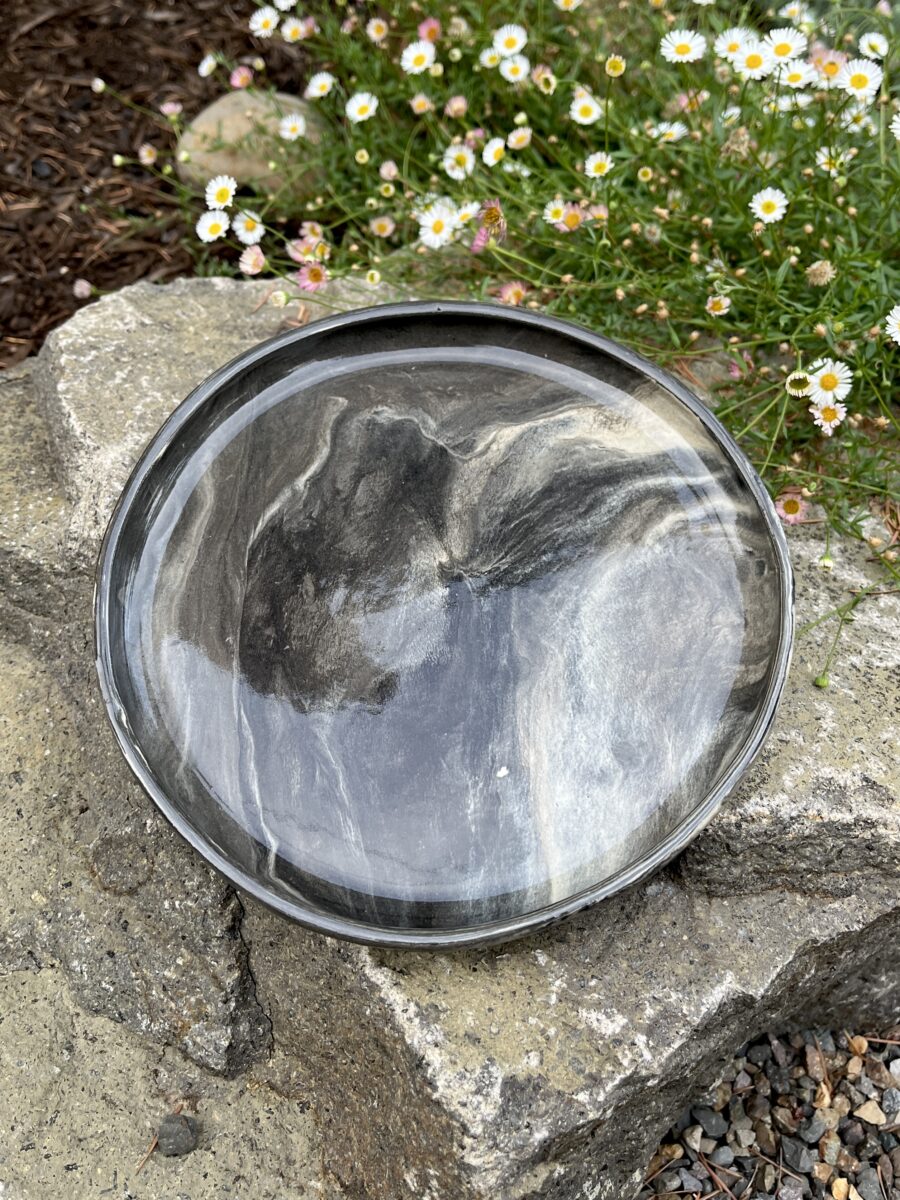
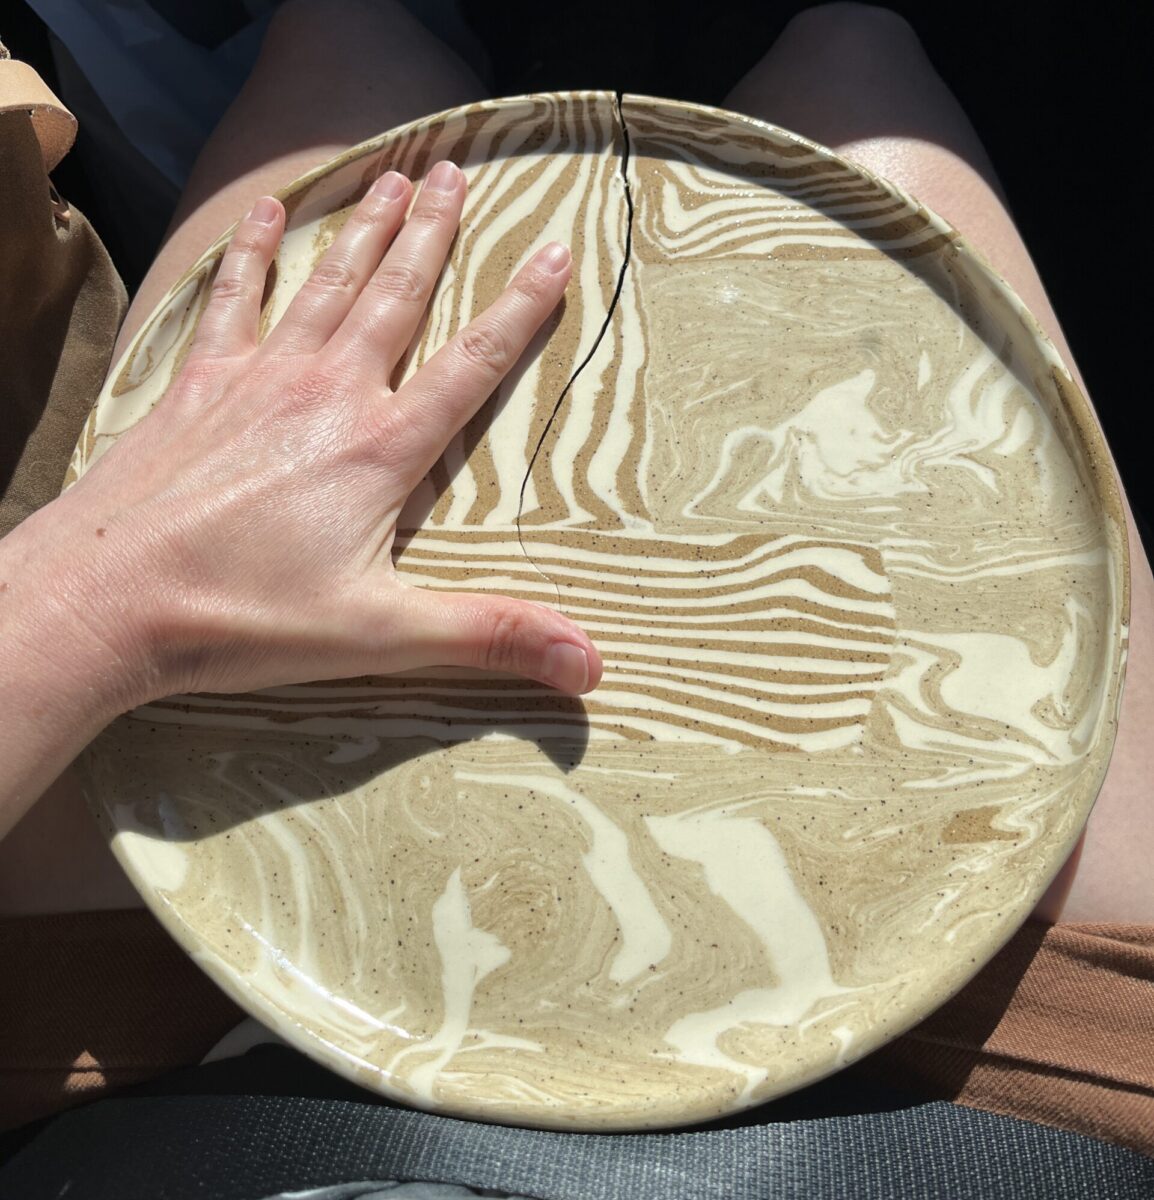
After posting yesterday, I went to the studio and almost immediately broke this plate. I’m 1 for 3 big nerikomi plates, so I think I’m done trying to makes these happen for a while.


Documenting my sewing, knitting, ceramics, etc.
After posting yesterday, I went to the studio and almost immediately broke this plate. I’m 1 for 3 big nerikomi plates, so I think I’m done trying to makes these happen for a while.
How is November already over? Anyway, here’s some stuff I’ve been making.
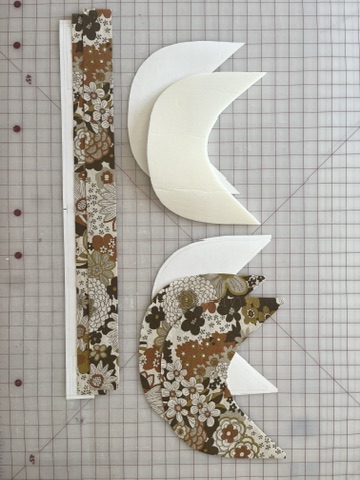
I started the Lakes Cardigan a couple weeks ago and it’s knitting up pretty quickly. I’m making a size M (the size I always make for Ozetta patterns) and using Noro Madera yarn in the color Shogi #30. Here’s the yellow Lakes Pullover I made in 2023.
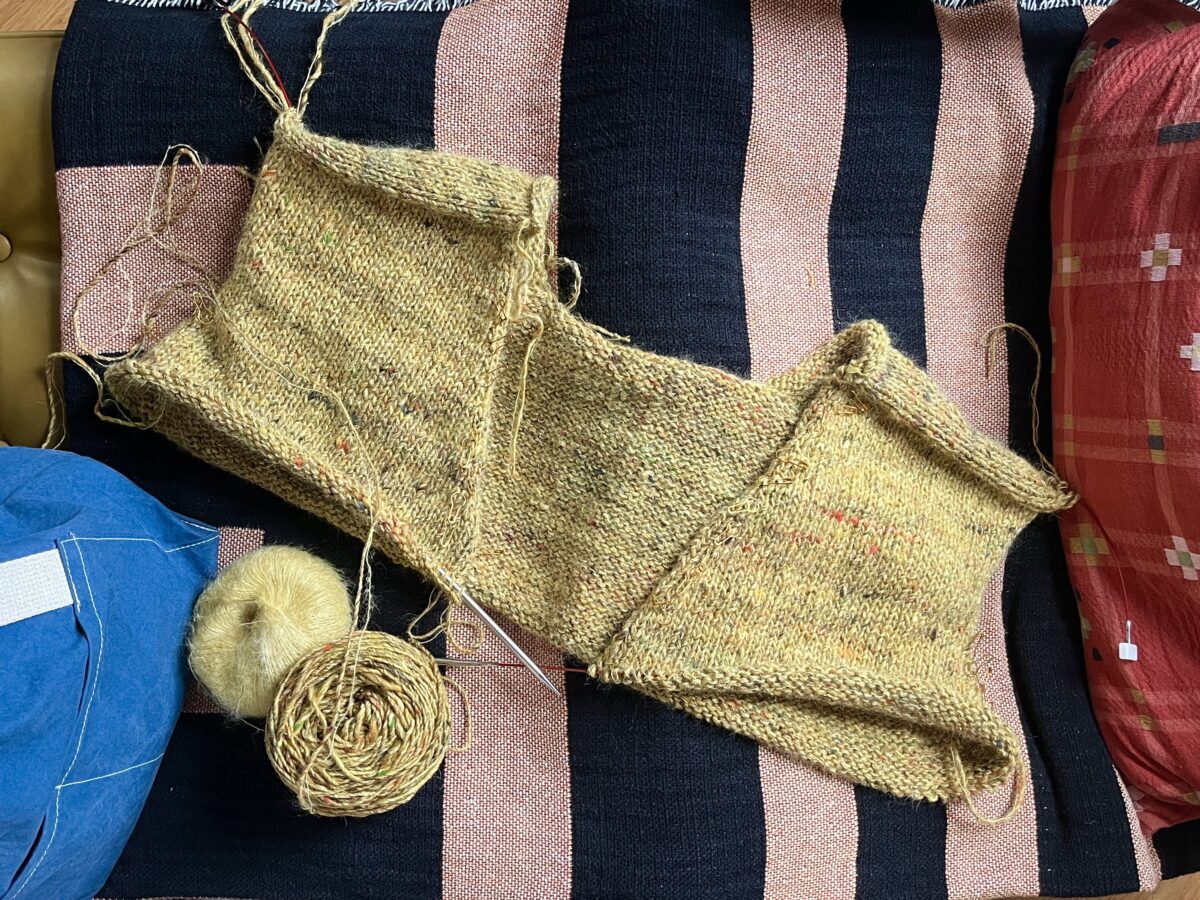
Initially I planned to use leftover mohair from this sweater, which created an interesting marled effect, but it really muddied the yellow. I then thought about not using mohair at all, but ultimately decided to since my last Noro Madera project didn’t.
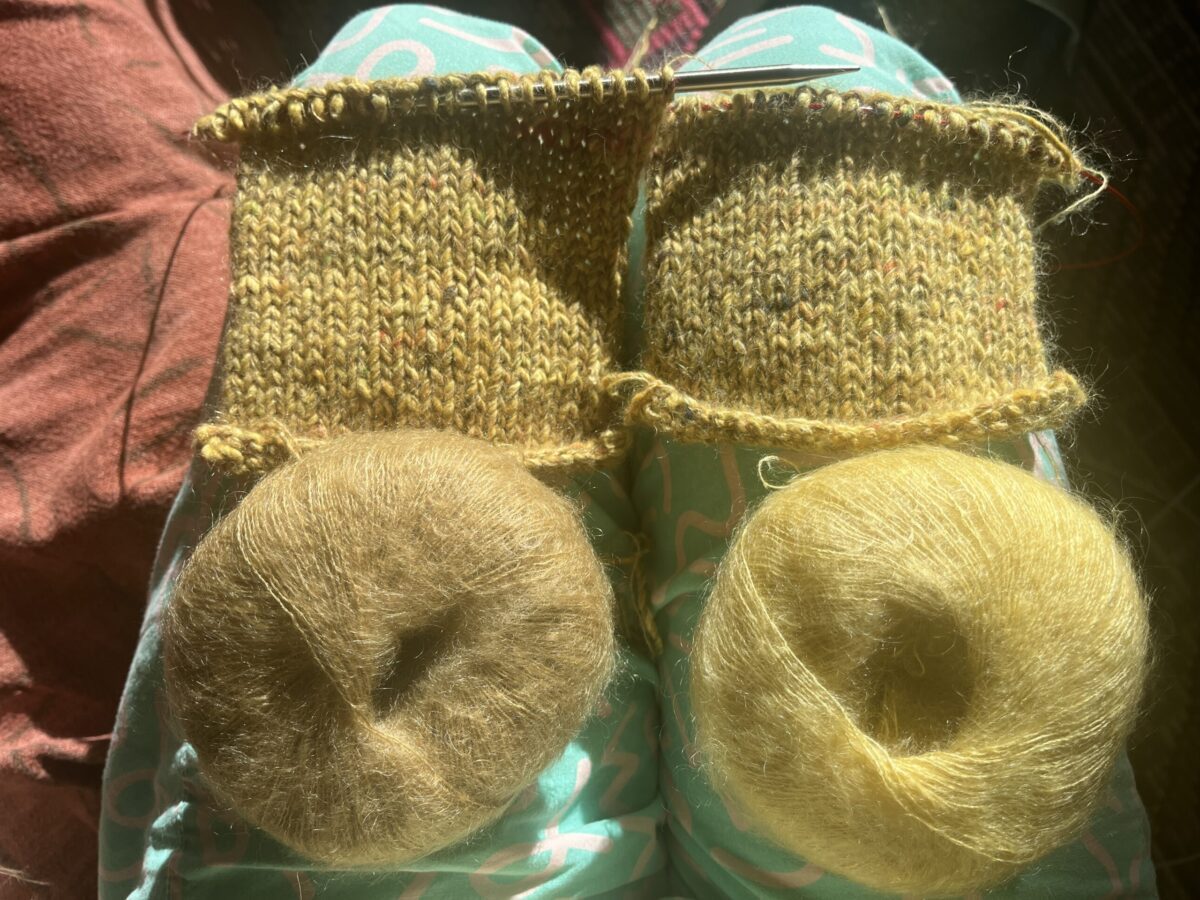
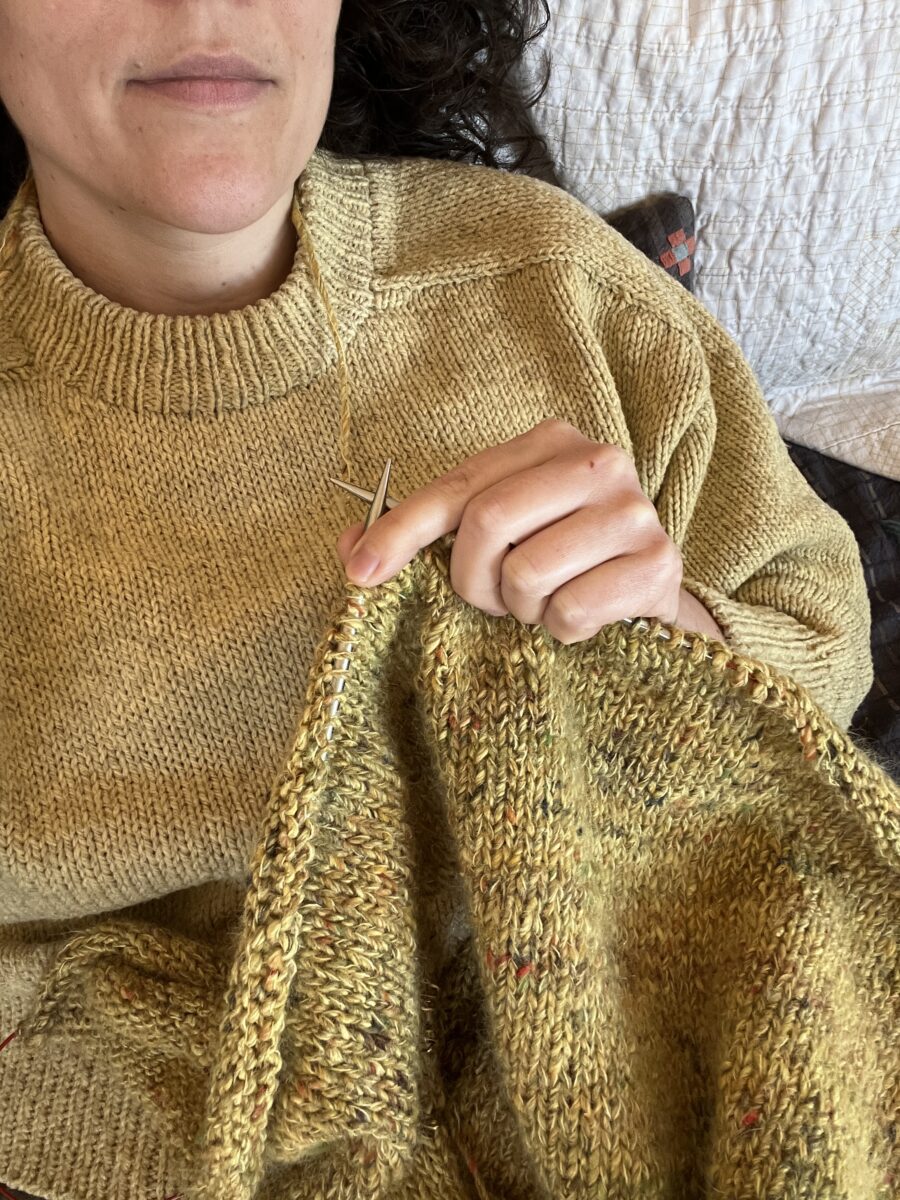
So I ordered two skeins of Knitting For Olive soft silk mohair – one in ‘dusty honey’ and my wildcard color ‘quince’. I ended up going with quince, even though the swatches looked almost identical. I made so many swatches, yet didn’t block a single one ¯\_(ツ)_/¯
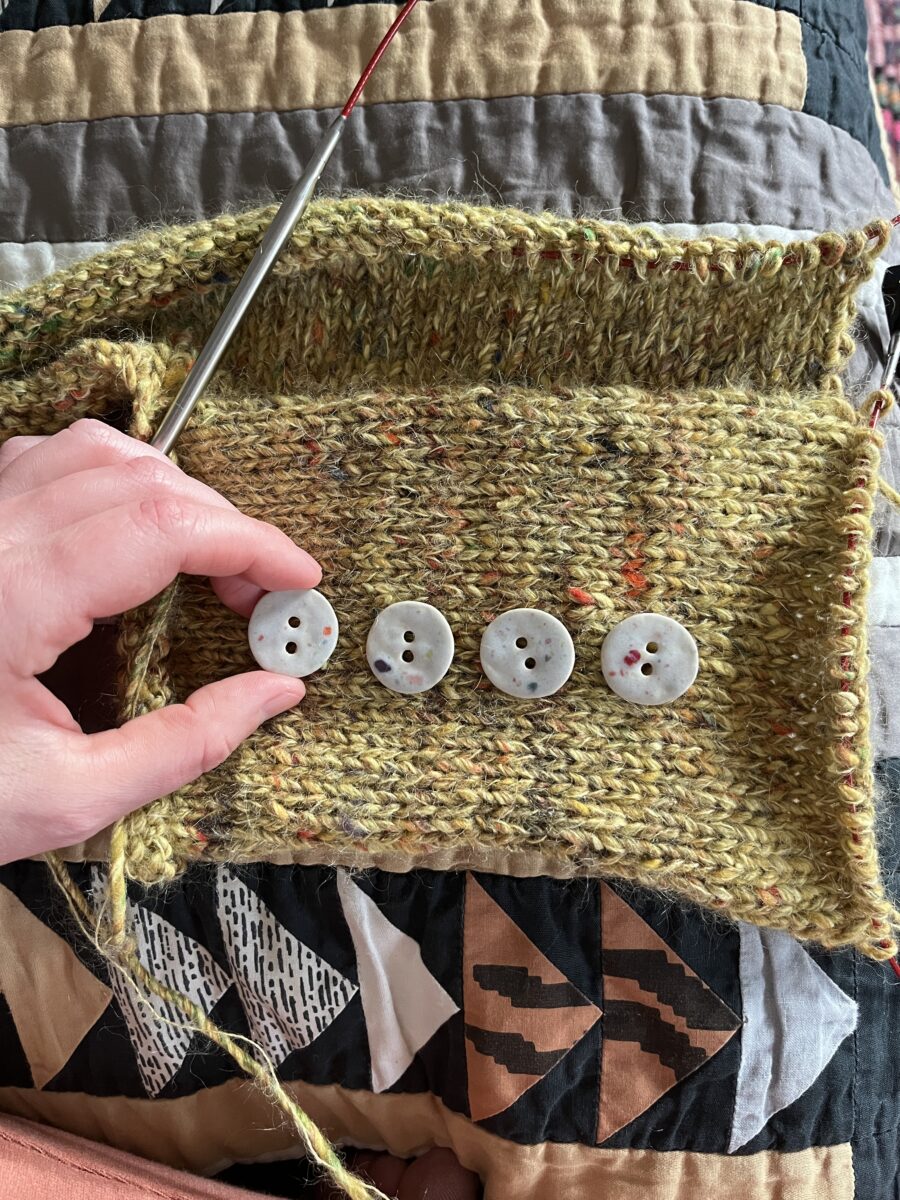
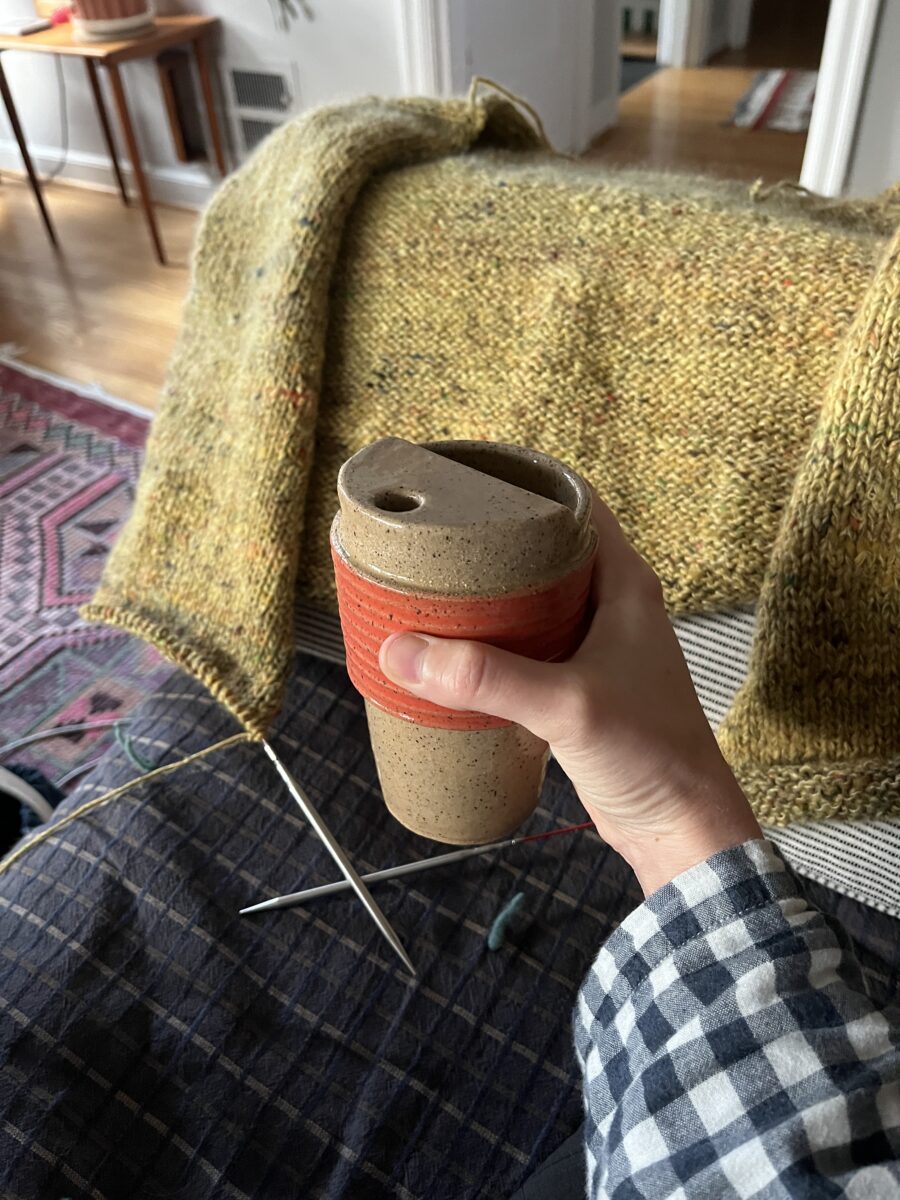
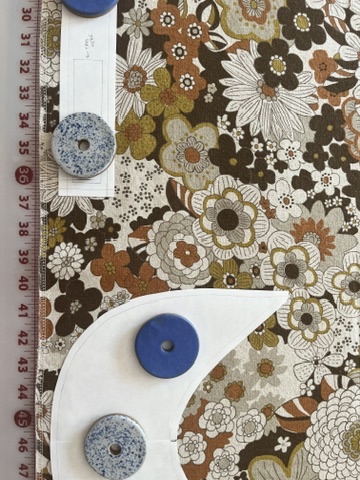
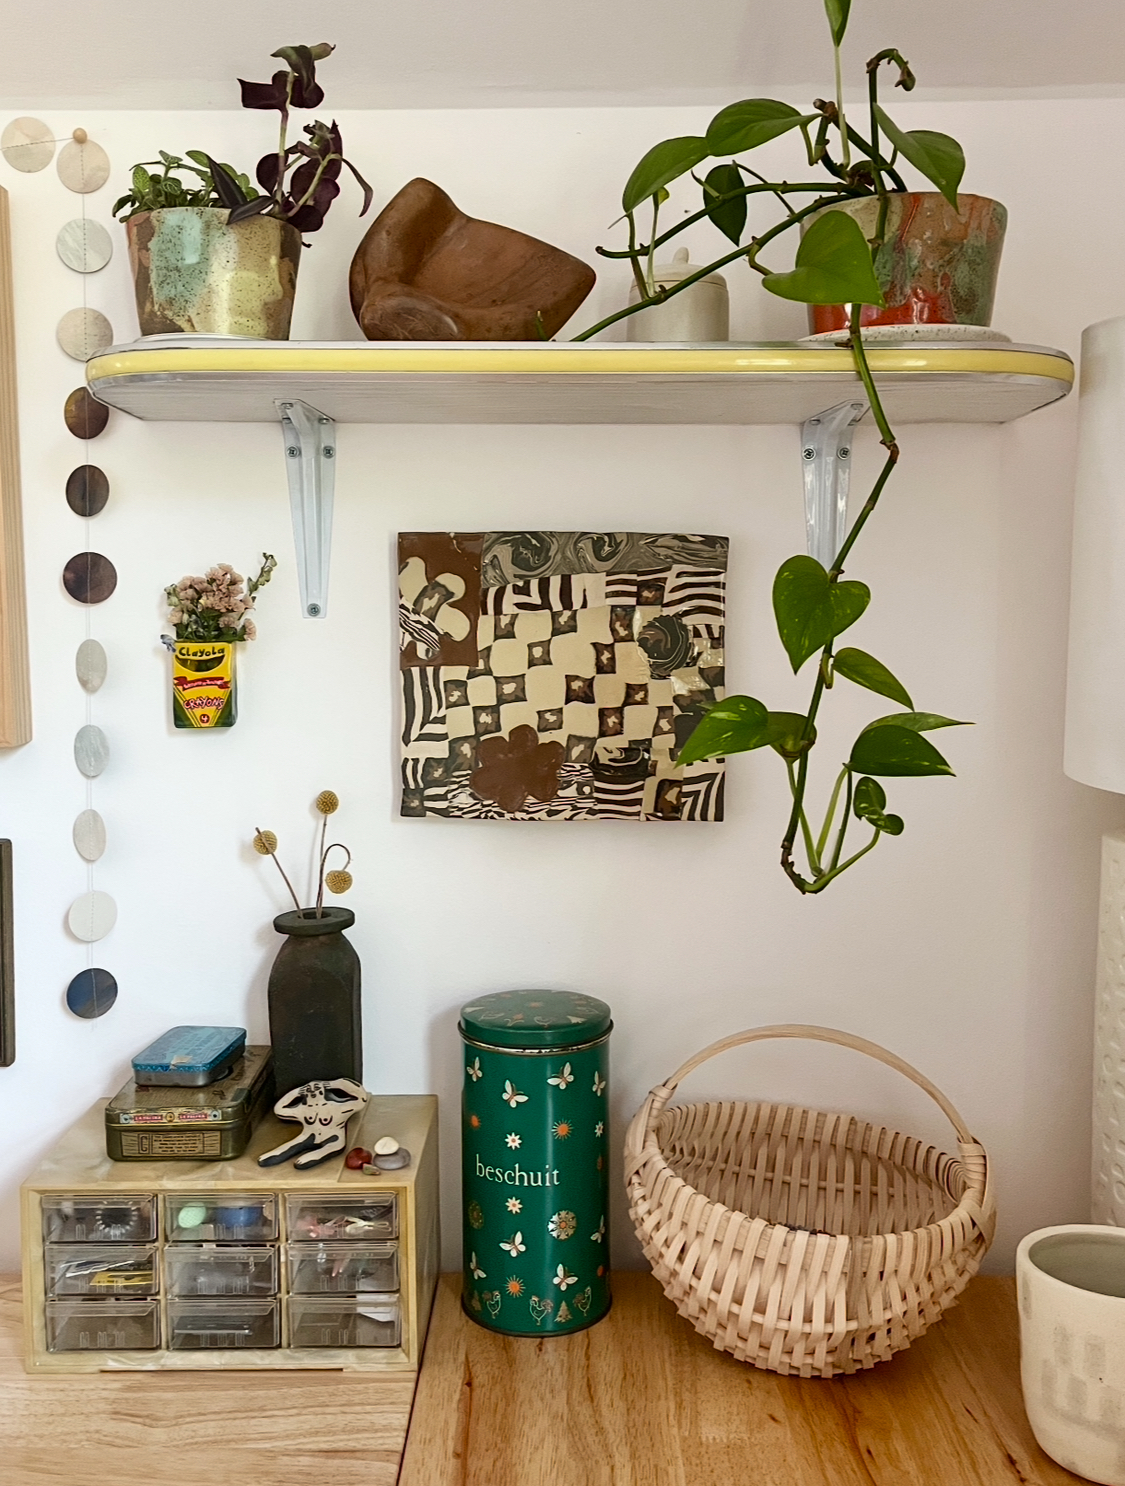
I planned to use these ceramic buttons on another cardigan, but they look so good with this yarn! They’re made by my studio buddy, Animated Earth. Also my travel mugs made it through the glaze firing! I’m keeping this ‘pumpkin’ one, gifting the ‘blue jeans’ one, and trashing the one I accidentally glazed with a non-food safe glaze. I’m excited to make more.
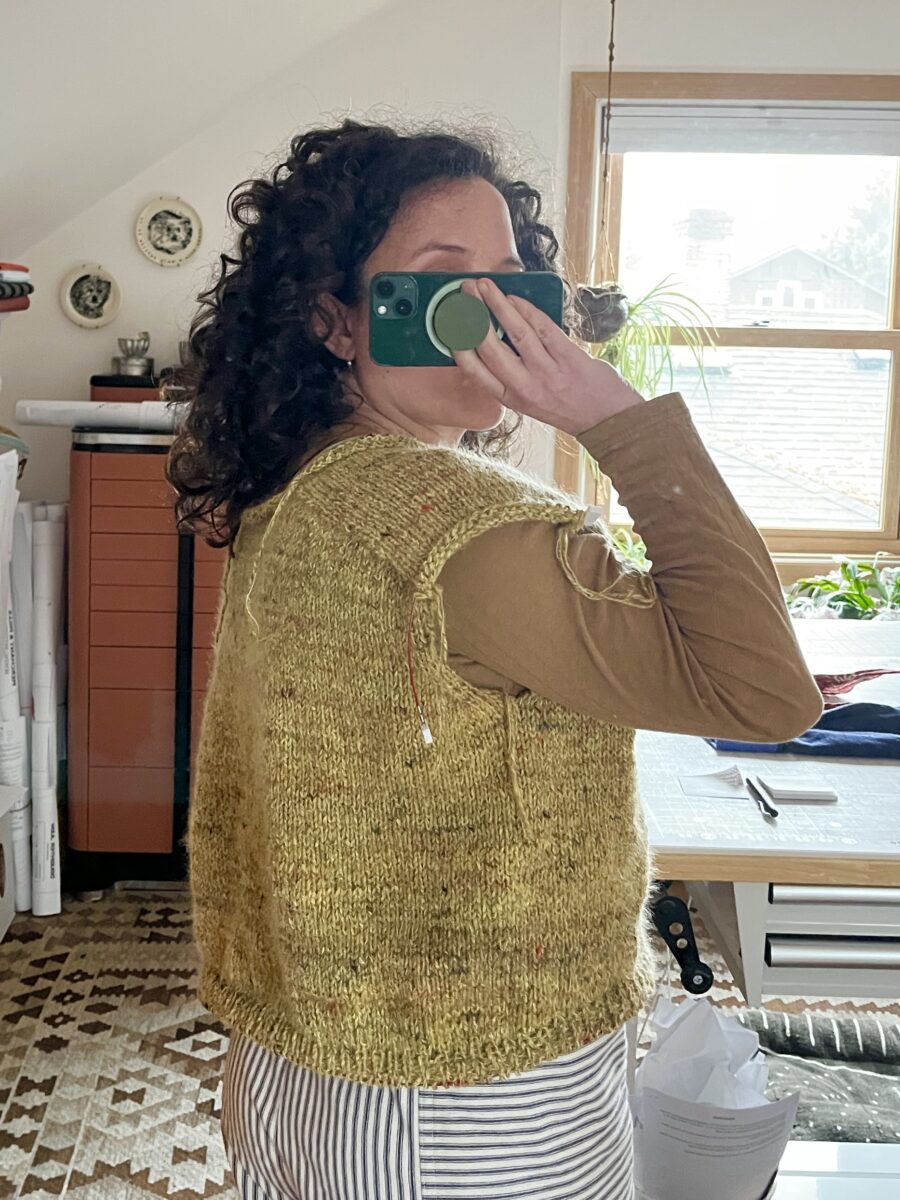
I am using US 9 needles for the body, US 8 for the ribbing, and did include the short rows on the back hem. I purchased 6 skeins of Noro and 6 skeins of mohair – I think I will have a decent amount leftover… Hoping I can finish it in December!
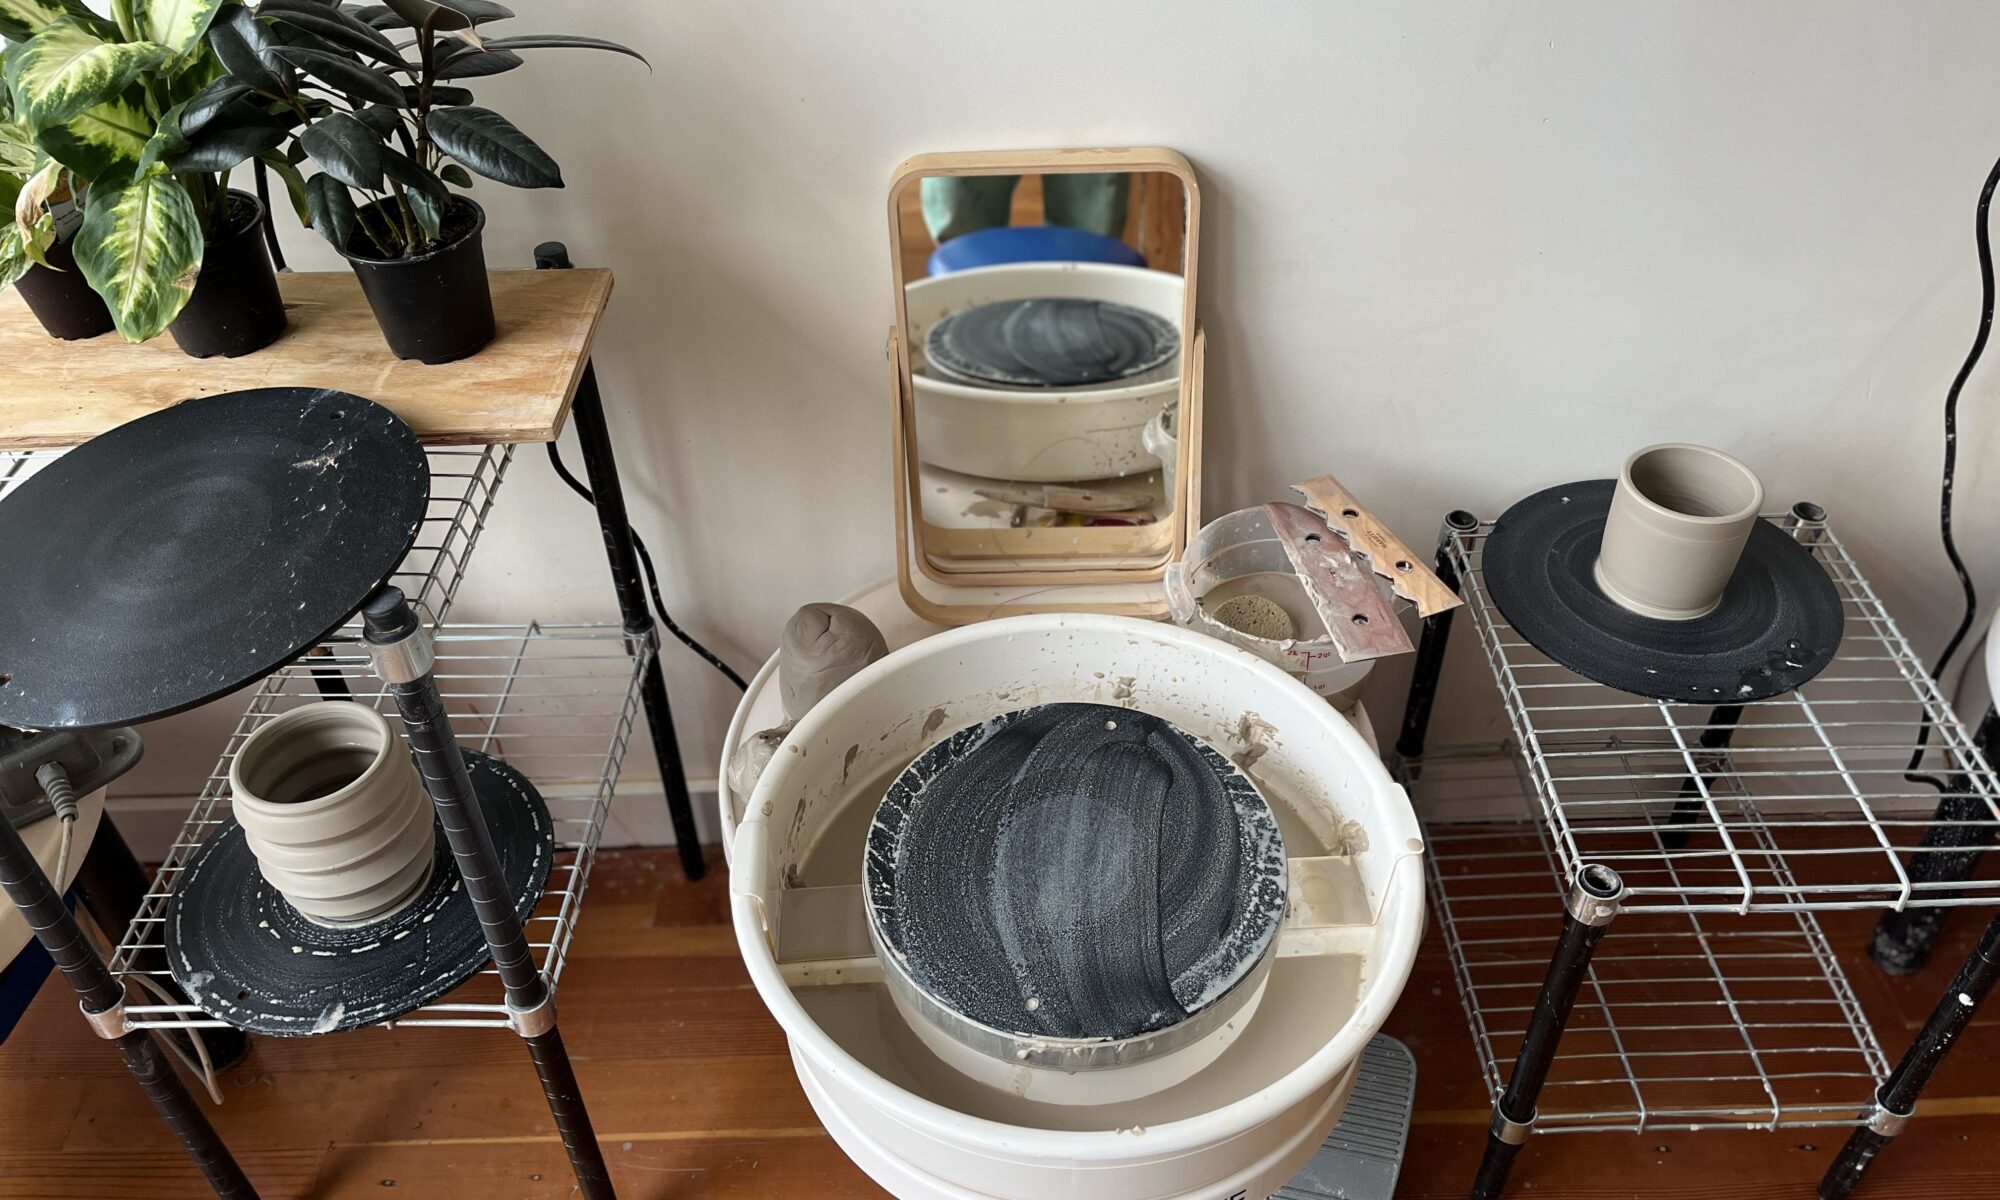
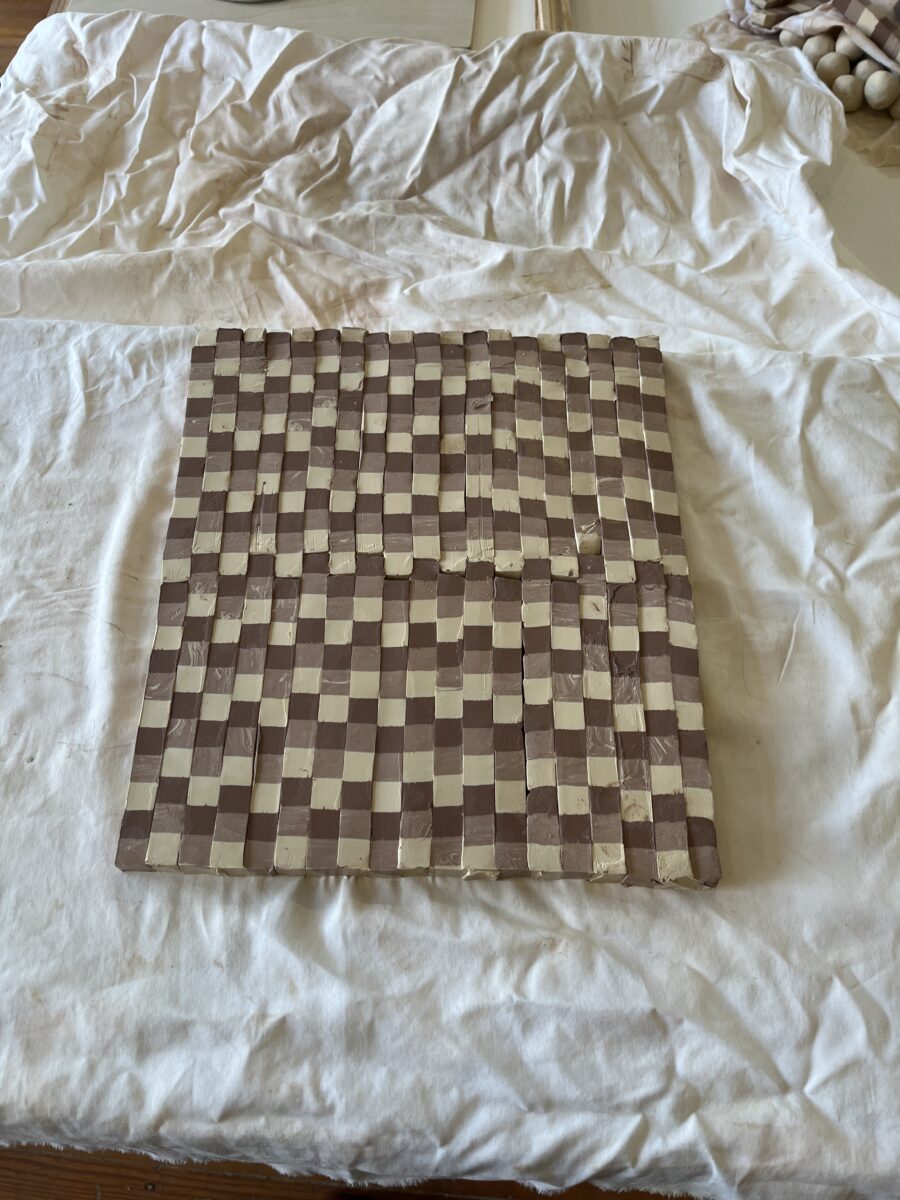
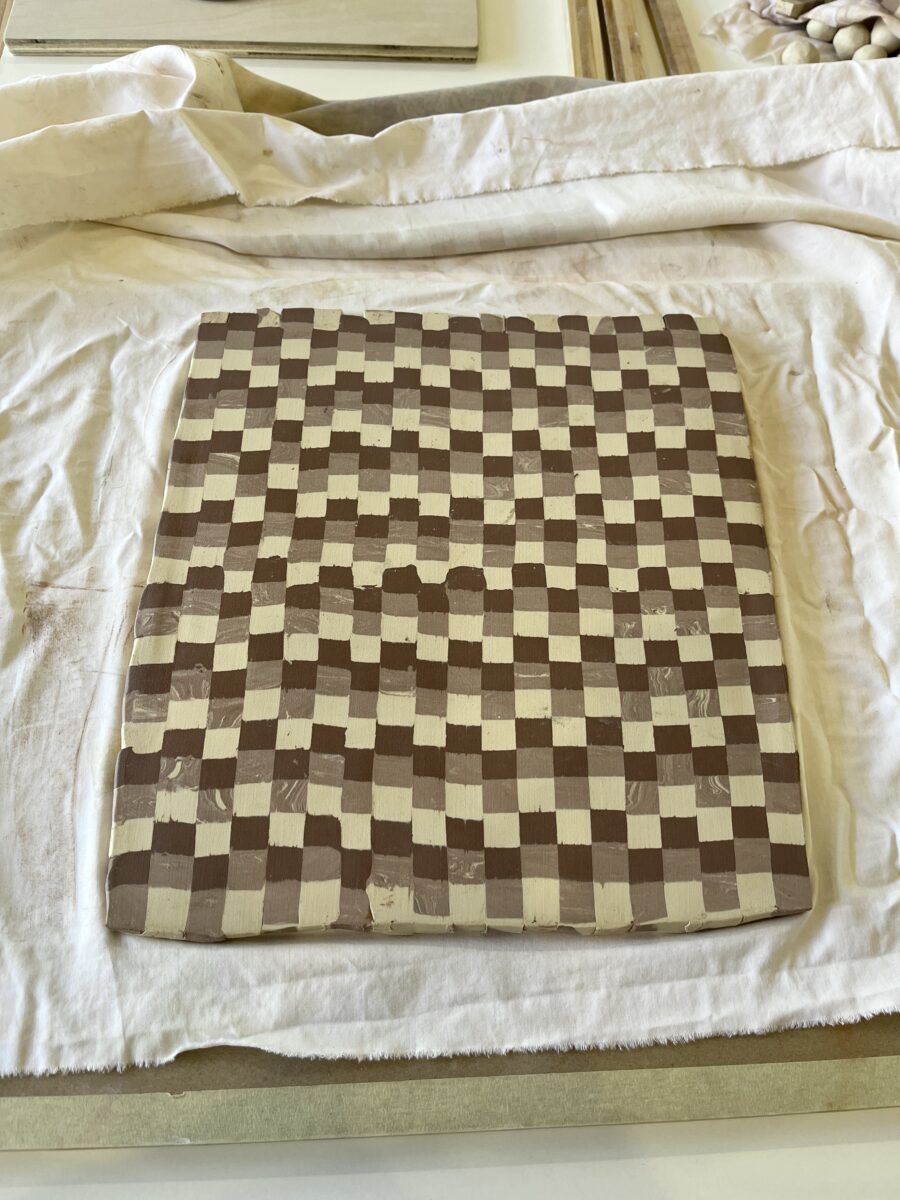
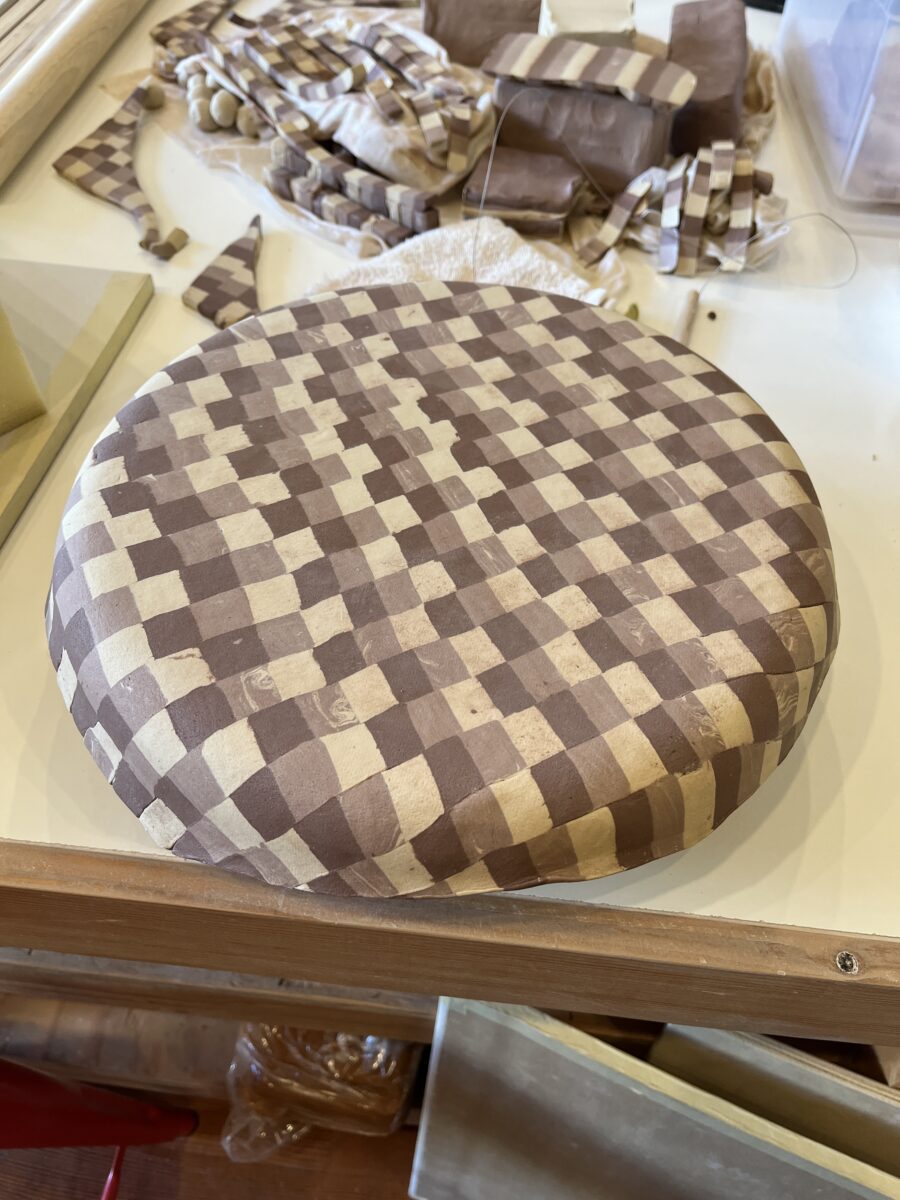
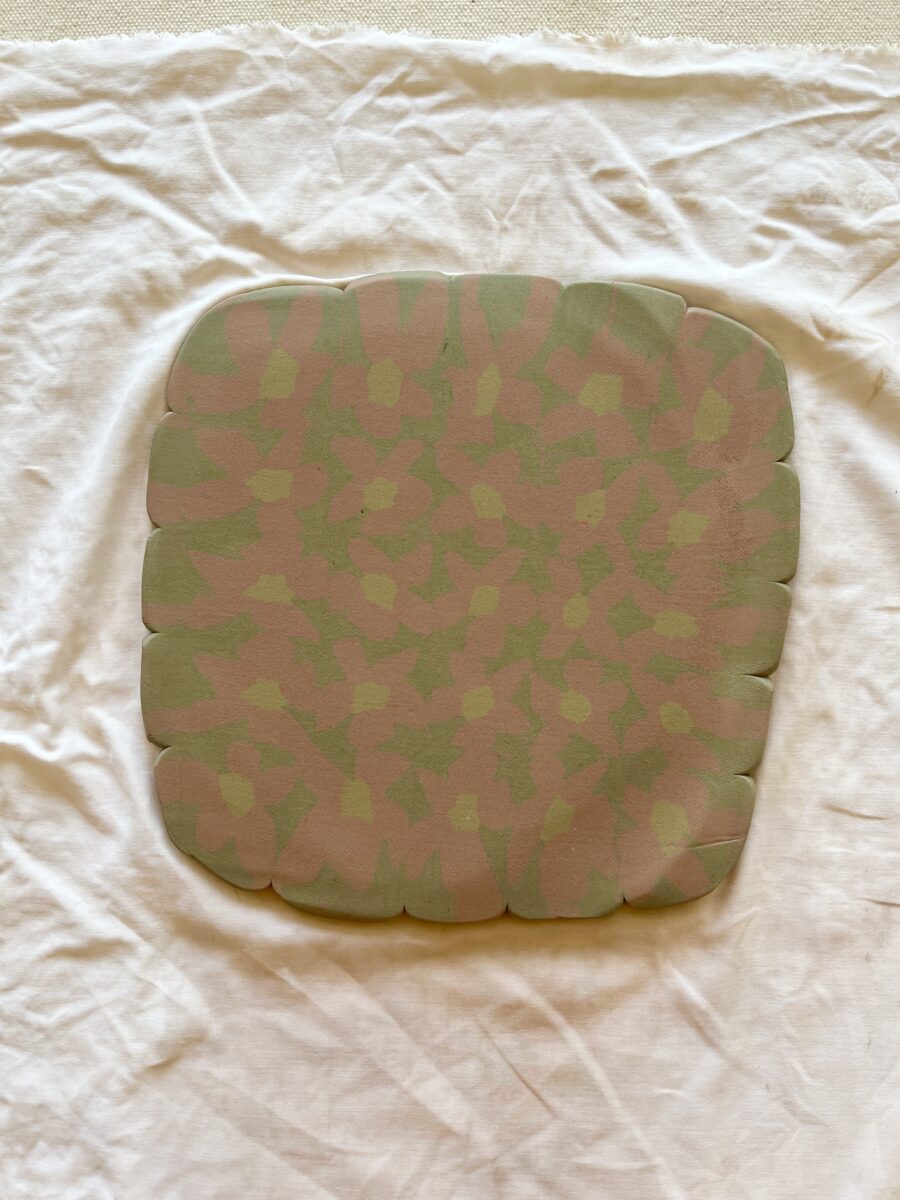
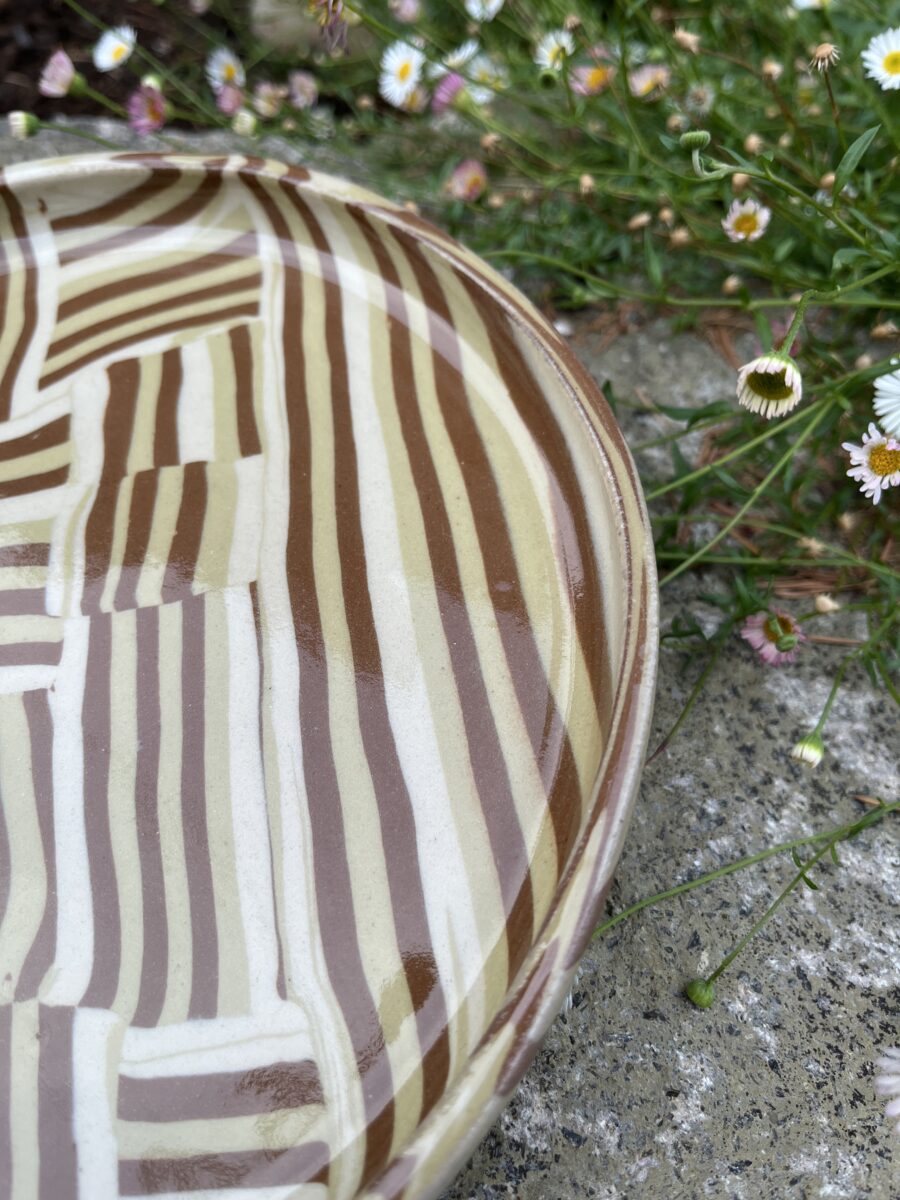
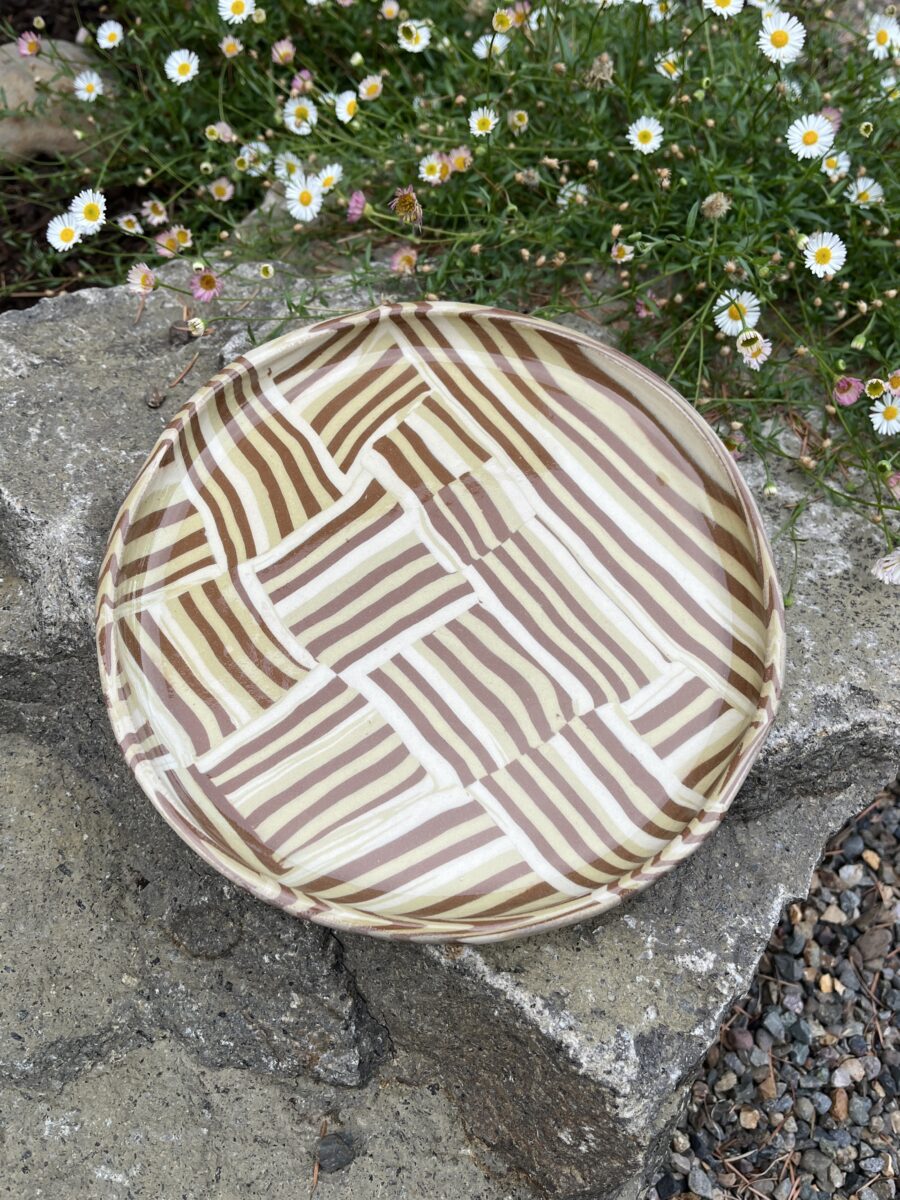
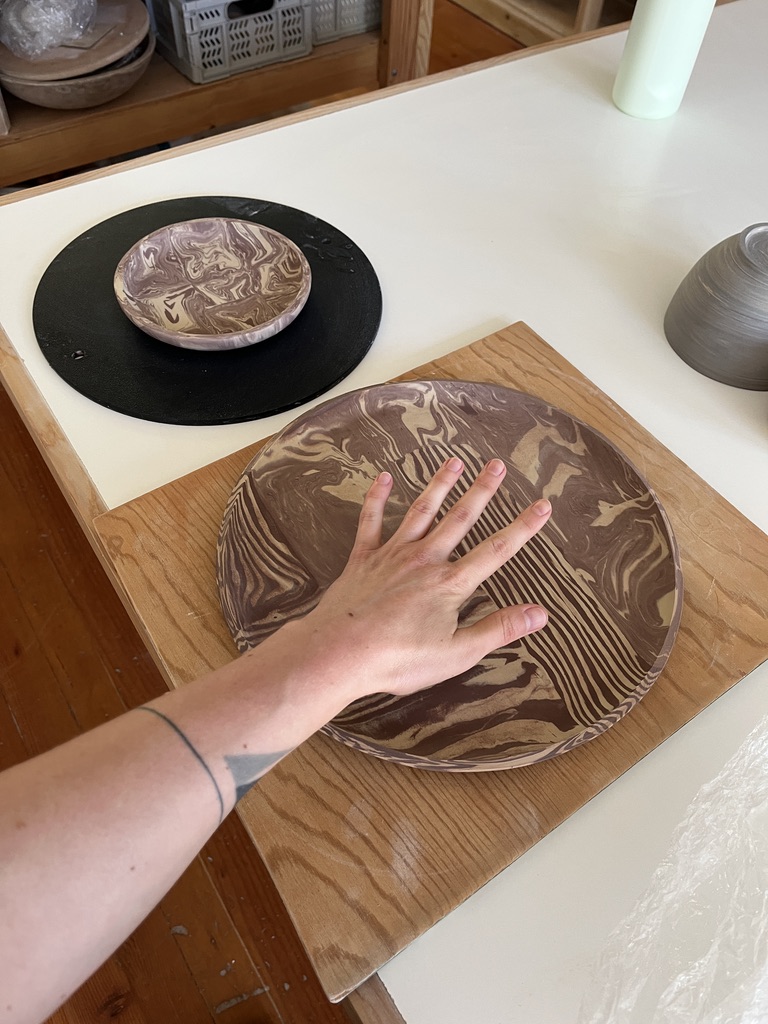
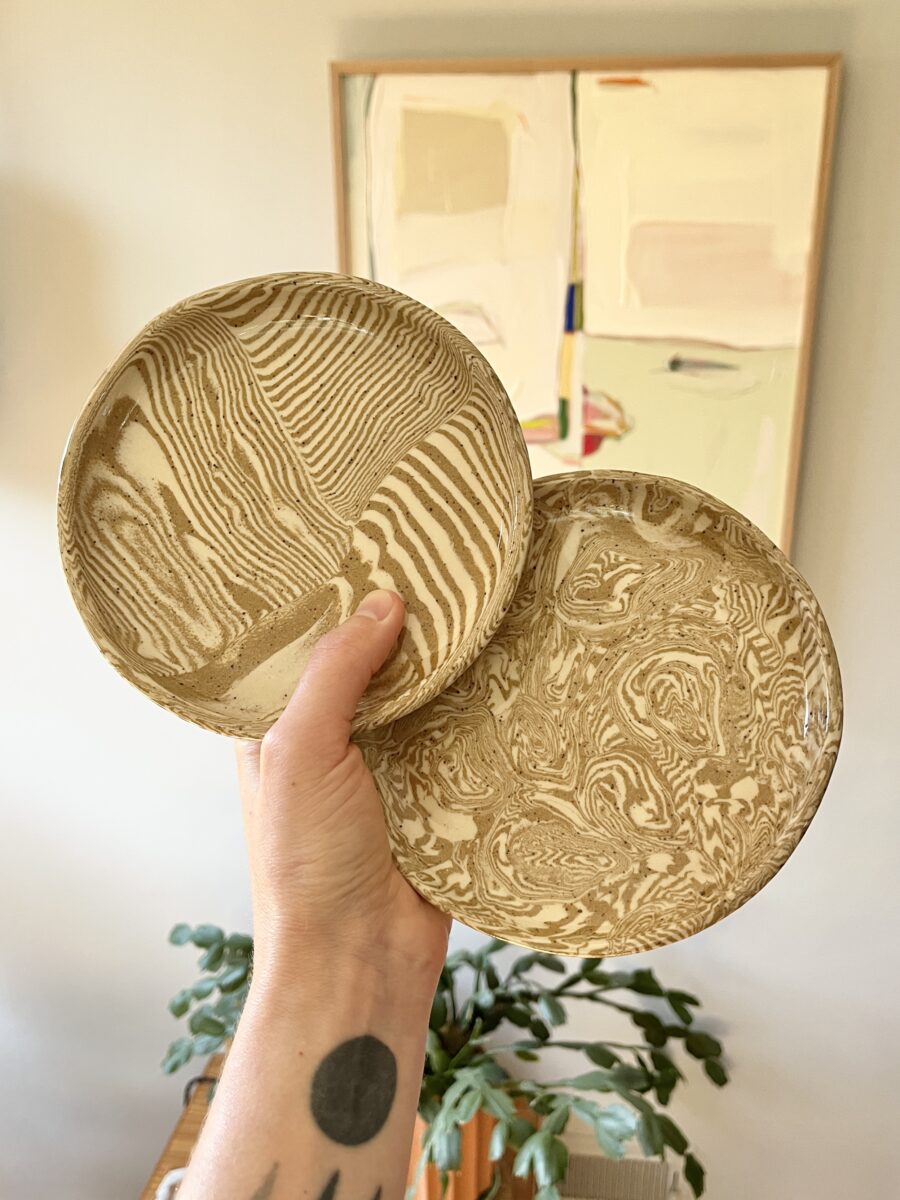
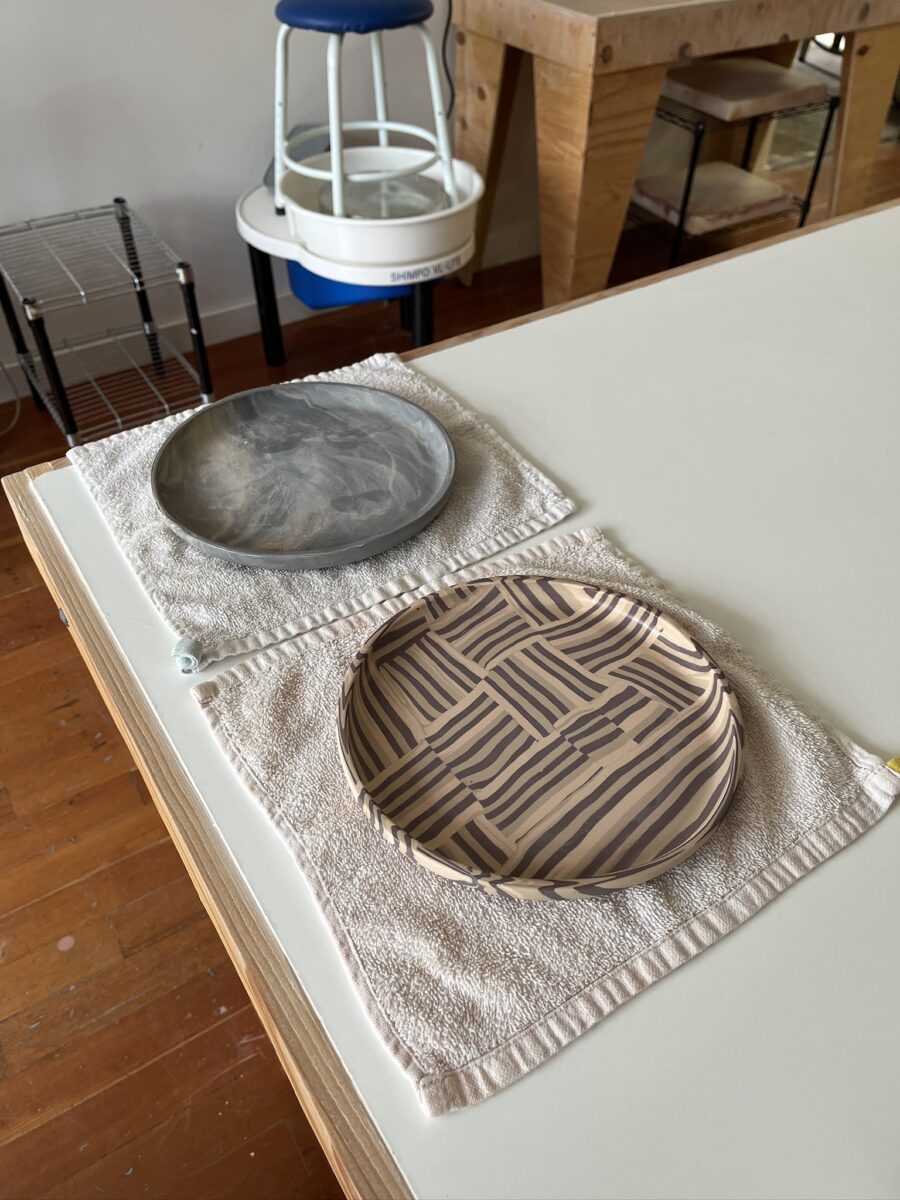
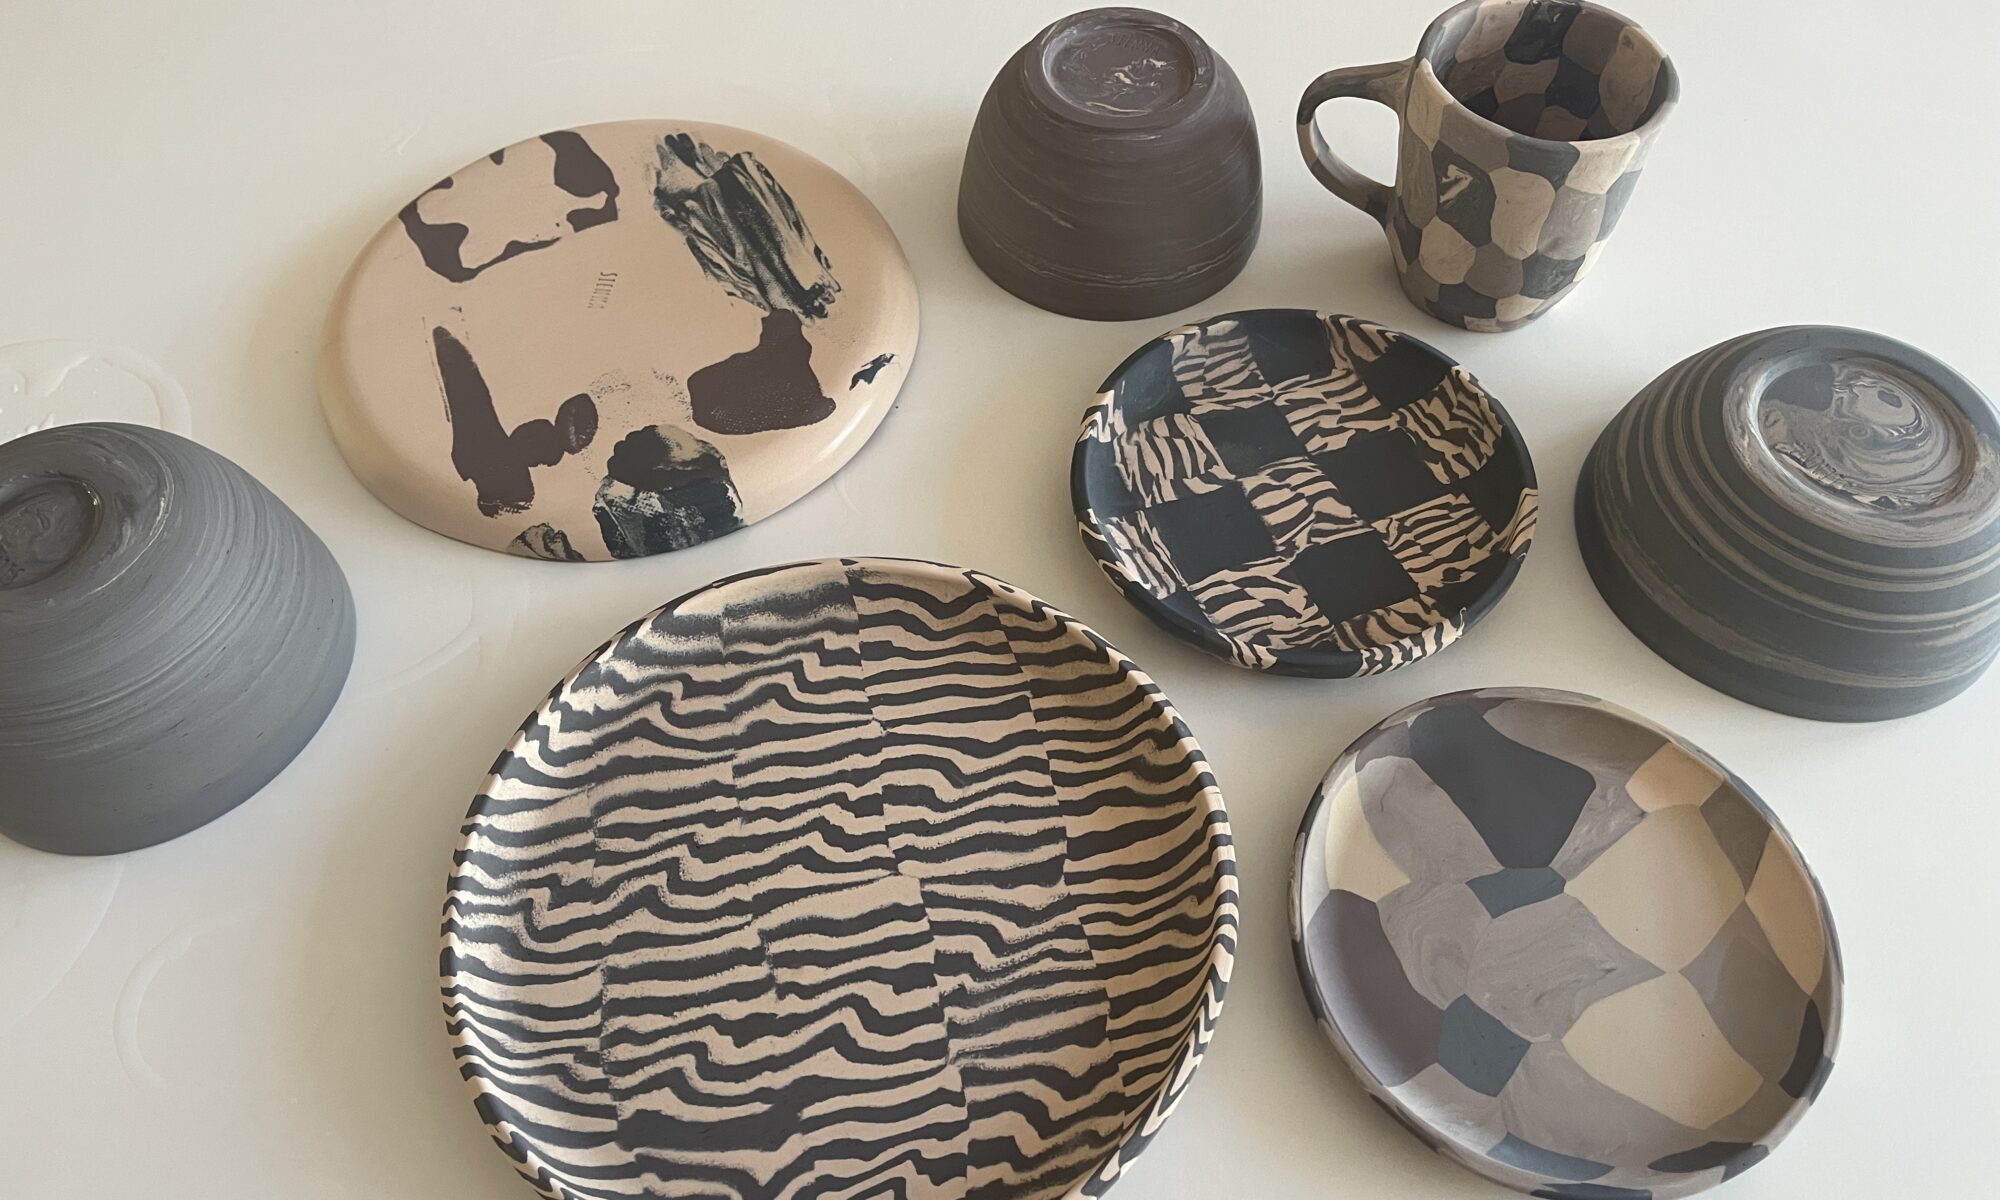
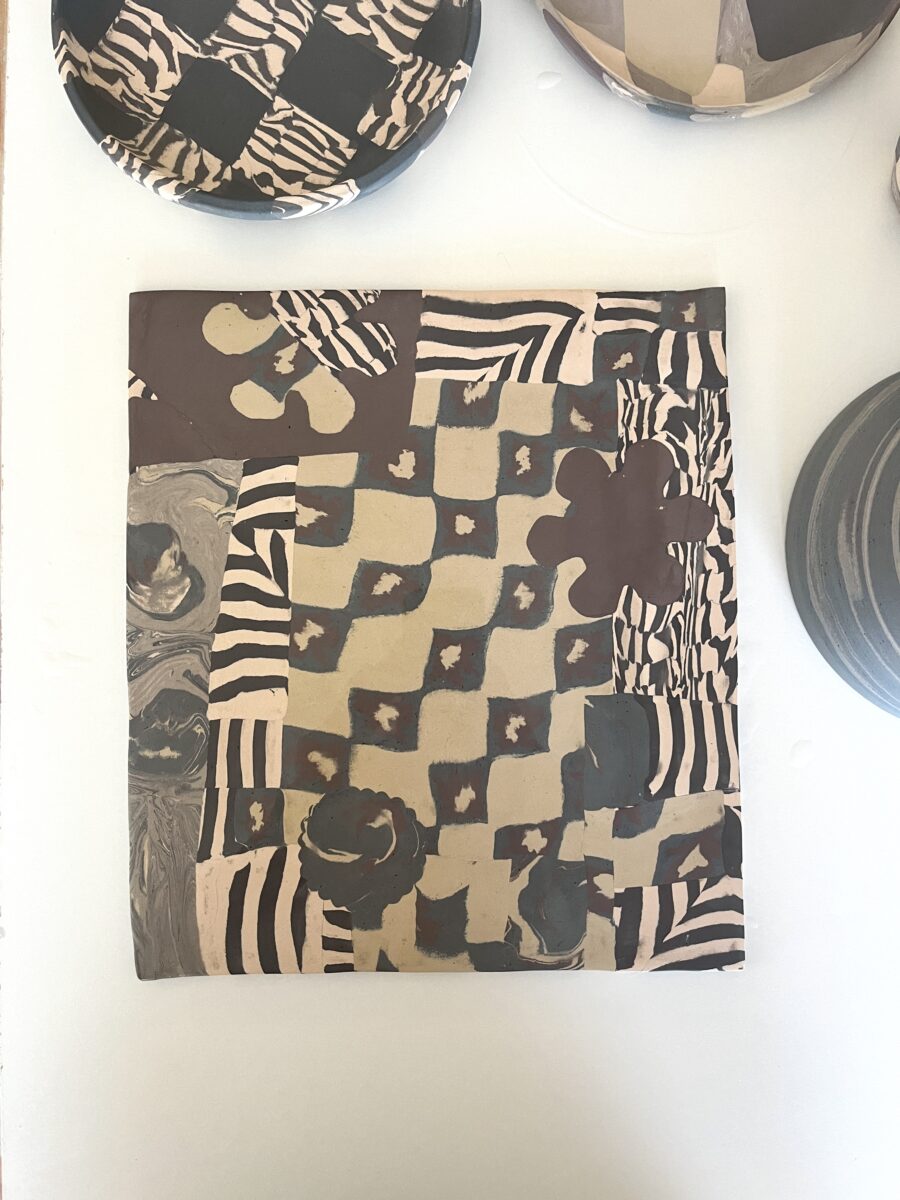
It has been a challenge to make big nerikomi plates. One so far has made it through all the stages and one has a sizeable crack. I made this checkerboard plate a few weeks ago, but it’s been too wet outside to sand, so it’s sitting on the shelf at the studio. Wishing for a break in the rain so I can have two big plates at home.
I have been trying to work through my fabric stash and finally sewed up this lovely linen I bought ages ago from Stonemountain. I have no idea if they carry it anymore, or what it is, but it’s very nice!
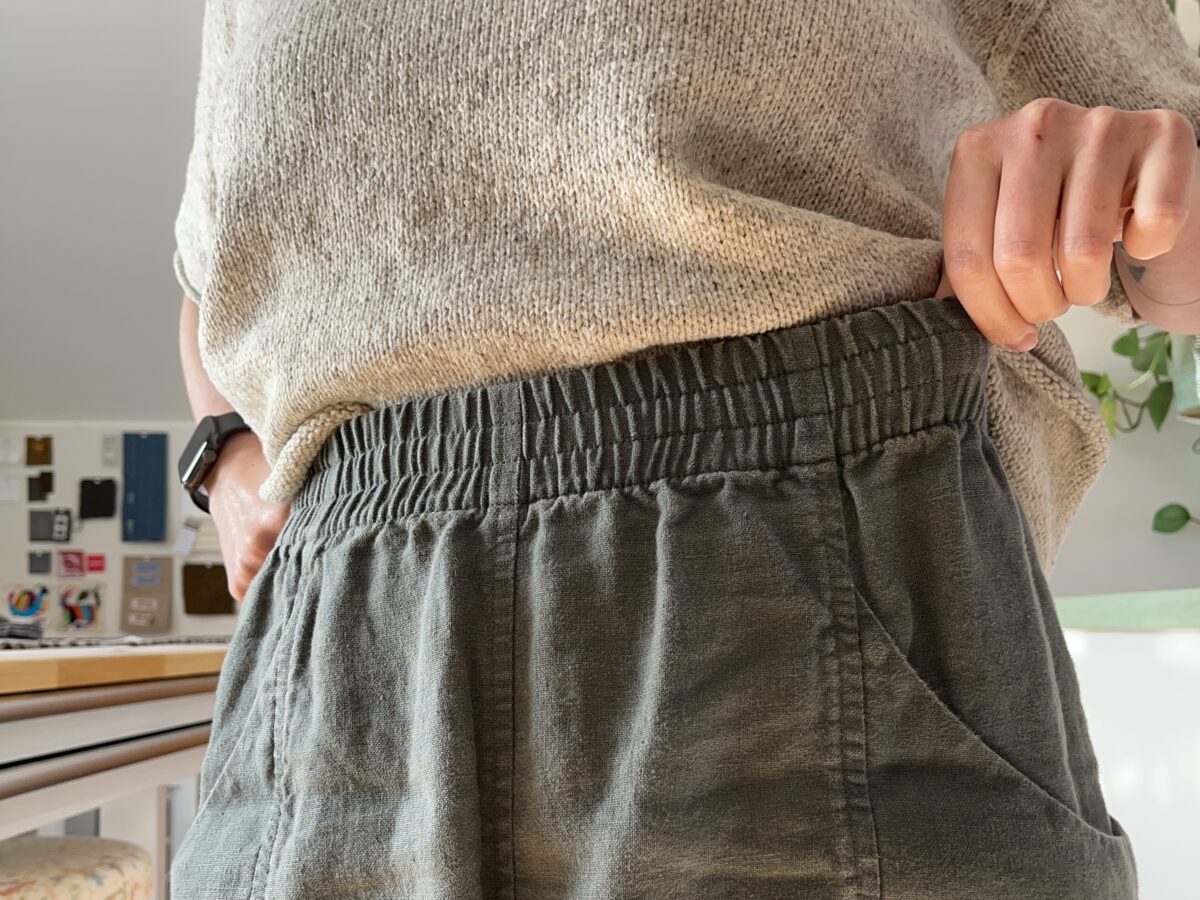
I made the Elizabeth Suzann Clyde Work Pants in size 10. I just love how the waistband looks. After one wash, it was already perfectly worn in.
And I finished my summer knitting project last month. It’s totally fine, I think it’ll be much too warm to wear in the summer anyway.
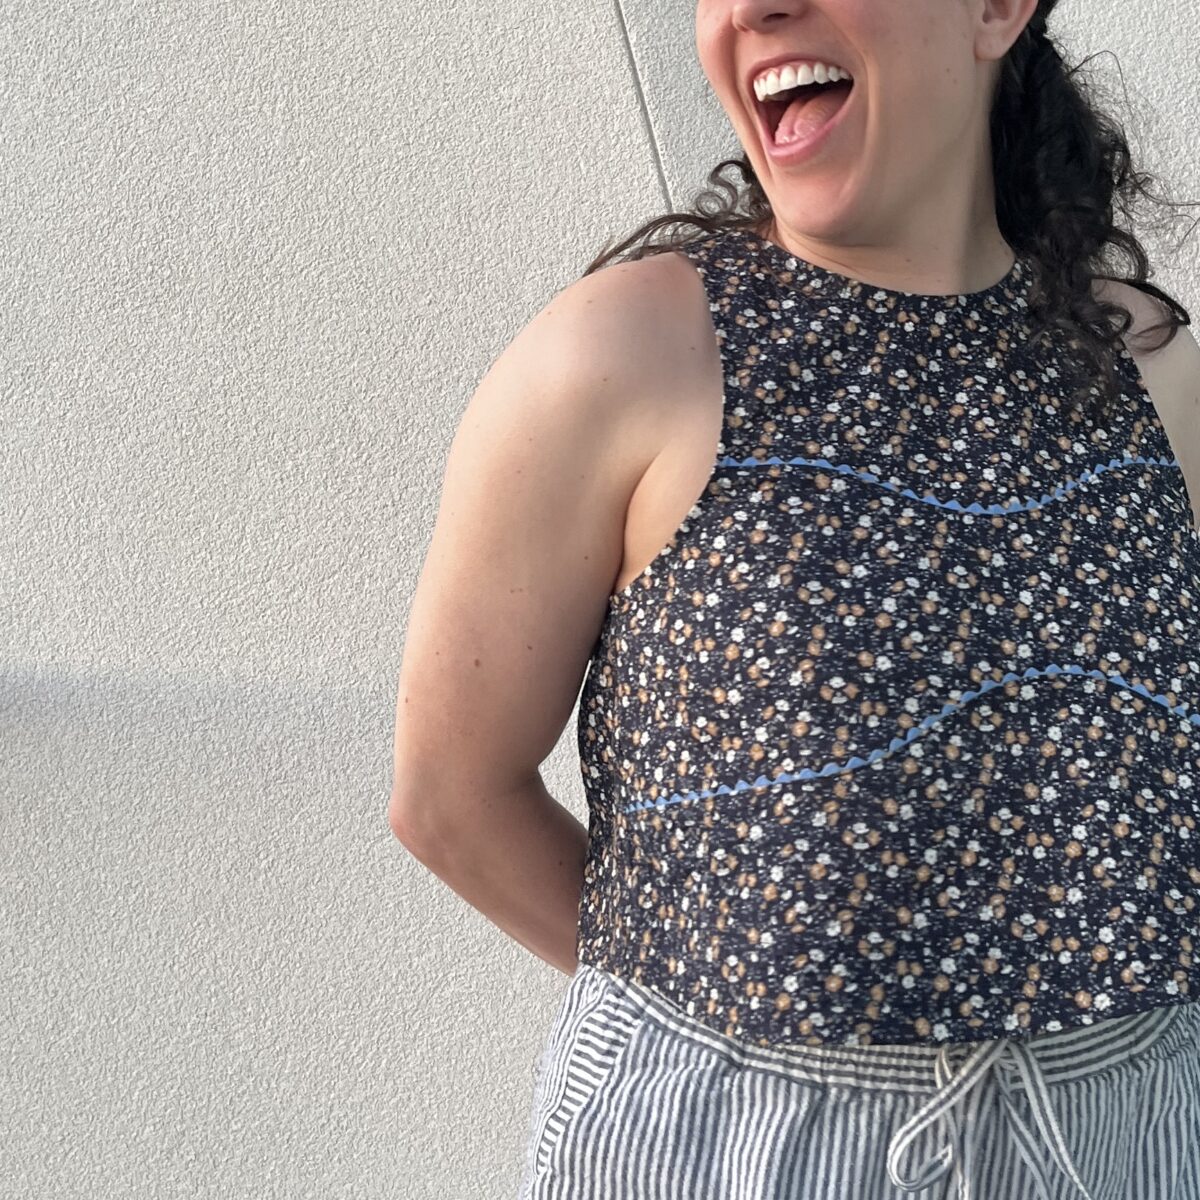
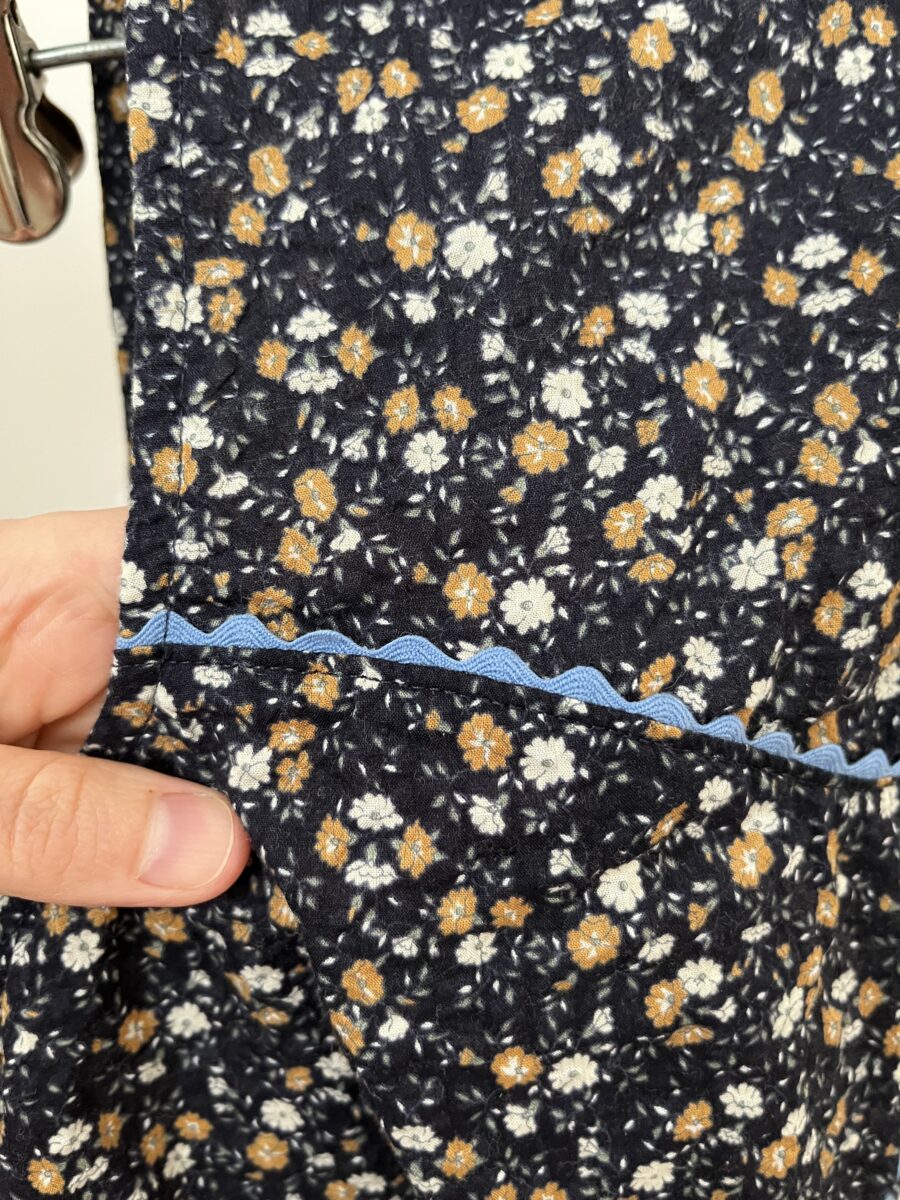
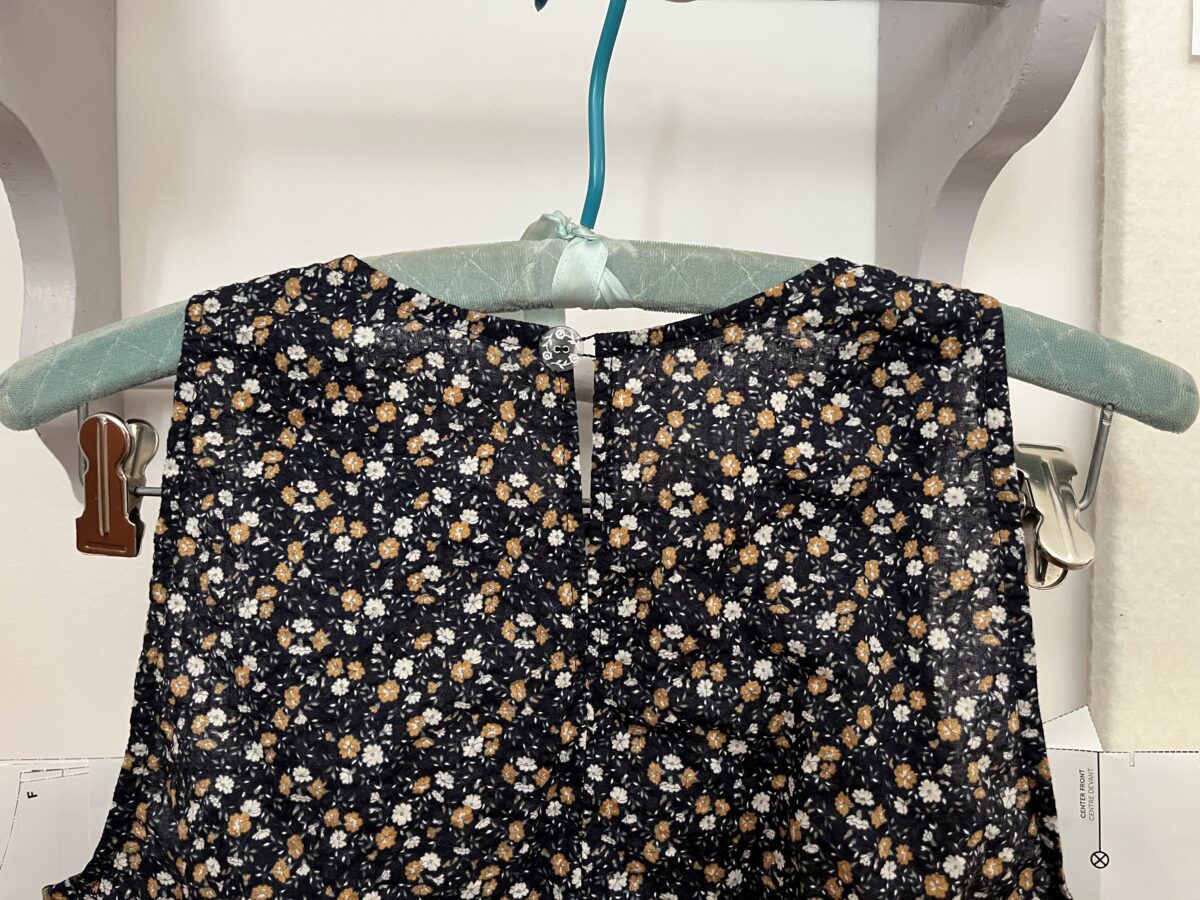
I love that Sadie was inspired by those trashy bikini t-shirts when designing this top. The style lines add so much interest to an otherwise simple sleeveless top.
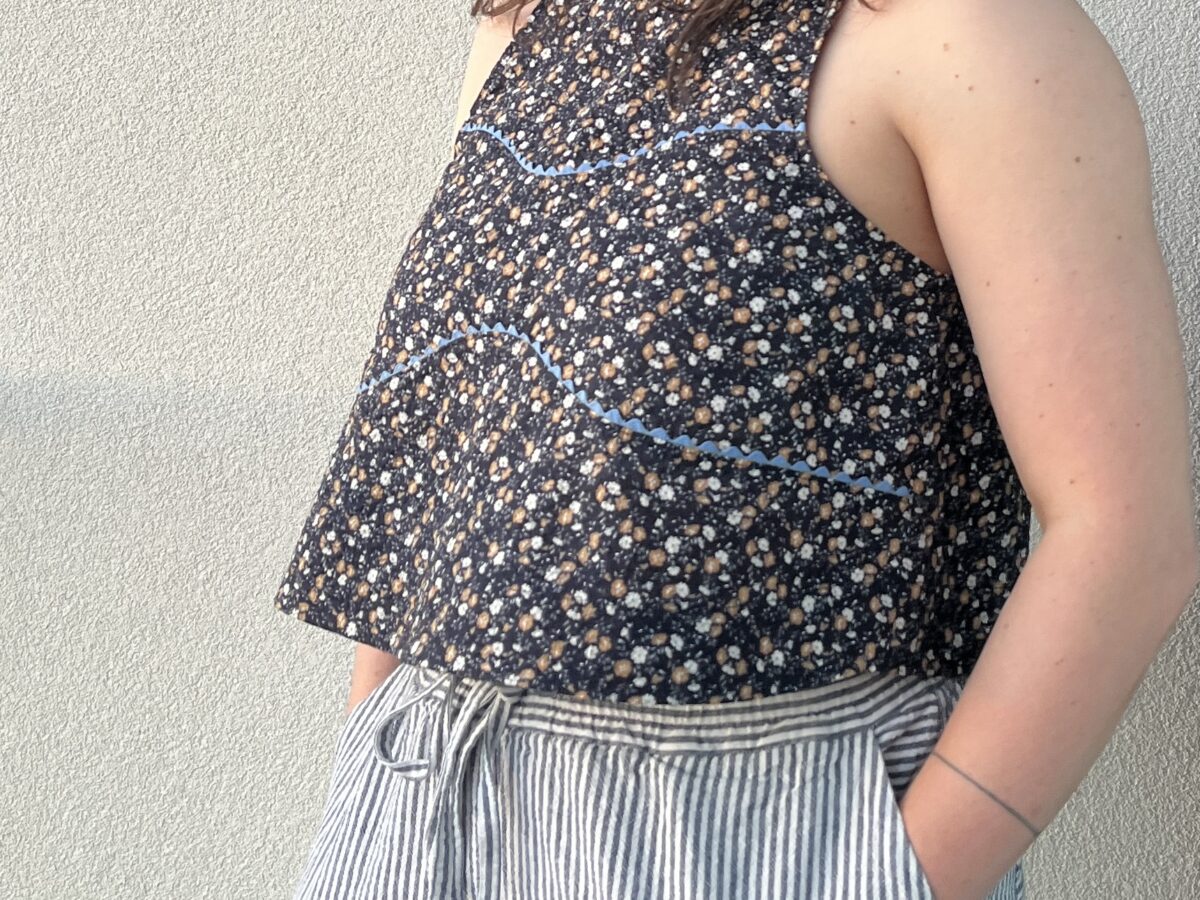
This version confirmed I’d chosen the right size, so I’m definitely planning to make a classic striped version next out of more precious fabric. For this one, I used crinkle cotton and applied rickrack to show off the style lines.
Basting the rickrack stretched out the fabric a bit, so the opposite curves of the shirt needed to be eased together than what’s instructed. I found the armhole and neckline bias pieces to be a little too wide for this fabric and trimmed them down about ⅜”.
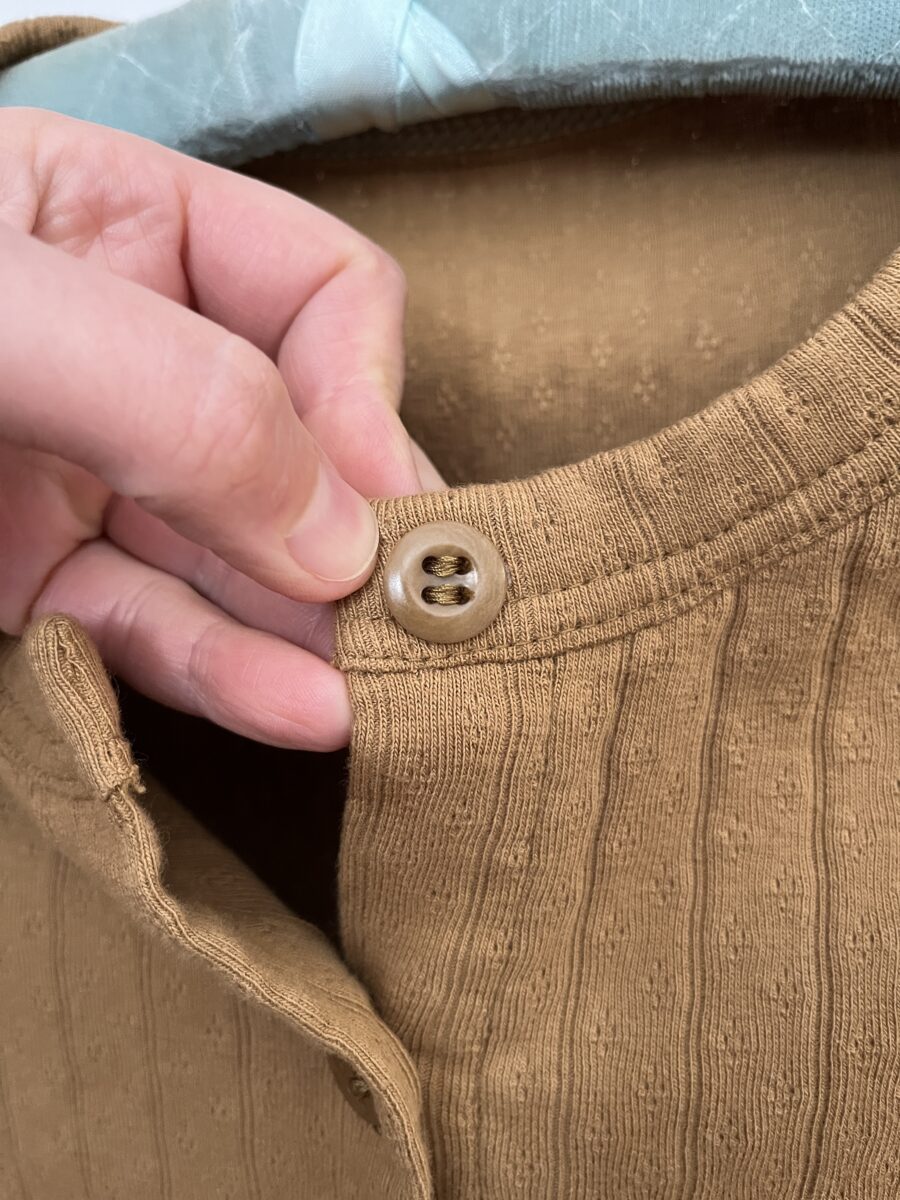
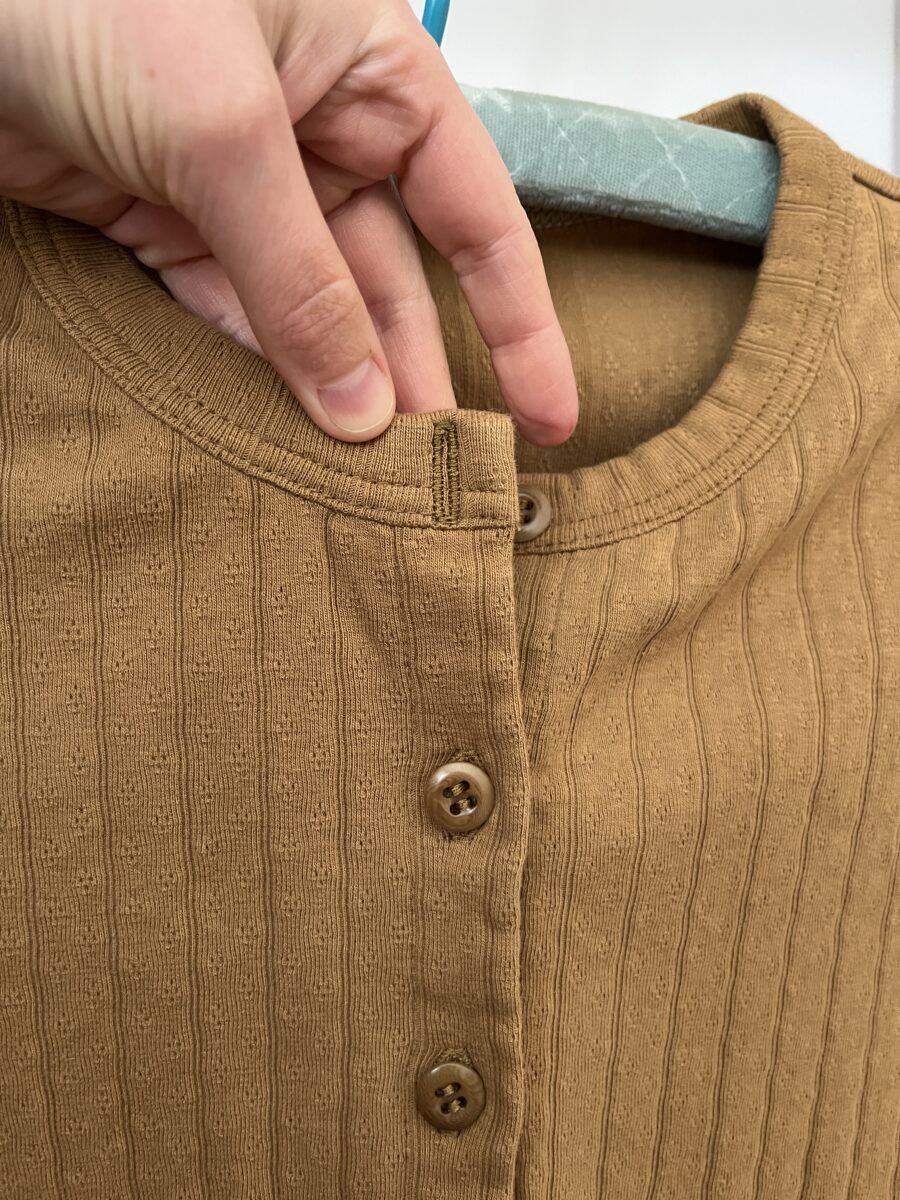
The Honeygirl is my favorite shirt pattern. The neckline finish, the overall fit, and its recommended fabric are all the best. So when Paradise Patterns released the Honeygirl Cardigan, I knew I’d be making at least one.

This Lyrical pointelle was perfect for this pattern. It’s substantial enough for the button placket and is the perfect weight for a lighter layer. I also had perfectly matching buttons in my stash.
The hem and neckband were attached by coverstitch and I am curious to see how the stitches at center front will hold up over time. I knotted the threads and added a dab of FrayCheck just in case.

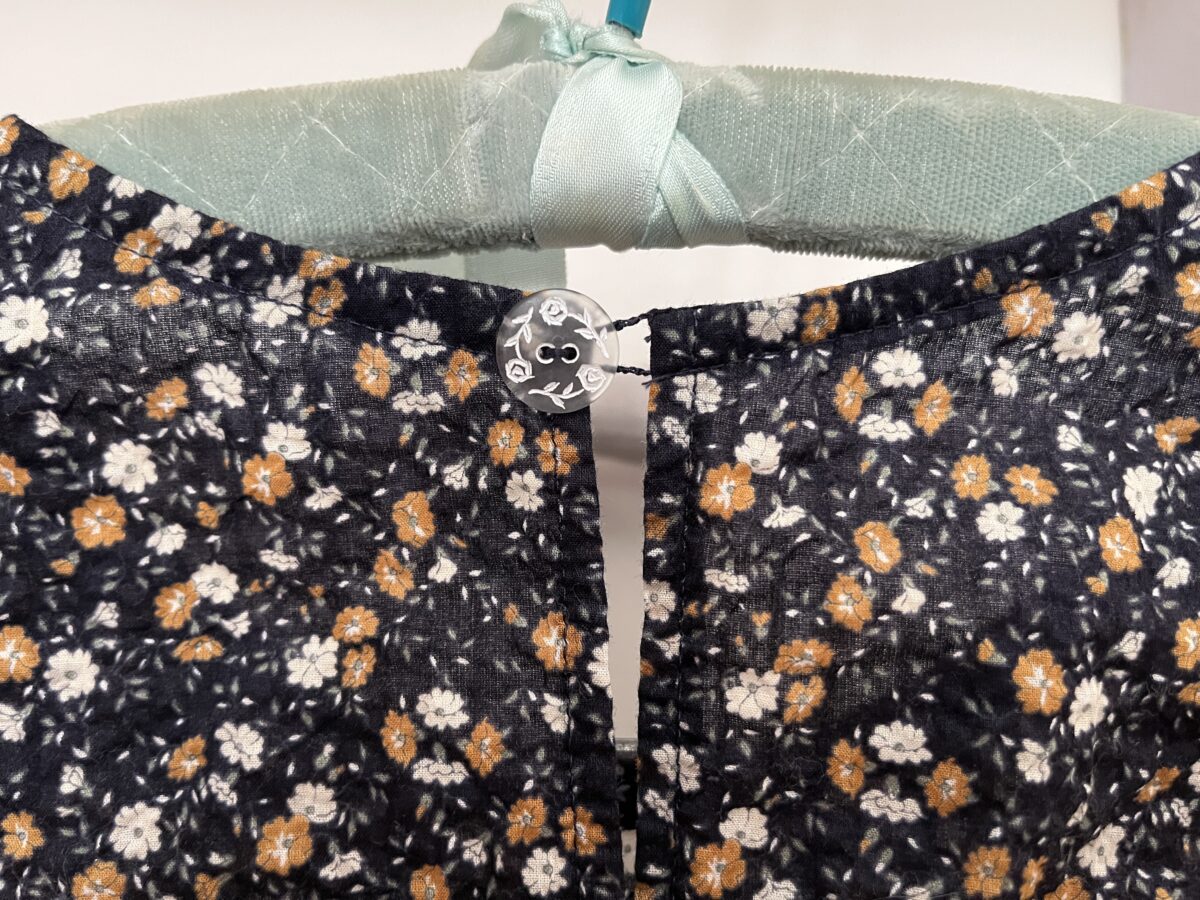
The top buttonhole isn’t cut open – for some reason I thought centering the buttonhole on the neckband would look better than what was instructed and it does not. It warped the neckband and is so close to the edge I was worried cutting it open would cause more issues.
And I really don’t know why I’ve waited so long to make the Blomma. It’s the tank equivalent of my favorite t-shirt. I had just enough leftover pointelle from the cardigan to make it.
I wasn’t sure if these would work as a set because the necklines are so similar, but I’ve worn them together a few times and I like it!

And finally, here’s my contribution to an upcoming fabric swap. I’ve had some of these in my stash for years and it feels great to set them free.
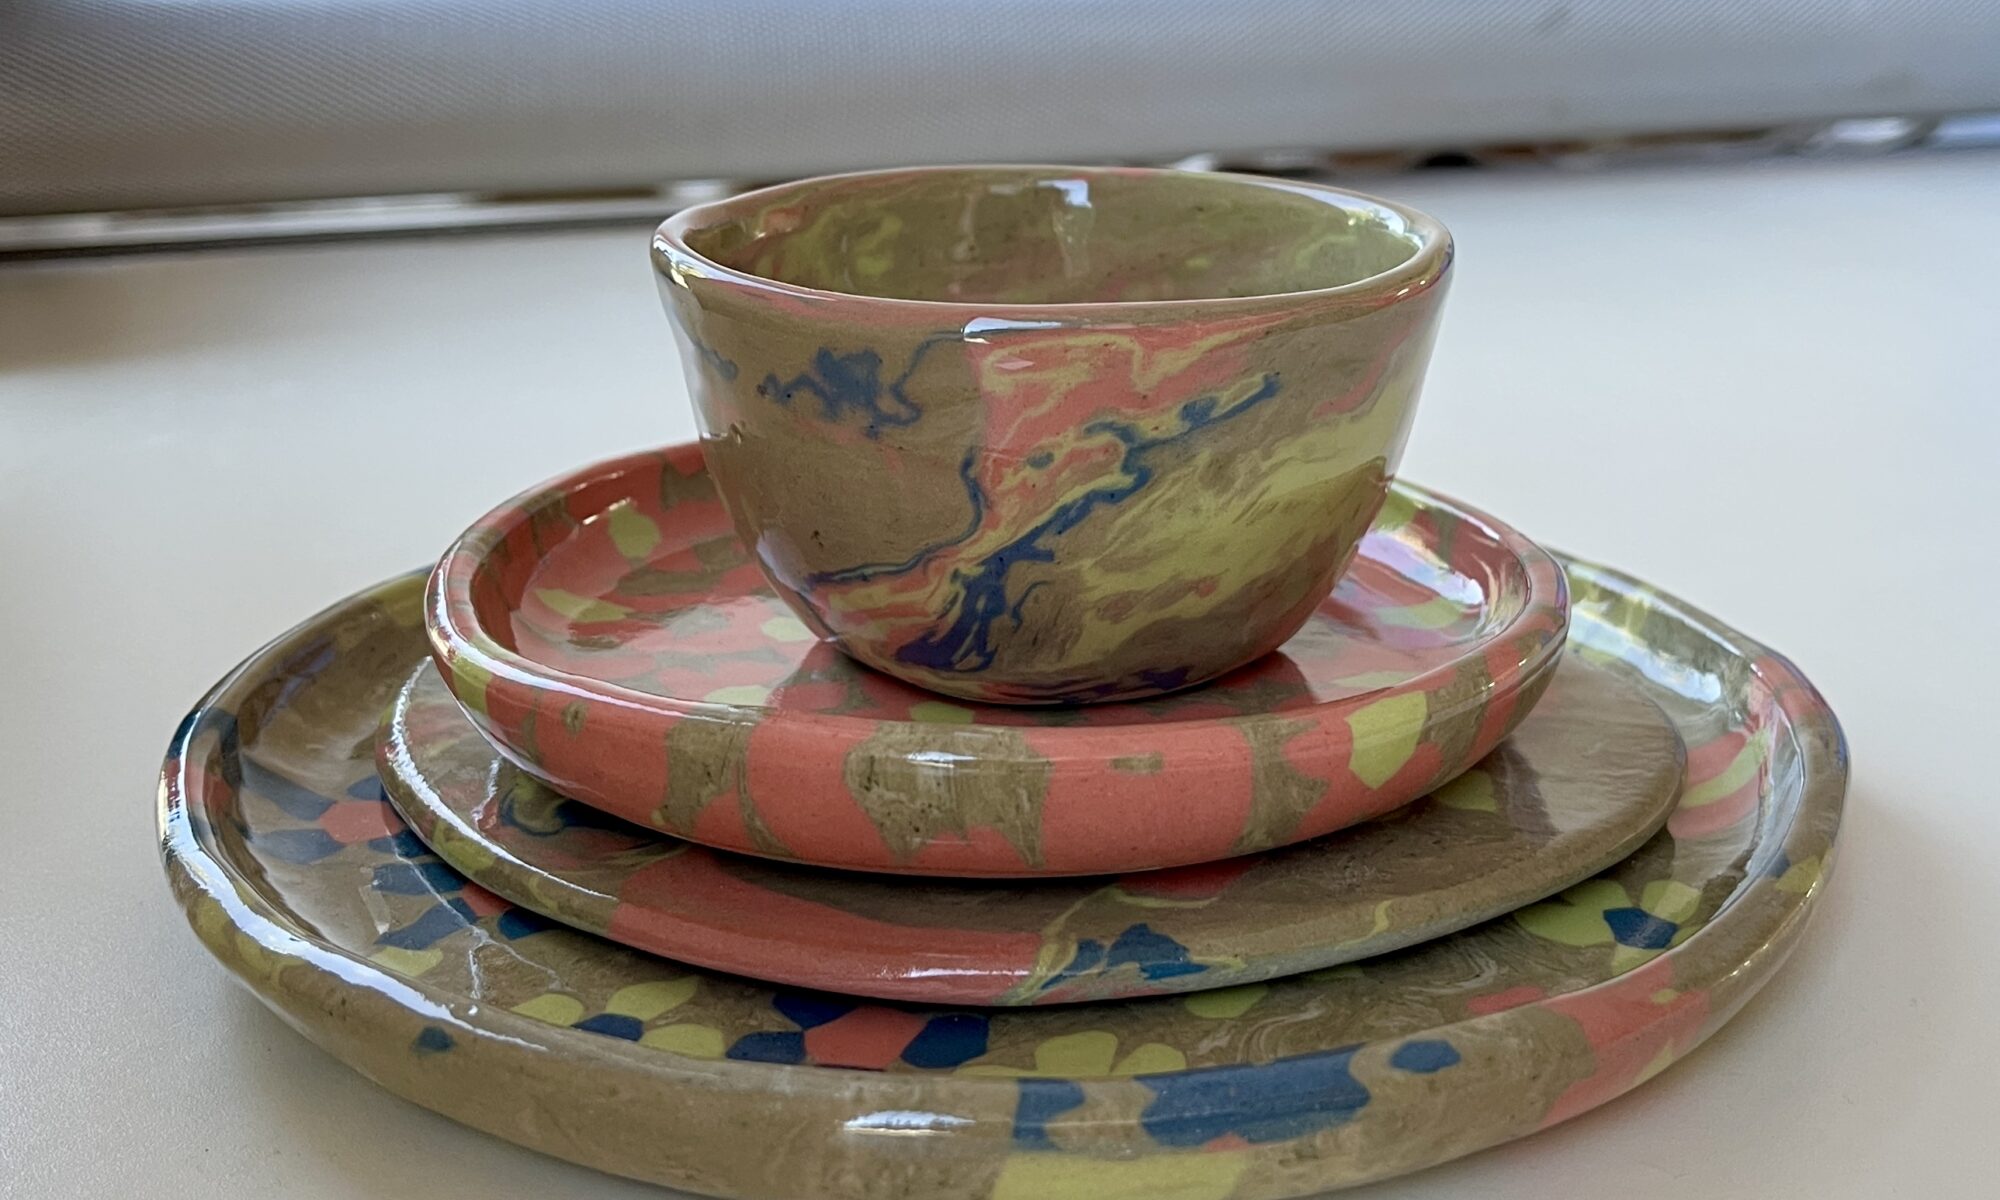
So pleased with this little flower plate. The background color is Avocado 5%, the petals are Lobster 10%, and the centers are Chartreuse 10%.
Also very pleased with this bigger guy. It features the same colors as above, but with the addition of Peacock 10%. I’m pretty sure the Avocado background was the last bit of colored clay I made this round and I clearly was done wedging because the stain was not fully incorporated.

And I made a little pinch bowl out of leftovers. The bottom is my favorite.
I recently decided to make a quilt inspired by this pillow. I found a tutorial that makes two blocks from two different colors of 14” x 14” squares that look like this:
I played around with some color combos before settling on Kona cotton “wasabi” and “pickle”.
While waiting for fabric to arrive, I pulled out the only solid scraps in my stash to test it out.

I haven’t calculated how many blocks I’ll need, but I’m excited to start a new quilt project.
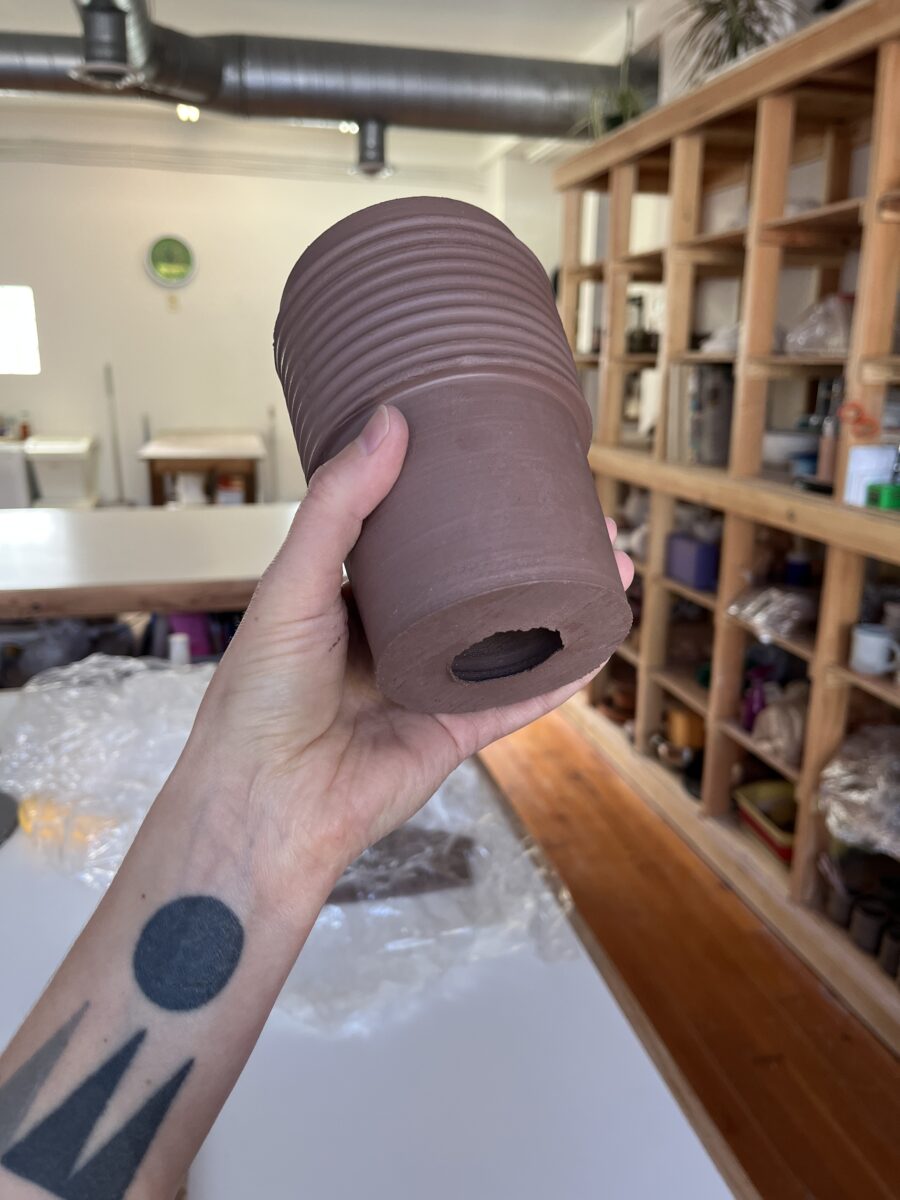
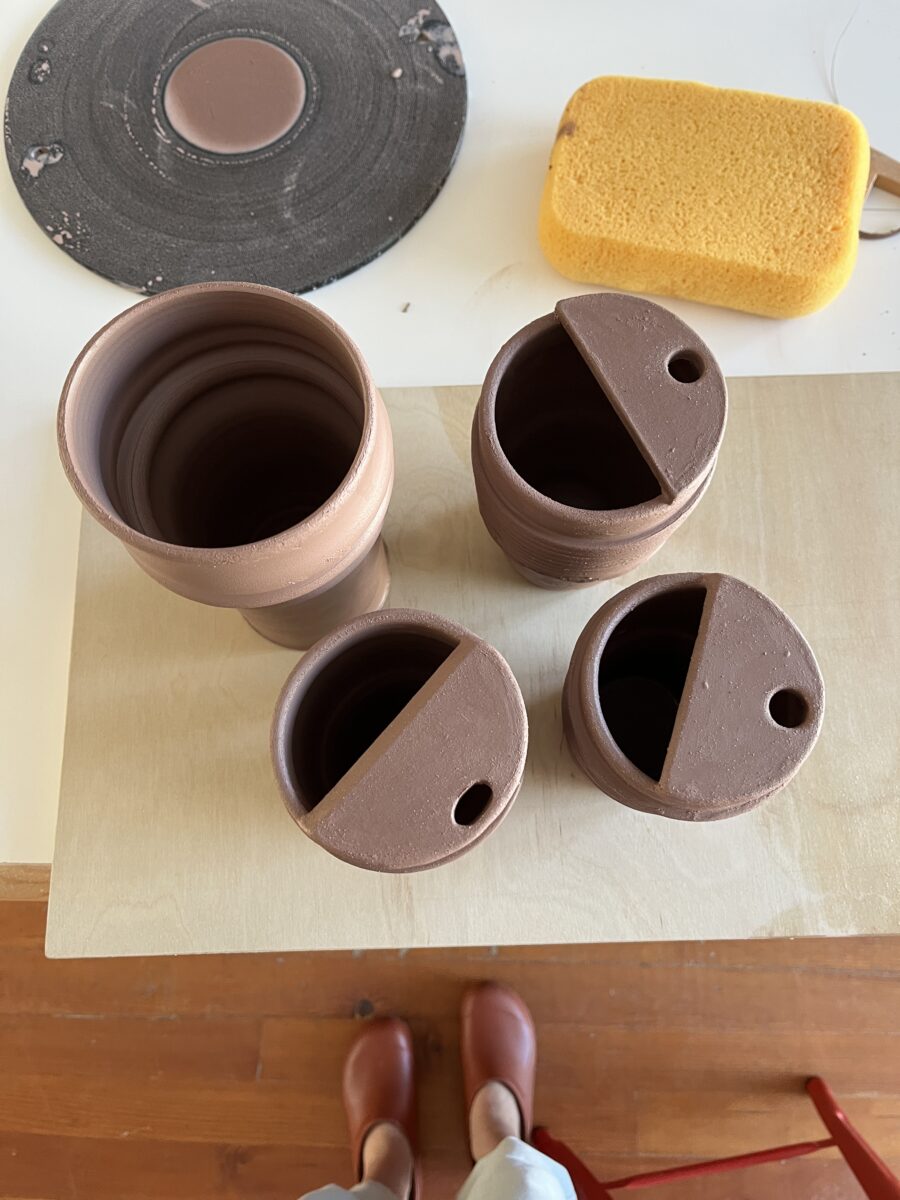
I bought this rib from Garrity with the goal of making some portable hot drink containers.
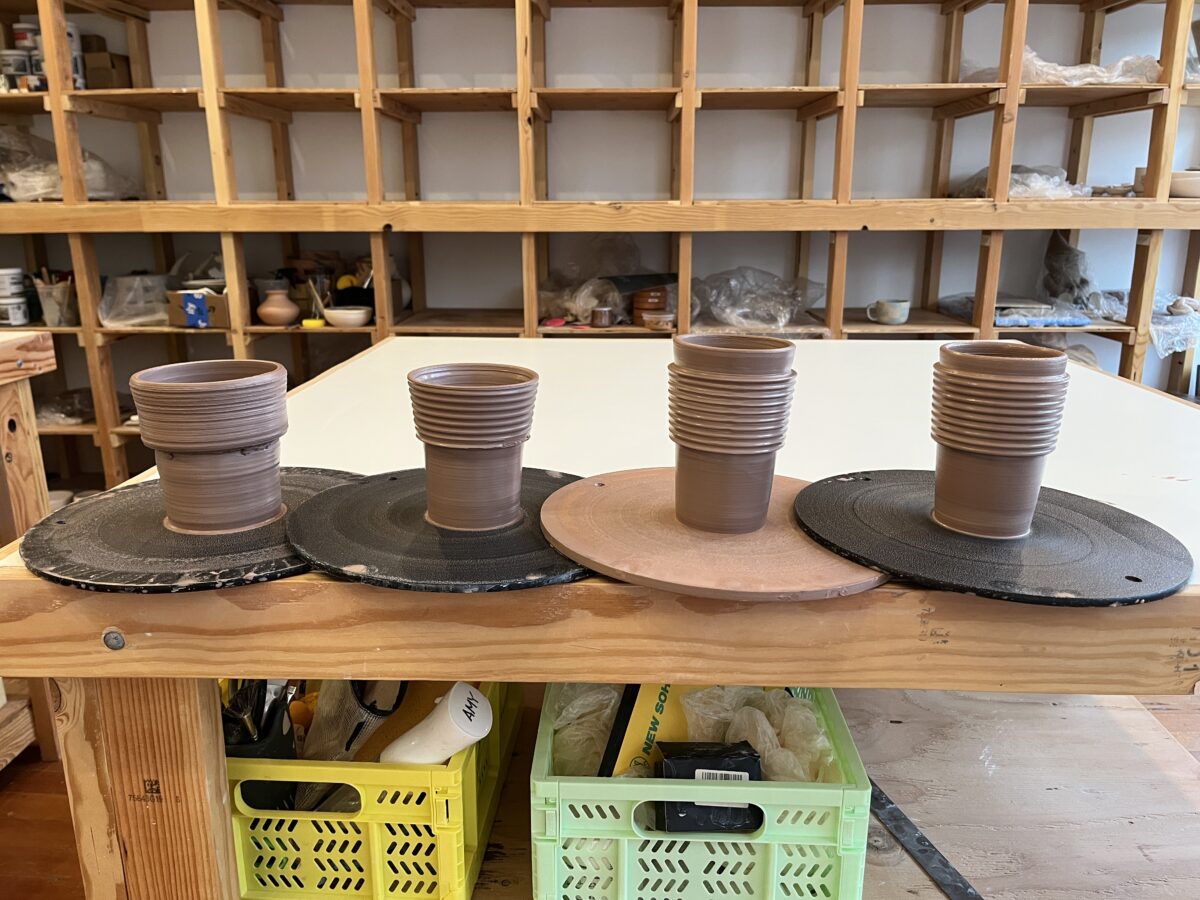
It took about three attempts before I started to get it. Ideally, I should have documented how much clay I used here, but I honestly didn’t think I’d make anything useable this first round.
I haven’t thrown in a few months, so naturally there were some casualties.
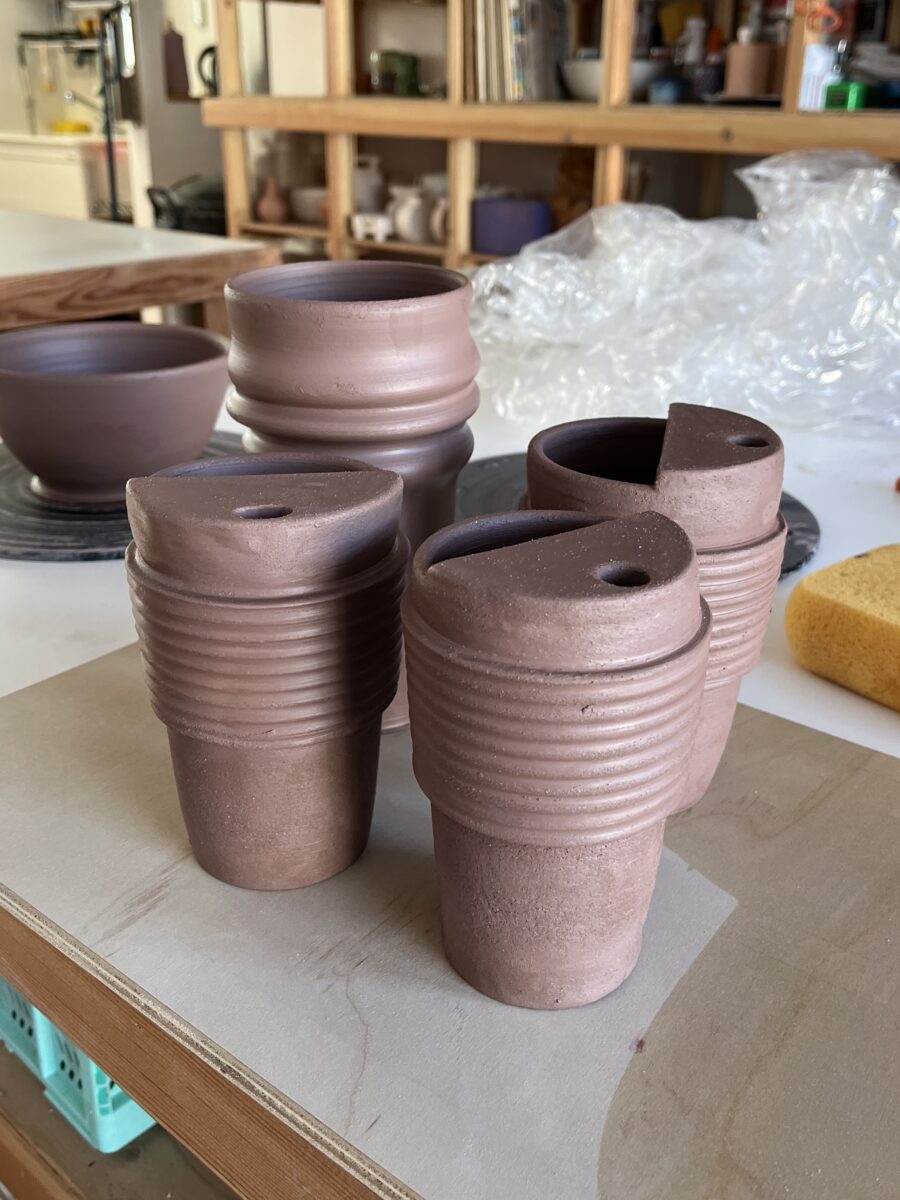
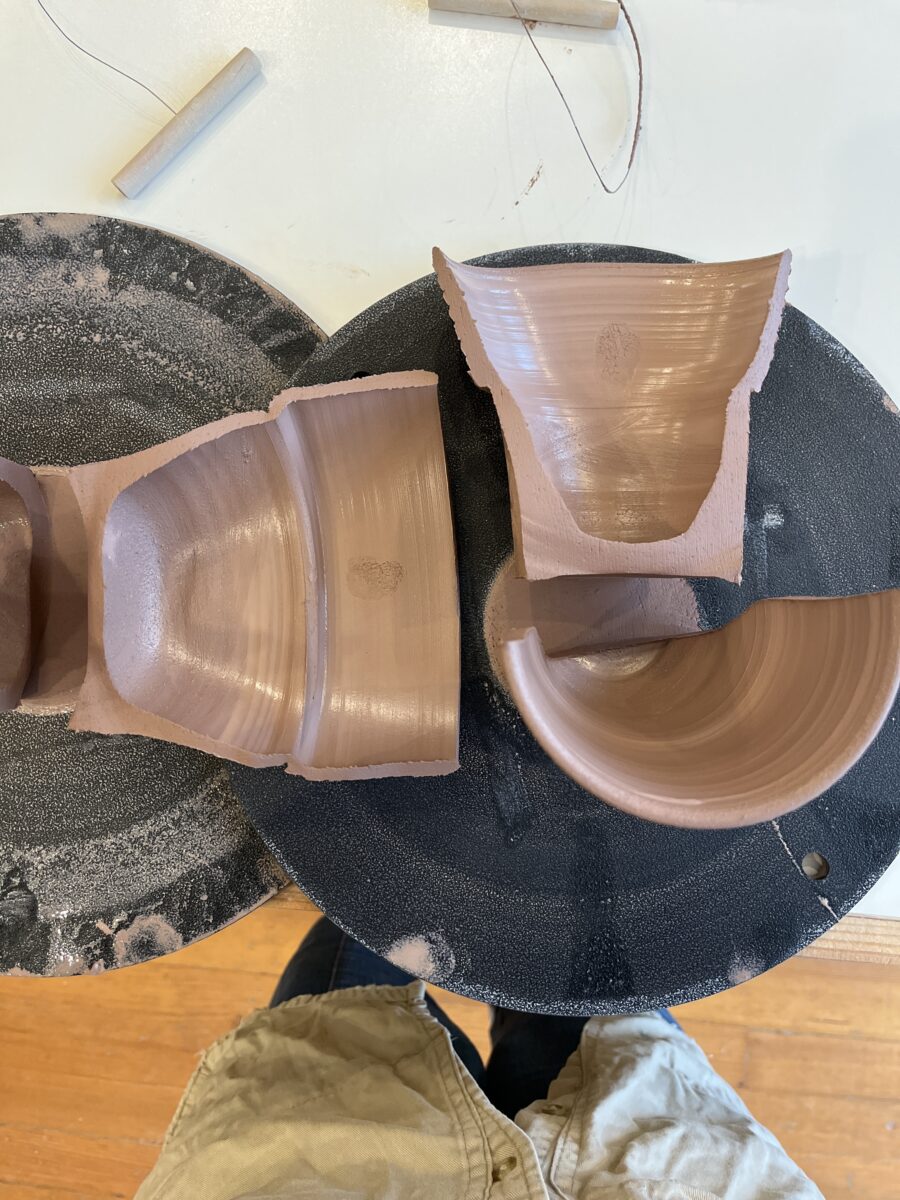
I rolled out slabs for the tops the same day I threw the mugs and then didn’t get back in the studio for a while. The slabs were much dryer when I finally got around the attaching them, so hopefully they actually adhere to each other.
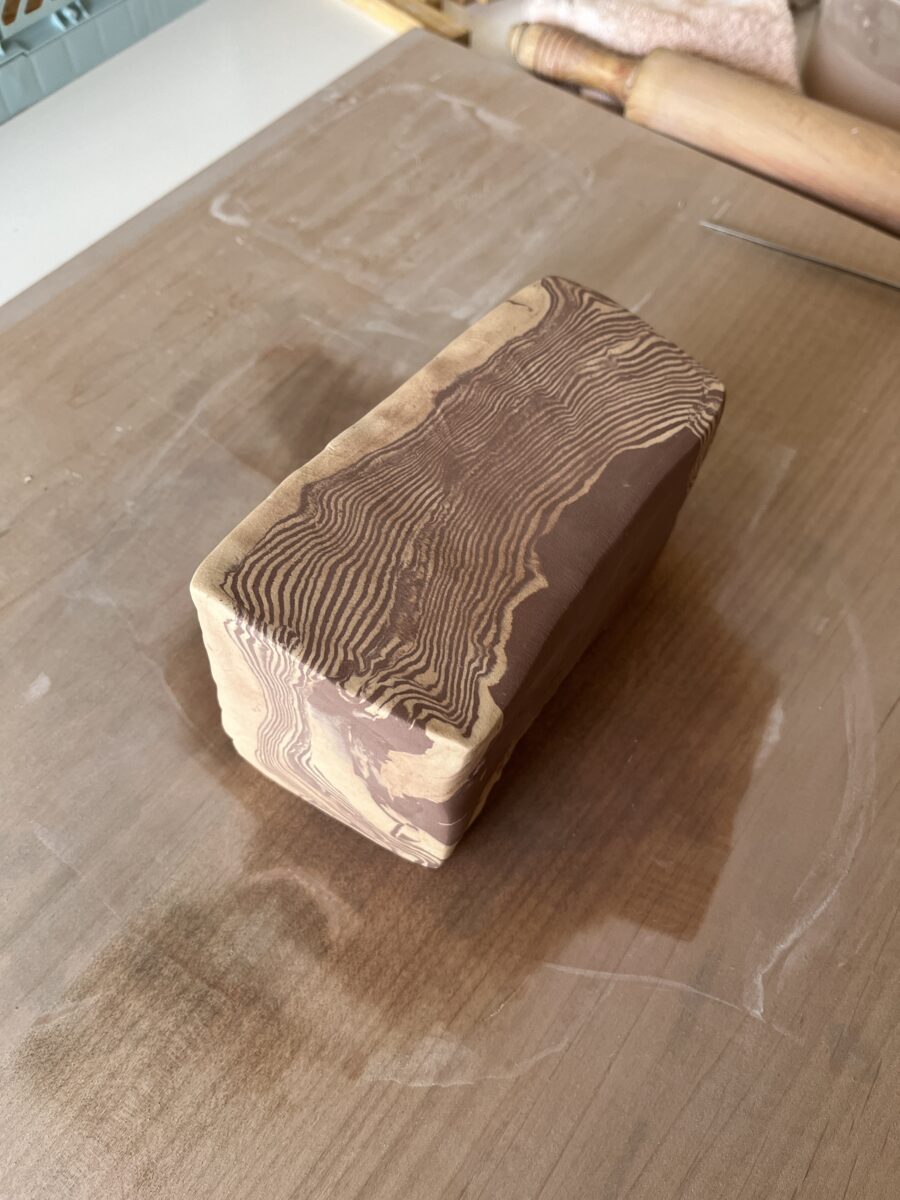
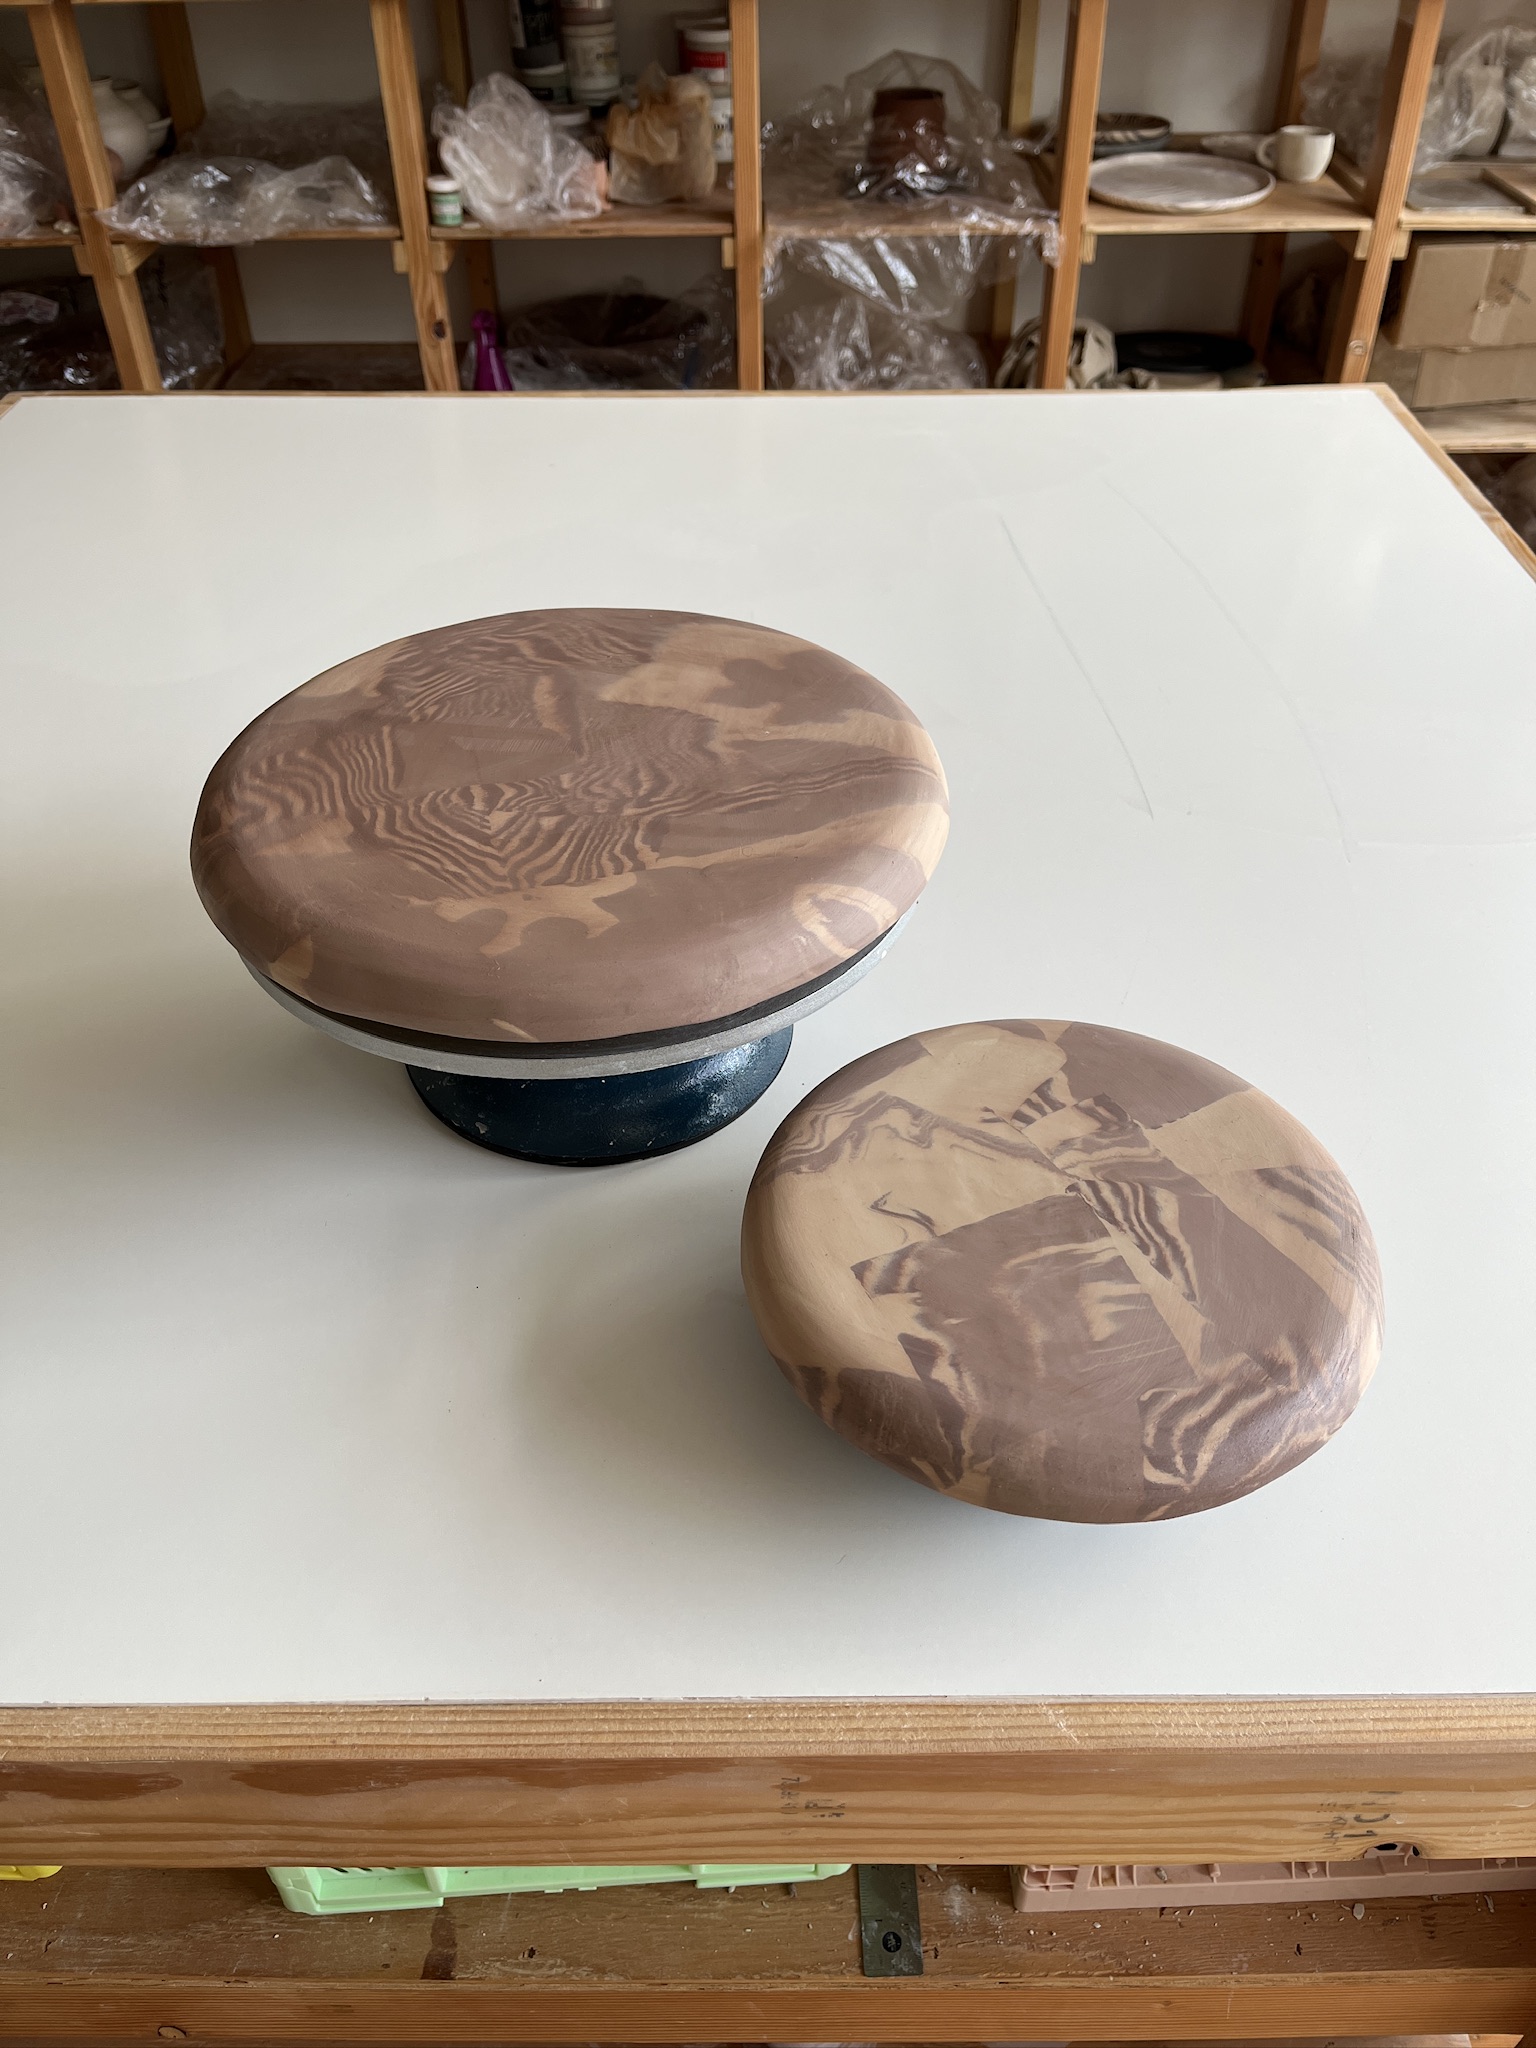
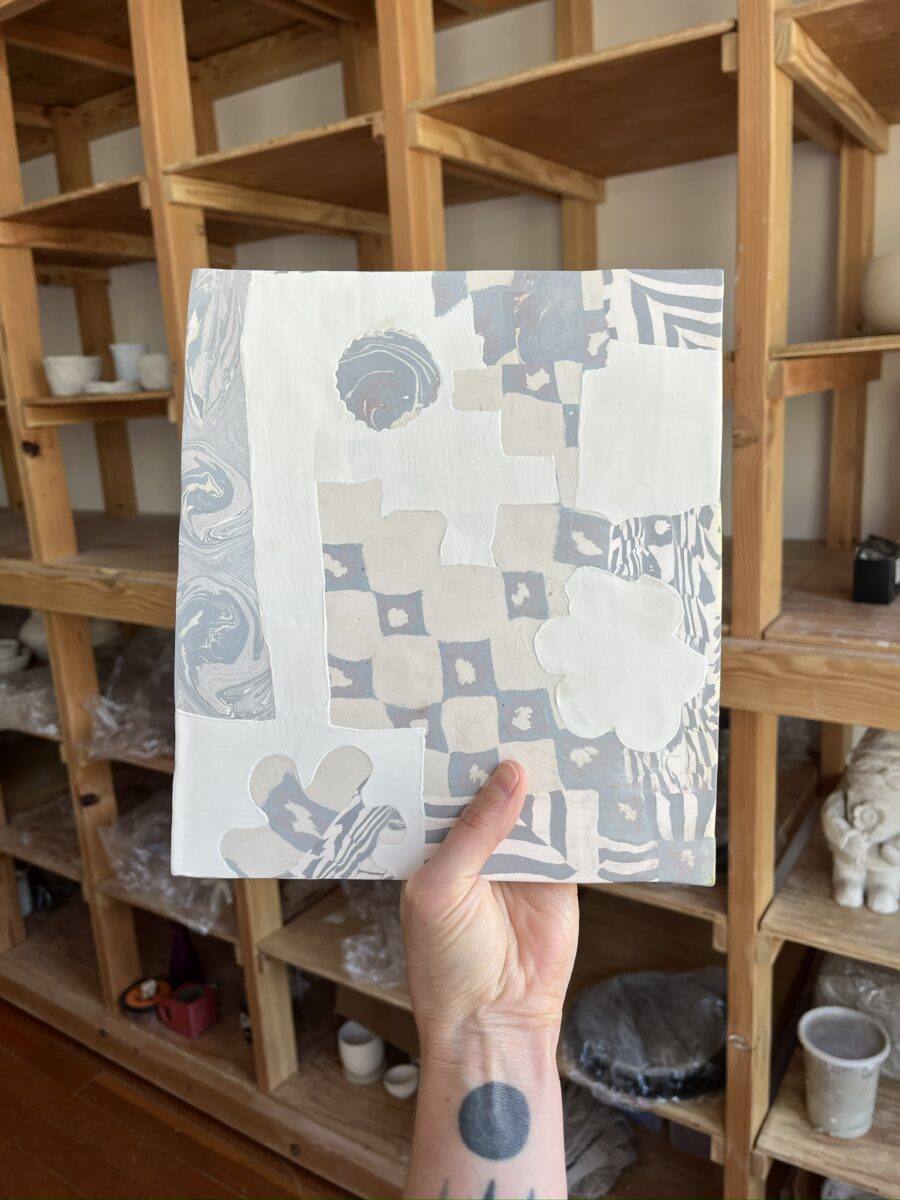
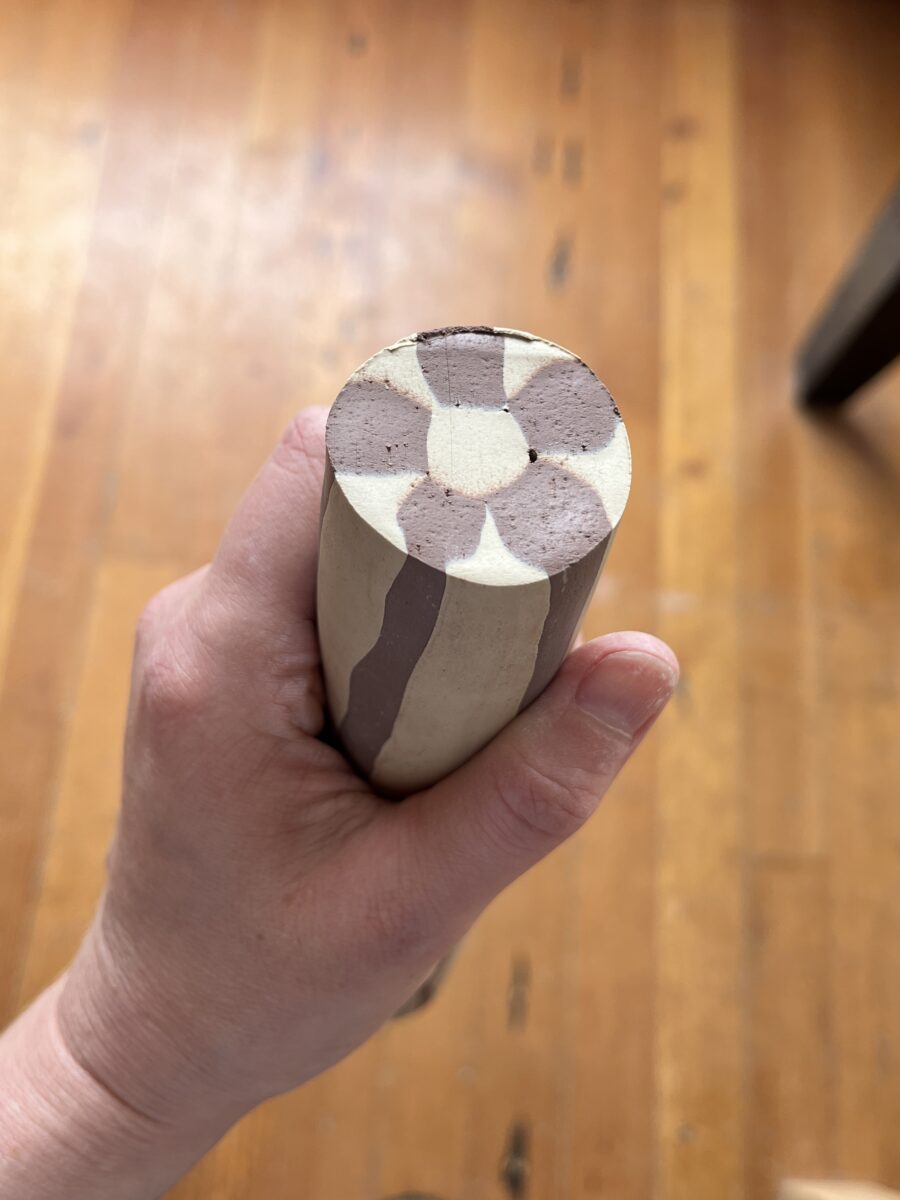
This is the first plate of leftover mason stained clay. I layered slabs of old gold and hazelnut brown with unstained clay and haphazardly rolled cross sections together.

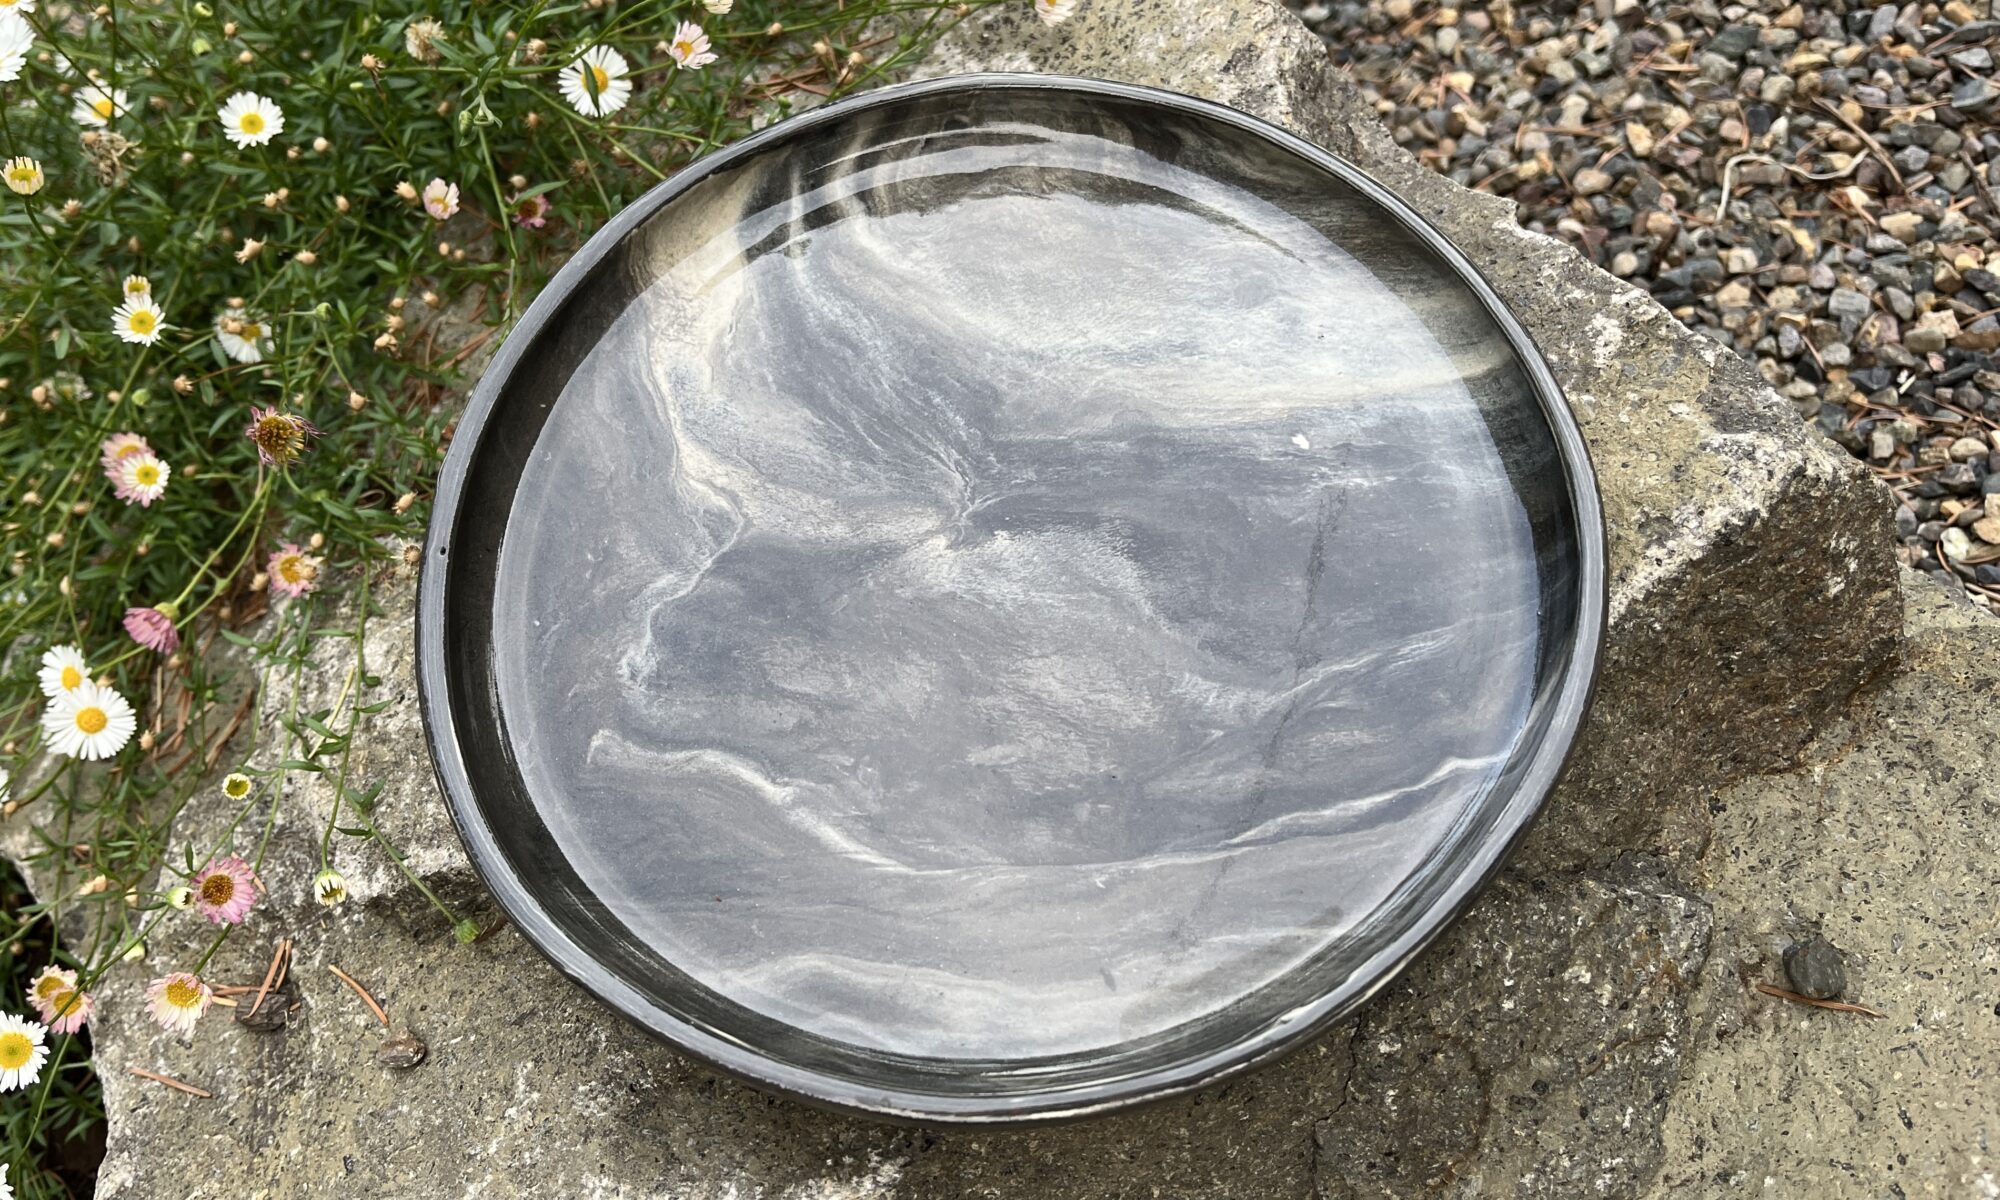
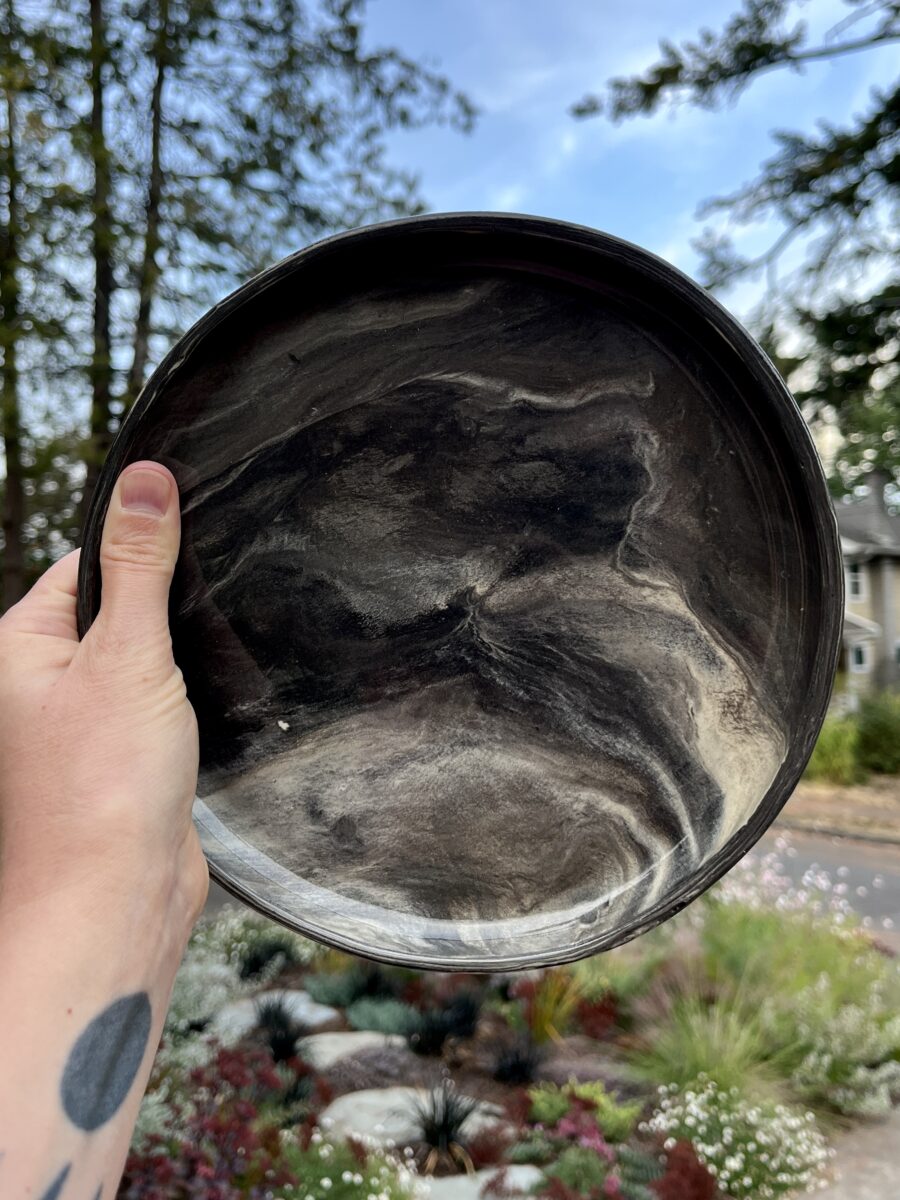
Okay, it doesn’t actually look like the moon, but it feels spacey. This isn’t technically nerikomi – I took leftover black clay and lightly wedged some unstained clay into it. This plate did warp a bit, but it’s still usable.
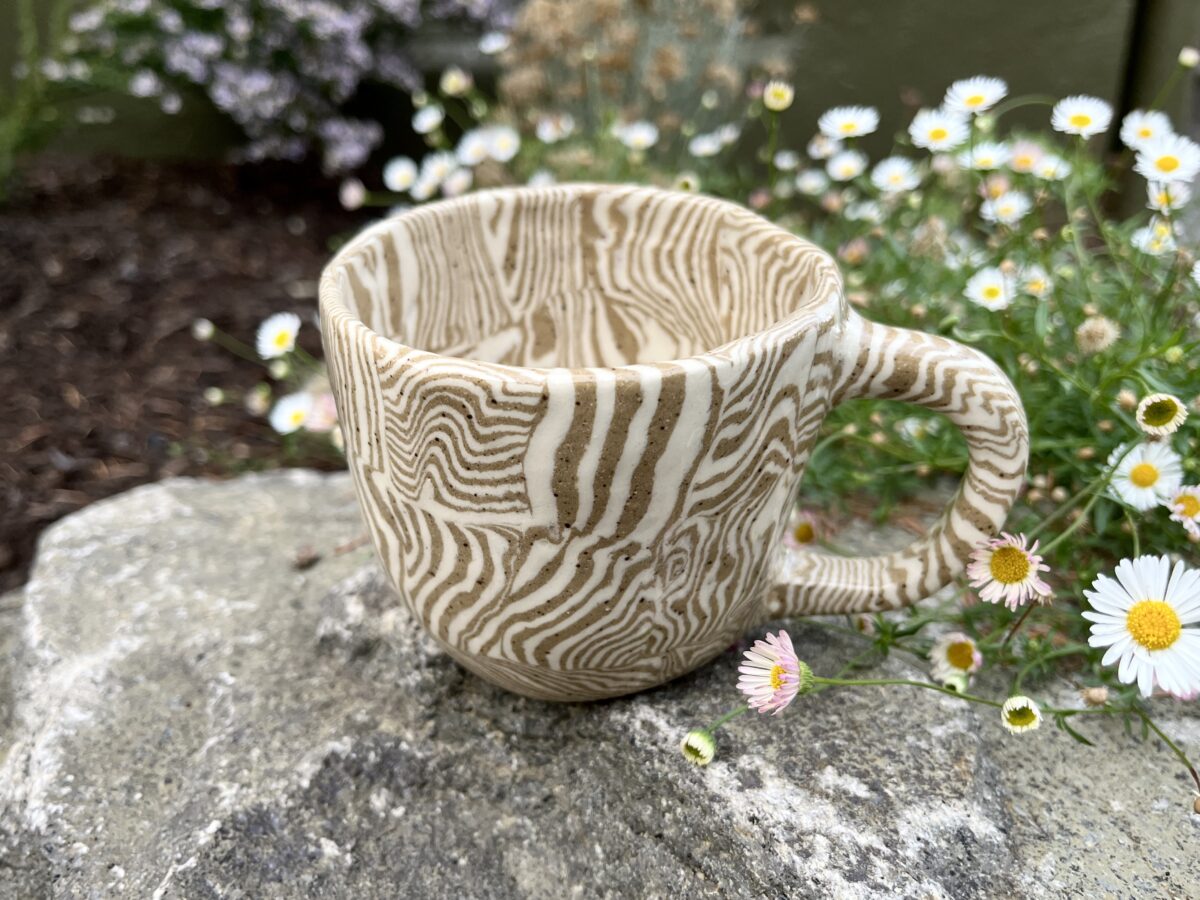
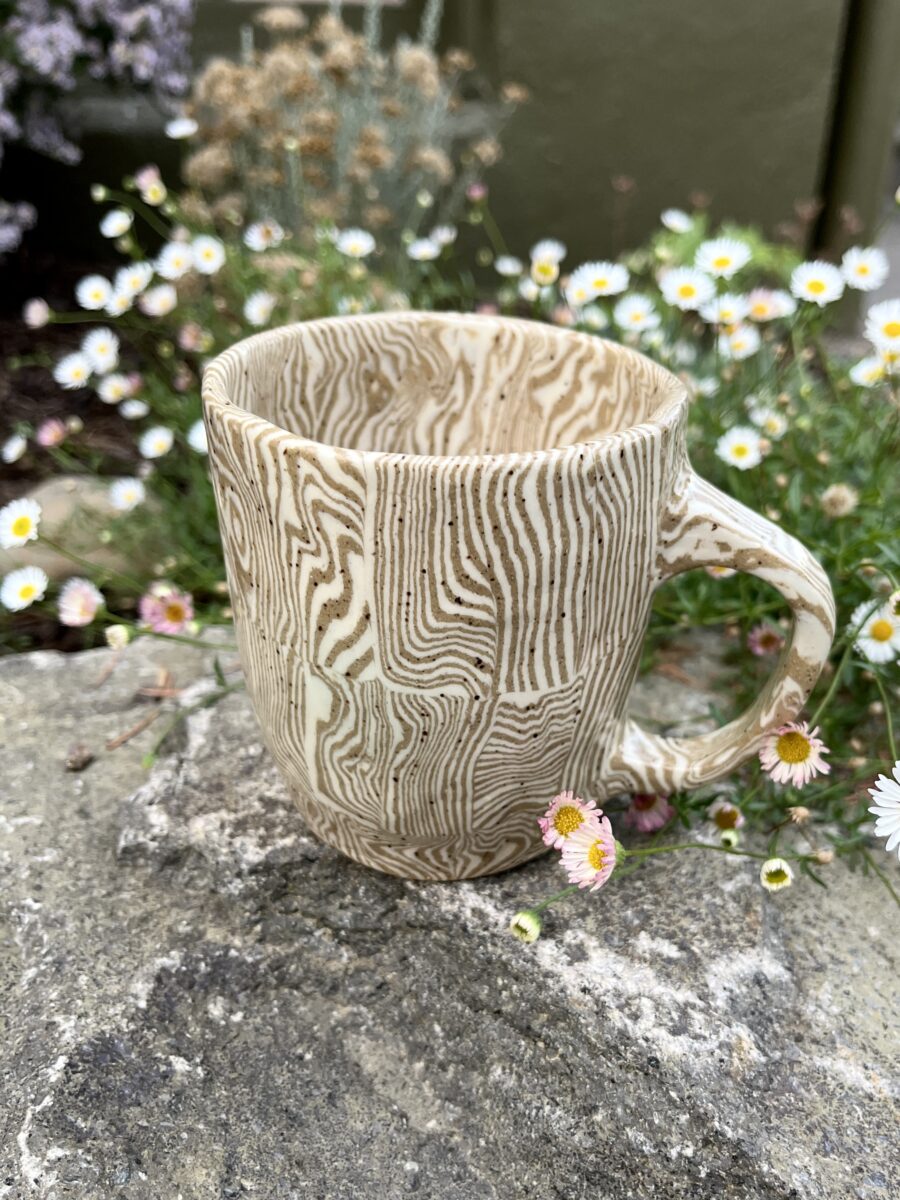
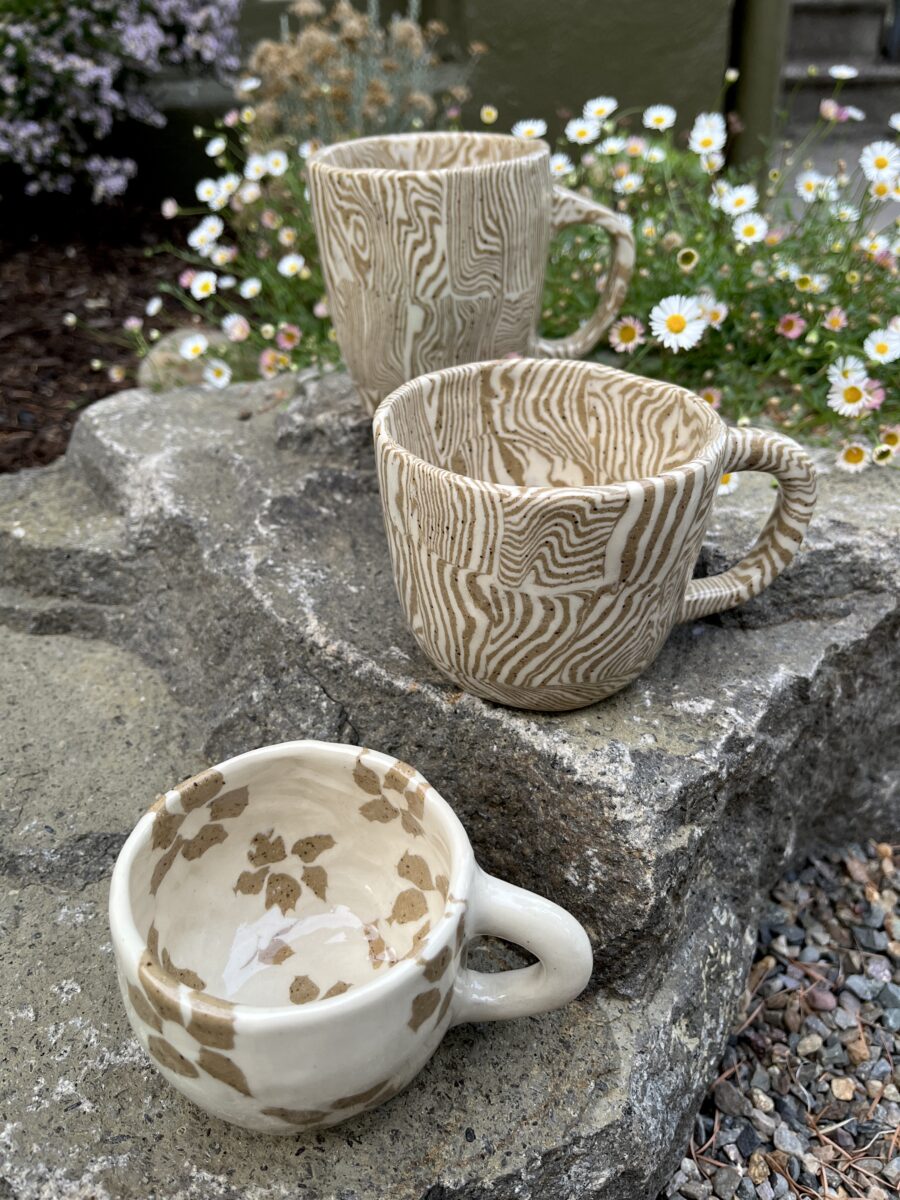
I am so pleased with these mugs. The ‘bacon’ series was a risk – instead of using the same clay body stained with different colors, I used two different clay bodies with the same shrinkage. For the record, they’re Laguna B Mix 5 and Laguna Speckled Buff.
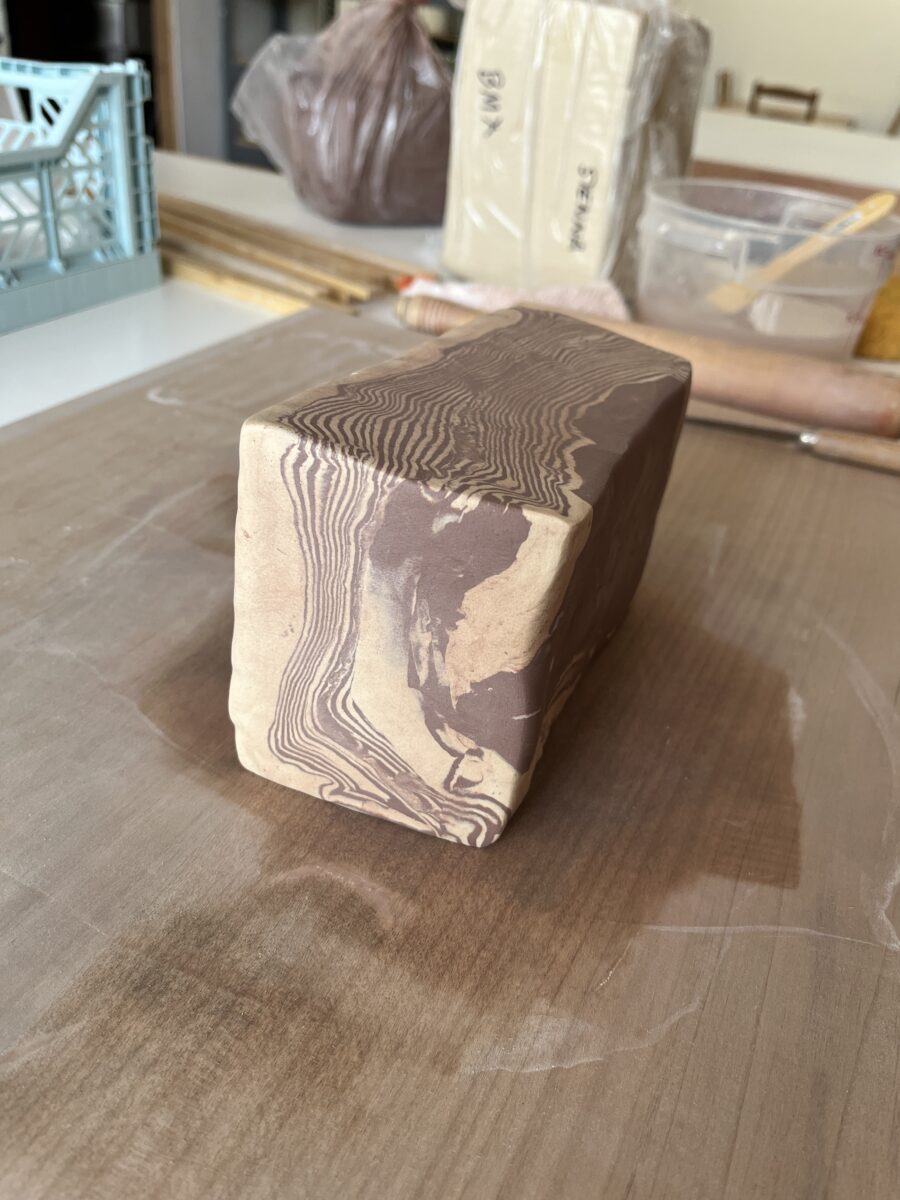
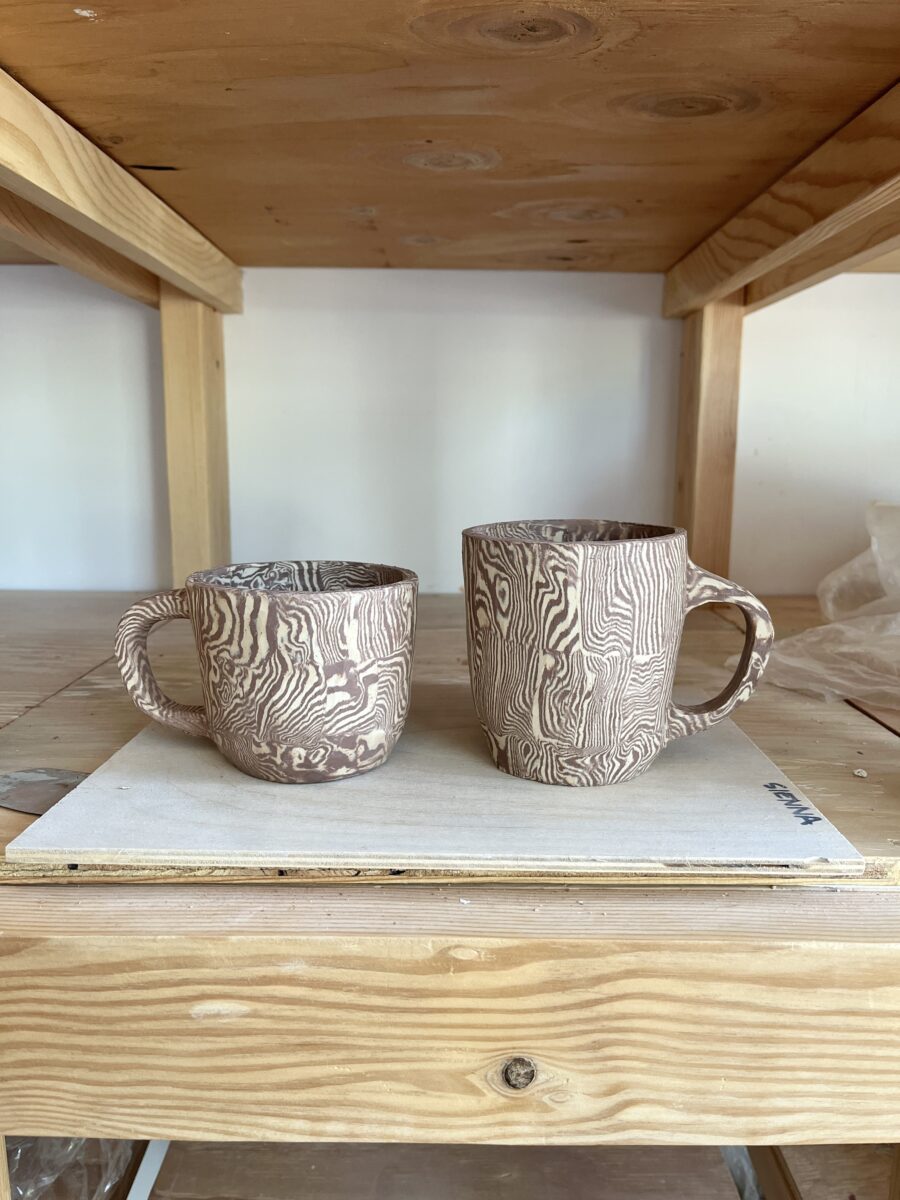
The mugs started as this hunk of what I think looks like bacon. I can’t quite remember how I went from the hunk to smaller pieces, but the mugs were formed using the same process as the mug found in this post.
Can’t win them all. I knew after the bisque firing that this plate was doomed, but I still went ahead and glazed it. Compression is really important for plates, especially large ones, and I think I just didn’t take enough care in the first stages of making this guy. The smaller plates have been quite successful!
And this little flower mug made it. Like a lot of my other nerikomi mugs, this one is just a little too small for my liking. My focus on the next round will be size.

This mug might be a better size, but the handle already feels too small. The colors are Peacock and Chartreuse.
And I did (hopefully) have some success with more flowers…

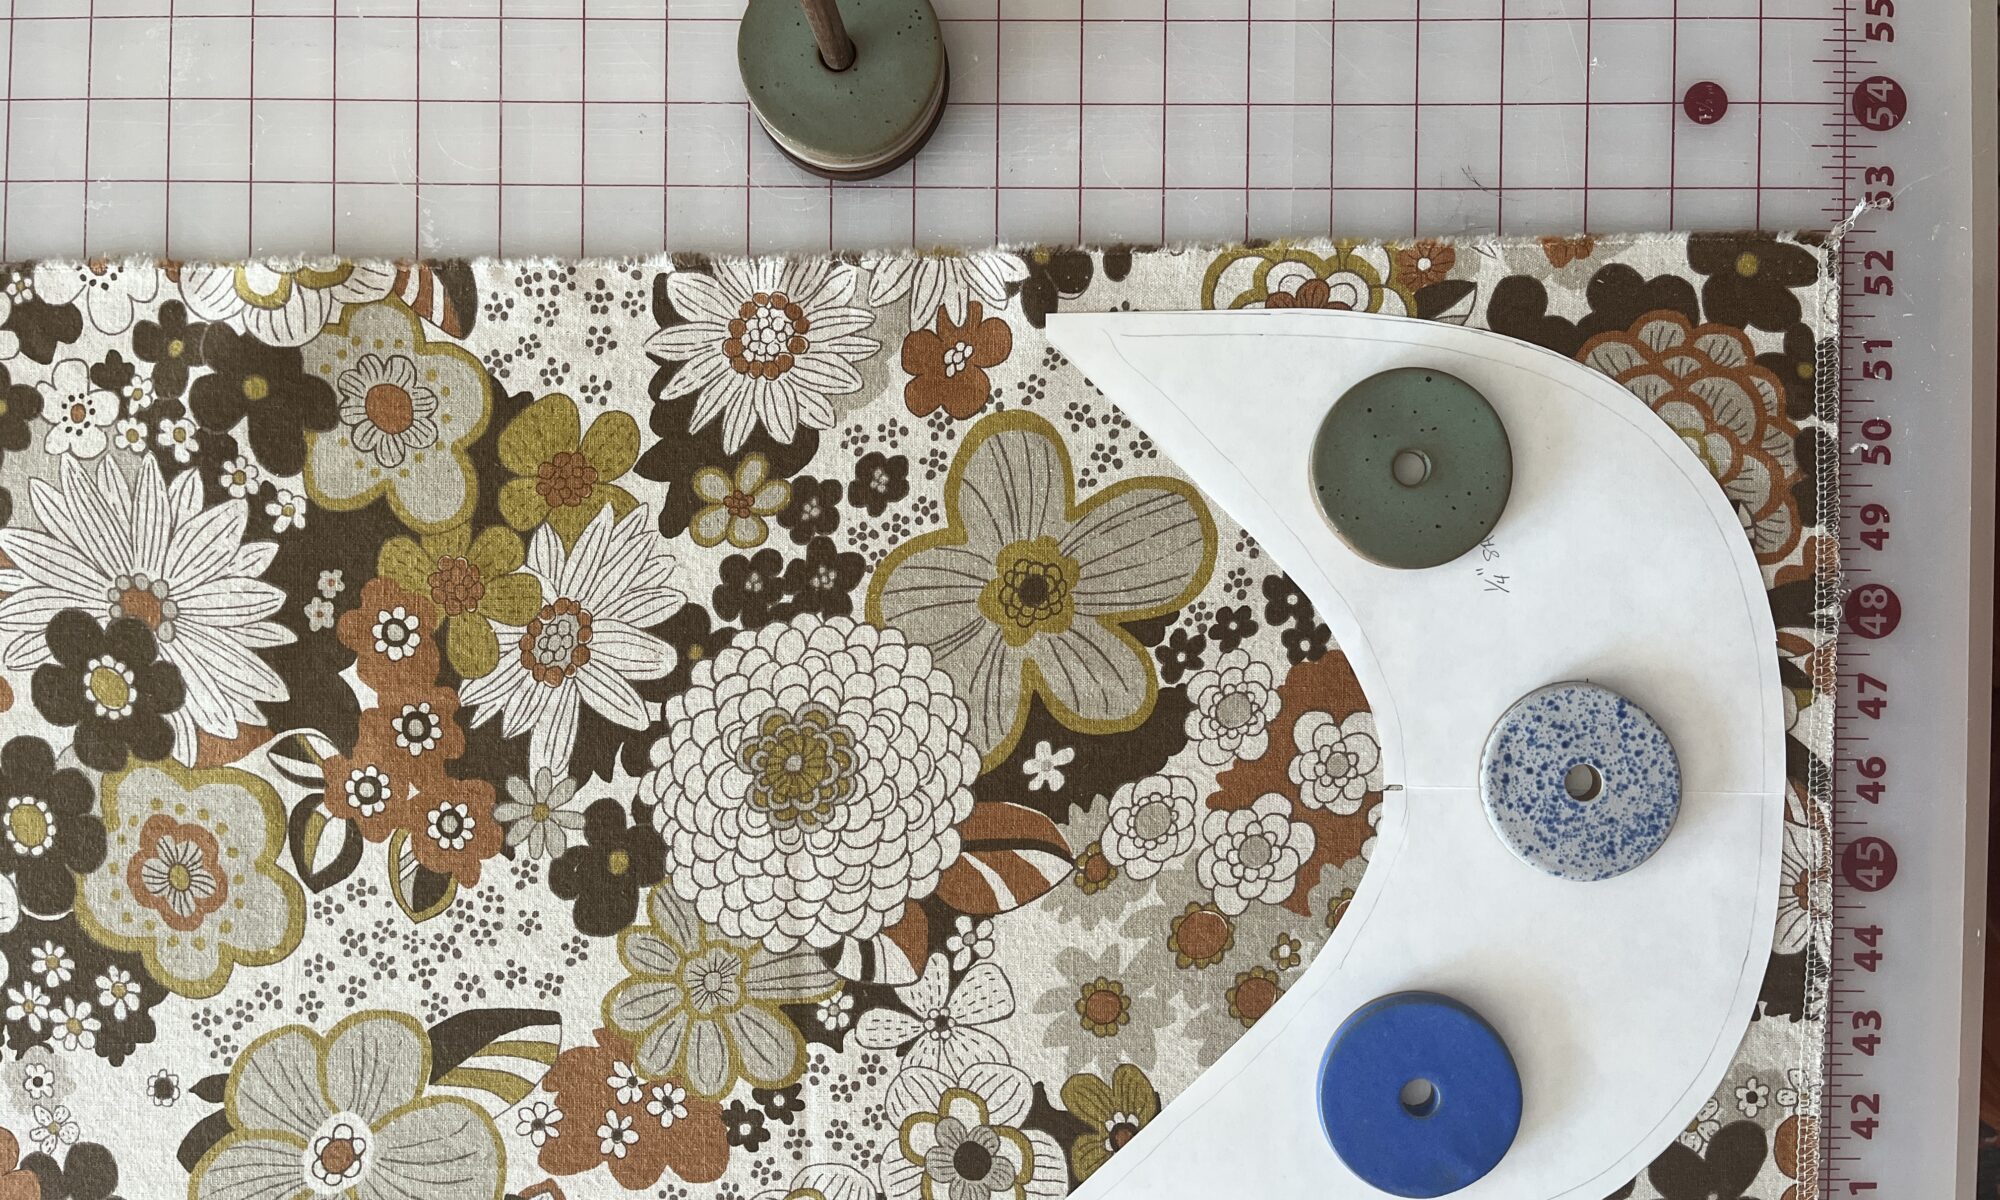
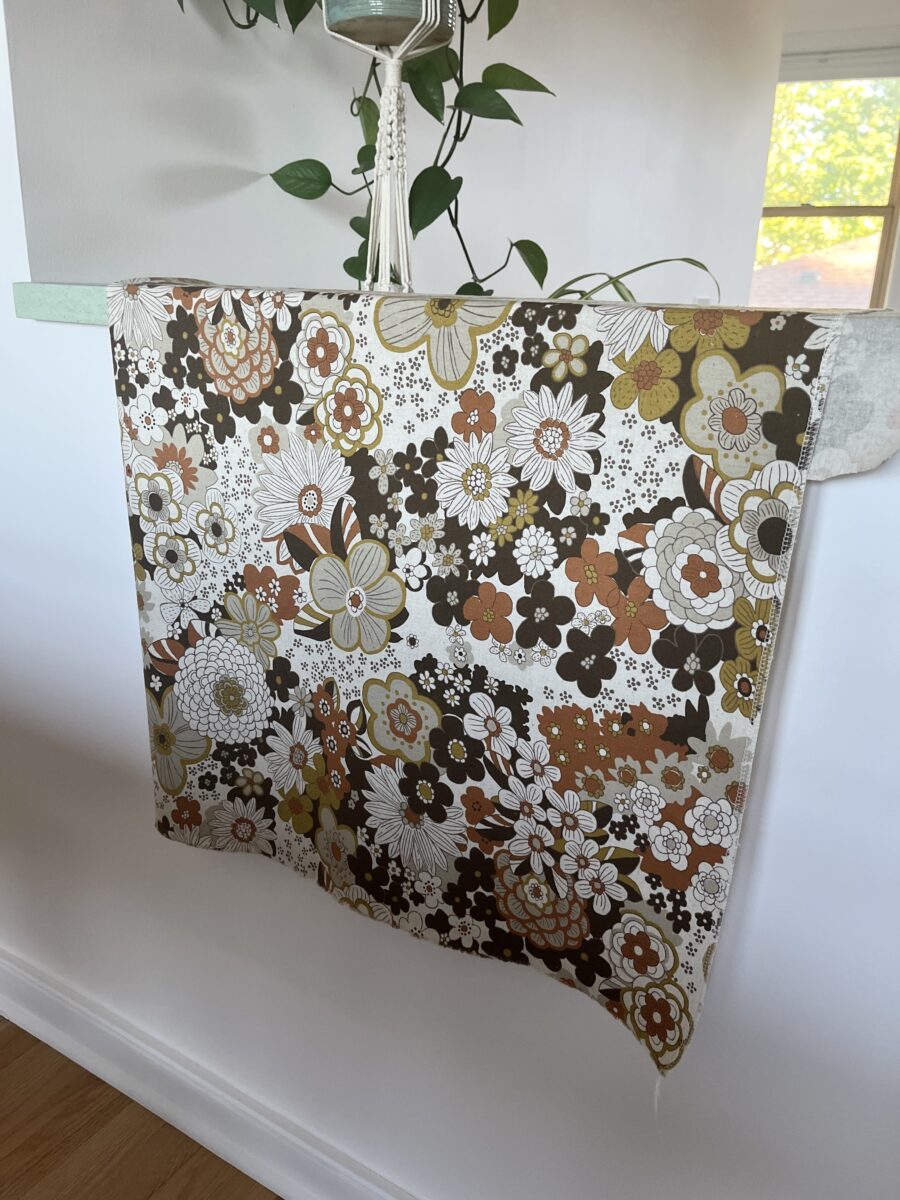
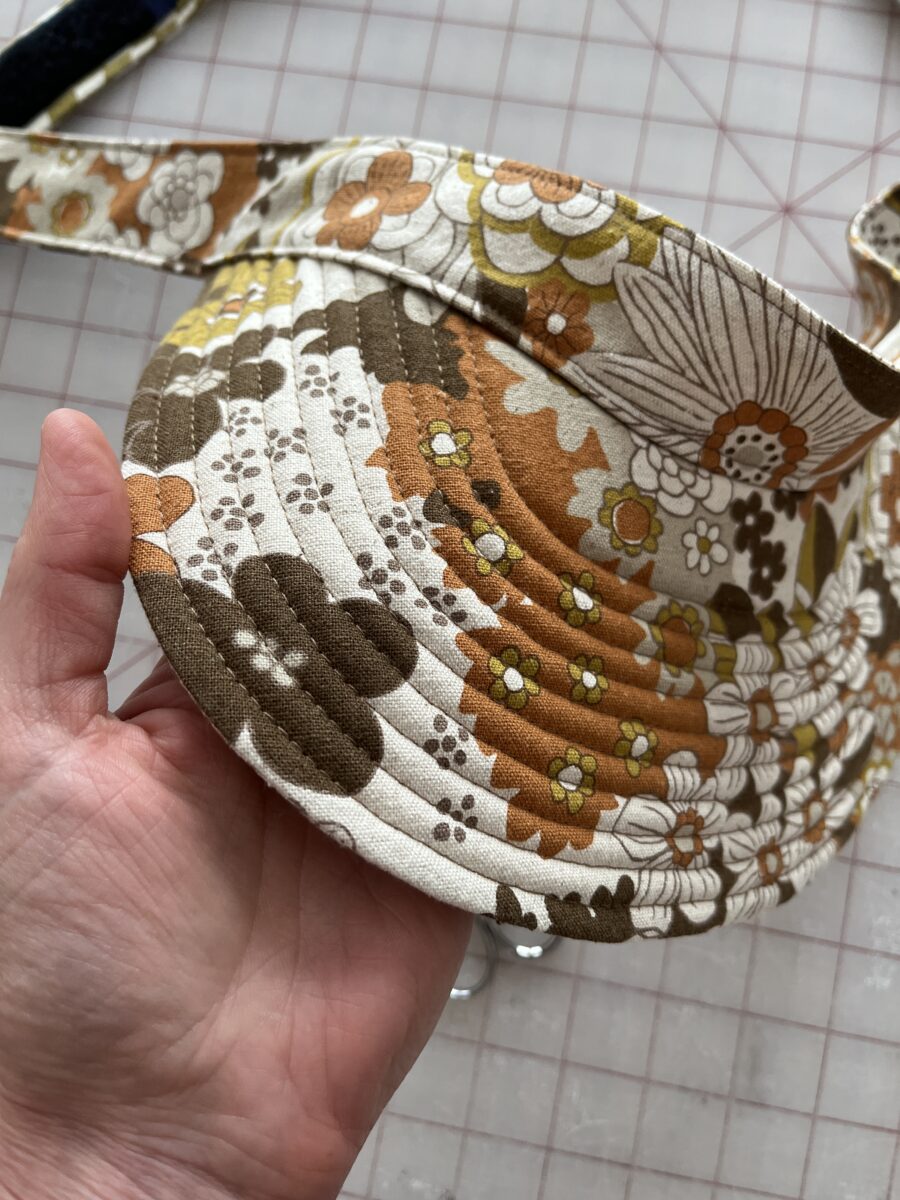
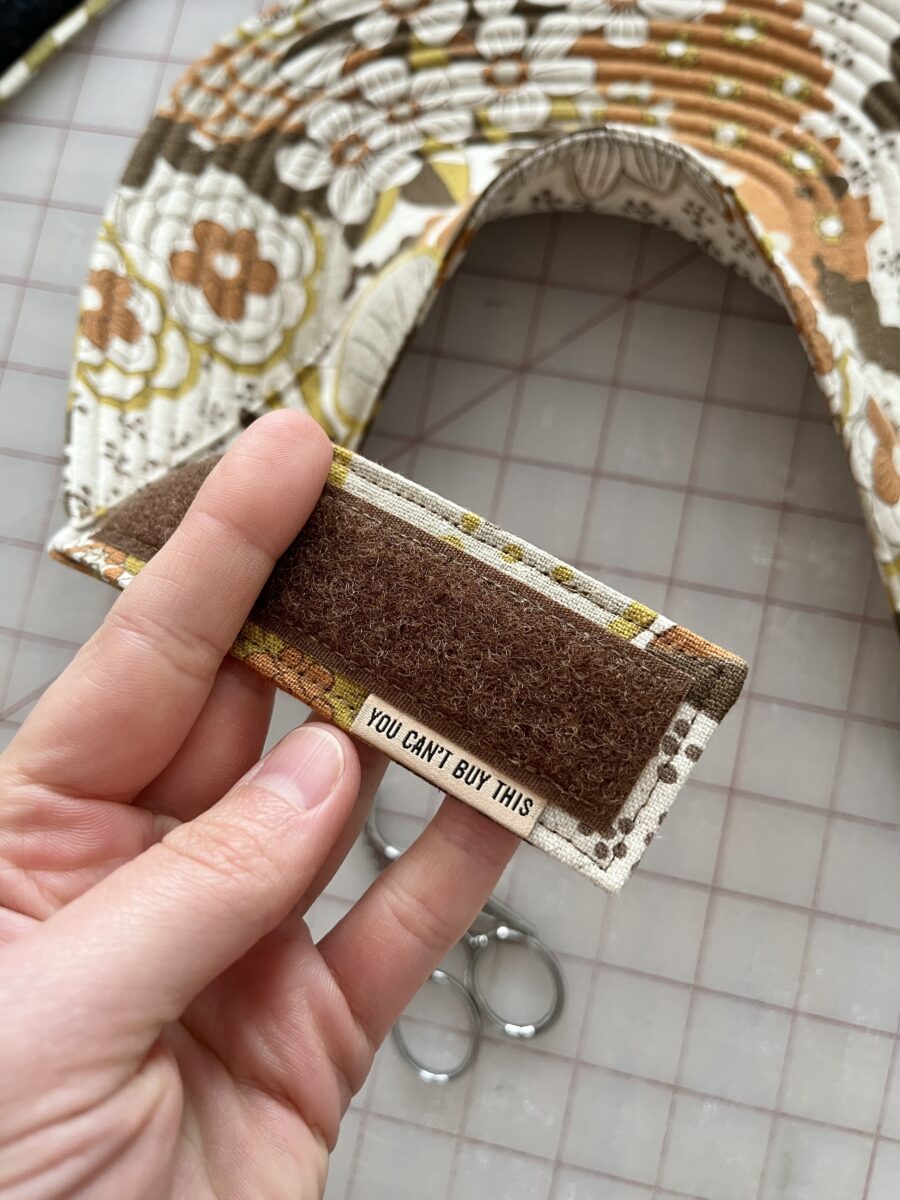
I’d been wanting to knock off my Baggu visor for a while because I thought it would be a fun project and because they stopped producing them. I liked its line of hats, so it was inevitable that they’d disappear.
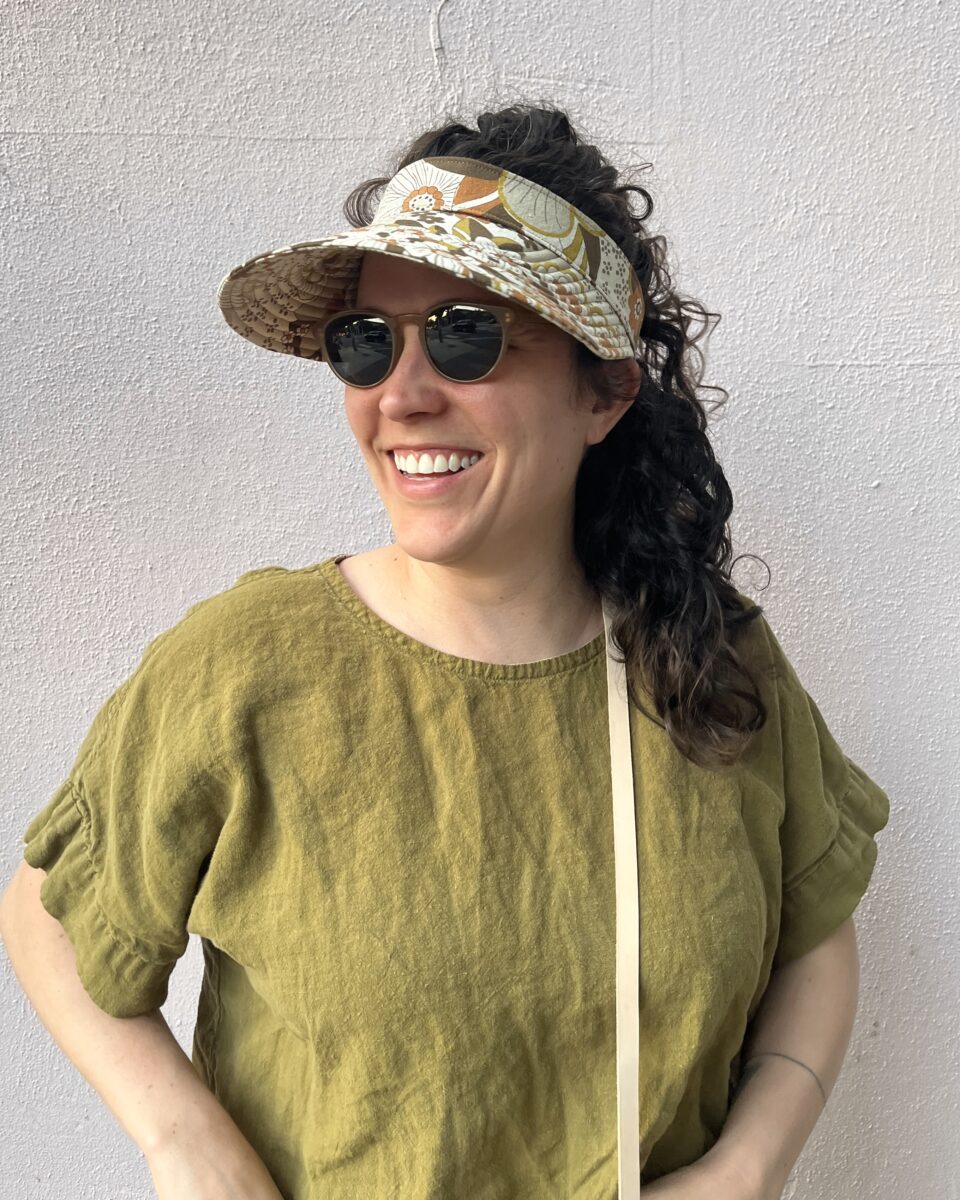

Inspiration finally struck when I found some Kokka canvas that reminded me of my grandparents’ bathroom paneling. The colors go great with most of my wardrobe!
Overall, I’m quite happy with it! It was fun to puzzle out the construction and what inner workings were needed to emulate the Baggu version.
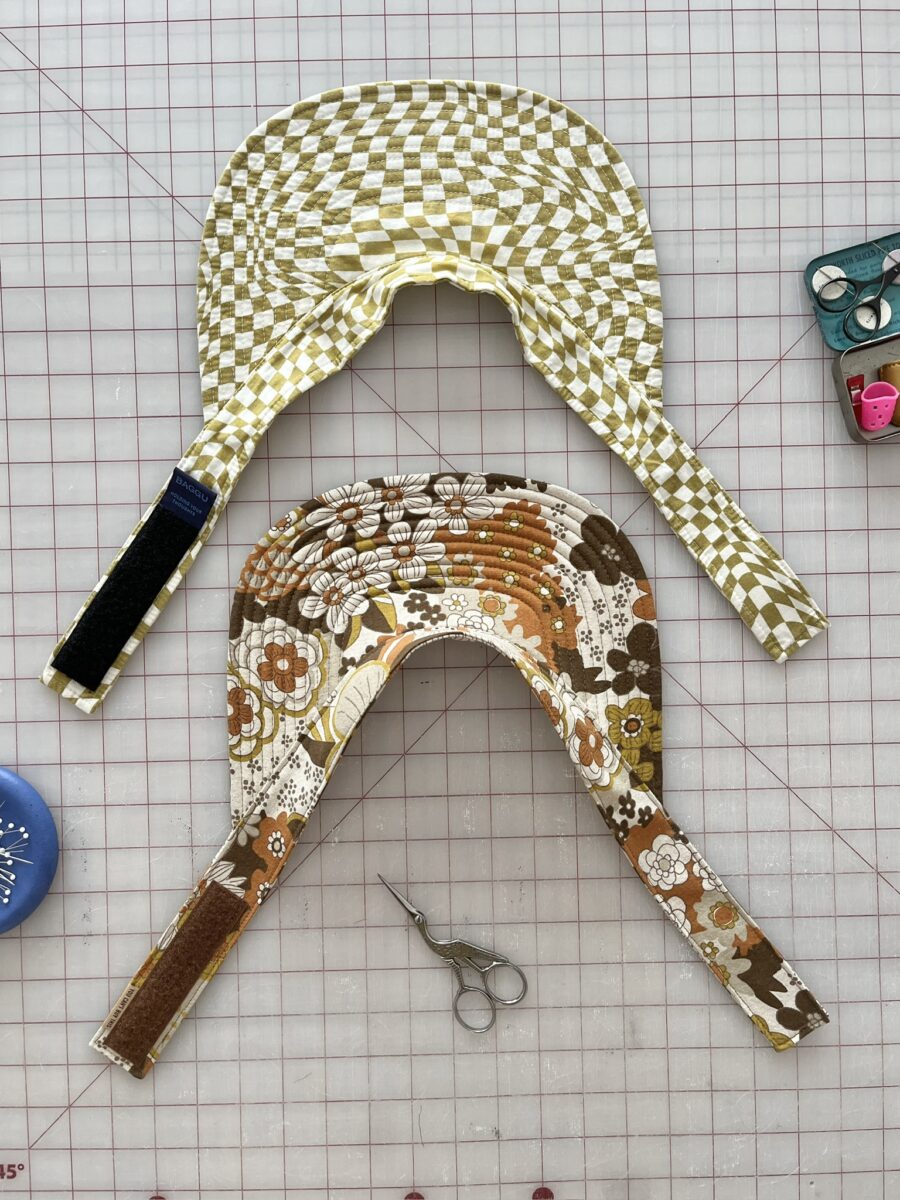

For my memory, here are the construction steps:

These Pomonas have never quite been right. For one, the khaki leg became about an inch longer than the other. The canvas weight is also too heavy for a wide leg cut, so the fix was to turn them into shorts.
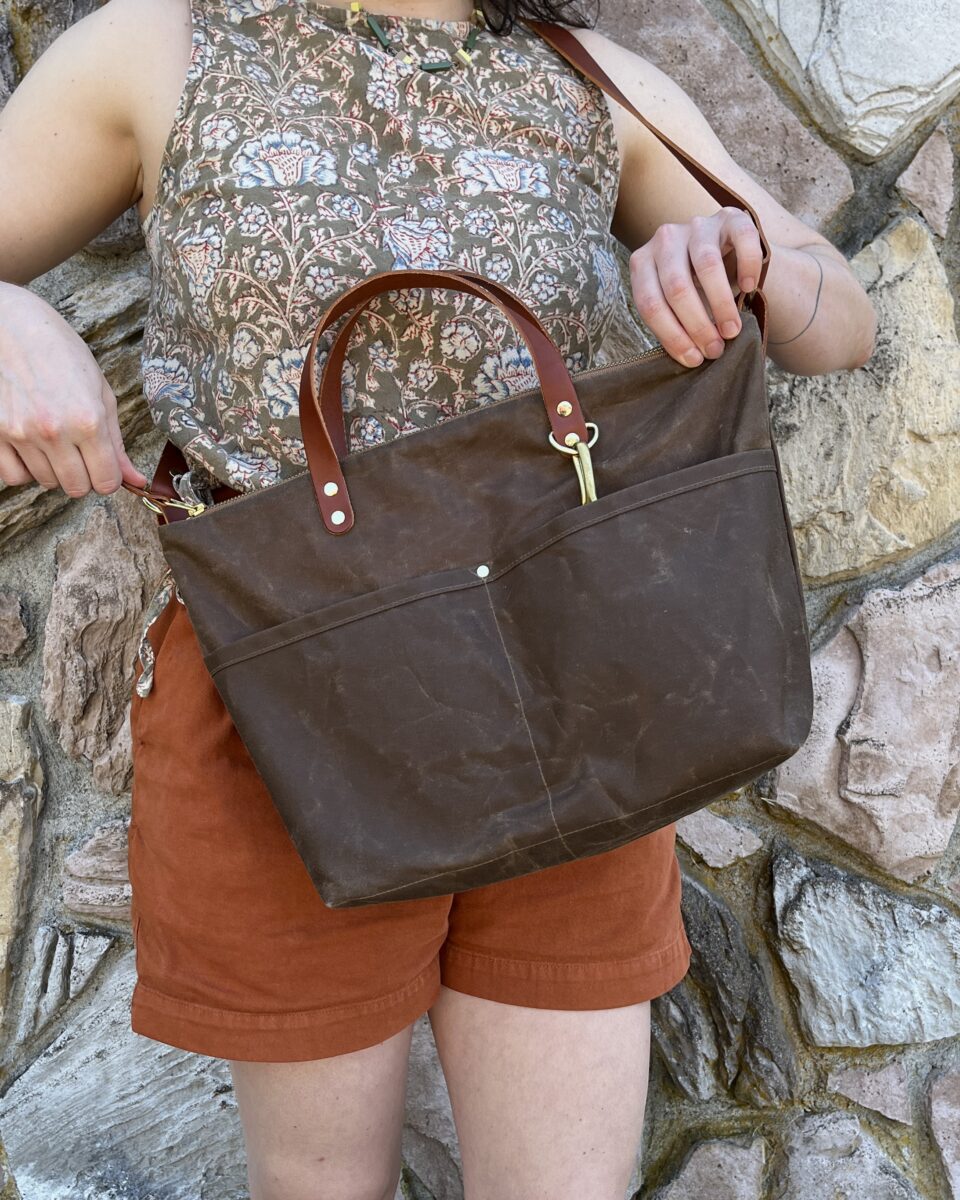
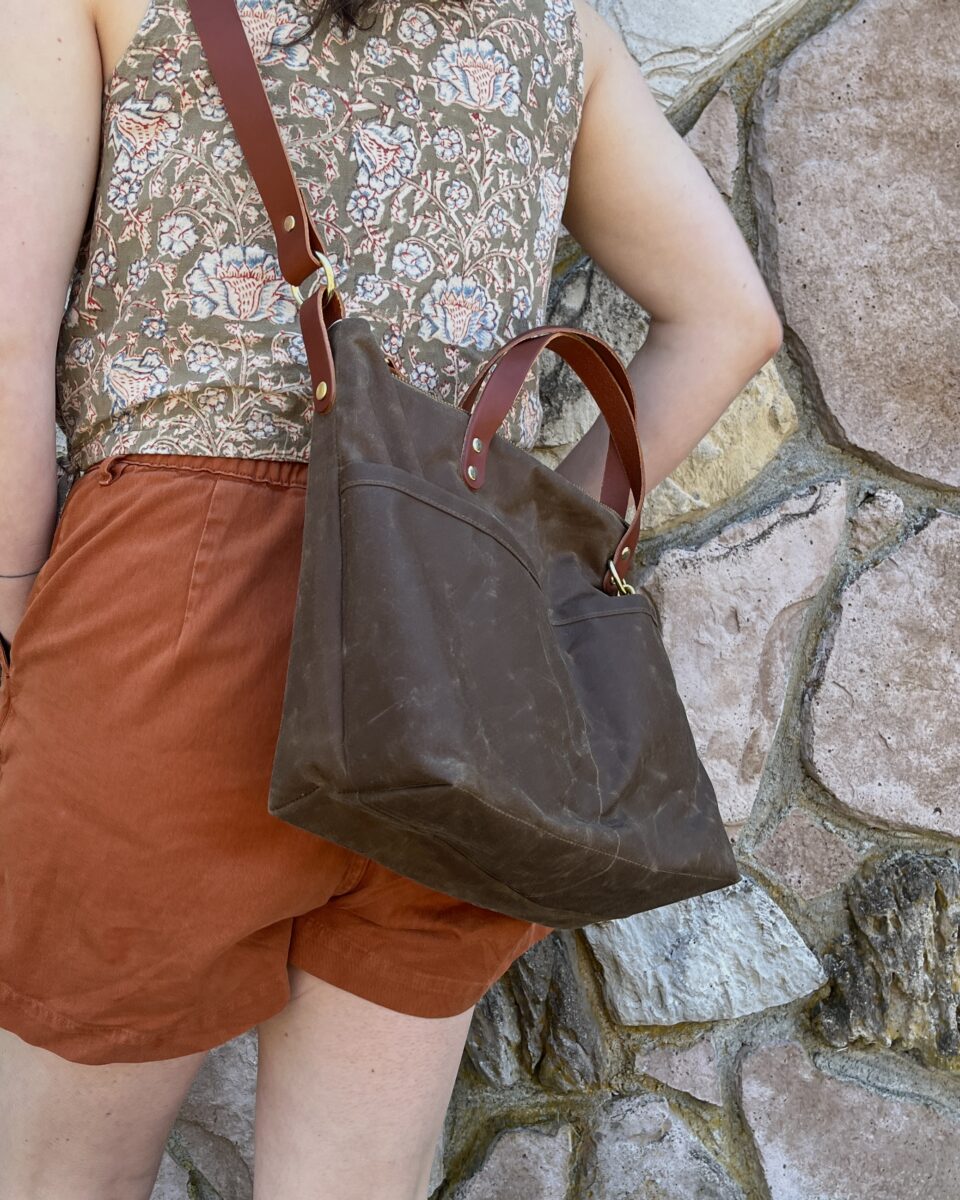
And I tested Klum House’s soon to be released Alberta bag. It’s smaller than the Fremont I just finished, making it a great everyday bag.
Finally hung this piece and even though I totally bonked the french cleat epoxying it at an angle, it’s level on the wall! I love it and I want to make more.
I’ve been making lots of plates too!
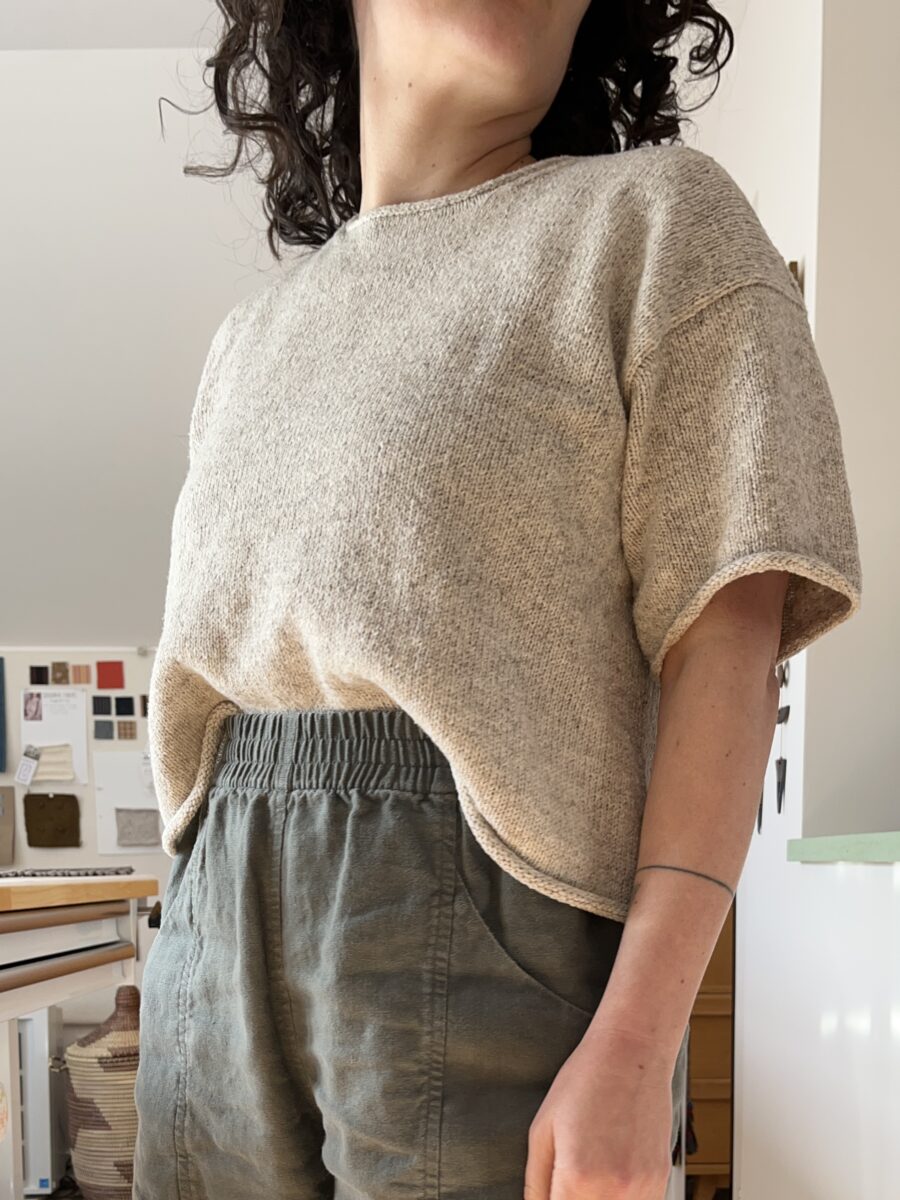
And finally, I started the Ozetta Air Tee. It’ll probably be done by the end of summer…
I made another Fremont bag, this time using all Klum House waxed canvas. I made this set in 2020 using accent fabric I’d sourced on my own and boy has it stretched out. I also added that little initial tag between the handles, which made the zipper catch and the bag collapse in a weird way. The light colors of the set were risky and they definitely showed a lot of wear immediately. Ah, learning.
The only change I made to the exterior was to hem the pockets to the right side, taking inspiration from the hems on the Naito bucket bag. I like how the pocket contents don’t get caught on the hem ridge when I grab things.
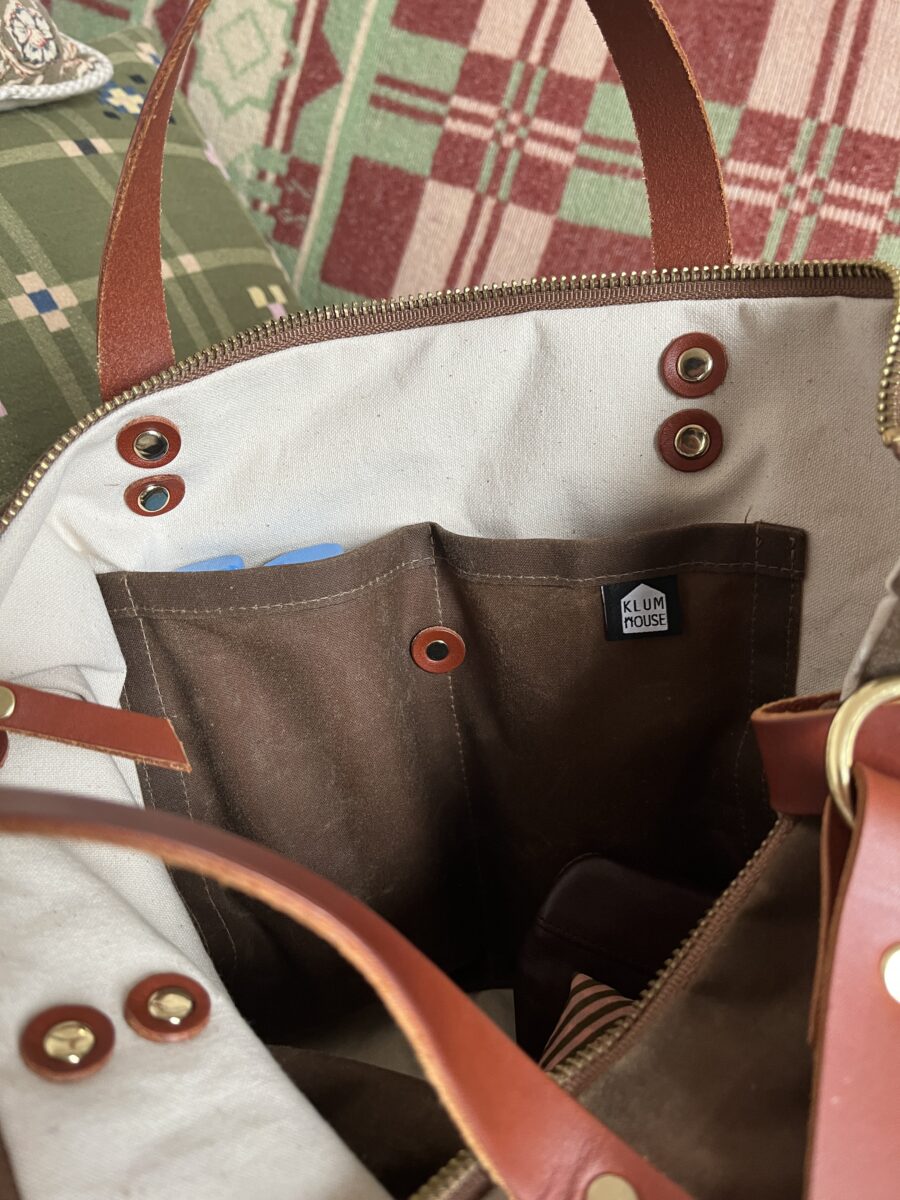
This bag is quite roomy, so I wanted at least one more interior pocket to organize things. I added one to the front lining of the bag, totally forgetting that the one little rivet on the exterior would go through it. It worked out though, perfectly aligning with the stitch line. However, I may have punched right through these stitches, so there’s some risk it’ll come undone with wear.
The interior pockets were stitched on with two lines, the first at ⅛” and the second at ¼”. The instructions only include the ⅛” line, but on my first Fremont, I didn’t like how the raw edges of the pockets were just flapping around inside the pocket.
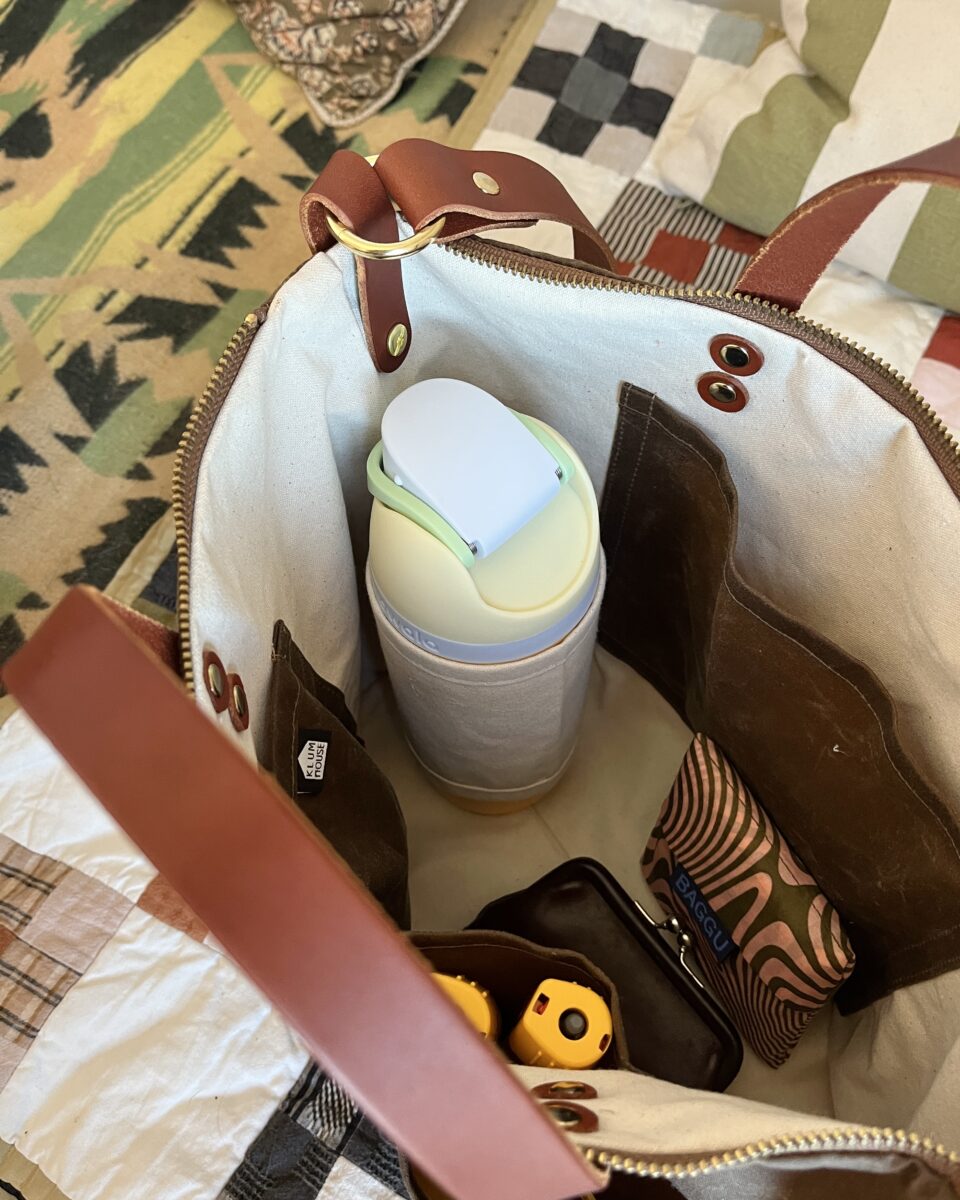
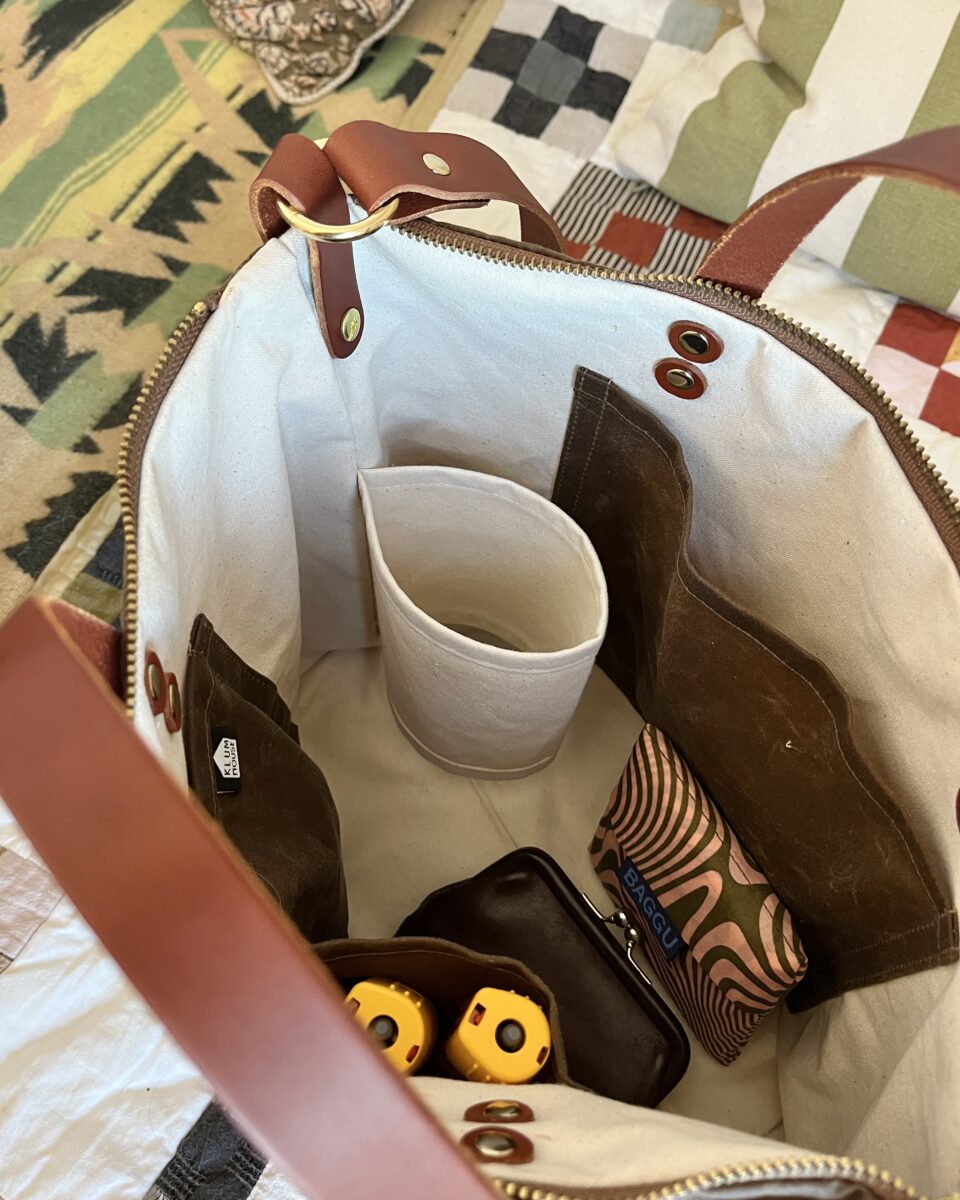
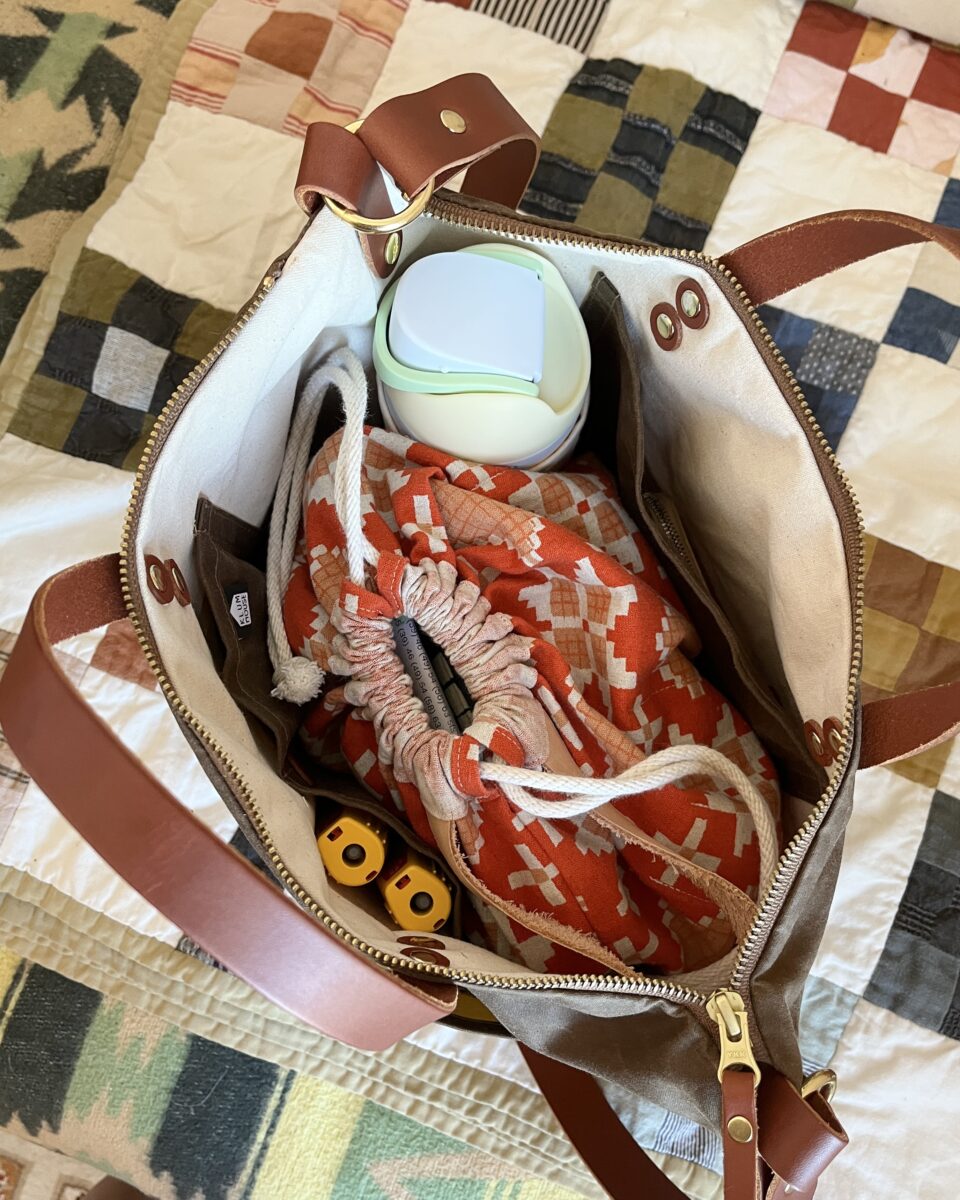
The only other modification I made was to add this very simple water bottle loop. Again, this bag is very roomy, so I wanted a way to keep things in place. It’s just a strip of fabric with two double fold hems, inserted into one side of the lining. To get the approximate size, I hemmed a long strip of fabric, wrapped it around the bottle adding a little bit of wiggle room, and finally seam allowance. I totally guessed the placement and ended up moving it a little lower after turning the bag right side out.
I love Klum House bags and kits, but they’ve made a significant change recently – kits no longer come with pre-cut fabric. I understand this change, but was pretty shocked and bummed to not be able to jump right to sewing after unpacking the kit. When I purchased this kit, I also bought the Slabtown in the same colorway (I want to replace the bag set mentioned above) but I have to build up motivation to cut out all the pieces out.
I wet sanded and glazed so many pieces last week. It’ll be a while before they’re fired, but I’m so excited to see how they turn out!
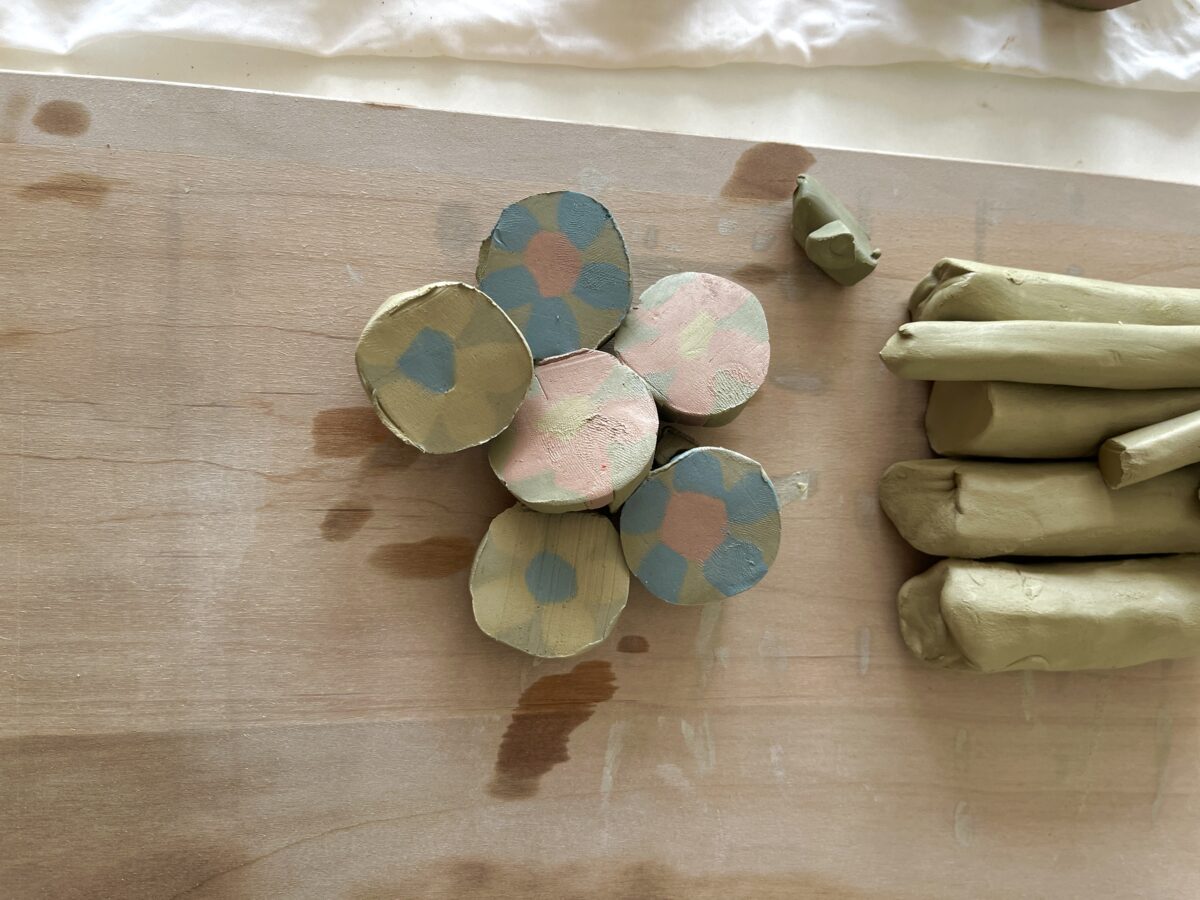
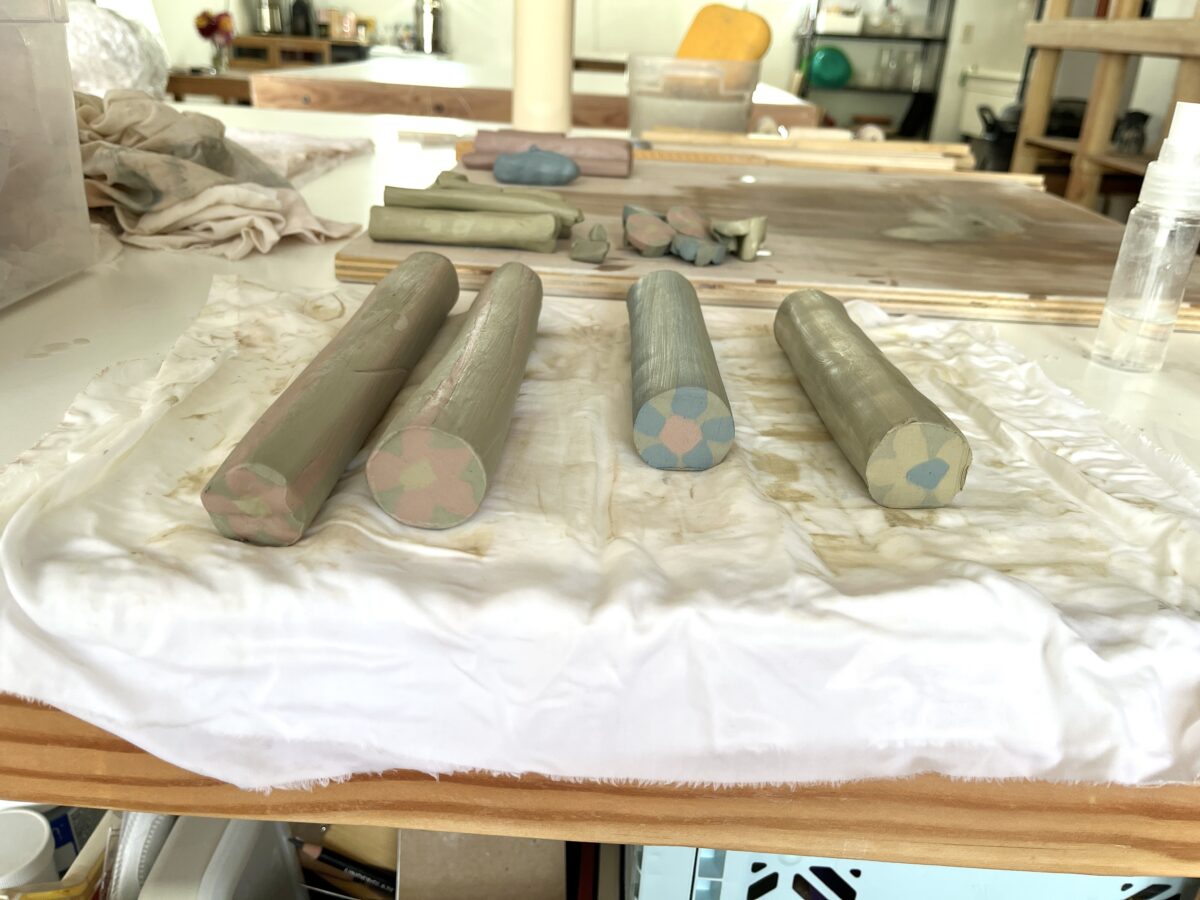
I also had a big fail after spending so much time making this flower log. The goal was to turn this slab into a plate, but the white clay was too dry to properly adhere to itself causing bubbles. At least I sort of improved my coil making technique in the process!
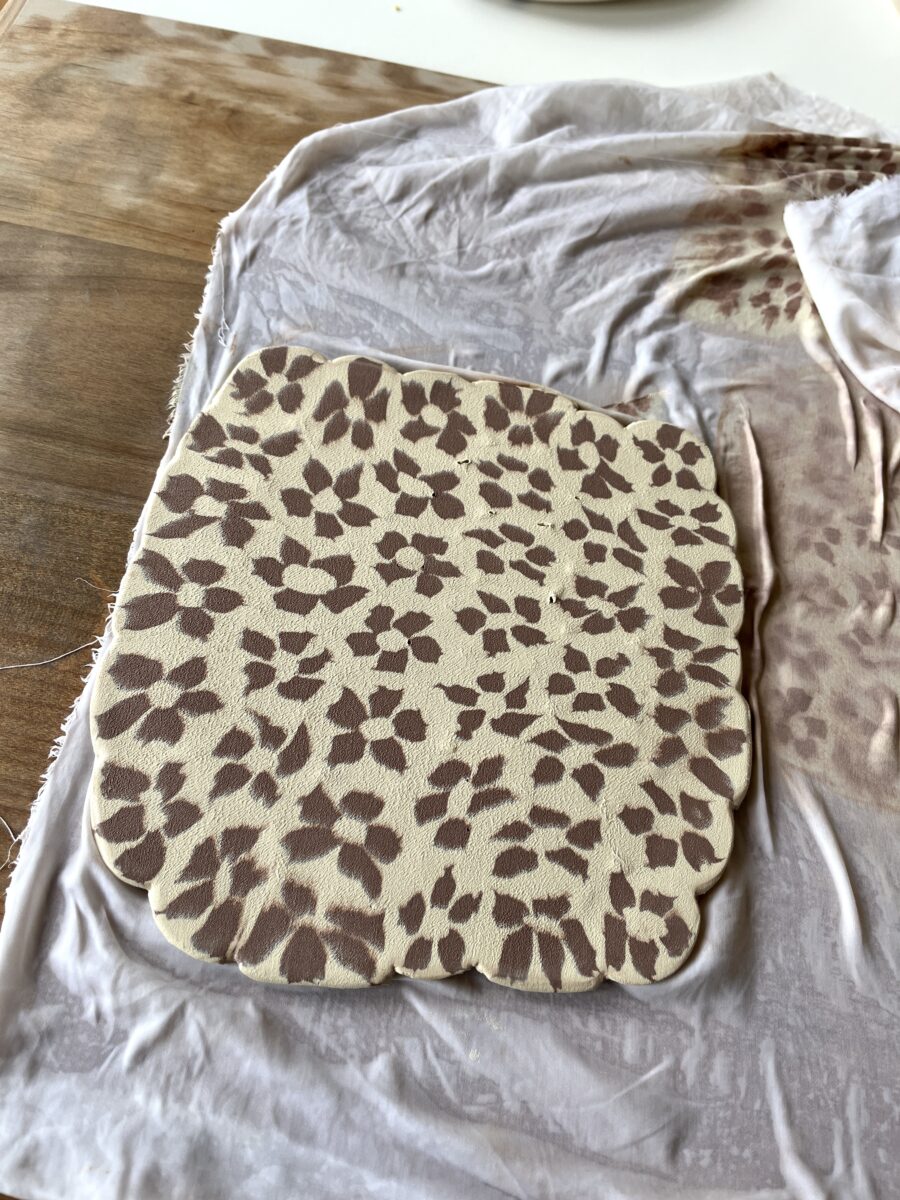
I was able to use some of the flowers to make a mug, so it wasn’t a total fail.
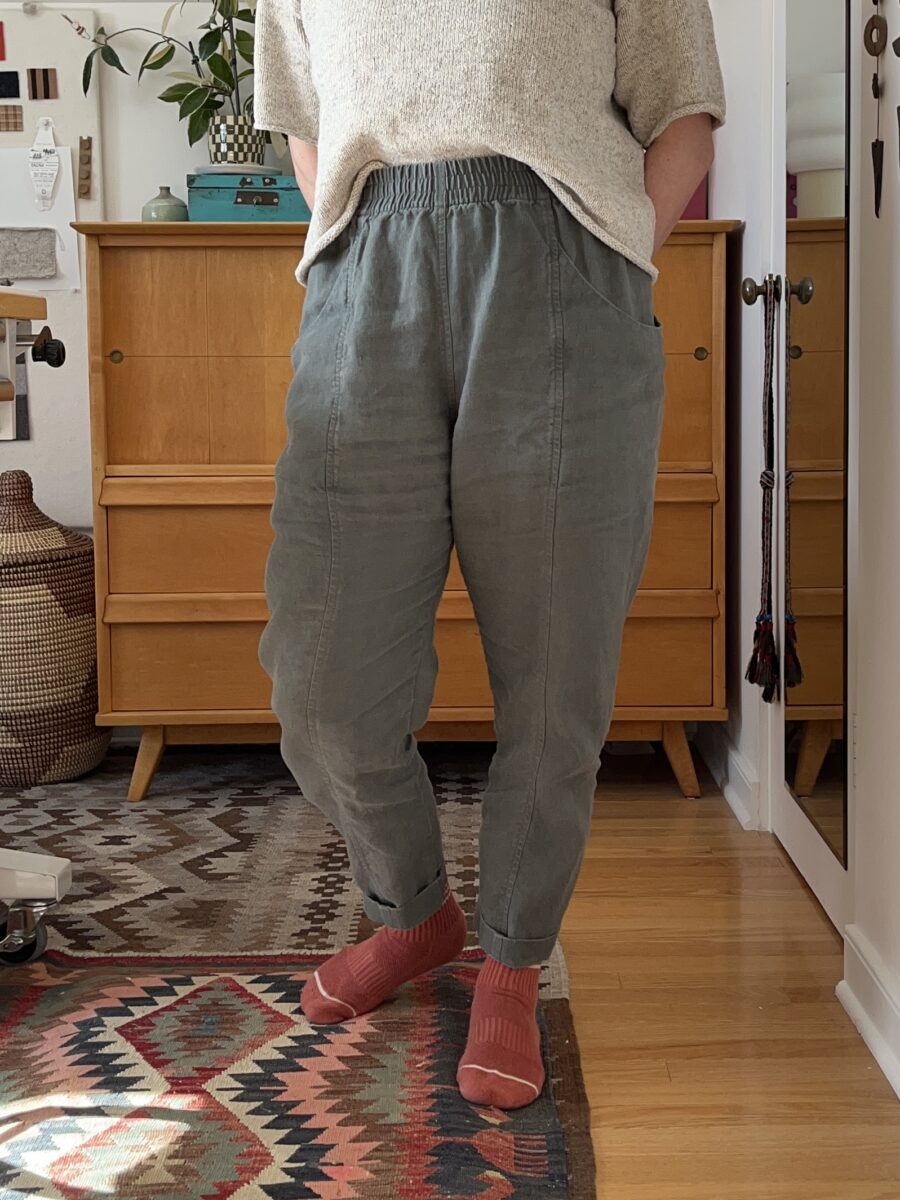
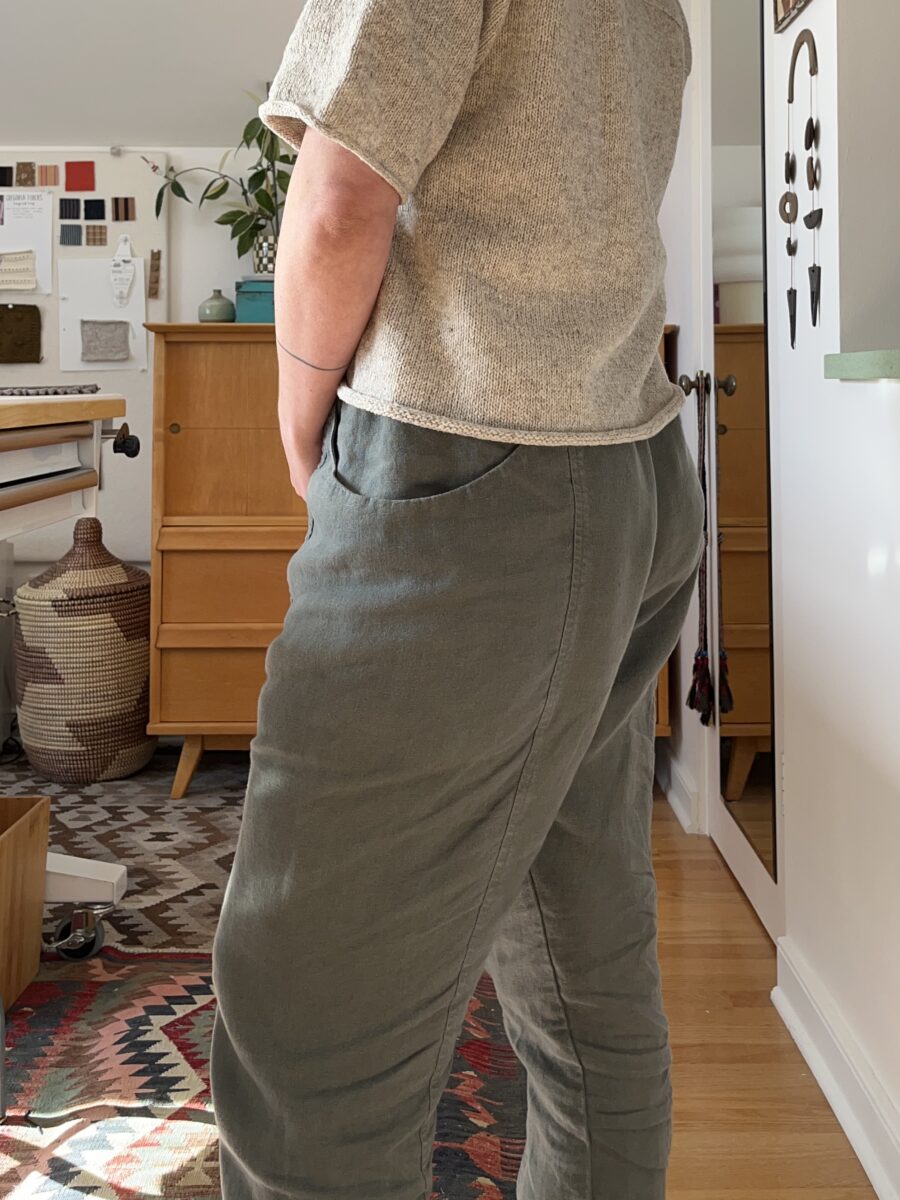
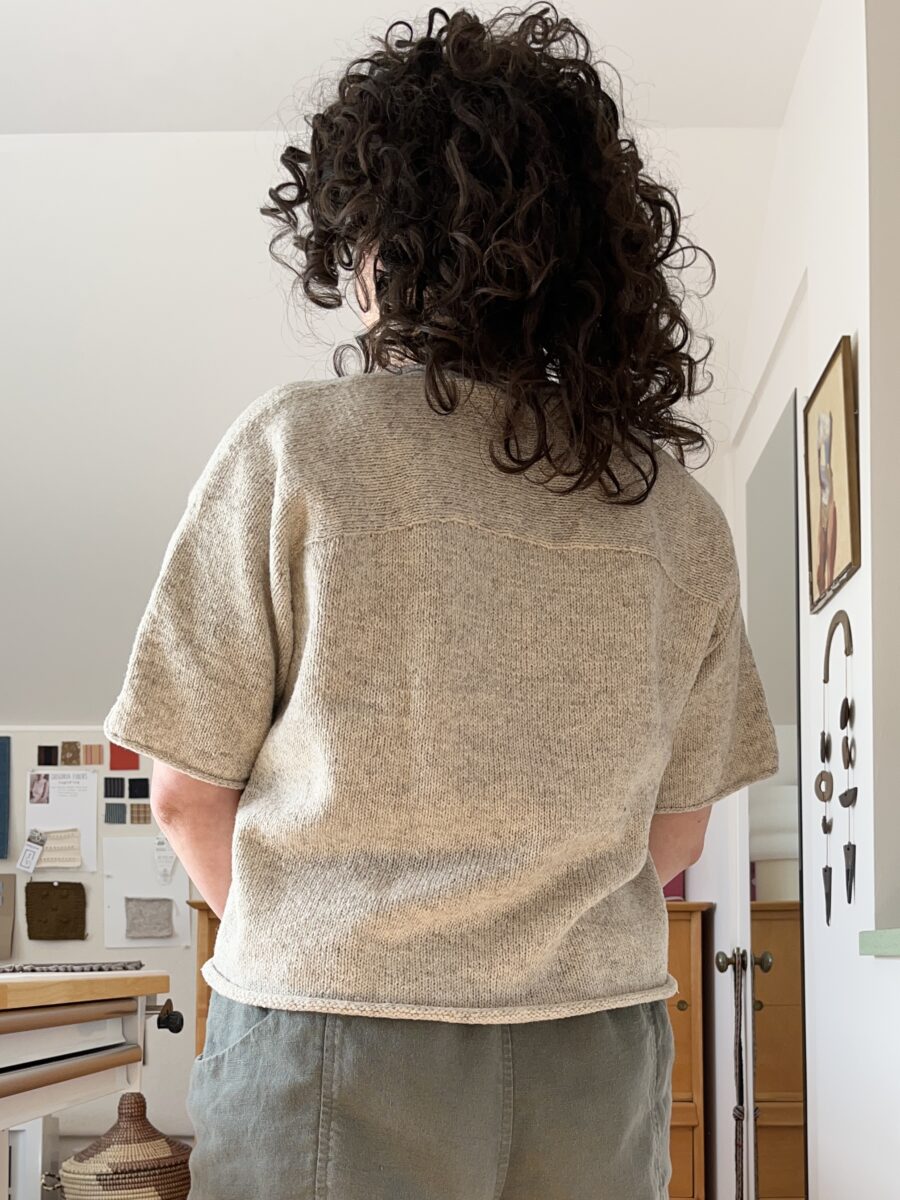
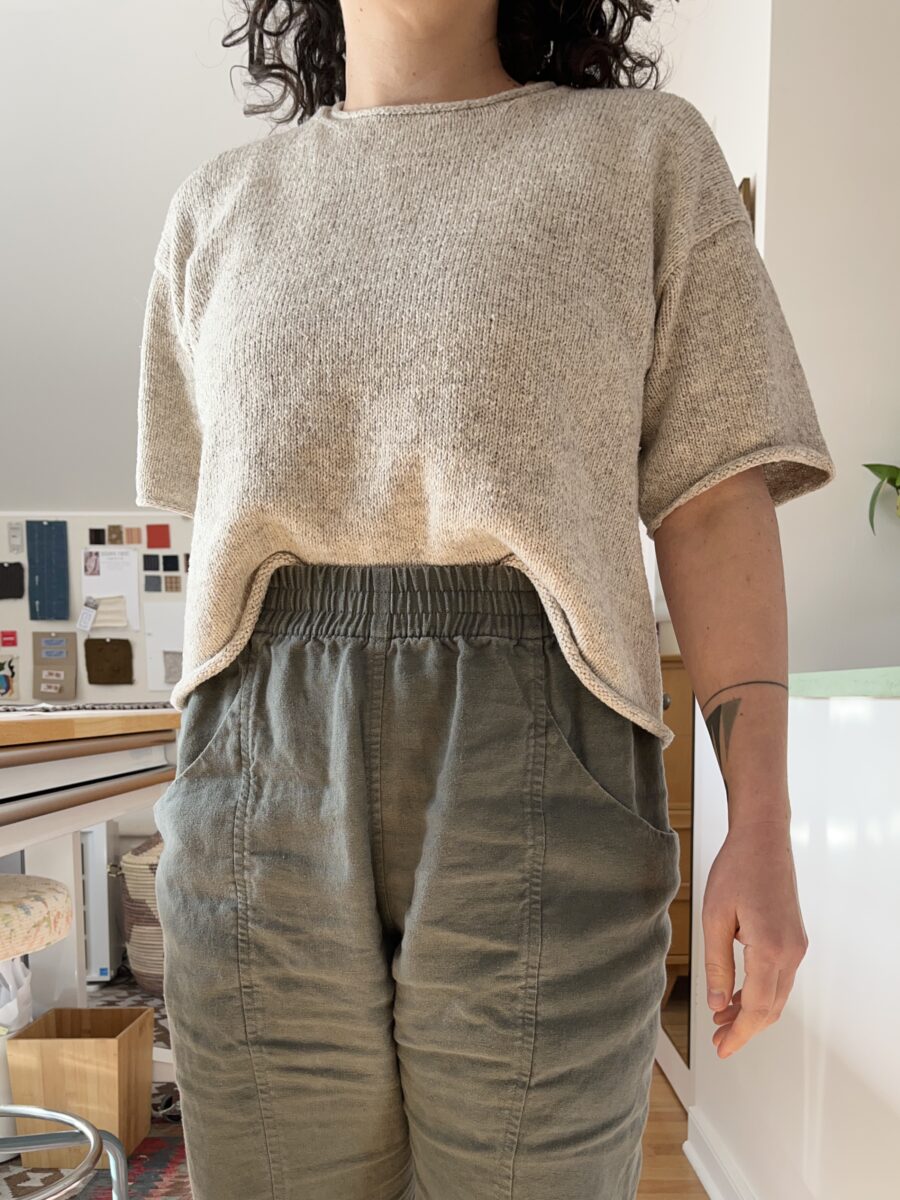
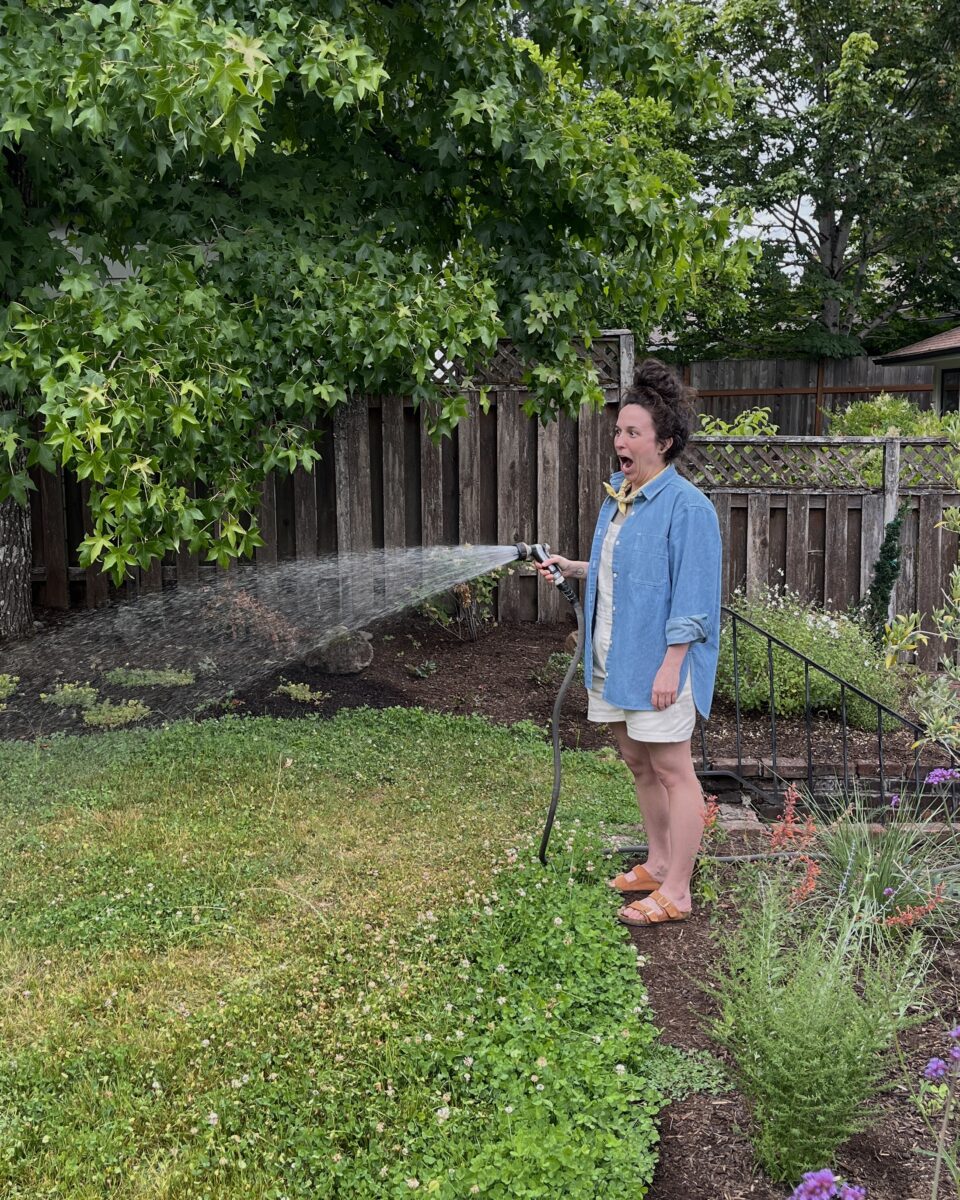
I have been wearing this combo a lot lately. It’s perfect for gardening, dog walks, potting at the studio, and everywhere else.
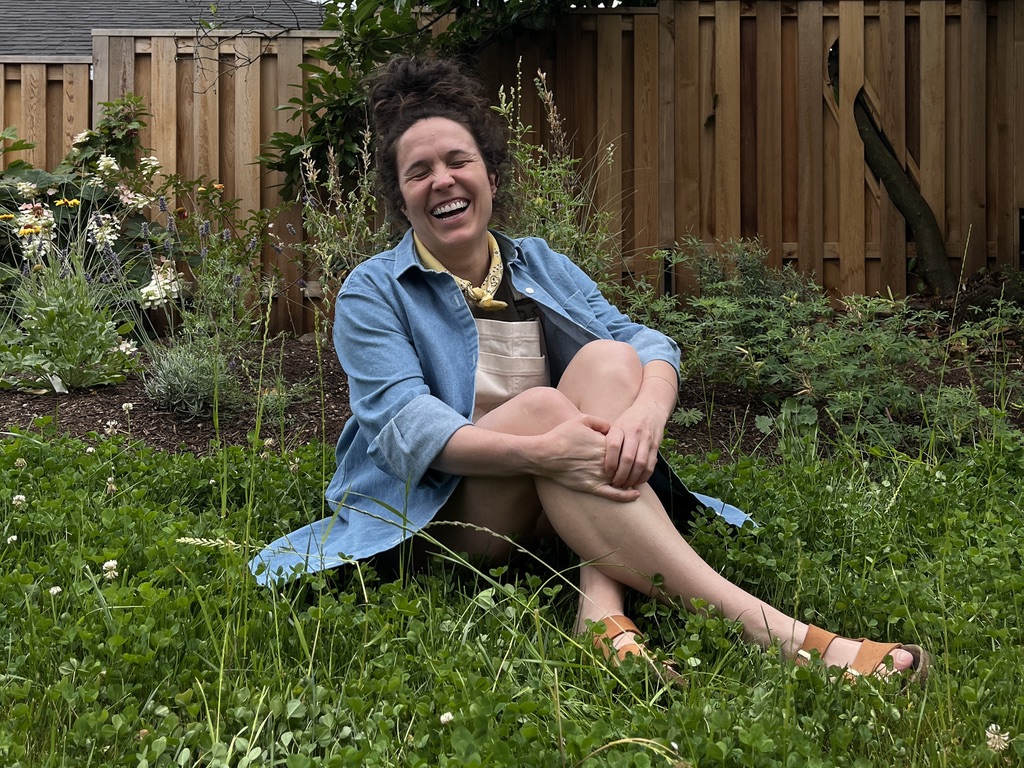
I had a pair of thirfted shorteralls (I refuse to use the word shortalls) that I outgrew a few years ago and have been missing ever since. Then I saw True Bias’s Riley pattern and knew the white Carhartt denim in my stash would be a perfect combo. I’m also wearing a hacked Seamwork Orlando.
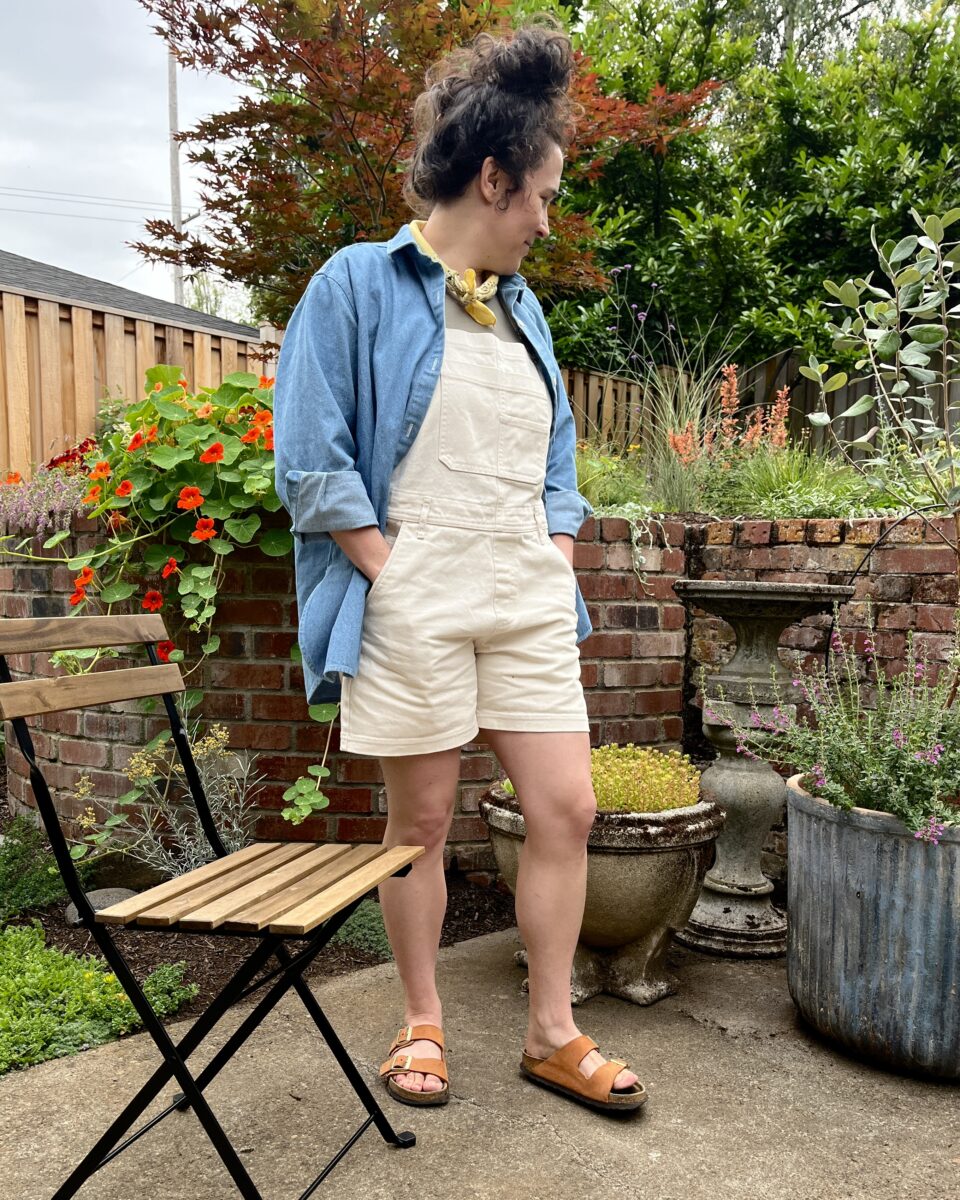
They came together pretty quickly and I excitedly used some vintage feed sack cotton for the pockets and tags. I especially love the back pocket detail.
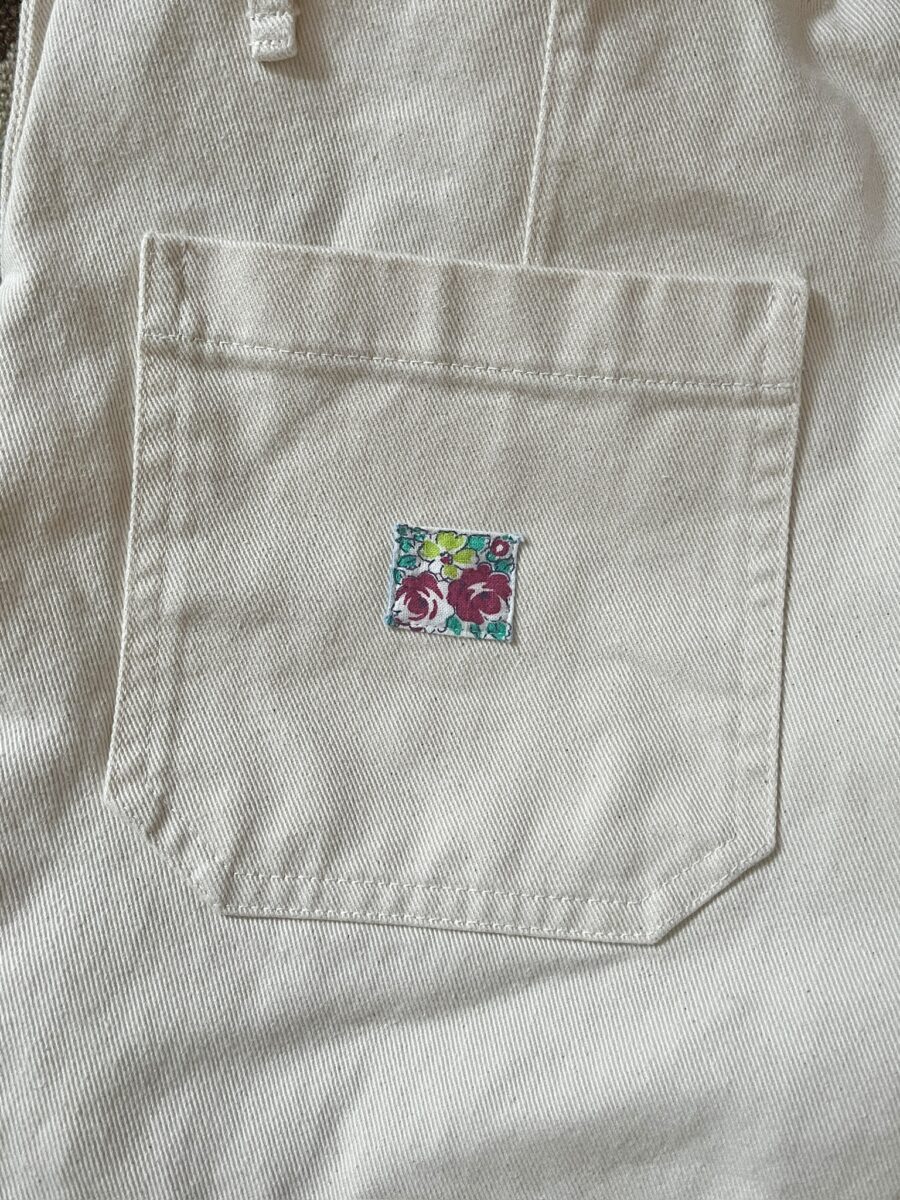
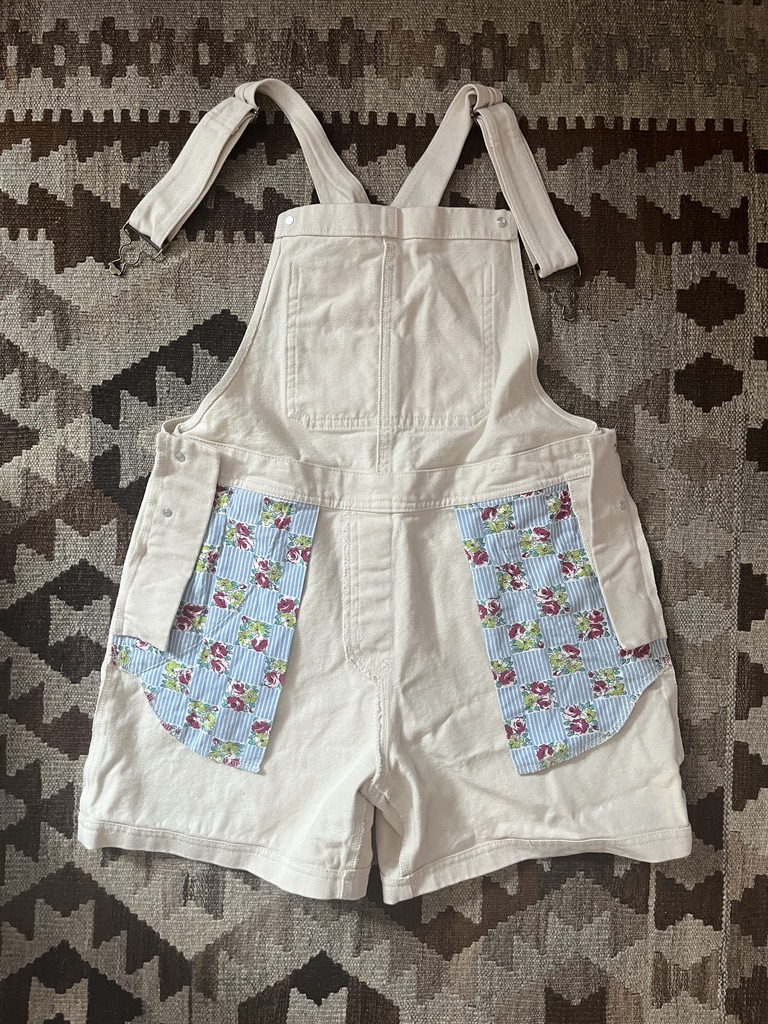
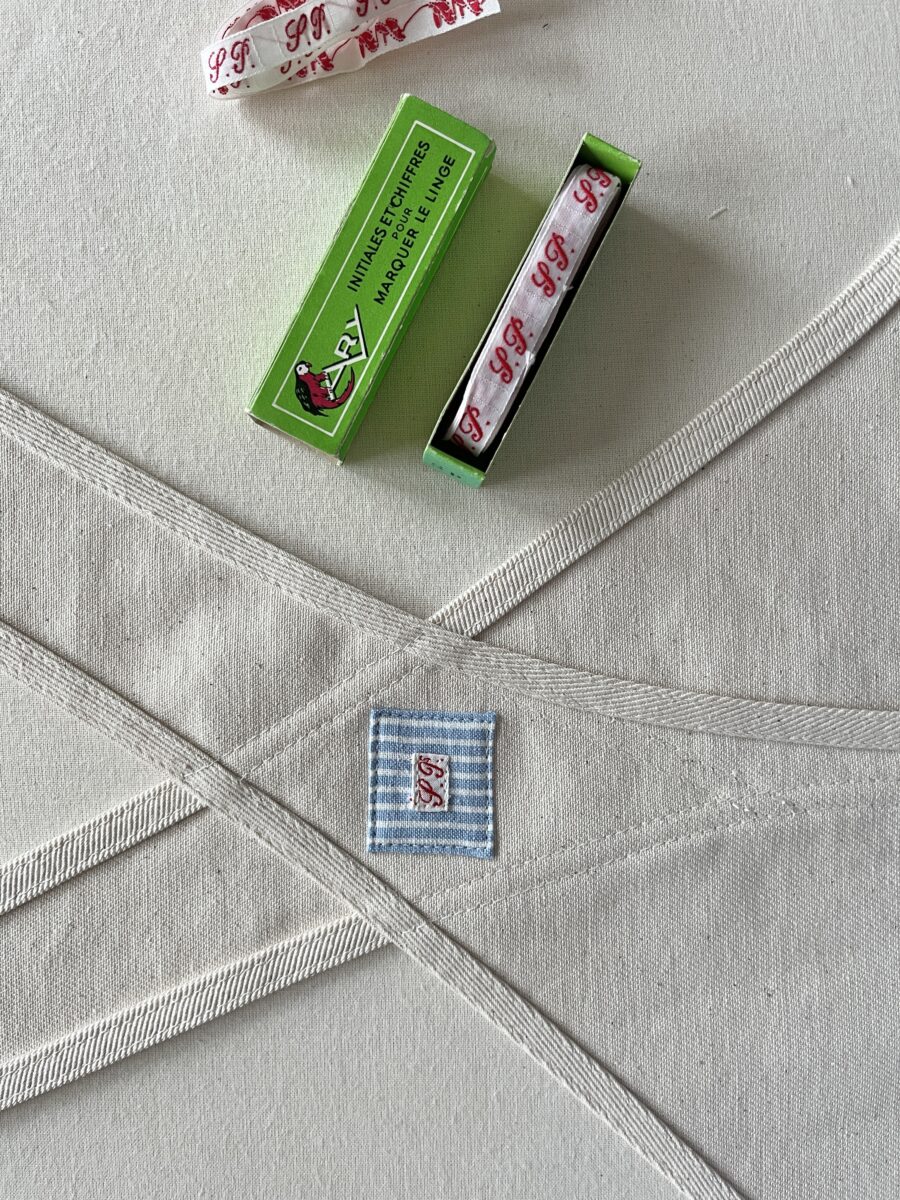
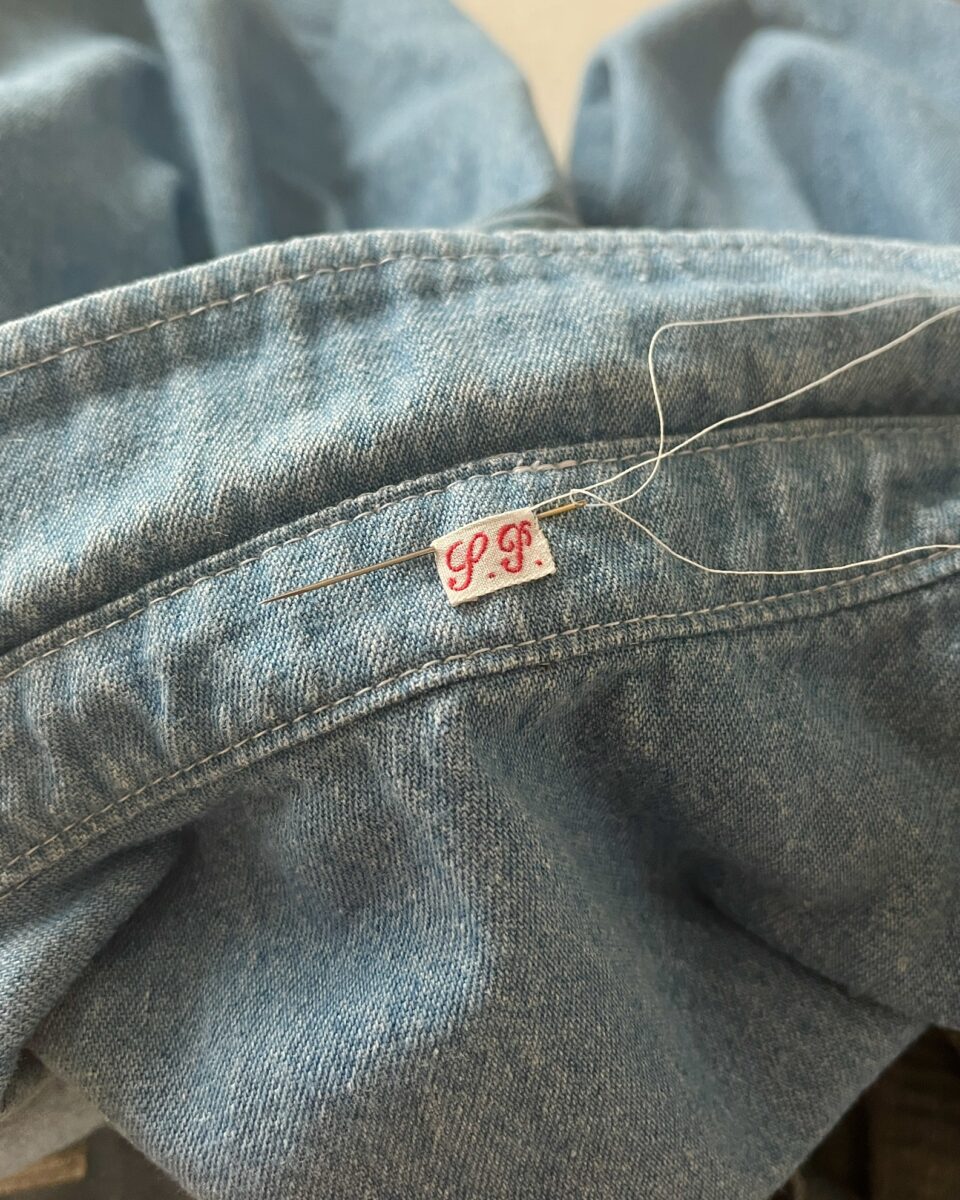
I ordered some vintage French laundry initial tags a while ago and have slowly been adding them to my makes. They are a lot smaller than I thought they’d be, so I used some of the feed sack cotton again. I machine stitched this one on, but will hand sew all future tags because the P got a little obscured.
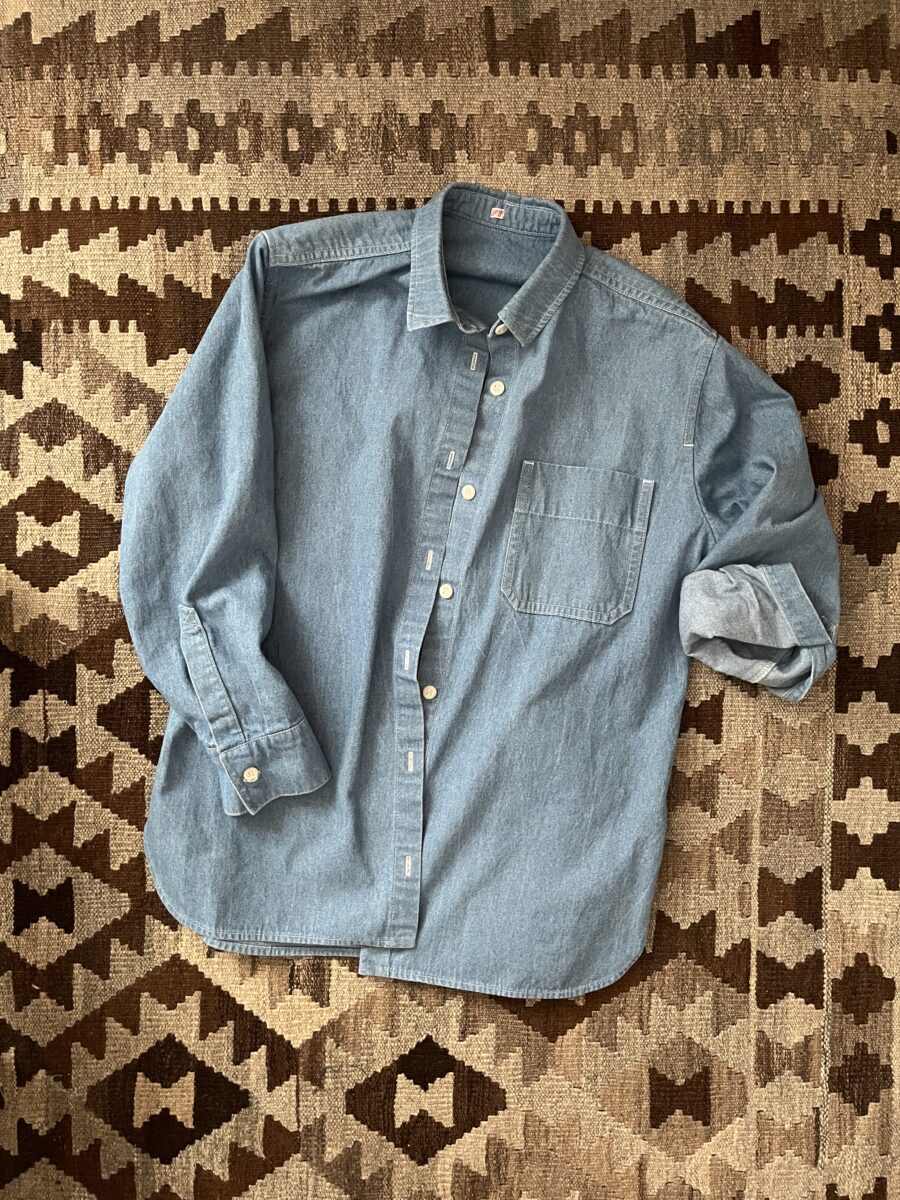
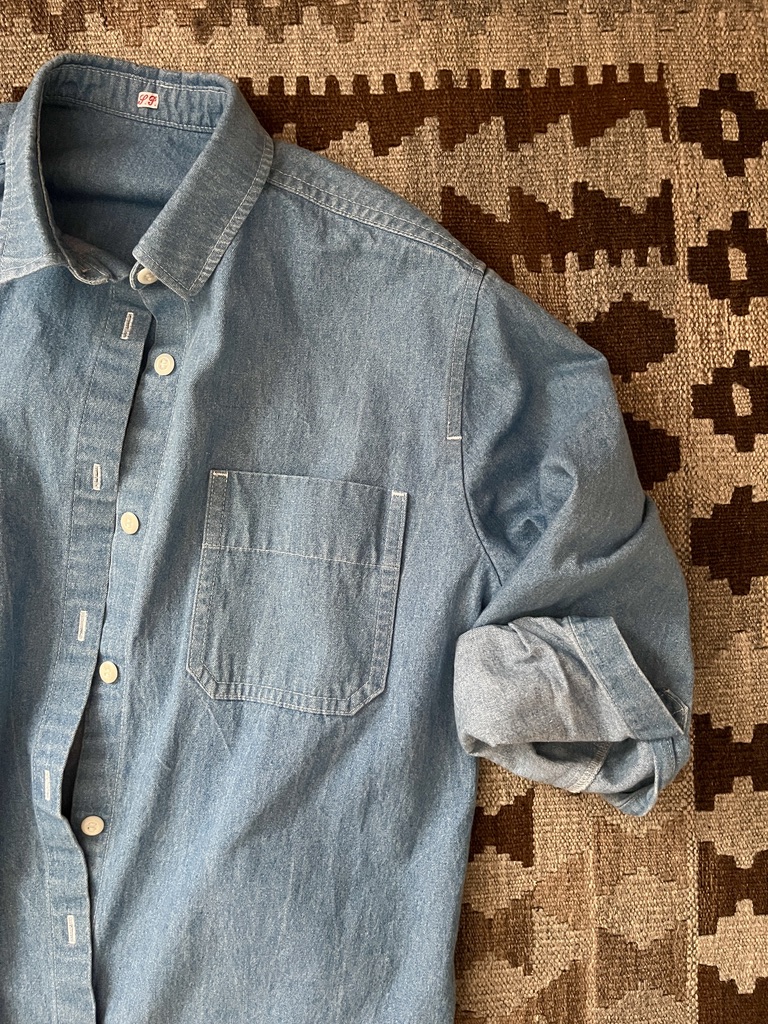
I LOVE this shirt. After making this version, I knew I needed another one. The denim is light weight, maybe 5 oz, and it’s the perfect layering piece. I changed the construction on the bottom placket edge a bit to reduce bulk.
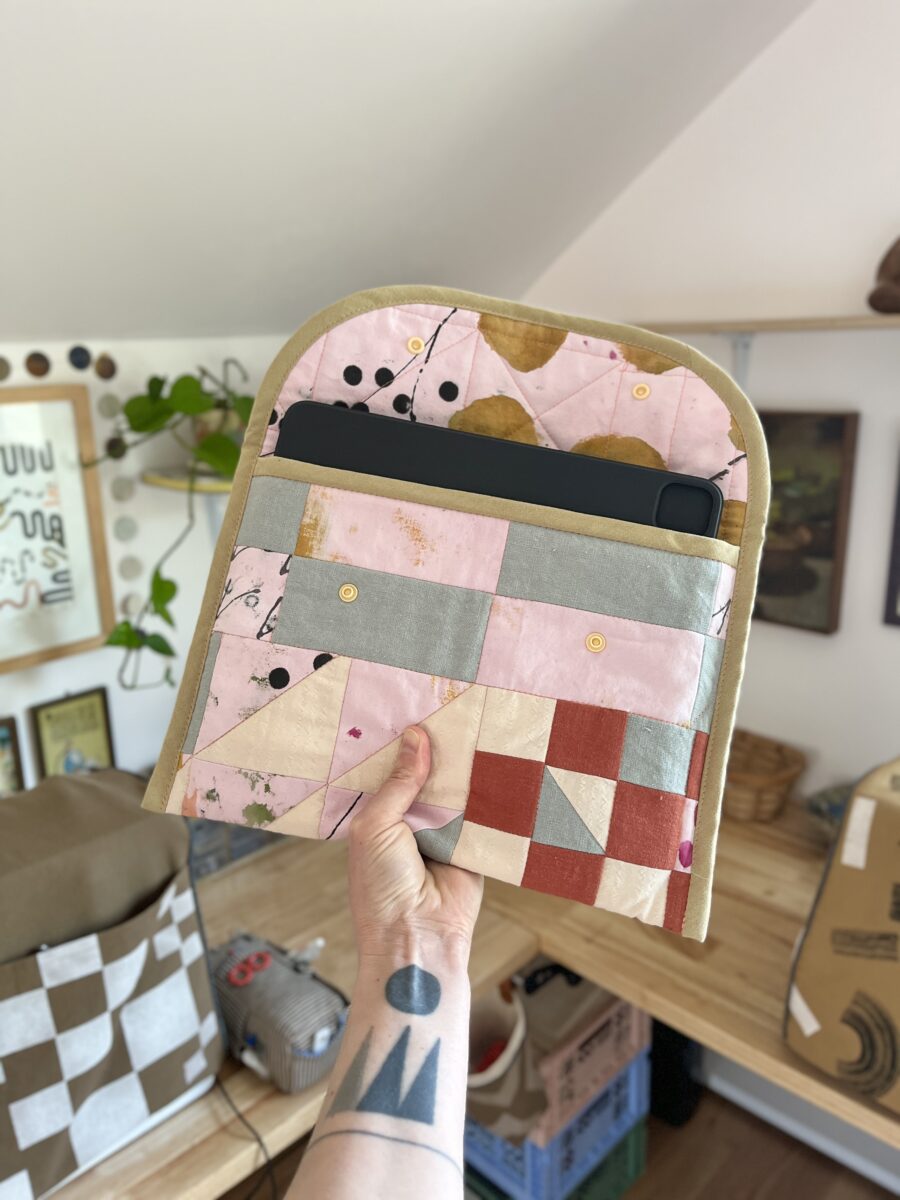
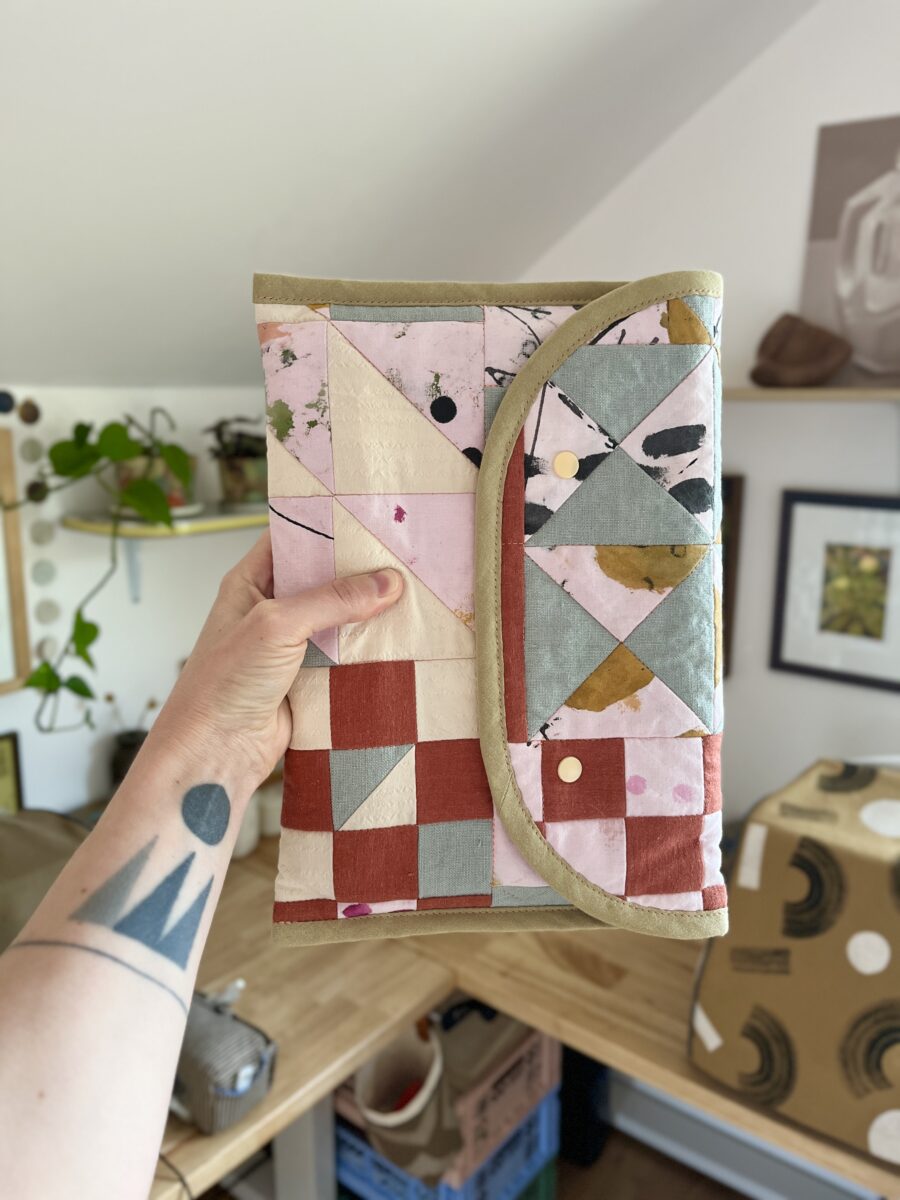
I took a Procreate workshop a while back and decided my iPad needed a better travel case. This quilted fabric was originally going to be a wall hanging that sat unfinished in my stash for a few years.
Textile Indie teaches really fun and rewarding basketry classes at Wildcraft and this sunhat was my third workshop with her. I managed to take only a few process shots, all of which include me trying it on. The construction was way more complex than I thought it would be, but it was so much fun to try a more involved basketry project.
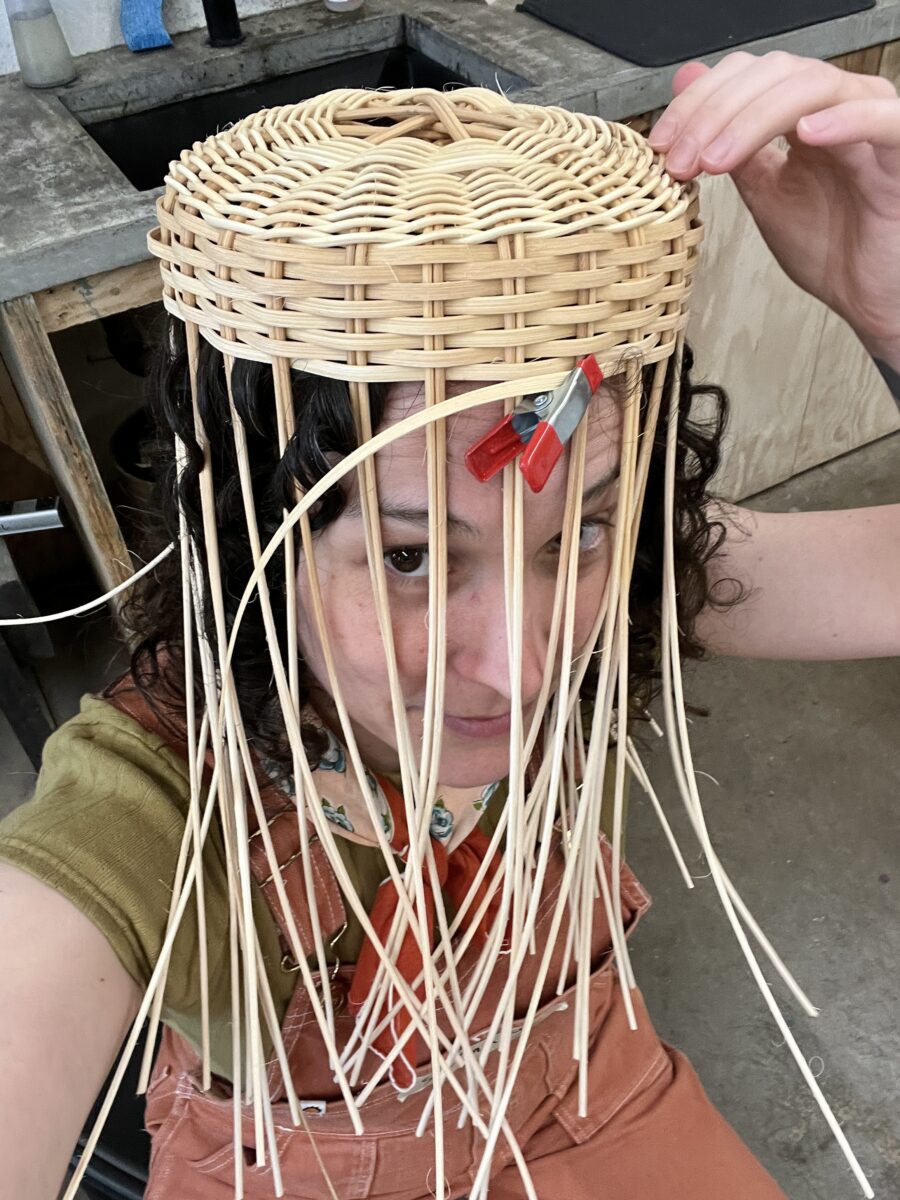
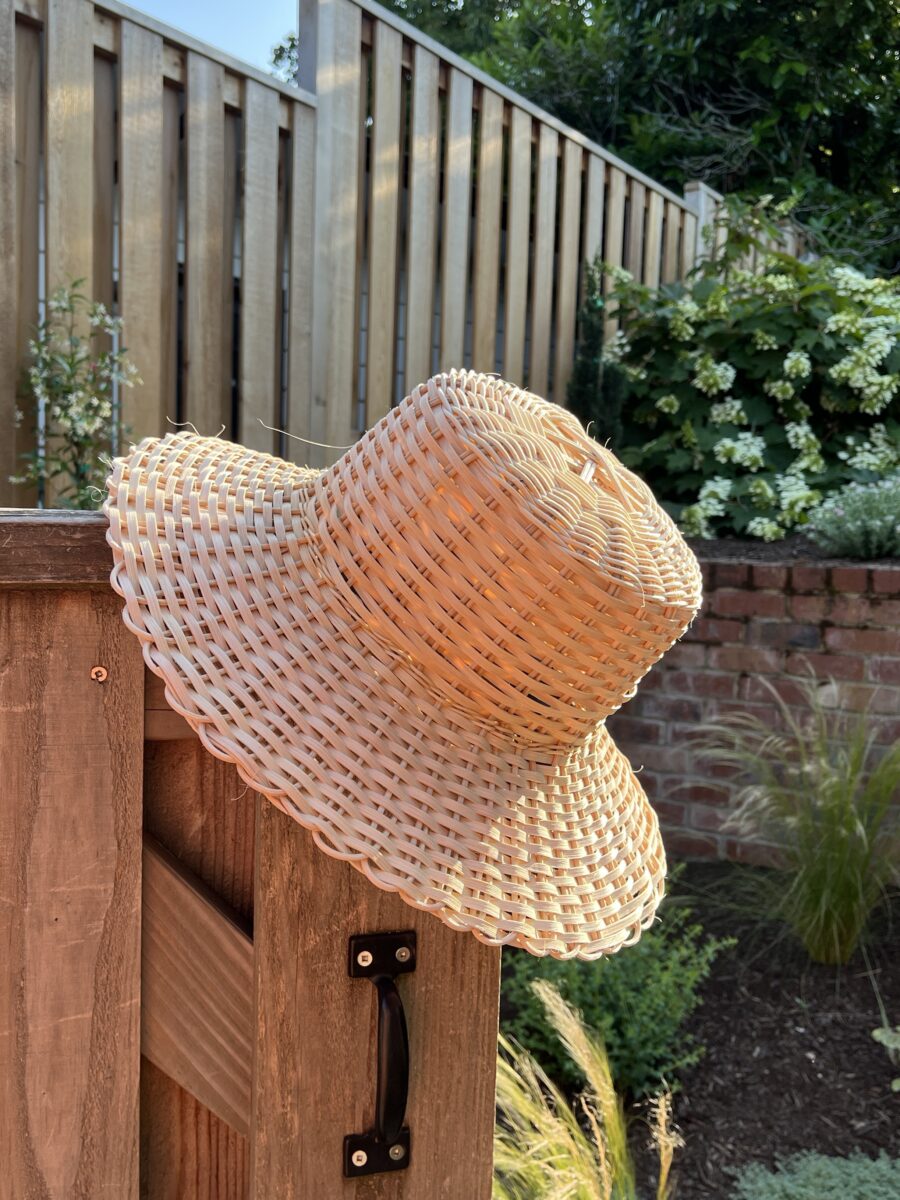
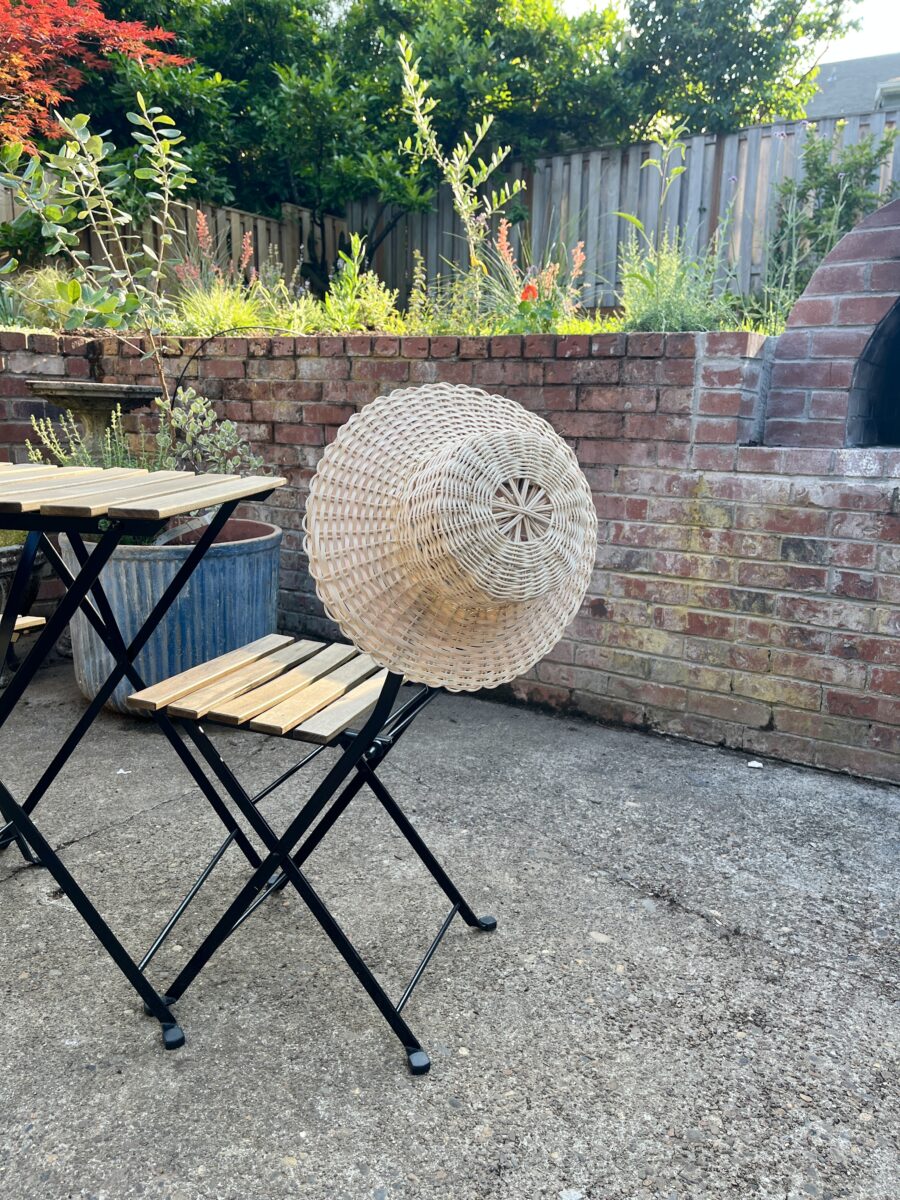
While this hat fits my giant melon and was woven pretty neatly, the shape is not quite right. It’s too square at the top and really accentuates my big head. I’m pondering ordering supplies and trying to make a more rounded one at home.

The pottery studio I have a membership at only has paint on glazes available, so I decided to turn these pots into “test tiles,” which made the process of glazing way more enjoyable. Three nerikomi pieces have made it through glaze firing. I’m waiting to share them once more are finished.
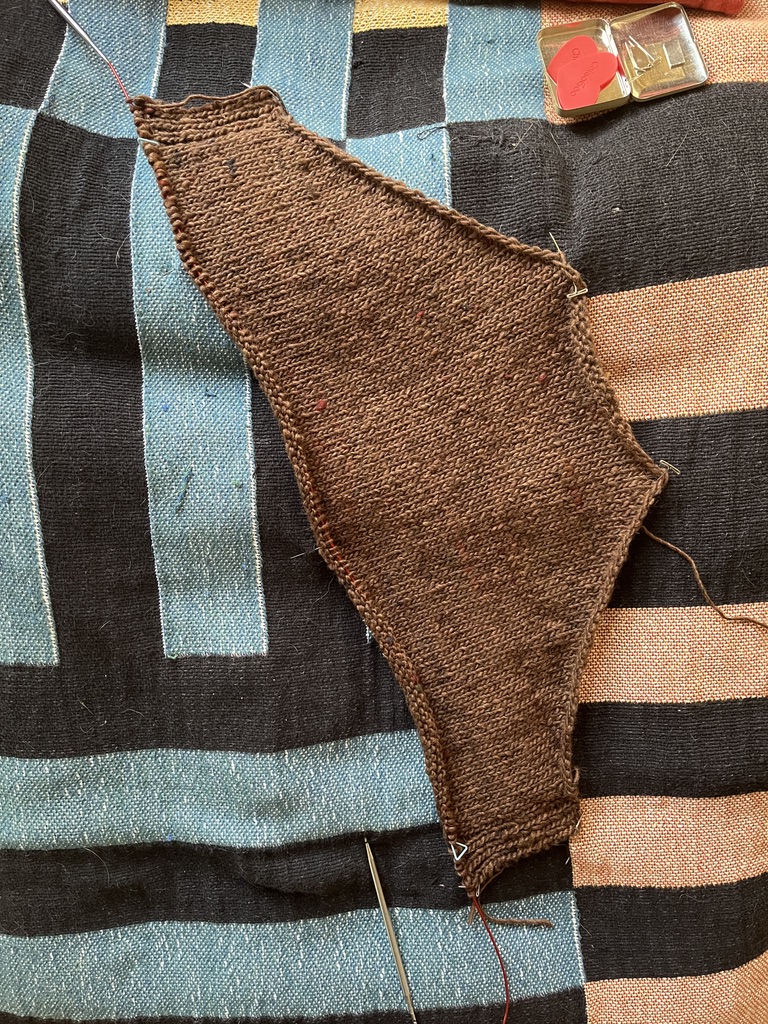
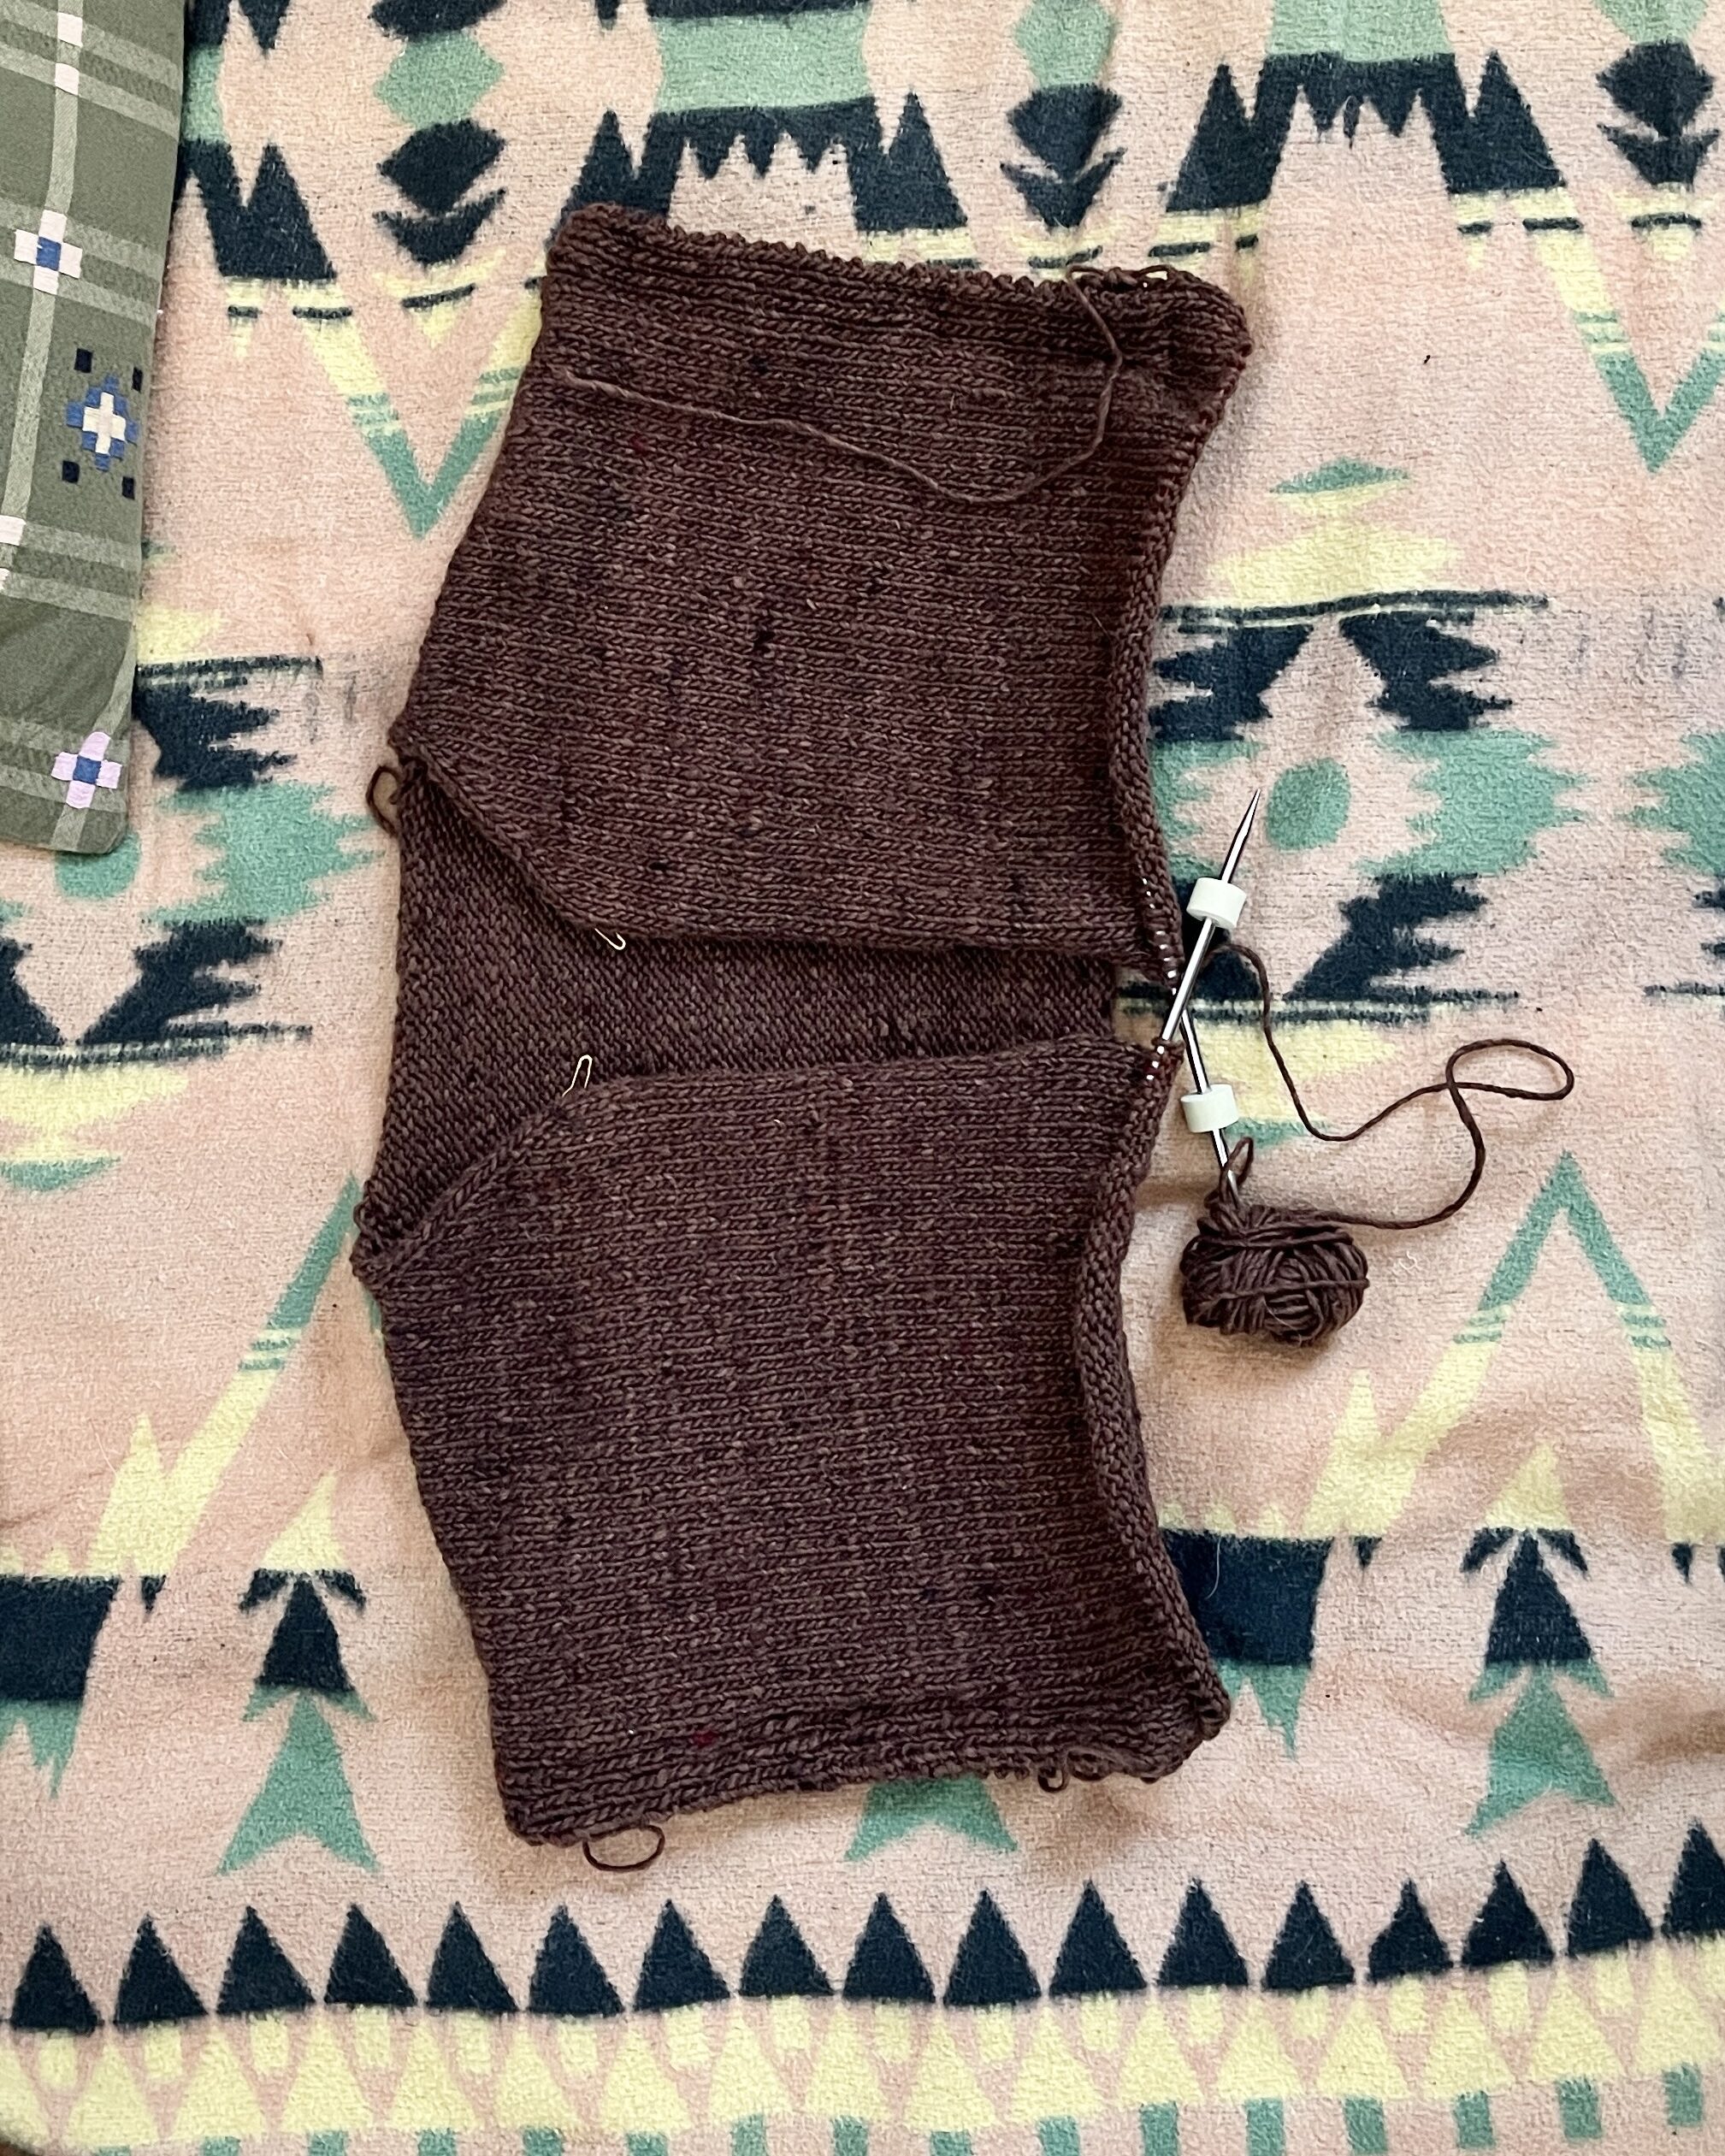
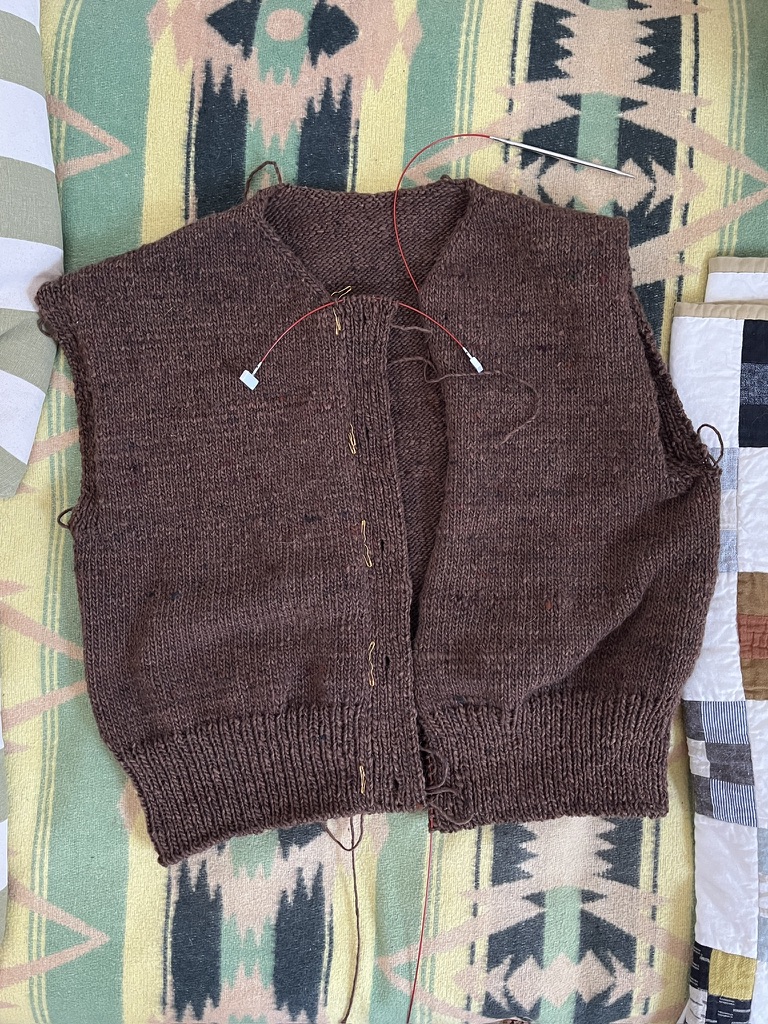
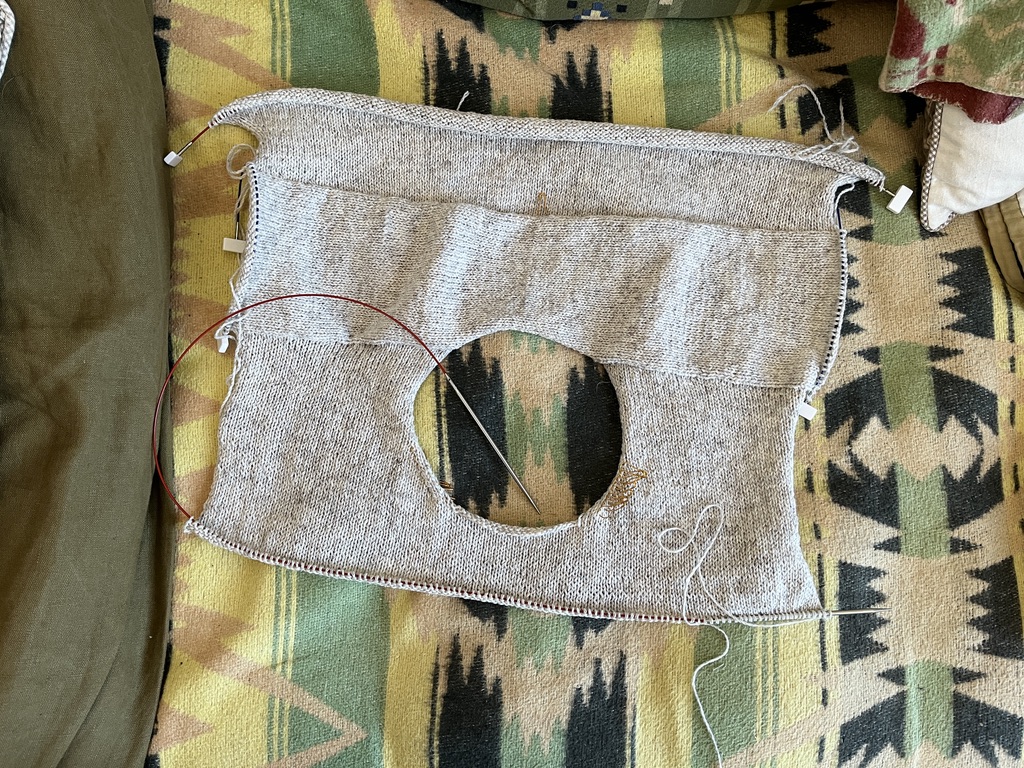
I started this jacket in January and have been slowly working on it, trying to manage hand and wrist pain. Most of it was knit using the Portugese knitting style where the yarn is held around your neck. I think my flat knitting tension is a lot more consistent with this technique. I want to focus on adding a few more cardigans to my wardrobe and now feel pretty confident they won’t have obvious knit and purl rows.

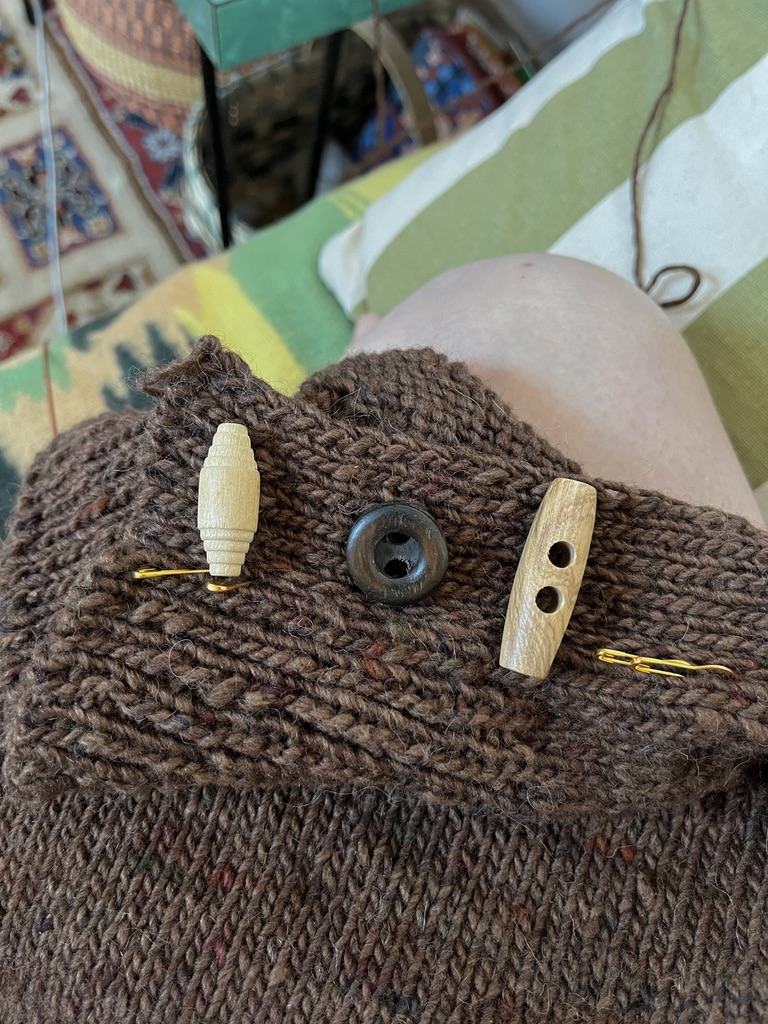
The way the button band is knit is straight up magic – how does this even work?! I really waffled on my button choice. I planned to use the vintage buttons on the left, but didn’t like the combo of dark brown yarn and yellowy wood. I bought these too big toggles (right) in New Zealand, which if they’d been like a 1/4″ smaller would have worked pretty well. Then I found these vintage dark brown buttons in my stash and loved the way they looked.
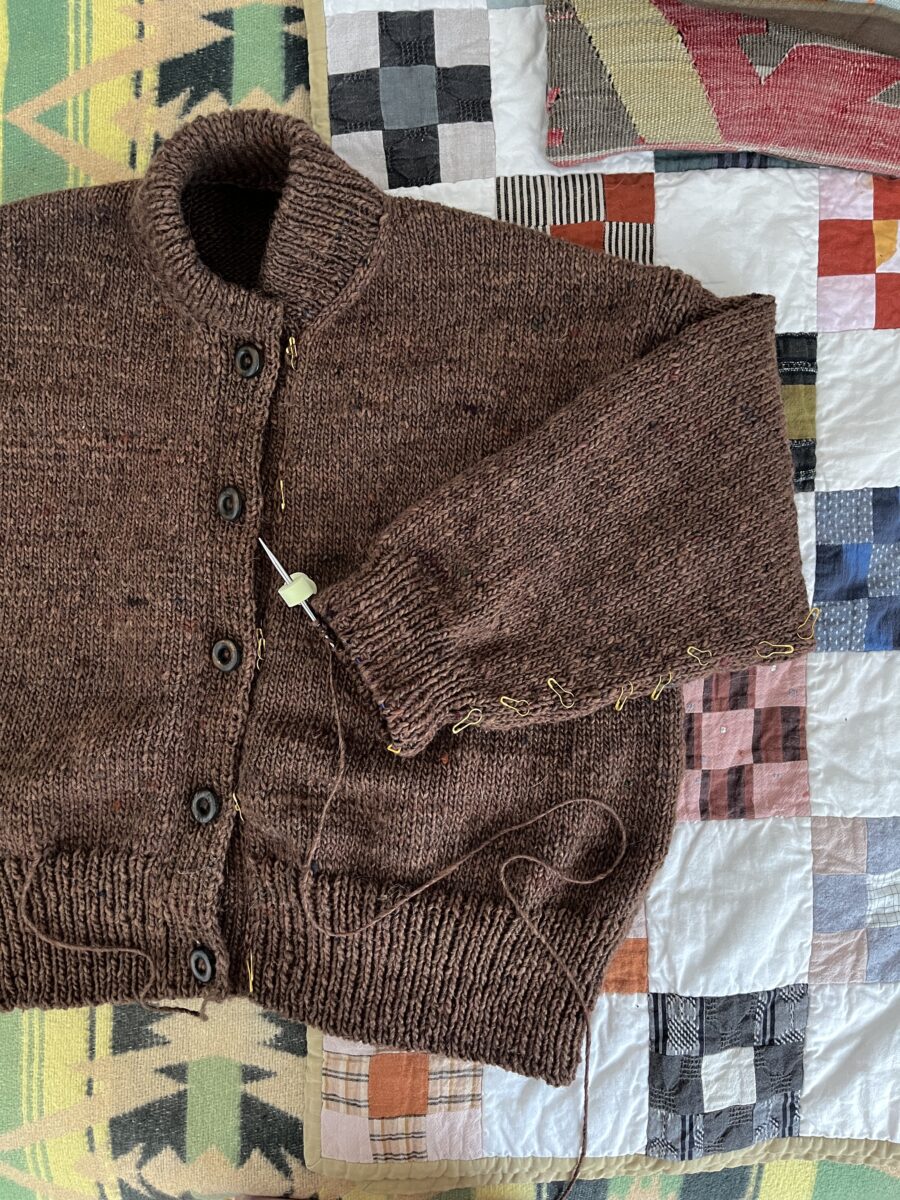
I just wove in the last end this morning and now the whole thing is drying. I’m hoping I’ll get to wear on chilly mornings this summer.
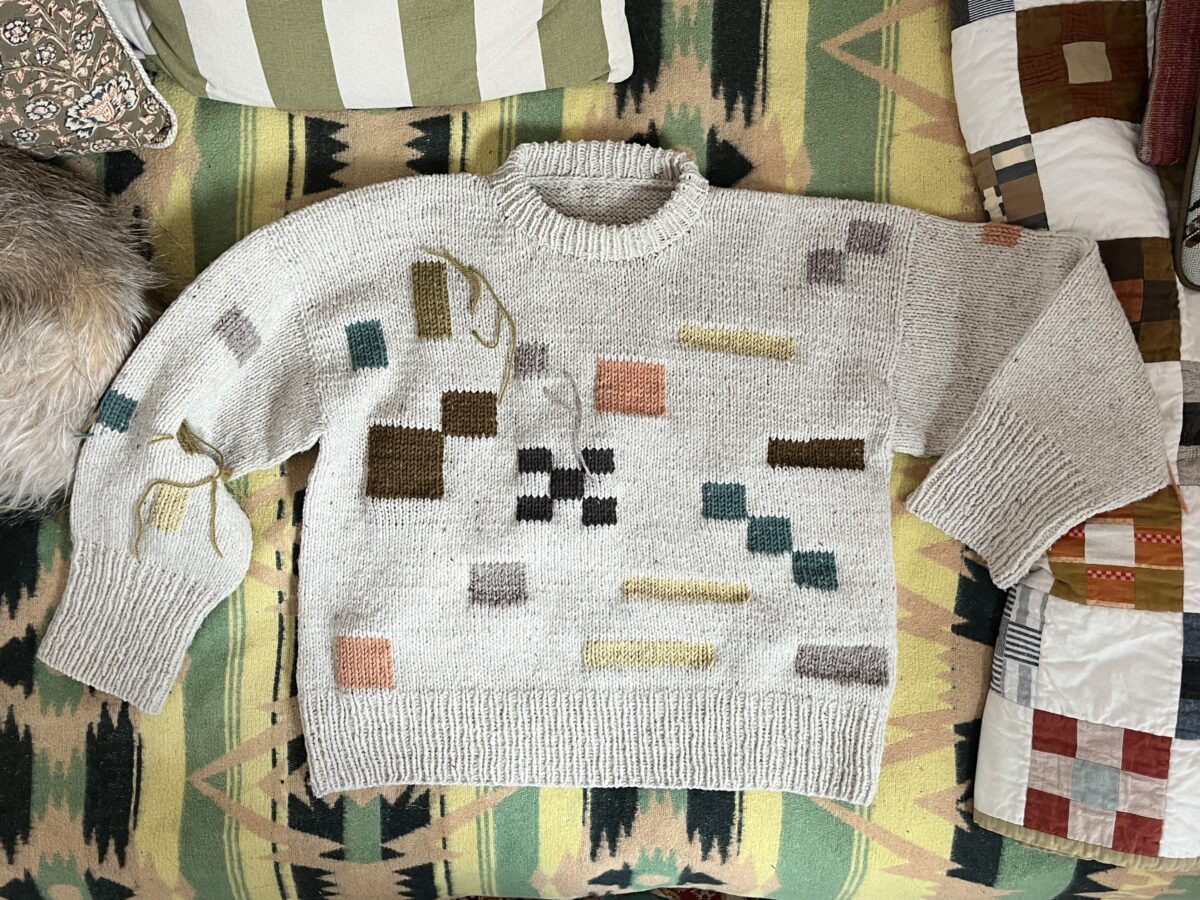
In other knitting news, I’m still working on this duplicate stitch project. I also redid the collar since I hated my first attempt. Here’s what it used to look like. A really kind fellow knitter fixed the shoulder I accidentally unpicked while trying to redo it. I could not make sense of the stitches, but she fixed it in a couple of minutes!