

After five months, she’s back. I wrote a decent amount about her and the mess that followed in another blog post, so this post is just about the pictures.

After five months, she’s back. I wrote a decent amount about her and the mess that followed in another blog post, so this post is just about the pictures.
Back in September of 2018, I was asked to contribute to a Sew News article about Grainline Tamarack hacks that would be in the Fall 2019 issue. I agreed, signed a contract for a small payment, and started planning. Sew News wasn’t providing fabric, or compensation for material costs. The jacket and article were due January 10, 2019 and I had to pay for its shipping to Sew News for the photo shoot. Months passed and I didn’t receive my payment. I inquired multiple times, but it was chocked up to a slow system. Then I received a Chapter 11 Notice in the mail. I reached out to the point person again and learned that I would need to submit a claim to the courts in order to receive payment.
Needless to say, I’m miffed. However, I am pleased to report that after asking for my jacket to be returned and for my writing to be removed from the issue, it happened. It’s not a good feeling to leave the magazine in a lurch, but it’s also unfair for them to publish it when I haven’t received the agreed upon compensation. The whole thing makes me feel very wary of working with “larger” companies in the future. As far as I know, they’re still asking for contributors for future issues. I don’t know if the magazine has been bought/has a stable financial future, or if they’re able to pay for contract work moving forward.
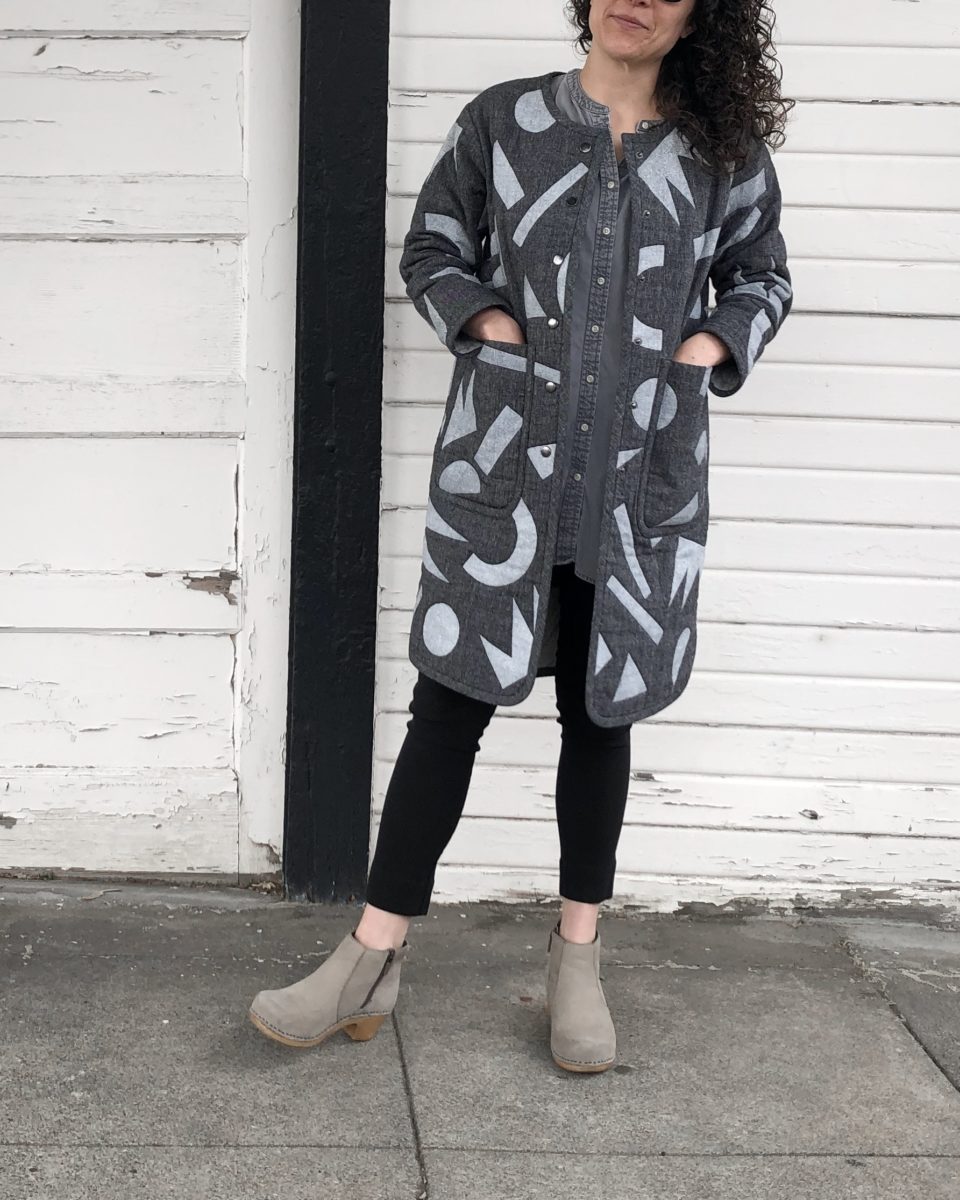
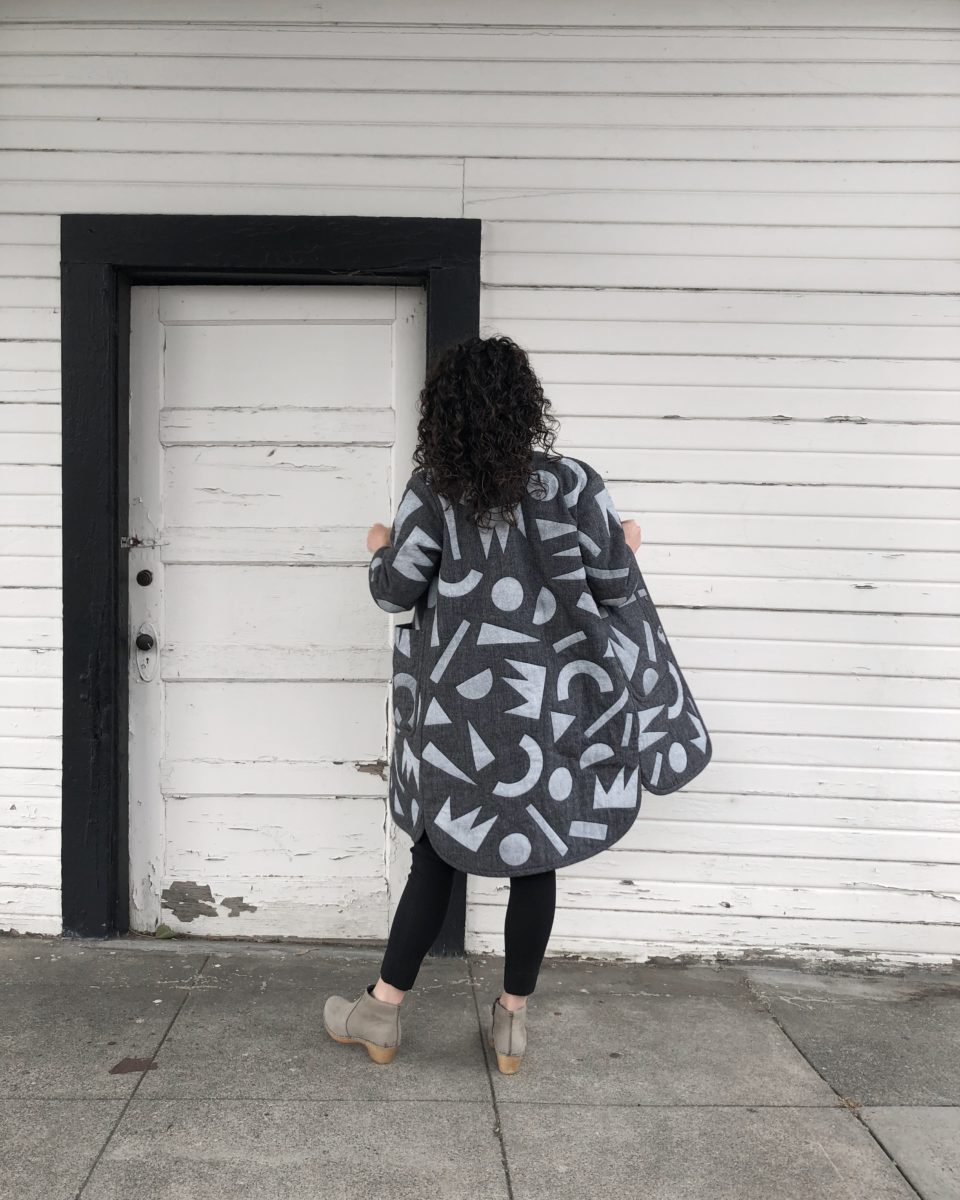
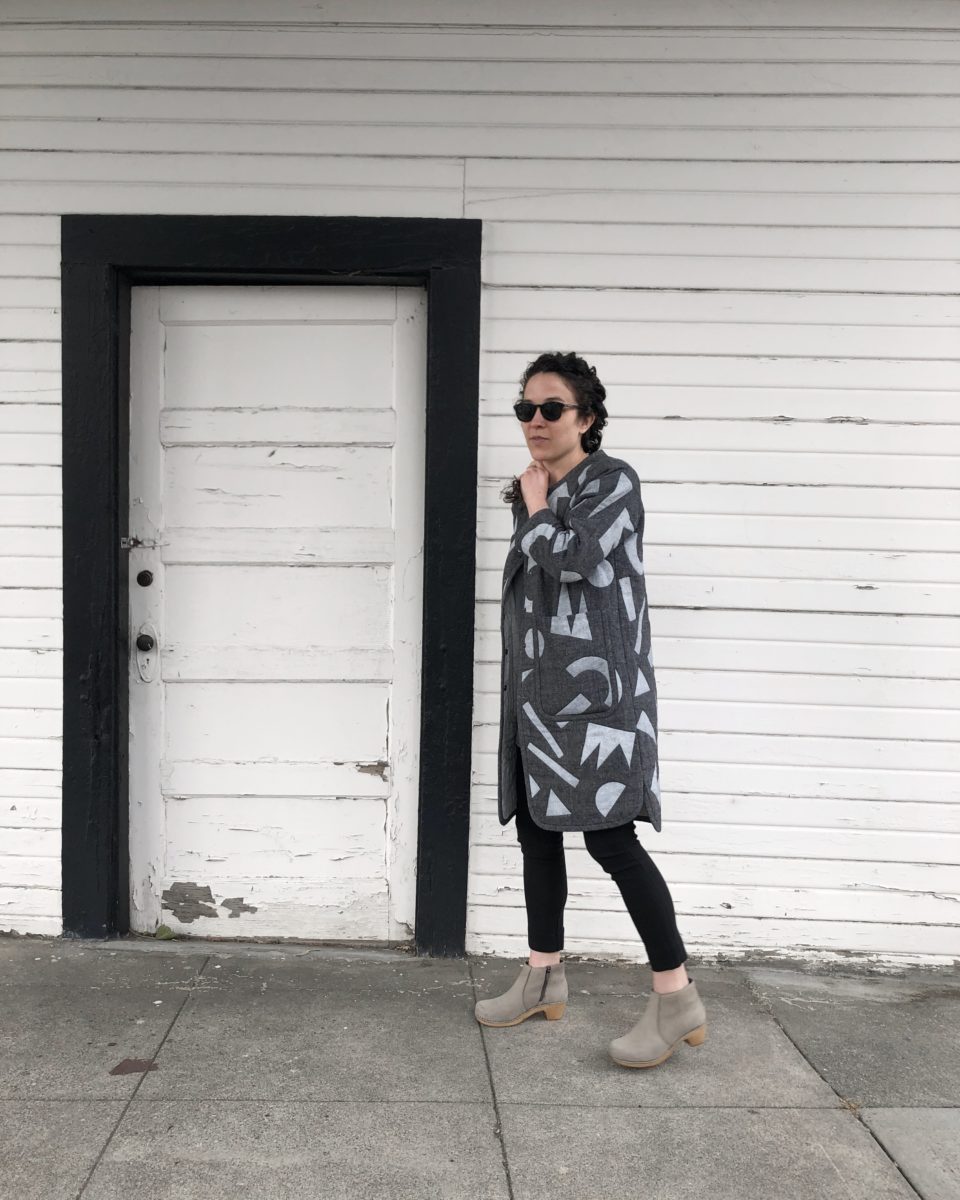
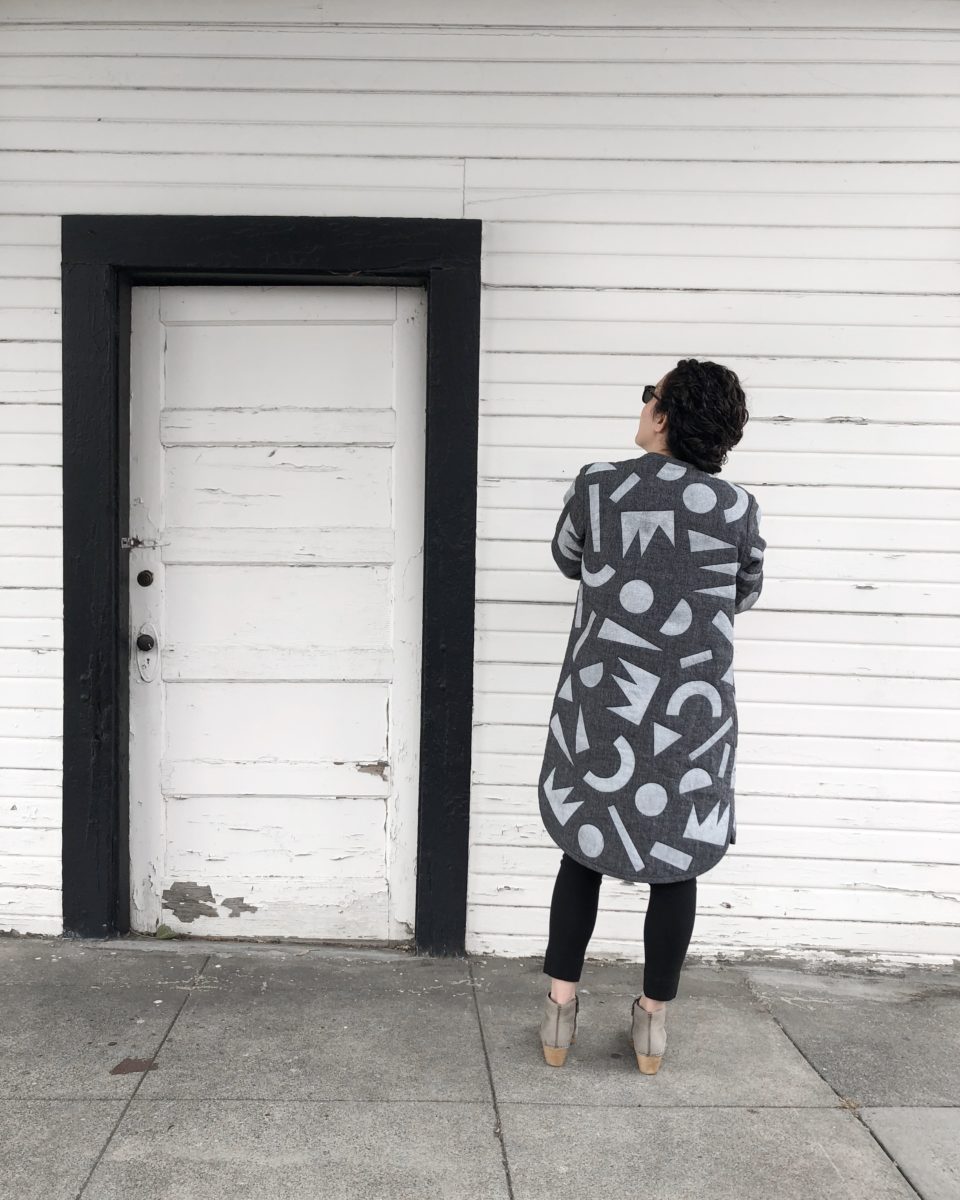
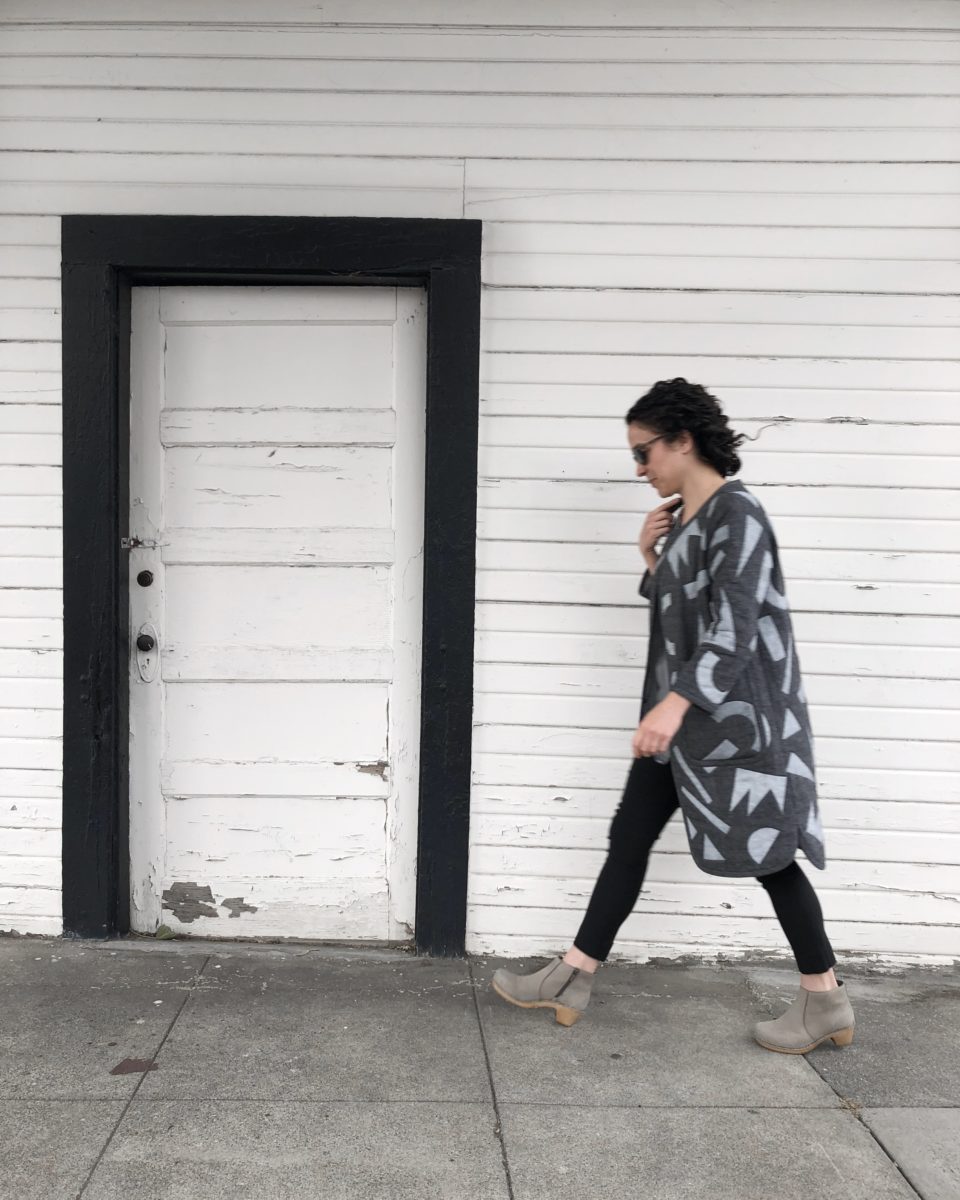
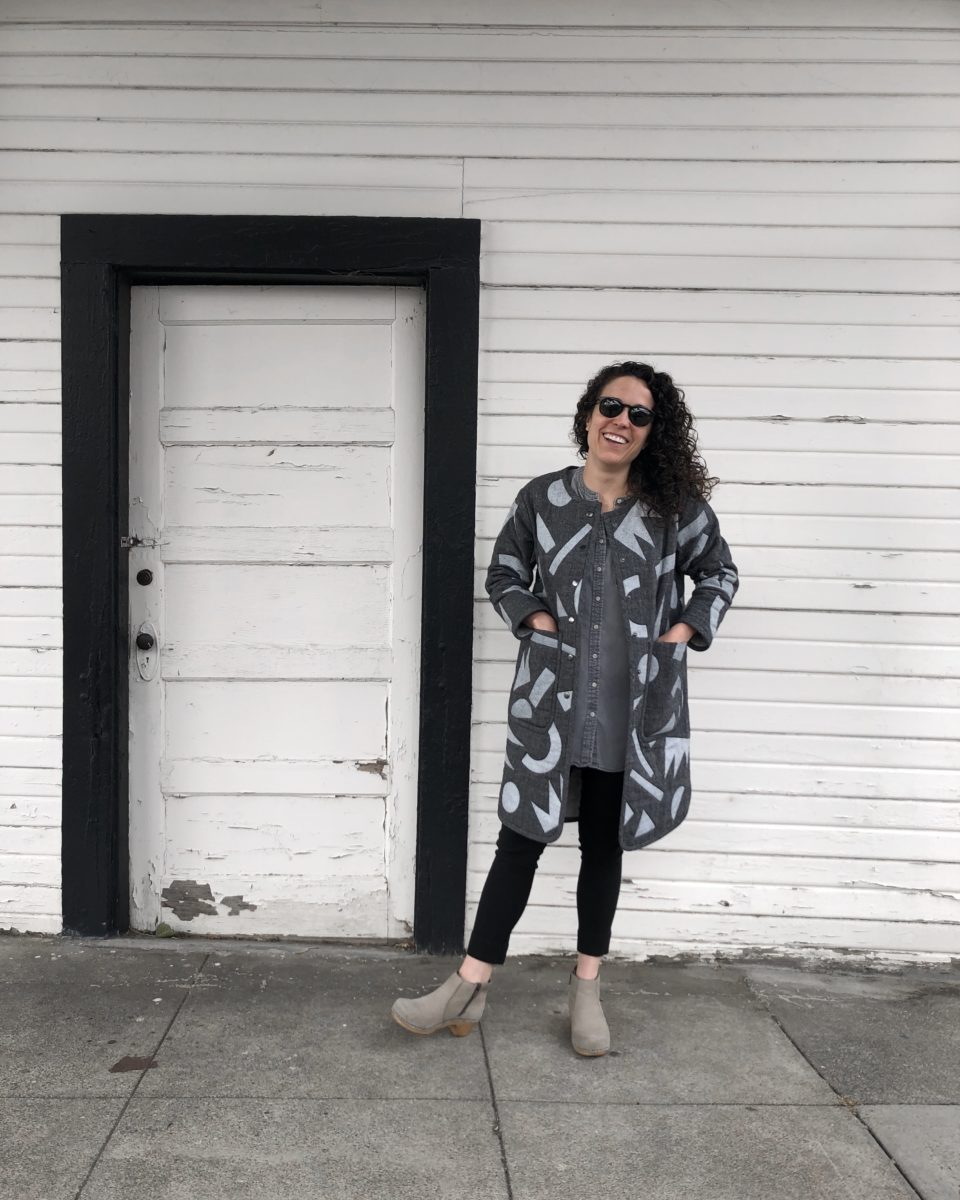
Anyway, here’s my write up and some process pics. As I mentioned above, the purpose of the article was Tamarack Jacket hacks. My twist on the pattern was more about the surface design and quilting pattern than big changes to the sewing pattern. I did do some basic mods like lengthen the body, shorten the sleeves, and use patch pockets in lieu of the pattern’s welt pockets.
Block printing is one of the easiest ways to alter the surface of just about any textile. With a few simple supplies, you have endless opportunities to customize fabric right from your home. In my at-home block printing kit, I like to use Speedball Speedy Carve Blocks, a Speedball brand linoleum cutter, a Testrite Foam Brayer, a baren to help apply even pressure, and water-based silkscreen ink for fabric. I prefer to use a foam brayer when block printing on fabric as it applies more ink to the blocks and prints more evenly than a rubber brayer. I also like to use water-based ink because oil-based is a little smelly. Whatever base ink you choose to use, make sure it’s designed to be applied to fabric, or your ink won’t ever fully adhere! Most importantly, remember to wash and dry your fabric to remove any sizing that might affect the ink.
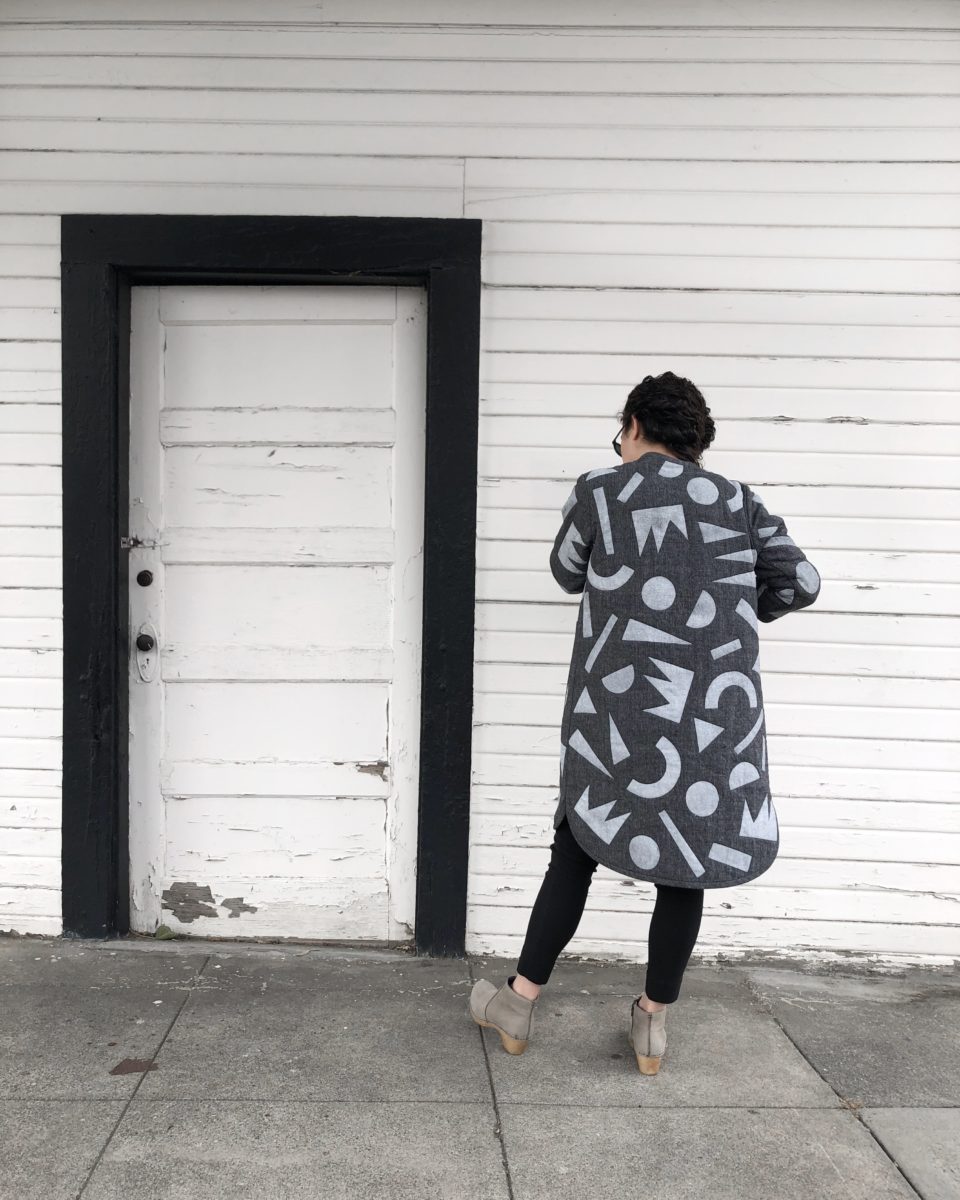
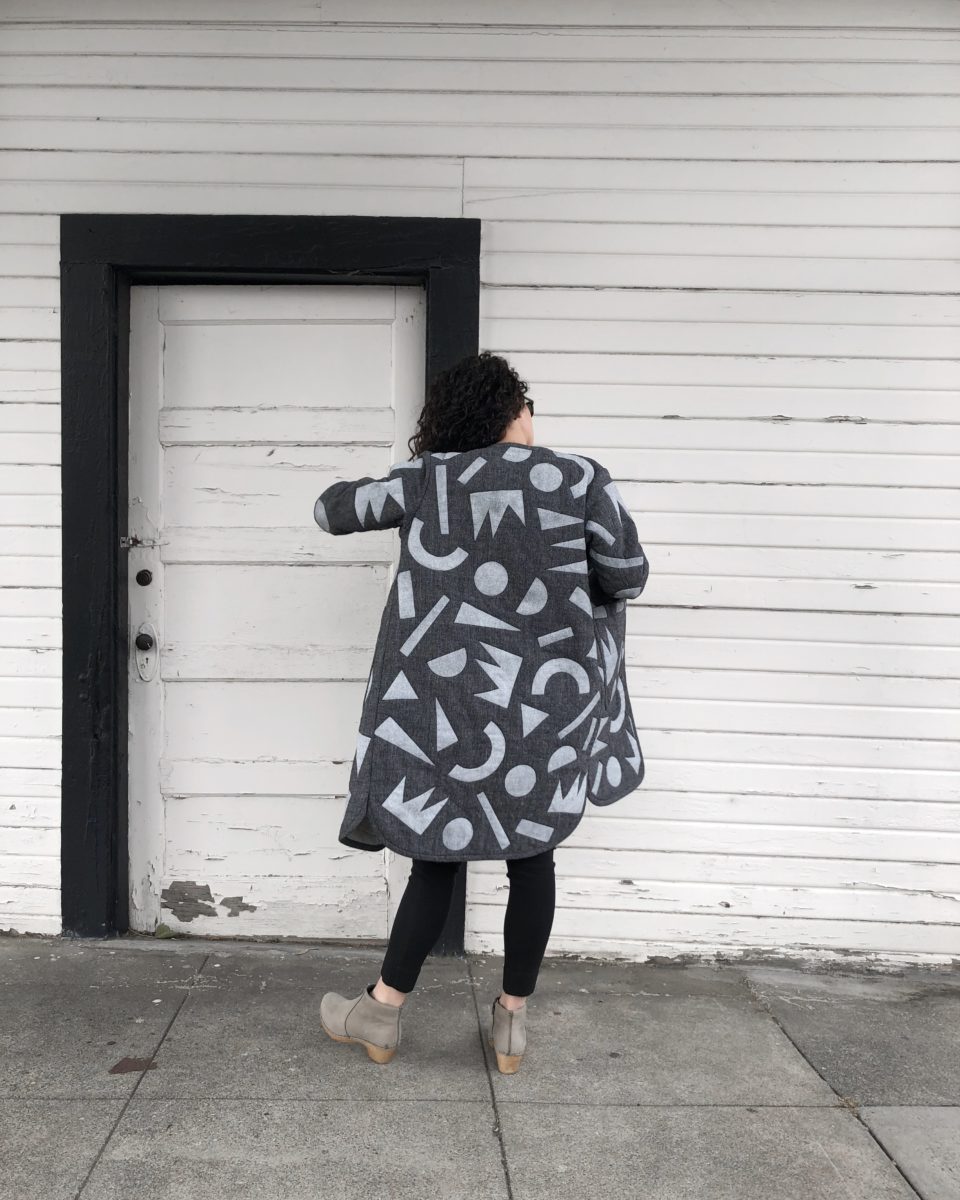
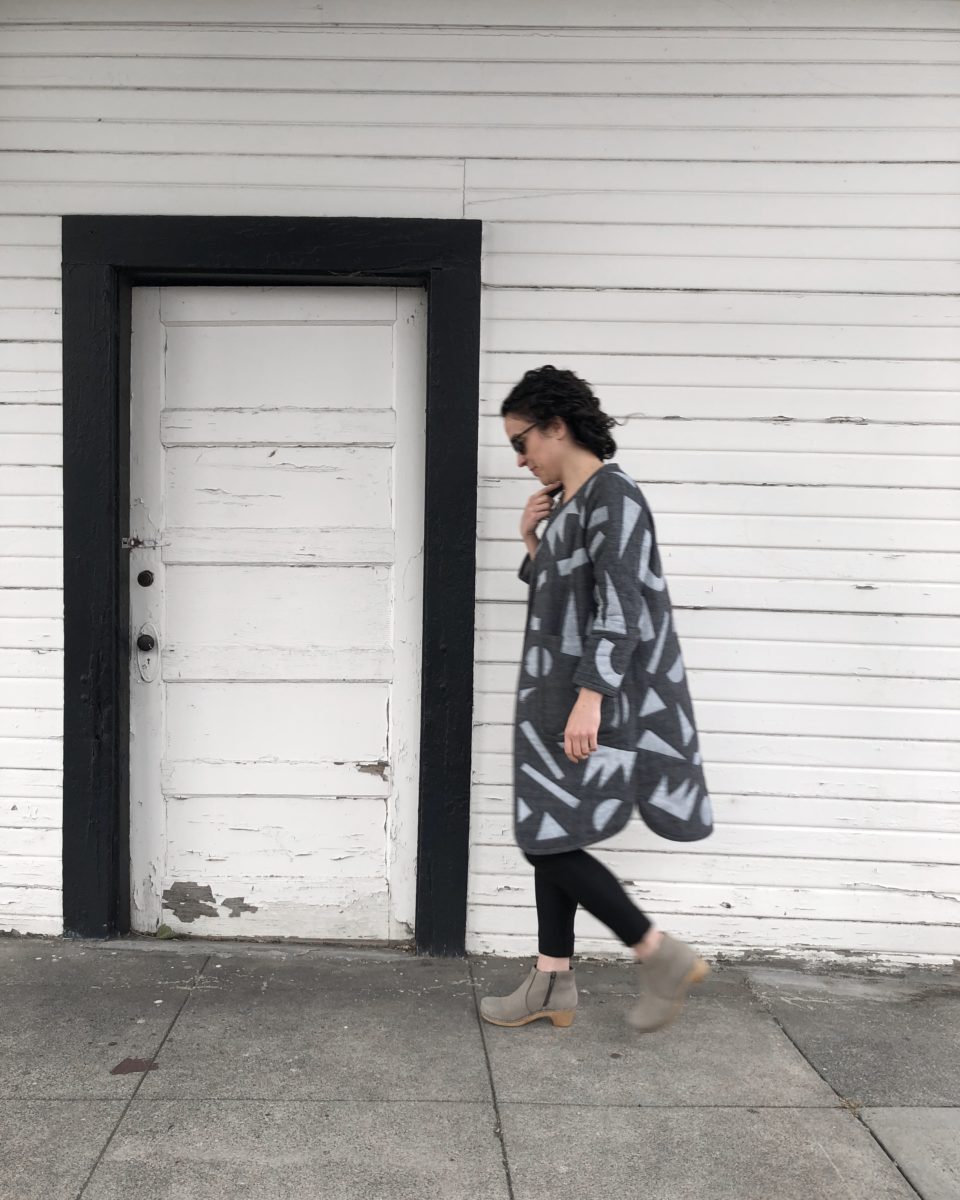
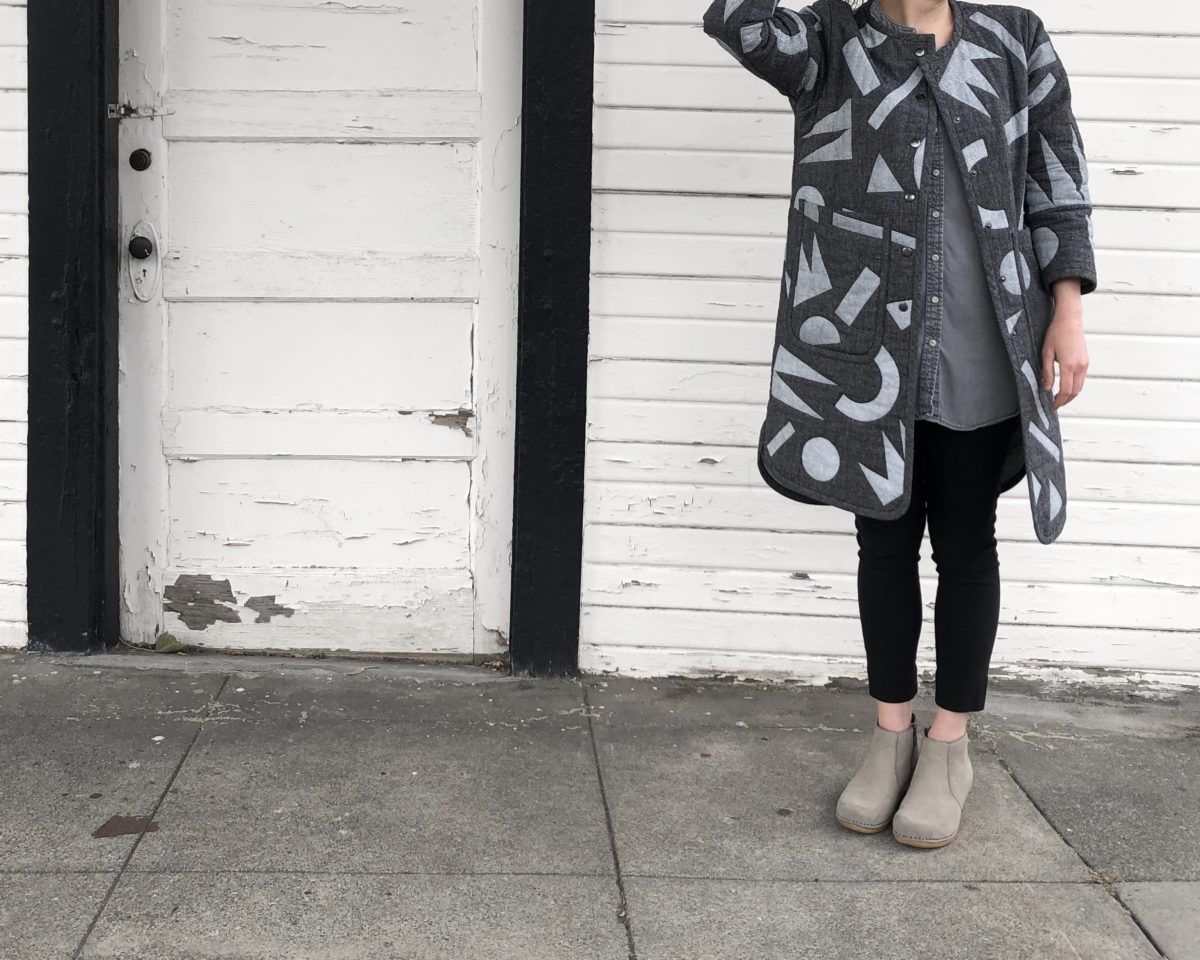
For the exterior fabric of my Tamarack, I chose Robert Kaufman’s Essex Yarn Dyed Homespun fabric in Pepper. This textile is a linen-cotton blend that I knew would quilt up beautifully. For the lining I used the same fabric in Charcoal. The bias binding is also Pepper to keep the emphasis on the block printed design. This was my first time block printing on a fabric with any visual texture (I usually keep to solid colors), and I just love the result. The weave shows through the print and also helps conceal the wonky, imperfect nature of block prints.
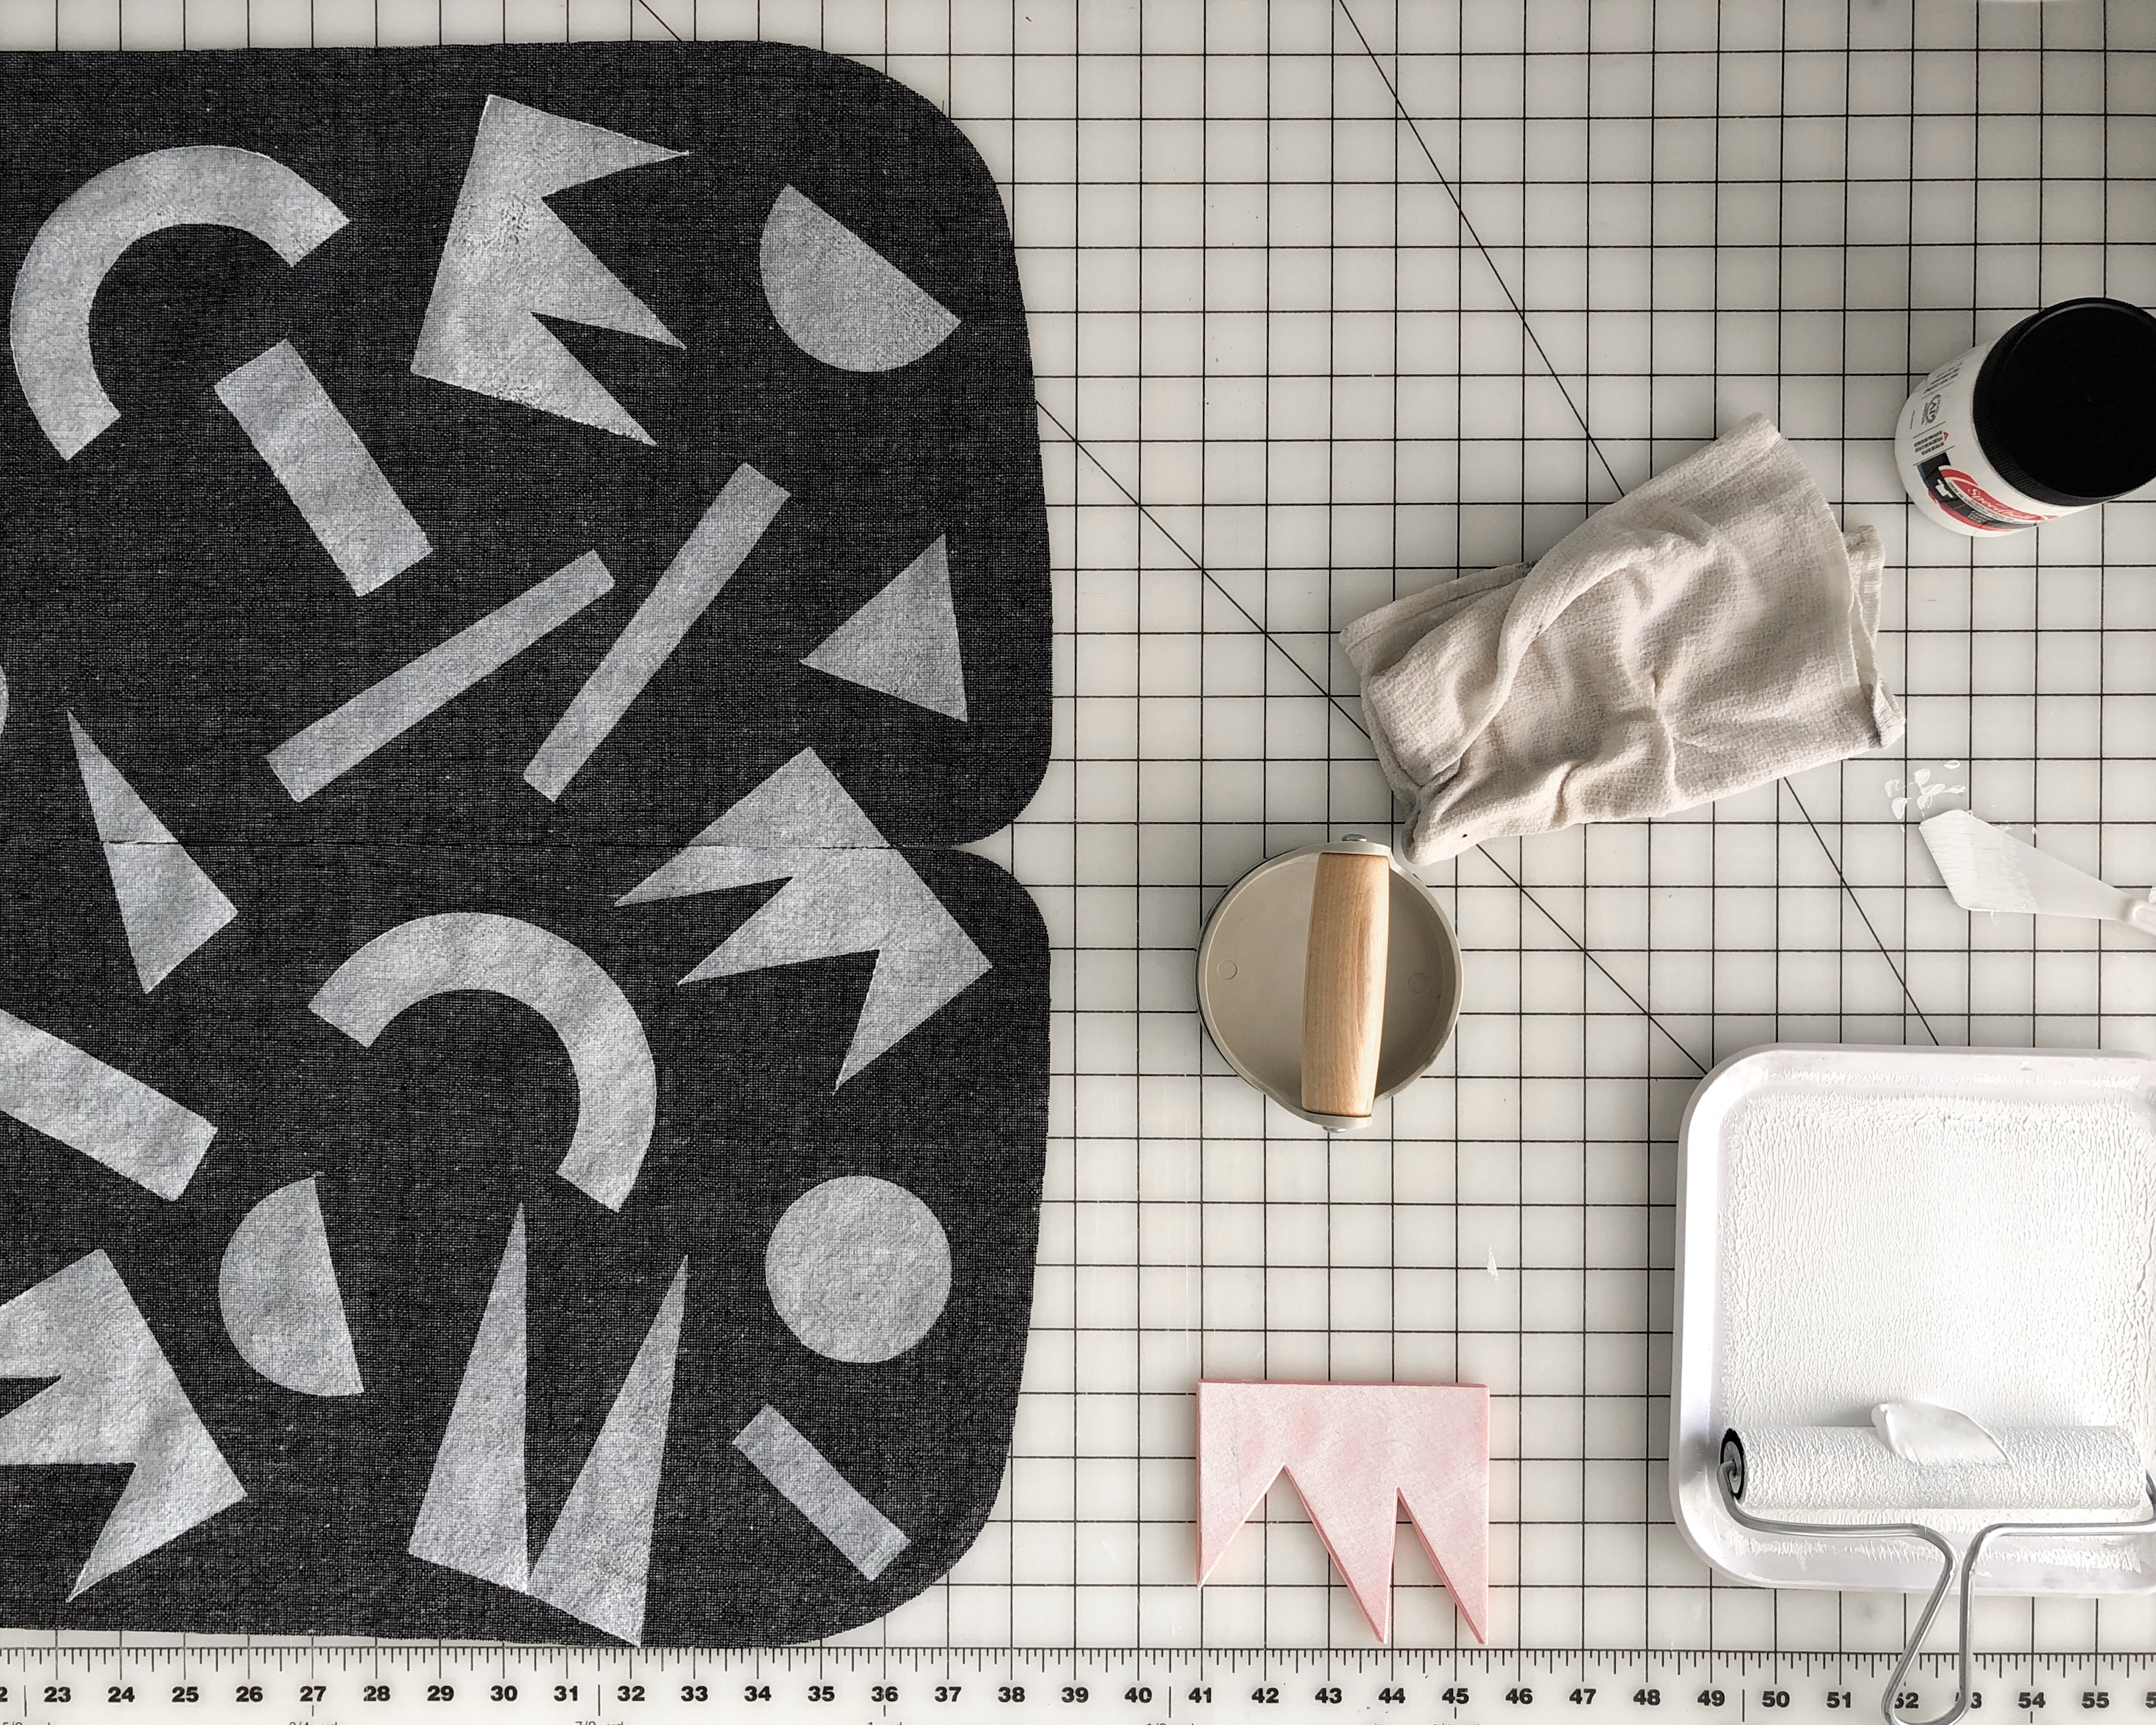
Block printing can be quite time consuming. I recommend cutting out your garment pieces before printing the fabric. There’s less waste, it requires less space, and you have more control over the print’s placement. With all of your pieces cut out, it’s easy to find a printing groove. I also recommend doing a few test prints on scrap fabric before committing to block printing your cut out pieces.
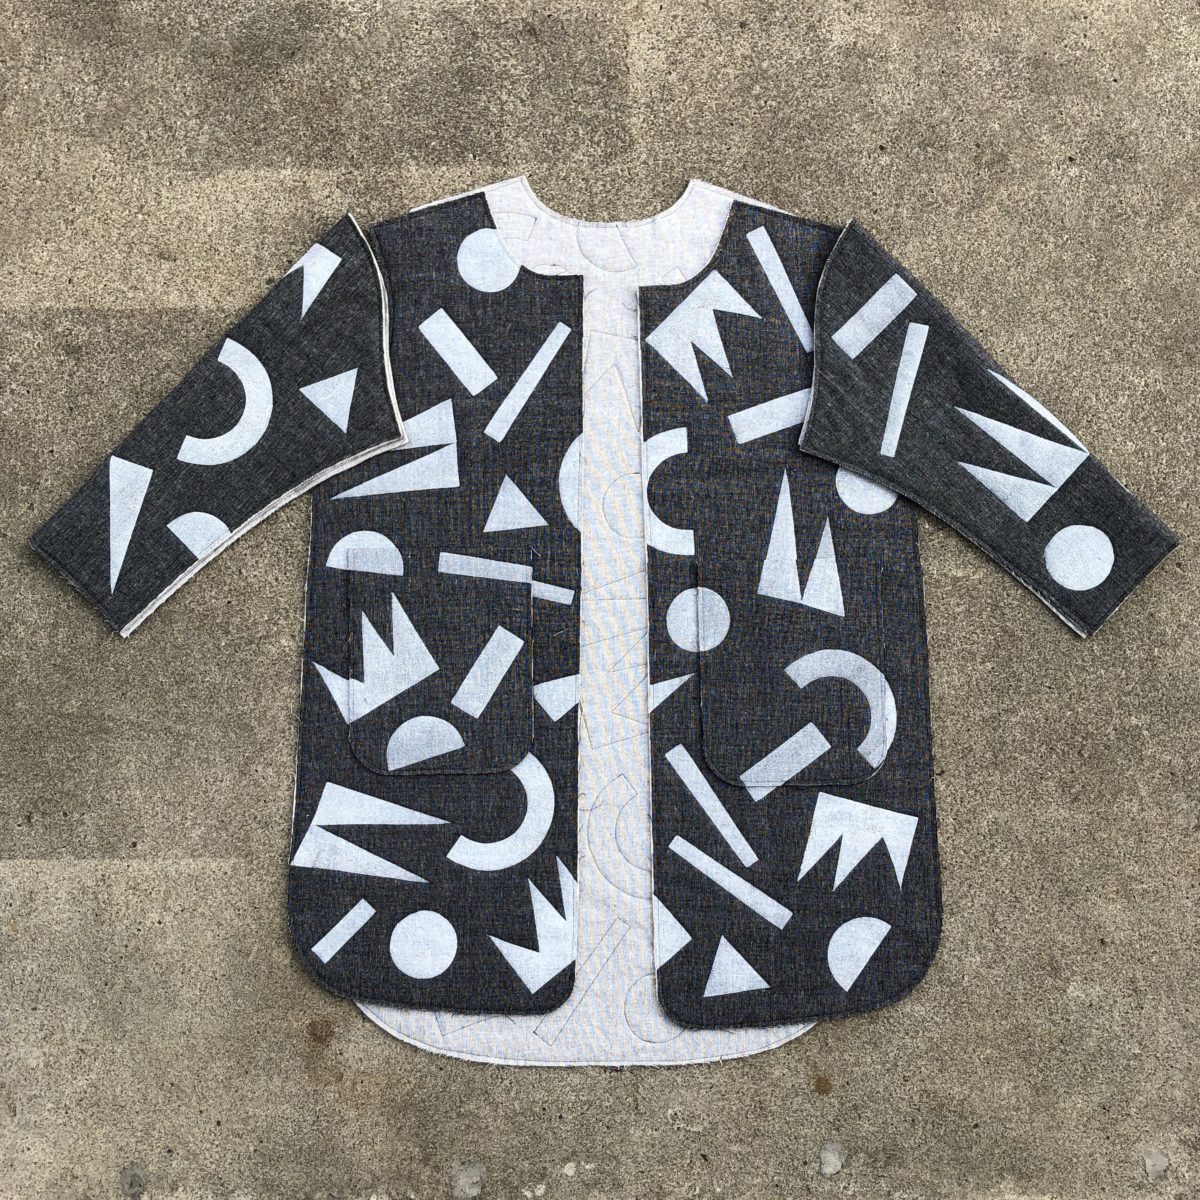
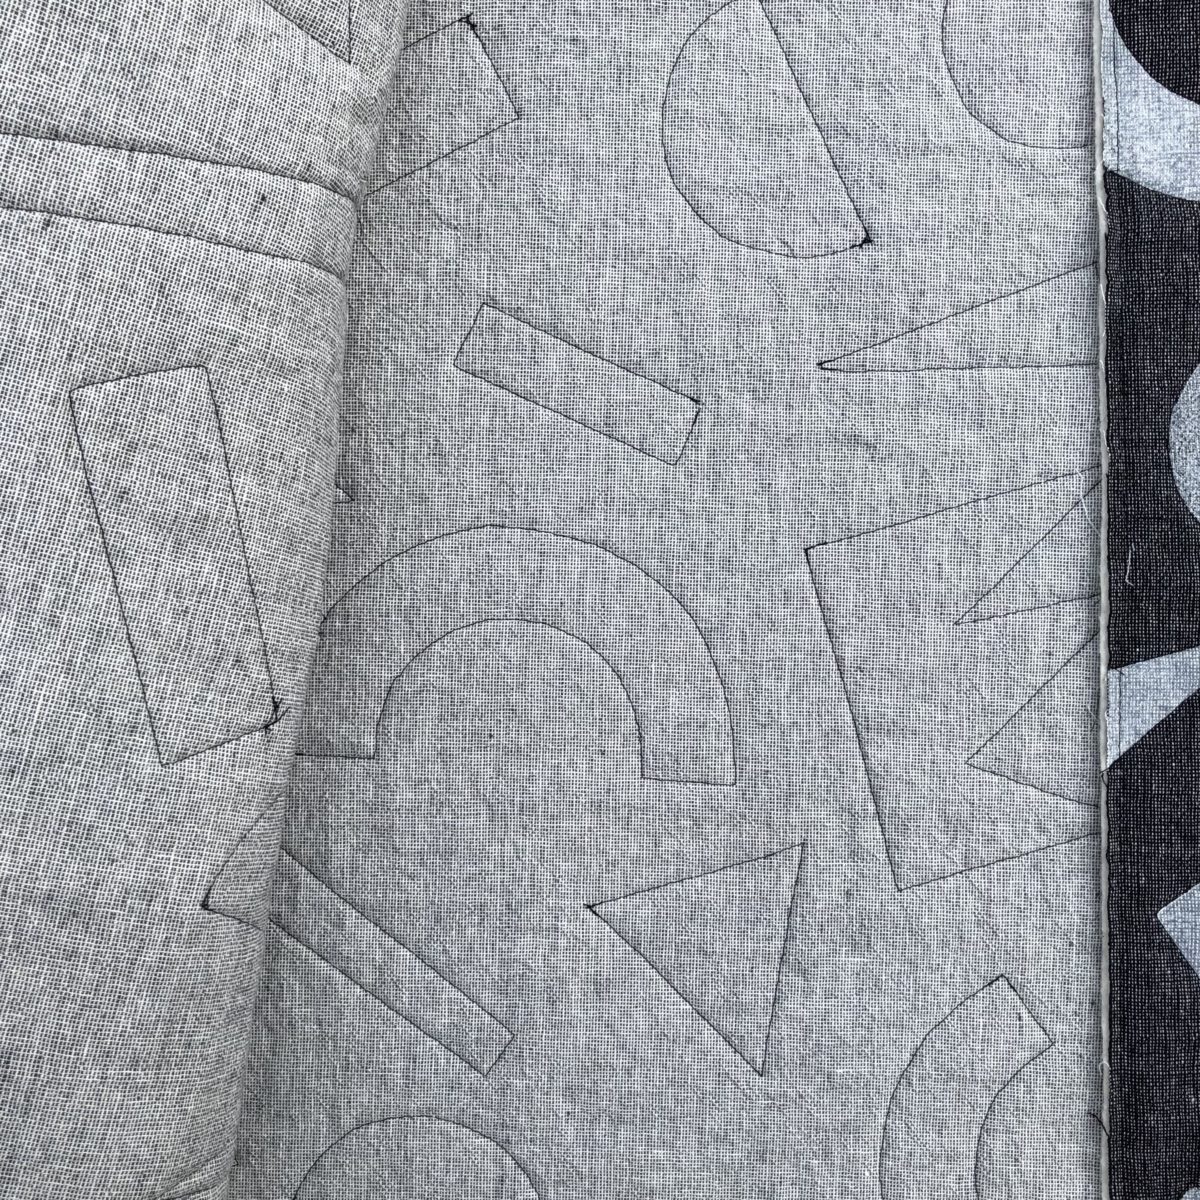
After your fabric is printed, it will need to dry for a minimum of 24 hours. It’s hard to wait, but I’ve found if I rush this step, the ink tends to smear. After it’s dried, be sure to heat set the ink with a hot iron too. While I was allowing my printed pieces to dry, I decided my quilting pattern would also emphasize the geometric shapes. I quilted around each shape instead of using a standard line quilting pattern. I used black thread in the bobbin and I love how the quilted shapes look on the inside.
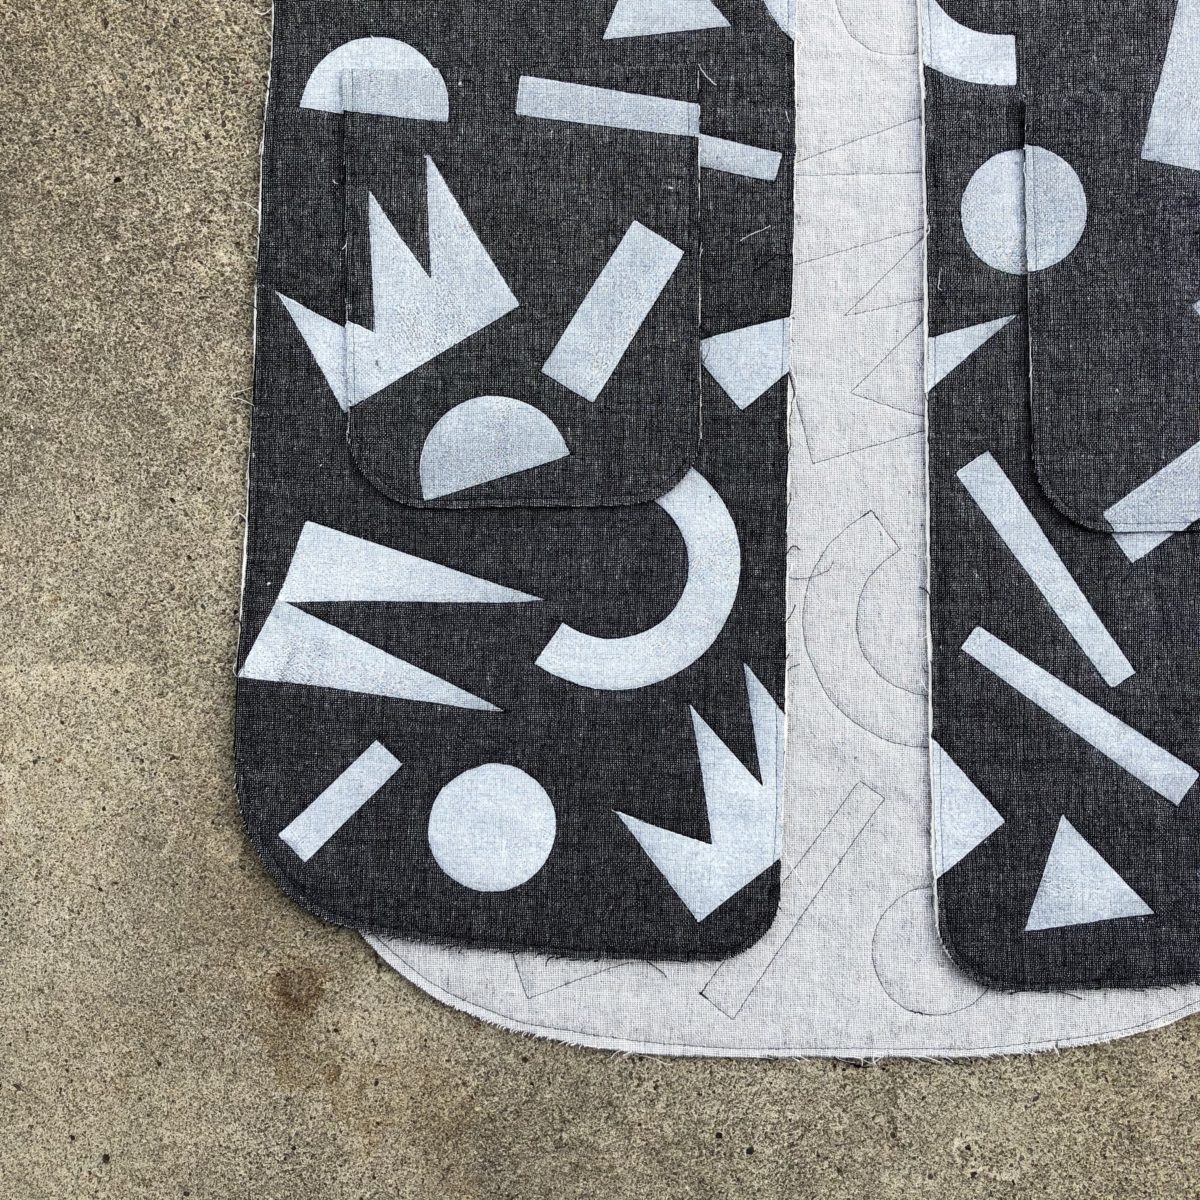
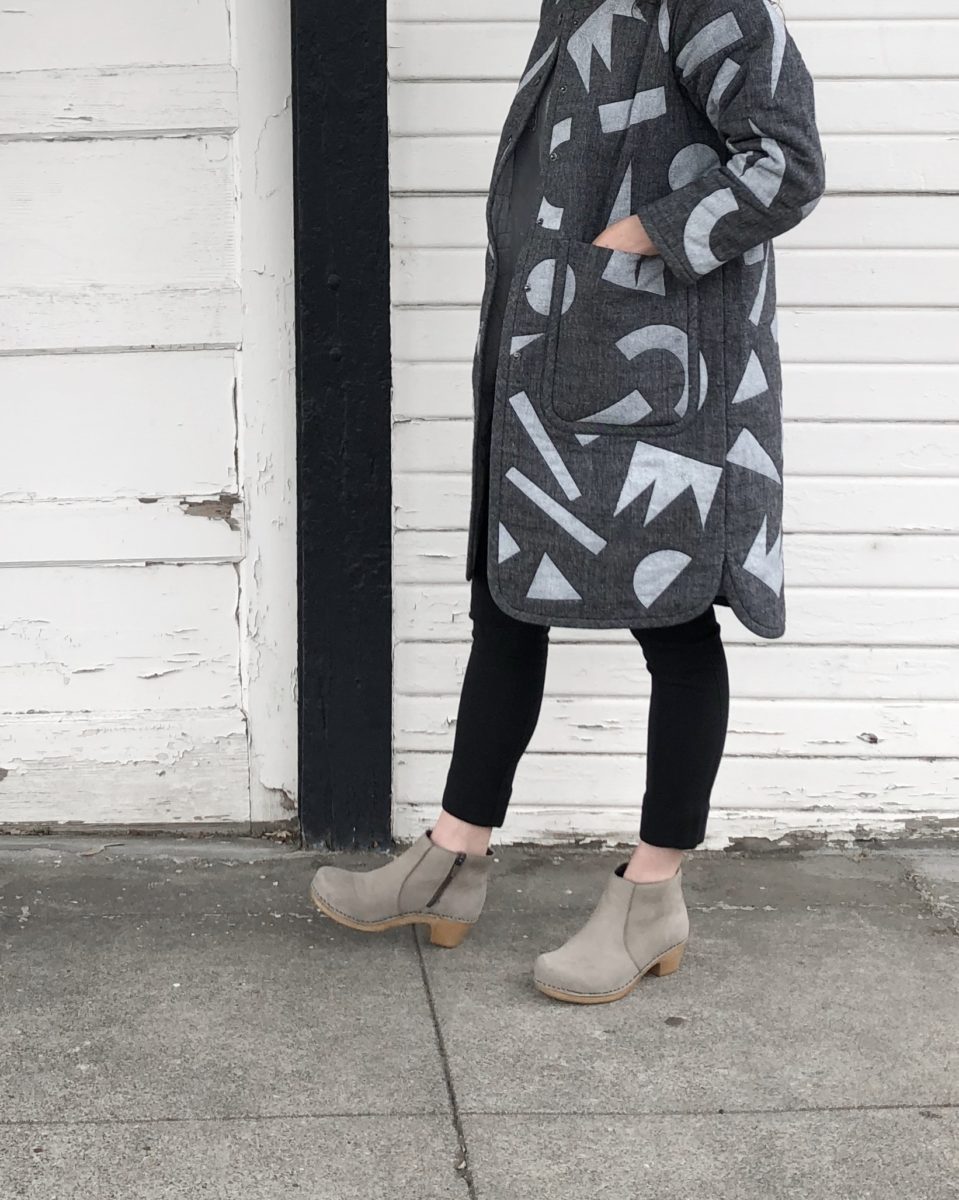
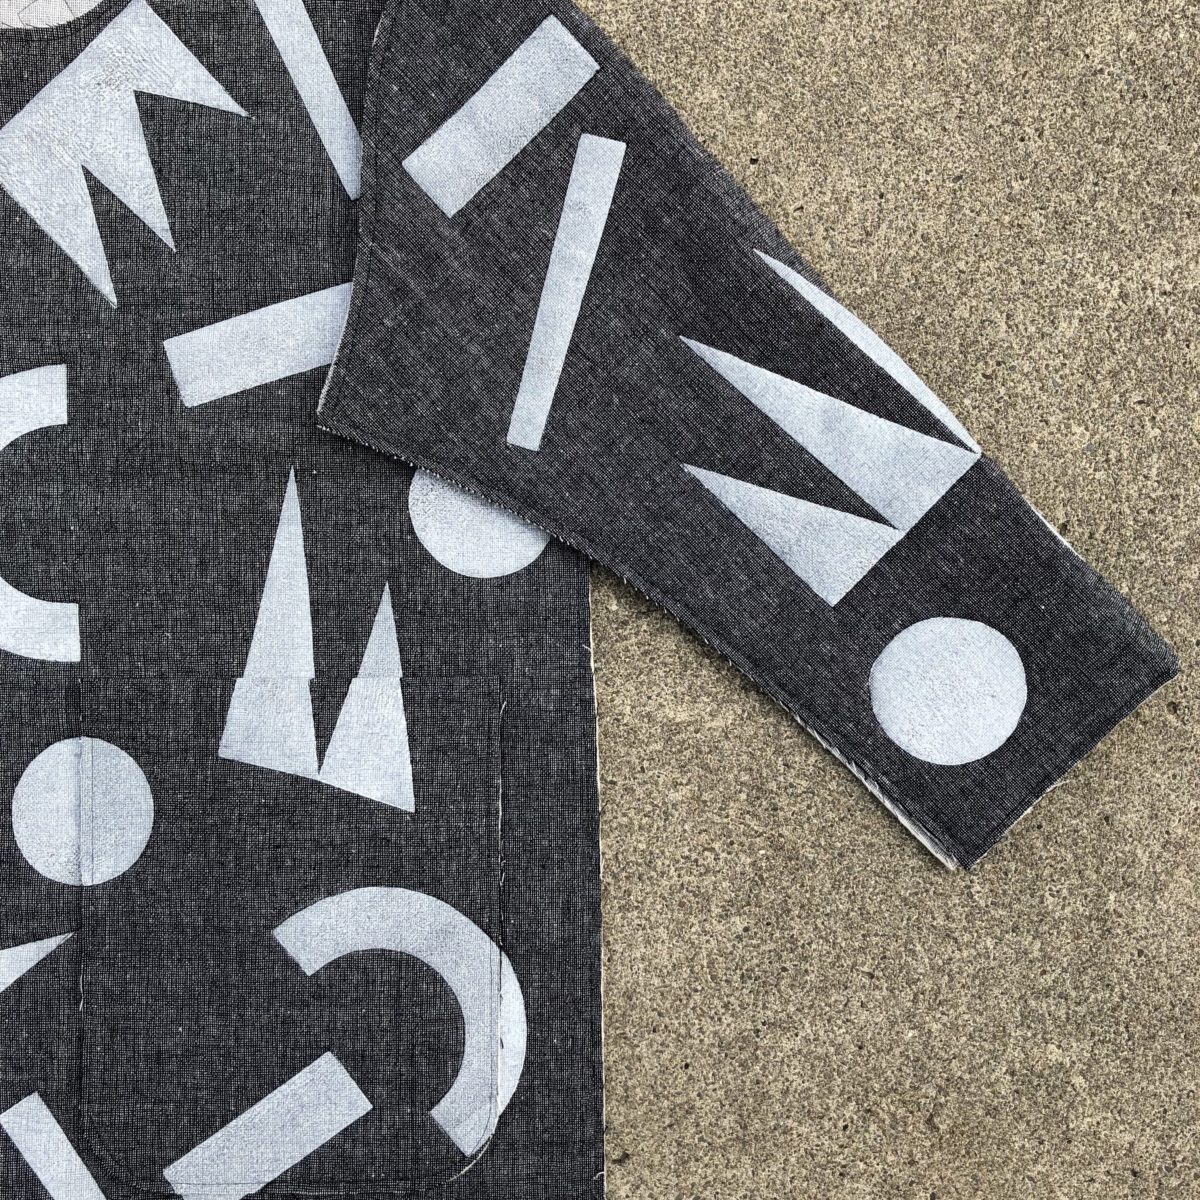
Since I decided to use large scale geometric shapes to create a surface pattern, I lengthened the body by 10 inches. Although many Tamaracks look great with a rolled cuff, I wanted the surface pattern on mine to be the focal point. I shortened the sleeves by three inches and added about half an inch to the cuff opening. Additionally, I chose to round the bottom front opening to mimic the rounded corners of the patch pockets.
A lot of RTW quilted jackets feature patch pockets and I thought it would be an opportunity to puzzle out how to print an uninterrupted pattern. I cut the pocket pieces so that the top edge is on the fold, sandwiched batting in between, quilted around the shapes, and finished the sides and bottom with the same bias binding. It didn’t turn out perfect, but it’s pretty close! Instead of attempting to pin the pockets in place, I used Wash Away Wonder Tape to stitch in the ditch and edgestitch the pockets in place.
Initially I had planned to use Hong Kong seams to finish the inside of the jacket, but it ended up being too bulky. Instead the seams were serged and pressed open. The finishing touch was a block printed label. I like to add these to all my me-mades, or print directly onto the garment with my NOT A PRIMARY COLOR block.