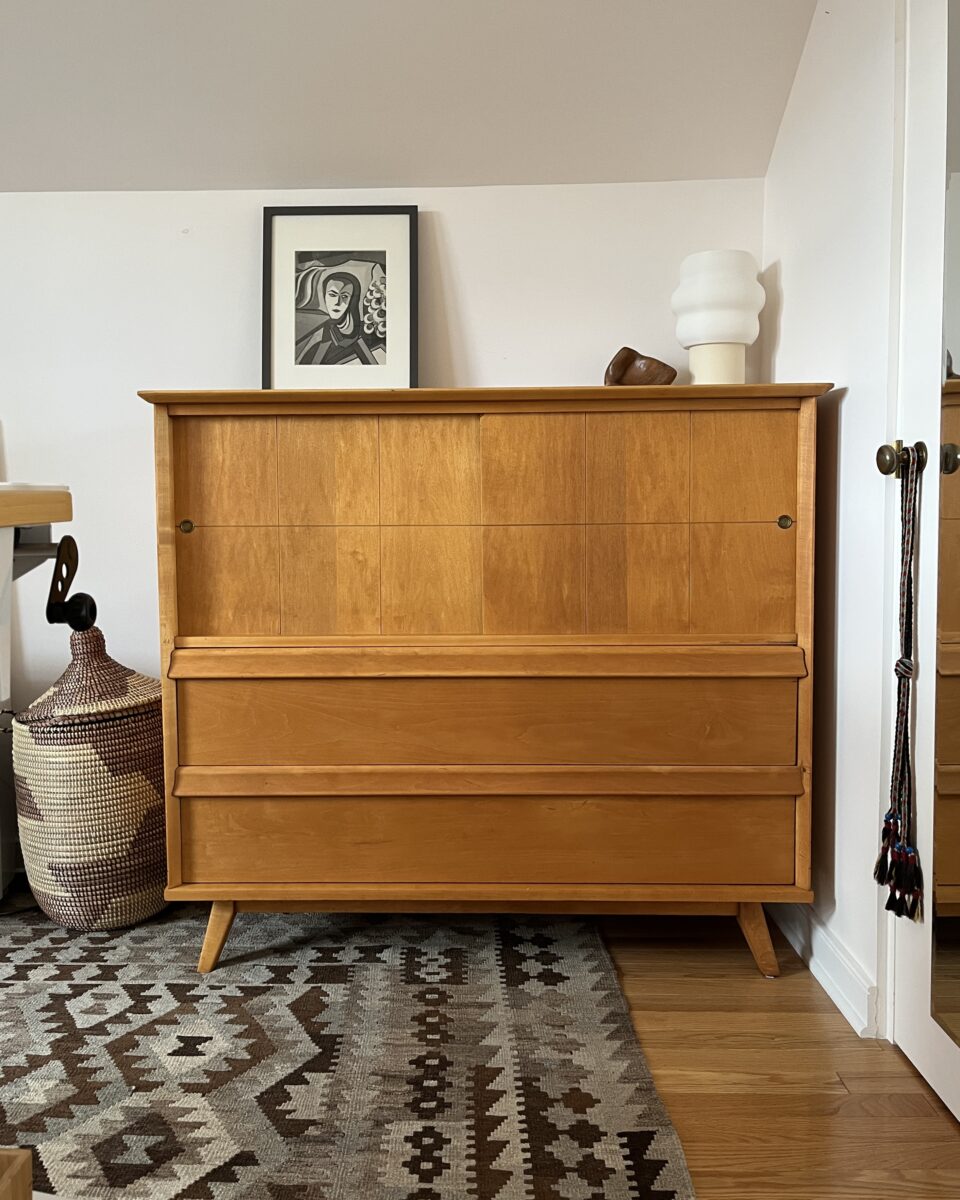
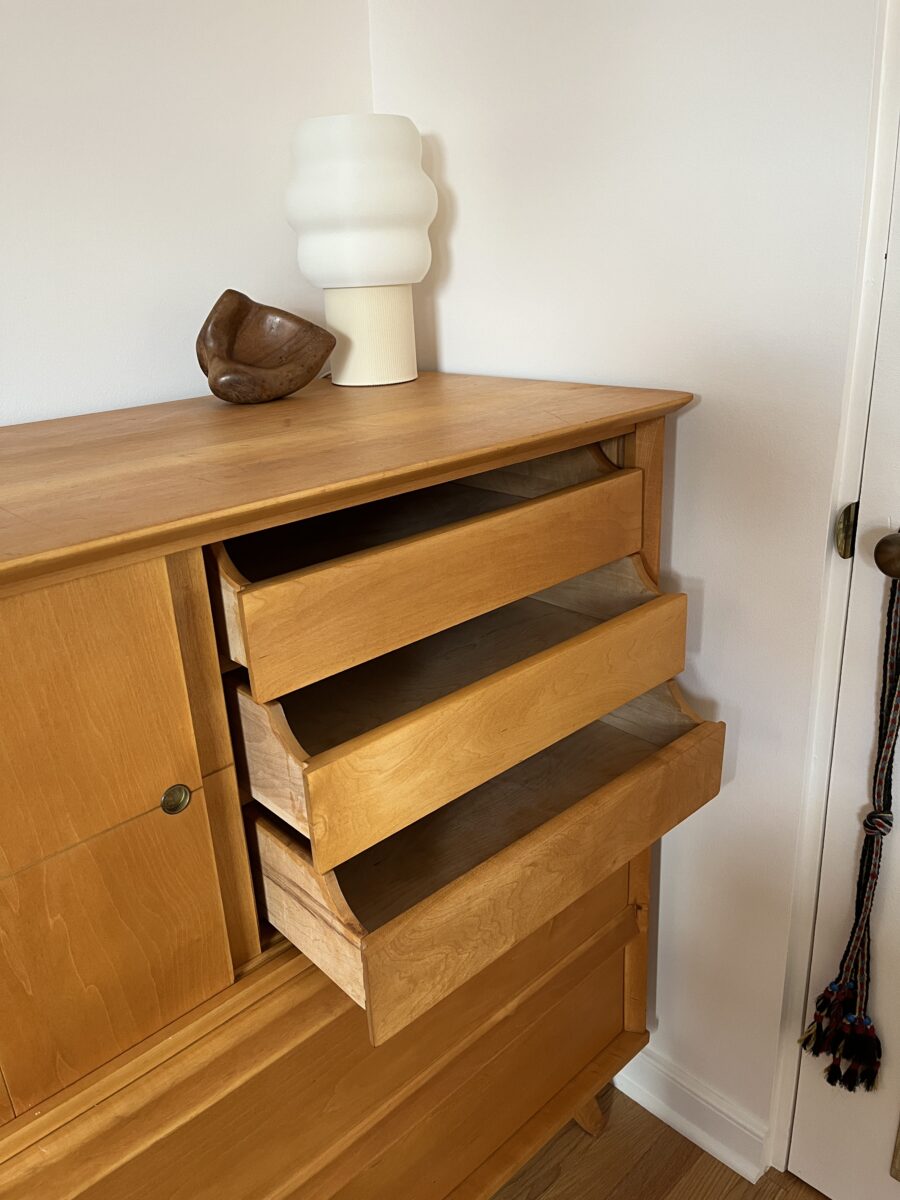
The gentleman’s cabinet is done! It still needs a coat of wax, but it’s upstairs and looking so much better. This thing is solid wood, so I was able to sand out a lot of the deep scuffs and scratches. It’s still sporting some imperfections, but I’m calling it *character*
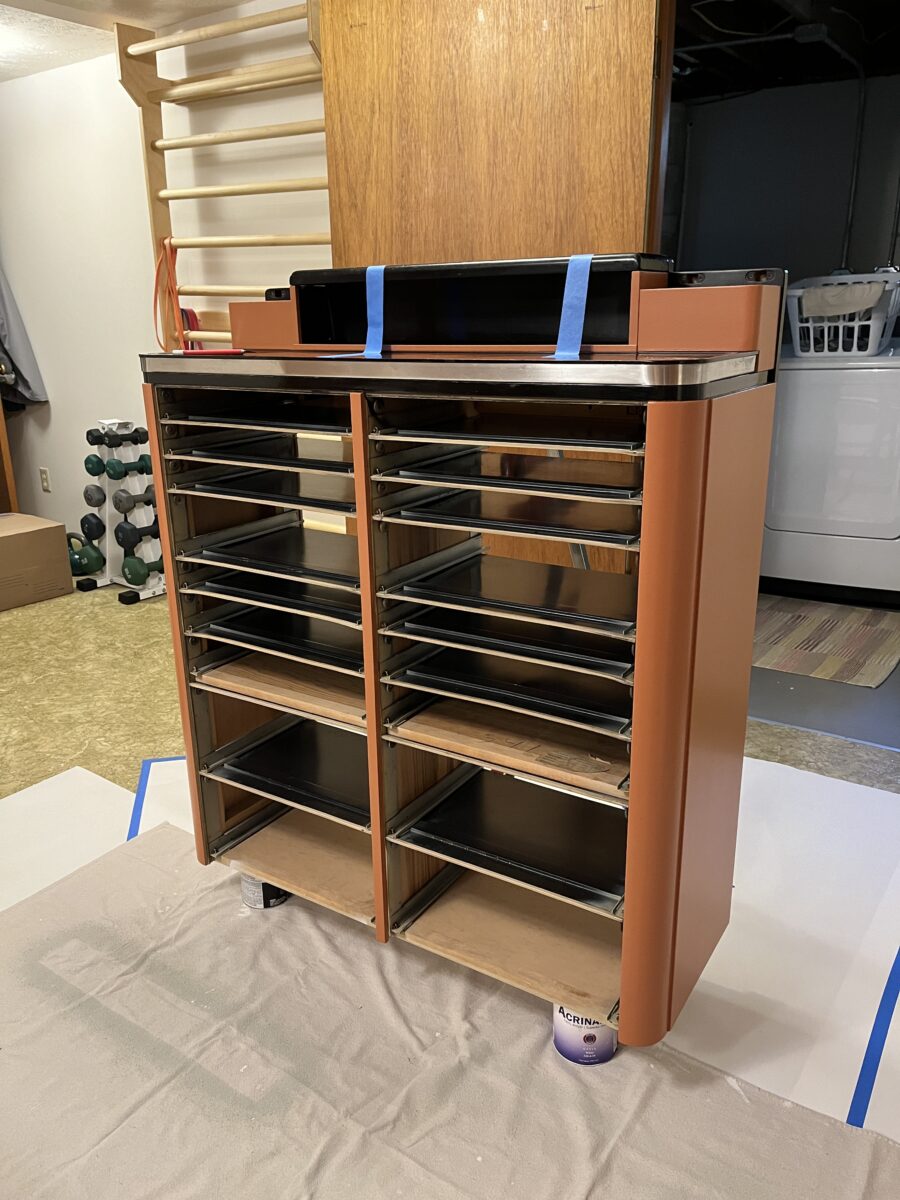
I am okay with the stain color. It’s a bit more orange than I thought it would be and it kinda makes my eyes vibrate. There’s absolutely no way I’m going to re-sand it though!
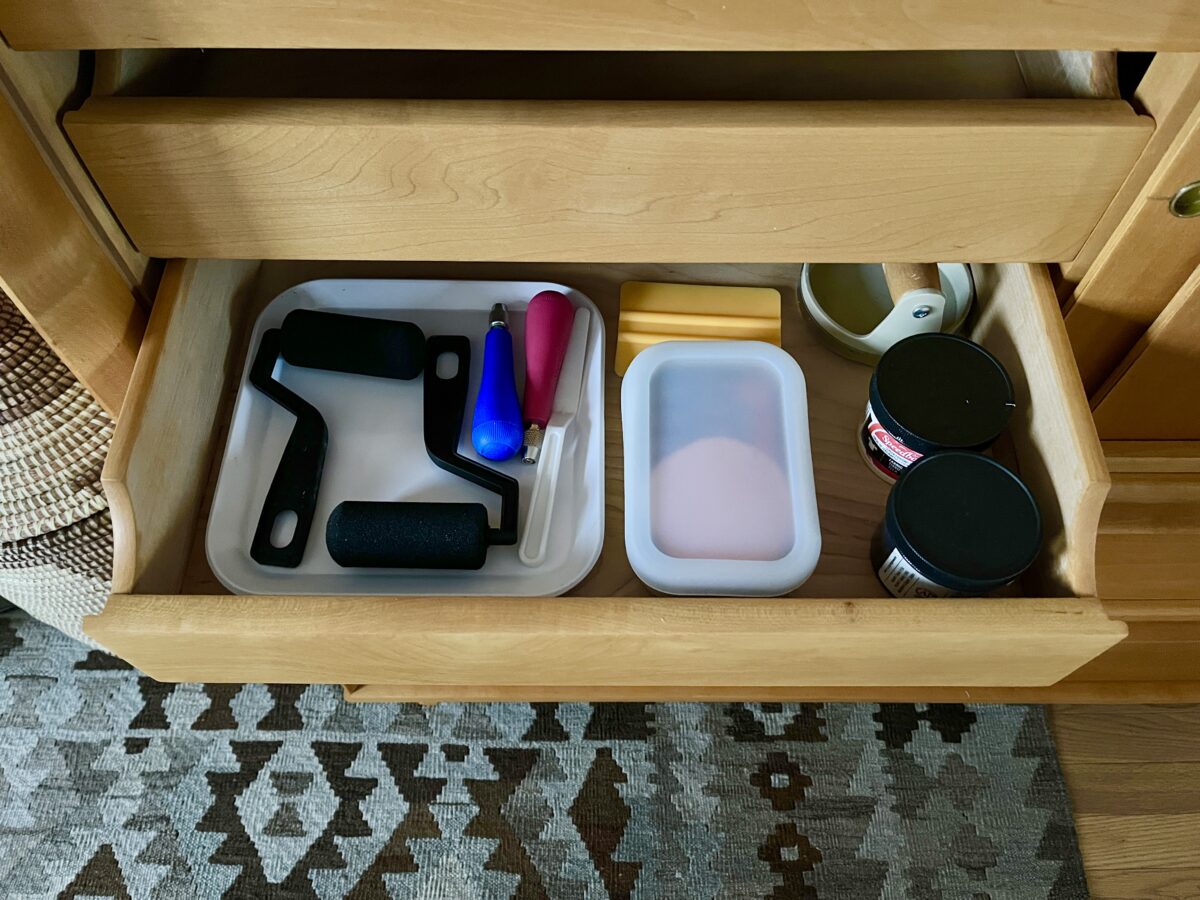
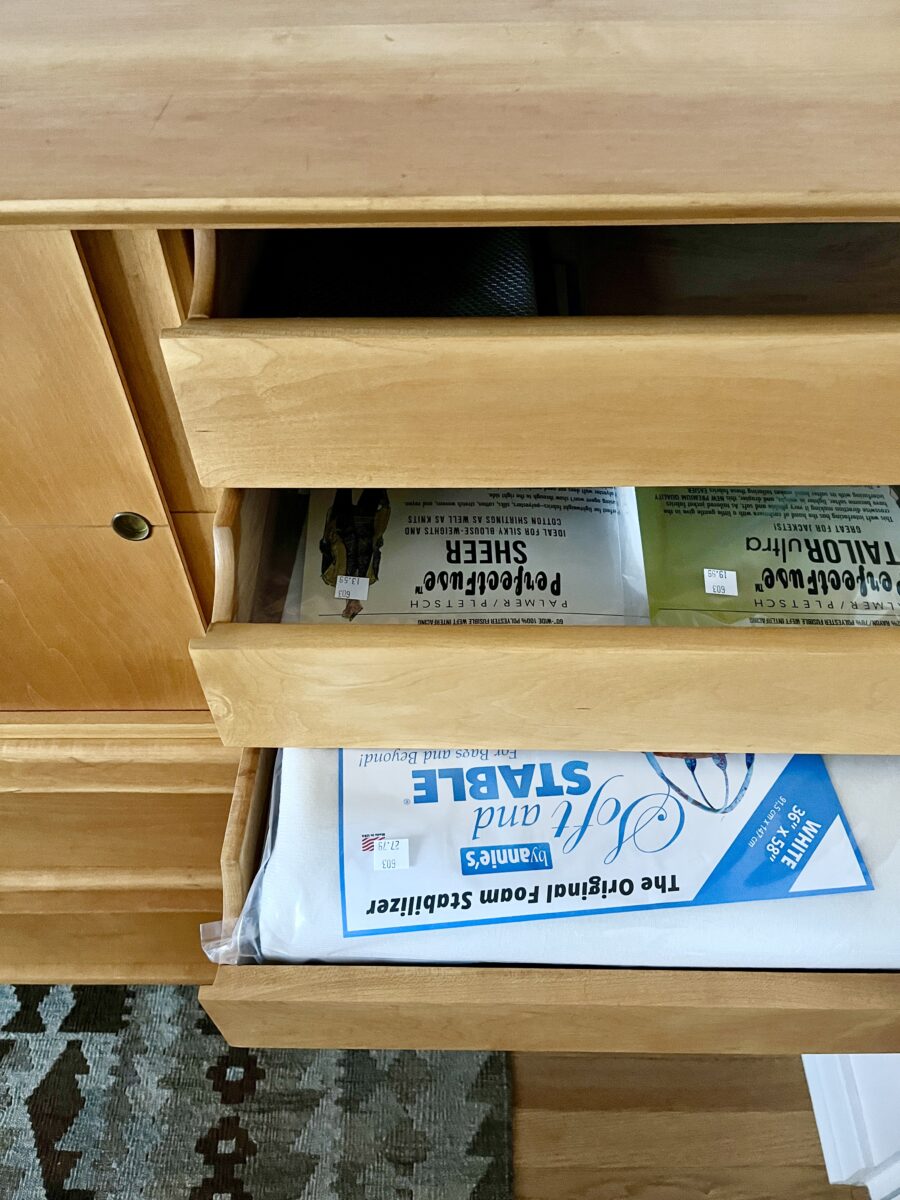
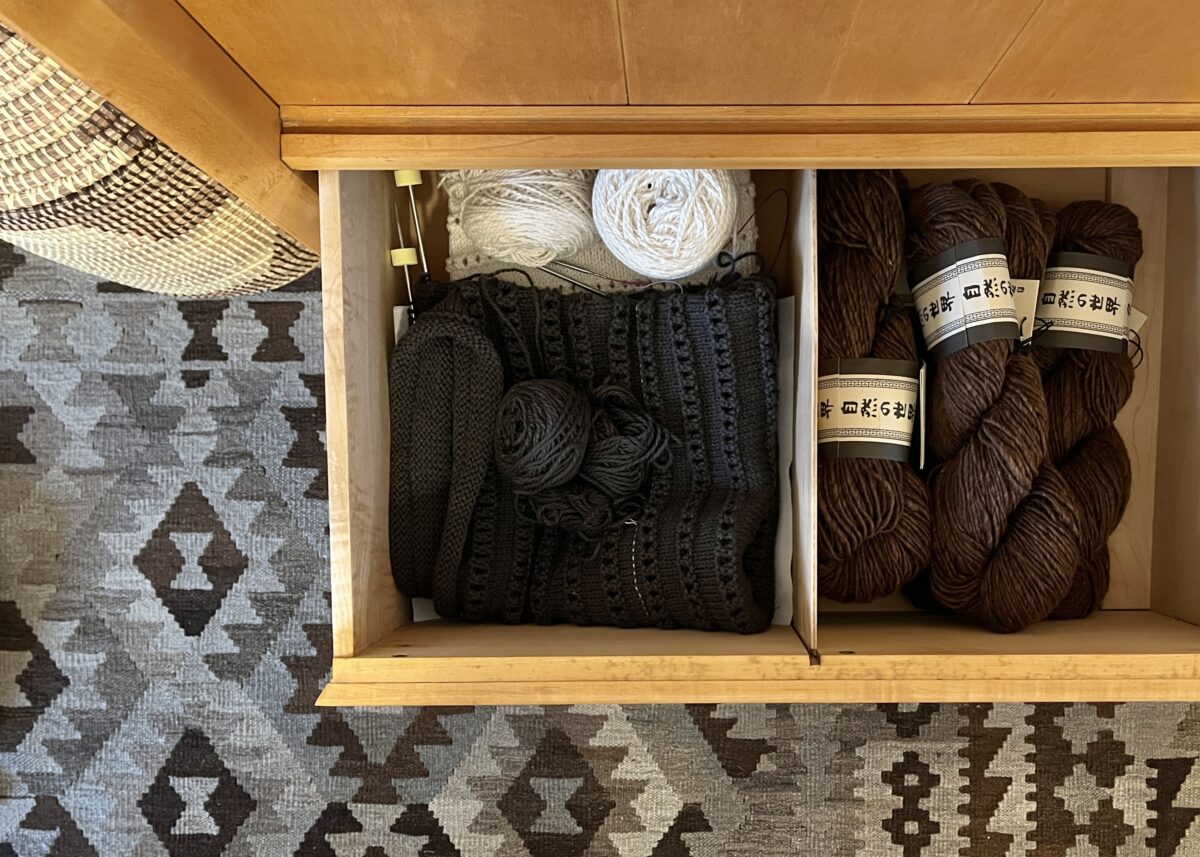
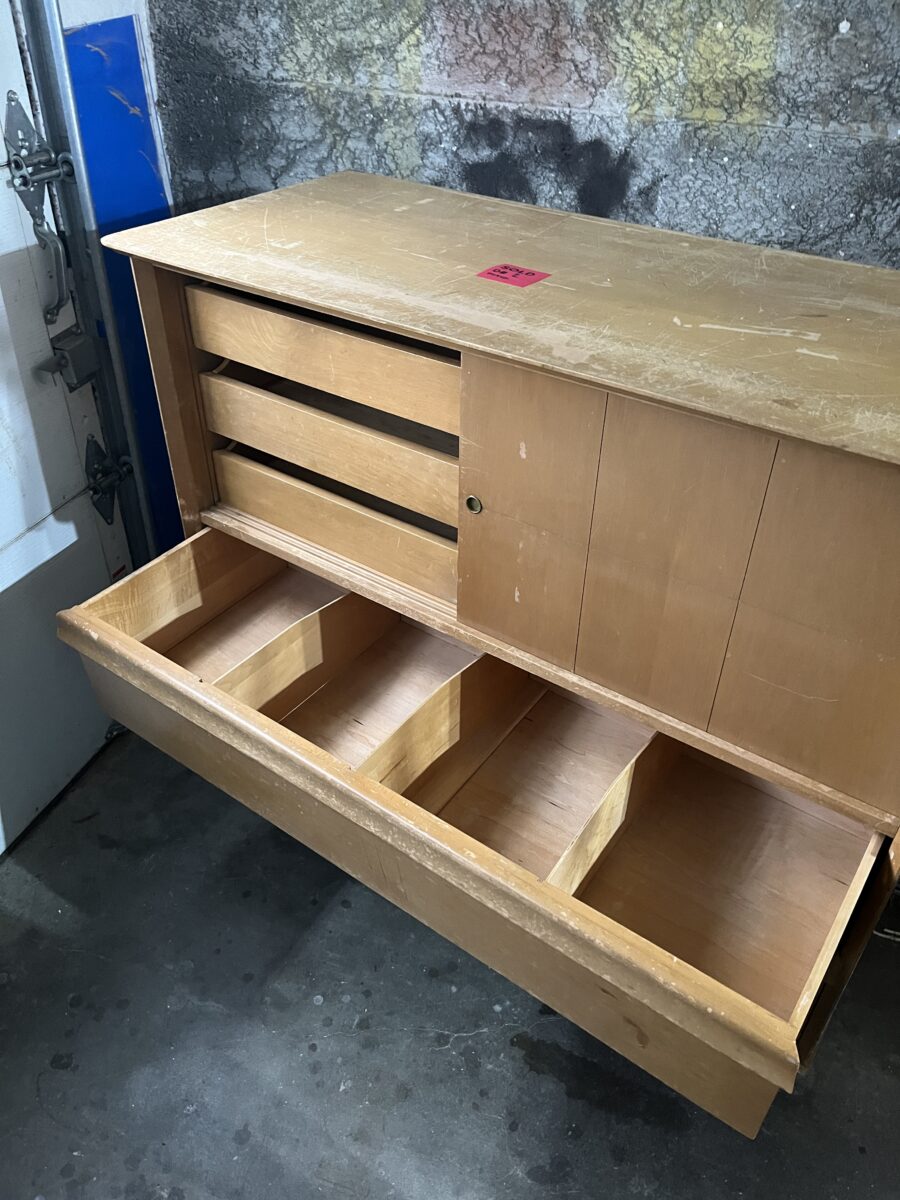
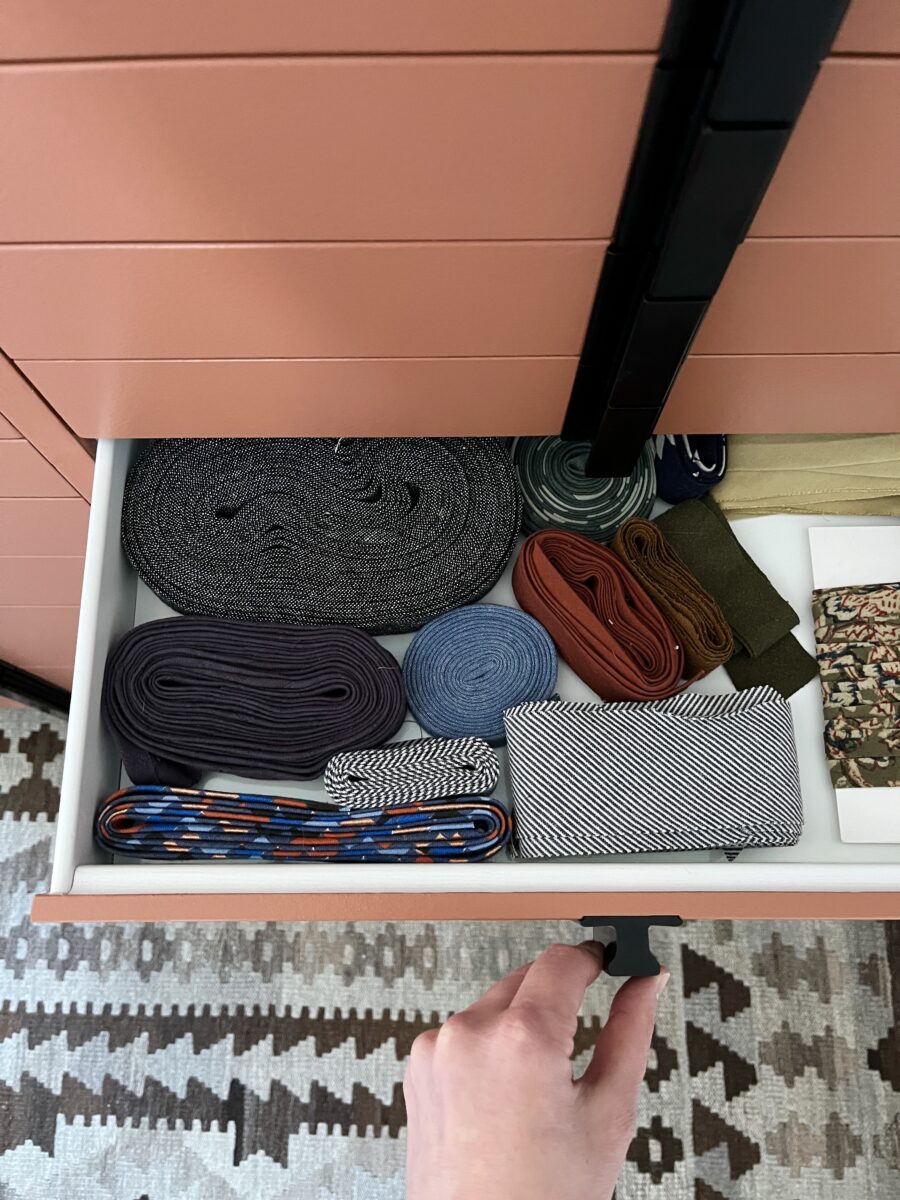
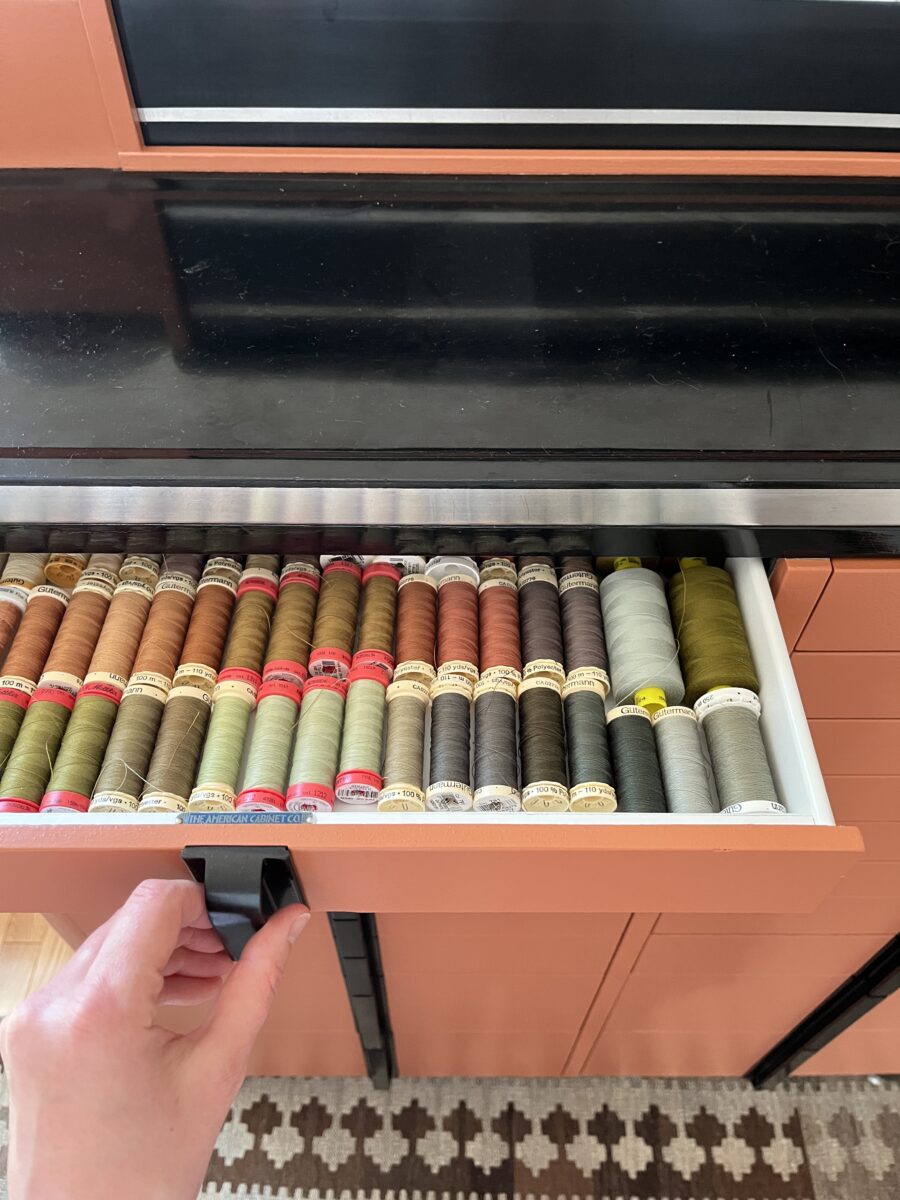
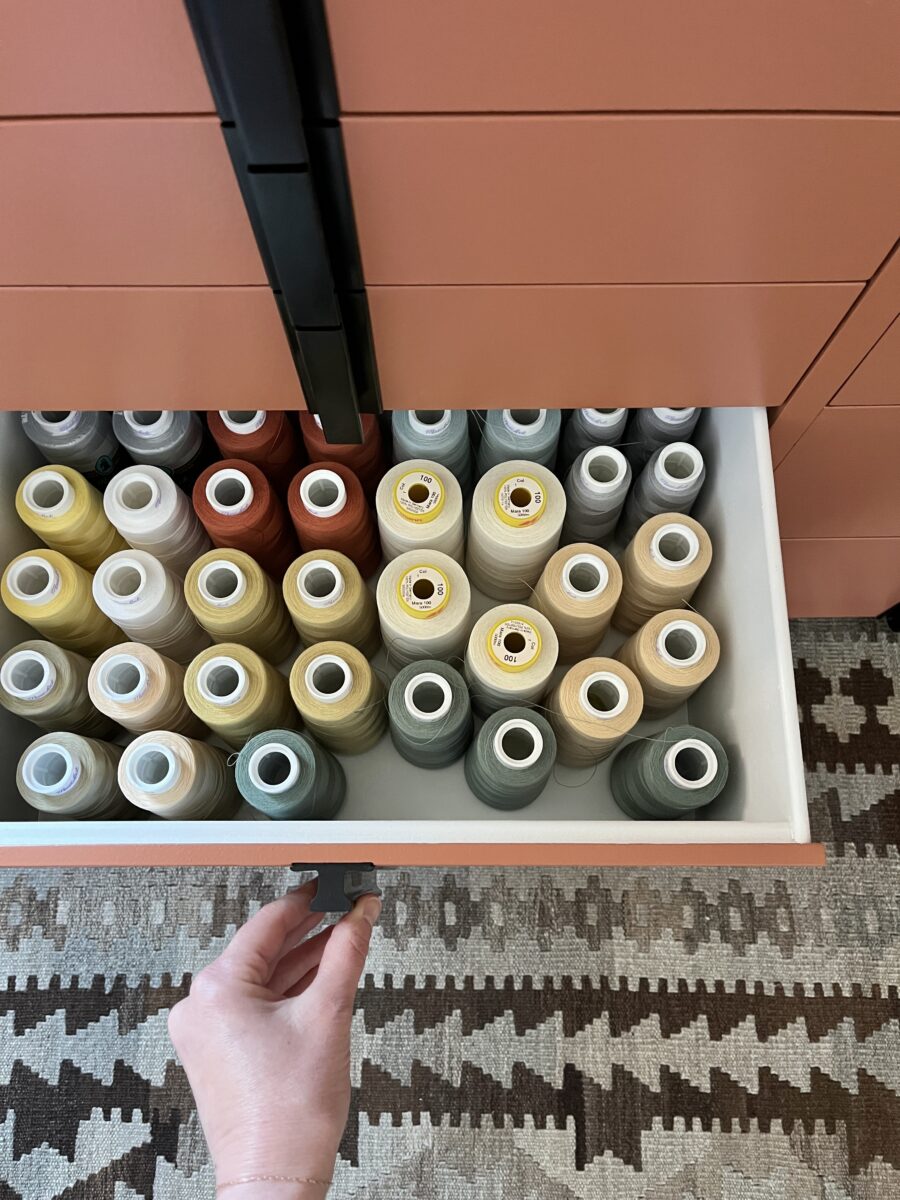
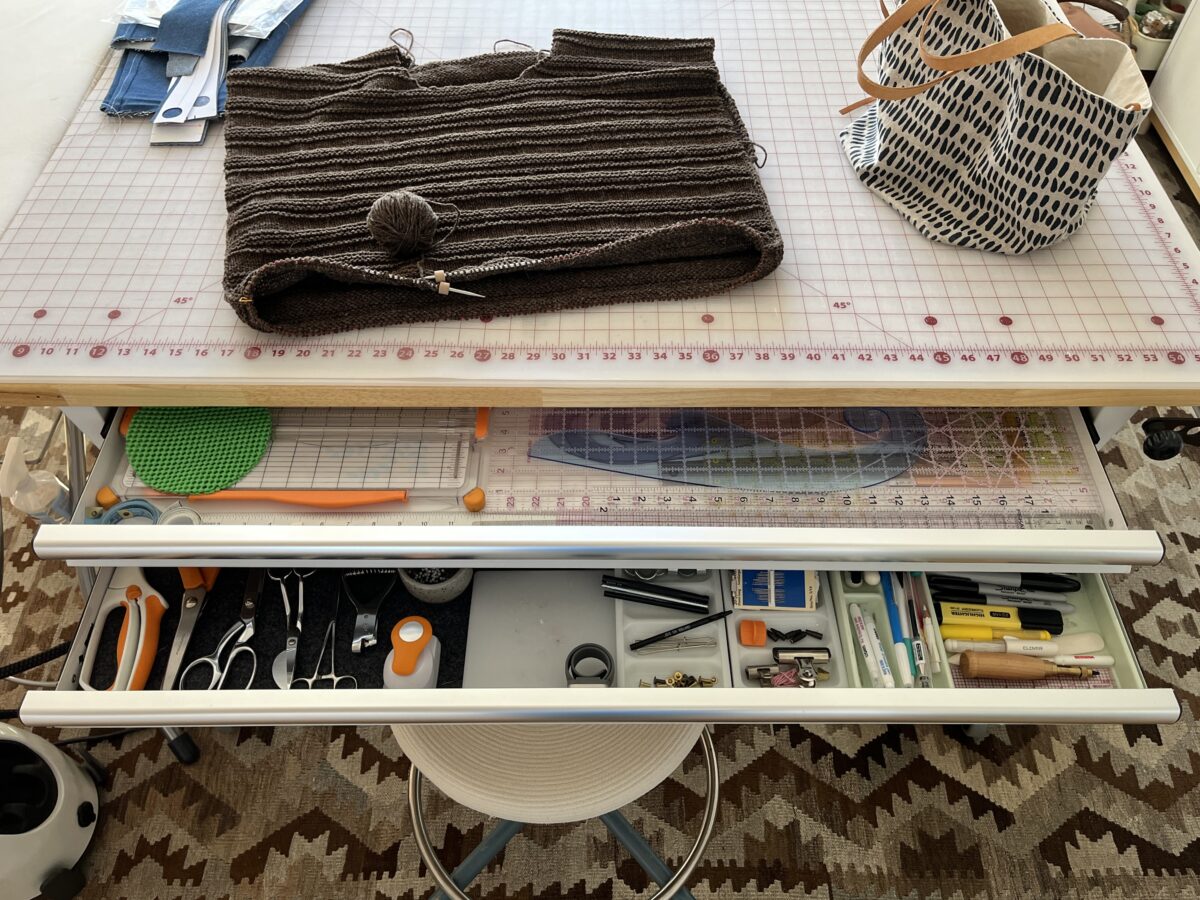
I’ve still gotta figure out what goes in each drawer, but I know it’s for sure going to be a home for interfacing and bulkier sewing supplies. I think the big divided drawer is going to be perfect for yarn and knitting WIPs too.
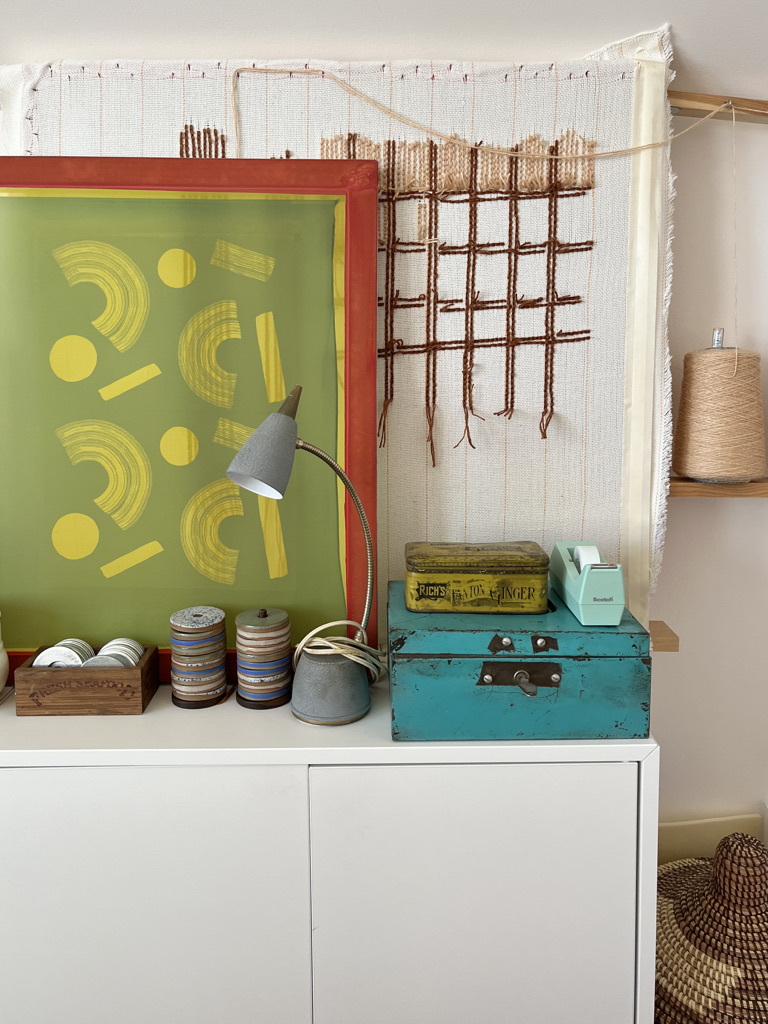
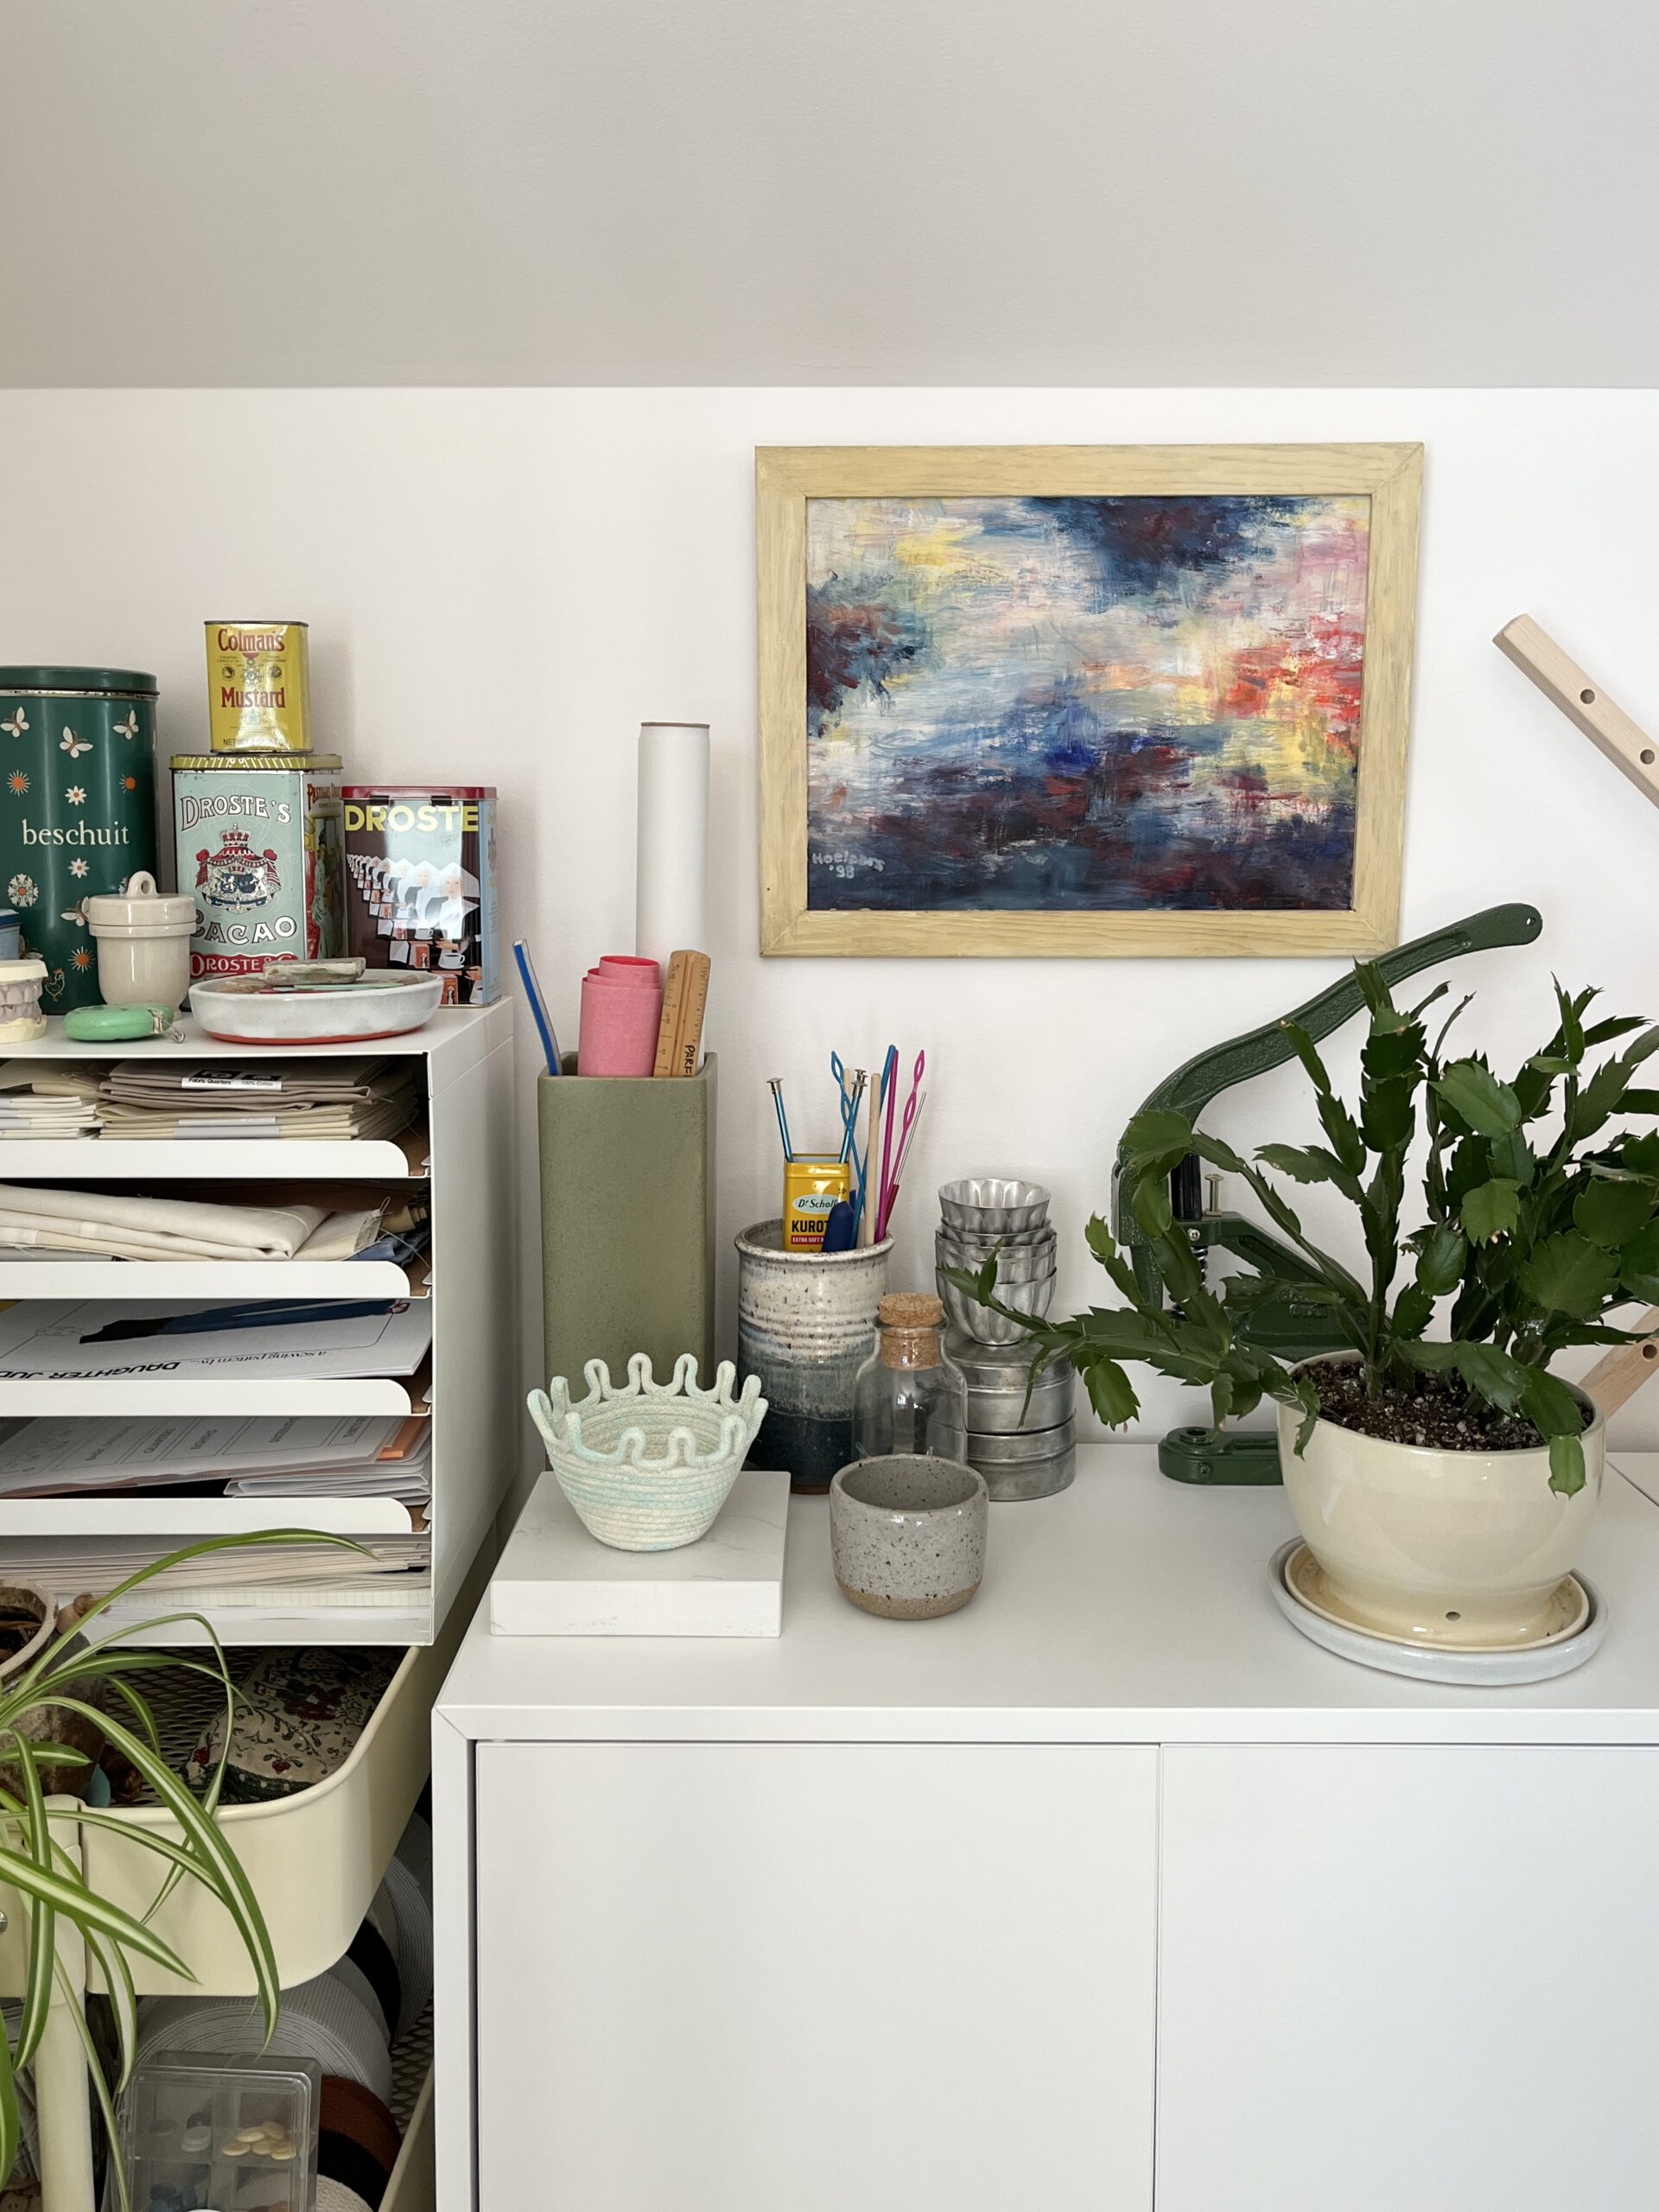
I’m excited to find some art n’ things to style the top of it. The extra surface has already proven super handy and adding a light to this dark corner has lengthened my nighttime making sessions.
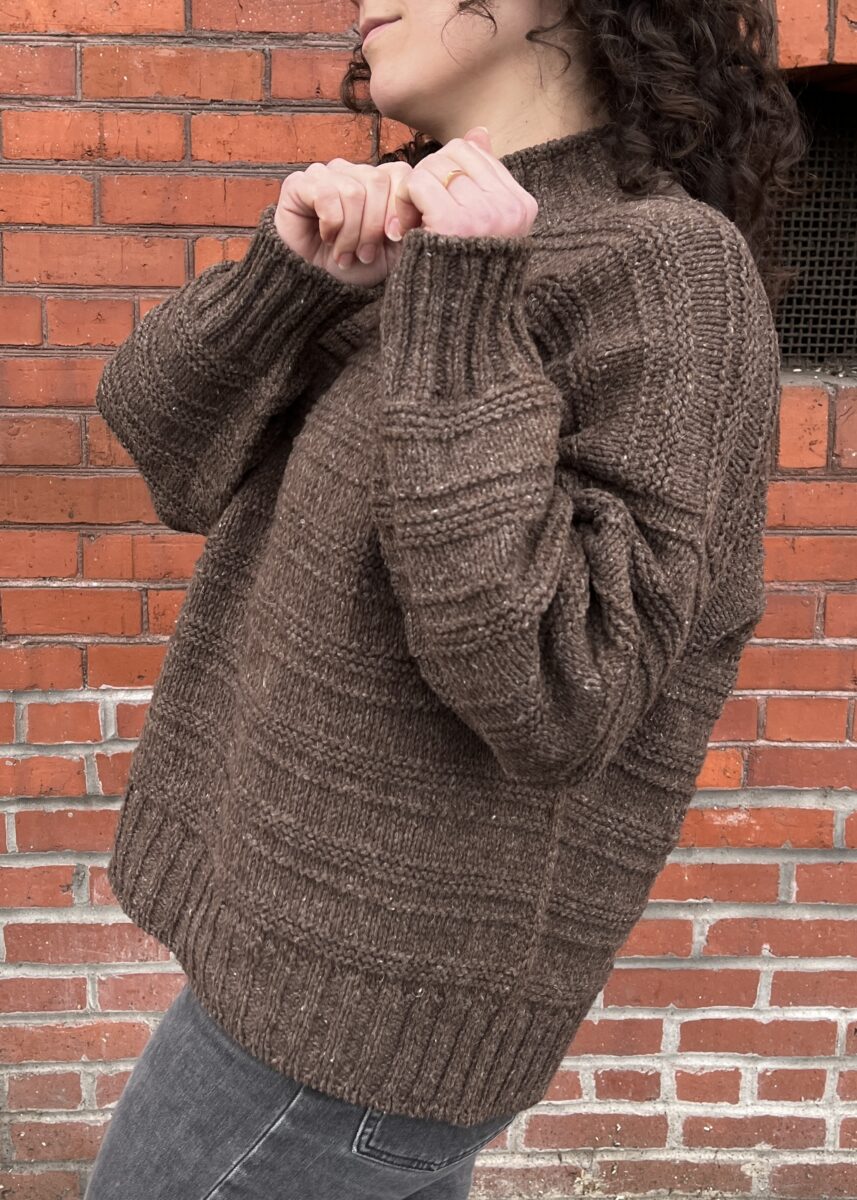
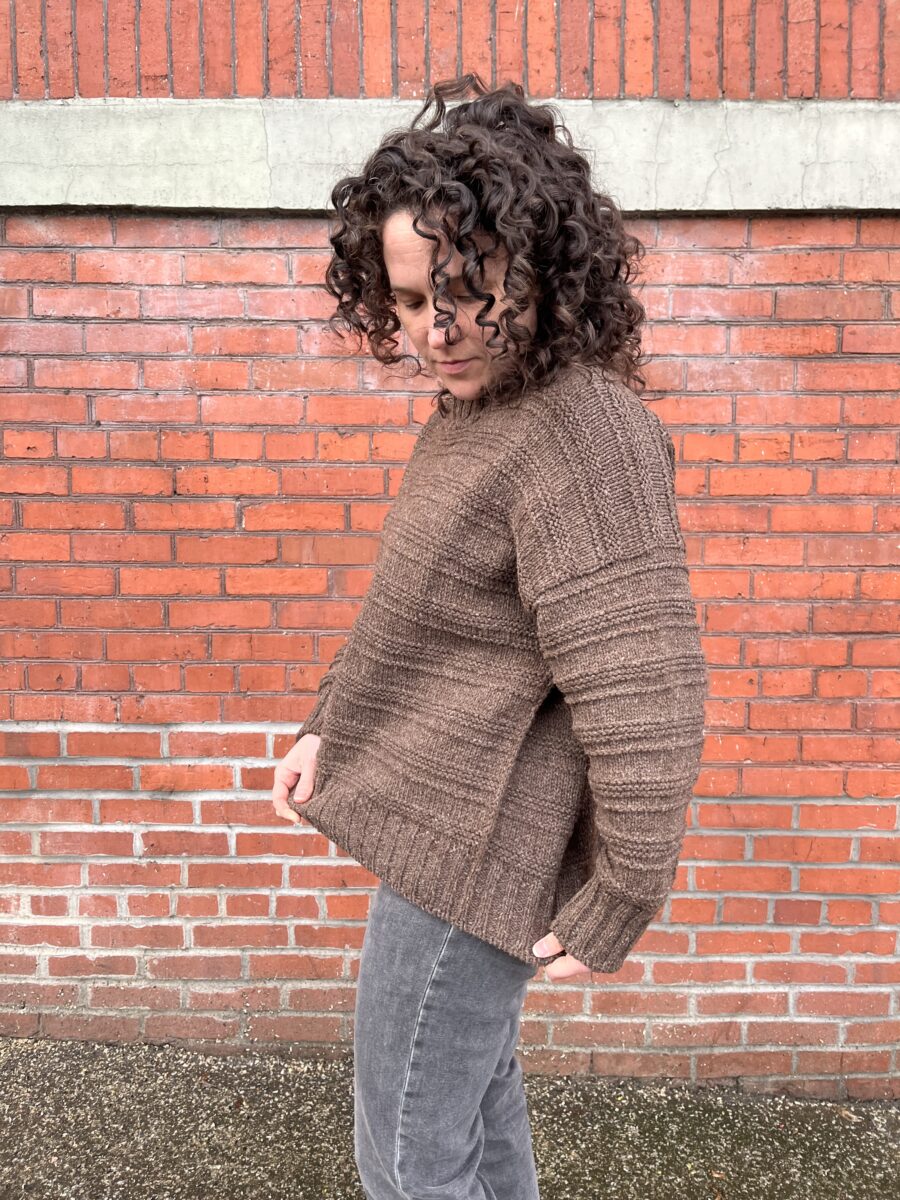
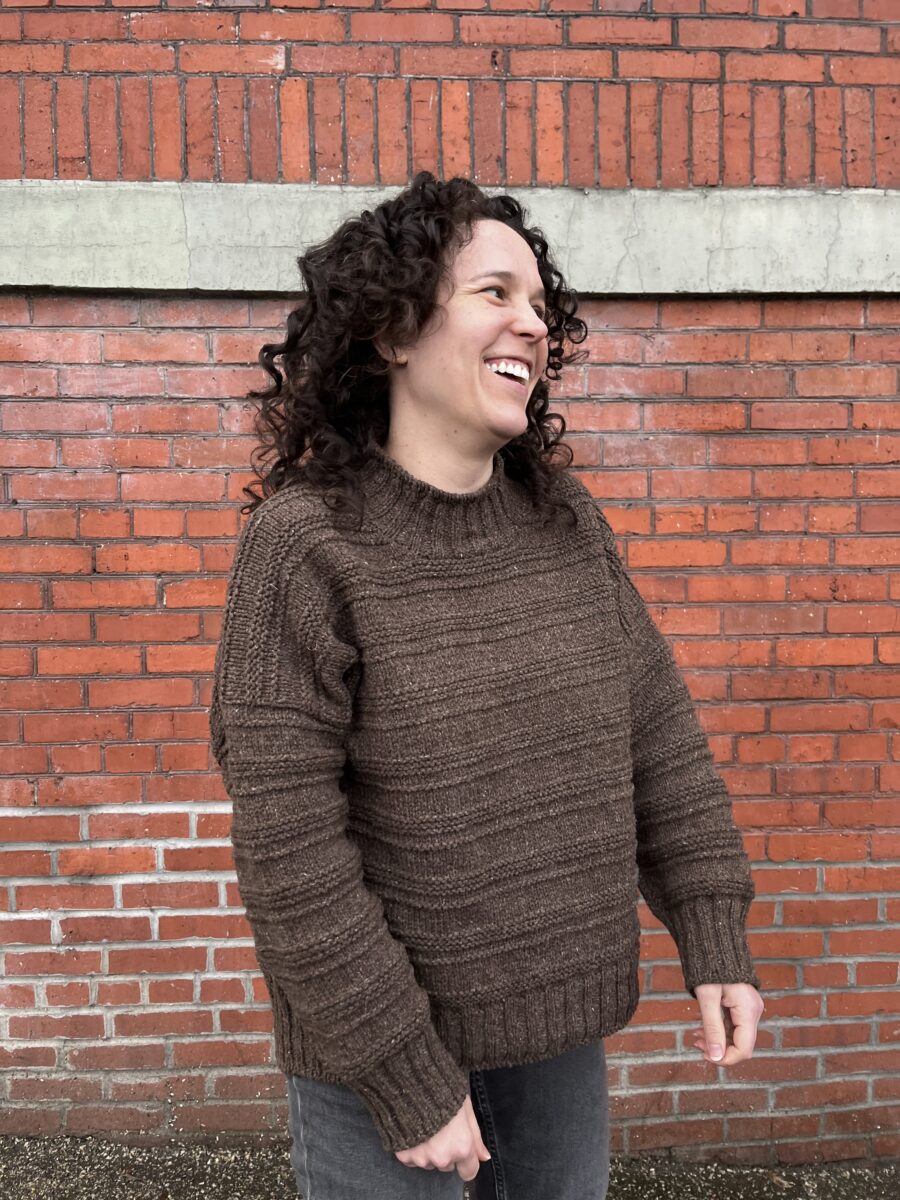
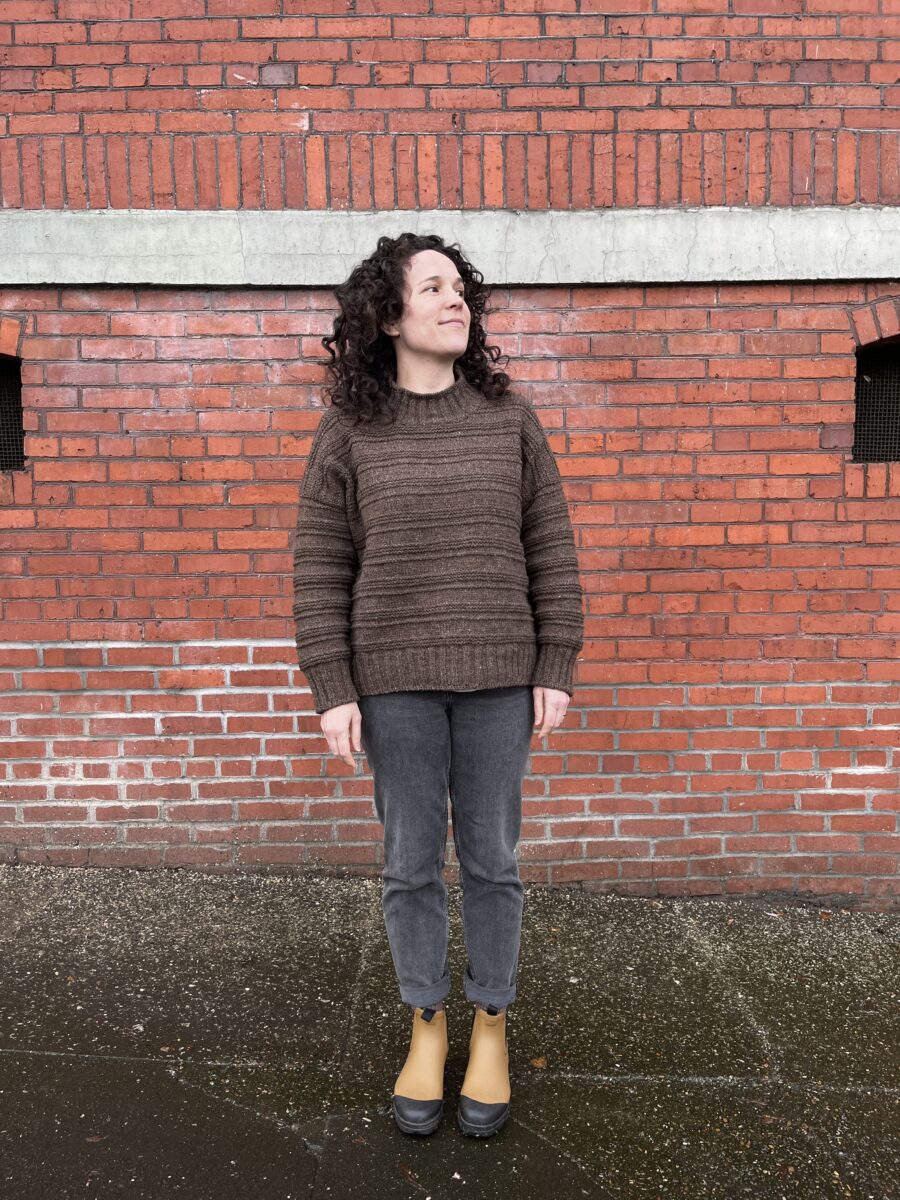
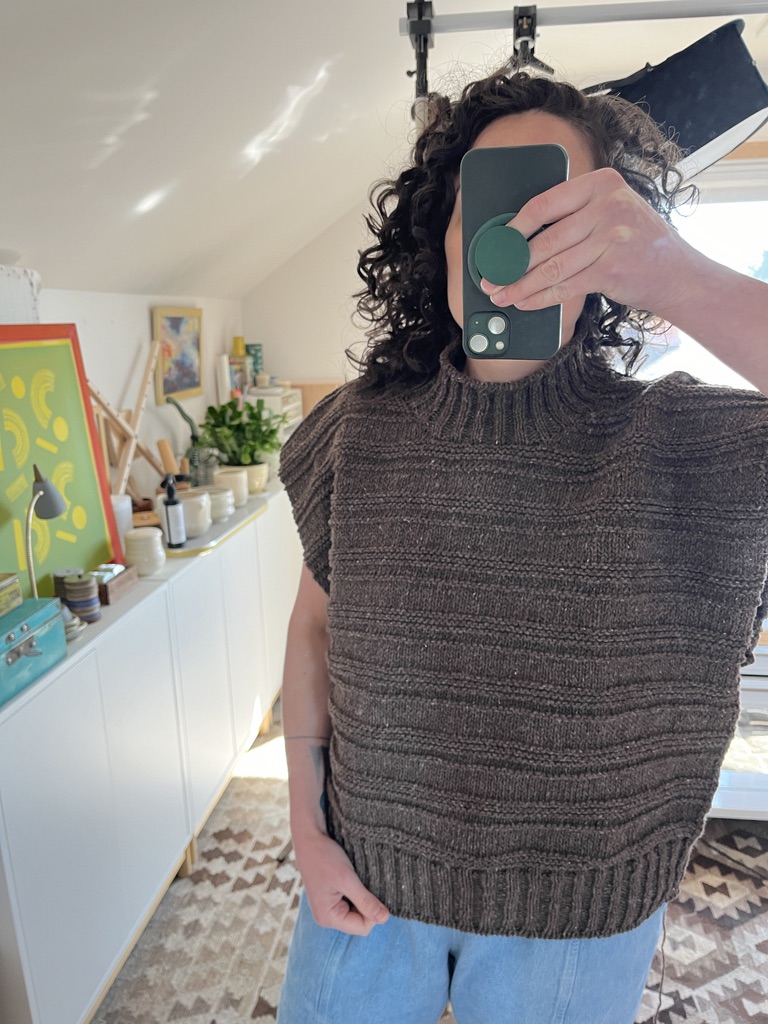
I am a huge Ozetta fan and when she posted a sneak peek of this pattern back in 2023, I knew I’d make it. I even used the same yarn / colorway because it was just SO GOOD.
I started this sweater in February of last year, but didn’t work on it from April to December.
YARN: WoolDreamers La Rinconada (DK) purchased from Close Knit
SIZE: M
NEEDLES: US 7 needles for the body and US 5 needles for the rib
The body knitted up really fast, but then I took a break to work on a portable summer project. I finally picked it back up in December and finished the sleeves in about two weeks.
The sleeve decrease instructions confused me, so I just repeated the size M sleeve instructions 4.5 times, ending on row 8 and did a bunch of K2togs to get down to the correct number of stitches.
I love the “stripe” that runs up the sides and down the sleeves to hide the jog in the the purl rows. Ozetta always includes little details that just make her patterns so beautiful.
This yarn is absolutely great in sweater form, but my hands hated knitting with it. I think it’s minimally processed so it’s kinda sticky and gripped even my metal needles. This sweater is 100/10 and I’m going to wear it all the time.
I absolutely love Dental Cabinet and it fits a ton of supplies. But its drawers are full and I have some more stuff that needs a home.
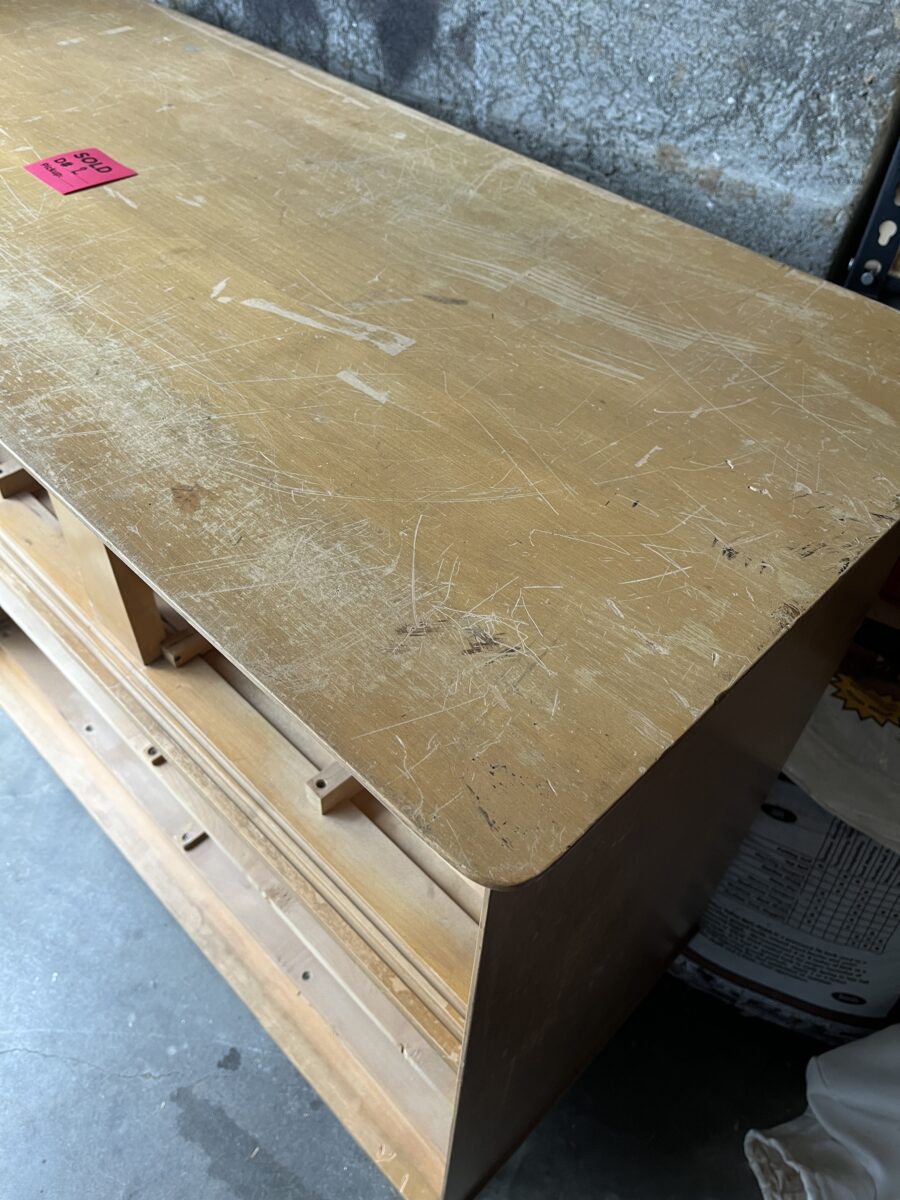
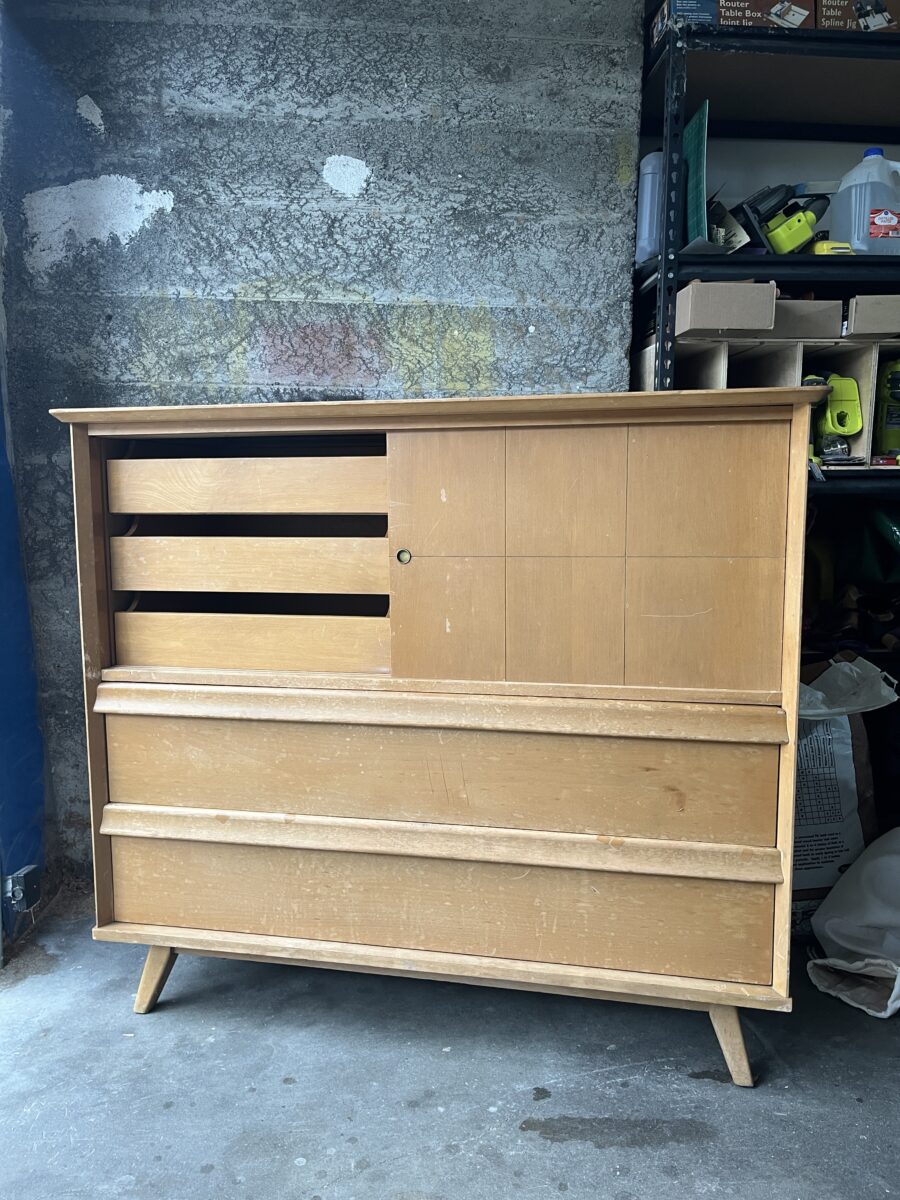
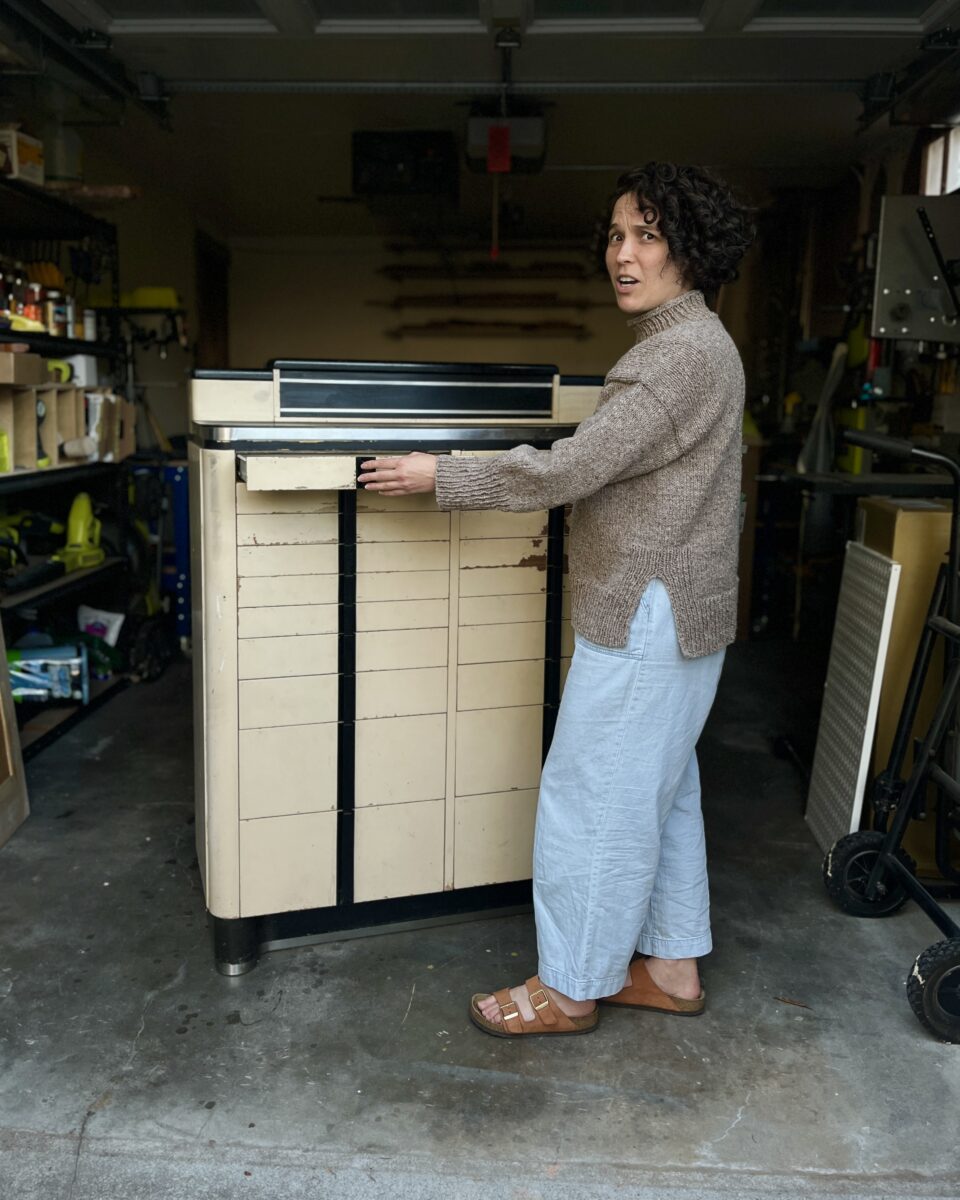
Enter the Gentleman’s Chest, a mid-century piece I first saw on marketplace, but sold before I could arrange a pickup time. The size and configuration of drawers feels perfect for all the stuff I have just kinda piled up in this corner currently.
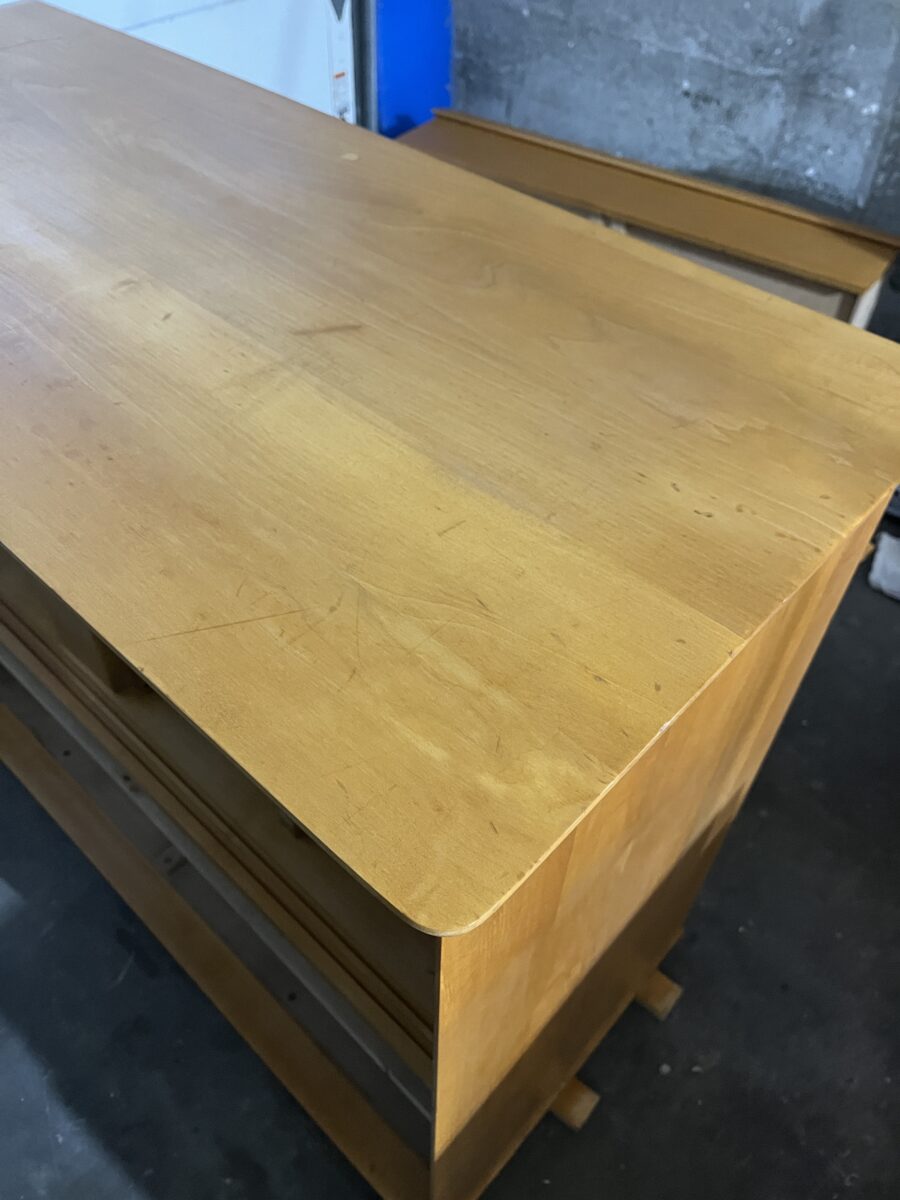
Somehow another listing for the exact same piece popped up and since it was being held at a consignment shop, I was able to snag it. It’s solid wood, so I am confident it will be a much faster restoration than dental cabinet was. I won’t have to agonize over choosing a paint color since I’m not painting this wood, even if it is dinged up.
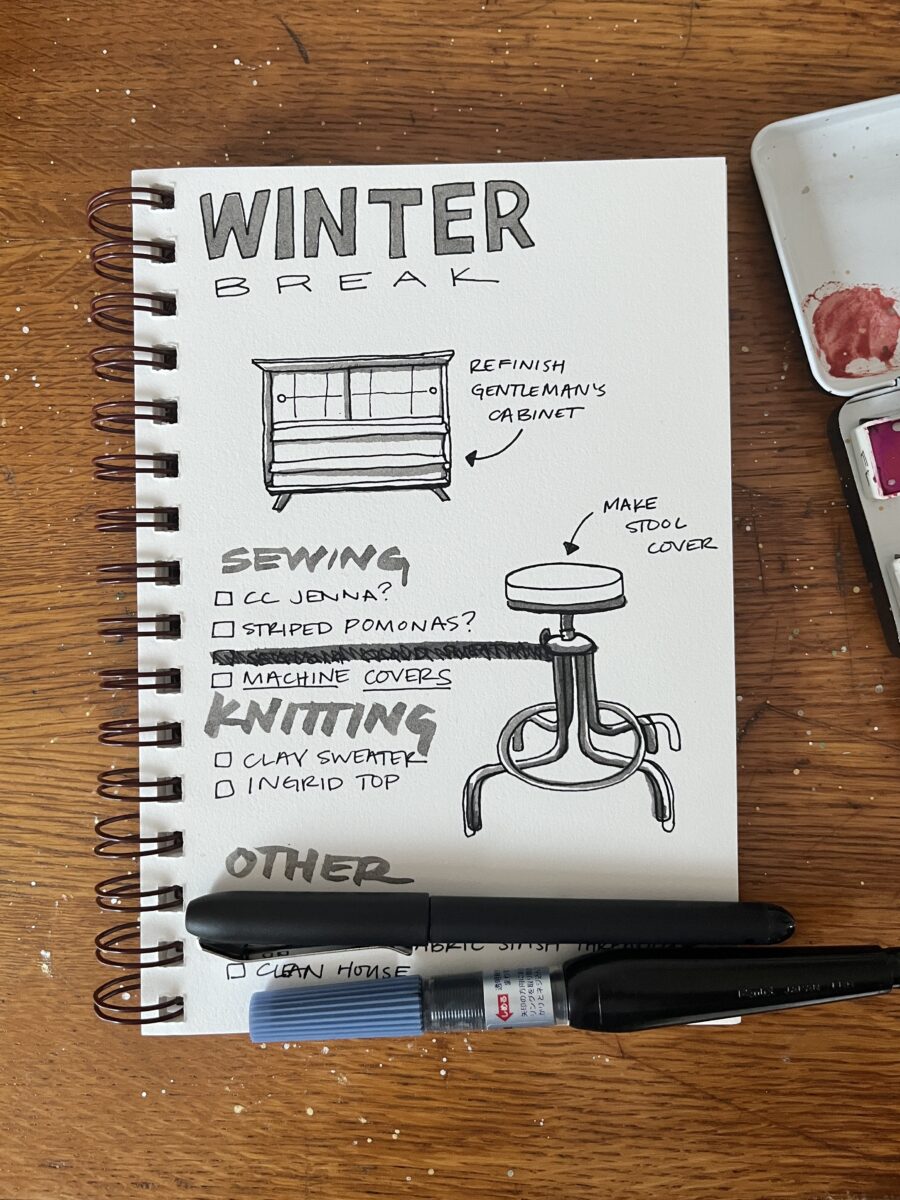
I plan to refinish it over the holiday break and I’m posting about it now for accountability!
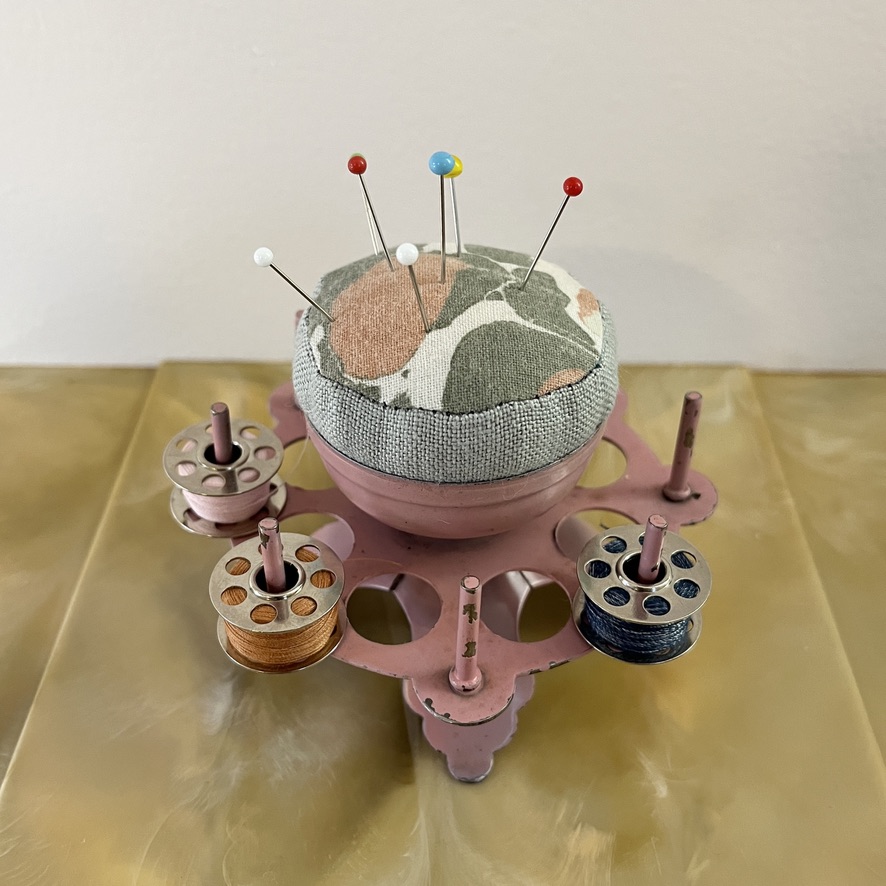
I found this cute bobbin holder at an antique mall. The paint is chipped and it doesn’t really serve a good purpose in my space, but I have a hard time passing up old sewing accoutrements. I’m thinking about painting it another color, but in the meantime, I made this goofy pincushion top for it. It’s not the best construction (I even used black thread) but I just wanted to test out the idea. I did use some precious marbled fabric that I made, which maybe I should have saved for the second iteration.
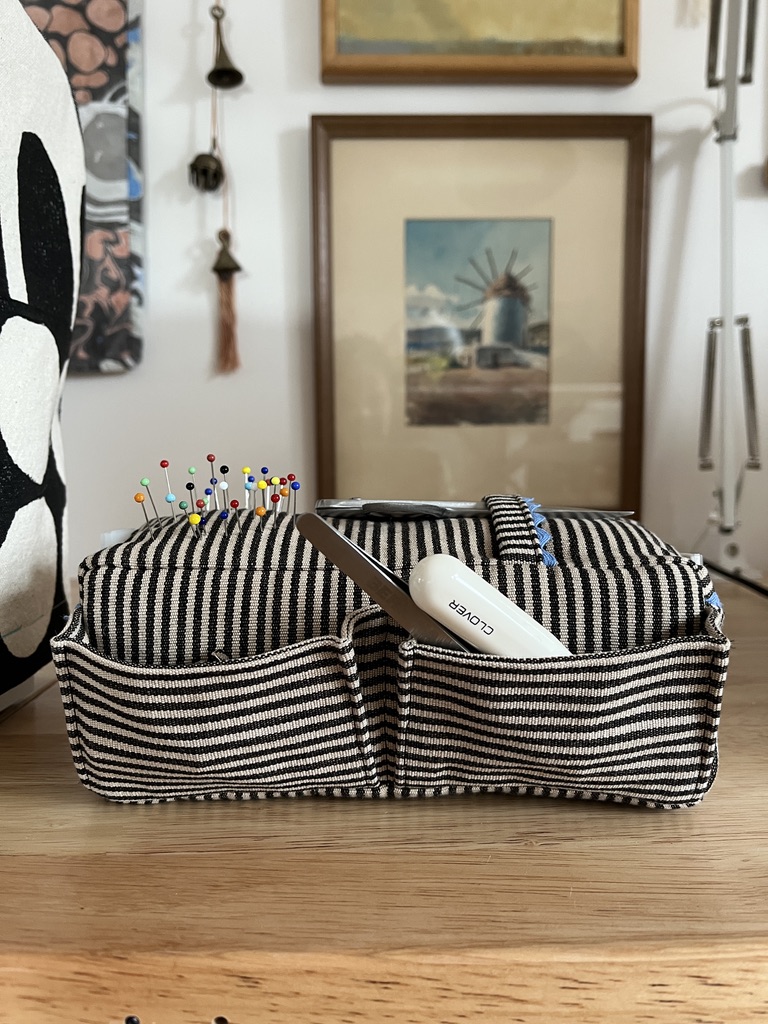
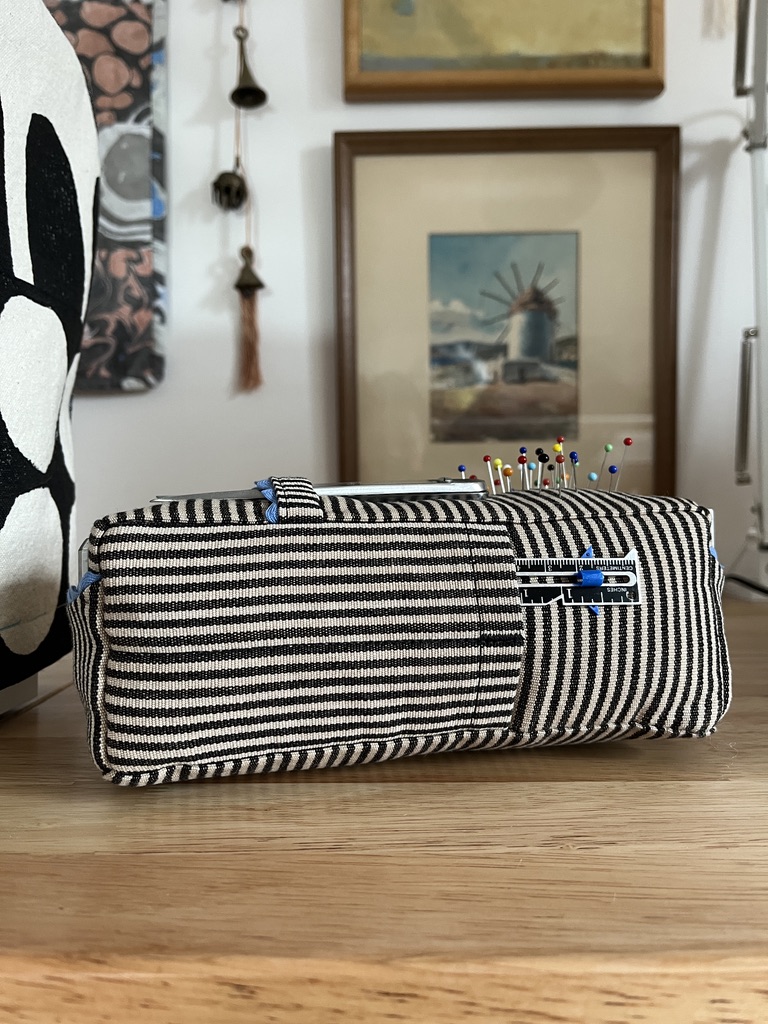
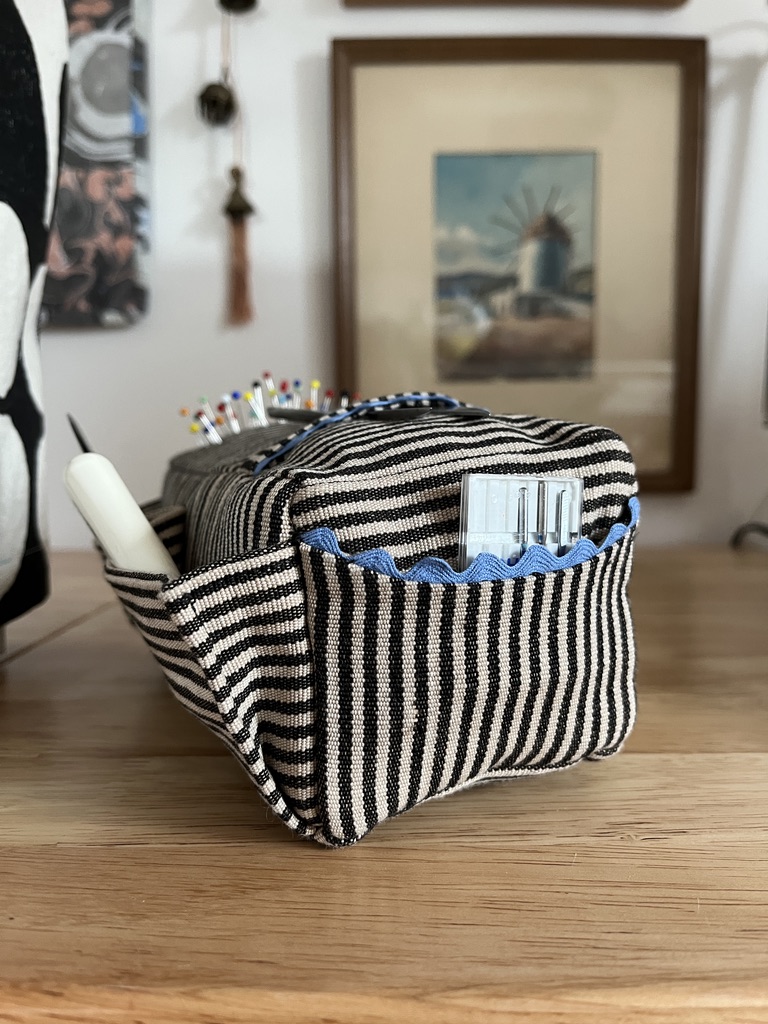
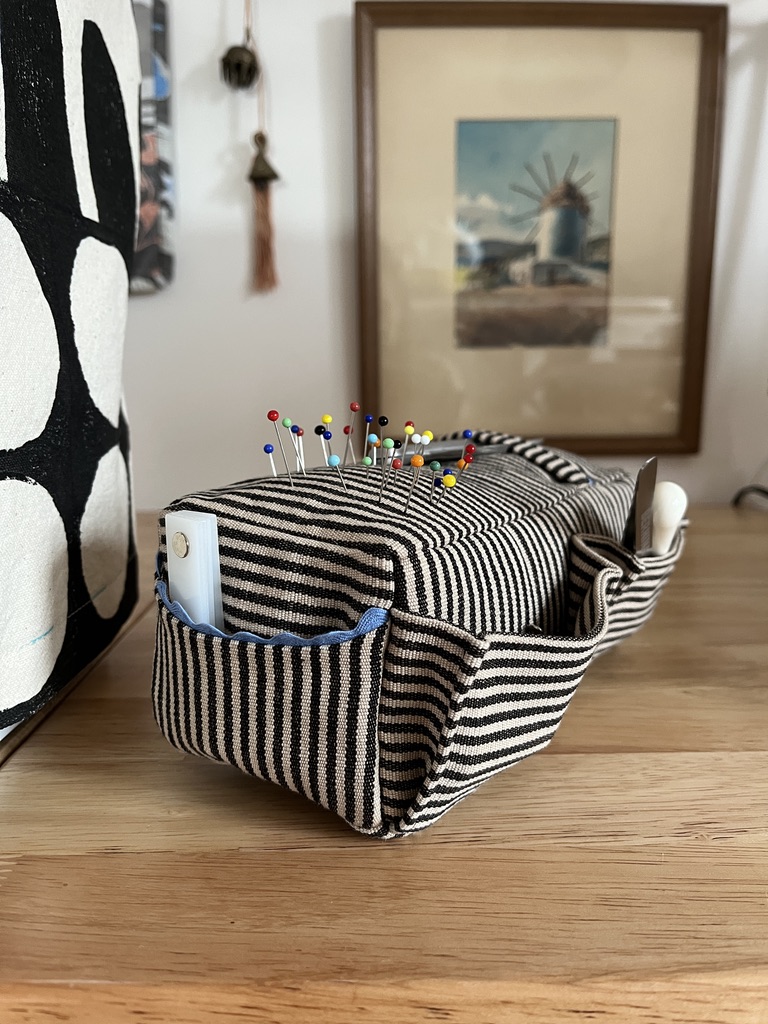
The bobbin carousel pincushion inspired me to make something that I did need – a second Carry-All Pincushion. Here’s the first one I made way back in 2015. It sits next to my main sewing machine and holds things like a hump jumper, seam ripper, tweezers, snips, needles, and of course, pins. This new one will sit next to my secondary machine that I mainly use for topstitching.
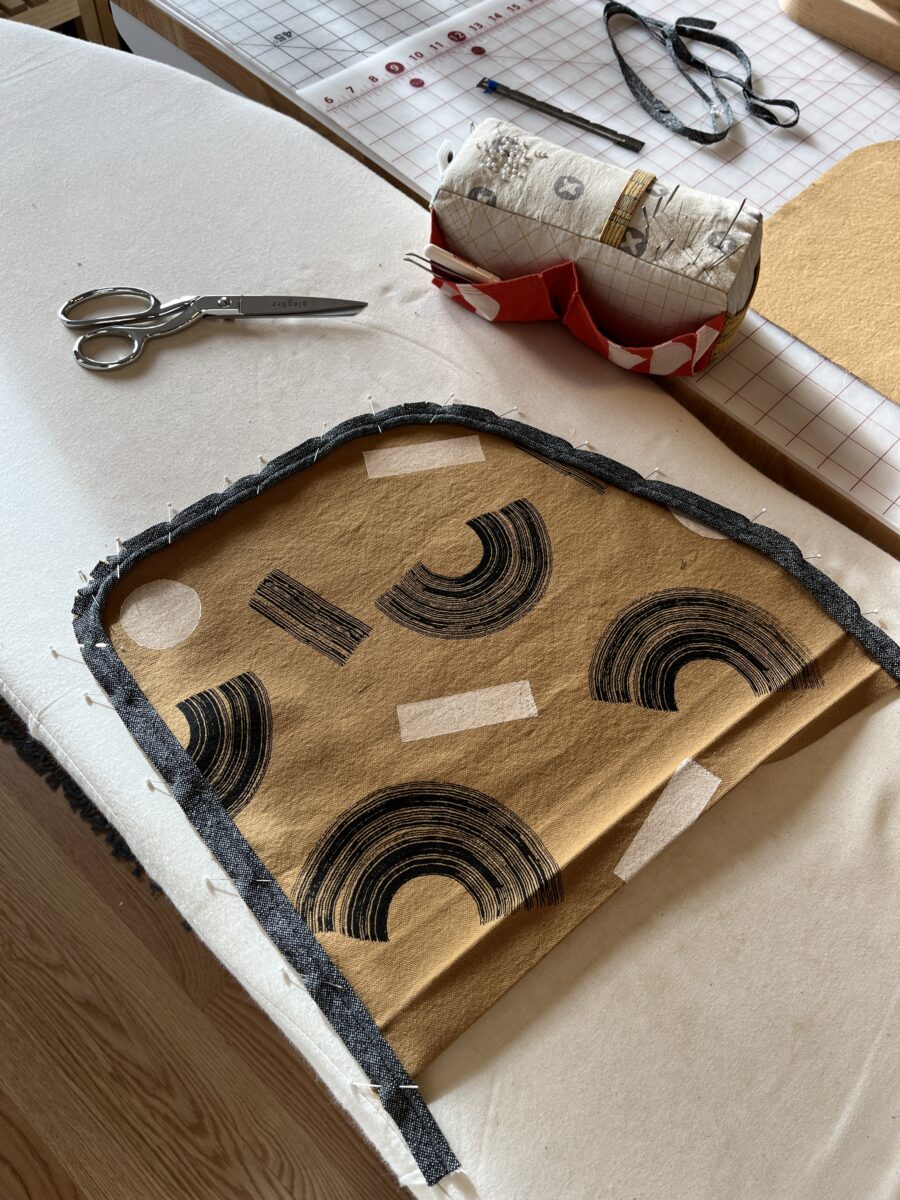
I’ve had this heavyweight striped fabric in my stash since 2014. It’s thrifted yardage from Savers that I used in some of my first sewing projects. I kinda wish I still had this laptop sleeve but the tote is still with me. It’s a little too heavyweight for this project, but I made it work. I do wish I’d added more blue rickrack.
Oh hey – there’s that original pincushion above! I’m also remaking my sewing machine covers to include pockets to hold the tables and knee lifts. Making them has gotten me back into block and screen printing and it’s exciting! Hoping to finish them over winter break.
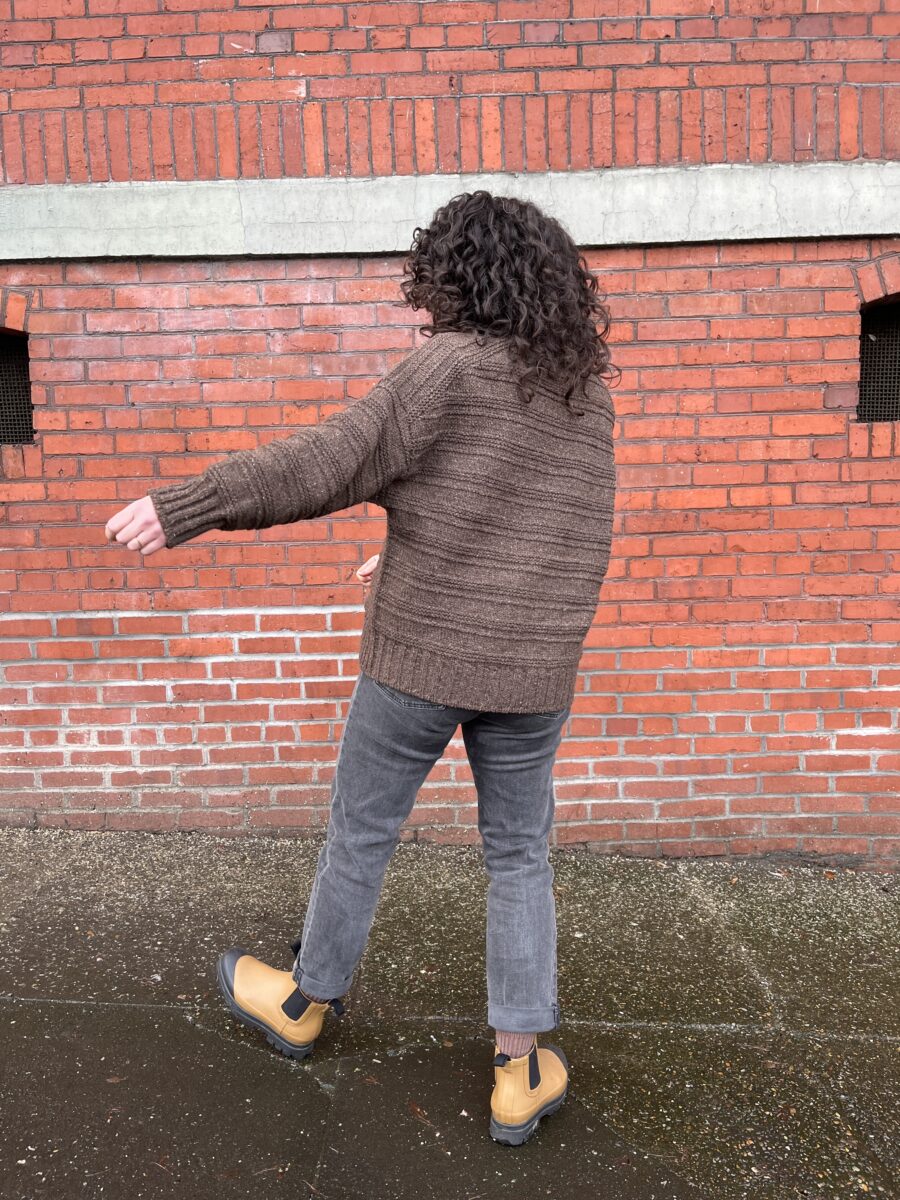
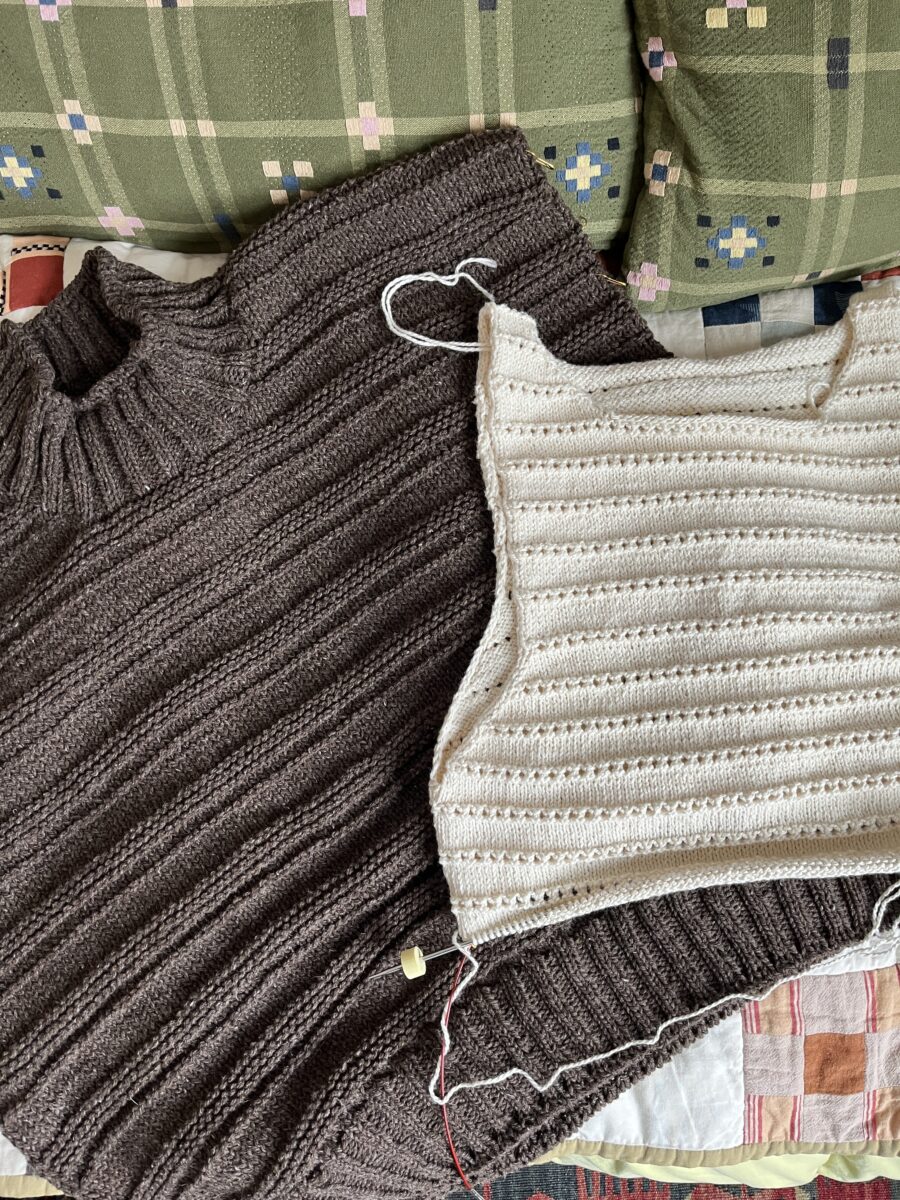
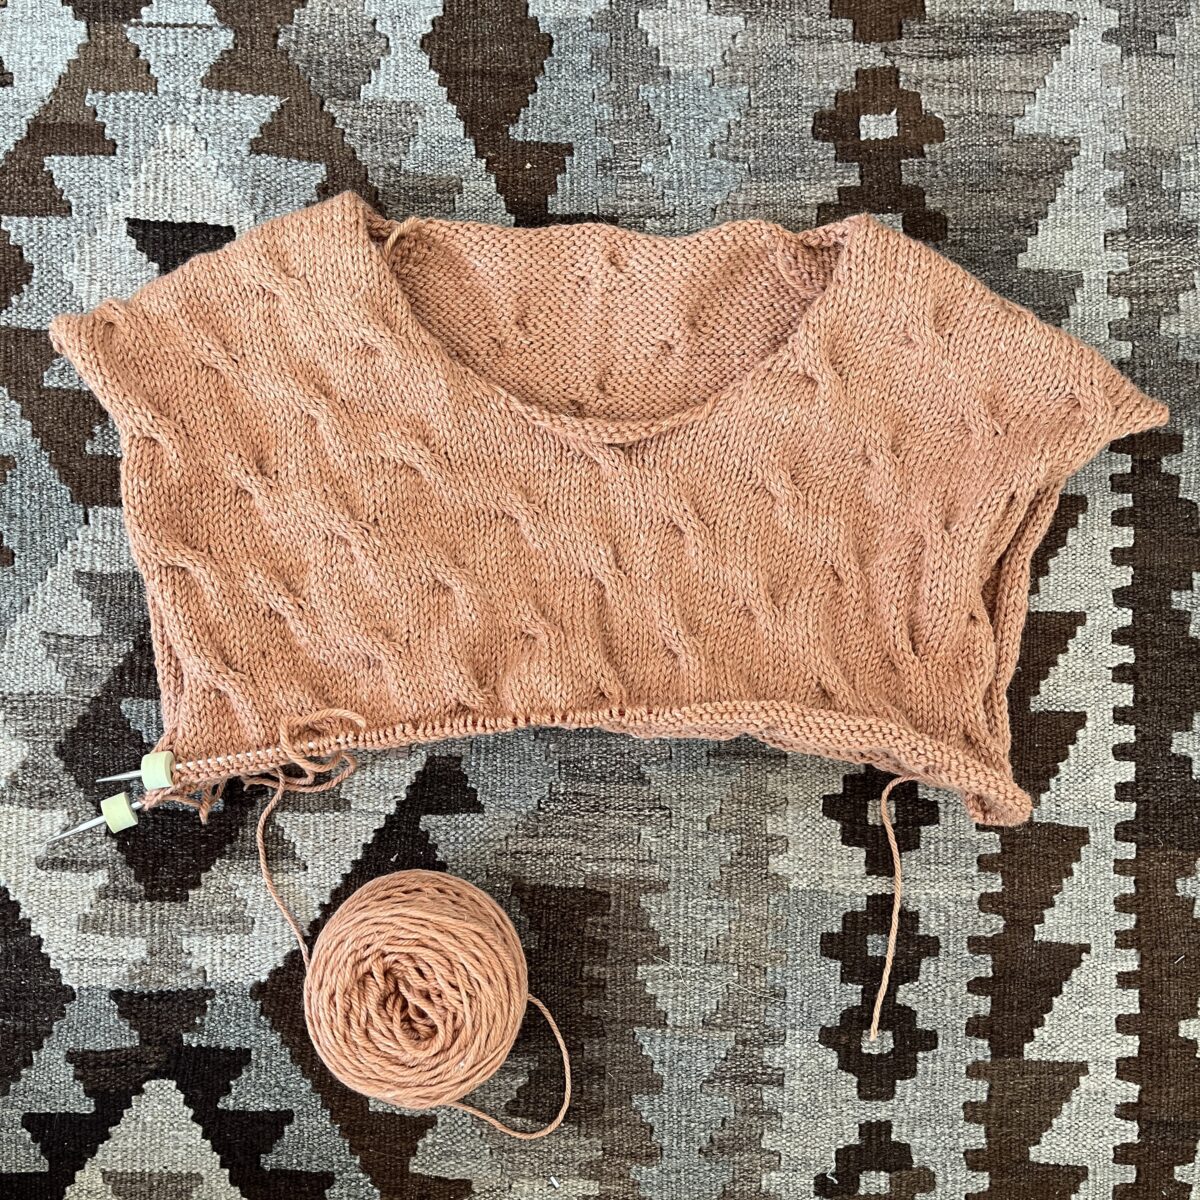
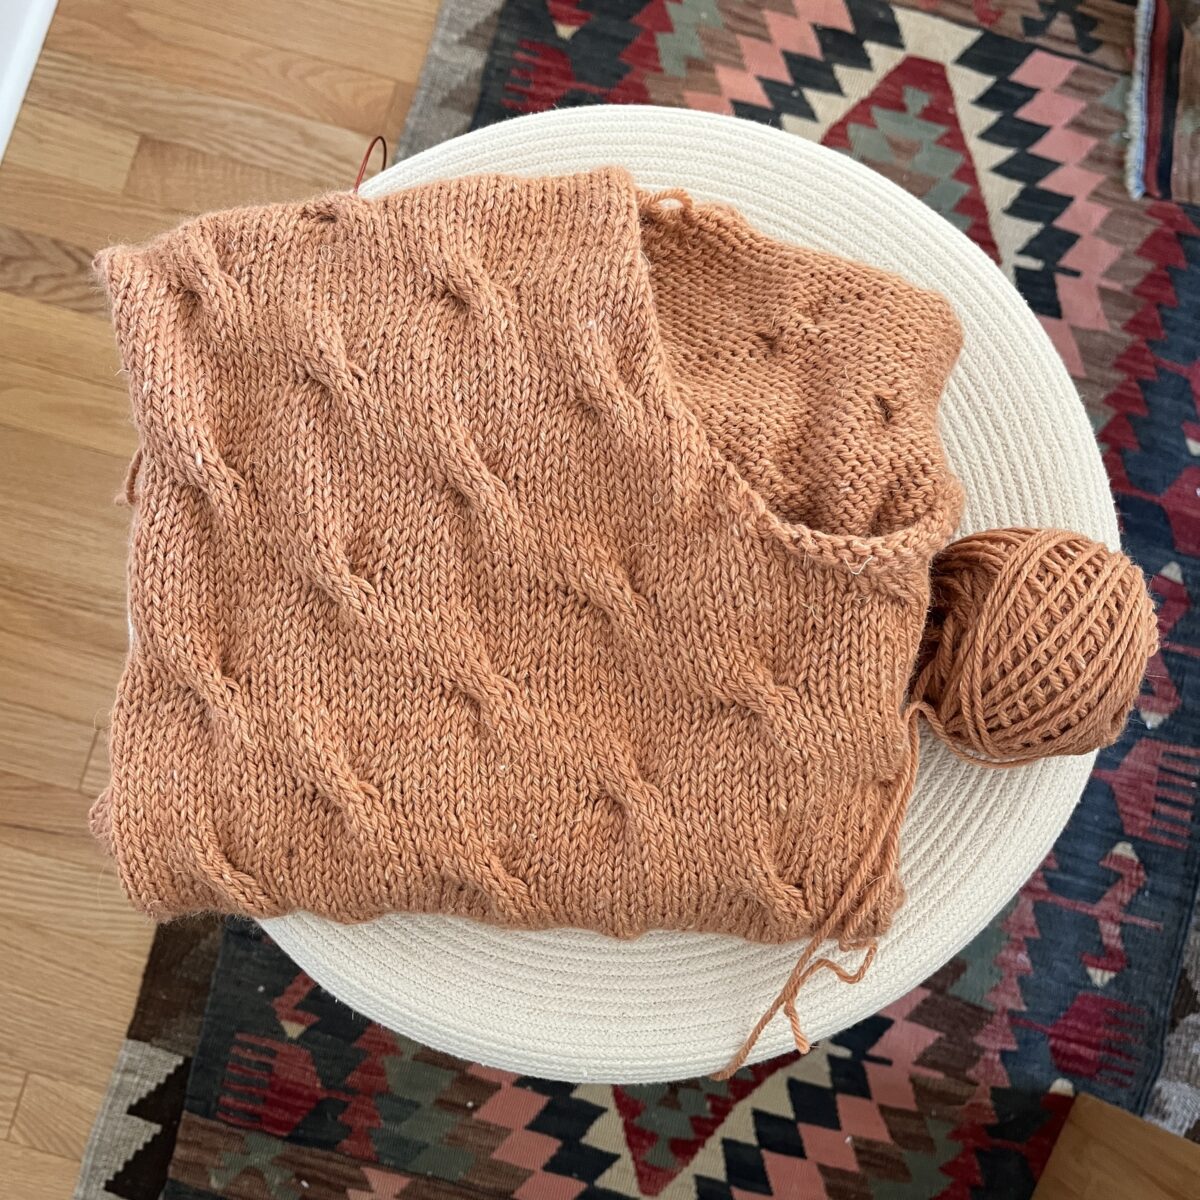
After finishing my Seasons Cardigan, I immediately started this Clay Sweater. It’s a pattern I knew I wanted to knit the minute the pattern was released. I even bought the same colorway of yarn as the photo sample because it’s so perfect.
It almost flew off my needles, but then the weather started to warm up and an upcoming international trip convinced me I needed to start a more portable summer project.
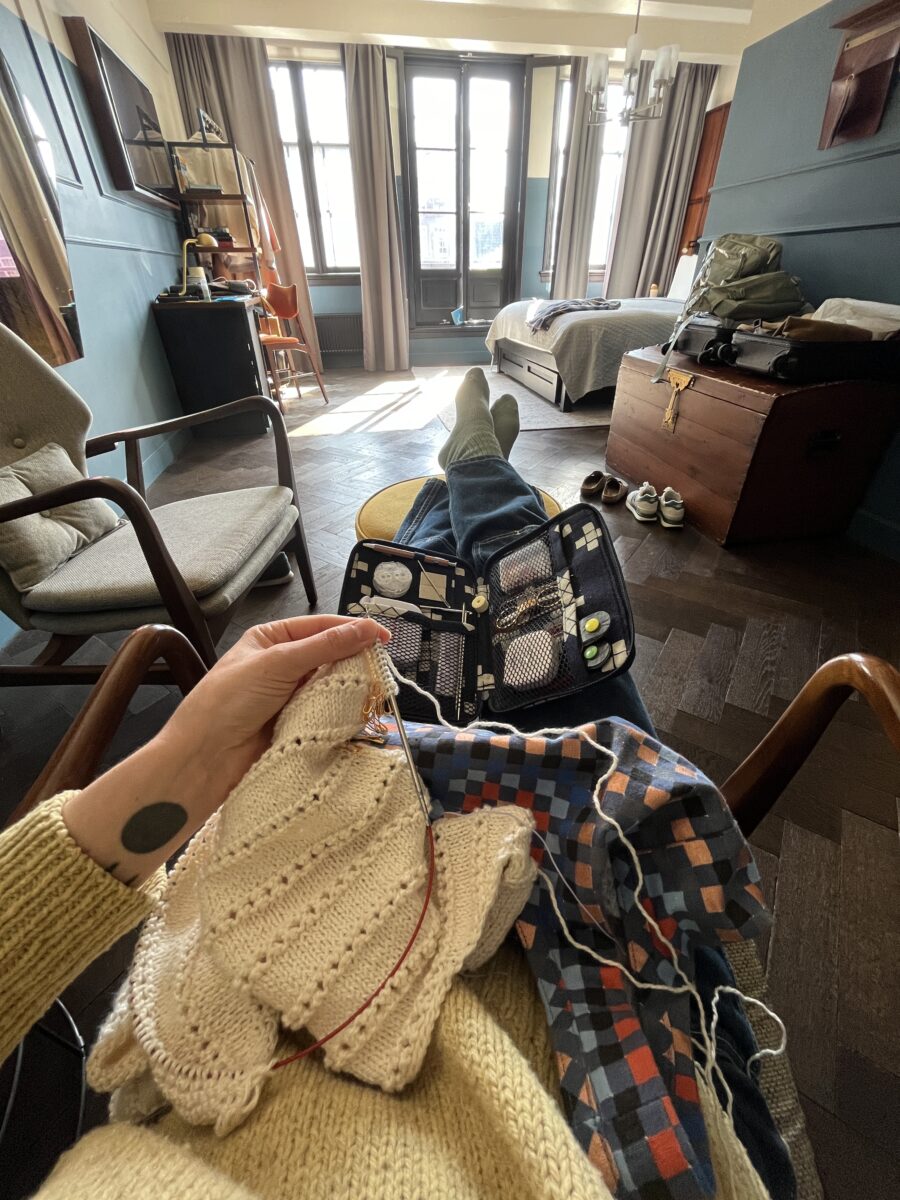
Knitting in Amsterdam
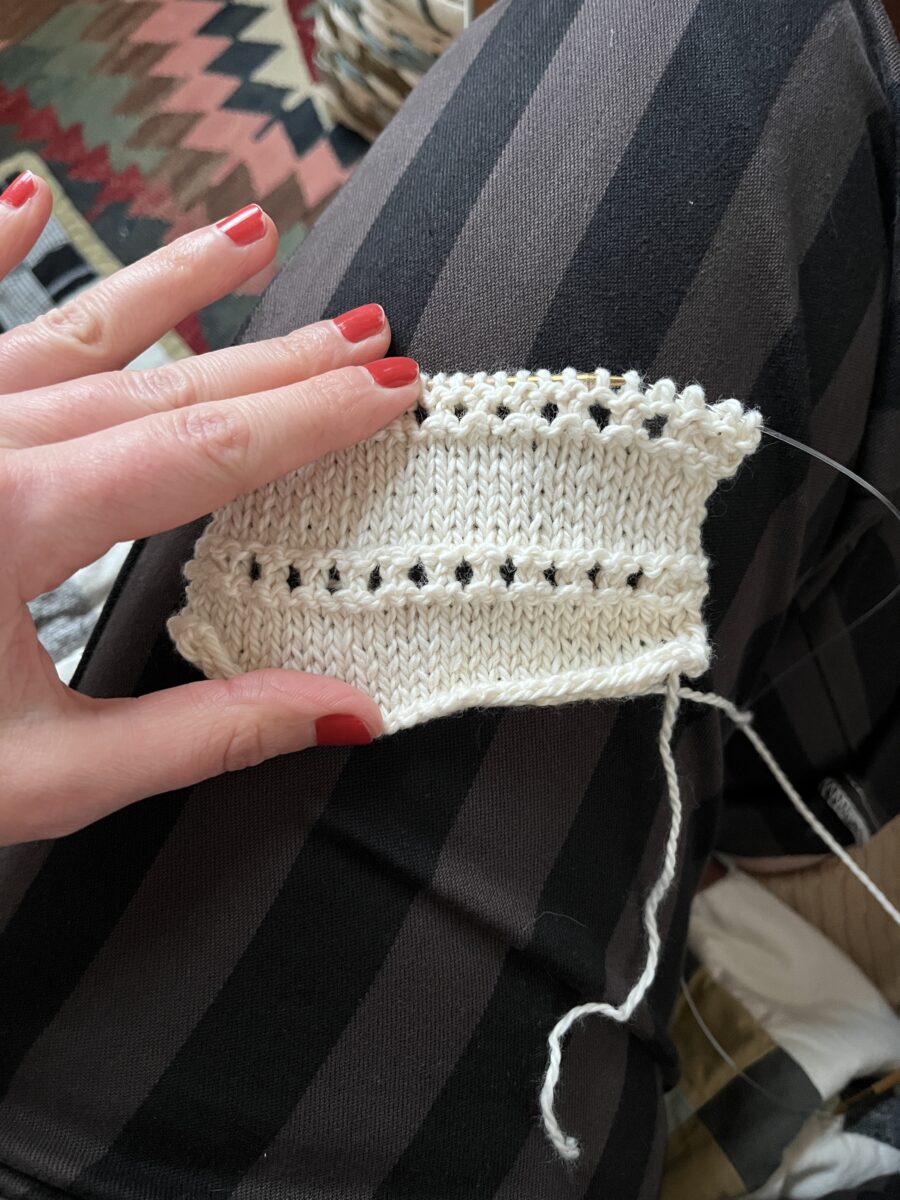
So I set aside my sleeveless Clay, picked up some cotton yarn, and stared knitting a tank top. This design is simple, but the instructions were hard to interpret sometimes and I made mistakes that required ripping back a lot. After knitting the front, I started to suspect the fit would also be weird. But I persisted because I didn’t have a way to try it one while traveling and I couldn’t not knit on the plane.
When I got home and tried it on… it offered up so much side boob. I was frustrated and for some reason, my solution was… to make a second one? I actually bought enough of the same yarn in a different color to make it again! I felt I needed to have the original to reference, I guess? On this version I started the armhole shaping immediately after completing the neckline shaping and I’m much happier with it. However, it is currently waiting to be bound off, summer being very much over.
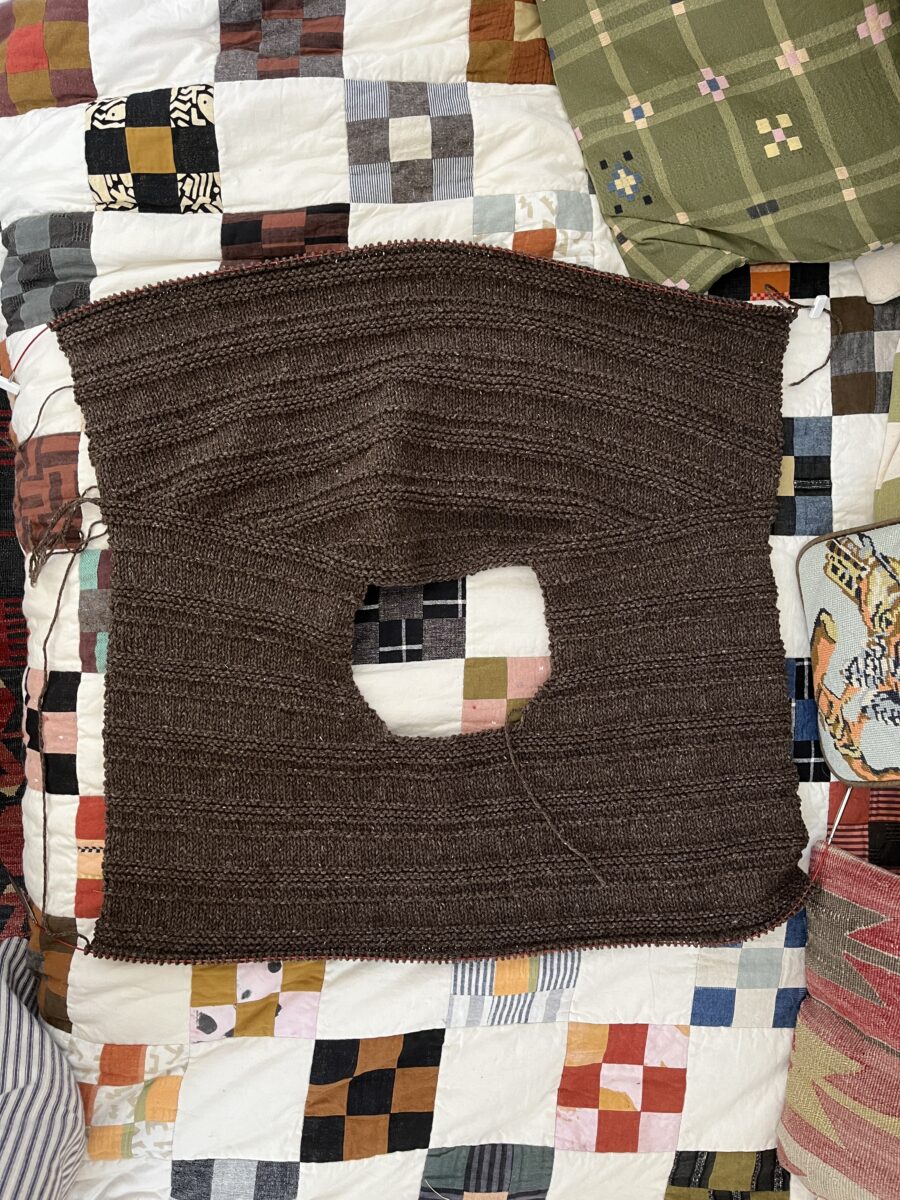
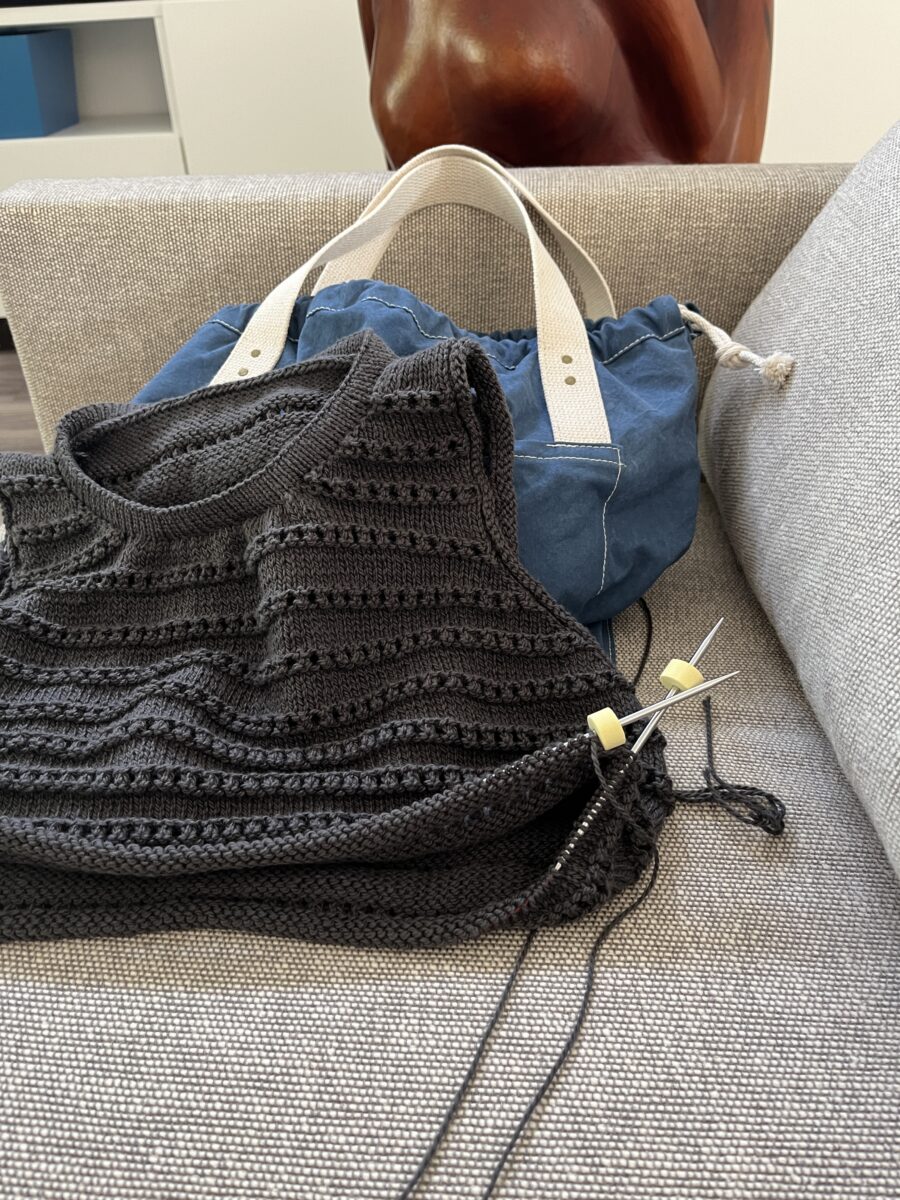
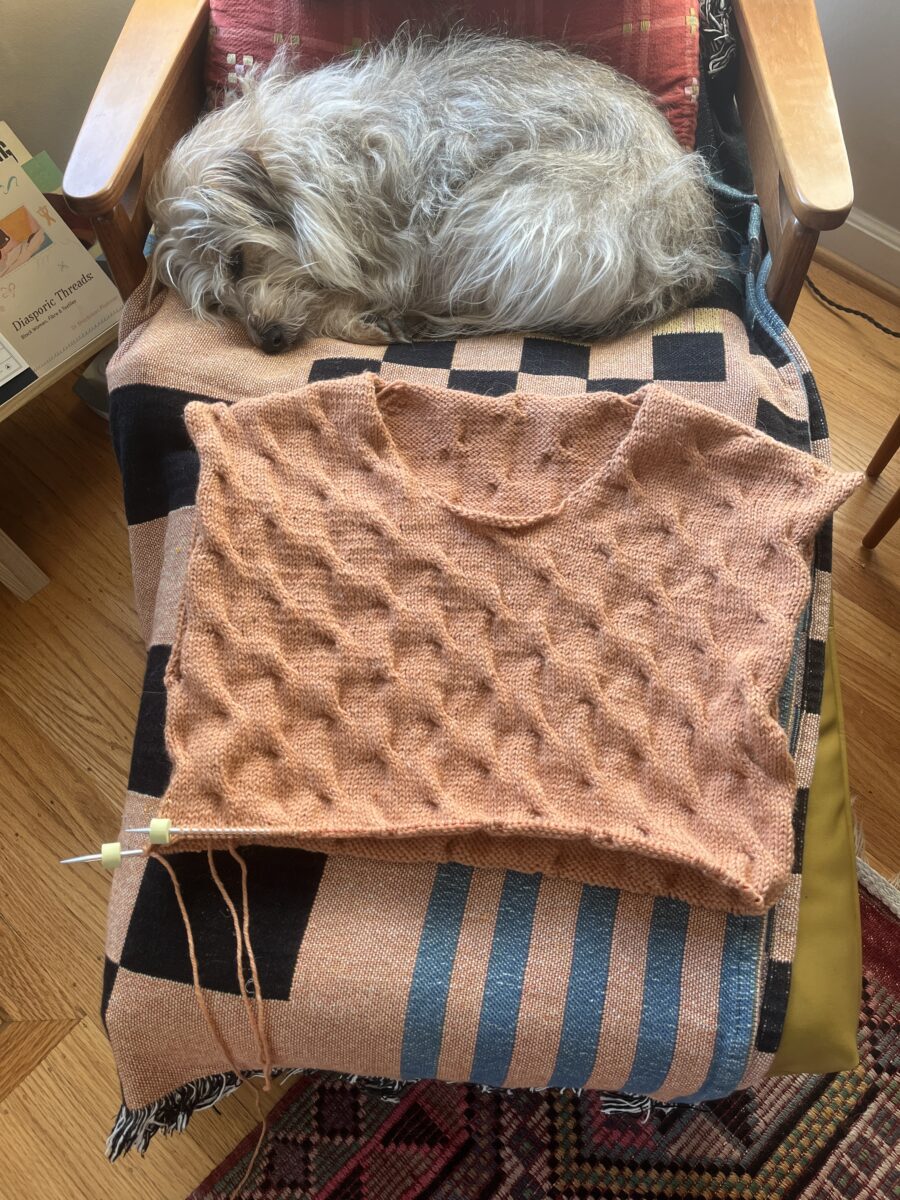
And even though I clearly have THREE other knit wips, I started a new one. While I was recovering from major surgery, I wanted to start a fresh, new project that had no baggage!
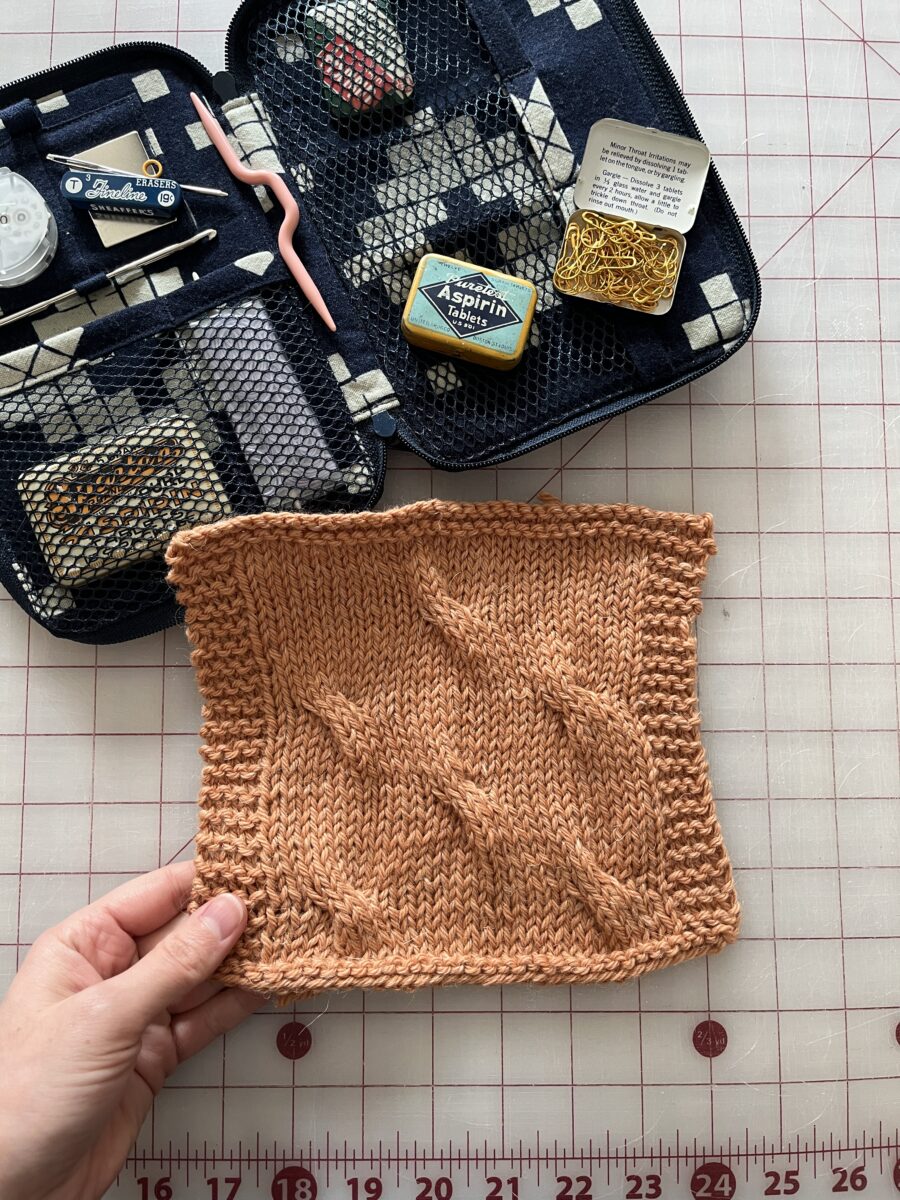
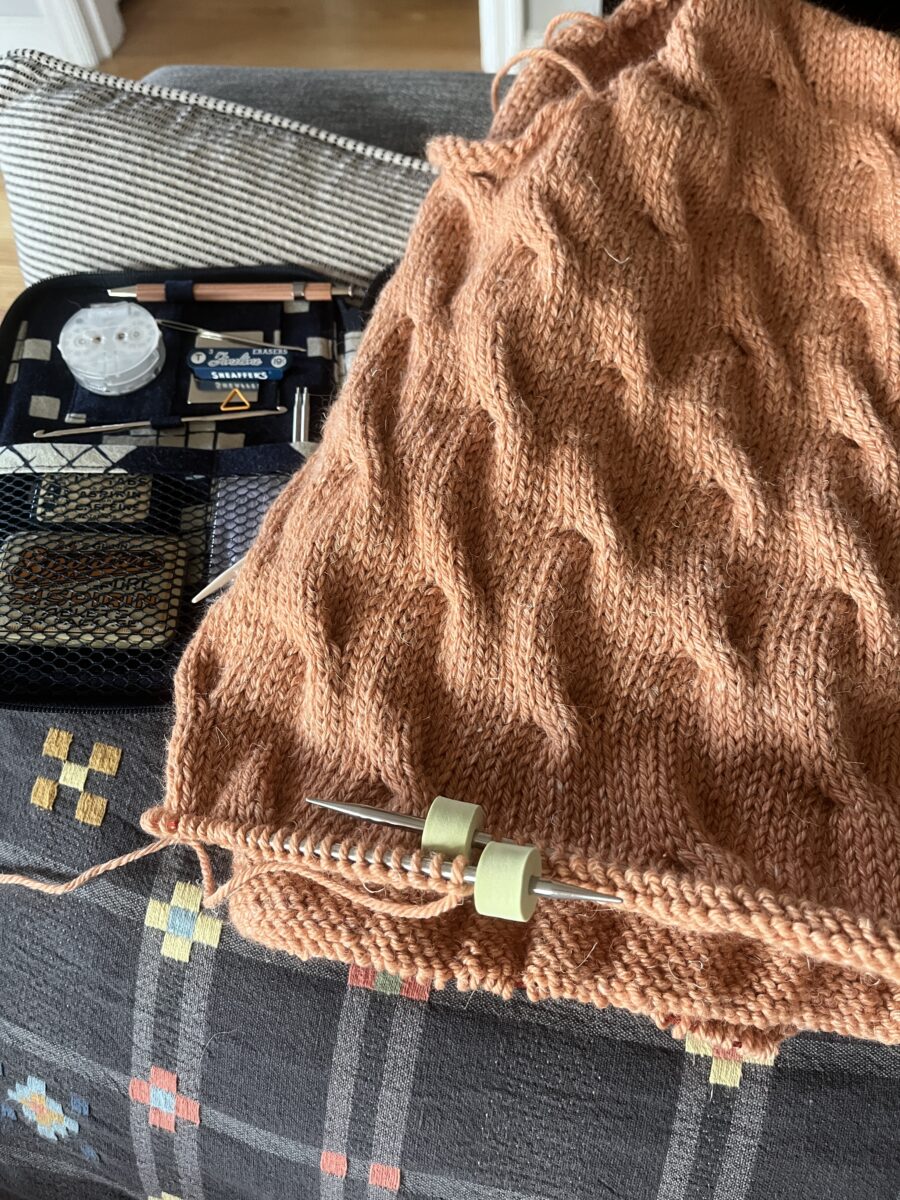
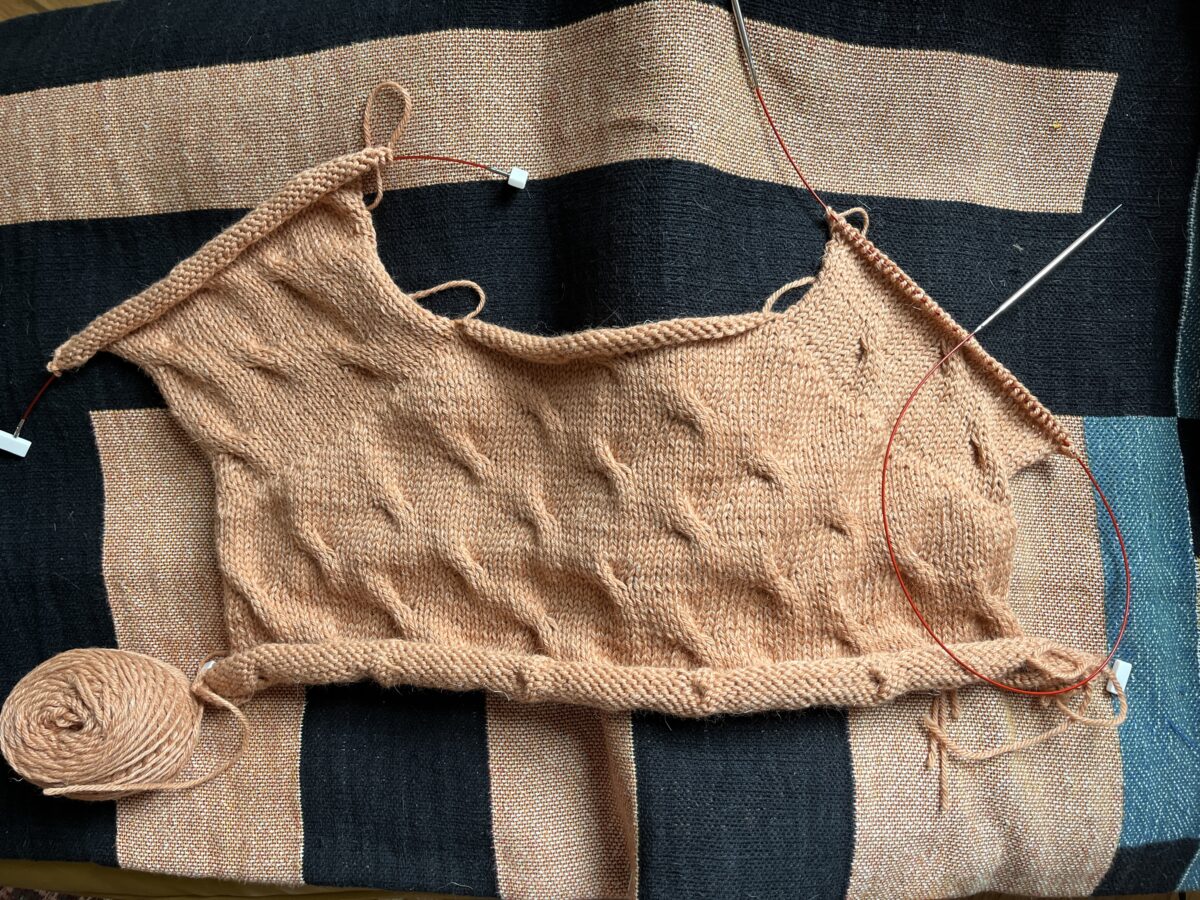
The theme this year is definitely texture, and these subtle cables on the Seaway fit right in. This yarn is so nice. It’s the Purl Soho Linen Quill Worsted in the “Baked Earth” color. It’s unfortunately discontinued.
I’m trying to loosen my death grip on this project and am getting some striping in the parts that were knit flat. I’m trying to be okay with it.
Anyway, I’m hoping to at least finish the Seaway and the gray Ingrid before the year ends. Or maybe I’ll start another project 🙂
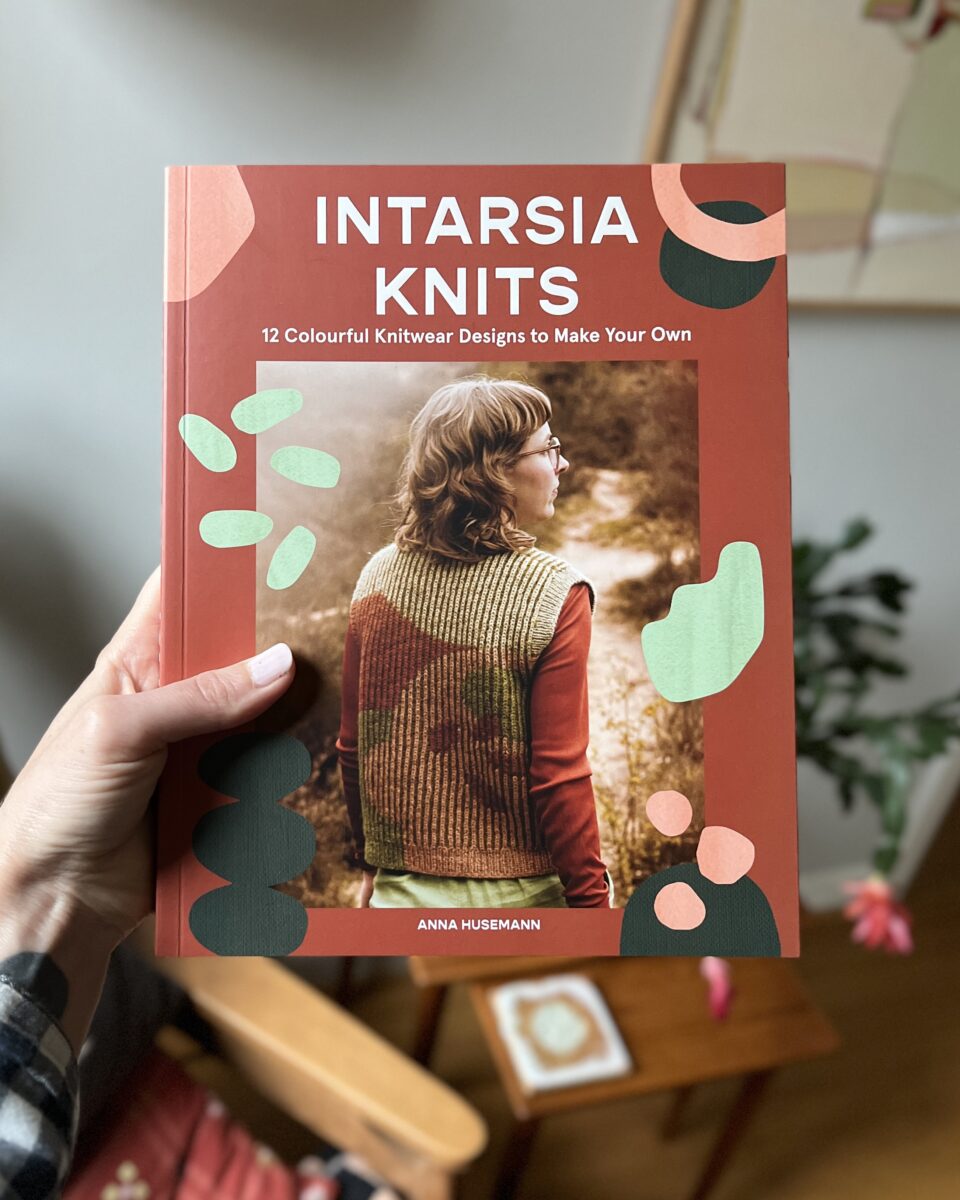
New book by Anna Husemann (gifted). Excited to learn intarsia!
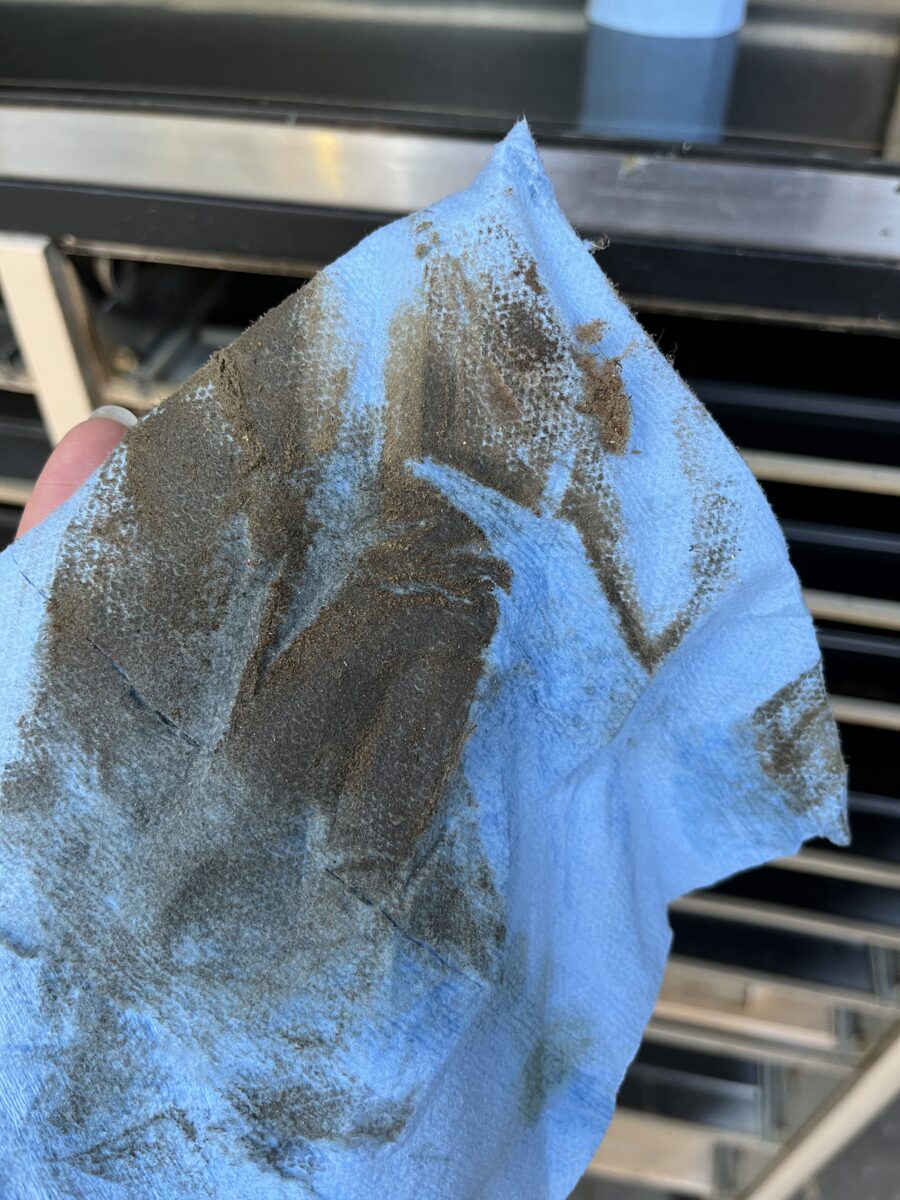
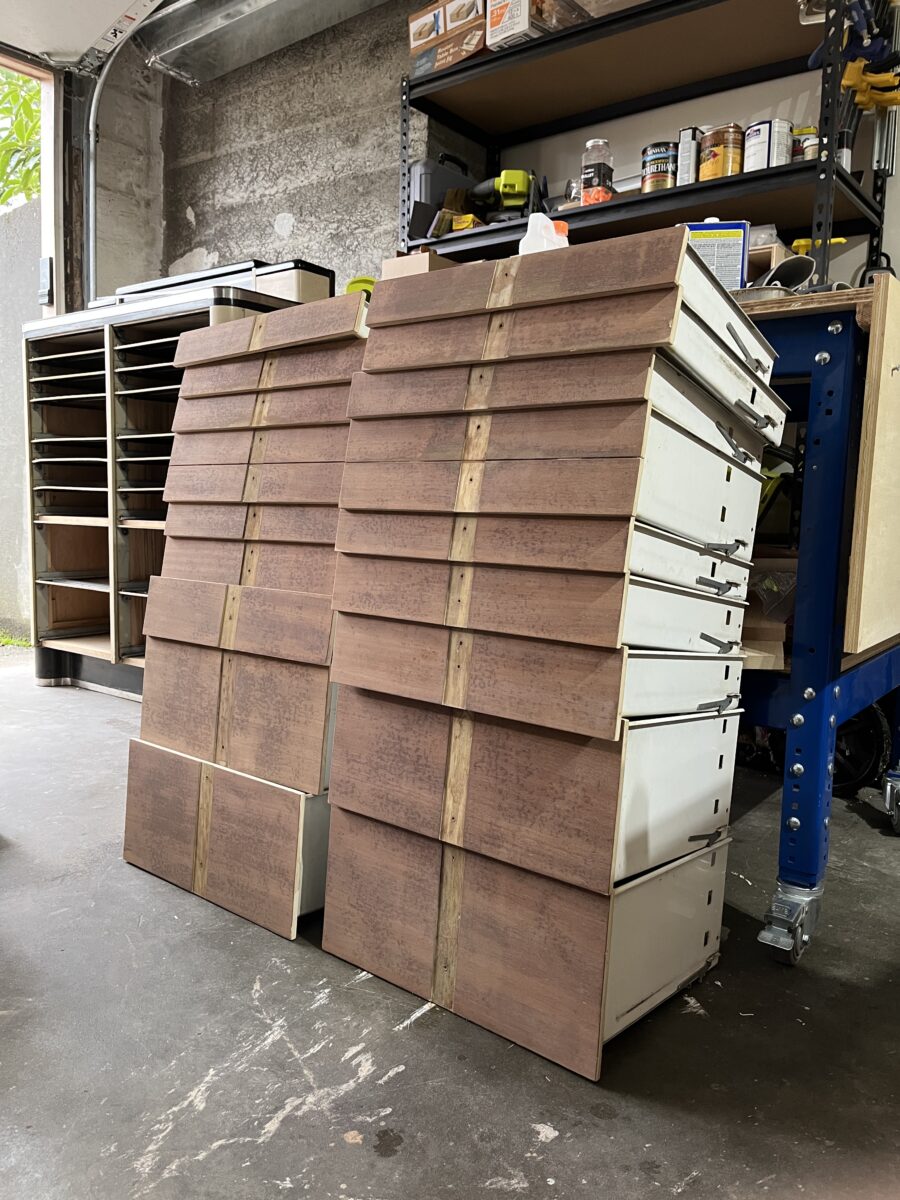
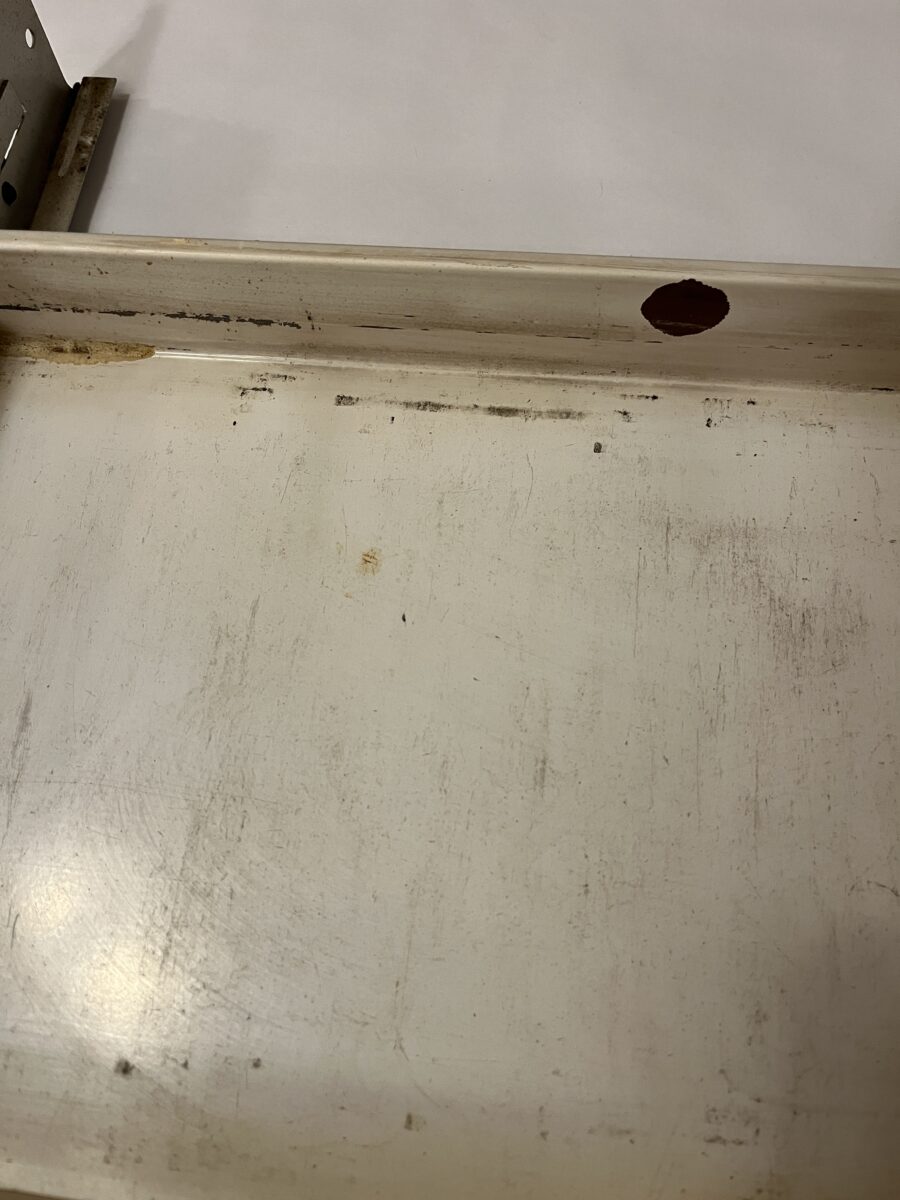
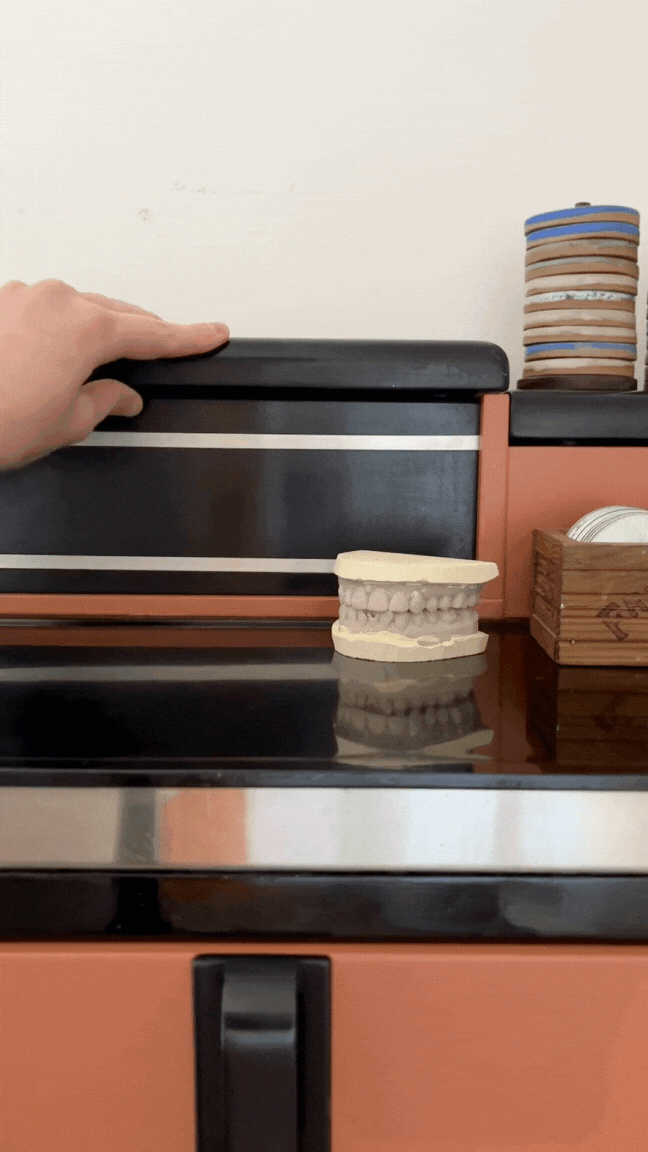
I bought this old, heavy, and apparently very dirty dental cabinet two years ago with the intention of cleaning it up and storing sewing supplies in it. I knew at the time that it was going to be a big job, but damn, I really underestimated it.
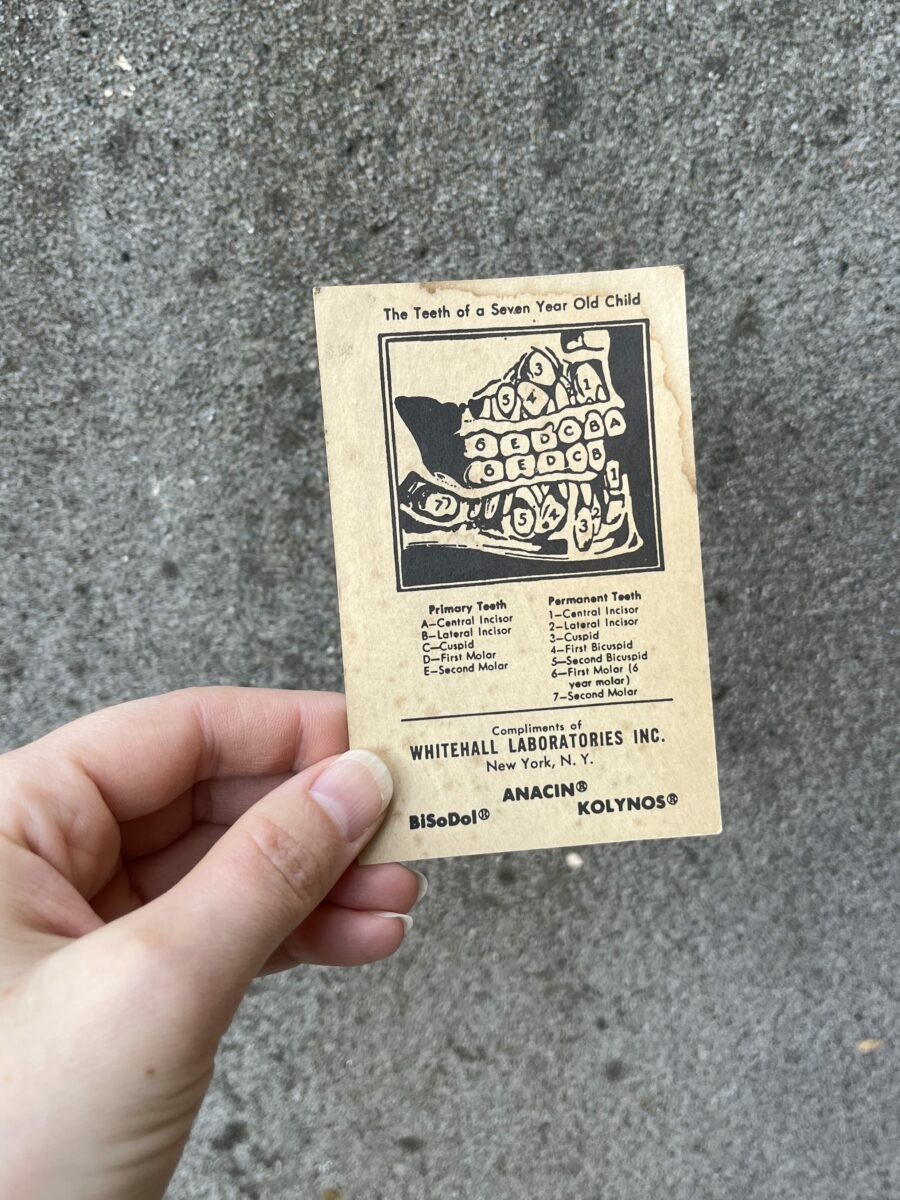
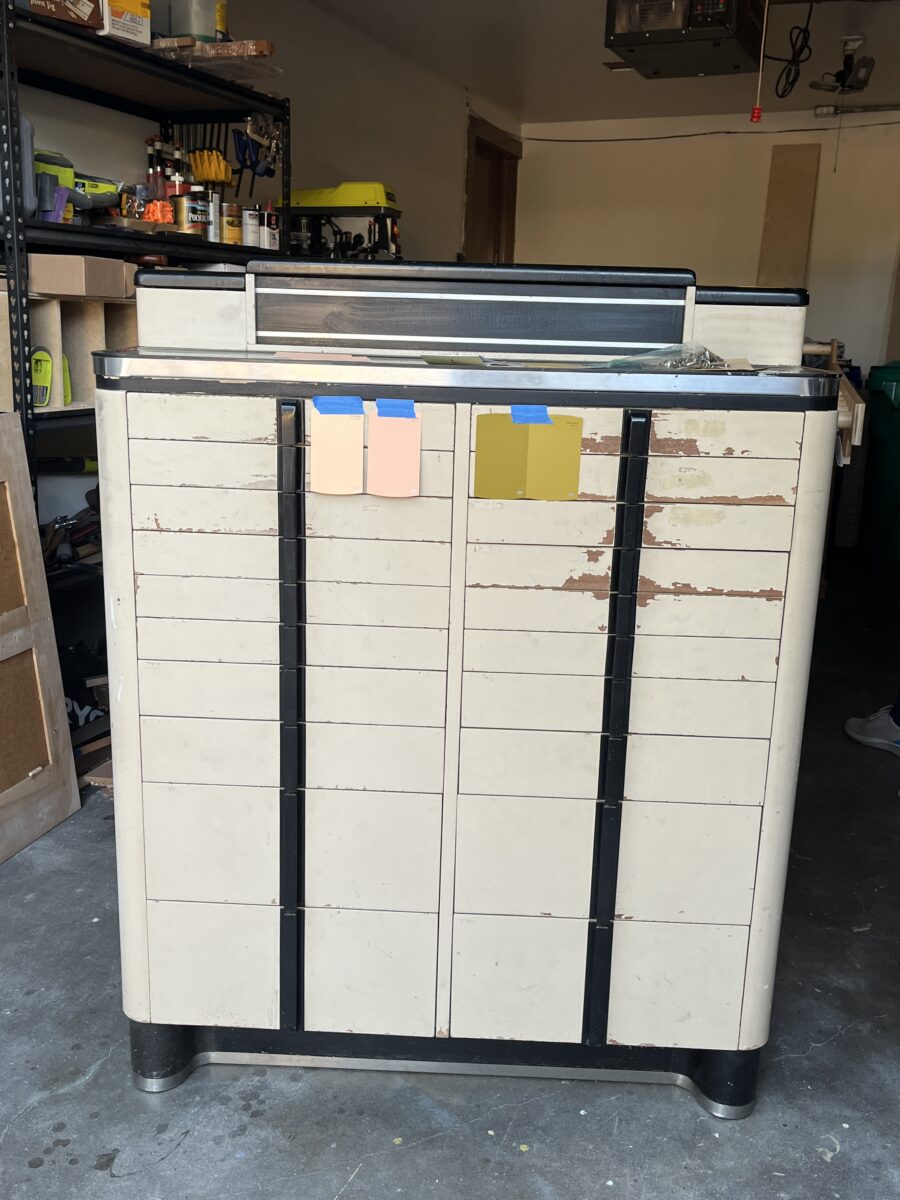
In addition to 75+ years of muck, and a little bit of mildew, there were a few forgotten treasures inside. The diagram of “The Teeth of a Seven Year Old Child” was my favorite find.
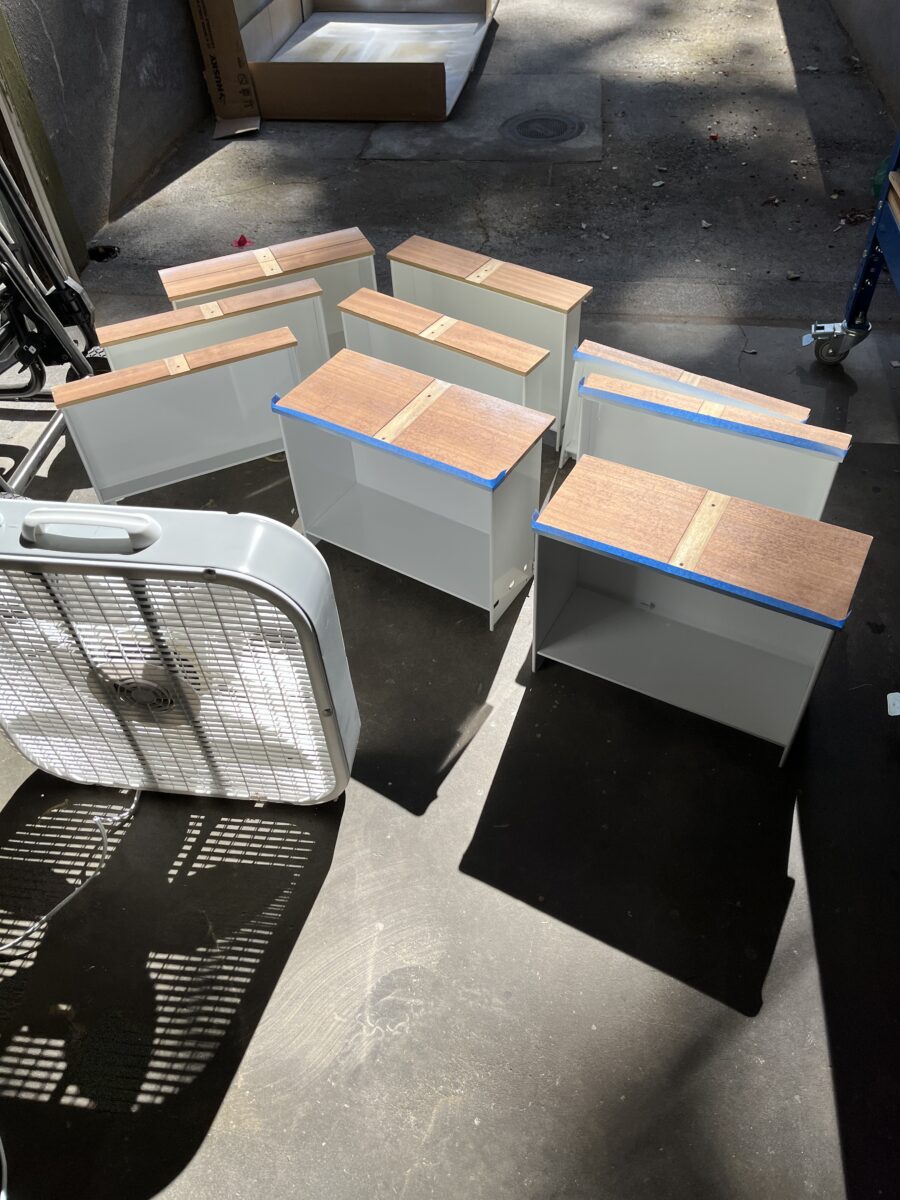
I cleaned the whole thing and stripped the drawer fronts of paint, but then simply couldn’t pick a color. Then winter hit and I didn’t have to choose a paint color… and then it was two years later…
Well I think working through my sewing WIPs made me want to wrap up this furniture WIP. So I went back to the paint store and picked up even more color chips.
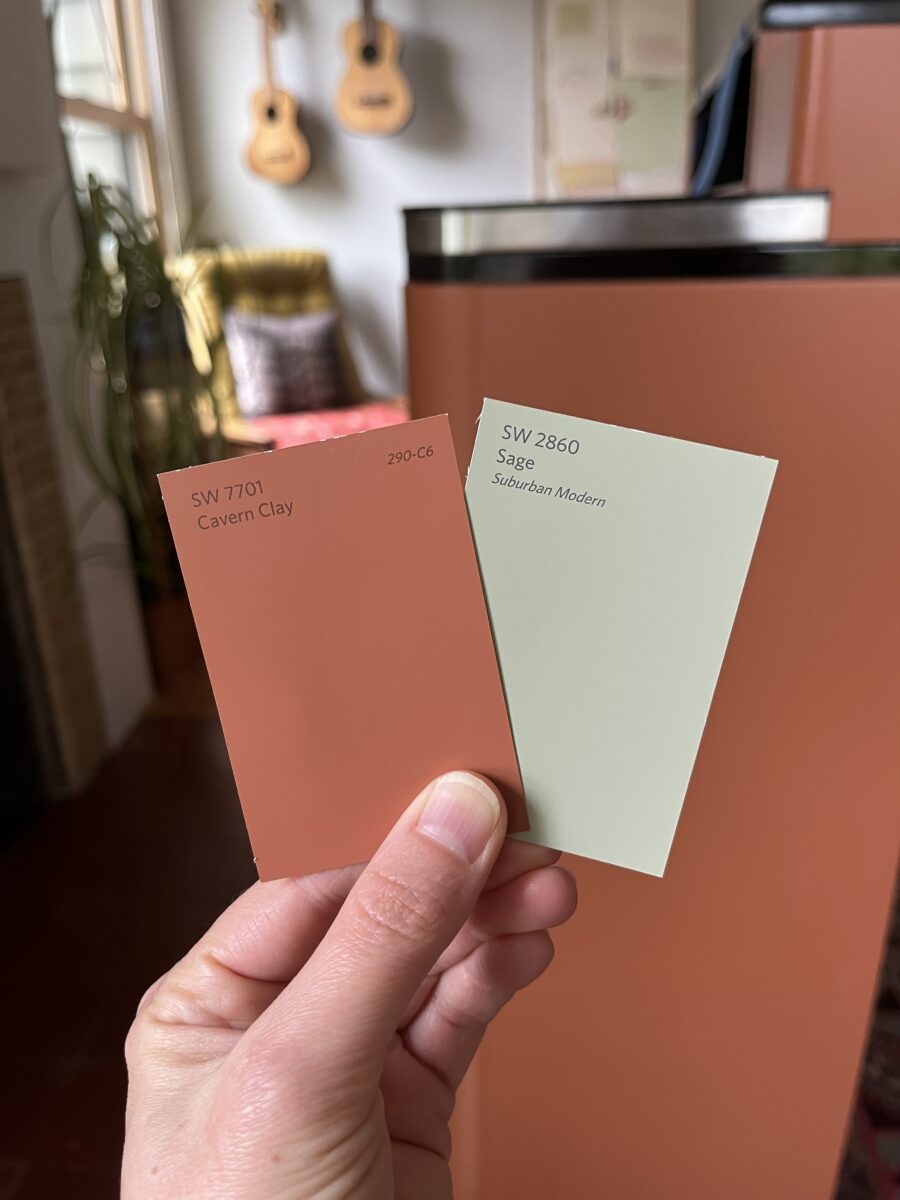
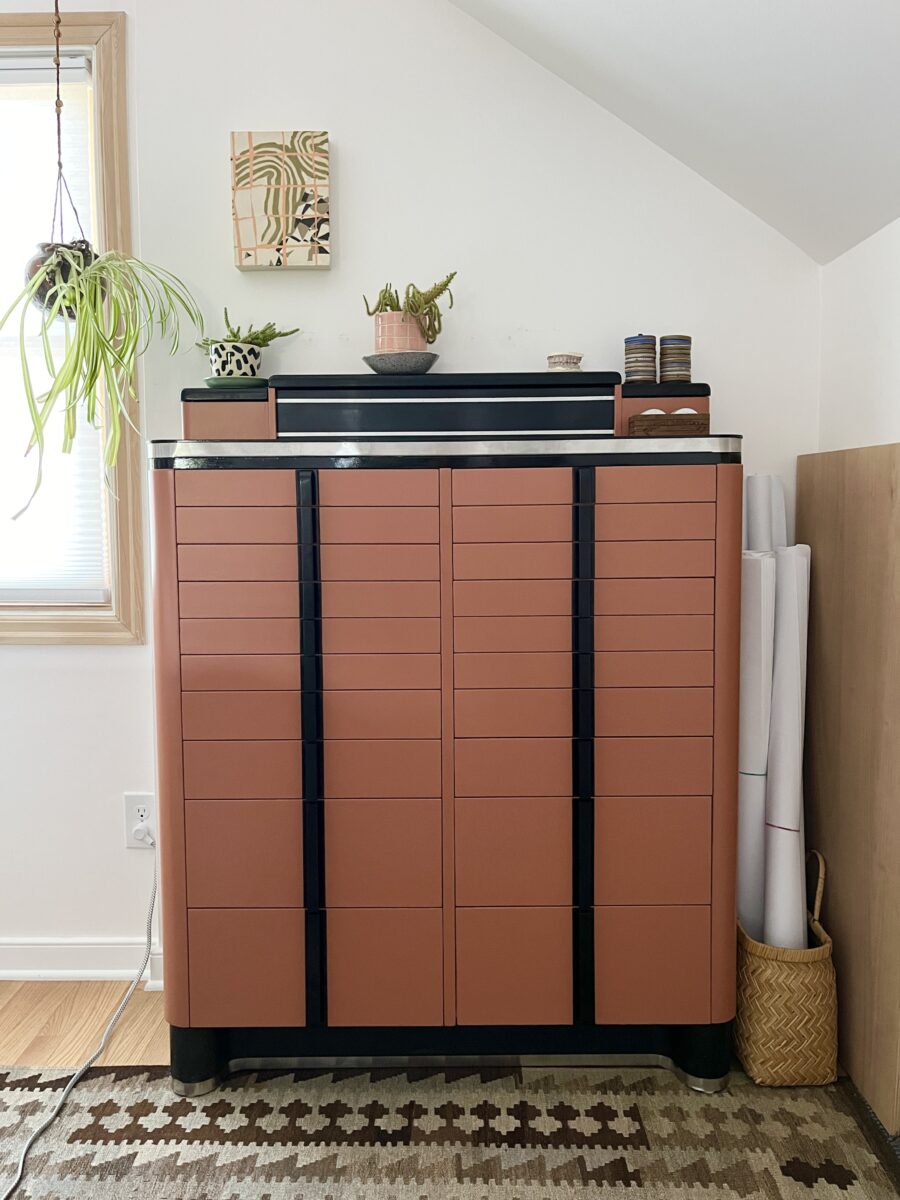
It came down to these two colors and since I already have a lot of green in my space, I went for clay. The basement lighting made it look like a Halloween cabinet and I did briefly question everything. But once the back was dry, I brought it upstairs and in natural light, it looked just as I’d imagined.
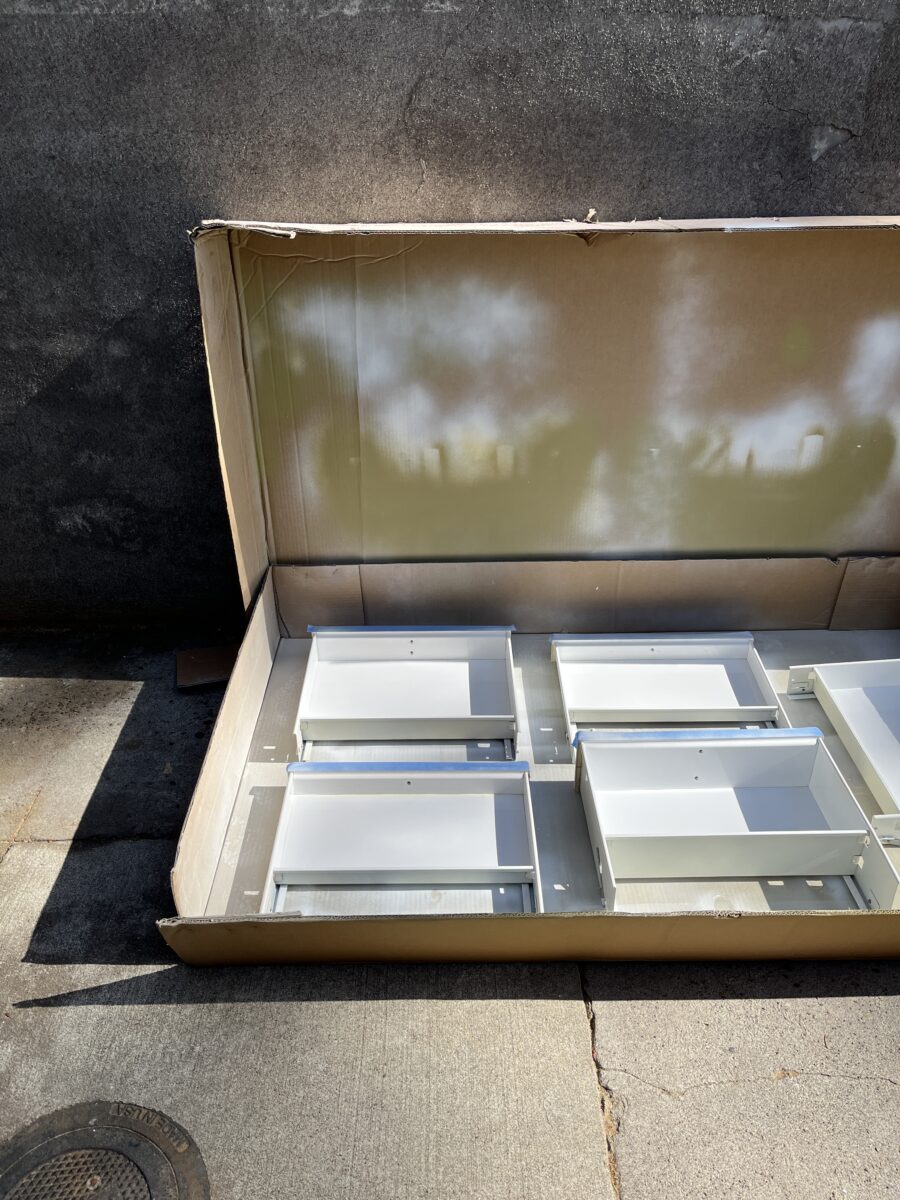
In the stripping process, I accidentally removed spots of the enamel on the insides of the drawers, which added MORE things I needed to paint. But ultimately the insides needed to be repainted because they were truly gross, even without my paint stripping damage.
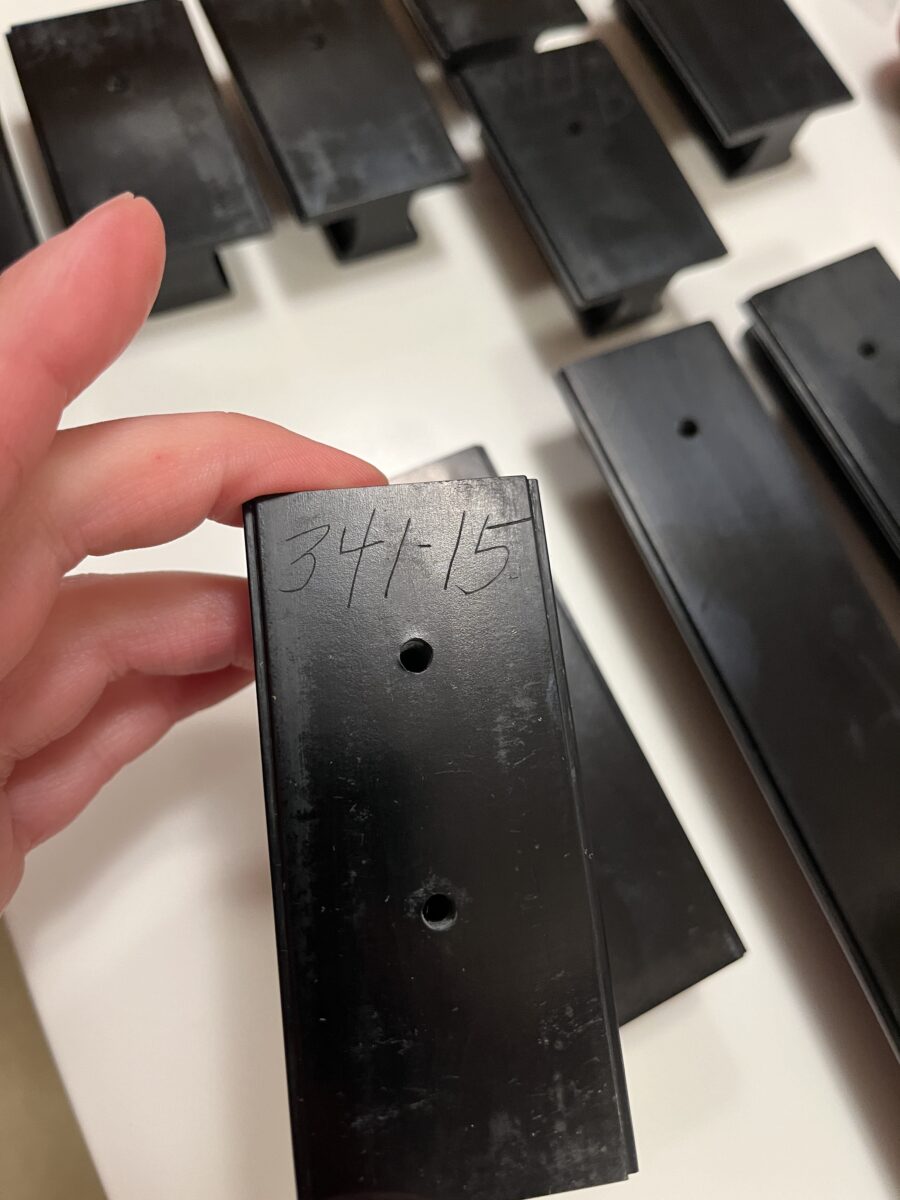
I used spray enamel for just the drawer interiors and left the original paint on the outside because of the locking mechanisms. There’s also writing on the bottoms of the drawers. This cabinet appears to have been built by a couple of people (they all initialed a little sticker) and the process included numbering the cabinet itself and each of its parts. So each drawer and each drawer pull has a hand written number, which is pretty cool, and I didn’t want to cover that up.
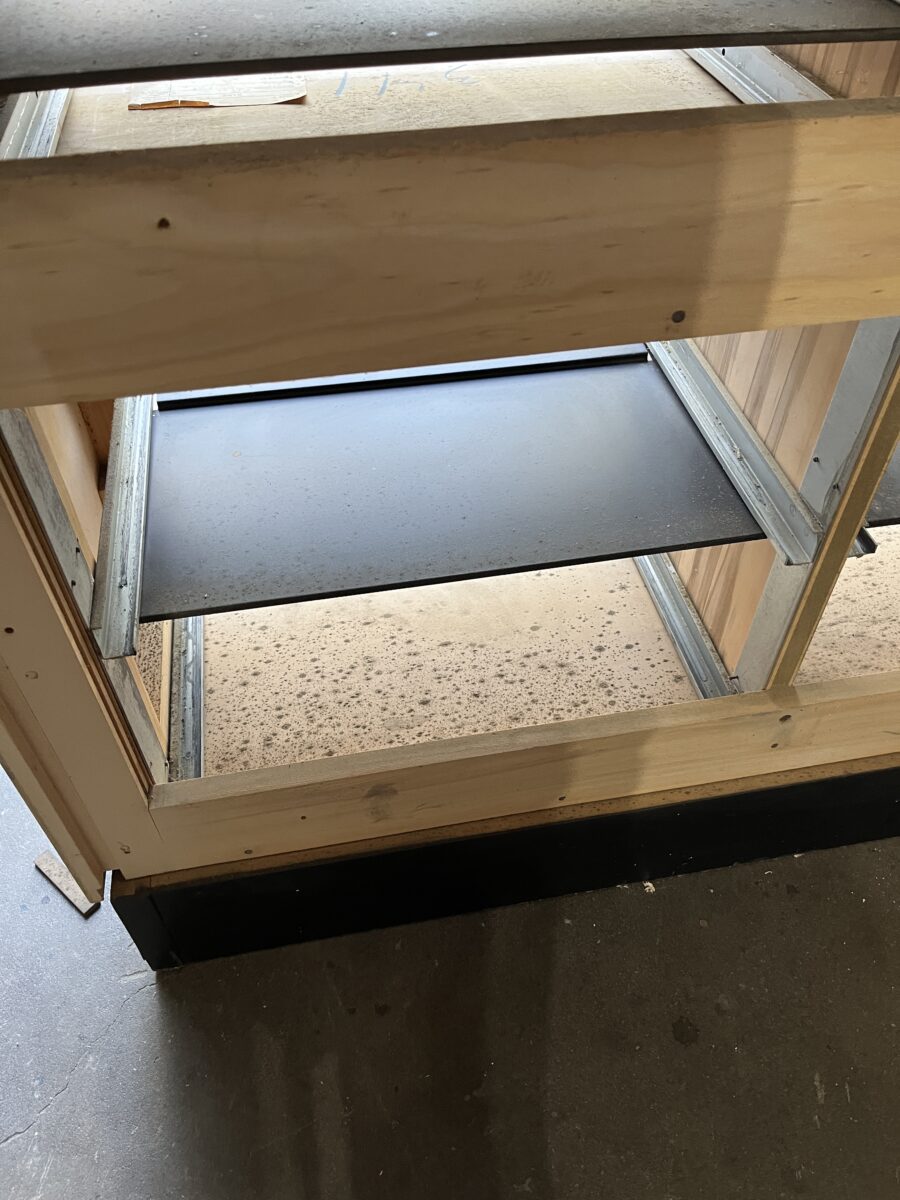
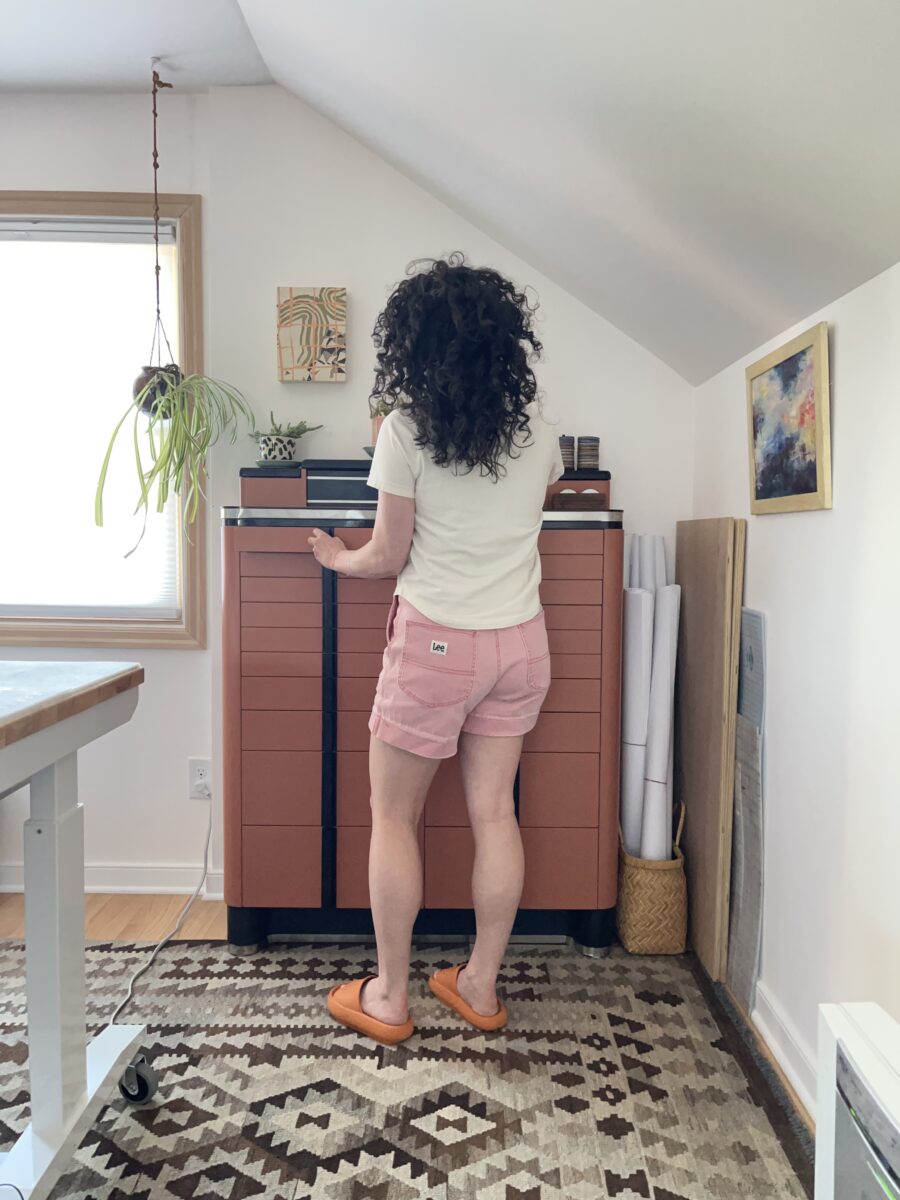
The cabinet probably weighs around 200 lbs and needed to be maneuvered up two flights of stairs. It was awkward and a little scary but we did it! Due to space restrictions, I had to work on the drawers in two batches. Getting the first batch done and in the cabinet was really exciting.
My paint job isn’t perfect, but I wasn’t starting with a perfect surface either. I did my best and think it looks a whole heck of a lot better. I added this photo to show how much time has passed – my hair is quite a bit longer than in the first picture.
This cabinet holds a lot and I’m really enjoying that every drawer has a certain supply in it.
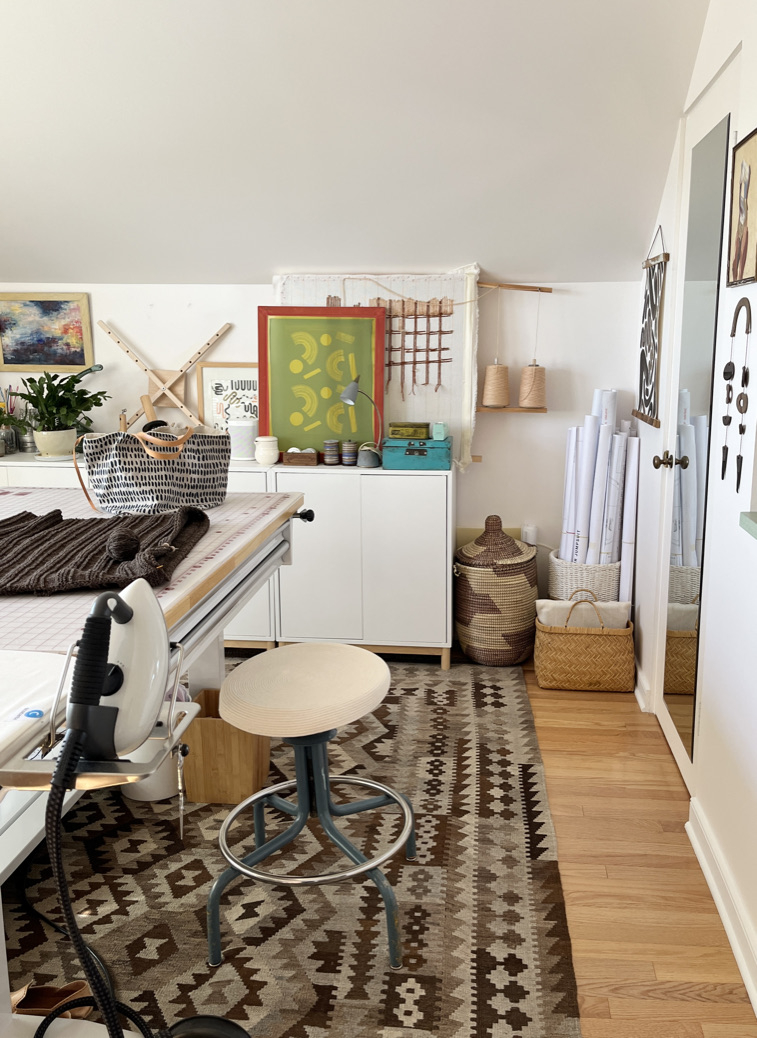
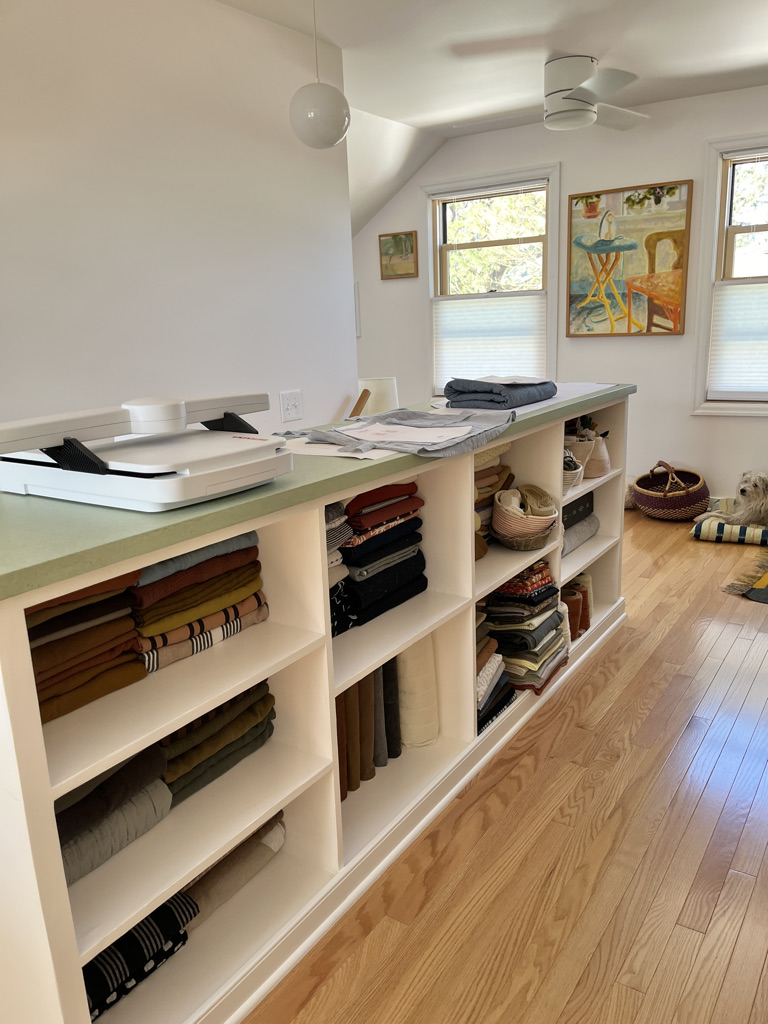
I’m a rearranger. I get a boost of creativity from rearranging a space. You can see several iterations of my space (and past spaces) here.
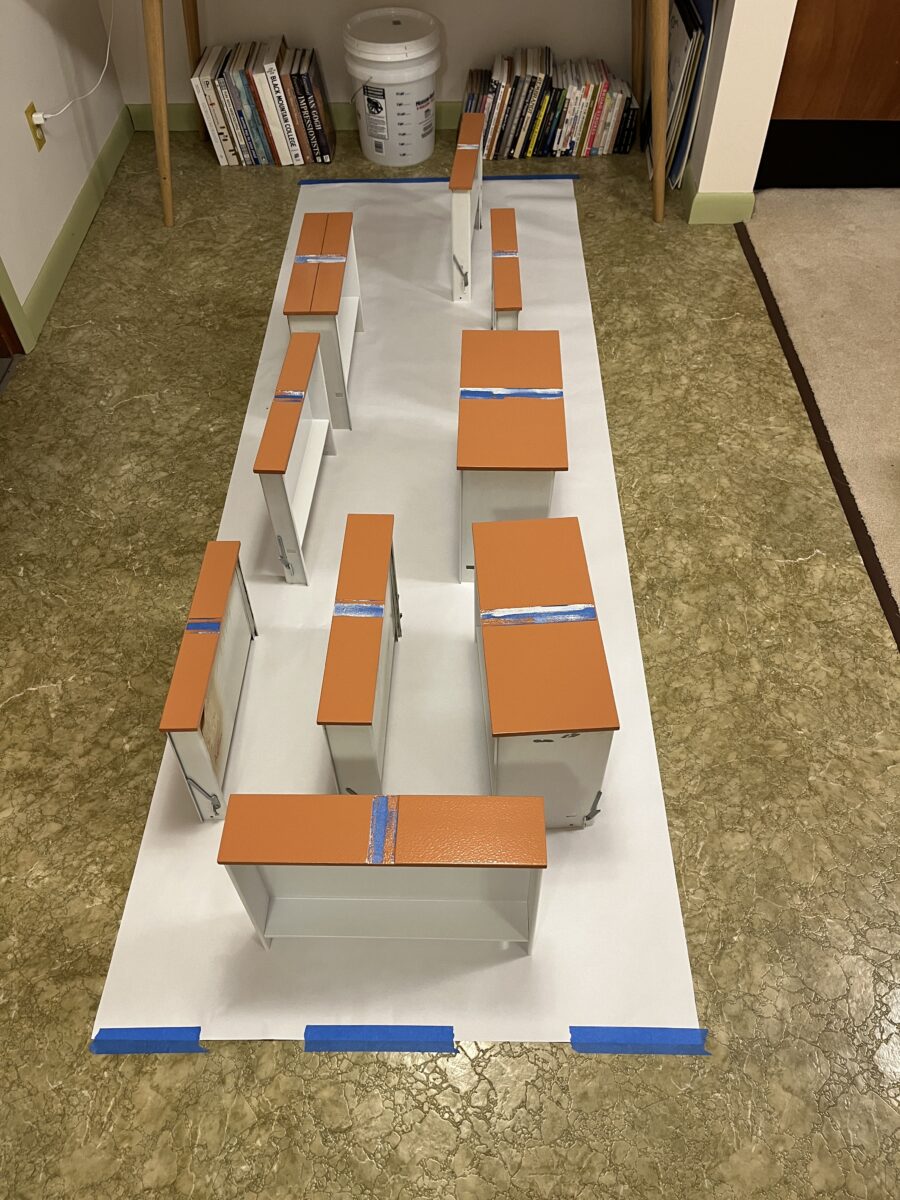
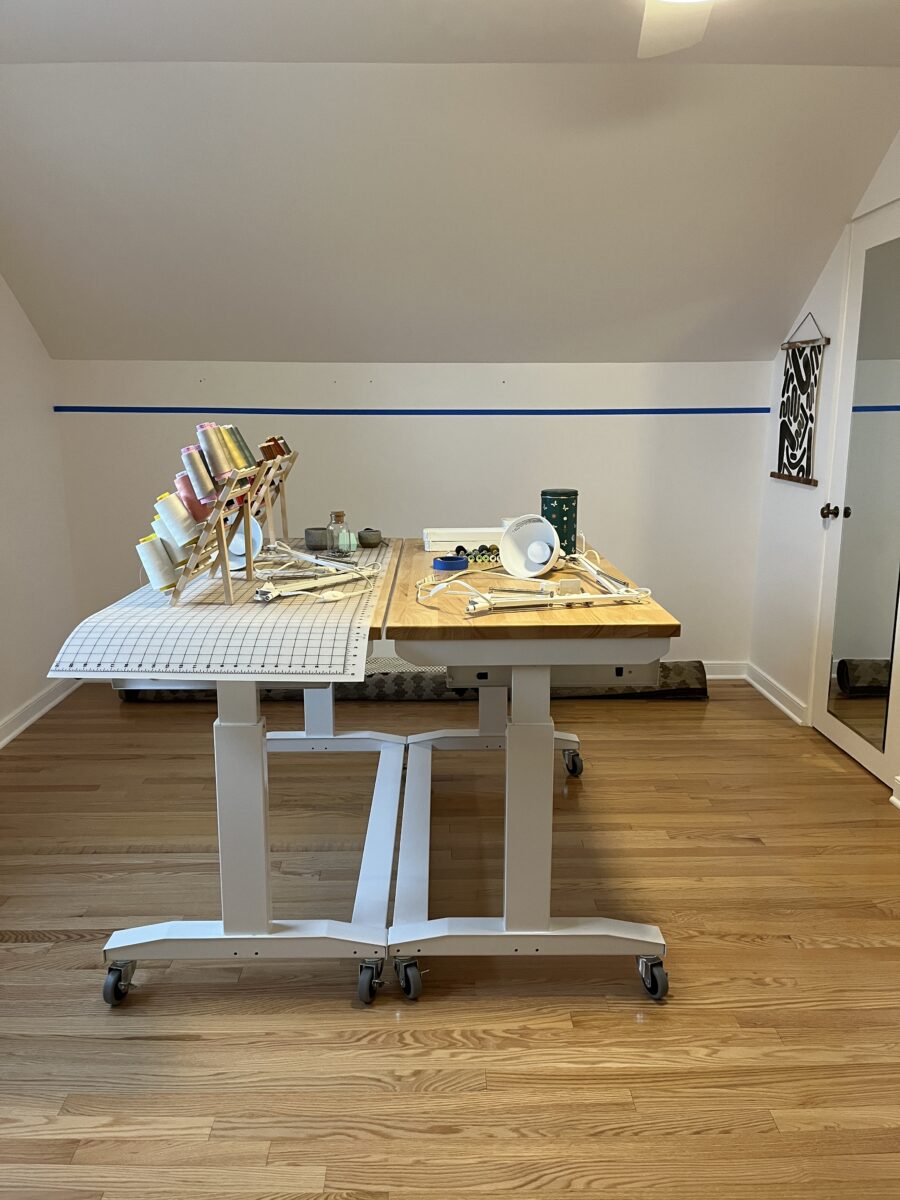
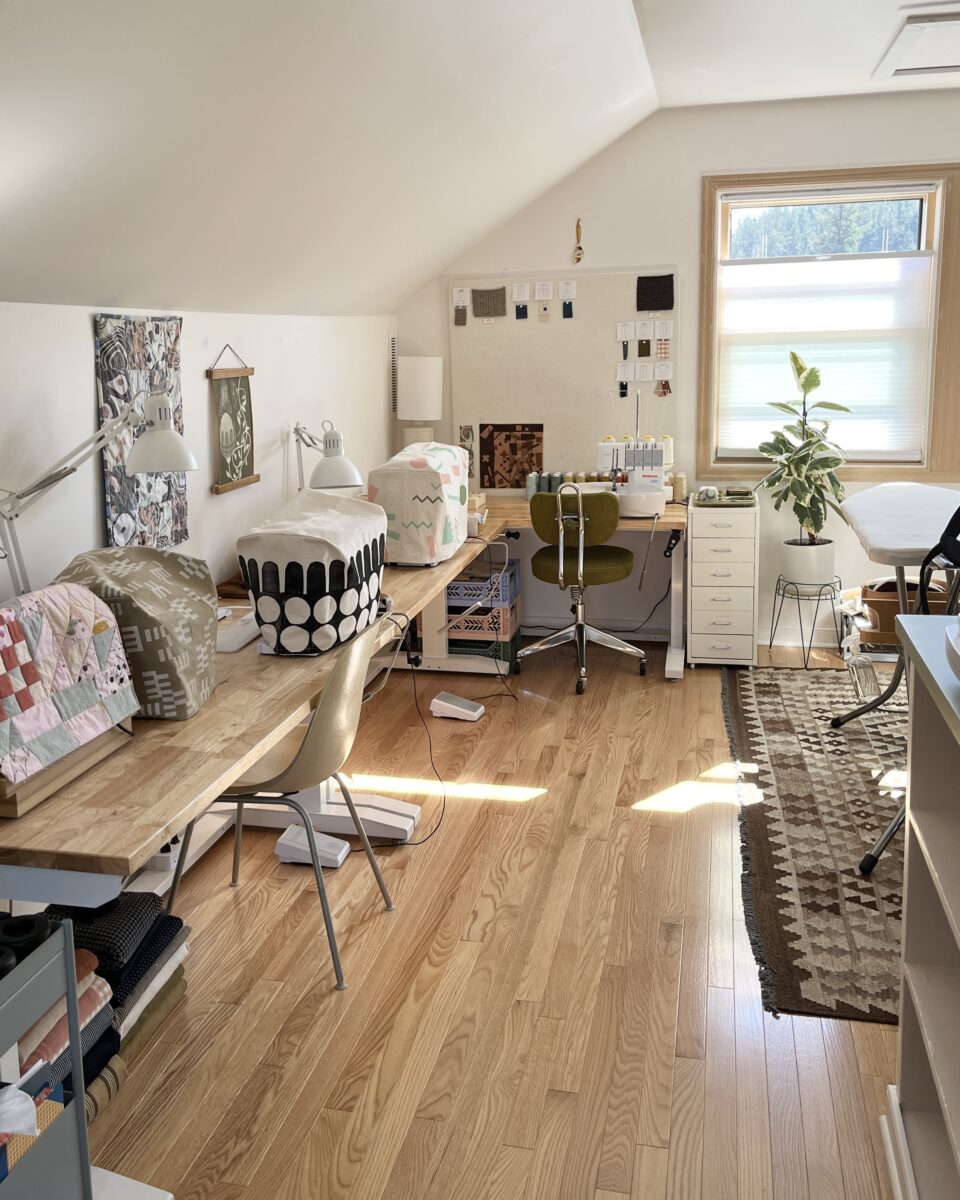
Everything started with wanting to downsize my cutting table. The big IKEA table was fine but it really dominated the room and wasn’t super sturdy.
These Husky tables had been my sewing tables (they were lined up along the back wall) and I’d taken off the drawers because I kept bashing my knees on them while sewing. I knew with the drawers attached, they’d make a much better (adjustable height) cutting table and would allow me to have all my cutting tools at my fingertips.
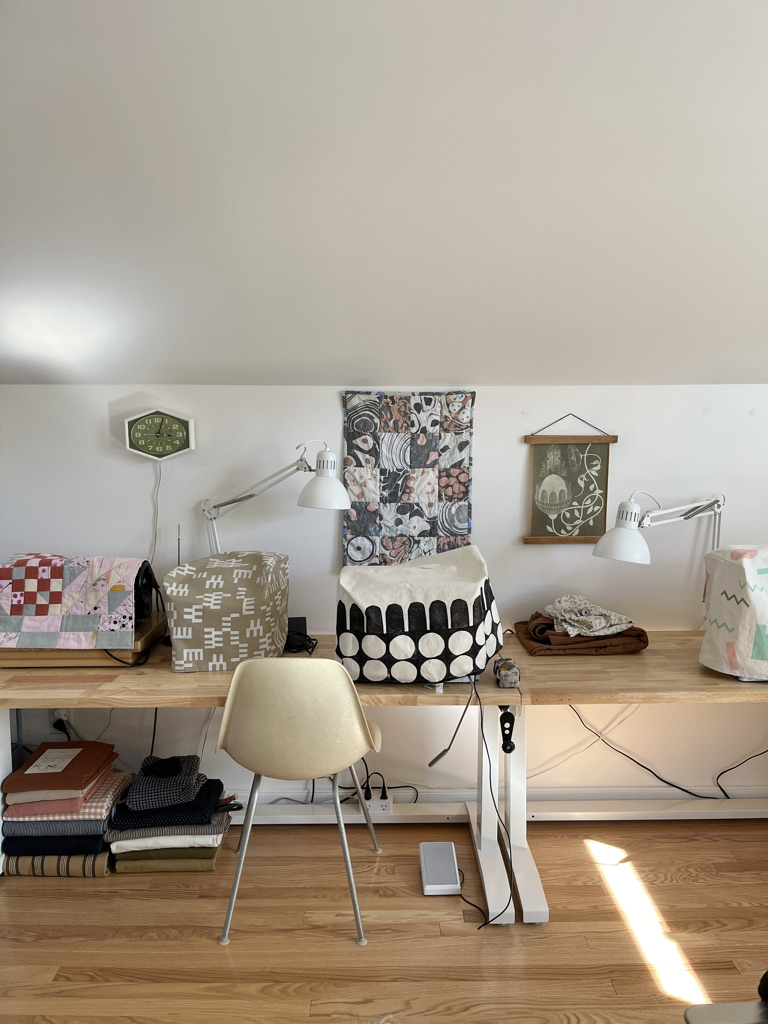
I really, really love this new cutting set up. The wall mounted system I’d been using to store all this was starting to annoy me since I’d have to carefully grab each item in order to not make the hooks fly off the pegboard. It was also a dust magnet.
Once my sewing tables transformed into the cutting table, I splurged and bought three more Husky workbenches without drawers and wheels (the wheels made them too tall before).
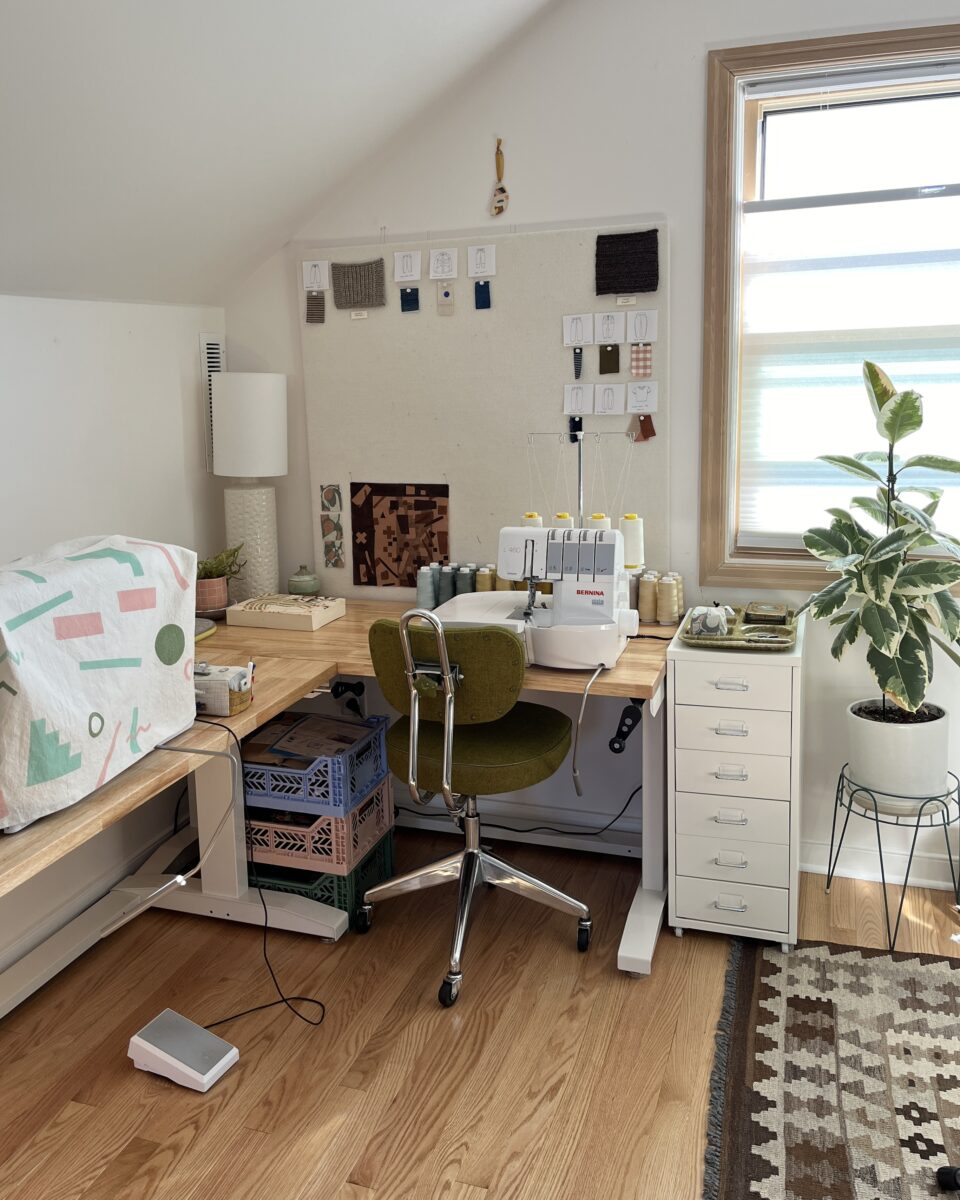
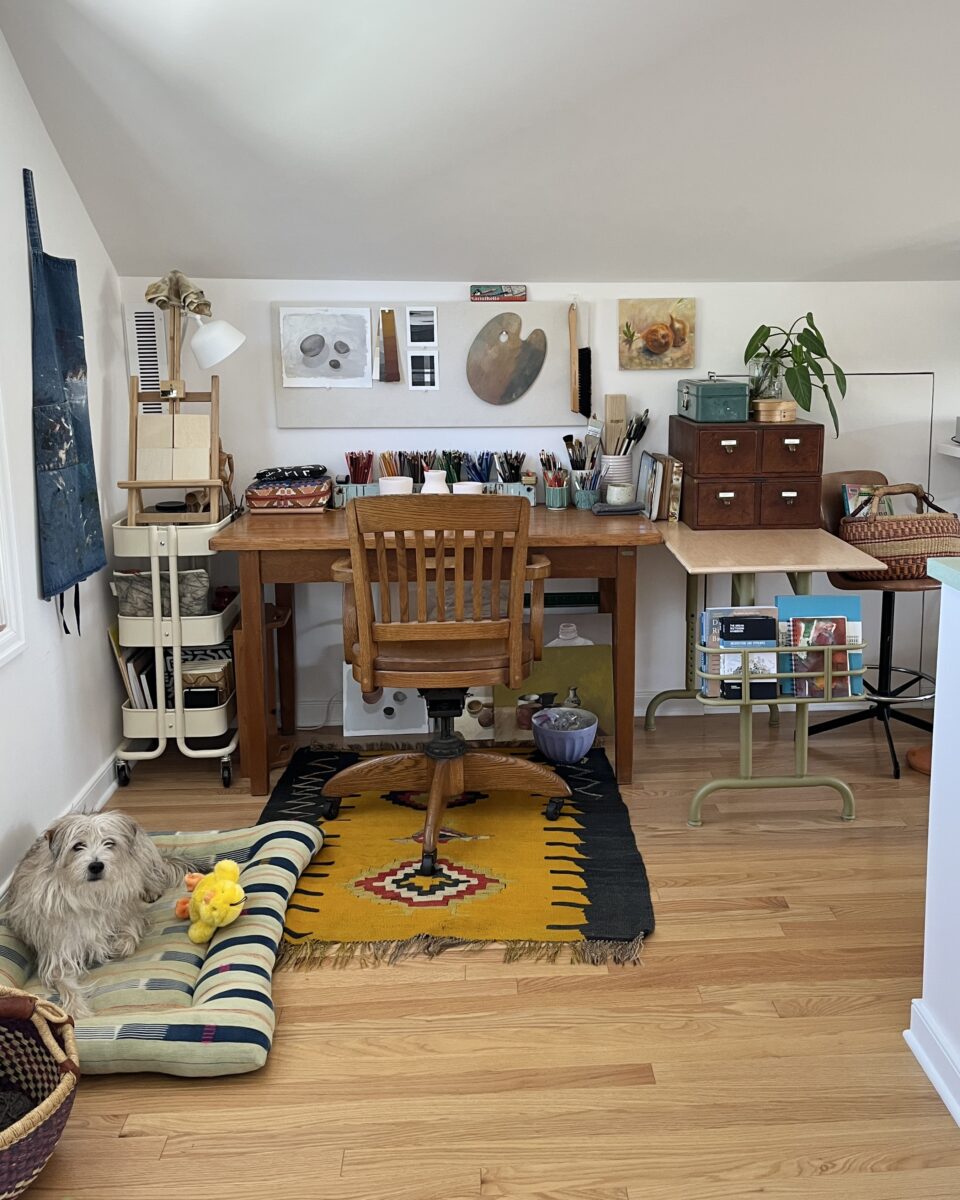
I knew I wanted to flip the space too so that the table length could increase. I’m able to fit all my personal machines and the machines I use for work all together without having to move stuff around as often. The little swivel corner where I can stitch a seam and then spin to my serger is my favorite part.
I’m planning on replacing these IKEA cabinets too with this old dental cabinet I’ve been trying to restore for a while.
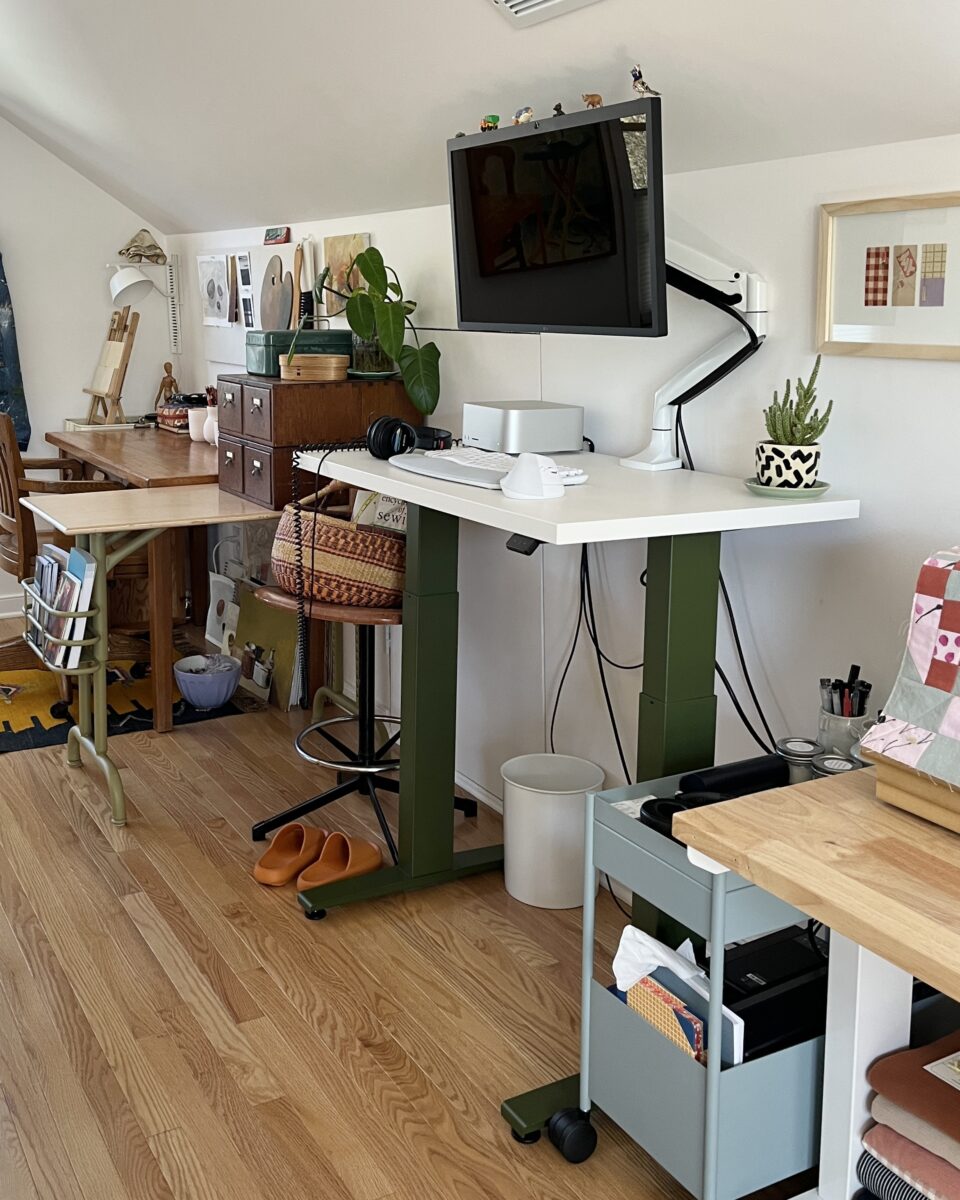
Rearranging kinda helped me de-prioritize my work-from-home set up too. My computer desk had always been in a major corner of the room and now it’s in between the two sides, which has made it take up less mental space. It’s across from the built in fabric storage pictured on the right.
Moving my computer table freed up this corner for art! I lost my practice during the past 5+ chaotic years and I’m desperate to find it again. It’s not routine yet, but at least I’ve started.
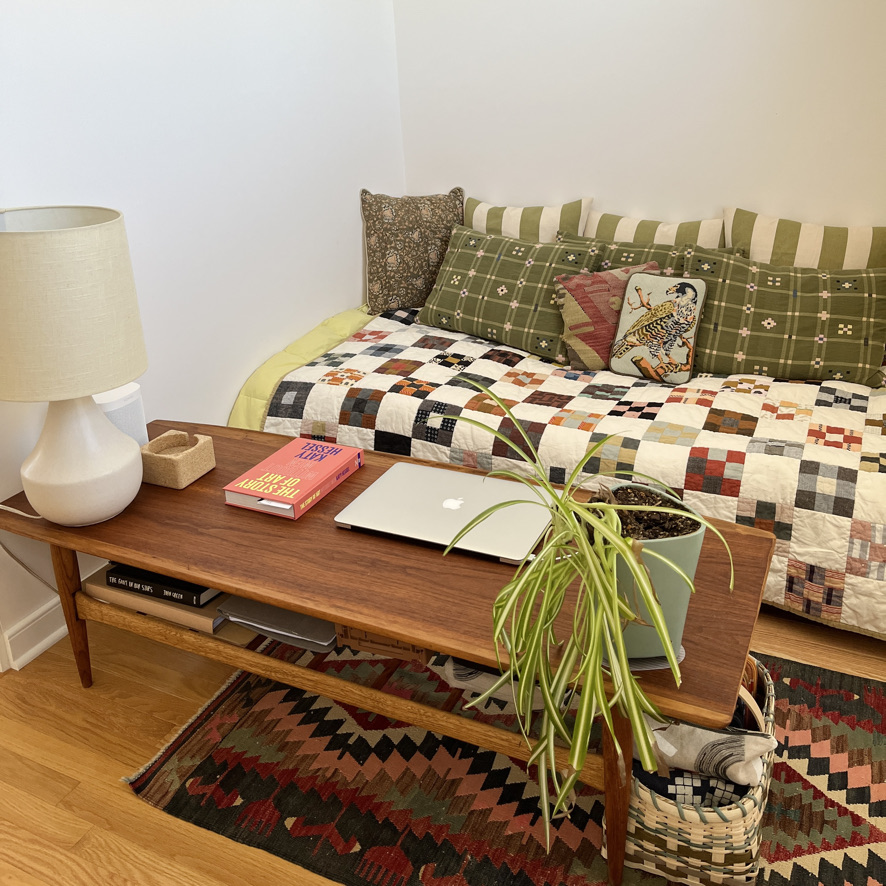
And finally, after working in this space for several years, I realized it was missing something crucial to any creative practice – a comfy spot. It’s not complete yet (this is an air mattress) and the coffee table is much too large, but it does the job. My husband is building me a custom daybed and I’m going to learn some upholstery skills too. This spot will double as a guest space, but will mostly be my Knitting (and seam ripping) Nook.
I’ve been a weird combination of highly motivated / can’t be bothered to sew for several years, which has resulted in a bunch of partially completed projects. Why finish a project when you can start a new one?! I’ve also accumulated a small pile of things that needed minor fitting tweaks, which are never as exciting as starting a fresh project.
But a couple weeks ago, I’d apparently had enough and dedicated a Sunday to tackling the stack. I set a goal of completing or fixing five doom pile projects and, to my utter shock, completed four. Here’s what I did…
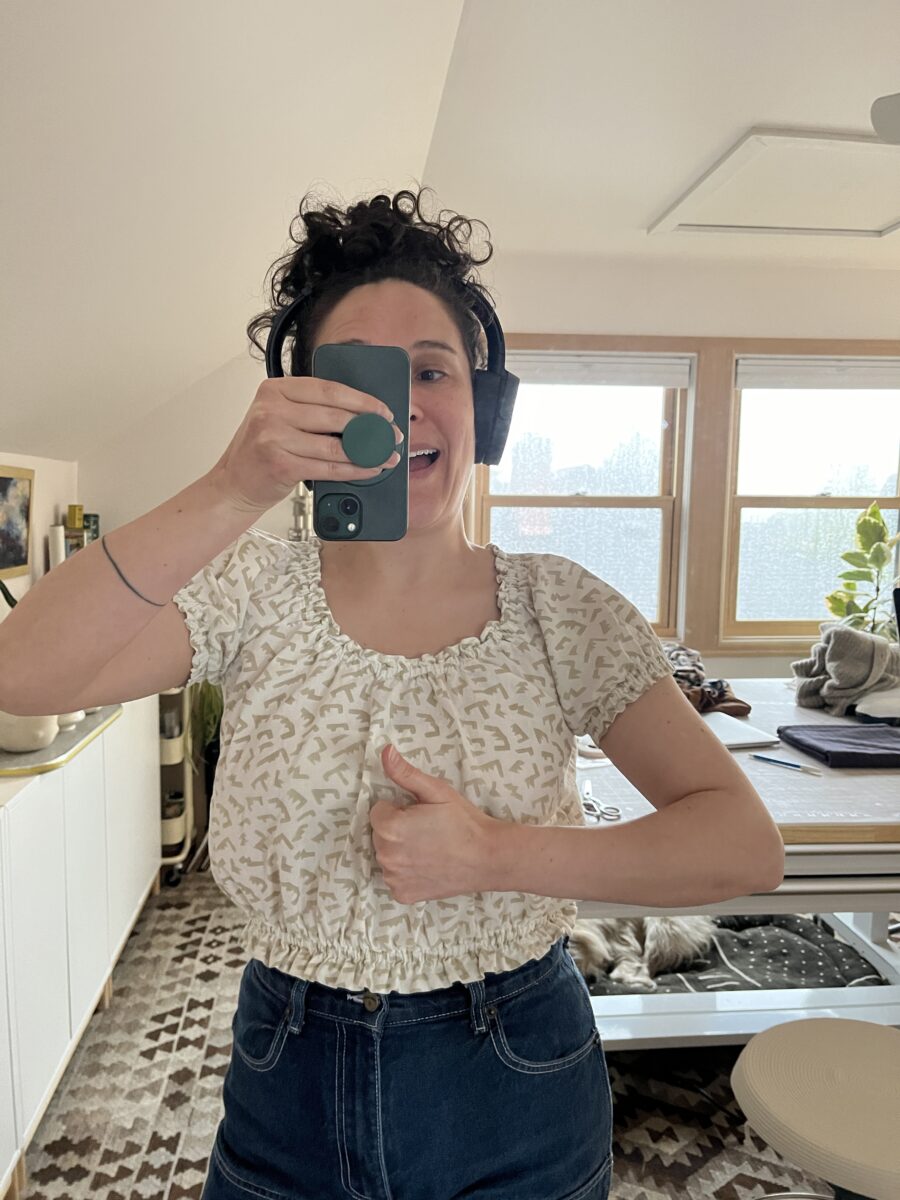
The first garment was this Seamwork Madhu that simply needed longer lengths of elastic in the sleeves. The sleeves were squeezing my arms, so I’d stopped wearing it.
I had already unpicked and replaced the elastic but lost steam when it came to stitching up a grand total of 1 inch on the casings. While I had white thread in my machine, I also put some tacks in the neckline elastic to keep it in place.
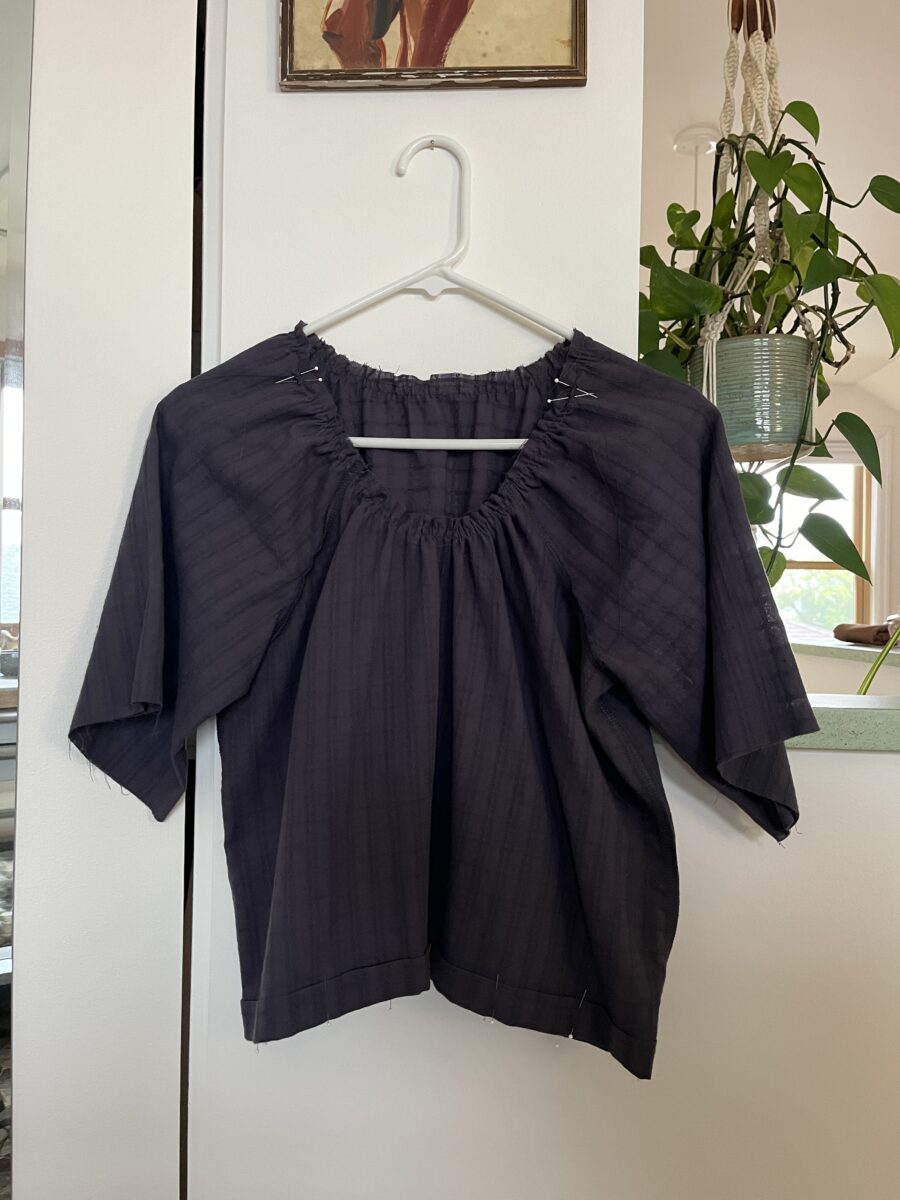
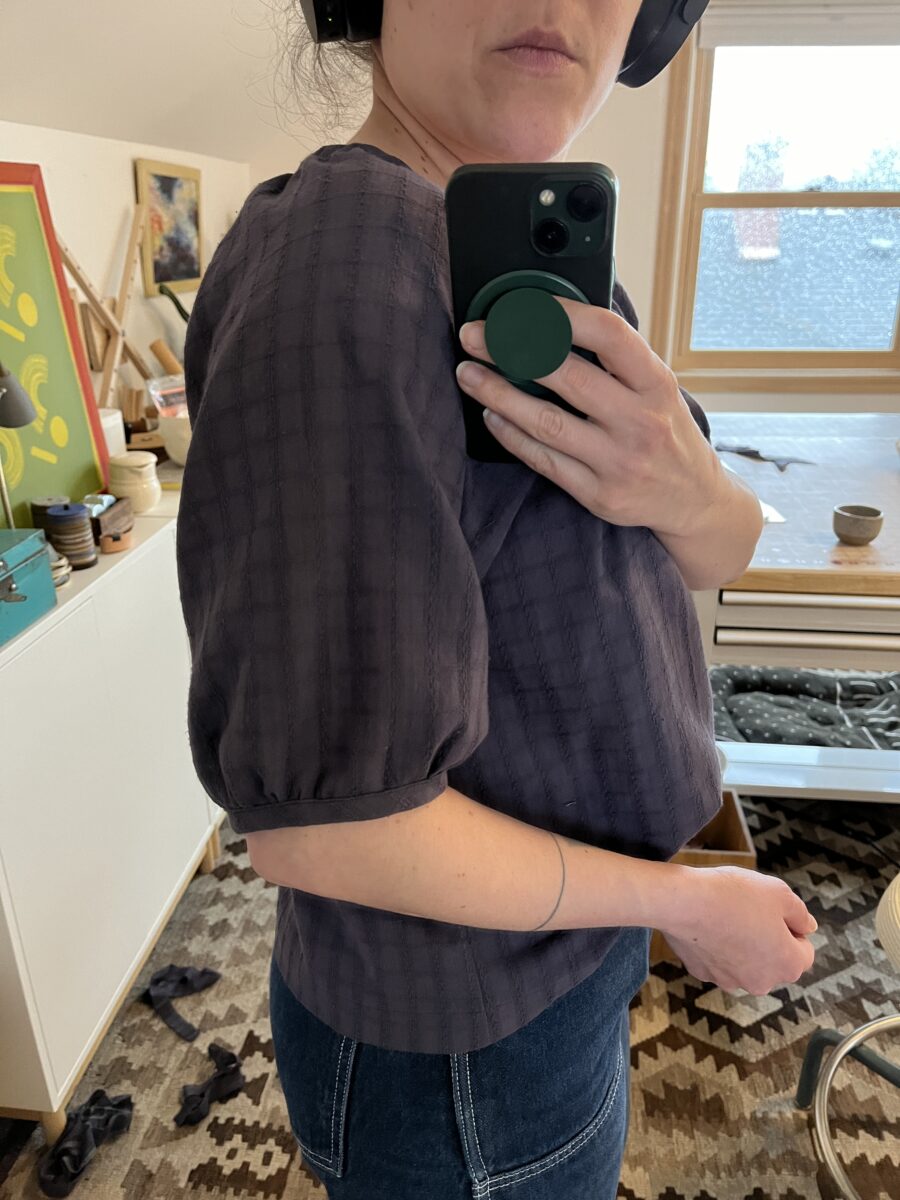
The second project was a also a Madhu, but an Ace & Jig inspired hack! I raised the neckline, lengthened the sleeves, modified the waist hem, and planned to finish the neckline and sleeves with bias binding.
All the construction was completed but I’d pooped out at the finishing steps, including creating the bias tape. I’m pretty pleased with this hack!
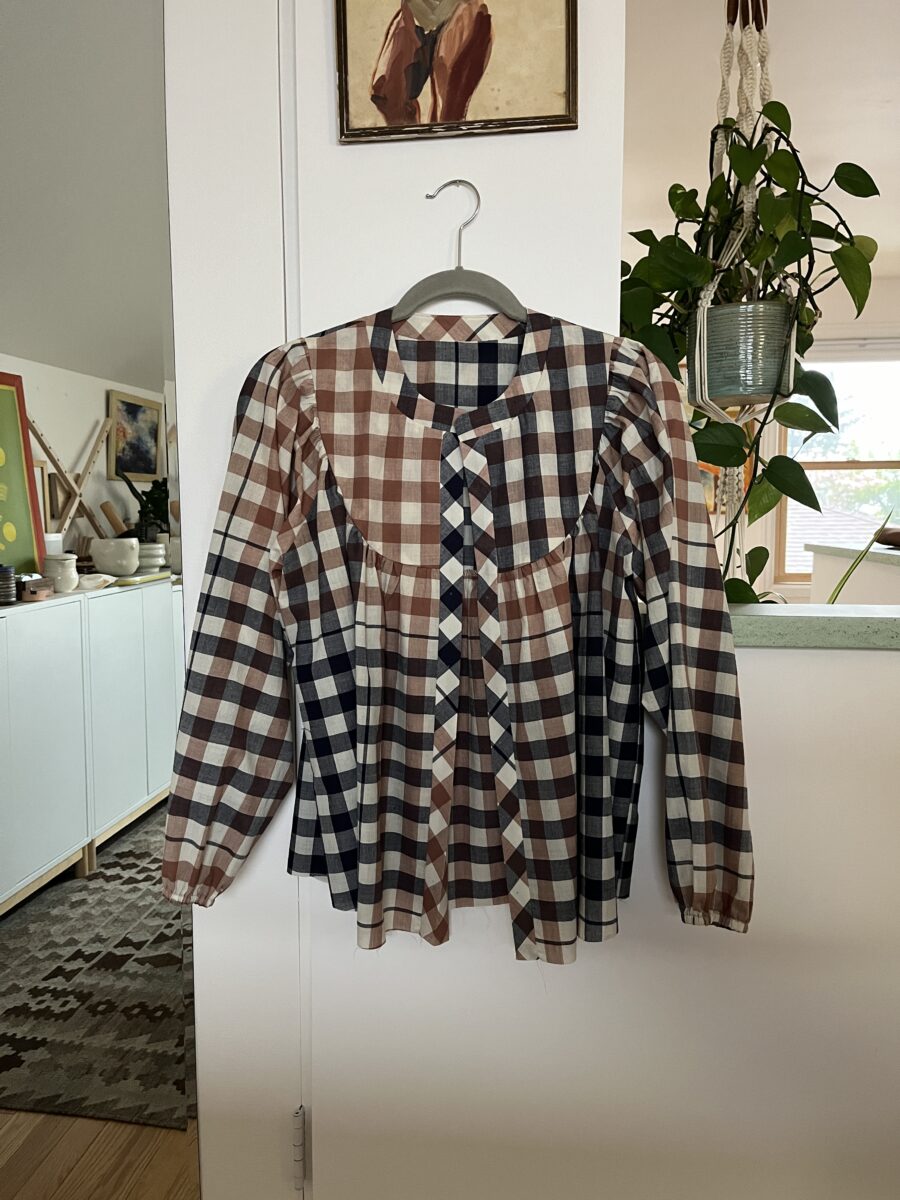
Next, was this top. It’s the Seamwork Aims and while it looks flipping cute on others, I’ve learned I don’t feel great in tops with even the slightest amount of poof at the shoulders. But I wanted to finish it, even if it ultimately gets donated. It needed the hem and placket stitched, plus buttons and buttonholes. It’s a little yeehaw but I’m kinda into it?
The last thing I was able to squeeze into this weekend WIP party was taking in the center back seam on this Isola jumpsuit. My fabric kinda bagged out and was flapping in the wind making me not want to wear them. It was a subtle change but made a big difference!
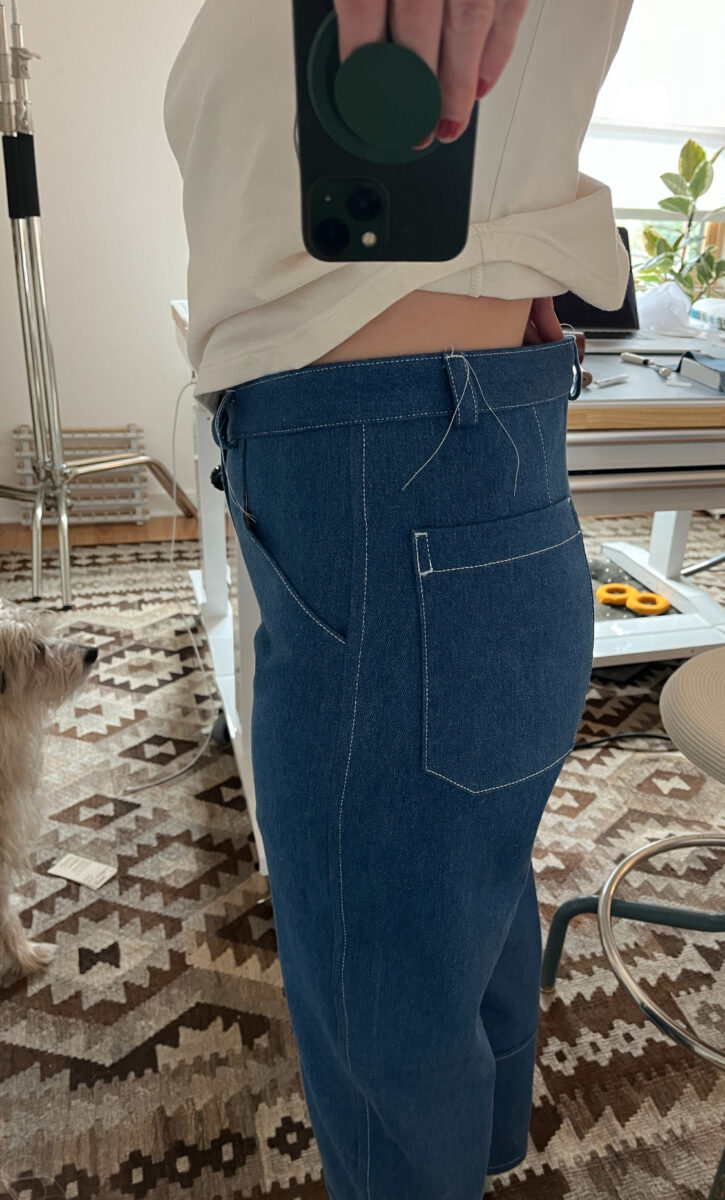
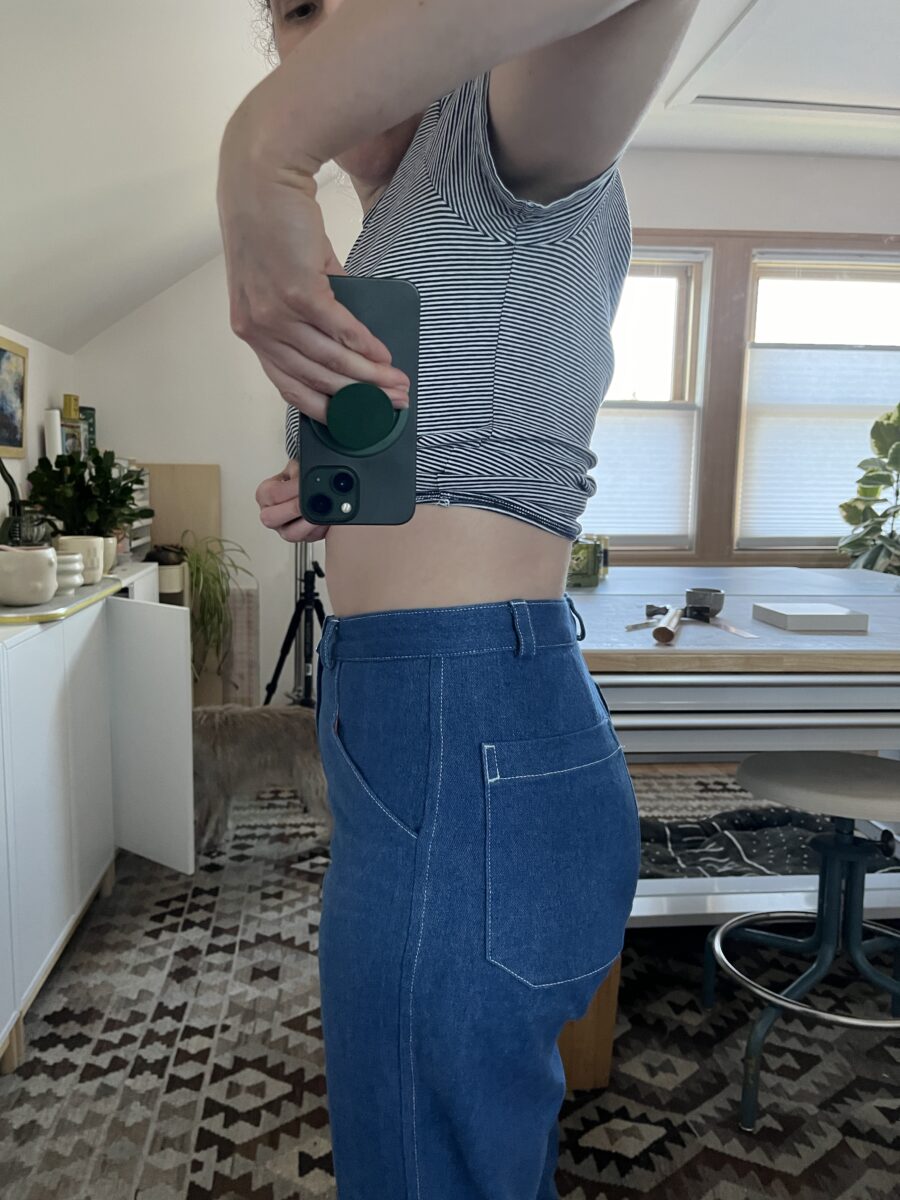
The following weekend I was still riding the WIP pile high and decided to fix the fit on these Shop Pants. Despite previously making these in the same fabric (just a different dye) the fit was completely different at the back waist. I had also placed the back belt loop off center and was happy to have the opportunity to fix it. I took about an inch out of the center back and was able to hide all the backstitching under the belt loops. I’m so excited to have another pair since I wear this pair all the time!
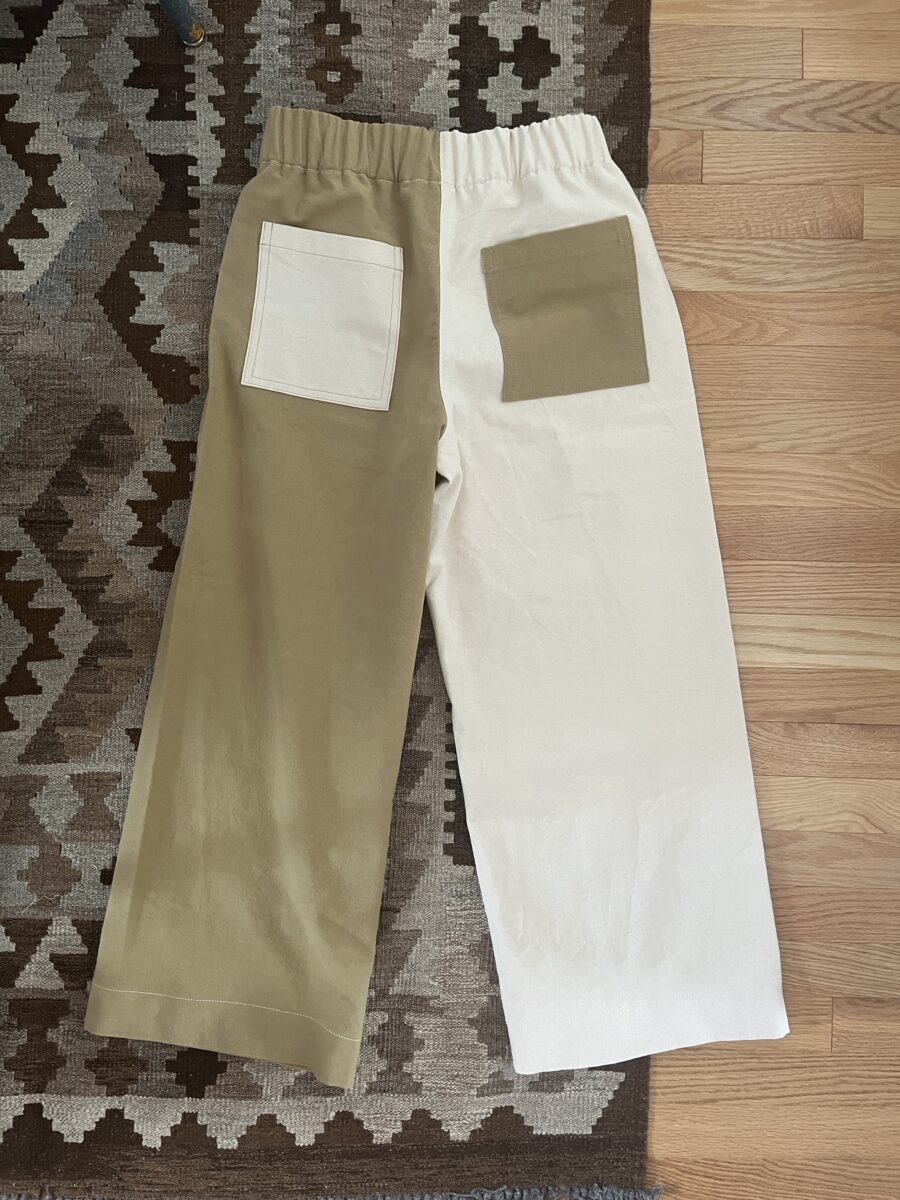
And then this past weekend I tackled this incredibly old WIP. It’s seriously old, like multiple years old. These canvas Pomona pants needed the inseam, hems, and waistband sewn. After finishing them, I unpicked the front patch pocket because it looked weird.
Believe it or not, there are still WIPs to be finished! And I’m committing to not starting any new projects (except for simple pointelle t-shirts, I gotta have some fun) until the pile is conquered!
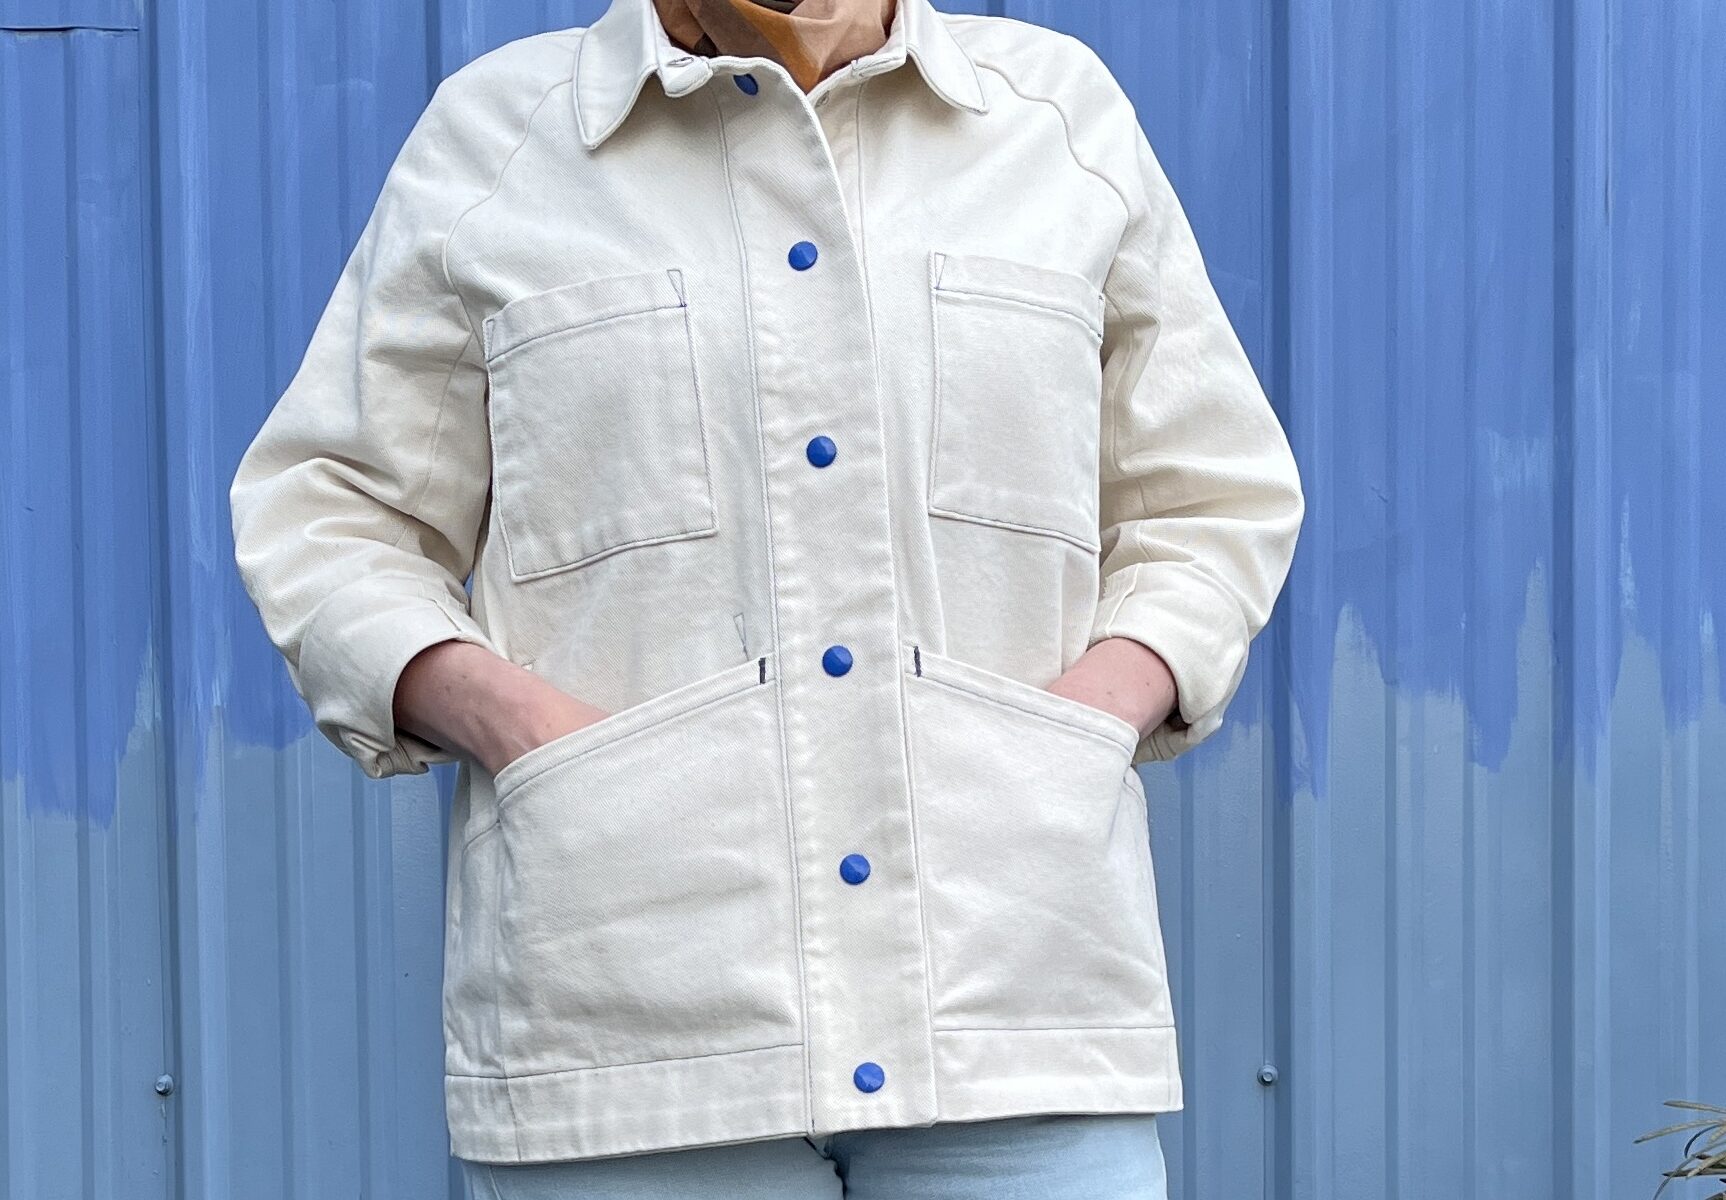
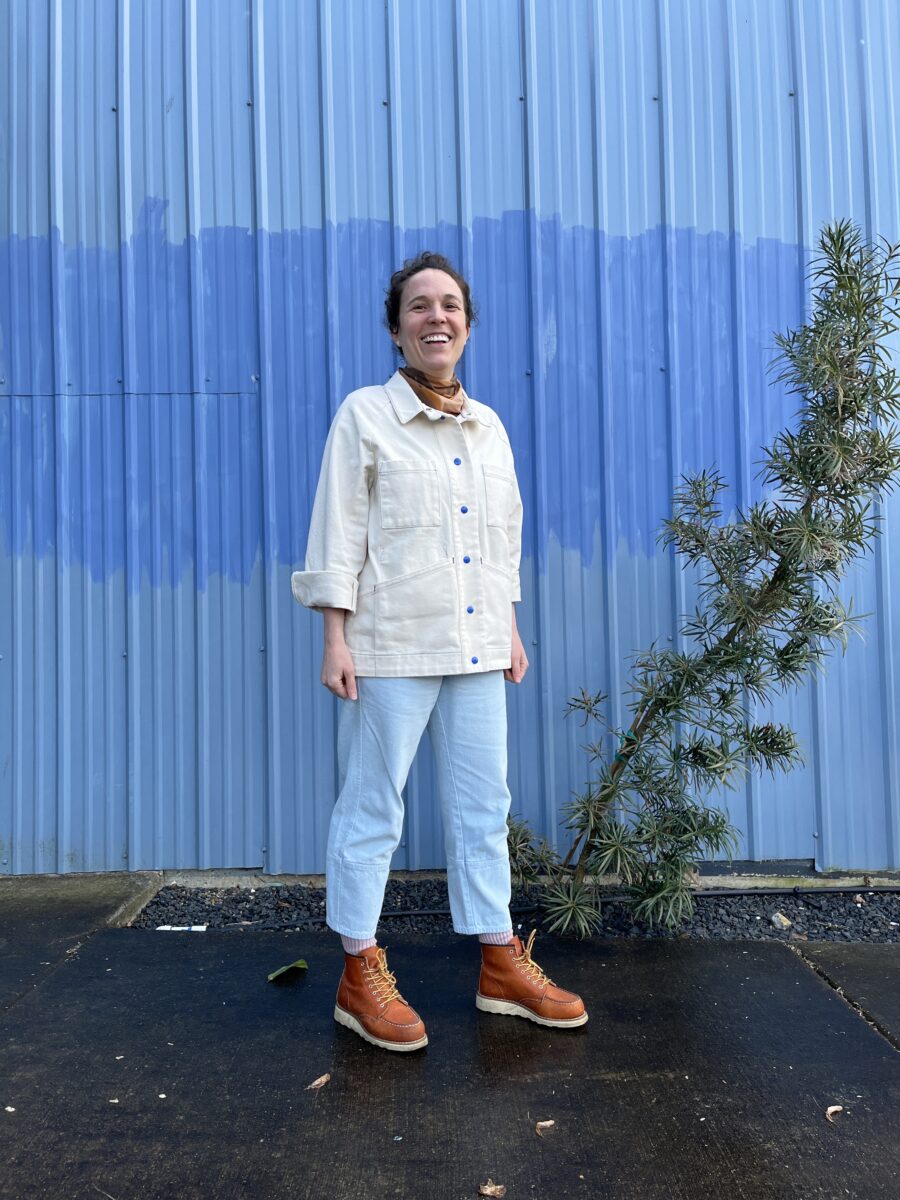
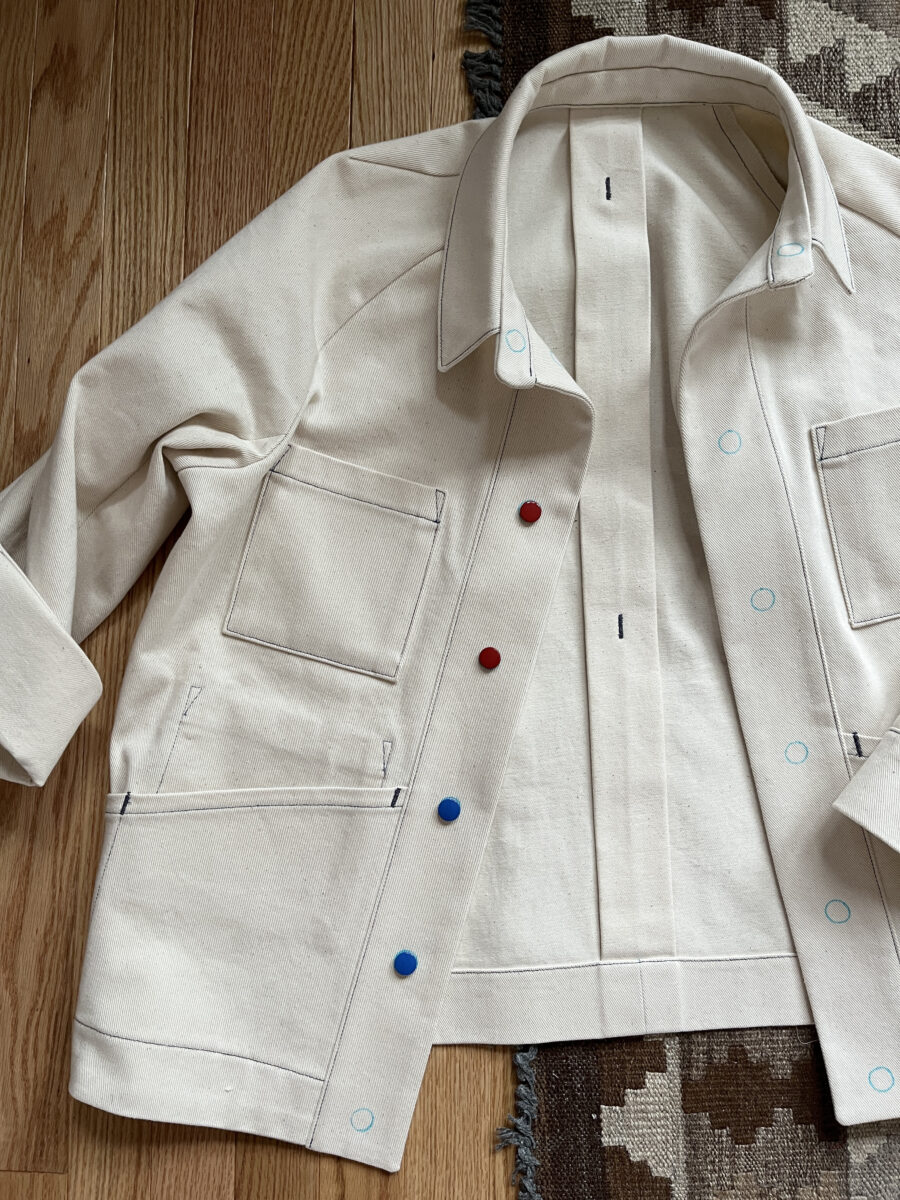
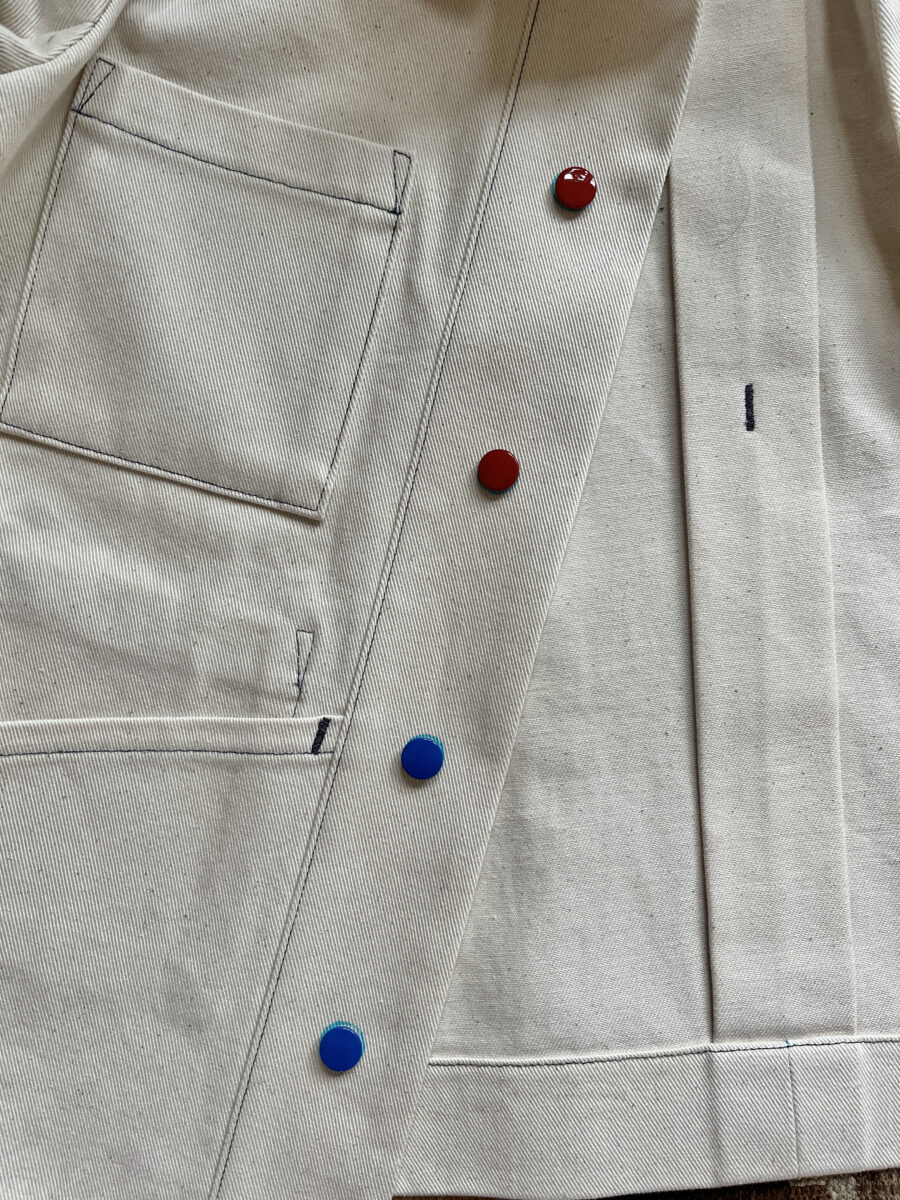
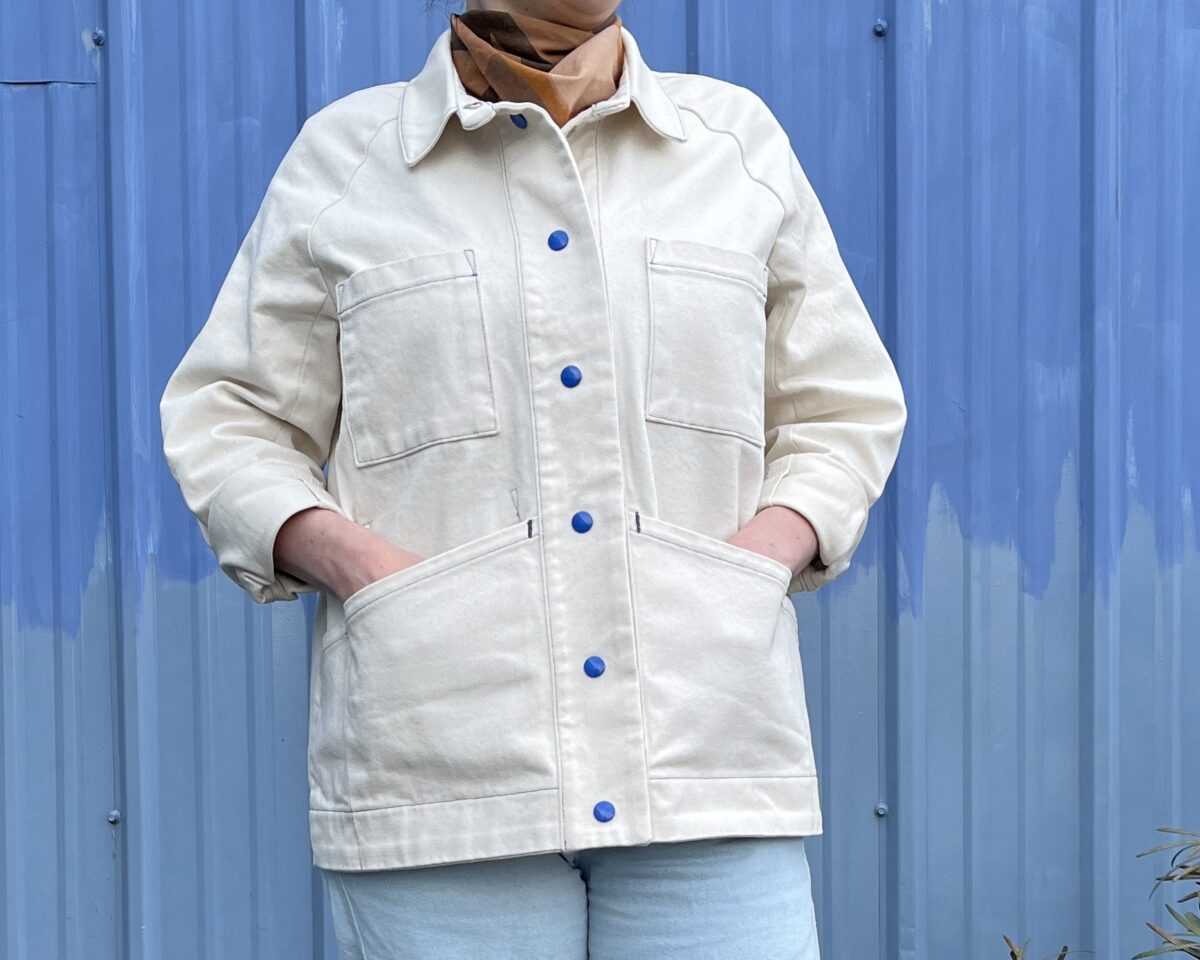
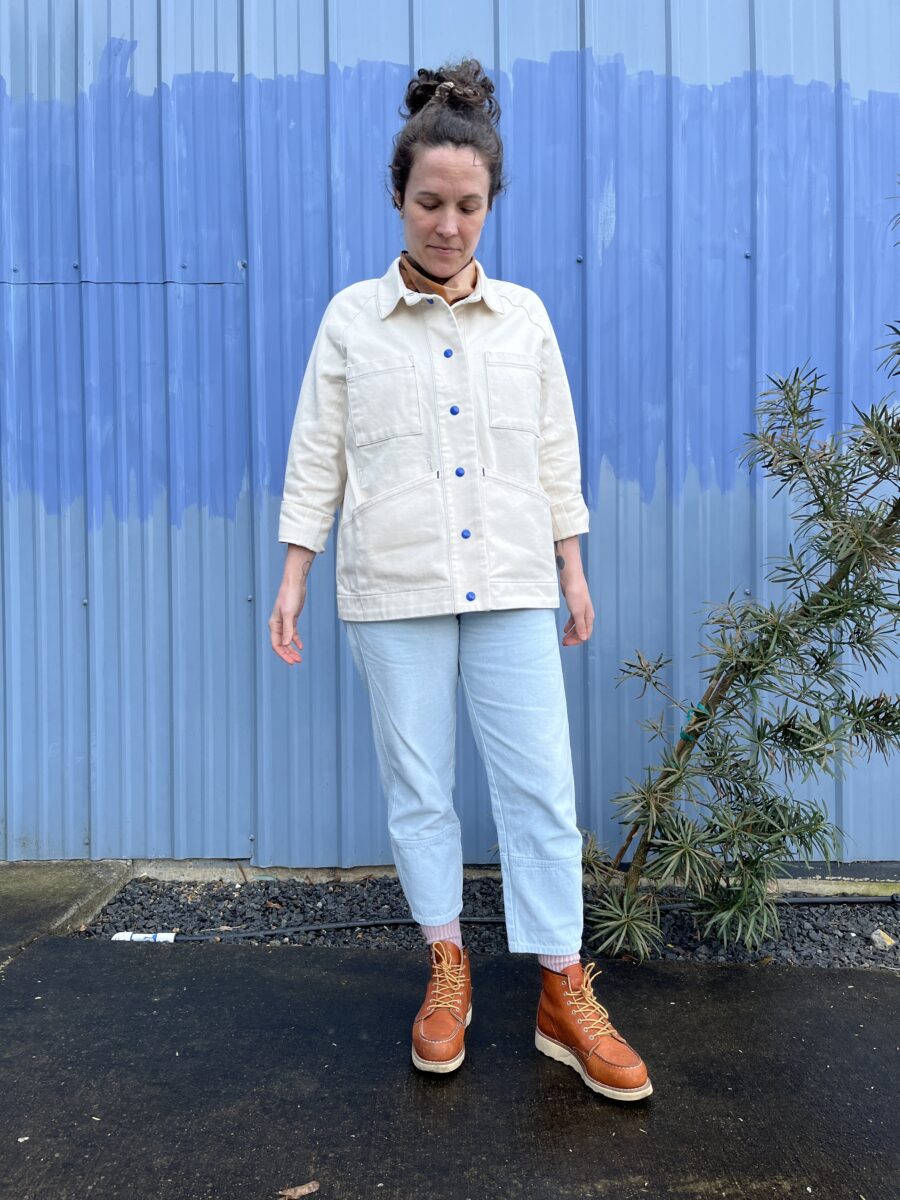
I know, I know. Neutrals are my favorite, but sometimes a primary pop is what a project needs.
This subtle splash of color was inspired by the jacket itself. While constructing, I thought it looked like a painter’s smock sans paint. Inspiration hit and I thought maybe some colorful snaps could stand in for paint smears.
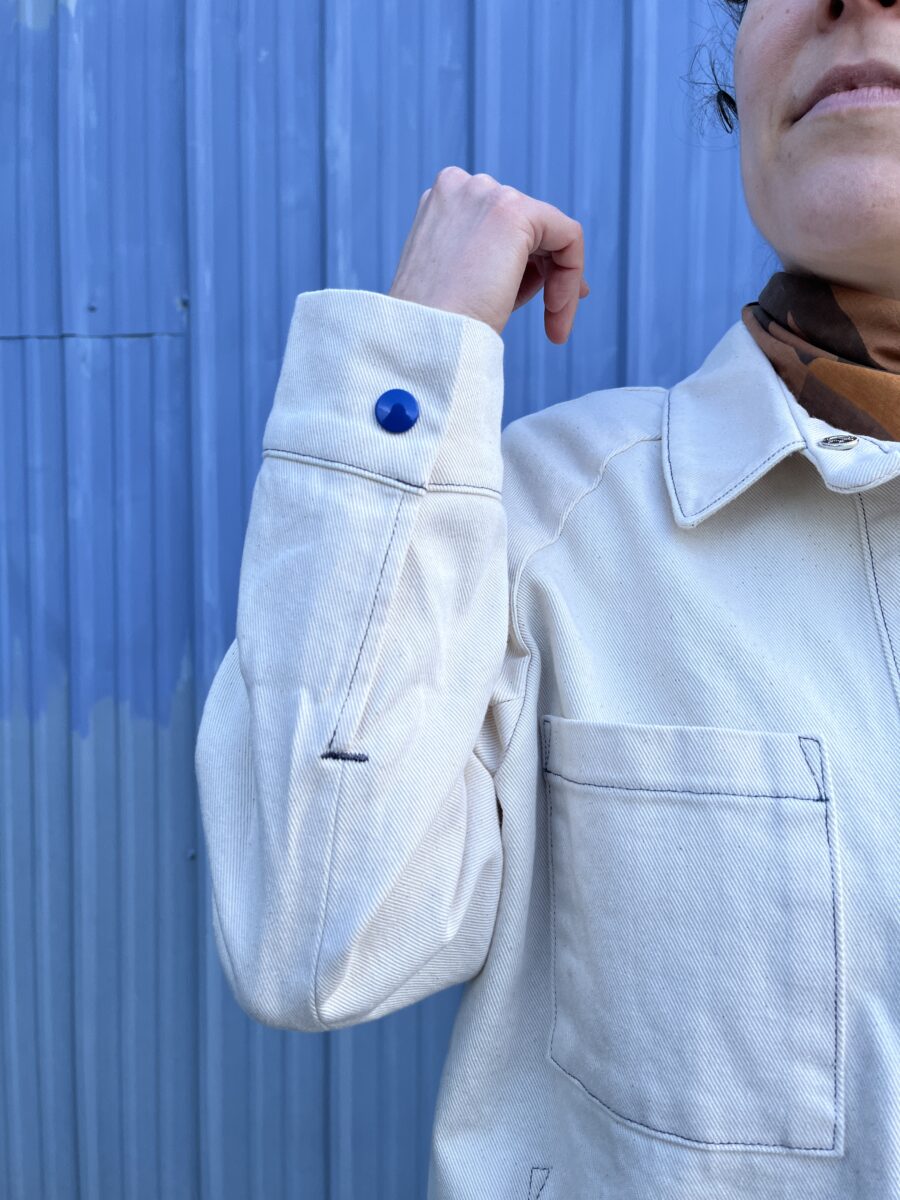
After a quick google, I found both red and blue snaps and ordered. I ended up choosing the blue to coordinate with the dark blue topstitching.
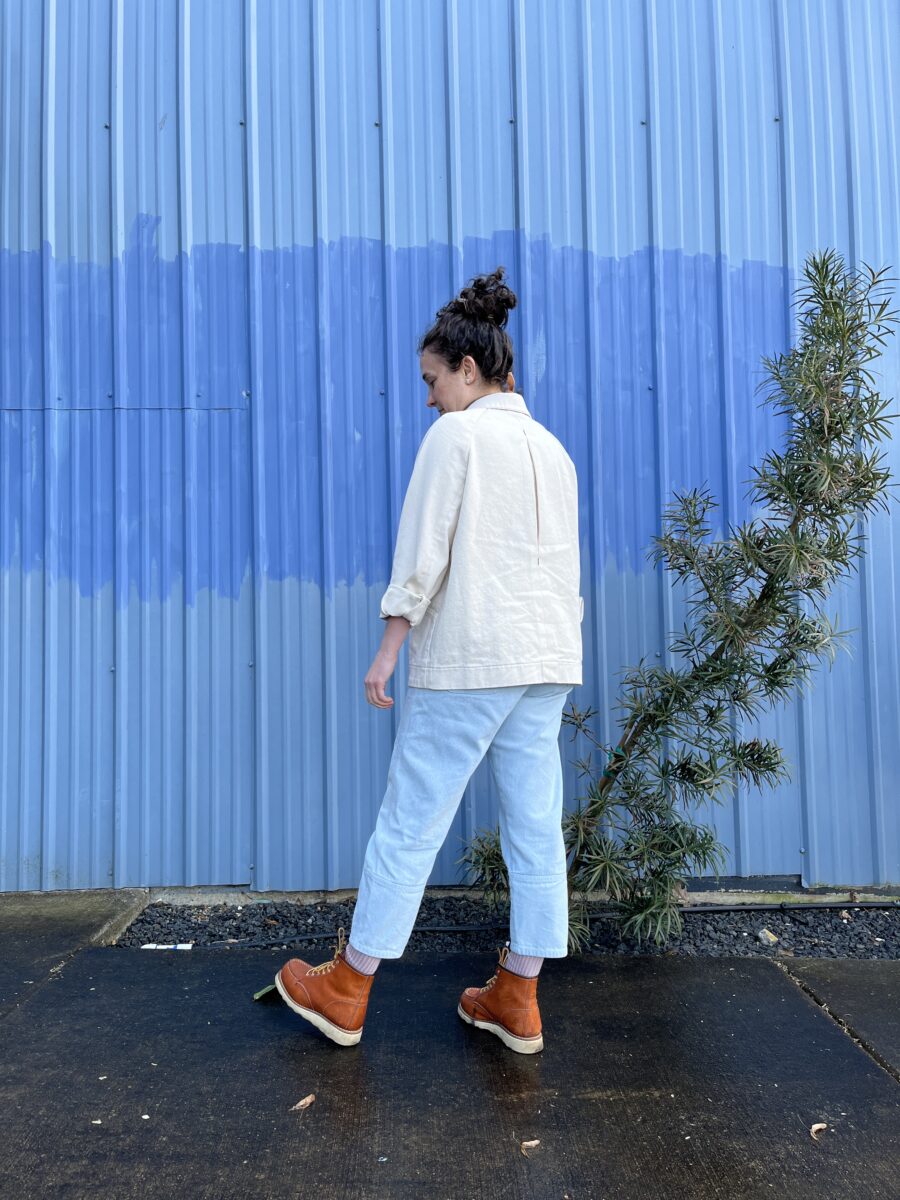
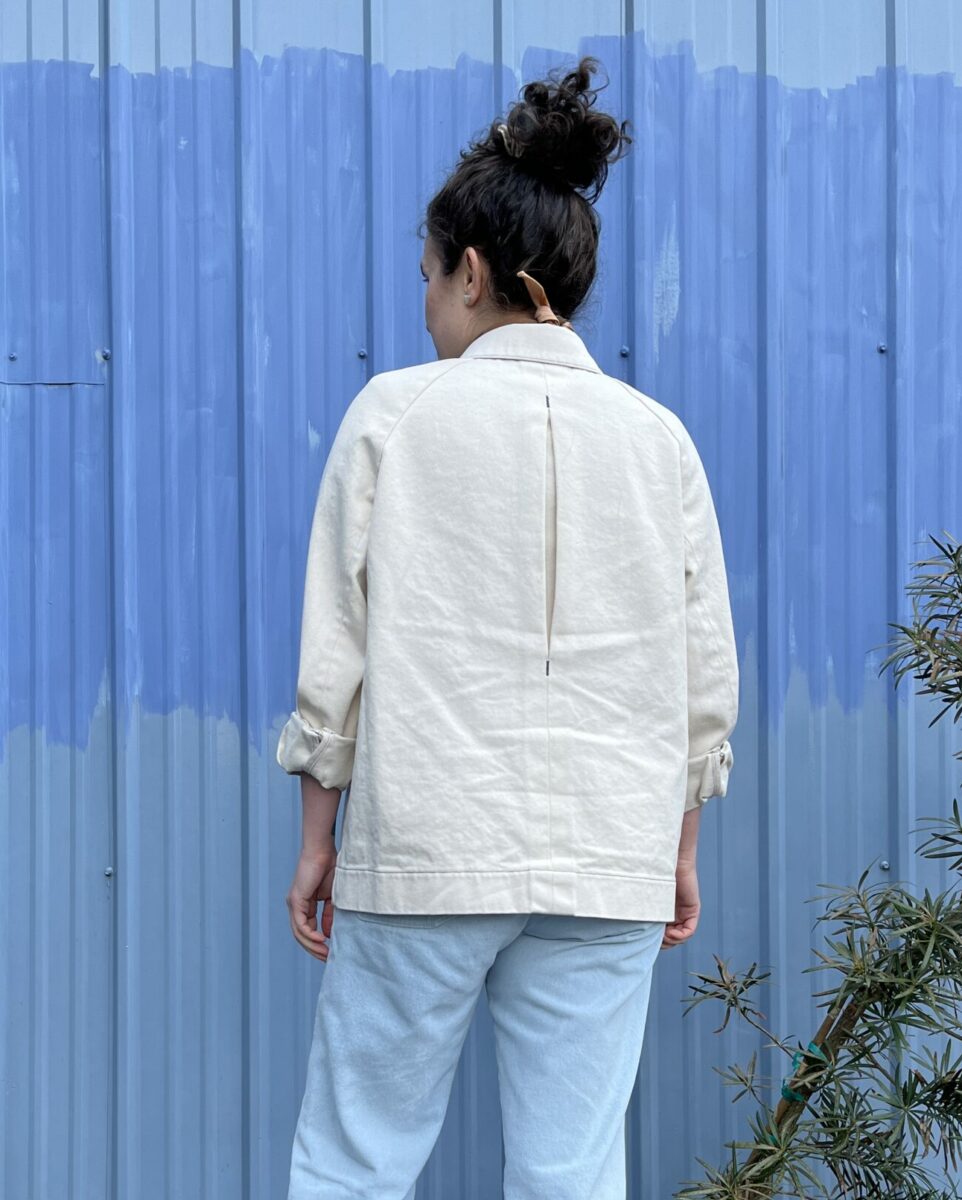
This jacket is very easy to throw on and I’ve been wearing a lot. It features raglan sleeves, angled pockets that go all the way to the side seams creating FOUR POCKETS, a back pleat, stand collar, a perfect straight cut, and cuffs.
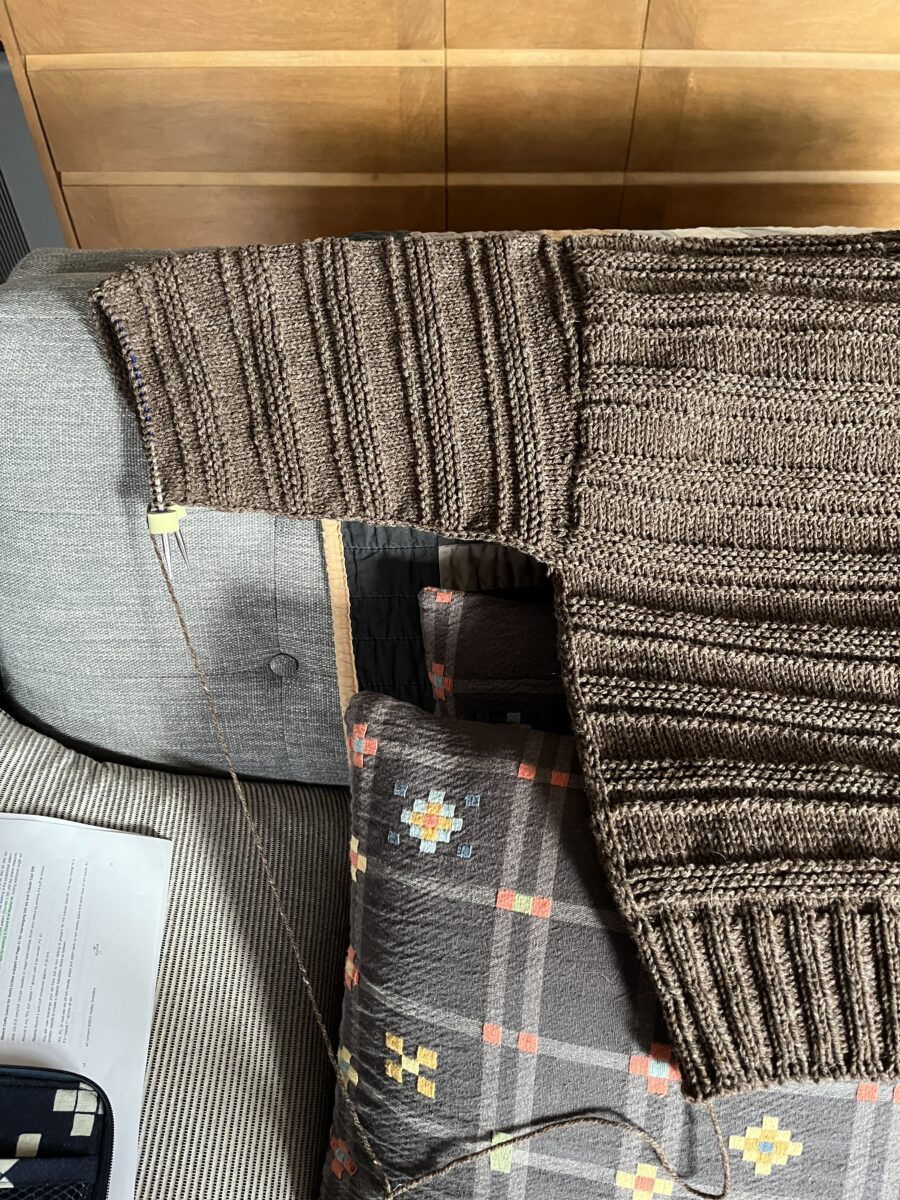
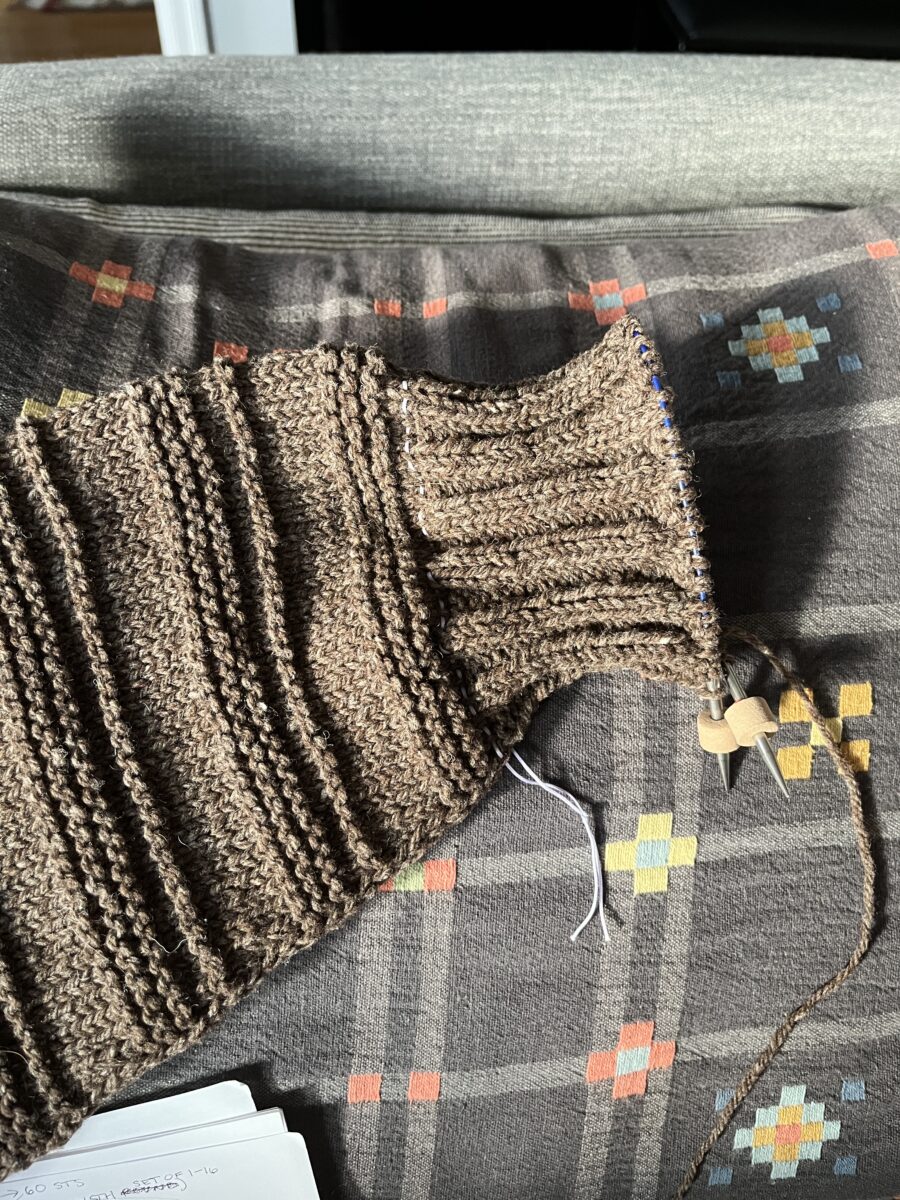
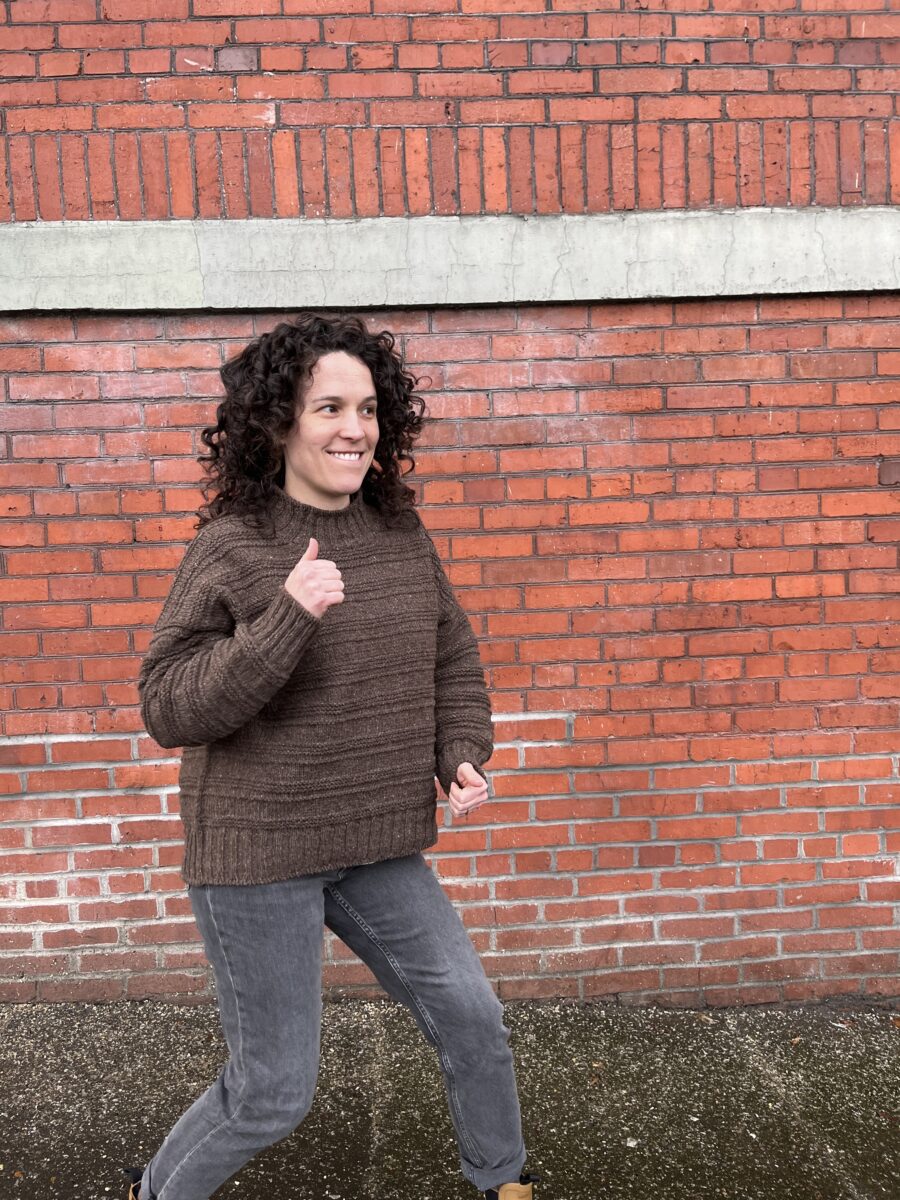
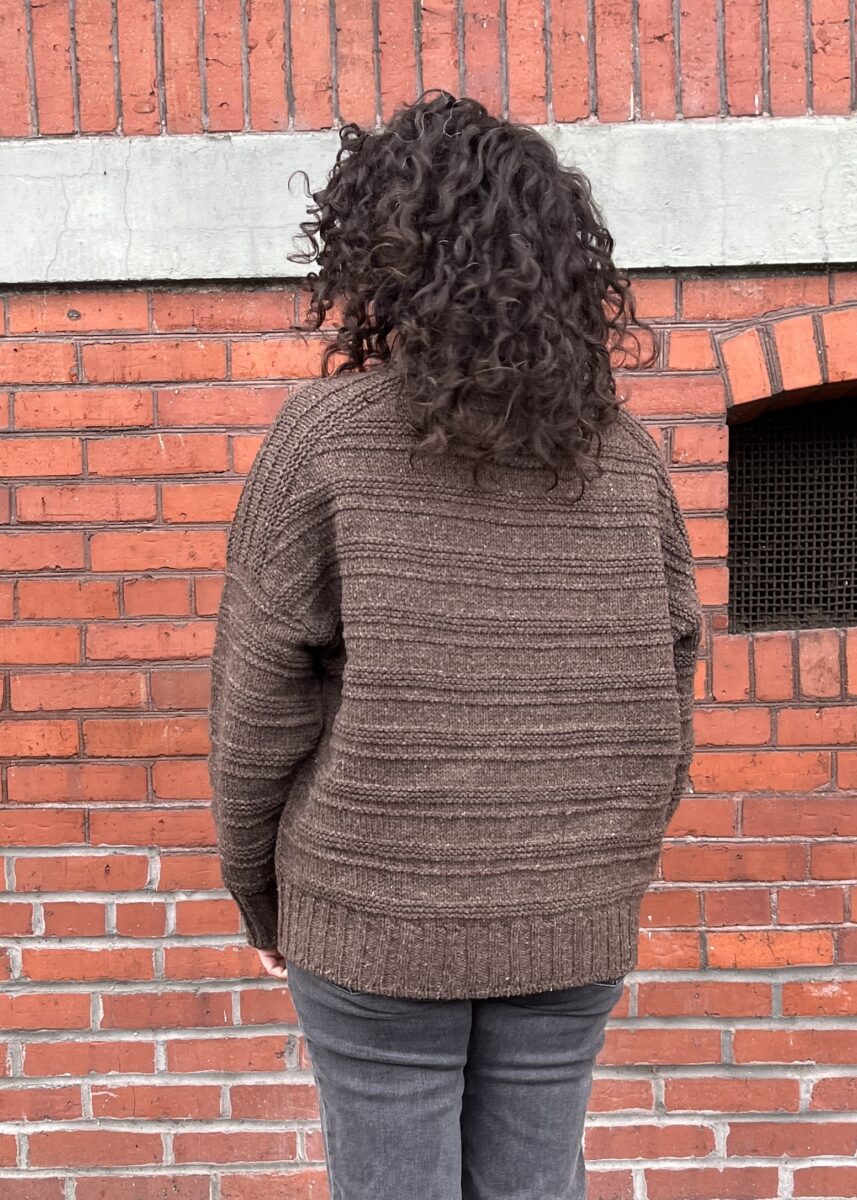
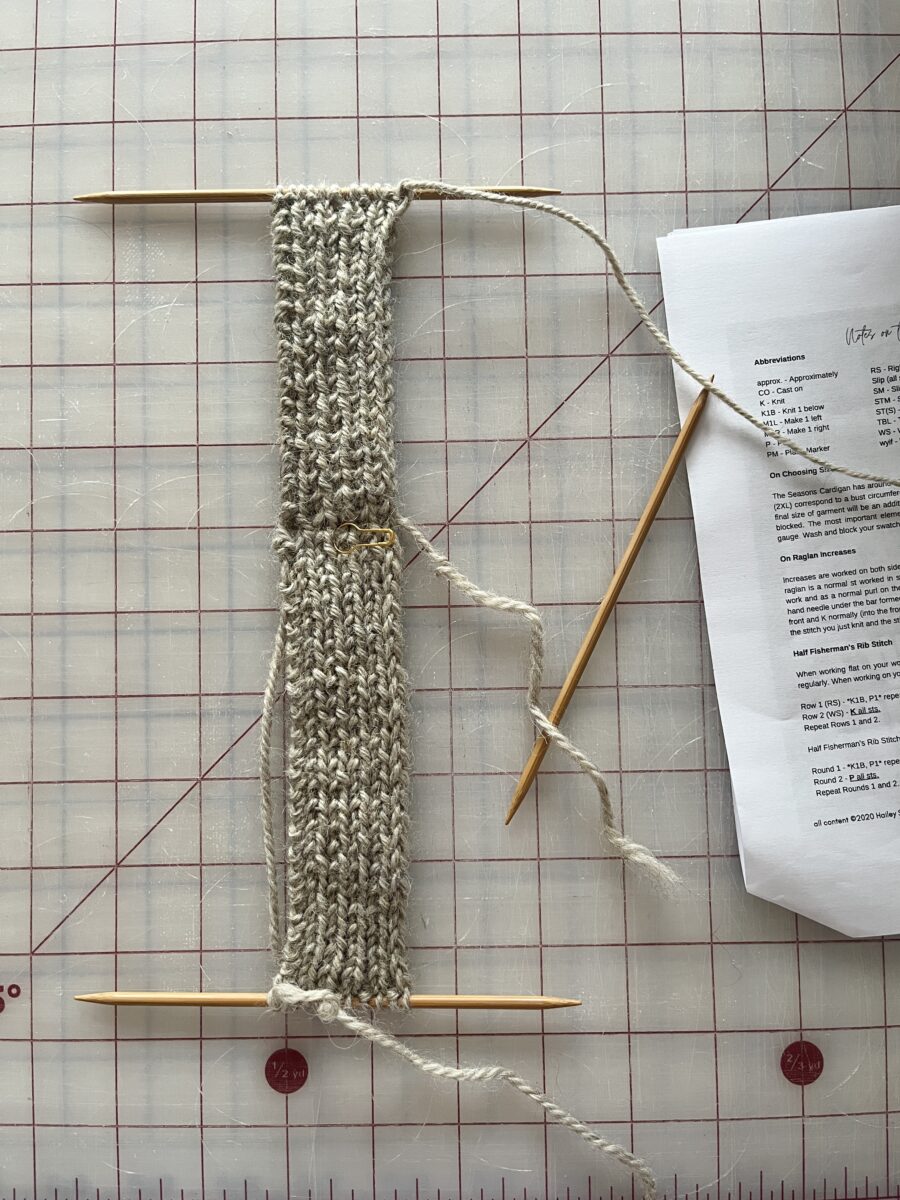
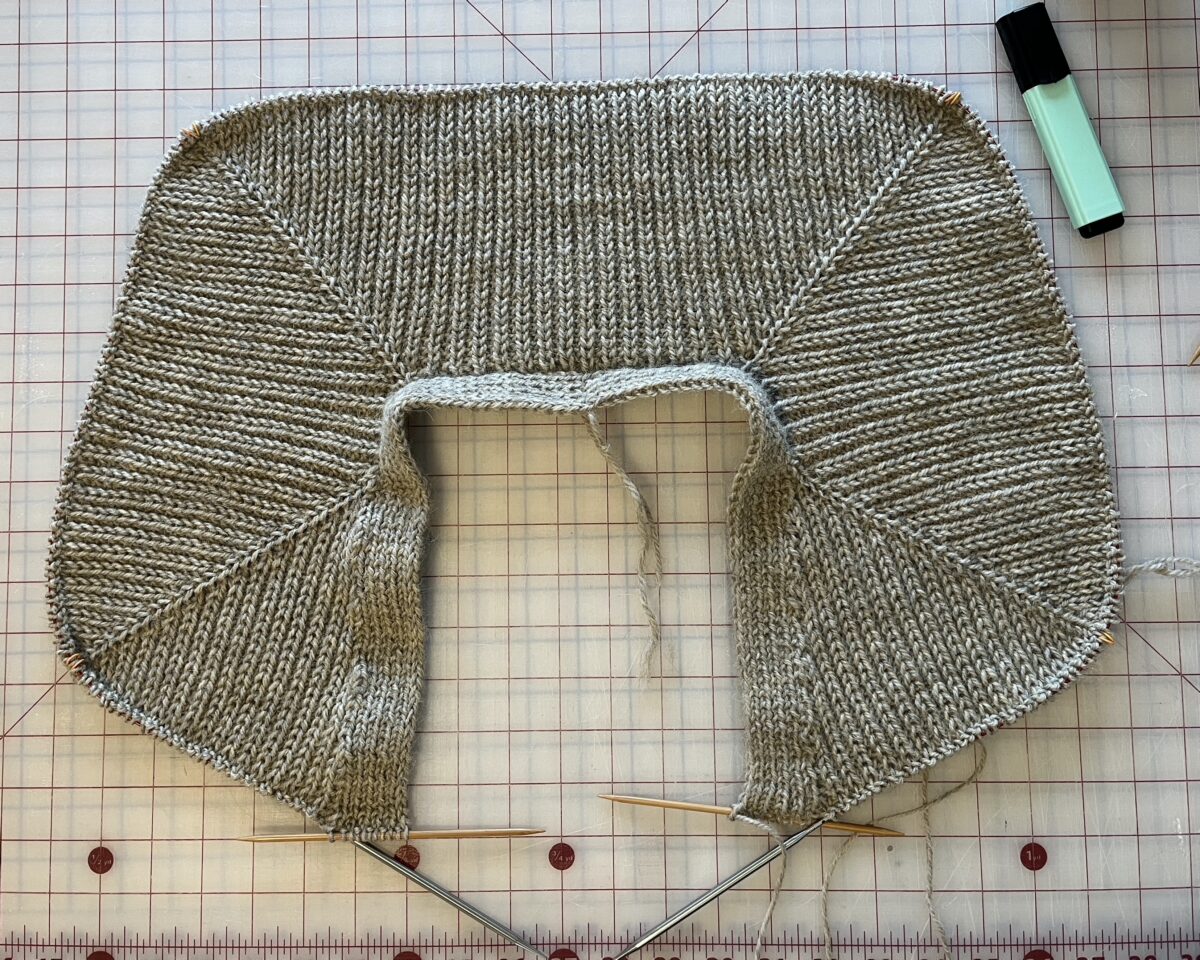
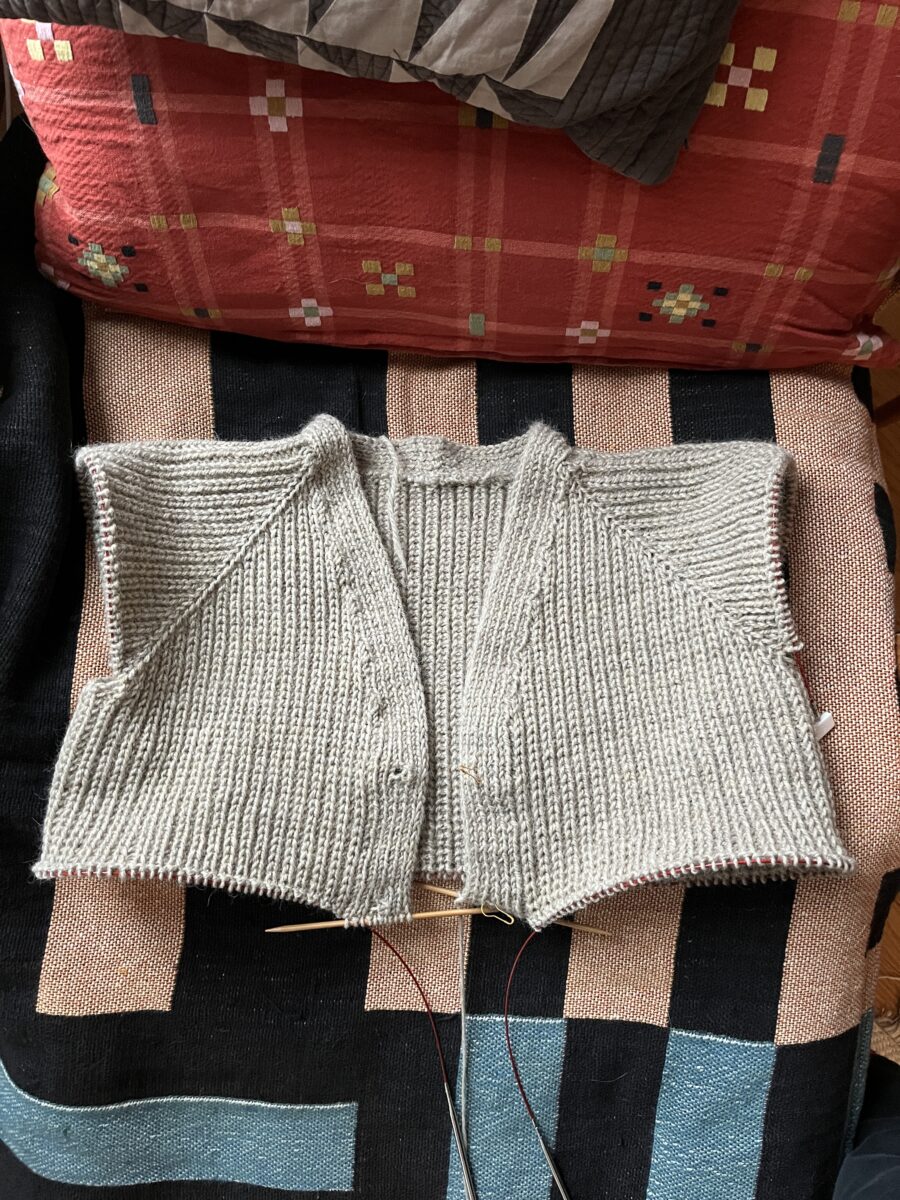
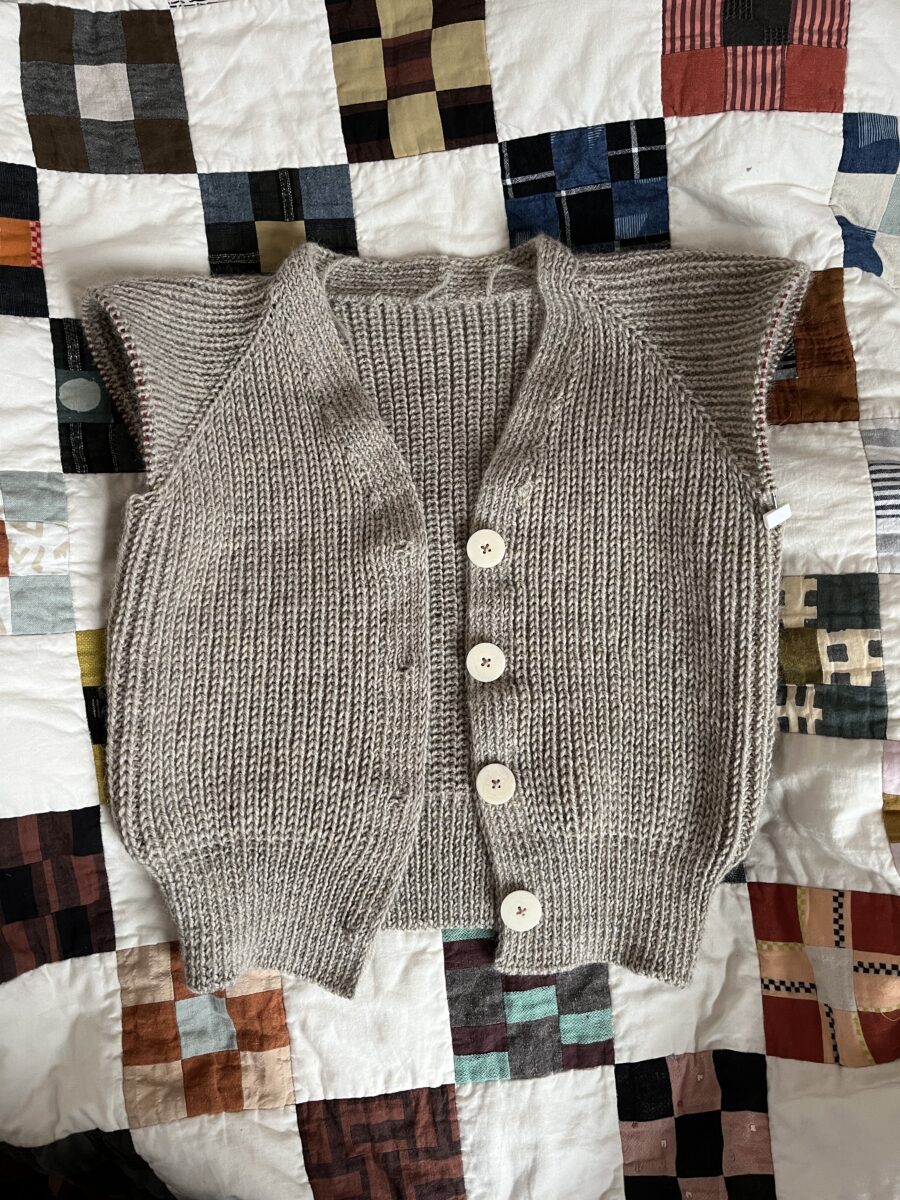
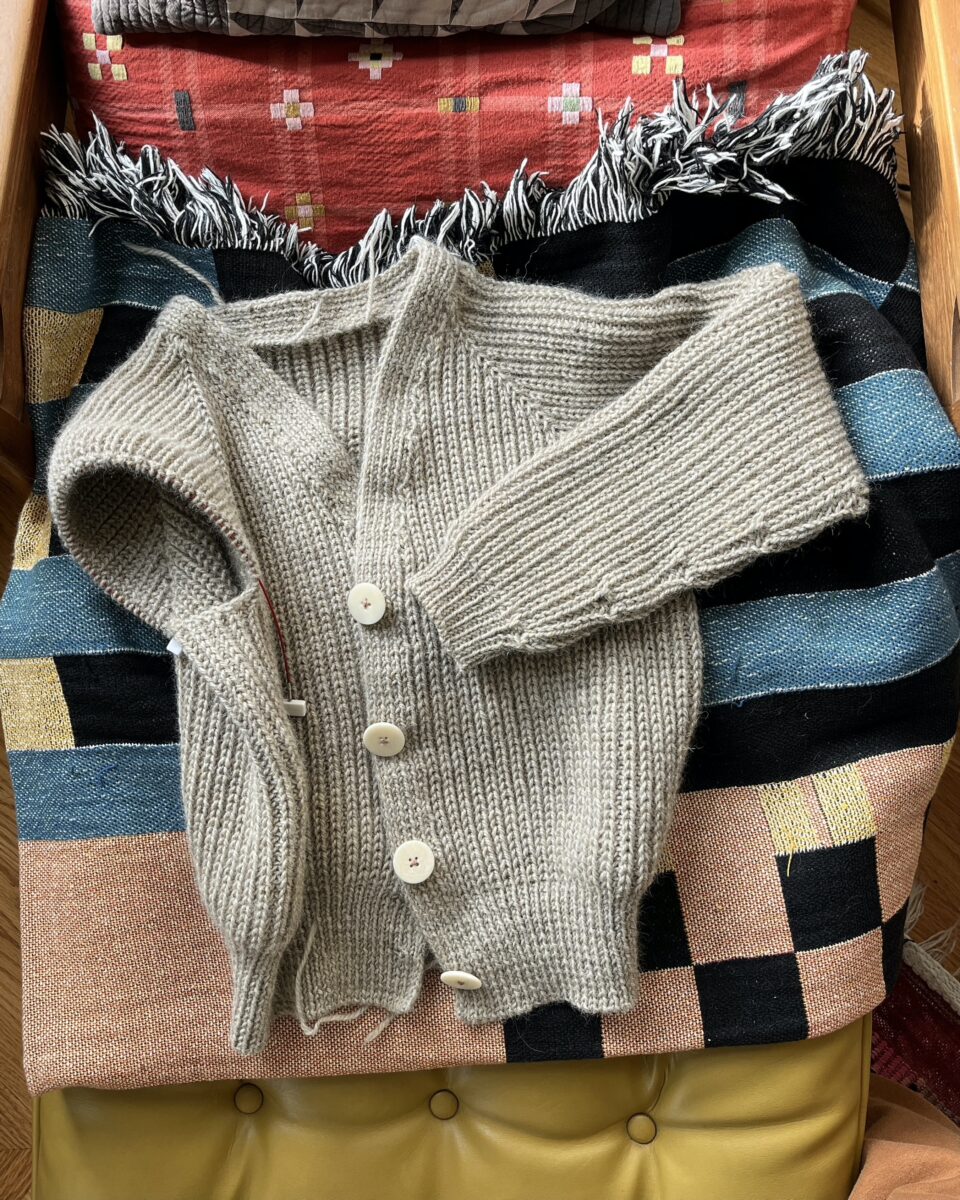
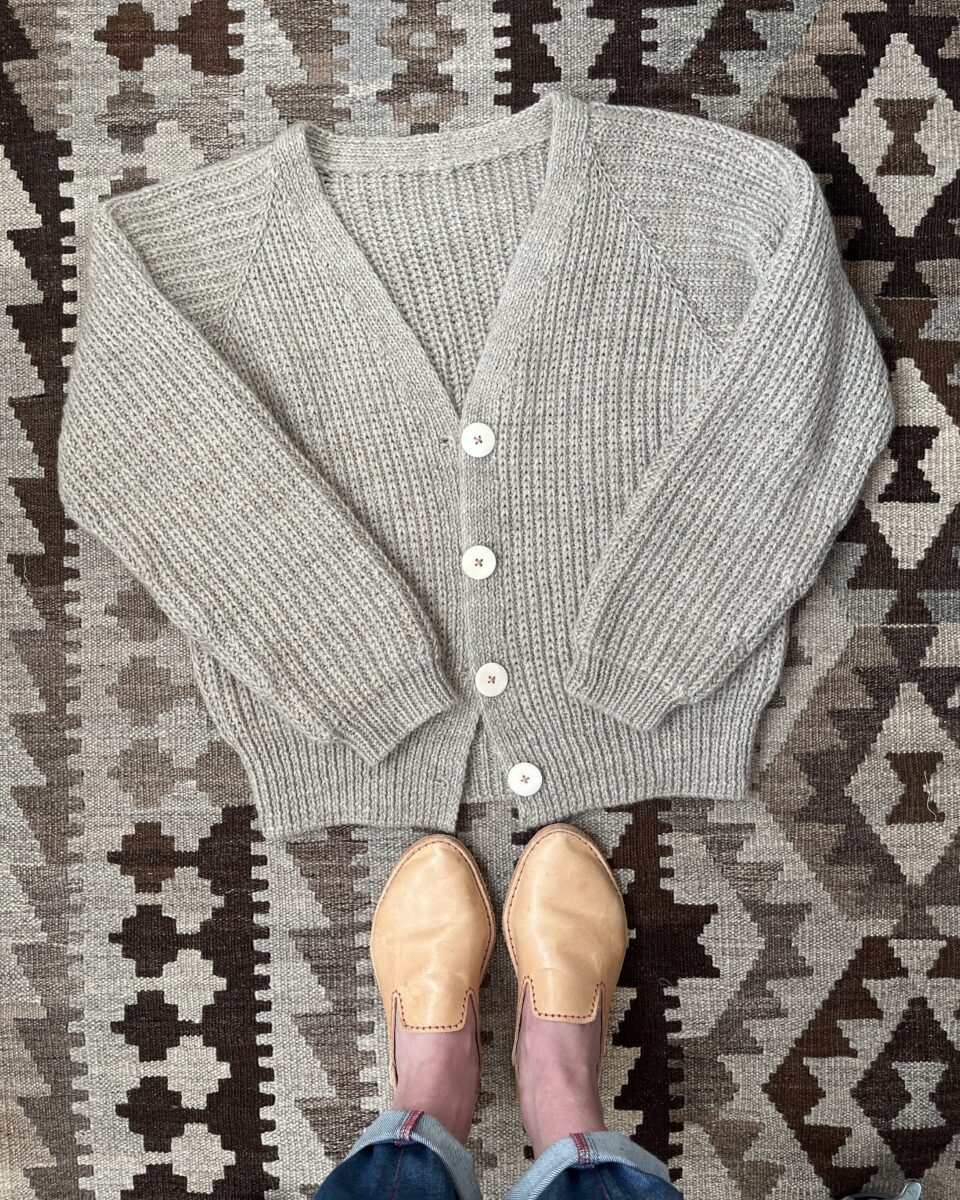
This project taught me an important lesson – one can’t just assume the steps and start knitting. I just didn’t read the instructions and had to redo the neckband multiple times. Once I finally realized it wasn’t just a simple K1, P1 repeat (by reading), it took off and was a pretty fun knit.
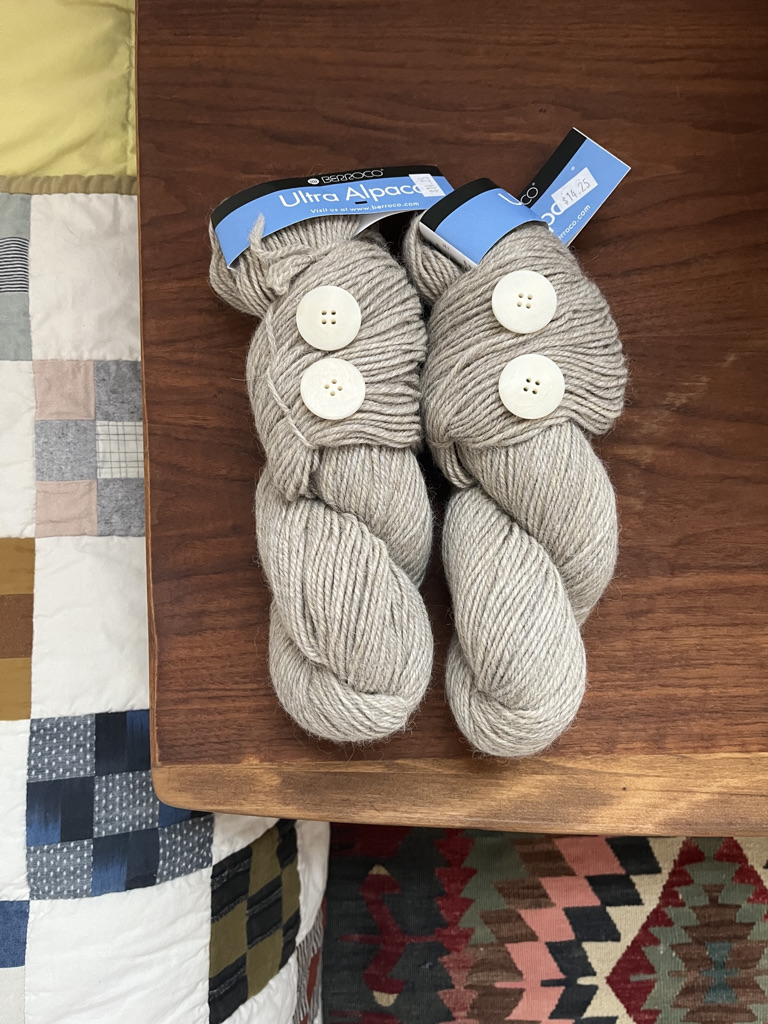
I bought the yarn and buttons over a year ago, but didn’t feel ready for the pattern until completing the pullover version. Now that I’ve knit both, I think the cardigan is actually easier – the short rows in the pullover kinda broke my brain.
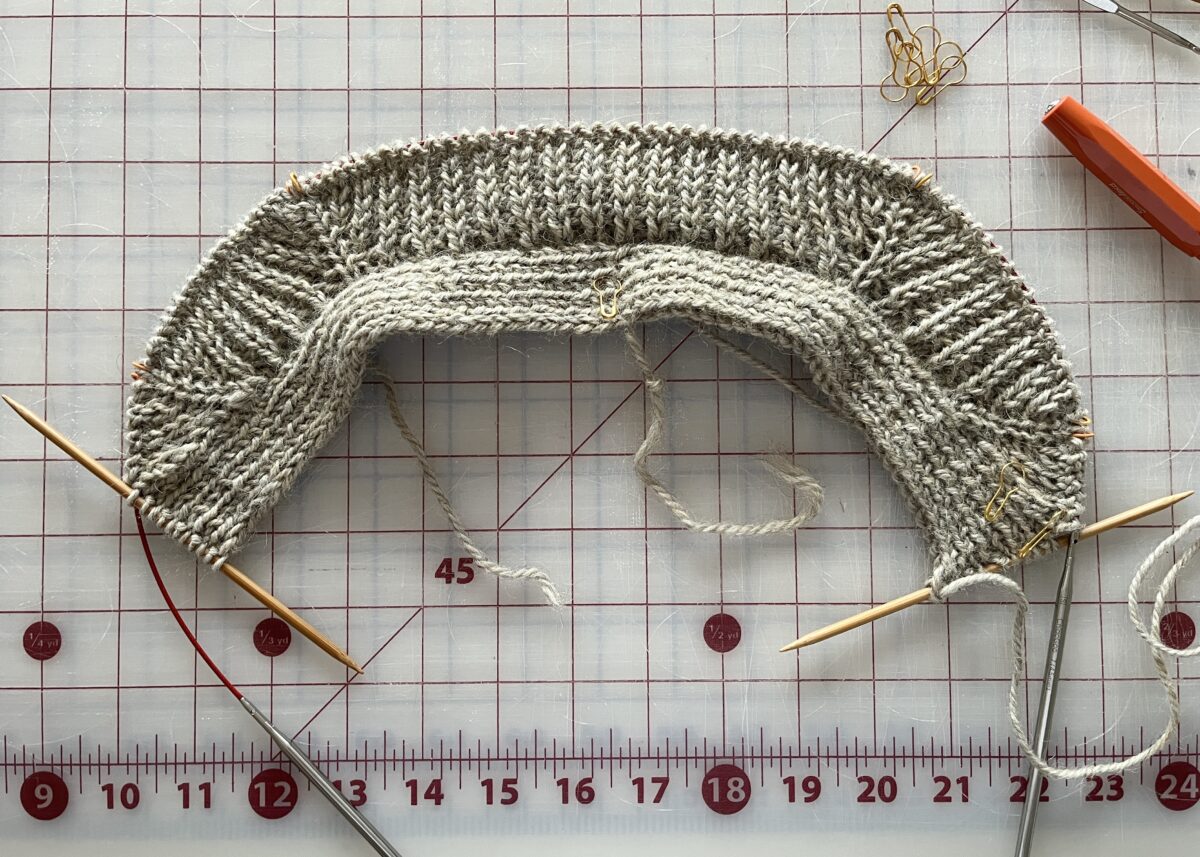
The coolest part of this pattern is that the neckband is knit with the body. I used Berroco Ultra Alpaca in Barley and made a size M.
I shortened the sleeve cuffs by half. The sleeves are a little longer than I’d like after blocking but not enough to redo.
This sweater is a classic and it’s going to get a lot of wear. I’m considering making the oversized version at some point but definitely need a break from half fisherman’s rib for a bit.
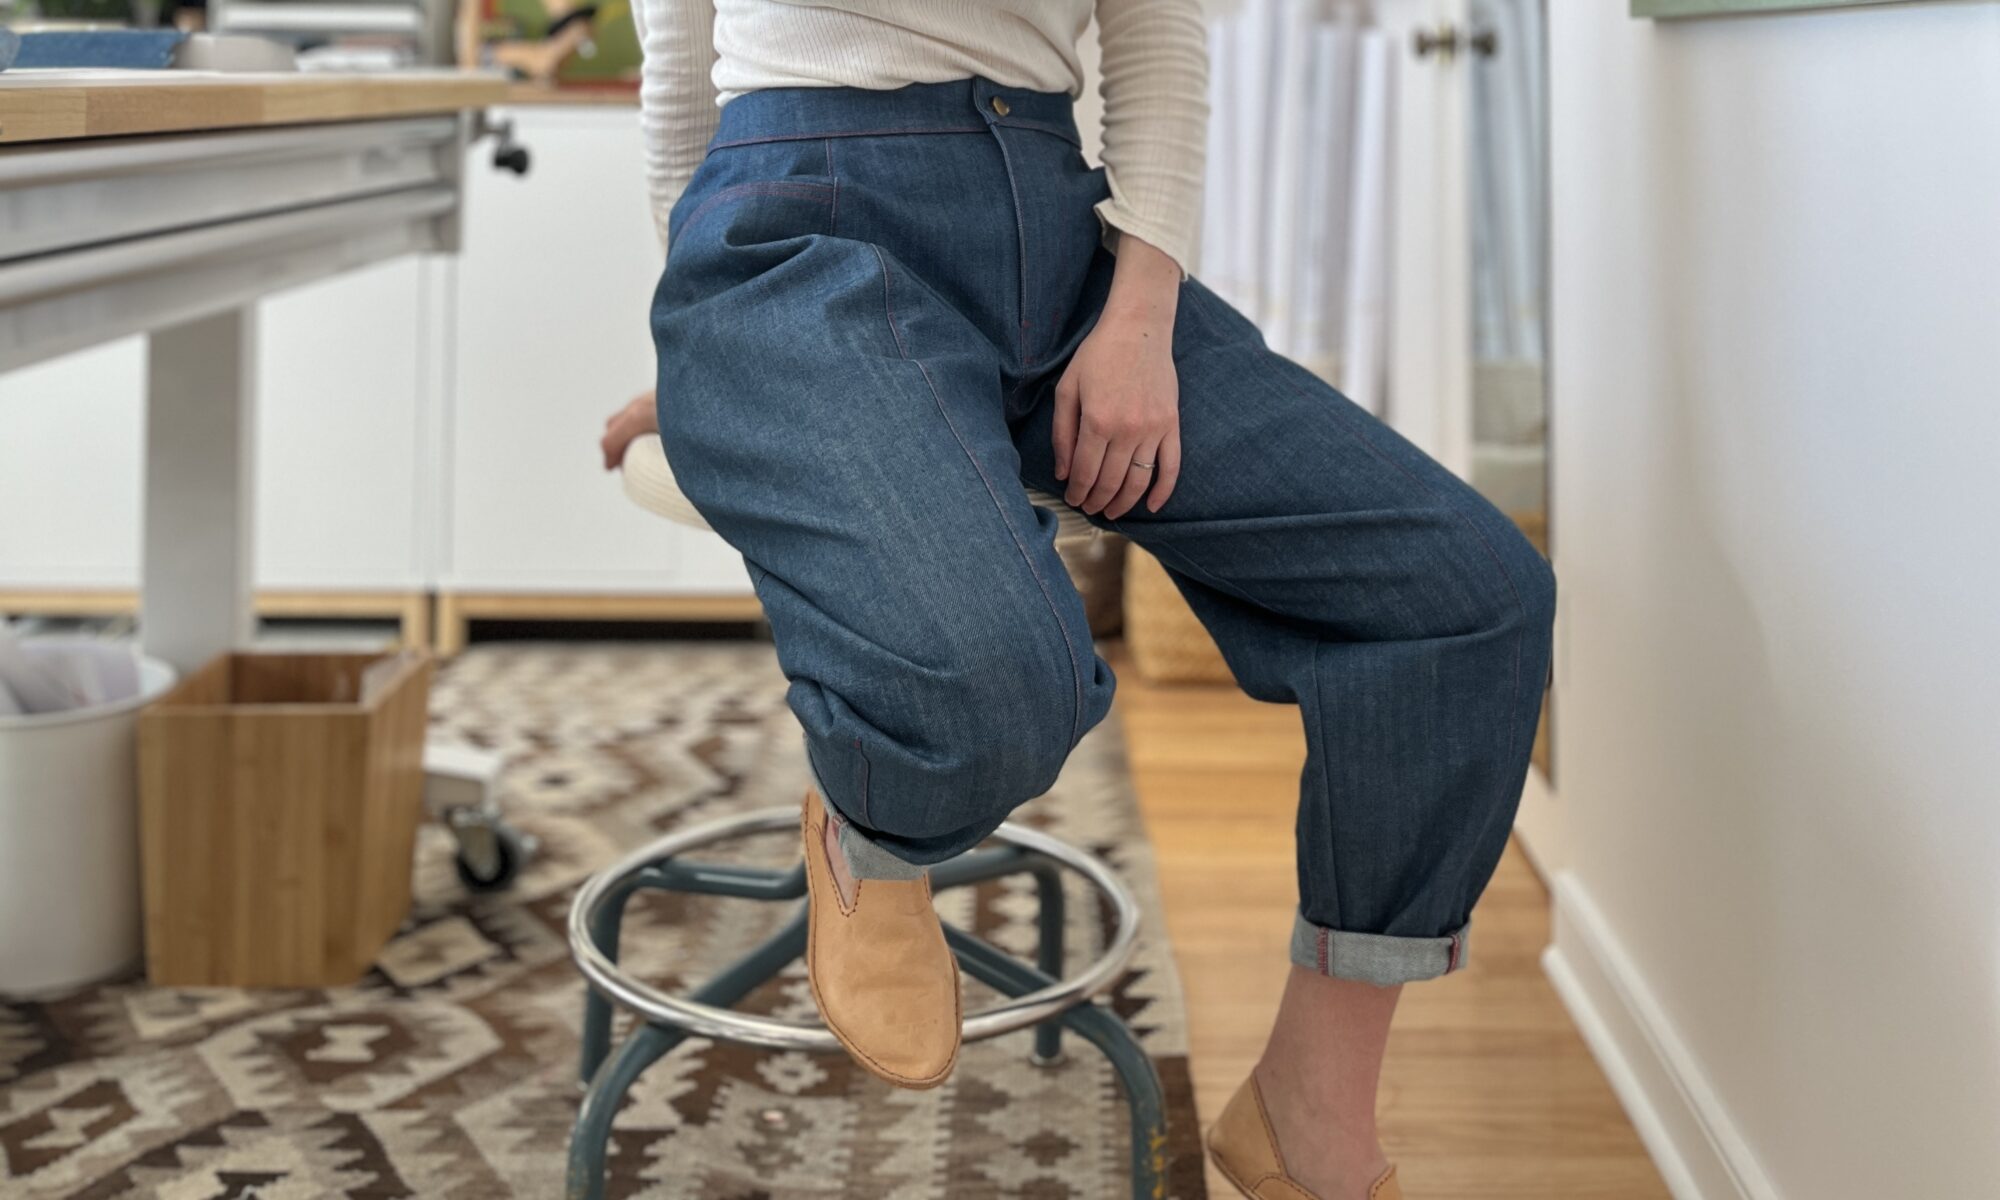
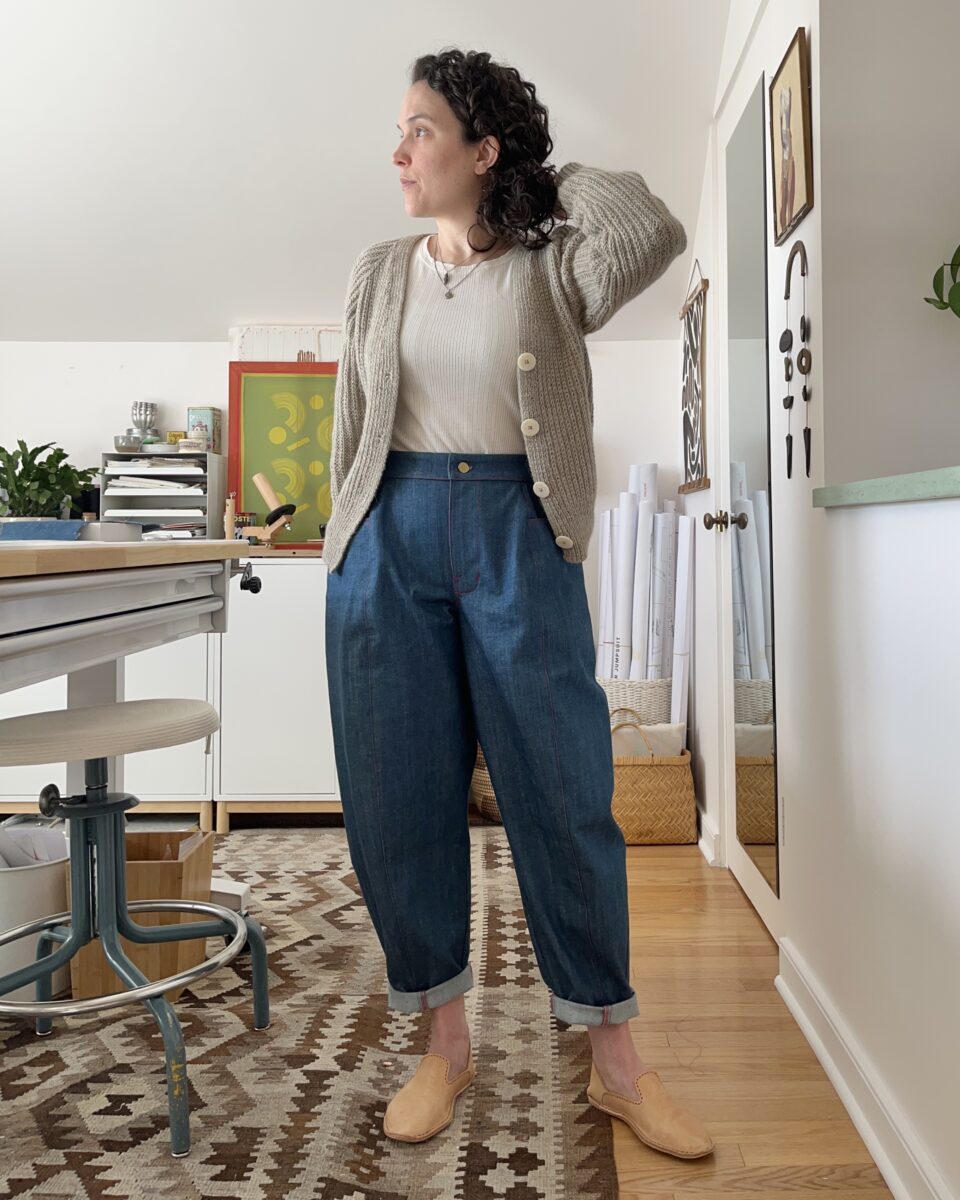
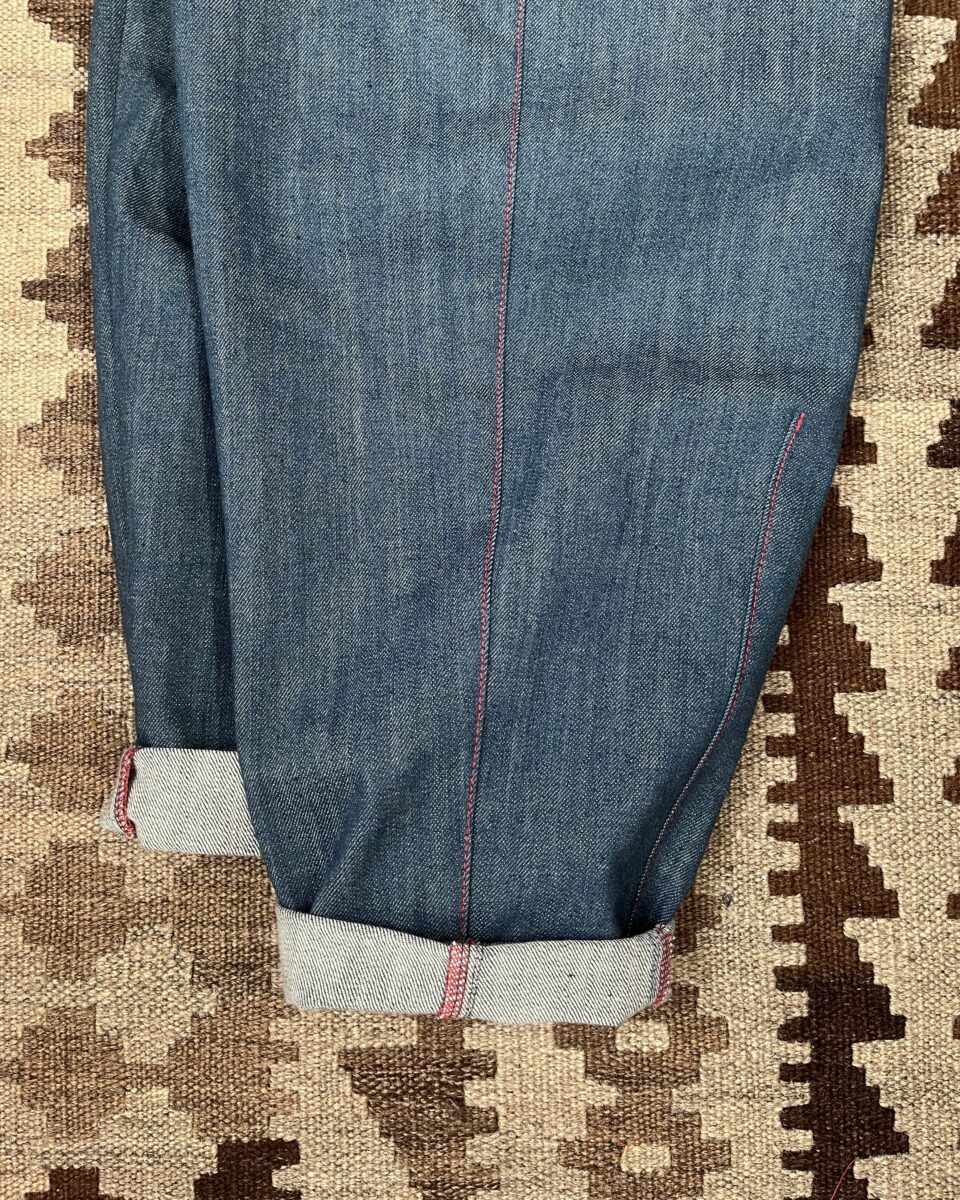
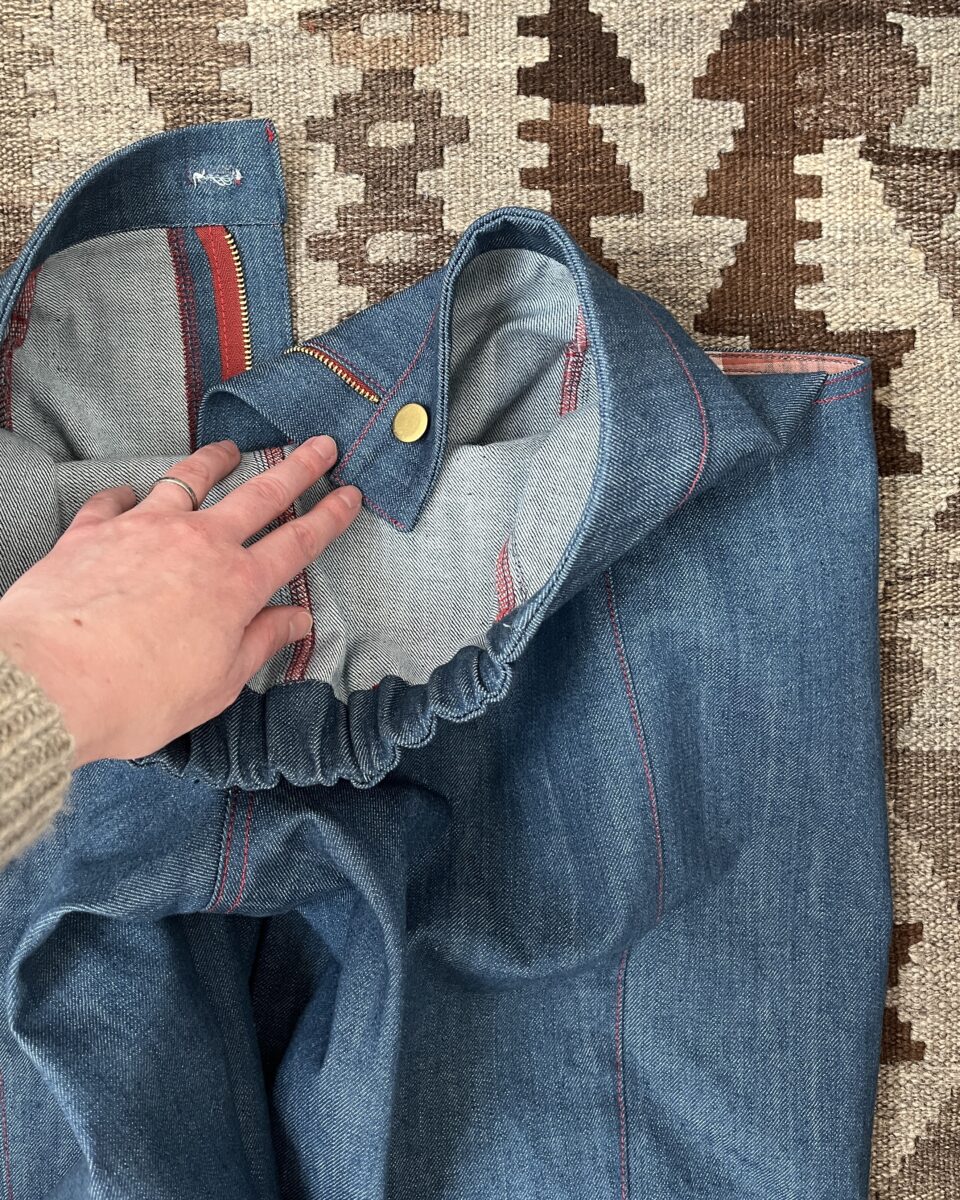
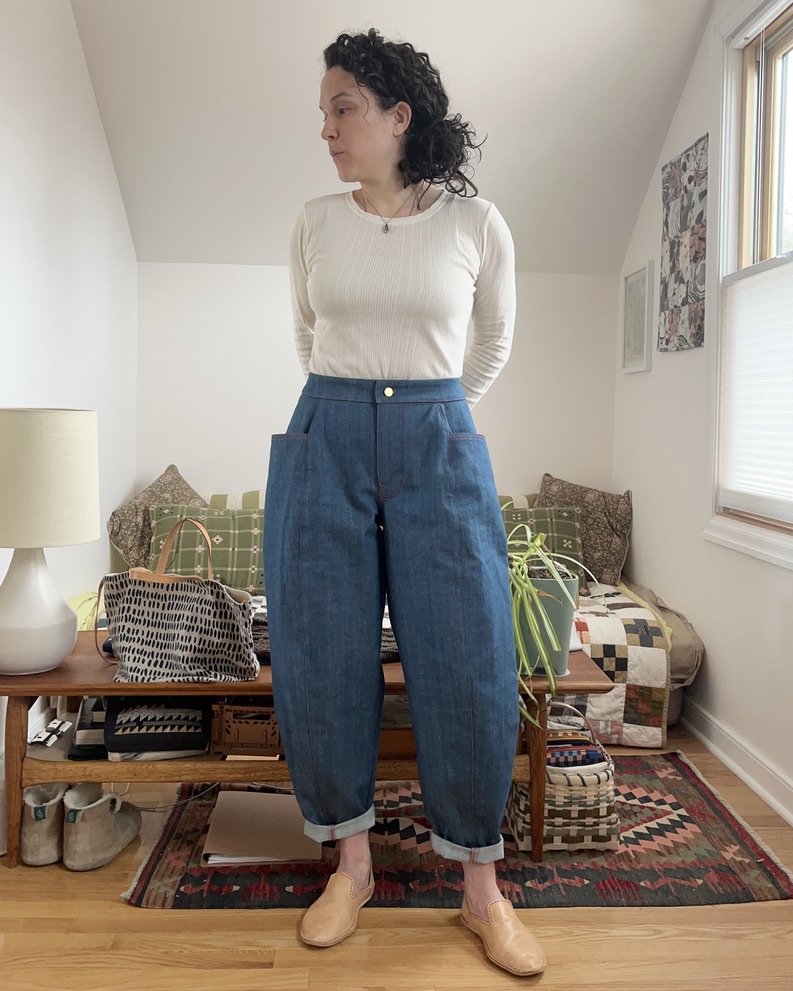
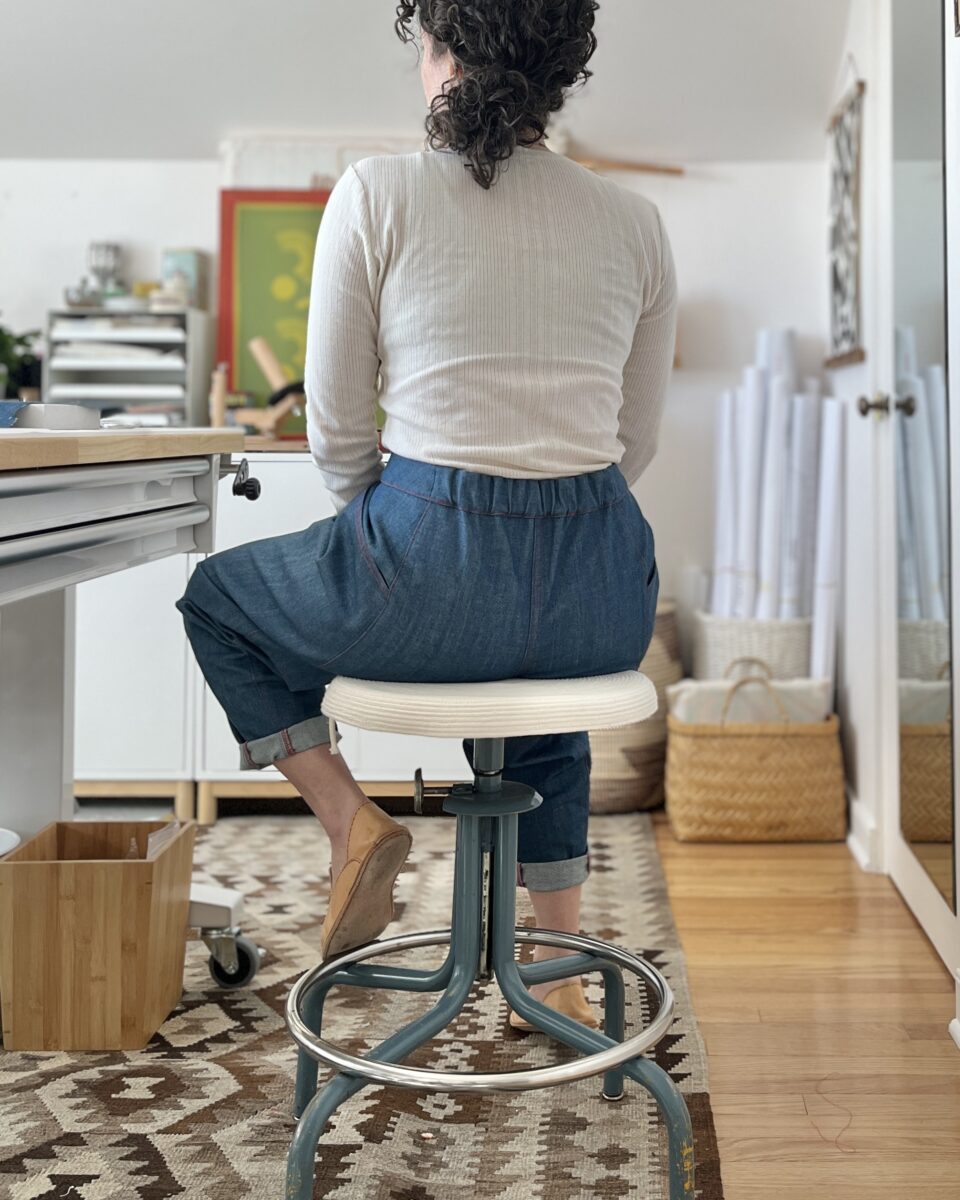
Iggy Pants | Seamwork
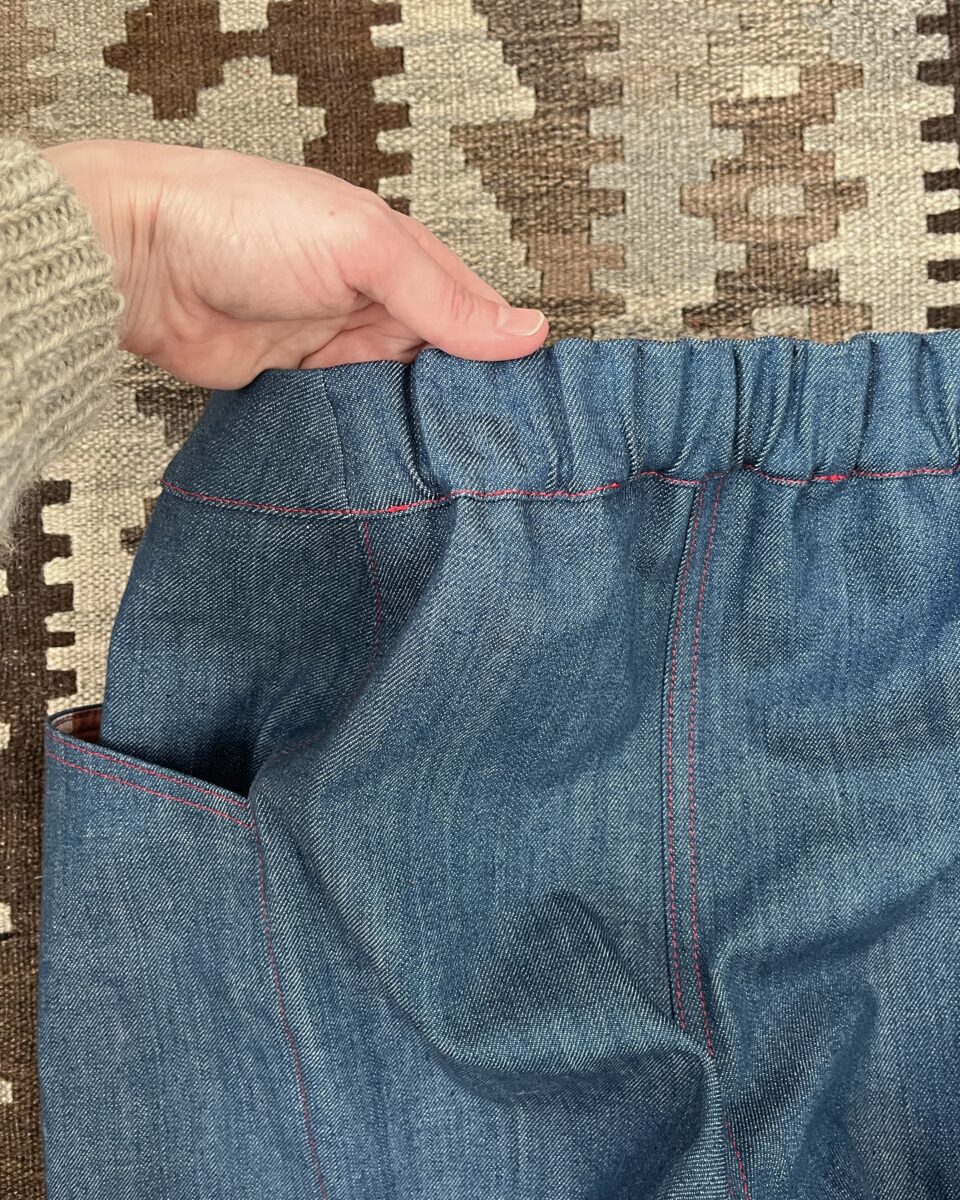
My stomach hates tight waistbands so I fricking LOVE pants with elastic backs. Also love a weird leg shape!
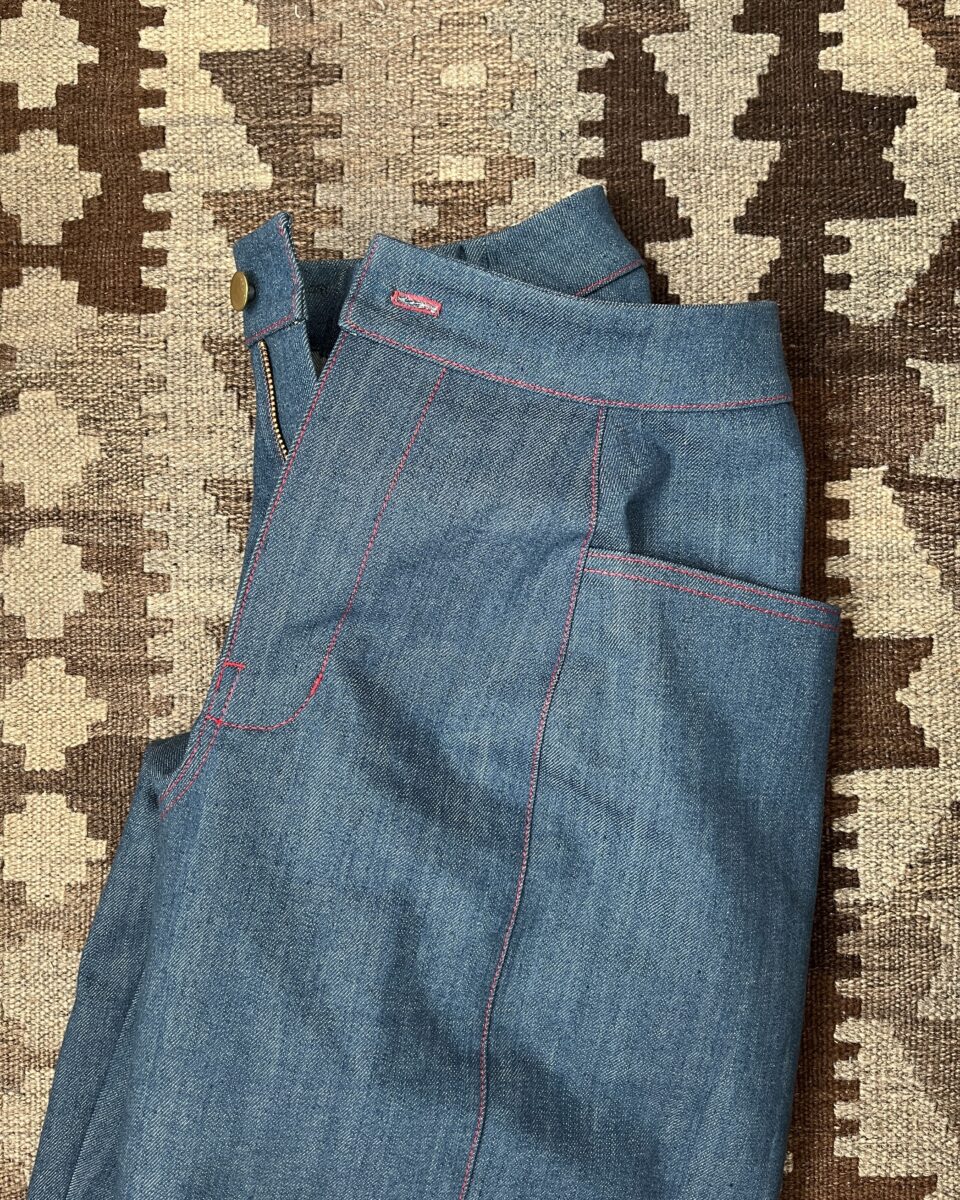
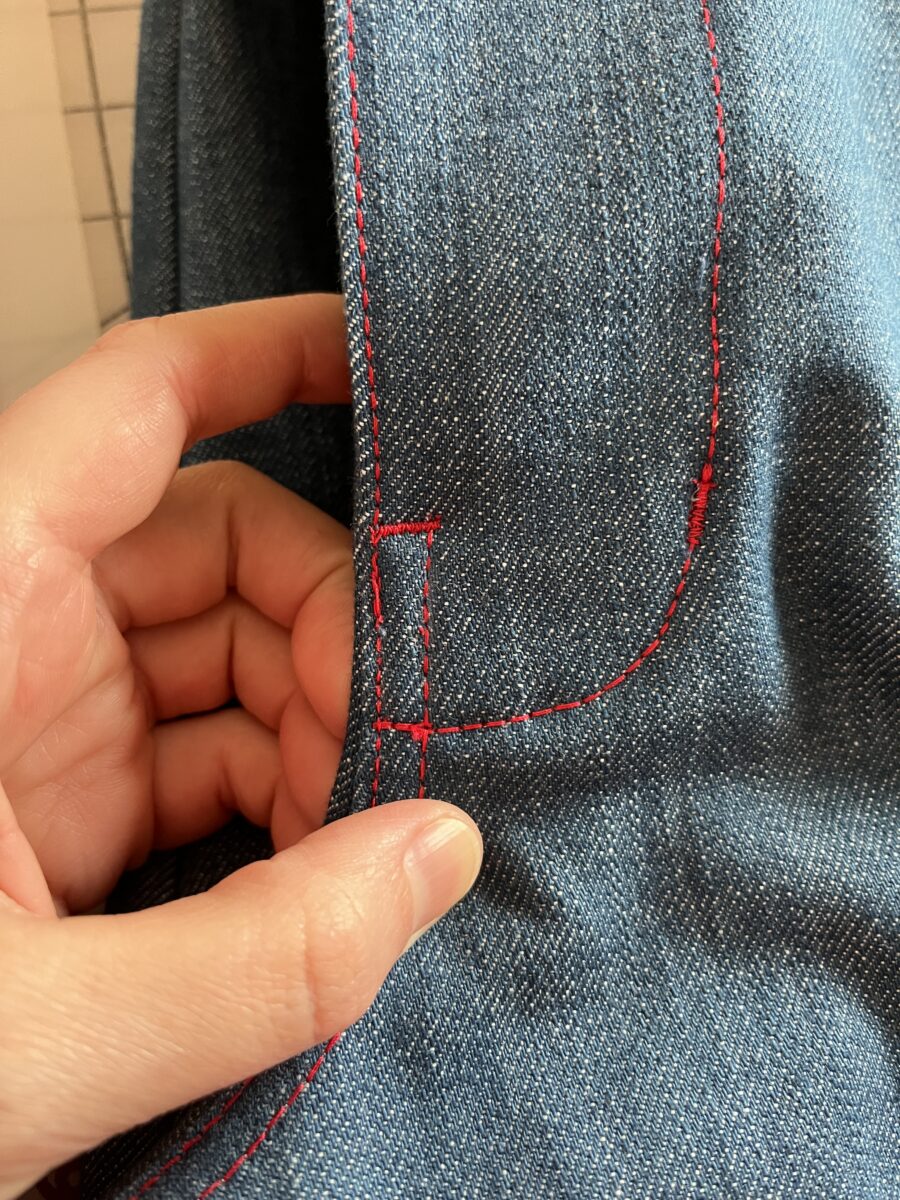
A pair of pants from Big Bud Press got the idea of red topstitching stuck in my head and this pattern seemed perfect for a pop of red. Plus, I already had a red zipper in my stash.
I first made a size 8 but then realized I hadn’t taken my measurements in a while. The 8 fit but didn’t have the waistband comfort I wanted, so this denim pair is a size 10. I did need to pull the elastic a little tighter to get the fit just right.
A few ways I deviated from the instructions:
Serged off the dart uptake to make the hem less bulky.
Pressed the seams to one side and topstitched.
Added more topstitching overall (pockets, fly, rise, darts).
Attached waistband to inside of pants first, then topstitched the fold and added elastic from the outside.
Used one tack button instead of two regular buttons.