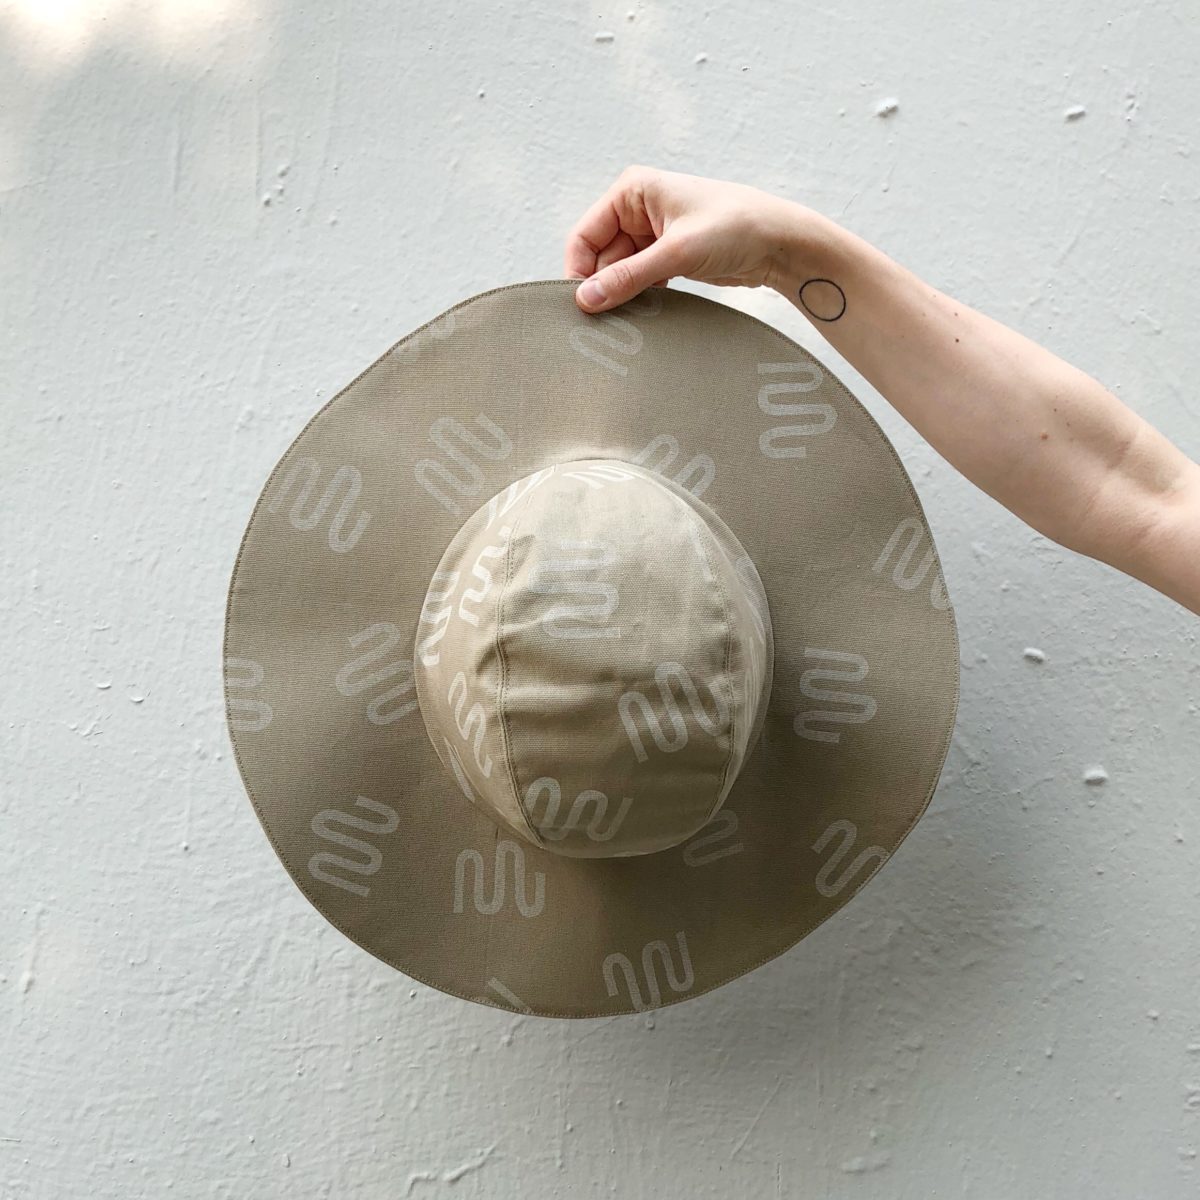
Big hair and a big head (23.5″) has made finding good sun protection challenging. One of the cool things about sewing is that when you can’t purchase something that fits in the stores, you can make it yourself.
I block printed khaki canvas from Joann Fabrics and used this free pattern. My hat is a size large with a 4″ brim. It was a super fast and easy make!
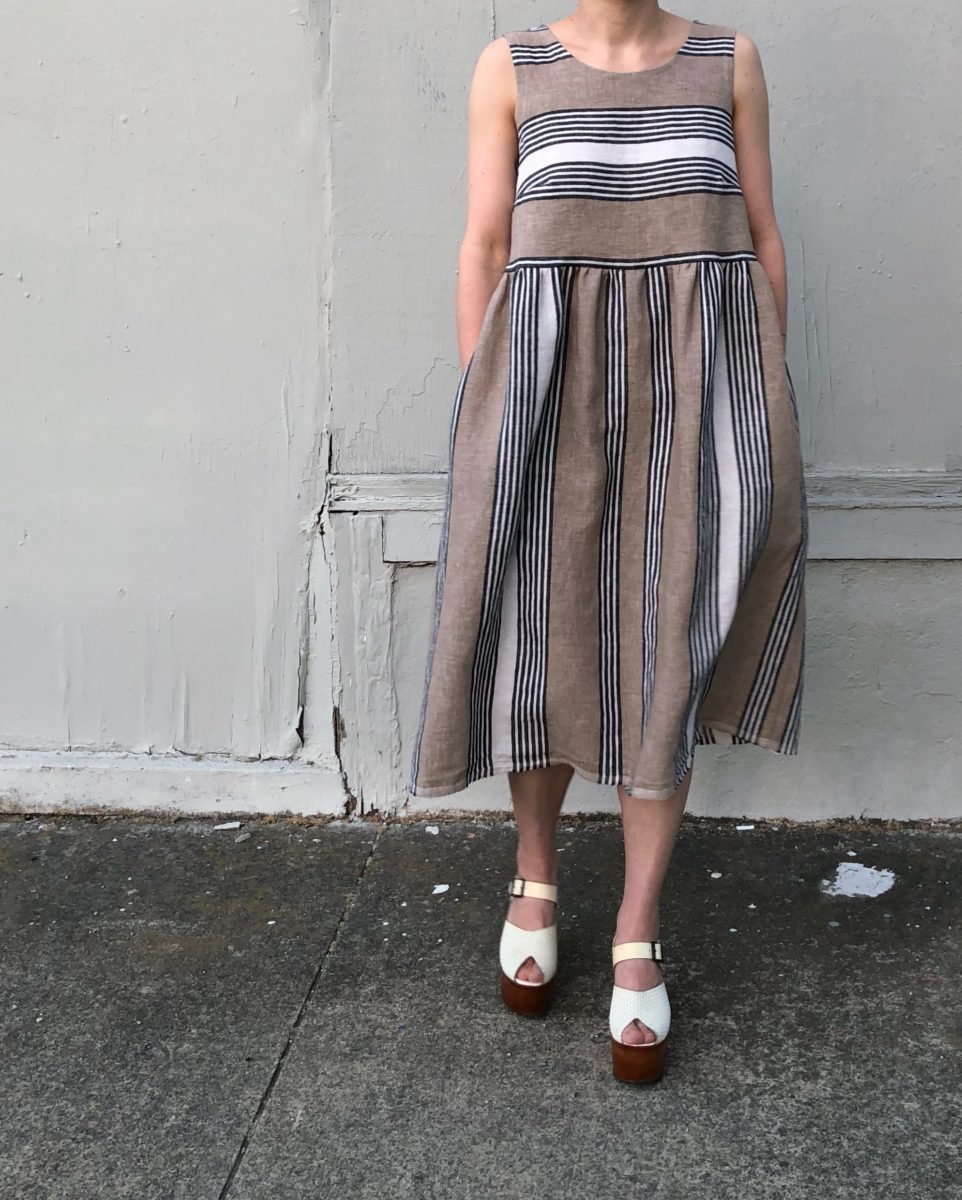
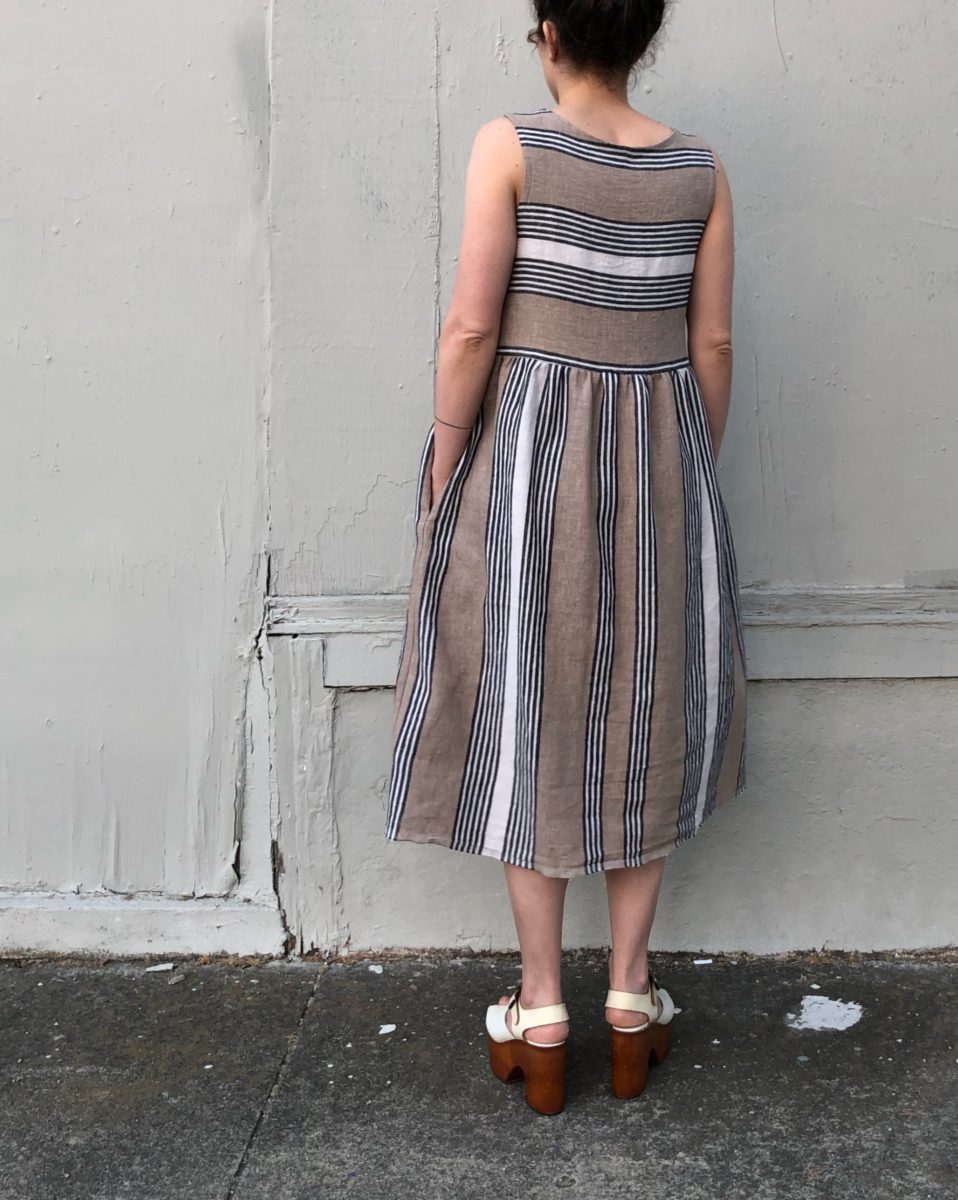
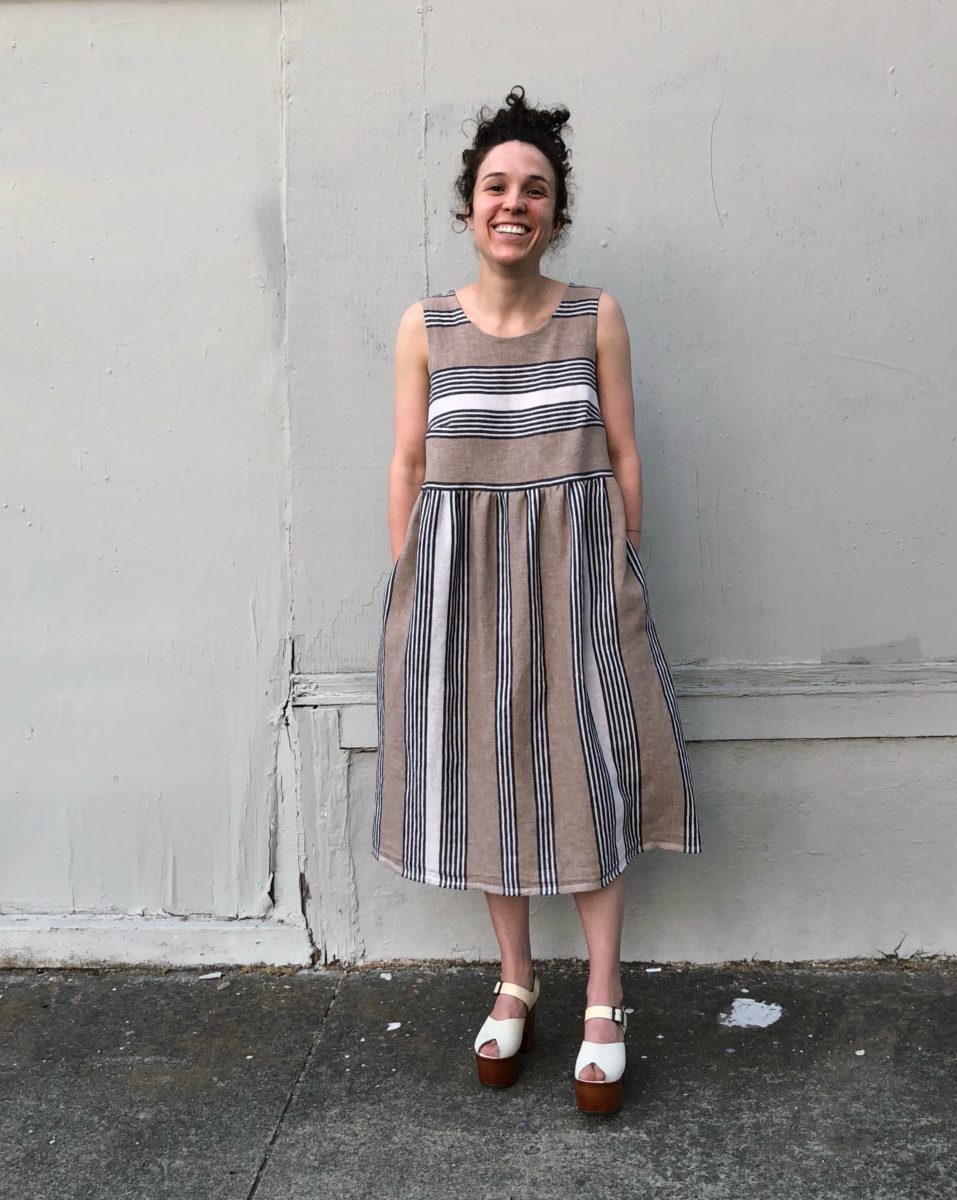
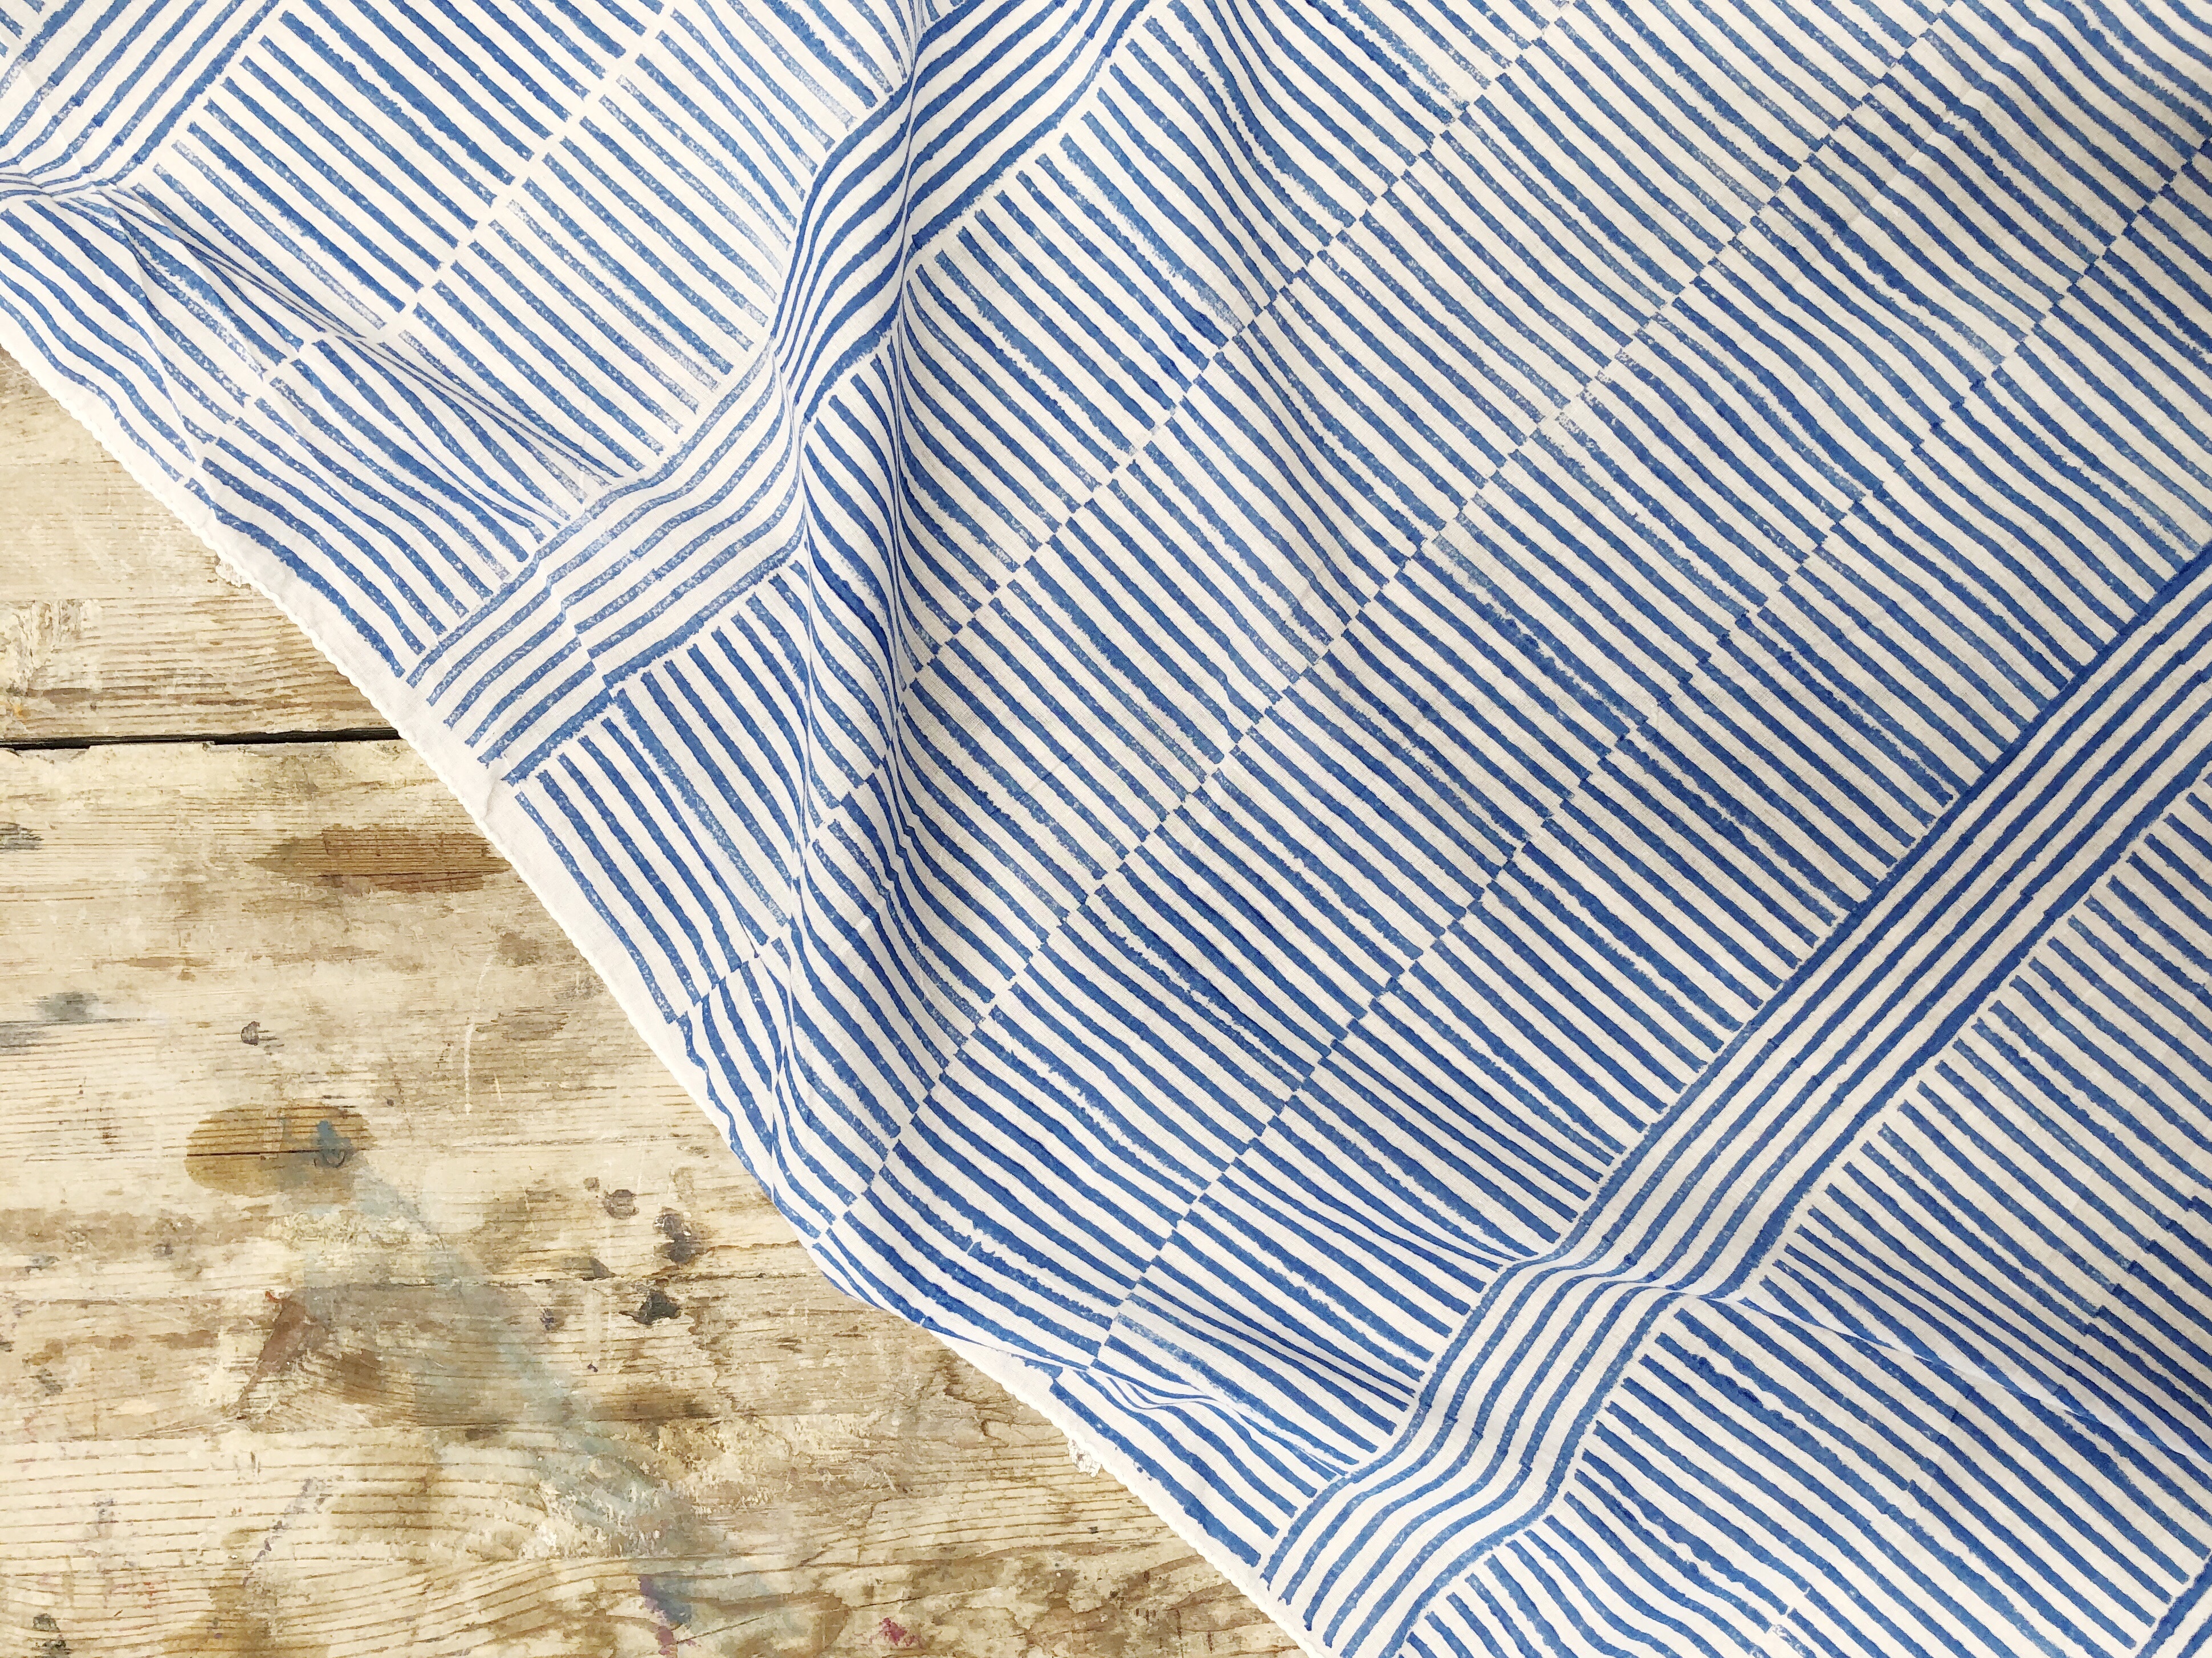
Sometimes you see fabric online and you wait. Wait just a little too long and then it’s sold out. That’s what happened with this squishy linen I saw a while back on Fabric.com. Then a fellow maker posted a photo of her stash and there it was! I commented, she said she’d be up for a trade, it happened. I was happy.
I knew I wanted to make something summery and eventually came around to the idea of mashing up the Willow Tank with a gathered skirt. Even though Me Made May revealed I don’t want any more dresses, I didn’t want to waste any of this fabric by just making a top.
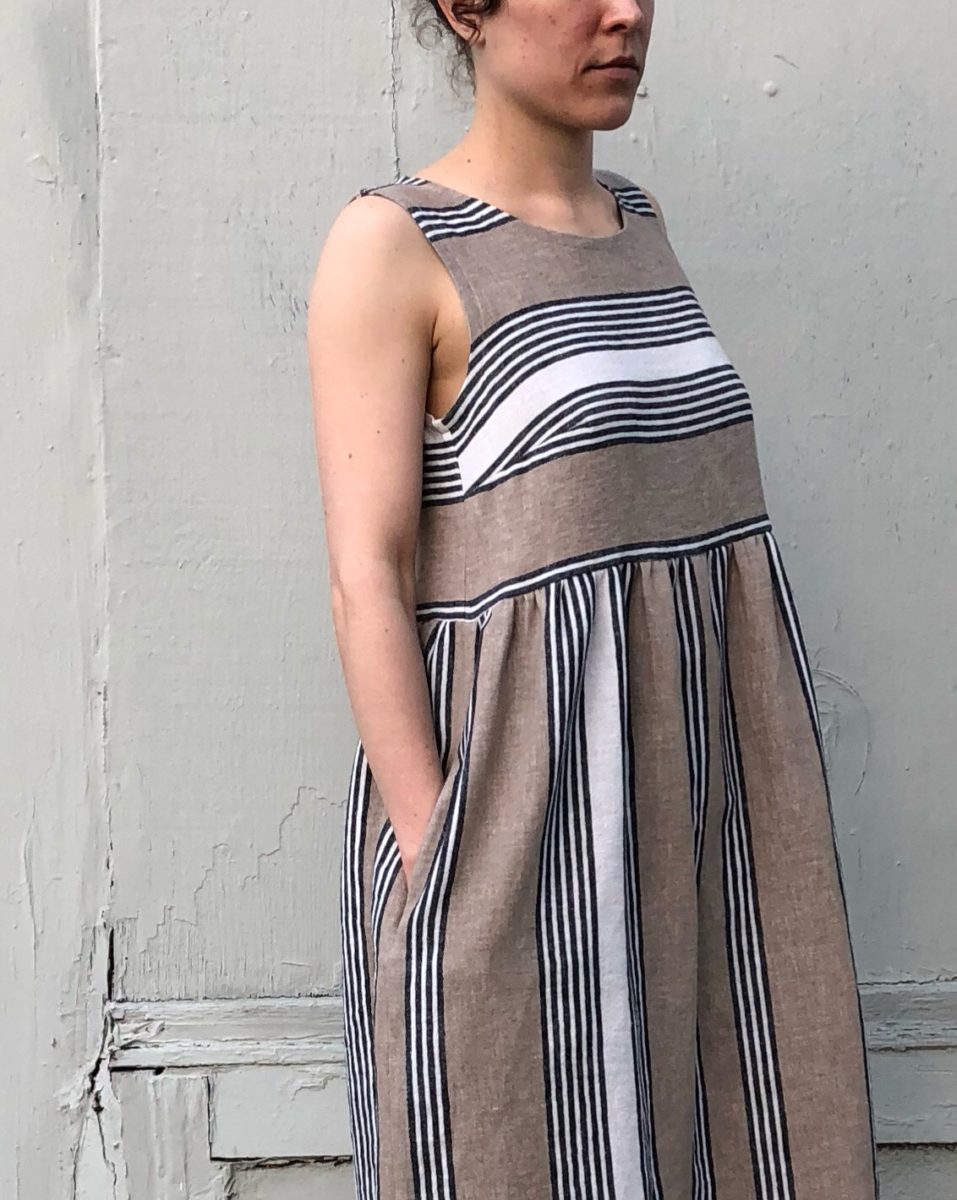
This stripe deserved to be played with so I cut the bodice horizontally and the skirt vertically. When I first planned this in my sketchbook I toyed with the idea of a button placket on the bodice. I’m glad I left it off as it would have detracted from the fun and totally unplanned thing that happened with the bust darts. The fabric is also so squishy a placket would have been a nightmare.
I had two yards to work with and just barely squeaked out the bias binding, two skirt pieces, front and back bodice pieces, and 4 large pocket pieces. I’m quite pleased that the front and back of the skirt are perfectly symmetrical and that the stripes on the side of the tank match up. I’m usually so bad at pattern matching so this win feels great!
I cut a straight size 6 in the Willow. I previously made a size 4 and found that after a day of wear my armpits hurt. I could have just scooped out the shape and recut the bias but it was late and I was determined to have it all cut out. I think the size 6 might actually fit me better than the 4…
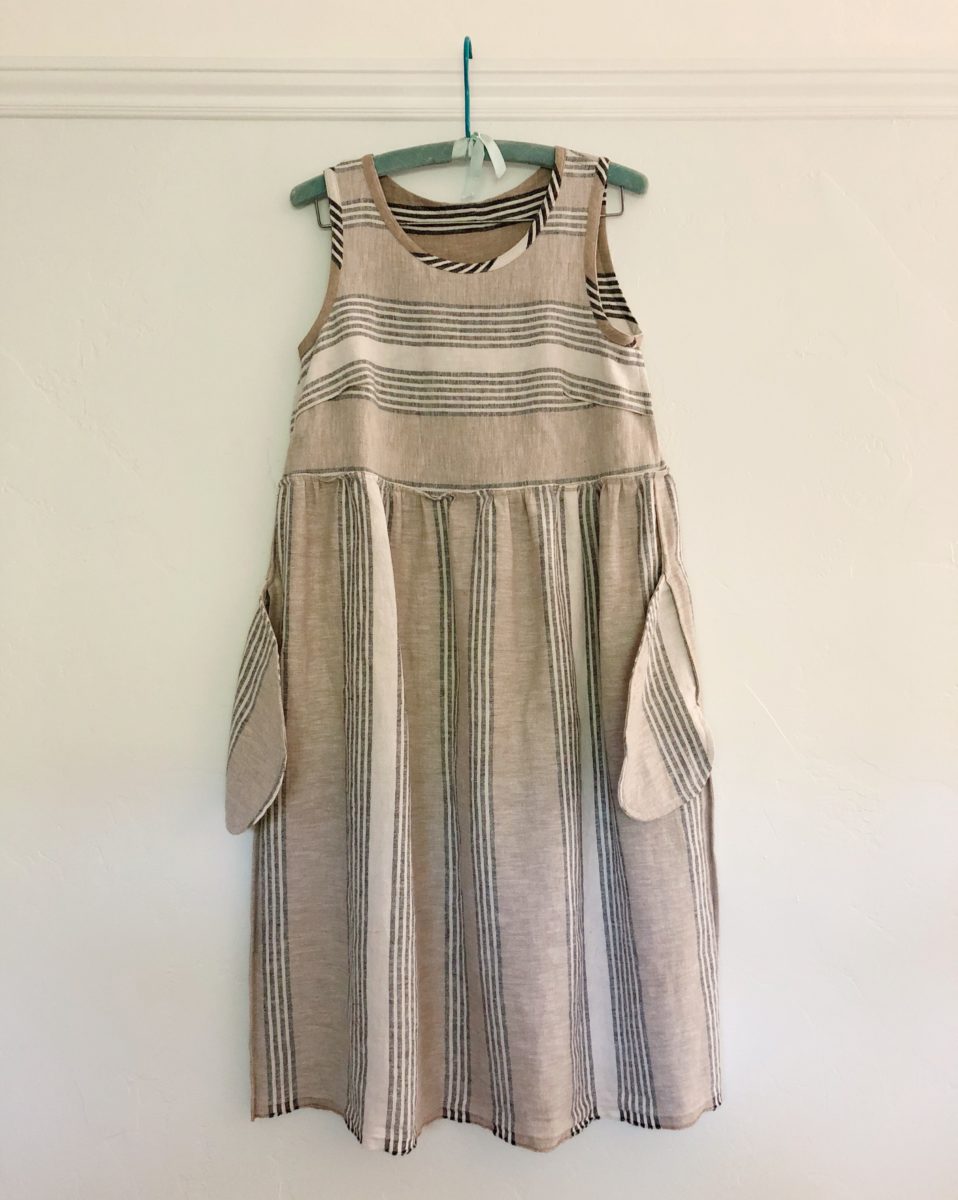
I wanted the bodice of the dress to be fairly short so I used the lengthen/shorten line as the bottom edge. To that I added 1/2″ of seam allowance and squared the corners to make it attach to the skirt a little easier.
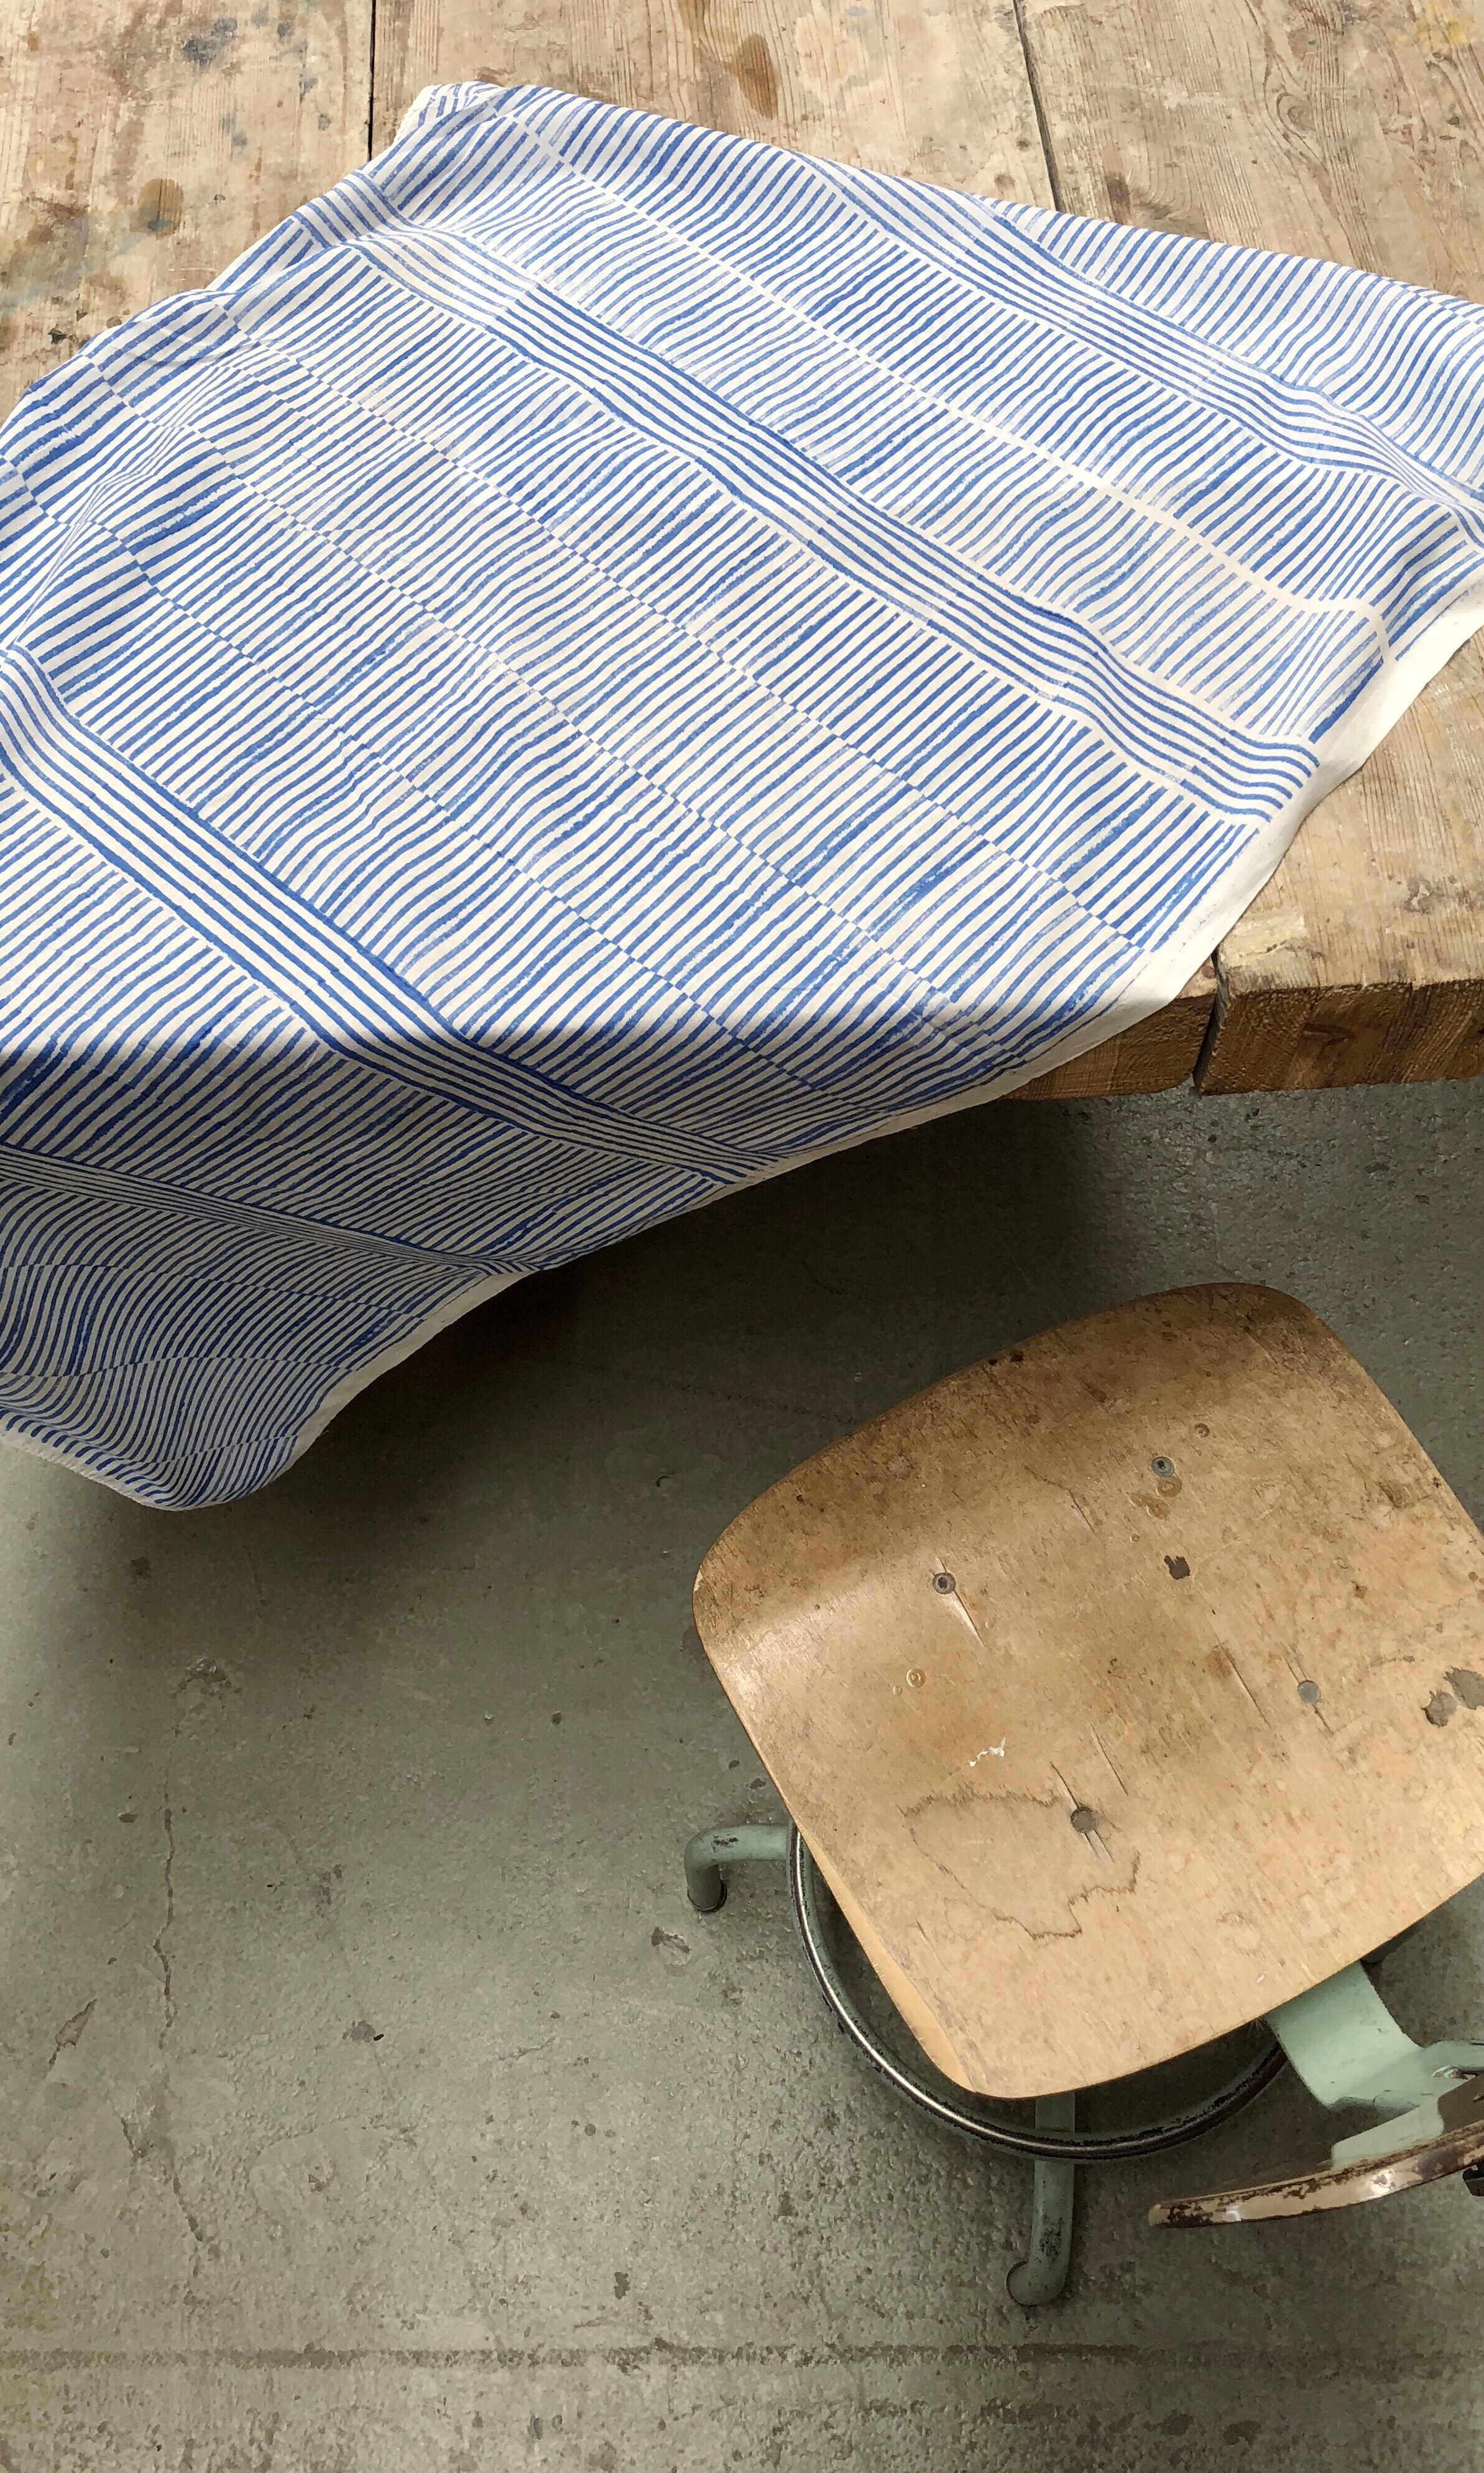
Determining the skirt shape involved just a little math but was mostly controlled by the amount of fabric I had left after cutting out the top. The skirt ended up being about 20-ish” wider than the bottom edge of the tank and after measuring, I ended up using the stripes as my cut line. The skirt length ended up being half of the fabric width (30″).
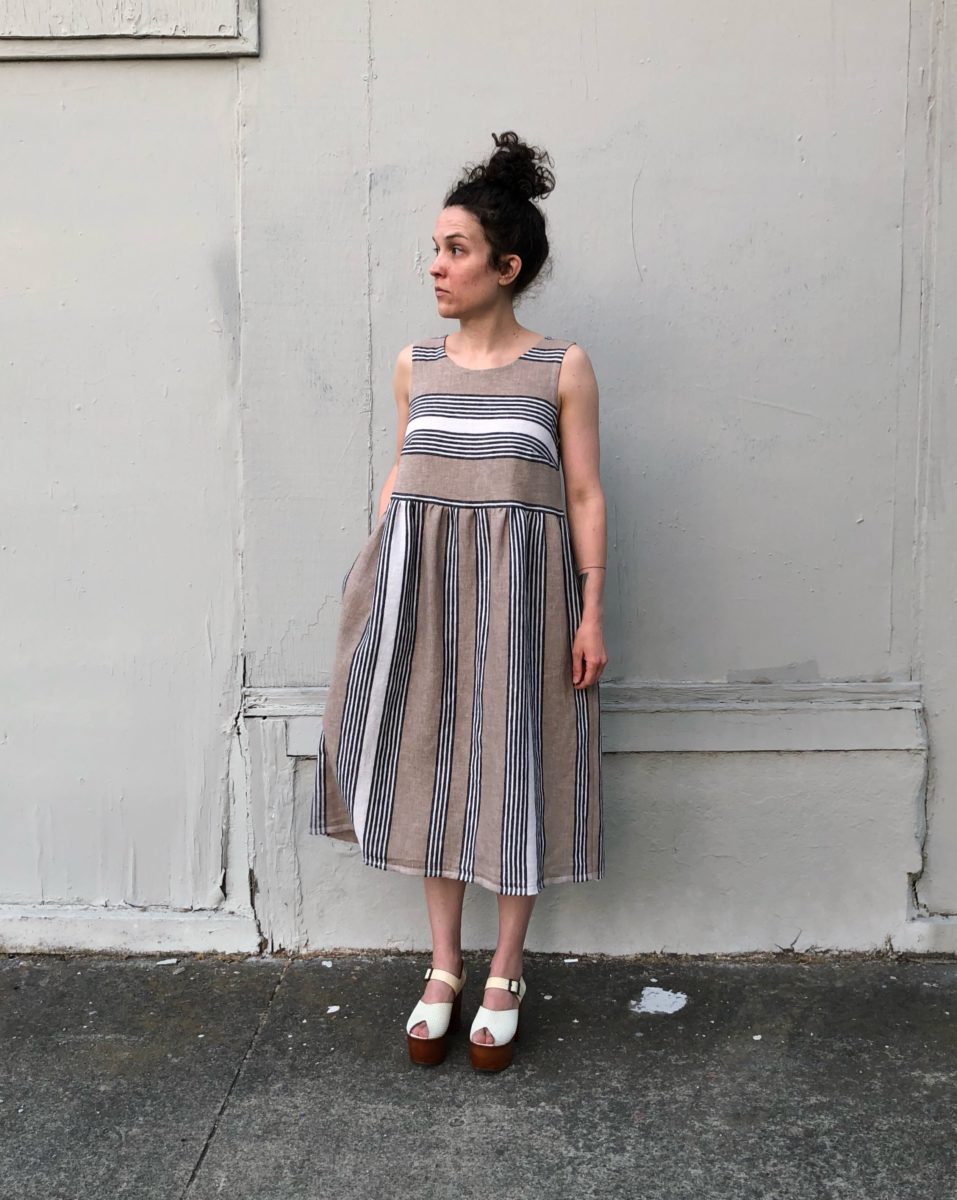
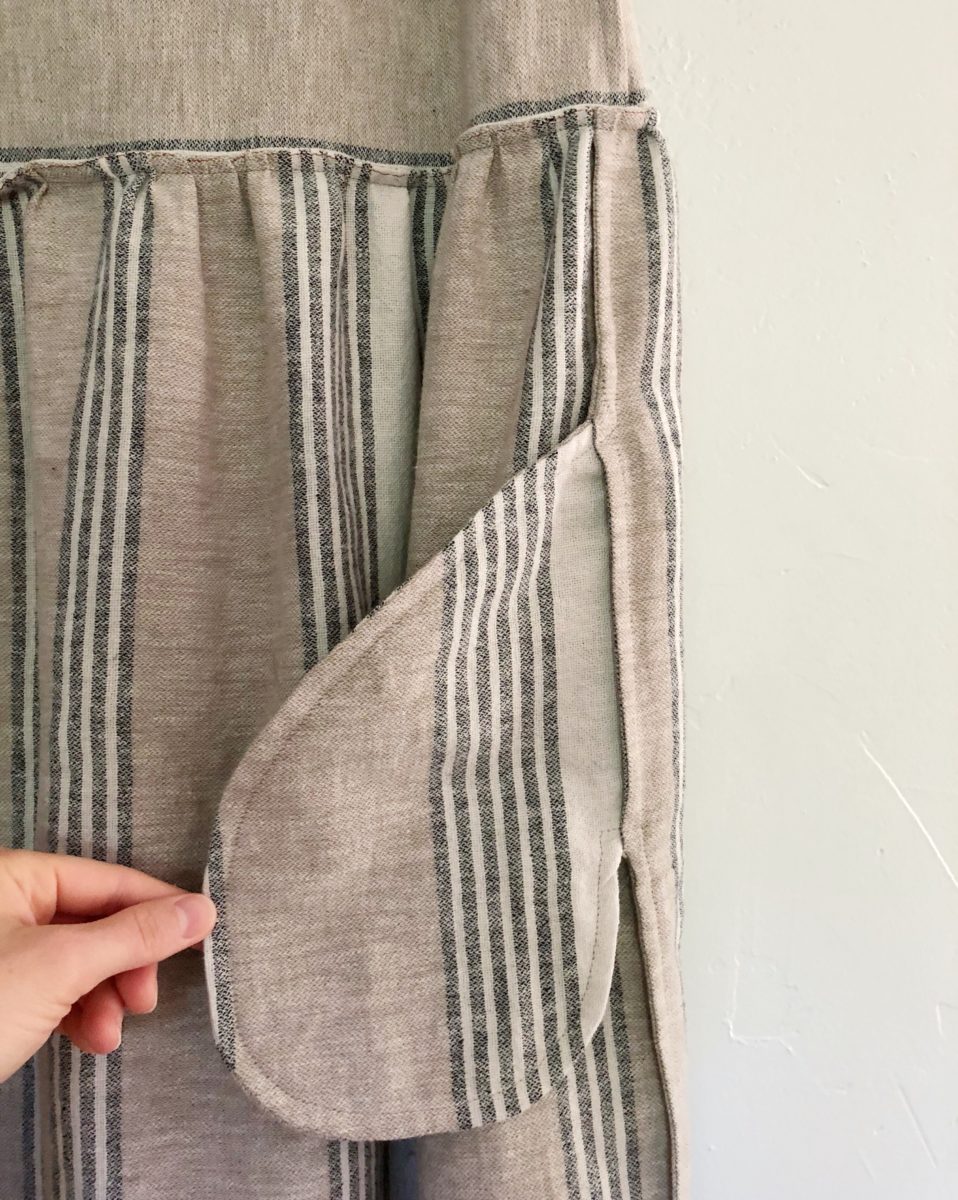
The fabric is a fairly loose weave and since I throw everything in the washing machine, I decided French seams were the only way to go. I assembled and finished the tank first, then sewed up the skirt using this tutorial for inseam pockets with French seams. I definitely ran into issues with the pockets, which can happen when you steal a pocket with a different seam allowance from another pattern and cut everything out late at night.
I basted the skirt in a circle and would NOT recommend this strategy. If I were to do it again, I’d baste the front and back portions separately so creating the gathers and matching up the side seams is easier. Sewing a french seam with gathers was an interesting challenge, but I’m glad I did it. EVERY SINGLE SEAM is a French seam.
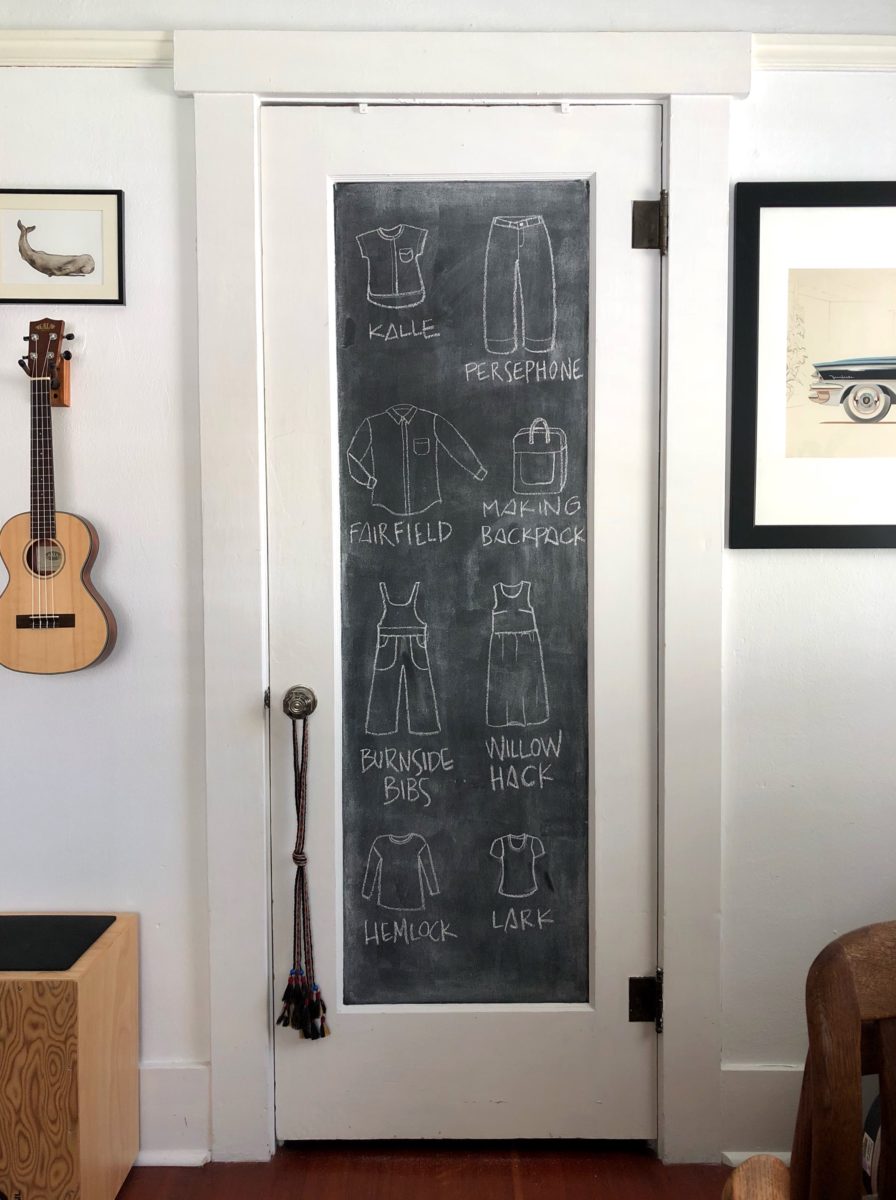
I can finally wipe a make off this board. I have two Kalle Shirts that are SO CLOSE to being finished and I’m working through some butt issues with the Persephone Pants too.
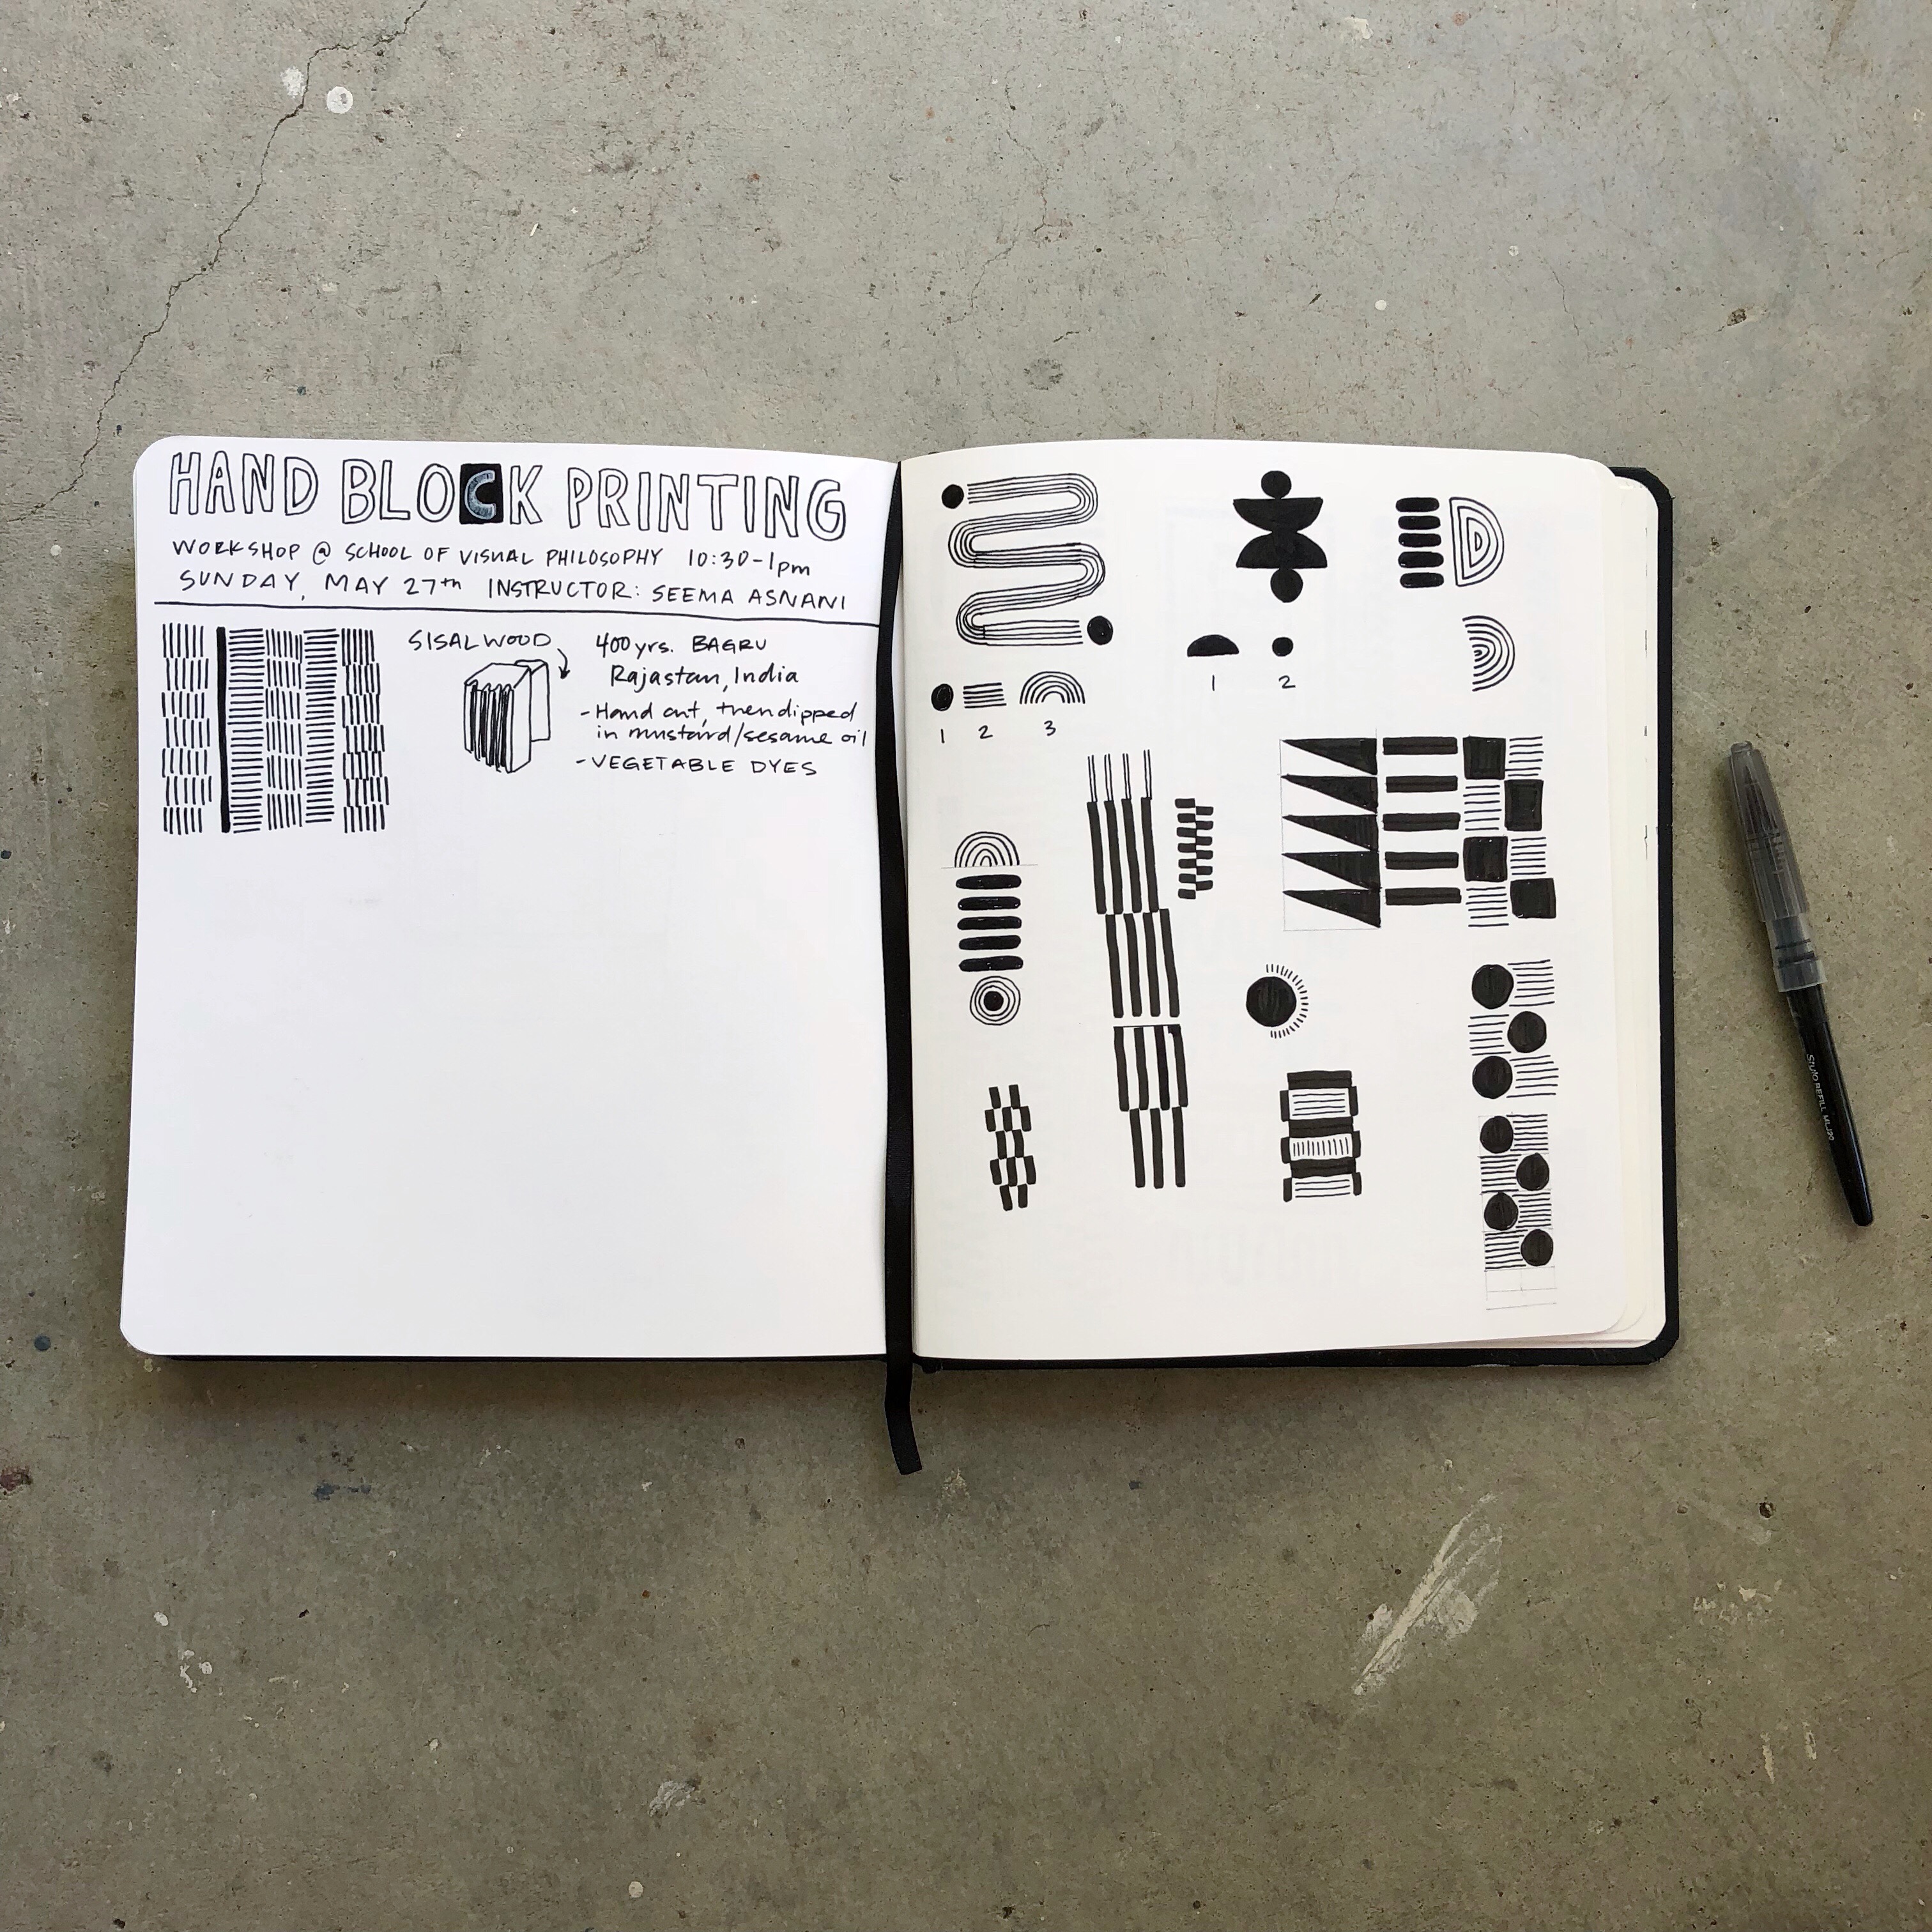
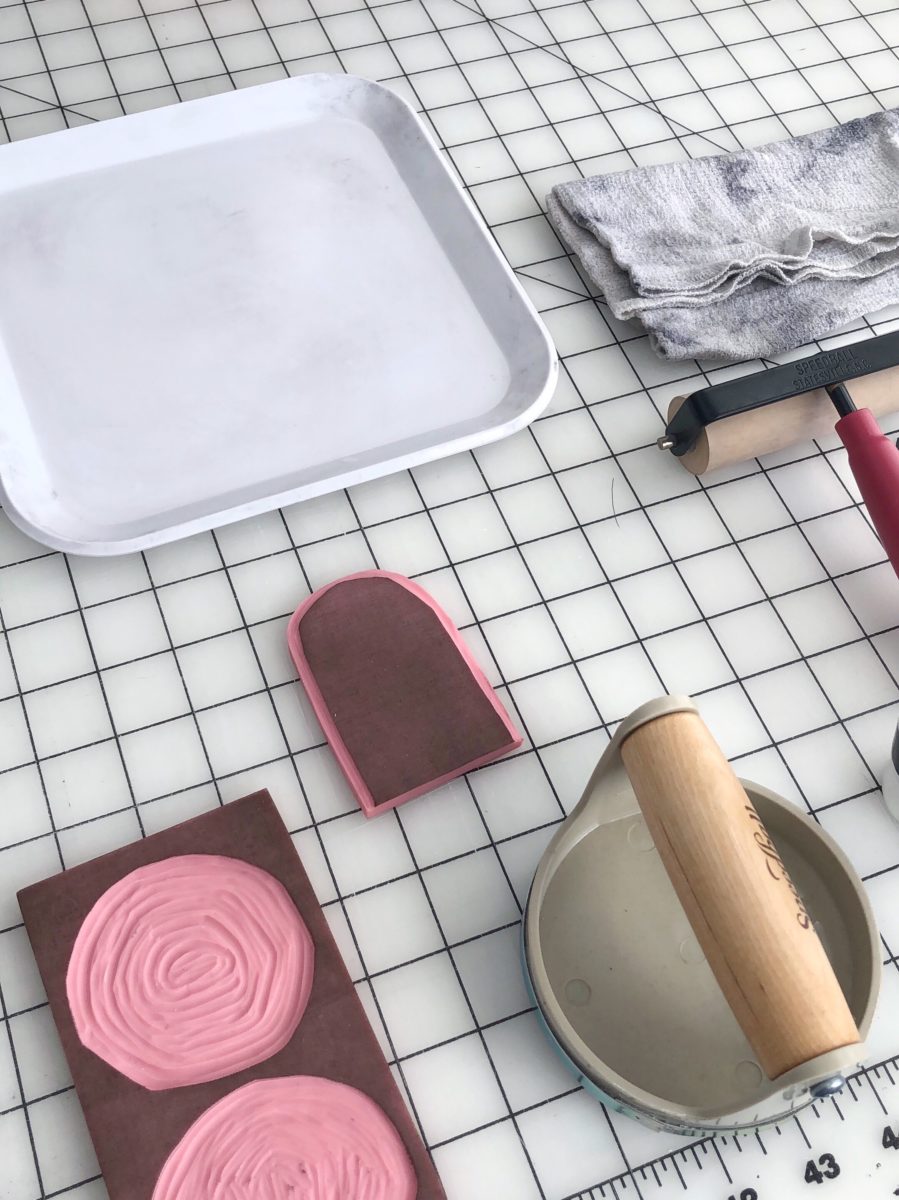
Taking art and making classes has been one of the best things I’ve done as an adult. It’s helped me develop an art practice, meet new people, and chop up the monotony of adulthood. I recently stumbled upon a local community art space & school and on a whim signed up for a block printing class the day before. It wasn’t all I was hoping for, but it was something to do over the three day weekend.
It’s less than a mile from my house, so I chose to walk despite coming down with a cold. A bird pooped on me and I saw a man pooping, but otherwise it was a nice walk.
The community arts space has all sorts of classes and workshops available ranging from welding to drawing. Once the school year ends, I’m going to do some drop in figure drawing sessions and maybe screen printing for fabric.
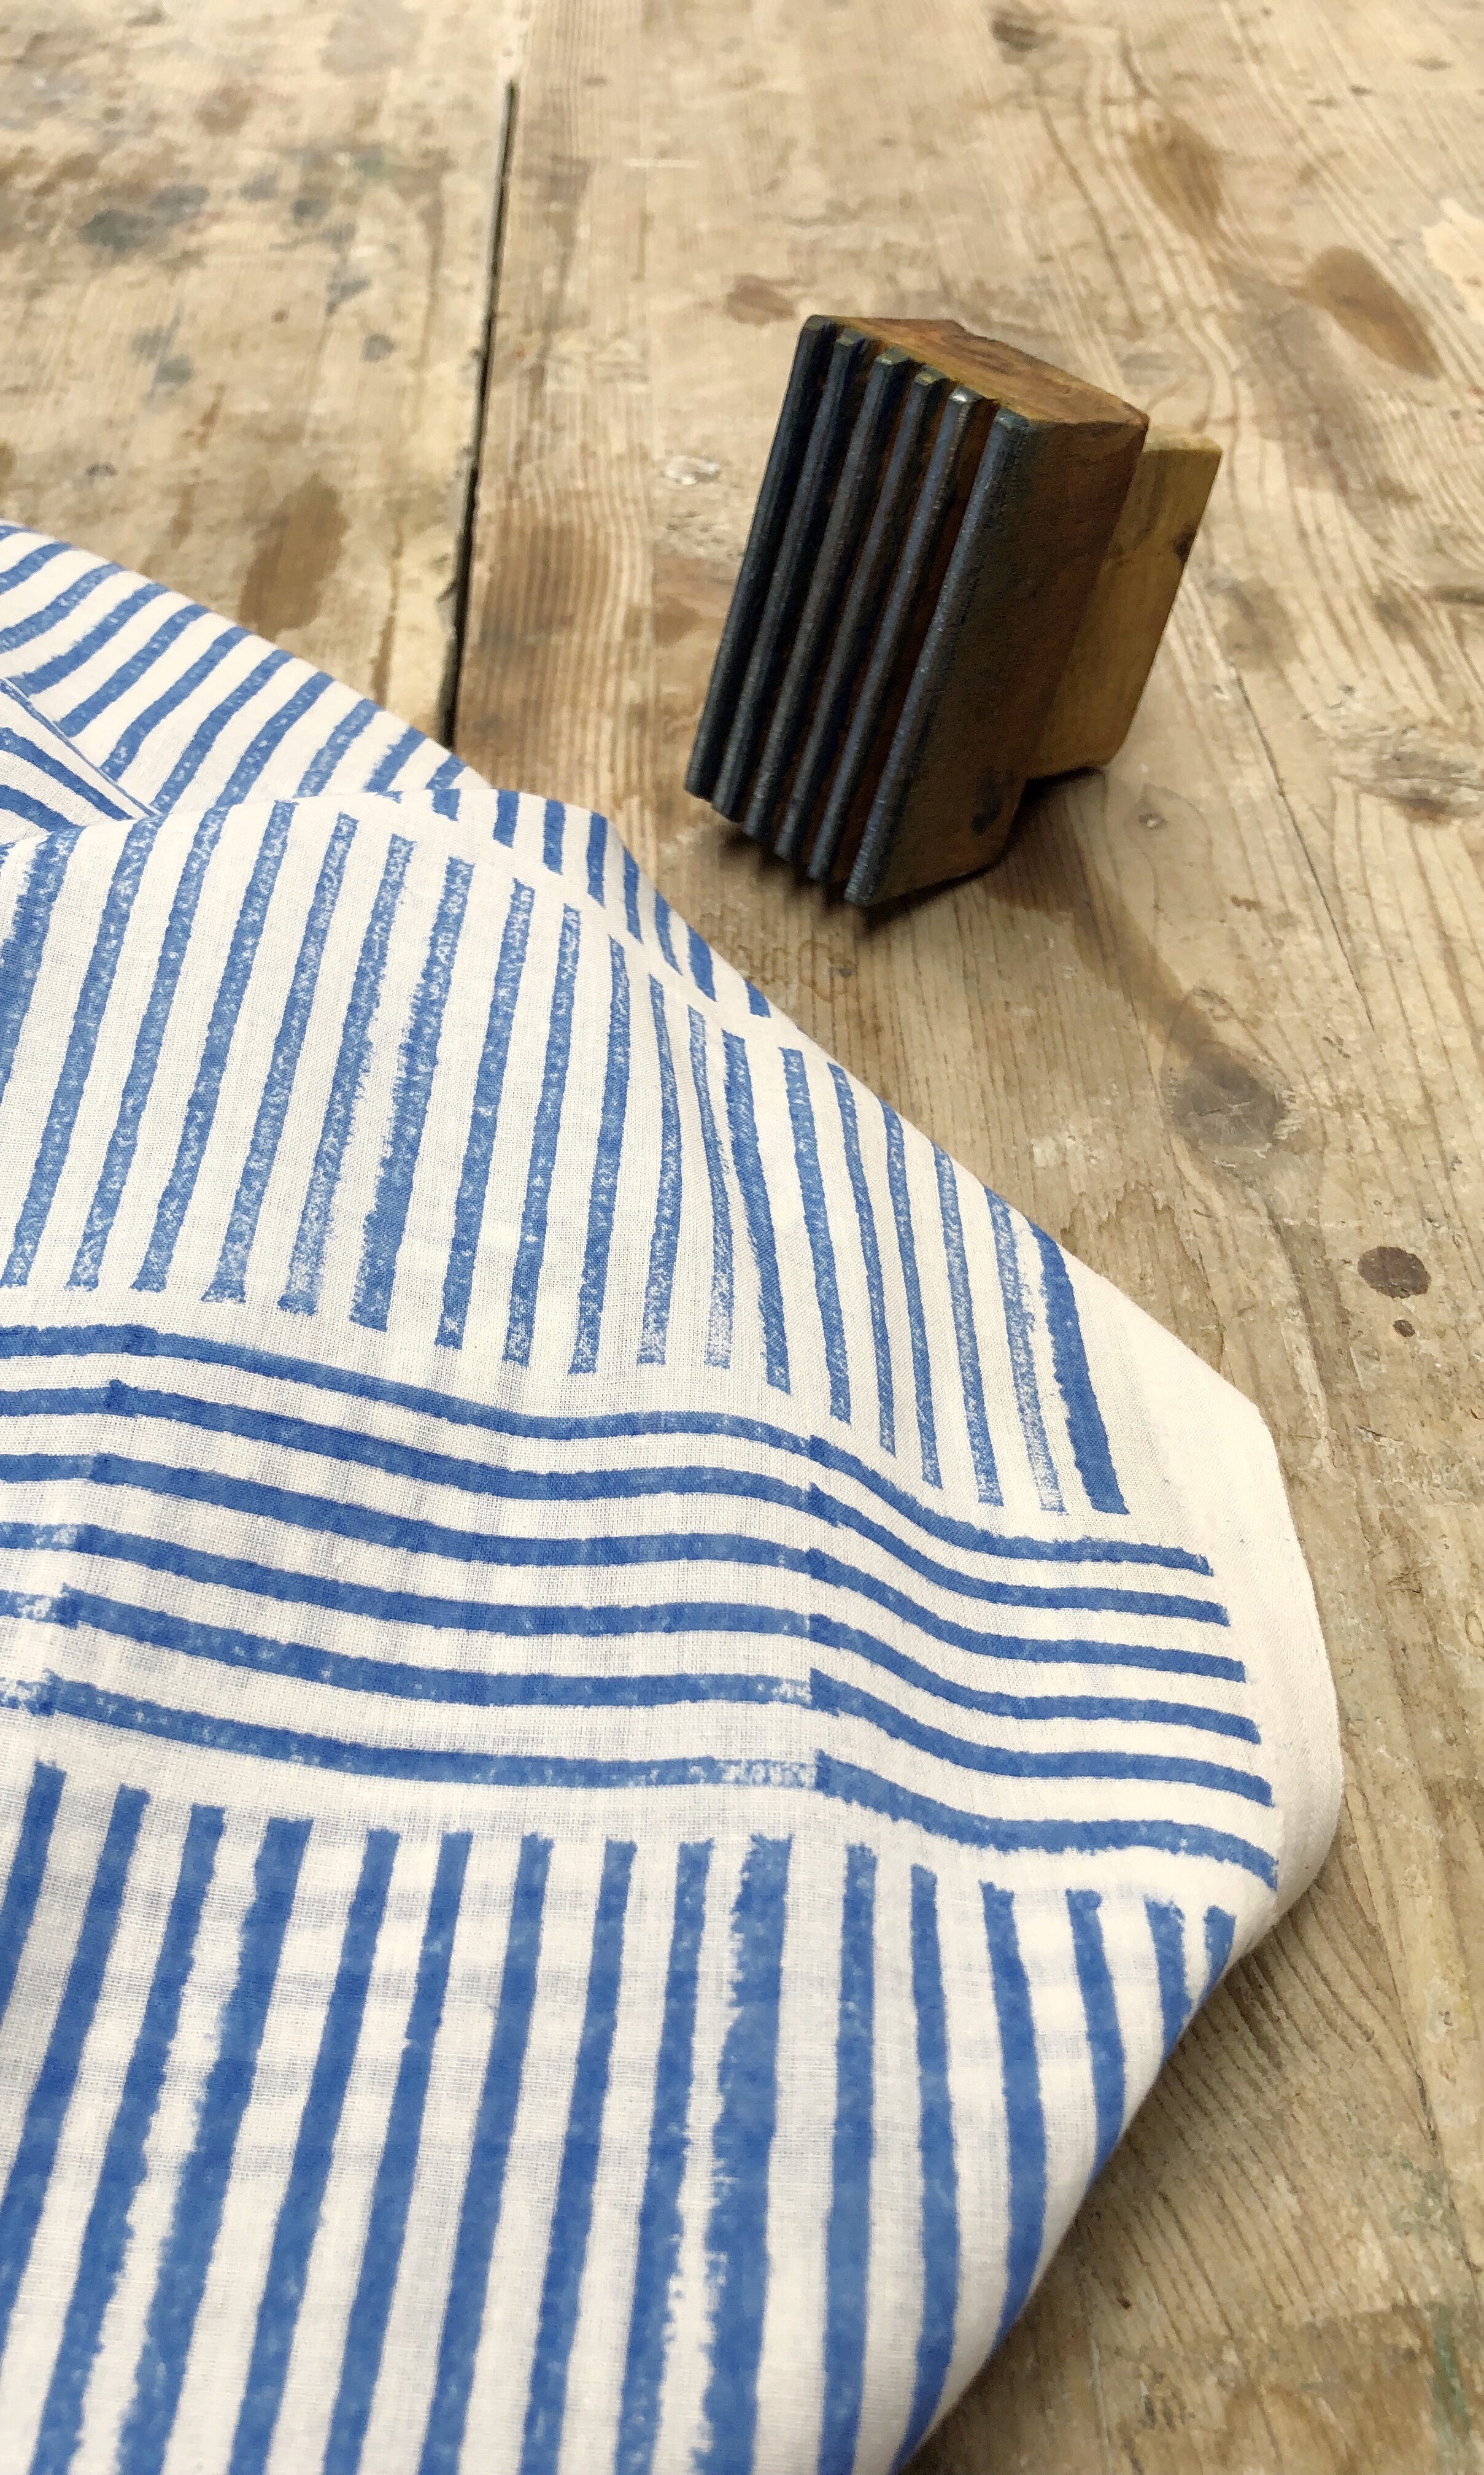
I channeled Block Shop Textiles to get ideas flowing.
The class description said that you could “design your own scarf” and “unlock your creativity,” but in reality we had to choose from pre-made wood blocks and just two colors of dye. Most of the blocks were intricate floral designs, which are nice, but not my aesthetic. Thankfully I found one “border” block that was sort similar to what I had sketched out before class.
There were only three other workshop participants making things pretty cozy. The instructor gave us a very brief history on the 400 year old craft and her husband brought samosas and lassi. We listened to really old Bollywood movies while we worked.
The other participants chose to create a border and then a dot repeat pattern for their scarves. I chose to fill in the whole scarf and took twice as long.
I will probably end up dying this. The white is a little too white and doesn’t really coordinate with my wardrobe. Maybe indigo?
Remember how I said I was obsessed with making repeat patterns? Well, I’ve made 23 in the past two weeks. Here’s a gif I made of all but the most recent one while trying to figure out Photoshop last night. Once the school year ends, I plan to dive into Adobe Creative Suite and upload a lot of these to Spoonflower. I’m excited.
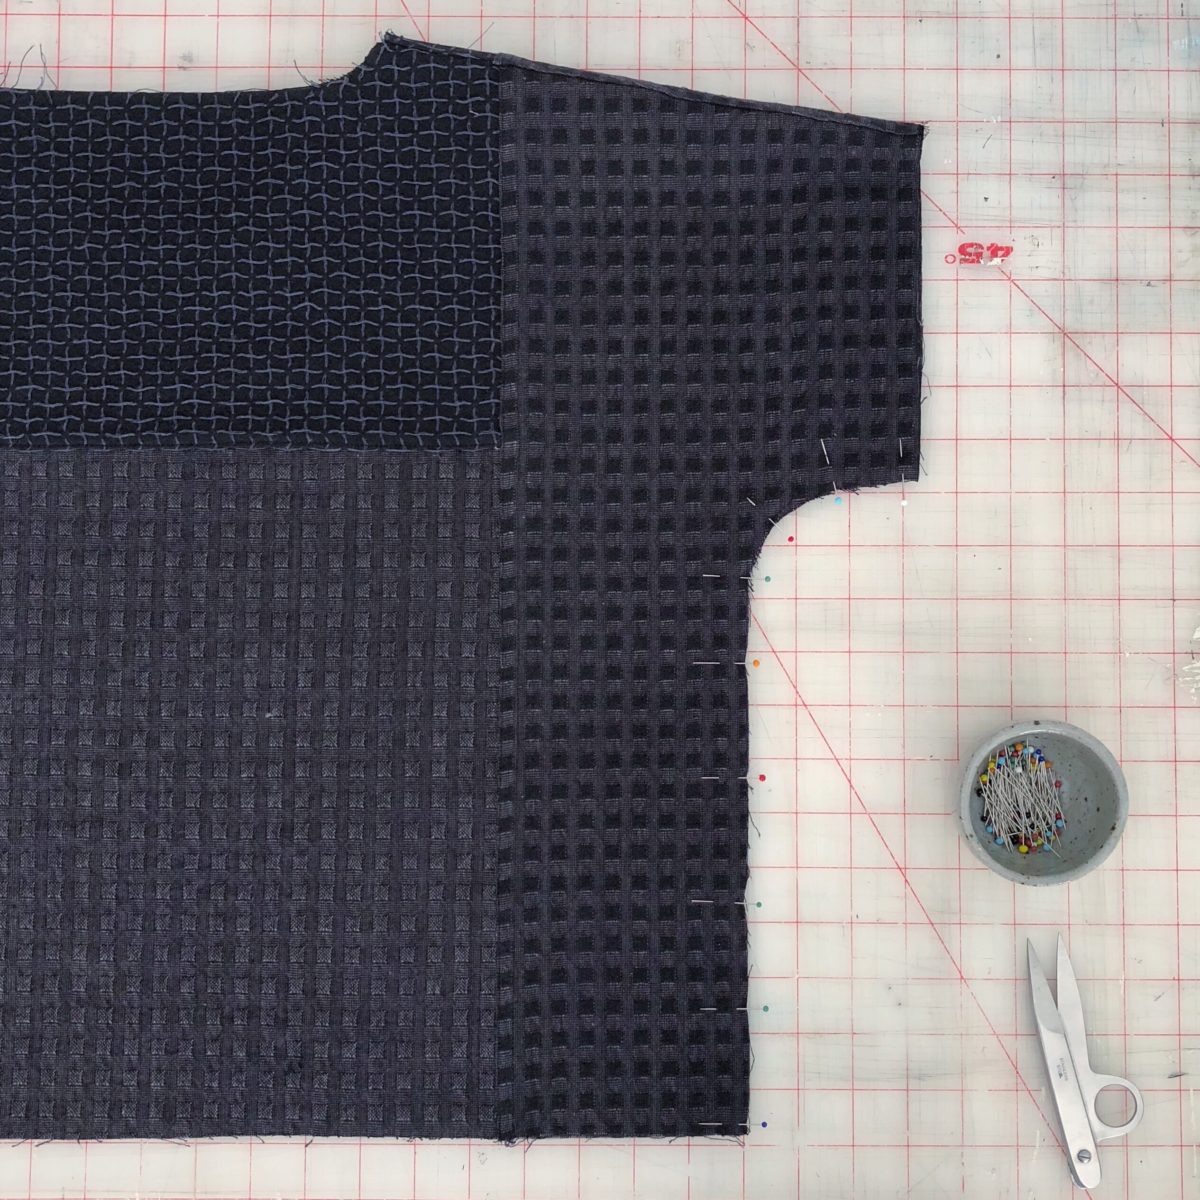
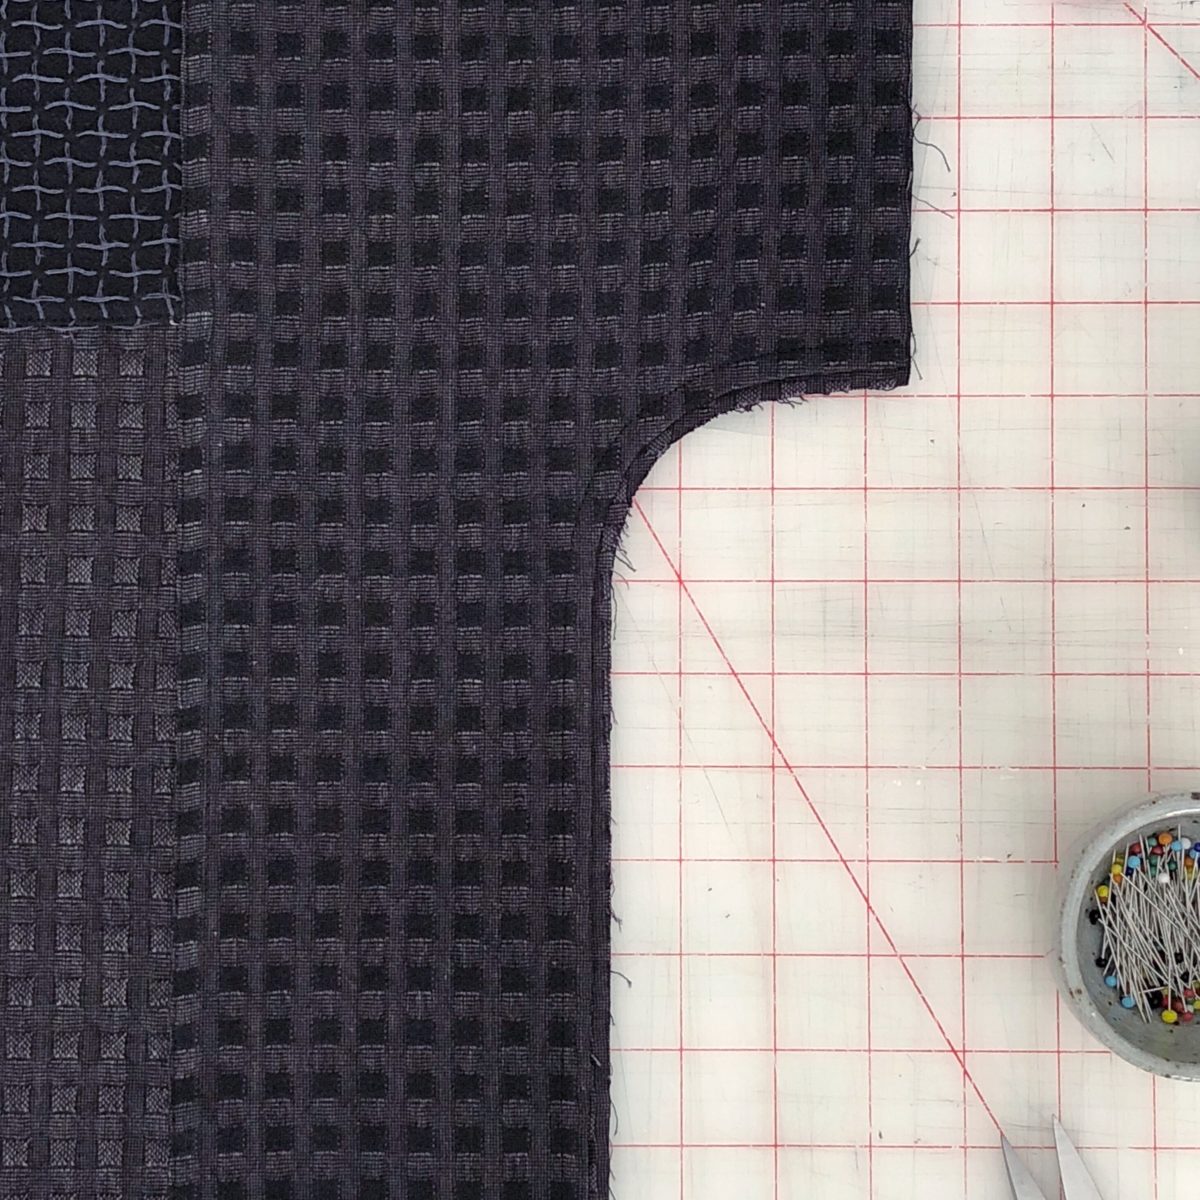
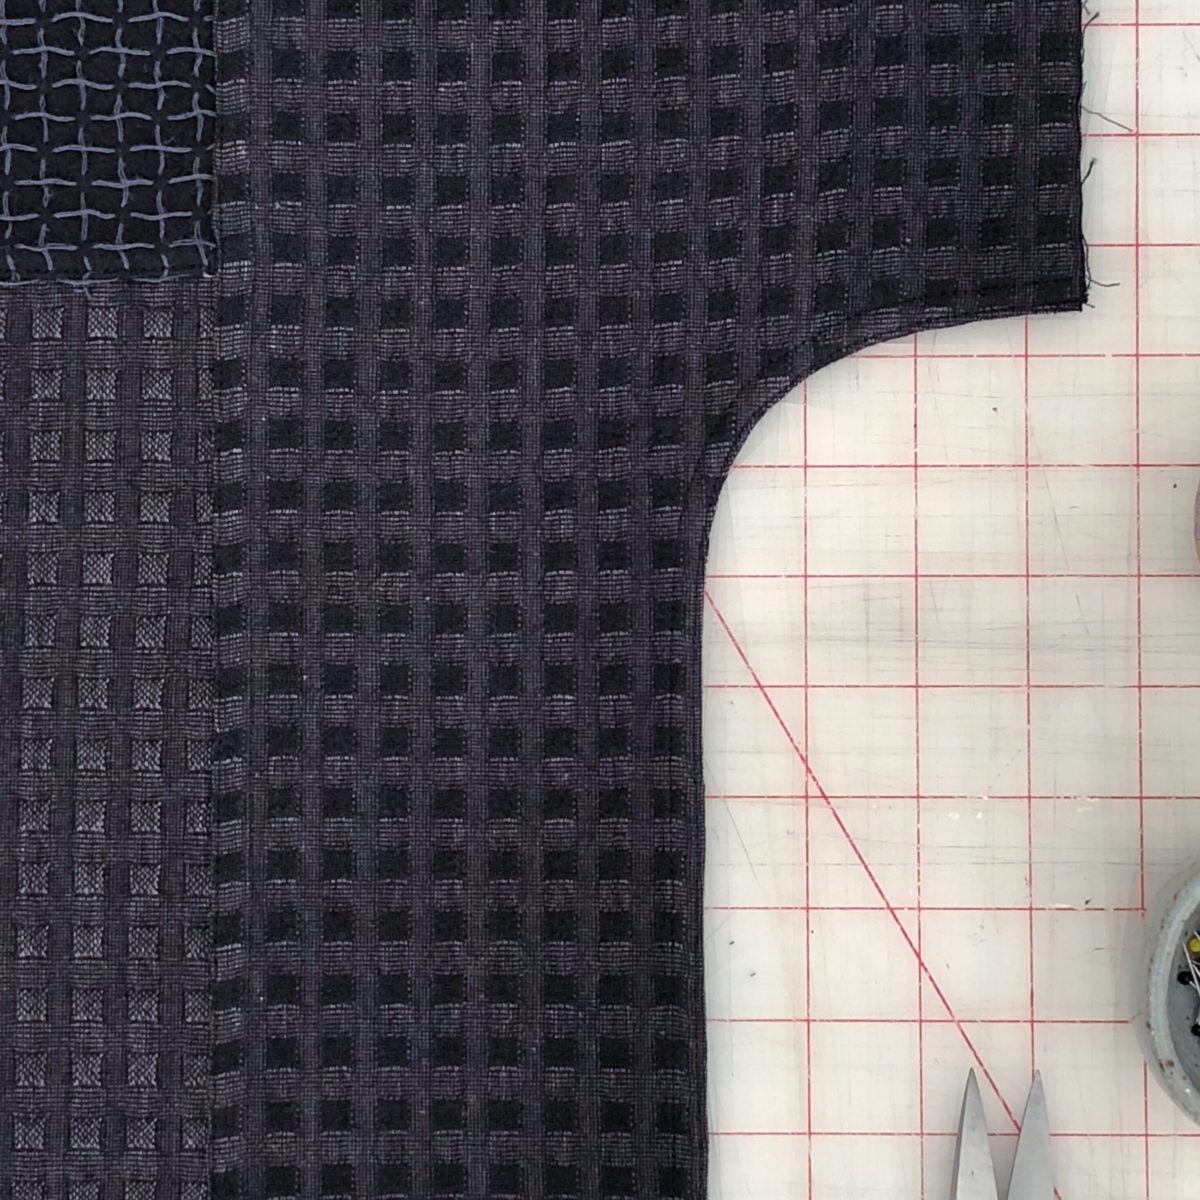
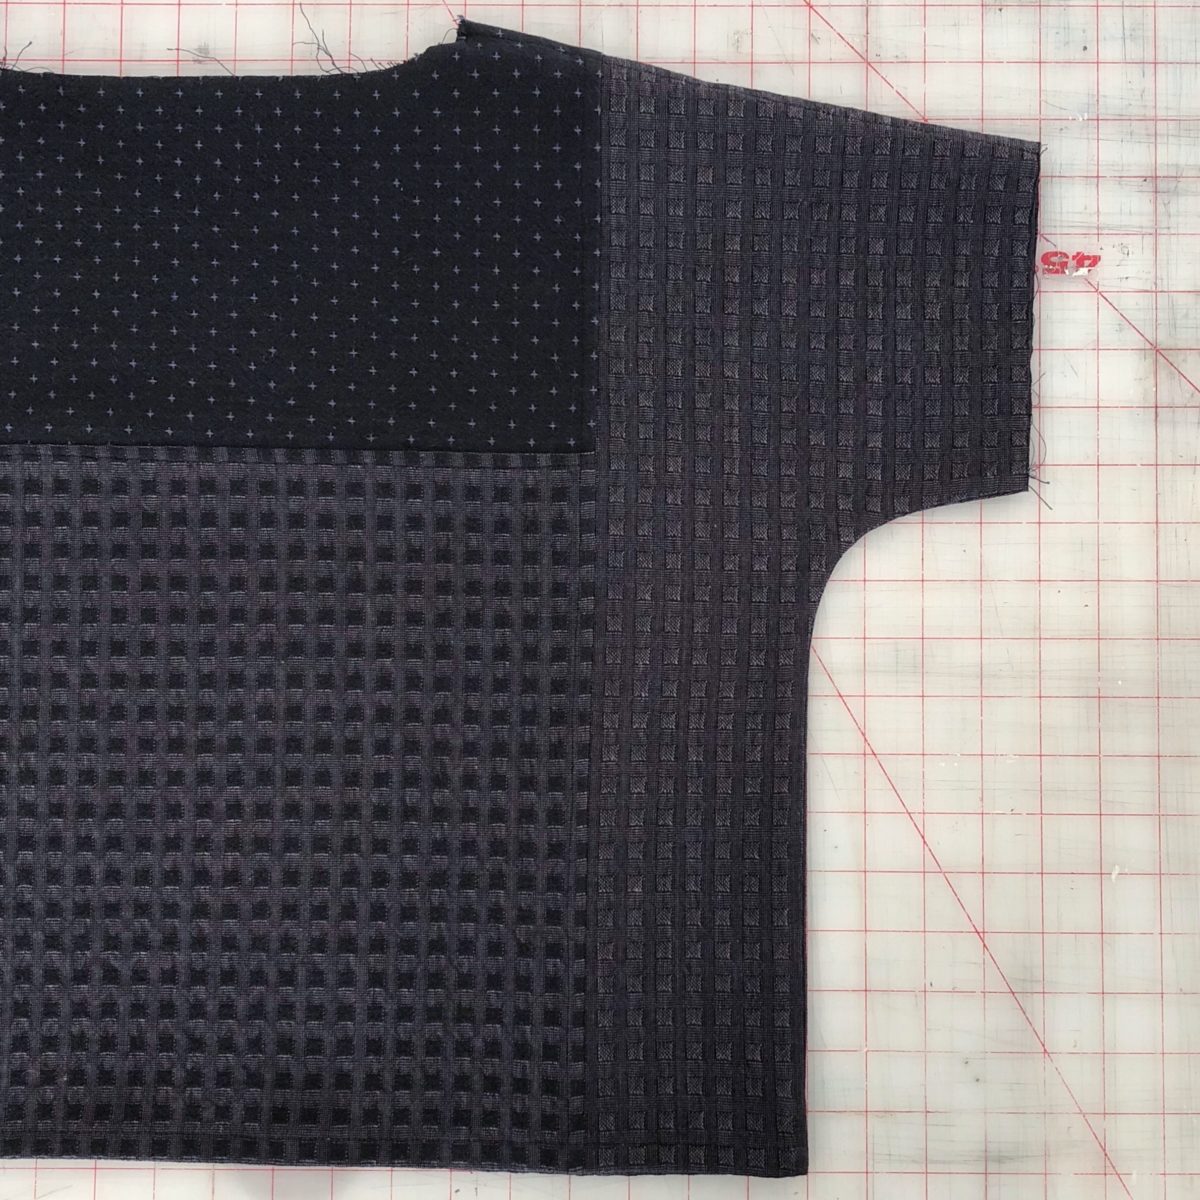
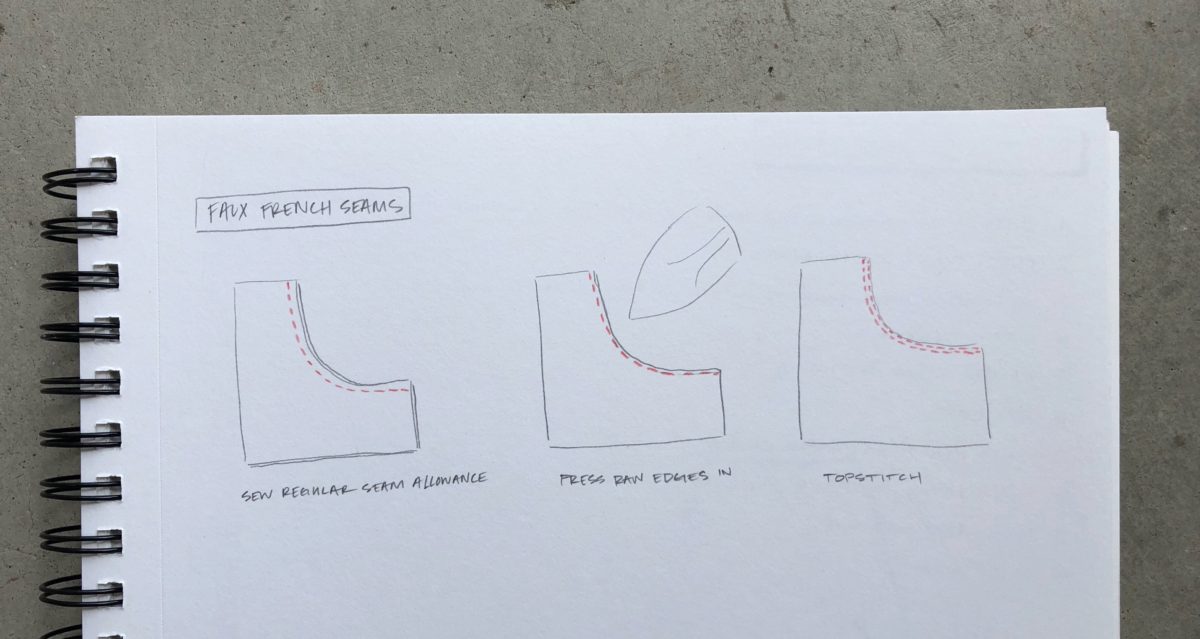
I love a French seam. I’ll French any seam I can. Even curves. But, French seams don’t really work well with curves. They look great on the inside but are bunchy as heck when you turn the garment right side out. Enter the Faux-French seam!
Step 1 Sew a regular seam (right sides together).
Step 2 Press raw edges in. Above shows one side pressed.
Step 4 Topstitch as close to the edge as you can.
Voila! Encased edges without the bunching! Here’s the top right side out and it’s almost perfectly smooth.
Here are the steps in drawn form since the black fabric makes it a little hard to see what’s going on.
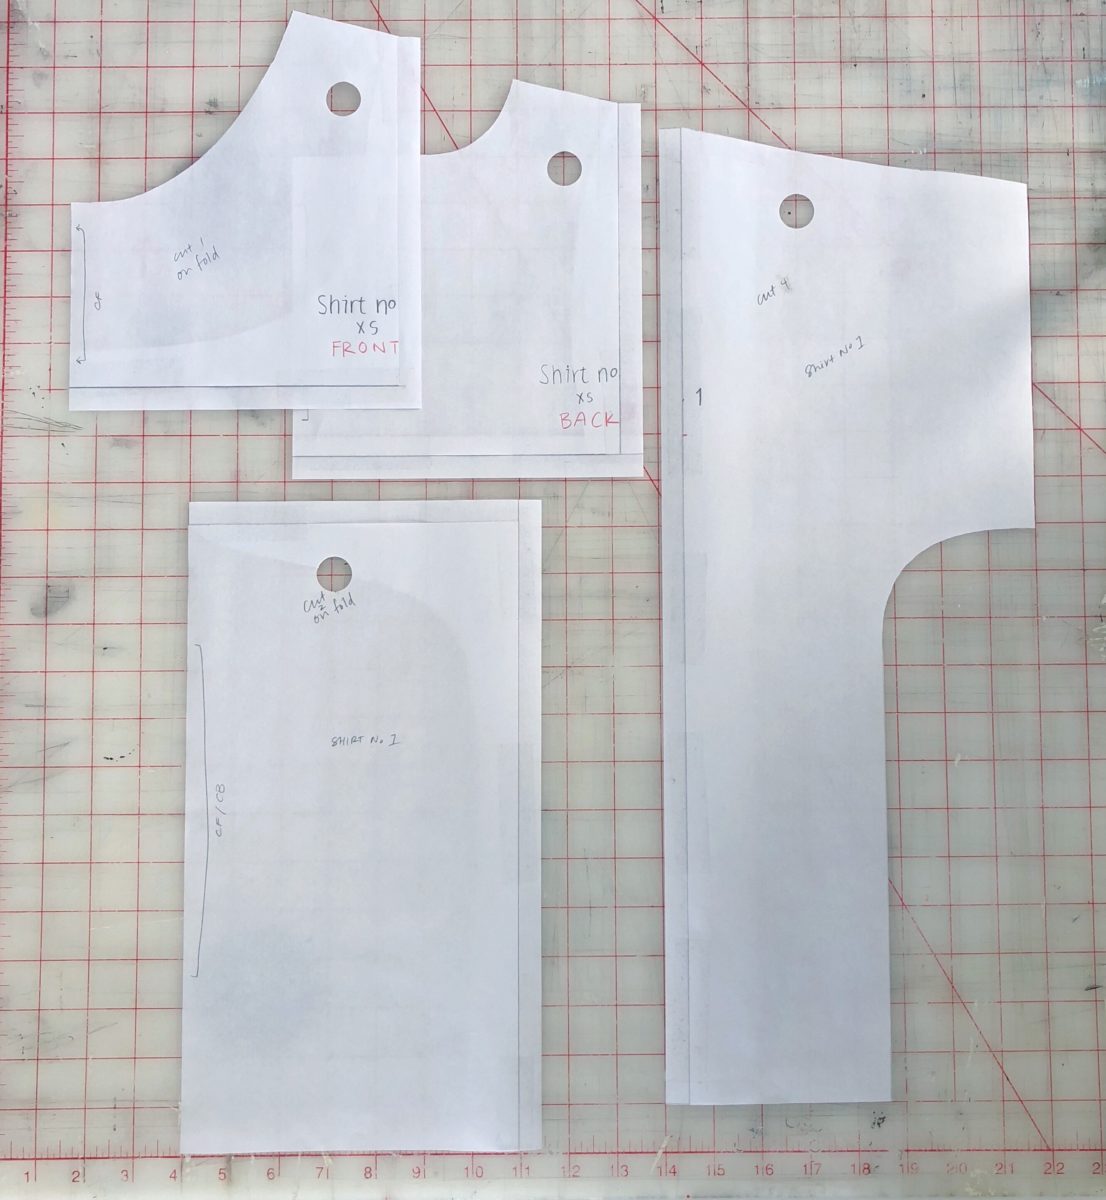
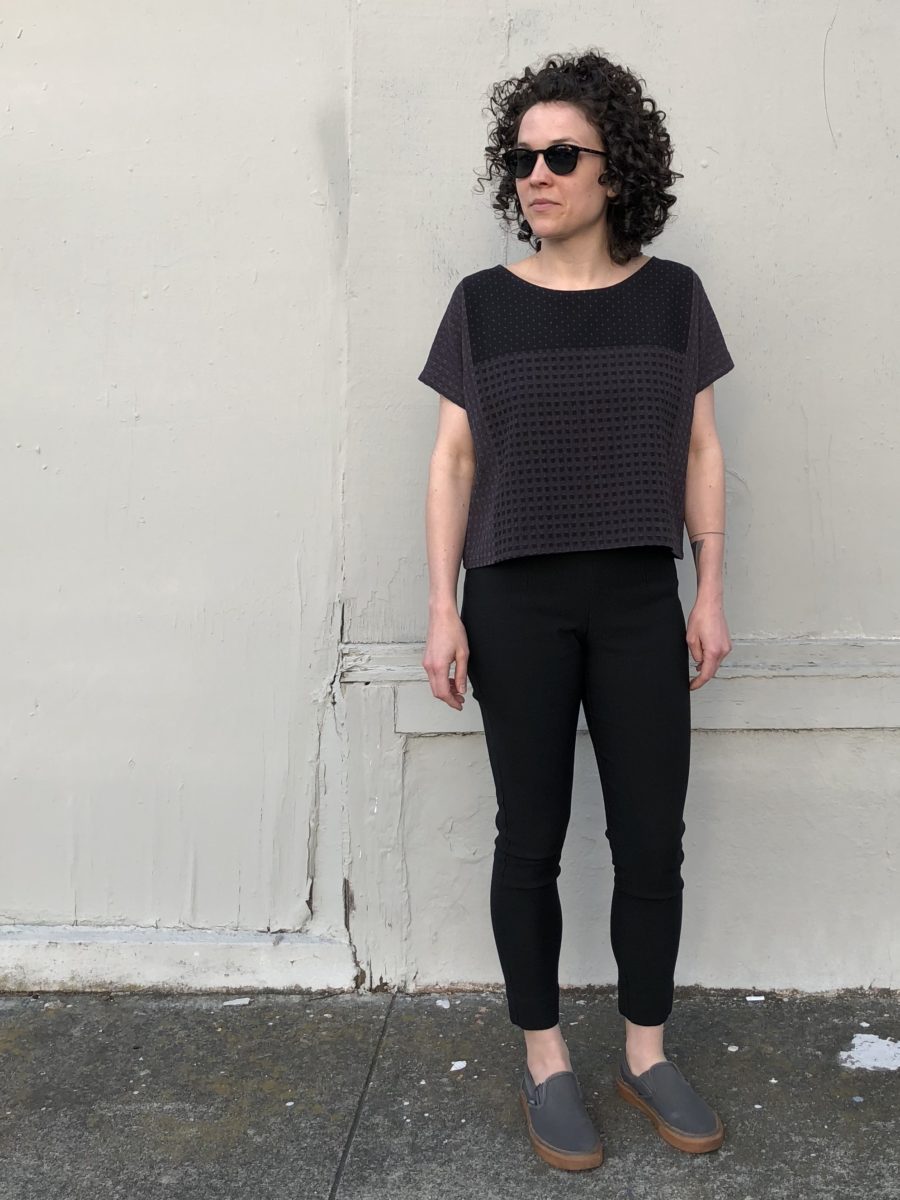
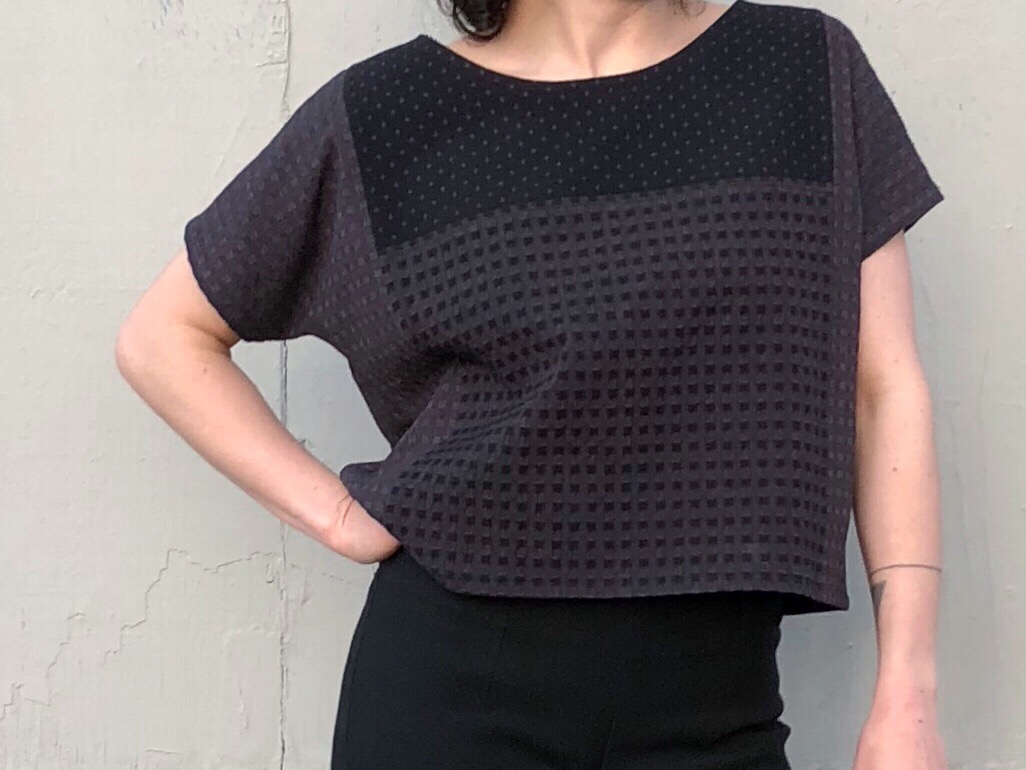
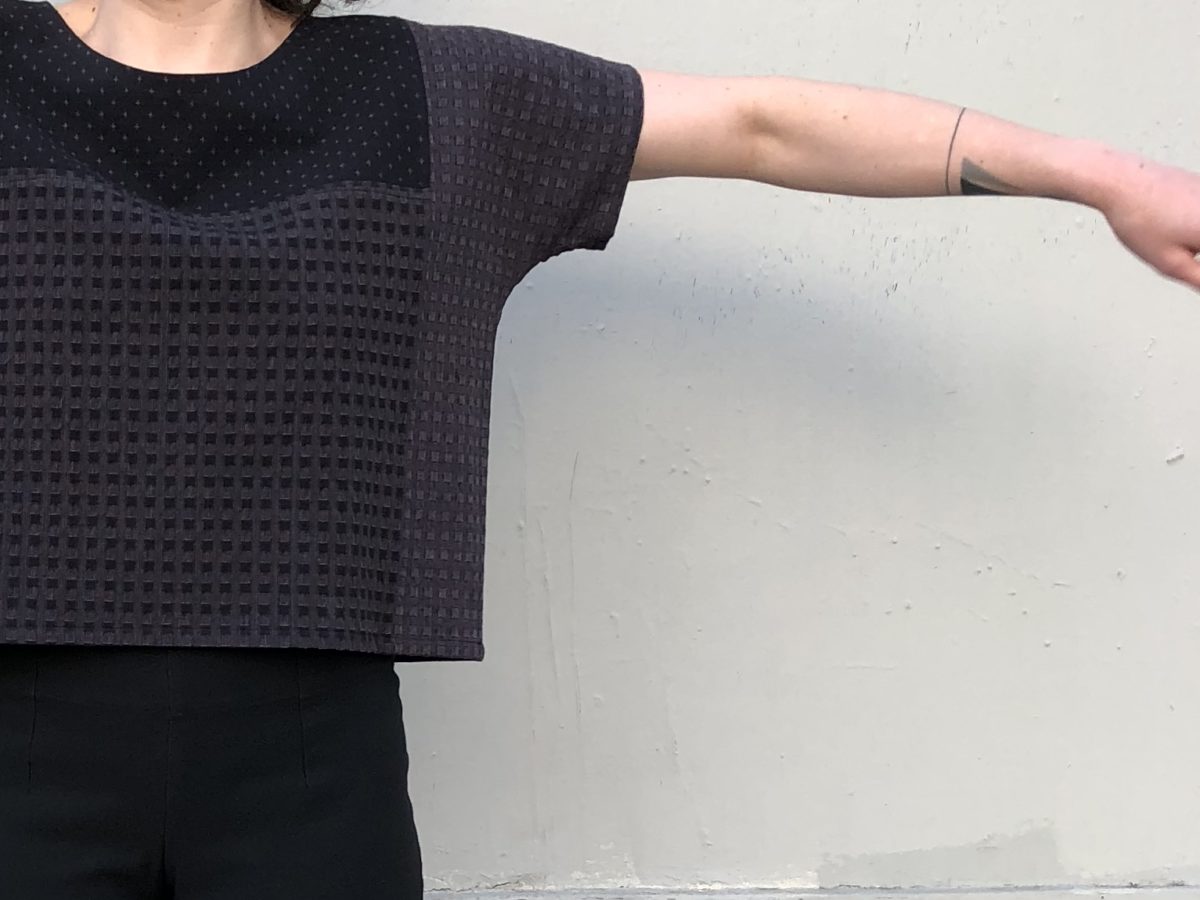
Shirt No 1 Hack I’ve been on a big Shirt No. 1 kick. It’s a simple sew and lends itself to so many fabrics. After making two (one solid, one in a print), I knew it would be the perfect pattern to achieve all of my Ace & Jig desires. This hack is a great option if you have a bunch of smaller fabric pieces.
First draw in the desired seam lines and cut. Add seam allowance where the pieces will join together (any side you cut along will need added seam allowance). I taped additional paper directly onto the pattern pieces so that I could use my rotary cutter and reuse this pattern again later. Square the seam allowance if pieces join on a diagonal line like it did along the shoulder seam. Squaring will help the pieces come together without extra fabric sticking out. I also squared off the hem and side seams. That’s pretty much it!
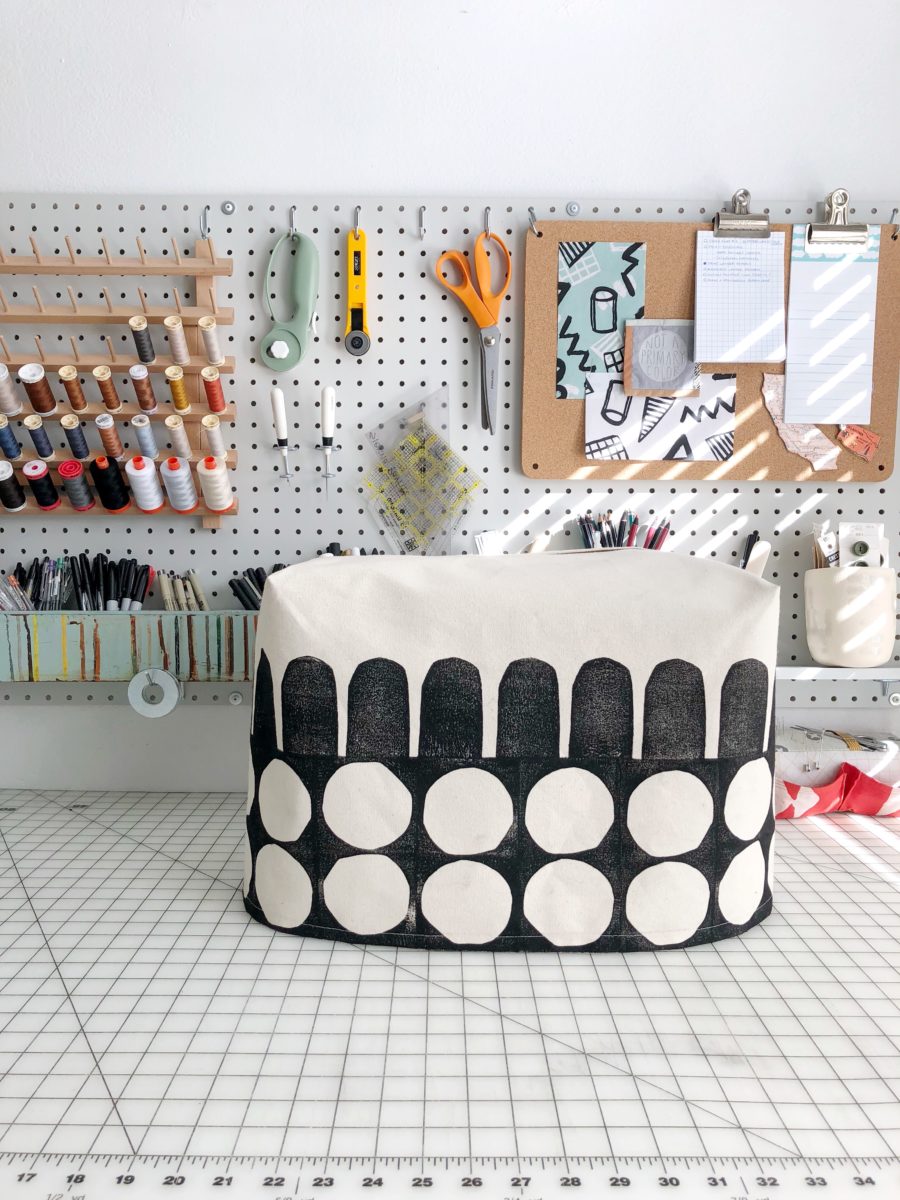
As I’ve mentioned in previous posts, buying my Bernina 530 was a big deal. I bought better thread (never again, Coats & Clark!), learned how to actually clean and oil a machine, and began planning projects just for her.
Although she came with a very fancy carrying case, she didn’t come with a cover. Since her purchase, I have resorted to throwing pieces of fabric over her in between makes.
The scrap fabric was a fine temporary solution, but she deserved something better.
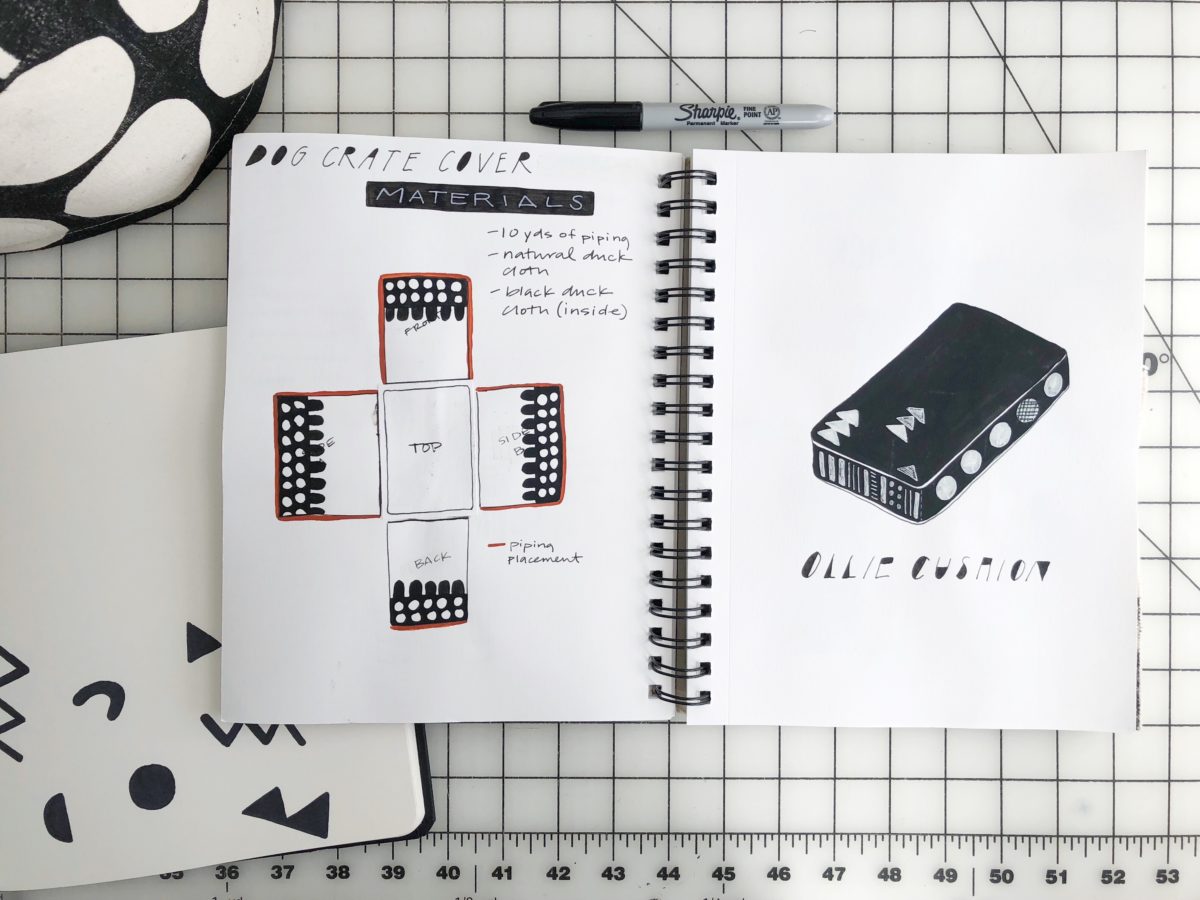
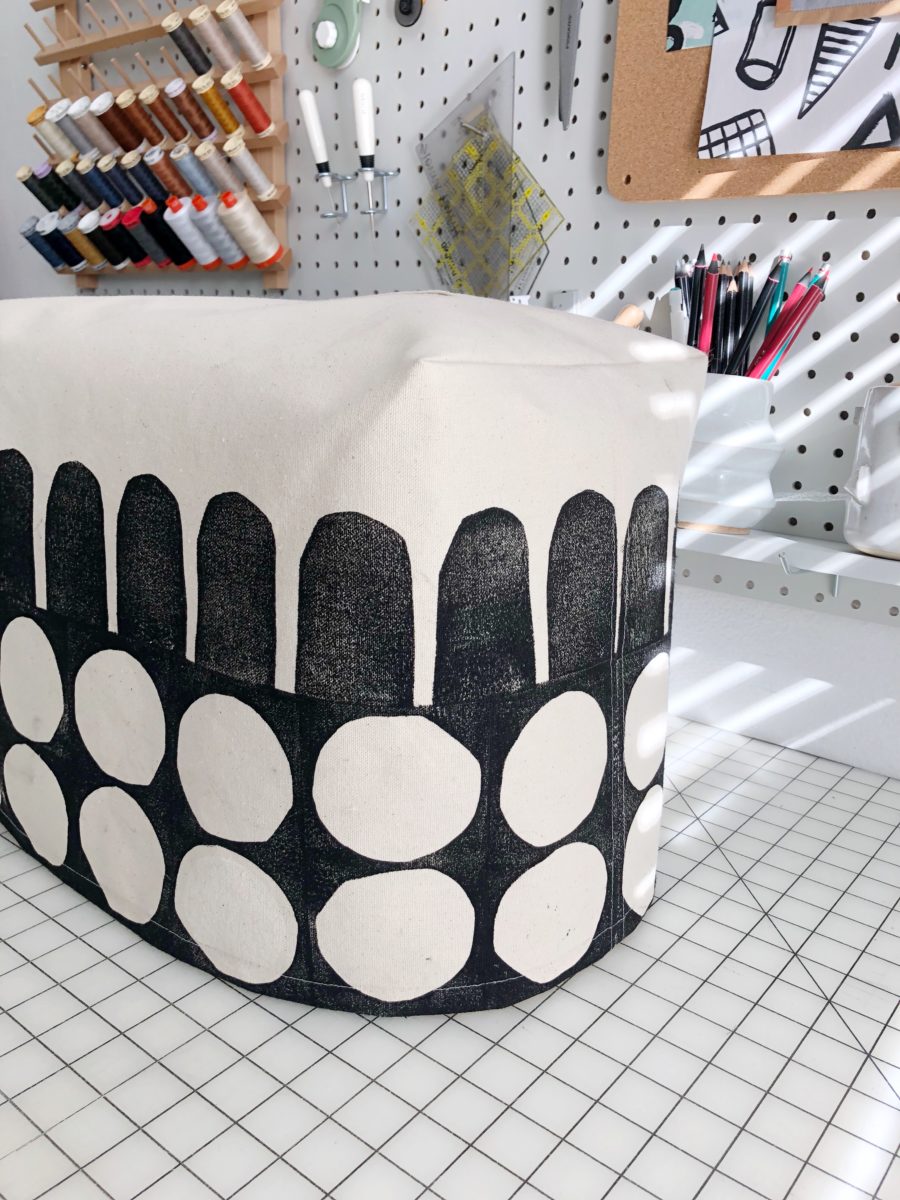
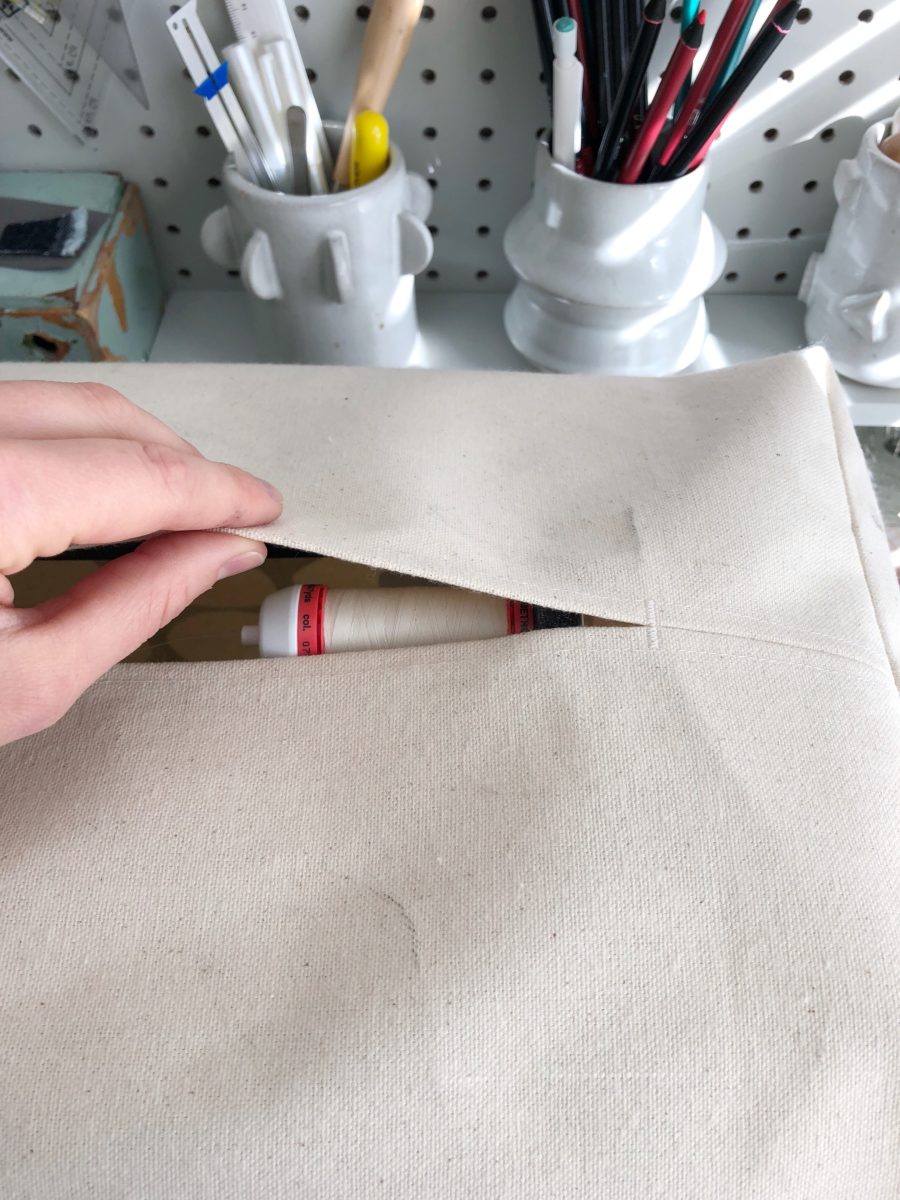
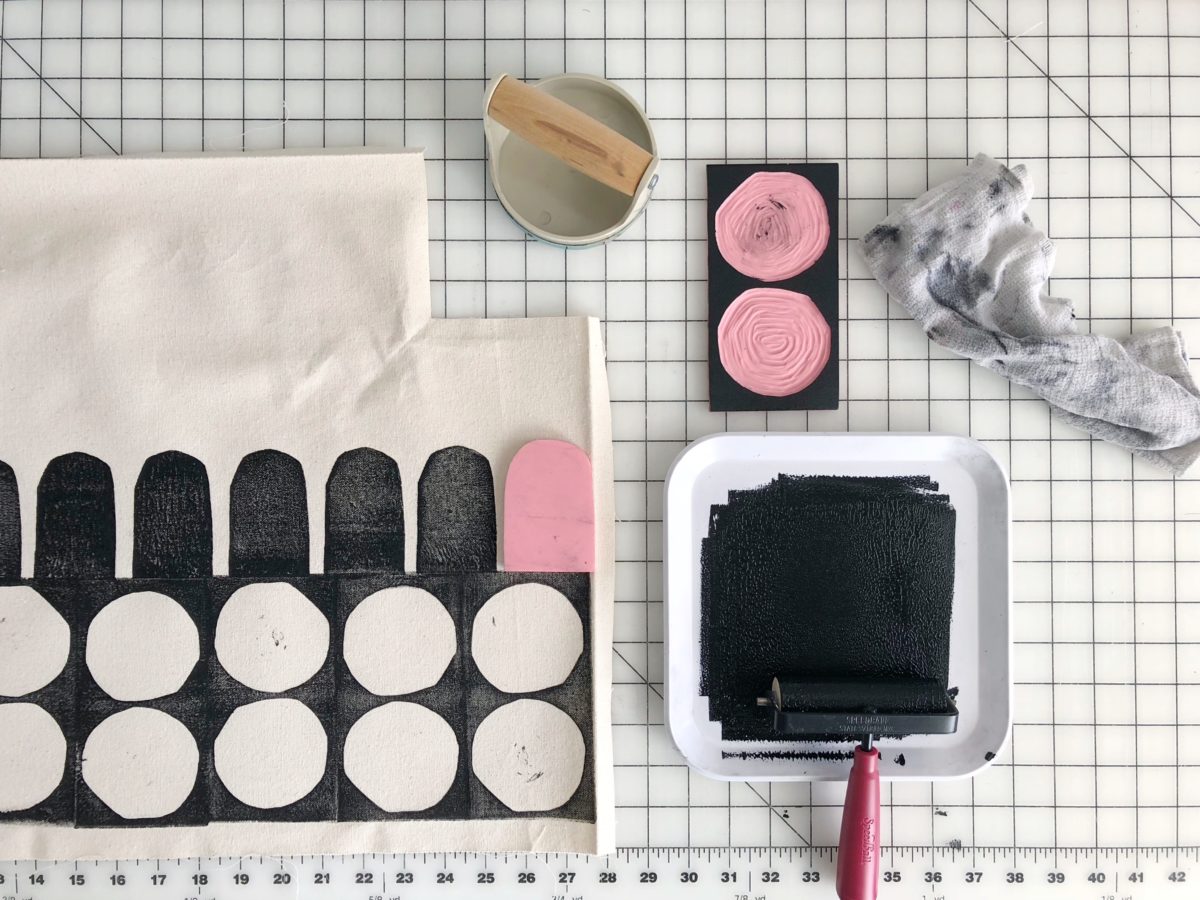
Before my dear, sweet dog bear Ollie died, I had planned to make him a fancy block printed crate cover. It didn’t come to fruition before he passed, but I did make the lino blocks and thought the design would work well for the sewing machine cover.
I didn’t quite get the measurements right on this first iteration so it doesn’t fit with the slide-on table attached. It’ll work until I make a larger one! I’m also scheming a cover for my serger with a different print design.
I flat felled the top and side seams, and left an opening at the top for access to the carrying handle.
I used Speedball fabric ink and although I let the print rest for 24 hours and heat set it with an iron, it smeared while sewing. I had a minor panic attack when I noticed the ink rubbing off on my machine, but thankfully a magic eraser wiped it off. Any seasoned block printers out there have tips for setting prints on fabric?
I recently did a pretty sizable closet clean out. We rent an old house (built in 1925) and although it’s had a fair share of updates, the closets are just tiny. I decided to take on this task for multiple reasons – 1. I LOVE organizing, 2. space was feeling very limited, and 3. I knew I wasn’t wearing everything I owned.
I donated over five bags of clothes, sold some shoes and purses, and found new homes for my vintage items I can’t part with yet. My closet feels really good now and the process allowed me to identify the types and styles of garments I wear most often, AND what I should focus on making this year.
Even though I’ve only been sewing for three years and some change, I never went through that phase of making fancy dresses, or using exciting novelty fabrics. I always went into a project knowing that I wanted whatever I was making to be worn often and to speak to my overall aesthetic of neutrals and geometric patterns. I don’t want my garments to look handmade and I want items to mix and match easily.
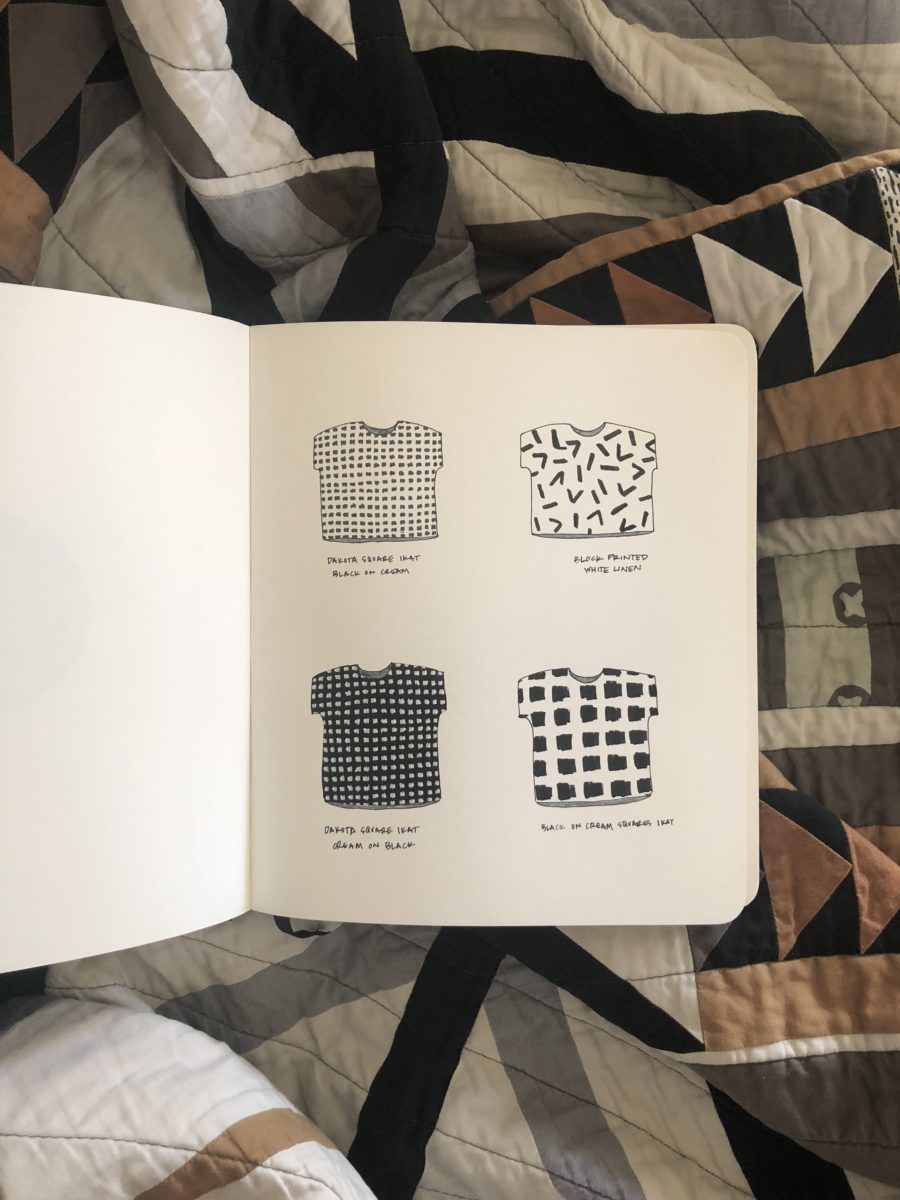
Enter simple tops! Part of my 2018 making plans is to use patterns such as Shirt No. 1, Lou Box Top, and the Maya Top to build a collection of coordinating shirts out of silk noil, linen, and ikat. These patterns are also a great canvas for block printing.
Last weekend I was able to finish the first top for this goal. I decided to use the smallest size even though my bust measurement put me in between a S and M. I was hoping the XS would achieve a slightly more fitted look but still maintain the pattern’s relaxed silhouette.
The size choice overall feels good, but there is some slight pulling on the shoulder seams that I’d like to get rid of on the next one. I’m not entirely sure how I’ll accomplish that.
I had a brief moment when I first started sewing where I wanted to achieve an entirely me-made closet. I don’t want that. I do want to have mostly me-made and secondhand, with a dash of investment pieces from boss women makers, like Elizabeth Suzann, and ethical companies like Nisolo.
My new Shirt No. 1 pairs nicely with my ES Clyde Jacket in clay cotton canvas, no?
I’m a pretty organized person. When it comes to physical things like my home and classroom, have I got systems. But when it comes to digital stuff, I’m just okay. I know which PDF sewing patterns I own and when I’m inspired to sew a pattern, I use my sketchbook to plan most of it out. But I was lacking in a system for collecting inspiration.
Instagram lets you save posts and organize them with collections, but you can only access those through the app. I’ve had a Pinterest account since it first came out, but it felt a little limited in what it could do (and the ads are annoying). Then a couple of days ago I realized Pinterest added a “Sections” feature to its boards and I ended up spending my Friday night re-organizing my whole account.
Since I’d had this account for years, it had quite a few pins that were no longer my style and entire boards that just didn’t make sense for how I wanted to use it now. As far as my making-related boards go, I pared things down to the following categories:
2018 Make Plans – I’m going to make a board for each year of the patterns I want to make (sewing and knitting). It’s divided into sections by pattern and will include RTW inspiration as well as others’ makes.
Fabric + Fabric Inspiration – This board has links to fabric I’d like to purchase (or just look at because they’re pretty) and a section of surface design inspiration for future blocking printing projects. Or if I ever figure out Adobe Creative Suite, my own fabric designs.
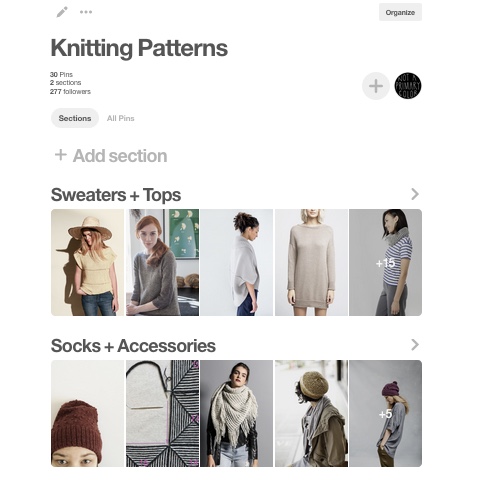
Knitting Patterns – This board consists of knitting patterns I don’t currently own, but might want to purchase in the future.
Sewing Patterns – This board also consists of patterns I don’t currently own, but might want to purchase in the future.
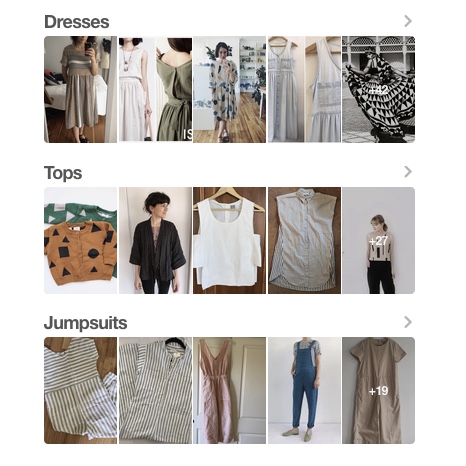
Fashion + Style – I’m quite excited about this board. I made sections for each type of garment. I’m planning to use this board to help my design process for my patternmaking class and for future making plans.
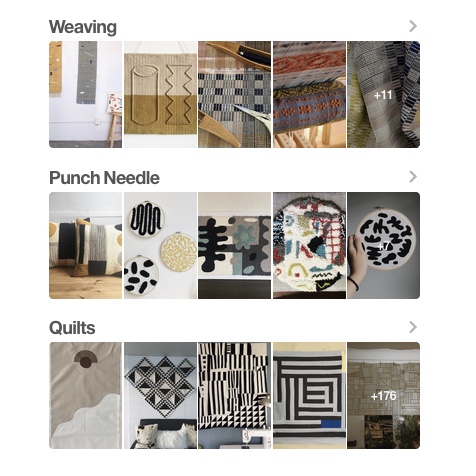
Fiber Arts – I also have an Art + Design board with media-based sections, but decided to make a separate Fiber Arts board. It includes weaving, punch needle/rug hooking, and quilt inspiration.
Sewing Tutorials – This board is a collection of links that help me sew french inseam pockets, bind a quilt, thread my serger, and etc.
All of my boards are linked if you’re inclined to check them out. How do you organize your inspiration and plan projects?
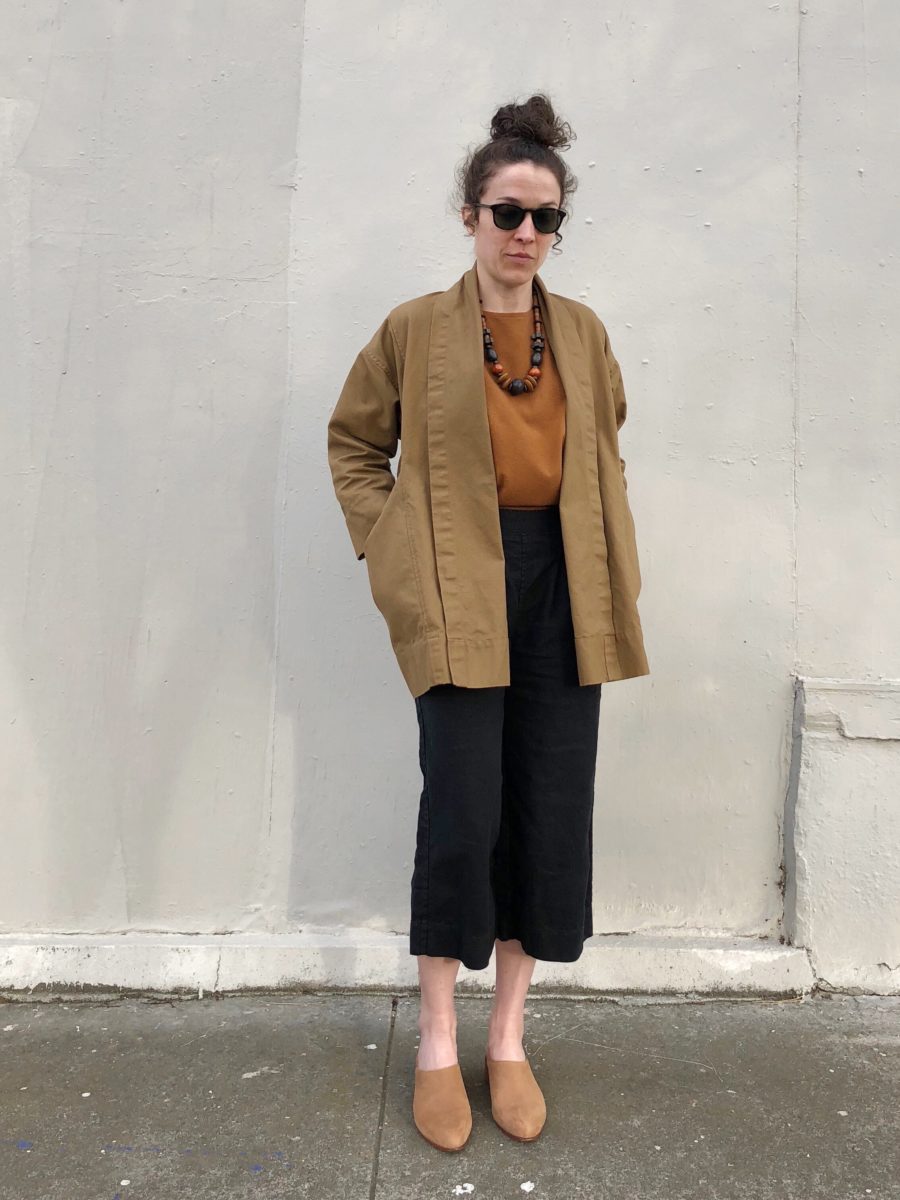
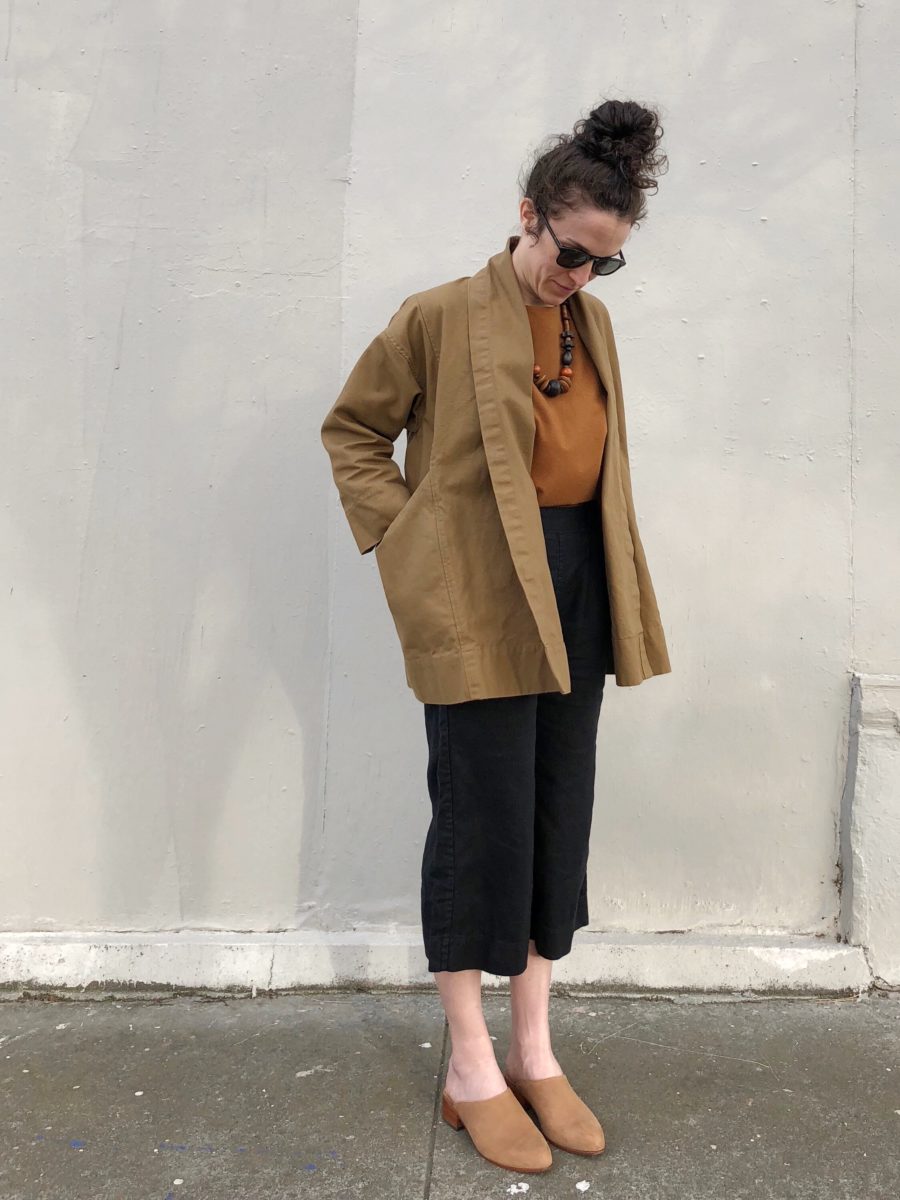
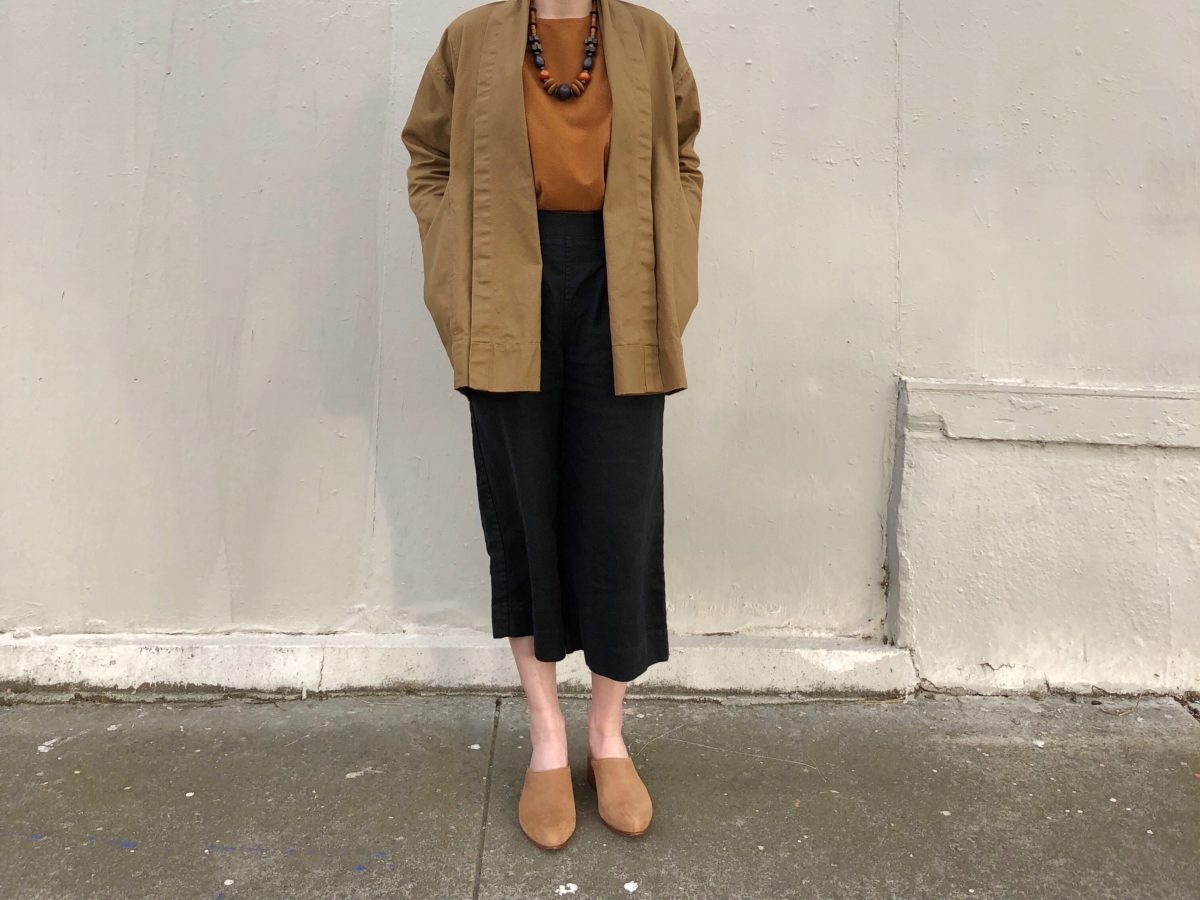
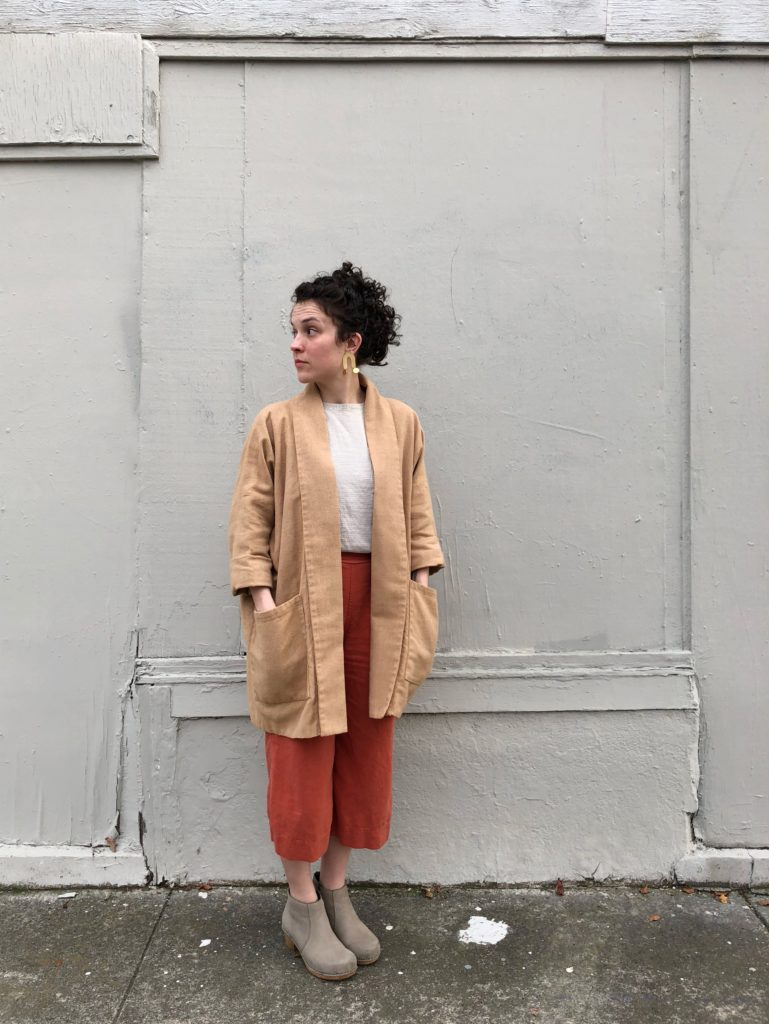
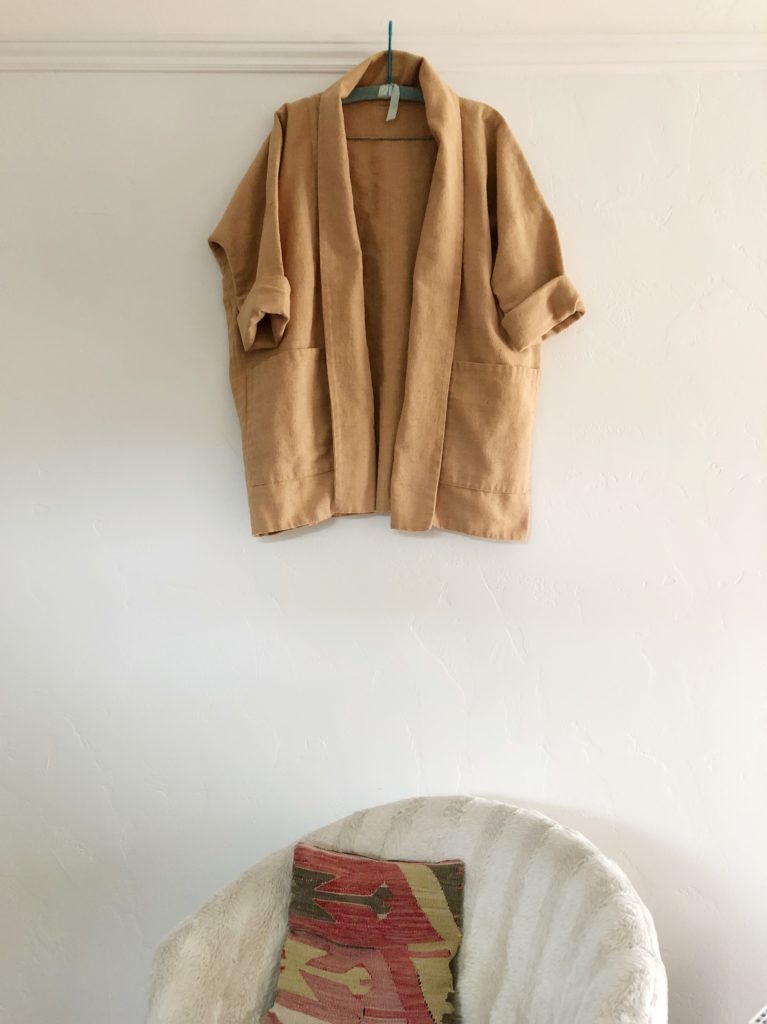
Pattern:Unfolding Jacket by @shopwiksten for Making Magazine vol. 4. I’ve heard that it will be released by Jenny as a stand alone pattern in late Spring. The magazine is totally worth buying though. It has SO. MANY. GREAT. PROJECTS.
Fabric: Main & Lining is a thrifted loose weave fabric. Unsure of the content, but guessing it’s a linen/cotton blend. I’ve had it for years and I’m glad I finally found the perfect pattern to pair it with.
Size: XS
Mods: None, other than forgetting to interface the collar, which I don’t recommend.
I started my second Unfolding Jacket in late December right after returning from an unsuccessful trip to the airport. Many delays and future missed connections meant surprise extra sewing time. I was able to finish everything but the collar before leaving.
As mentioned in the last post, I left the black and cream cotton ikat version of this jacket with my mom making me VERY motivated to finish this one when we returned home.
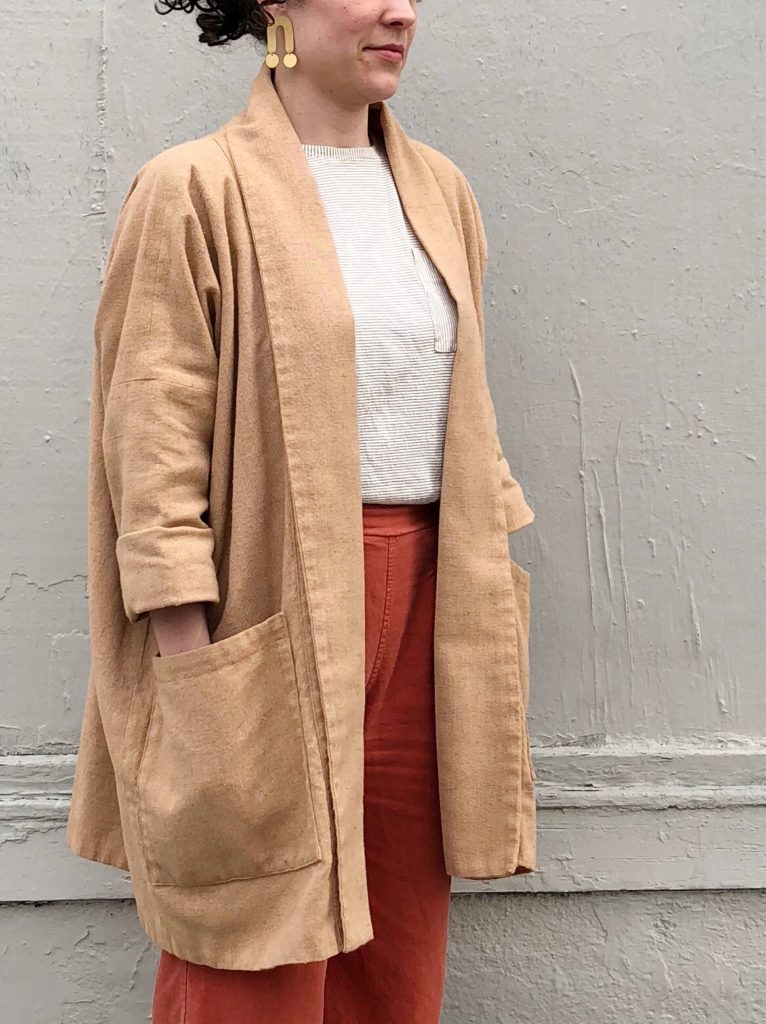
Normally, I have better habits and interface all necessary pieces before moving on to sewing. My extreme excitement to finish and the time away from it caused me to forget this step. I think it’s not as disastrous as I initially thought, but you can see that the collar doesn’t quite have enough structure to fully roll in the picture above.
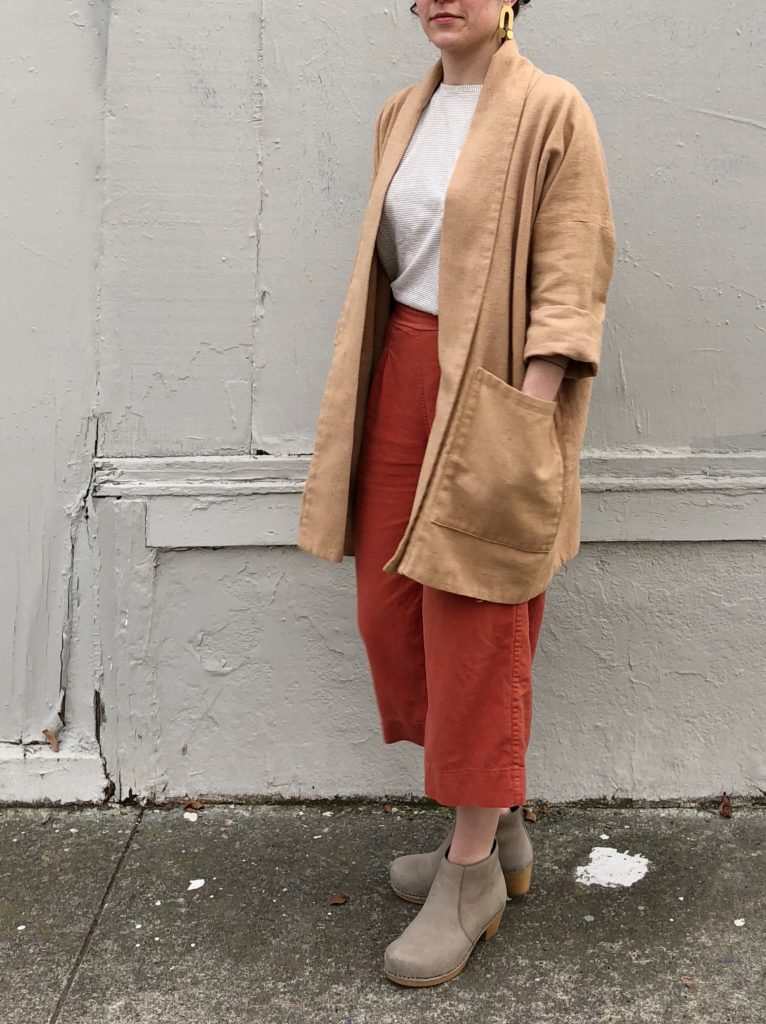
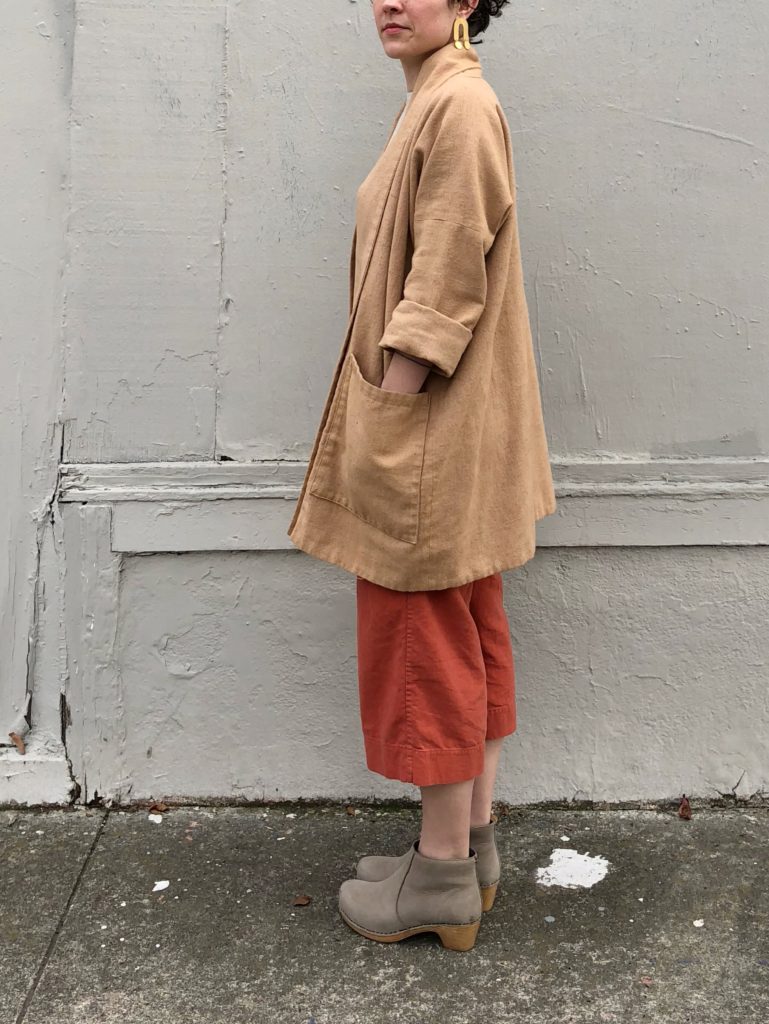
After making the first version with the modified pockets (set into side and collar seams), I intended to make the same changes on this one. However, the pieces were already cut out (I’m trying to batch cut things on weekends) and since the lining is from the same fabric there just wasn’t enough to re-cut all 4 pocket pieces.
Even with my new Bernina my topstitching skills are a little wonky (hoping to buy a new foot for this soon), so I was a little worried about needing to do the patch pockets. No pockets was not an option so I pushed forward, learned how to do bartacks, and think they look great!
I’m really enamored with this color combination. I paired the jacket with a pair of Emerson Crop Pants (pattern by True Bias) and a knit Lou Box Top (pattern by Sew DIY). The earrings are my new favorite pair by Baleen which I picked up at Dear Golden while in Ann Arbor.