Natural Dyes Workshop

Leave a comment

Last weekend I took a two day workshop at Wildcraft called Pattern Play & Natural Dyes.

Day 1 | Dye Paste Samples

The first day of the workshop covered creating dye pastes and three techniques for application. The pastes included alum and different percentages of iron. We got to make two 12″ x 12″ cotton samples at each technique station. It’s pretty cool how the different pastes would determine how the dye would adhere to the cloth.

These are my stencil samples that were later dyed in cutch and madder.

These samples were block printed and dyed in pomegranate and logwood.

The last technique was hand painting. These were dyed in weld and lac.

Day 2 | Immersion Dye

Our samples dried over night and then we dissolved the paste using a process called dunging. After the paste was removed from the cloth, the samples went into the dye pots along with blank cotton bandanas that were pre-treated.

I chose to dye my bandana in cutch and then we had a little time to design. I threw a quick sketch together and decided to use the stenciling process.

We again used different dye pastes that were painted on to the dyed cloth, but this time titanium and citric acid were in the mix. The titanium practically removed the dye.

We were sent home with dunging supplies and after my bandana dried overnight, I dissolved the paste and let my bandana dry. I’m pretty pleased with how it turned out.

This workshop was a lot of fun and I would really like to try this at home.

New Sewing PR

1 Comment

WOOT! I made TWO garments in one day! Definitely a new personal record for me. Ah, I do love time off.

We leave for our honeymoon/anniversary in less than a week so naturally I think I can sew up an entire travel capsule. It’s going to be warm in Paris and Brussels requiring nothing but relaxed silhouettes in linen and silk. Everything also needs to mix and match.

I batch cut out four projects the other night and this cropped Willow Tank and self-drafted culottes were in the stack. As I was cutting them out I thought there was no chance I could finish them in time, BUT I DID. With ample time to spare! The other two projects are a button up shirt for my husband and a Maya top.

I followed Grainline’s tutorial to crop the tank and used leftover silk noil from my wedding separates. I thought it appropriate to wear a little bit from our wedding while on our honeymoon.

The culottes are from my first final skirt project in my pattern drafting class. The pockets are a little too snug over the hips but I’m impatient and didn’t feel like making that adjustment.

Both fabrics are from Stonemountain & Daughter in Berkeley, CA. They don’t currently have this linen in stock but I have it on good authority that they’re looking into it. Isn’t it just the yummiest color?!

Hoping to finish the Maya top, Fairfield Button Up, and Making Backpack before the trip!

Patternmaking Dart Manipulation Exercises

2 Comments

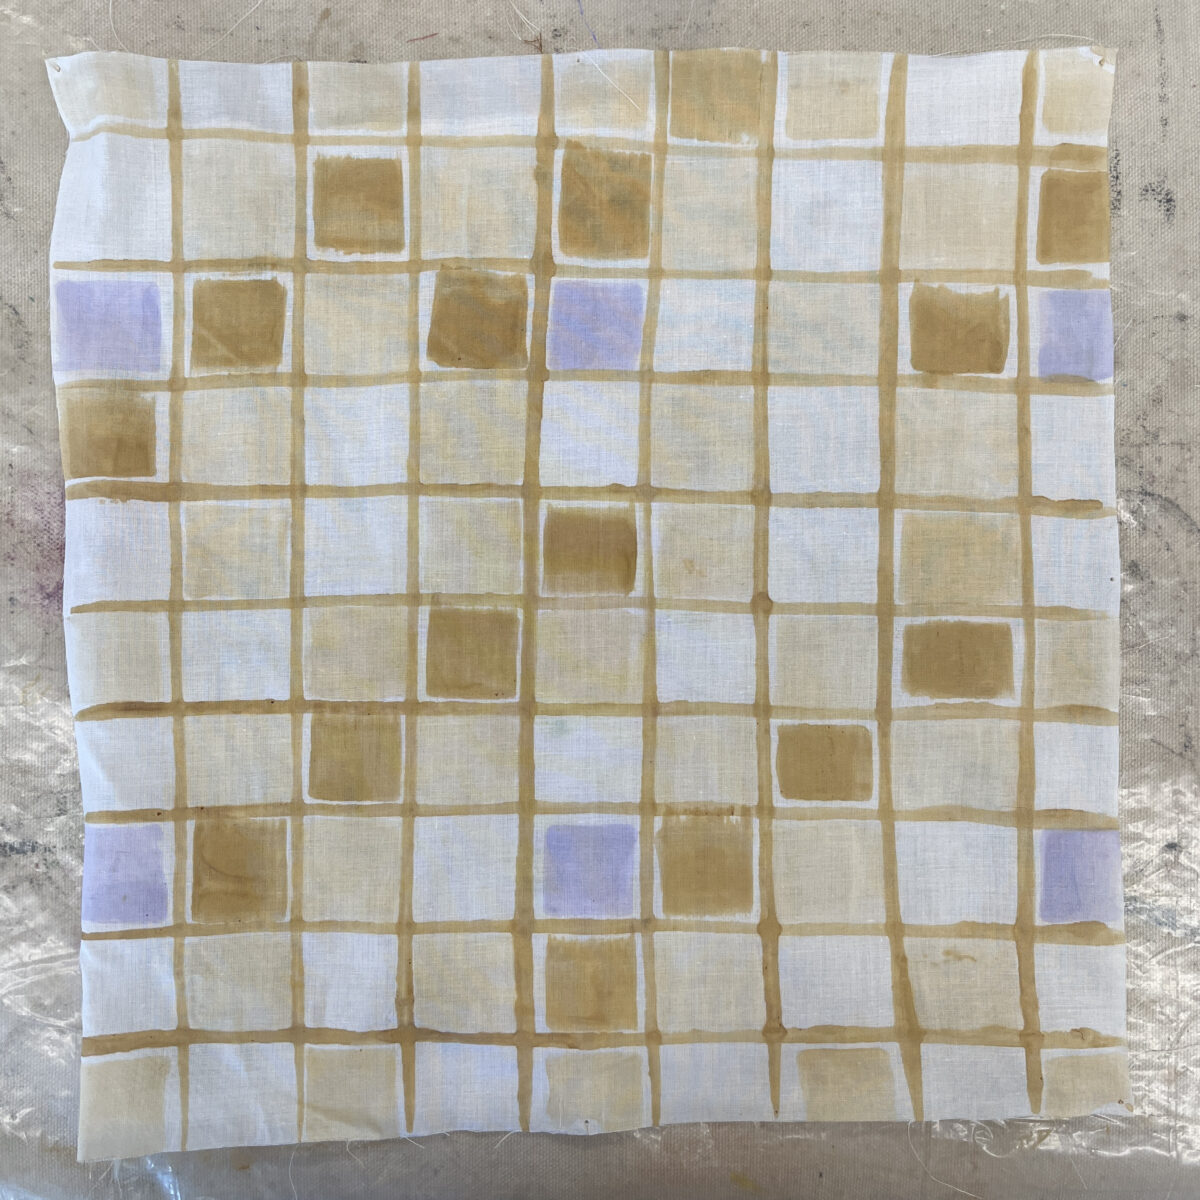
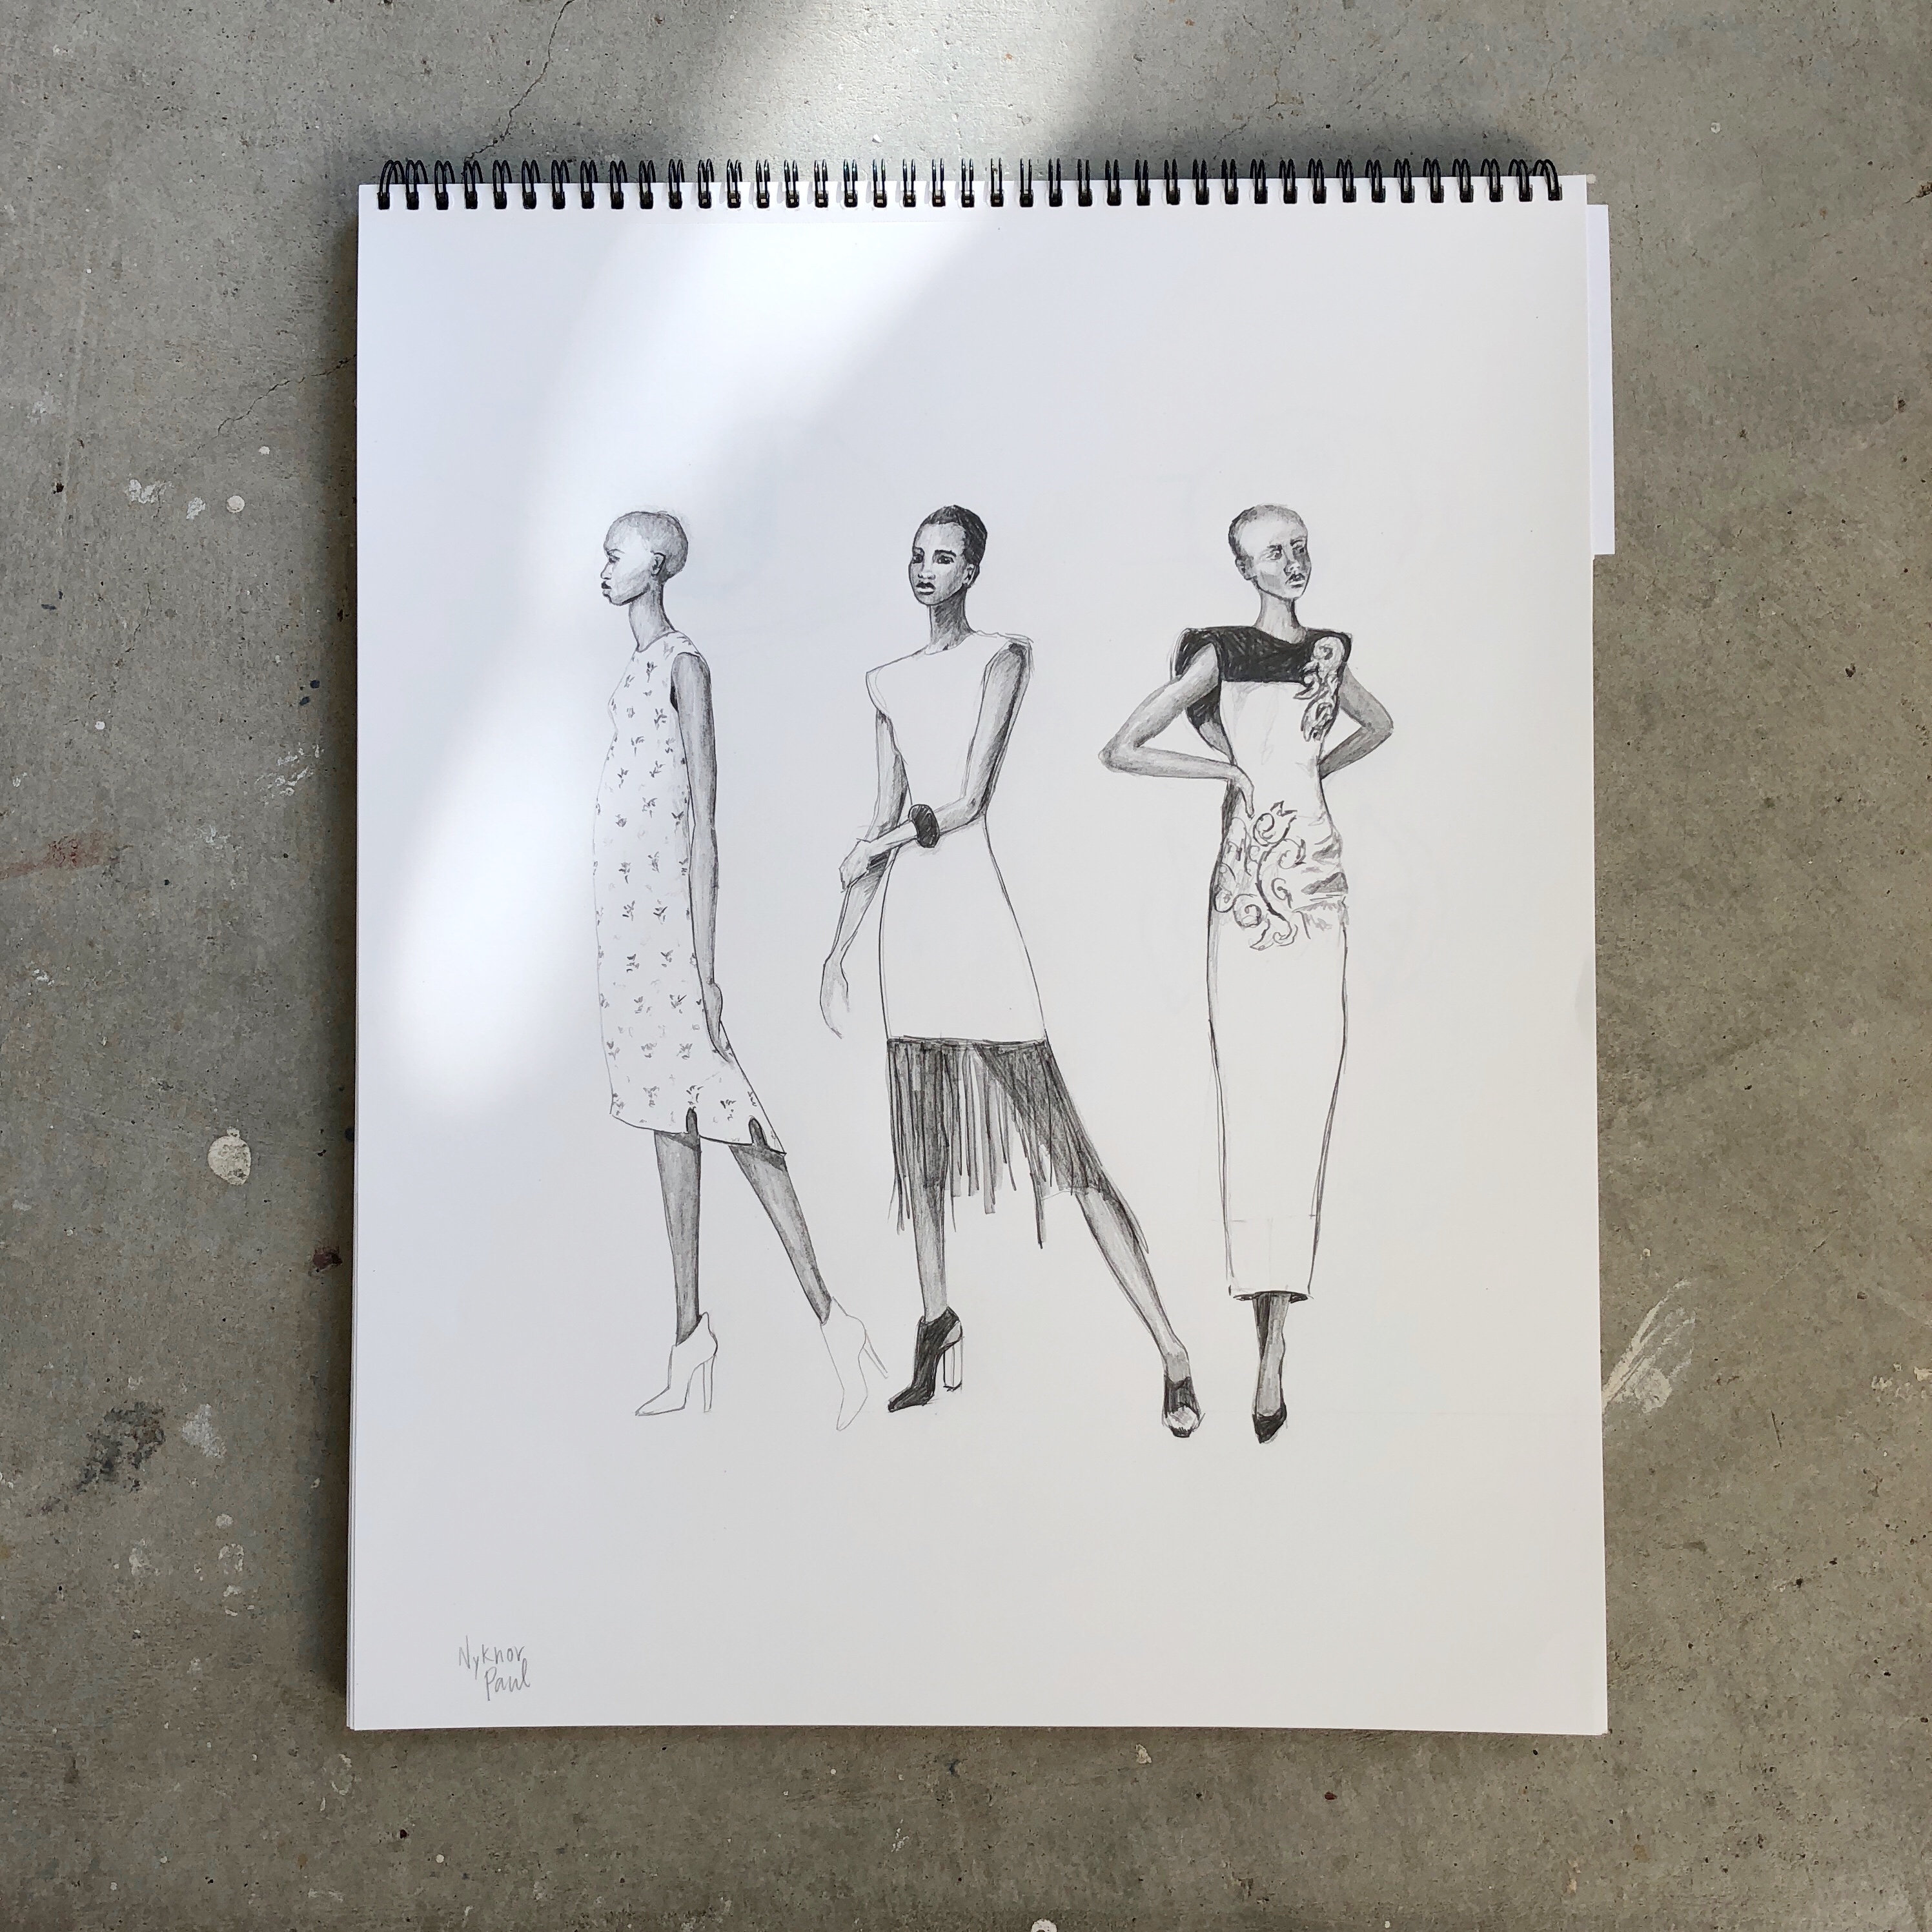
One full week of summer break has passed and I’ve been trying to power through as much of my Patternmaking & Design class as I can. It’s a self-paced program and my pace for the last year has been not much faster than a snail. I’m picking up speed and the program finally feels like I can draft independently without constantly relying on my wonderful teacher. Maybe I’m at a turtle’s pace now?

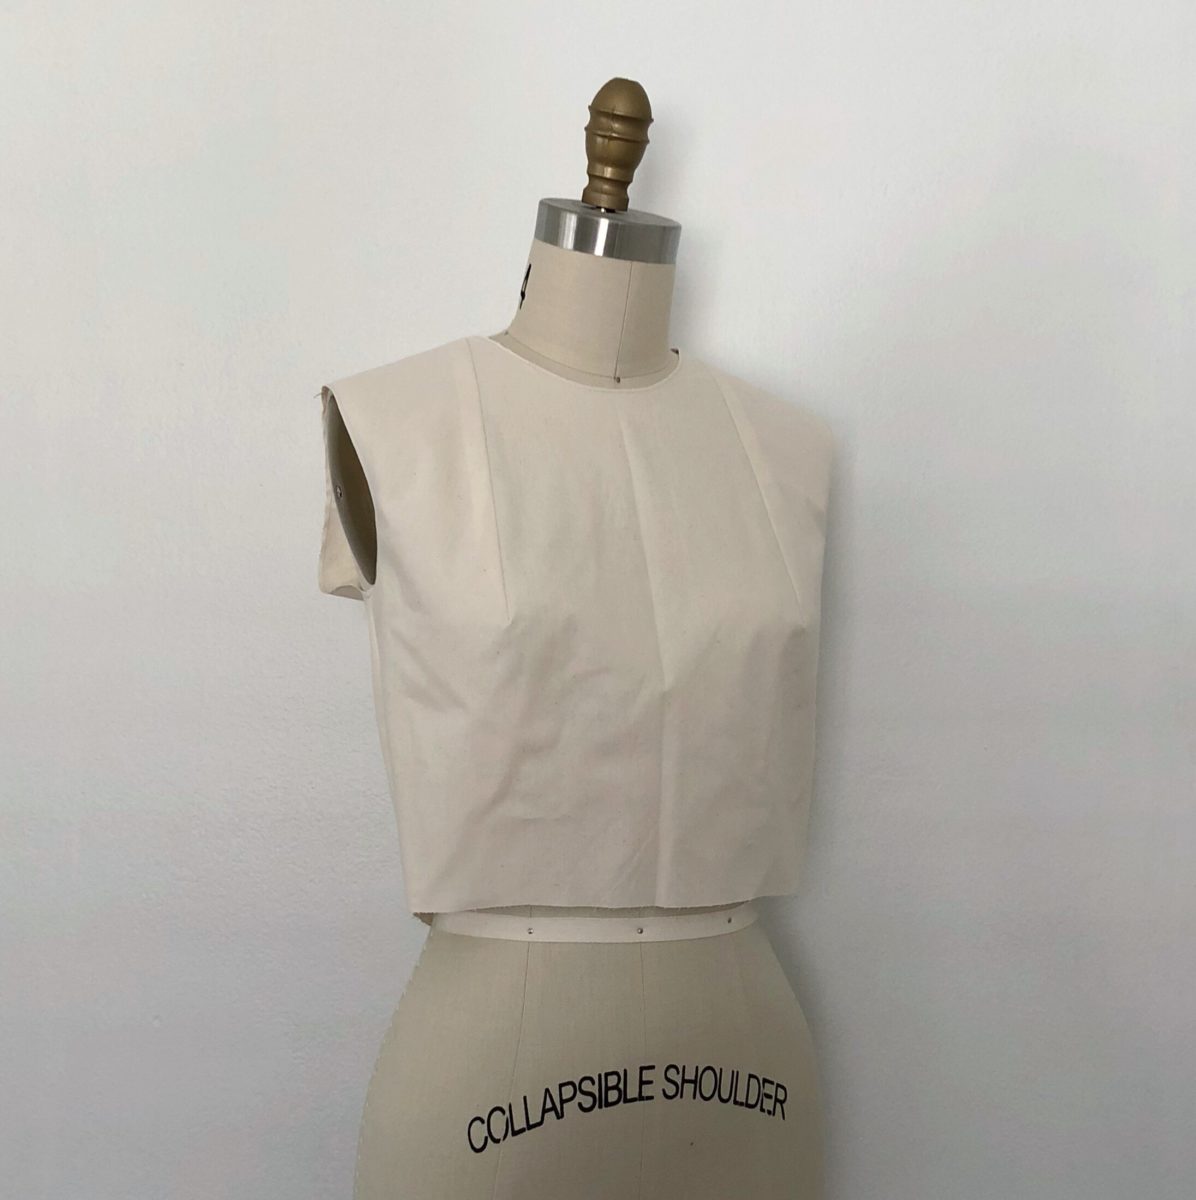
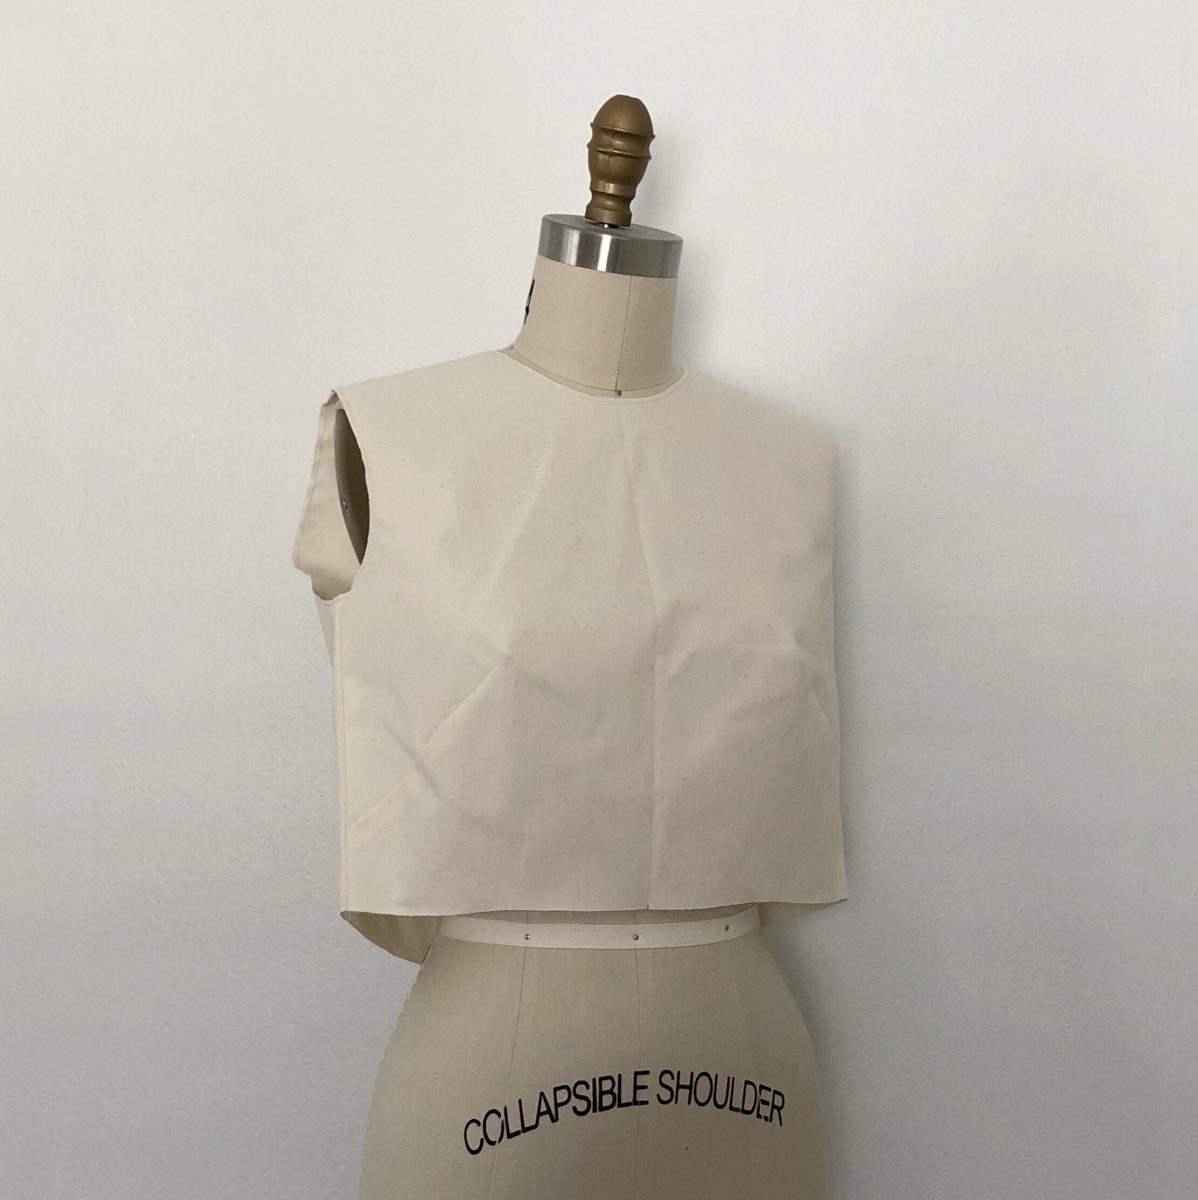
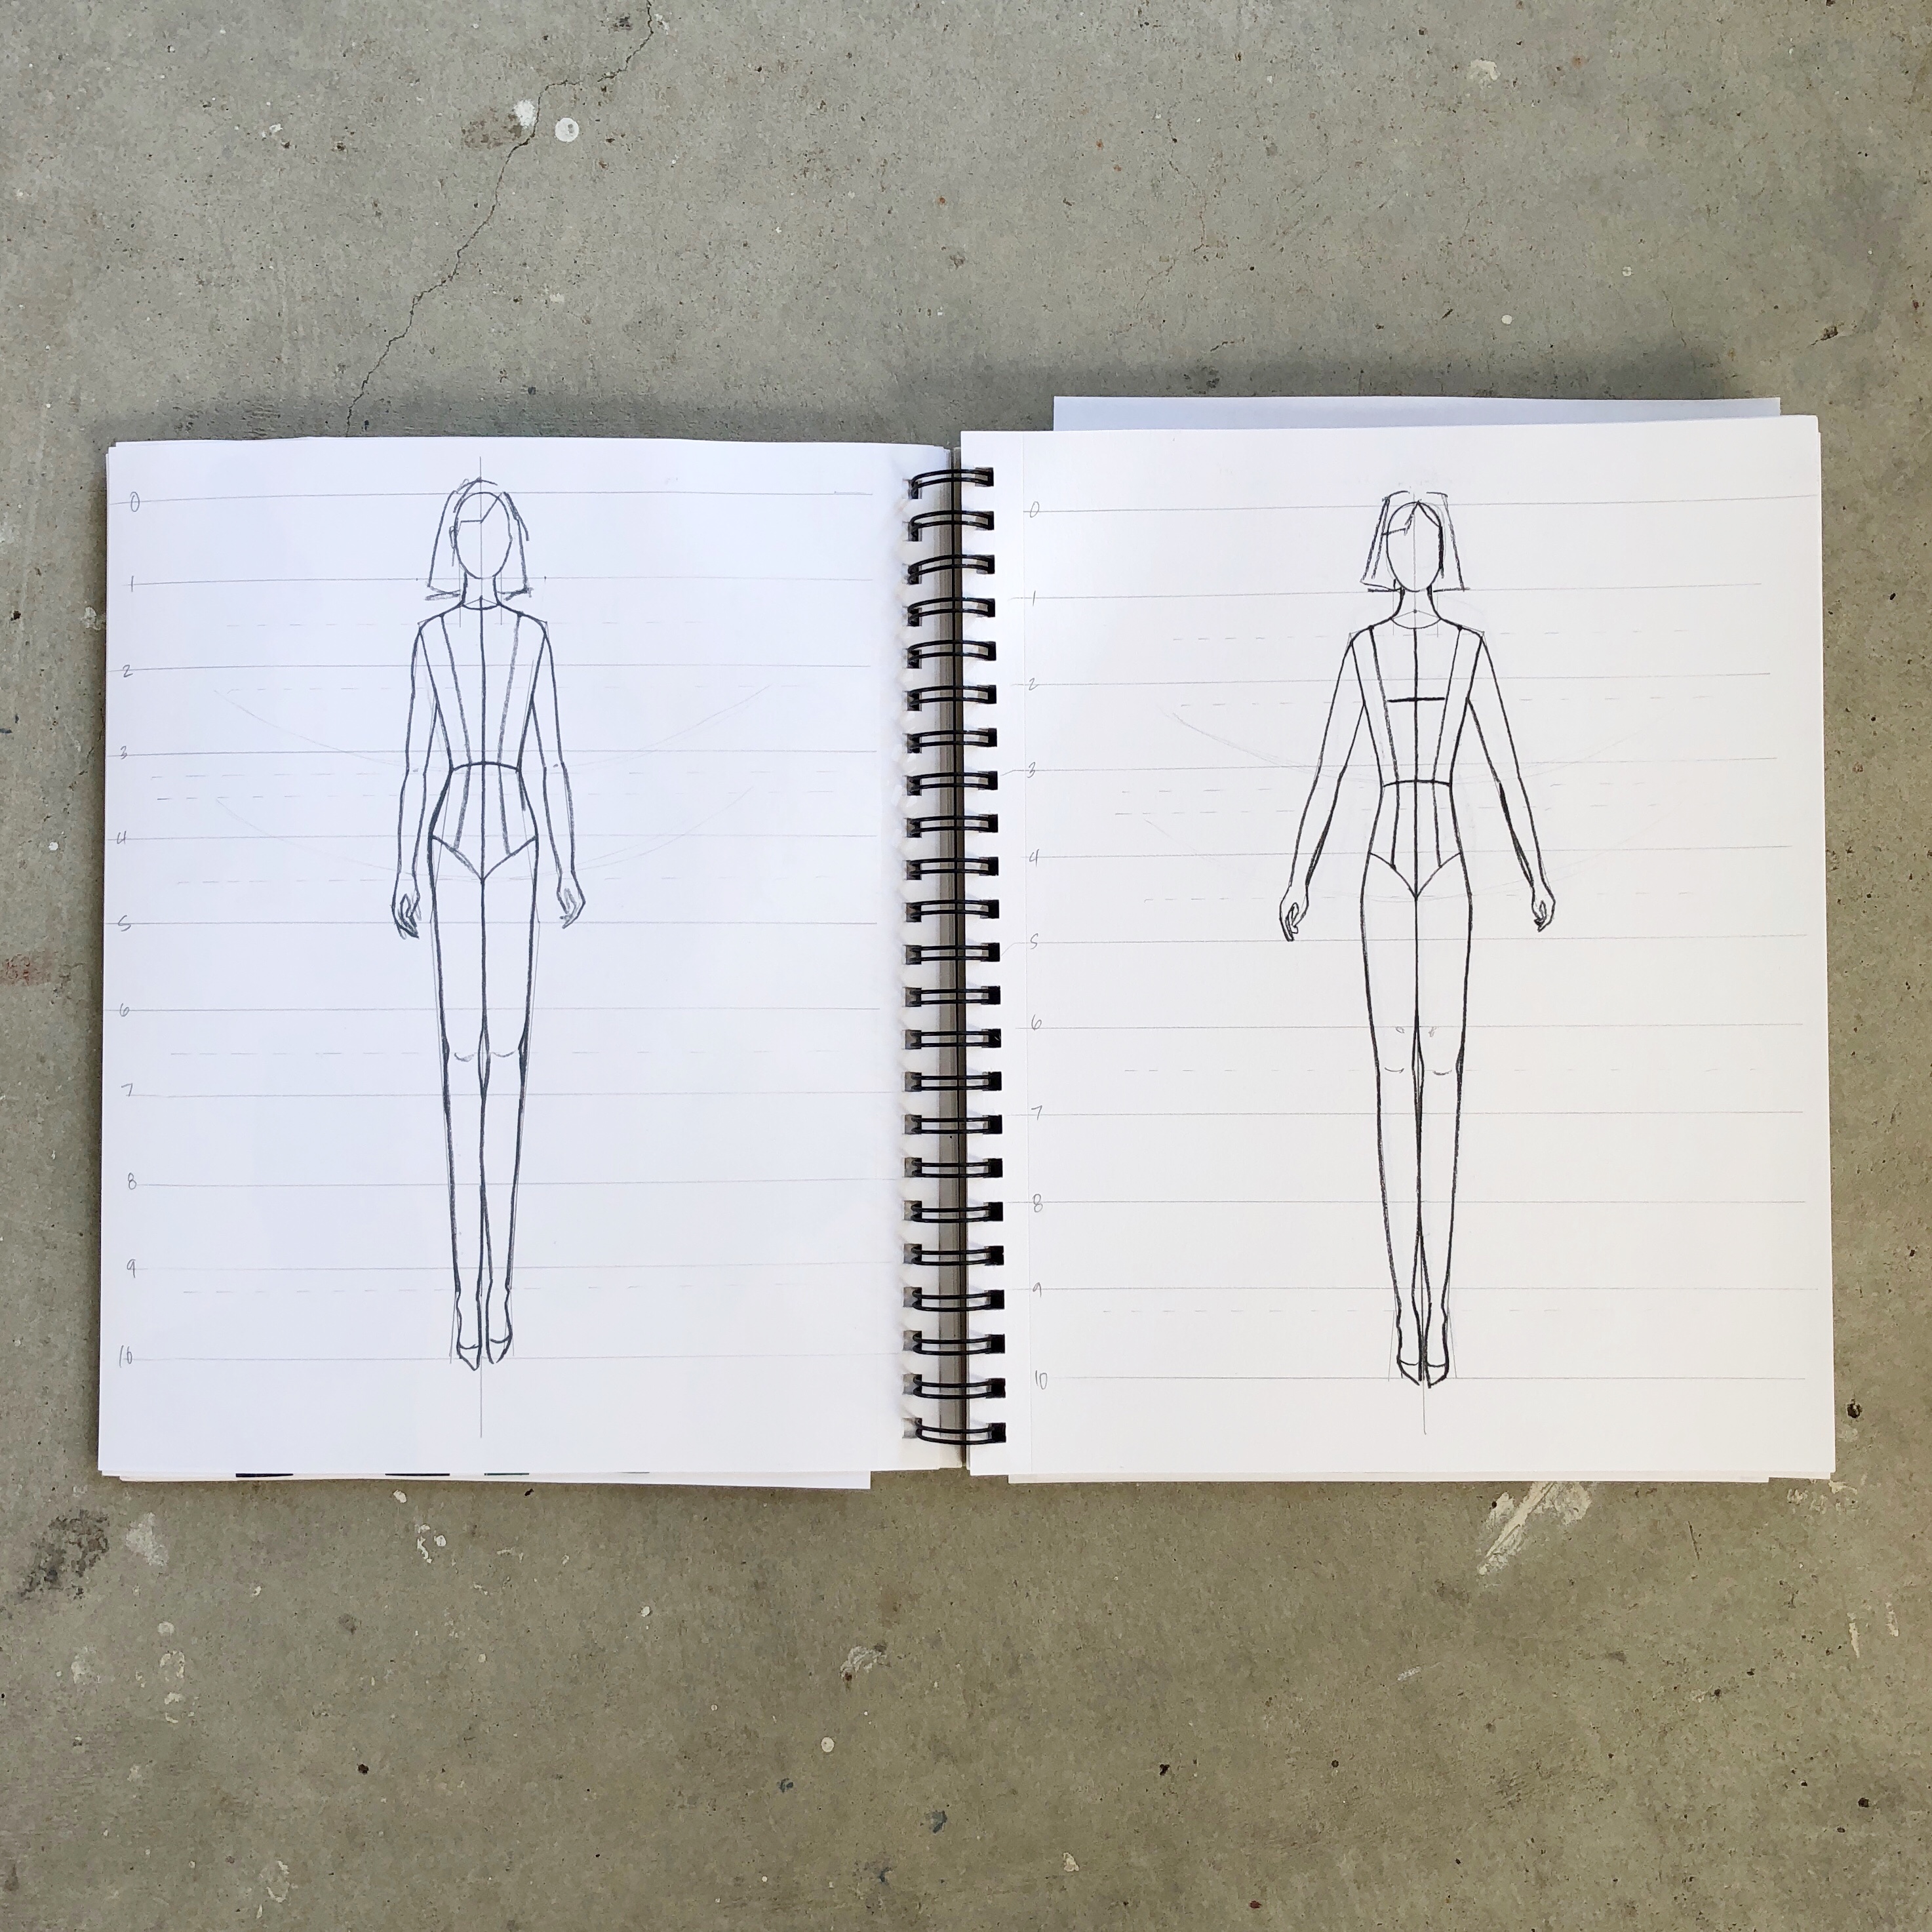
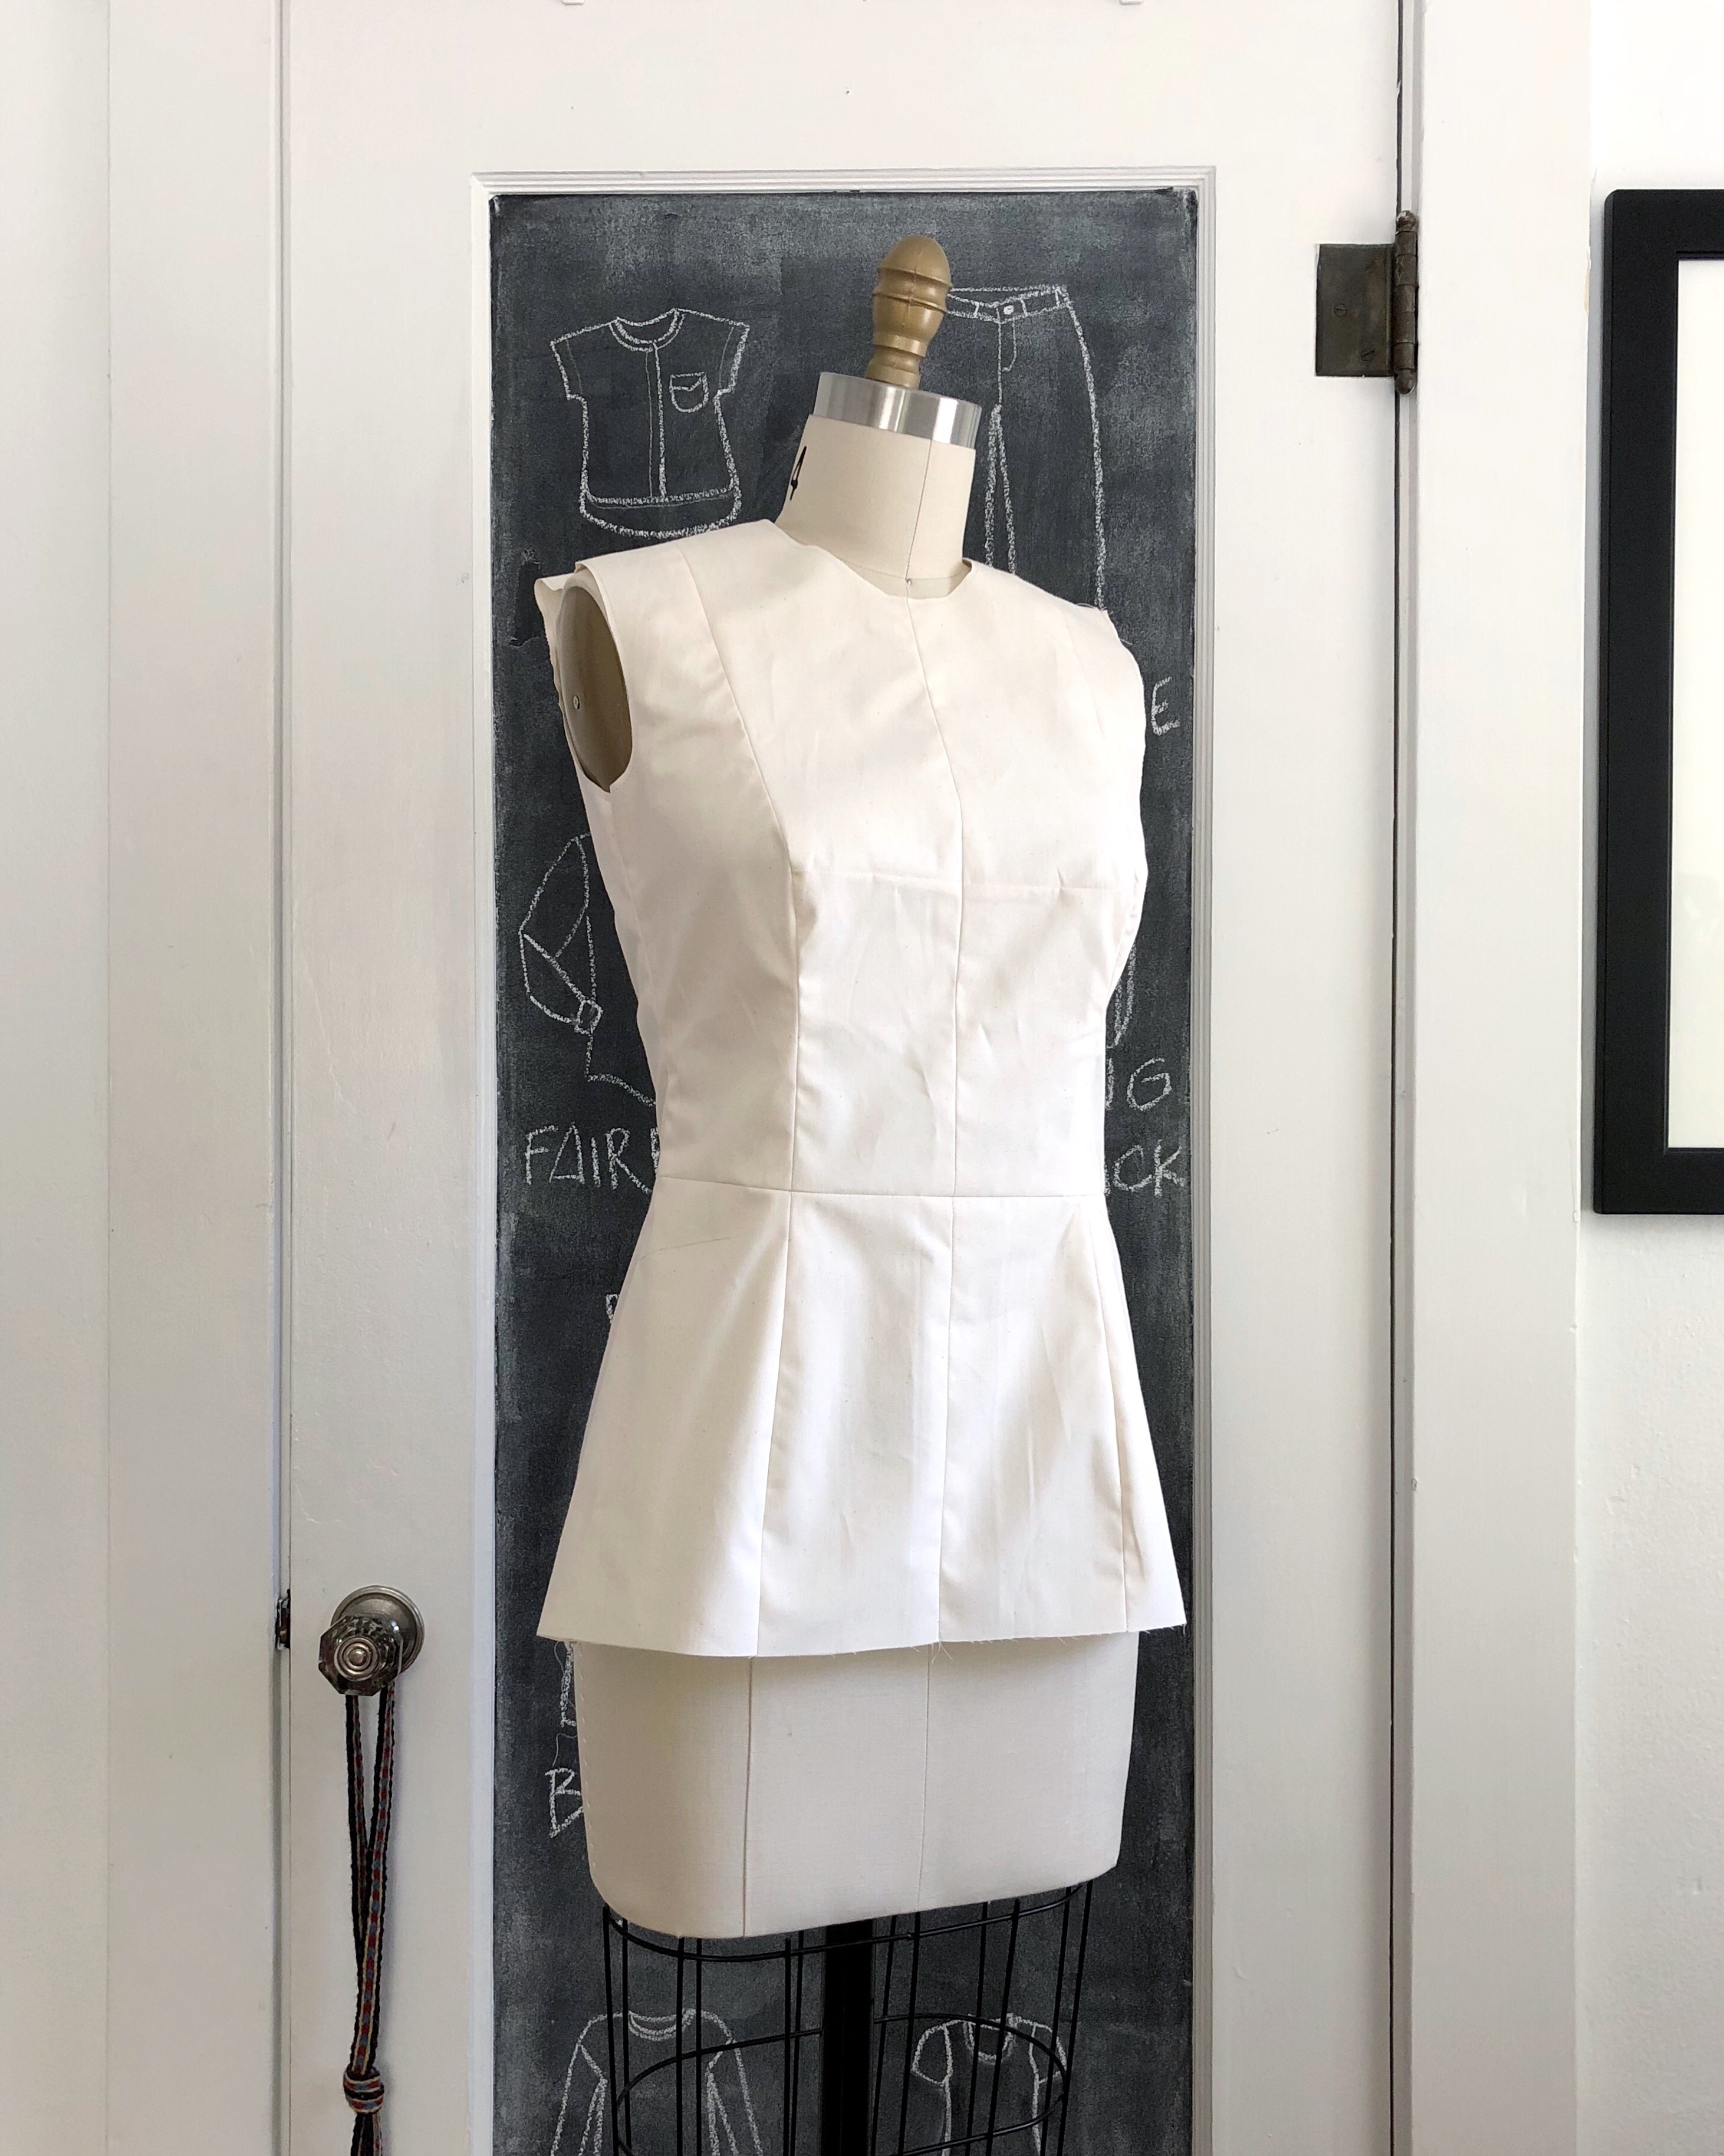
Above is my moulage or “mold” of my measurements which, once it had a perfect fit, I turned into my bodice sloper. The next section of the program is Dart Manipulation. I was able to draft 12 different exercises with 4 different backs in one week and then sewed all of them the following week. I’m pretty excited that I got through a section with the suggested timeline of 4-8 weeks in 2! Ok, I’m not actually done yet. I have to design, draft, and sew two designs of my own, but I’m feeling pretty confident I can do so this week.

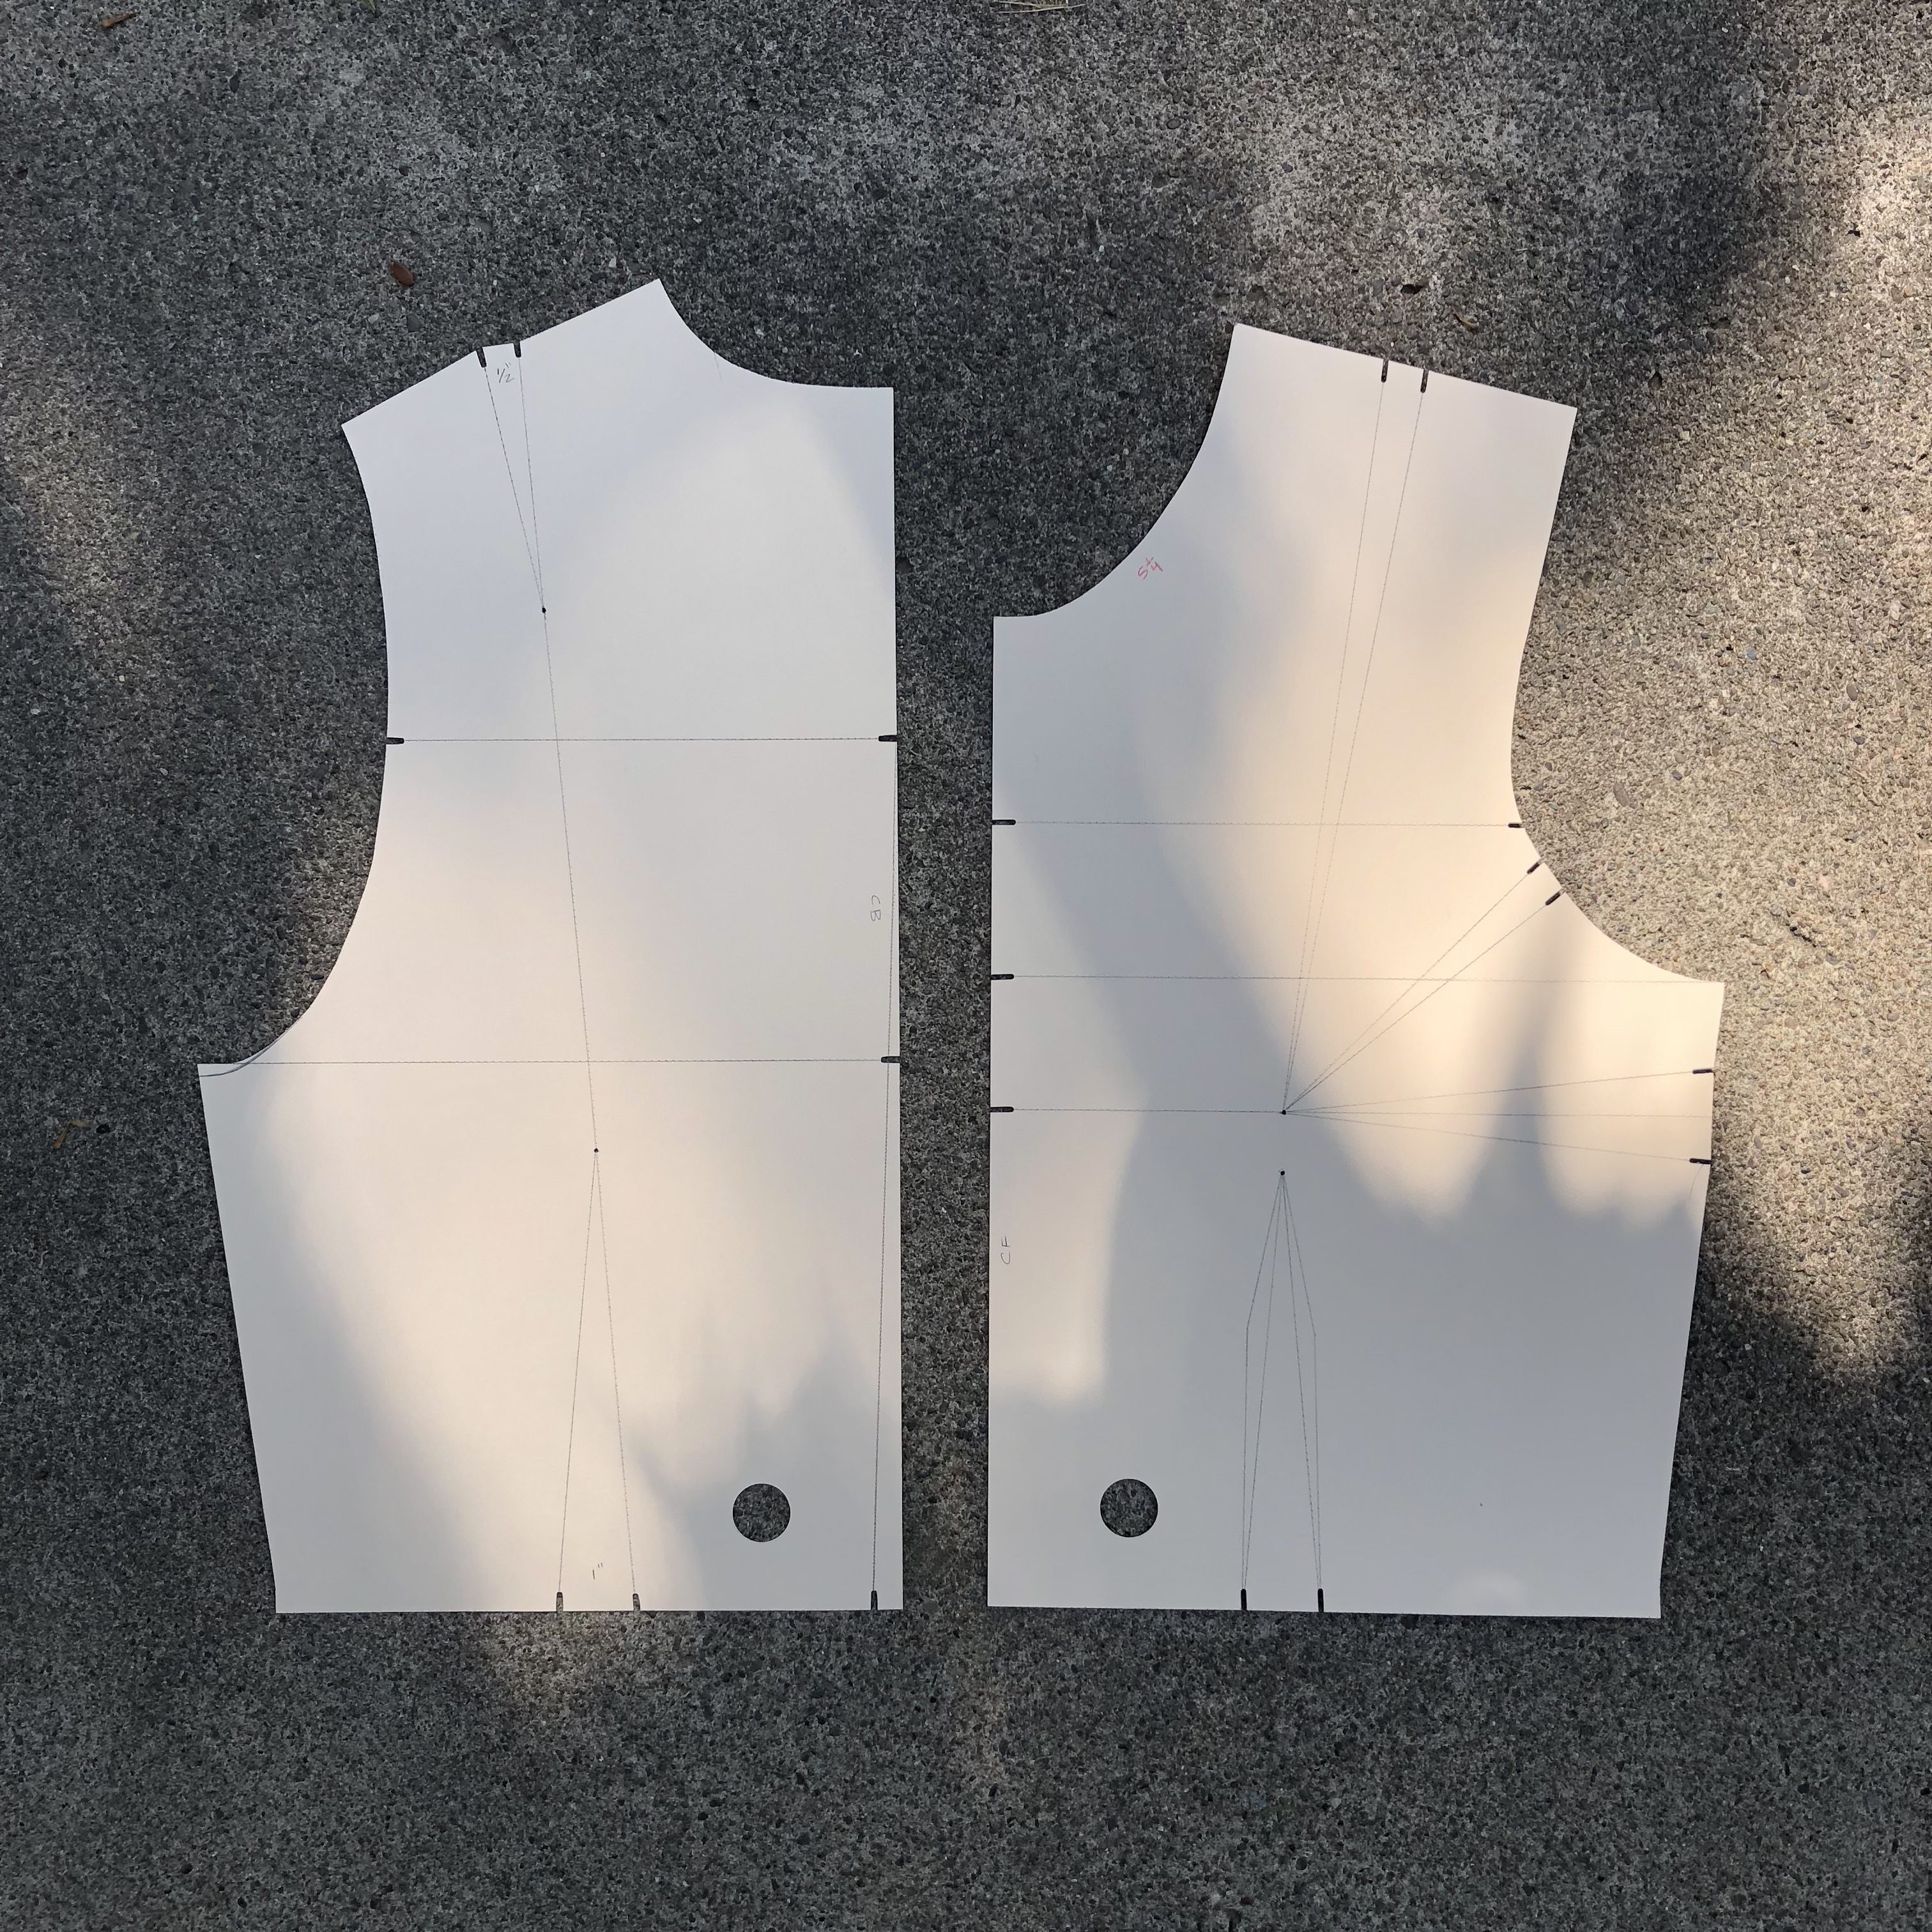
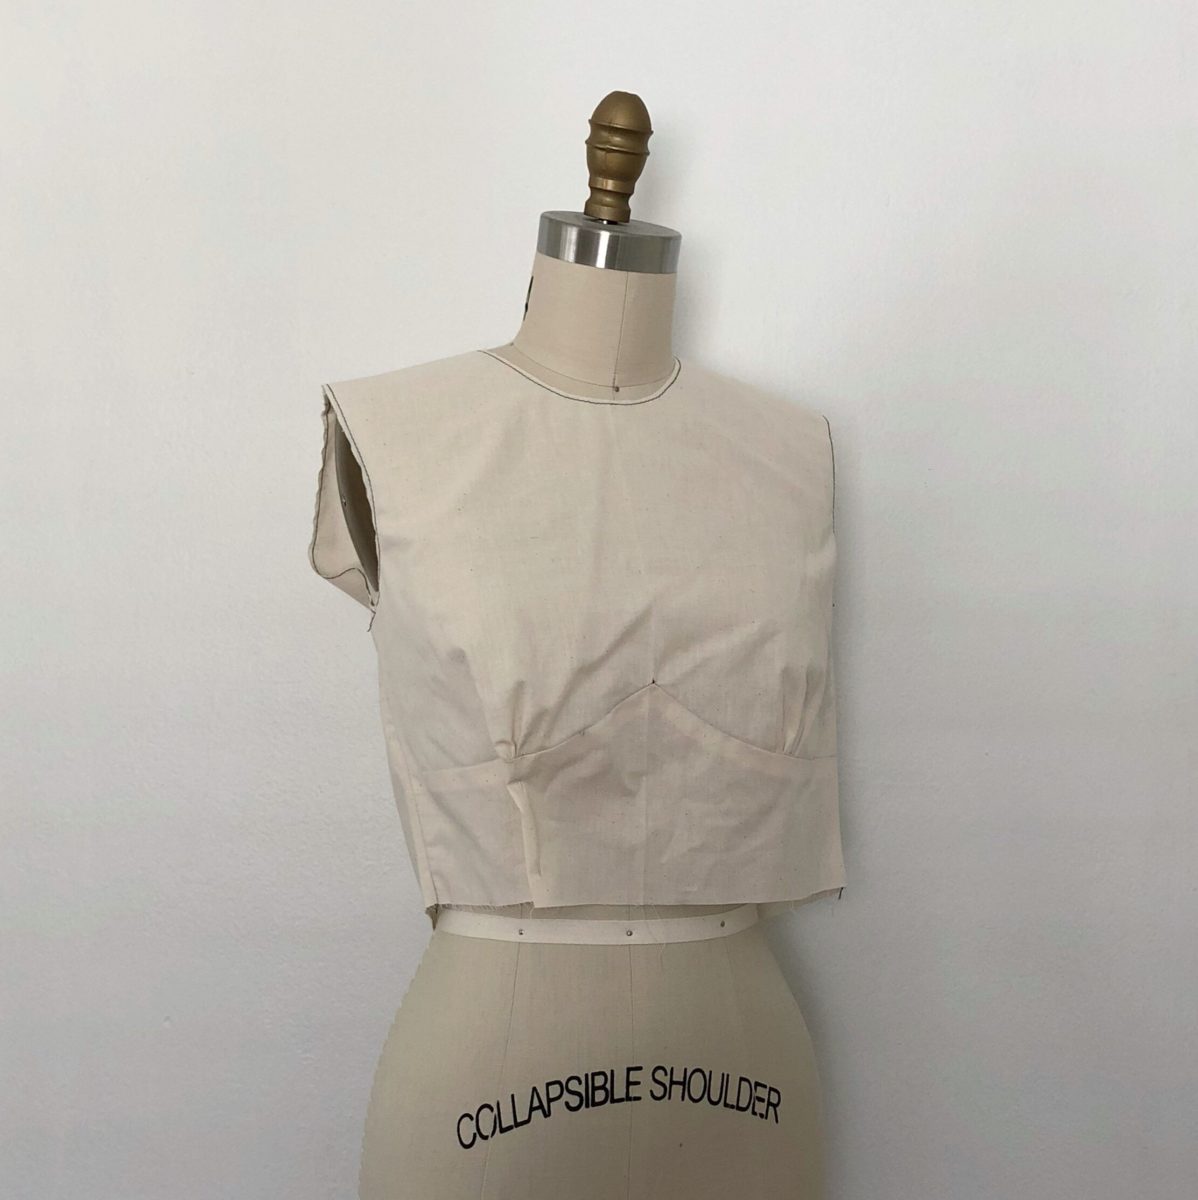
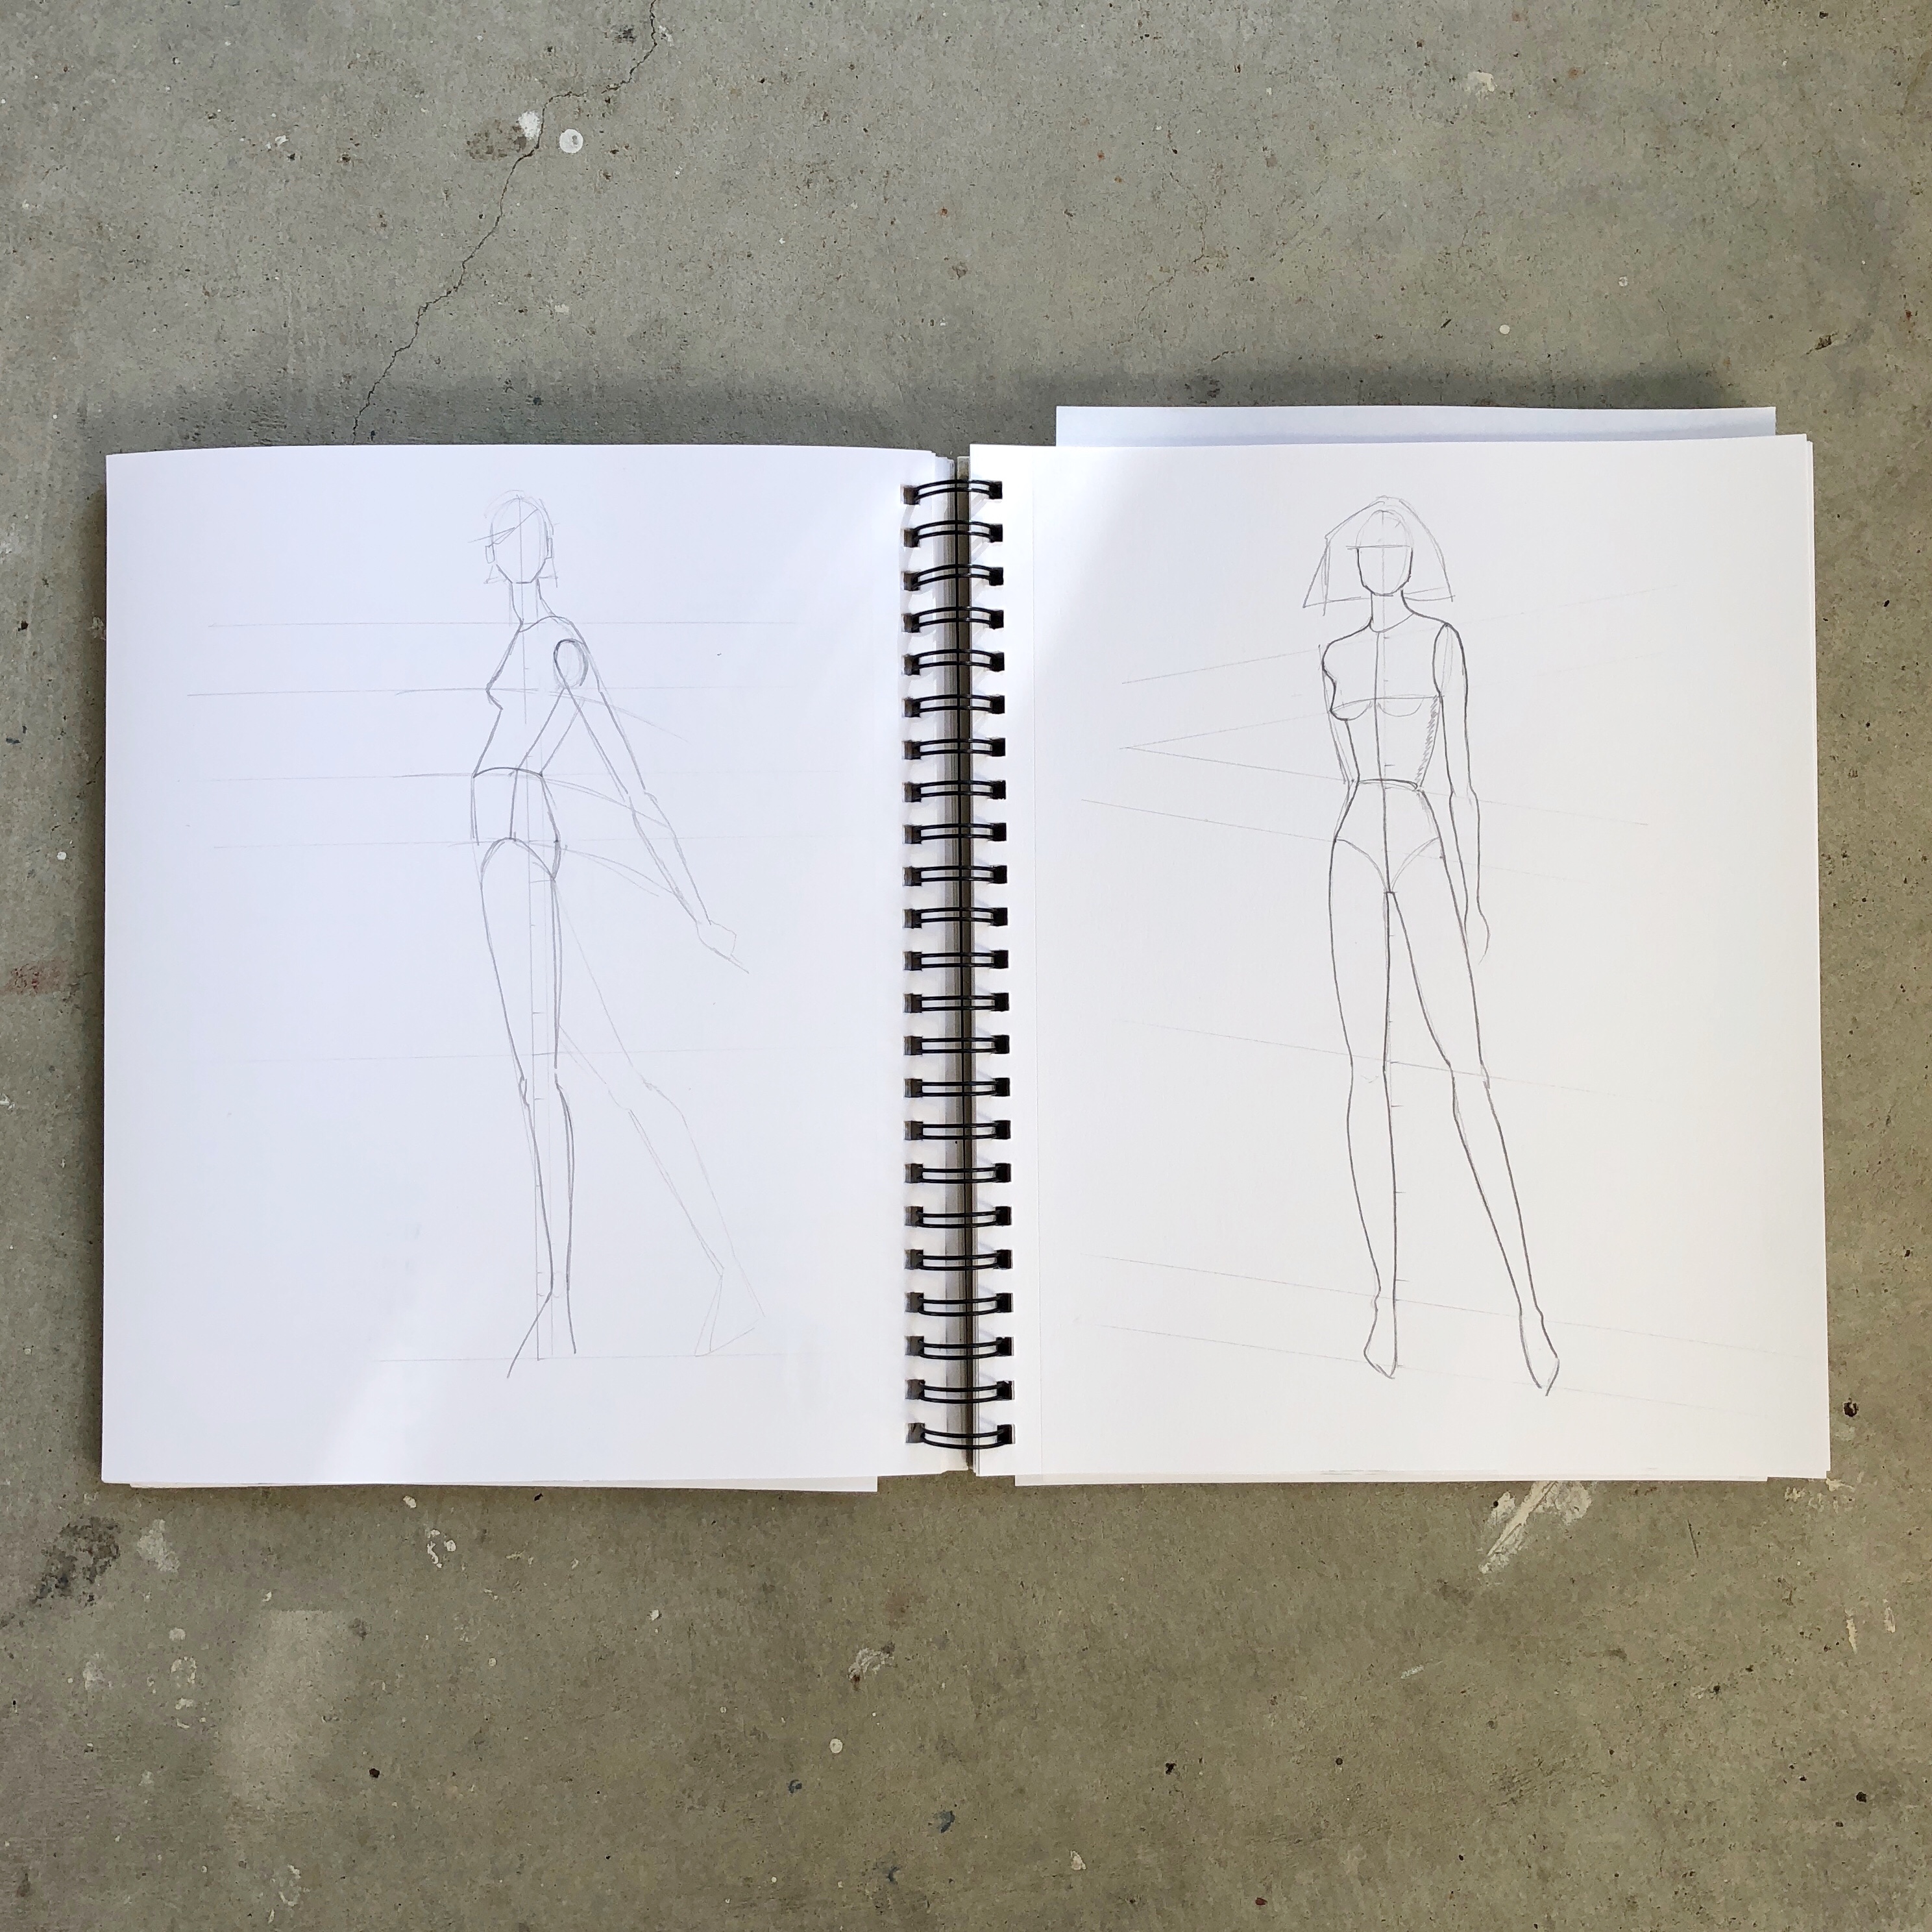
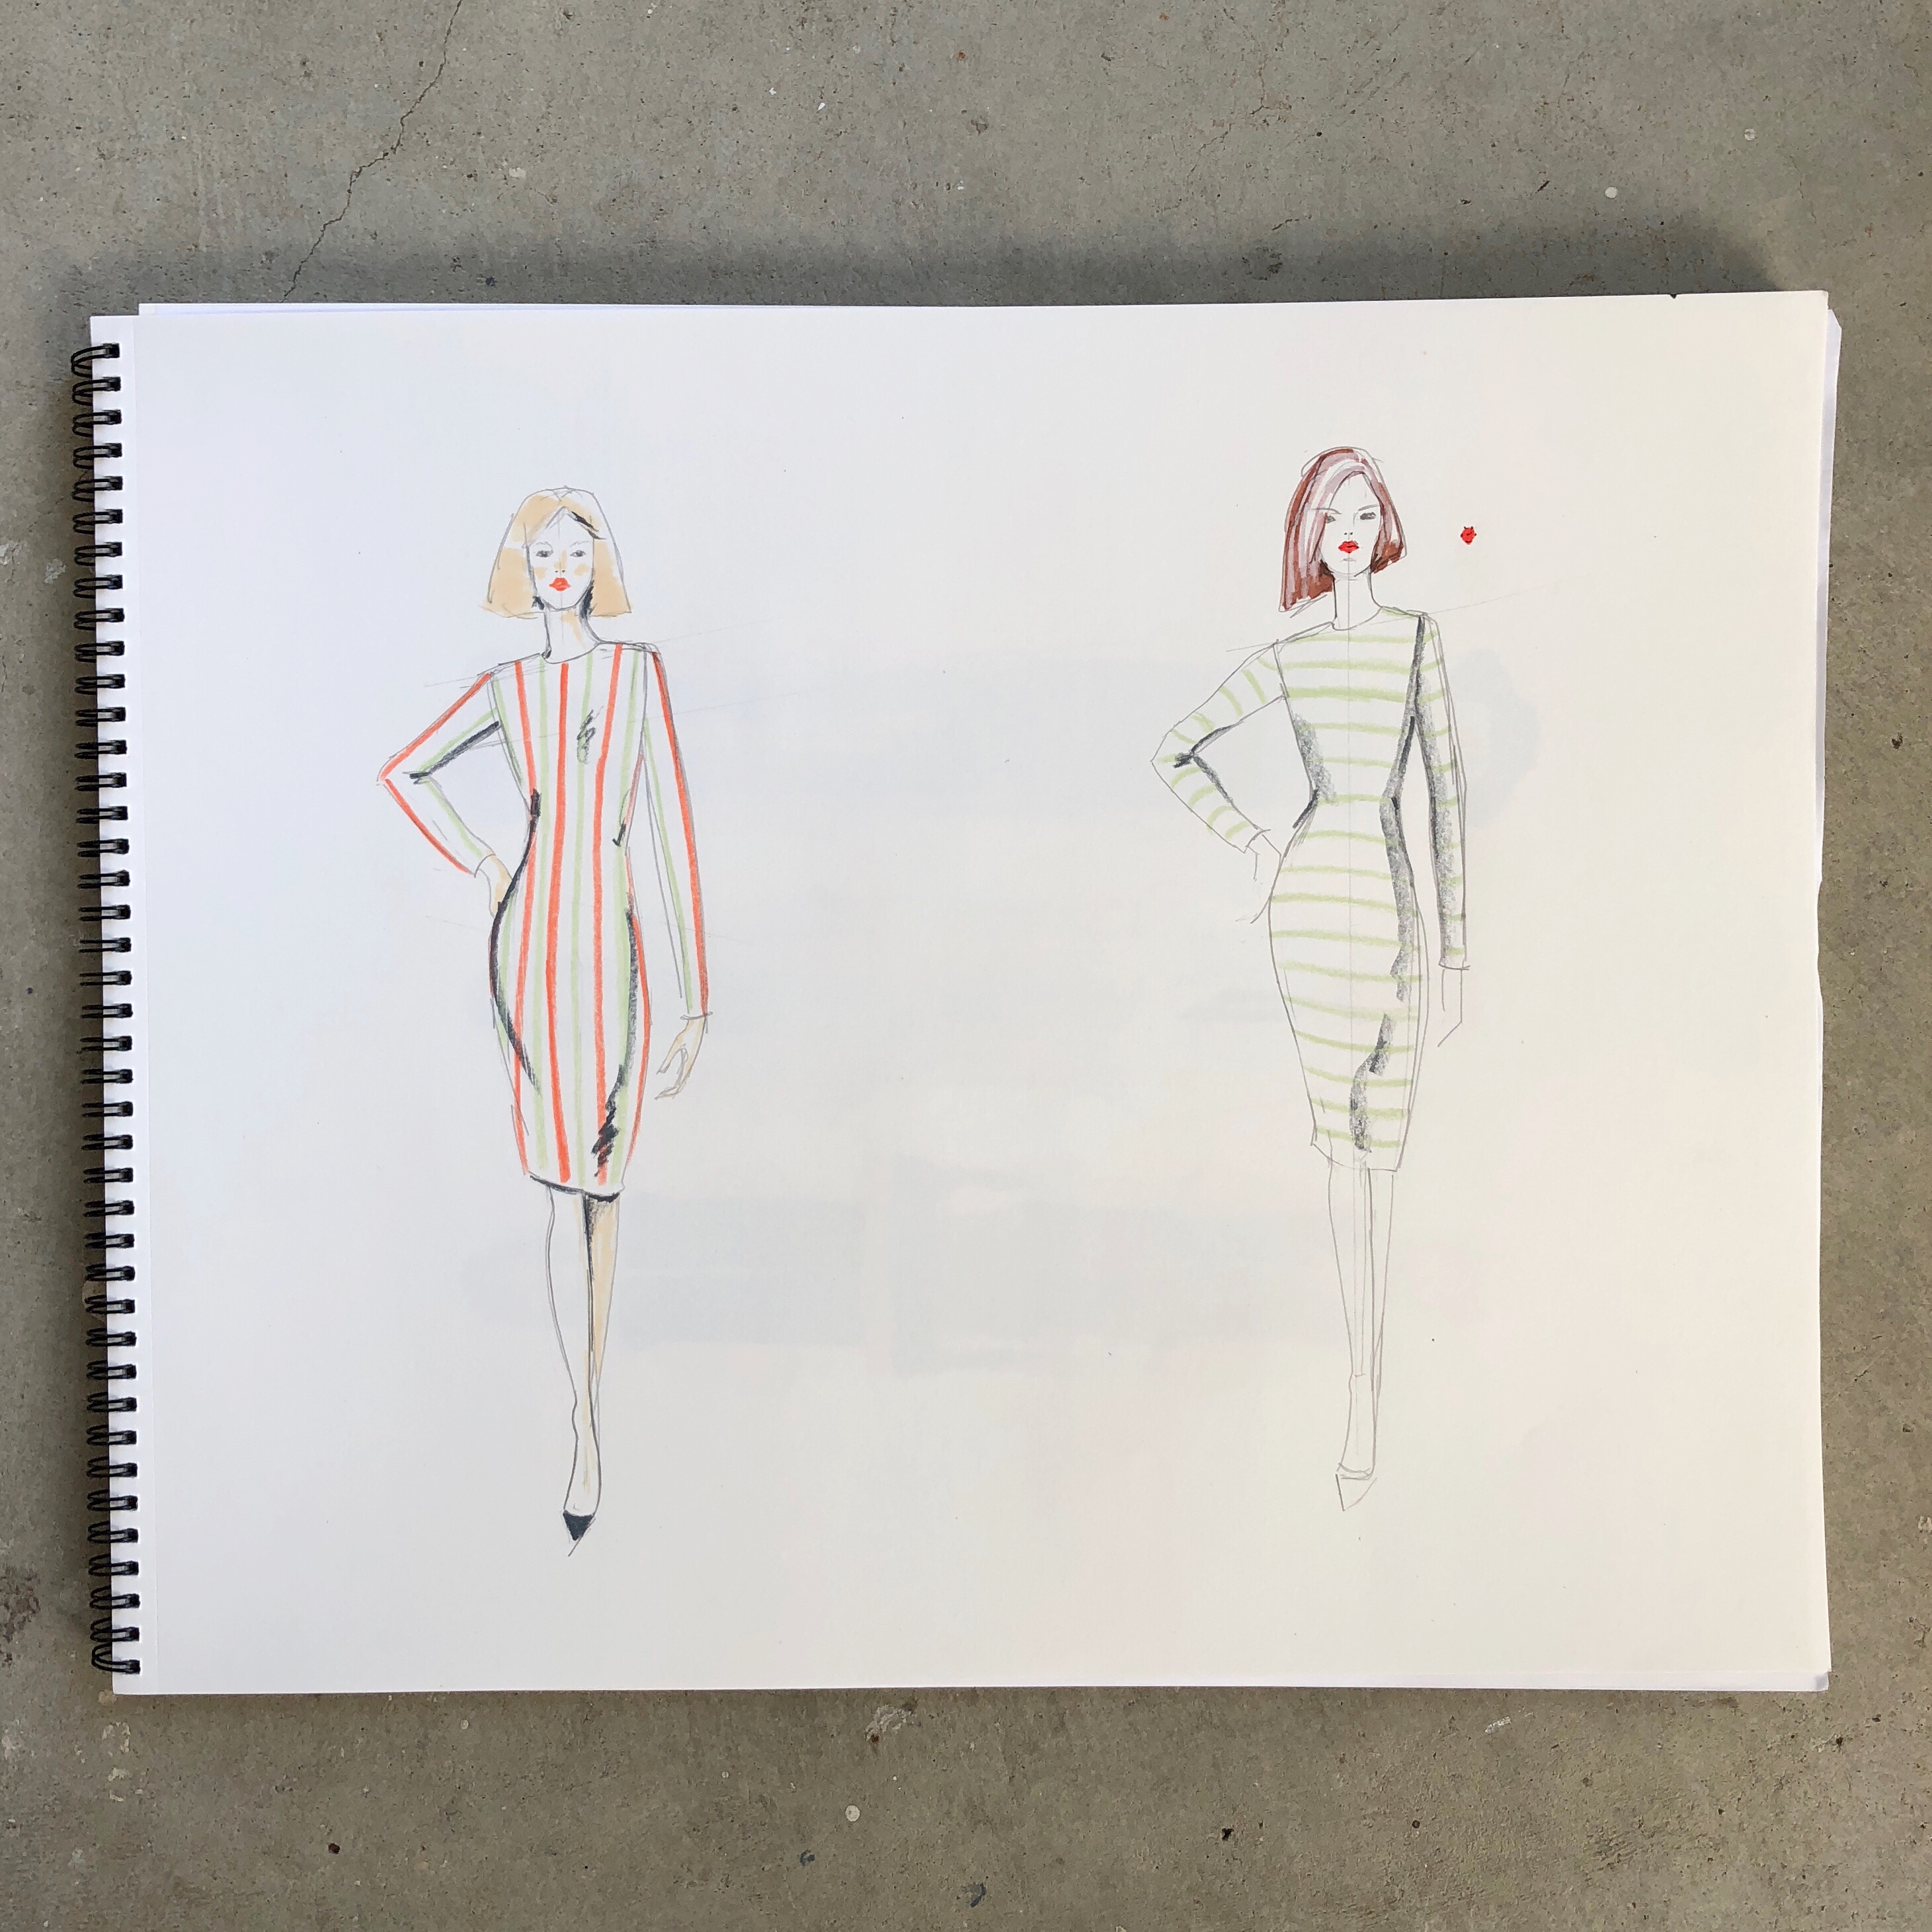
The front sloper has 4 darts that can be manipulated into different designs, the back has two darts. All 12 exercises used this sloper and I’m quite impressed with the variety of styles achieved.

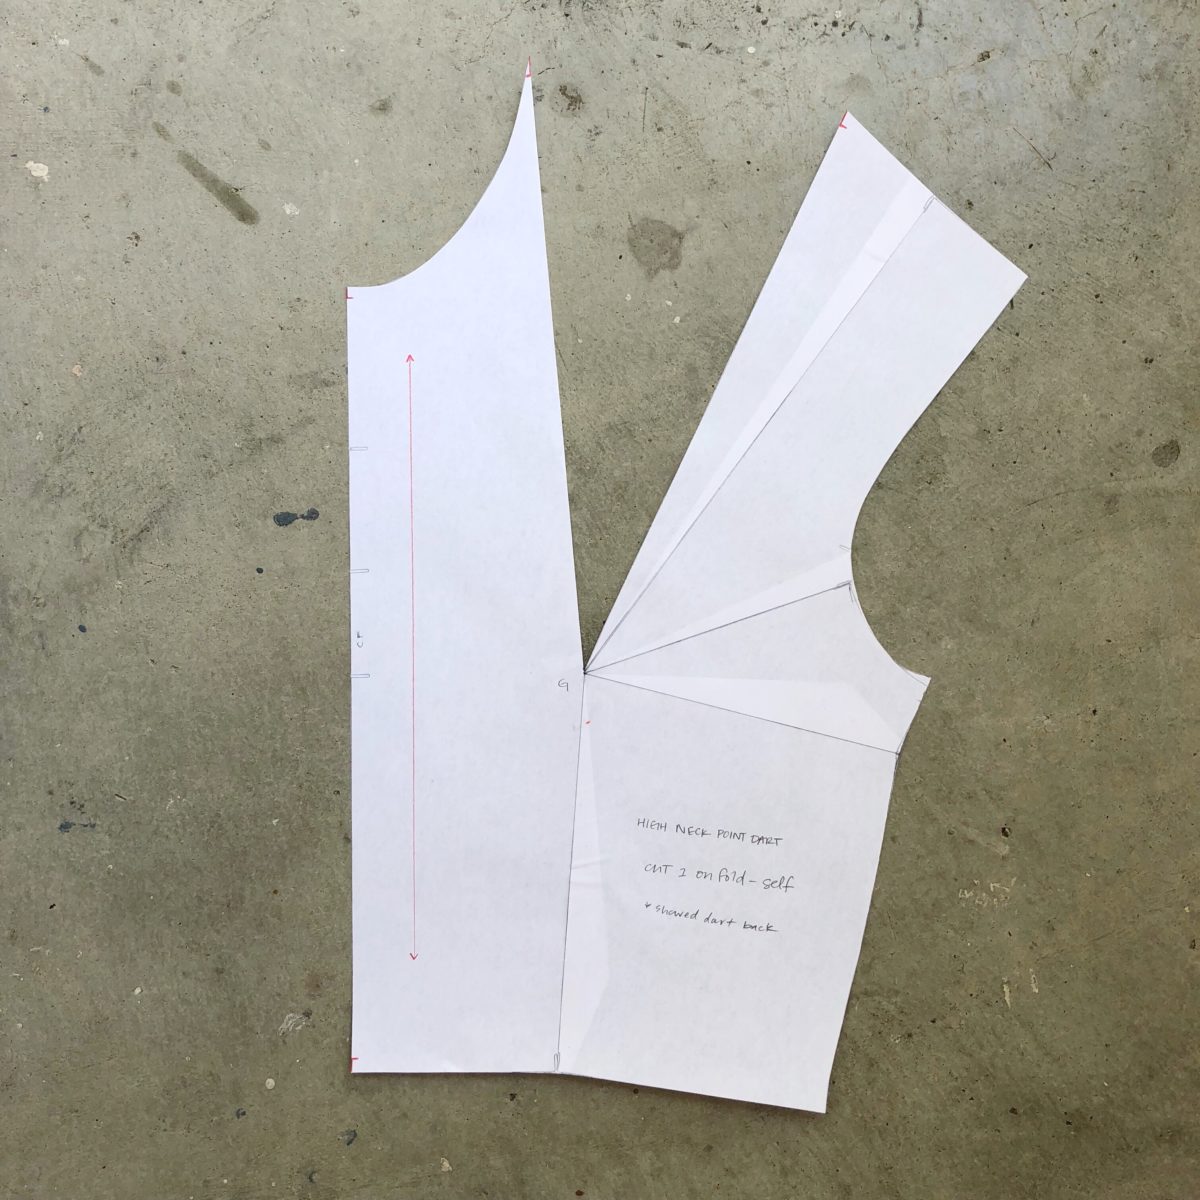
High Neck Point Dart – Slash a line from the high neck point to the high bust point and then fold all other darts into it.

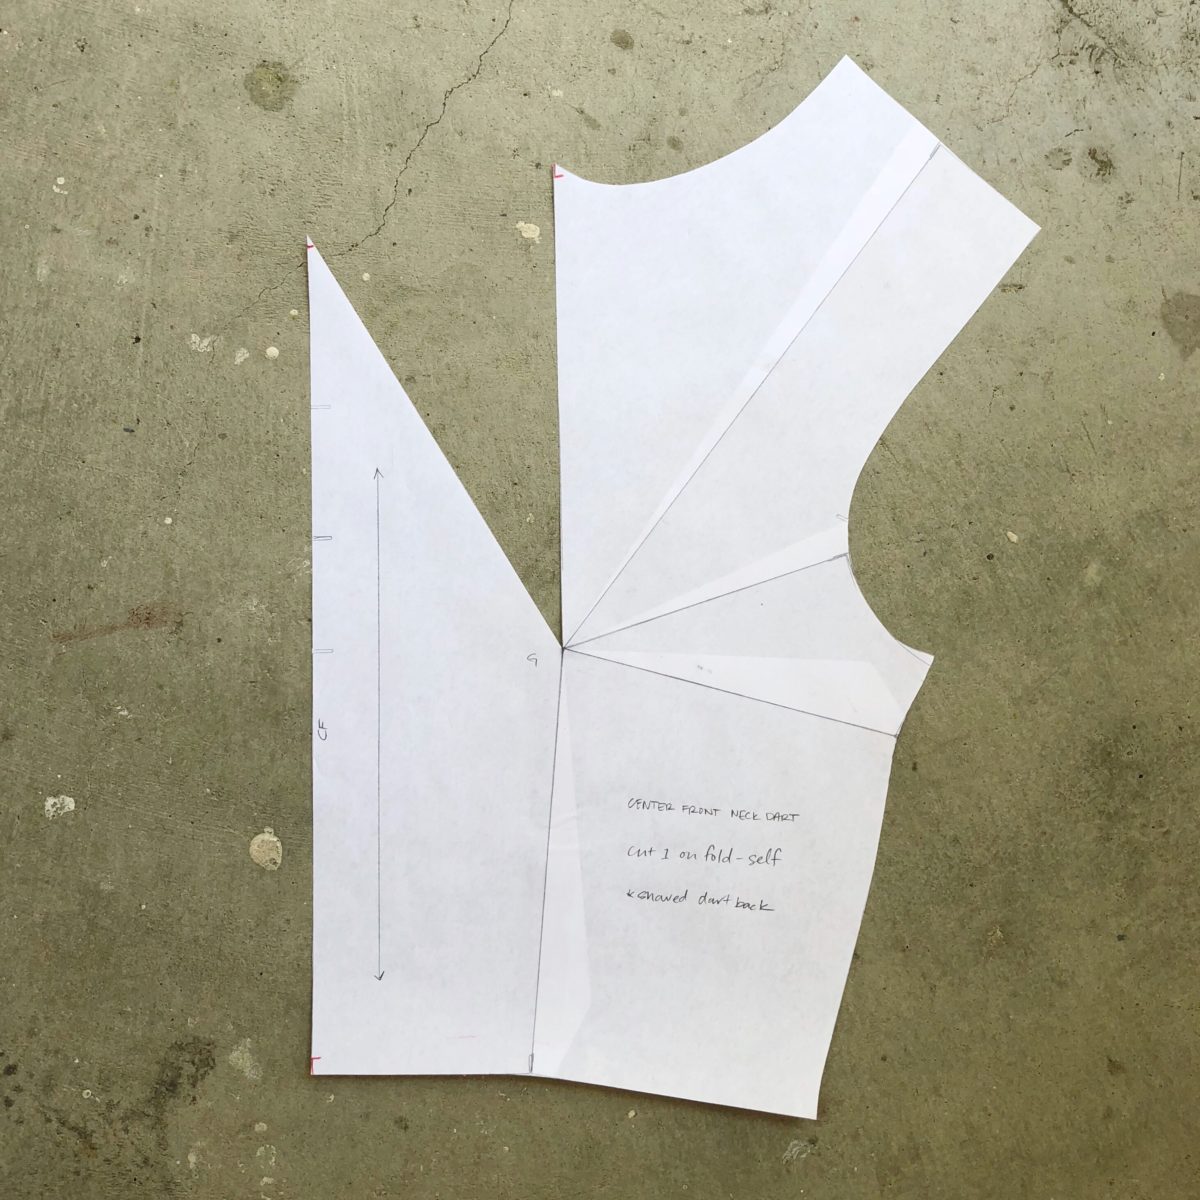
Center Front Neck Dart – Slash a line to the high bust point and fold all other darts into it.

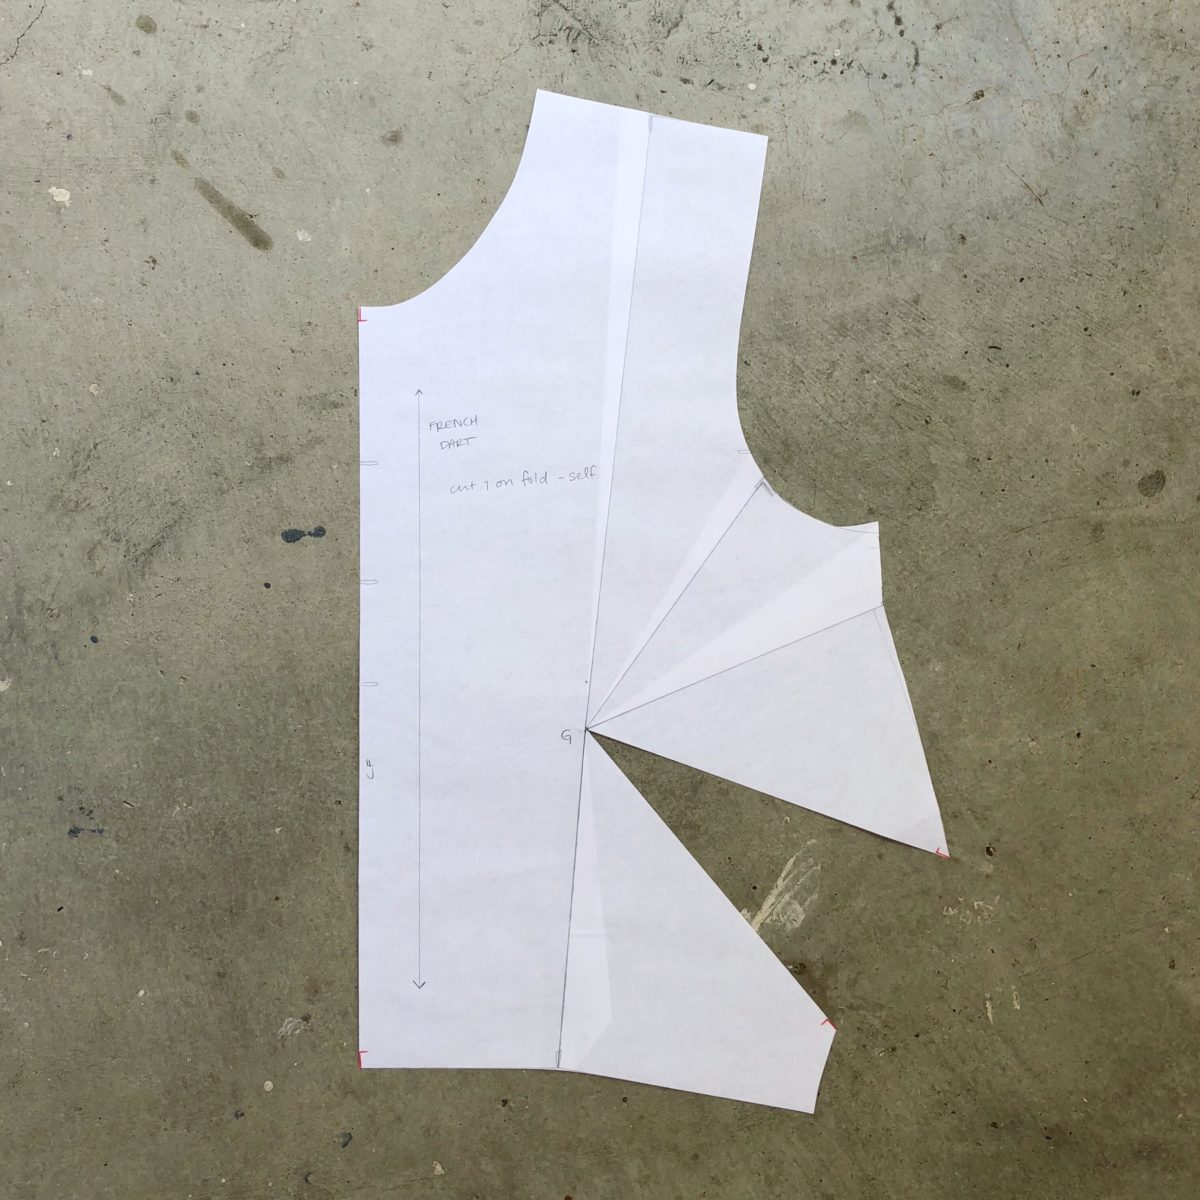
French Dart – Slash a seamline to the low bust point from a position lower than the existing side dart. Fold all other darts into it.

Armhole Dart – Slash a line to the high bust point from any point along the armhole. Fold all other darts into it.

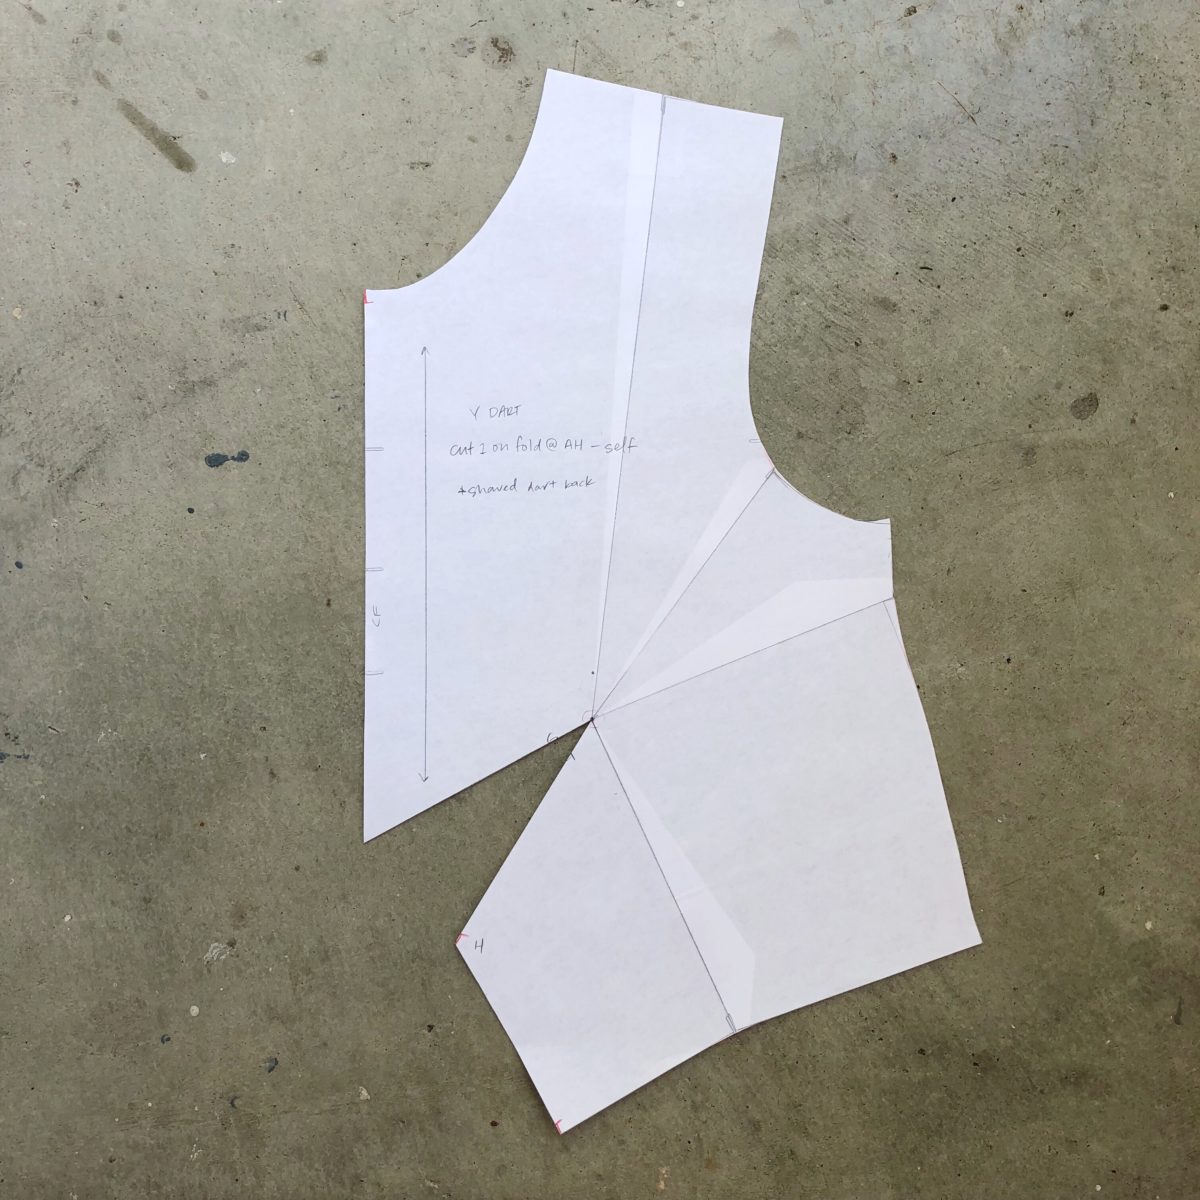
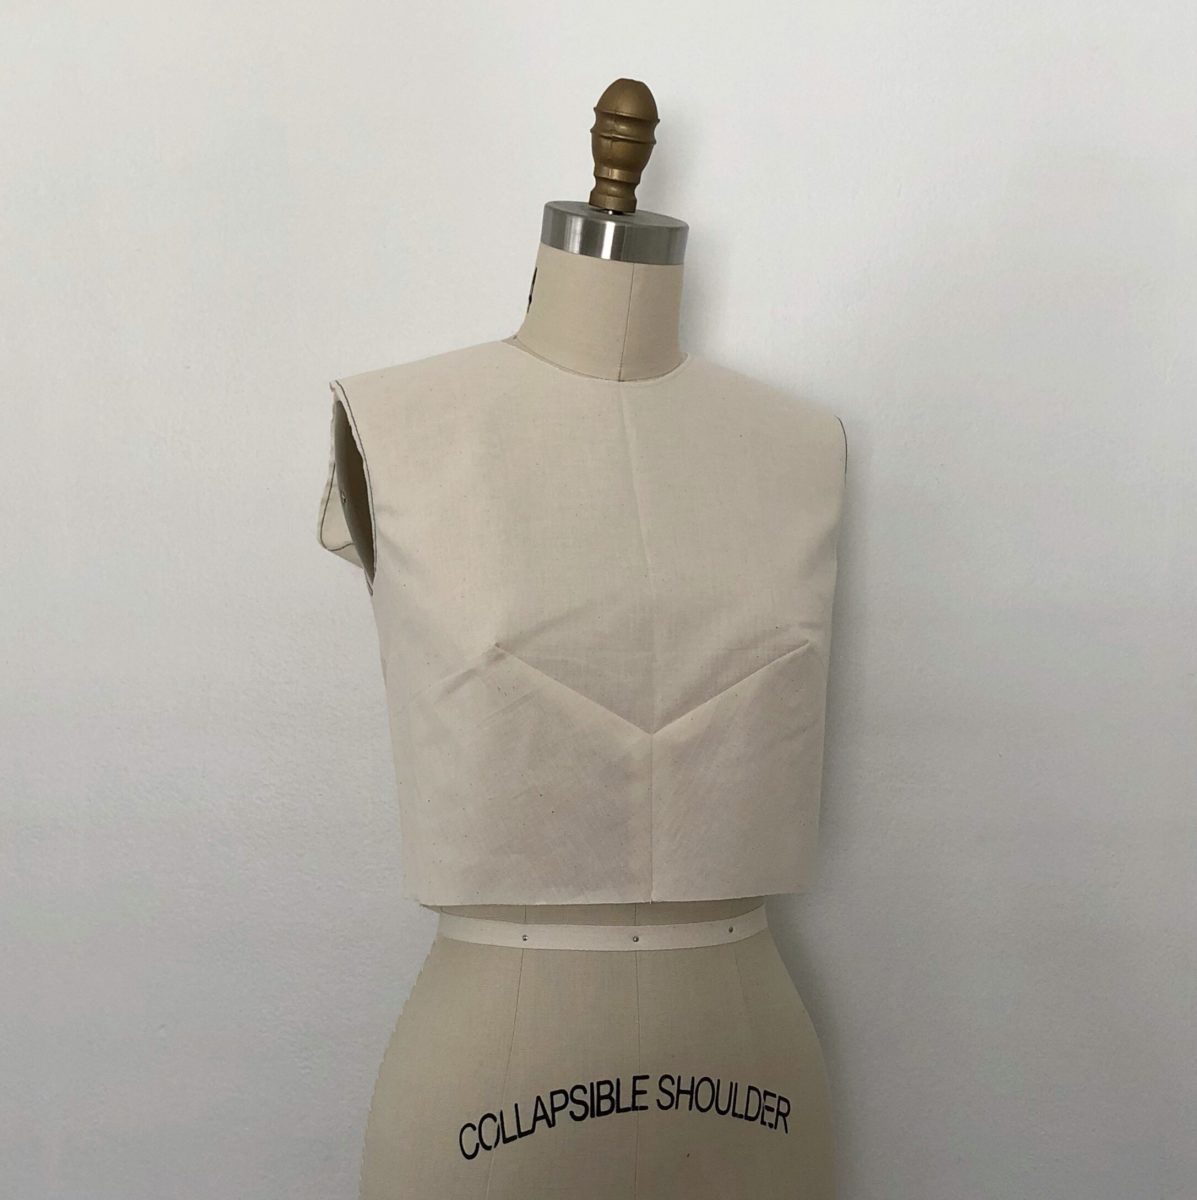
Y Dart – Draw a seamline starting at 3″ – 5″ up along center front to the low bust point. Fold all other darts into it.

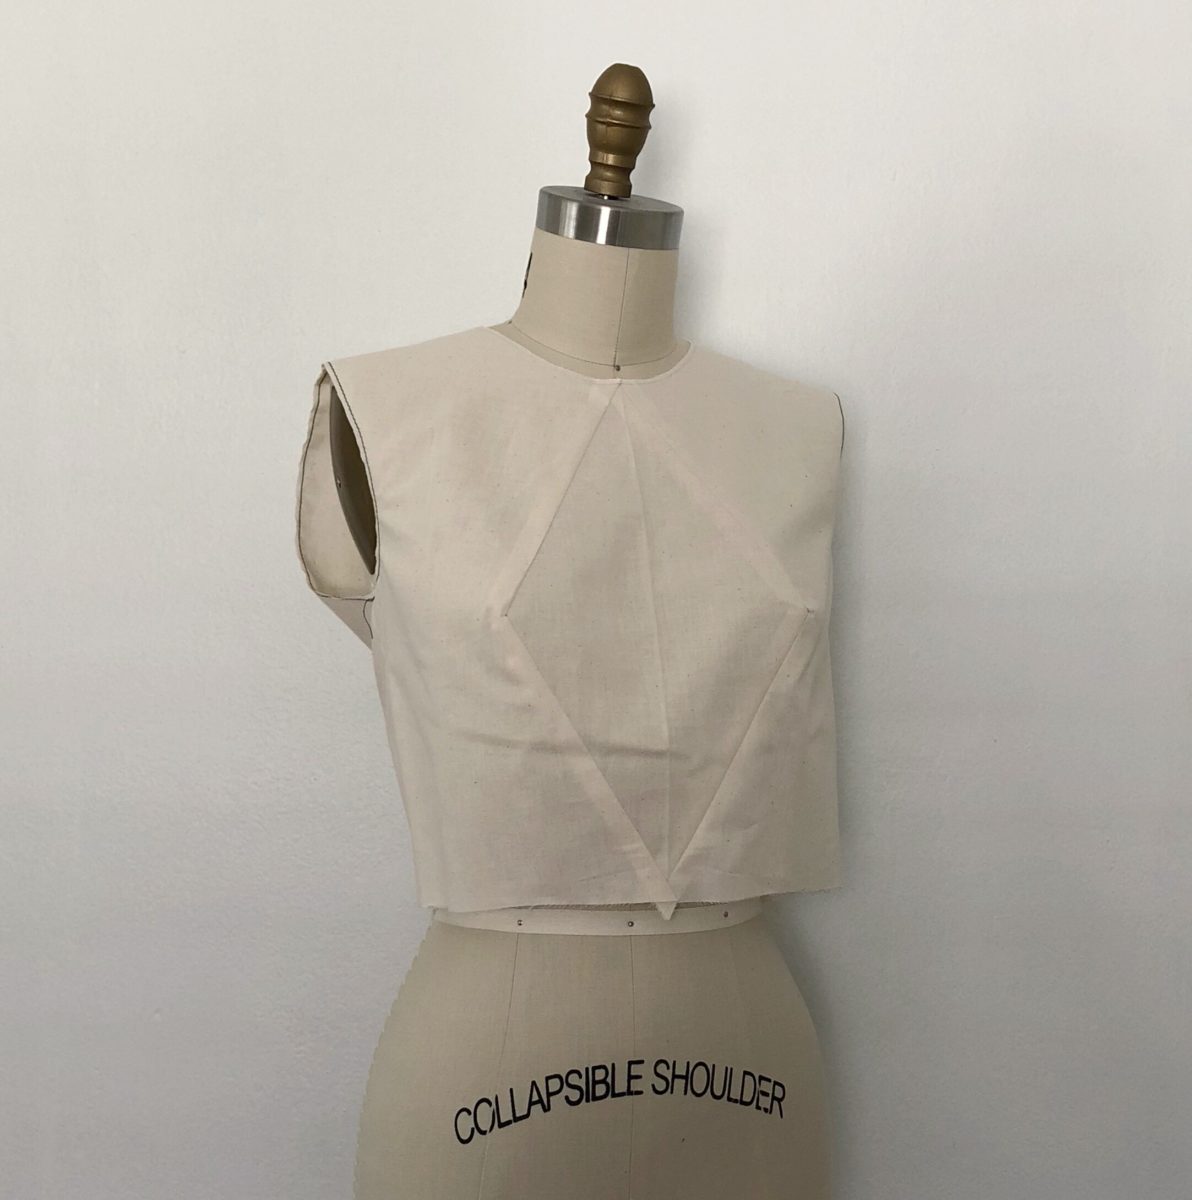
Diamond – Draw a line from the center front neck and center front waist to the high bust point. Fold all other darts out.

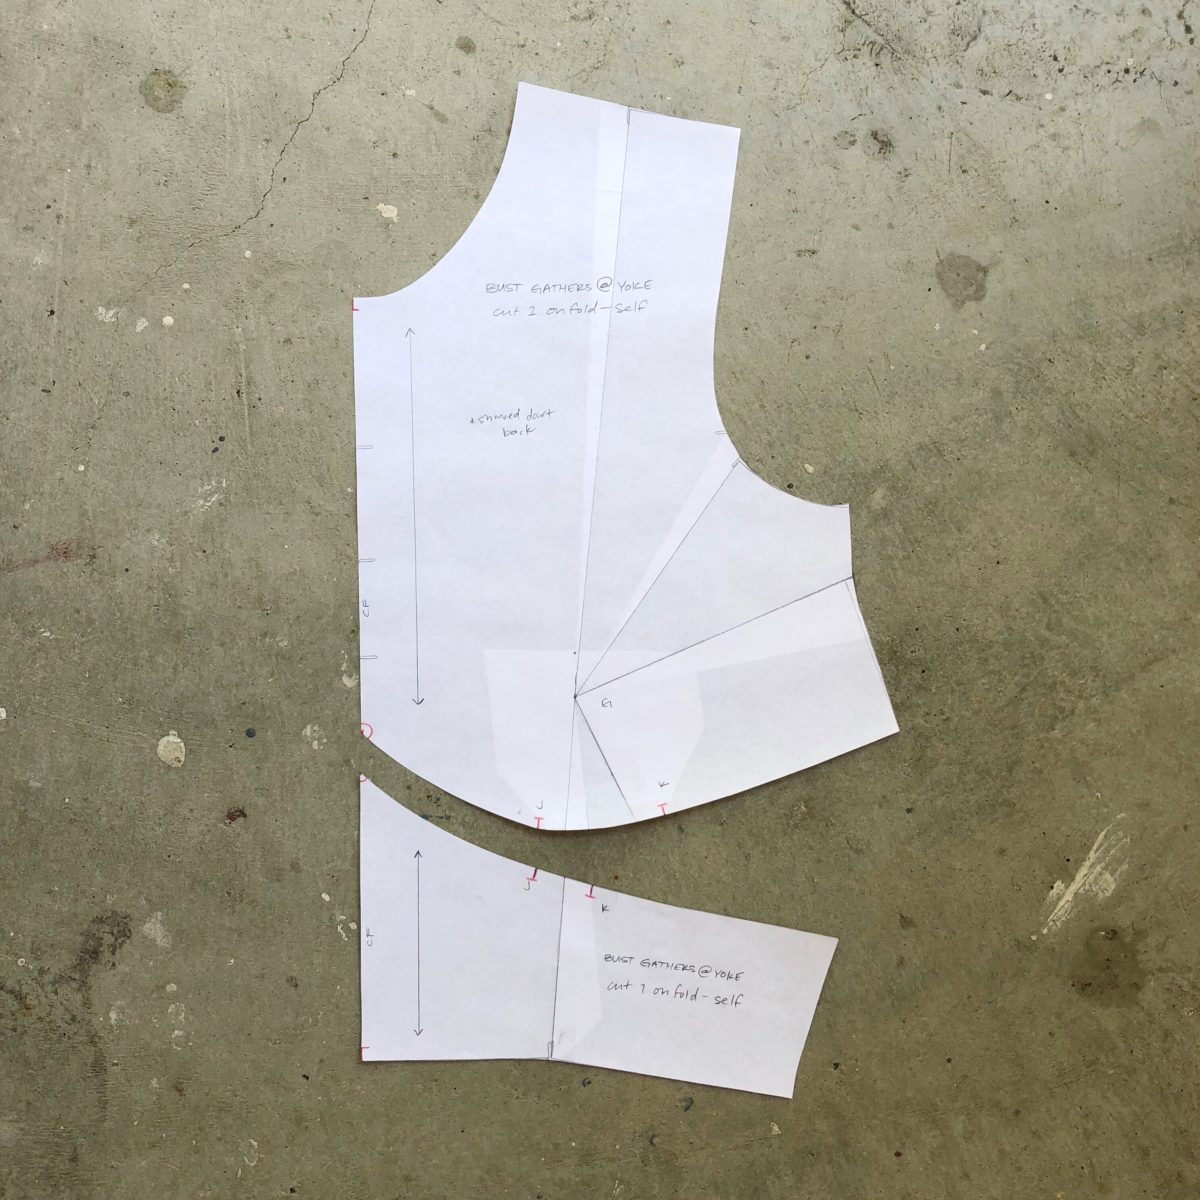
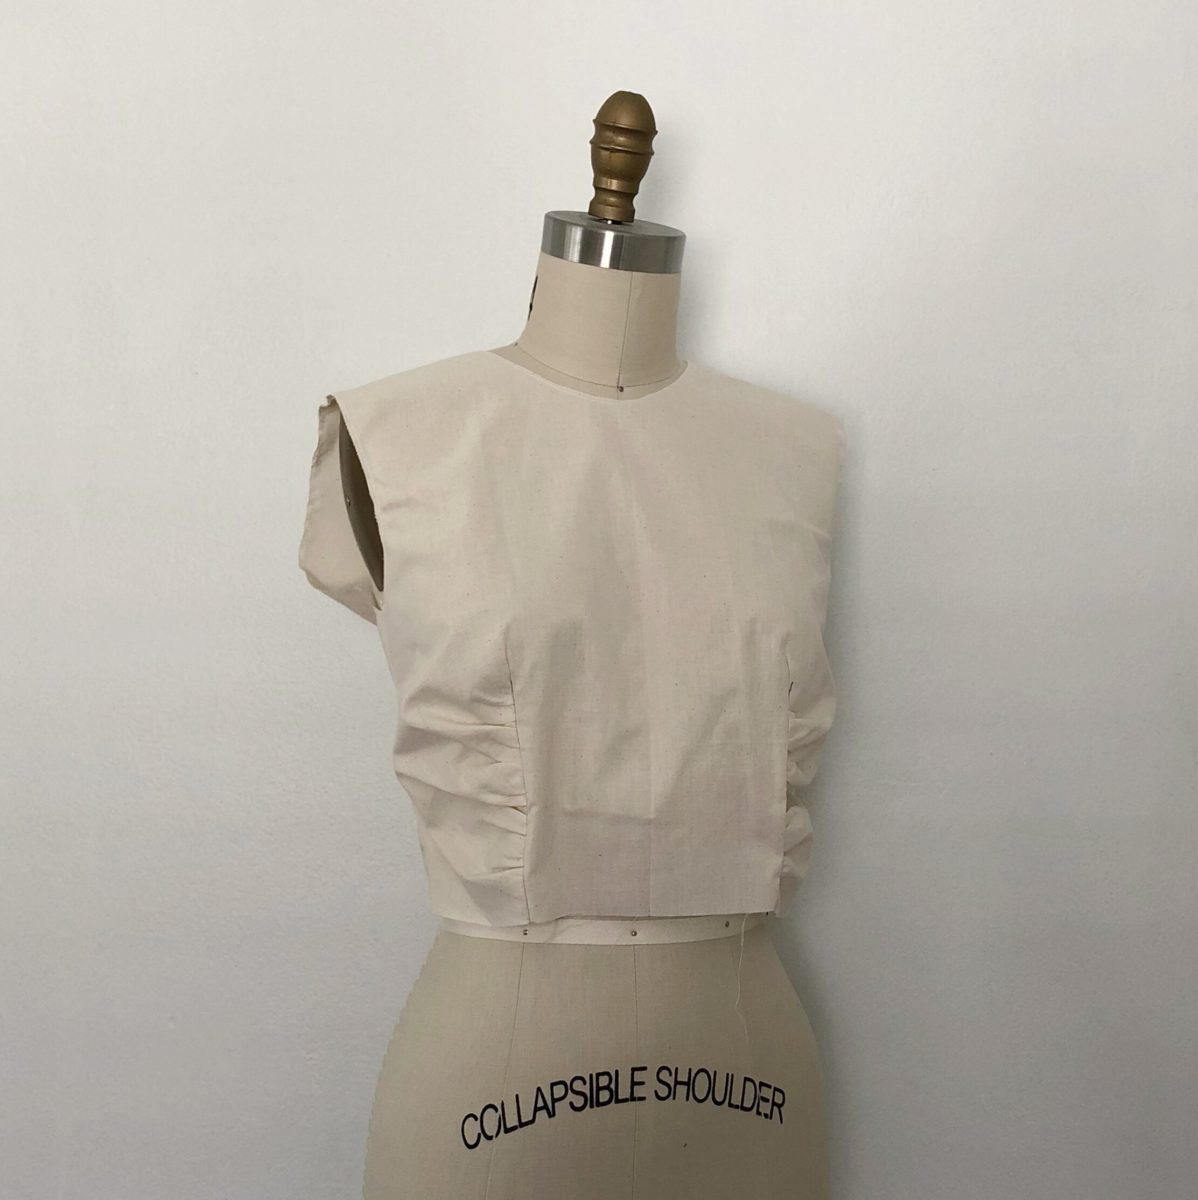
Bust Gathers with Yoke – In my fittings I learned that a lot of the exercises that used the low bust point need some tweaks. You can see on the muslin that on the bottom yoke I pinned out about an inch that would make this pattern more fitted. Gathers also tended to add more volume than anticipated.

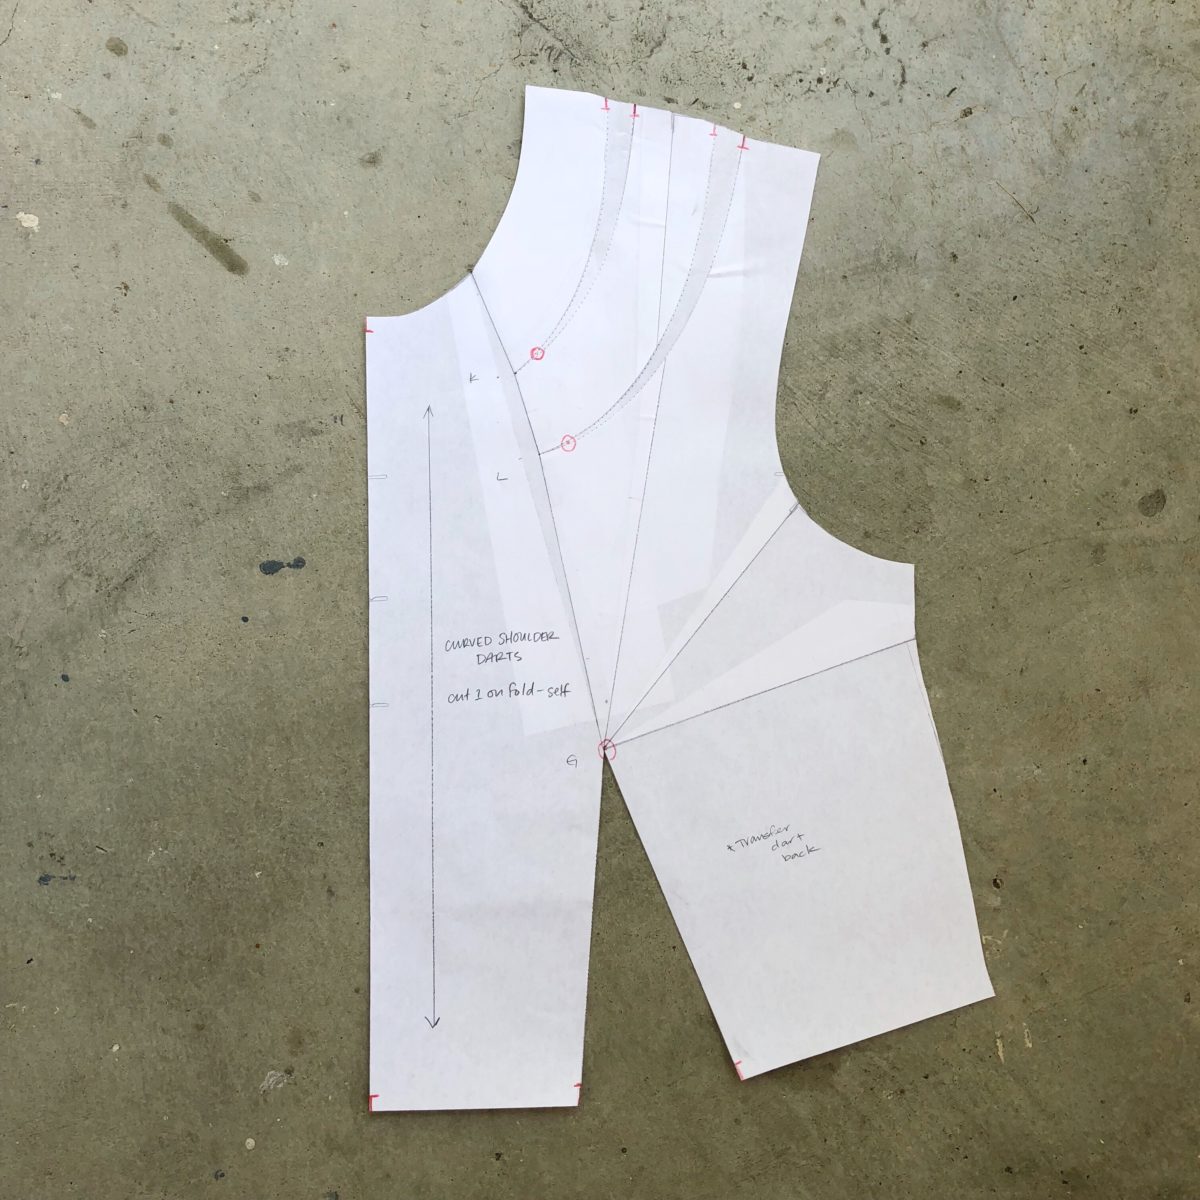
Curved Shoulder Darts – Low bust point used.

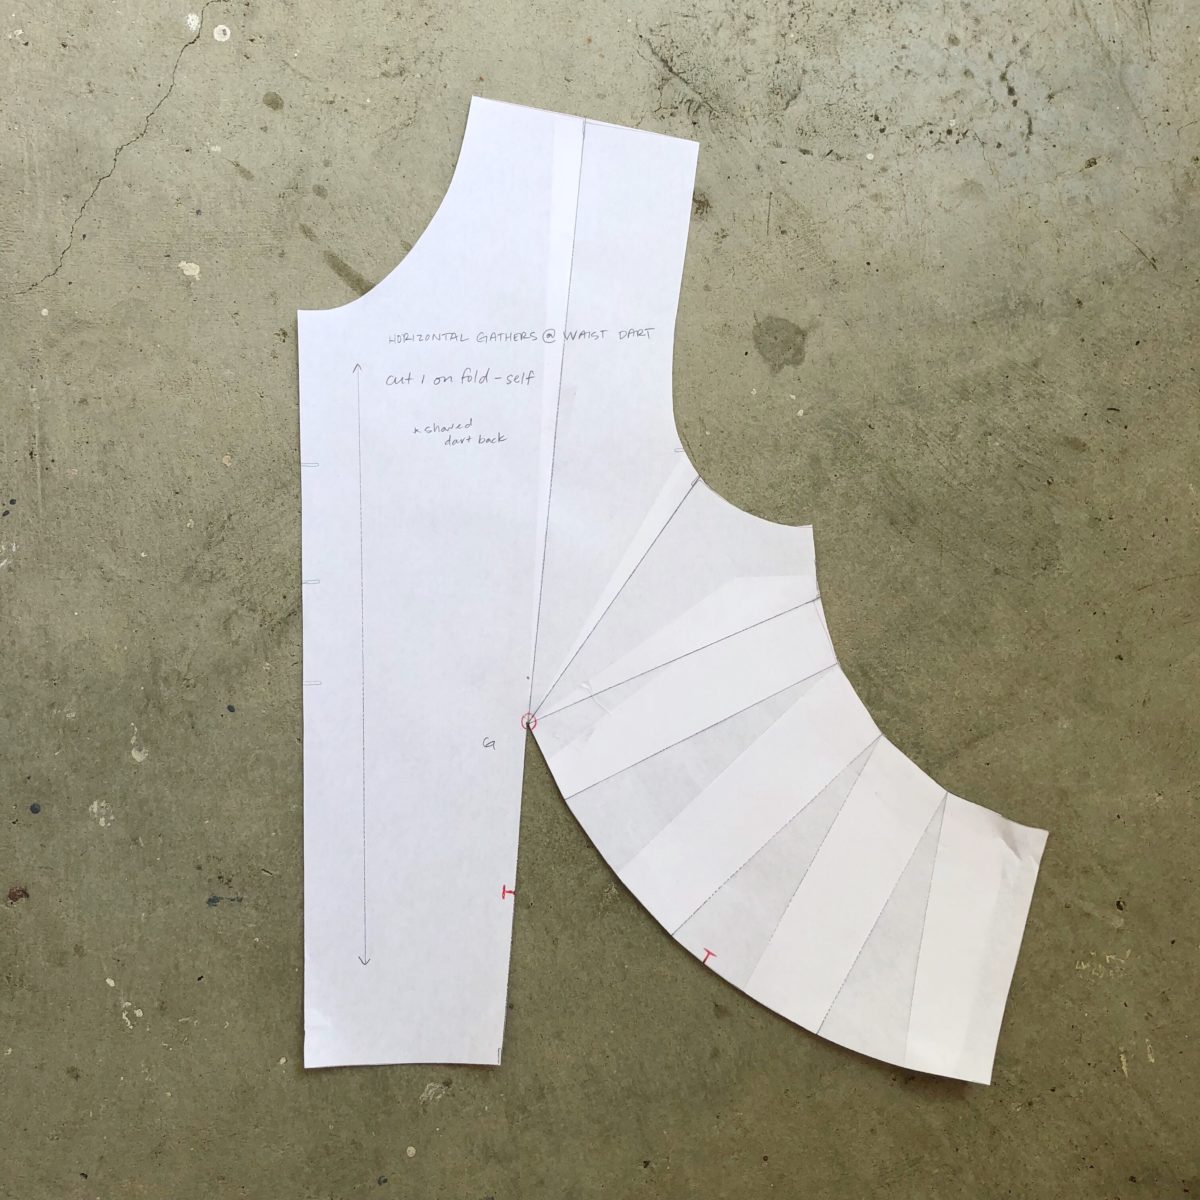
Horizontal Gathers at Waist Dart – Low bust point used.

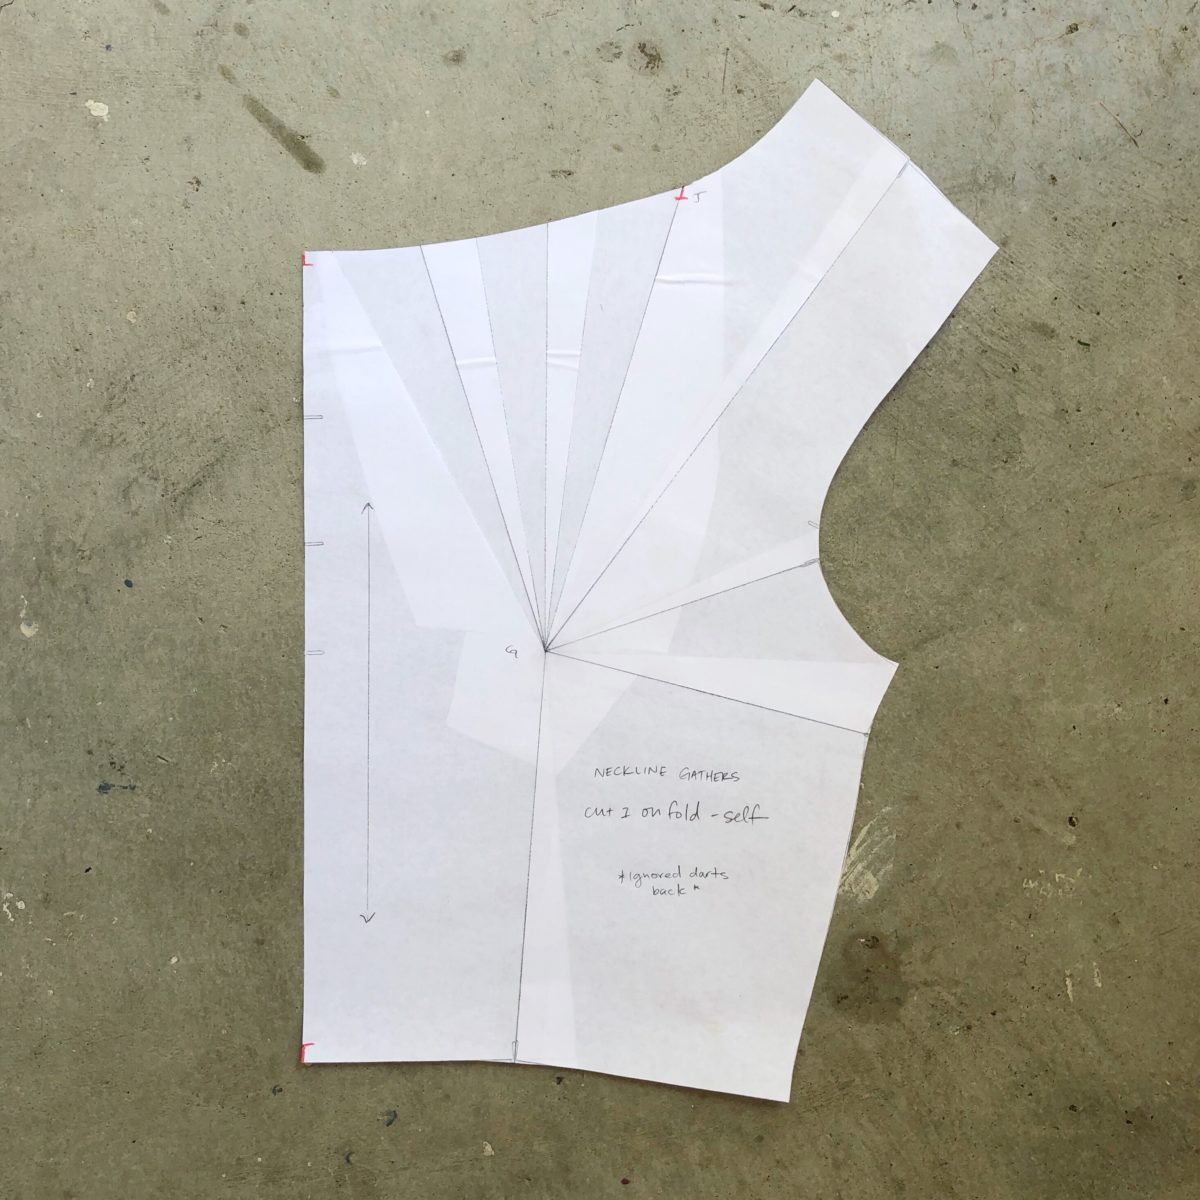
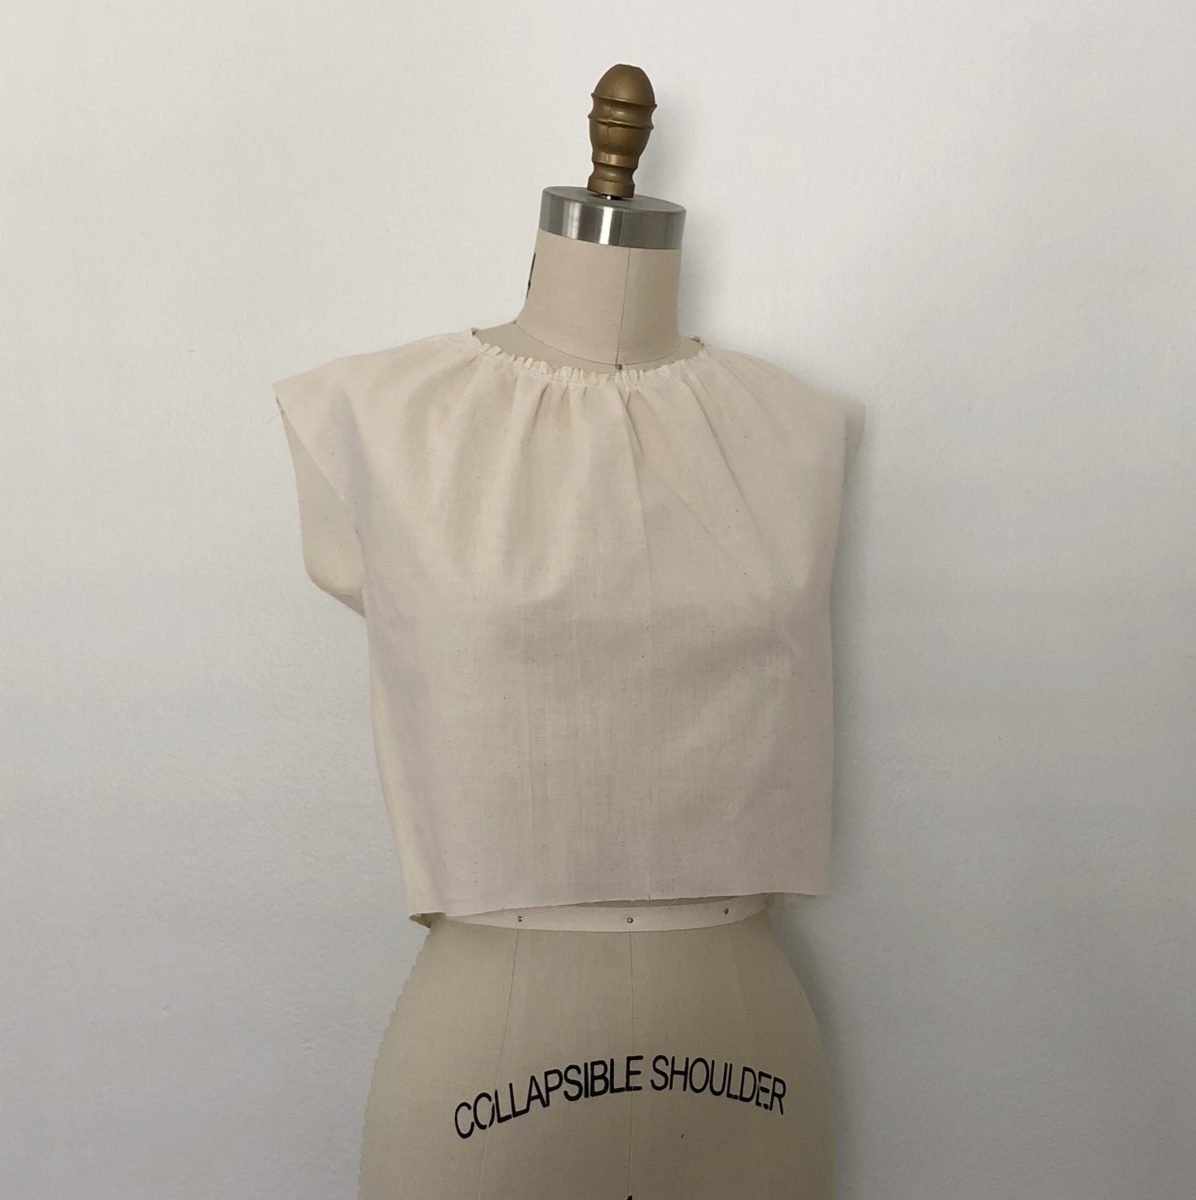
Neckline Gathers – High bust point used. Helpful to add finished neck length on to the pattern for gathers.

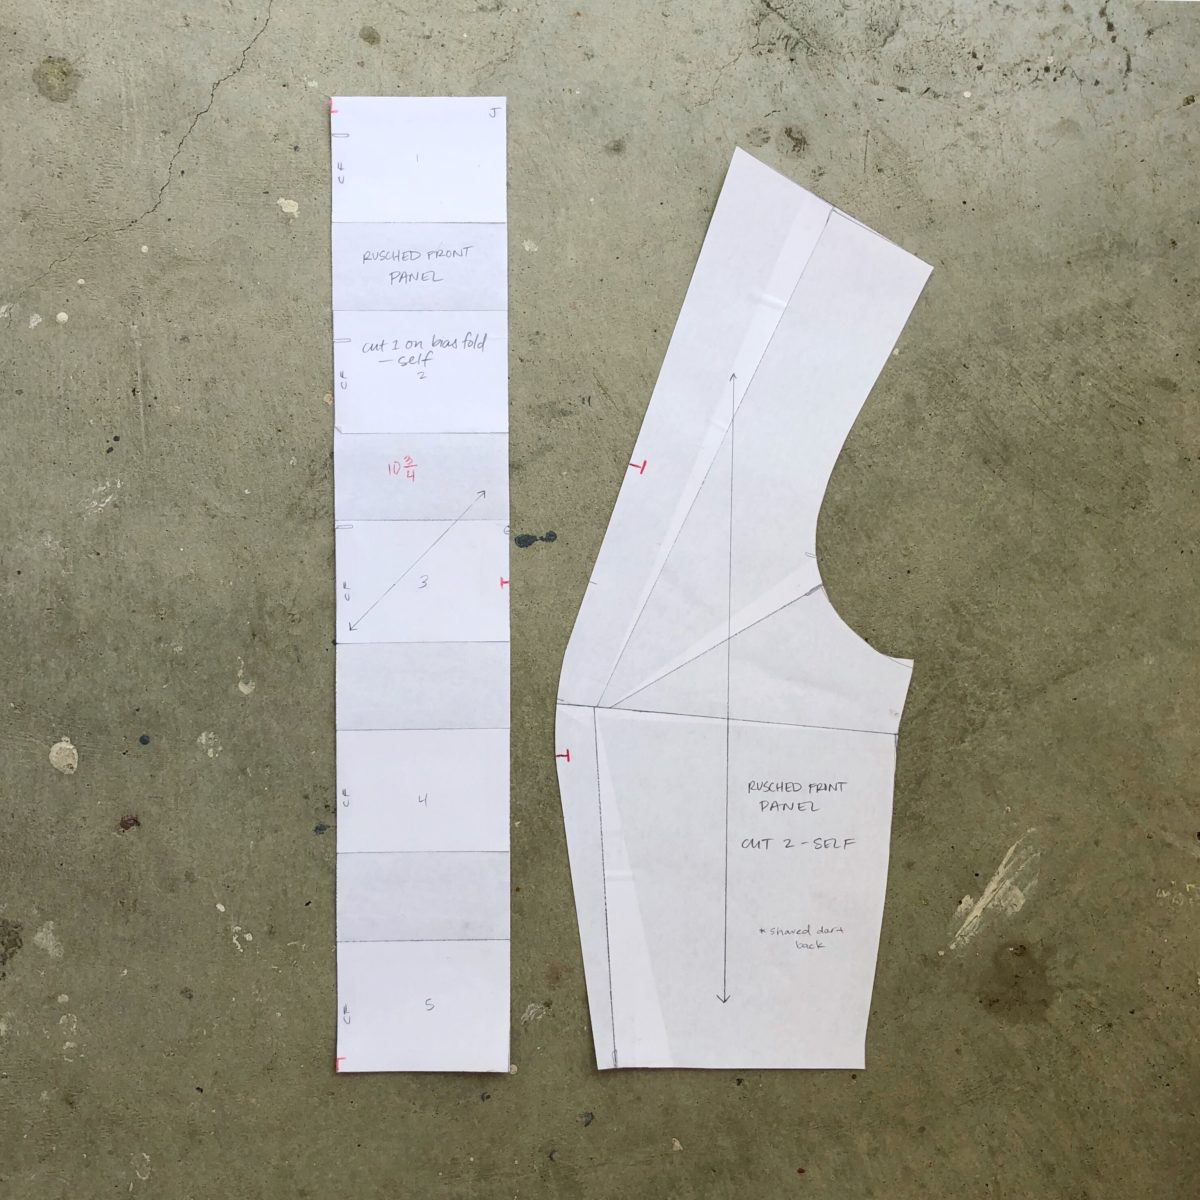
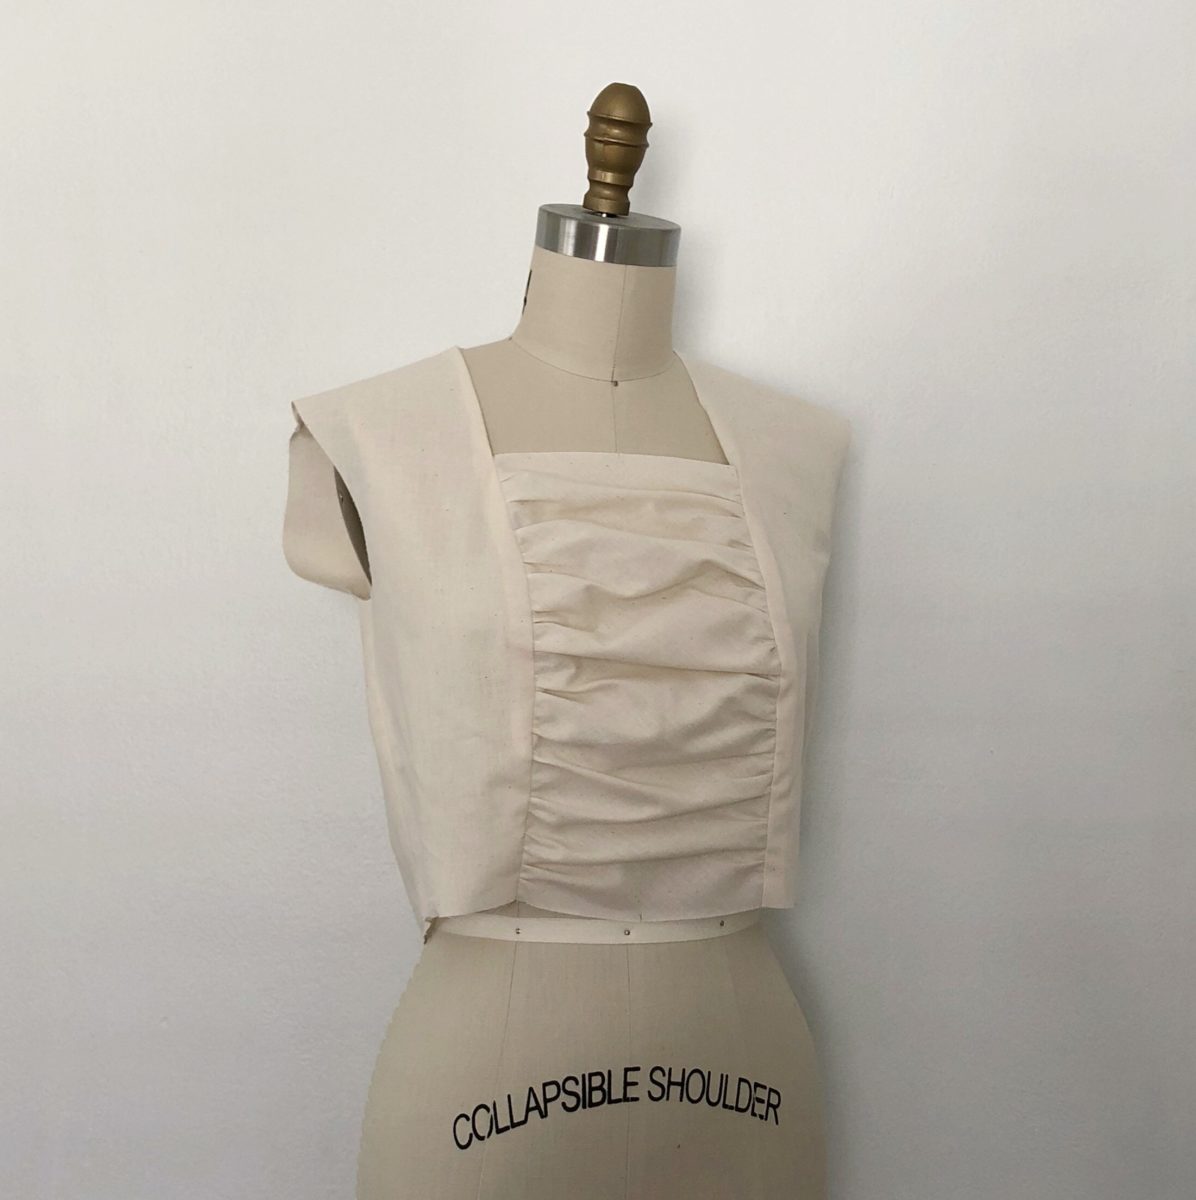
Rusched Front Panel – High bust point used, move toward center front until directly under the high next point.

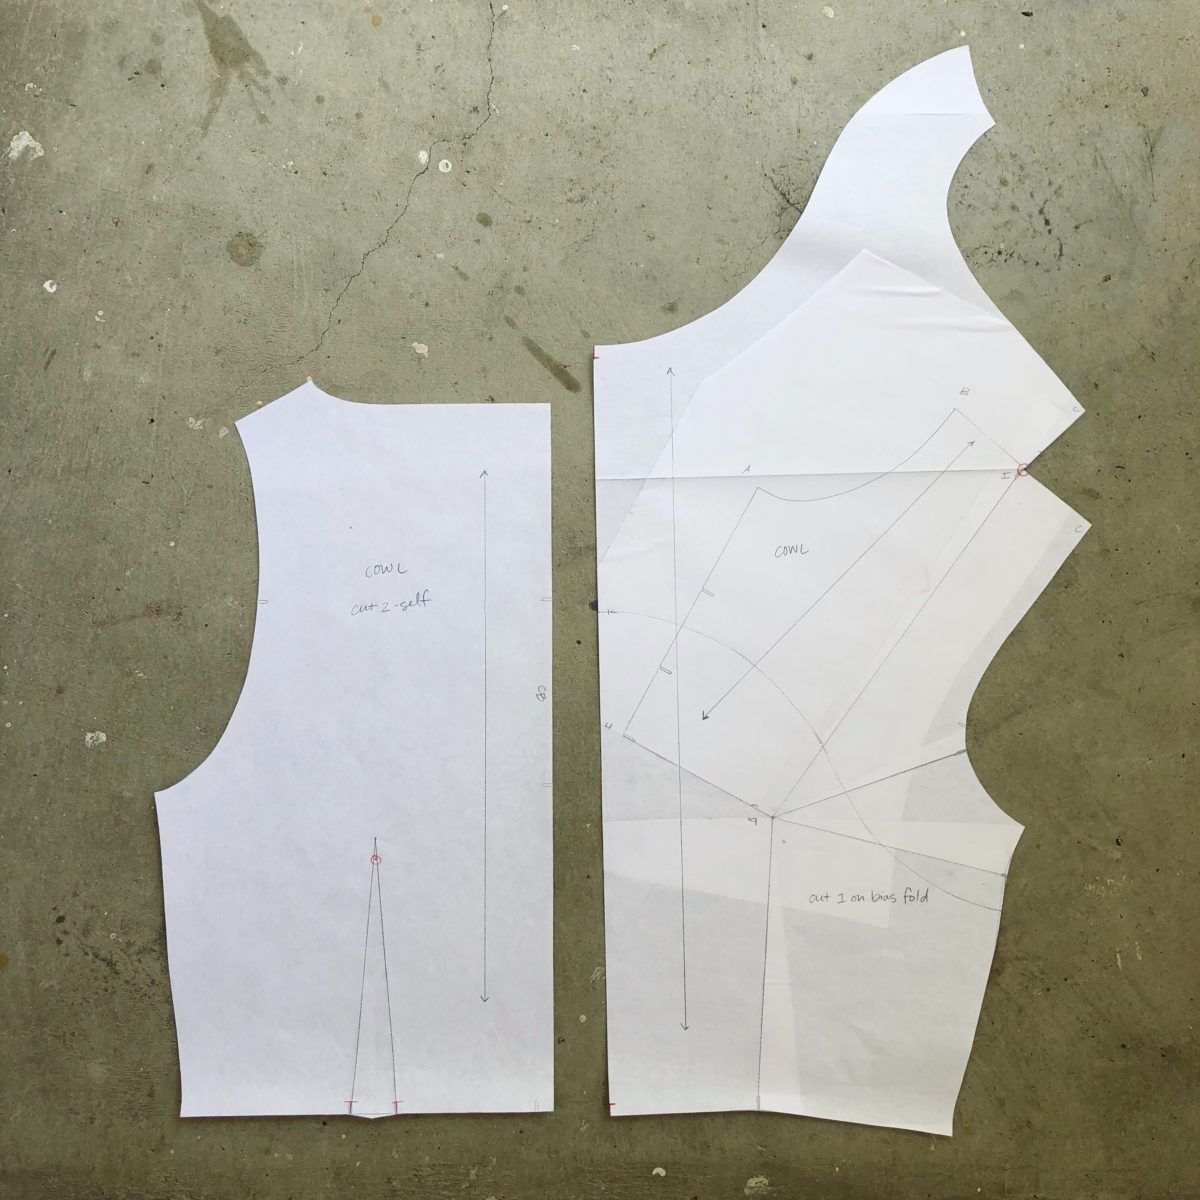
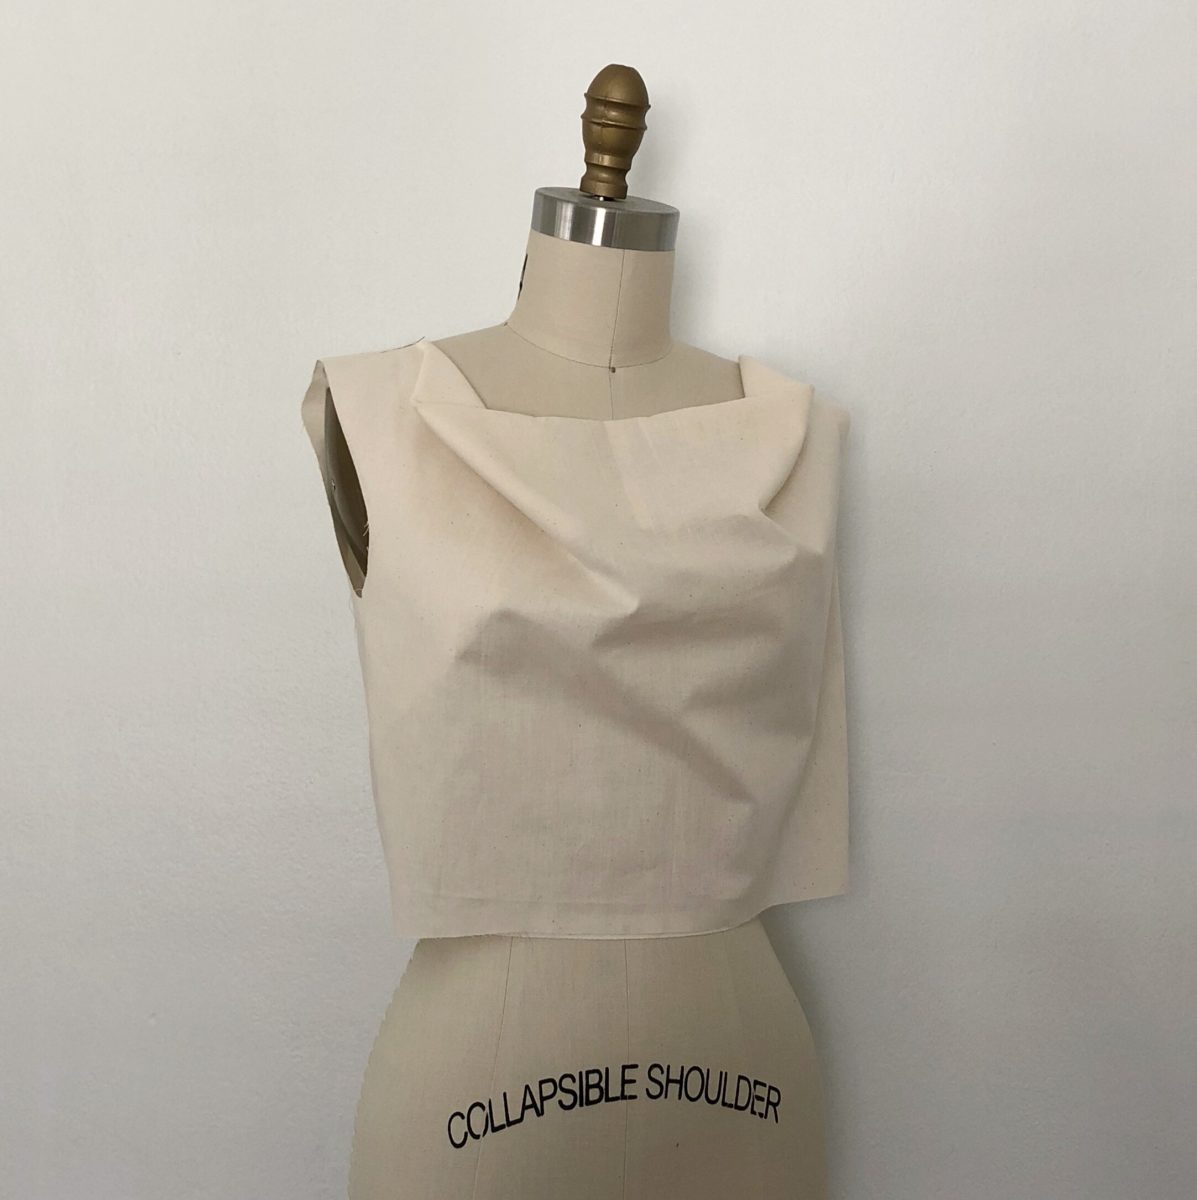
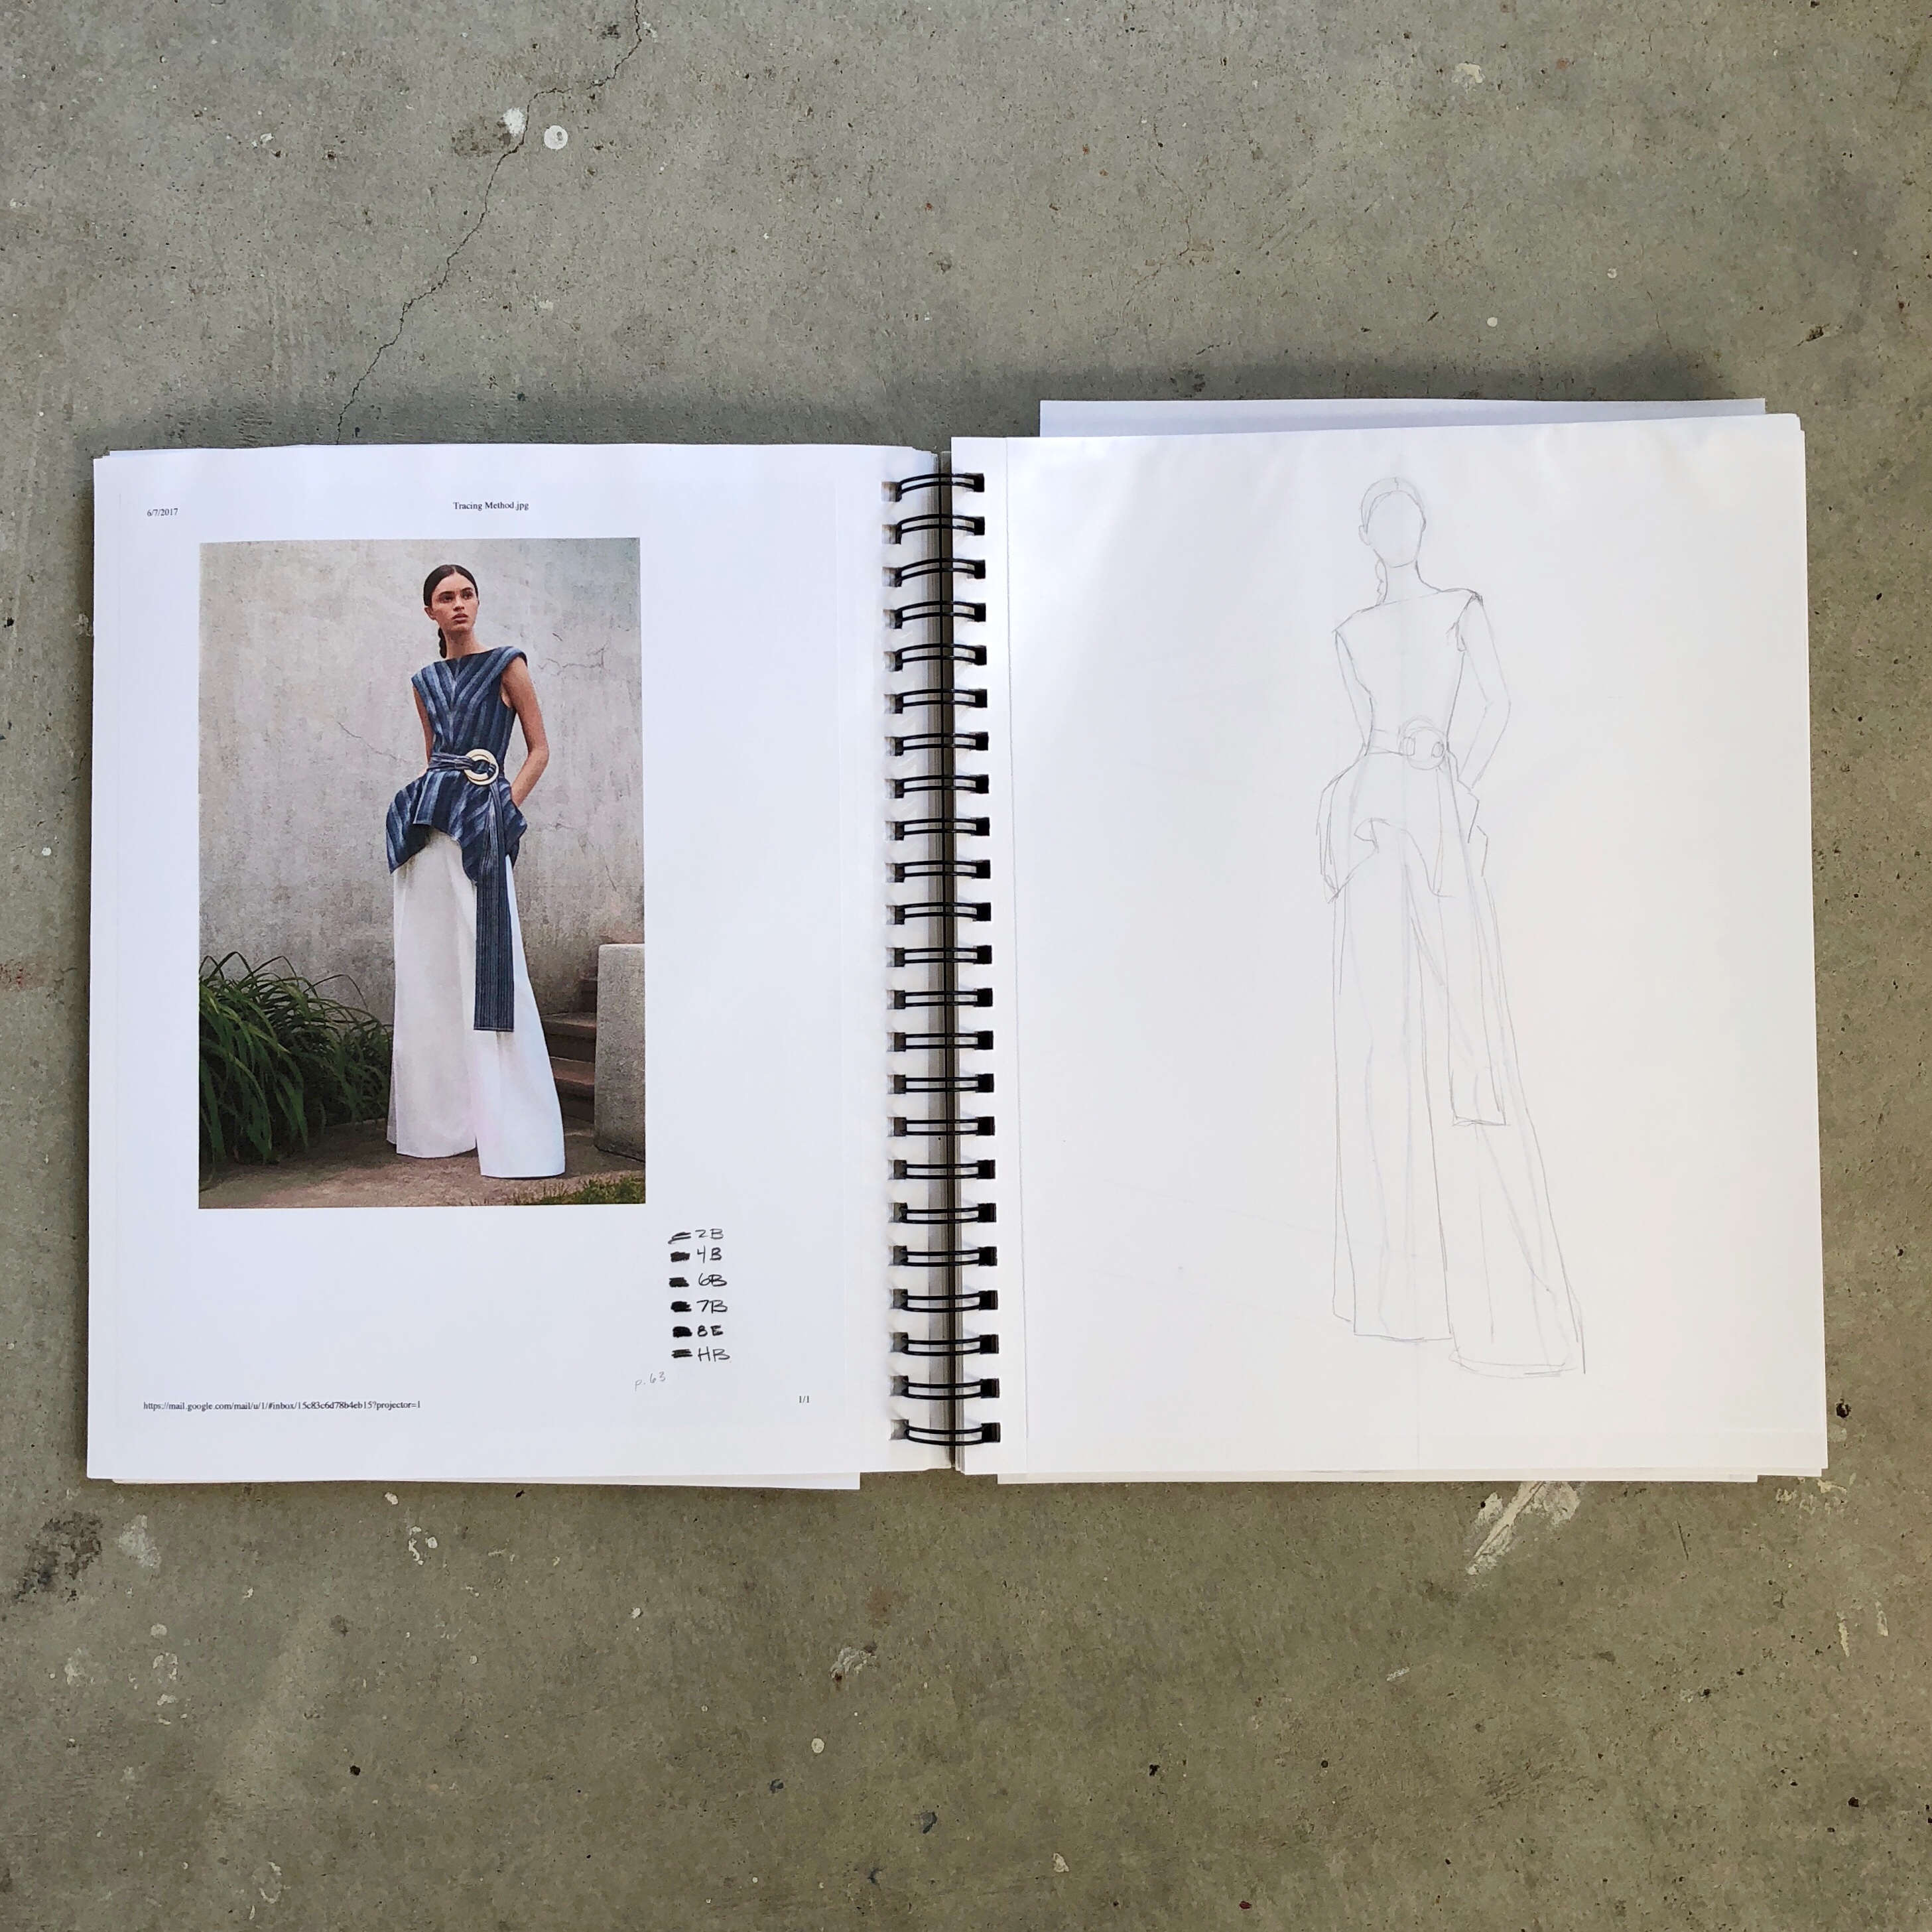
Cowl – This one was the most confusing as far as construction went. It also required its own back to be drafted along with it.

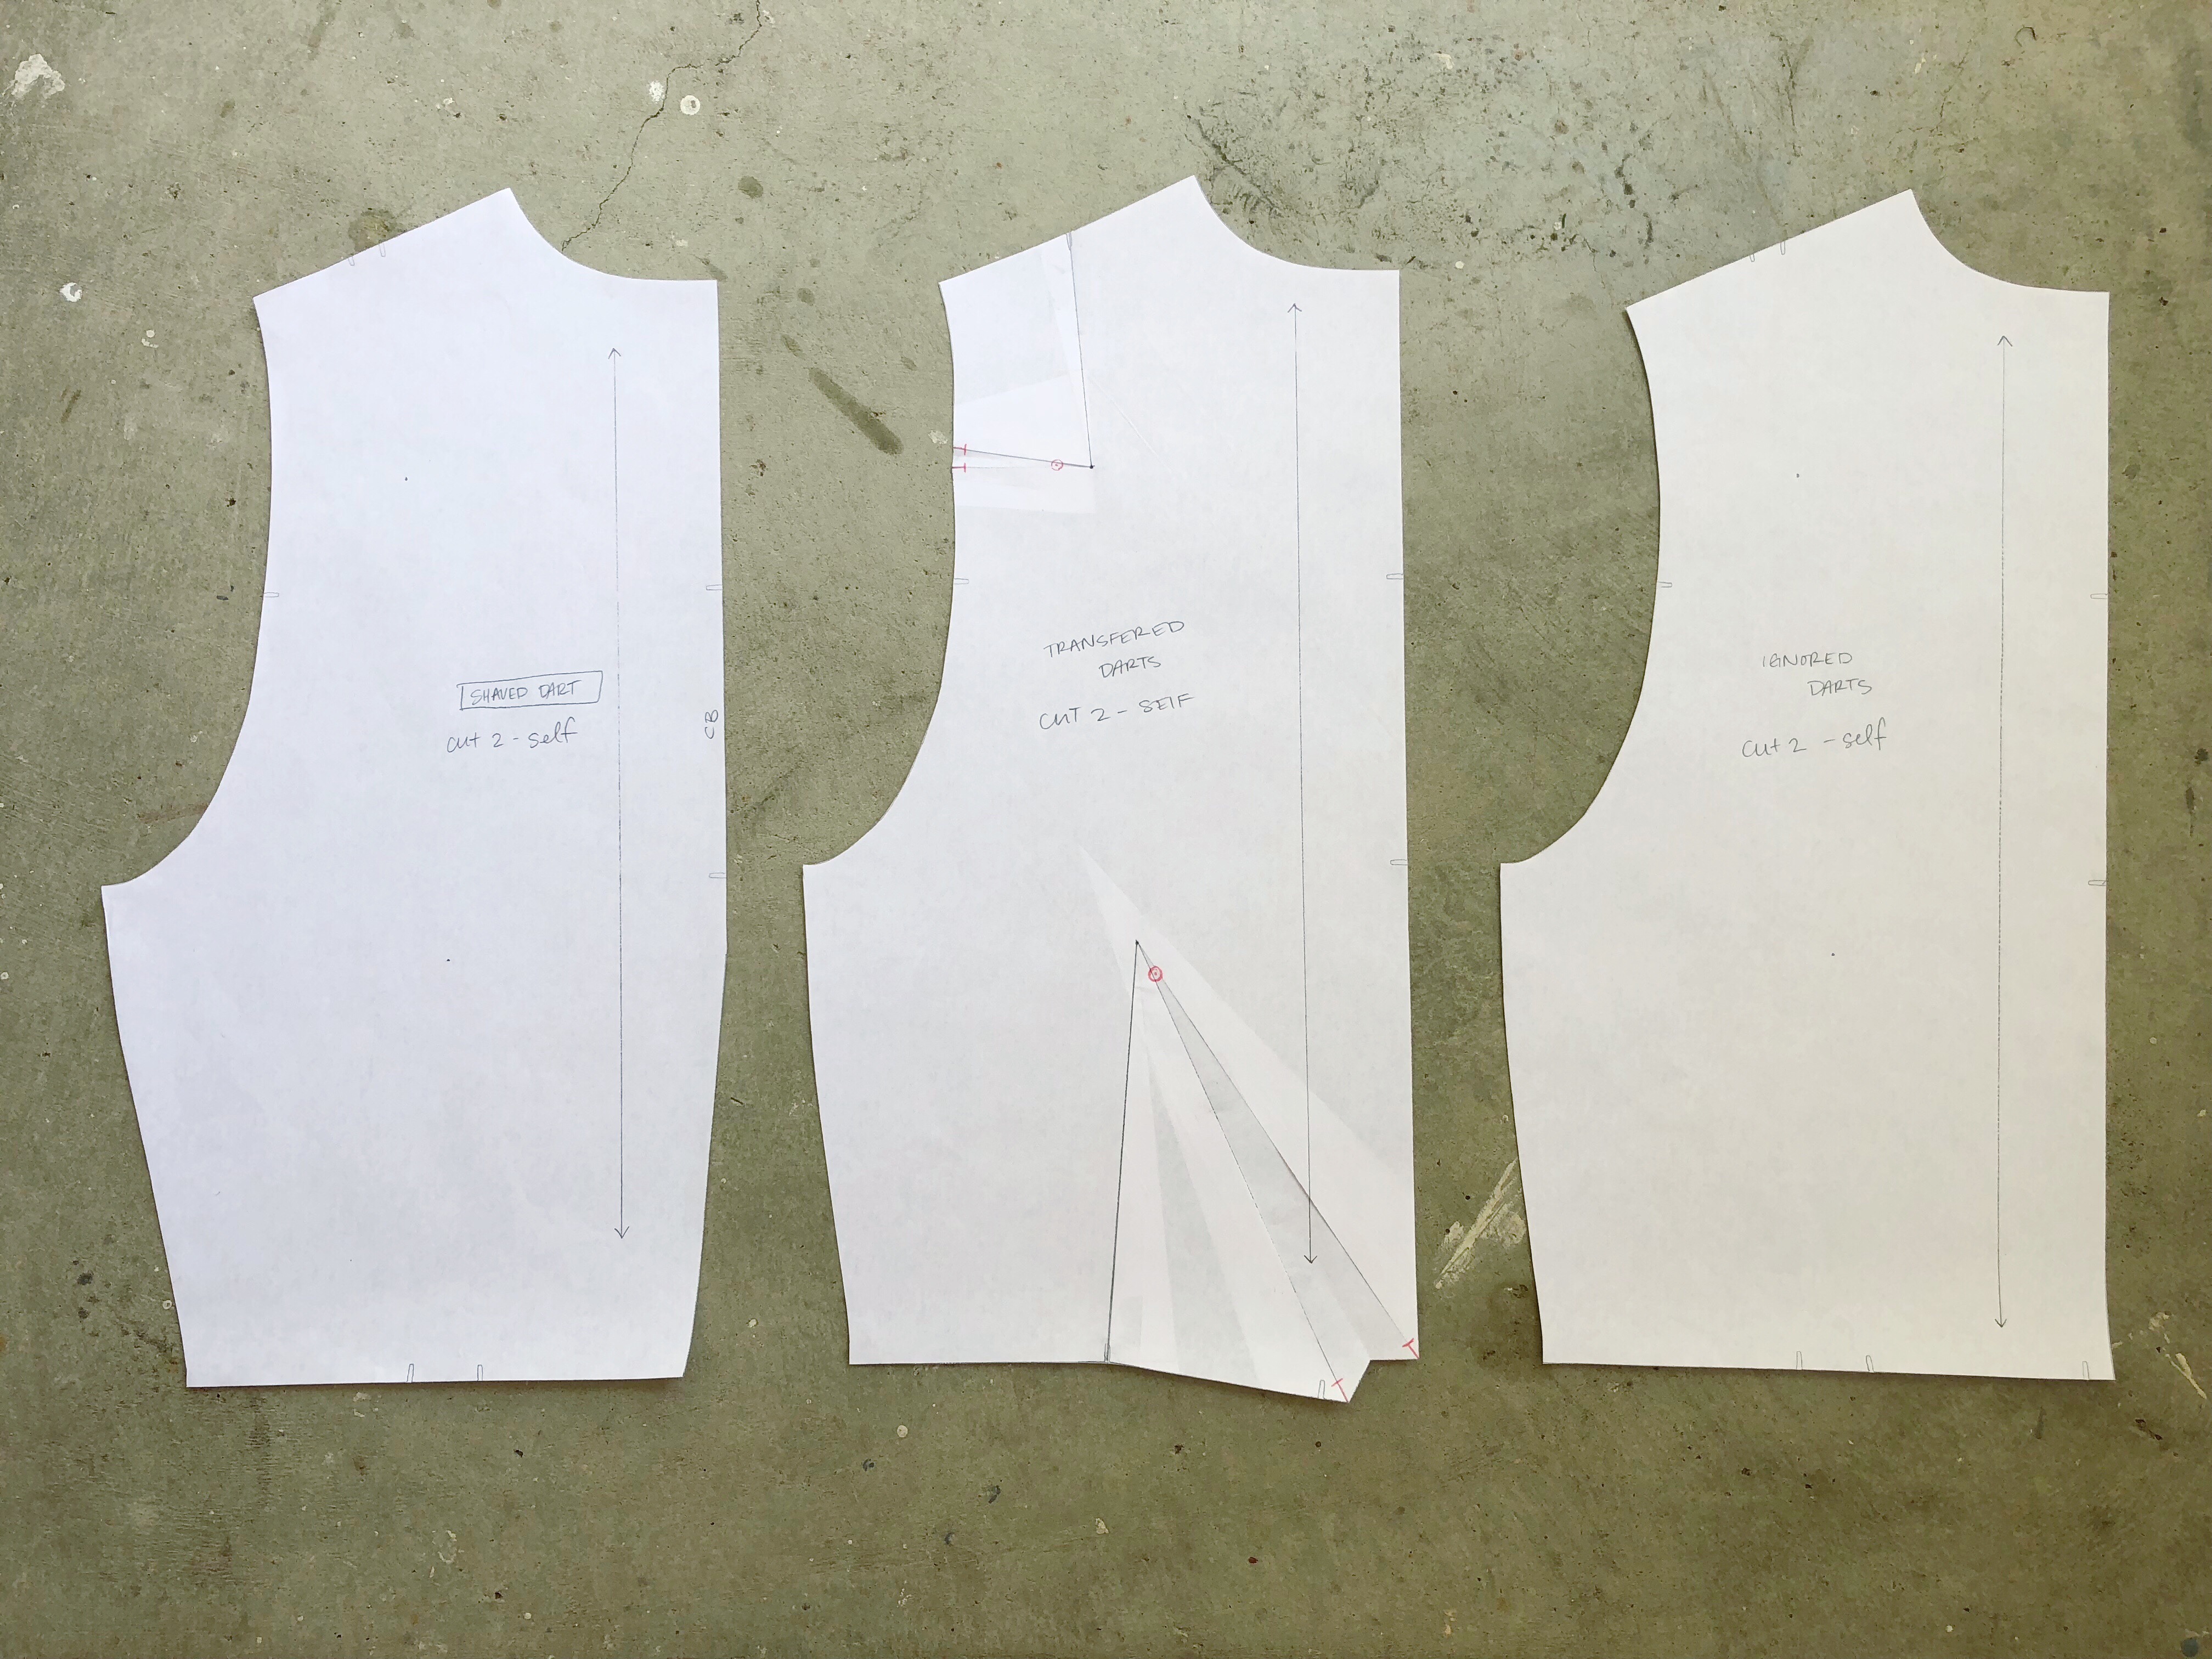
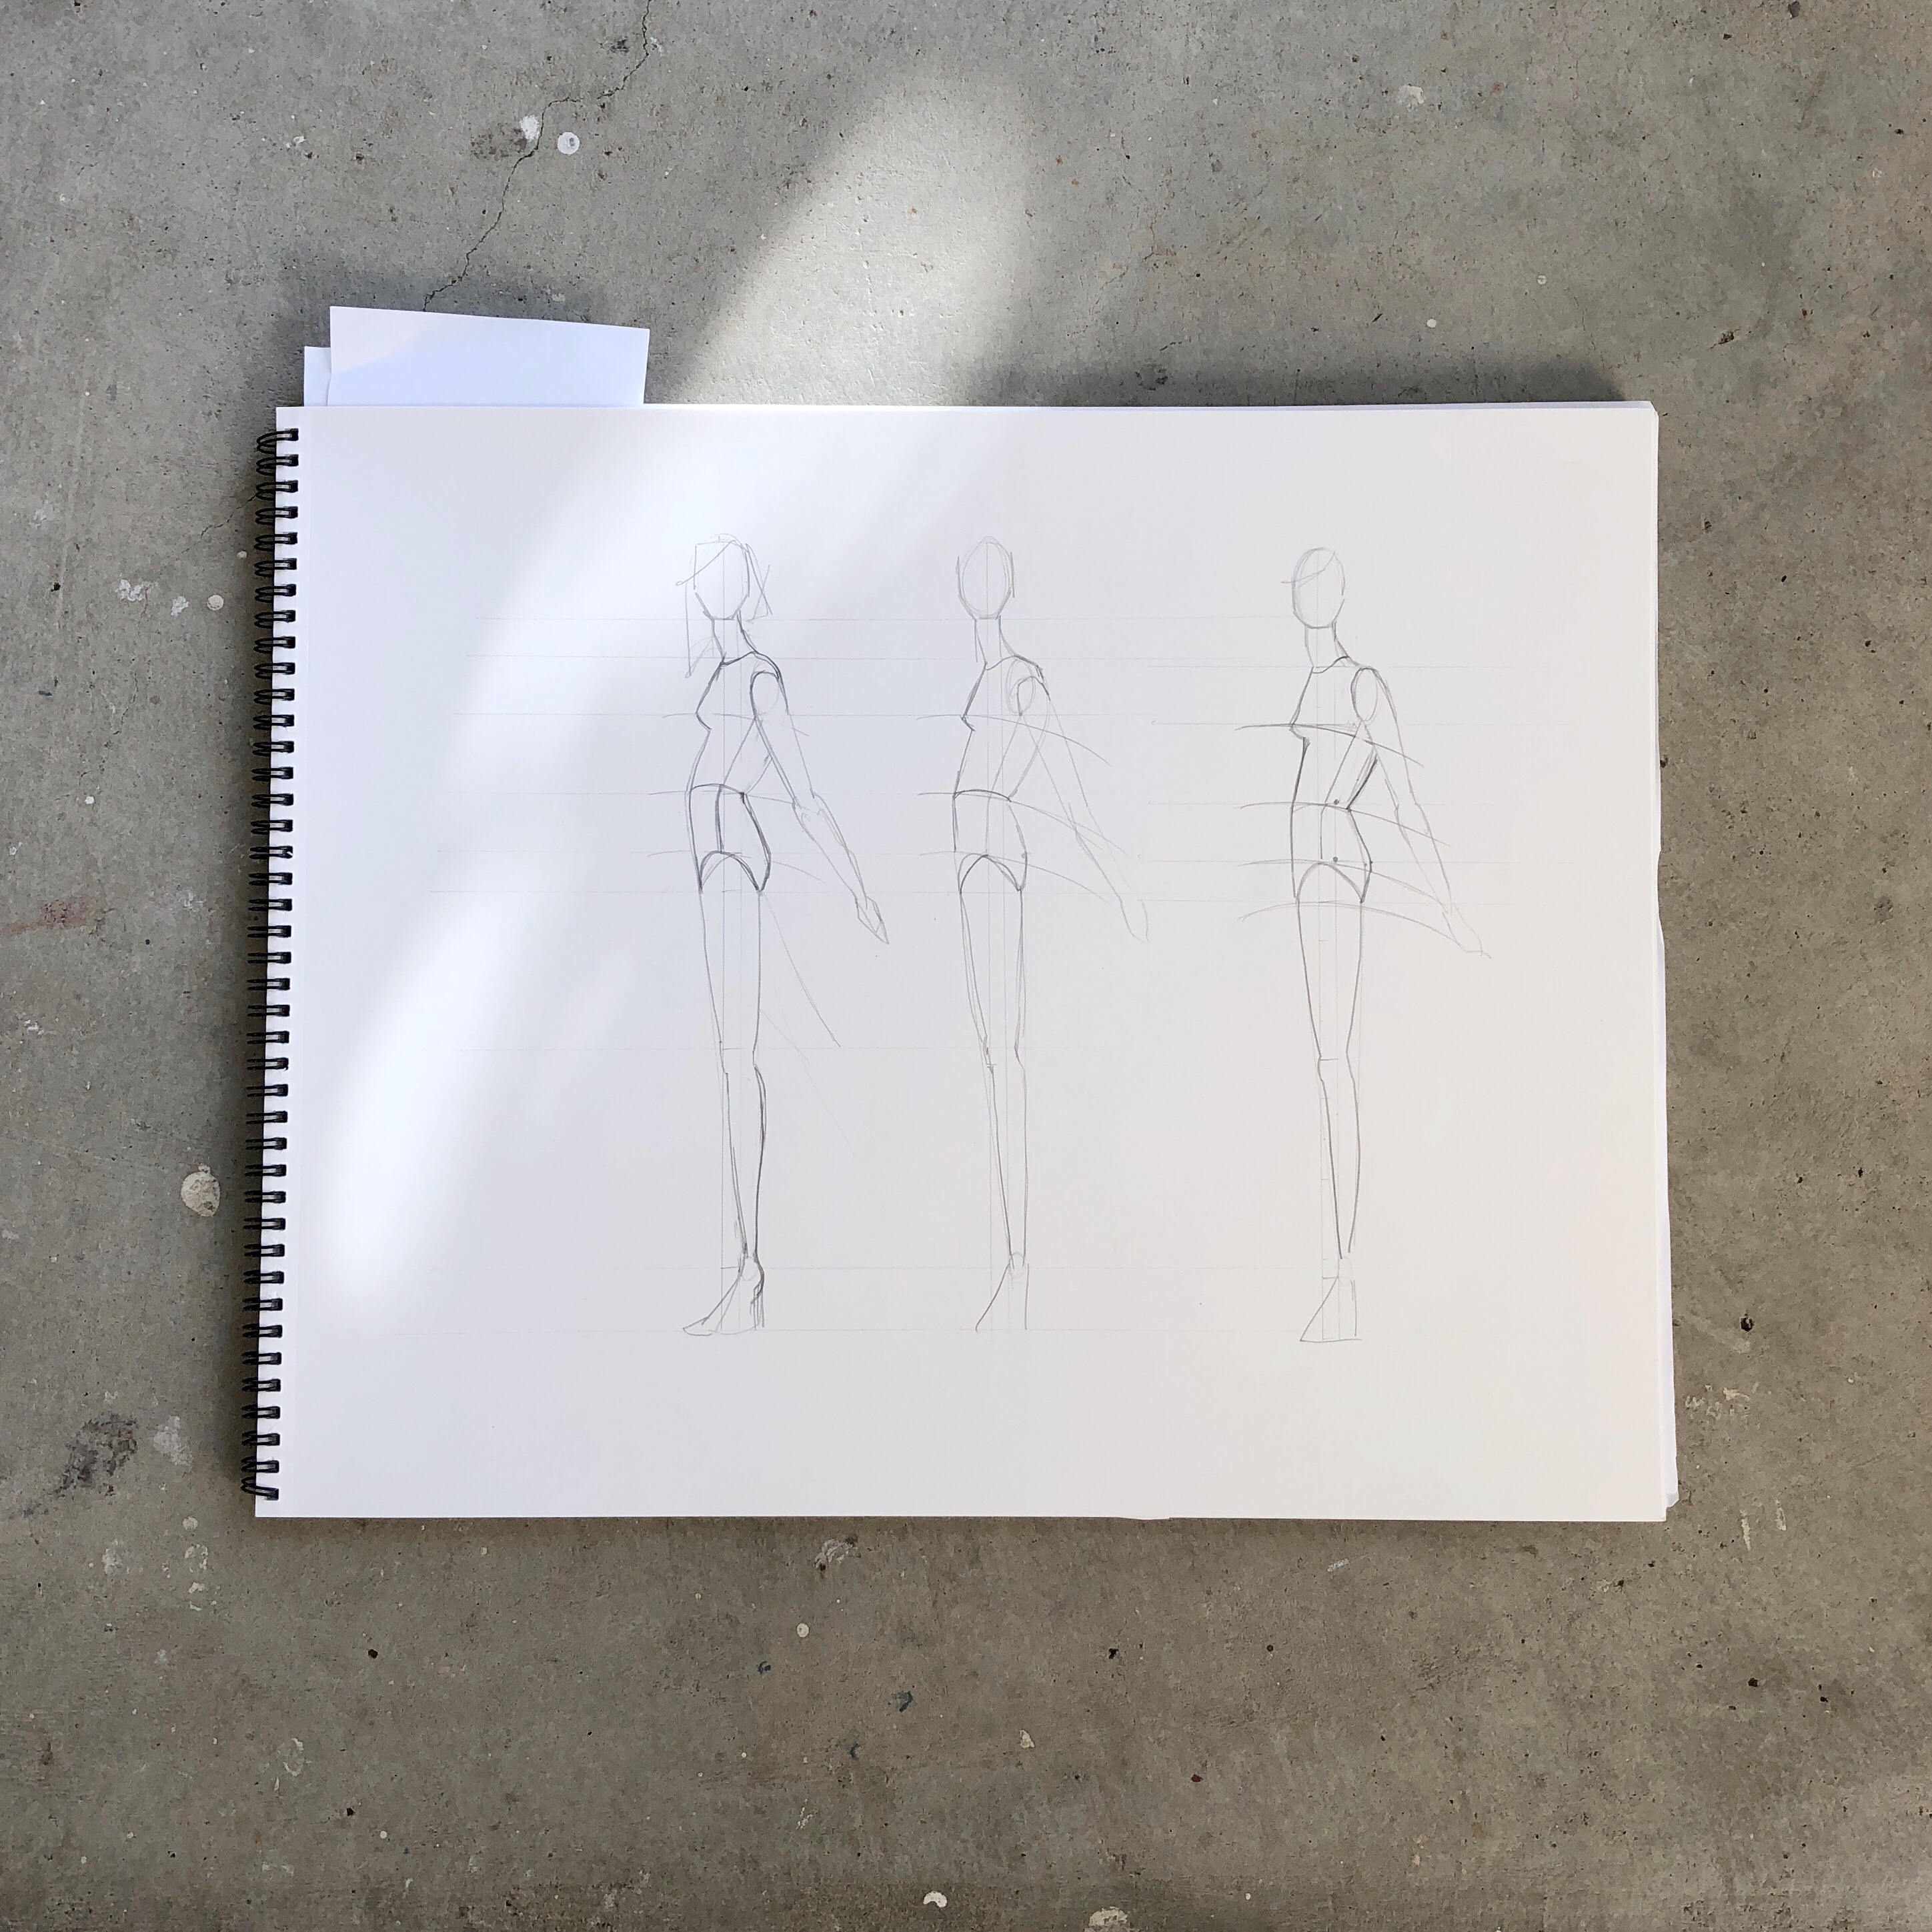
Backs – The Shaved Darts back (left) was used for most of the exercises because they were the easiest to knock out. I paired the Transferred Darts back (middle) with the Curved Should Darts front and I honestly can’t remember which exercise I paired the Ignored Darts back (right) with. The Ignored Darts back has a looser fit and requires easing the back shoulder with the front.

SPRING BREAK

Leave a comment

It was really starting to feel like Spring Break would never get here. Last Friday felt like five days. And I’m definitely not counting, but there are 8 weeks left of school.  Eight.  8.  E. I. G. H. T.   This middle school teacher really needed some time off.

I’m trying to be gentle with myself this break. I have a tendency to over estimate what can be accomplished during a small amount of time off and despite usually getting a lot done, it never feels like enough.

So aside from one project and my PM&D homework, I’m taking it easy. Going to read this book, probably clean some areas of the house, and visit some fabric/thrift stores.

I don’t have to make all the things.

Lately

Leave a comment

It’s the time of year when things start to speed way up, but also move as slow as mud. Example: Where did March go? But how are there 10 more school days before Spring Break? Anyway, a lot has been happening, but it feels like my productivity hasn’t been keeping up.

Sew News Last summer, the lovely Amanda reached out to me on Instagram and… that’s my mug in a bonafide magazine! You can read the related blog post here.

Sketchbook Sewing Plans I have been impatiently waiting for Sarah Golden’s new fabric collection ‘Around Town’ to be released from Andover. Feeling pretty confident I’ve found the perfect sewing pattern to pair the print ‘Improv‘ with – the cropped Kalle Shirt Dress.

Patternmaking & Design I’ve FINALLY moved on to the second section in my design class, Moulage. I turned in my second skirt design last weekend and will blog about both designs soon, but here’s my first design:

If you’re interested in patternmaking, the owner of Apparel Arts has several Craftsy classes.

Sewing I’ve managed to throw together two simple tops from my 2018 Make Plans. They both need the necklines finished, and the Shirt No. 1 needs the sleeves hemmed. Not sure it’ll happen today since I have SO MUCH PM&D HOMEWORK.

Happy Sunday!

Digital Organization

Leave a comment

I’m a pretty organized person. When it comes to physical things like my home and classroom, have I got systems. But when it comes to digital stuff, I’m just okay. I know which PDF sewing patterns I own and when I’m inspired to sew a pattern, I use my sketchbook to plan most of it out. But I was lacking in a system for collecting inspiration.

Instagram lets you save posts and organize them with collections, but you can only access those through the app. I’ve had a Pinterest account since it first came out, but it felt a little limited in what it could do (and the ads are annoying). Then a couple of days ago I realized Pinterest added a “Sections” feature to its boards and I ended up spending my Friday night re-organizing my whole account.

Since I’d had this account for years, it had quite a few pins that were no longer my style and entire boards that just didn’t make sense for how I wanted to use it now. As far as my making-related boards go, I pared things down to the following categories:

2018 Make Plans – I’m going to make a board for each year of the patterns I want to make (sewing and knitting). It’s divided into sections by pattern and will include RTW inspiration as well as others’ makes.

Fabric + Fabric Inspiration – This board has links to fabric I’d like to purchase (or just look at because they’re pretty) and a section of surface design inspiration for future blocking printing projects. Or if I ever figure out Adobe Creative Suite, my own fabric designs.

Knitting Patterns – This board consists of knitting patterns I don’t currently own, but might want to purchase in the future.

Sewing Patterns – This board also consists of patterns I don’t currently own, but might want to purchase in the future.

Fashion + Style – I’m quite excited about this board. I made sections for each type of garment. I’m planning to use this board to help my design process for my patternmaking class and for future making plans.

Fiber Arts – I also have an Art + Design board with media-based sections, but decided to make a separate Fiber Arts board. It includes weaving, punch needle/rug hooking, and quilt inspiration.

Sewing Tutorials – This board is a collection of links that help me sew french inseam pockets, bind a quilt, thread my serger, and etc.

All of my boards are linked if you’re inclined to check them out. How do you organize your inspiration and plan projects?

Three Day Weekend

2 Comments

This weekend was a good weekend to reflect. I took some time to make some long term plans (moved this lil blog over to my swanky new domain name), did some deep cleaning and organizing (purged our closets), and started a new book: The Hate You Give. I’m still trying to read mainly women authors and this particular book feels very relevant to where we are as a country. Hoping we can drive out some of the darkness soon.

I did make what I was hoping would be a quick trip to Joann’s. It was packed and took close to an hour to get this linen and lightweight denim cut, but the coupons more than made up for it. I’m planning to use these fabrics to make the FINAL version of my culottes.

The Patternmaking & Design certificate program I’m pursuing is split into sections, the first being skirts. At the end of each section, students are required to design, draft, muslin, and sew two designs in fashion fabric.

I’m not a huge wearer of skirts so I was thrilled that my teacher allowed me to draft culottes as one of my final designs. The pockets are heavily influenced by the iconic Clyde pockets of Elizabeth Suzann. I wanted to see if I could take what I’ve learned and puzzle out their construction.

The first draft’s pockets (pictured above) were a little too droopy so I decided to hike them up in the final production pattern (I didn’t like having to bend over to reach the pocket bottom!). My goal is to finish both the production pattern AND sew them in fashion fabric this week before class next Saturday. Putting those words out in to the world to hold myself accountable!

Another thing I reflected on this weekend is how slowly I’m moving through the PM&D program. I really need to buckle down and figure out a system for completing the homework throughout the work week. I think documenting my progress and what I’m learning here will help.

Fashion Illustration

1 Comment

I started taking classes at Apparel Arts in May of this year. My goal is to obtain the Patternmaking & Design certificate, a 24 to 30 month self-paced program. The bulk of the program is a 3 hour weekly class in pattern drafting and design with 10 shorter classes such as Construction, Textiles, and Manufacturing. The first of the “electives” I took was Fashion Illustration.

As a former art student, the class was lovely. It opened me up to a new style of drawing,  introduced me to many fashion illustrators I otherwise wouldn’t have discovered, and got me into the habit of drawing more regularly.

The class used the text Illustrating Fashion: Concept to Creation by Steven Stipelman. It’s a really fabulous book if you’re interested in learning to draw the fashion figure. The class was structured to start with a short lecture which moved through the history of fashion illustration and ended with the work of contemporary fashion illustrators, followed by several hours of drawing.

Here’s some of my work from the 10 week class:

IMG_0269
10 head croquis
IMG_0272
Side Profile | Turned Figure
IMG_0270
Clothing the figure
IMG_0266
Rendering prints from multiple views
IMG_0274
Side profile practice
IMG_0276
Drawing from magazines
IMG_0271
Some exercises included copying Stipelman’s work
IMG_0267
Rendering texture with colored pencil
IMG_0277
Quick gesture drawings from magazines
IMG_0280
Rendering fabric prints
IMG_0282
Several figures on a page
IMG_0286
Ace & Jig muses
IMG_0279
Walking figure, rendering fabric
IMG_0283
More Stipelman inspiration
IMG_0275
Muse study (Nykhor Paul), several figures on a page
IMG_0278
Fashion face
IMG_0273
Silhouettes
IMG_0268
Sketching for finals

Our final projects required us to draw 4-5 fashion figures and create a corresponding mood board. I had a hard time designing my own line and chose to depict some of Vika Gazinskaya’s Spring 2018 Ready-to-Wear collection.

IMG_0284
IMG_0285
Work on the right is by Marialaura Fedi