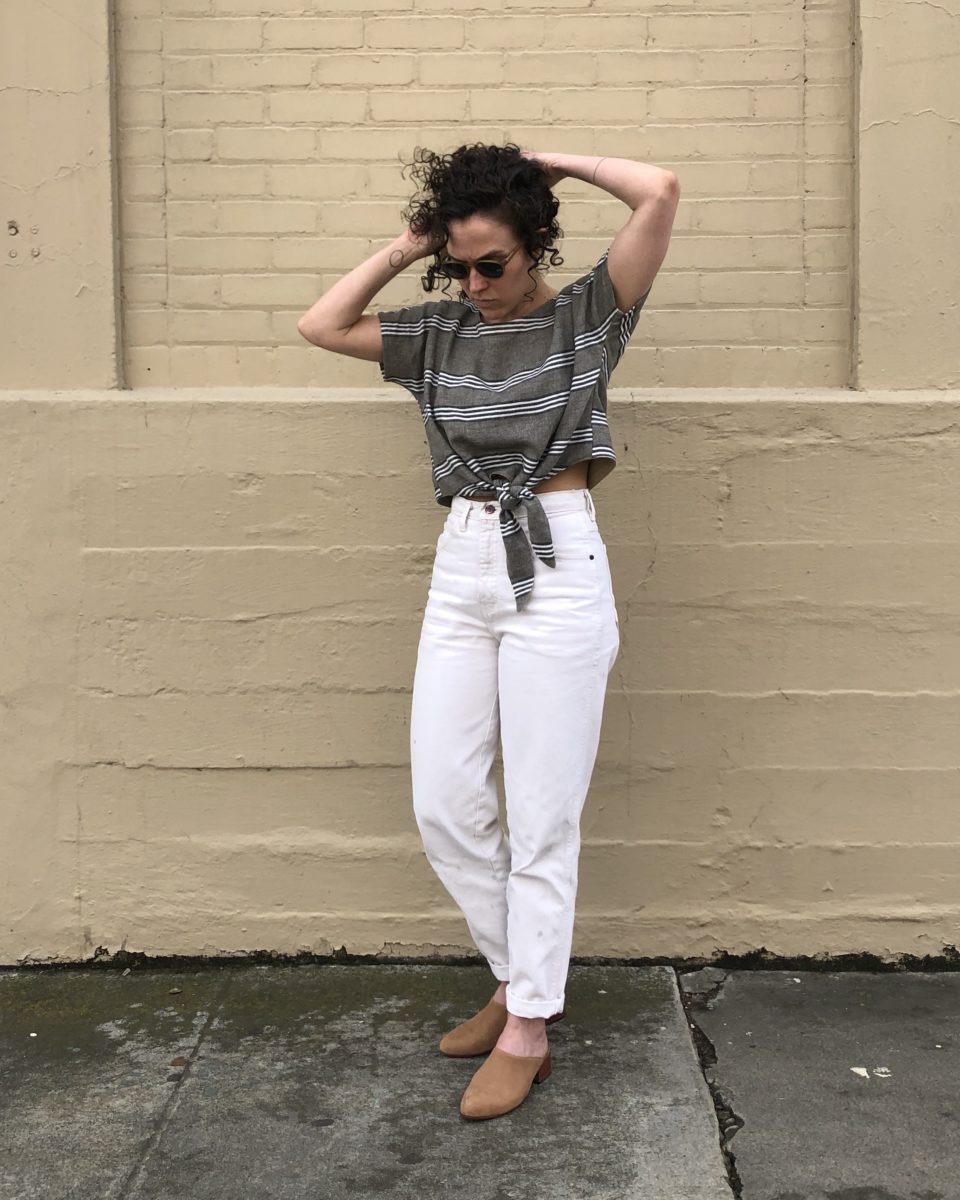
Yesterday morning, I was fondling fabric in my stash and inspiration hit. It hit so hard, I couldn’t do anything else until I worked through it.
The idea was pretty basic, but was engrossing enough that I forgot to eat or brush my teeth until 2pm. Gross, or awesome – I can’t decide.
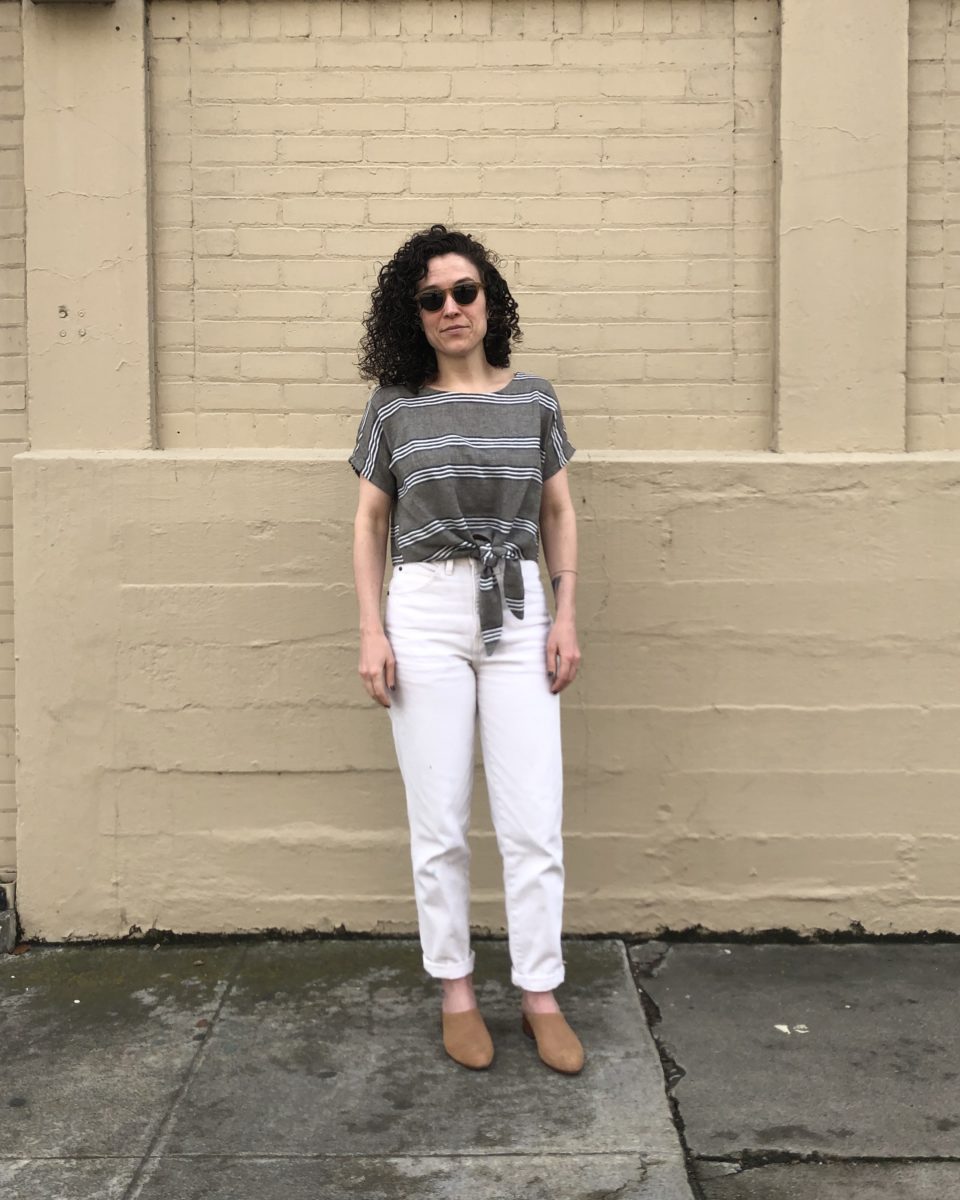
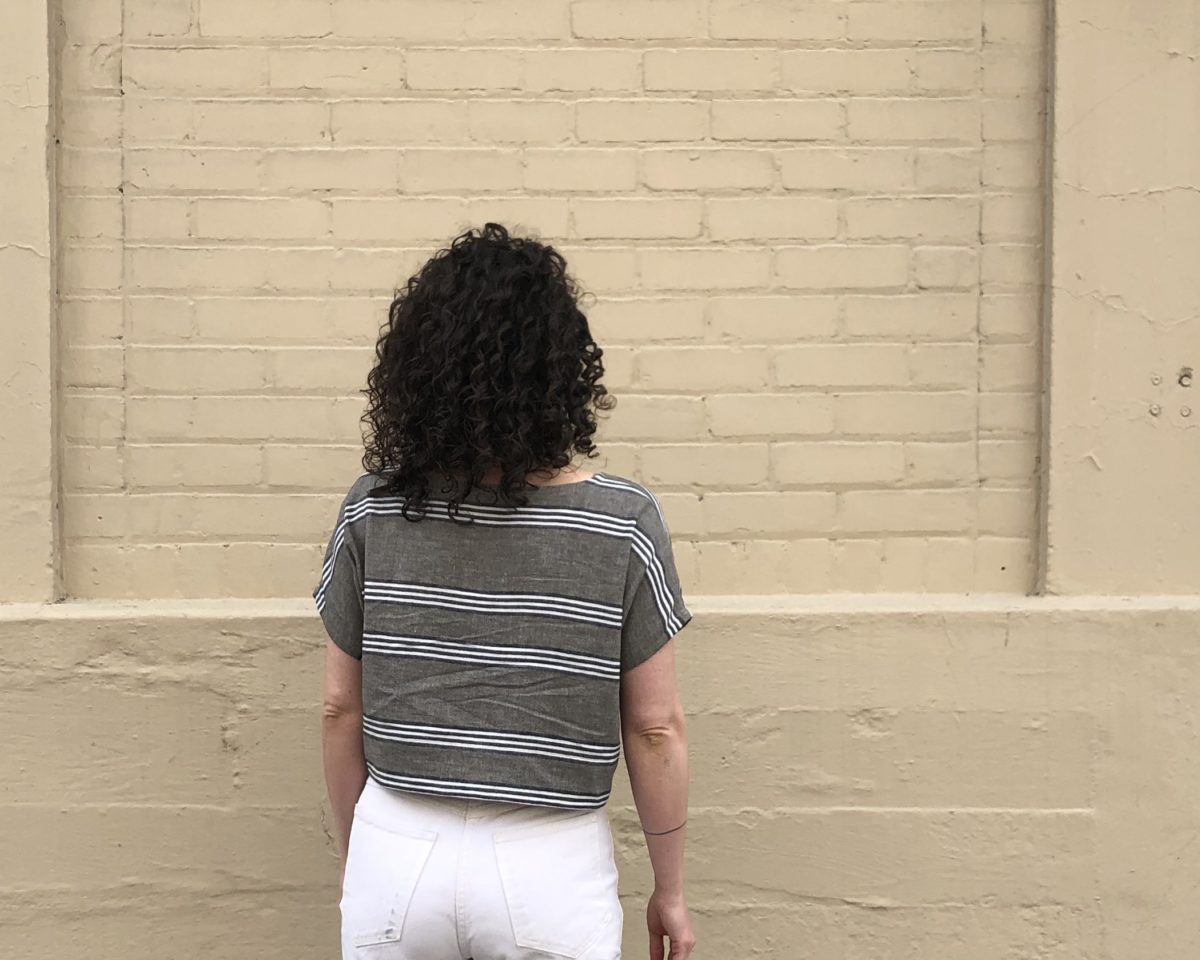
It’s a pretty simple hack. I cropped and straightened the original curved hem, then just drew lines until I had a tie shape I liked. I made sure to square off from center front and the side seam for about a 1/4 inch before swooping down. I made the XS size and cropped it by about 3 inches. The tie length ended up being around 13-ish inches, I think.
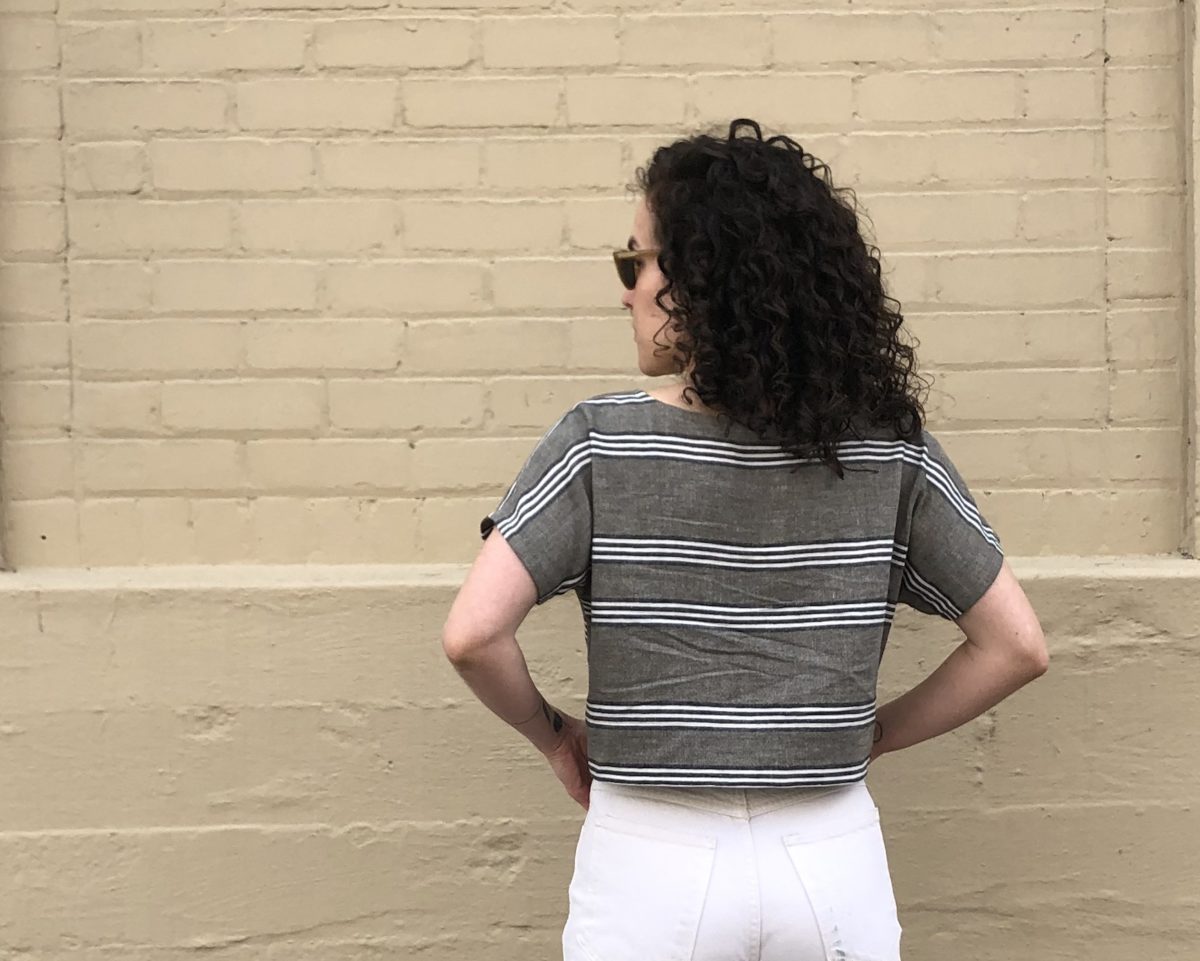
I managed to cut the back piece so that the stripes don’t match up, but I’m going to blame that on the small amount of yardage I had… it totally wasn’t because of that. GAH!
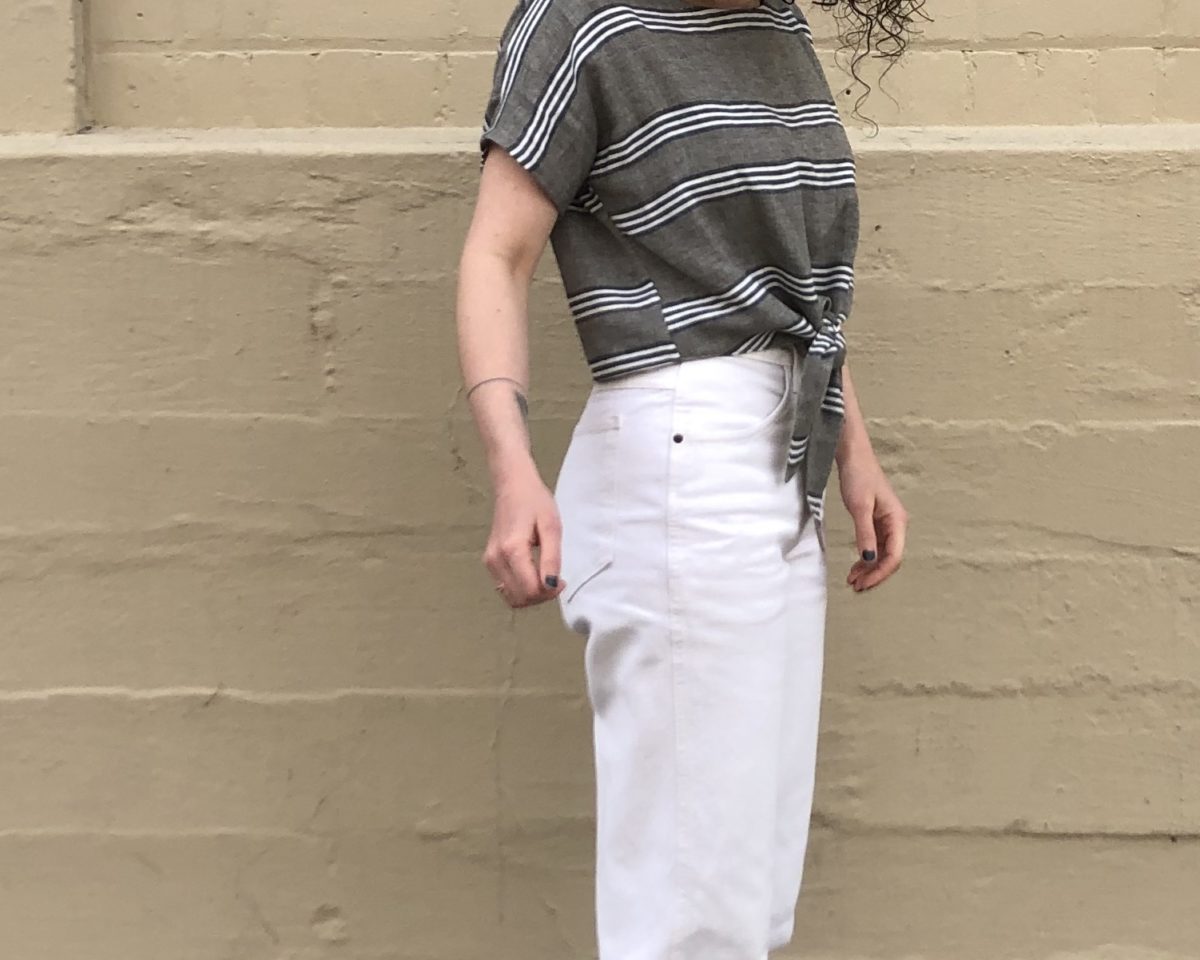
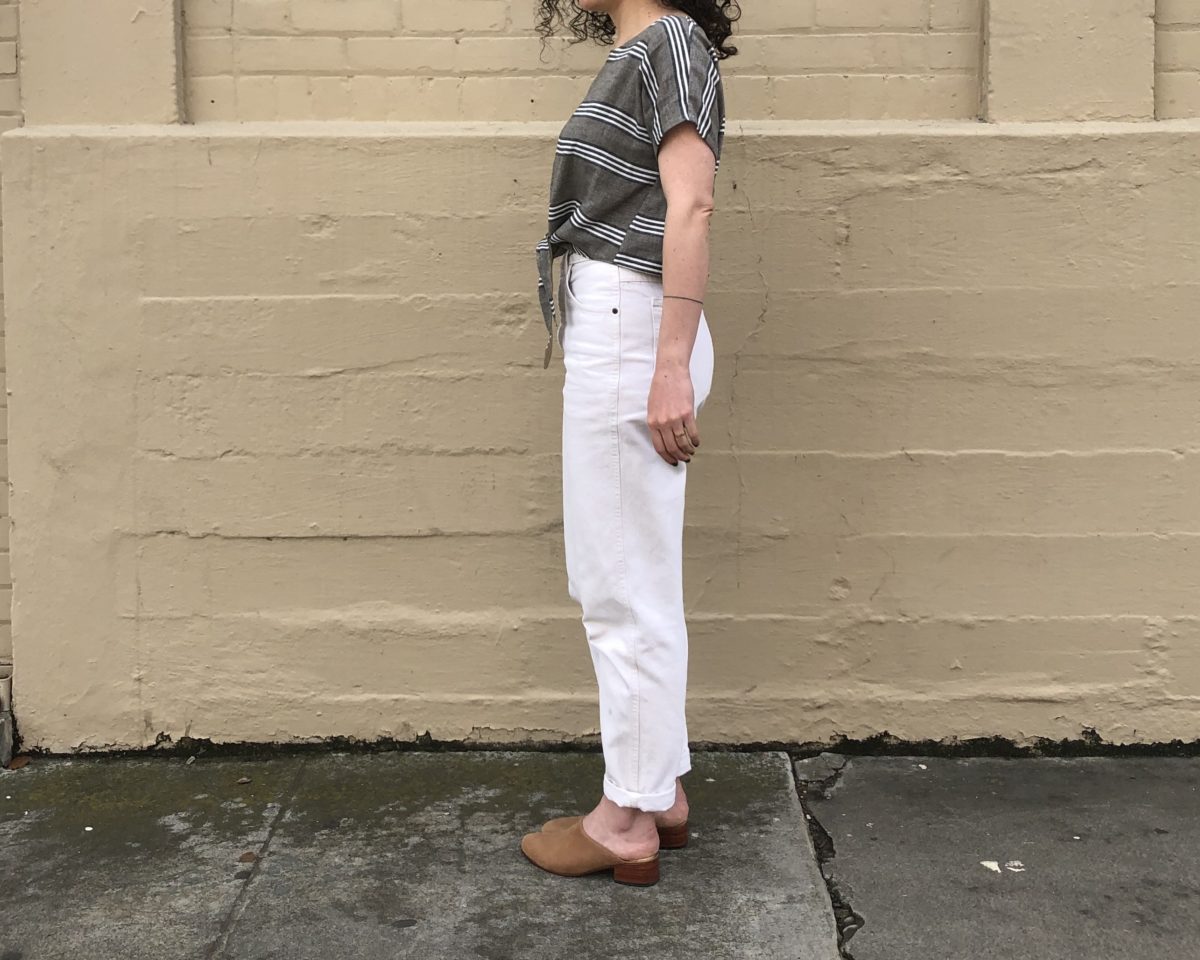
Initially I wanted a snugger fit around the waist, but I actually like how it hangs away from my body.
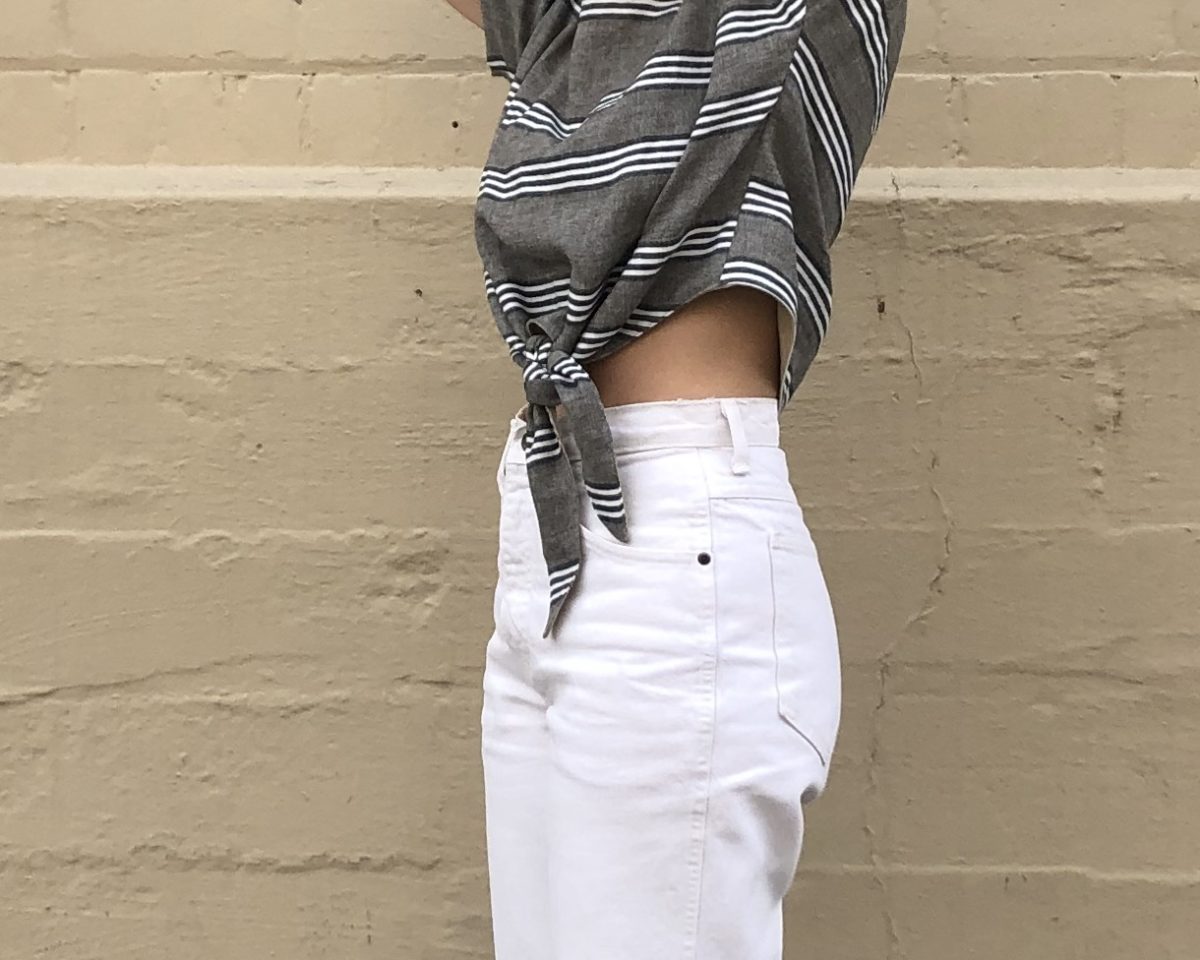
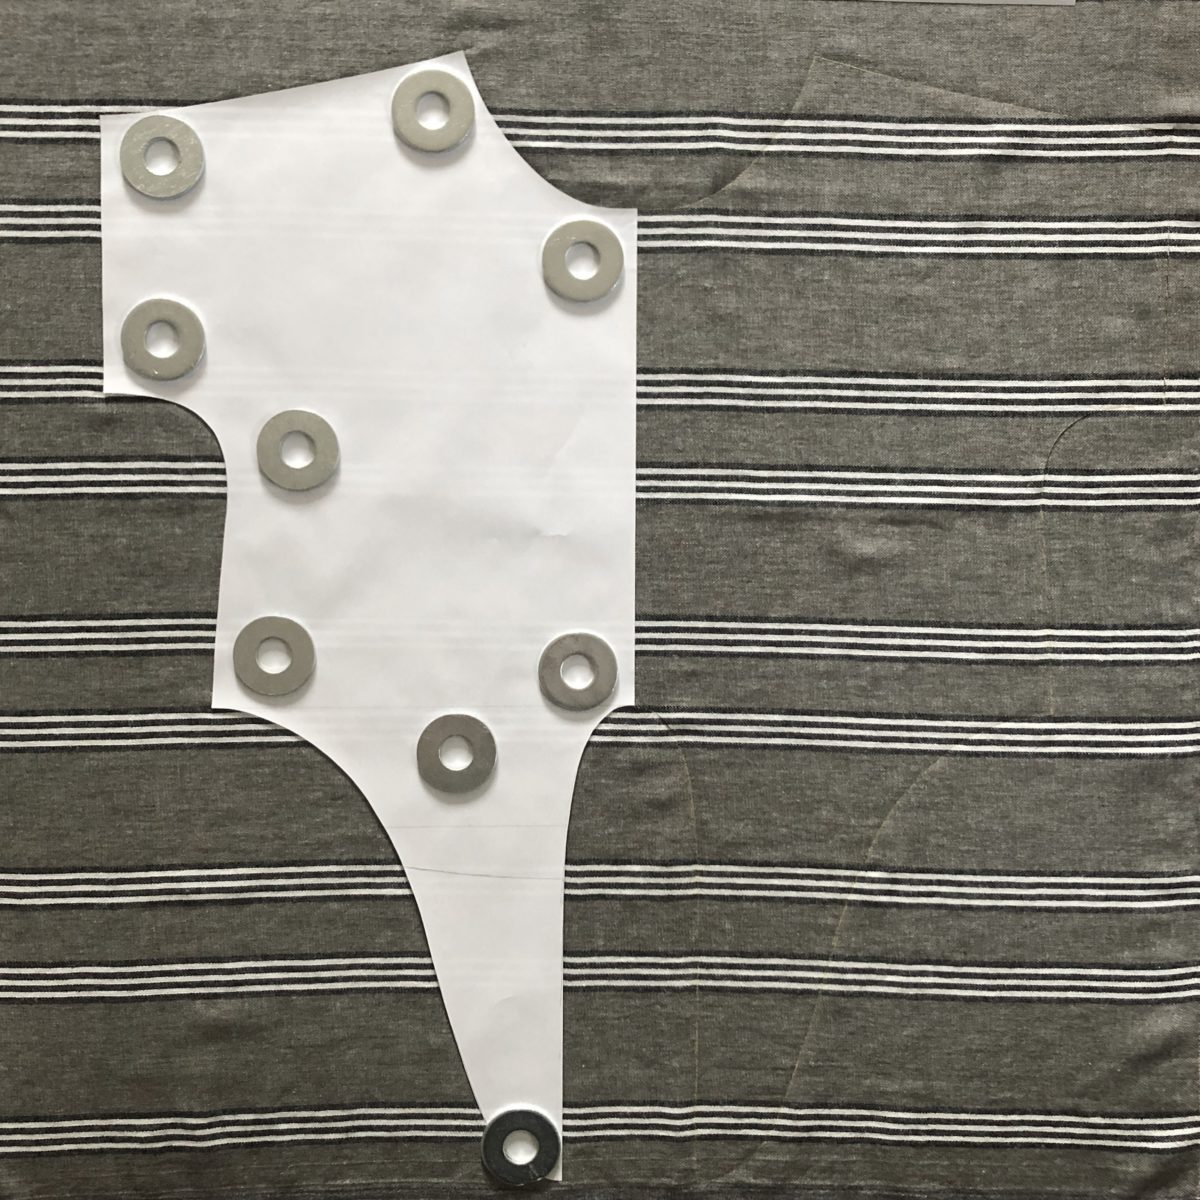
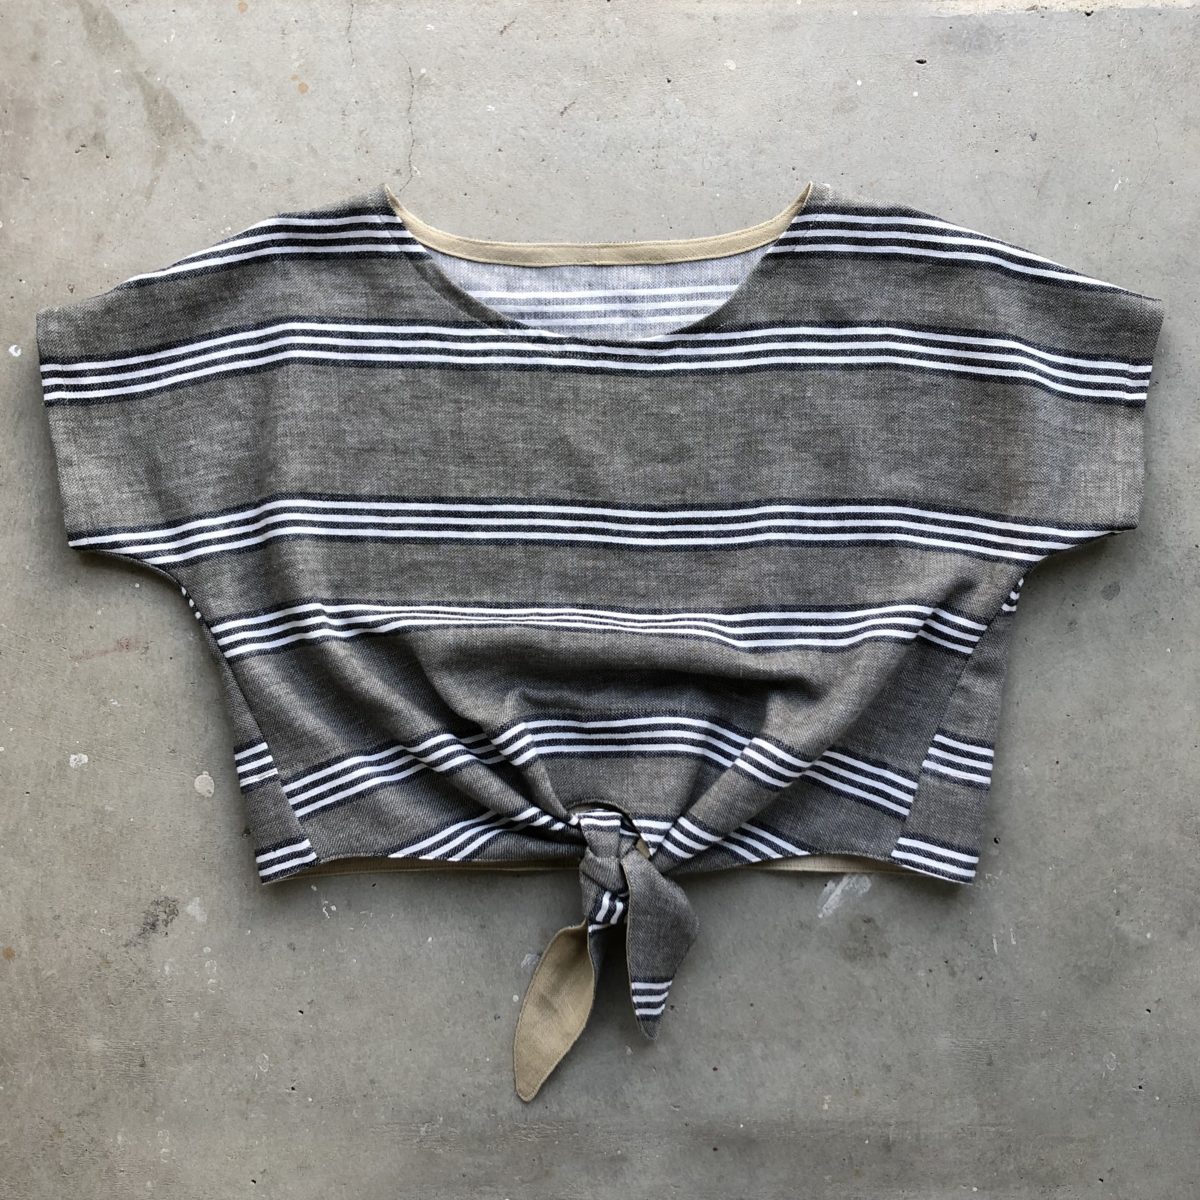
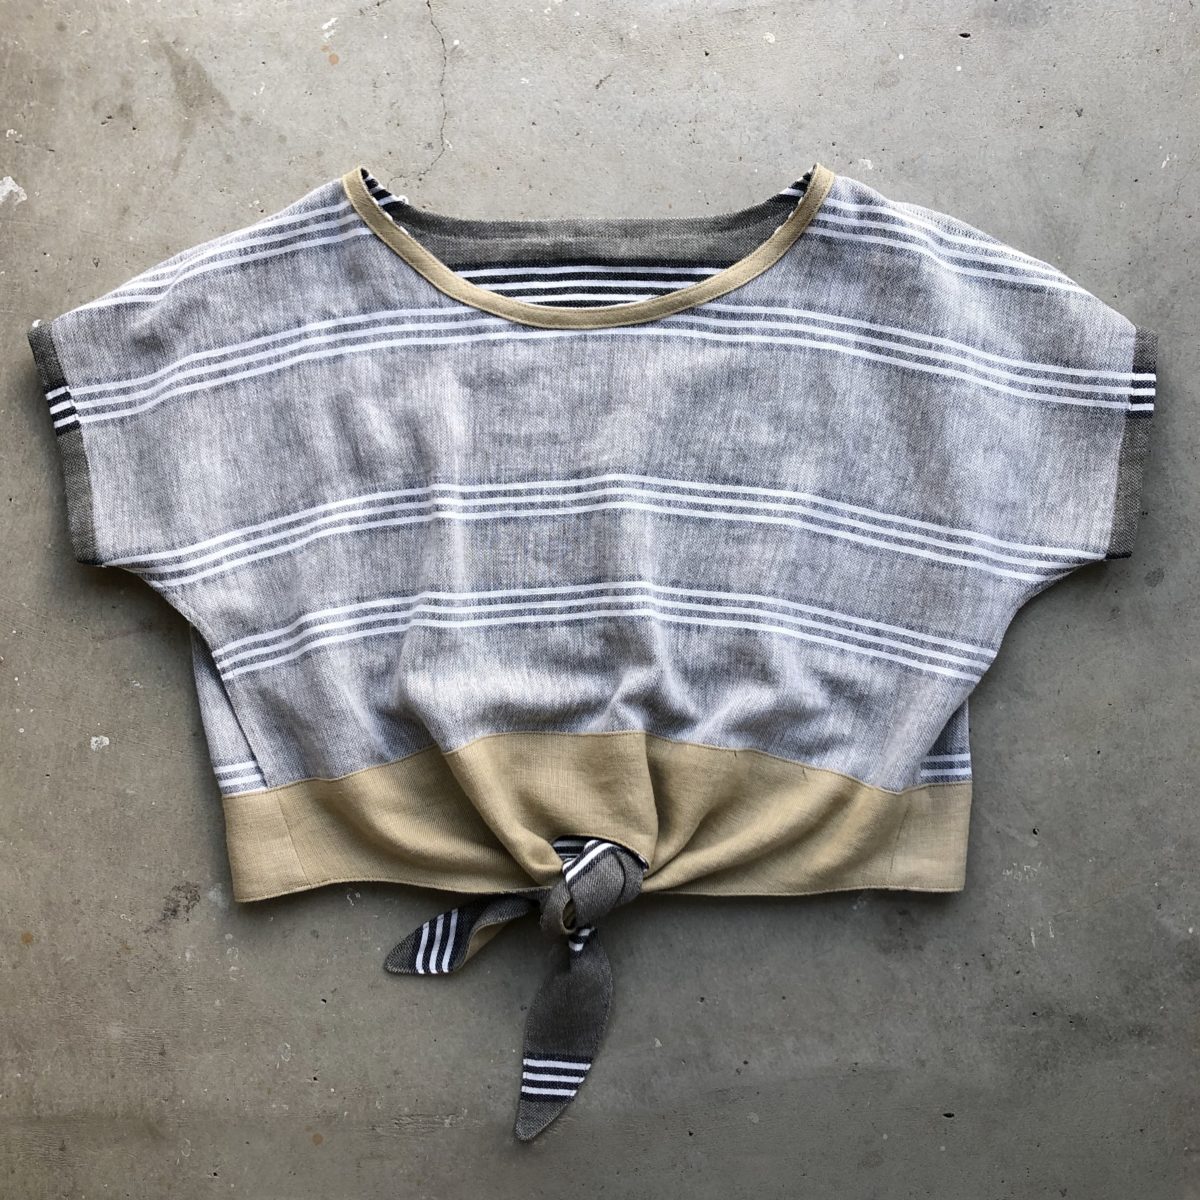
I didn’t want to fuss with a tiny hem on the ties and decided to use a hem facing. To do that, I traced the bottom portion of the shirt front and back pattern pieces. The facing comes up about 3 inches from the bottom hem and ties (see last picture).
I assembled the shirt as instructed, but used faux-french seams for the sides. To finish the hem and ties, I sewed the front and back pieces of the hem facing together and pressed the seams open. I then pressed the top edge a 1/2 inch down toward the wrong side and pinned the facing to the shirt right sides together. I sewed around the bottom edge using a 1/4 inch seam allowance, clipped the corners of the ties, and turned everything right sides out.
I gave it a good press, then edgestitched the hem and the top of the facing to the shirt.
I had to use another fabric for the hem facing and bias neckline finish, but I kind of love the contrast. It’s leftover fabric from this Maya Top, which is a little heftier than the main fabric. It adds some structure to this squishy cotton-linen blend from Stonemountain. I think it also helps the ties not stretch out of shape. And it’s a thrifted tablecloth!
This pattern is great right out of the envelope (see here and here), but is also such a fun base to hack. I’ve turned it into a dress, an Ace & Jig-esque top, and now this fun top!
I have a feeling this will get a lot of wear this summer, but let’s be honest – I’m going to wear it under sweaters until it warms up.
As I’ve mentioned before, I freaking love sewing bags. They are super satisfying to make and when I tell folks I’ve made the bag they’re admiring it feels SO GOOD. Really though, if you haven’t tried making a bag yet, you should!
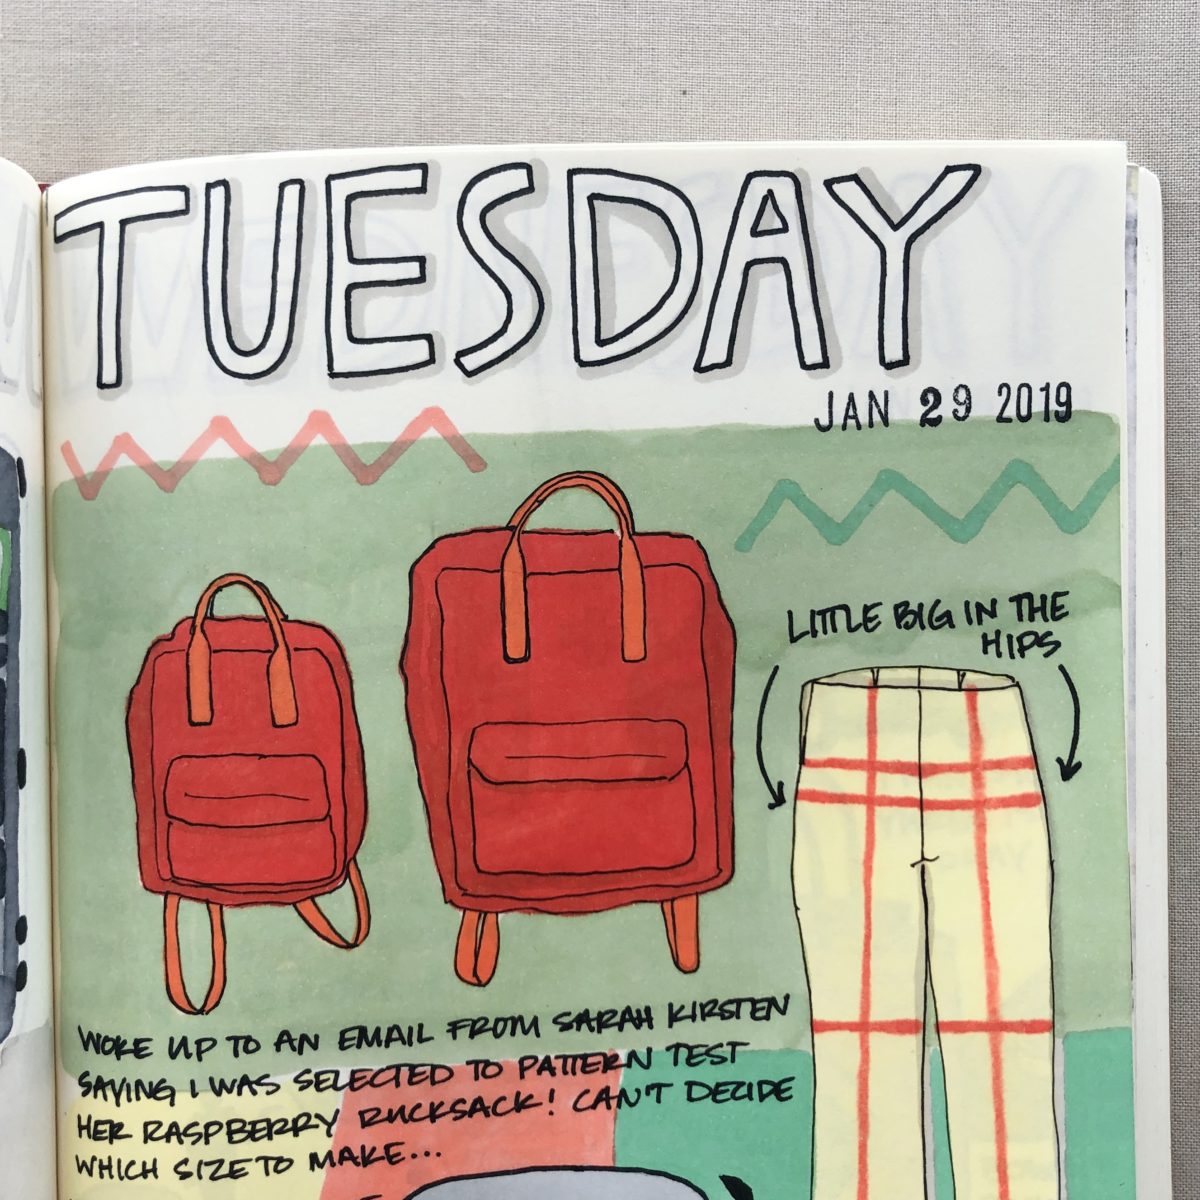
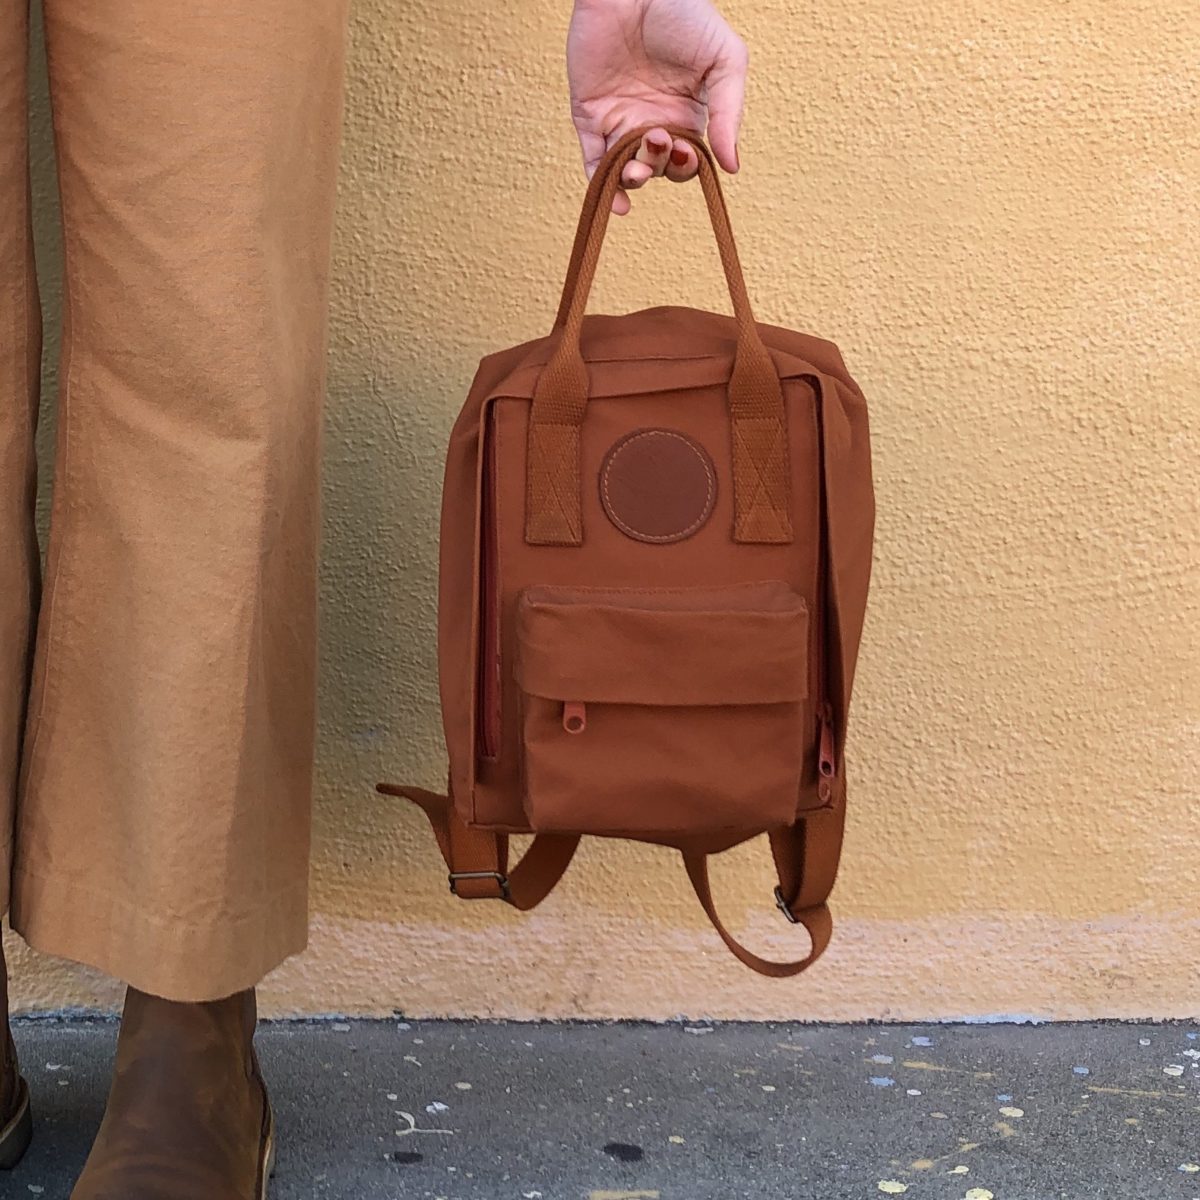
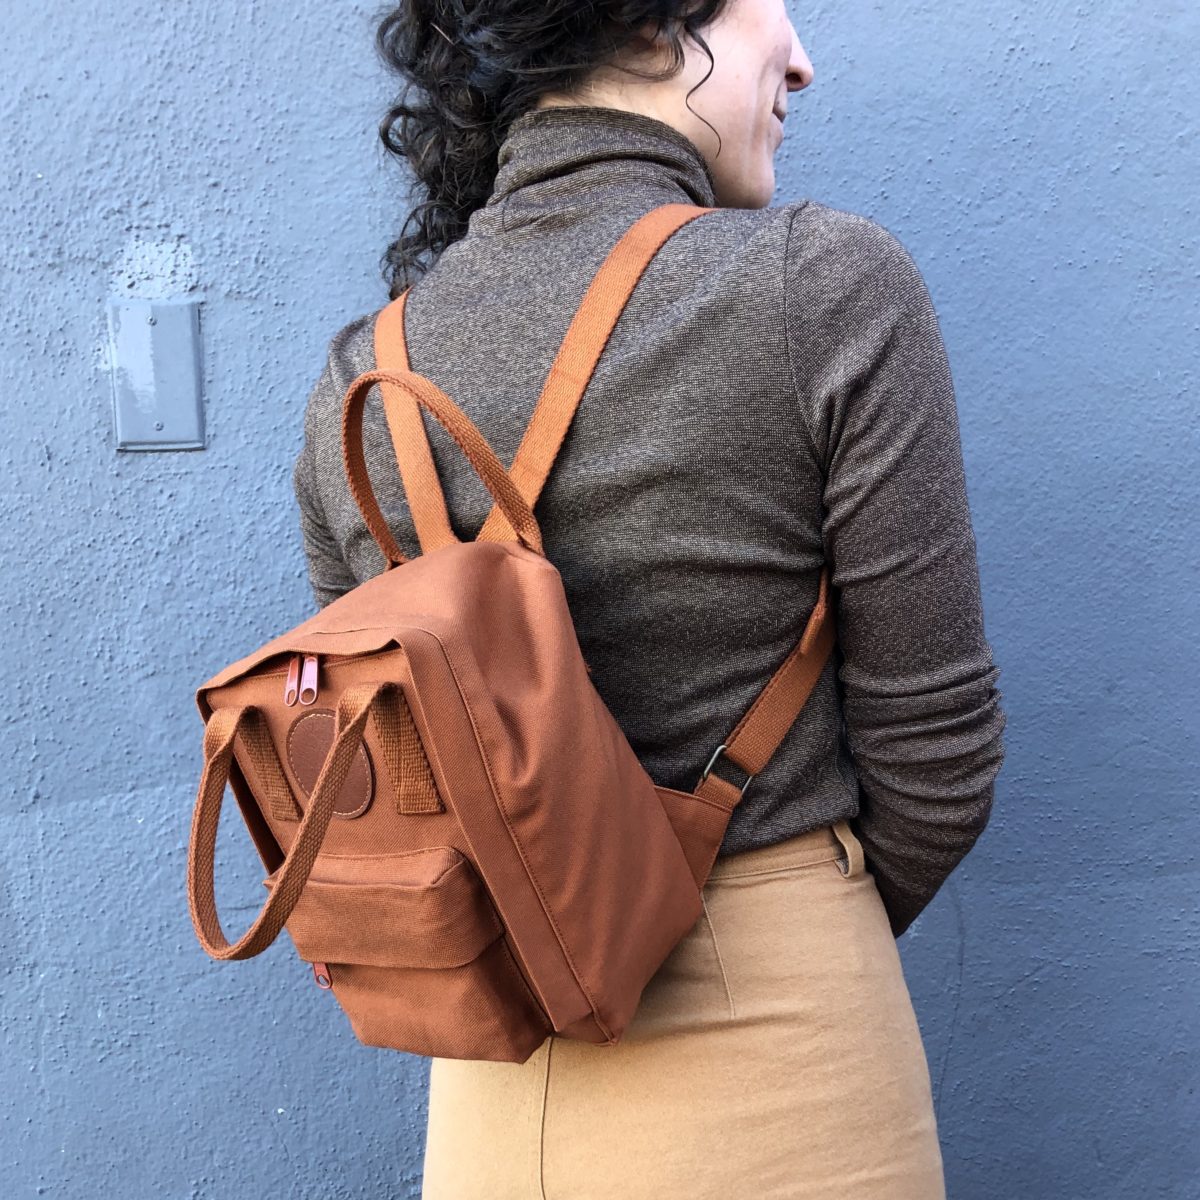
In late January when Sarah Kirsten put out a call for testers for her new pattern, the Raspberry Rucksack, I filled out the survey as fast as humanly possible. The pictures she posted looked similar to the iconic 1970’s Fjällräven Kånken that I’ve secretly lusted after for years and was super excited to find a sewing pattern to meet that want. The Raspberry Rucksack is fully lined (unlike the Kånken), comes in two sizes, is completely customizable, and best of all – is sewn by you (or a really dedicated loved one)!
I think one of the best things about sewing is that you can take RTW things that might otherwise not fit your body or fully suit your aesthetic and customize them to your liking. For me, it’s far more appealing to make the things I wear and use rather than buying them.
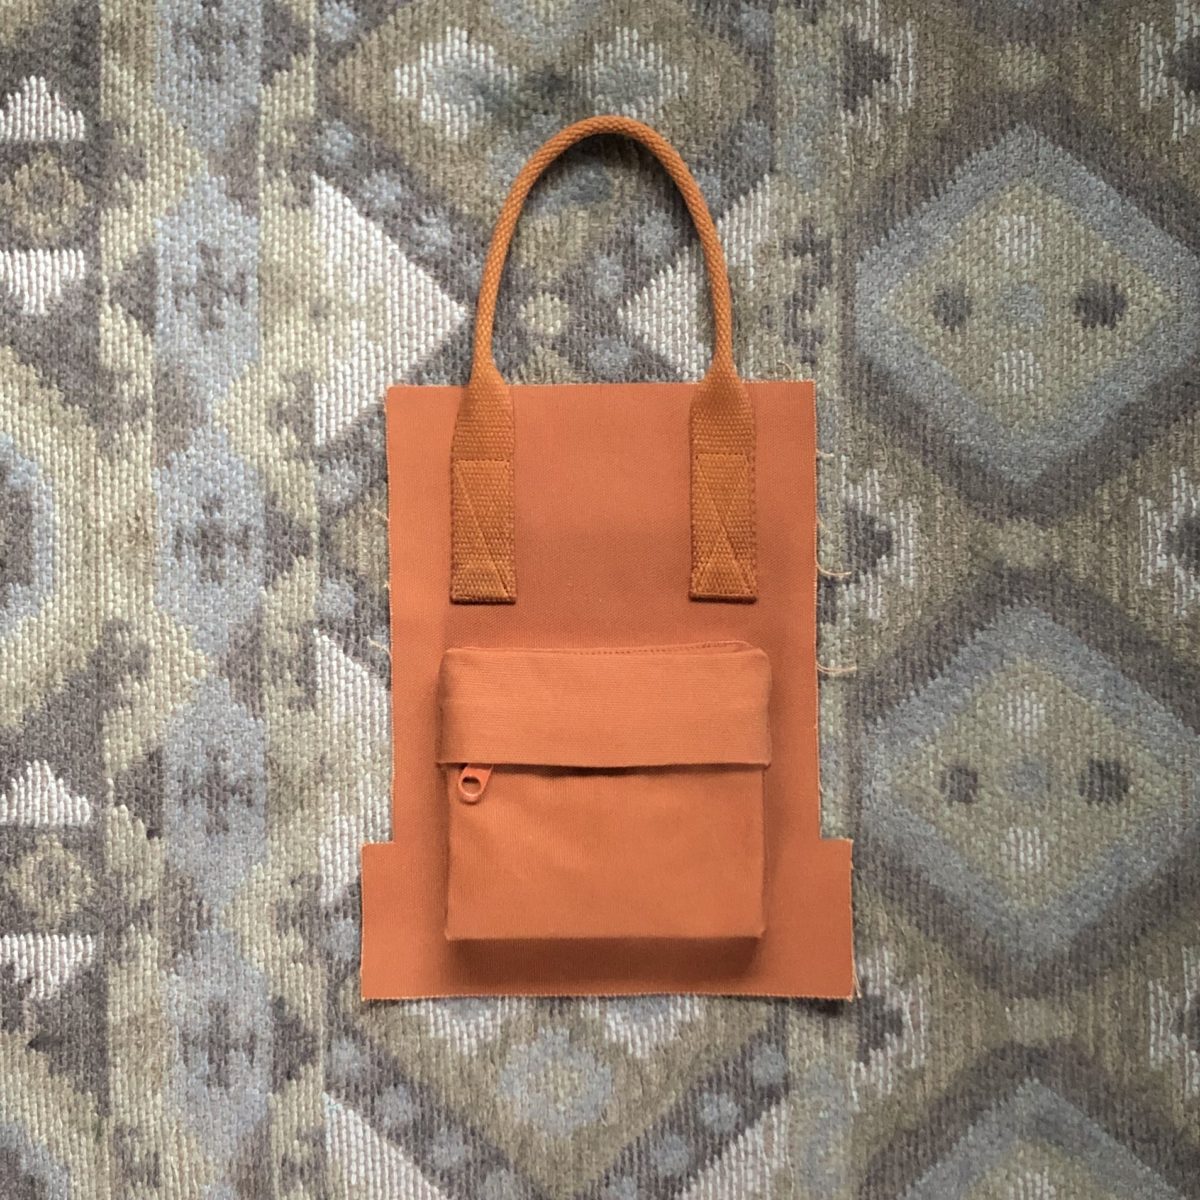
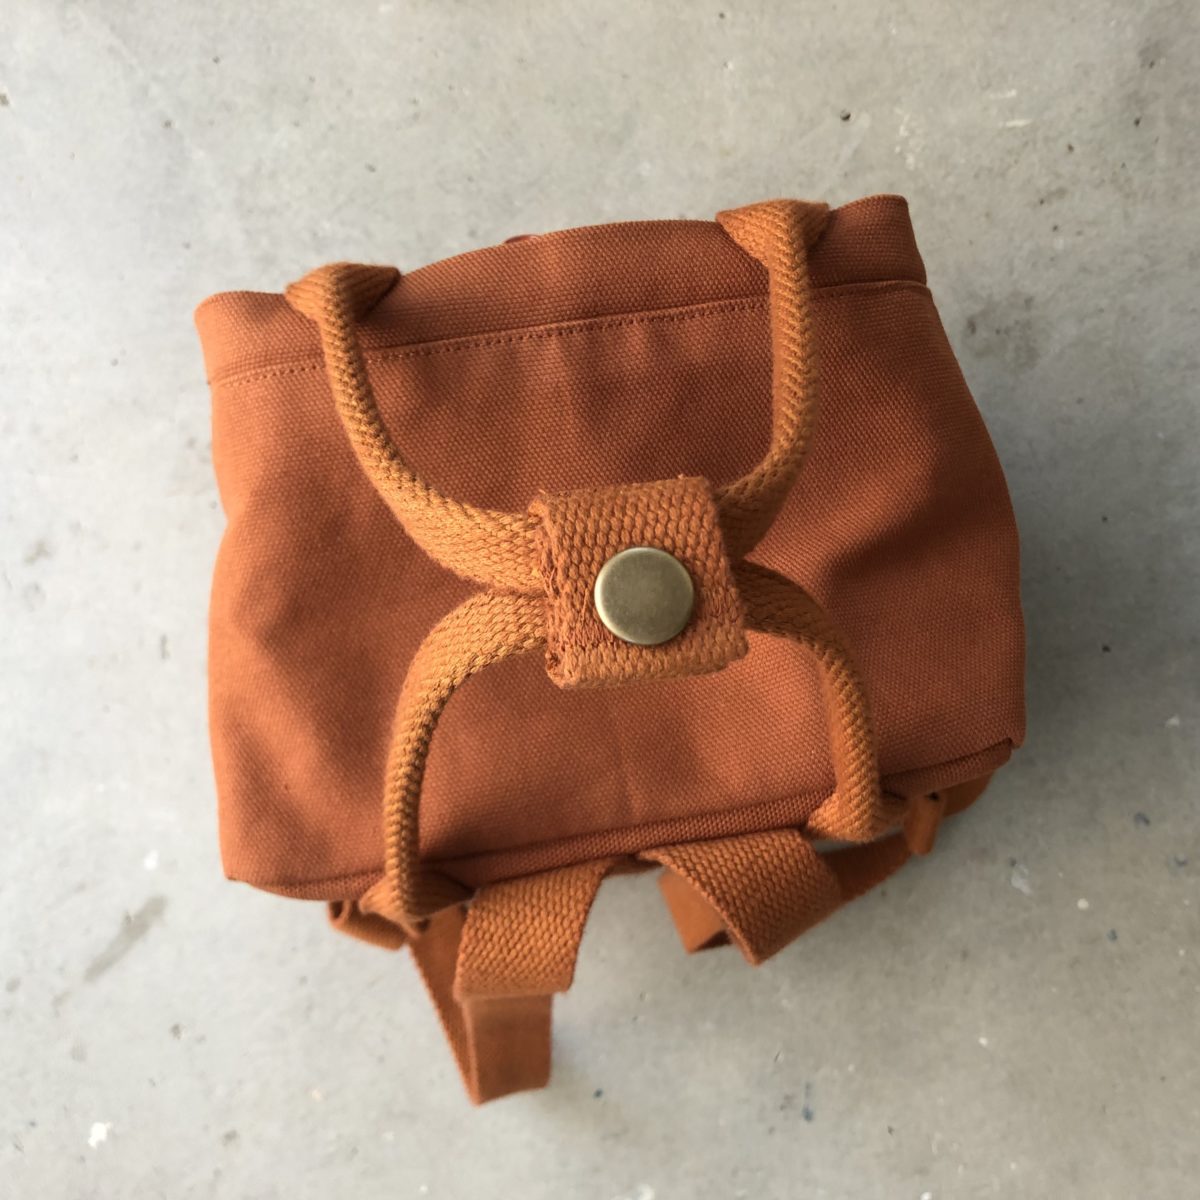
I was so delighted to be chosen to test the pattern and immediately started planning. I chose the Little Mini size since I have enough big backpacks and I thought the Little would be perfect for toting around my logbook and art supplies, or as a purse.
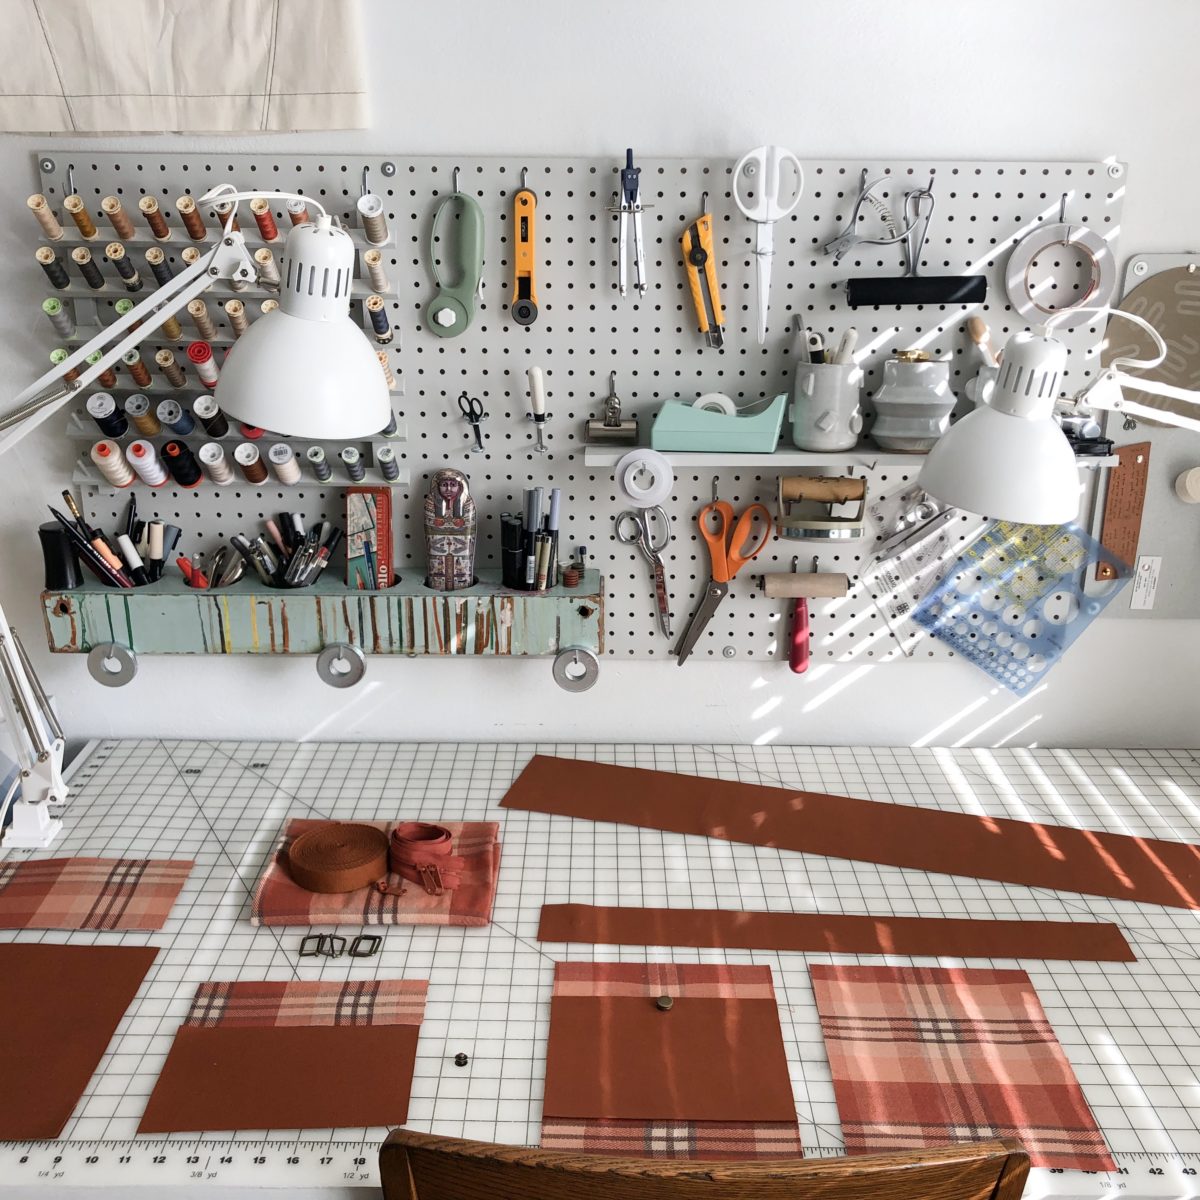
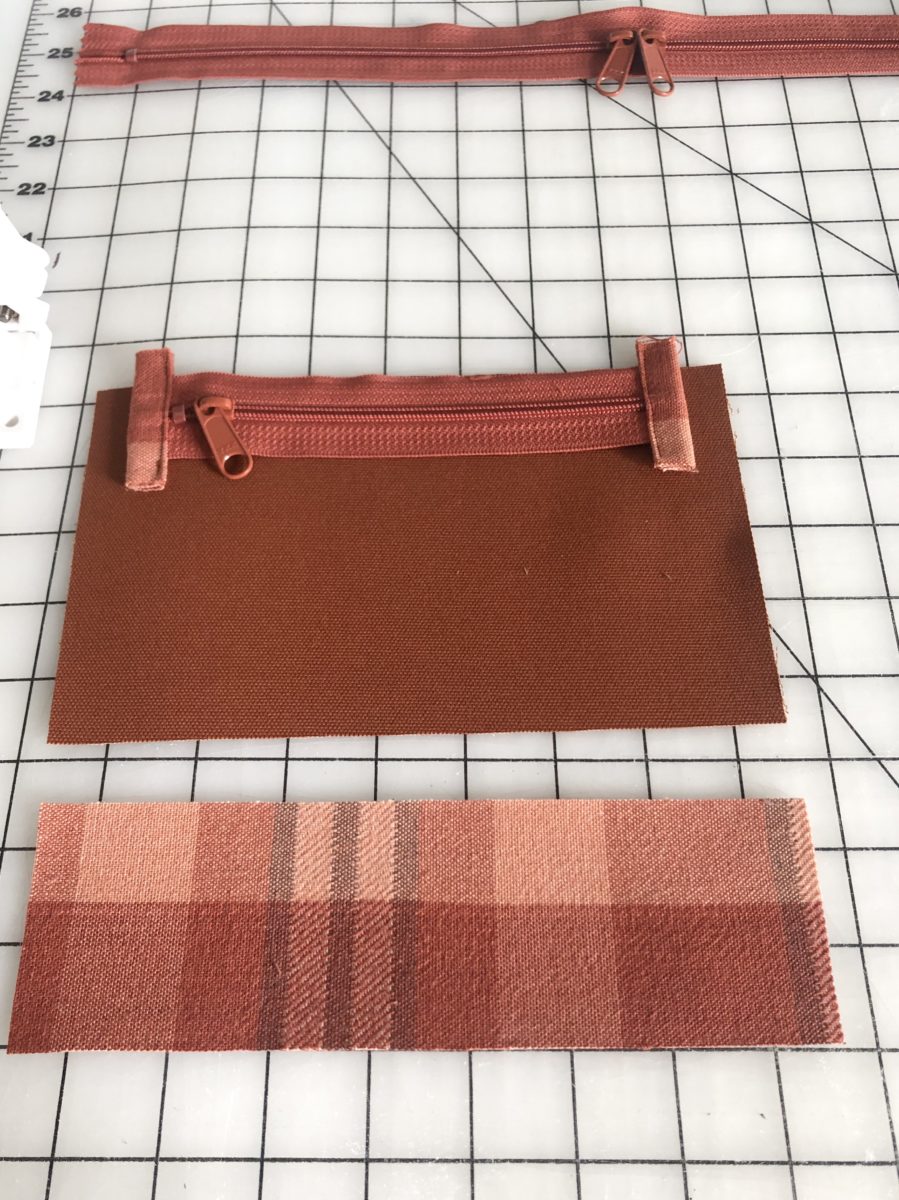
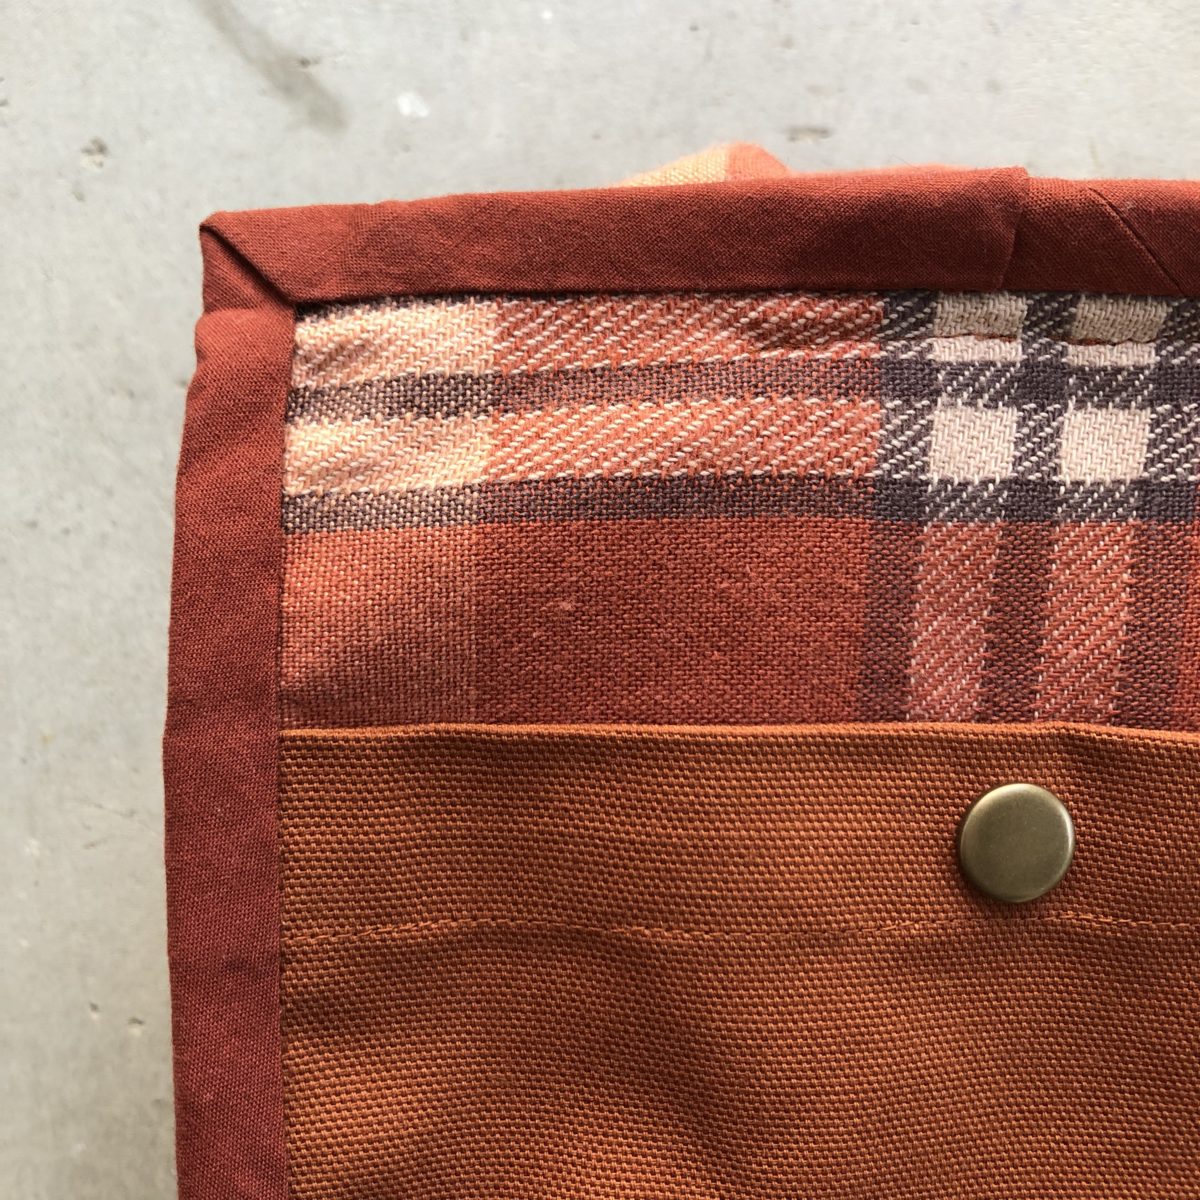
The pattern calls for heavyweight canvas for the exterior and quilting cotton for the lining. I’m really having a moment with rusty reds and oranges and quickly settled on this Big Sur Canvas from Stonemountain. I wanted the zippers to match the exterior fabric and after a little internet searching, bought one 30″ double-slide zipper (color Redwood) and one individual zipper pull from Zippers By Annie. They offer a wide variety of colors and stated the zippers could easily be cut and another pull installed on the remaining length. I really like when the hardware on a project matches!
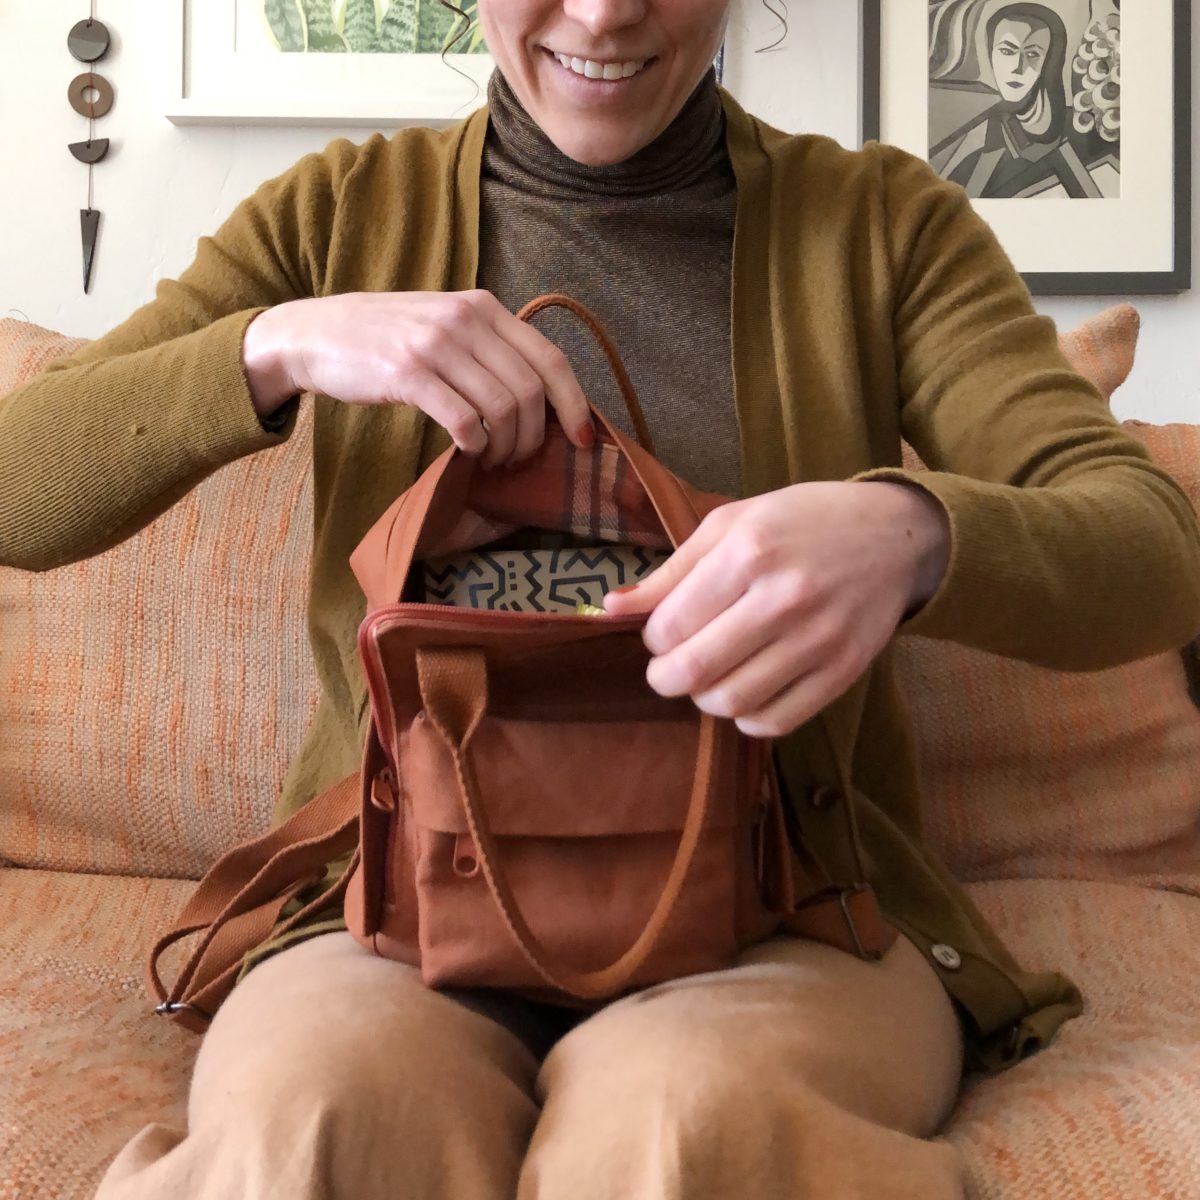
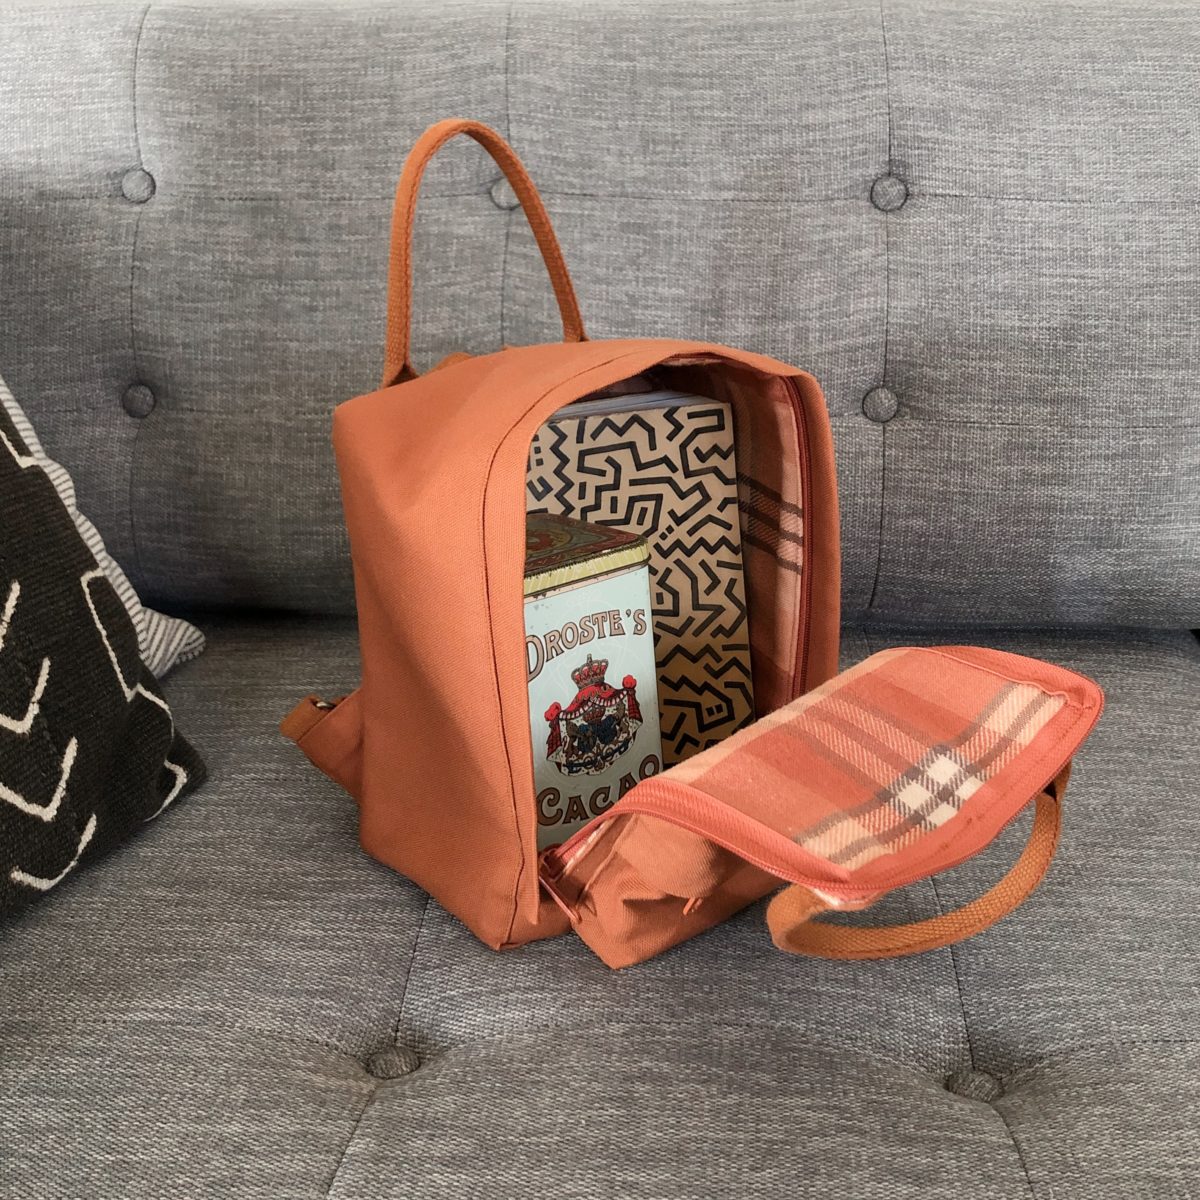
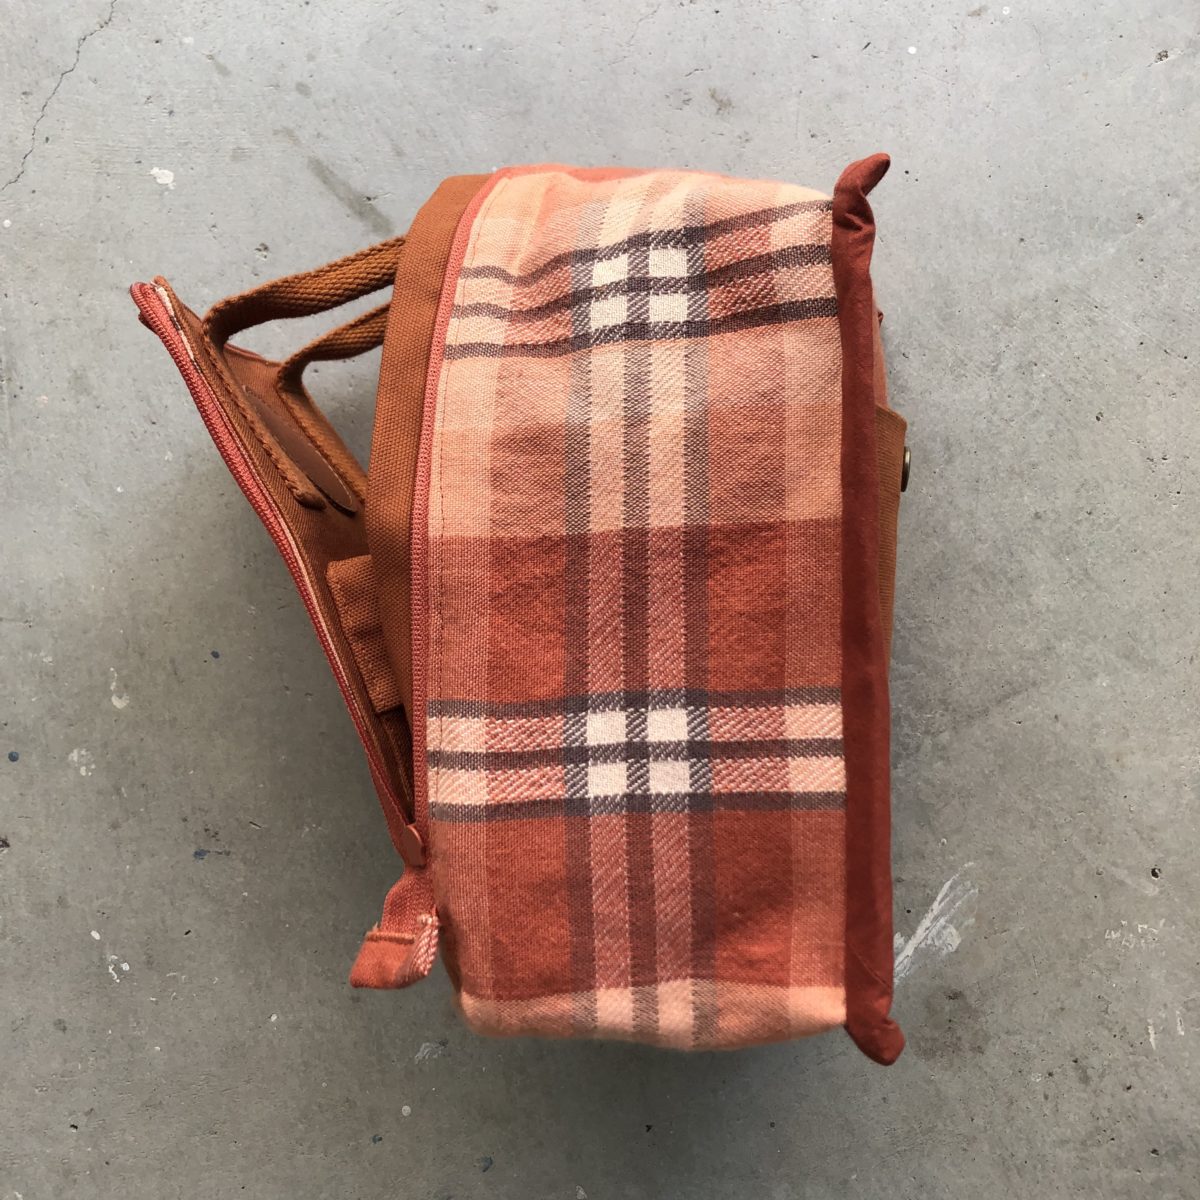
I was planning to use leftover fabric from my Making Backpack for the lining, but then found a plaid tablecloth at a thrift store – it was a perfect color match!
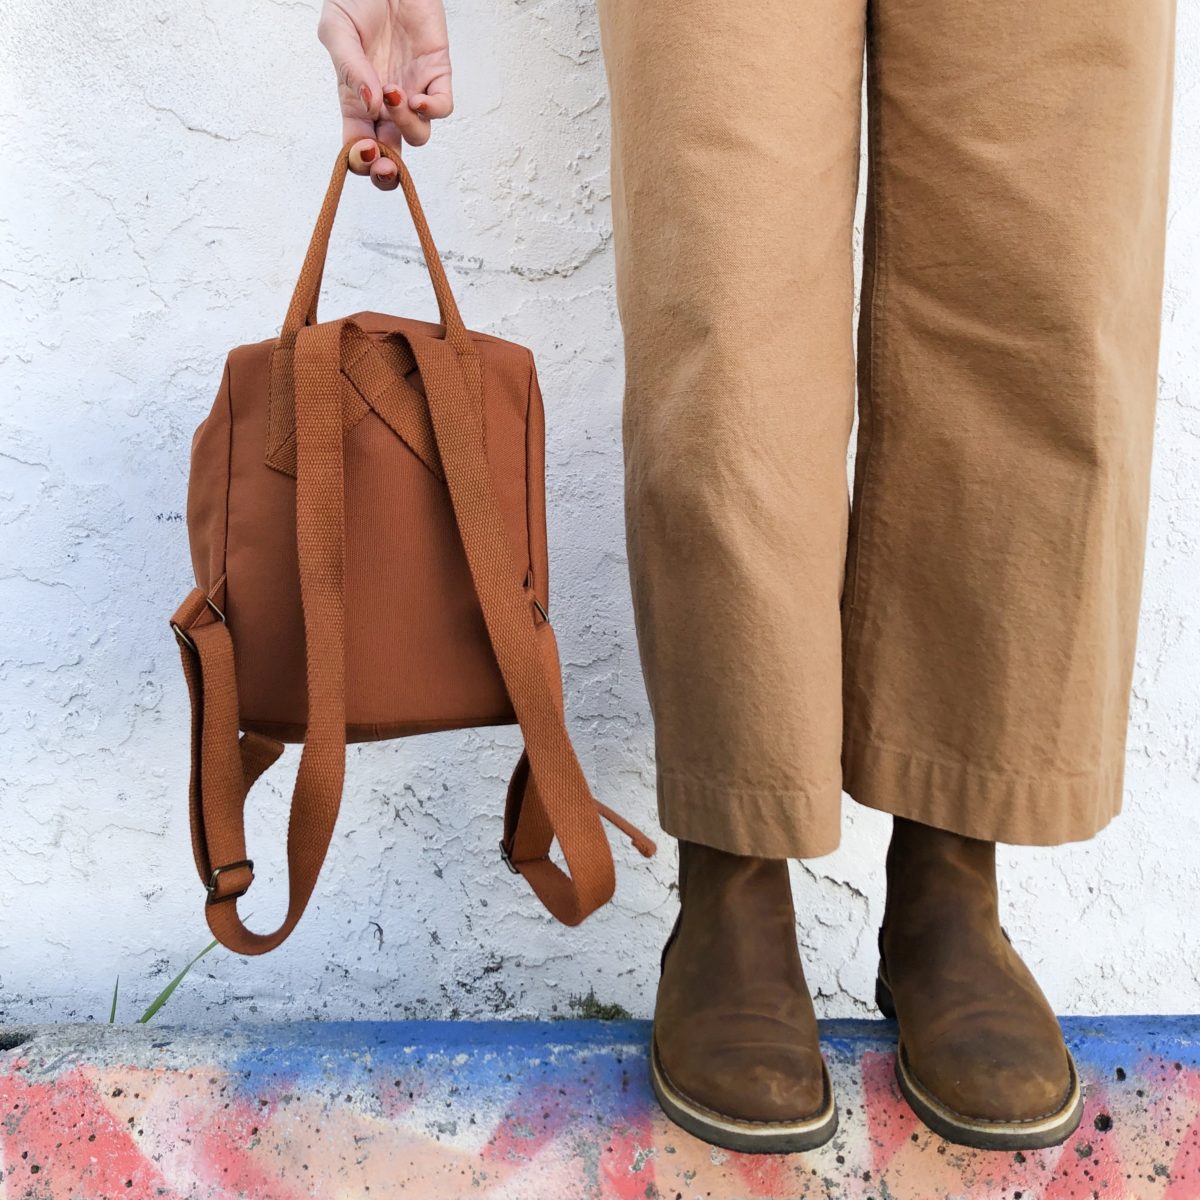
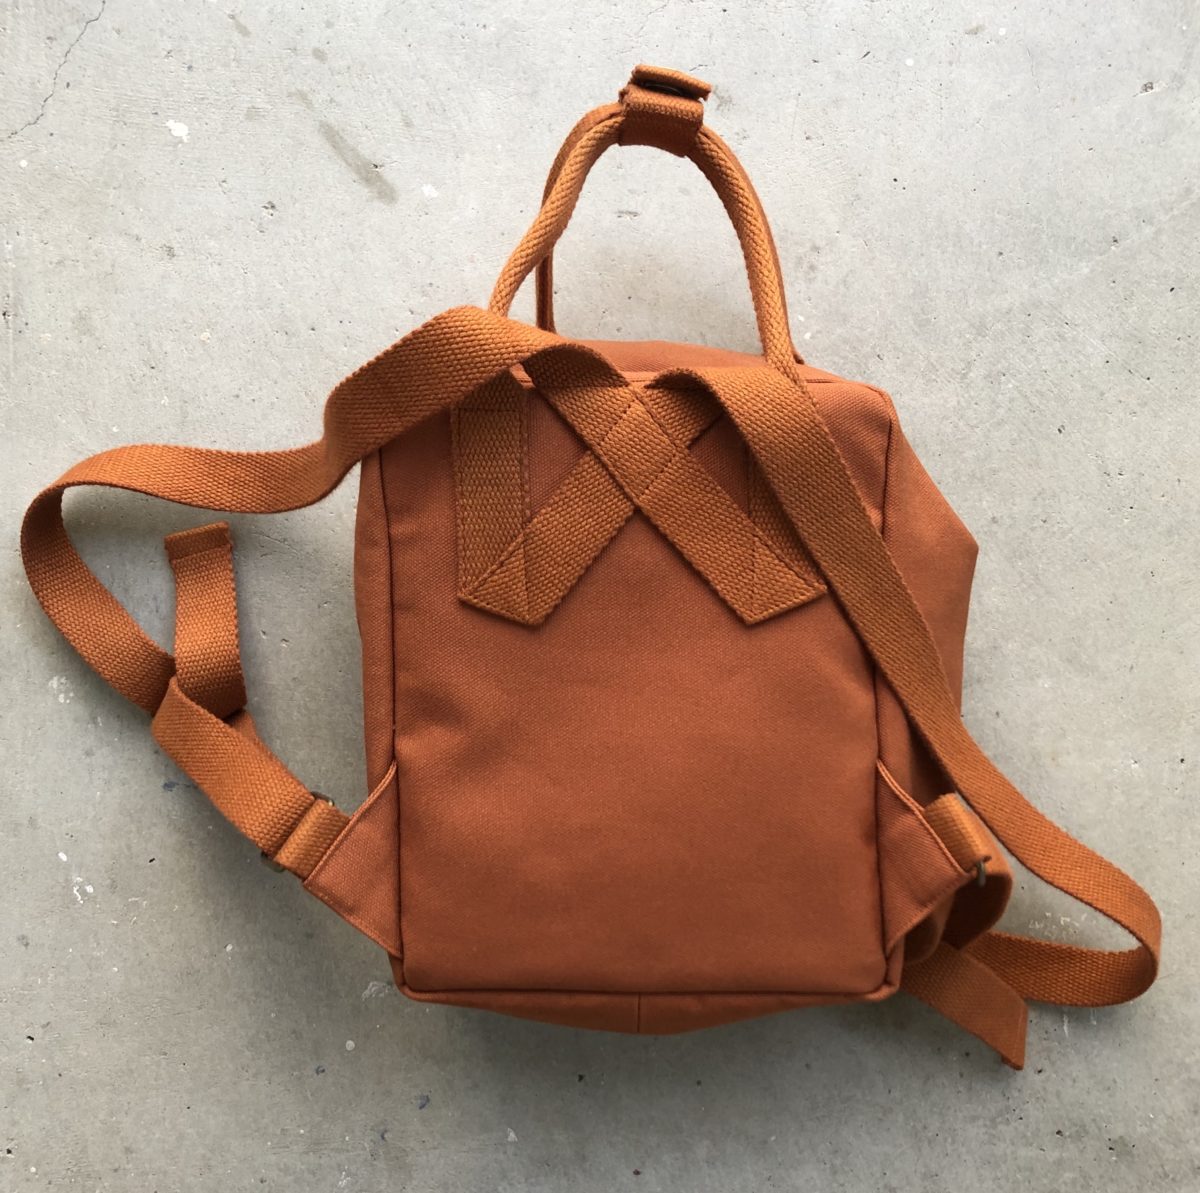
I also bought webbing, rectangle rings, and slide adjusters from Stonemountain. I was ready to start sewing, but after placing the golden yellow webbing on the Canyon Brown canvas it was clear I needed to adjust my plans. I did not like the contrast and decided to dye the webbing since a match couldn’t be found in stores (I searched EVERYWHERE). Dying proved to be a little challenging, but after de-tangling the webbing from the washing machine agitator (don’t dye webbing in the washing machine!), washing off some grease spots (seriously don’t do it!), and a second round of dye, I achieved the desired color. Totally worth it!
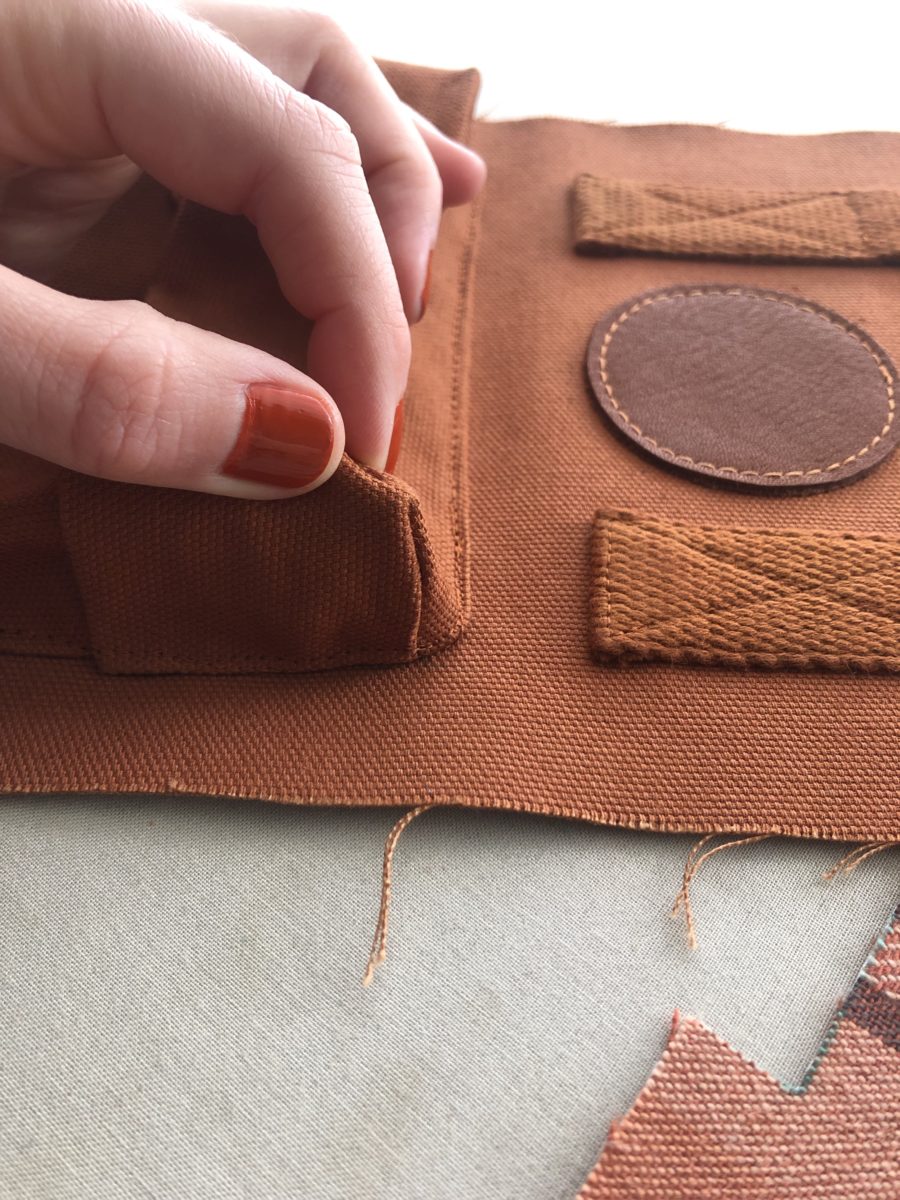
After sewing on the popup pocket and front handle, I thought I’d further mimic the Kånken by adding a circular patch. I dug into my scrap leather pile and found a really lovely piece, but because it was super thick, my cutting was a little too sloppy and I questioned whether my machine could handle it. I bought a thinner leather piece and set out to attach it. After doing a pretty terrible job of sewing the leather patch onto my Making Backpack, I decided this time to use topstitching thread, my Bernina #10 edgestitch foot, and a stitch length of 4.2. It turned out pretty perfect, but I wasn’t using a leather needle and my machine couldn’t handle backstitching, so I had to figure out a way to secure the stitches. I cut the threads long, and with a hand sewing needle brought the threads to the backside and tied them off there. I kind of wish I had used topstitching thread for the webbing too!
Attaching the popup pocket was definitely challenging. I found it next to impossible to pin it to the front piece and opted to hand baste it in place. For the webbing I used Wash Away Wonder Tape to stick everything in place, which I highly recommend! I hand basted the main compartment’s zipper in place too. If I made this again, I would definitely be more aggressive with rounding the top corners – mine are a little too subtle, which causes the zipper pulls to occasionally get stuck. It also meant I had to add folds in the zipper tape to make it go around the tiny curves.
I tend to fuse all of my interfacing before getting started and because the thrifted table cloth was a little wiggly, I opted to fuse all of the interfacing to the lining pieces. BUT because all of the handles and straps are sewn to the exterior, the interfacing is needed there! DUH! I ended up having double the interfacing the pattern called for (except for the center panel), but I do like the added structure. If I make this again, I will most likely double up the interfacing on all of the pieces, maybe even including the center panel.
After finishing the straps I had a couple lengths of extra webbing and decided to make this snappy-do to hold the handles together. It feels a little out of proportion to the rest of the bag, but I like how it keeps the front strap up when I’m wearing the backpack.
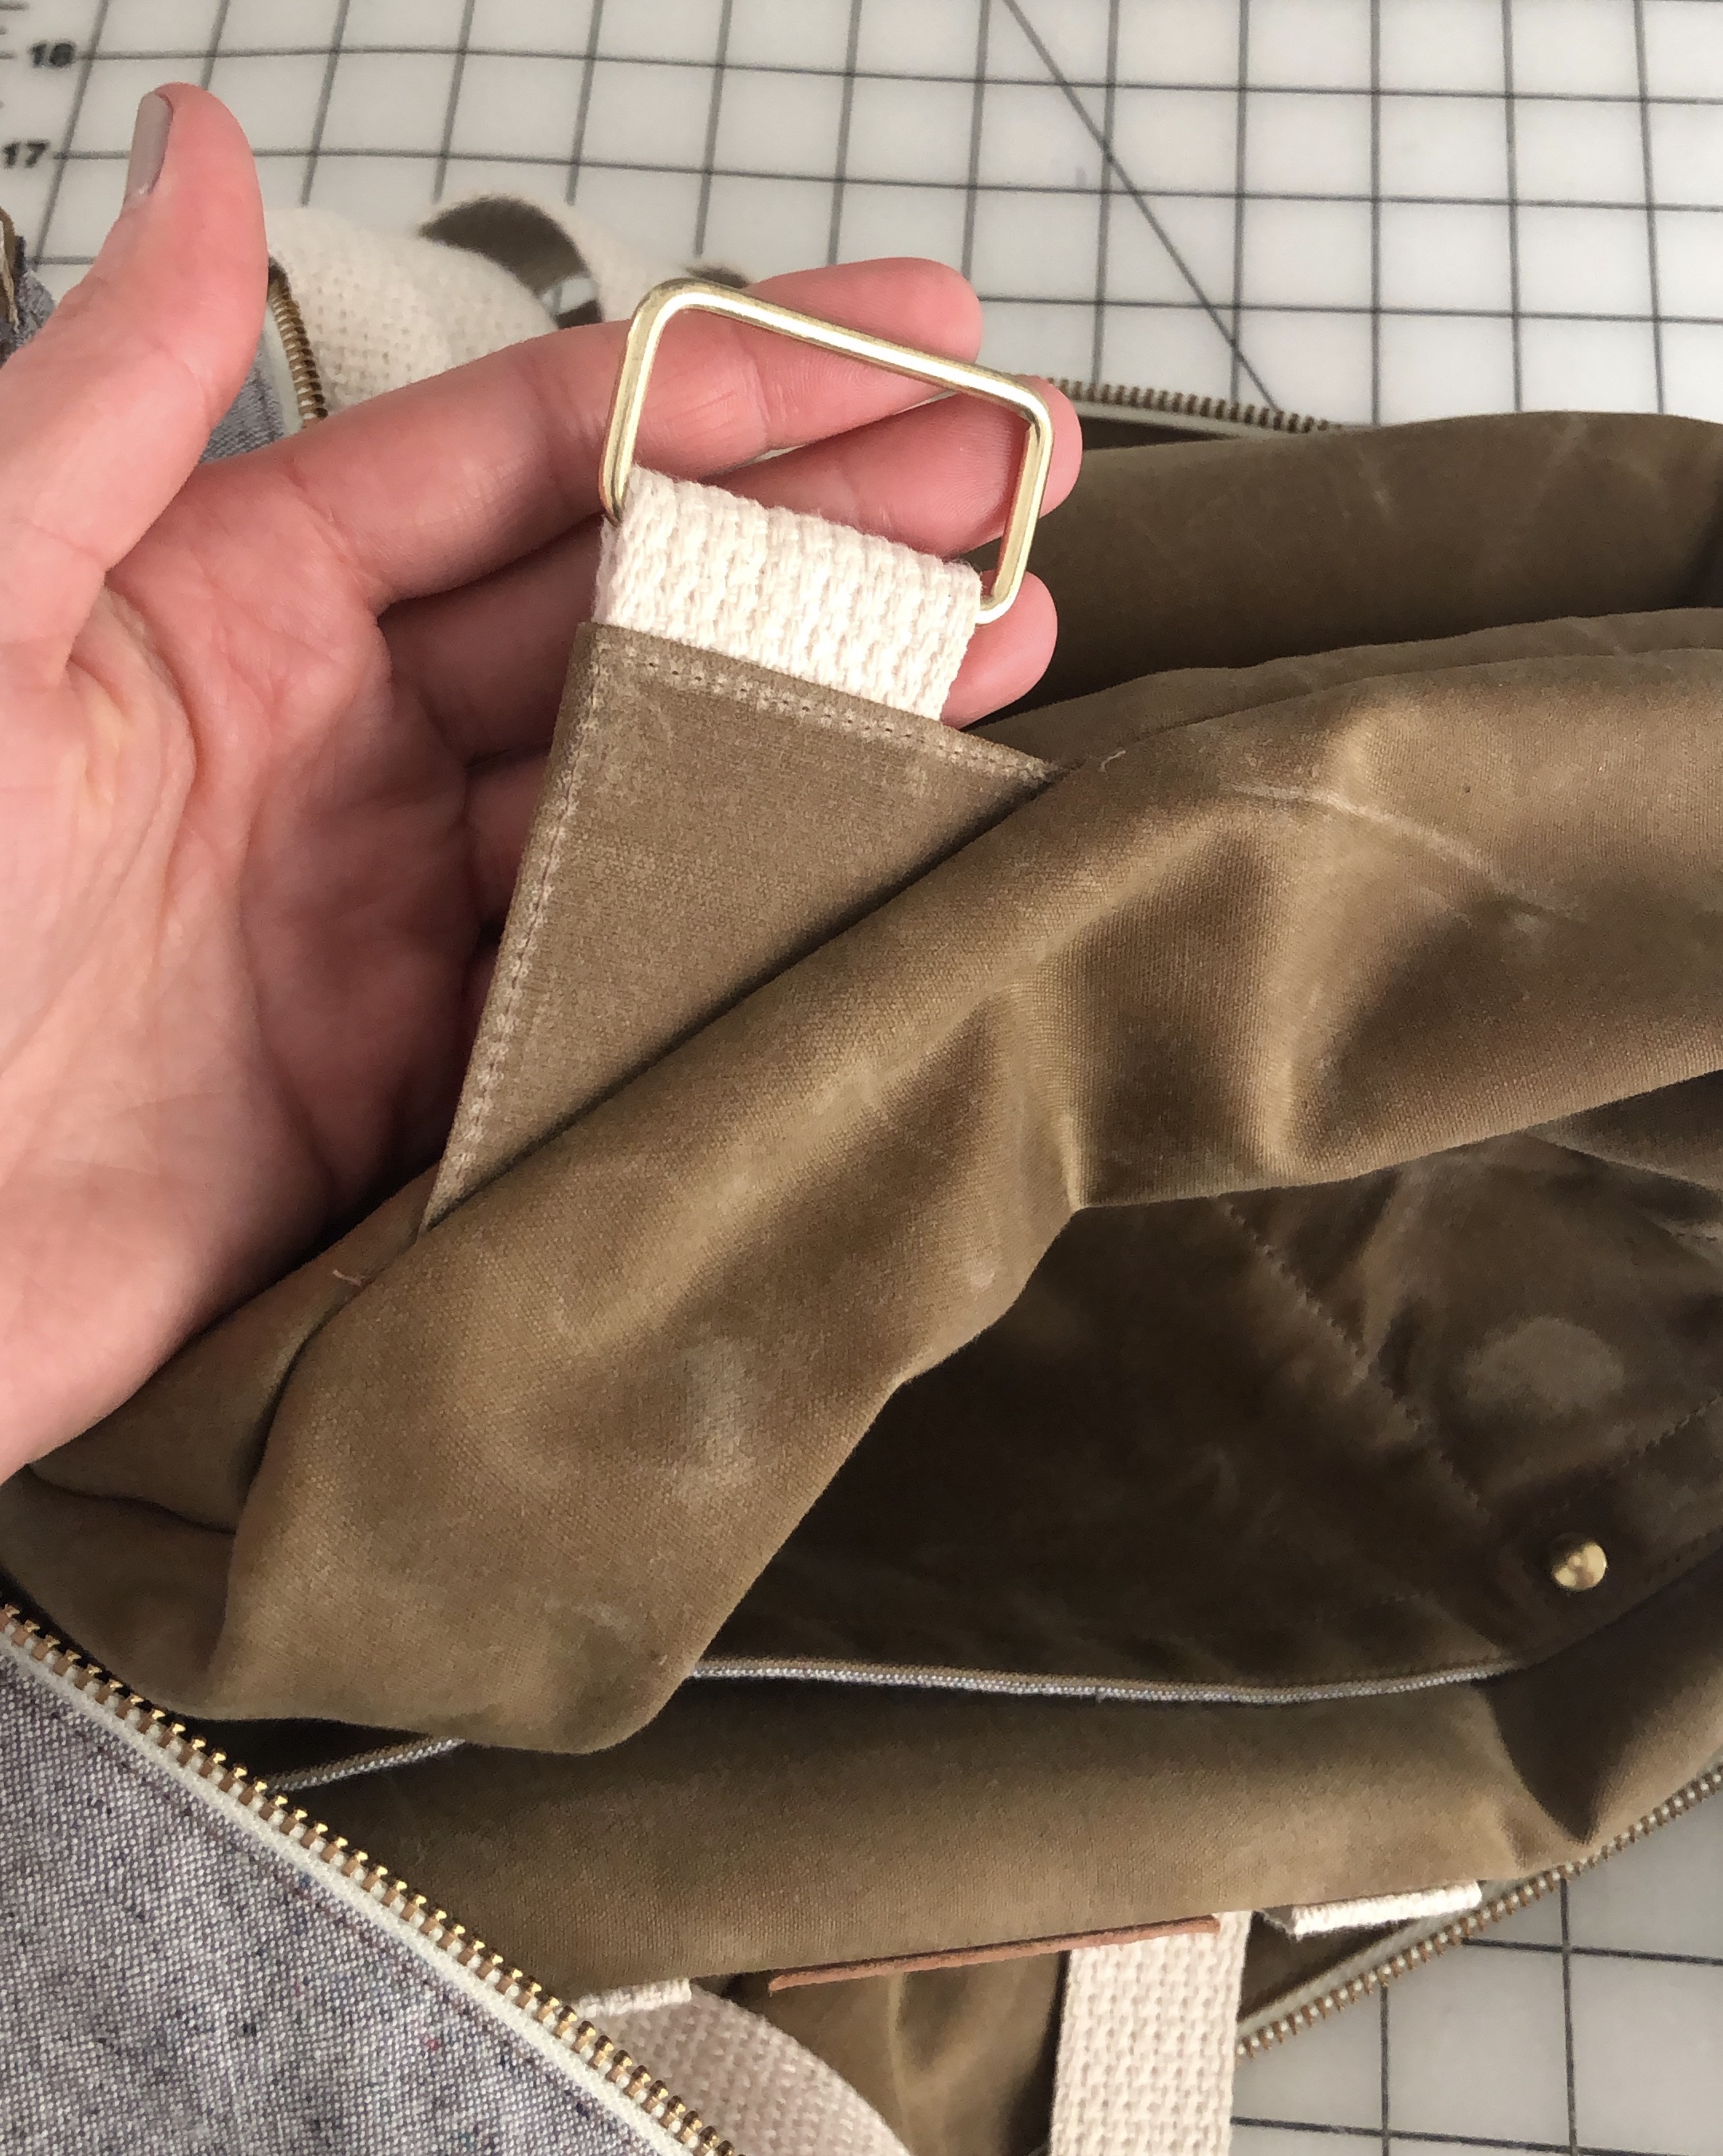
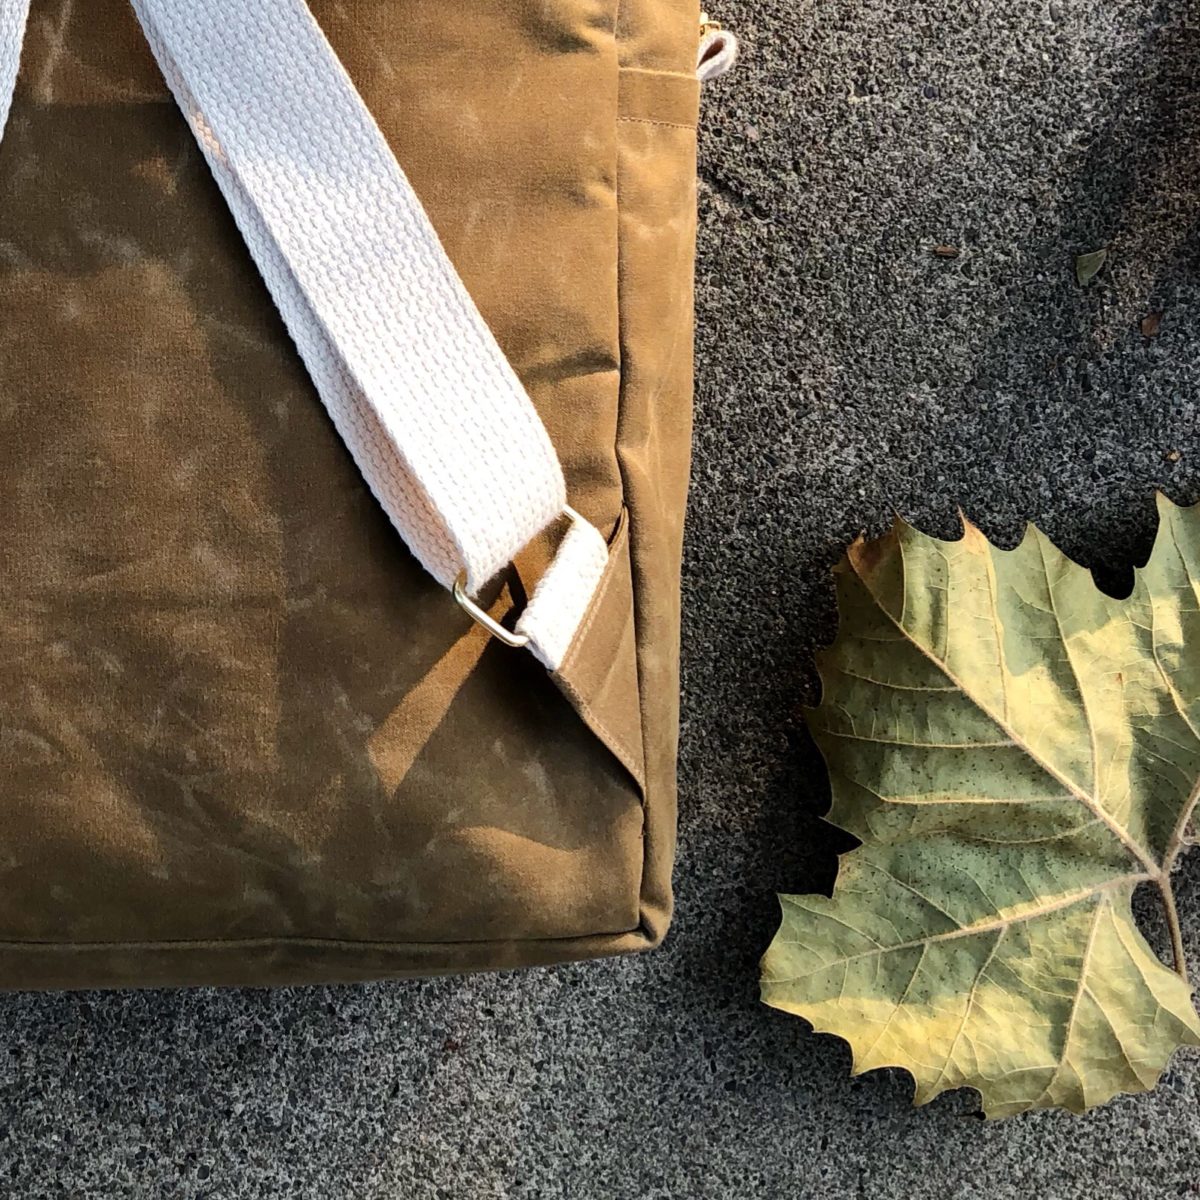
I went a little off script with the pattern and added the triangular side connectors using Noodlehead’s Range Backpack pattern pieces. The Rucksack pattern has the D rings attached at the bottom of the bag with a loop of webbing, which would probably work just fine, but I didn’t want to risk having to rip it all out like I did with my Making Backpack.
The construction of this bag is really incredible. Almost all of the seams are completely concealed! Total magic! This front flap would have been a nice place to add a patch pocket / phone sleeve to the lining.
The tester version of the pattern didn’t have a step to finish the ends of the main compartment’s zipper, but because mine had 7″ lobbed of its end, it was fraying like mad. I finished both ends using extra lining fabric, but found I had to pull them out of the way of the seam when sewing the front to the center panel. They’re a little wonky, but I’m confident the zipper won’t fall apart now. Perhaps if you choose to cut your zipper down to size, you might want to consider using a different finishing method.
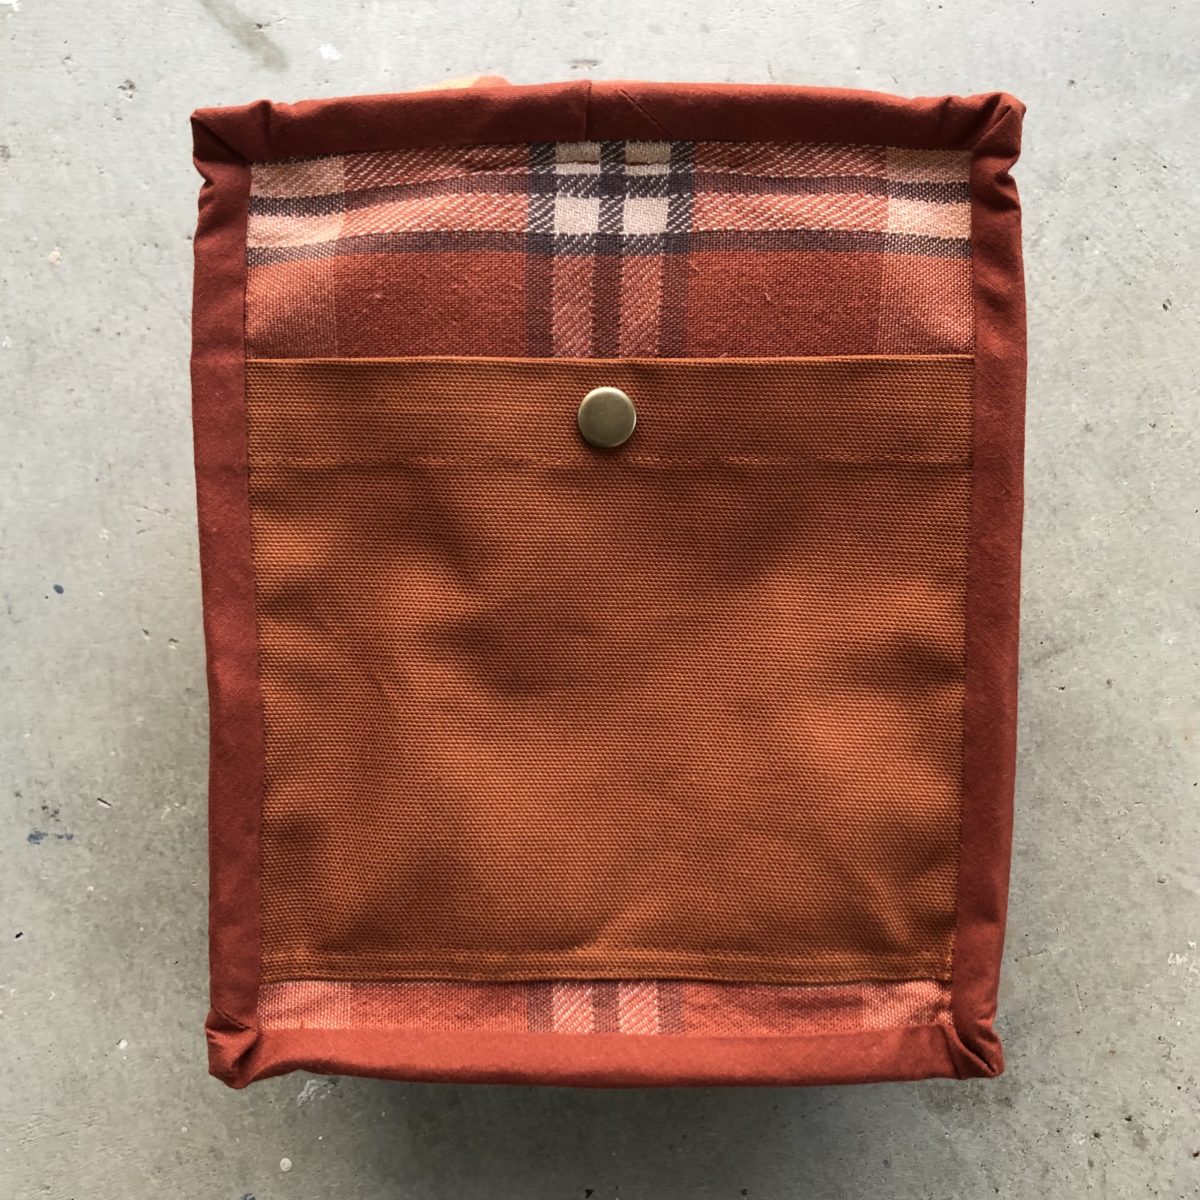
The only seams you need to finish are at the back of the pack. This pocket isn’t part of the pattern. Since I just guessed the measurements, it’s a little too tall to easily access way in the back of the pack, but since I’m using this as a purse, it’s nice to have a dedicated space for my wallet. I didn’t realize how overzealous I was with pounding in the snap until everything was already put together. The part of the snap that is connected to the main back panel is rounded and might eventually rub a hole through the exterior fabric (really hoping that doesn’t happen)… it’s also frustratingly hard to unsnap. Oh well!
I chose to blindstitch the bias tape to the bag. Even though you can’t really see it when the bag is right sides out, I think it looks really sharp.
For the Little size there was one step I had to leave out because I couldn’t fit the bag neatly under my machine – the corners are just too tiny to get the clean edgestitching on the bottom that I’d be happy with.
I hesitate to call this a good pattern for brand new sewists because it’s definitely a complex sew. However, I do think with some very small tszujes to the pattern’s instructions and a little determination from the maker, it’s totally doable. The sewing community and independent pattern designers are usually super helpful when folks ask questions, so don’t be shy if you run into a step that confuses you on any project – odds are someone has figured it out and they’d be happy to help!
I’m really, really pleased with this make and know I’ll use it for a long time. I’m not sure when Sarah plans to release this pattern, but will definitely keep folks updated on Instagram. You should also follow Sarah Kirsten for the most up-to-date info on this pattern (and because her grid is lovely)!
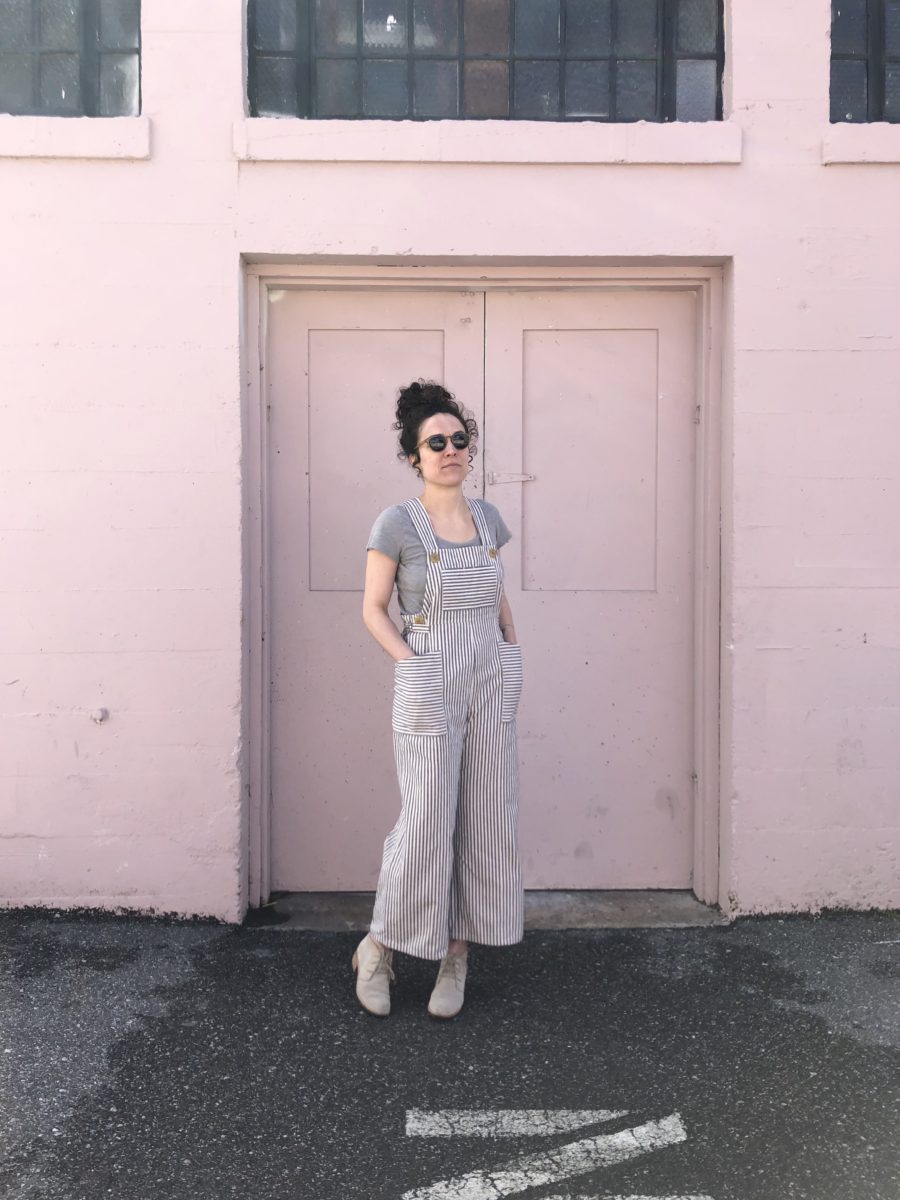
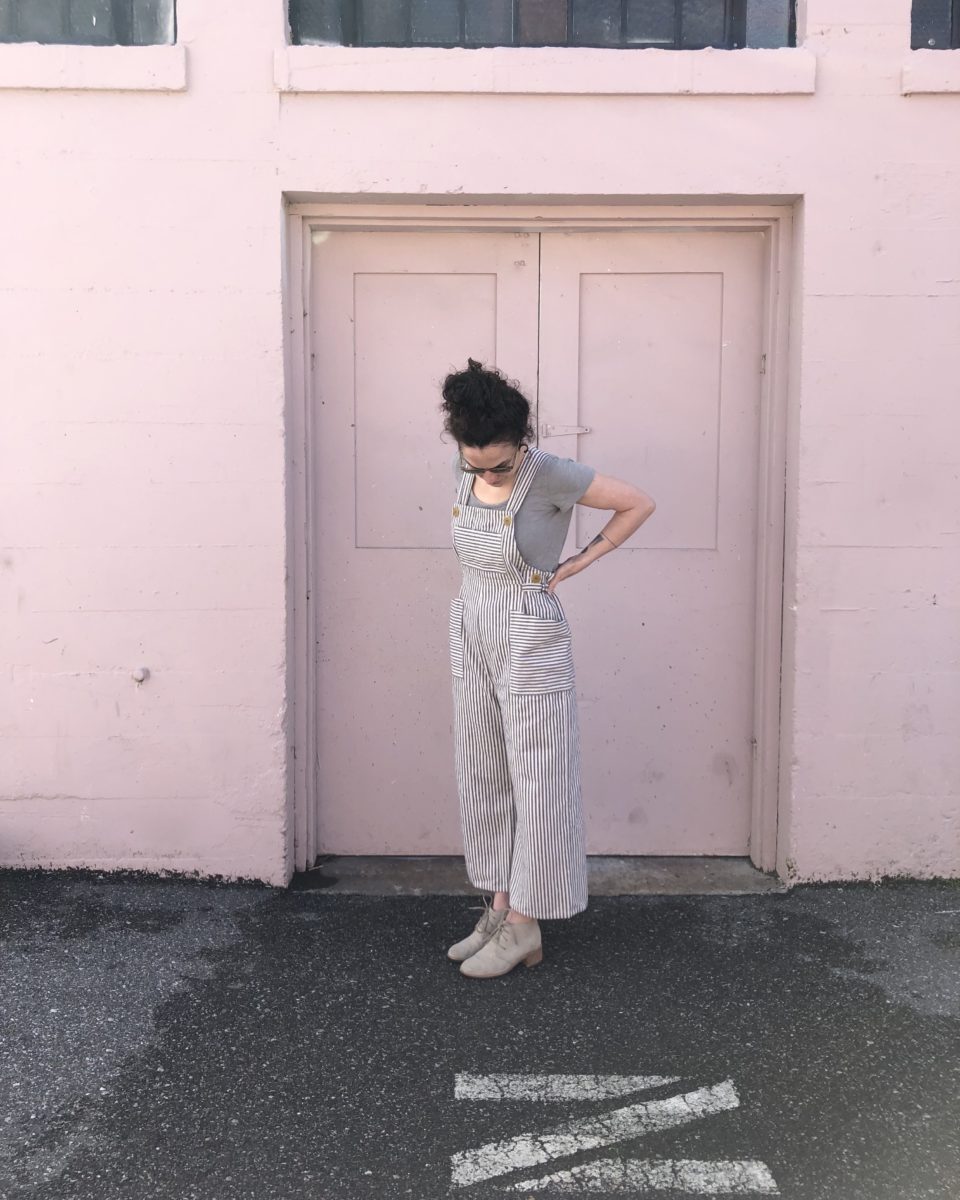
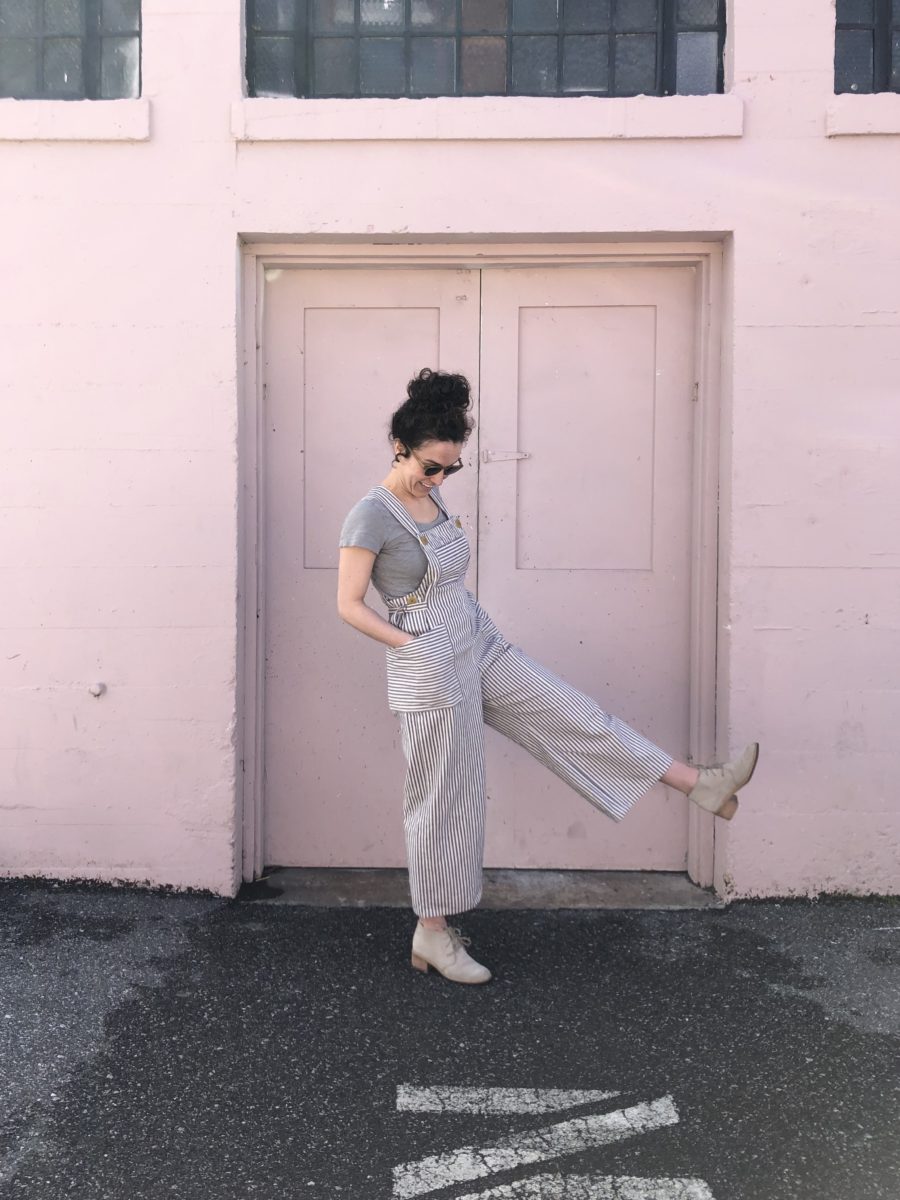
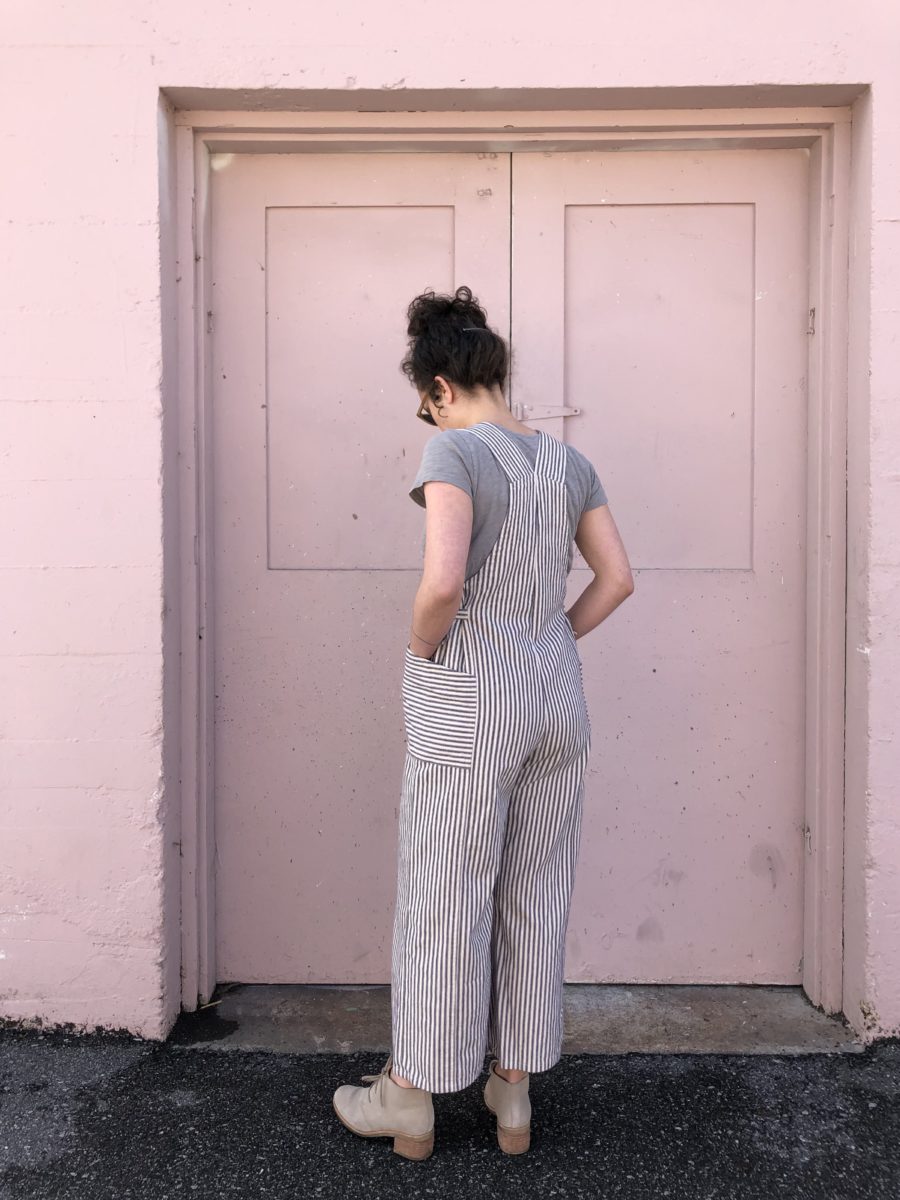
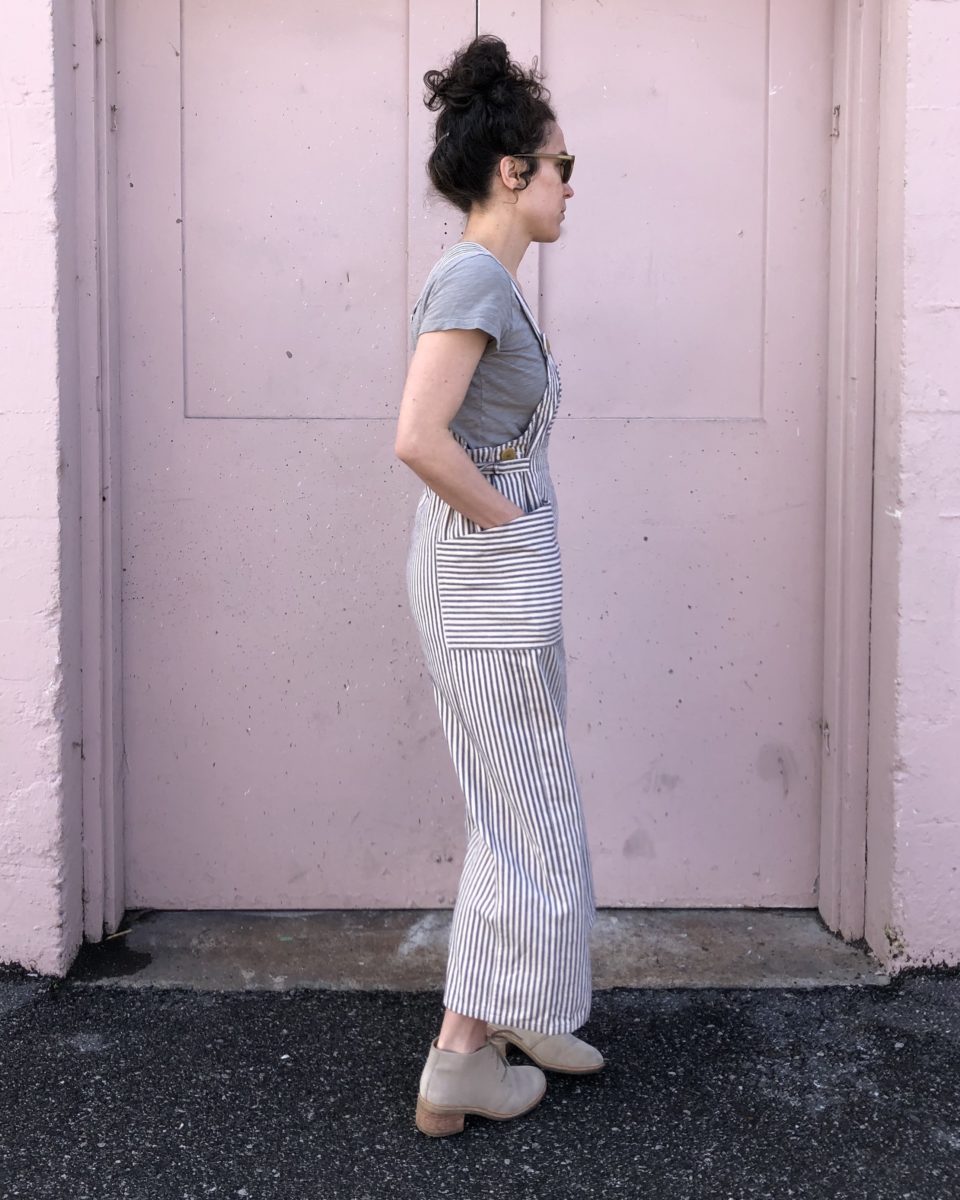
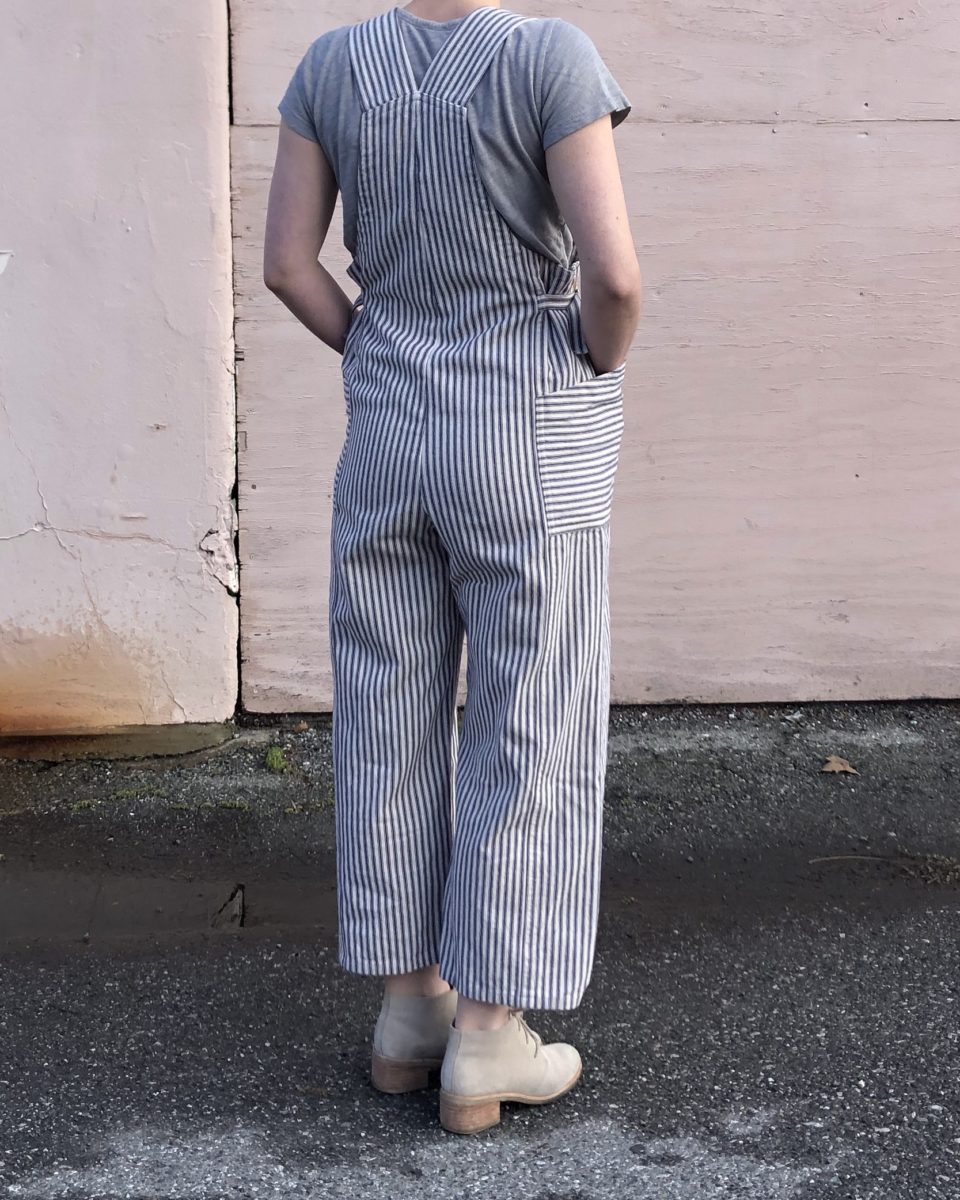
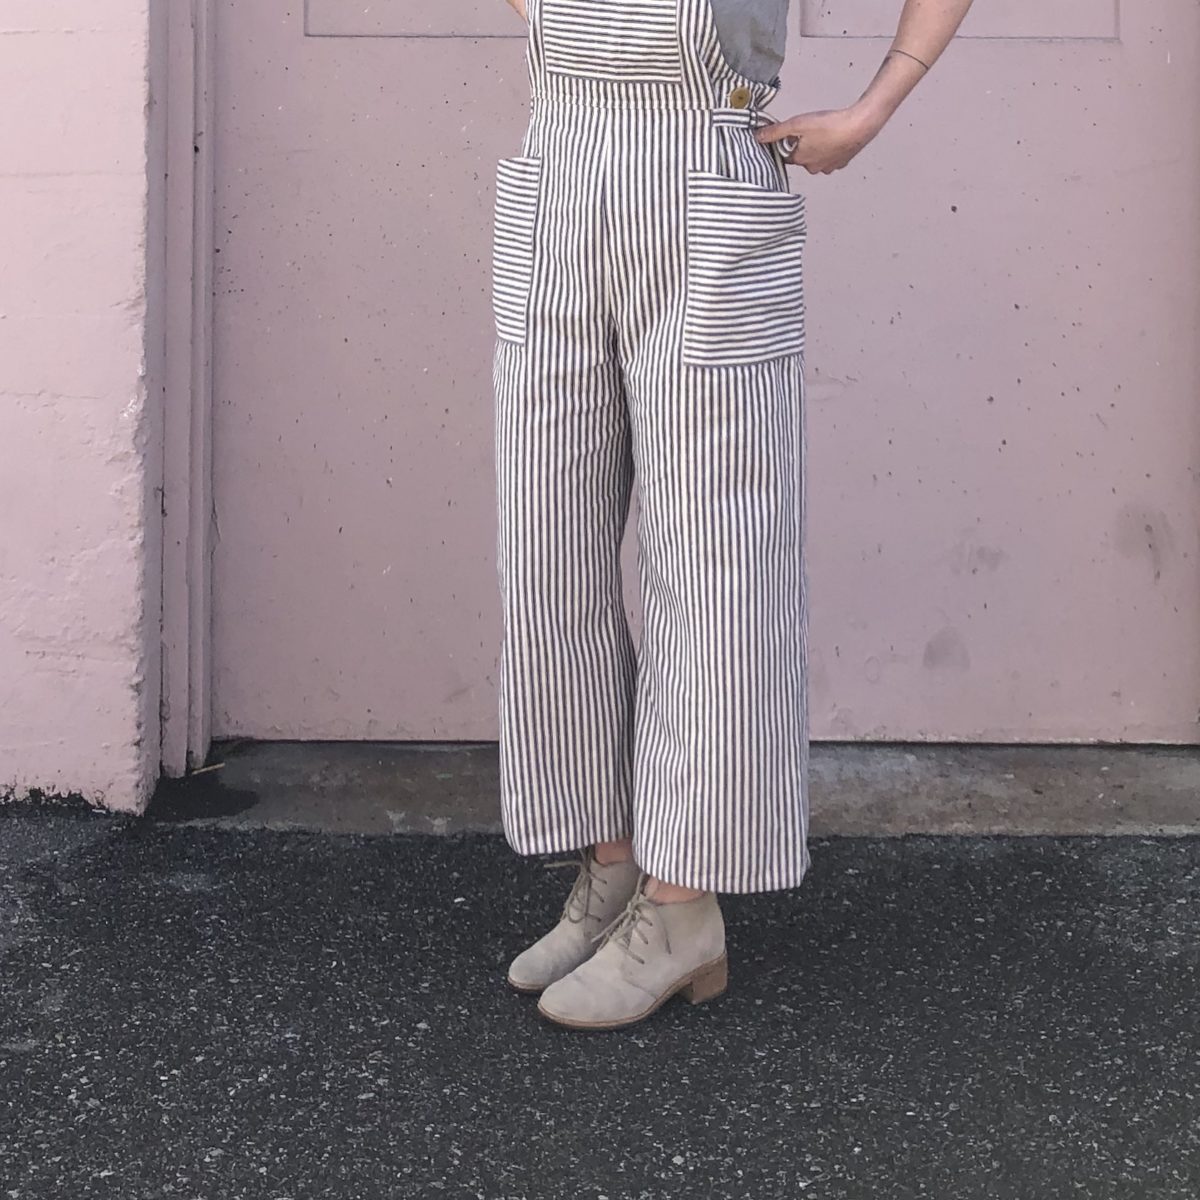
I love overalls, so when Janet from Decades of Style asked if I’d be willing test an overall pattern, I jumped at the chance. Plus, pattern testing for independent designers is such an enjoyable process!
Decades of Style is a Bay Area pattern company specializing in bringing home sewists styles from the 1920’s to the 1950’s. The Ophelia Overalls are part of their microline: Decades Everyday. The line’s focus is high quality patterns, but with zippier sewing. And these did sew up pretty fast!
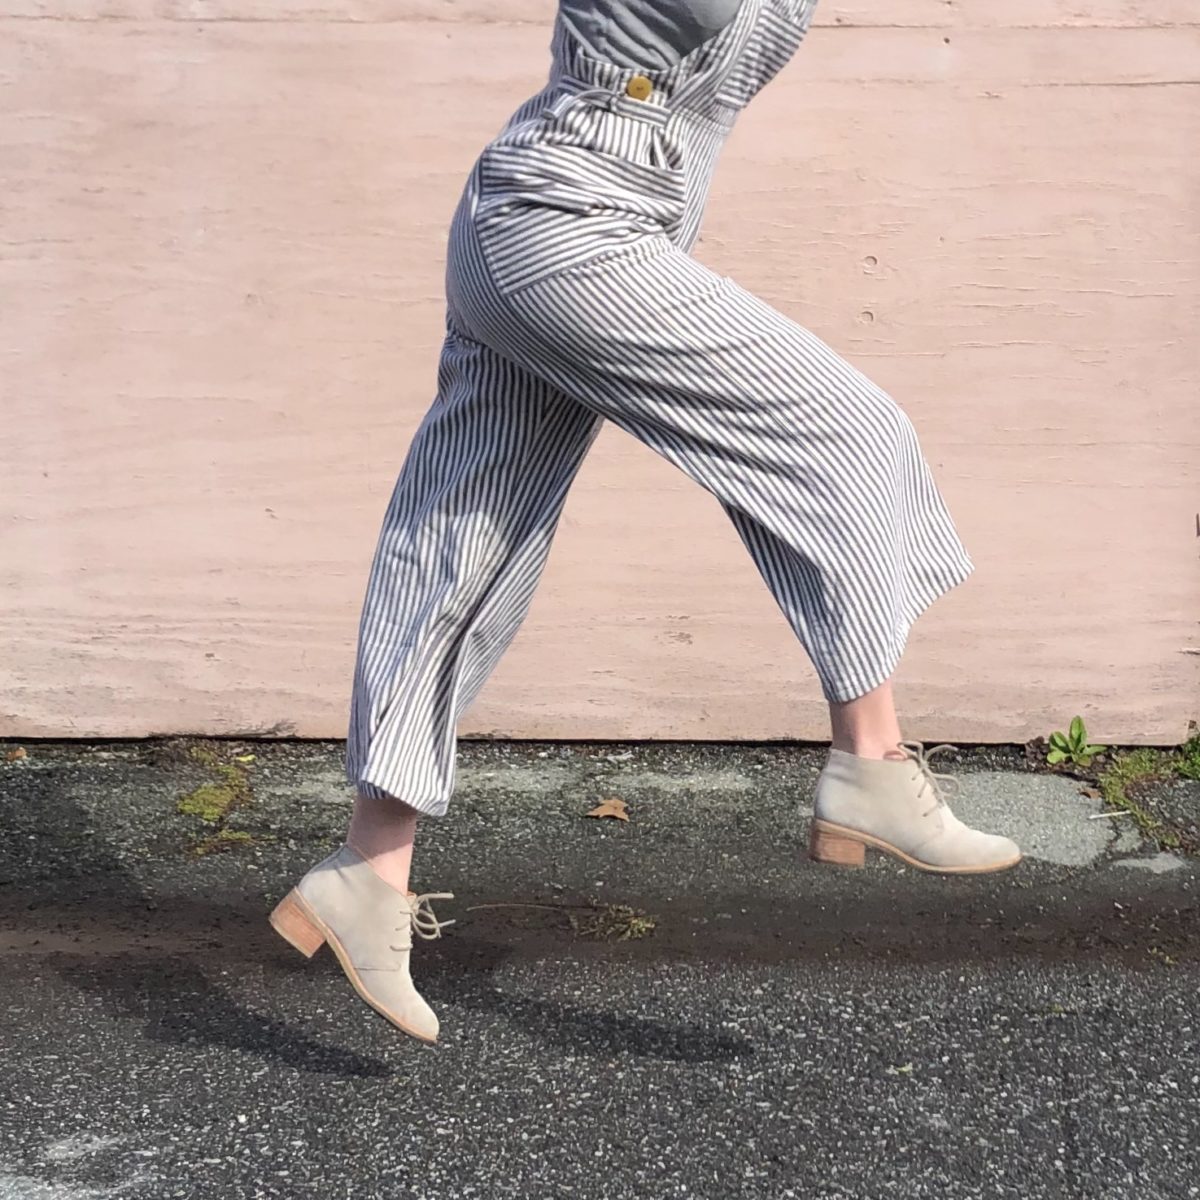
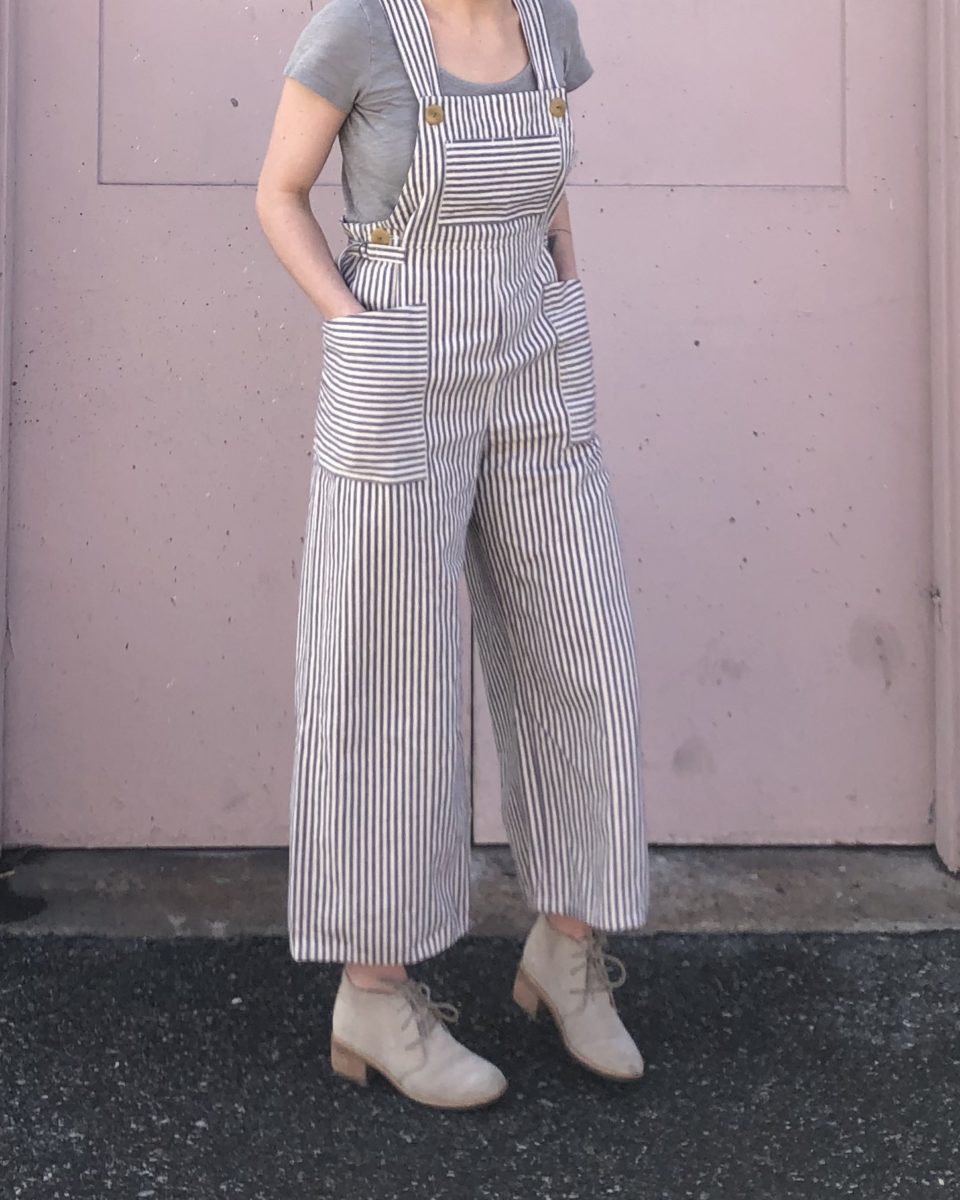
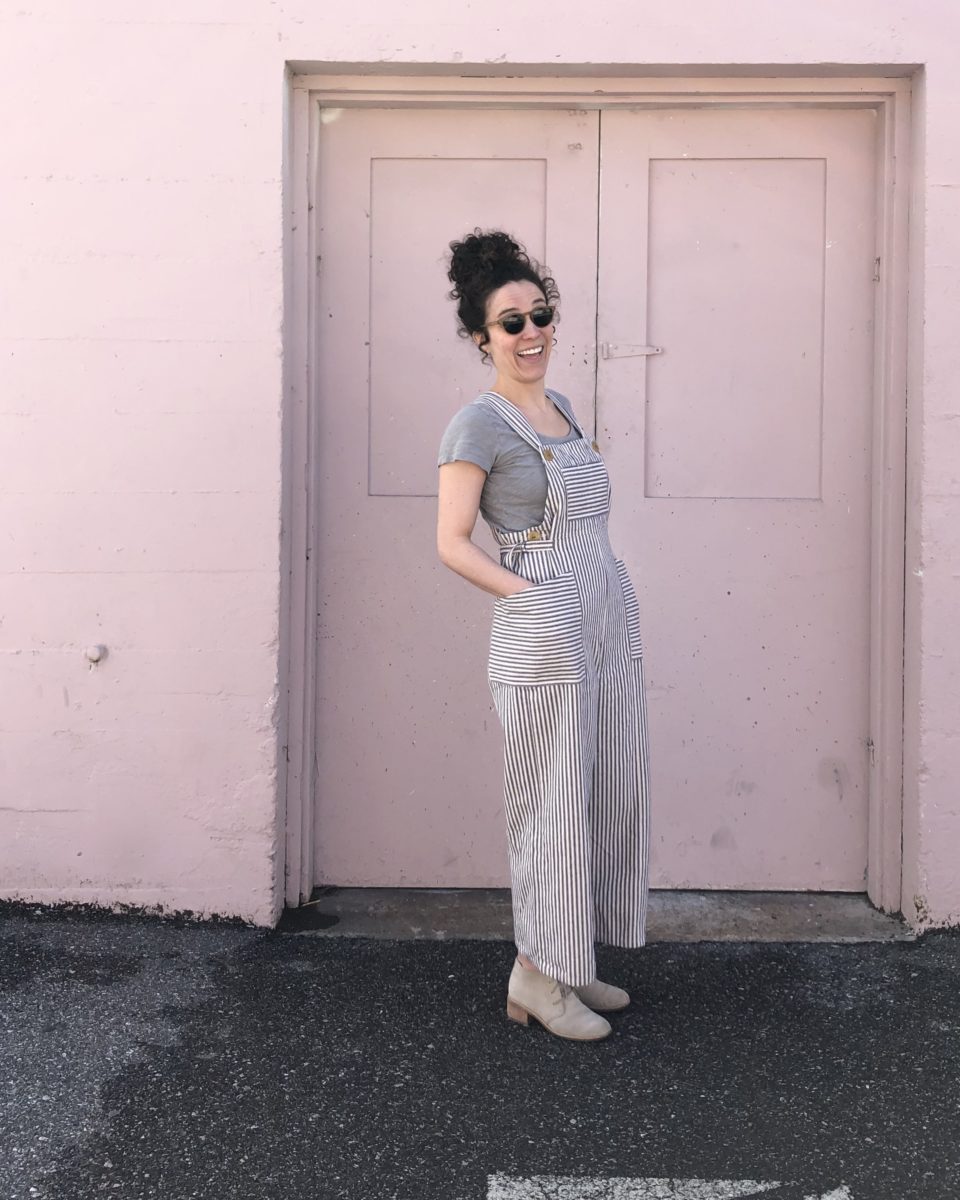
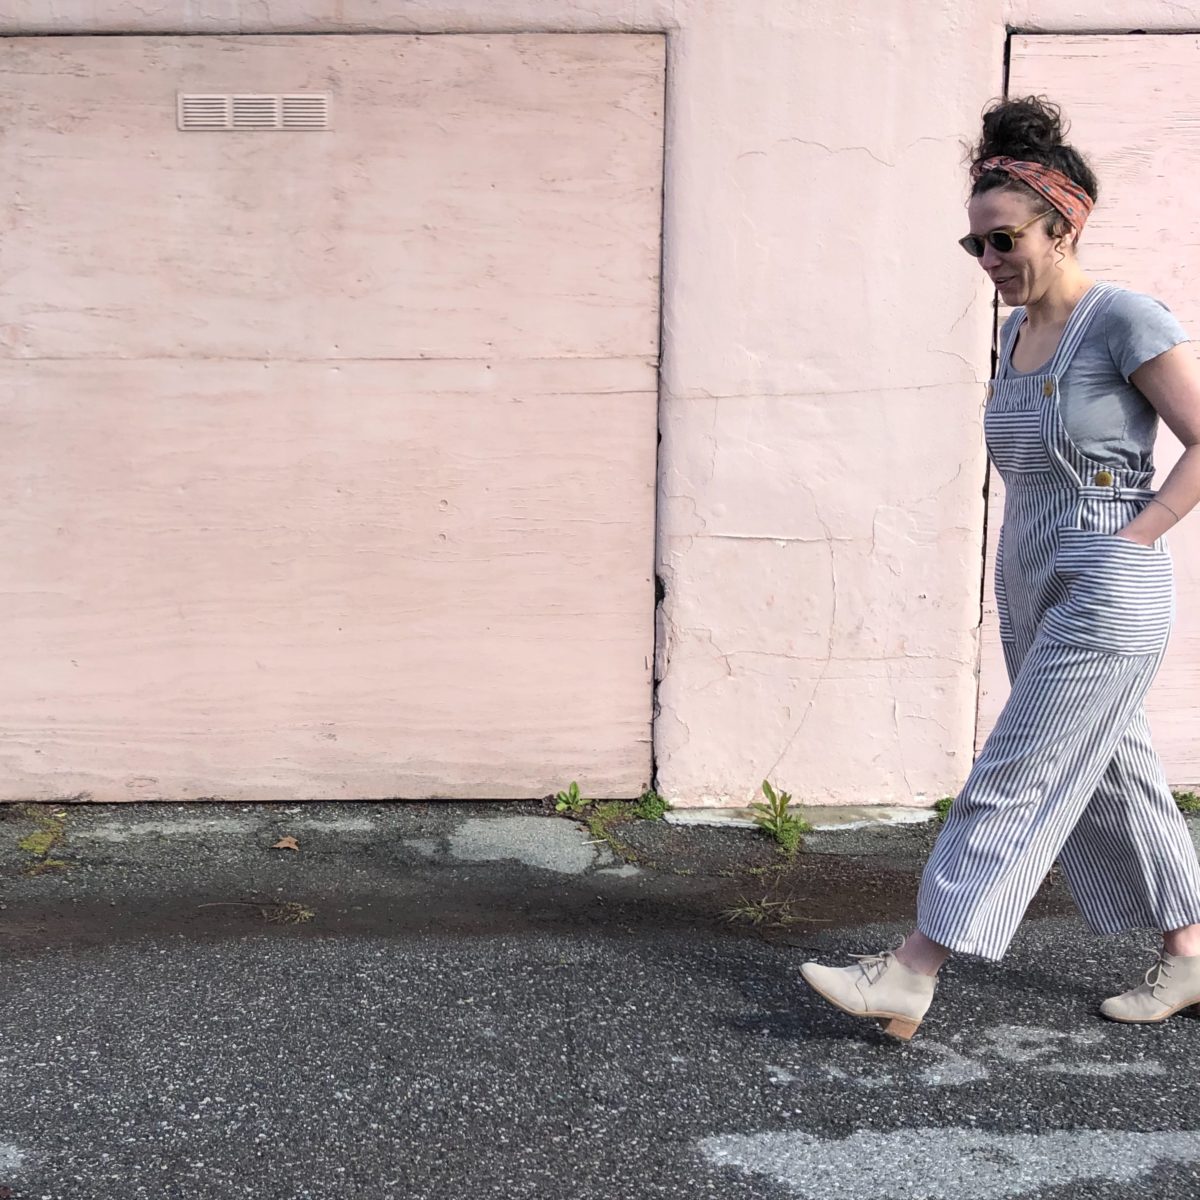
I’ve been wanting to make a striped pant/overall/jumpsuit for a while and thought this pattern would be perfect. Initially I had wanted to use a lighter weight striped denim, but couldn’t find exactly what I wanted… and the timing just didn’t work for a trip up to Stonemountain.
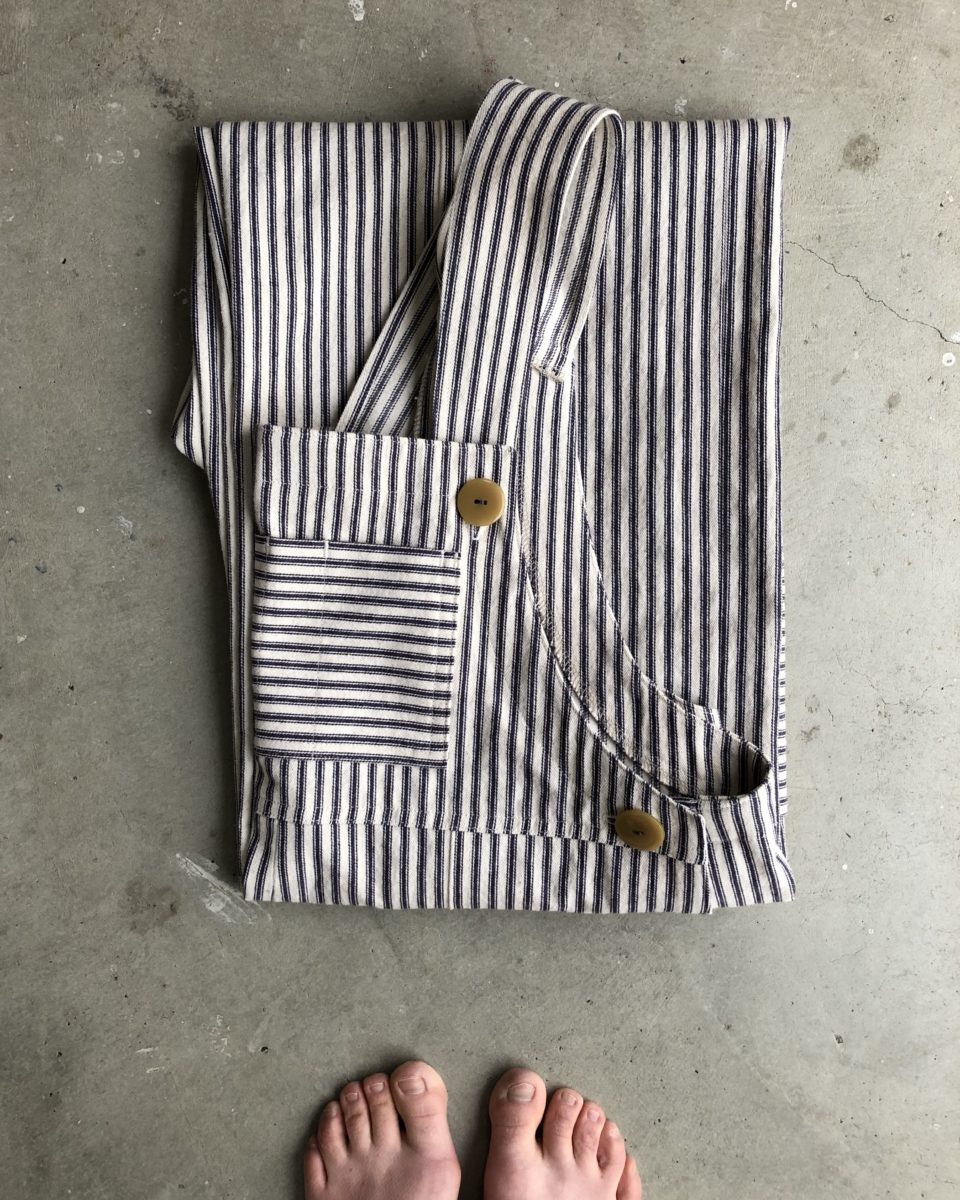
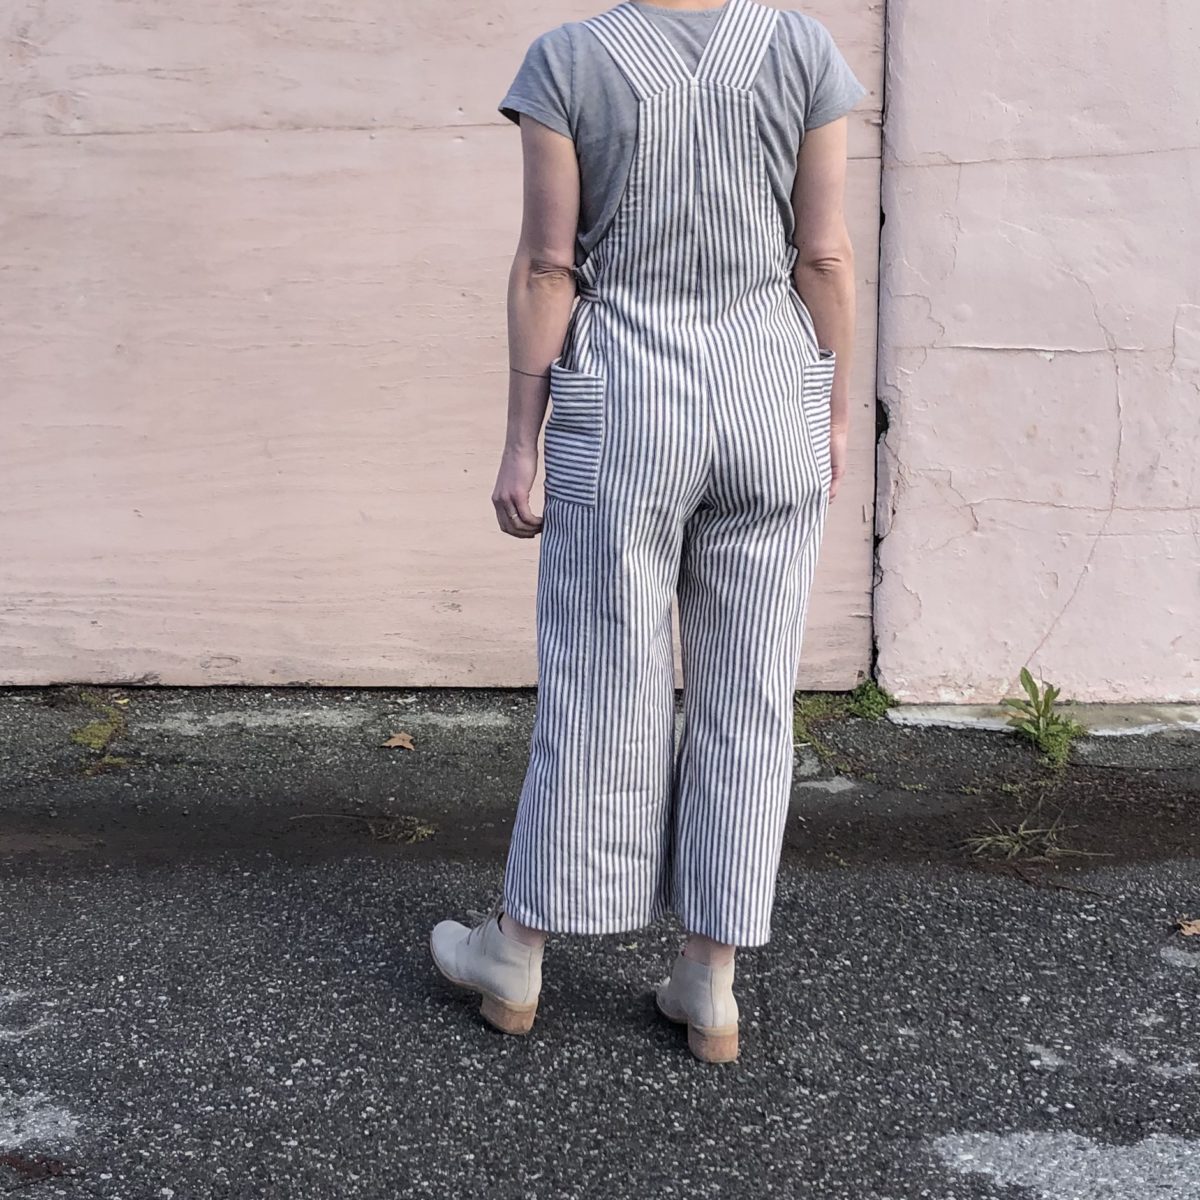
So I went to Joann Fabrics hoping to find a deal. I had to venture in to its Utility Fabrics section to find the stripe I’d envisioned, and ended up buying this pillow ticking! Before washing, it was really stiff but now it’s like walking around in a soft and drapey pillow case.
Word to the wise though, if you plan on making a garment with pillow ticking it SHRINKS SO MUCH. The yardage I bought shrunk about 30%. It was insane and necessitated another trip to Joann’s.
Well, after shortening the pant pieces by 4 inches, I was going to make it work on the shrunken yardage, but then I somehow managed to cut out one pocket the wrong direction. Gah!
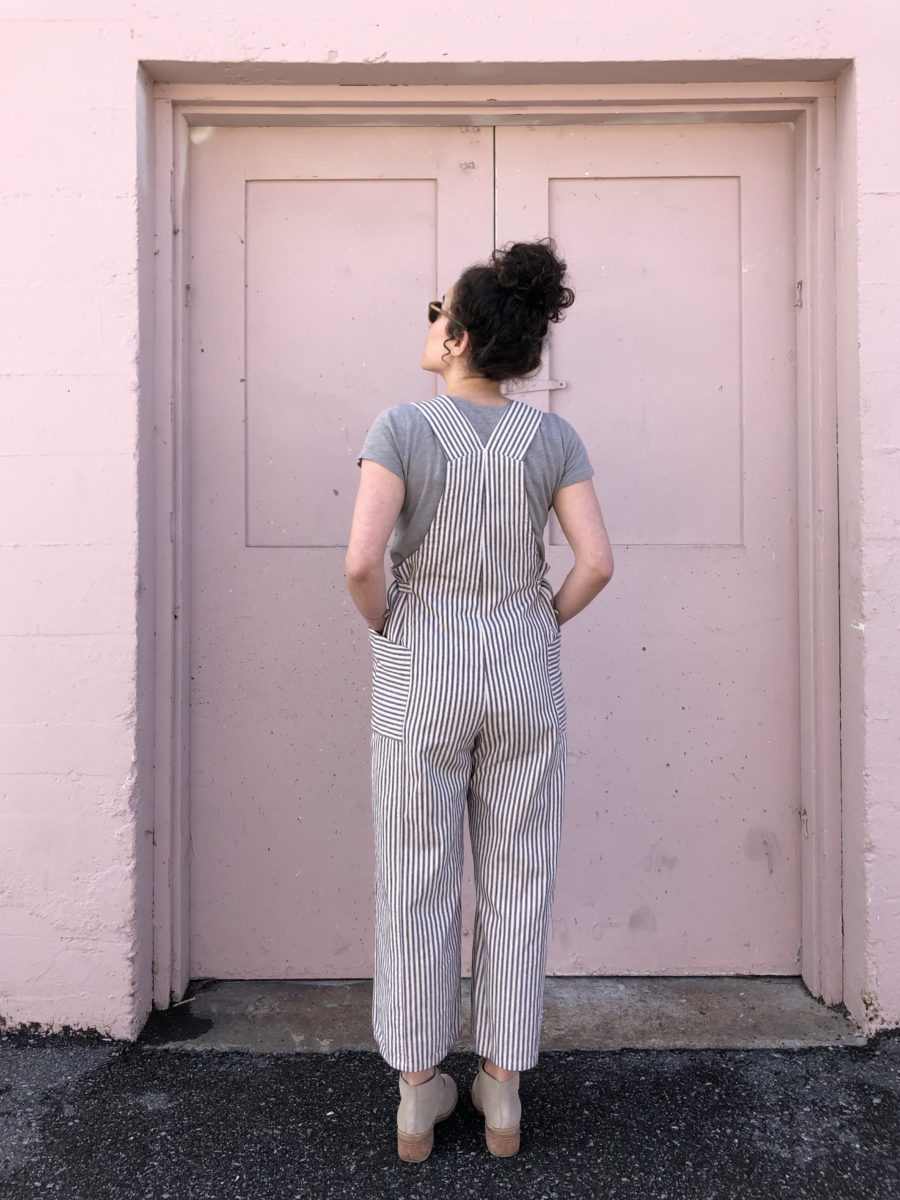
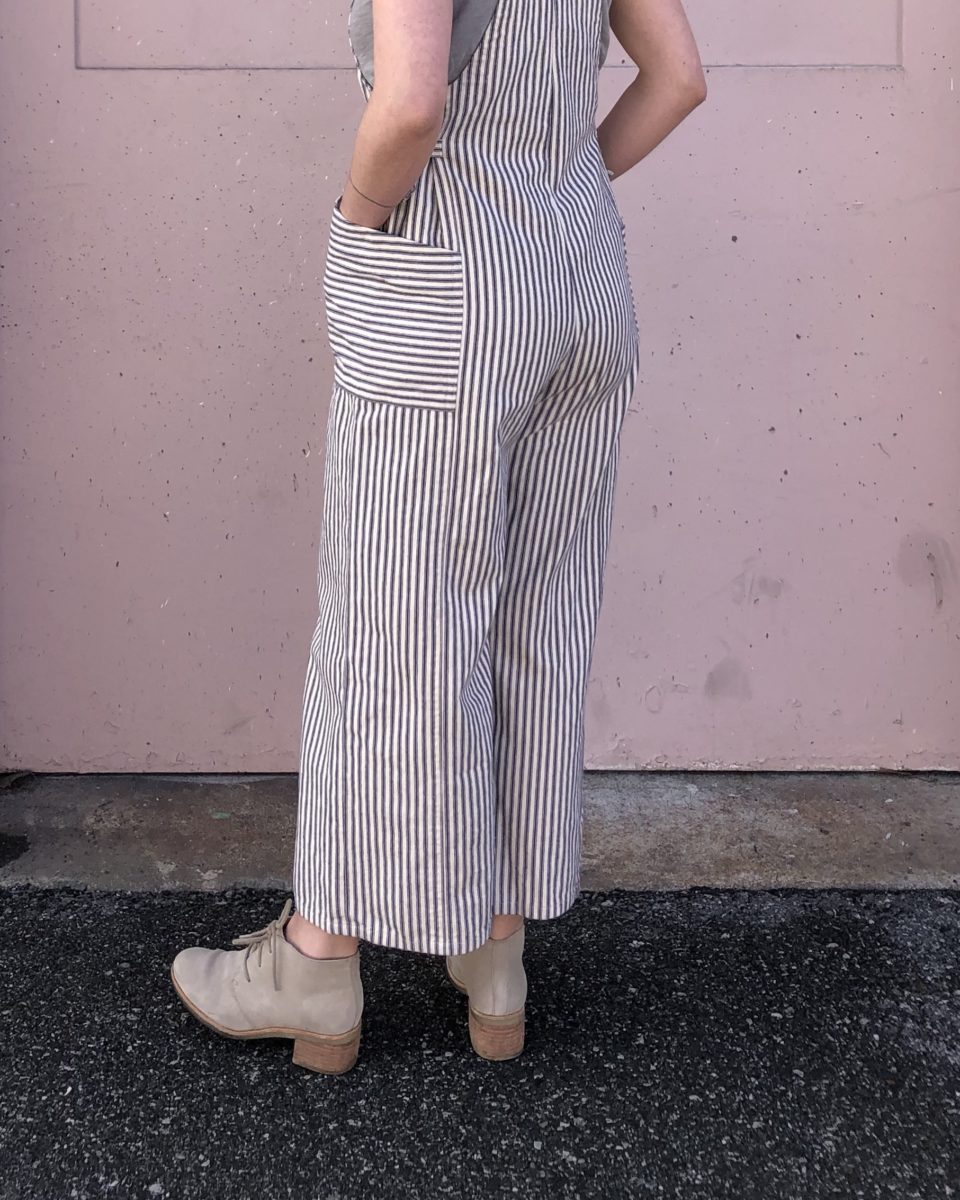
I made a straight size 8 (View A). View B has a “cleaner” finish and feels a little dressy. The only modification I made was to shorten the pant legs by 4 inches because I’m 5’2″. If I were to make these again I would also shorten the straps a few inches because there’s a lot of extra strap dangling behind the bib.
The pant legs are divided into four pieces so the pocket edges fit neatly into the seams. Each side has a button and snap closure, but I’ve found that at least on me, I never have to undo the snaps or buttons to get in and out. I just have to loosen the side belts and wiggle!
Both views feature side belts that allow you to cinch the waist. I’m toying with the idea of making a version without the belts for a super relaxed fit.
I’ve been wearing these at least once a week since finishing them. If you’re looking for an overall pattern that has 1940’s Land Girls vibes, these are for you!
Decades of Style is offering 20% off your entire purchase with the coupon code: OVER20 for the next two weeks!
Since I started logbooking, my sketchbook practice has pretty much come to halt. I started my second Shinola back in May of 2018 and I’ve only filled about a third of its pages.
This past week I definitely started to feel its absence, so I brought my sketchbook to work and in my more independent/chill classes, I worked alongside my kids.
It feels good and I’m hoping I can find a balance moving forward.
When I was first learning to sew, I painstakingly made one thing at a time, from start to finish. . . very, very slowly. My skills and brain just couldn’t handle juggling more than one project. I had a big fear of making mistakes, or ruining my sewing machine (?), or I assumed I didn’t understand the instructions. Little by little, I started to realize that things didn’t need to be cut out perfectly, seam rippers are there for a reason, and that instructions don’t disappear if you start a different project.
It appears that increased confidence sometimes comes with haphazard making. There are THREE (it’s actually more) WIPs / UFOs that I’ve been bouncing between for months. I kind of miss the extreme focus I used to dedicate to each project when I first started. So I’m doing a WIP Check and declaring a moratorium on starting anything new until these four are finished!
I planned this shirt in March of 2018, cut it out in May, actually started sewing it in June, and. . . haven’t touched it since. It needs one side of the button placket, the sides, cuffs, and collar.
I don’t even know when the plan for this happened, but it was a LONG, LONG time ago. I cut it out on September 3rd and finished quilting it on October 14th, 2018. I installed one welt pocket over the weekend and plan to finish this WIP first since it’s still chilly jacket weather!
I’m not sure this hack is going to work out, but I’m going to push through because I used really nice fabric. Just need to sew up one leg, the crotch, waistband, and hem.
Are you a one project at a time sewist, or do you juggle?
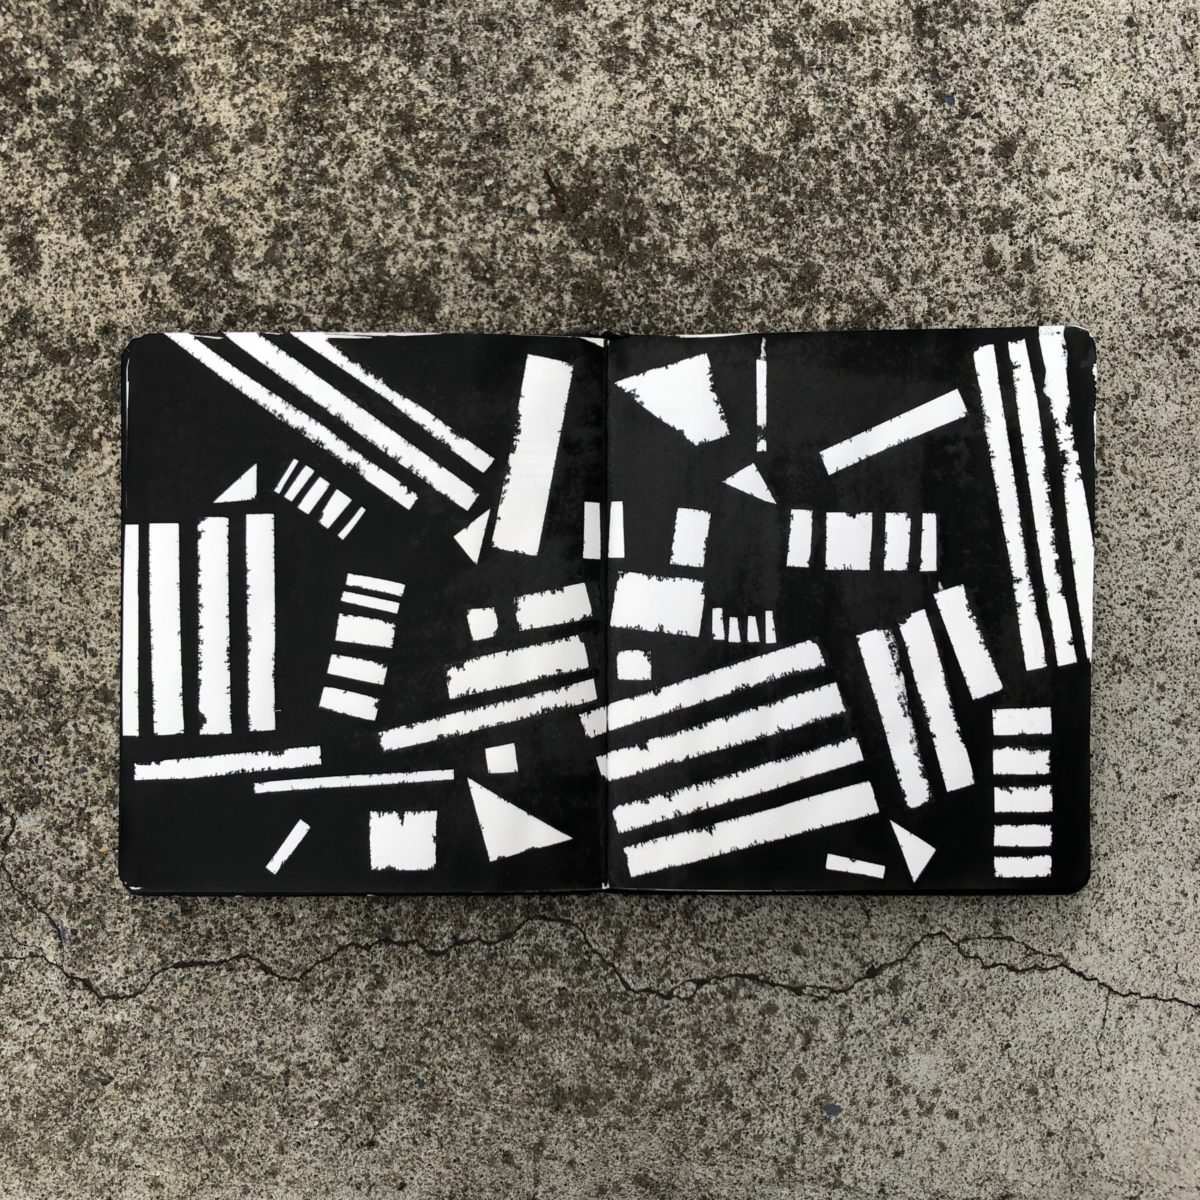
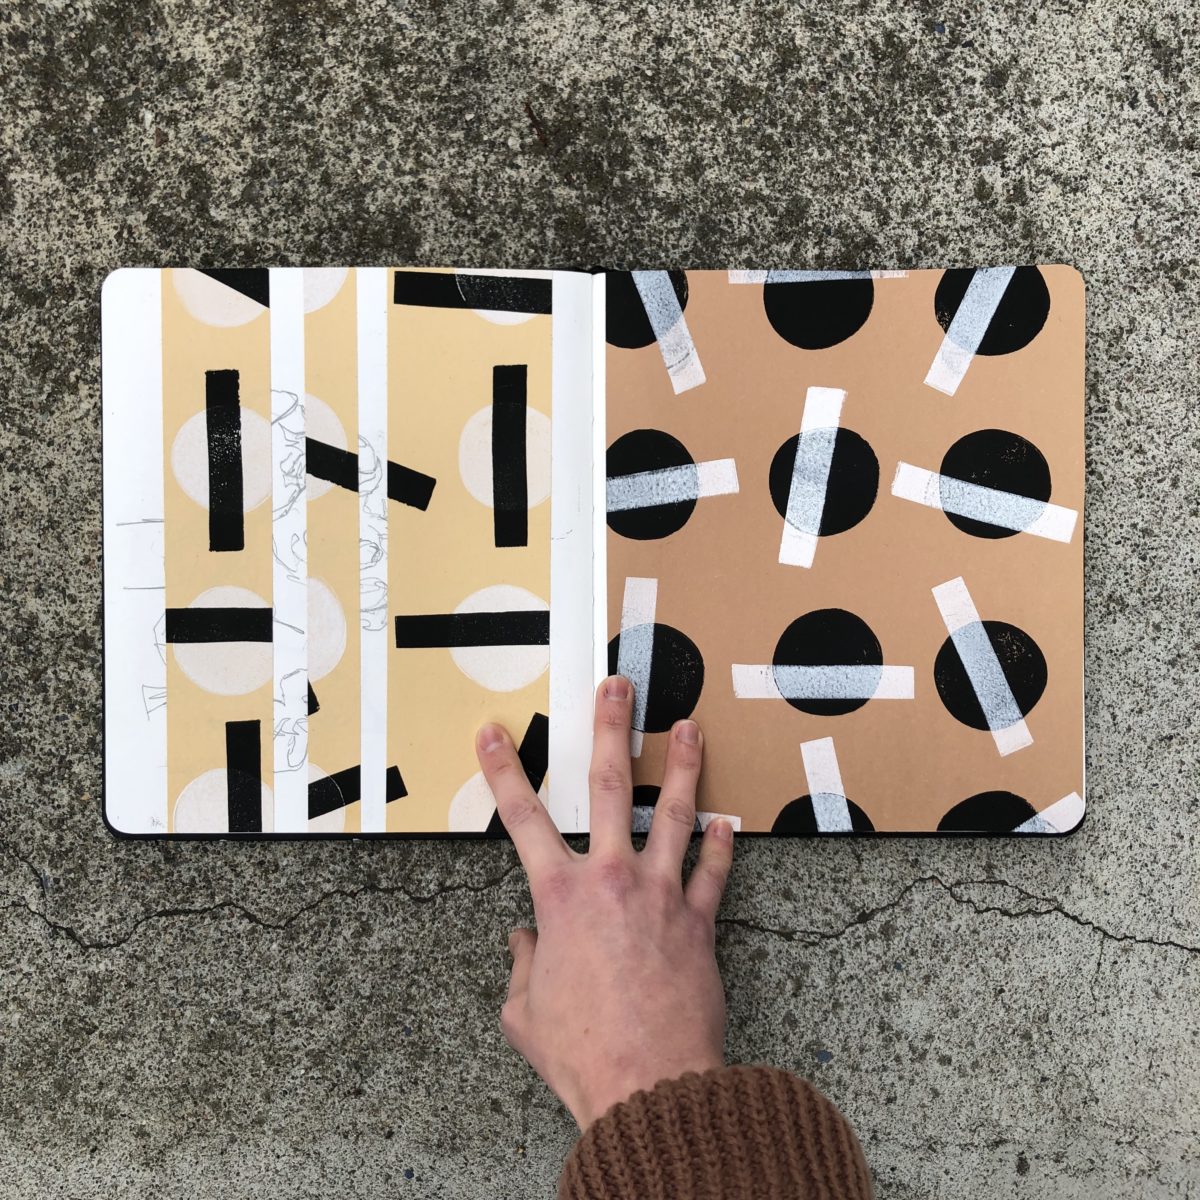
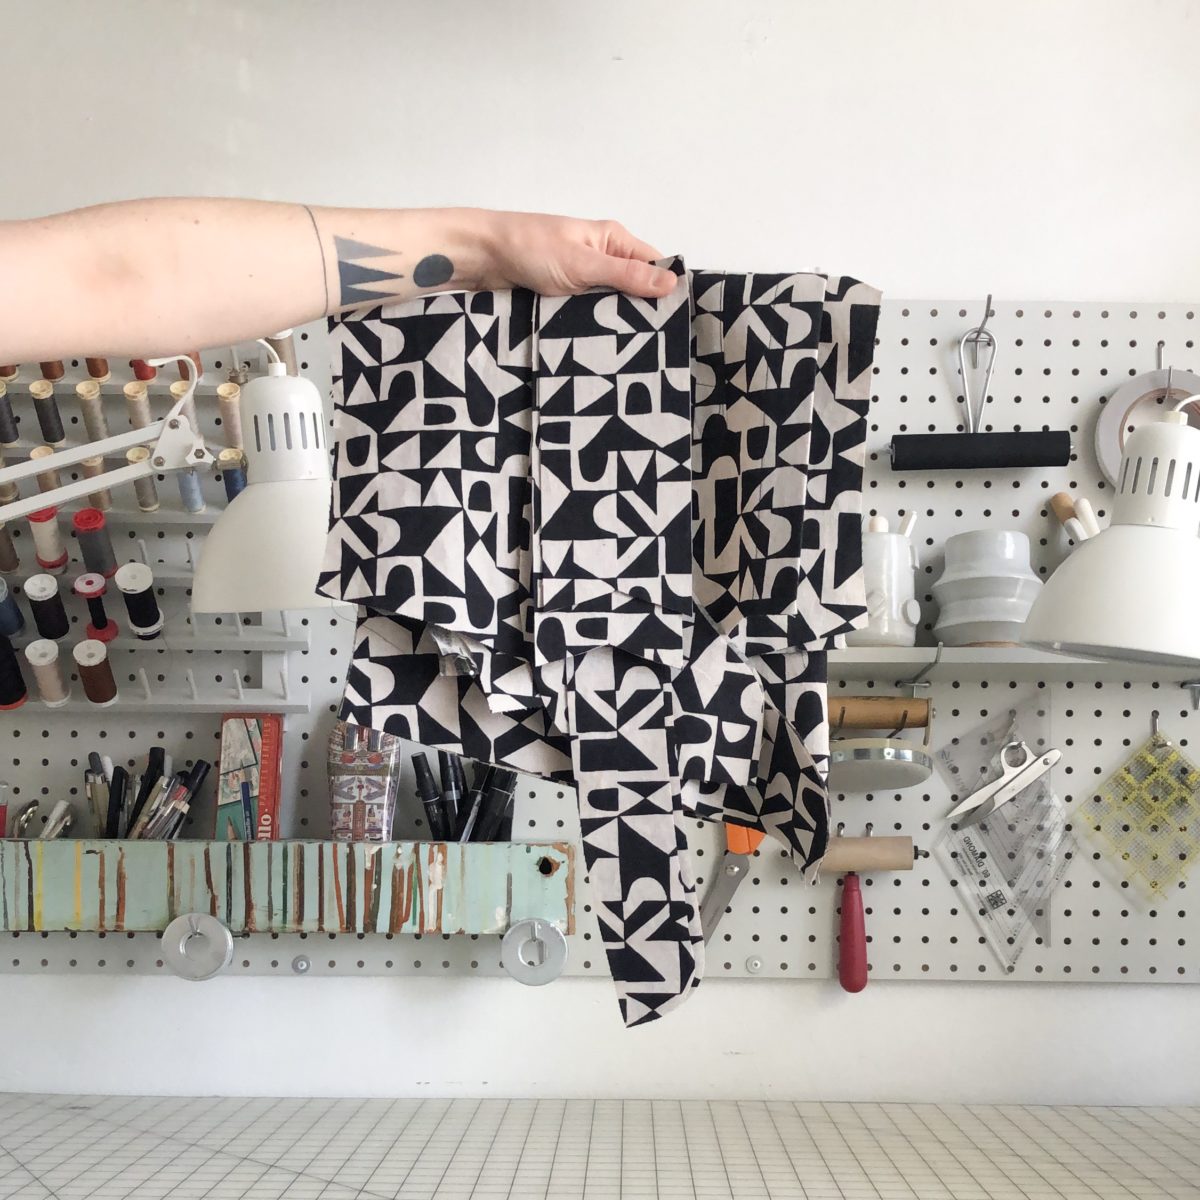
Hi 2019! You’re the year I’m going to figure out Adobe Illustrator! There are two main reasons for this goal: The first is I need to diversify my skills for that impending career change and the second is that I want to design and potentially even produce my own line of fabrics.
First (almost) independently made repeat. My mom had to help get it into my swatches.
As the child of two graphic designers, I really missed an opportunity to learn this software well before my 30s. But, that type of thinking won’t help me now, so while I was home for the holidays, I sat down with my mom for several in-person tutorials.
It is a powerful and imperfect software. Aside from there being a million different ways to do one thing, it has some annoying glitches. It was actually a little comforting to see my mom, a person who has used the creative suite for many years, occasionally struggle to make a thing happen on our computer screens. But, with just a few curse words and a lot of ⌘z’s, I was able to get the basics down for creating repeat patterns!
In the name of learning, I’m going to challenge myself to create one repeat pattern a week for 10 weeks and share them here on the blog. I’m having a Repeat Pattern Party! Will those 10 repeats lead to a fabric collection? Maybe. Hopefully. But honestly, this self-imposed challenge is going to be focused on learning to navigate the software with some ease.
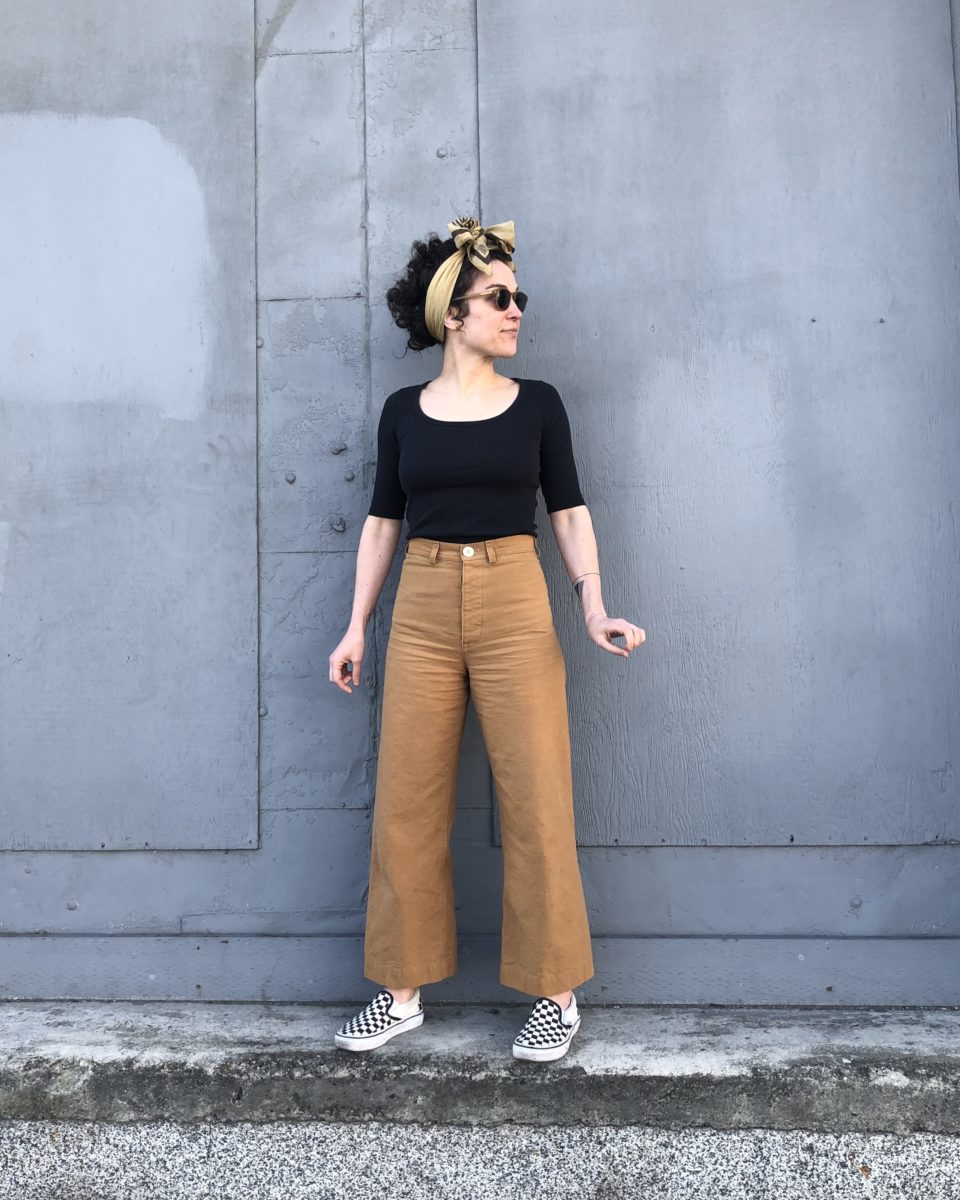
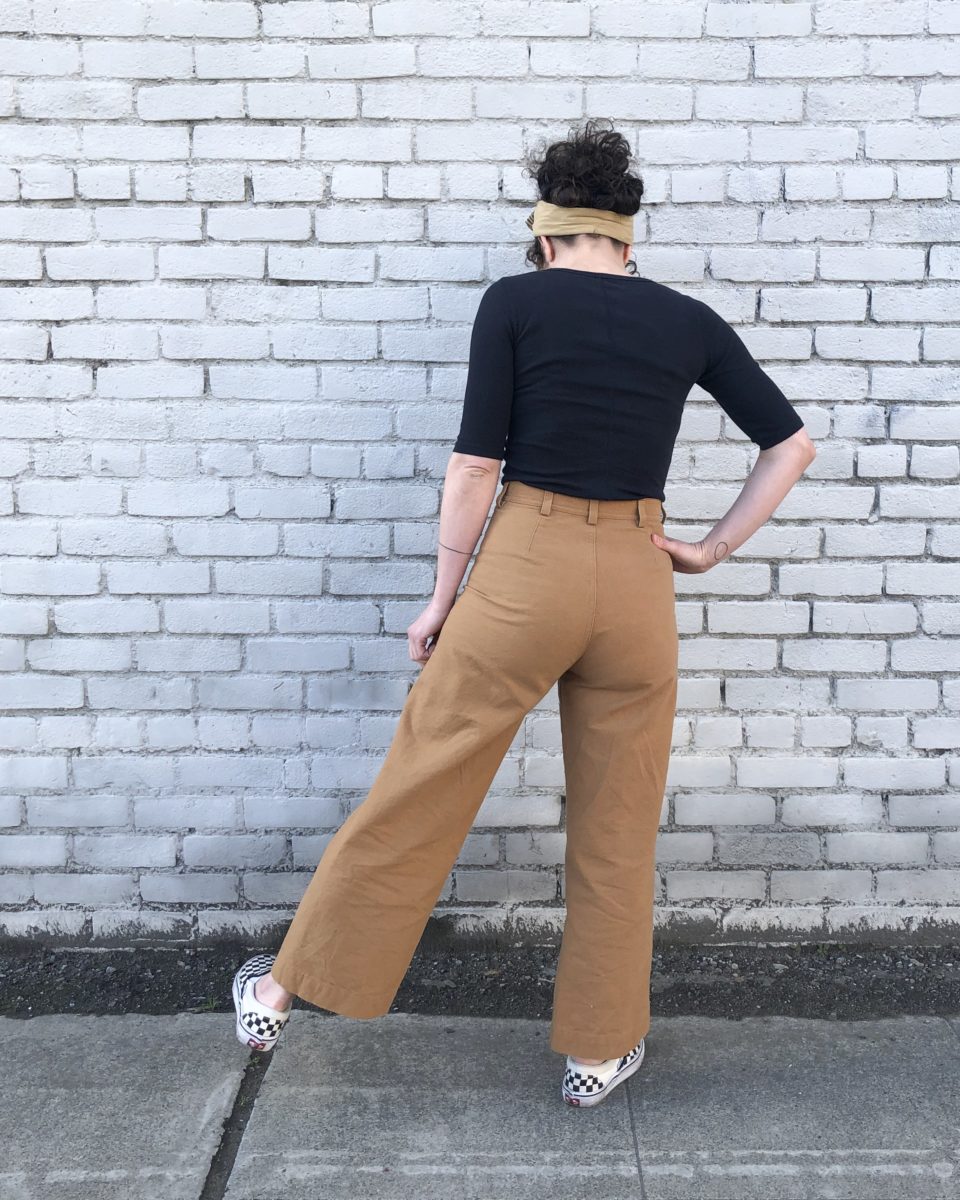
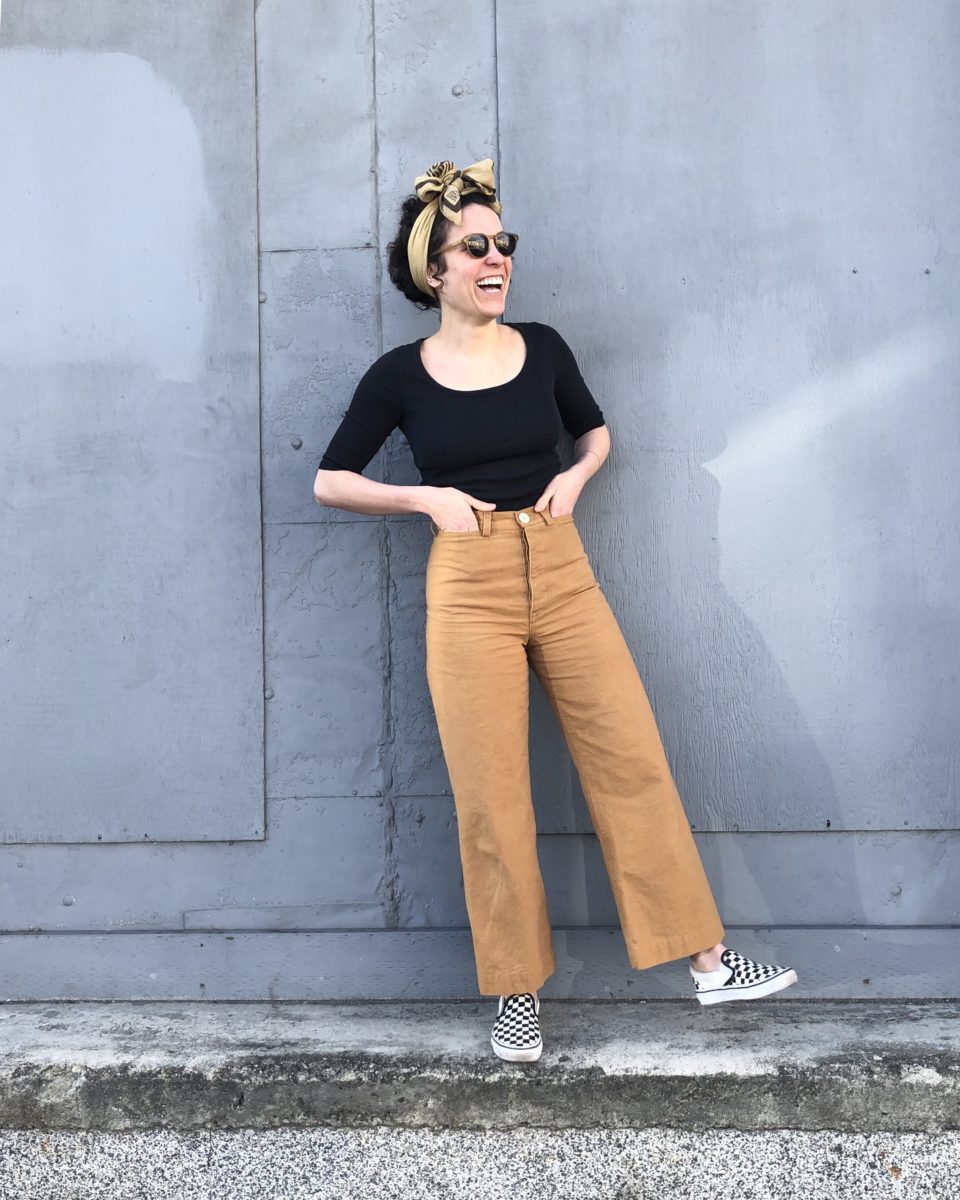
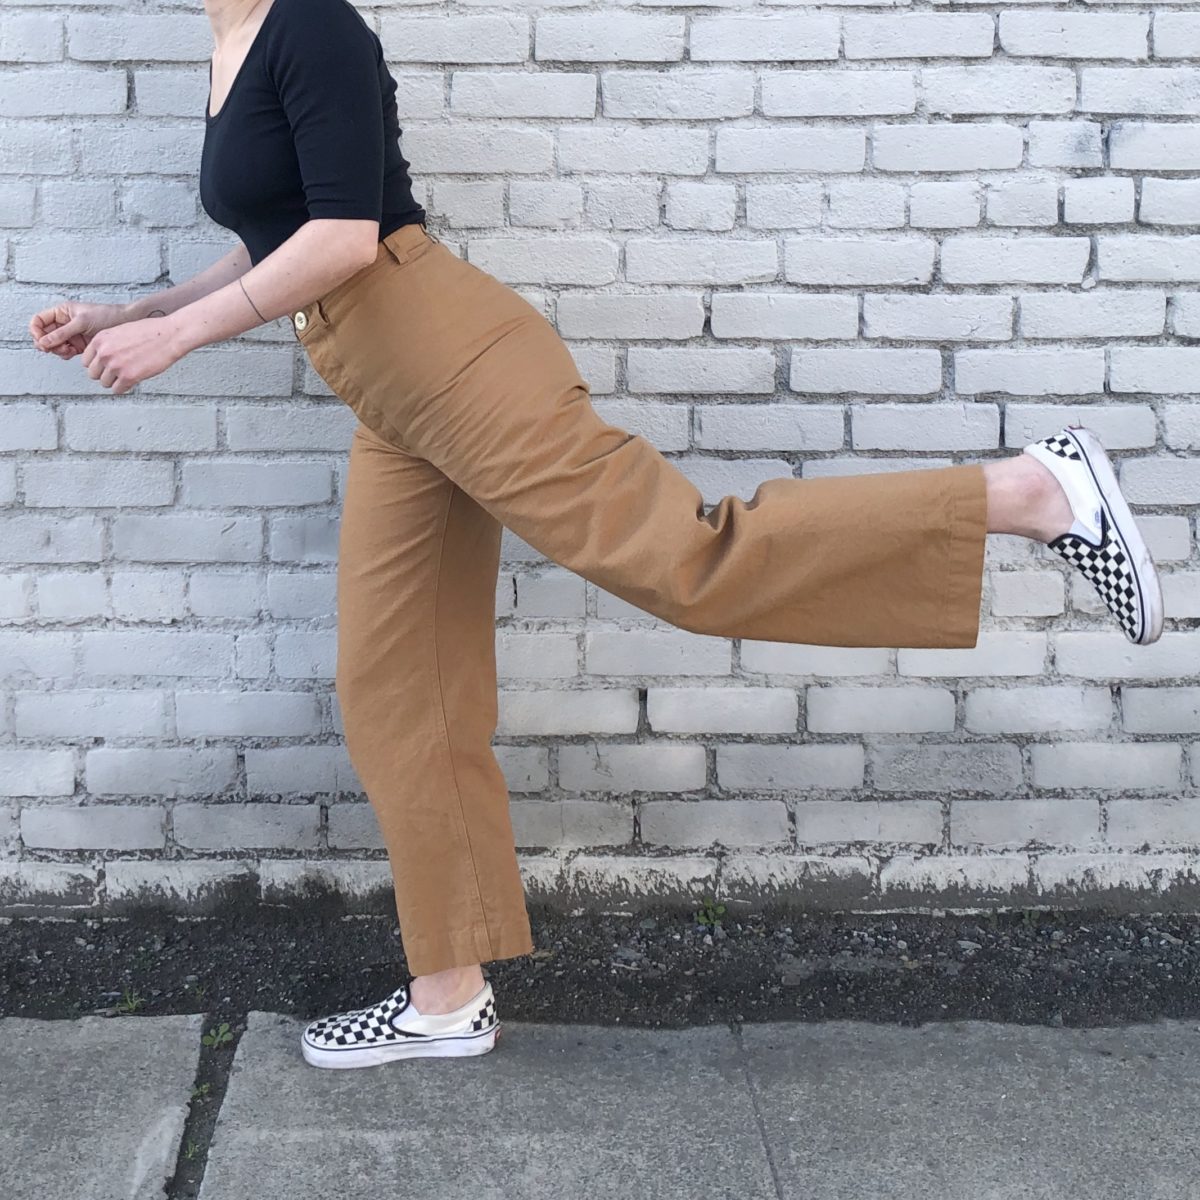
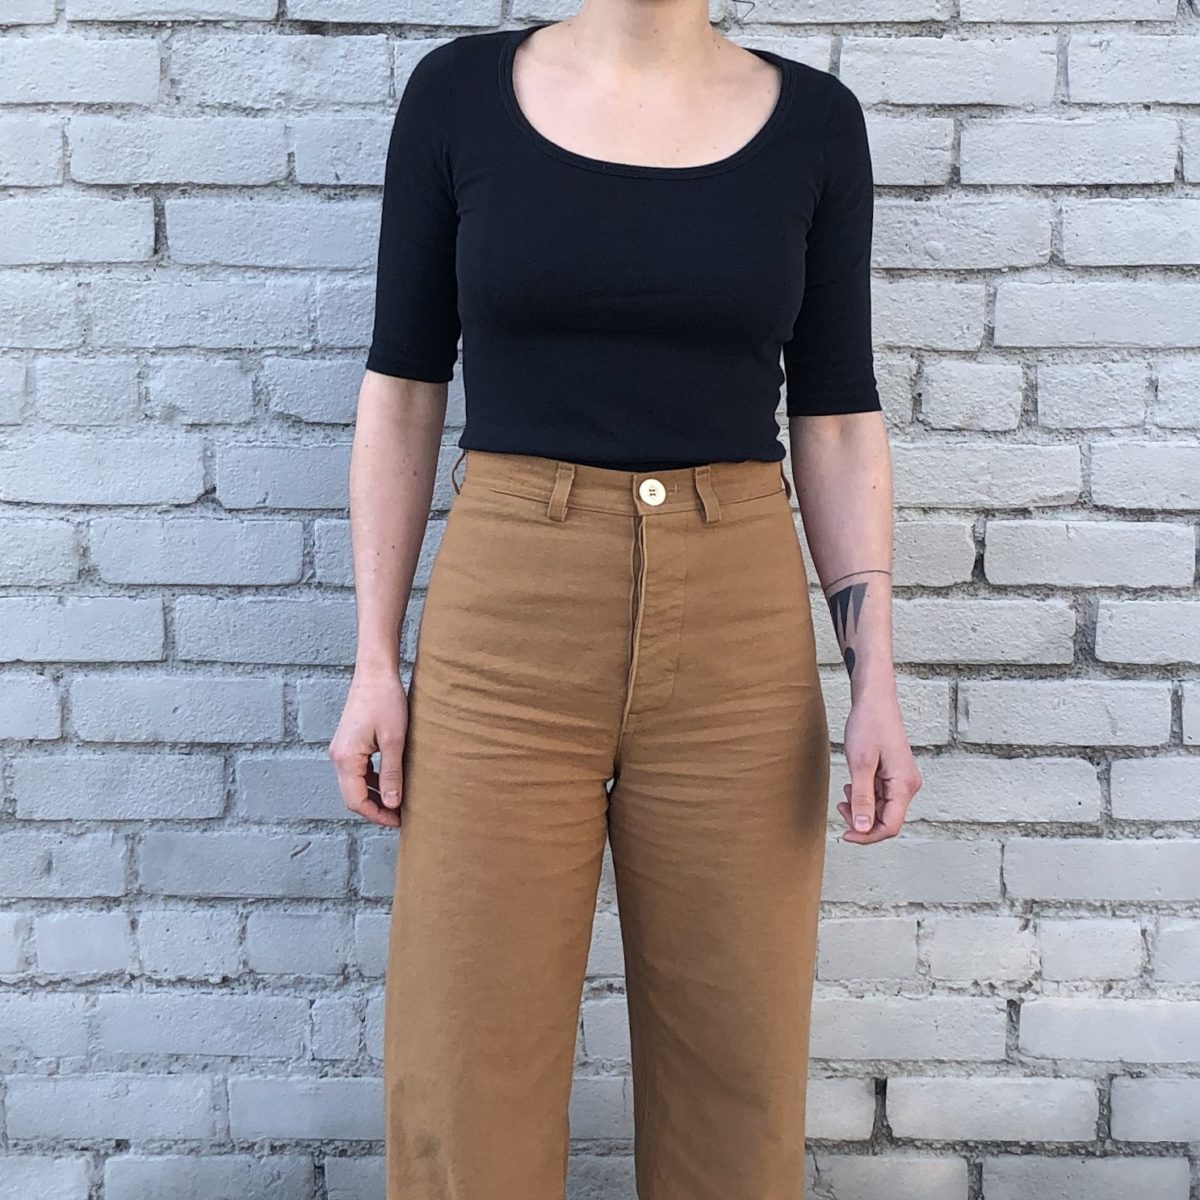
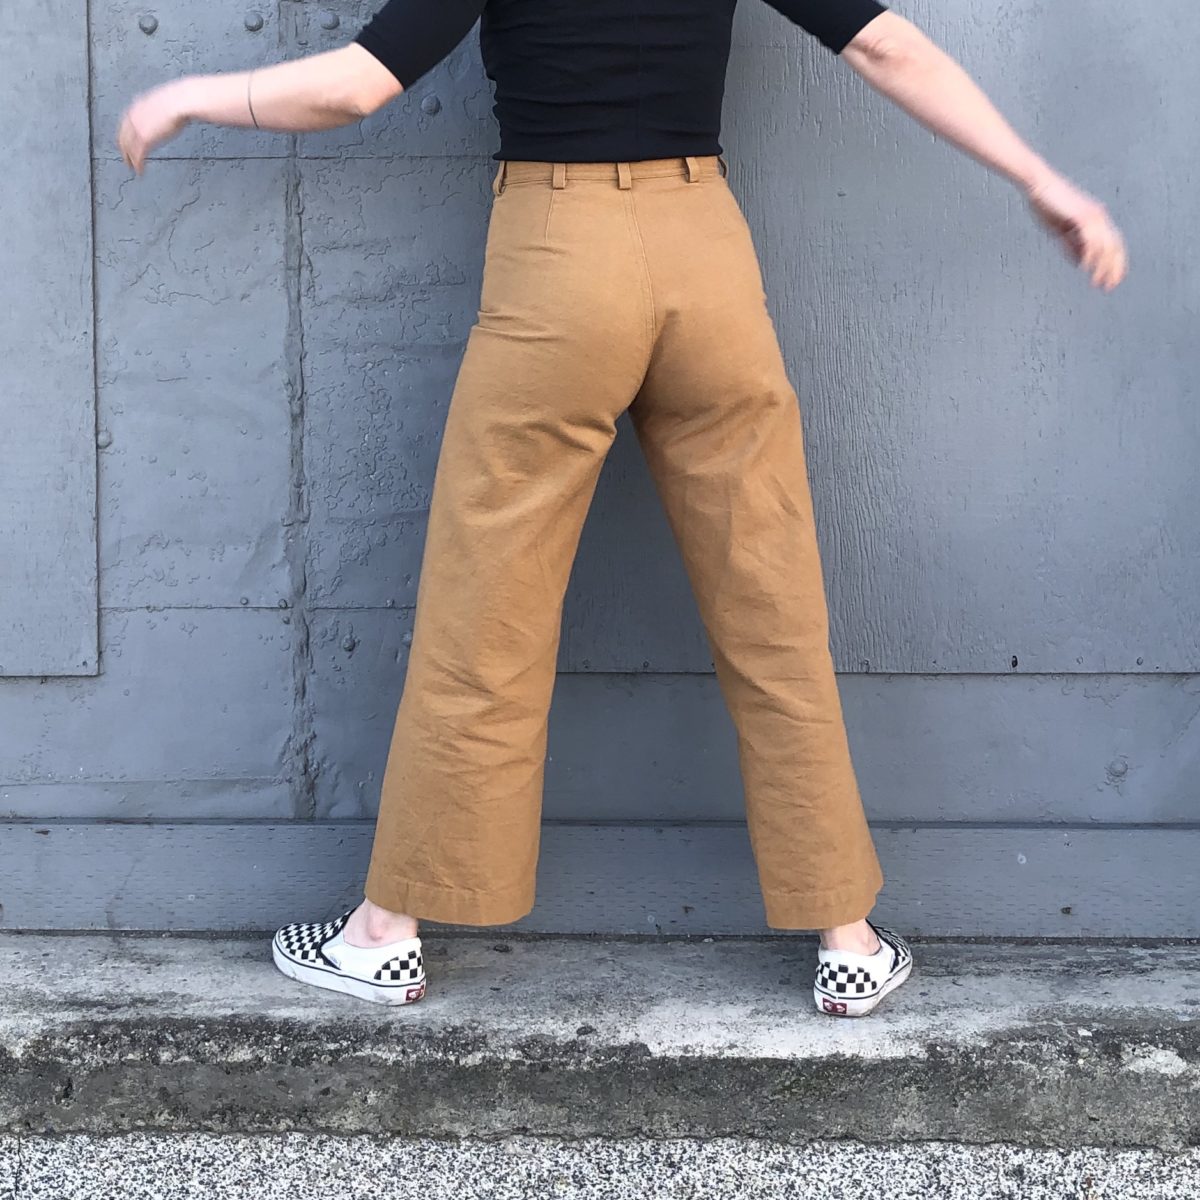
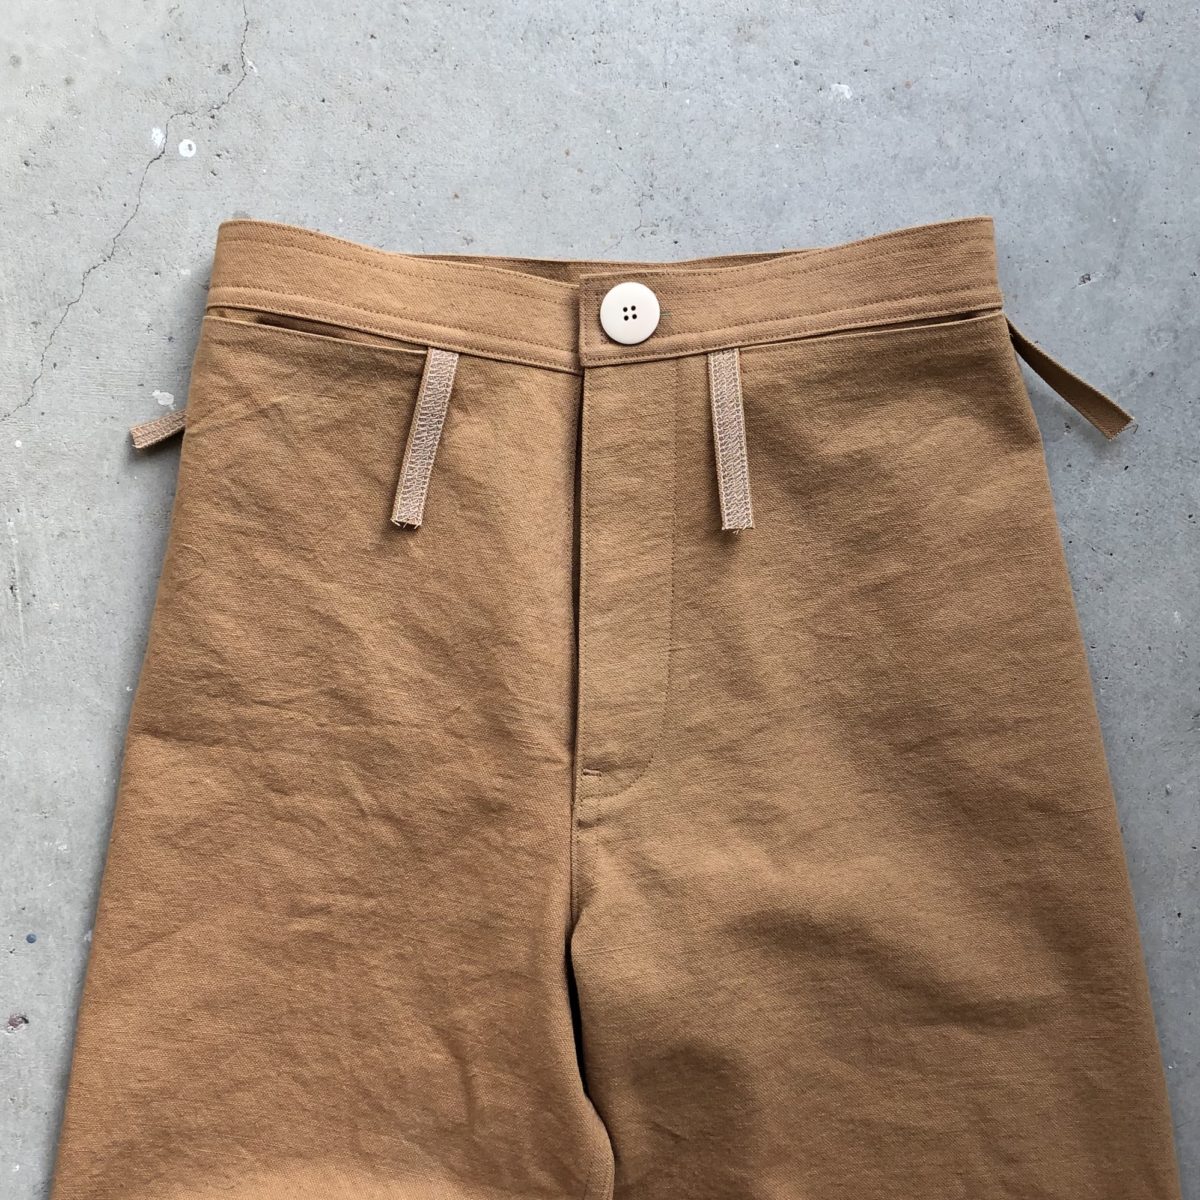
I’m late to the Persephone Pants party, but I’m glad I arrived. Anna drew inspiration from 1940’s sailor pants by including a super high waist, waistband inseam pockets, a button fly, and the design element that explodes most people’s heads: no side seams.
For me, one of the most appealing things about the pattern is how similar they are to highly coveted RTW sailor pants. Instead of paying $400, I could make a pair for under $40. Don’t get me wrong – I love supporting small women-run businesses and that $400 price point makes sense, but if the option to make it myself is there, I’ll take it! Also, the instructions are so stellar I’m certain a novice sewist could make them!
Shortly after the pattern was released, I did give it a go, but they just didn’t work out. My waist measurement ranges from 26.5″ to 27.5″ and my hip measurement ranges from 37″ to 38″. Even though that put me somewhere between a size 2-ish to a 6, I settled on cutting out a size 4 (waist 27″, hip 37″). They came together really quickly, but once I put them on, I had a bad case of dumpy butt. They were just too big.
I wasn’t entirely sure what the issue was; Was it fit? Fabric choice? Both? Was it an actual dumpy butt? I suspected the cheap bull denim I bought at Joann Fabrics may have grown, but in an effort to salvage them I tried taking in the back seam and crotch. Those efforts proved unsuccessful and I ended up setting the mutilated pants and pattern aside for a while.
After reading a couple folks had some luck with sizing down, I chopped my pattern pieces down to a size 2 and cut into some 10oz Duck Canvas hoping for the best. And it worked! I didn’t need to make any adjustments after sizing down.
Although I have a lot of love for this pattern, the lack of side seams and rear pockets leave your booty and thighs on display. What the hell type of underwear do you wear with these? Or do you just not give a damn?
I have fabric set aside for two more pairs – more 10oz cotton duck, but in black and some Kaufman speckled denim that I’m really excited about. I thought I’d hate the button fly, but I’m warming up to it and will probably keep it on future pairs. It appears I adjusted the position of the left pocket in the wrong direction (step 30), so I’ll be careful not to do that again ¯\_(ツ)_/¯.
Hot tip: sew a line of stitching in between each buttonhole to connect the button fly and facing together (check out this Tessuti blog post for a visual). It definitely helps keep the fly from peeking open!
I love a good bag pattern, and boy does Klum House have some bags. Not only do they have a variety of awesome patterns, they also carry different levels of kits. A Maker Kit comes with EVERYTHING you need, even the fabric. And it’s pre-cut! And marked! A Finishing Kit comes with all the hardware and pre-cut/punched leather needed to finish a bag, eliminating the challenge of sourcing all those bits and bobs. Or just the pattern of many Klum House designs are available to purchase for ultimate customization options. All of the kit materials are high quality and there are so many colors to choose from. One thing to note is that all of the zippers appear to be brass, so take that into consideration when choosing the other hardware options!
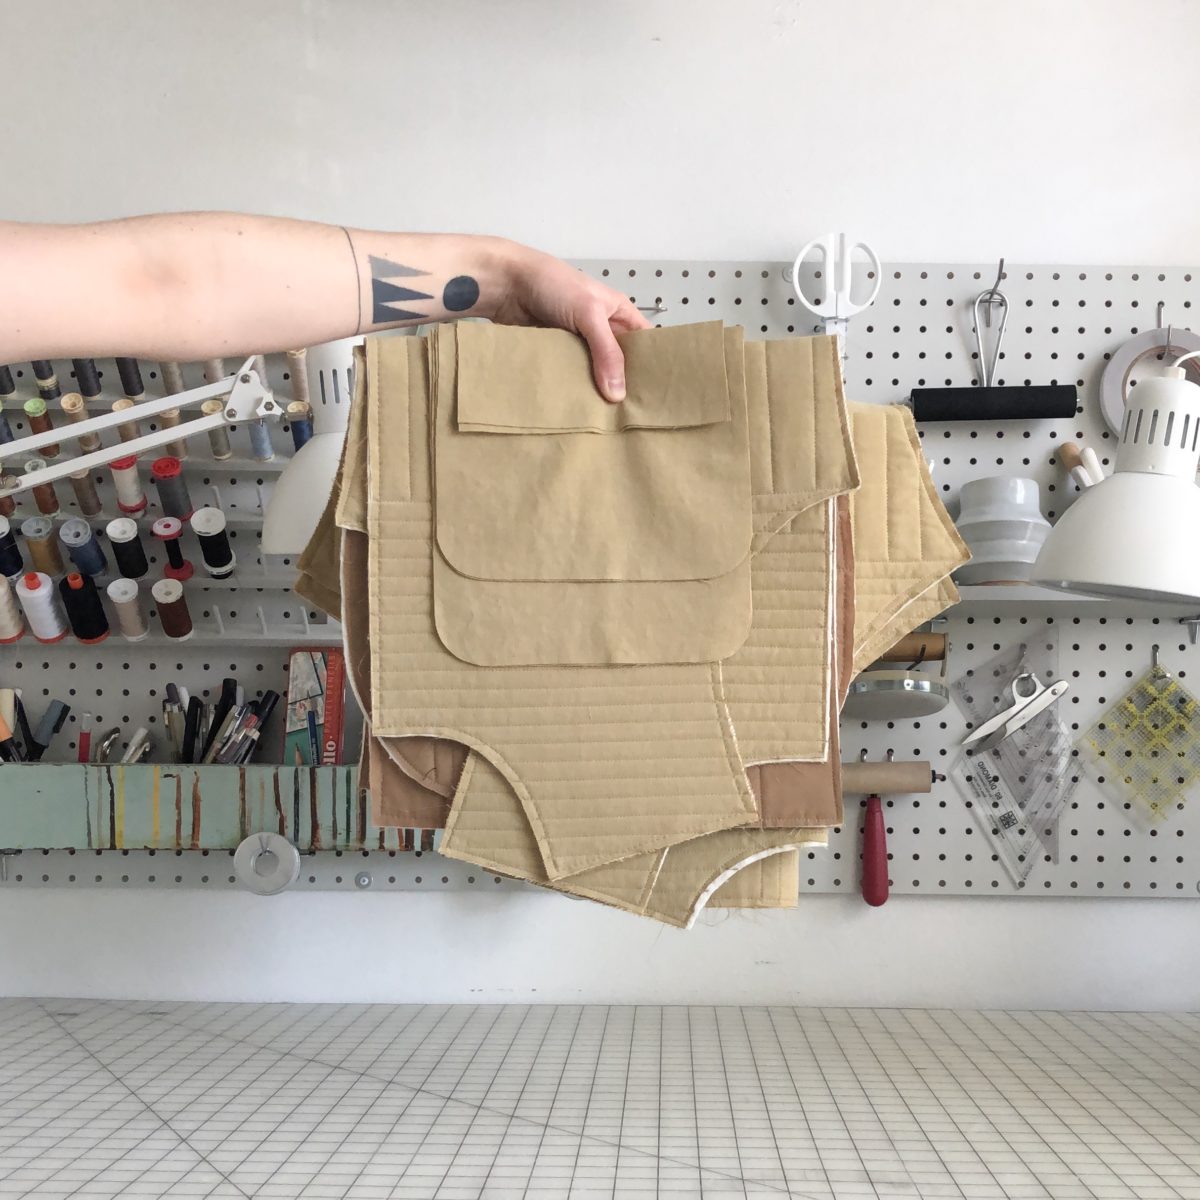
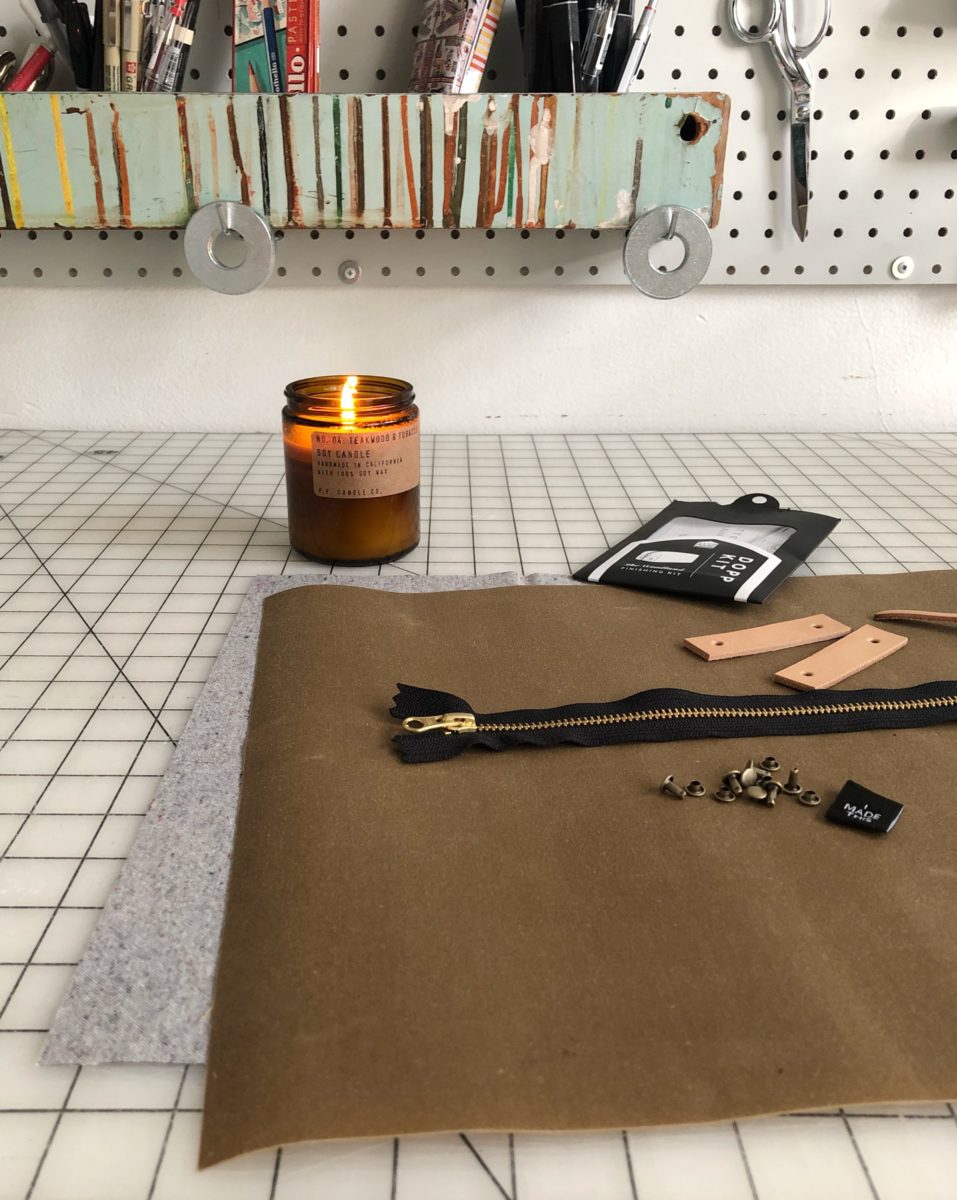
Way back in October, I was excited to see Klum House was getting ready to release a dopp kit pattern. Late October is when I start to fret over the task of finding (and sometimes making) both a Christmas gift and a birthday gift for my husband. He’s a minimalist and doesn’t want for much, so it’s an annual struggle. The Woodland Dopp Kit was a perfect fit! For years he’s been using an old Kinkos lunch box to hold his beard trimmer. The Woodland felt like a project I could commit to making in time and would serve as a nice update for the lunch box.
I can’t keep a gift secret to save my life (plus I wanted his input) so once the pattern/kits were released I had him take a look at the Woodland Finishing Kit. He settled on using leftover waxed canvas and lining from my Making Backpack, a black zipper, antique brass hardware, and tan leather. Klum House packs and ships orders at lightning speed, so I had everything I needed well before I was ready to start sewing.
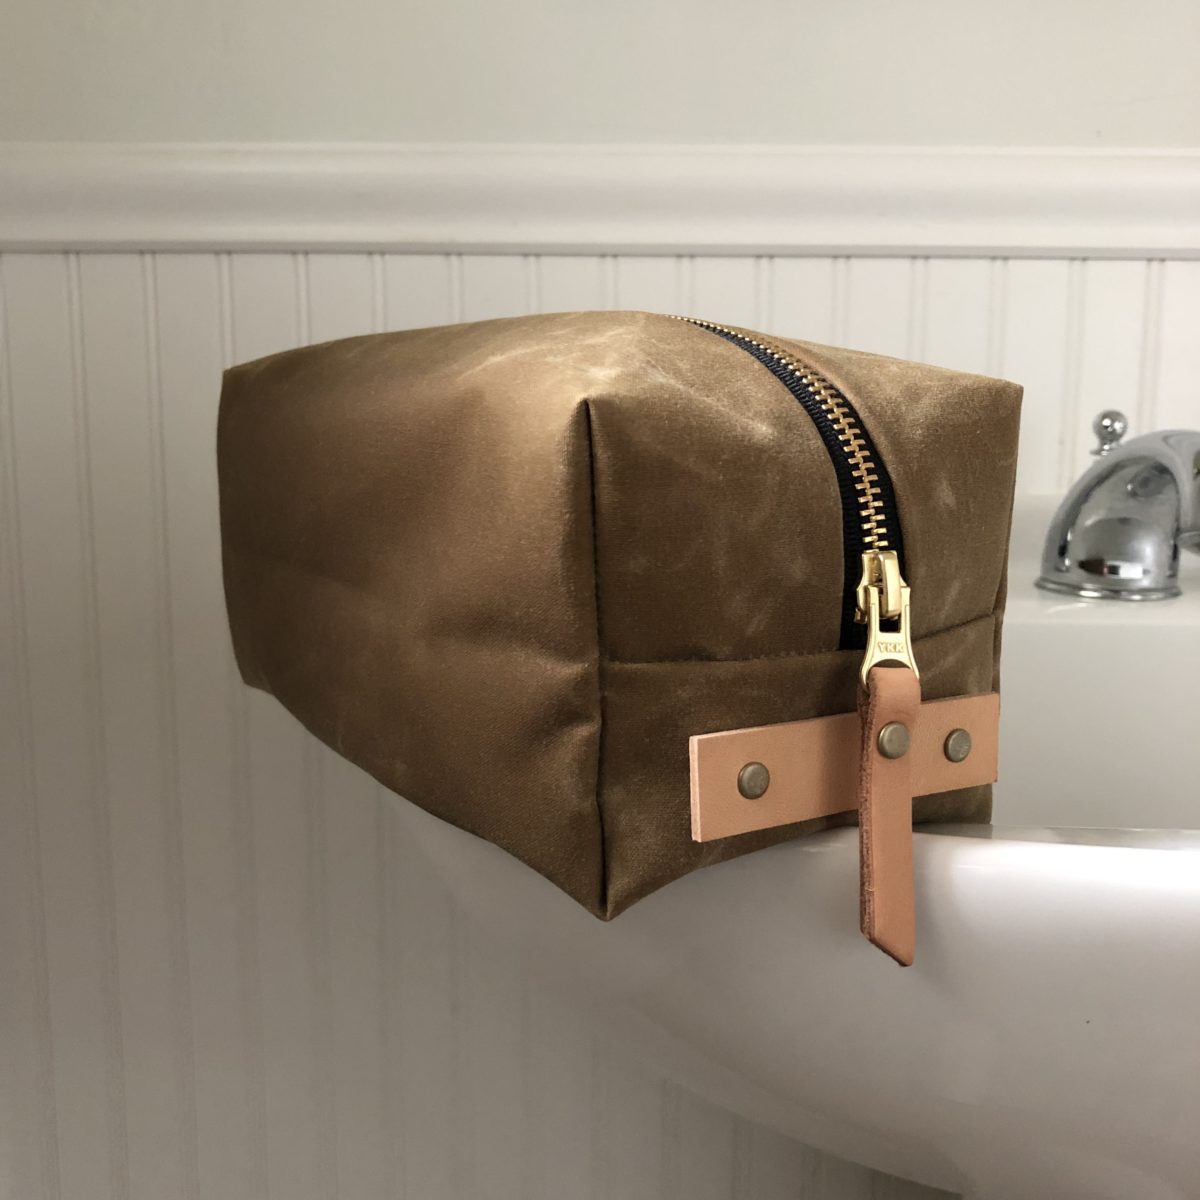
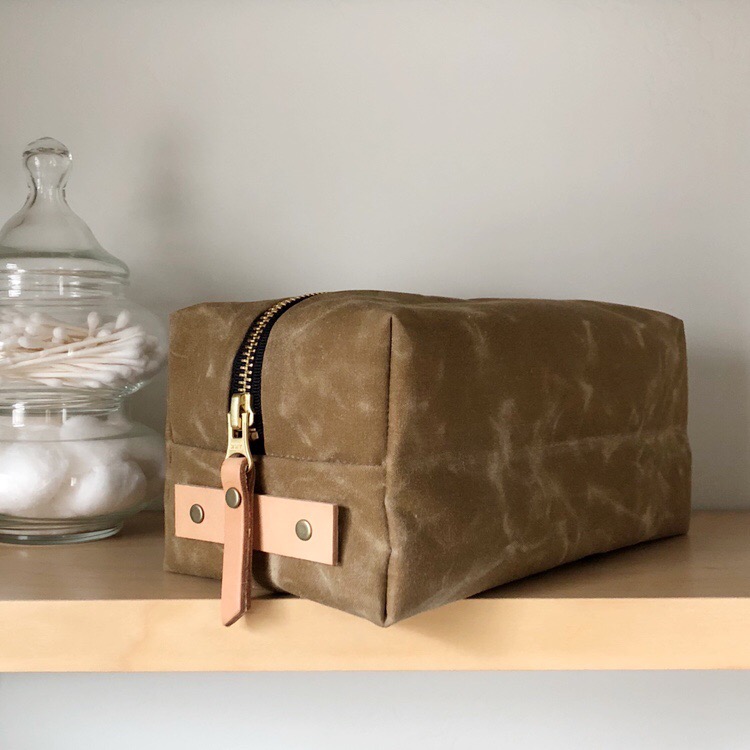
It came together really quickly, in fact I think the sewing took less than an hour. The instructions and illustrations are great and they even remind you take a snack break. Installing the hardware took maybe ten additional minutes. It was a little challenging to hammer the rivets in, but the end result is totally worth the effort.
One thing I’d like to puzzle out on the next Woodland is how to conceal the raw edges inside the lining. I’m sure there’s a way to do this, but I decided to make one as the pattern is written before making any modifications. My serger really struggled to get through all of the layers and I just prefer the look of clean, concealed seams. Another mod I’d like to make is a more functional handle. I love the look of the leather, but I can’t really grab it.
One tip I have for working with waxed canvas is hitting it with a hot blow dryer. It melts the wax and helps get rid of the creases you make during construction.
I’ve already ordered another Finishing Kit from Klum House – the Maywood Totepack and I’m patiently waiting for the Slabtown Rolltop Backpack pattern to be released. Yes, both would be for me… like I said, I just love a good bag pattern.
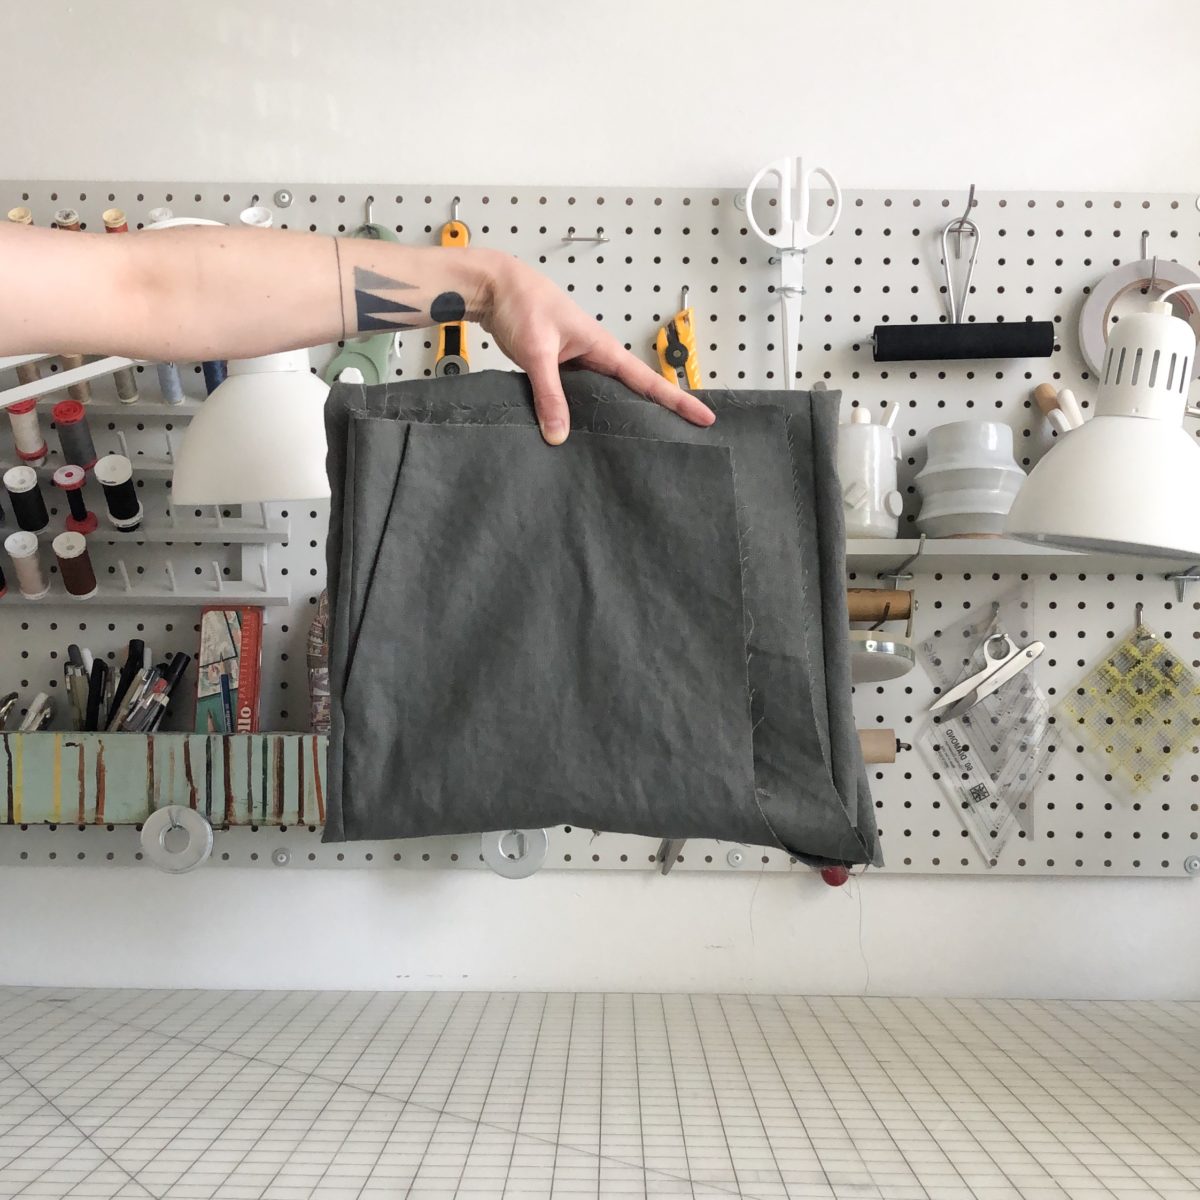
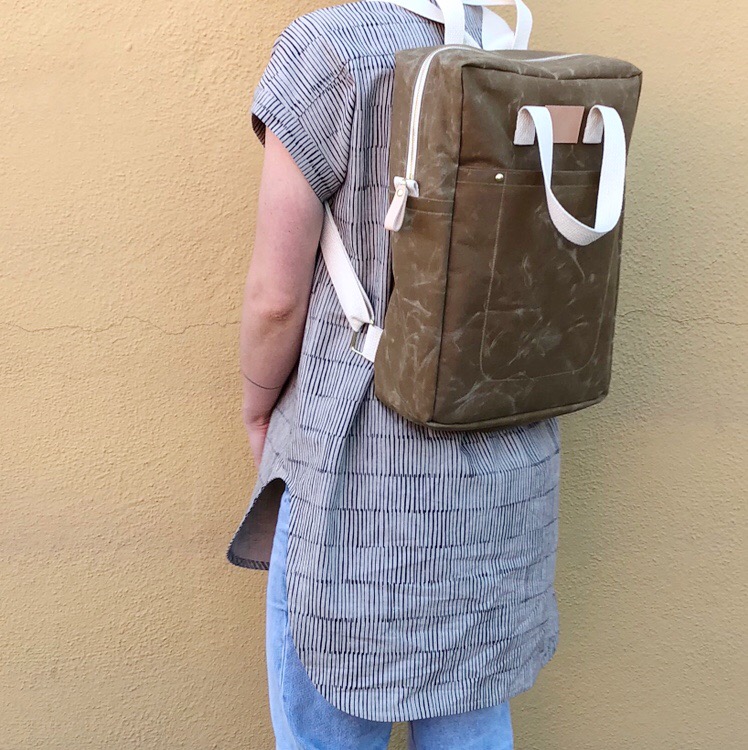
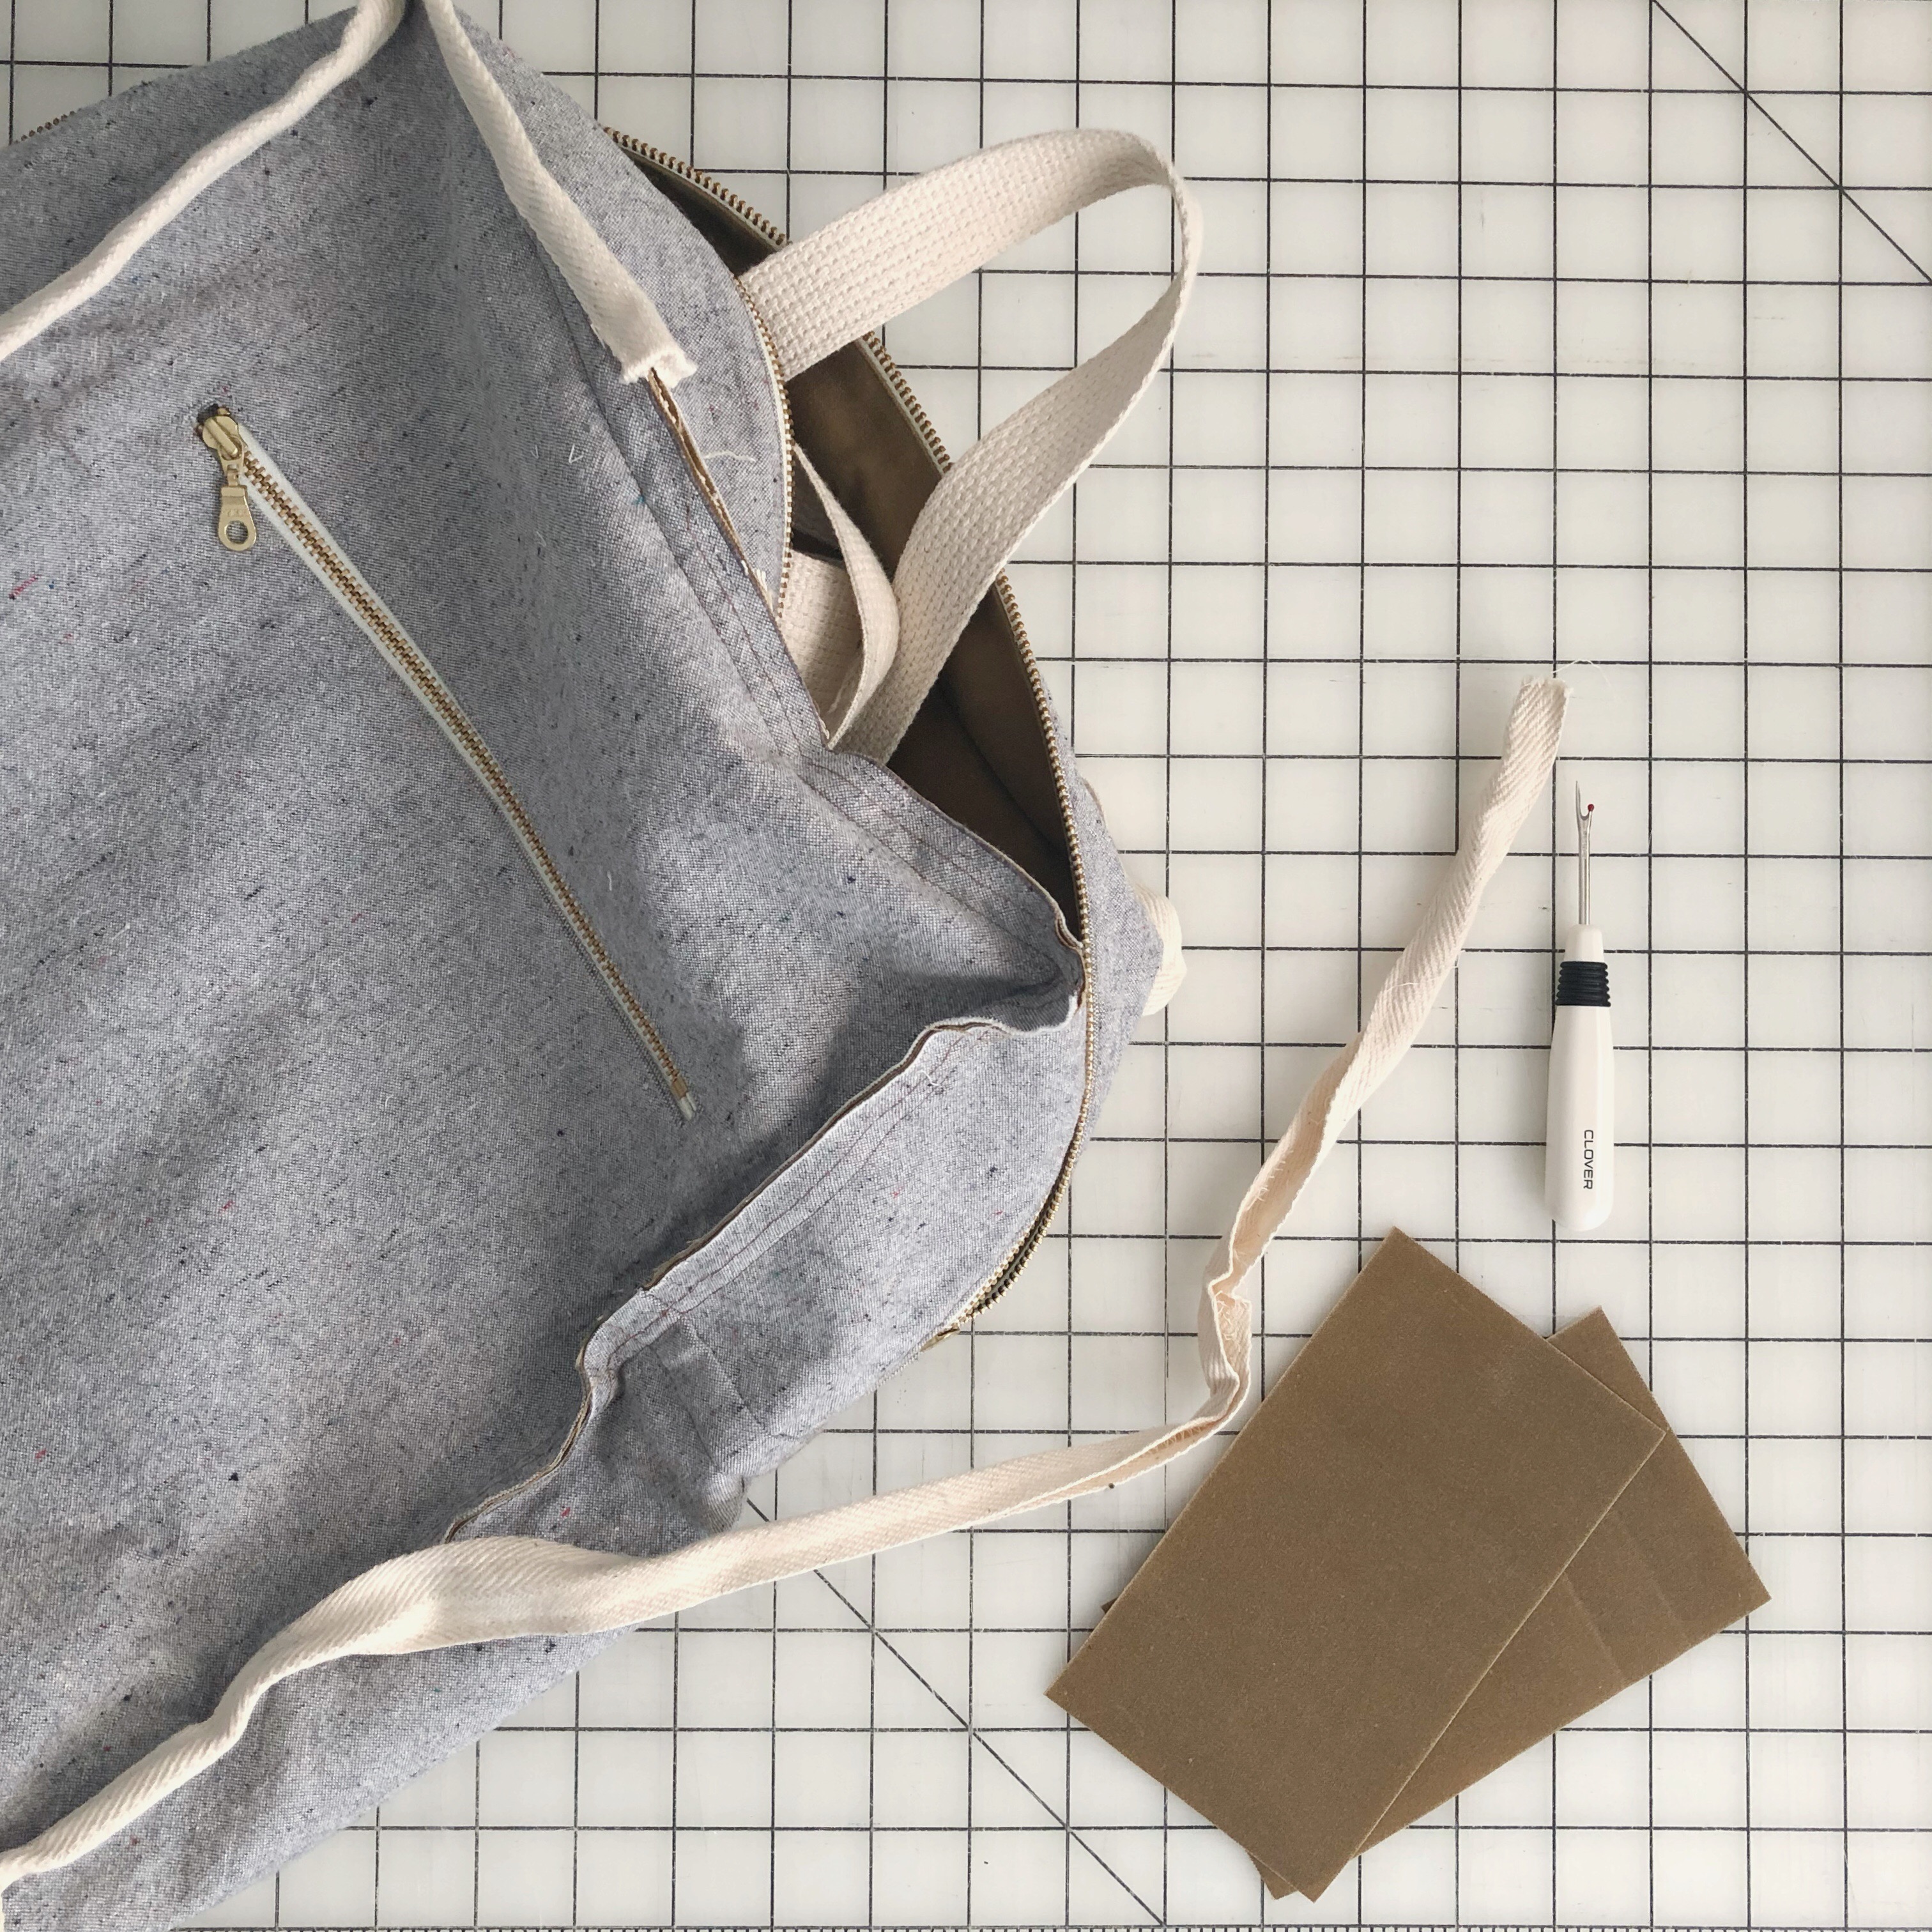
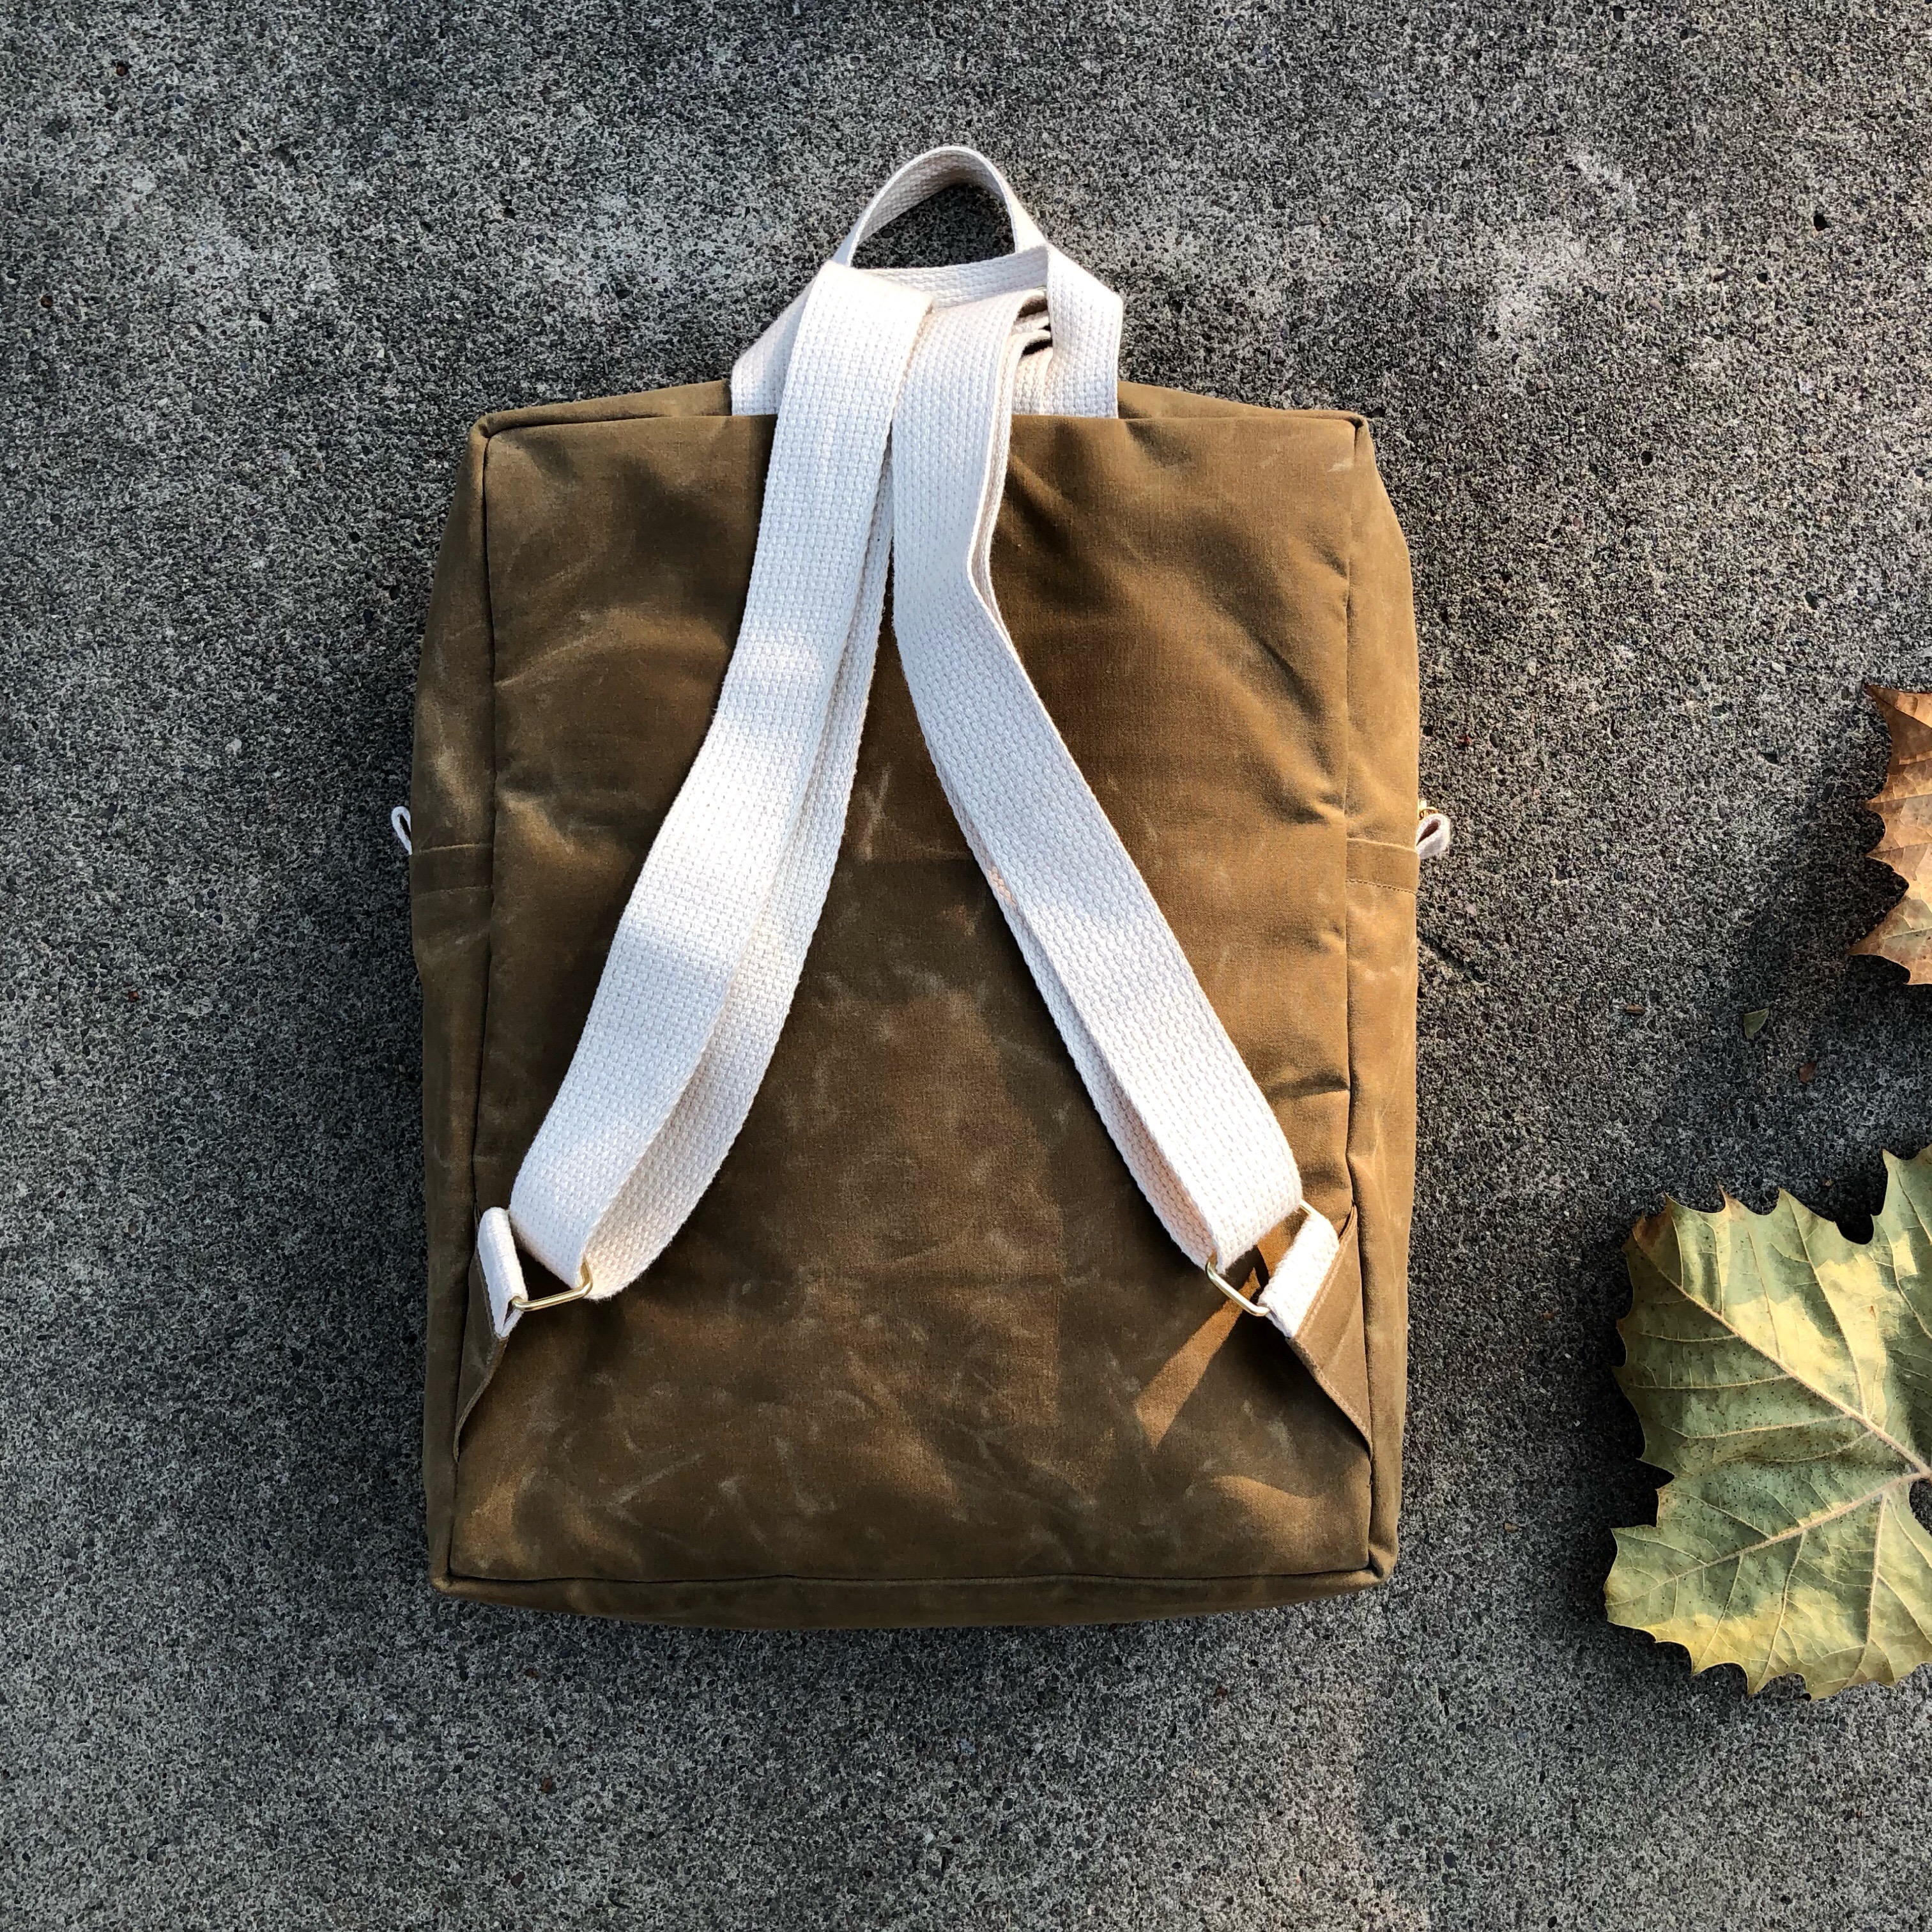
Sometimes you make a thing and although you love it, there’s just something not quite right about it. While making the Making Backpack, I KNEW it needed an additional pattern piece for the straps, but my desire to finish it quickly got the best of me.
So about two weeks ago I decided to fix it. I used the pattern pieces from the Noodlehead Range Backpack and followed the steps to sew. The construction was different than what I thought it would be, and was much easier to sew! I’m glad I referenced this pattern instead of making it up.
I thought I would need to seam rip both the sides and the top to make the straps work, but I ended up only needing to take apart the sides.
It ended up being a really easy fix. I’m glad I pushed through the fear of taking the finished backpack apart. I was really nervous!
The Making Backpack pattern was originally available in Making Magazine, but Anna has updated her pattern to include these triangle connectors. You can find the updated pattern in her shop!