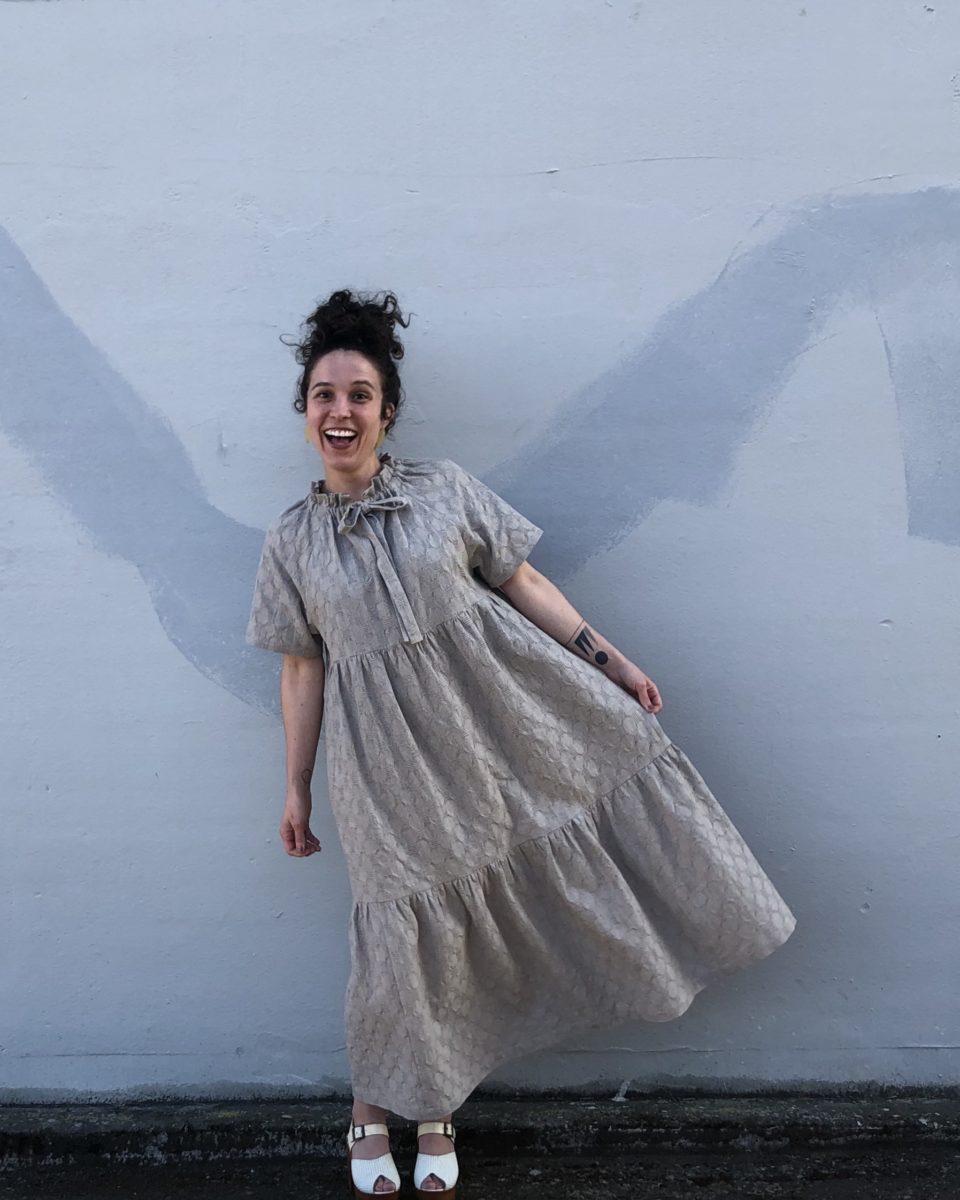
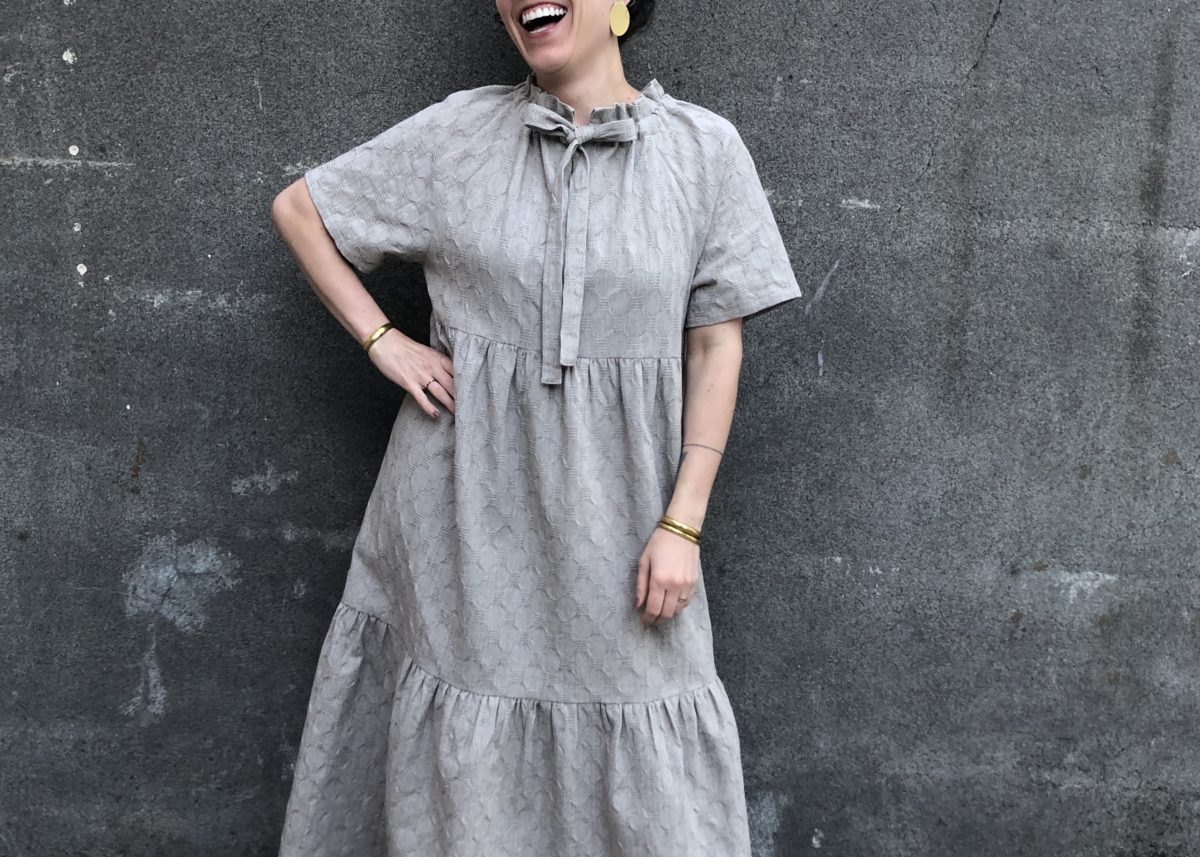
I did it. I finally sewed something and it’s way outside of my usual style.
Not long ago, on this very blog, I declared a hatred of ruffles, and here I am covered in them. There are more ruffled garments planned too. I guess I’ve changed my mind.
I can’t say that this garment has been a huge hit with my partner – “you look like you’re wearing a Victorian nightgown,” . . . “there’s no amount of swishing that’ll make that look good,” and “are you wearing that nightgown outside?” have all been uttered by his usually supportive mouth. Oh well – I’m here for this lewk.
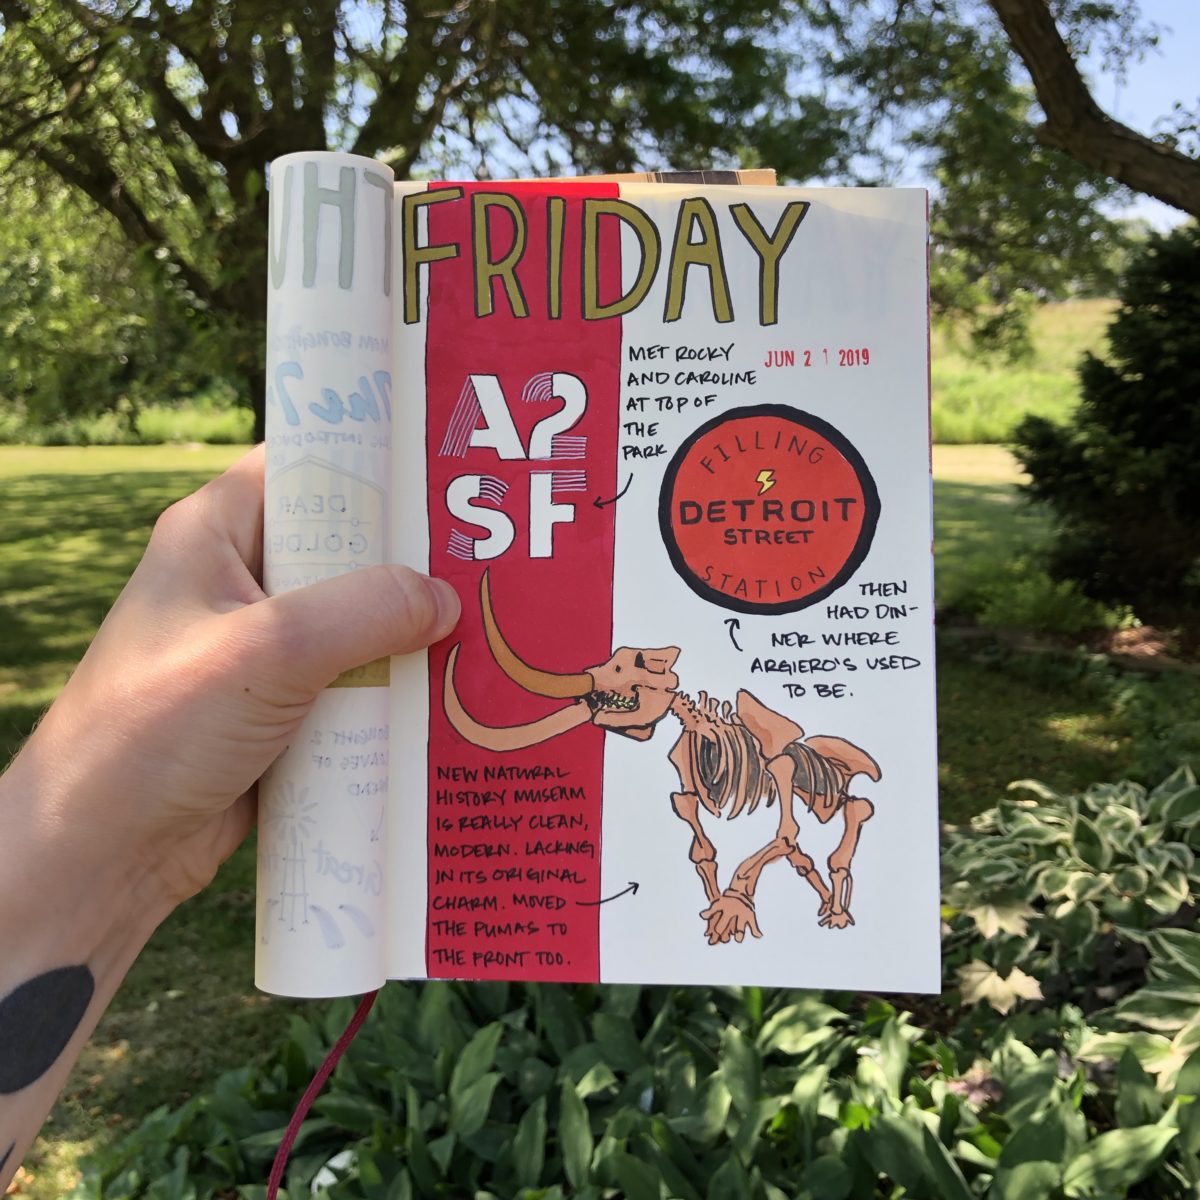
It’s been two months, five days, three hours, and 12 minutes since I’ve sewn anything. Okay, I have no idea exactly how long it’s been, but it’s definitely been over two months, and I’m going insane.
The last logbook page I posted on Instagram. I managed to squeeze a trip home to Michigan in between school ending and moving. More pages past this date exist, they just weren’t documented. I tried my hardest to keep this up during the move, but one missed day turned into a week, and then all of a sudden I was over two months behind. Planning to dive back in soon.
Aside from putting all of my creative practices on hold, the move to Portland has been really good for my soul; I love our new house and neighborhood, I love not working at a K-8 school (working in an office is AMAZING), I love my 11 minute commute to work (18 minutes by bike), and I know I’m going to get a lot of shit for saying this, but I love that it’s not constantly sunny here.
Move in day.
Same room, now livable.
Anyway, I know this space is primarily meant to be about sewing and making, but it’s my blog and there ain’t gunna be any of those things without some house updates first. So why not share what’s happening?
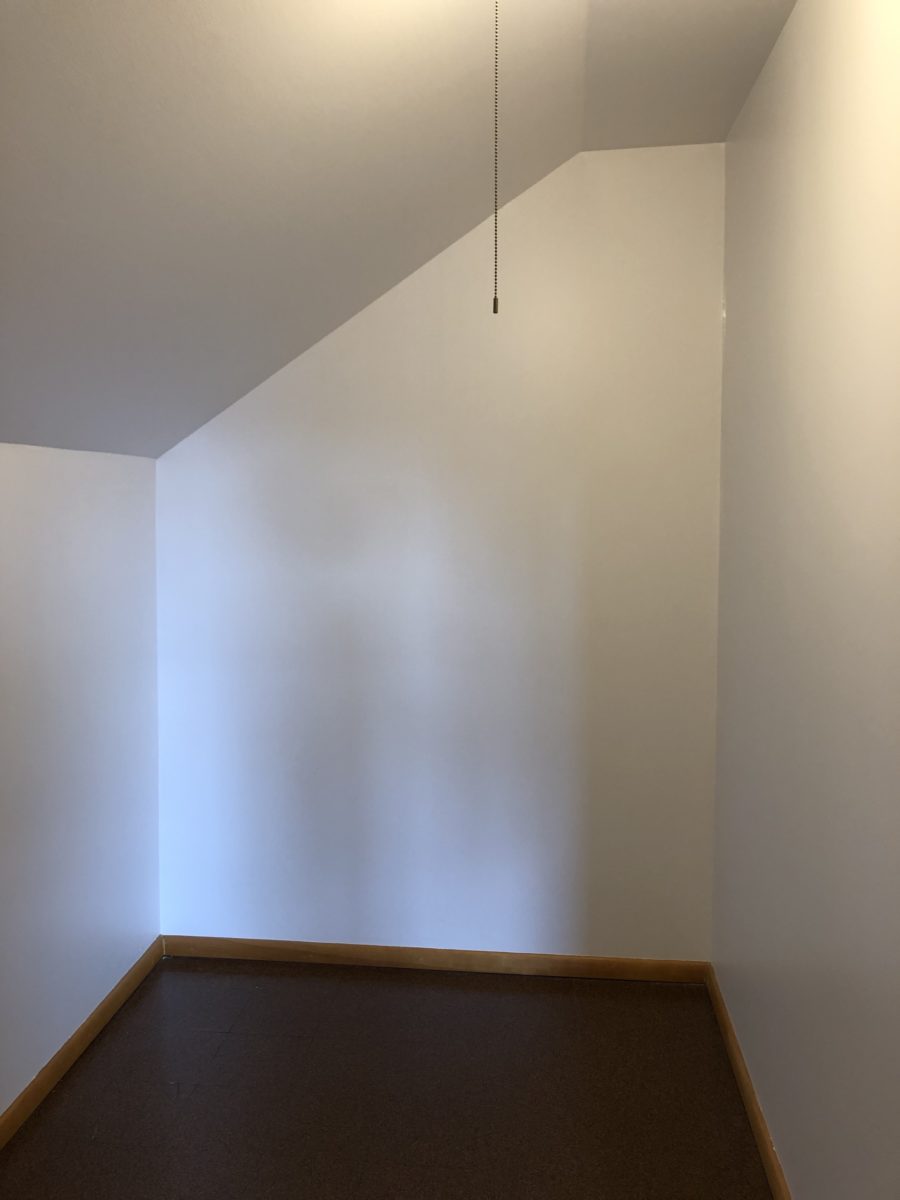
Current sewing space situation. So DARK.
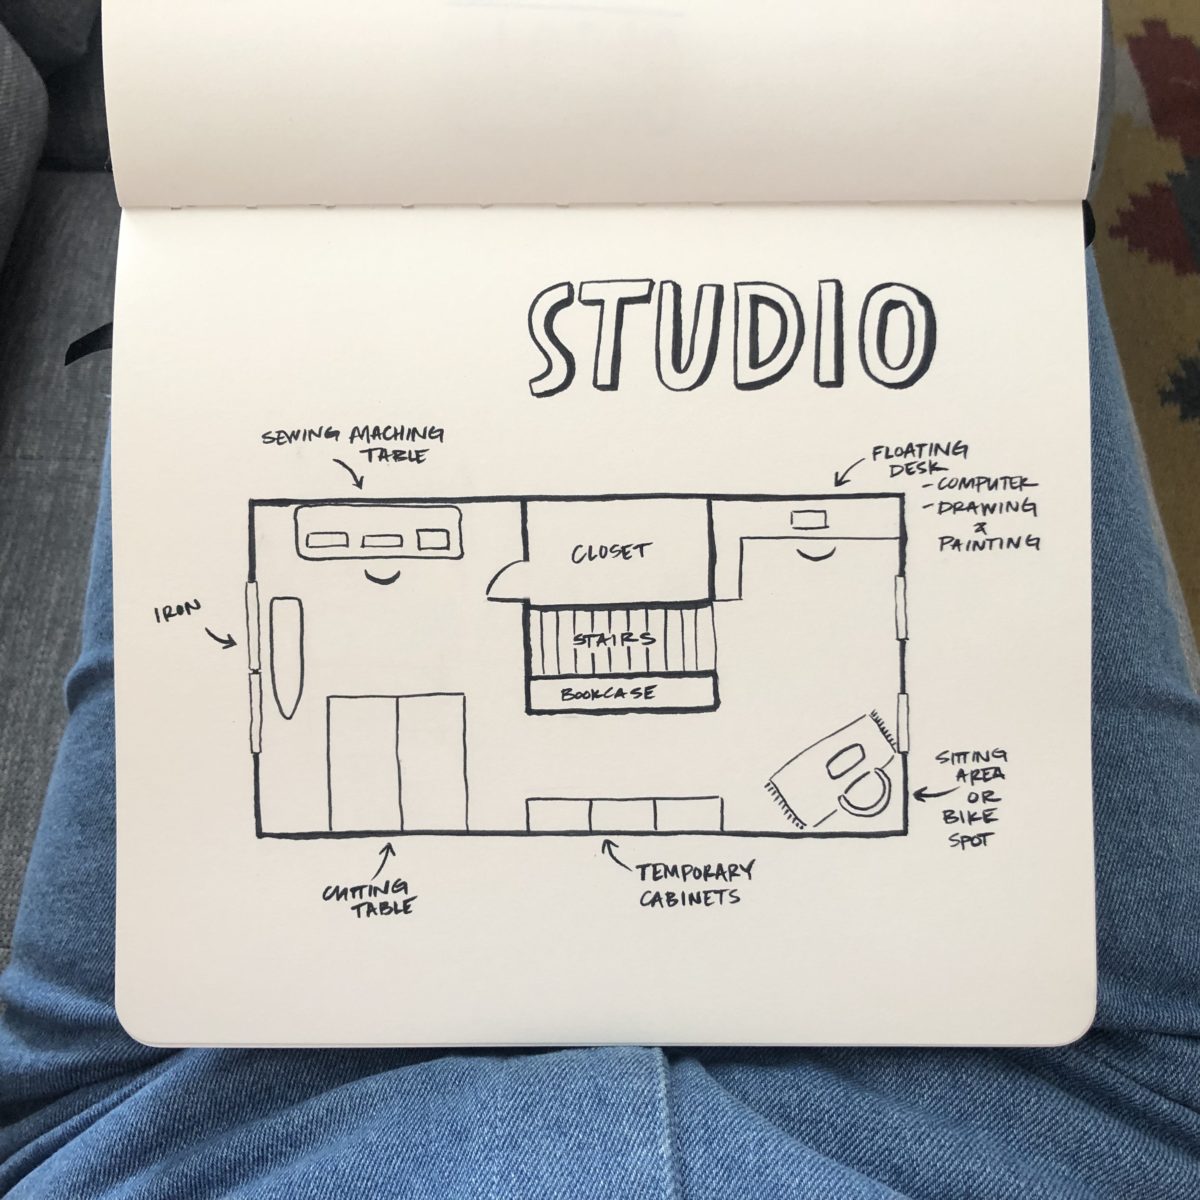
The entire second floor of our house is mine, and I’m so excited to transform it into a bright, beautiful, and functional workspace. As you can see, it’s currently dark and gross, but the bones, the bones are GOOD.
Not drawn to scale.
It’s a pretty big space. I’m planning to have a sewing zone and a computer / other art zone with storage in between. I think once it’s all done, it’s going to be pretty amazing. Now to just find some patience while all the work happens.
The plans:
update the electrical (currently everything is two-prong / un-grounded)
add lighting and two ceiling fans
install duct work and remove ugly wall heaters
drywall over the OSB and paint white
install hardwood flooring
remove carpet on stairs, refinish
paint built-in bookcase white and add countertop
remove weird 70s glass partition and install another bookshelf or pony wall
update closet (paint white and install closet system)
create a ton of storage in knee wall
So far we’ve done the duct work and the closet, and the electrical work is starting this week!
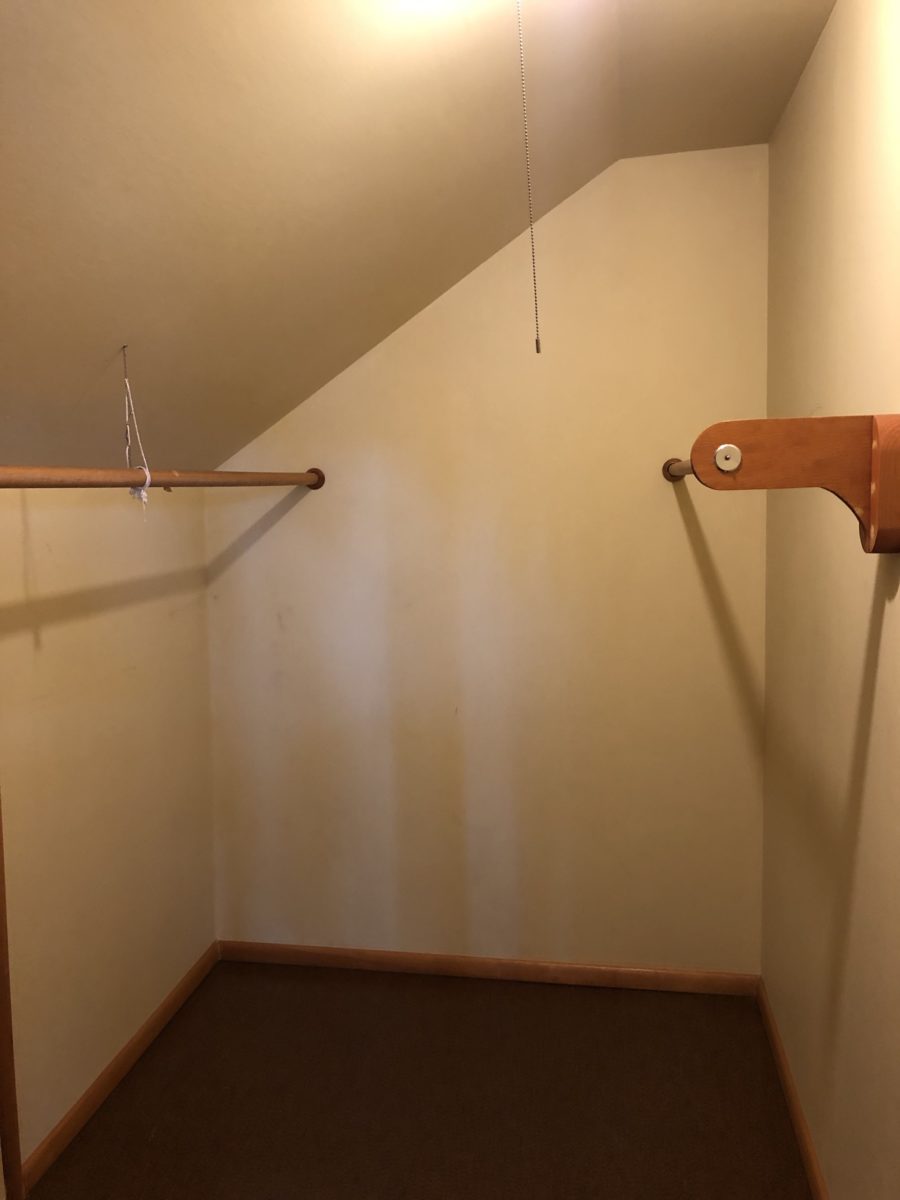
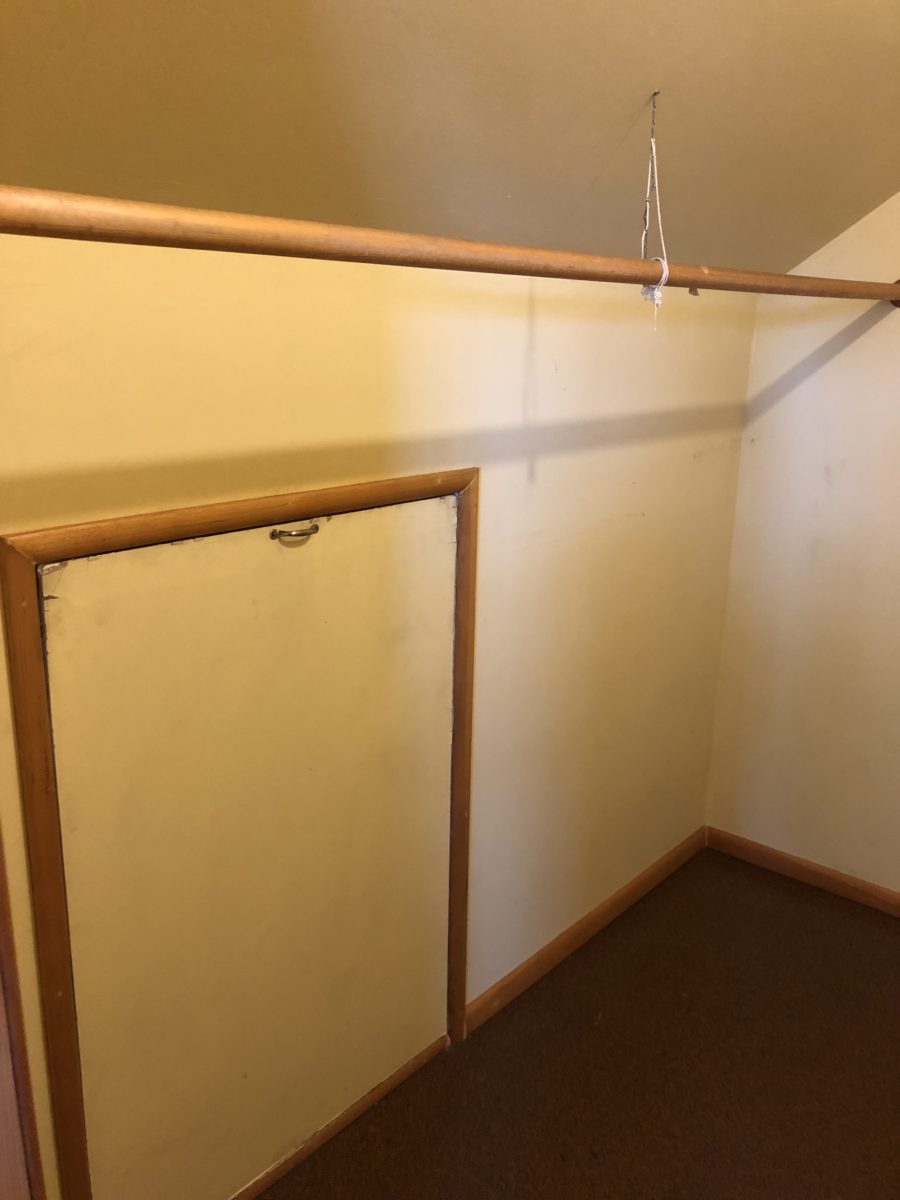
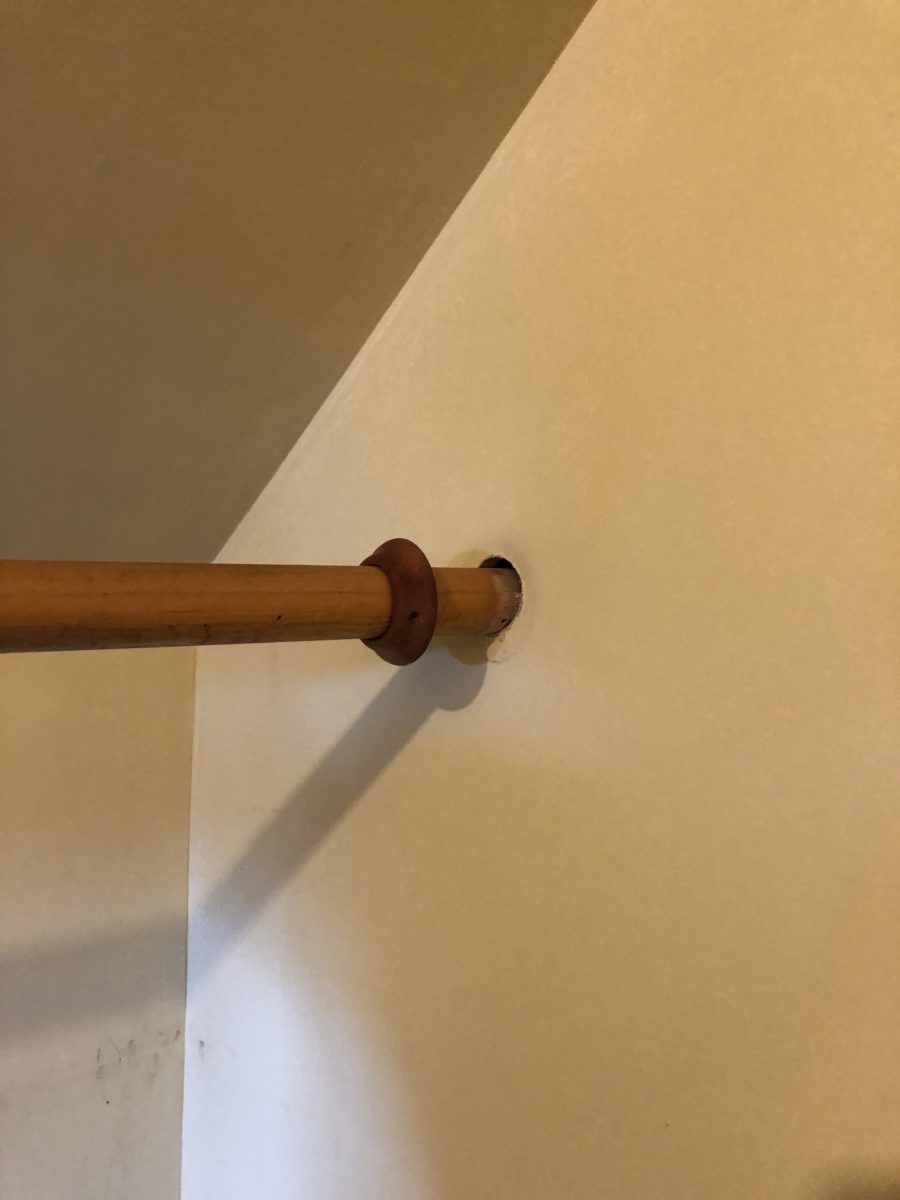
This is the closet before. It was painted a dingy yellow and had stupid clothing rails. The long one was supported in the middle with a piece of cord tied to a screw in the ceiling. Removing them was an irritating challenge. The support system (first pic, right side) had about an inch of wood filler covering all the screw heads meaning I had to dig all 6 of them out to remove the dumb thing. I also discovered that the rails were punched into the drywall for additional support. Drywall patches are amazing!
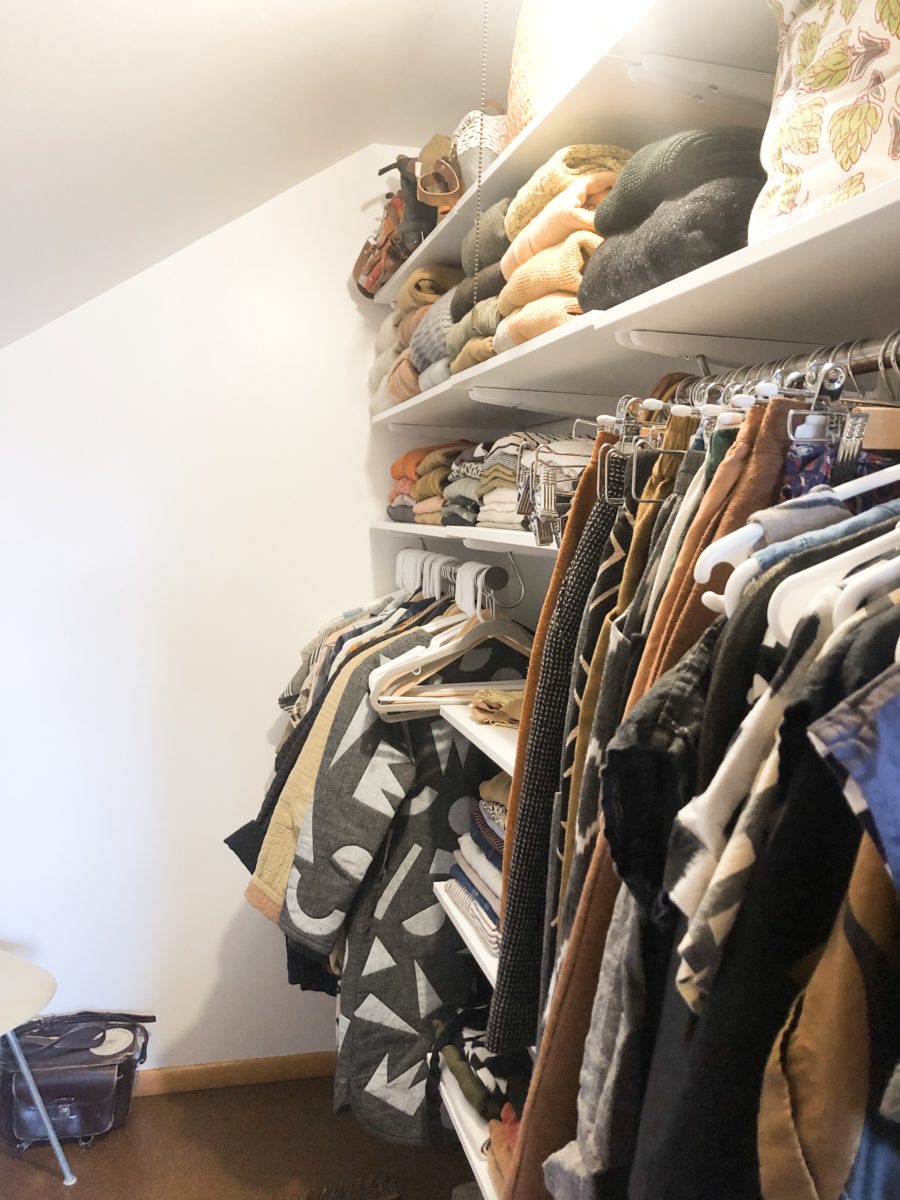
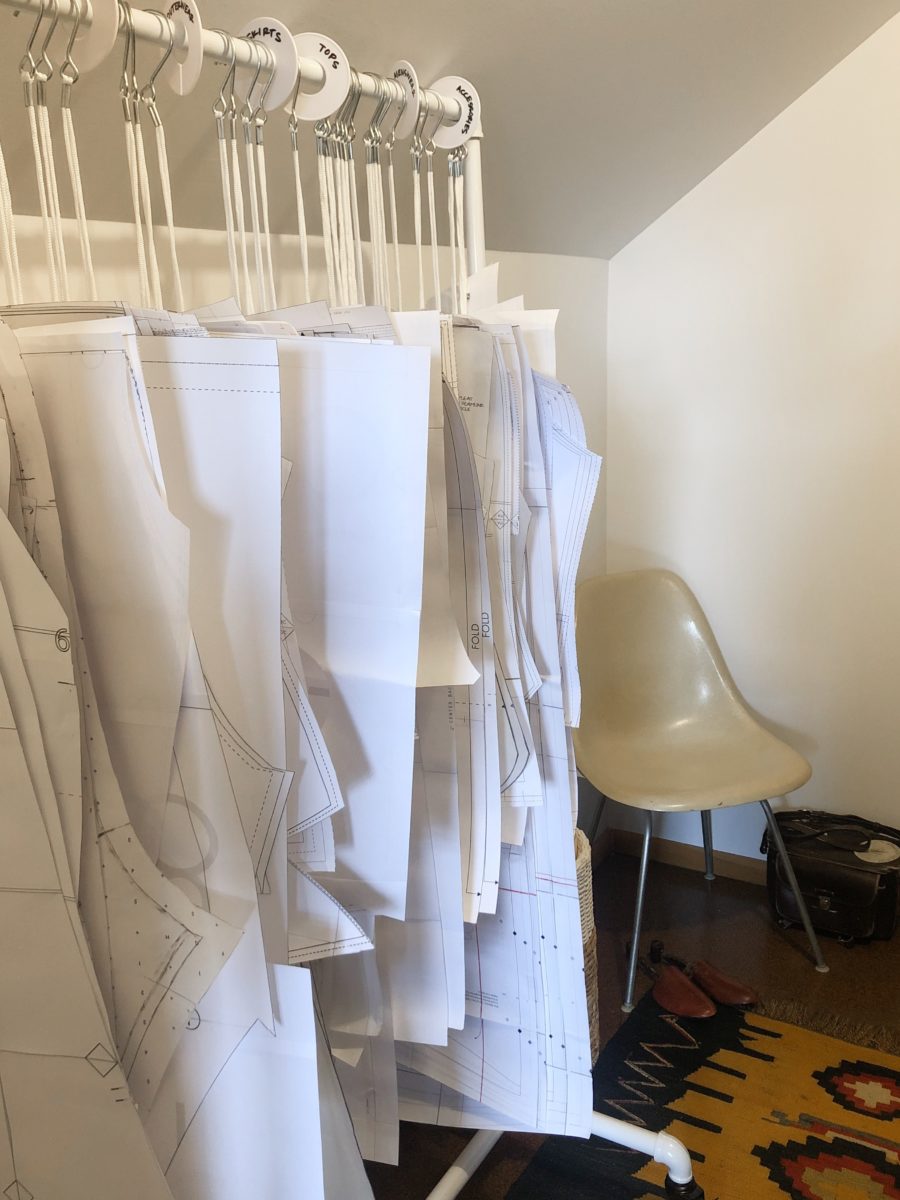
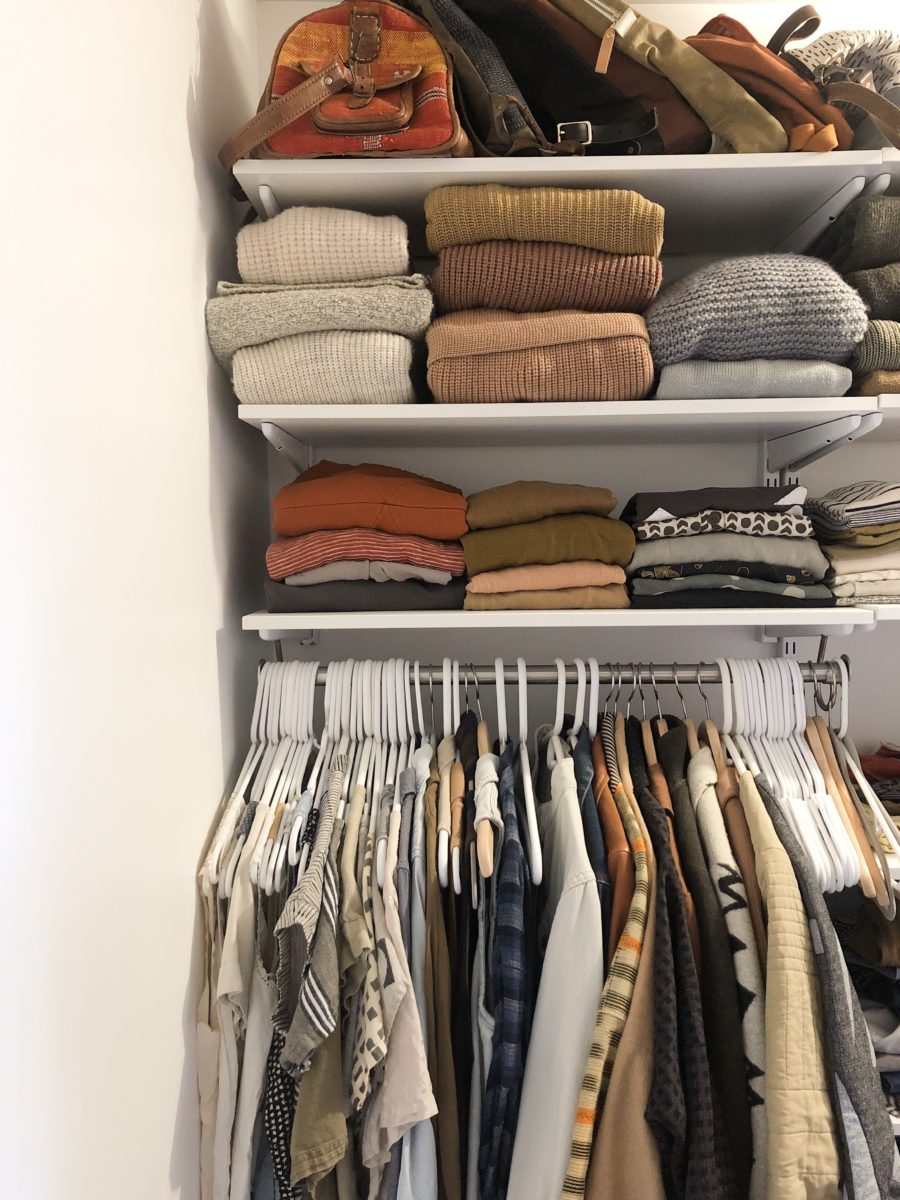
Ah, what a difference paint makes. Once I had the white box, I spent a small fortune on a closet system for my clothing and a garment rack to store all of my paper patterns.
I’m really pleased with the pattern rack. It was something I told myself I could have once we moved. Prior to this, all of the patterns hung on hooks and it was really hard to find what I needed. Now they’re organized by garment type and it makes me want to get back in to sewing IMMEDIATELY.
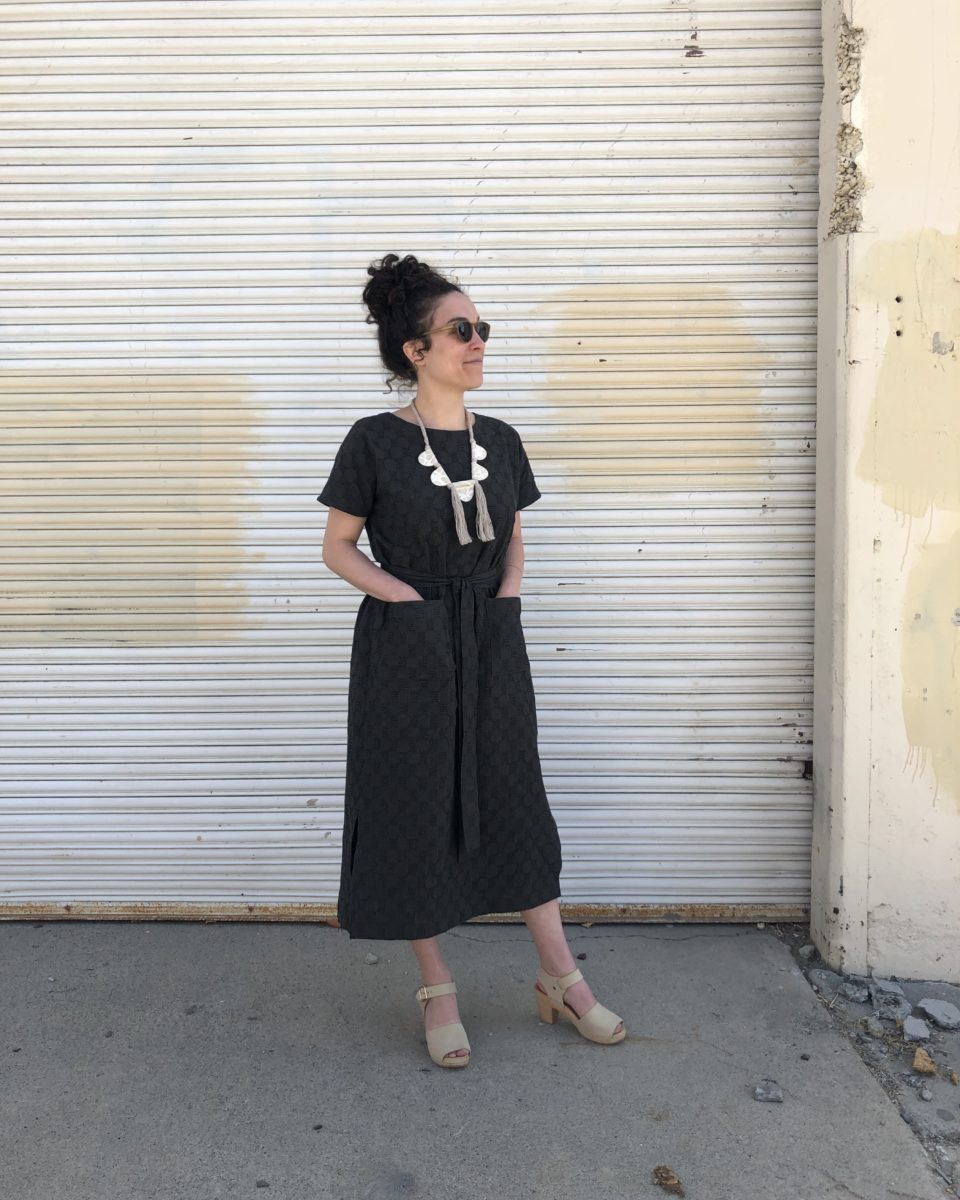
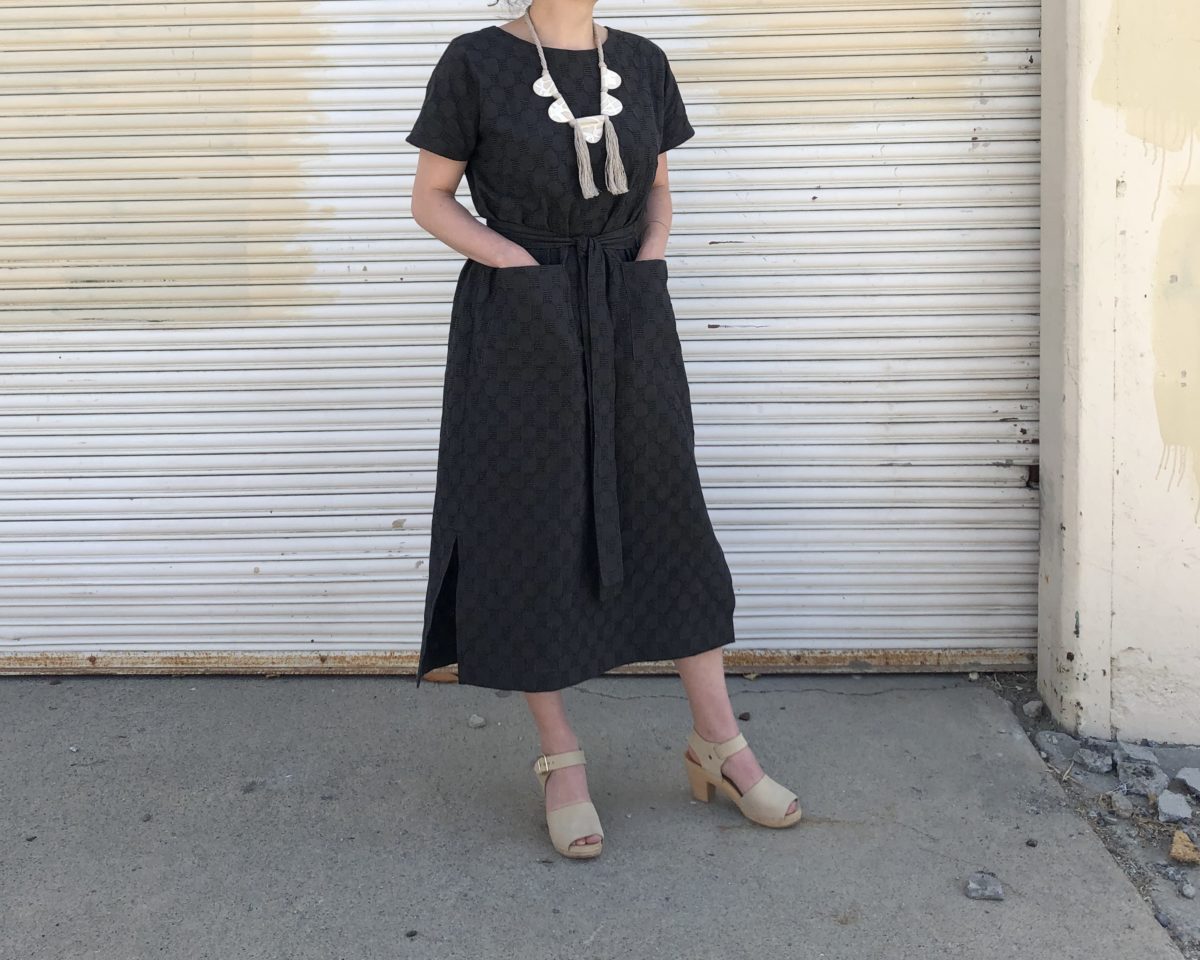
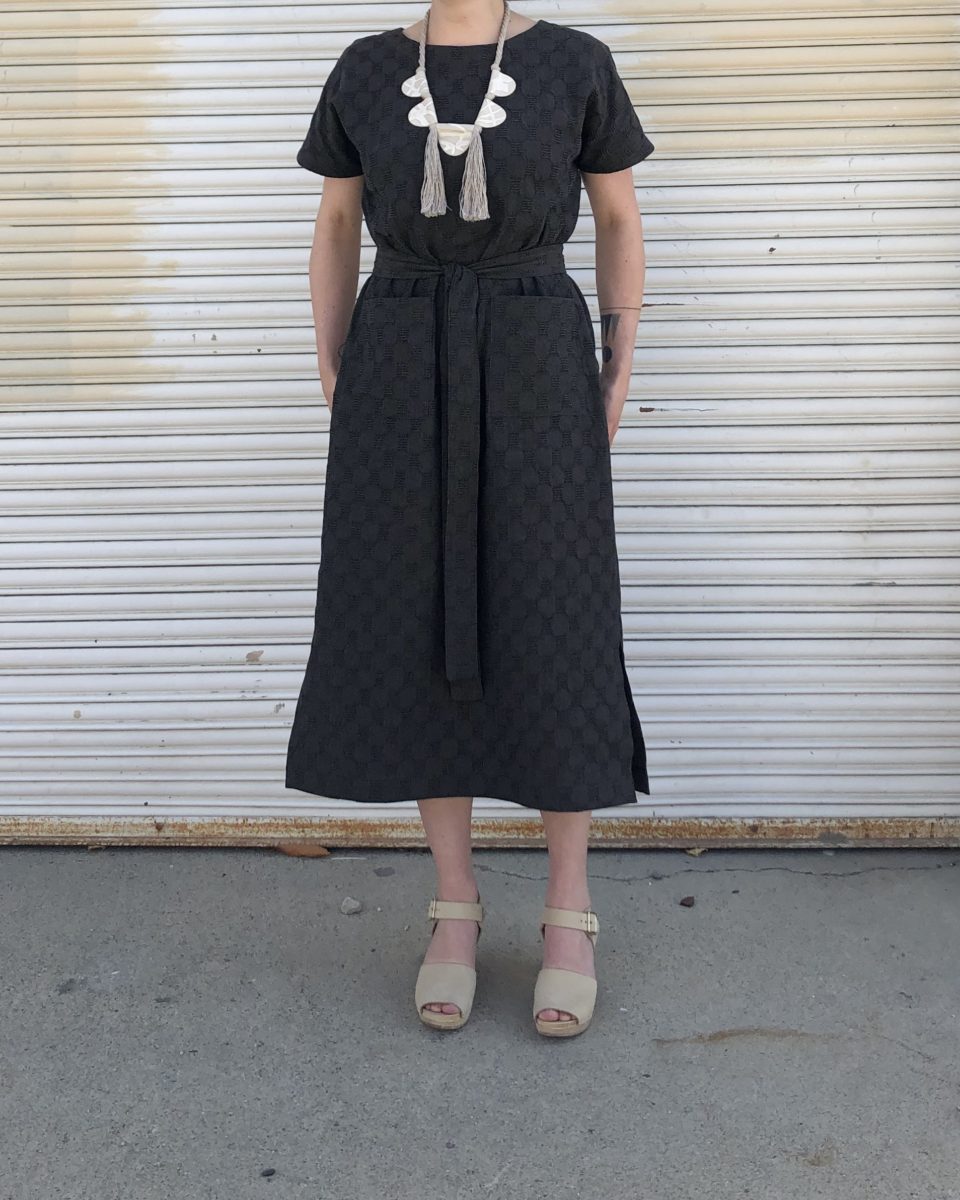
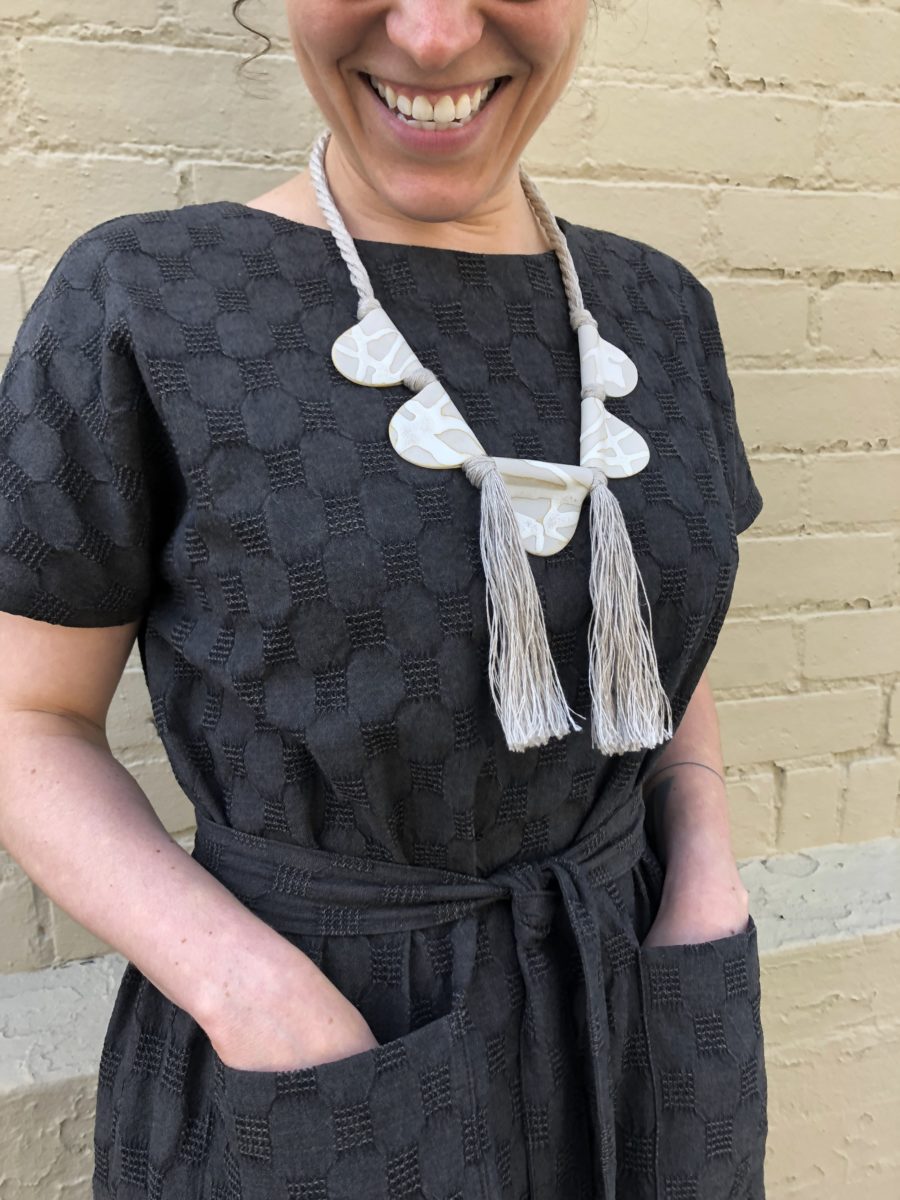
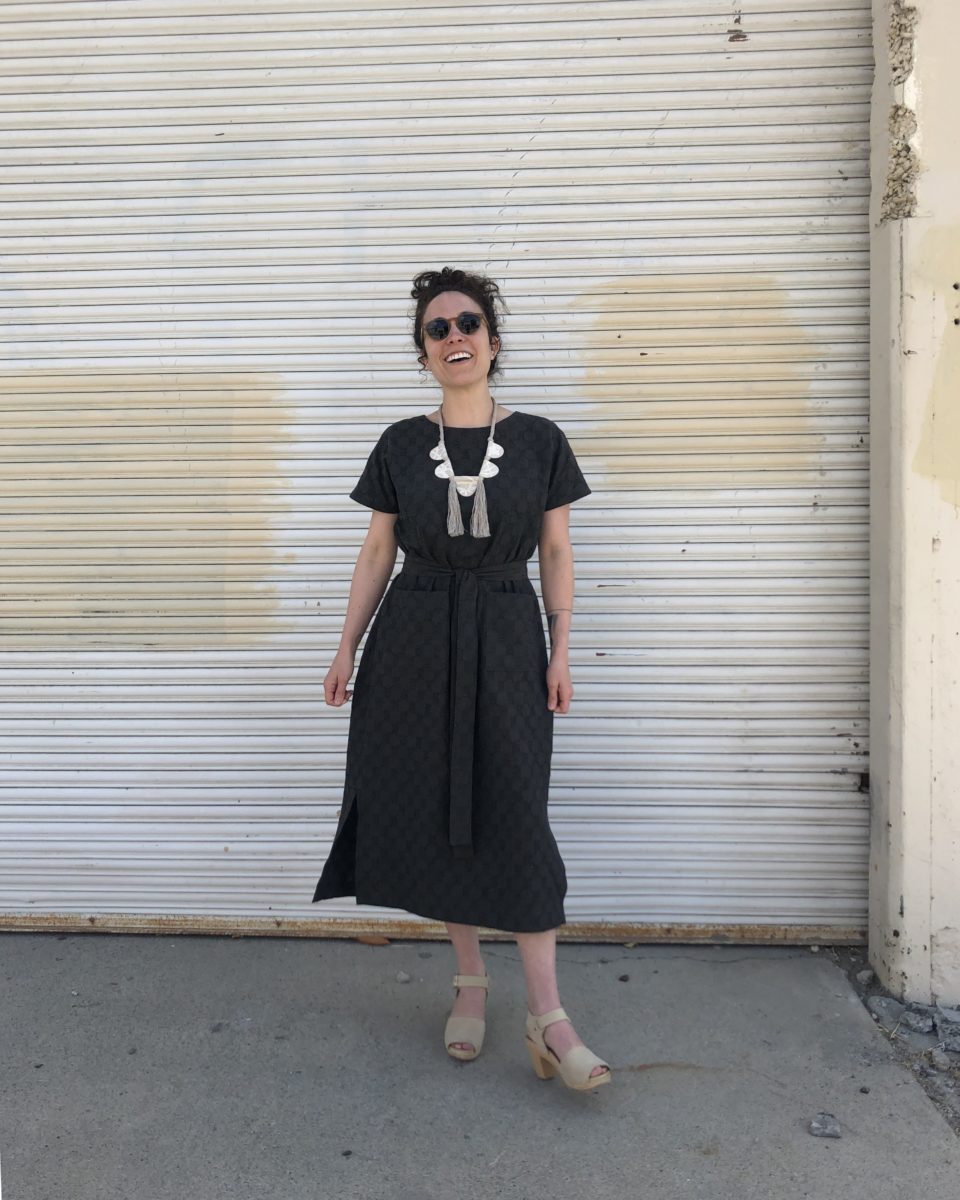
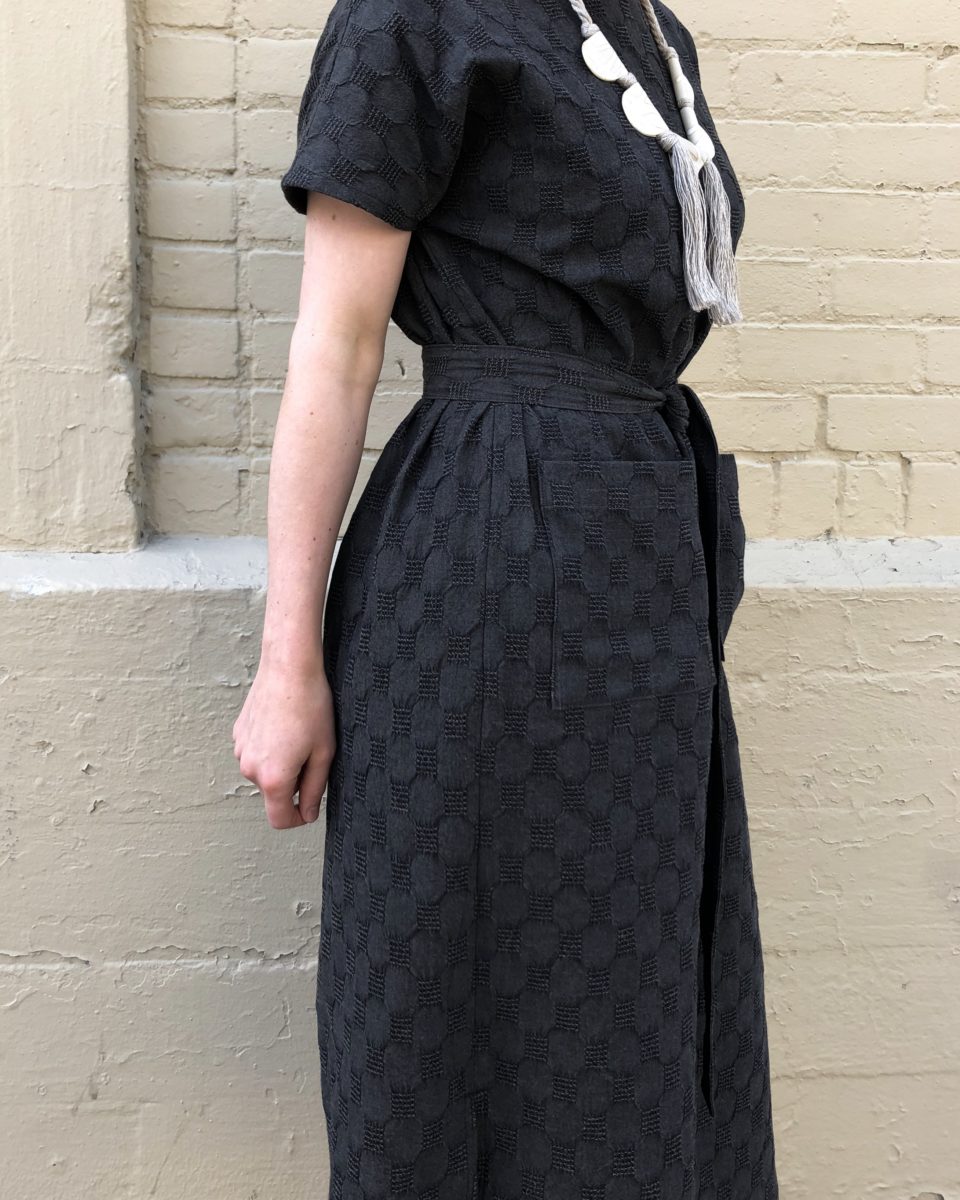
Jenny over at Wiksten kindly sent me this pattern shortly before it was released. After opening it up and drooling over the beautiful photos in the instruction booklet, I became super irritated that life wouldn’t allow me to dive right in to making one.
But the school year finally ended, packing up the house for our impending move was in a sort of good place, and I had just picked up this amazing fabric on my last trip to Stonemountain… it had to happen.
So I made a deal with myself that once this idea was out of my head and on my body, I’d pack up my sewing space.
After all, my last summer break as a teacher should include at least one day of uninterrupted sewing, right?!
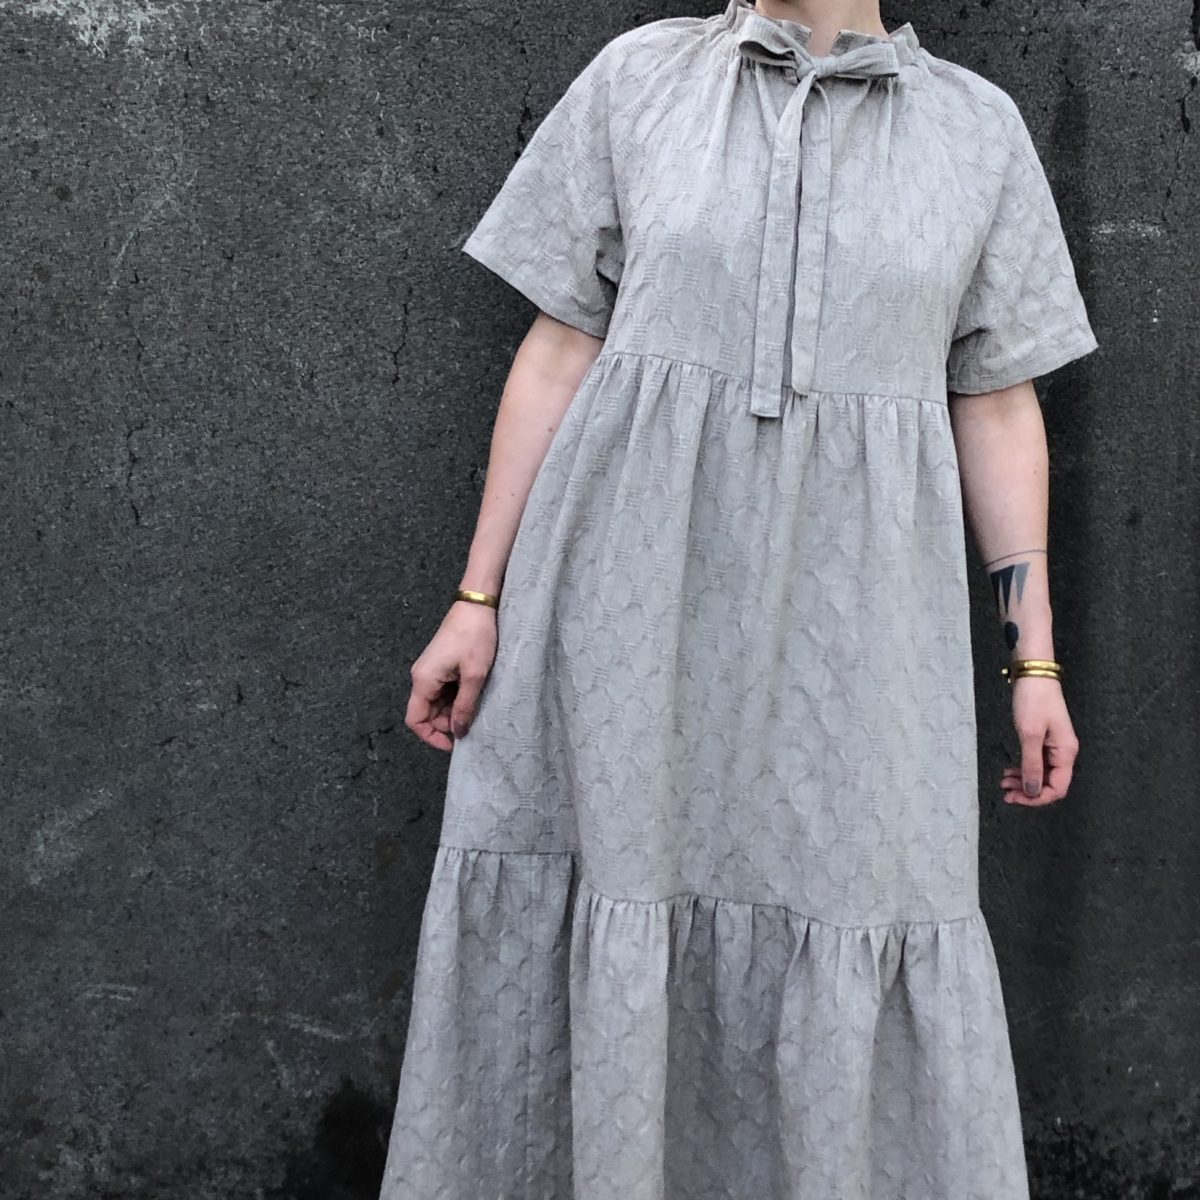
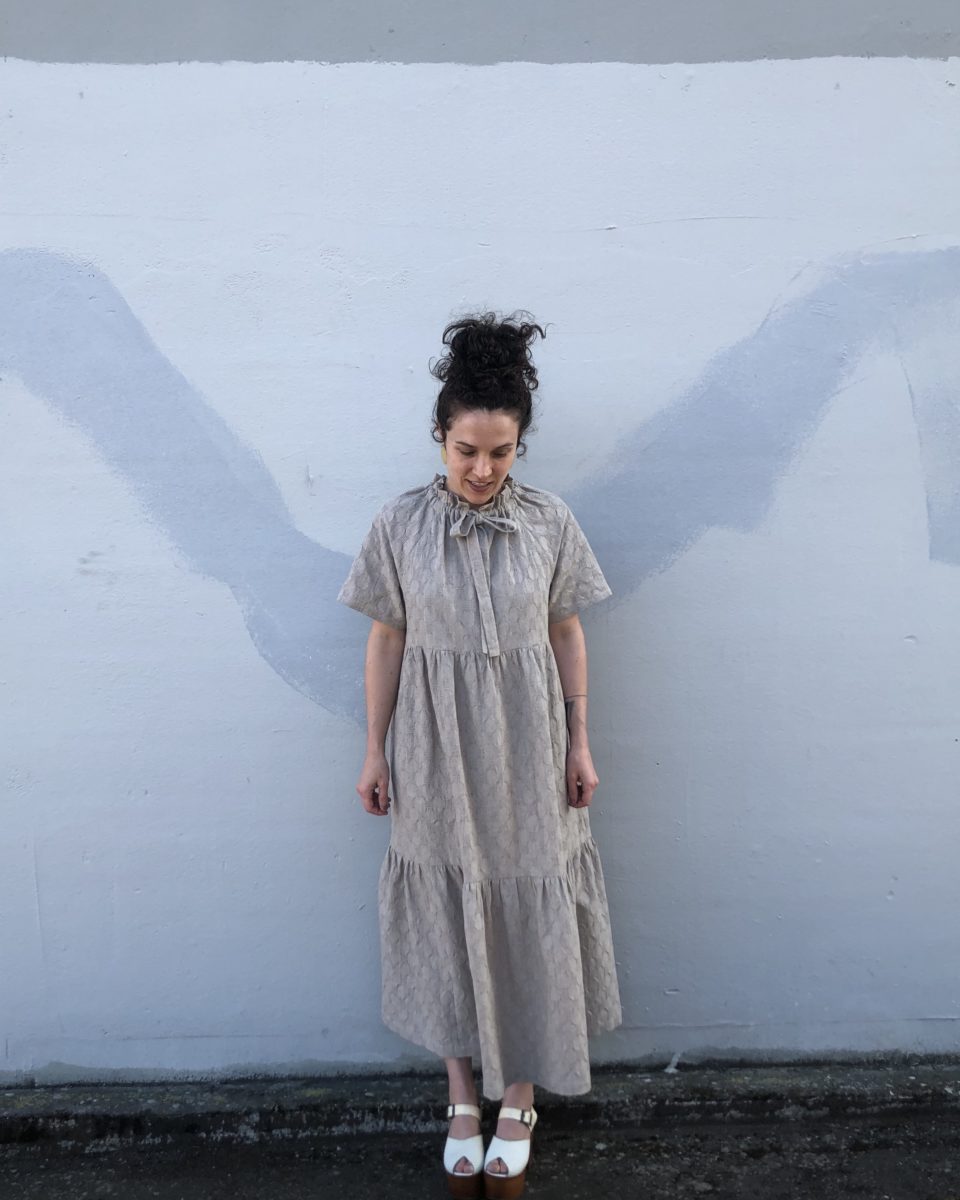
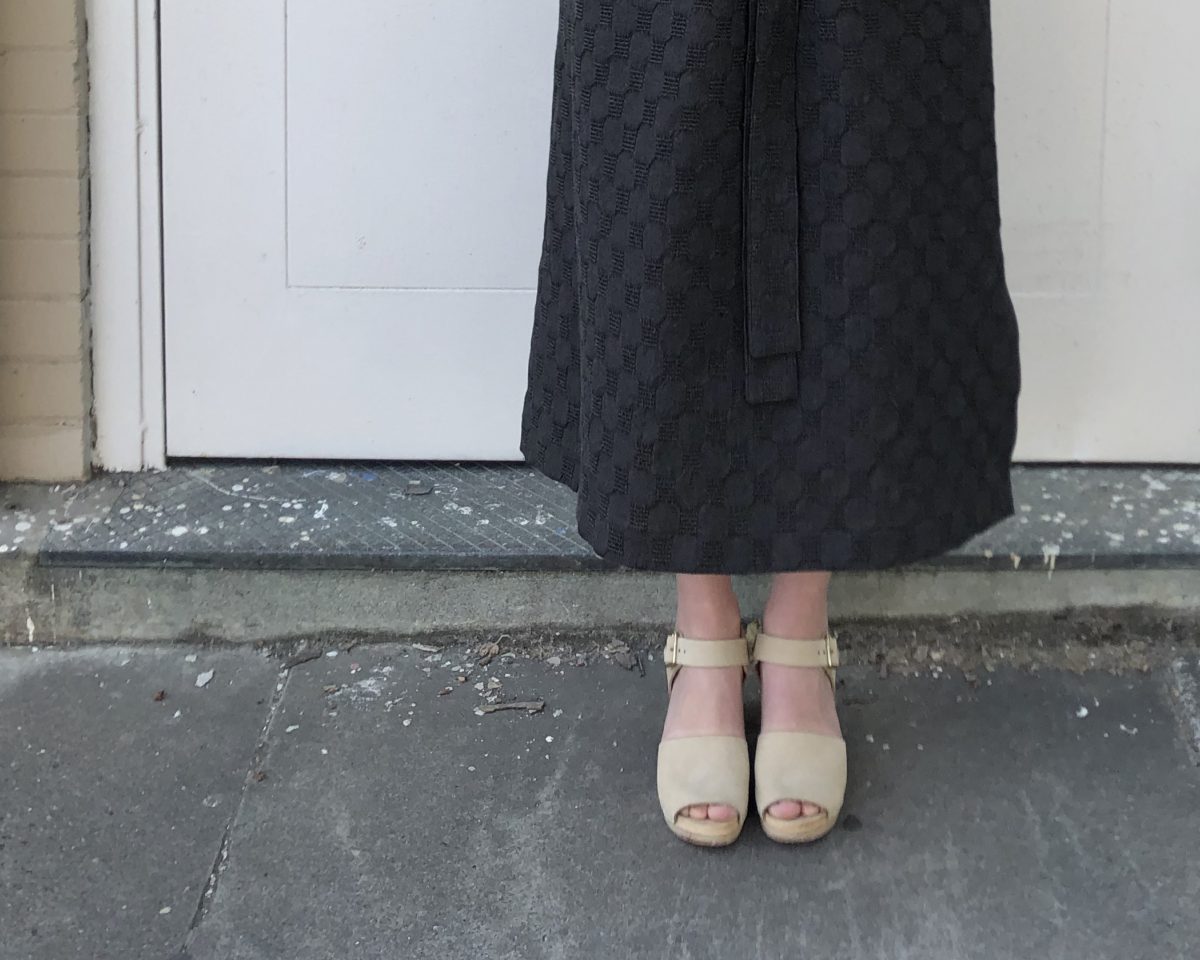
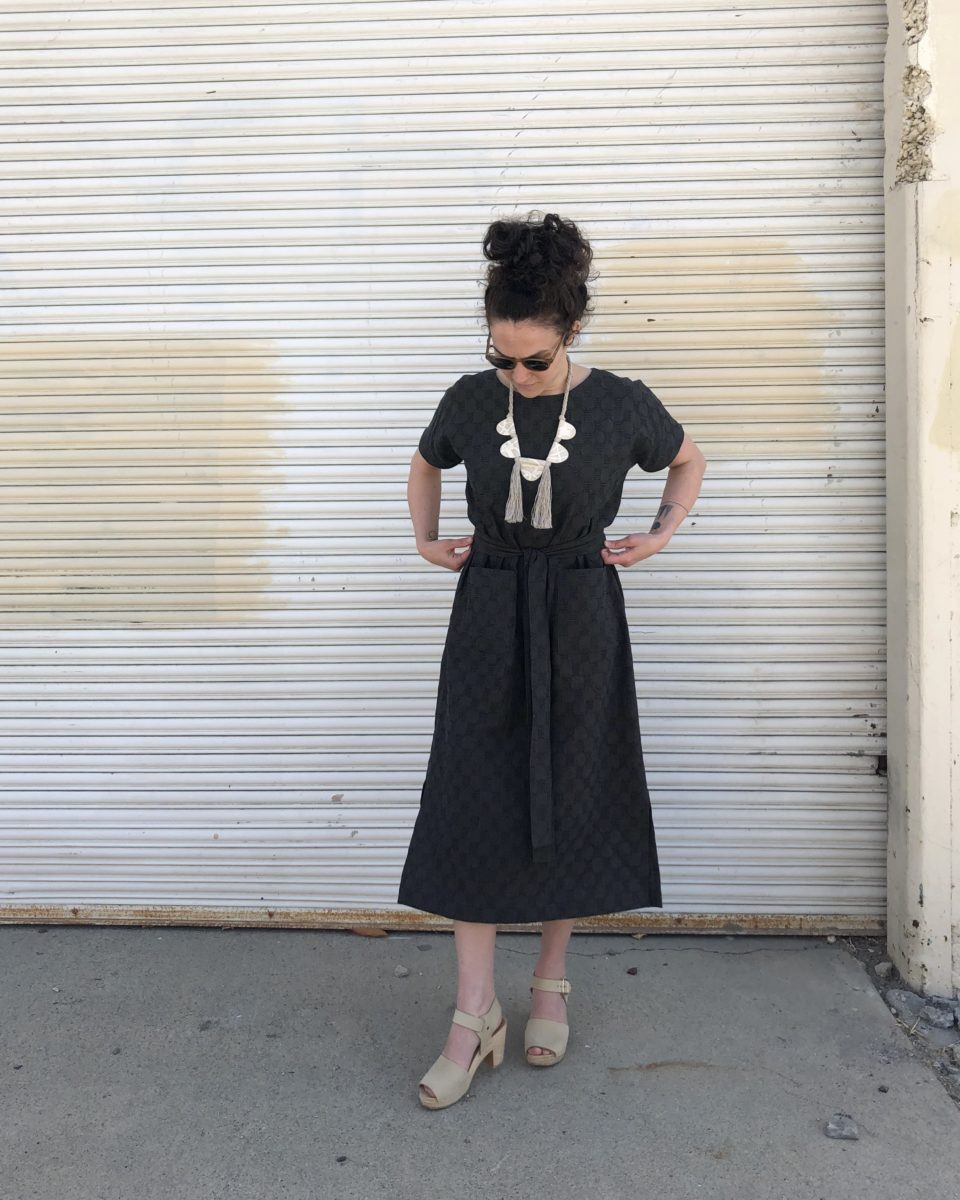
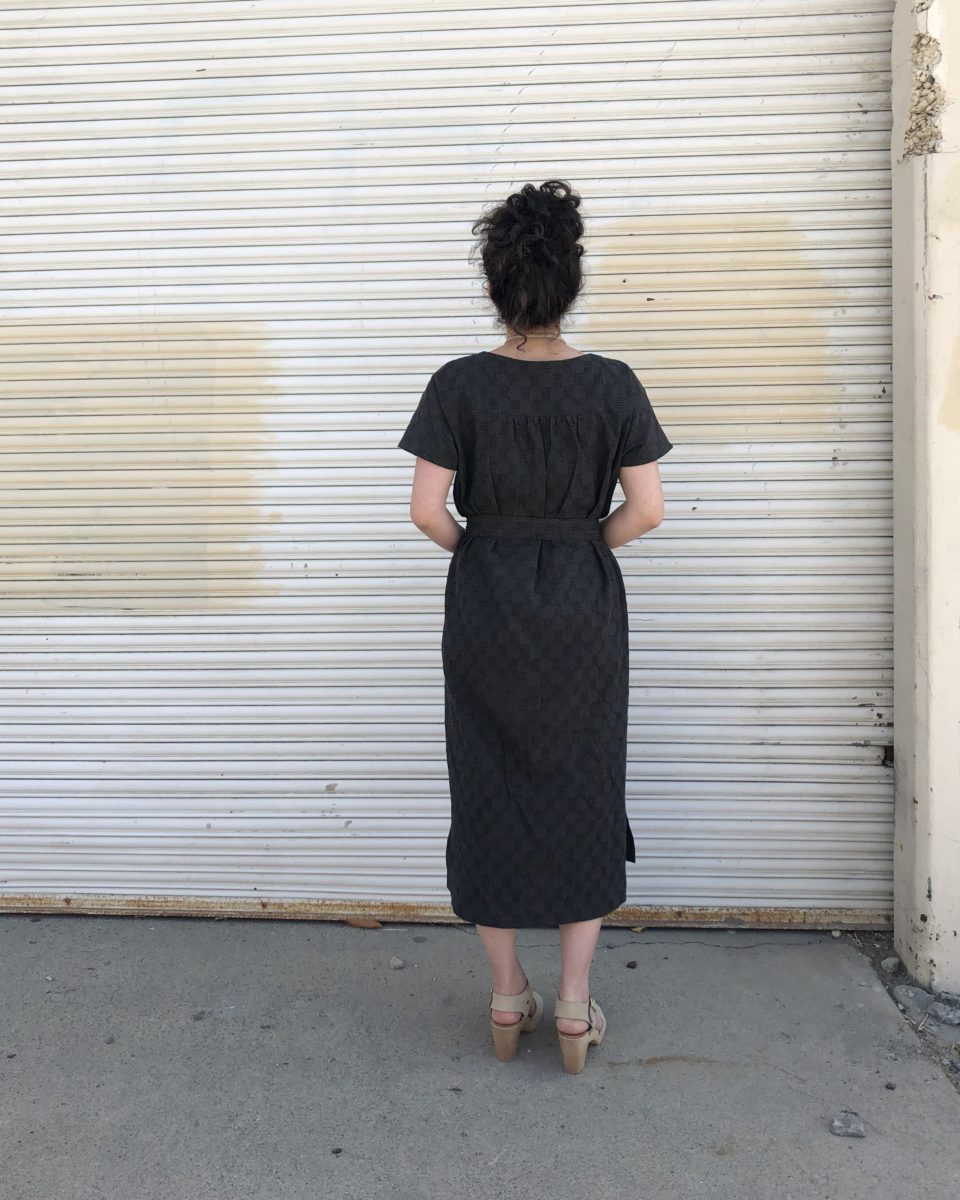
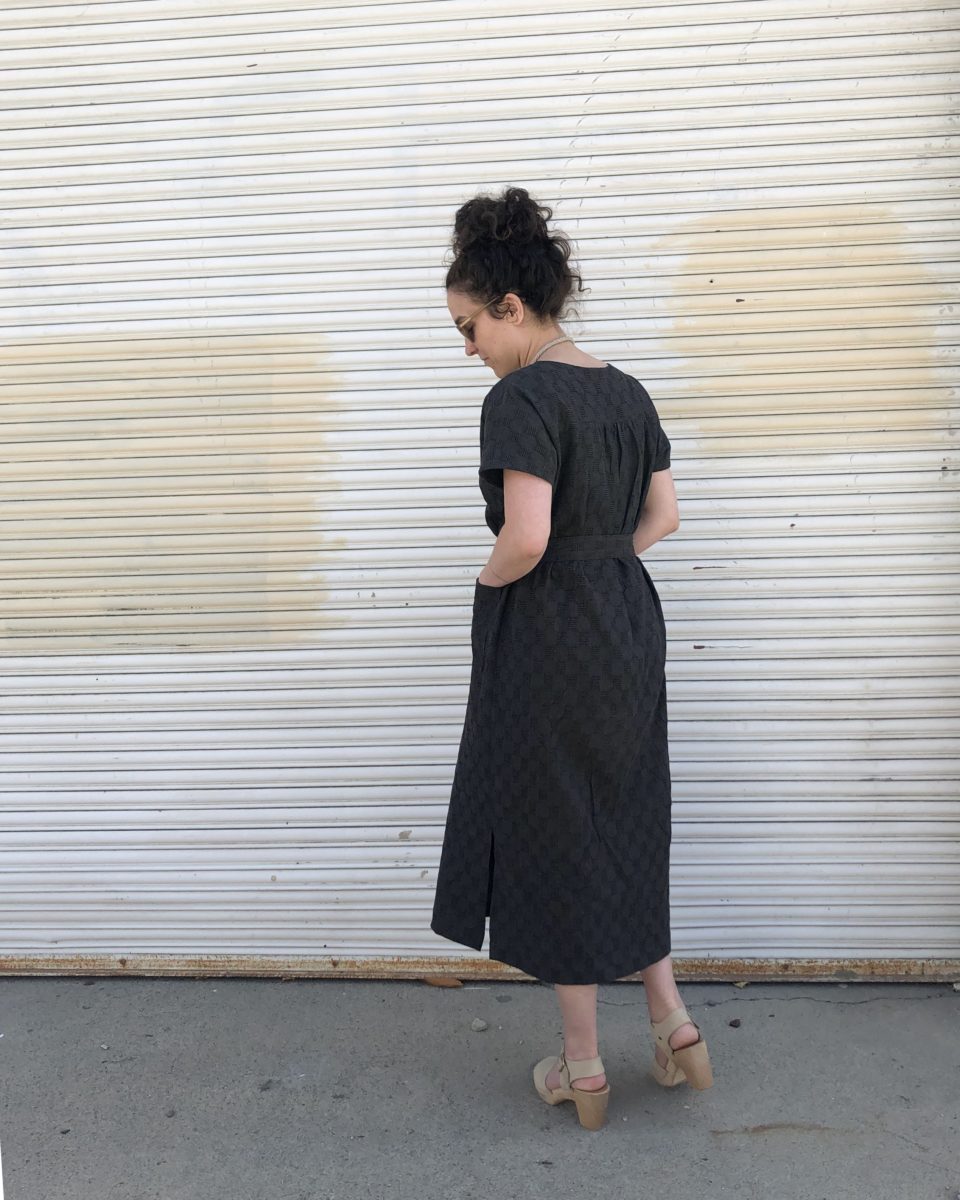
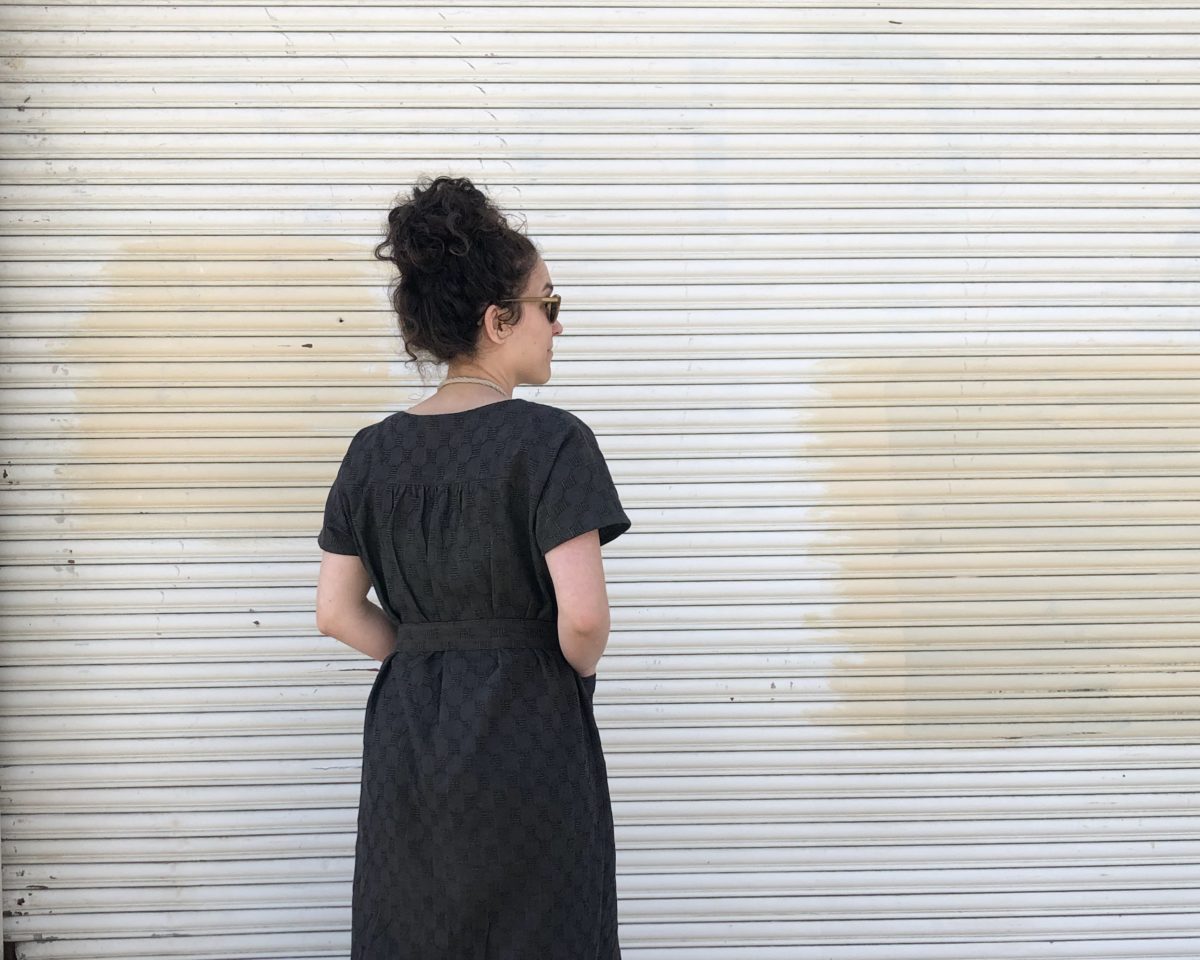
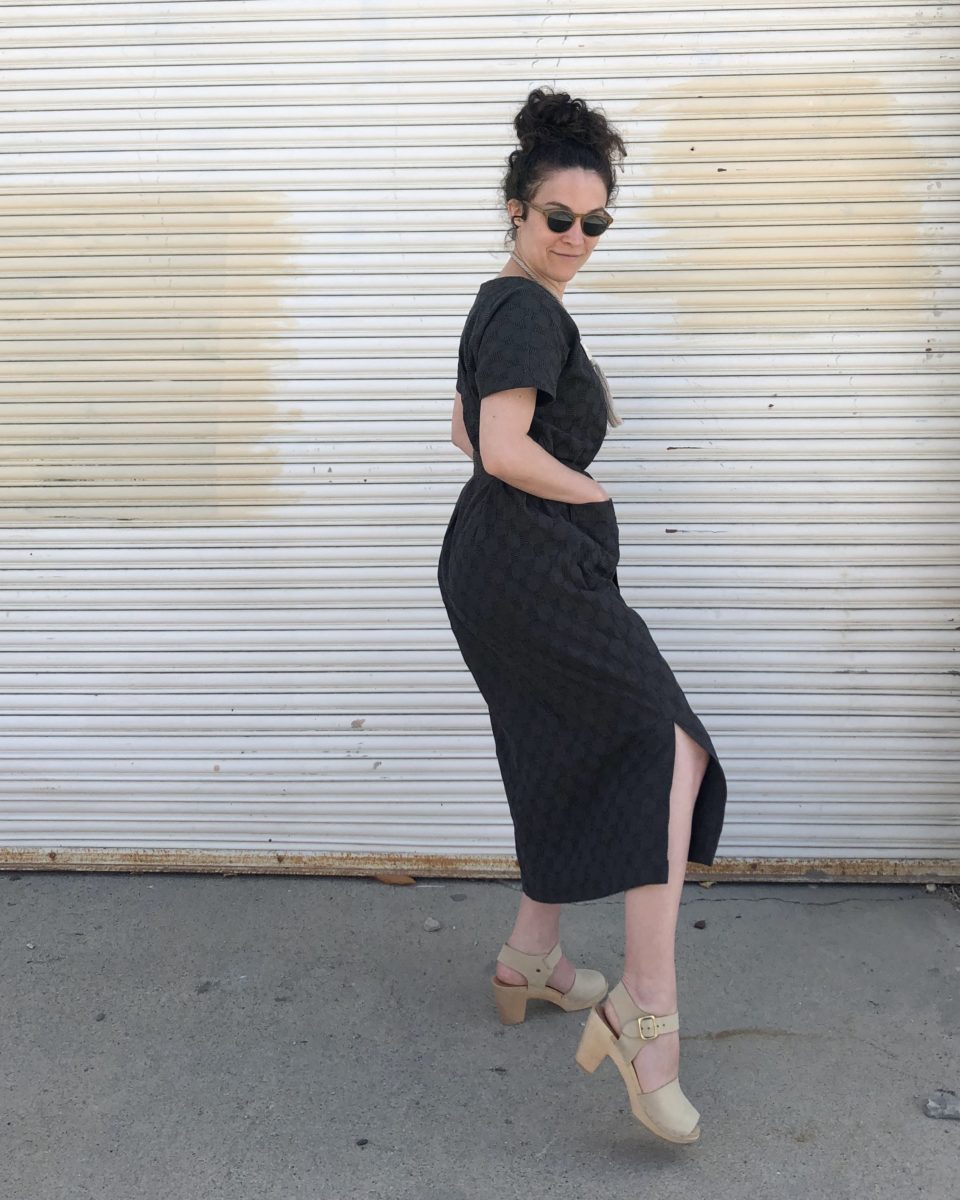
This texture is just so good! The fabric is probably a little more structured than the pattern calls for, but I don’t care.
I contemplated shortening the length while tracing off the pattern, but decided not to. I’m happy with its length even though I’m sure it was drafted for someone taller than 5’2″.
Pattern matching is not my strong suit, so I am wicked proud of the side seams and patch pockets.
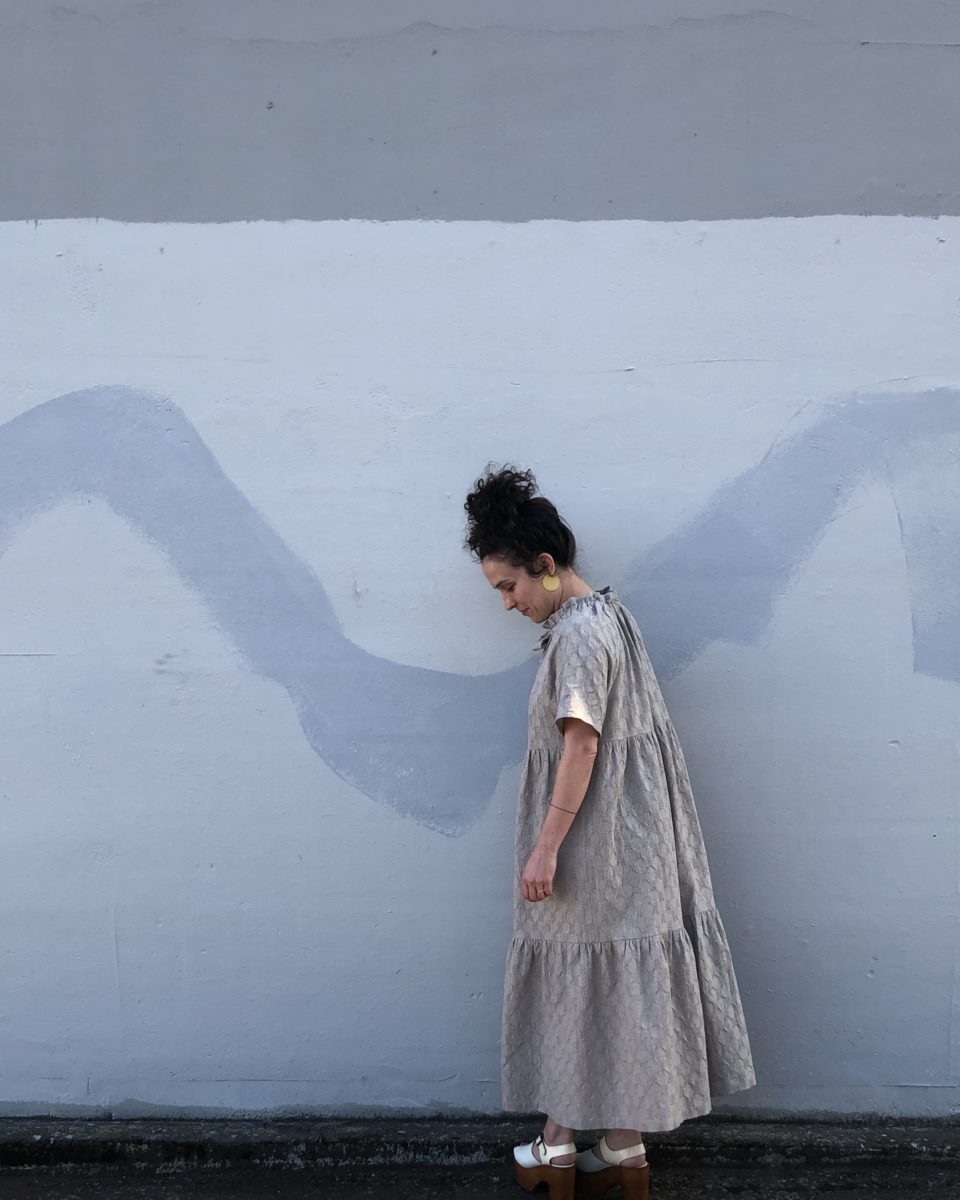
I had hoped to have this dress finished for a family wedding in May, but that didn’t happen, so I wore it out to a super casual breakfast yesterday morning.
Layered over some tights and worn with a sweater, this textile works year-round. I love it when a garment turns out to be seasonless.
Yep, pretty sure once we’ve moved and my new, huge studio space is set up , I’ll be making the Shift Top too.
This past week I finished my final year of teaching. In two weeks we’ll move from the Bay Area to Portland. Having some good, big life changes over here.
After five months, she’s back. I wrote a decent amount about her and the mess that followed in another blog post, so this post is just about the pictures.
Back in September of 2018, I was asked to contribute to a Sew News article about Grainline Tamarack hacks that would be in the Fall 2019 issue. I agreed, signed a contract for a small payment, and started planning. Sew News wasn’t providing fabric, or compensation for material costs. The jacket and article were due January 10, 2019 and I had to pay for its shipping to Sew News for the photo shoot. Months passed and I didn’t receive my payment. I inquired multiple times, but it was chocked up to a slow system. Then I received a Chapter 11 Notice in the mail. I reached out to the point person again and learned that I would need to submit a claim to the courts in order to receive payment.
Needless to say, I’m miffed. However, I am pleased to report that after asking for my jacket to be returned and for my writing to be removed from the issue, it happened. It’s not a good feeling to leave the magazine in a lurch, but it’s also unfair for them to publish it when I haven’t received the agreed upon compensation. The whole thing makes me feel very wary of working with “larger” companies in the future. As far as I know, they’re still asking for contributors for future issues. I don’t know if the magazine has been bought/has a stable financial future, or if they’re able to pay for contract work moving forward.
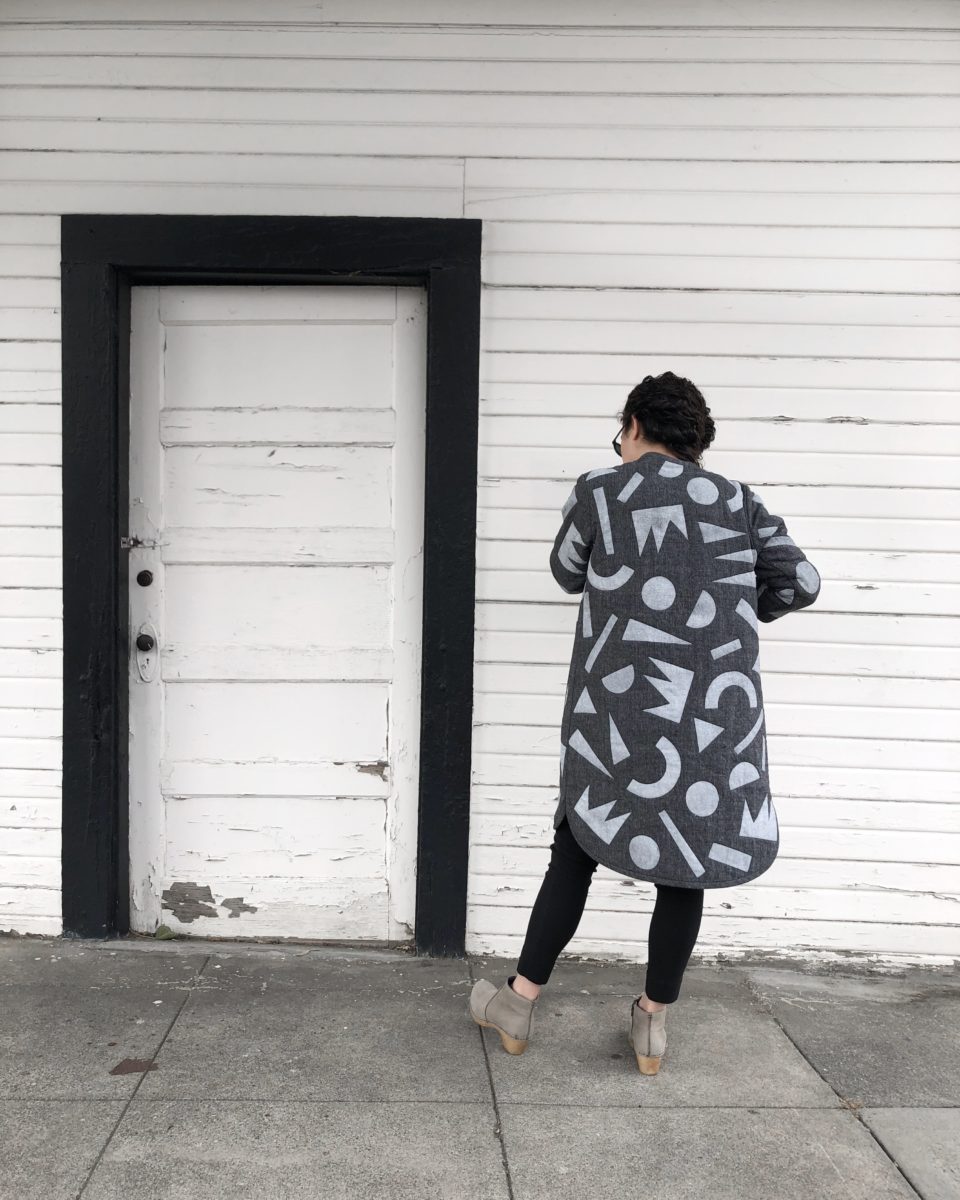
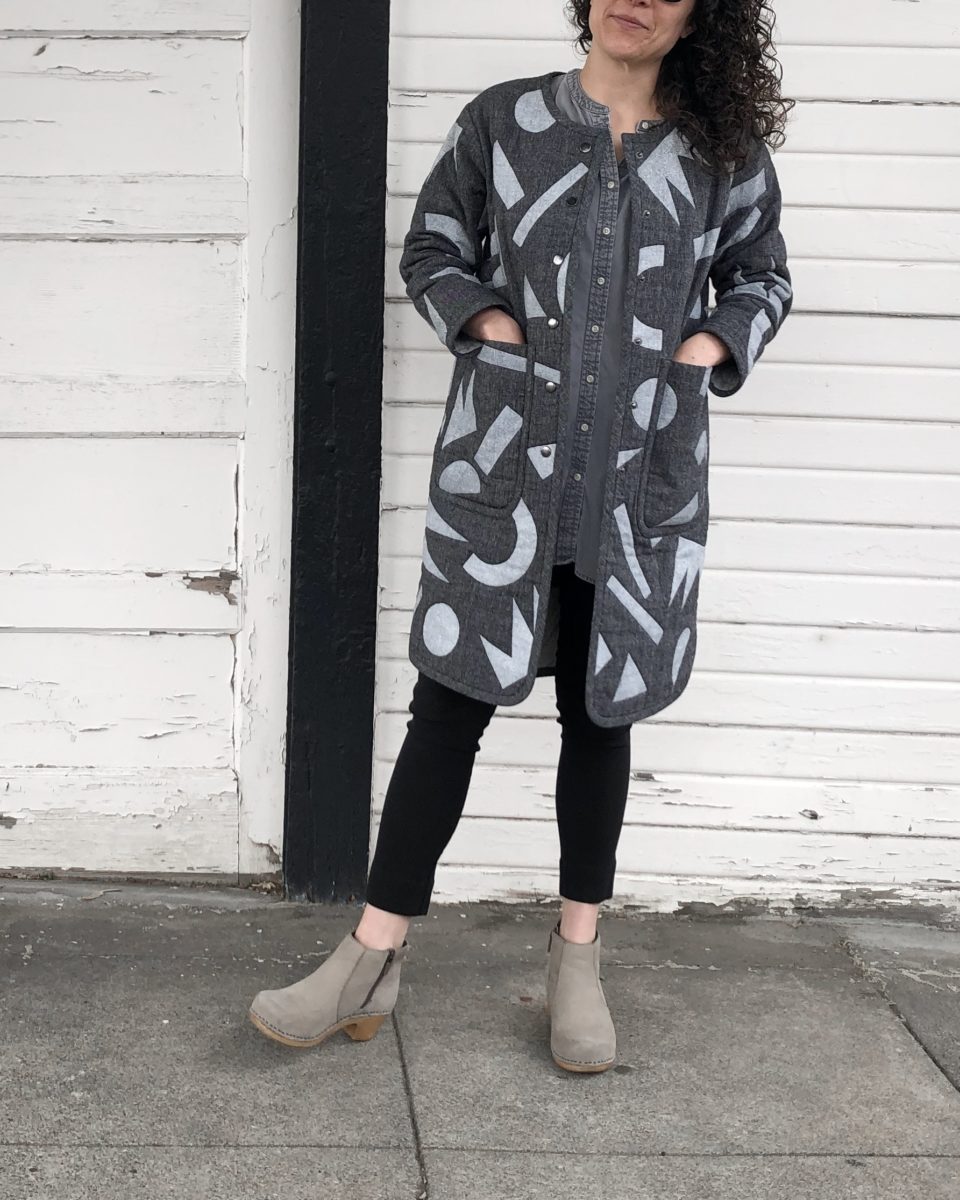
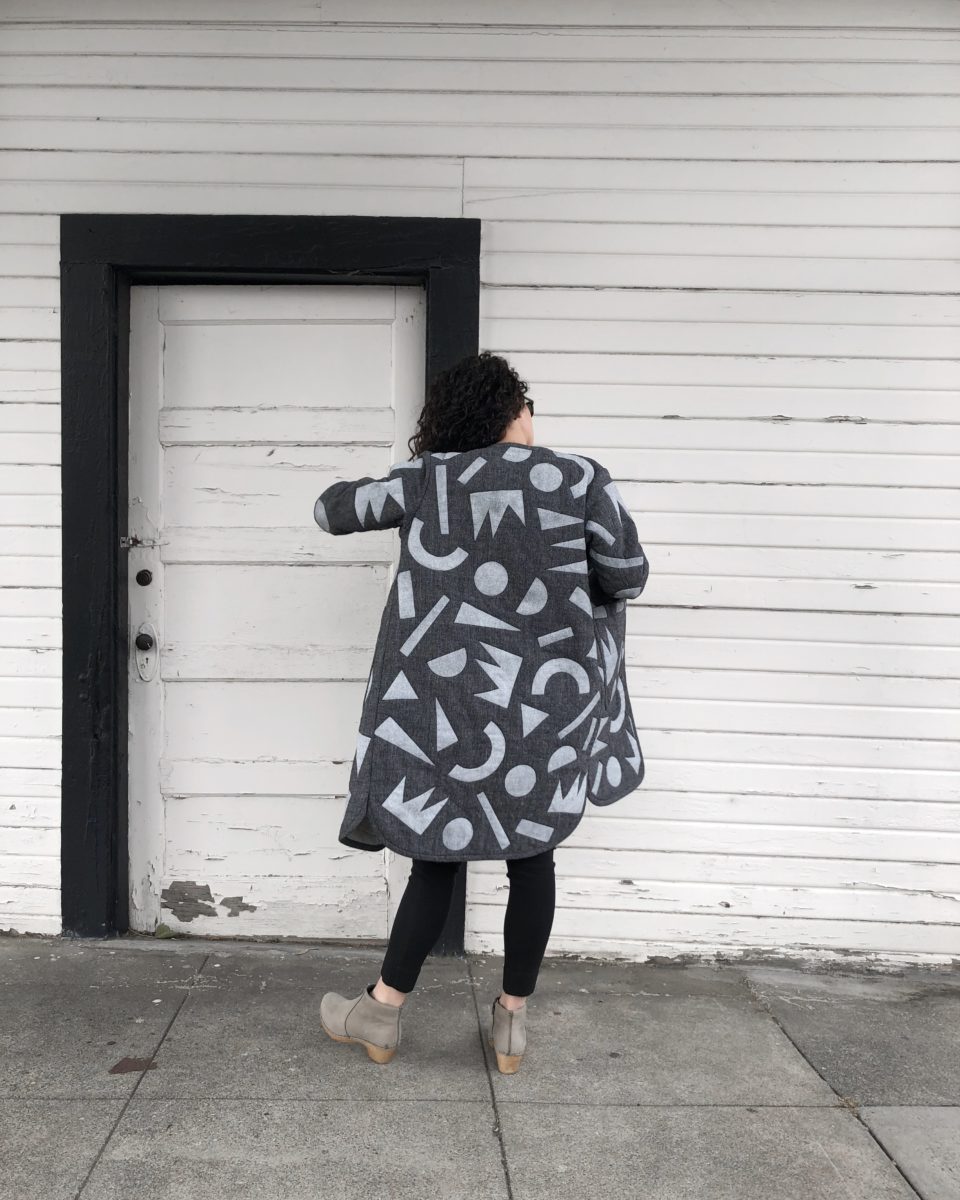
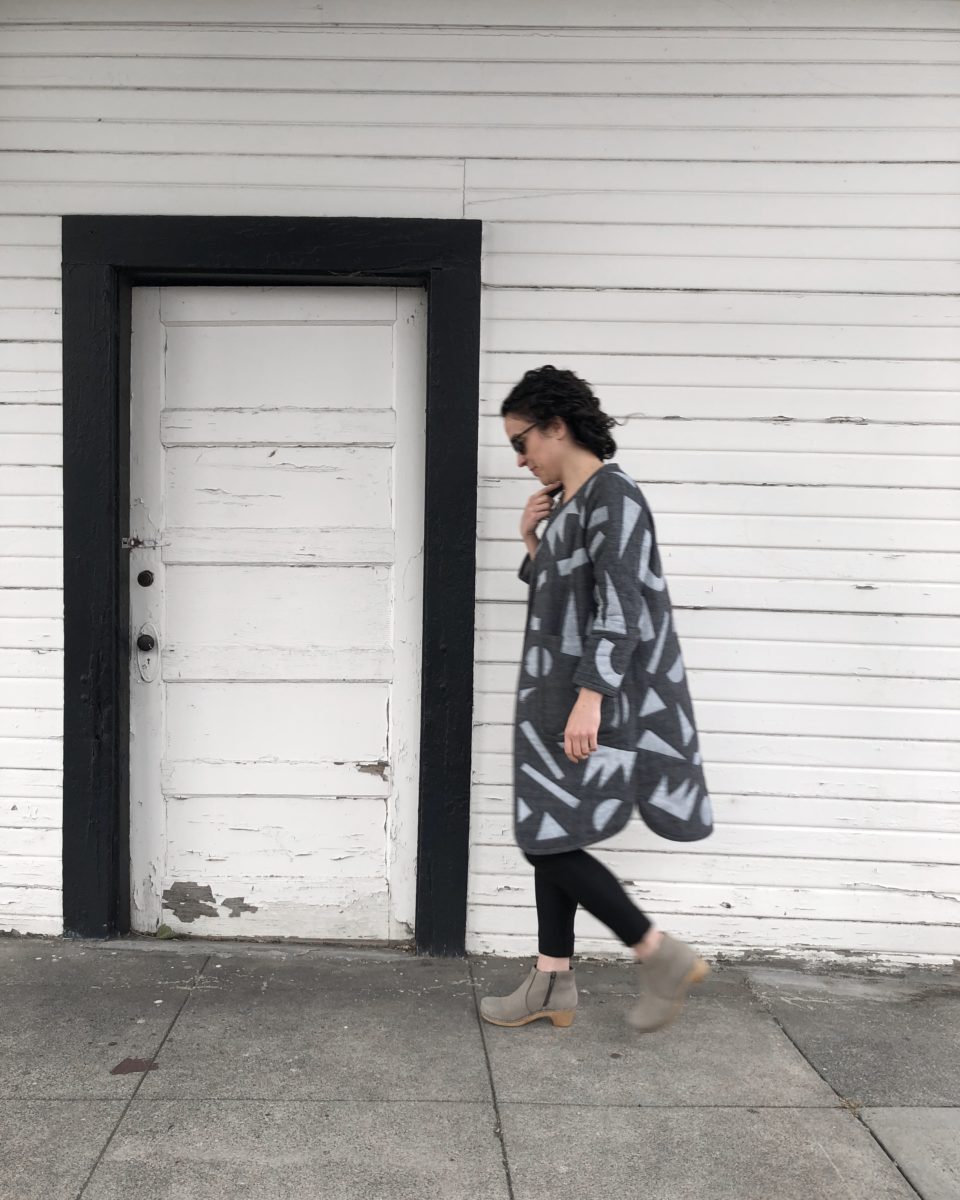
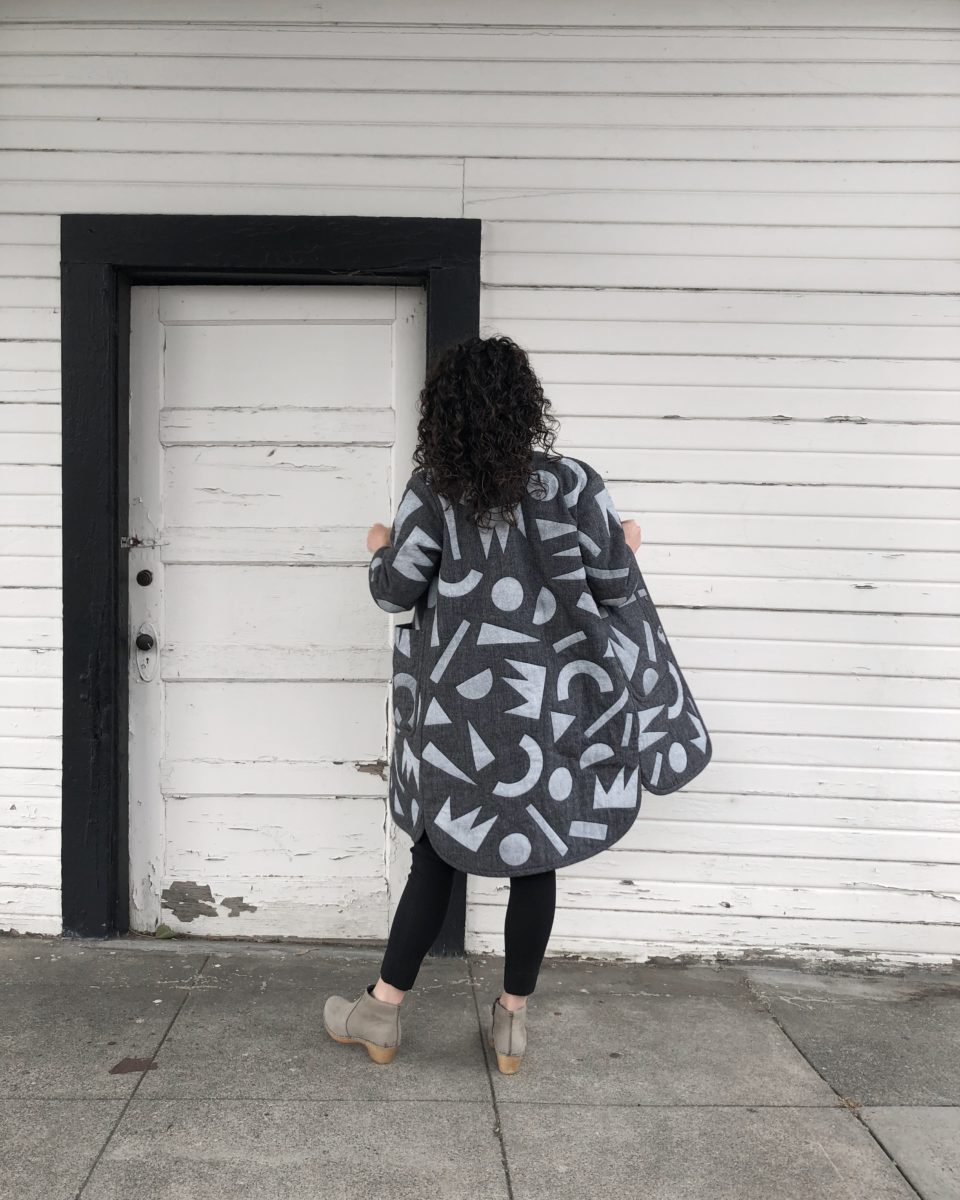
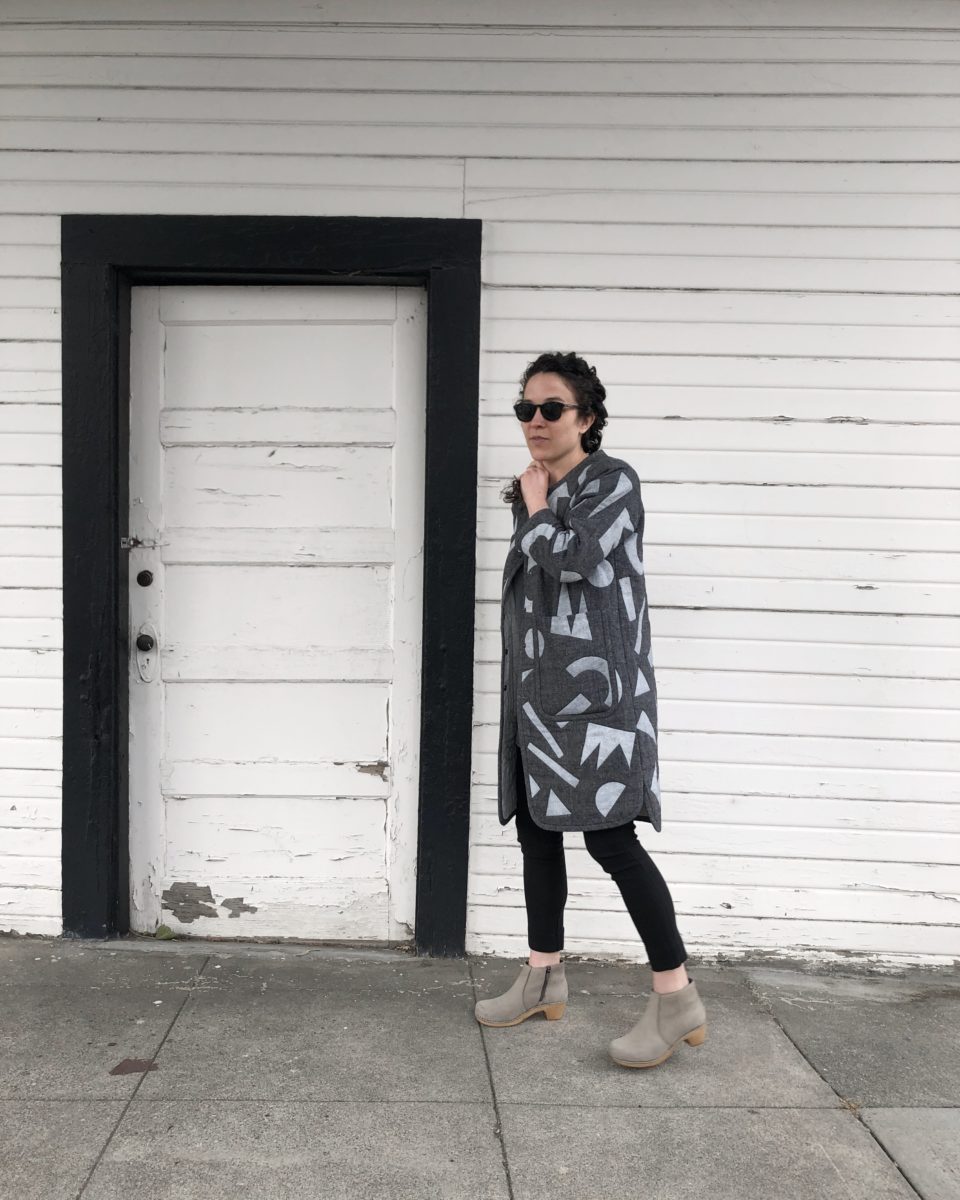
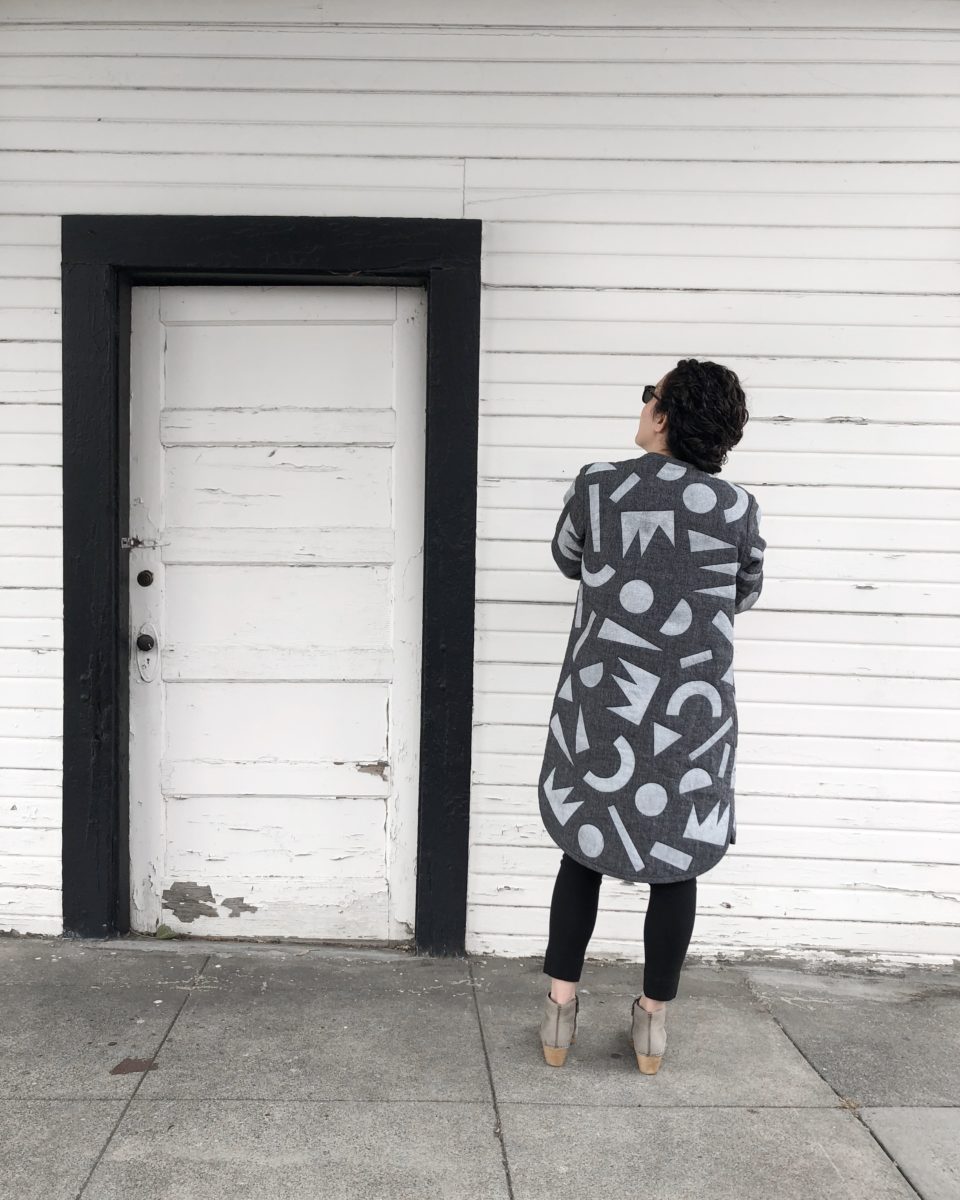
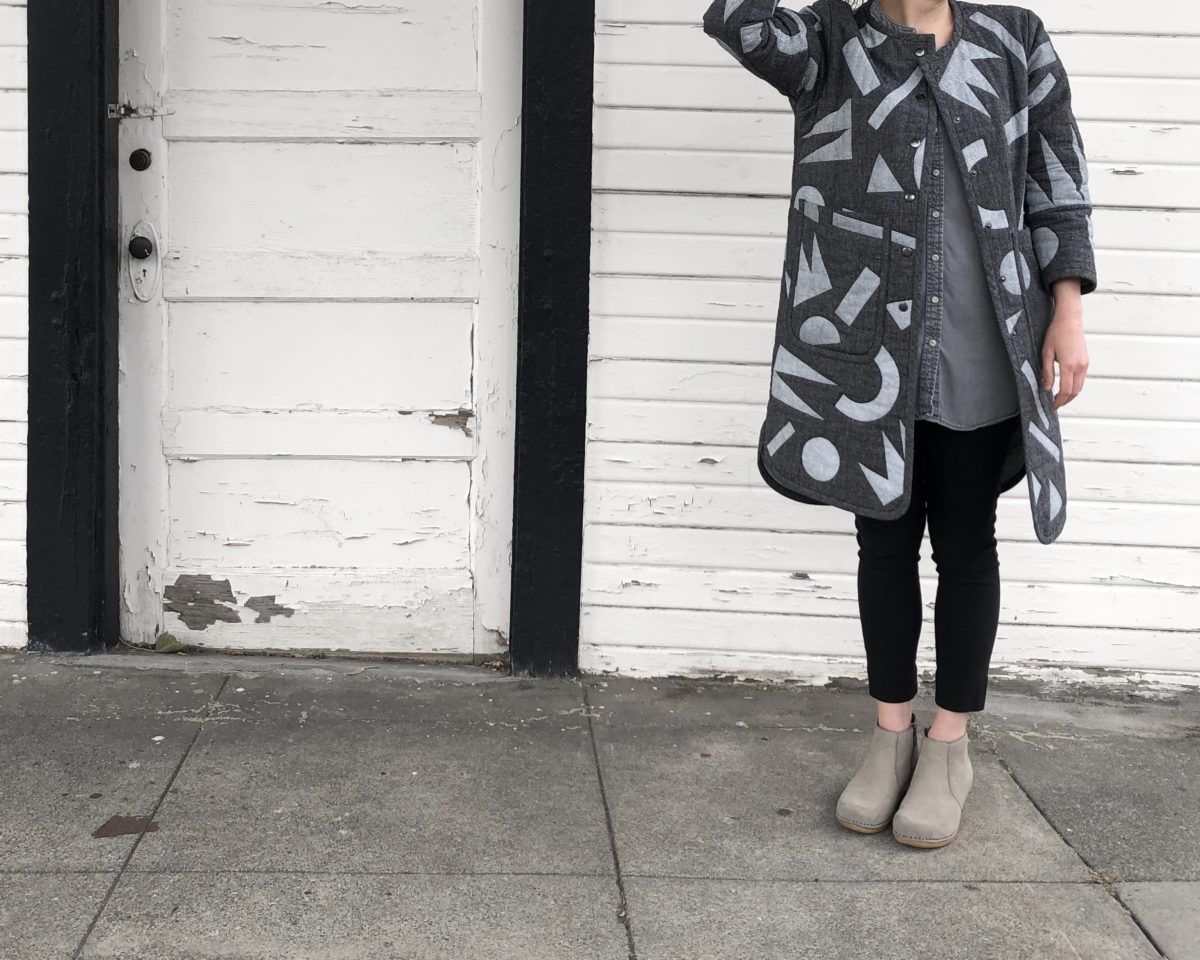
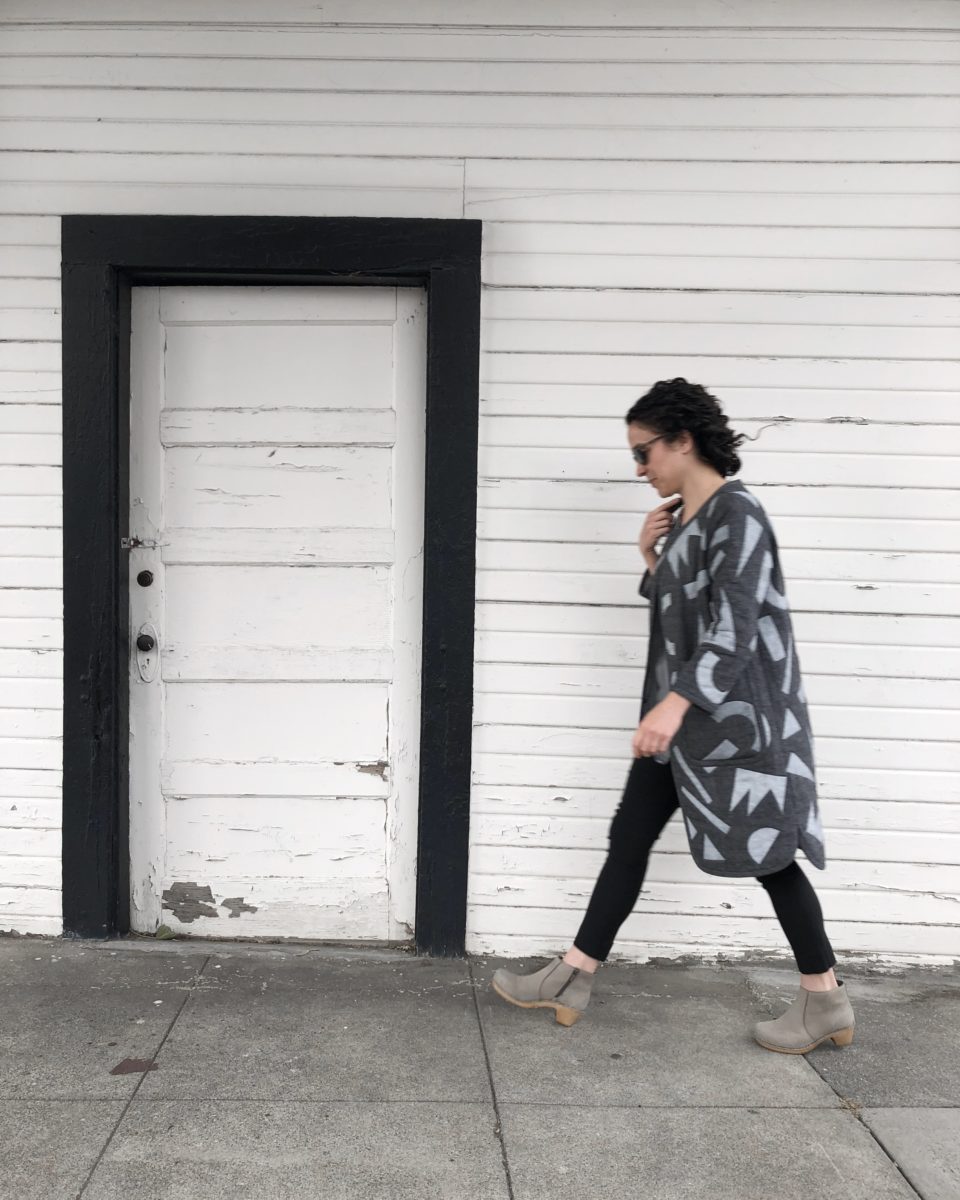
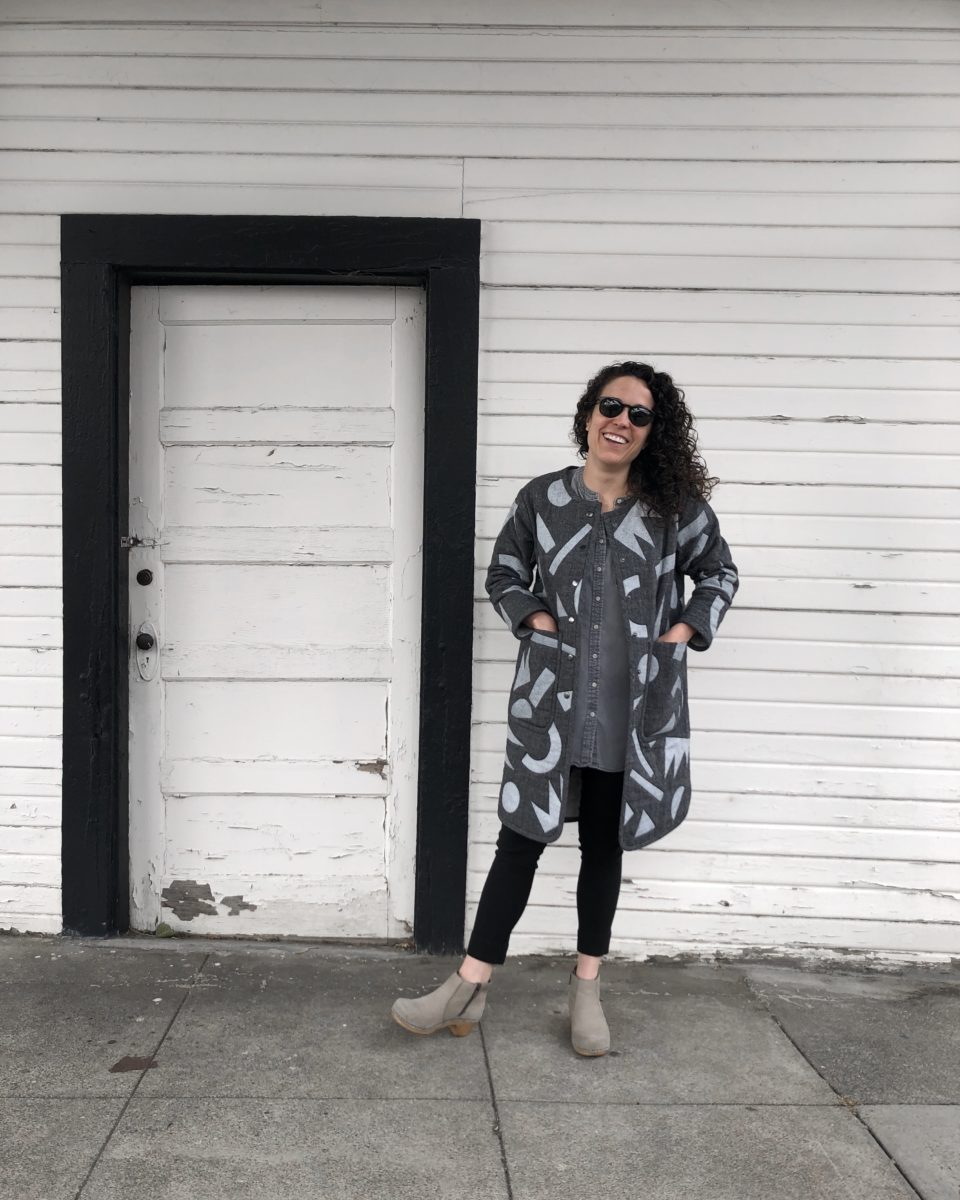
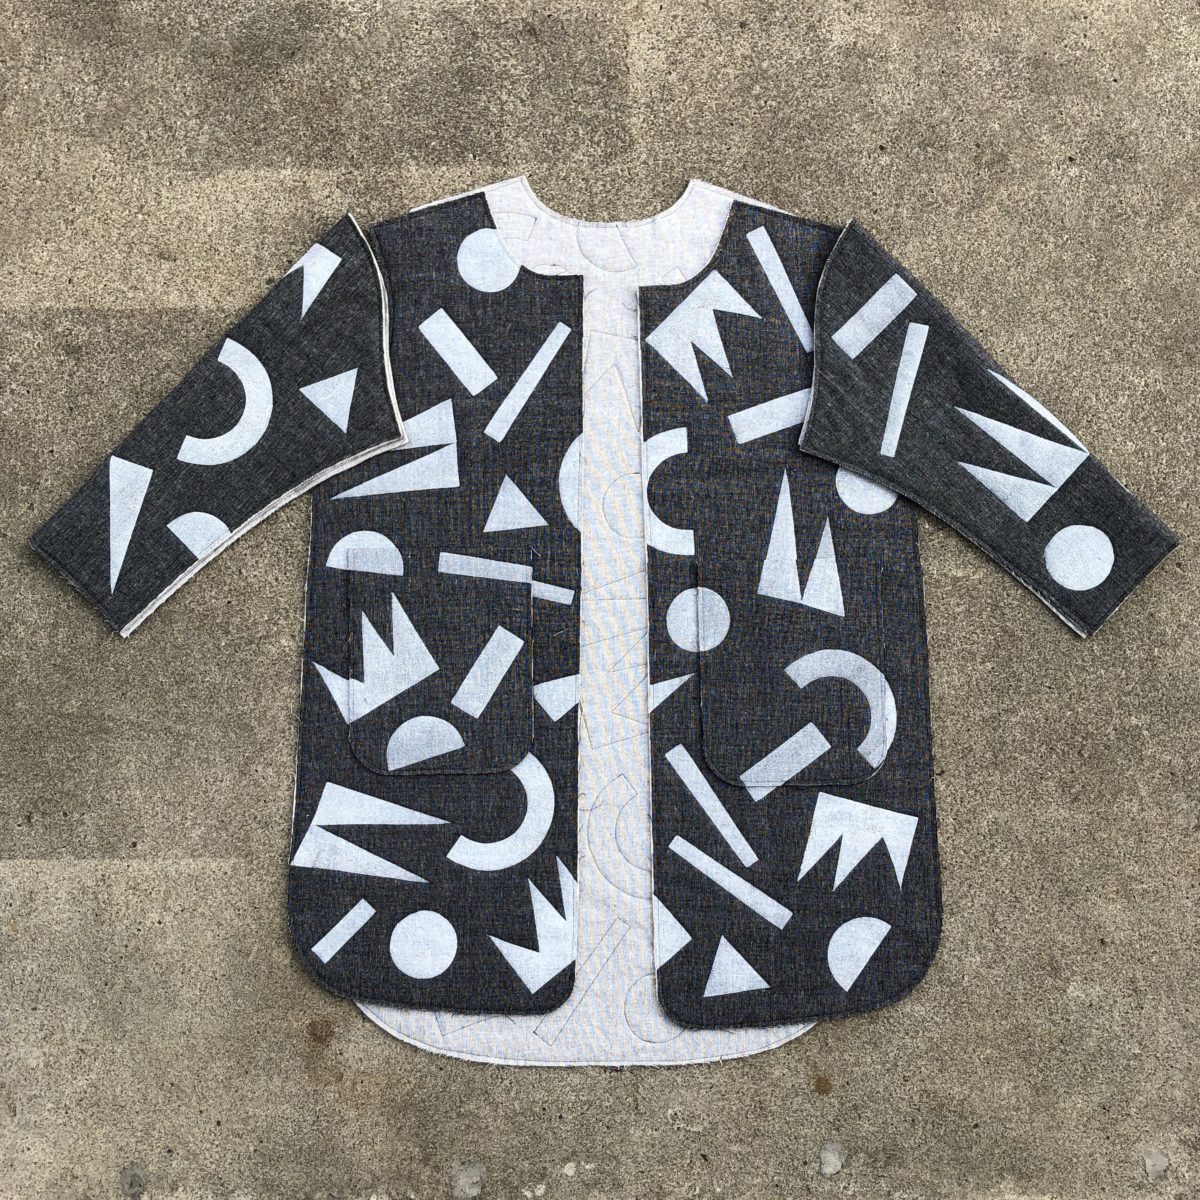
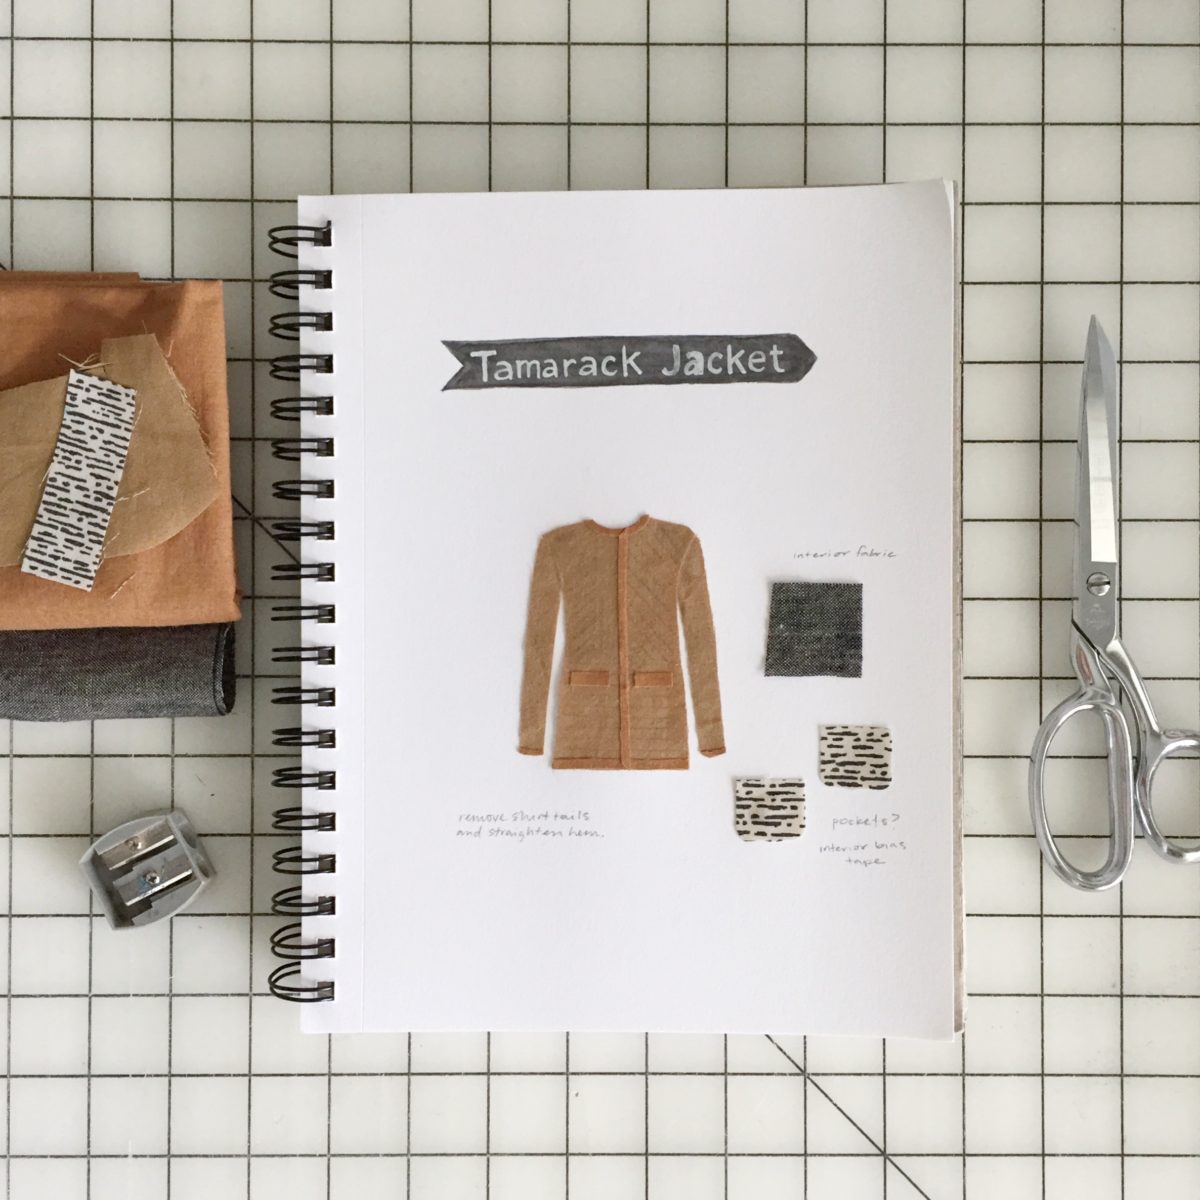
Anyway, here’s my write up and some process pics. As I mentioned above, the purpose of the article was Tamarack Jacket hacks. My twist on the pattern was more about the surface design and quilting pattern than big changes to the sewing pattern. I did do some basic mods like lengthen the body, shorten the sleeves, and use patch pockets in lieu of the pattern’s welt pockets.
Article
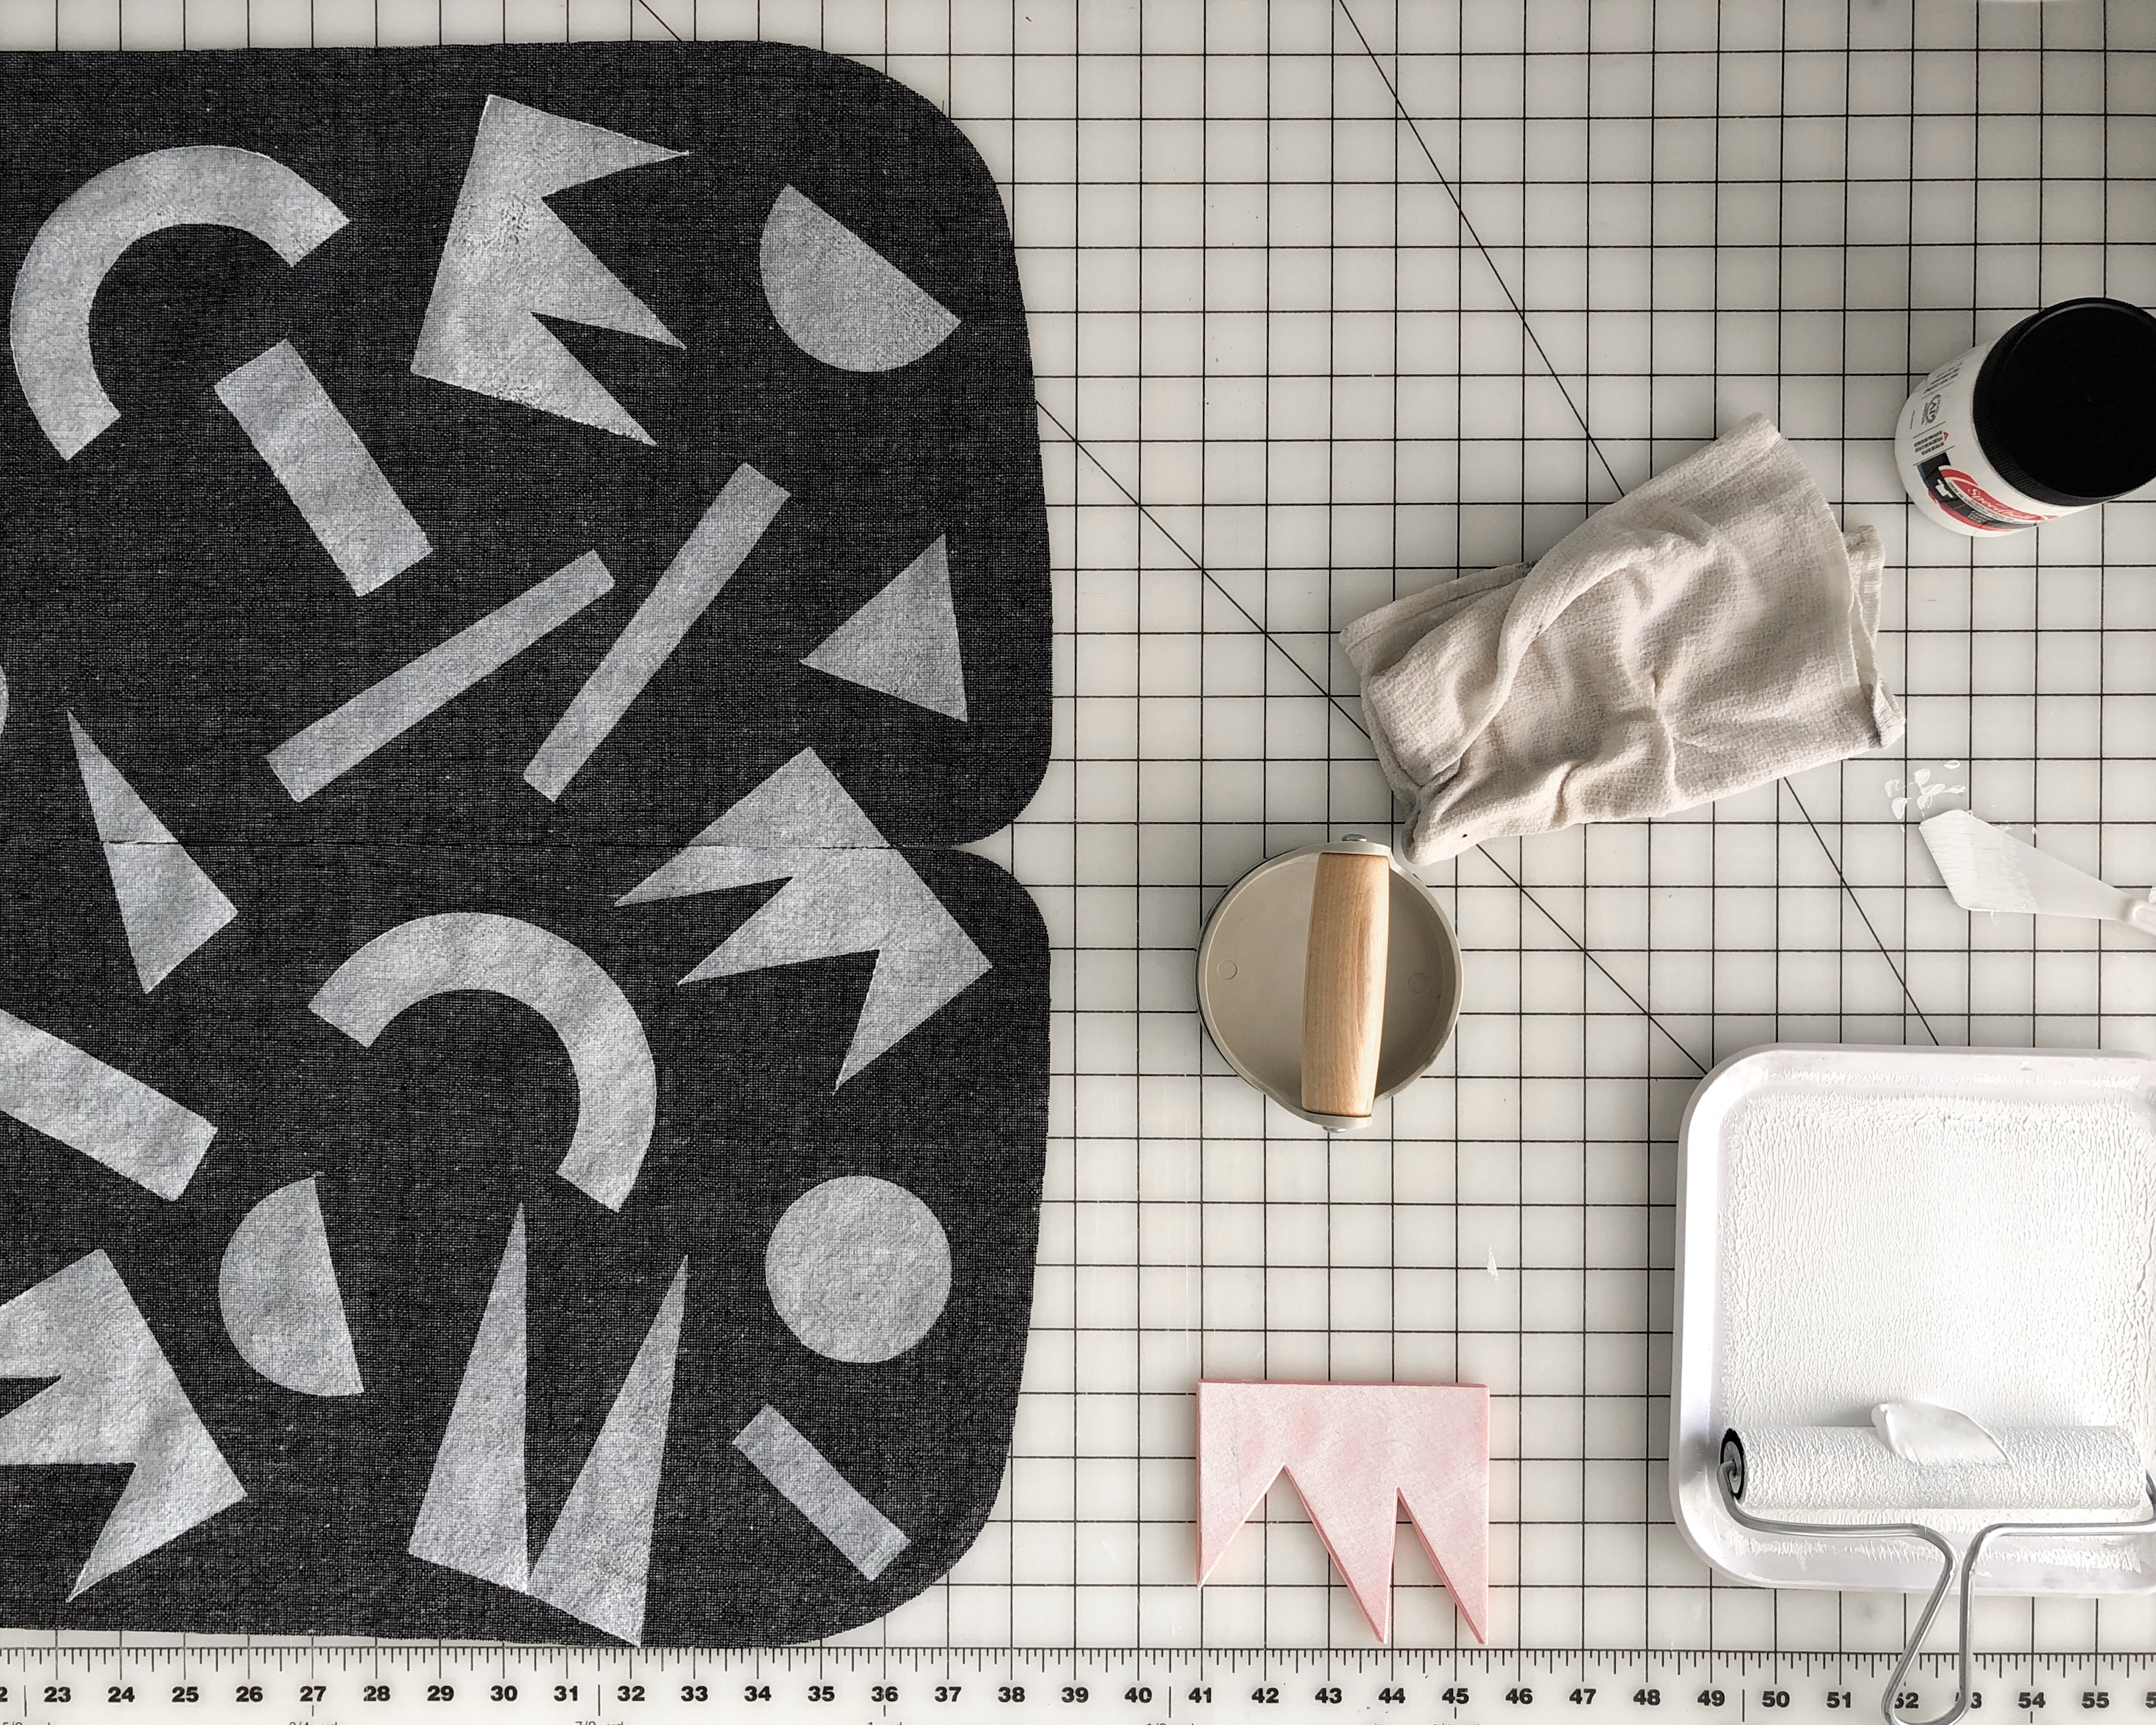
Block printing is one of the easiest ways to alter the surface of just about any textile. With a few simple supplies, you have endless opportunities to customize fabric right from your home. In my at-home block printing kit, I like to use Speedball Speedy Carve Blocks, a Speedball brand linoleum cutter, a Testrite Foam Brayer, a baren to help apply even pressure, and water-based silkscreen ink for fabric. I prefer to use a foam brayer when block printing on fabric as it applies more ink to the blocks and prints more evenly than a rubber brayer. I also like to use water-based ink because oil-based is a little smelly. Whatever base ink you choose to use, make sure it’s designed to be applied to fabric, or your ink won’t ever fully adhere! Most importantly, remember to wash and dry your fabric to remove any sizing that might affect the ink.
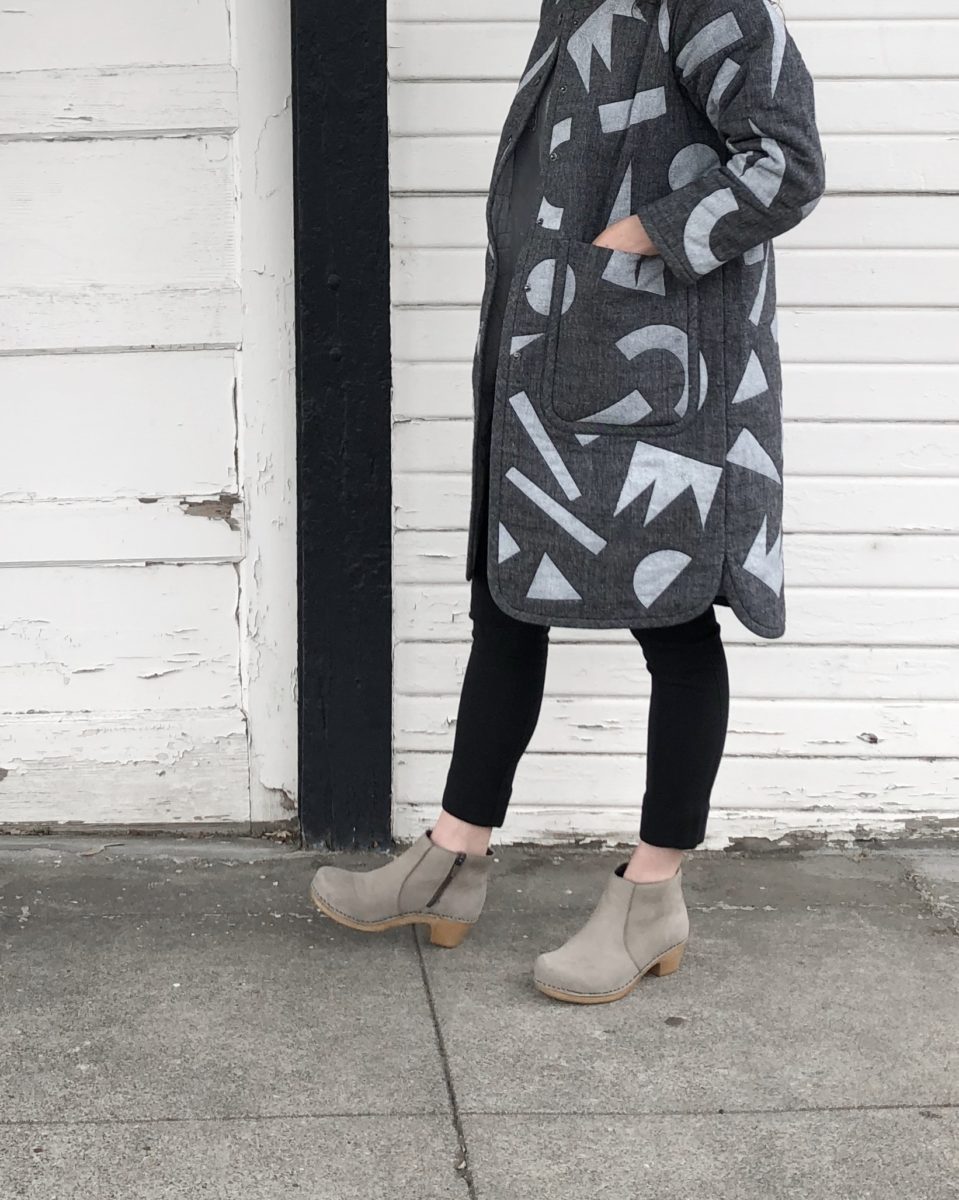
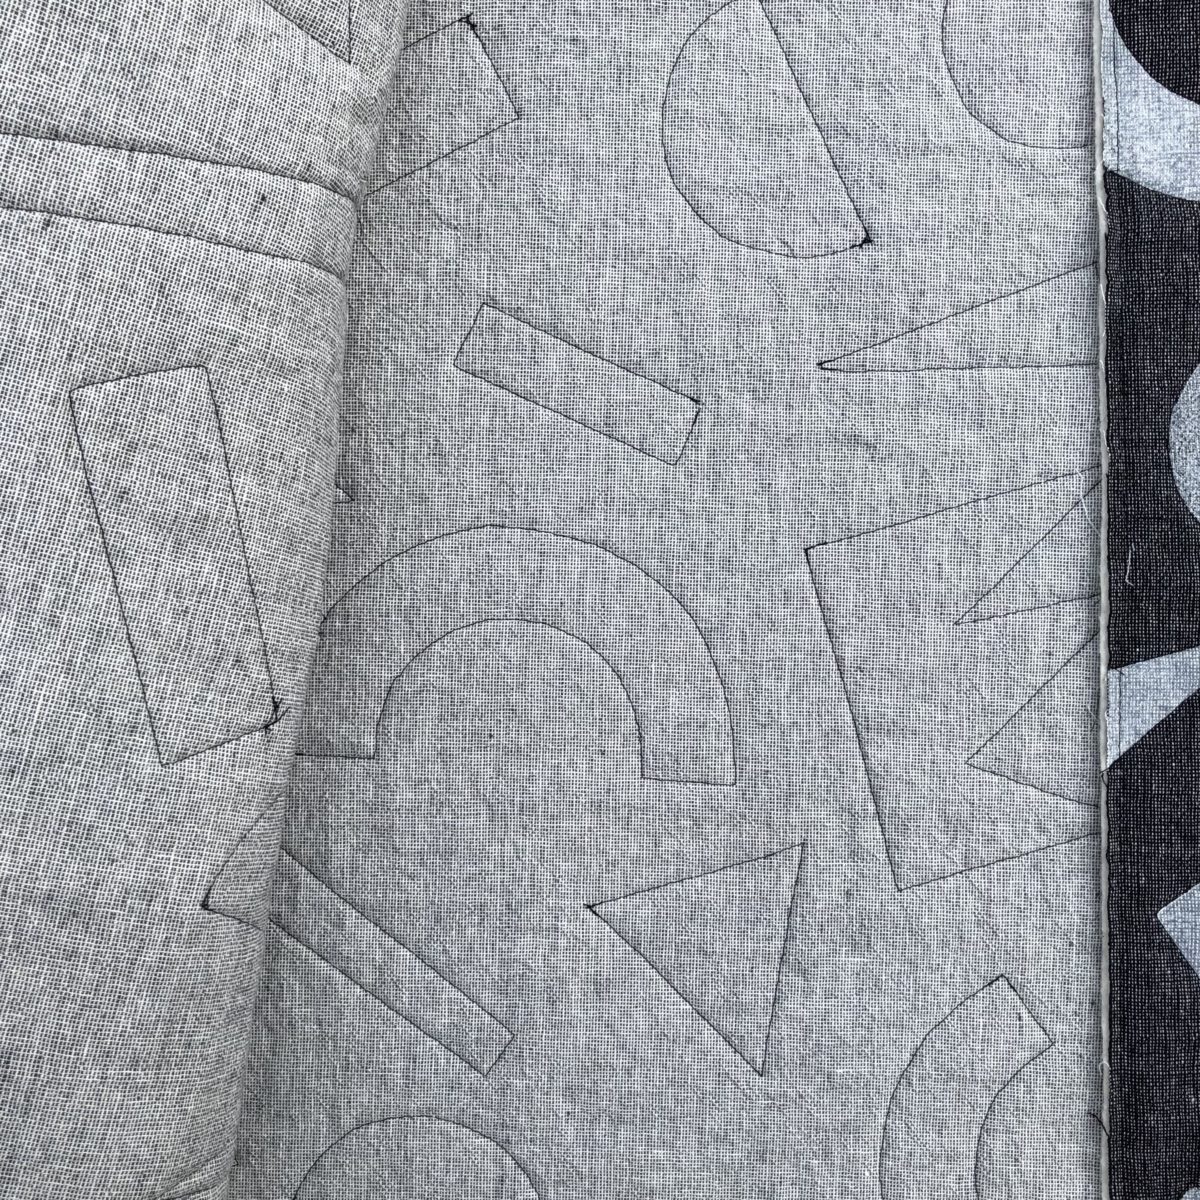
For the exterior fabric of my Tamarack, I chose Robert Kaufman’s Essex Yarn Dyed Homespun fabric in Pepper. This textile is a linen-cotton blend that I knew would quilt up beautifully. For the lining I used the same fabric in Charcoal. The bias binding is also Pepper to keep the emphasis on the block printed design. This was my first time block printing on a fabric with any visual texture (I usually keep to solid colors), and I just love the result. The weave shows through the print and also helps conceal the wonky, imperfect nature of block prints.
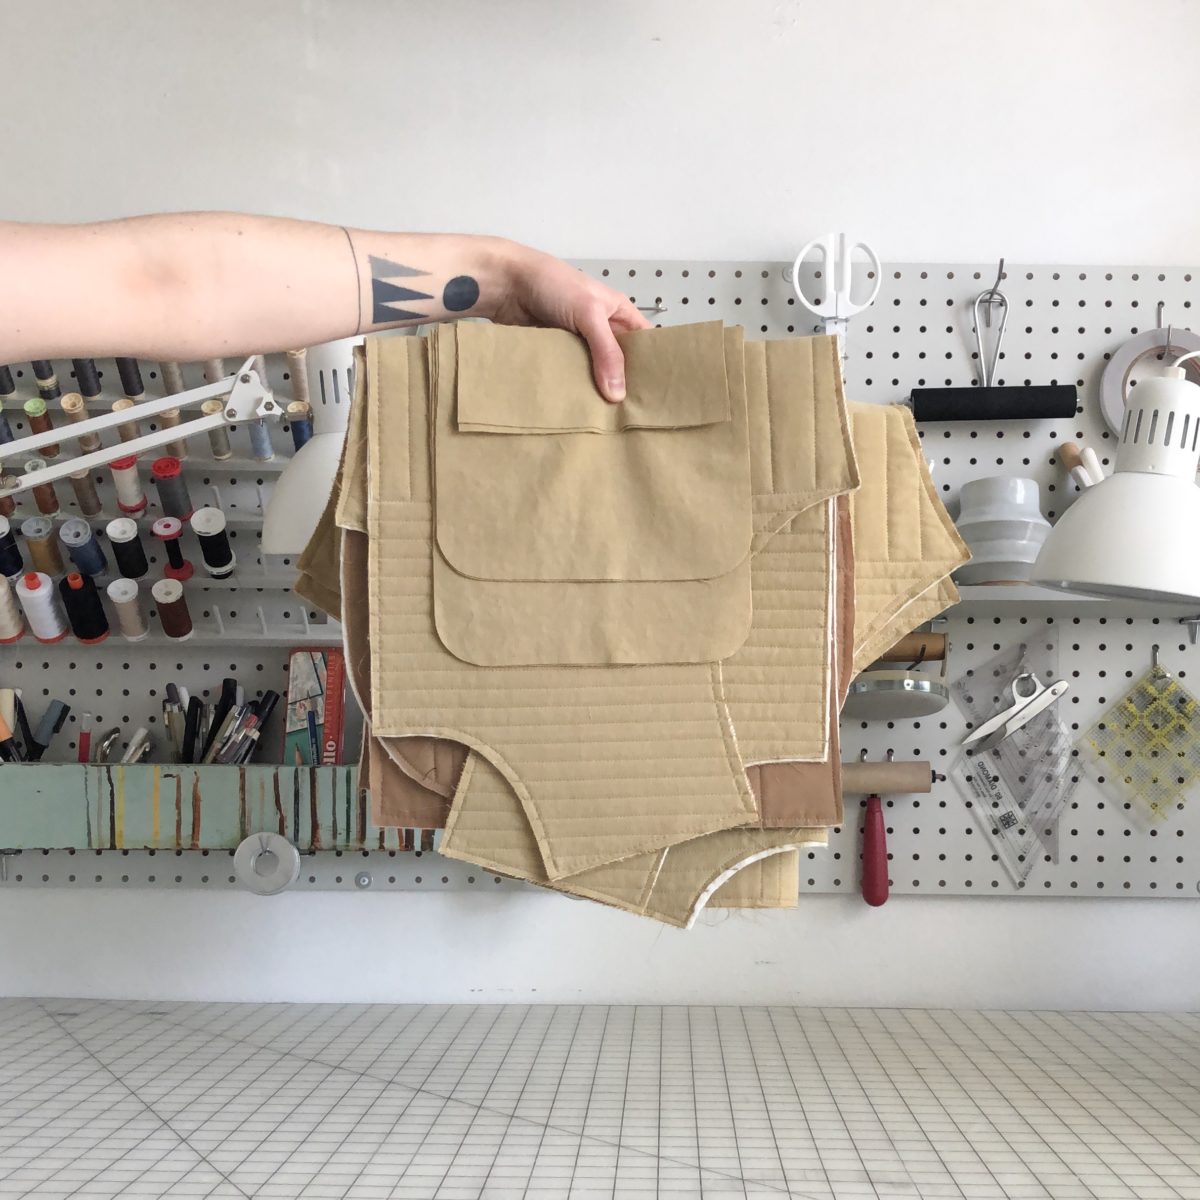
Block printing can be quite time consuming. I recommend cutting out your garment pieces before printing the fabric. There’s less waste, it requires less space, and you have more control over the print’s placement. With all of your pieces cut out, it’s easy to find a printing groove. I also recommend doing a few test prints on scrap fabric before committing to block printing your cut out pieces.
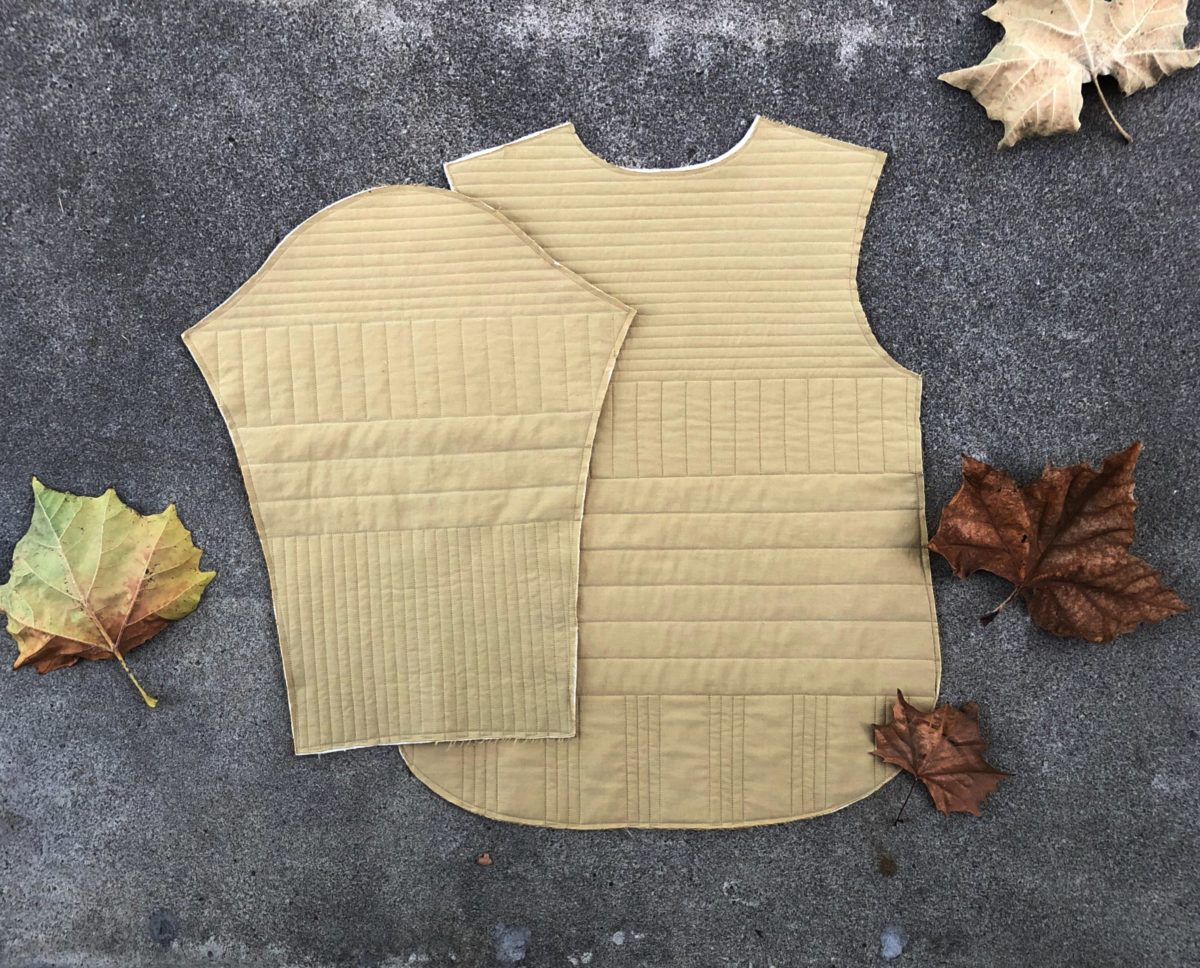
After your fabric is printed, it will need to dry for a minimum of 24 hours. It’s hard to wait, but I’ve found if I rush this step, the ink tends to smear. After it’s dried, be sure to heat set the ink with a hot iron too. While I was allowing my printed pieces to dry, I decided my quilting pattern would also emphasize the geometric shapes. I quilted around each shape instead of using a standard line quilting pattern. I used black thread in the bobbin and I love how the quilted shapes look on the inside.
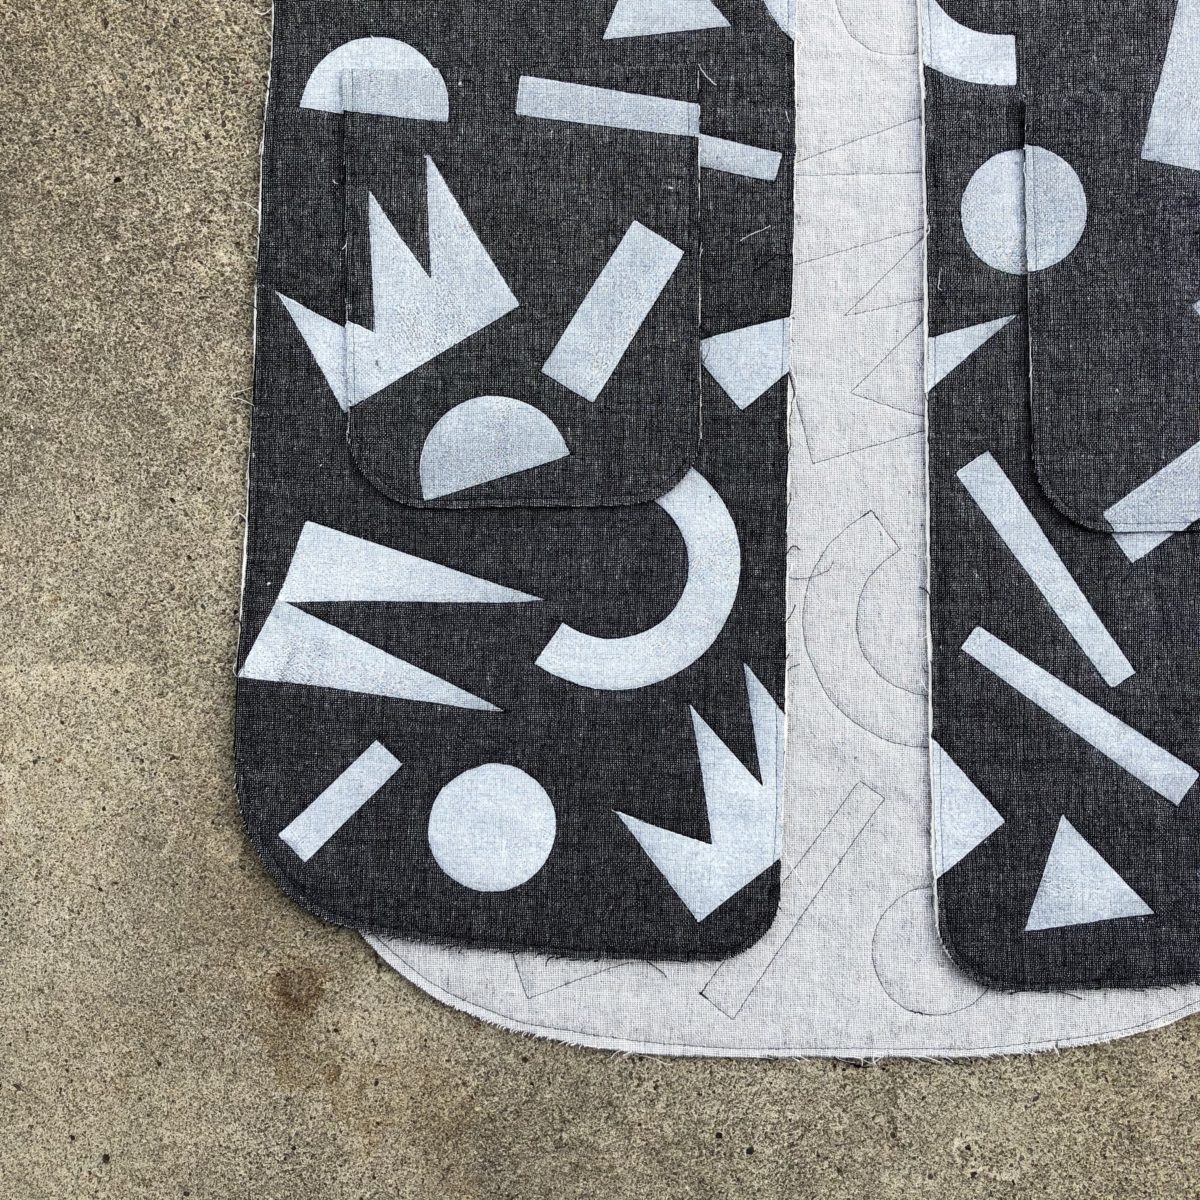
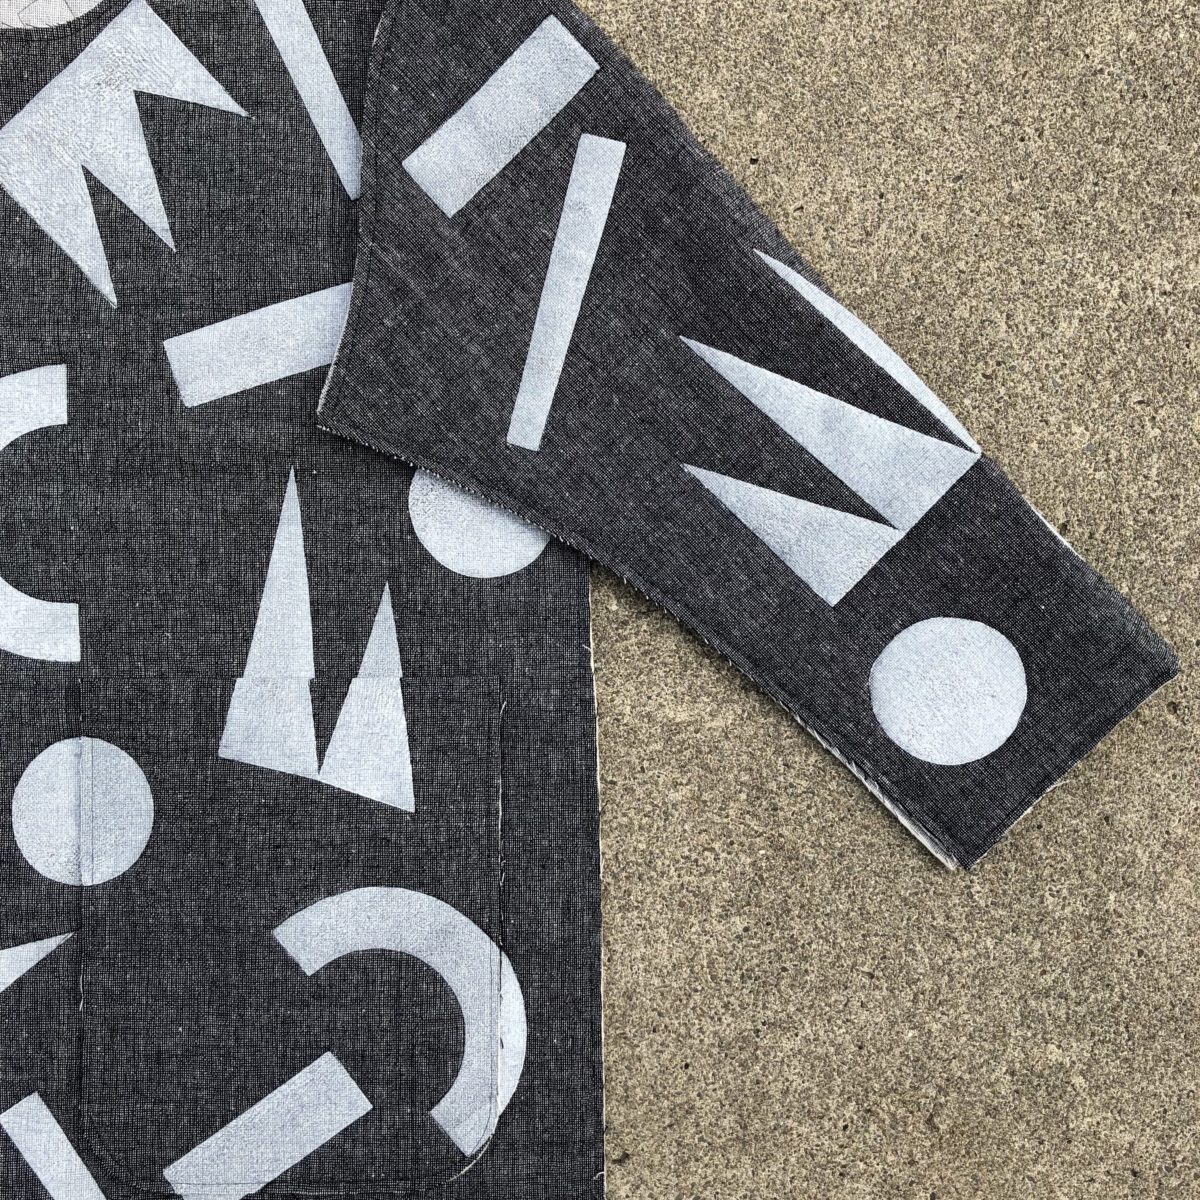
Since I decided to use large scale geometric shapes to create a surface pattern, I lengthened the body by 10 inches. Although many Tamaracks look great with a rolled cuff, I wanted the surface pattern on mine to be the focal point. I shortened the sleeves by three inches and added about half an inch to the cuff opening. Additionally, I chose to round the bottom front opening to mimic the rounded corners of the patch pockets.
A lot of RTW quilted jackets feature patch pockets and I thought it would be an opportunity to puzzle out how to print an uninterrupted pattern. I cut the pocket pieces so that the top edge is on the fold, sandwiched batting in between, quilted around the shapes, and finished the sides and bottom with the same bias binding. It didn’t turn out perfect, but it’s pretty close! Instead of attempting to pin the pockets in place, I used Wash Away Wonder Tape to stitch in the ditch and edgestitch the pockets in place.
Initially I had planned to use Hong Kong seams to finish the inside of the jacket, but it ended up being too bulky. Instead the seams were serged and pressed open. The finishing touch was a block printed label. I like to add these to all my me-mades, or print directly onto the garment with my NOT A PRIMARY COLOR block.
I have wanted to design fabric for a while now and knew one potential step in that direction would be to learn how to screen print fabric. I took a printmaking class during my undergraduate studies, but it was a long time ago and its focus was fine art prints. It did help me understand the basic concepts, but it didn’t include any practice with photo emulsion (we had to hand paint the screens), or using digital images.
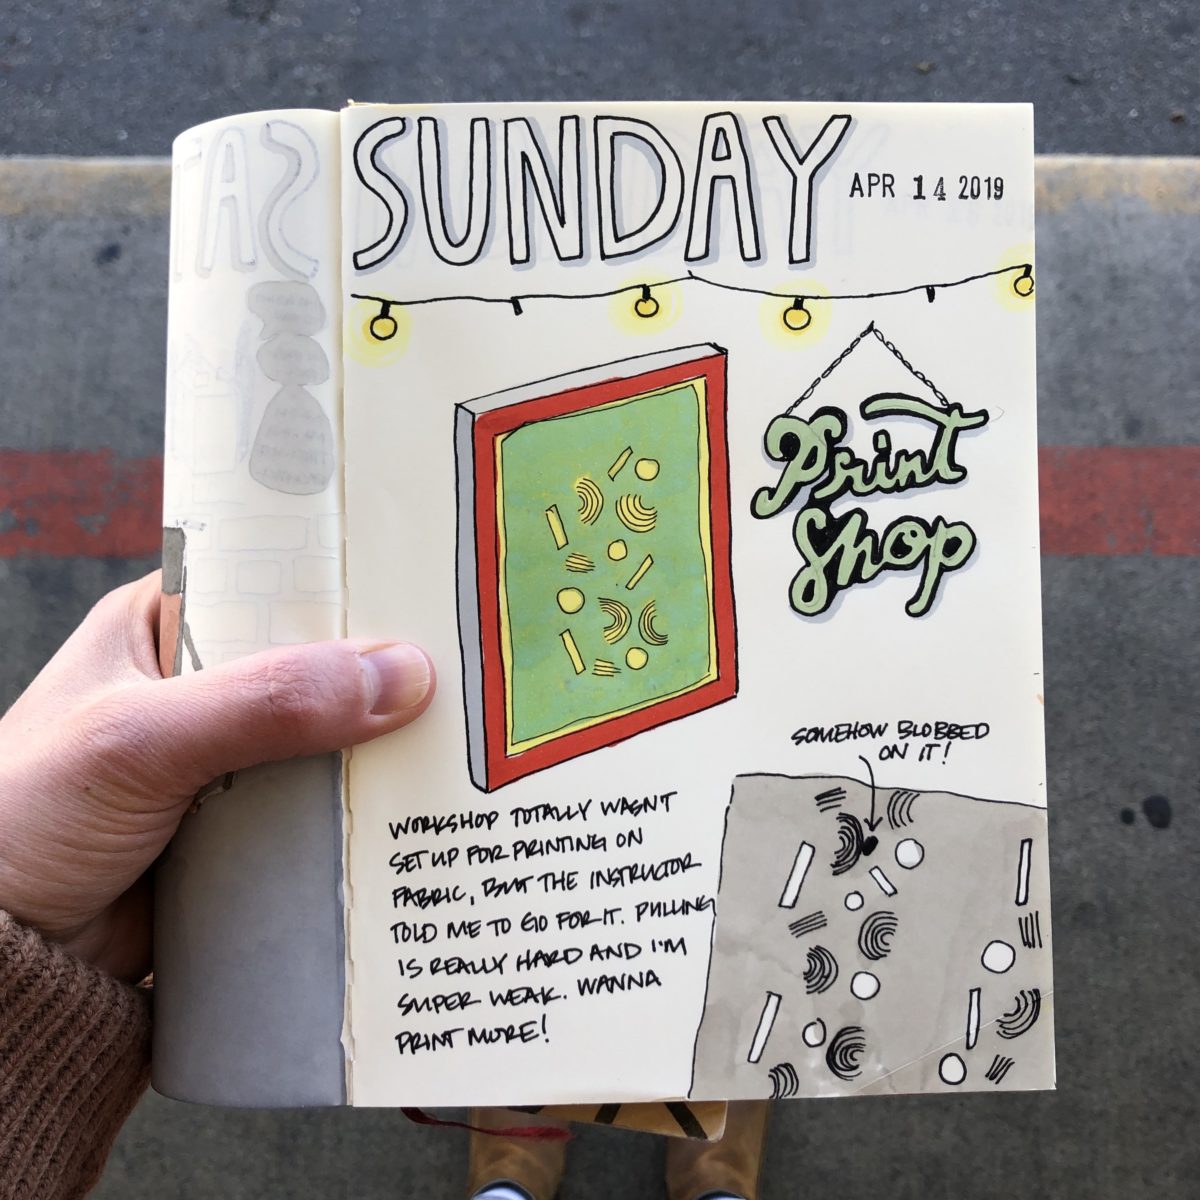
I found a local space that regularly holds screen printing workshops and thought I would just figure out how to use it on fabric later. Thankfully, after all my fabric-based questions, the instructor told me to just go for it.
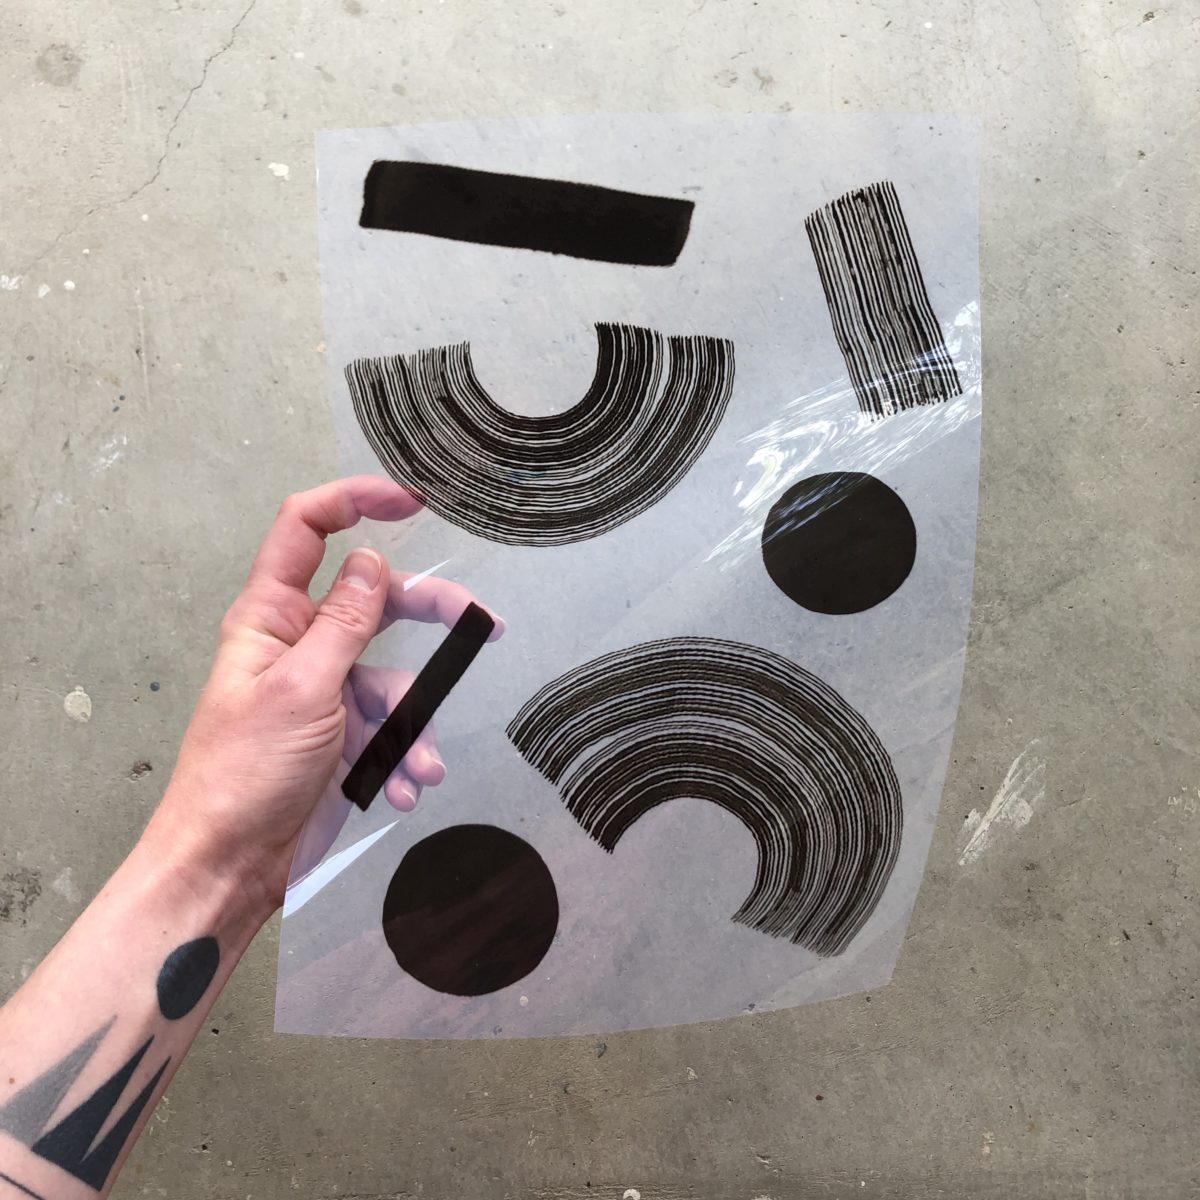
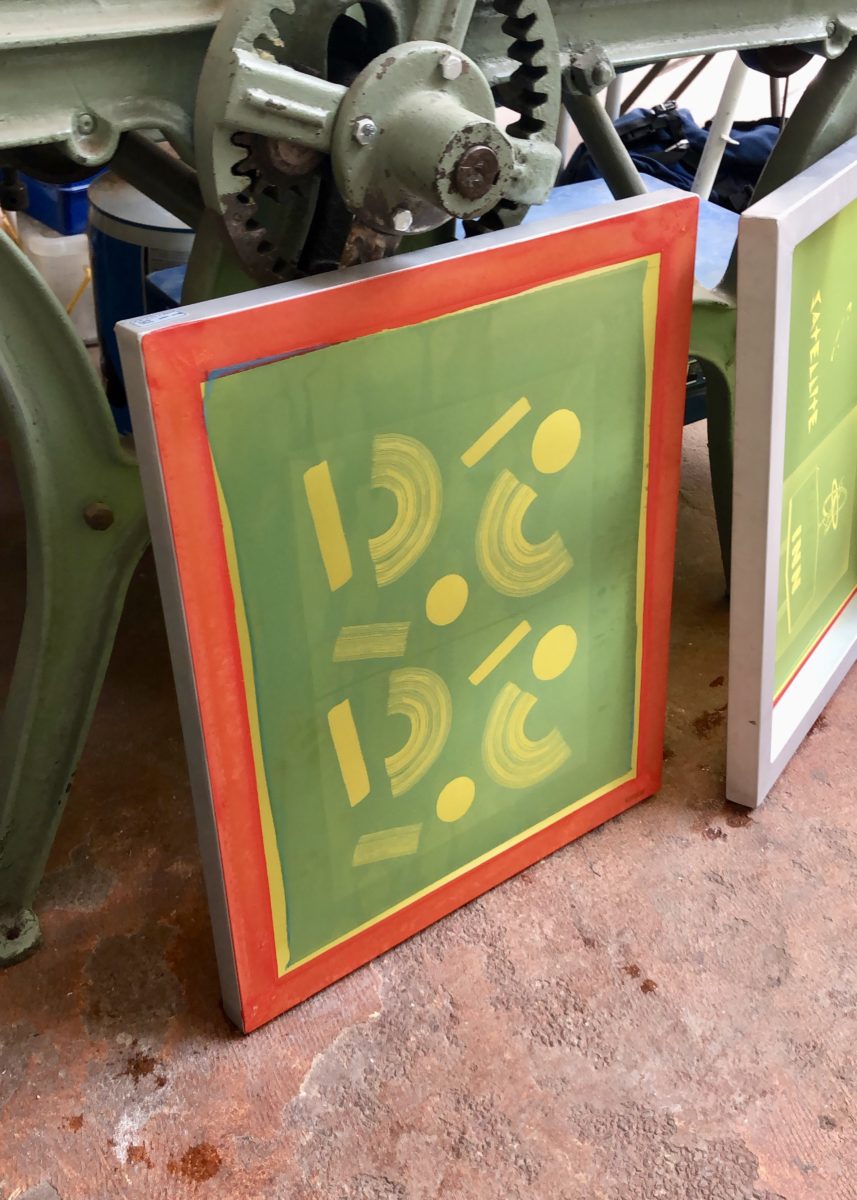
For my design, I went with something I’d drawn with ink in my sketchbook. I snapped a photo of the sketchbook page and imported the image into Photoshop. I cleaned up each element and arranged them until I was happy with the layout. This part was pretty fast paced, so I didn’t have enough time to figure out how to make a repeating pattern. My Illustrator and Photoshop skills are pretty basic. We then printed our designs on a transparent film.
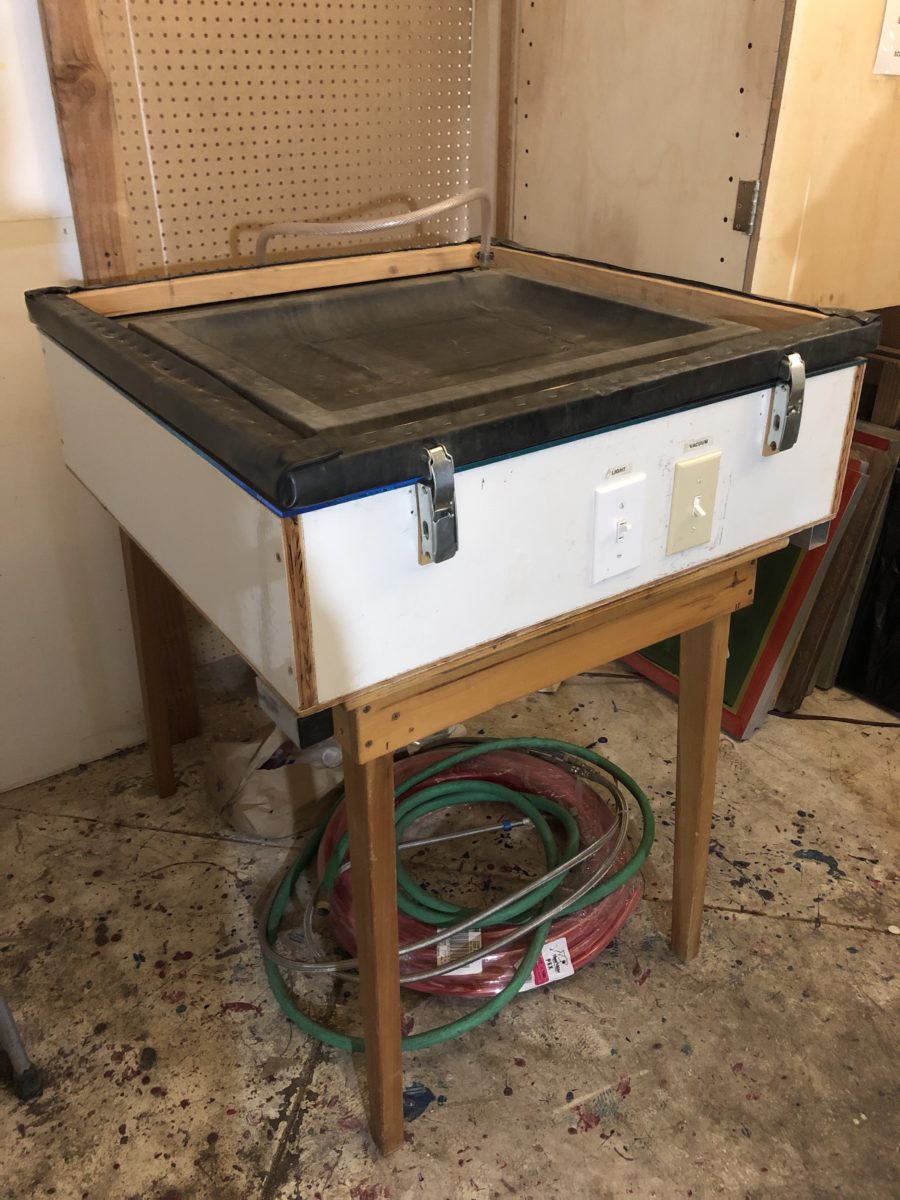
The next step was to create our screens. The studio had a pretty neat vacuum set up – you can see my screen’s frame underneath the rubber membrane which firmly presses the mesh up against the light box. The screen was exposed for 4 minutes and 45 seconds. After that, the screen is power washed to reveal the design.
The whole process was fairly quick since the instructor had already prepared our screens with the photo emulsion fluid. Usually that step takes a day to dry/cure.
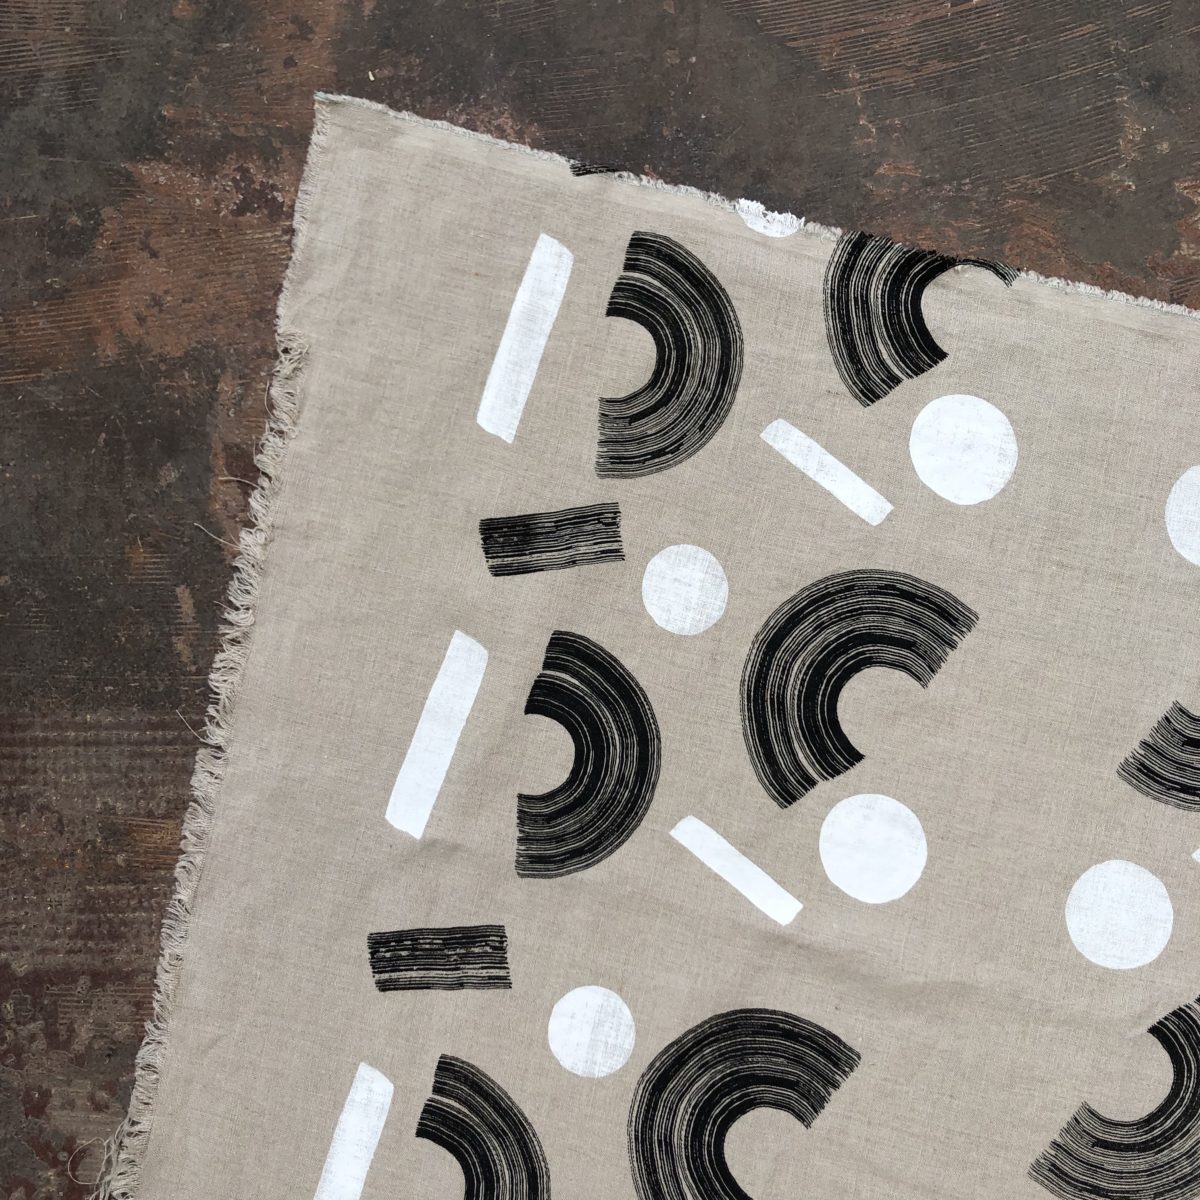
I didn’t take the time to register the fabric prior to printing so each print’s placement was just a guess. Again the class wasn’t set up to print on fabric, so I just had to wing it. I decided to print the solid shapes white and the brushstrokes in black. You can simply mask off the parts of the screen you don’t wish to print with painters tape.
Pulling prints is super physical and my lack of upper body strength became very apparent. I think that having a softer squeegee might help though – all of the tools were meant to print on paper and were quite firm. I had to pull each print a few times to get the desired coverage. We got to take home our screens!
I’m so impressed with the level of detail you can achieve with screen printing. I could have never created a lino block for that brushstroke arch!
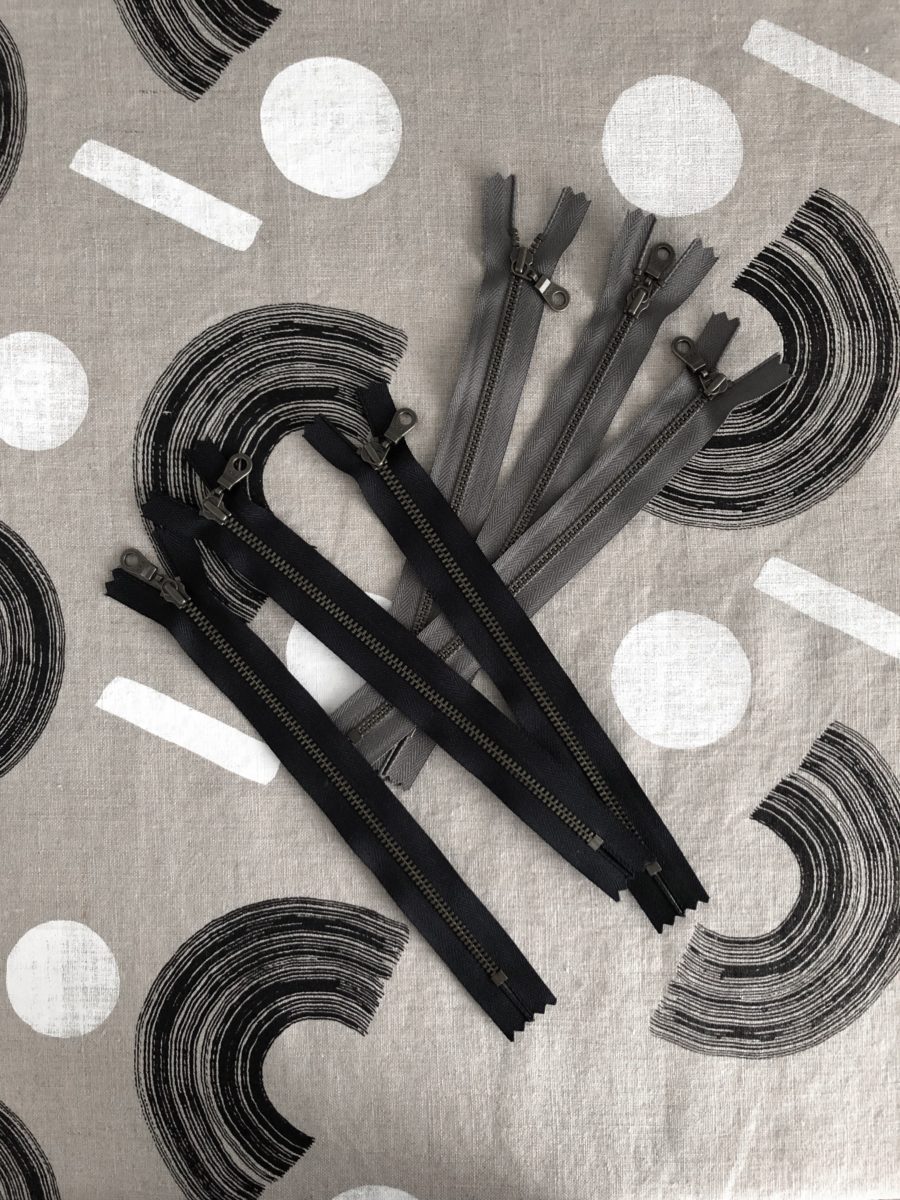
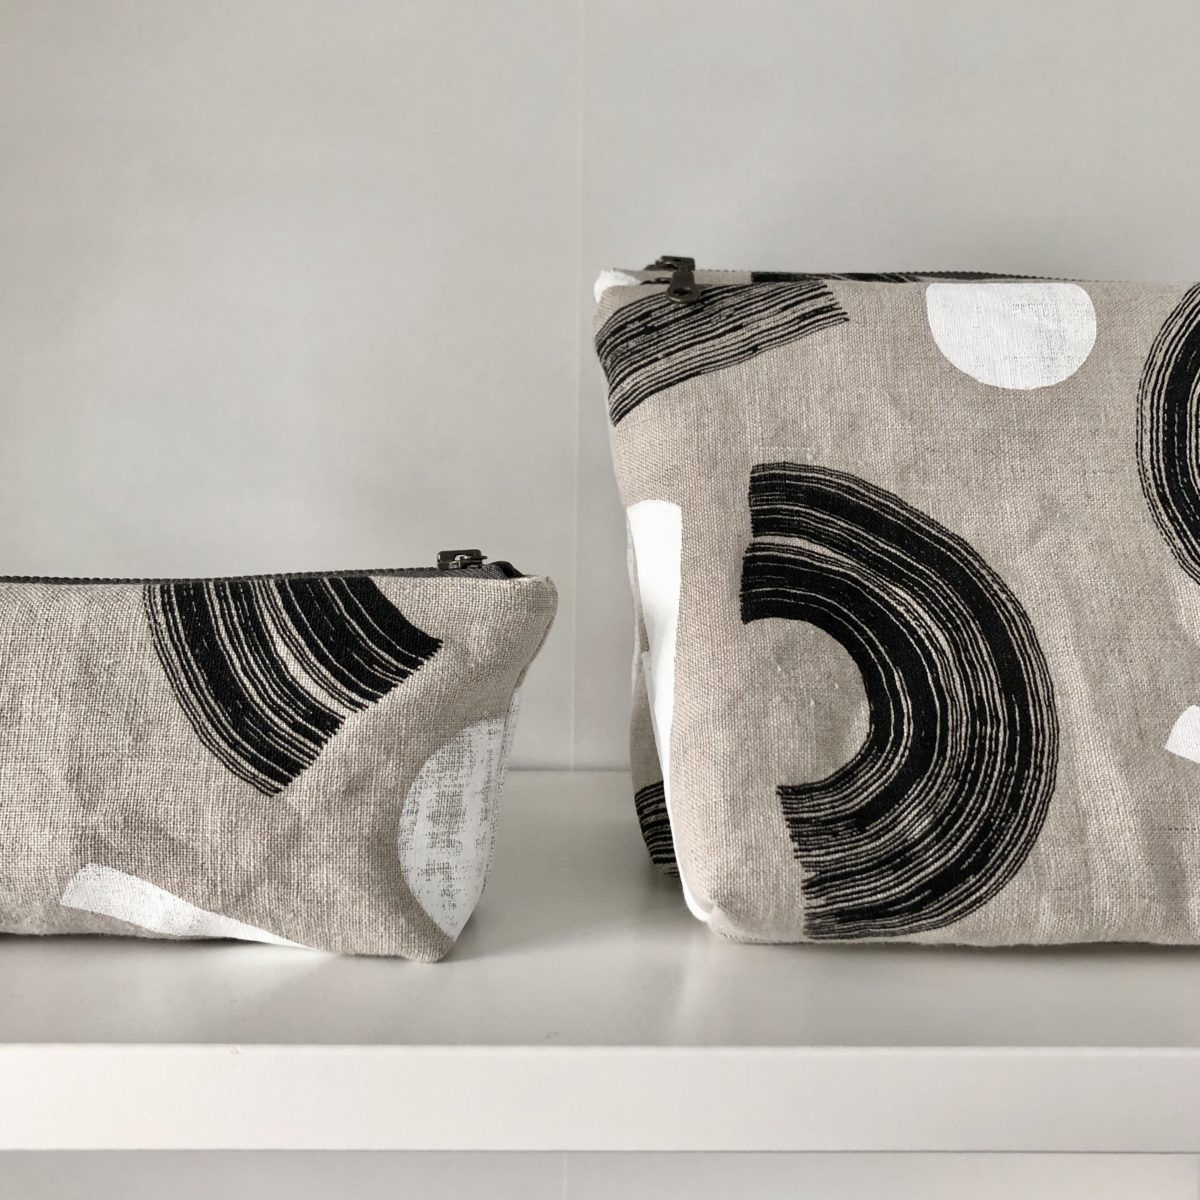
After heat setting the prints with a hot iron, I decided to sew up some zippered pouches. I think they’re pretty darn cute (and functional!). I’m figuring out a web shop, so they’ll be up for grabs soon!
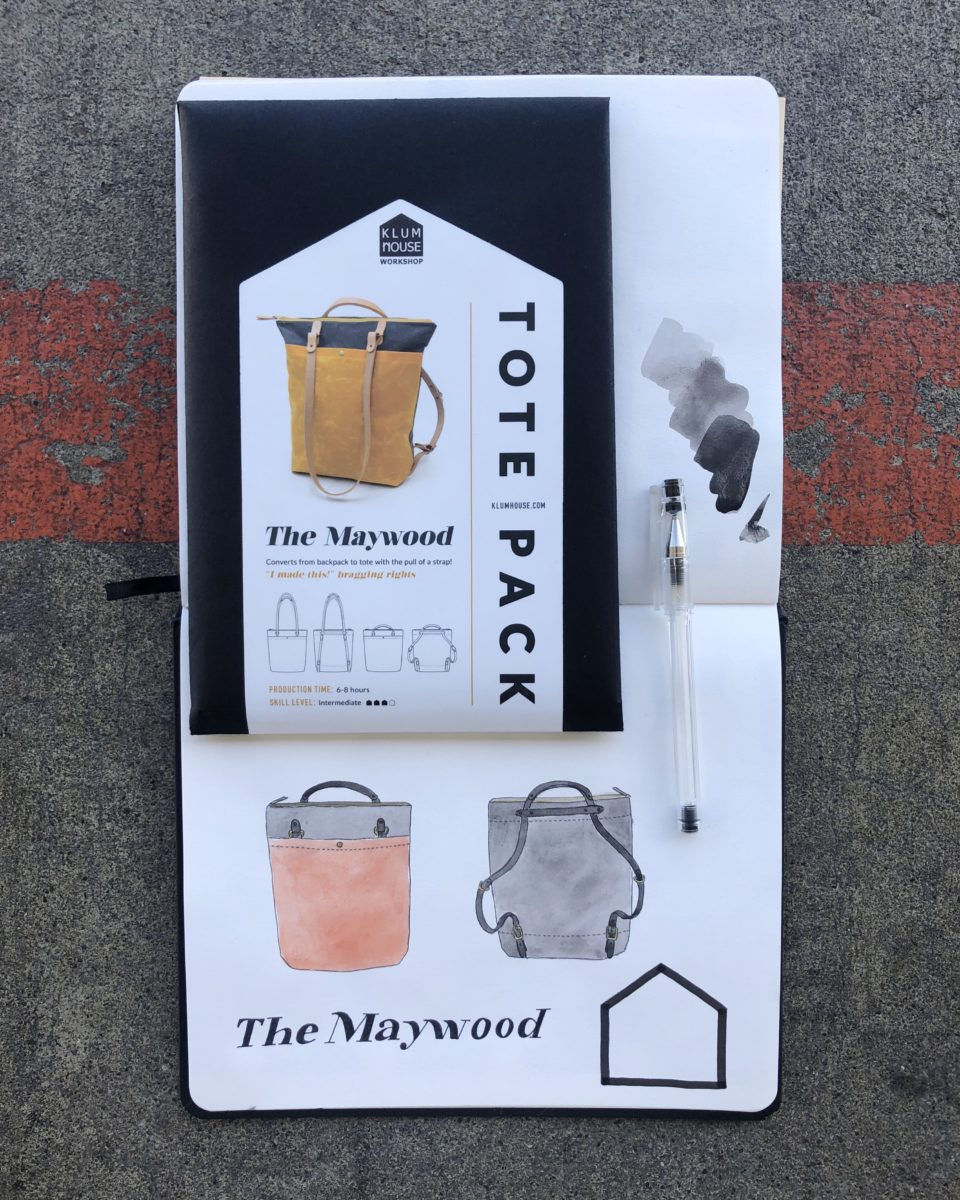
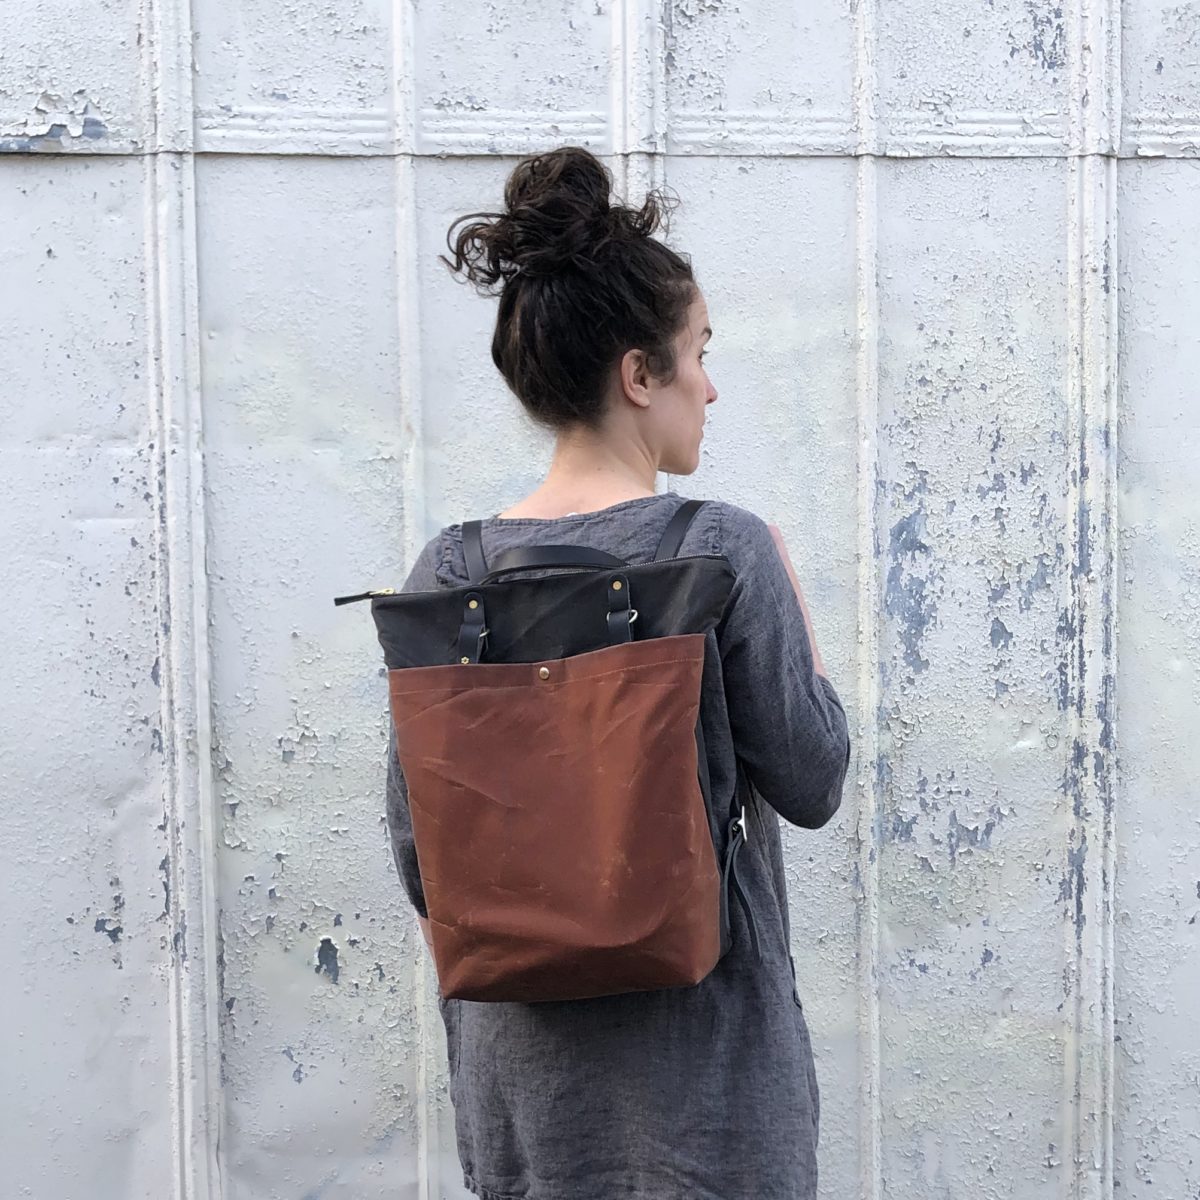
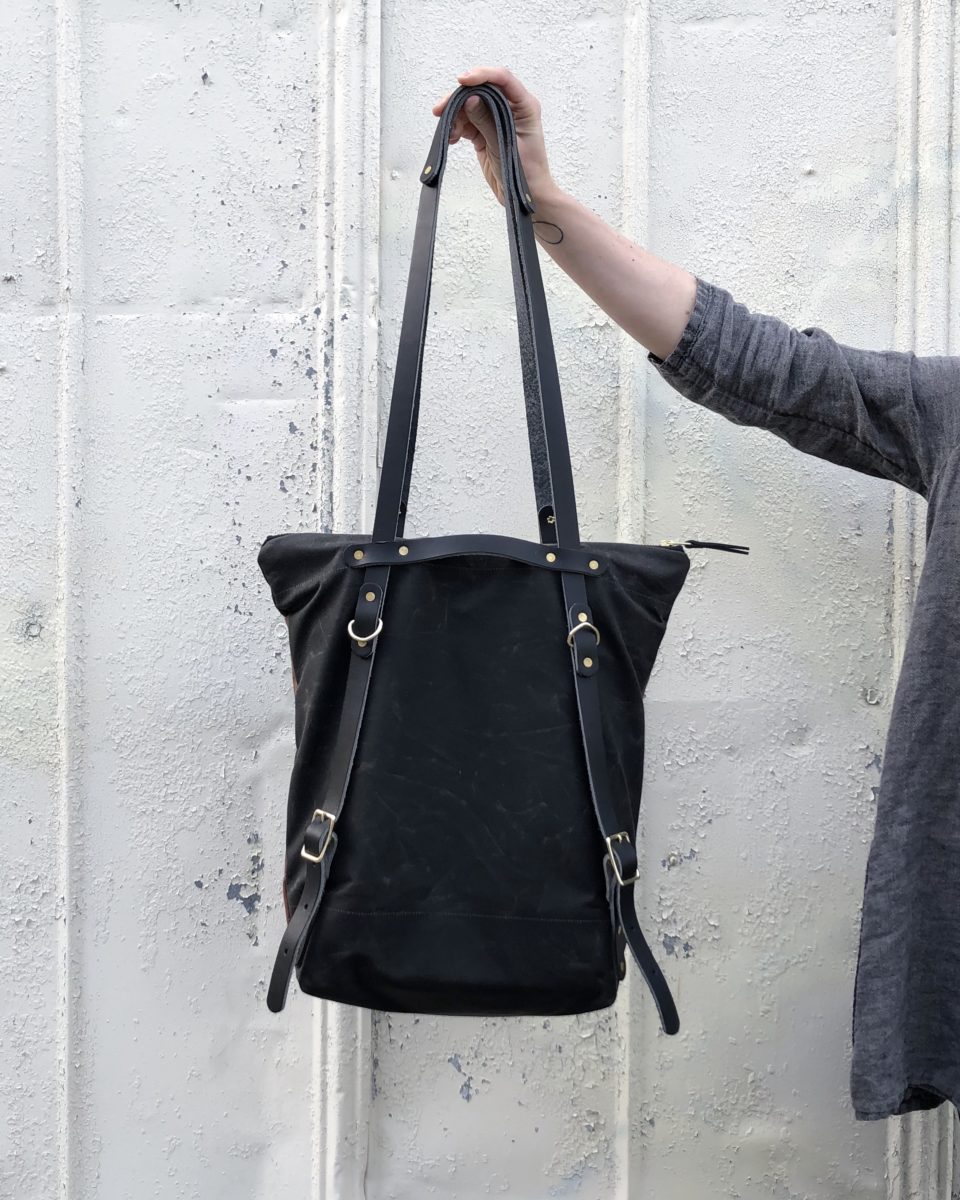
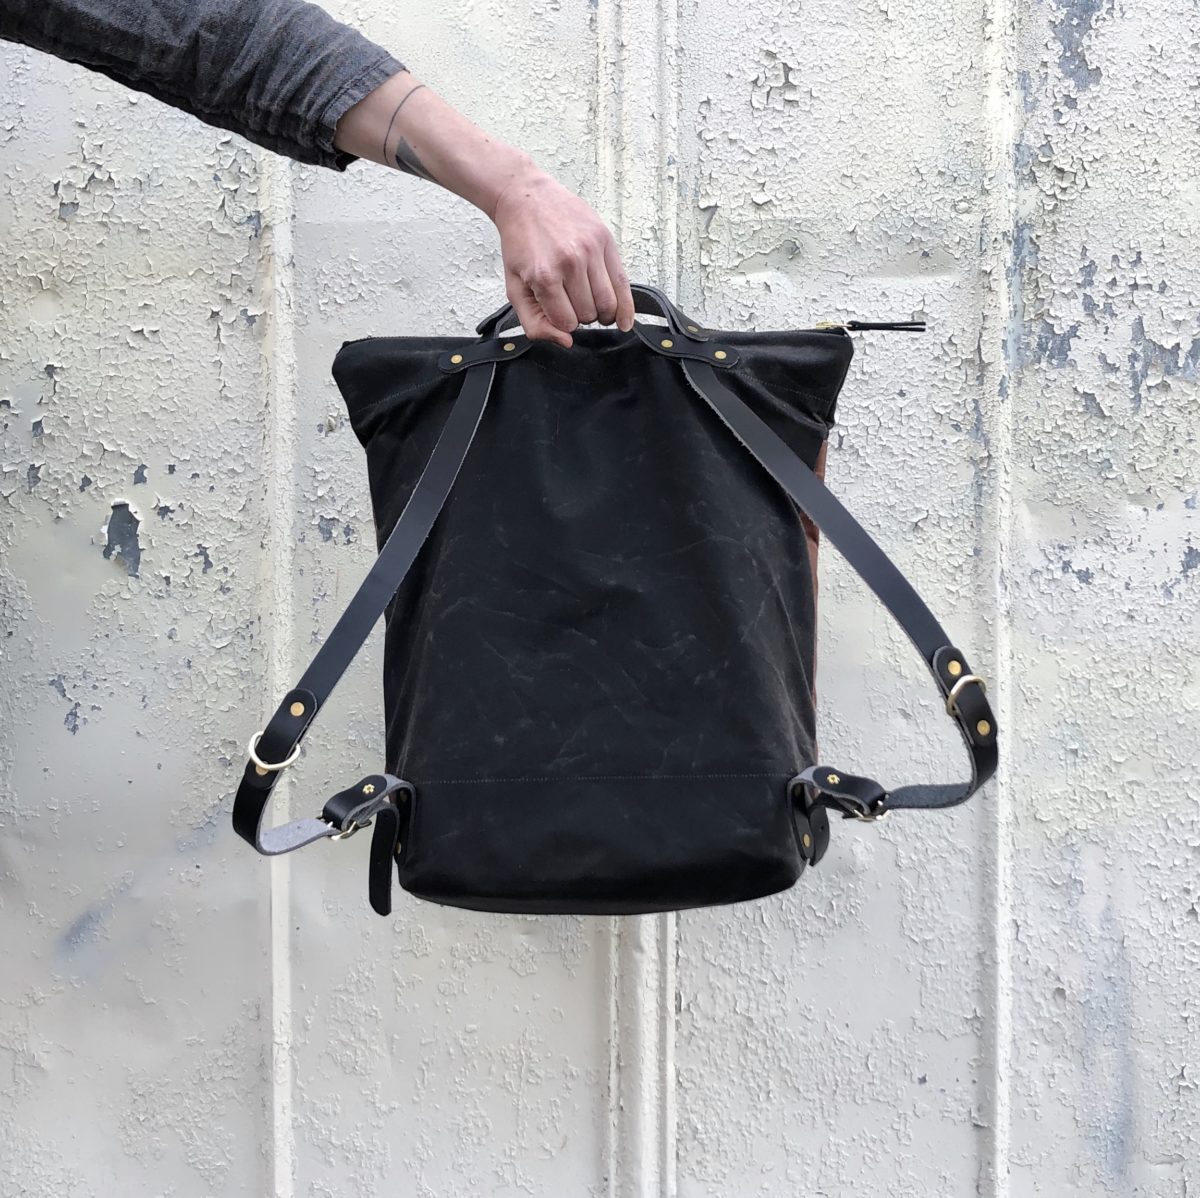
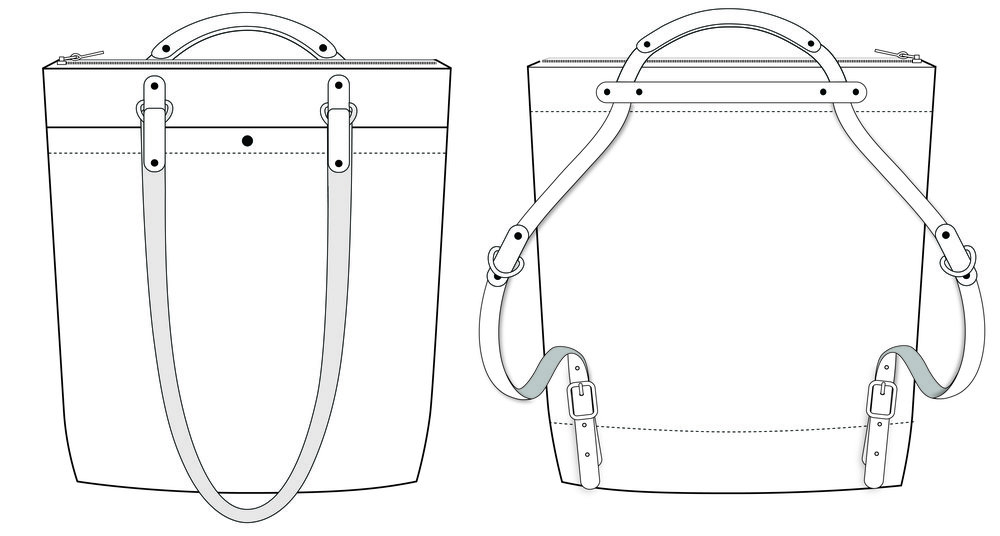
Back in December of 2018, Klum House reached out to ask if I’d be willing to make the relaunch of their Maywood Totepack once it was ready. I had already made their Dopp Kit and had recently purchased a Finishing Kit for the first Maywood pattern, so I was definitely on board!
The Maywood is not only a classic bag you’ll use for years, but its making process teaches you clever construction techniques and satisfying hardware setting skills. If you’re looking for a versatile bag with top notch finishes, look no further, the Klum House Maywood Totepack is for you!
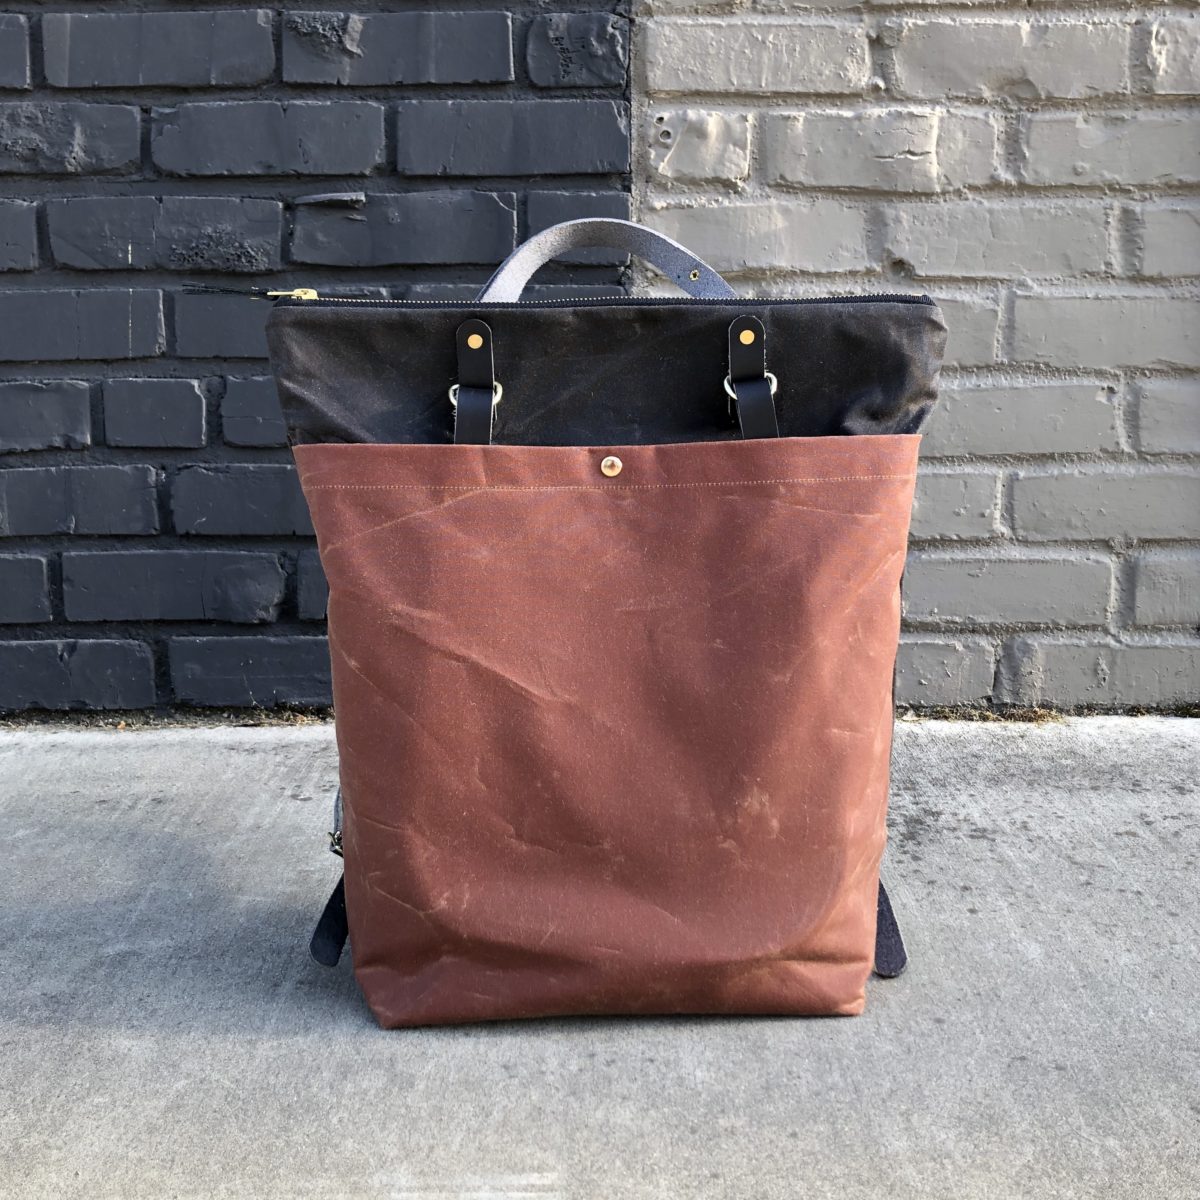
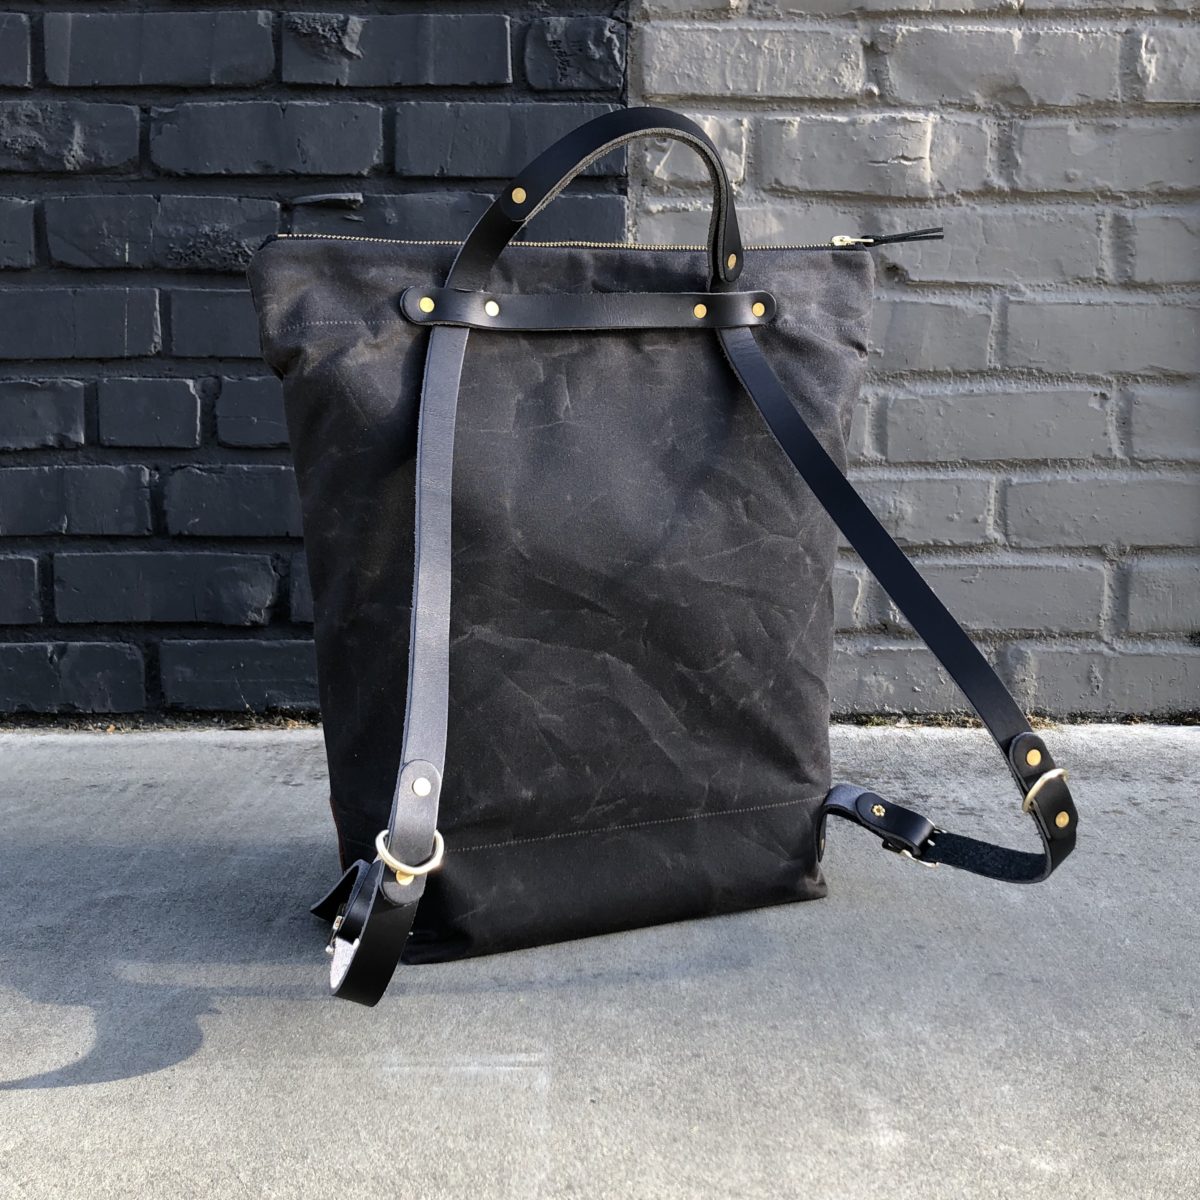
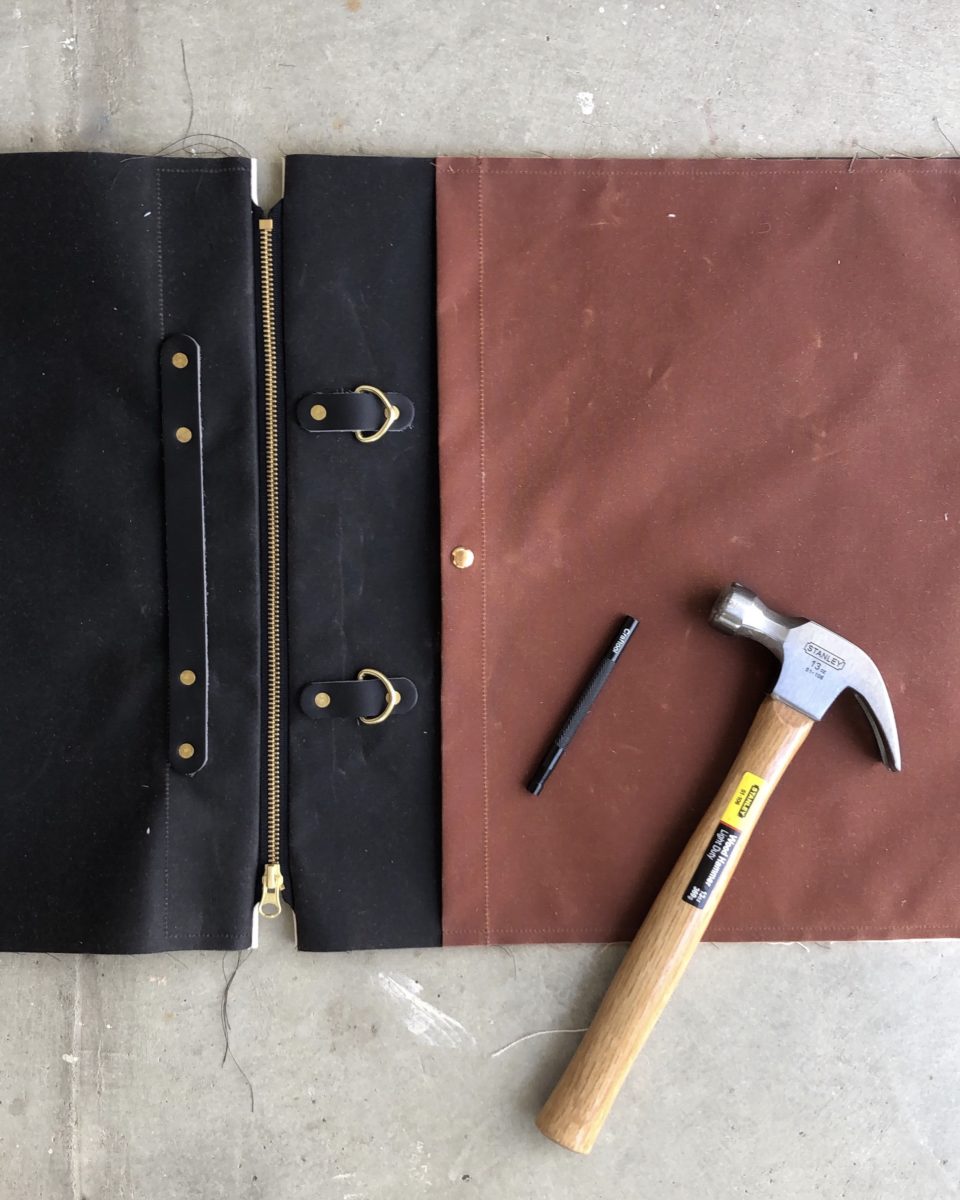
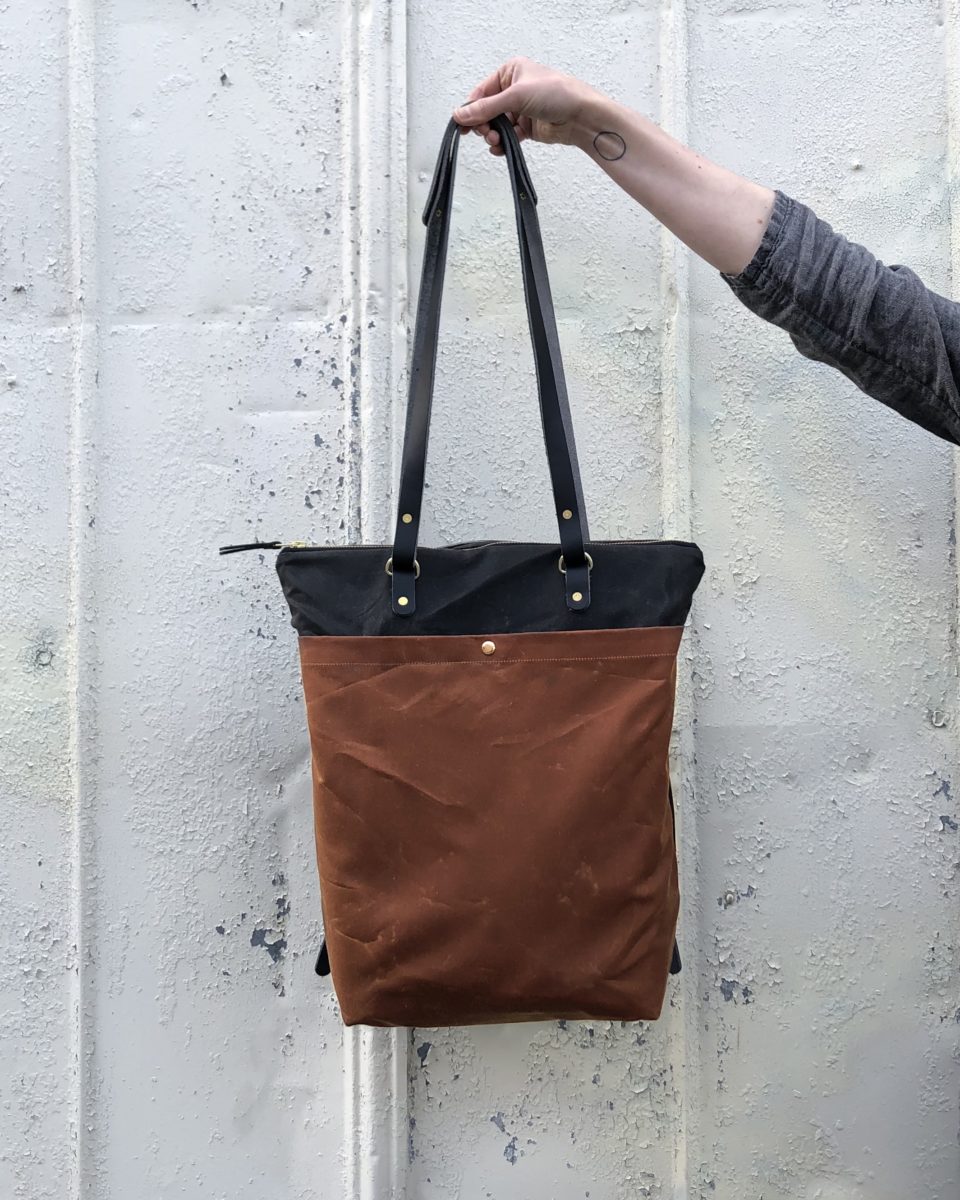
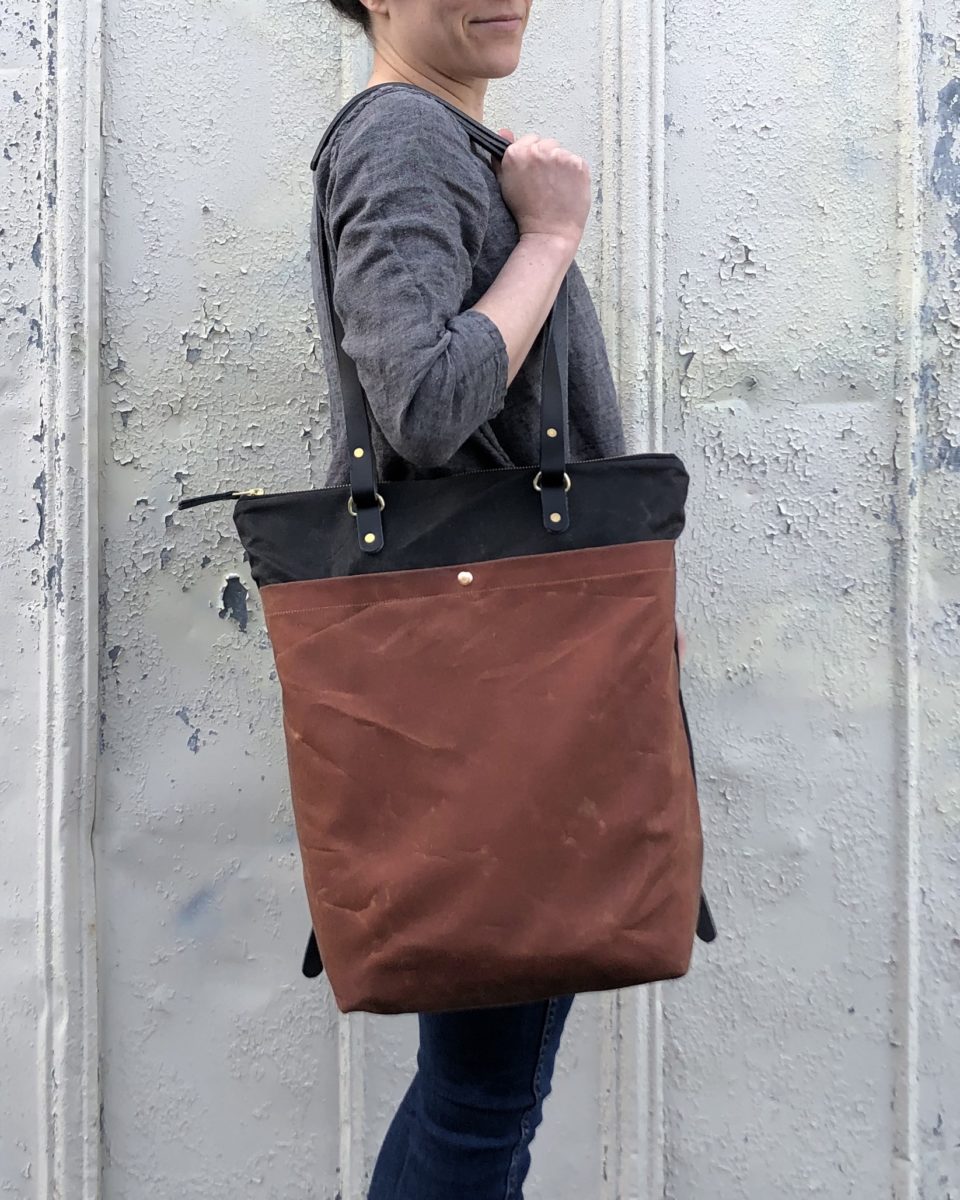
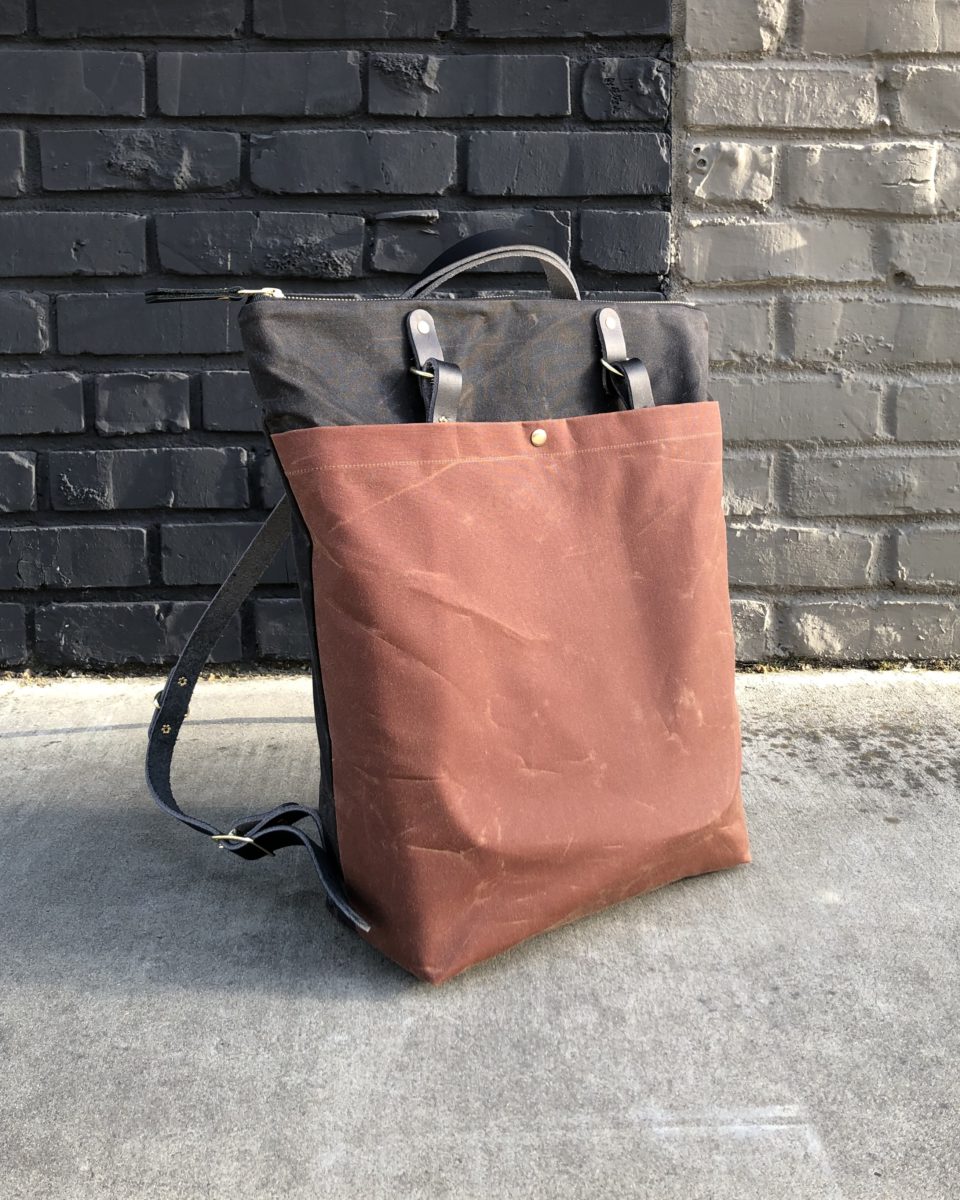
FABRIC & MATERIALS: Maywood Maker Kit, comes with EVERYTHING you need AND the fabric is already cut out and marked! After much deliberation, I went with the Brush Brown canvas for the front pocket, Dark Brown canvas for the exterior (which reads as a warm black to my eyes), black leather, and brass hardware. There are so many colors to choose from – it took me a while to settle on a color combination!
Sewing and installing the hardware only took a couple of hours, thanks to the Maker Kit. Maker Kits include pre-cut and marked fabric, making the process super fast. Klum House also has Finishing Kits, which include the leather and hardware – you just supply the fabric, or for ultimate customization options, you can buy just the pattern.
I will say that Ellie’s video tutorial (access included with pattern purchase) make rivet setting look like it takes just a few light taps, but I found I really needed to put some weight into it and hammer on the concrete of my porch. The tubular rivets, which are new for the relaunch, are really, really durable. The Finishing and Maker Kits also come with all the tools you need!
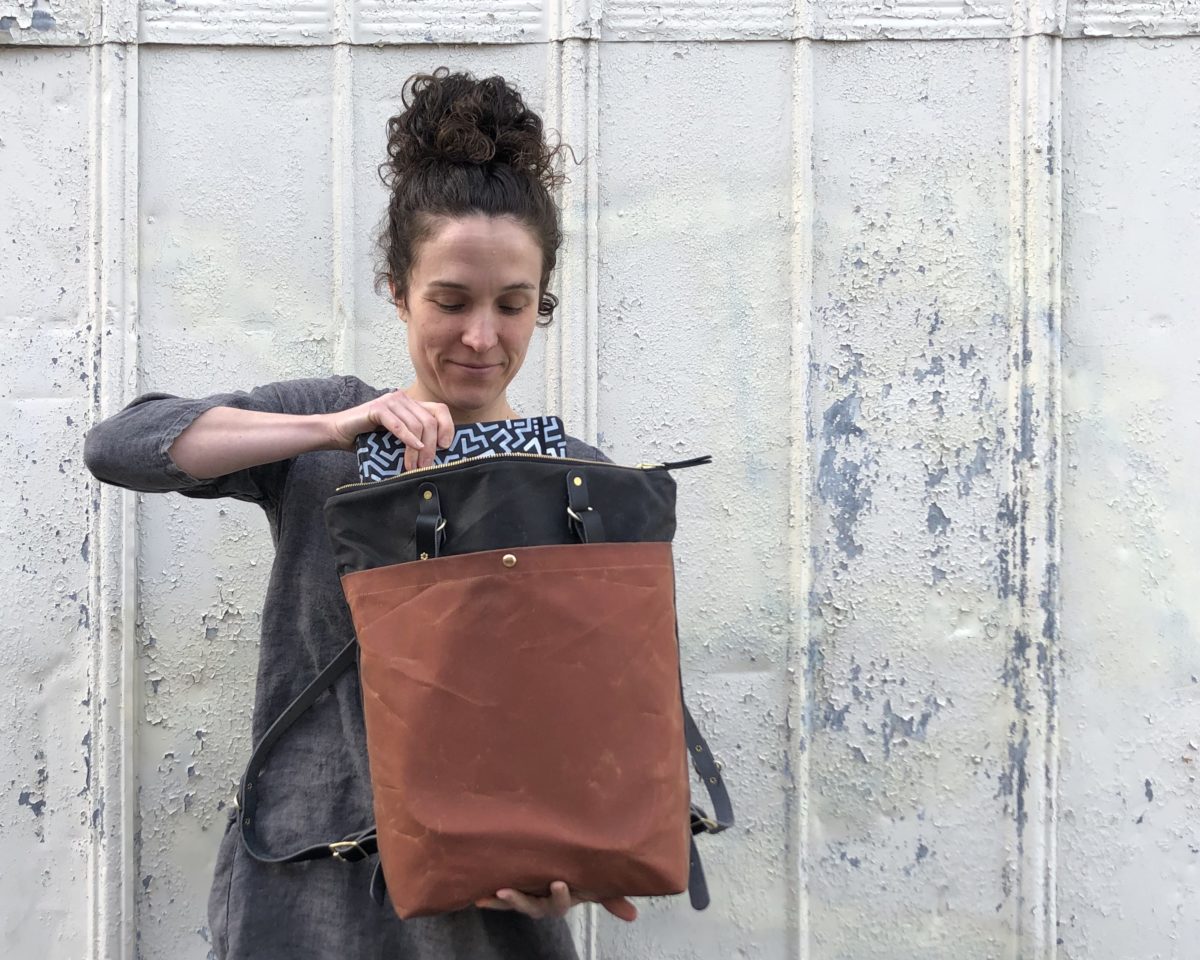
The Maywood is a really good size for a day bag. I have been able to carry my 15″ laptop, a sketchbook, a small bag of art supplies, and my usual purse things (wallet, lotion, keys, etc.) comfortably and with some room to spare. The front pocket provides additional toting space even with the front strap tucked inside.
I’ve made many a boxed corner, but the construction technique used in this pattern is super smart. It pretty much guarantees your seams will match up!
Here’s the coolest part of this bag – its versatility. Prefer to carry the day’s load at your side, it does that. Want to carry your stuff on your back, no problem. With a simple tuck and pull, the Maywood converts from a tote into a backpack. So clever!
I’m very happy with this make and am contemplating making a matching Fremont Tote for a slick travel set.
Remember there’s a discount code that’s good until April 22, if you want to make the Maywood too! The discount code MAKEMAYWOOD will take 10% off the purchase of any Maywood products.
Disclosure: I received the Maywood Maker Kit for free but all thoughts and opinions are my own. If you use the above link to purchase a Maywood product, I will receive a small commission from the sale with no change in cost to you.
The revamped Maywood Totepack has arrived! The Maywood is basically two bags in one; it transforms from a tote to a backpack with a simple slide and tuck and I CANNOT WAIT TO MAKE IT.
Ellie over at Klum House is a gem and has asked me to test out the updated pattern / hardware and share the process with you all. Best part? She’s included a sweet discount code for you!
The discount code is MAKEMAYWOOD. It will take 10% off the purchase of any Maywood products between now and Monday, April 22 at midnight.
What? There’s more?
April 22 is the shipping deadline for anyone who wants to participate in Klum House’s Live Virtual Maywood Classon Sunday, April 28. Access to that live class is free for anyone who buys a full Maywood Maker Kit (and $10-30 sliding scale without the maker kit).
Klum House patterns are super approachable and result in really fabulous, high quality bags. Make the Maywood with me – I’ll be sharing my progress on Instagram and my finished bag on the blog April 17th!
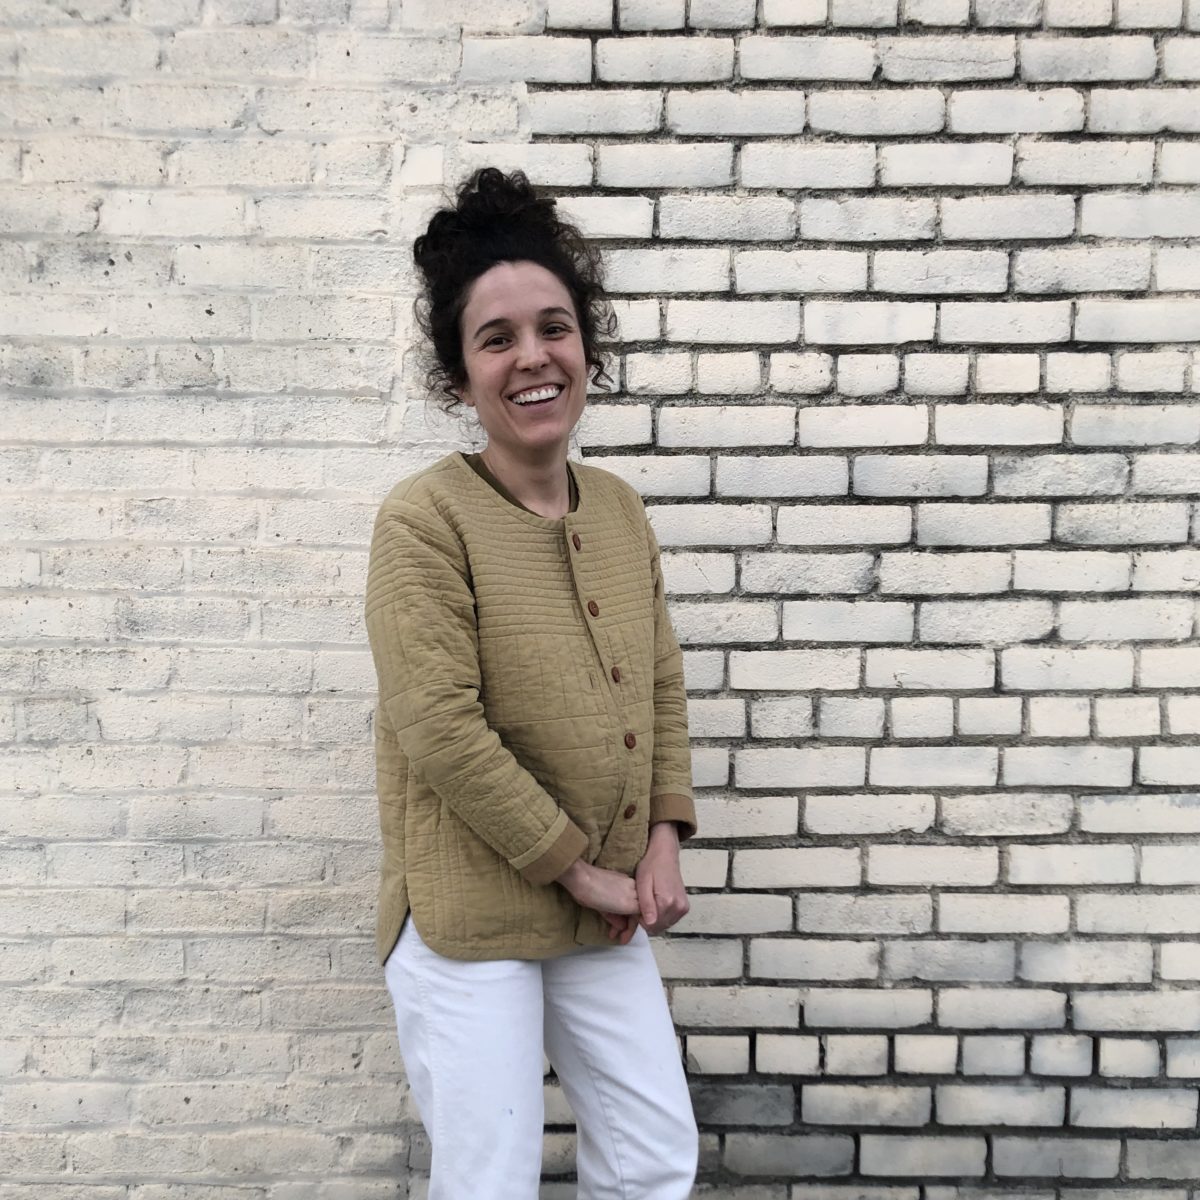
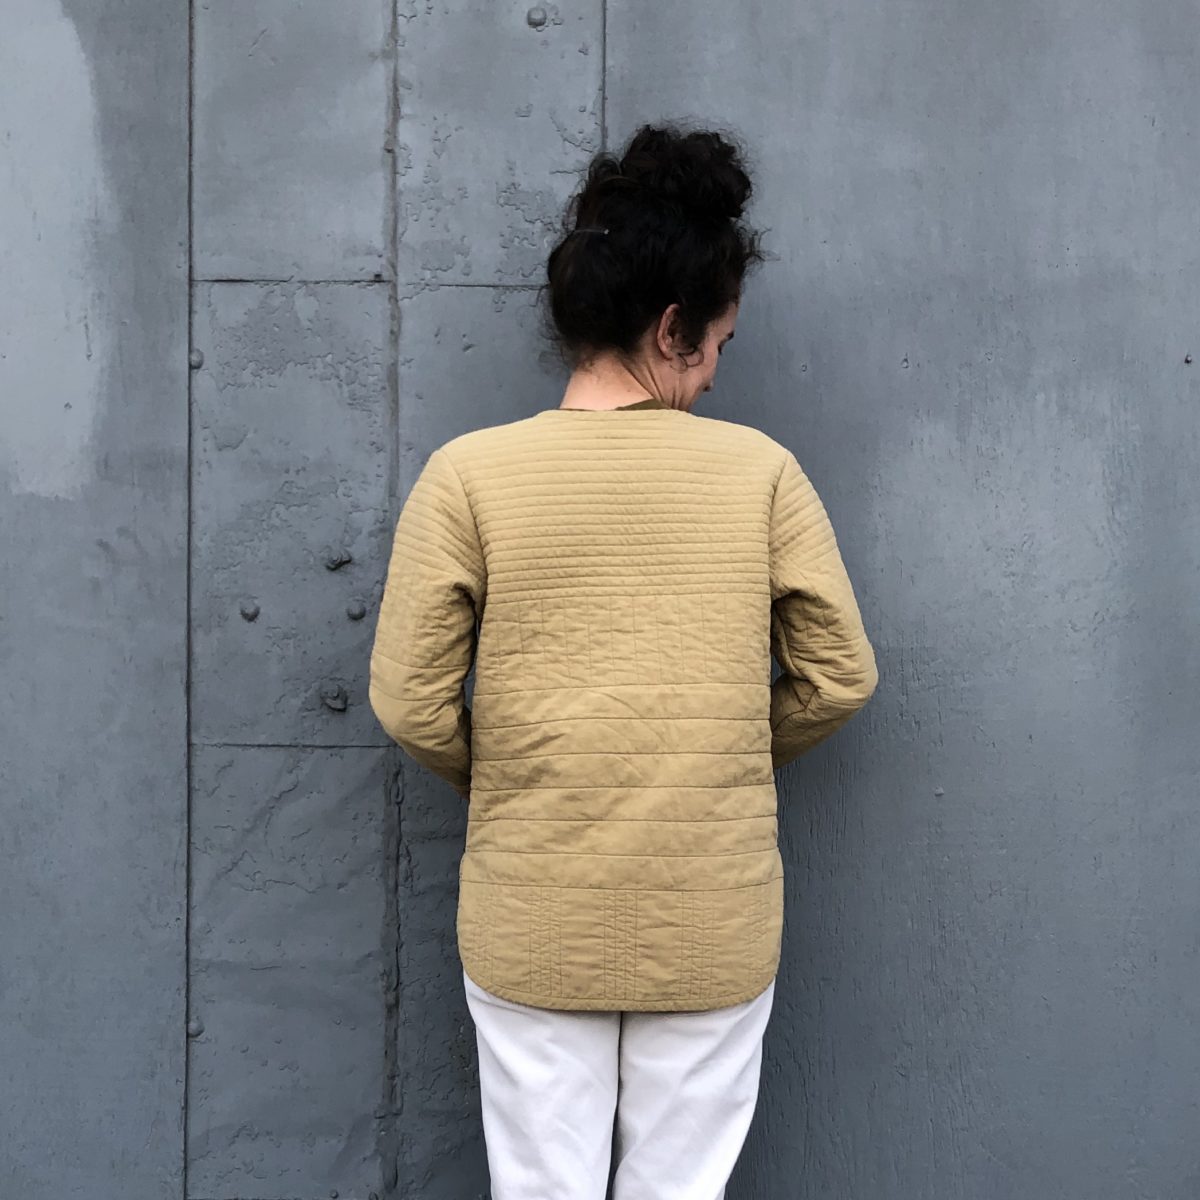
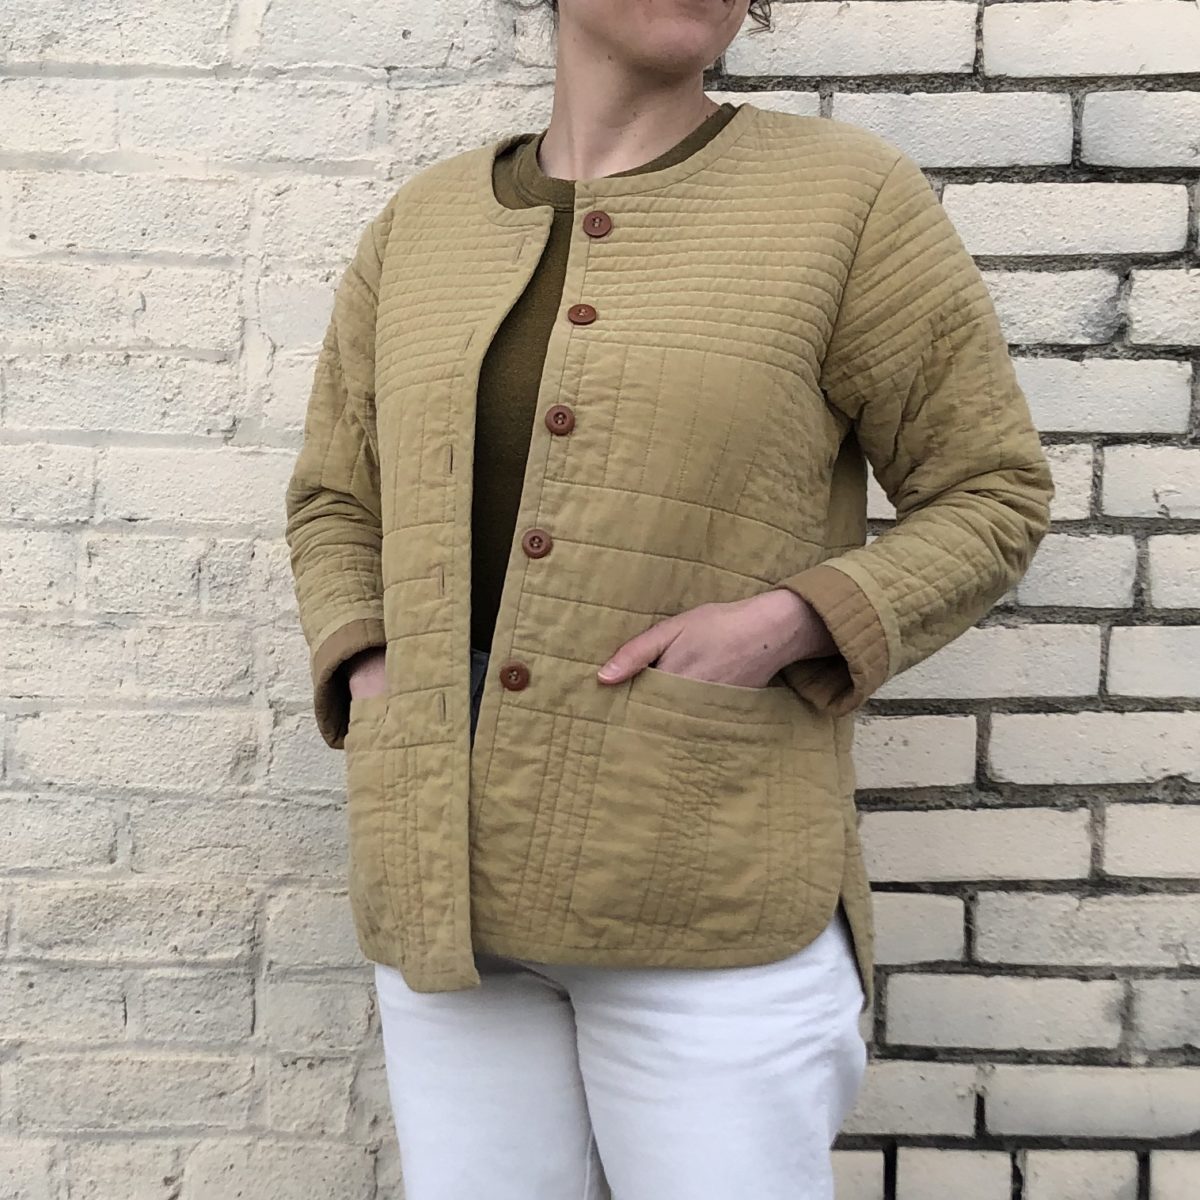
The Tamarack Jacket has been on my ‘To Make’ list for forever. I first planned it in early 2017.
Originally I had planned to modify the sides, but then decided to make the pattern as is to prepare for another Tamarack I’d been asked to make for a magazine (won’t be able to share that one for a while).
My motivation kinda pooped out after I finished machine quilting all the pieces and it sat in my WIP pile for a couple months.
The welt pockets felt like a big hurdle to overcome, which might be why I set the whole thing aside once I got to that step. But Grainline’s Inserting the Welt Pockets post made it really easy to understand.
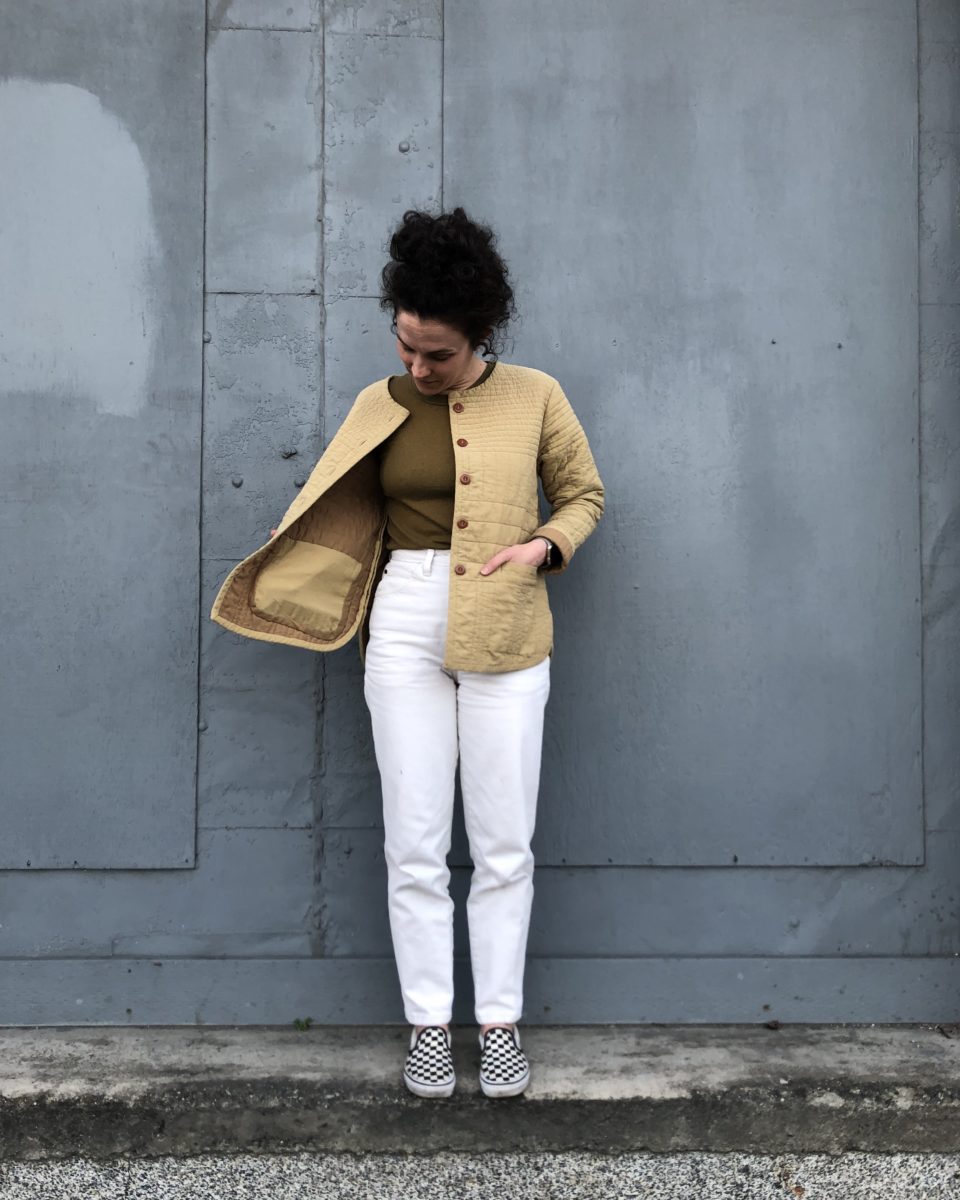
The lining was leftover from my Timber Quilt. Its former life was a Calvin Klein bed sheet and I think it’s the perfect greenish brown. The exterior fabric is also a thrifted sheet.
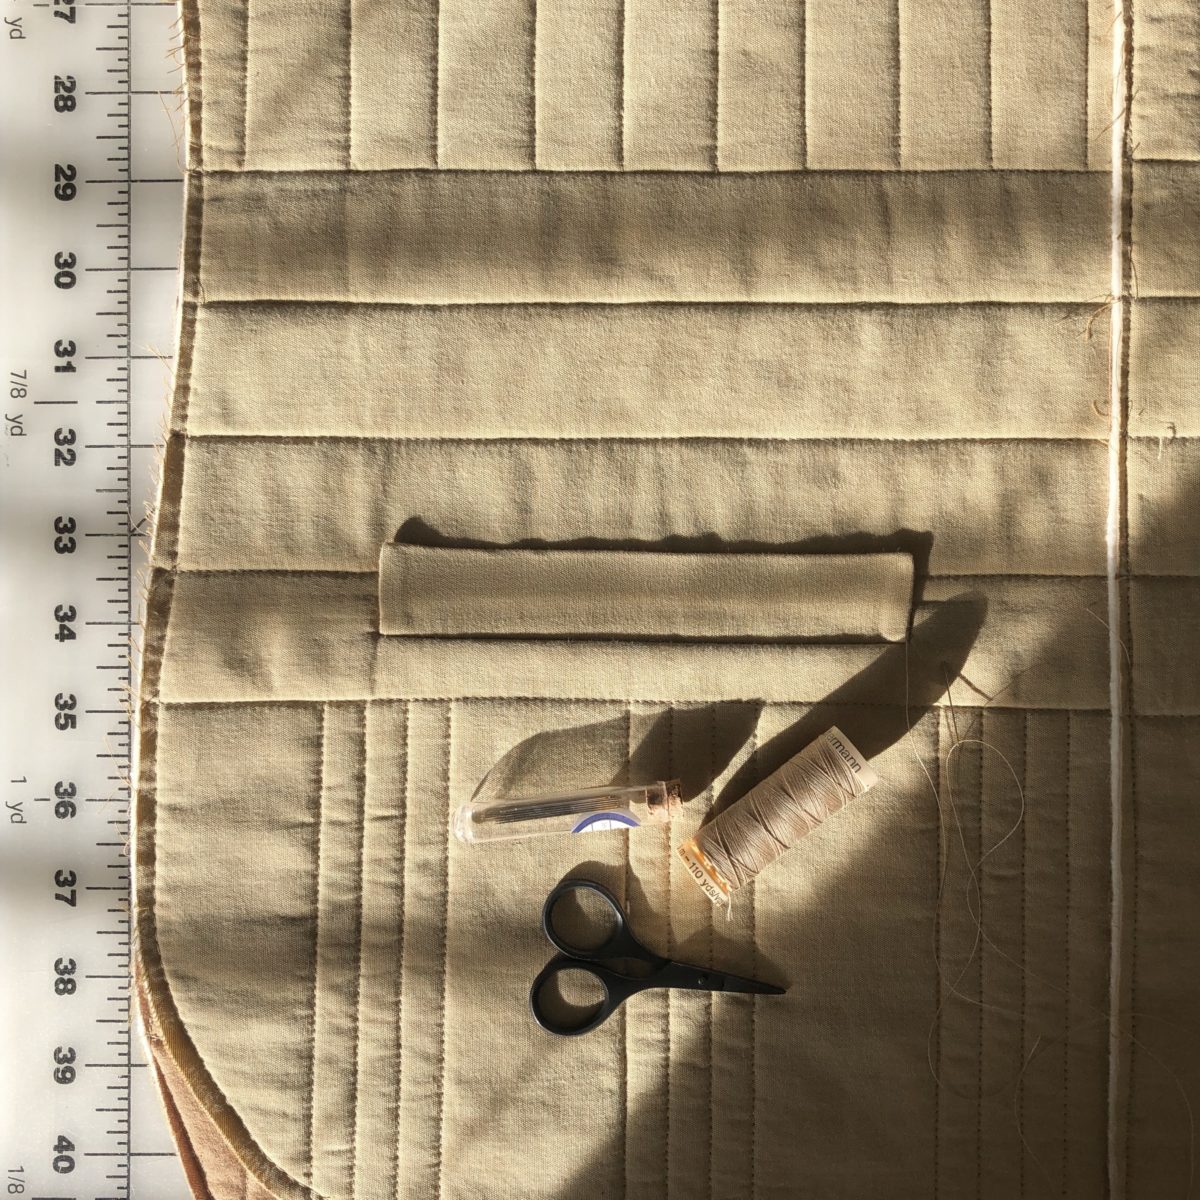
I was inspired by Bella Zilber to use buttons instead of snaps. Her monochrome version is perfection! I was nervous that my machine wouldn’t be able to make the buttonholes through so many layers, but I added them before the bias finish (so everything could evenly feed under the foot) and they turned out great! I also used a ton of Fray Check and didn’t cut the holes open for a few days. They’re really sturdy now!
I really wanted every seam to be encased in bias tape, but once the side seams were sewn up, I discovered the underarm seam was too bulky to comfortably wear. I took off the bias tape from the shoulder seams and serged the sleeve top and sleeve opening, which drastically reduced the bulk. I think the silhouette is just a little too fitted to have a complete bias finish on the inside.
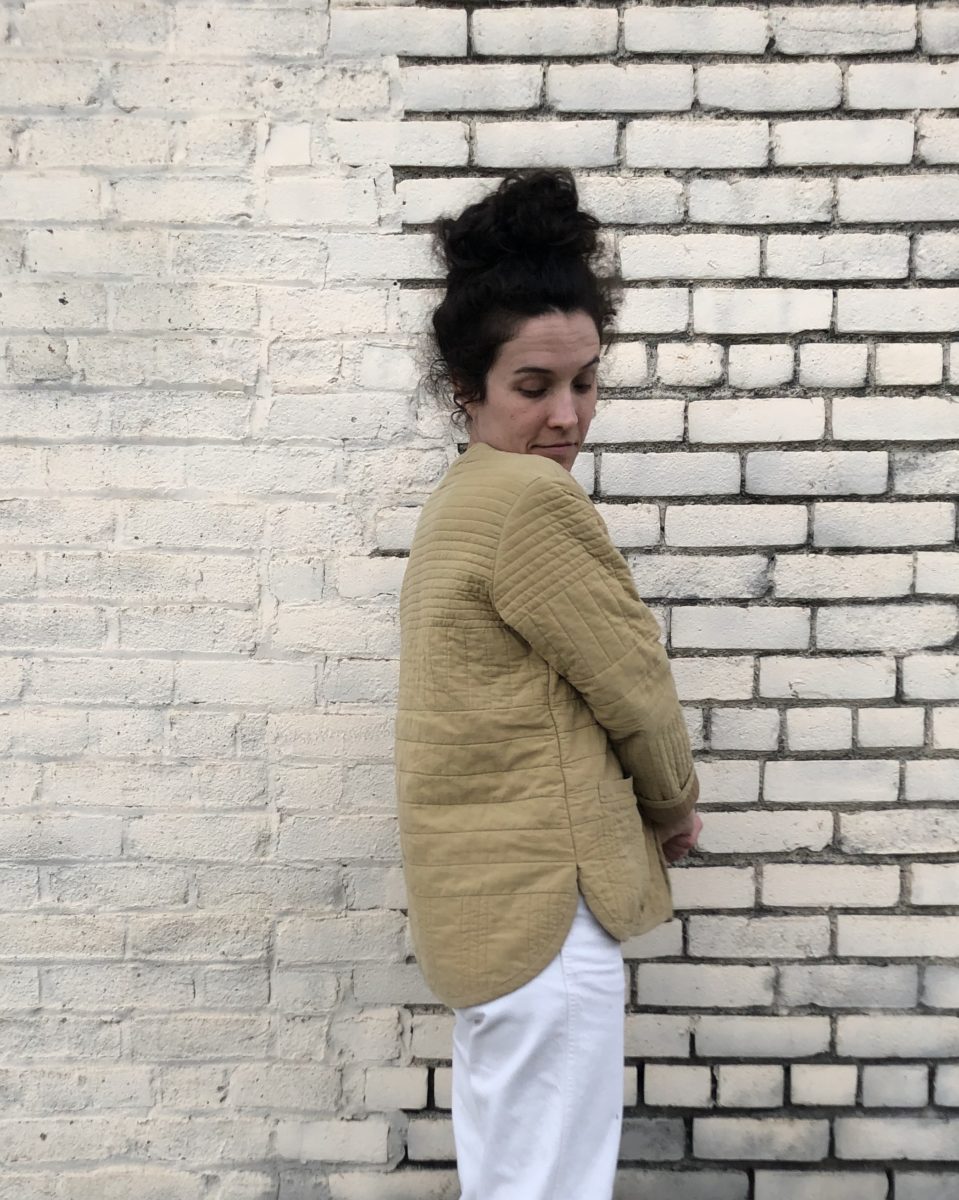
I’m pretty pleased that even though each piece was quilted independently, it all sorta lined up in the end. I also can’t tell that I accidentally made one section on the sleeve a half inch longer than every other piece.
This project made me understand the pleasure that can be found in hand sewing. It also made me want to take off the binding on my Timber Quilt and redo it (we’ll see if that actually happens). When you hand sew you can get near perfect corners!
I need to reassess if hand sewing the welt pockets to the jacket is the best option because after a week of wear, both pockets have come undone. Otherwise, even with the weird Frankenstein finishes on the inside, I’m so proud of this make! I wore it every day this week and know even after its novelty wears off, it’ll get a lot of use.
I doubt I’ll get around to this anytime soon, but I’m envisioning making a slightly cropped denim version with straight side seams, a 1″ grid quilting pattern, a zipper, patch pockets, and a collar.