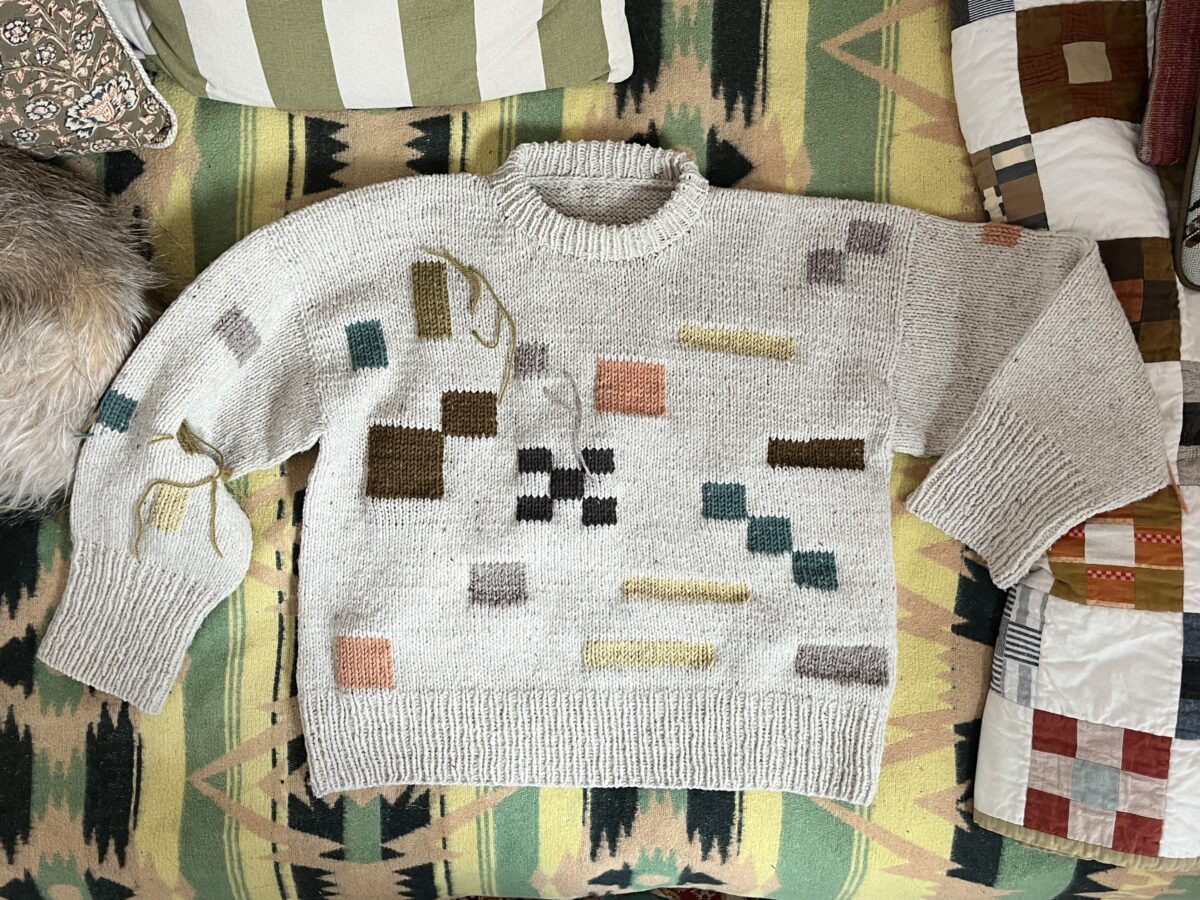
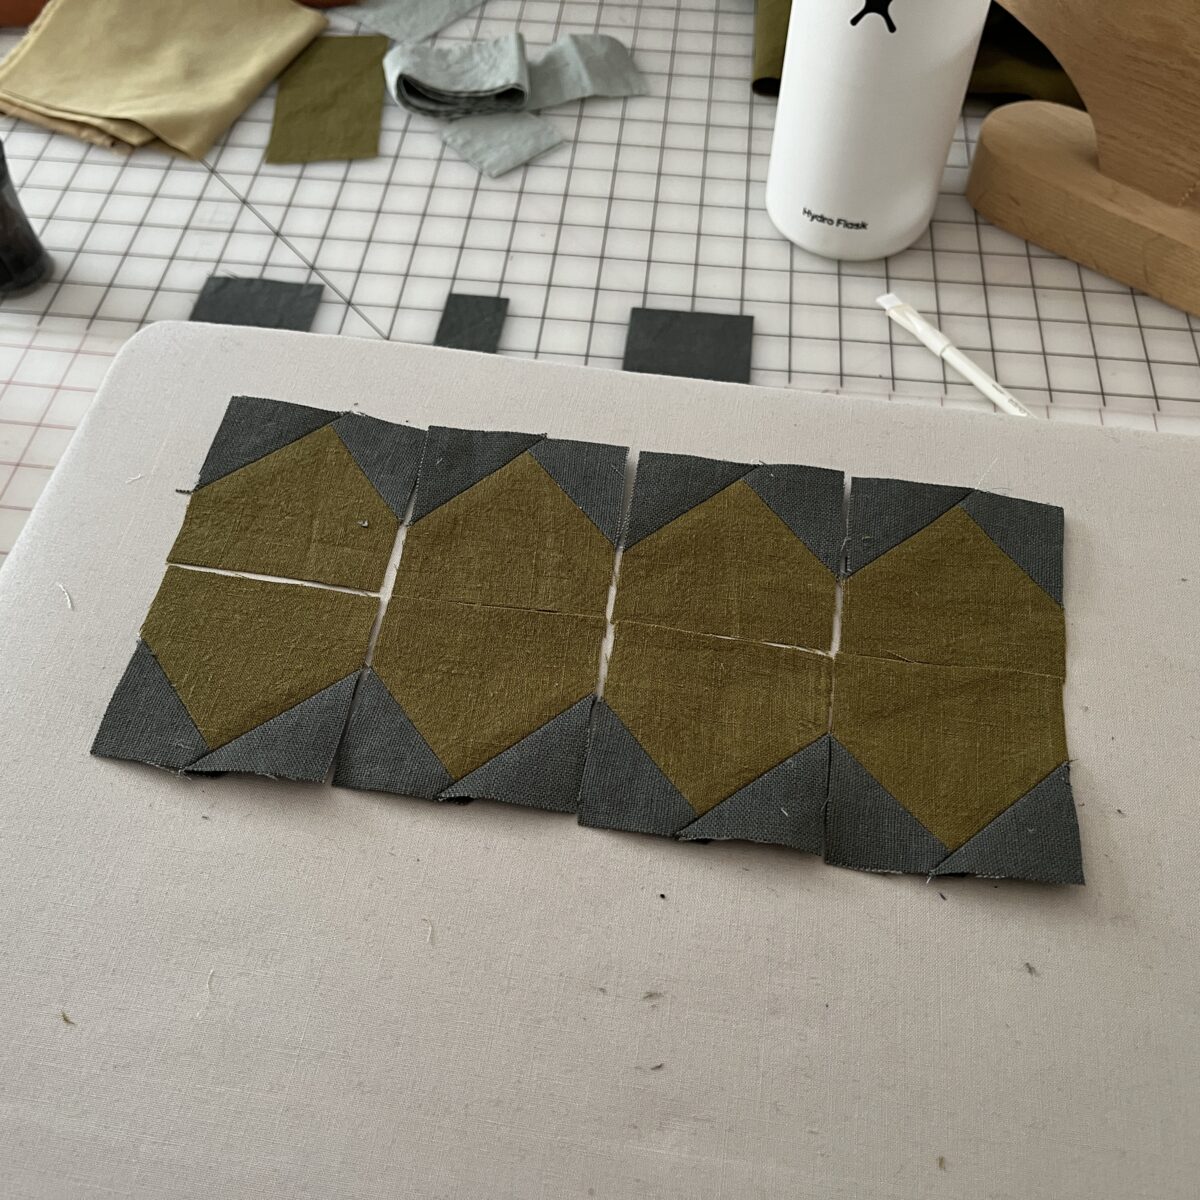
I recently decided to make a quilt inspired by this pillow. I found a tutorial that makes two blocks from two different colors of 14” x 14” squares that look like this:
I played around with some color combos before settling on Kona cotton “wasabi” and “pickle”.
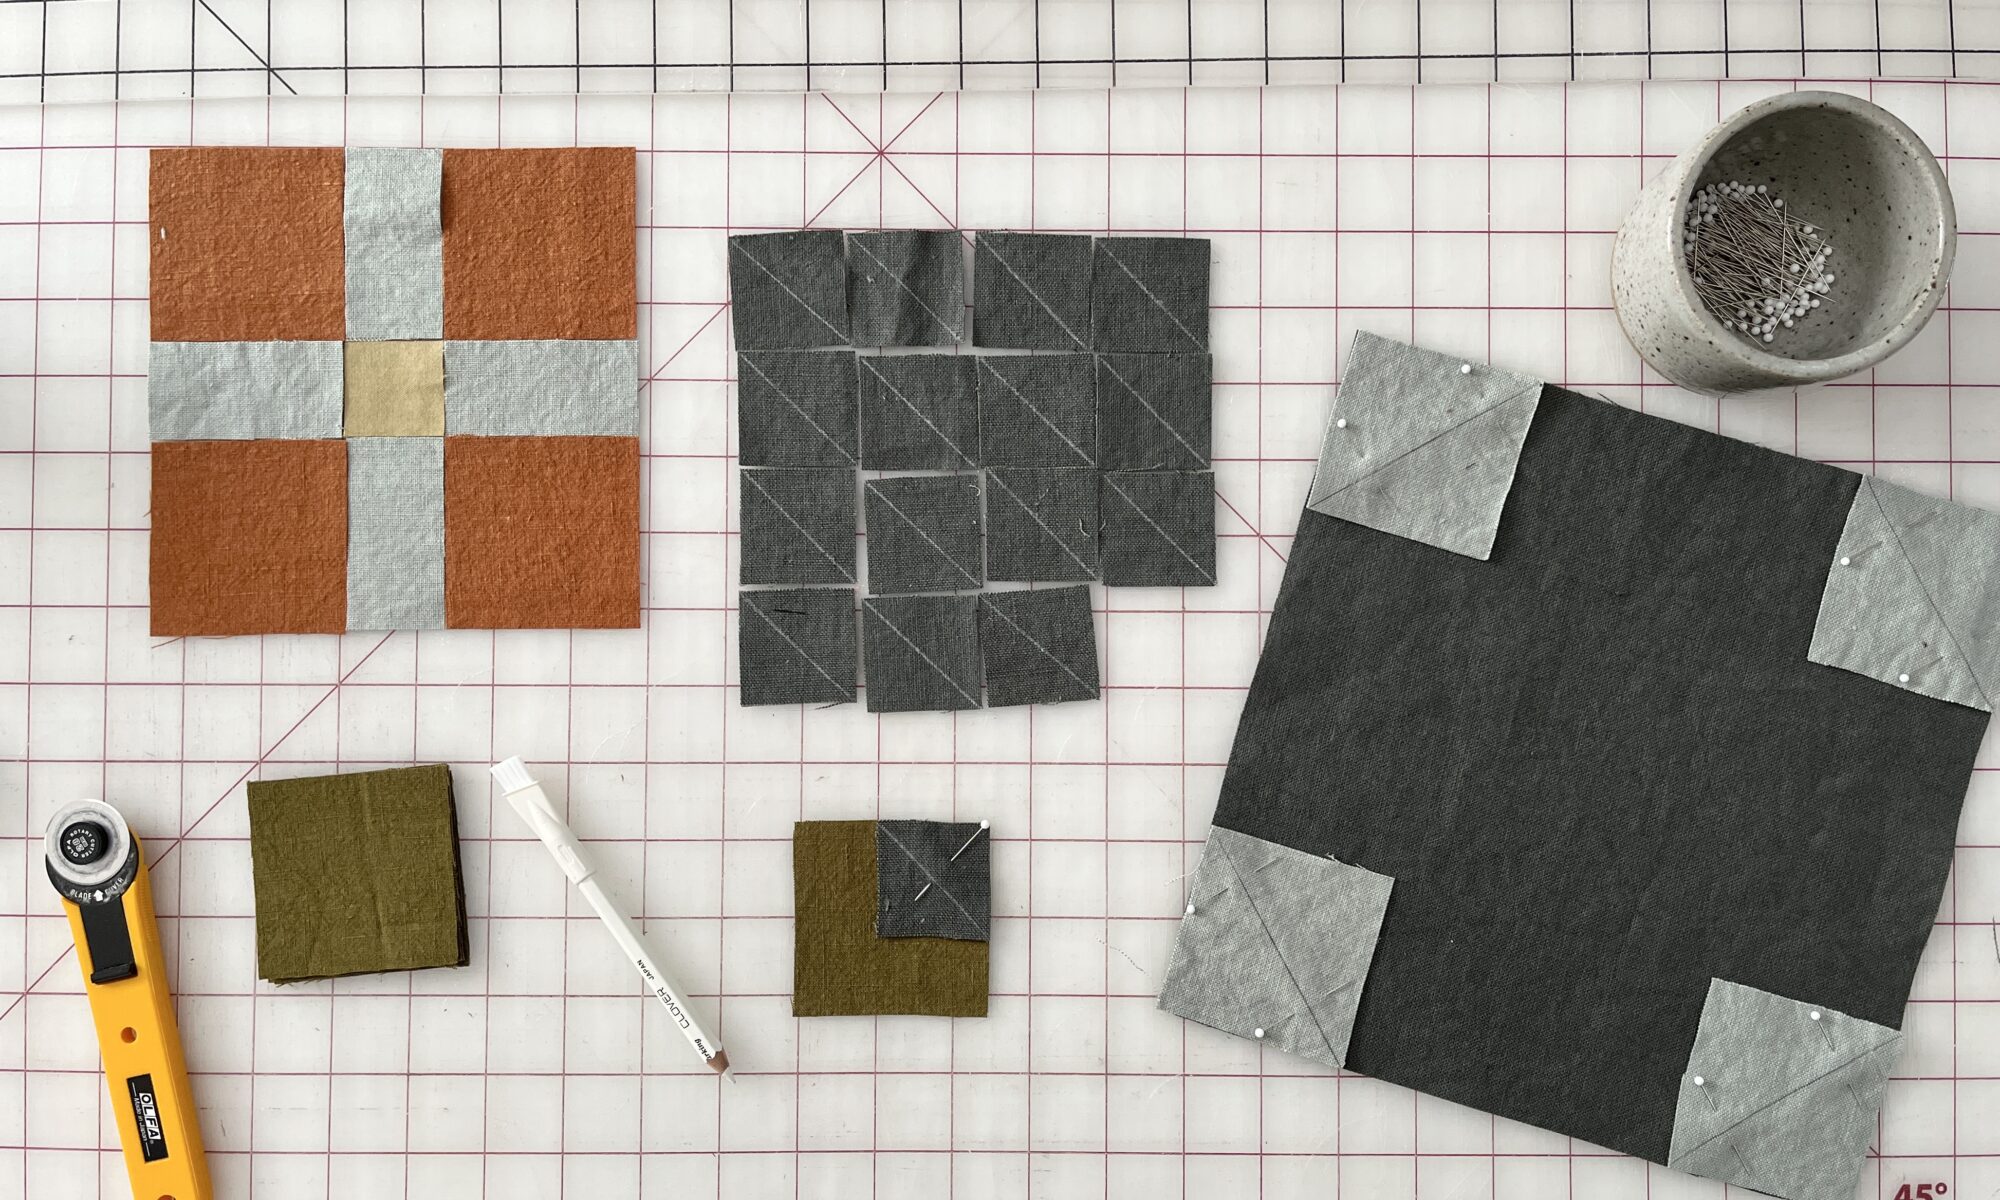
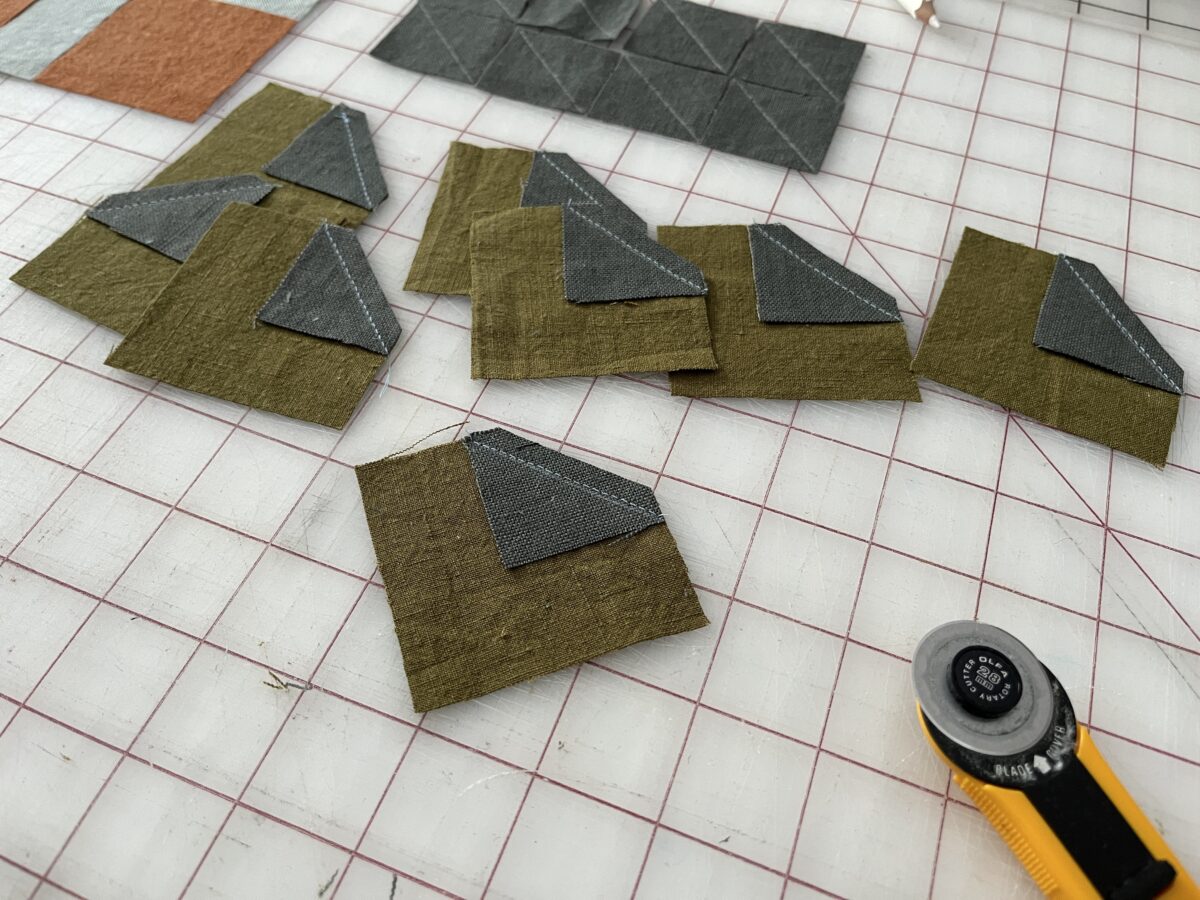
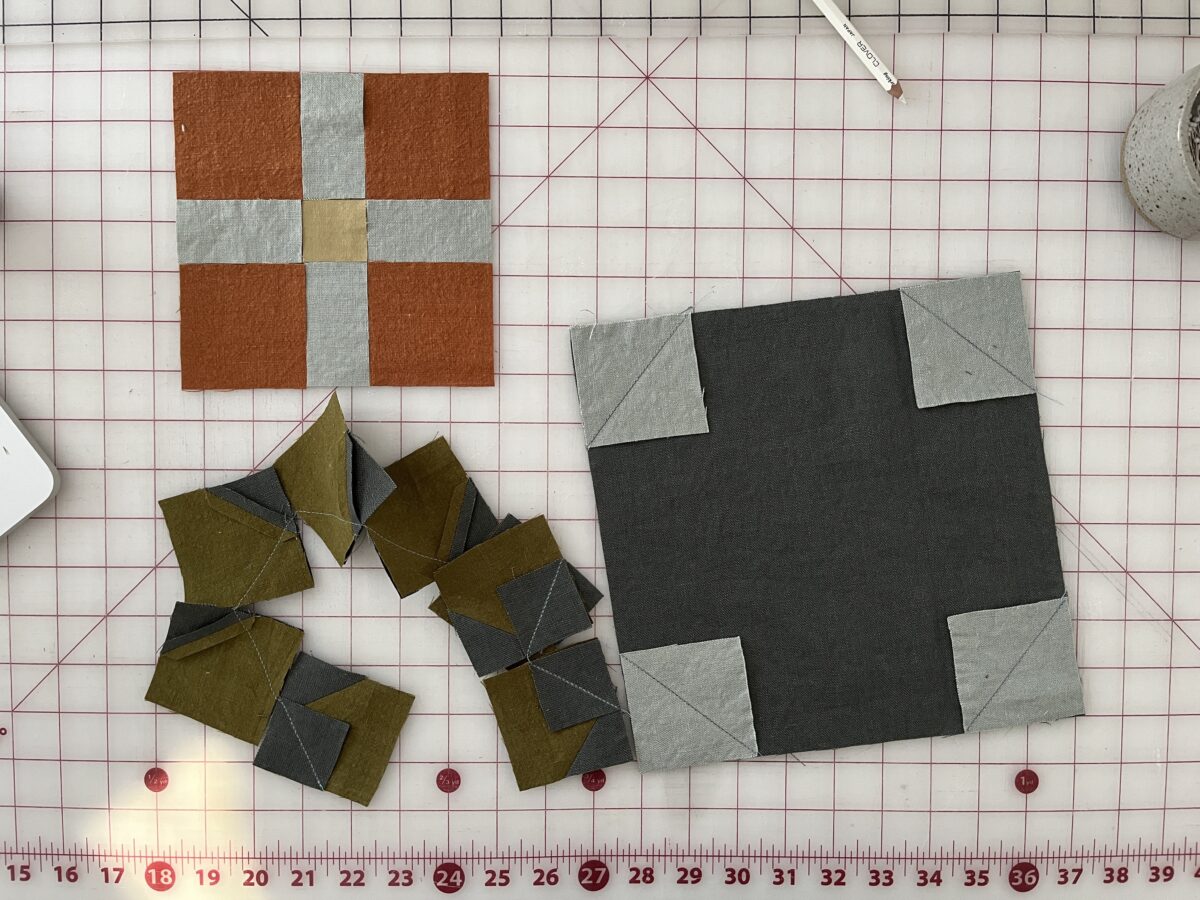
While waiting for fabric to arrive, I pulled out the only solid scraps in my stash to test it out.
I haven’t calculated how many blocks I’ll need, but I’m excited to start a new quilt project.
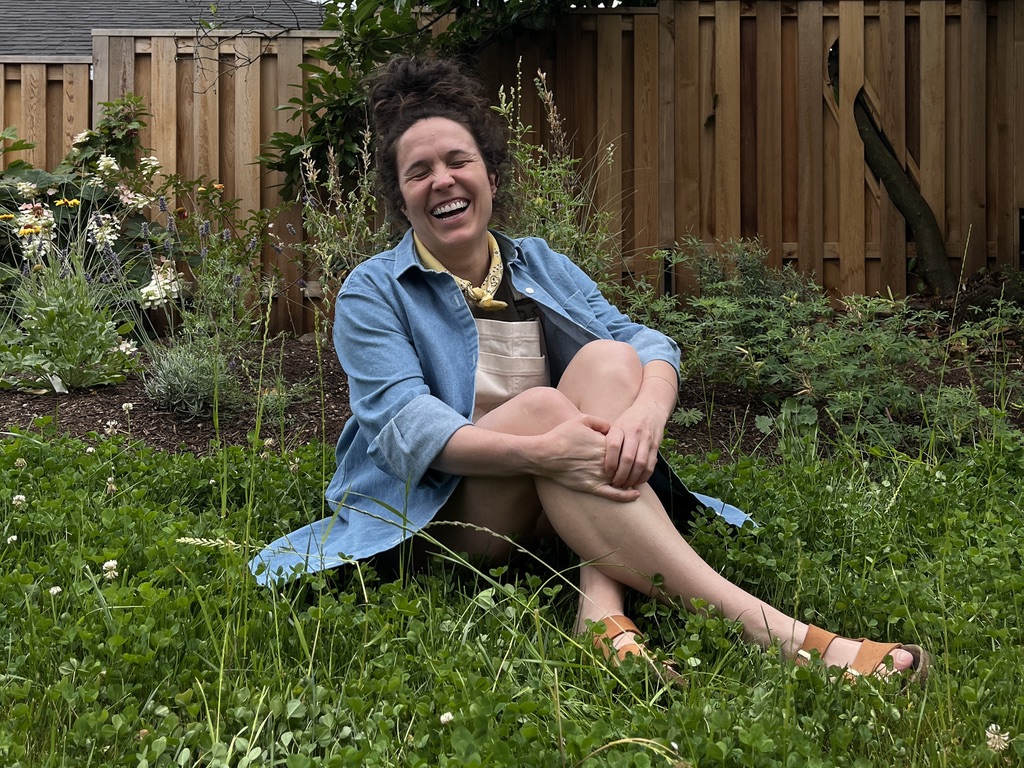
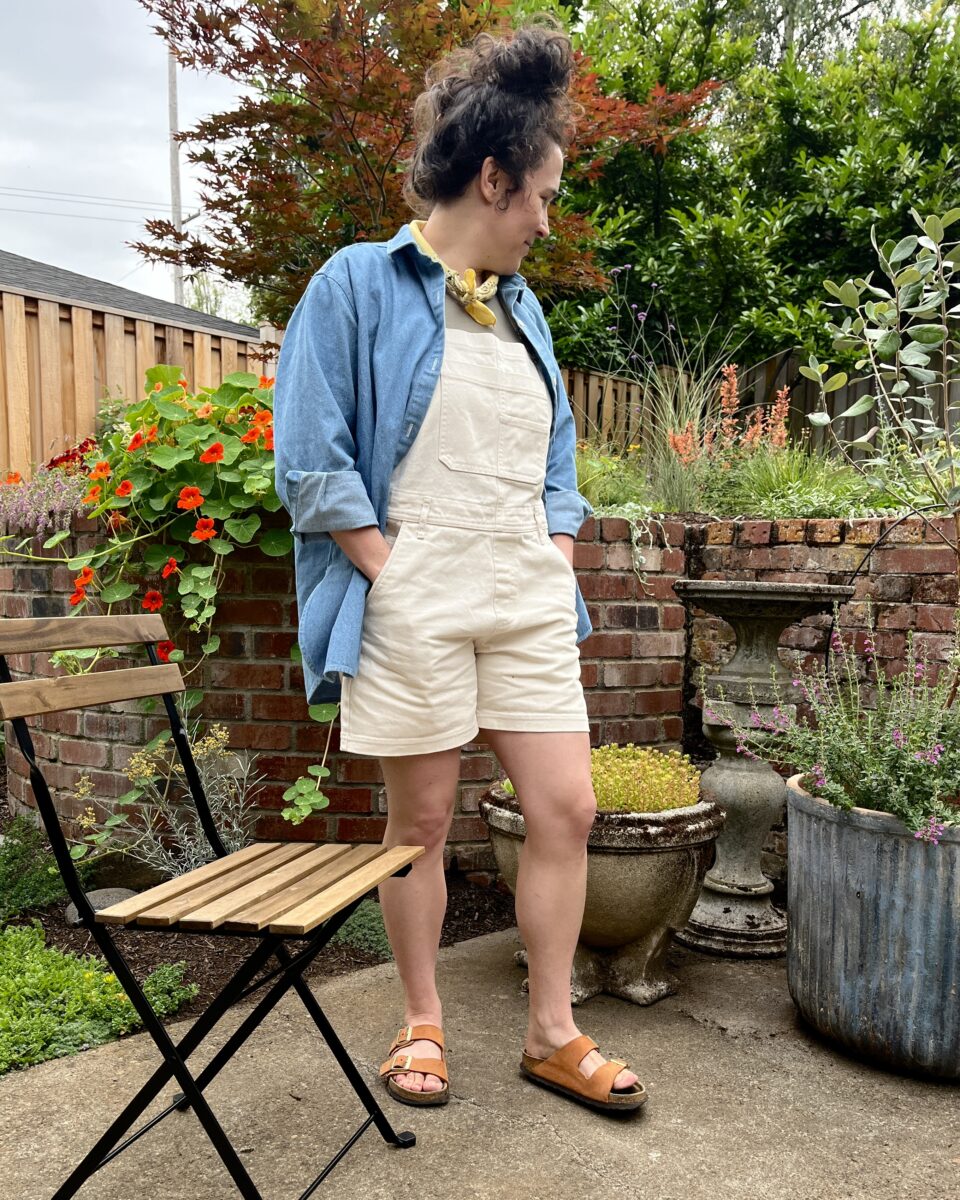
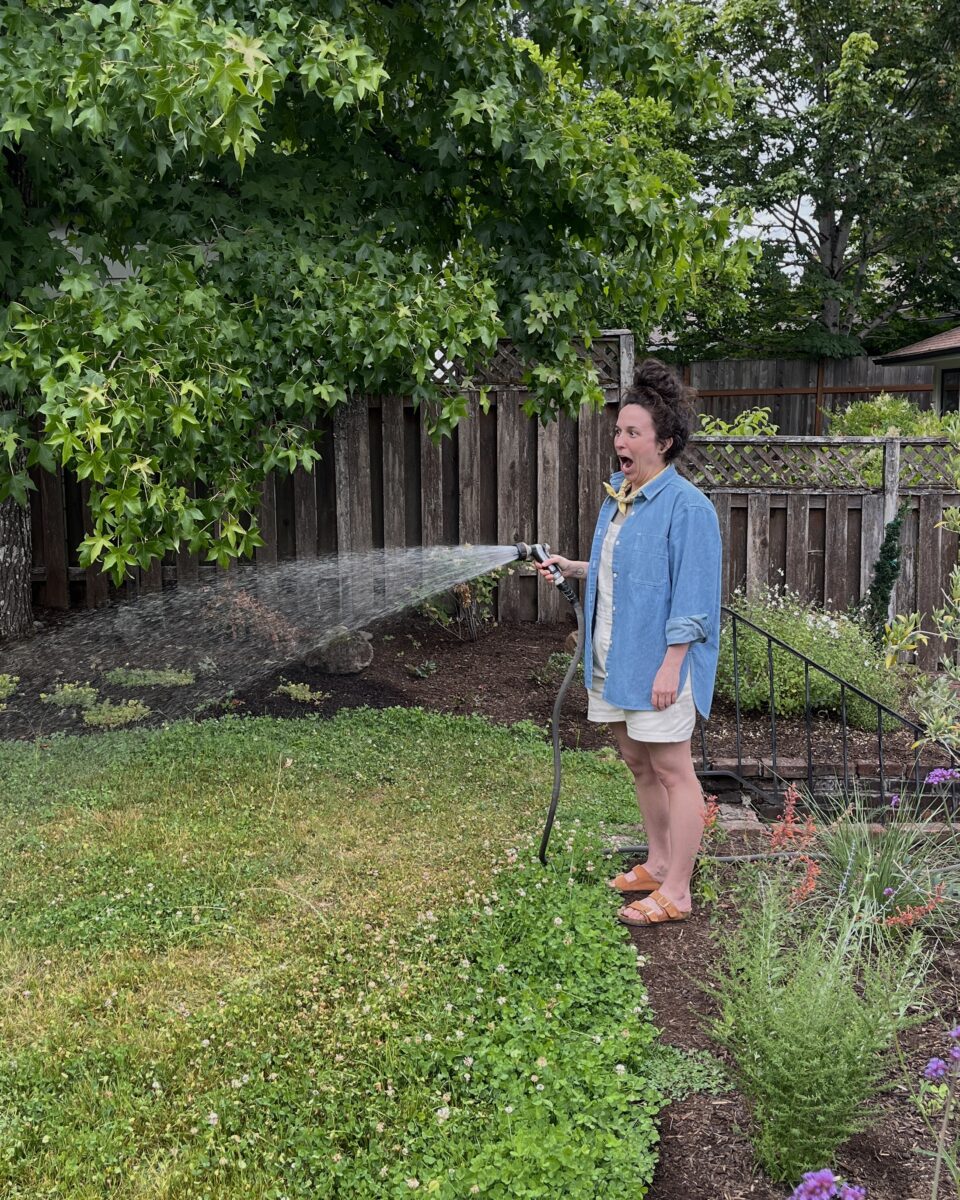
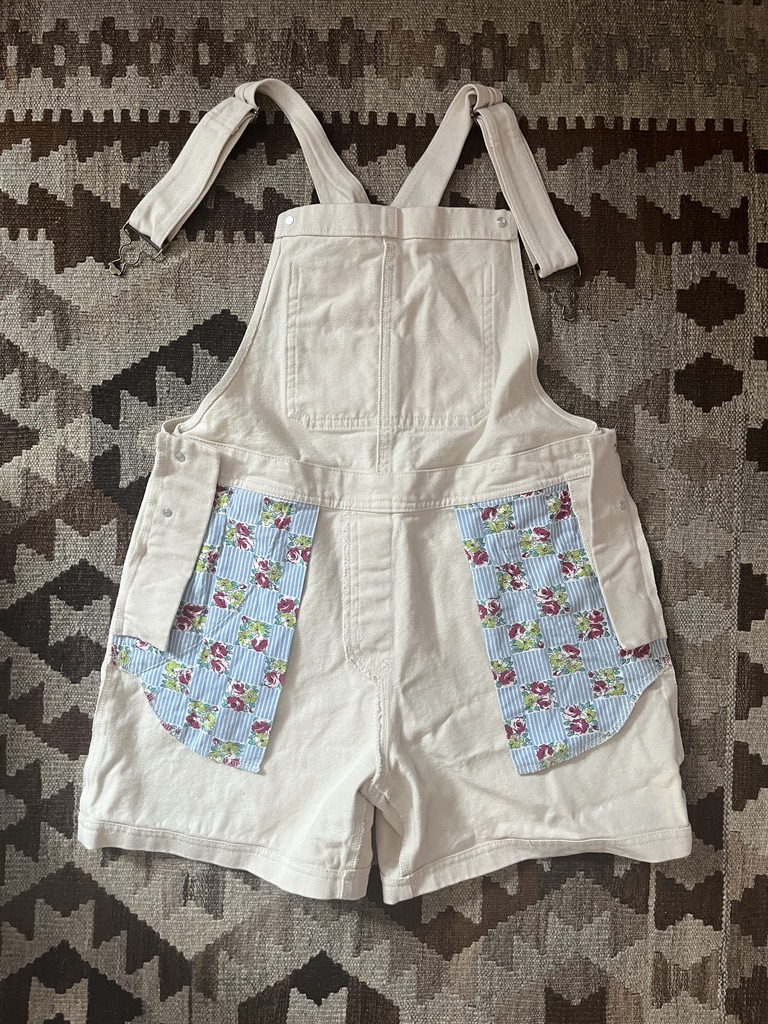
I have been wearing this combo a lot lately. It’s perfect for gardening, dog walks, potting at the studio, and everywhere else.
I had a pair of thirfted shorteralls (I refuse to use the word shortalls) that I outgrew a few years ago and have been missing ever since. Then I saw True Bias’s Riley pattern and knew the white Carhartt denim in my stash would be a perfect combo. I’m also wearing a hacked Seamwork Orlando.
A hummingbird took a shower.
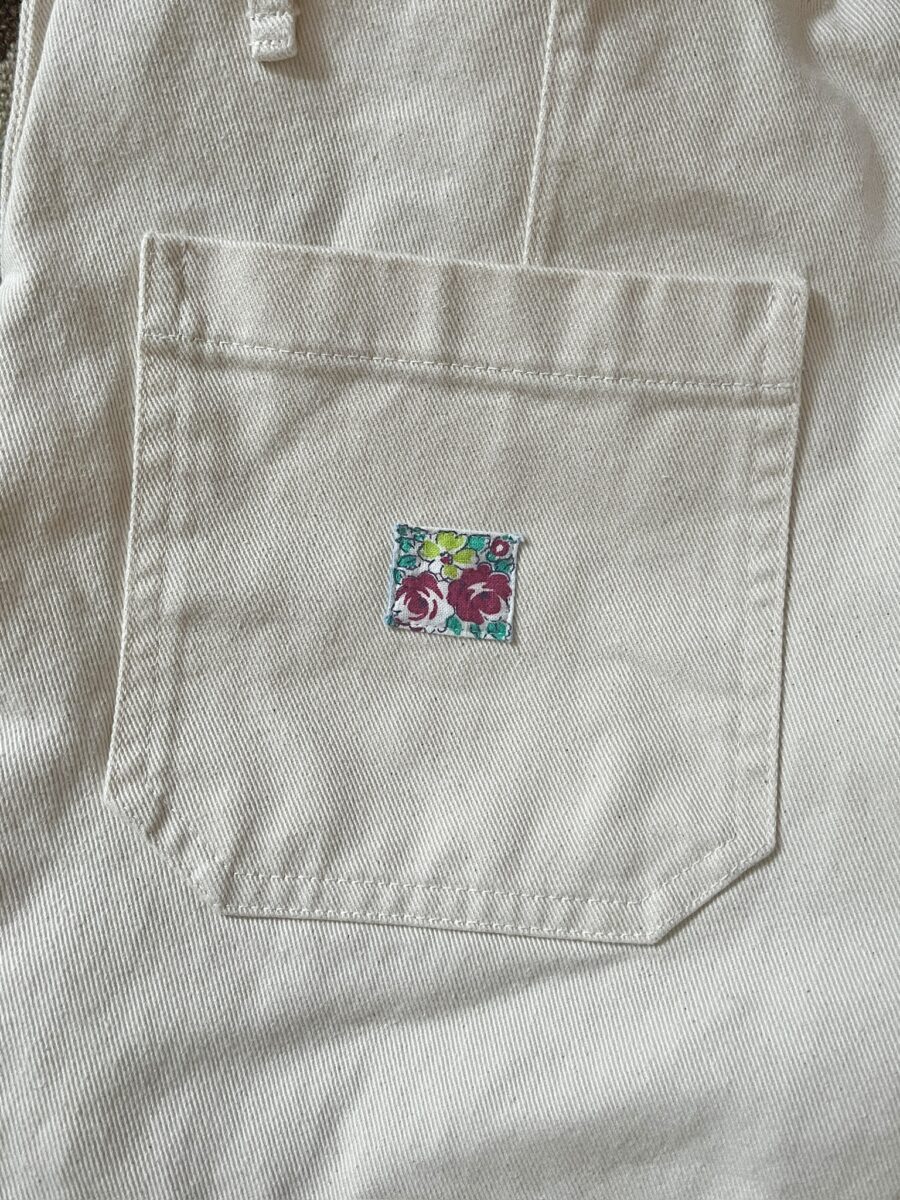
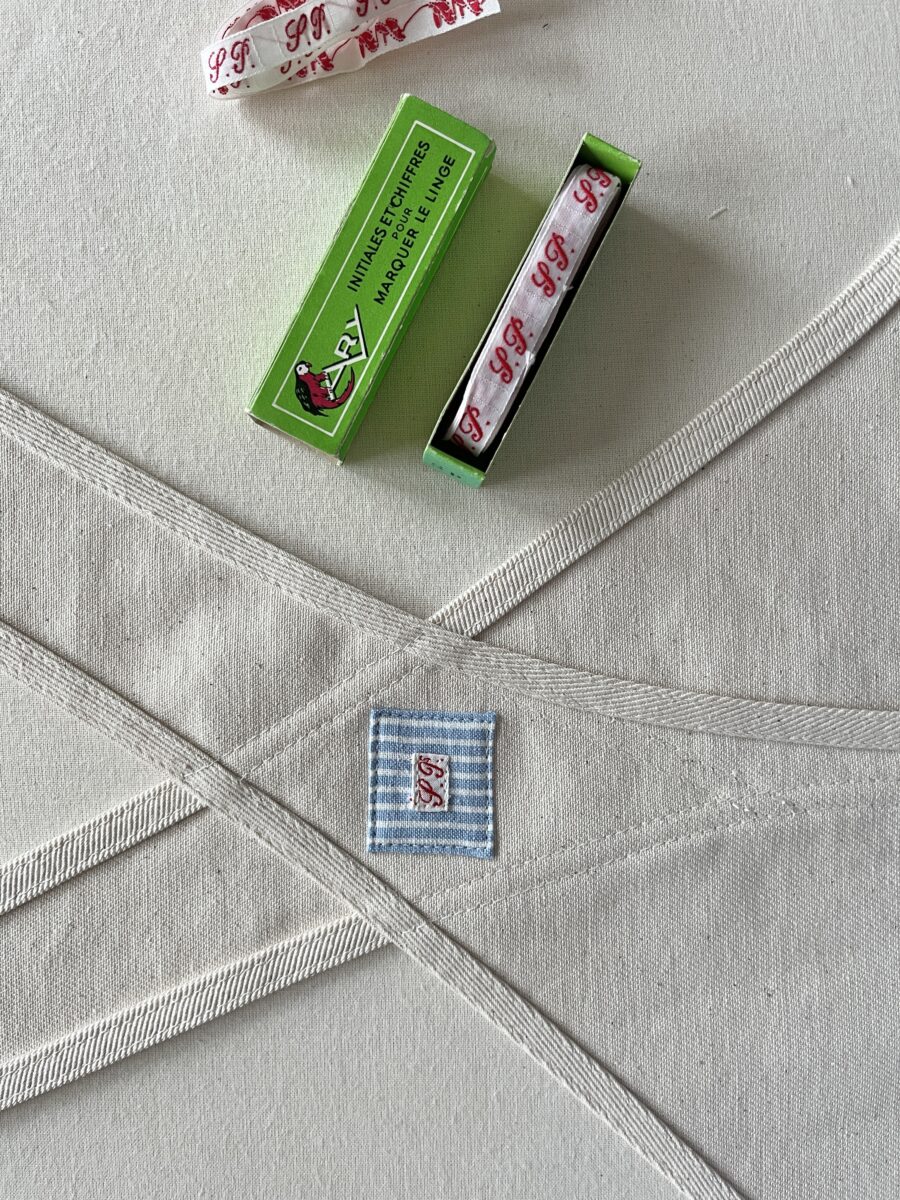
They came together pretty quickly and I excitedly used some vintage feed sack cotton for the pockets and tags. I especially love the back pocket detail.
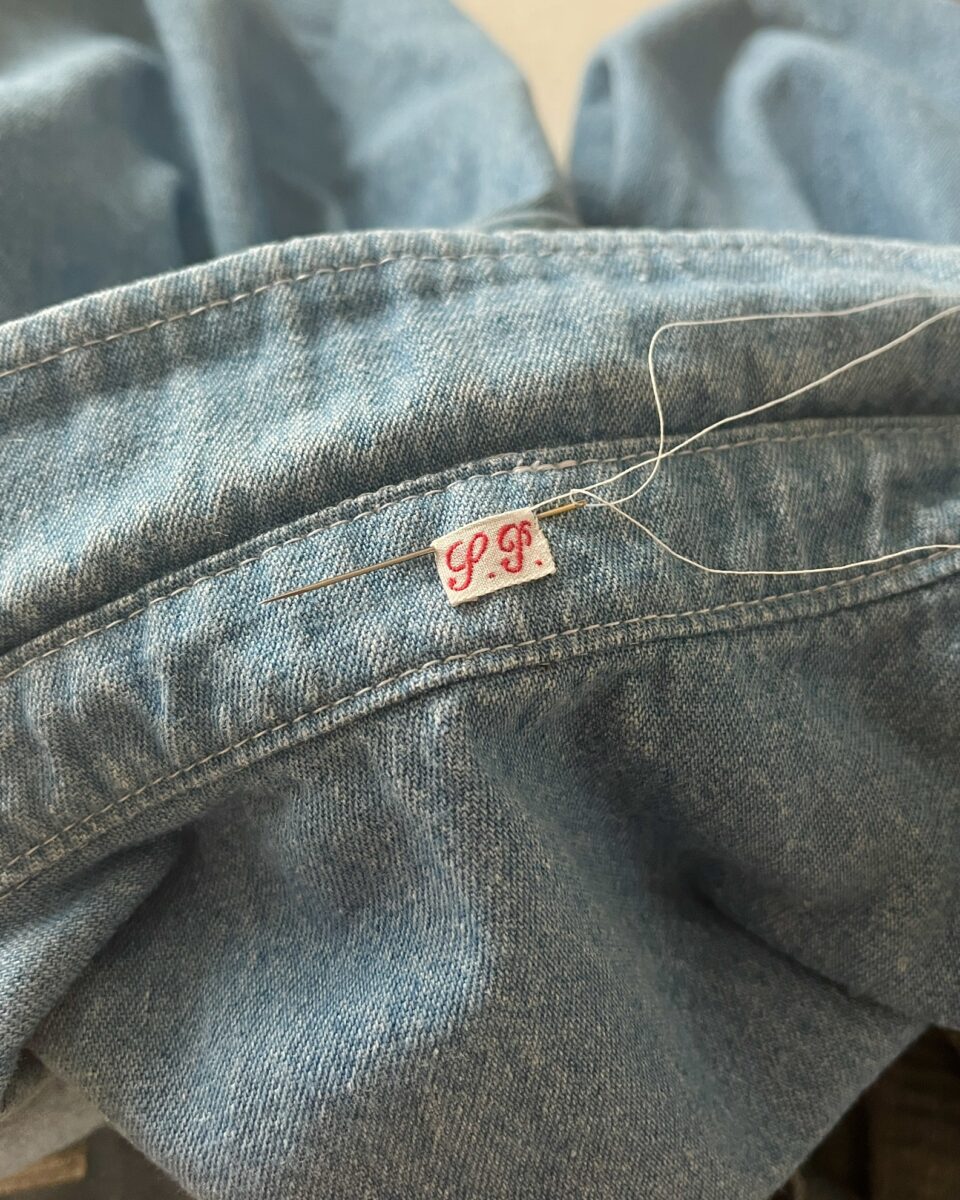
I ordered some vintage French laundry initial tags a while ago and have slowly been adding them to my makes. They are a lot smaller than I thought they’d be, so I used some of the feed sack cotton again. I machine stitched this one on, but will hand sew all future tags because the P got a little obscured.
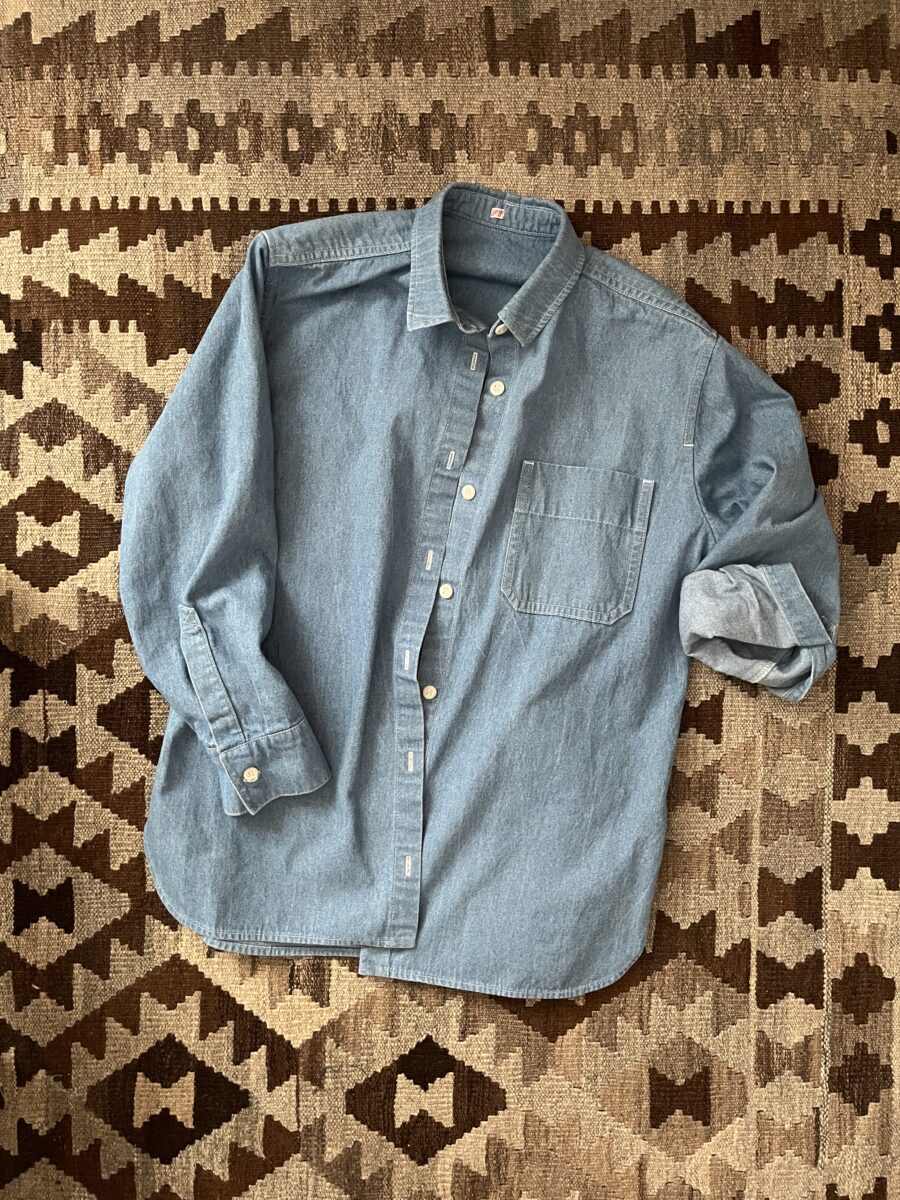
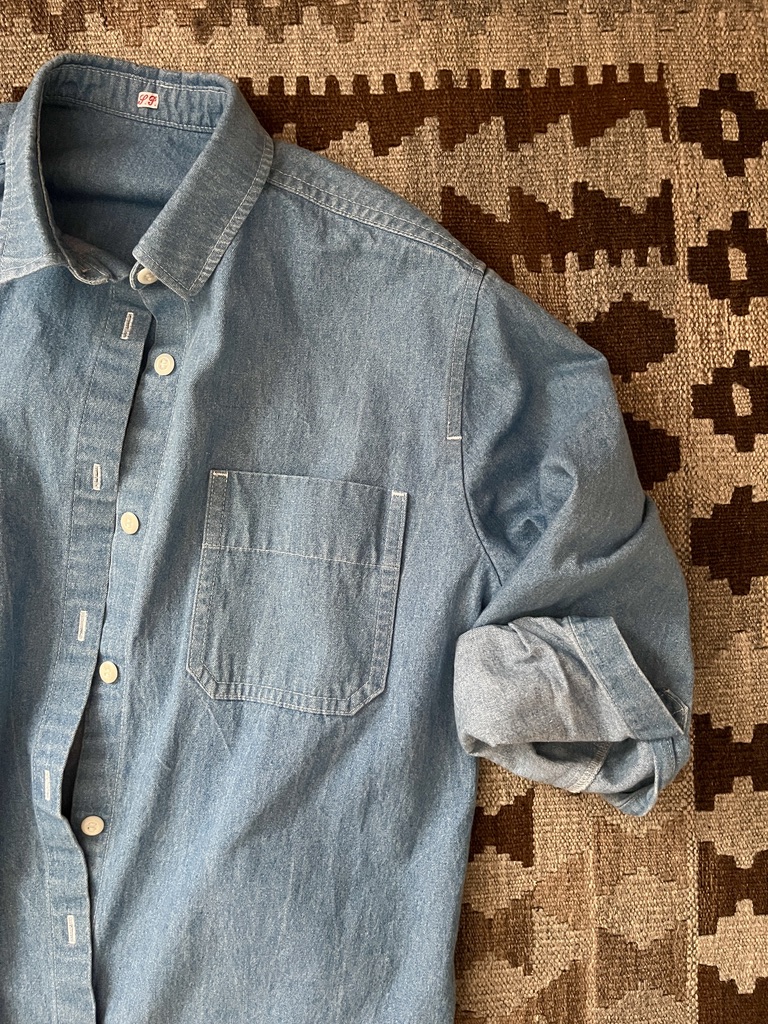
I LOVE this shirt. After making this version, I knew I needed another one. The denim is light weight, maybe 5 oz, and it’s the perfect layering piece. I changed the construction on the bottom placket edge a bit to reduce bulk.
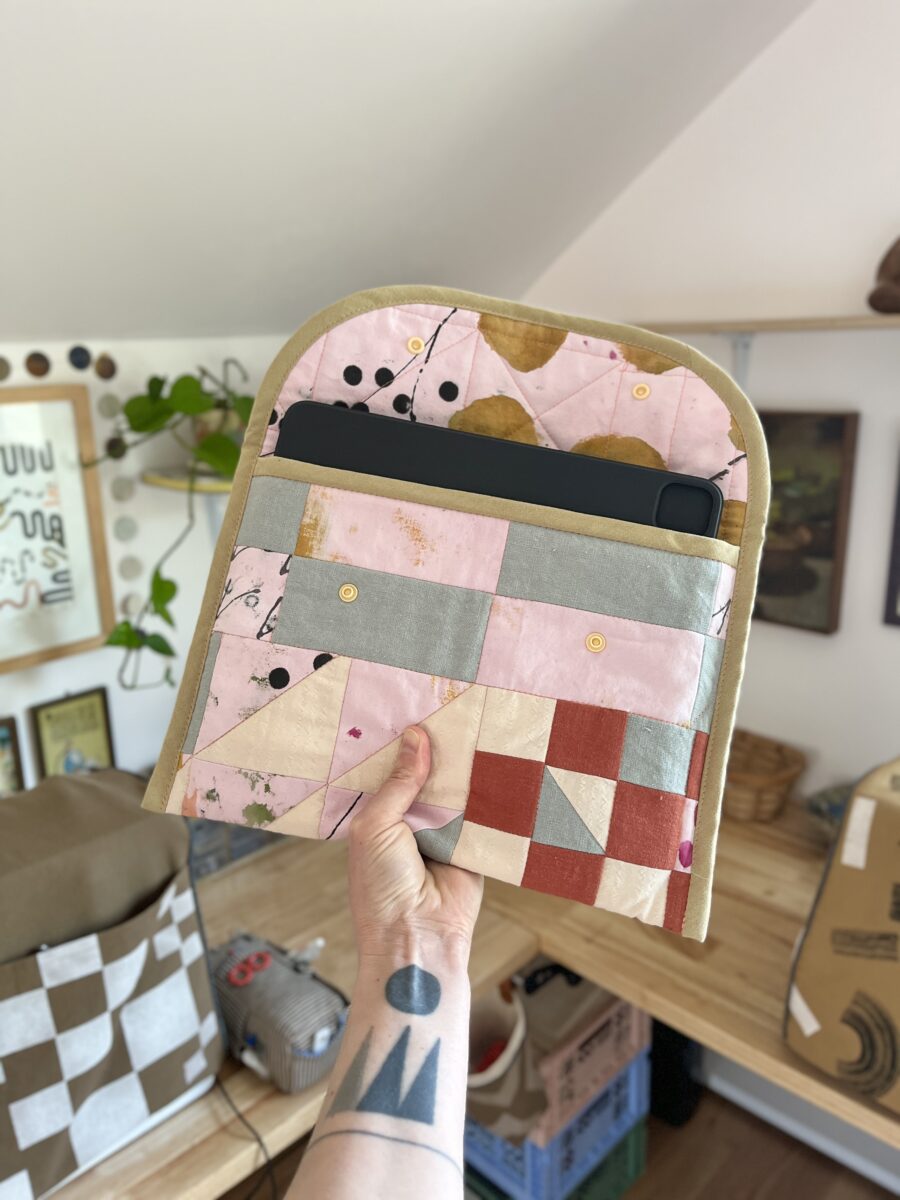
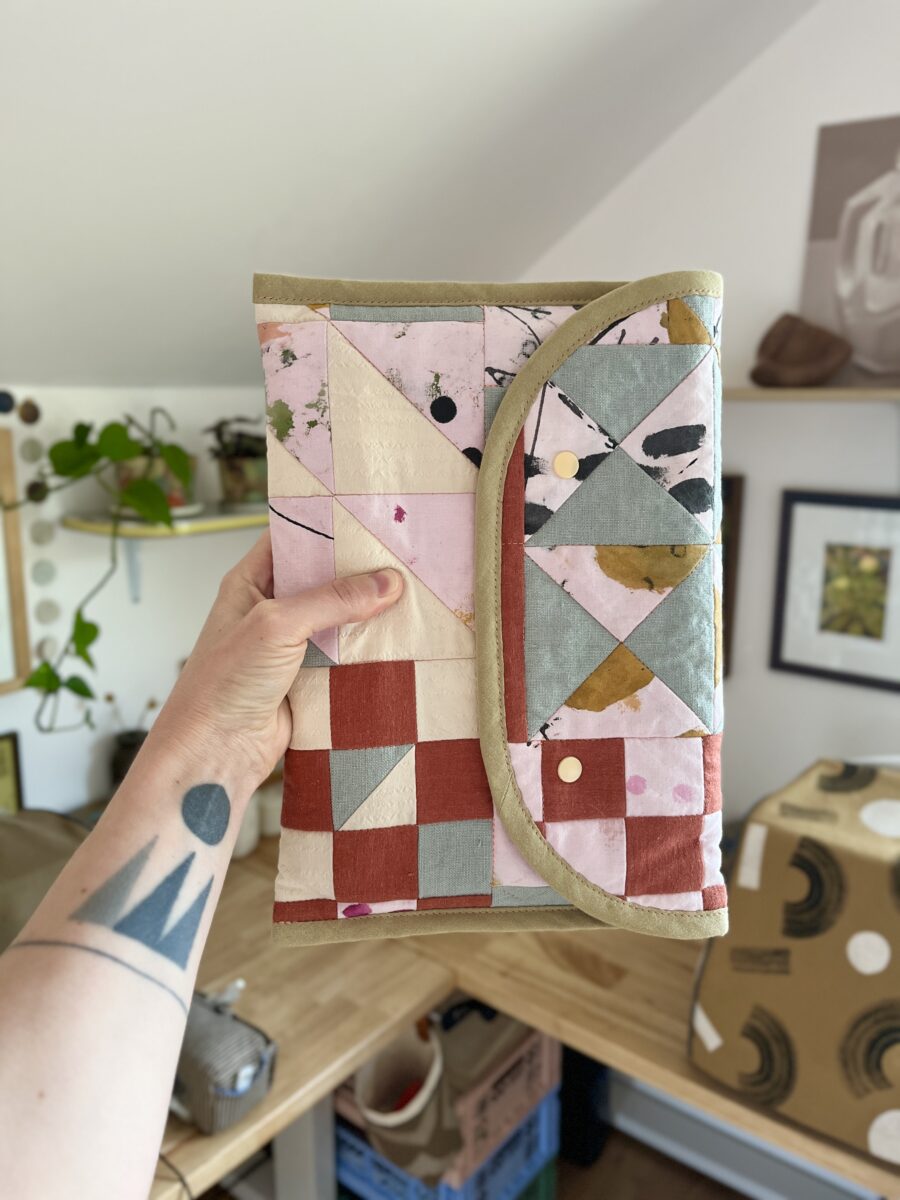
I took a Procreate workshop a while back and decided my iPad needed a better travel case. This quilted fabric was originally going to be a wall hanging that sat unfinished in my stash for a few years.
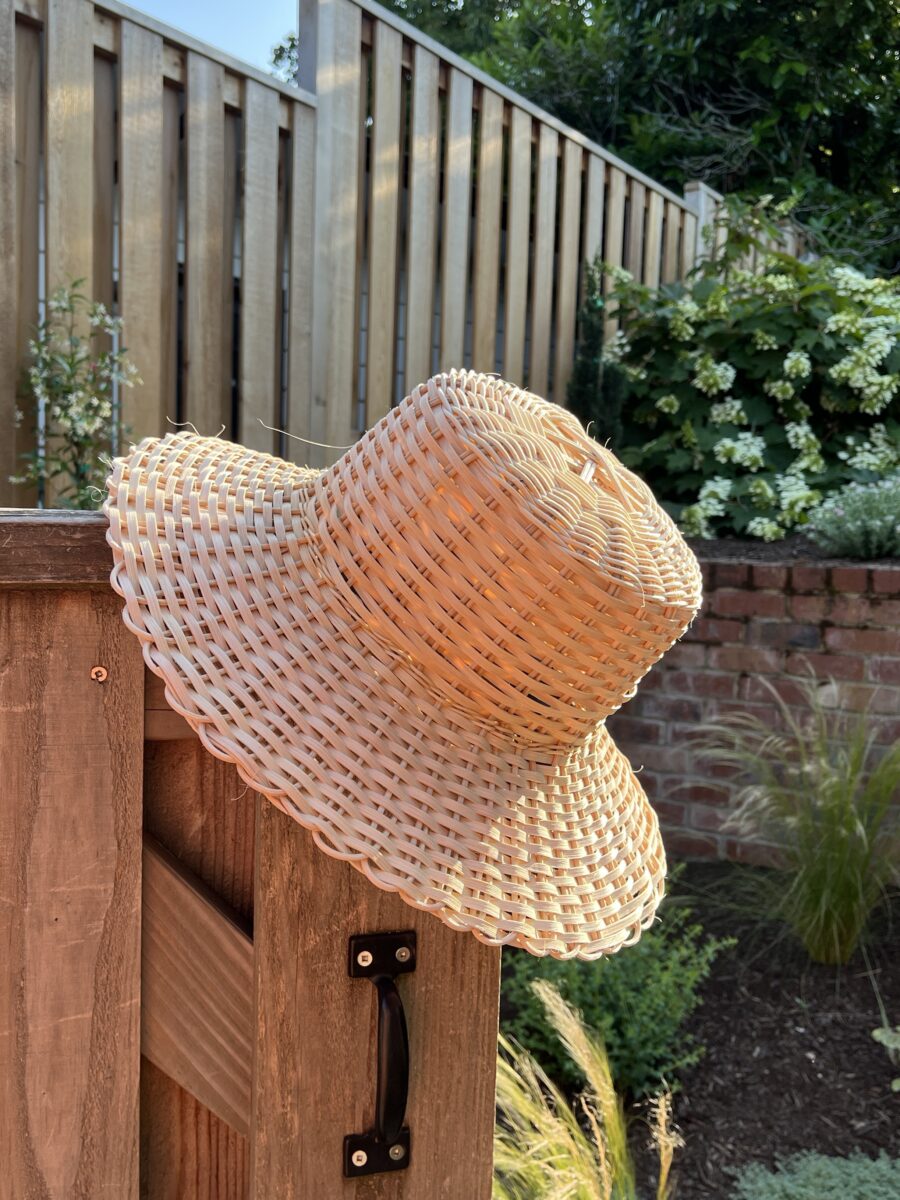
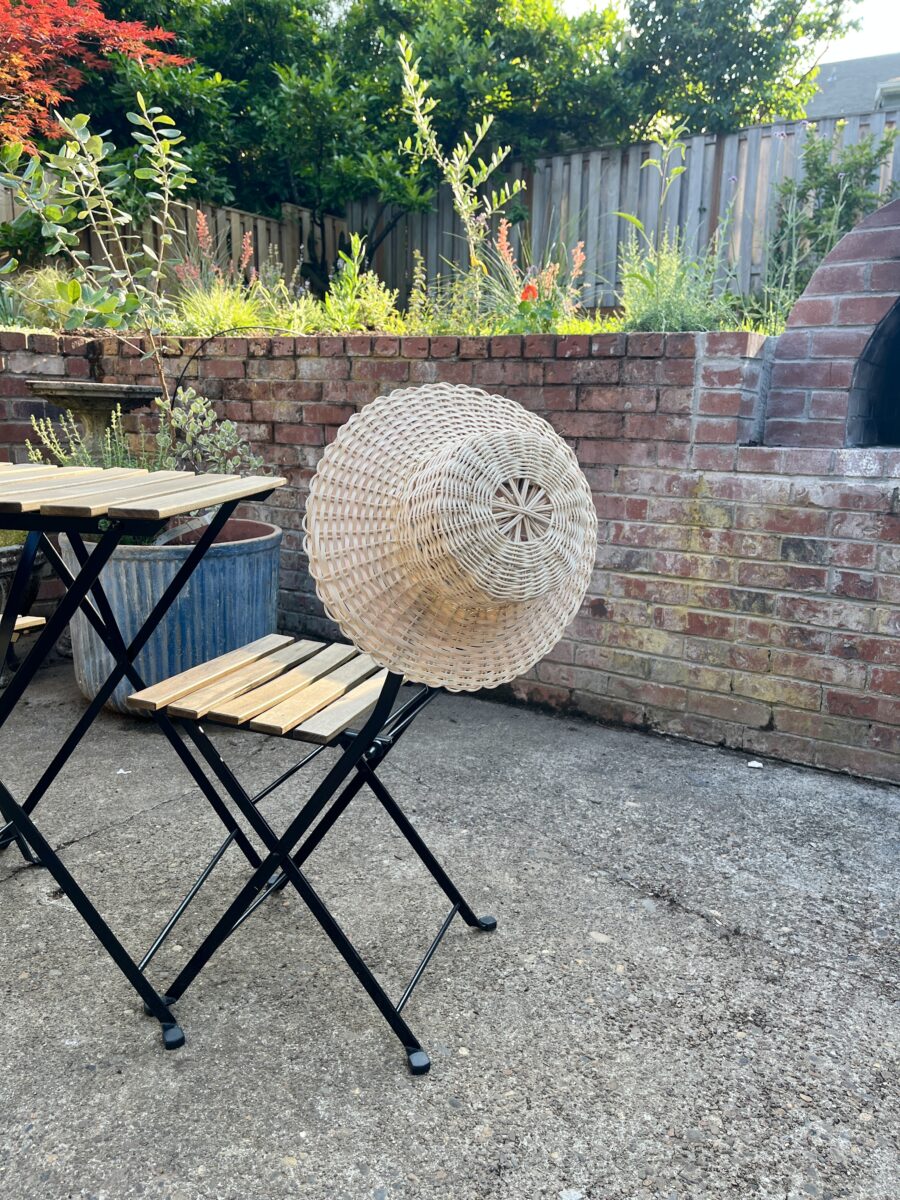
Wildcraft workshop | Weave a Sunhat
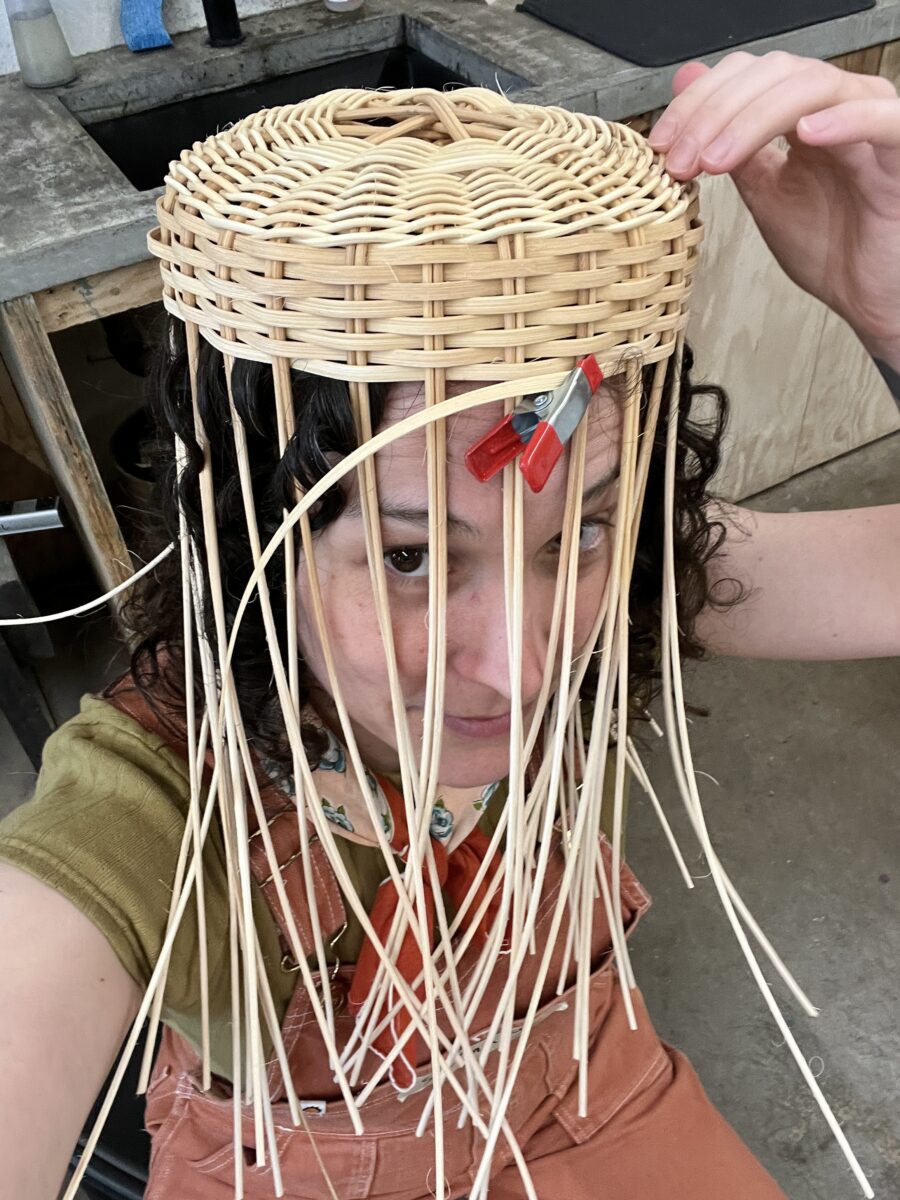
Textile Indie teaches really fun and rewarding basketry classes at Wildcraft and this sunhat was my third workshop with her. I managed to take only a few process shots, all of which include me trying it on. The construction was way more complex than I thought it would be, but it was so much fun to try a more involved basketry project.
While this hat fits my giant melon and was woven pretty neatly, the shape is not quite right. It’s too square at the top and really accentuates my big head. I’m pondering ordering supplies and trying to make a more rounded one at home.
Glaze Fun
The pottery studio I have a membership at only has paint on glazes available, so I decided to turn these pots into “test tiles,” which made the process of glazing way more enjoyable. Three nerikomi pieces have made it through glaze firing. I’m waiting to share them once more are finished.
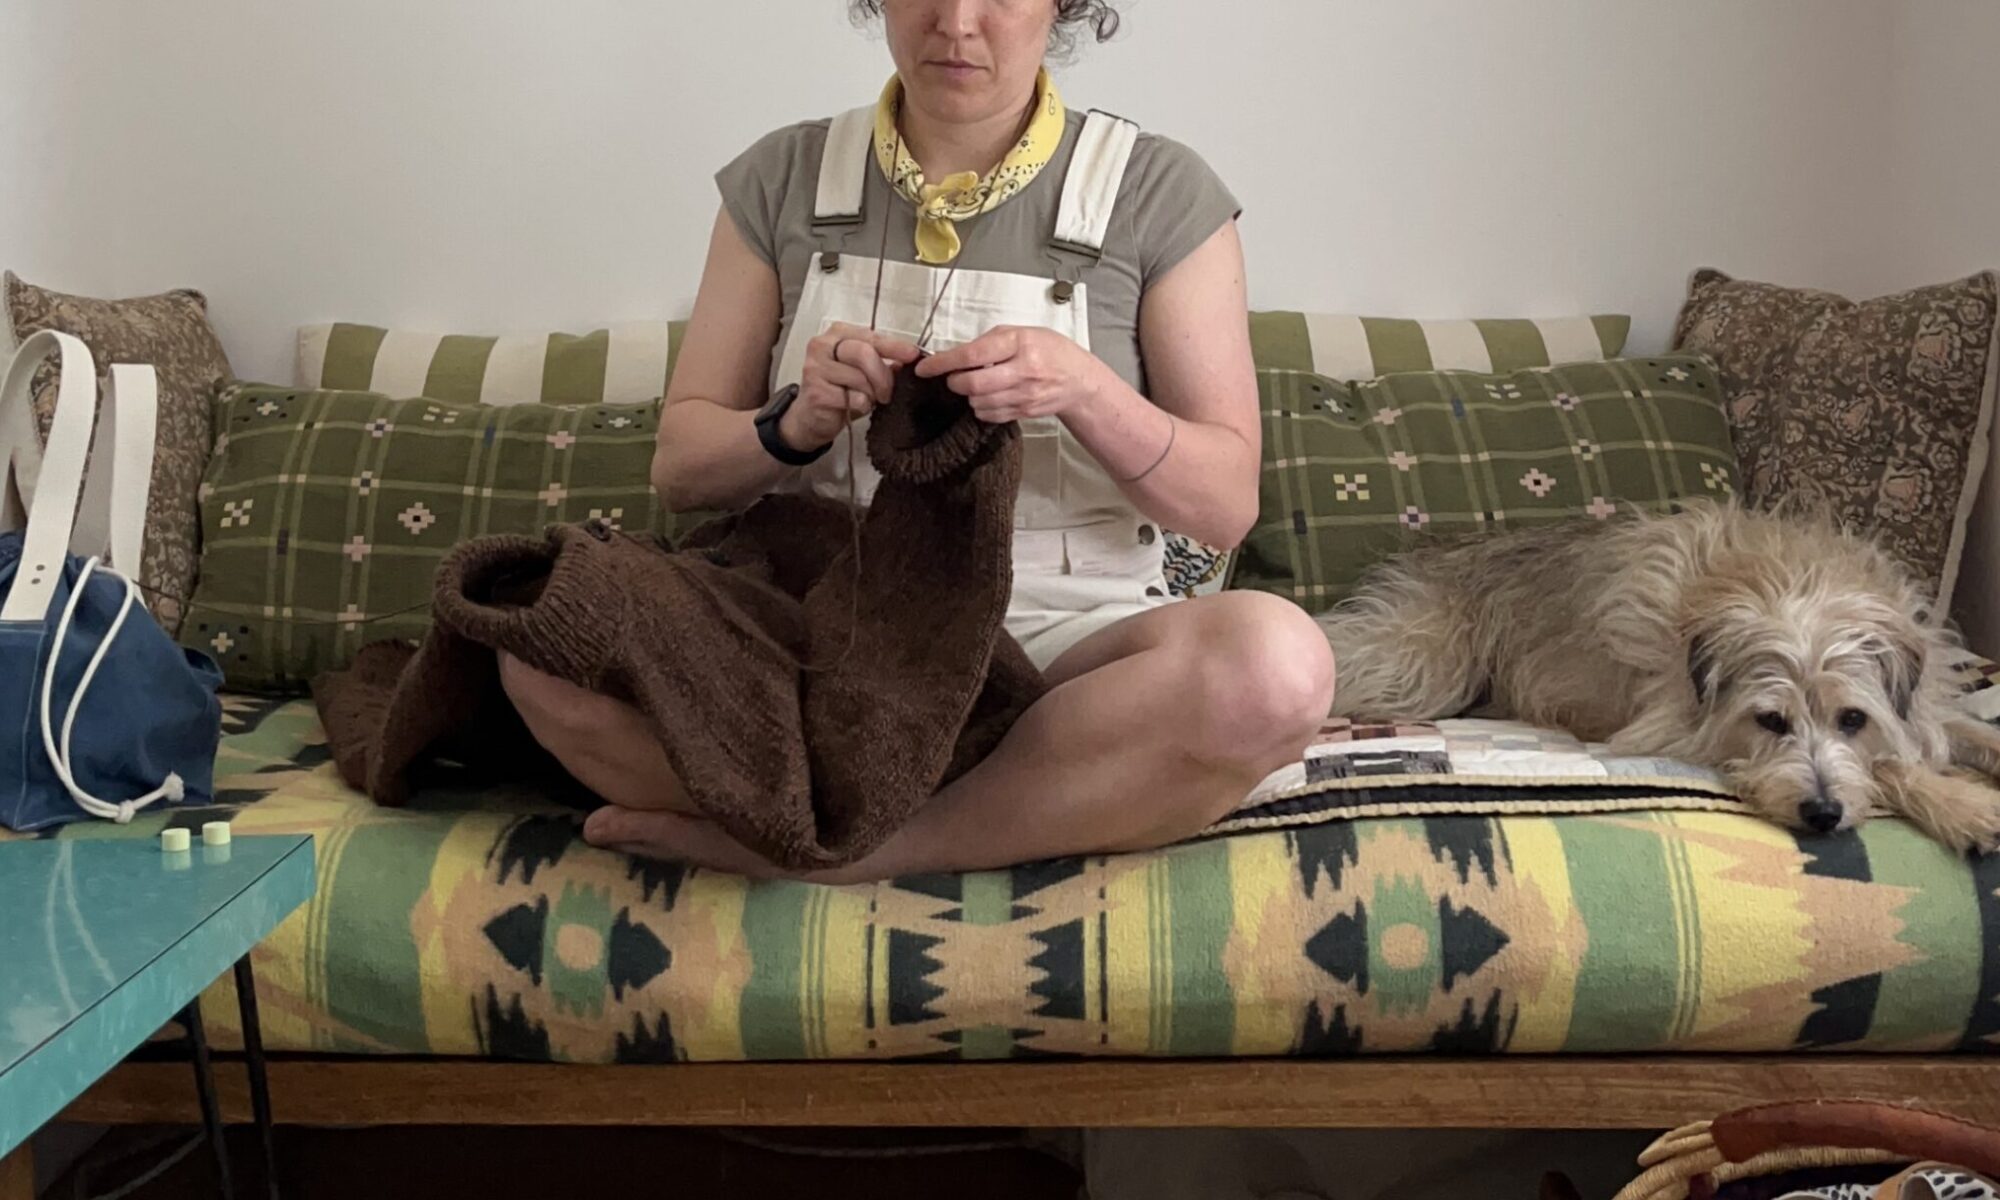
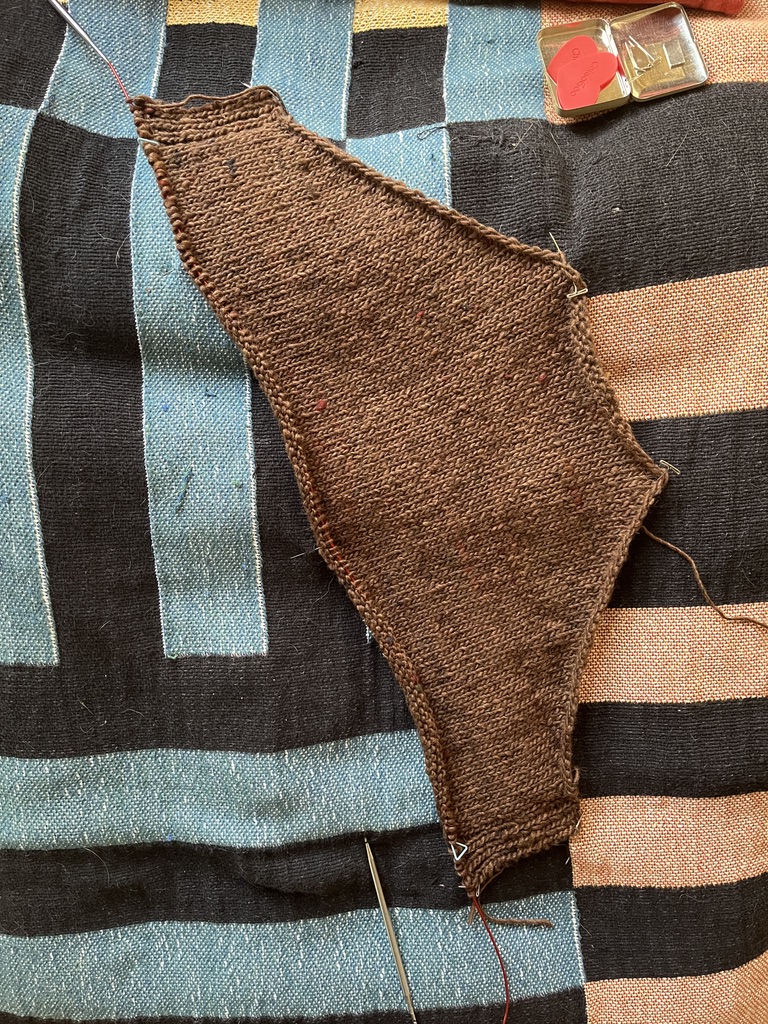
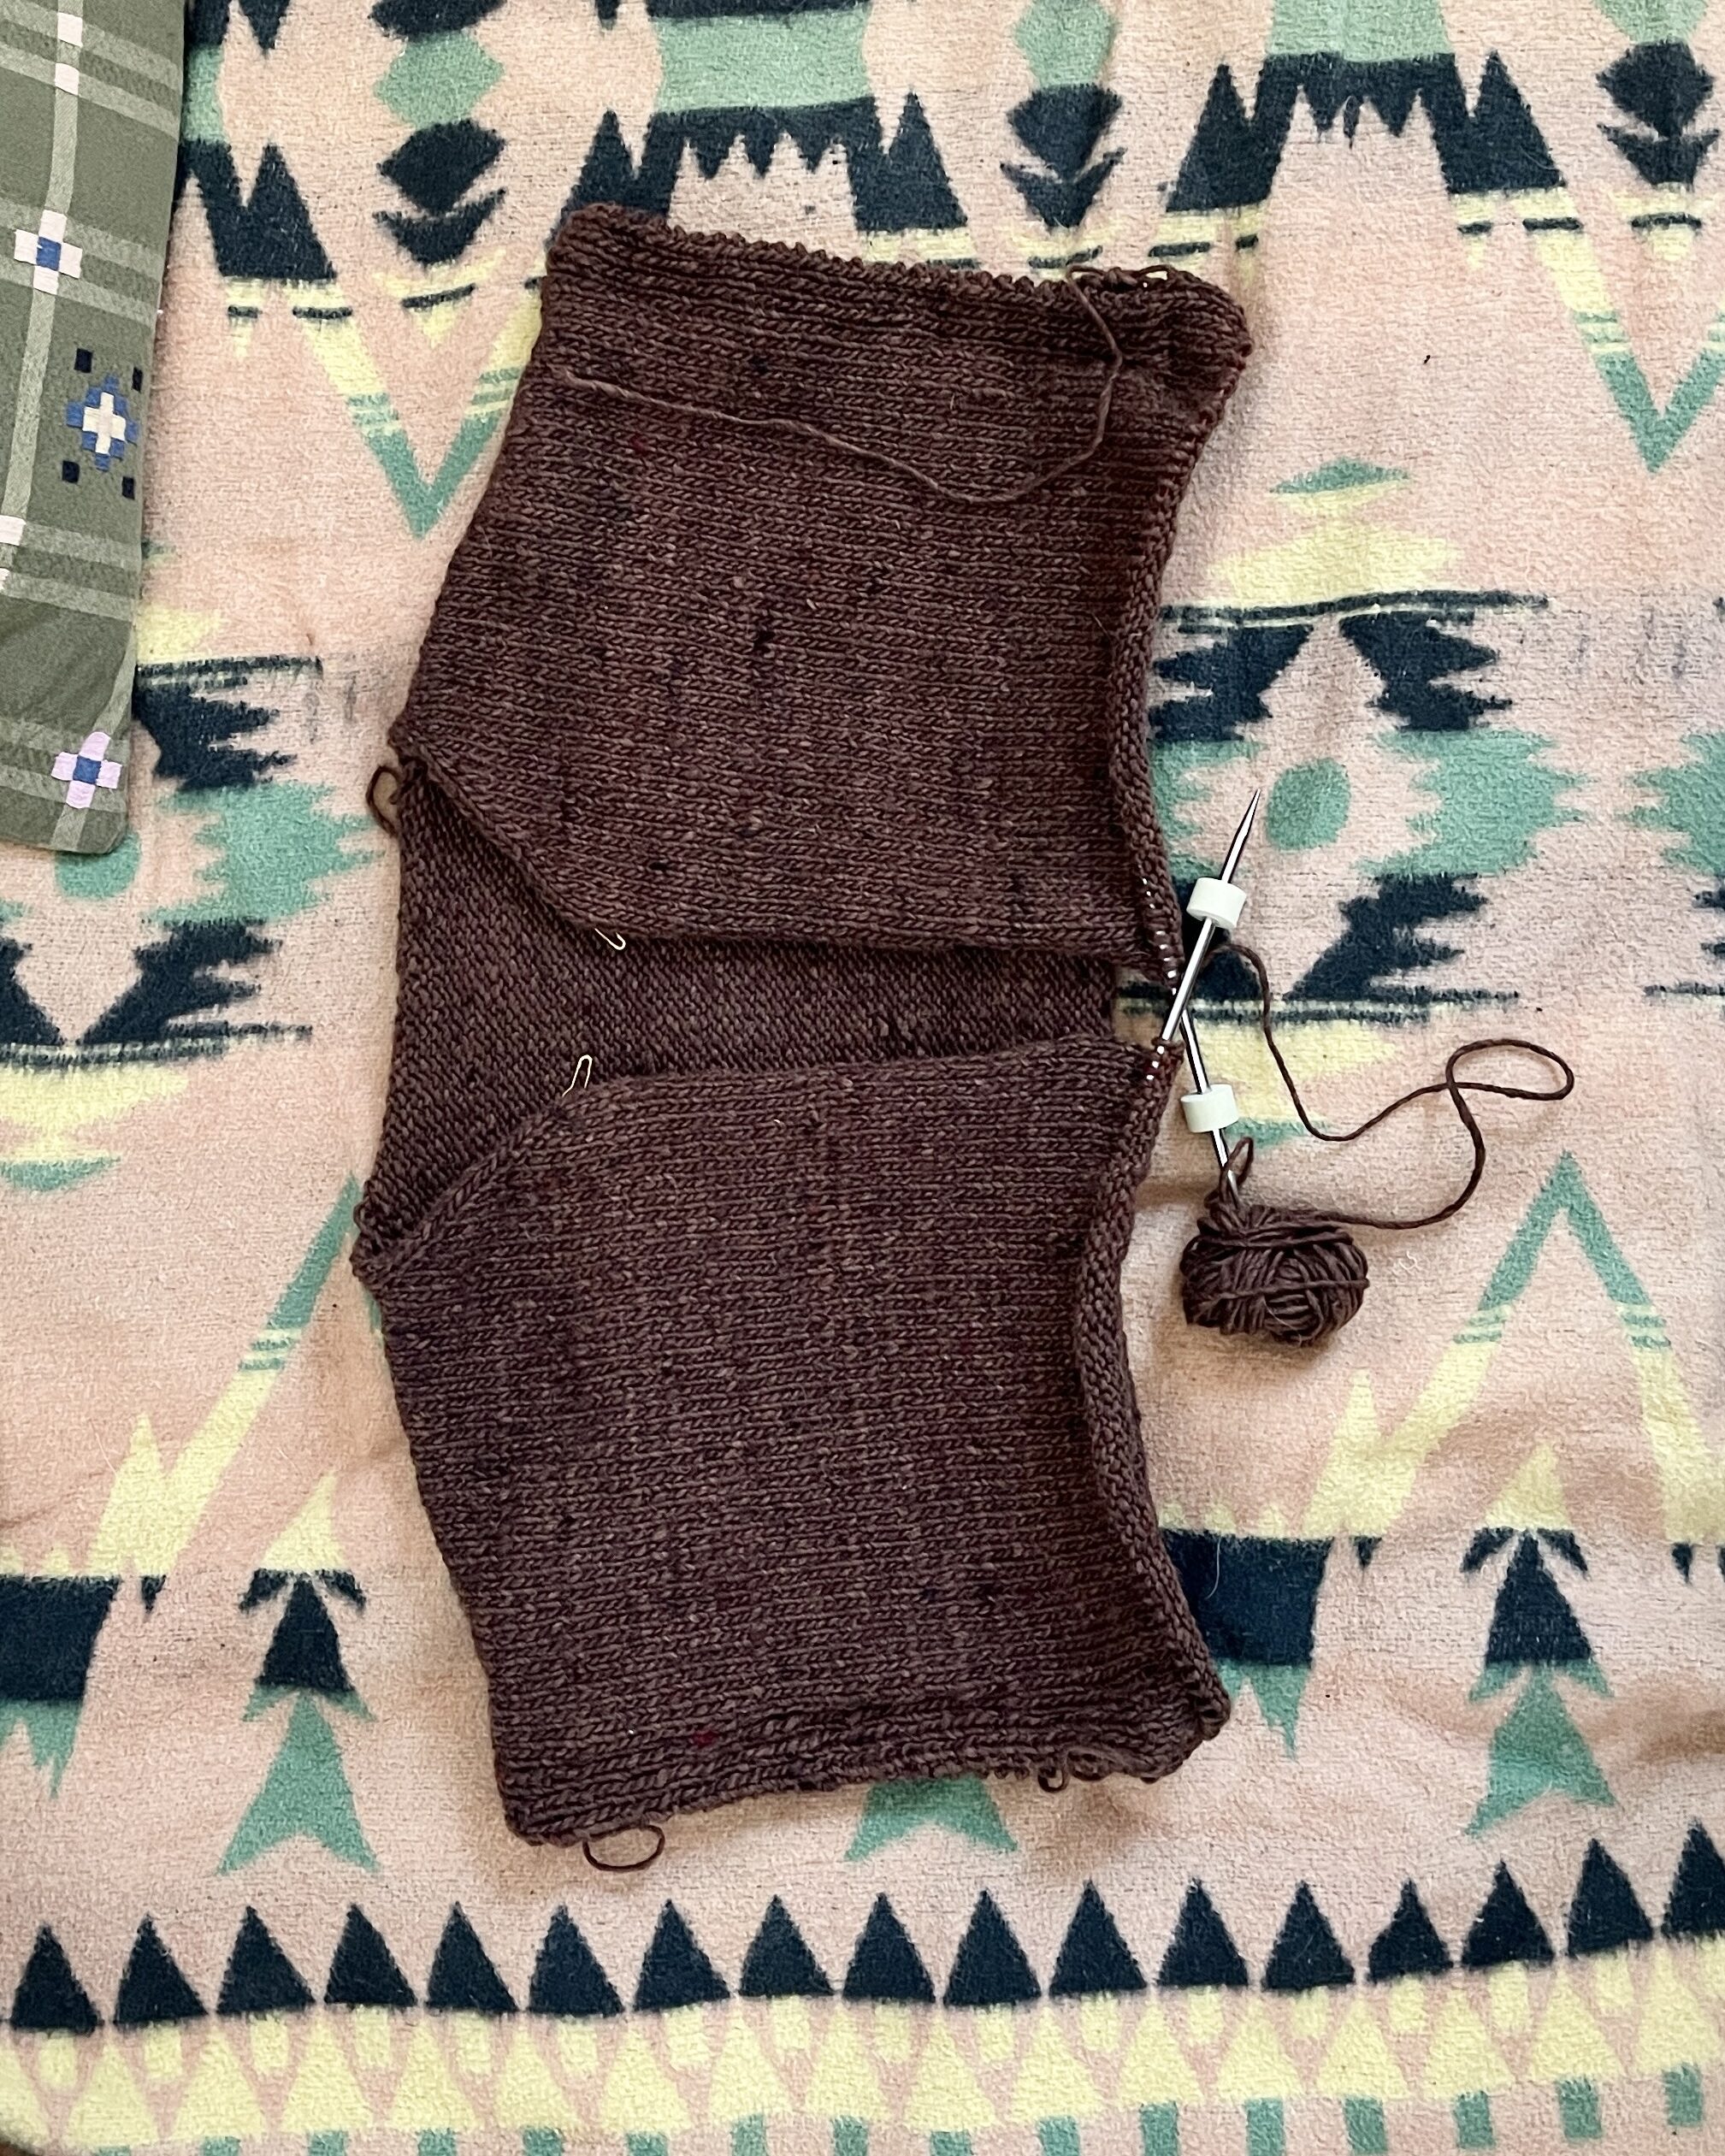
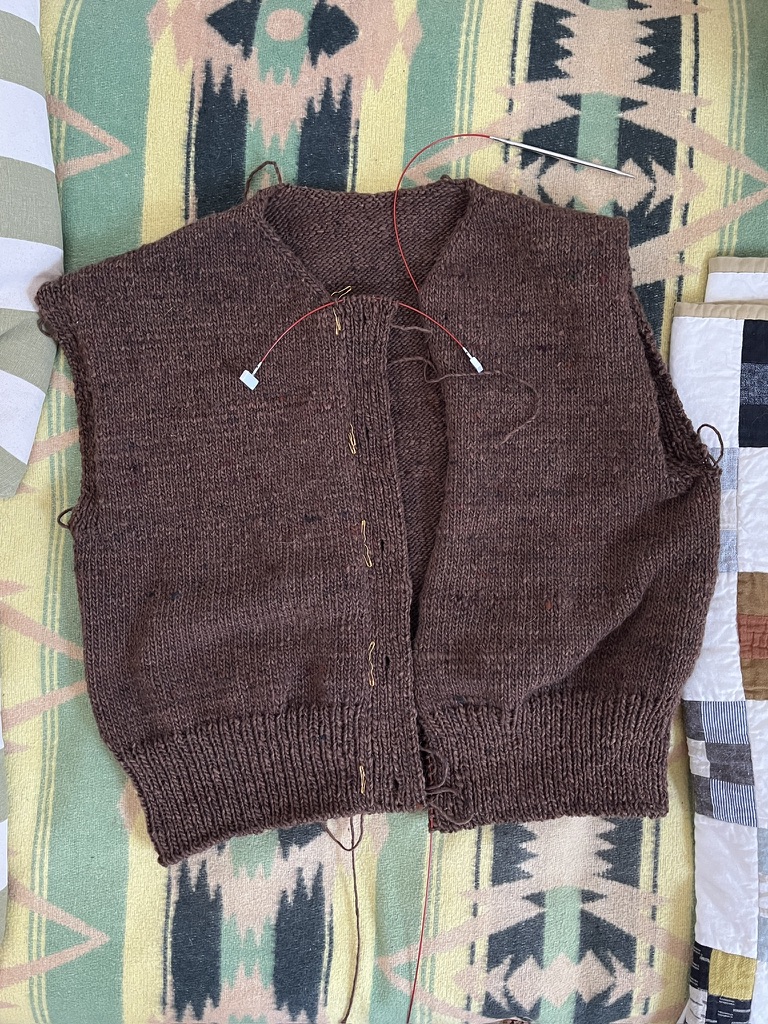
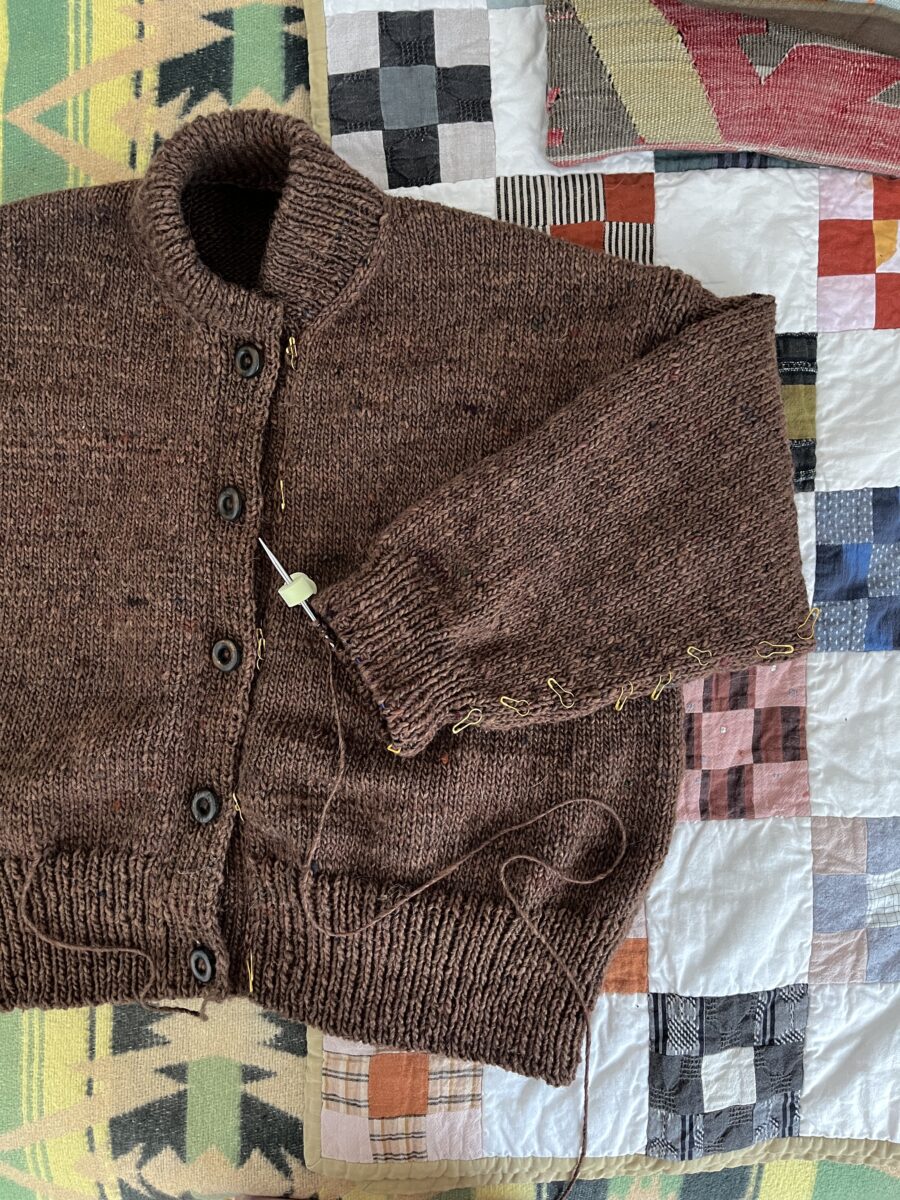
Knitting | Port Jacket by Ozetta, plus an oldie refashioned.
I started this jacket in January and have been slowly working on it, trying to manage hand and wrist pain. Most of it was knit using the Portugese knitting style where the yarn is held around your neck. I think my flat knitting tension is a lot more consistent with this technique. I want to focus on adding a few more cardigans to my wardrobe and now feel pretty confident they won’t have obvious knit and purl rows.
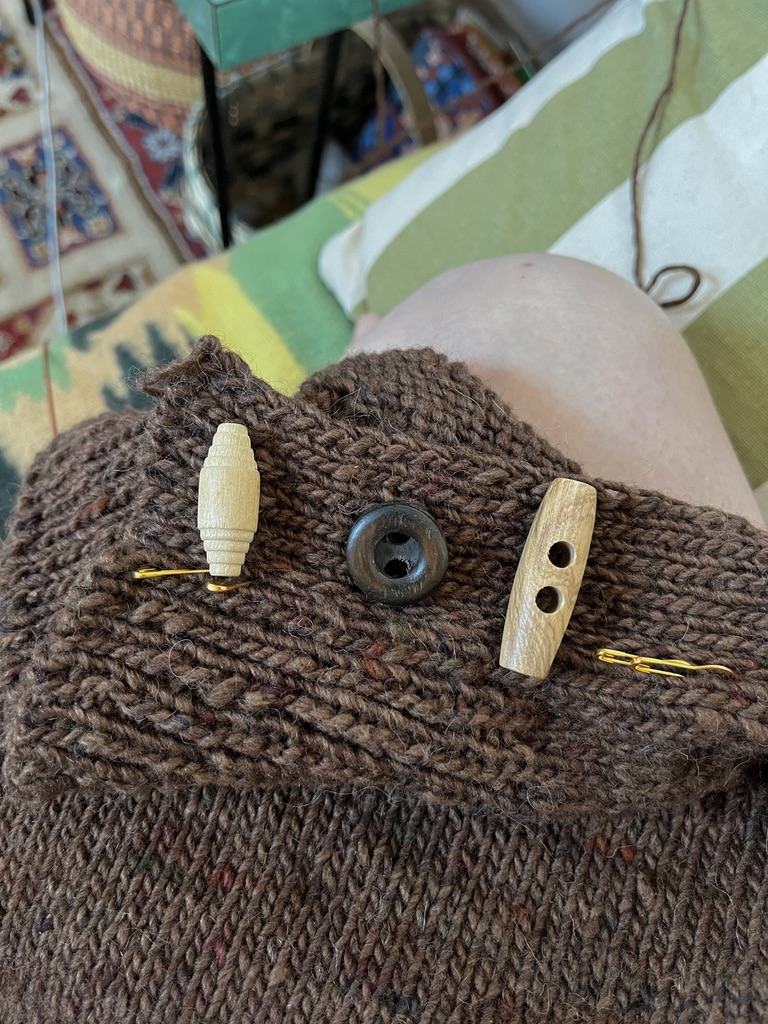
The way the button band is knit is straight up magic – how does this even work?! I really waffled on my button choice. I planned to use the vintage buttons on the left, but didn’t like the combo of dark brown yarn and yellowy wood. I bought these too big toggles (right) in New Zealand, which if they’d been like a 1/4″ smaller would have worked pretty well. Then I found these vintage dark brown buttons in my stash and loved the way they looked.
I just wove in the last end this morning and now the whole thing is drying. I’m hoping I’ll get to wear on chilly mornings this summer.
In other knitting news, I’m still working on this duplicate stitch project. I also redid the collar since I hated my first attempt. Here’s what it used to look like. A really kind fellow knitter fixed the shoulder I accidentally unpicked while trying to redo it. I could not make sense of the stitches, but she fixed it in a couple of minutes!
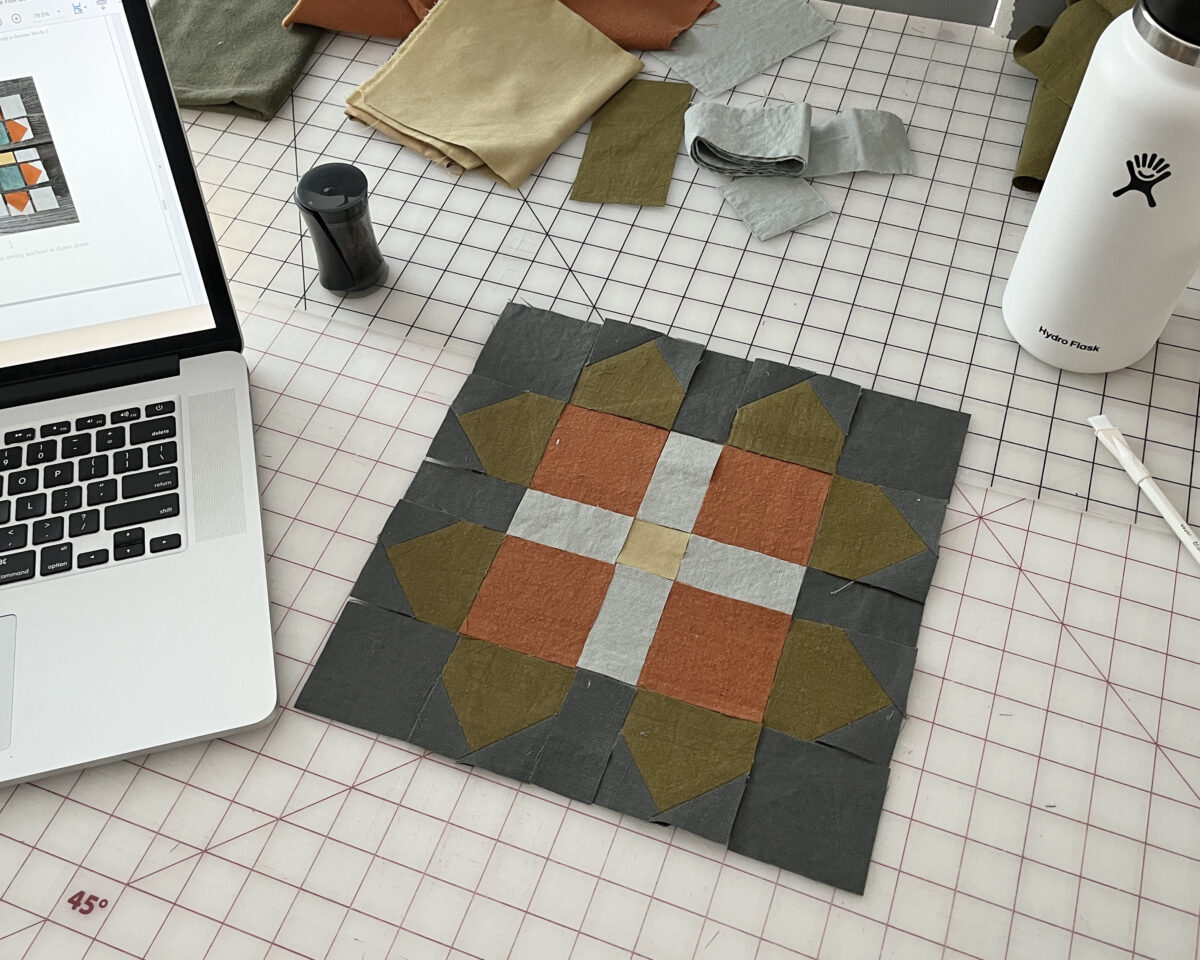
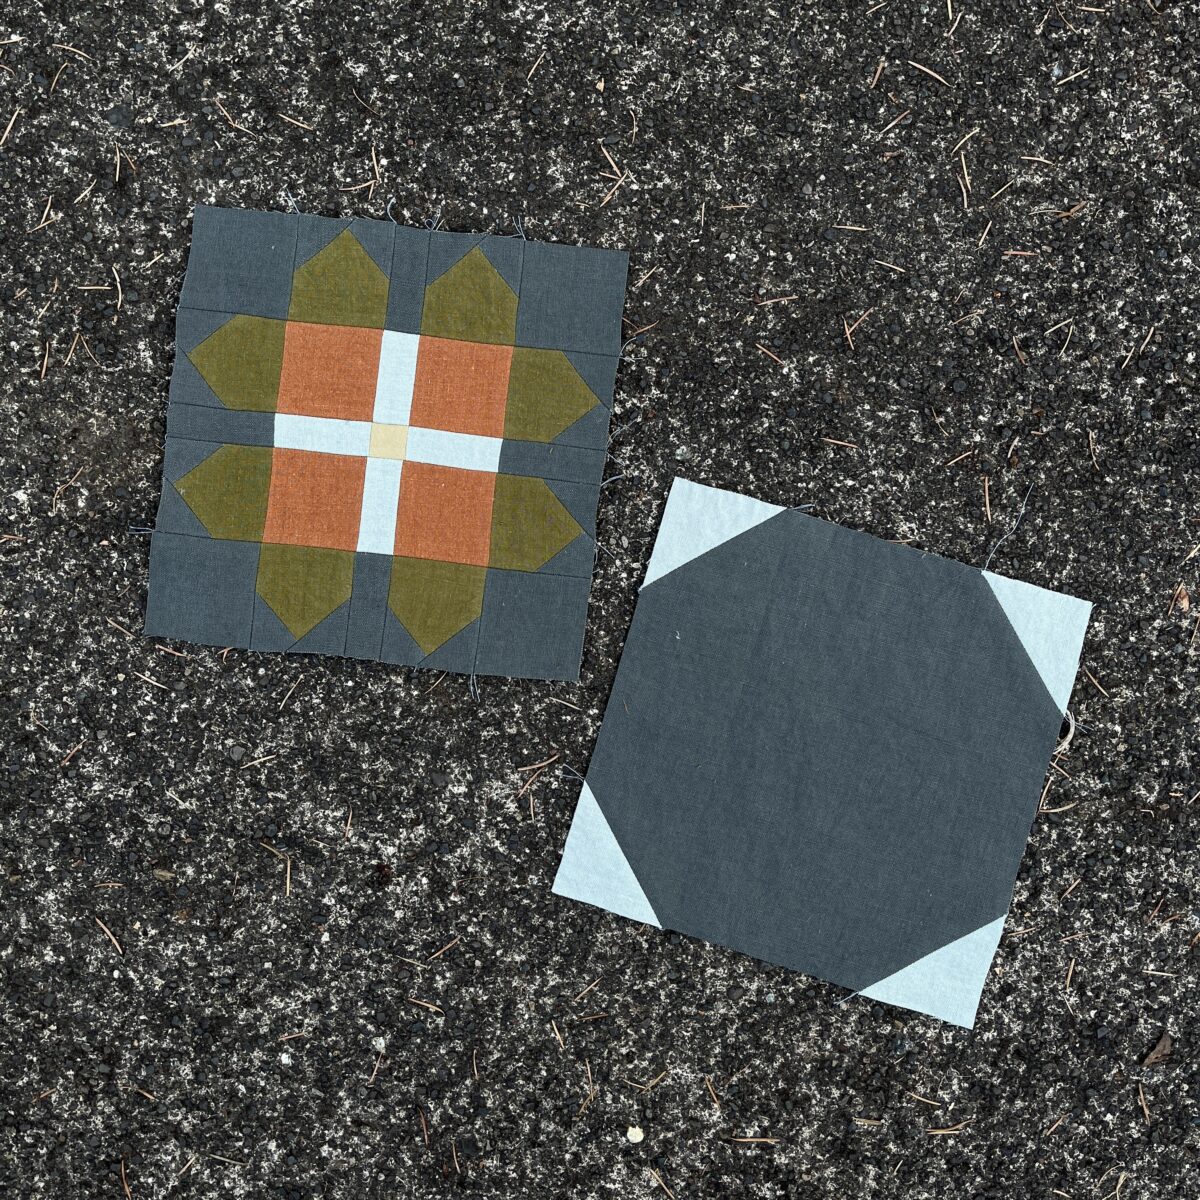
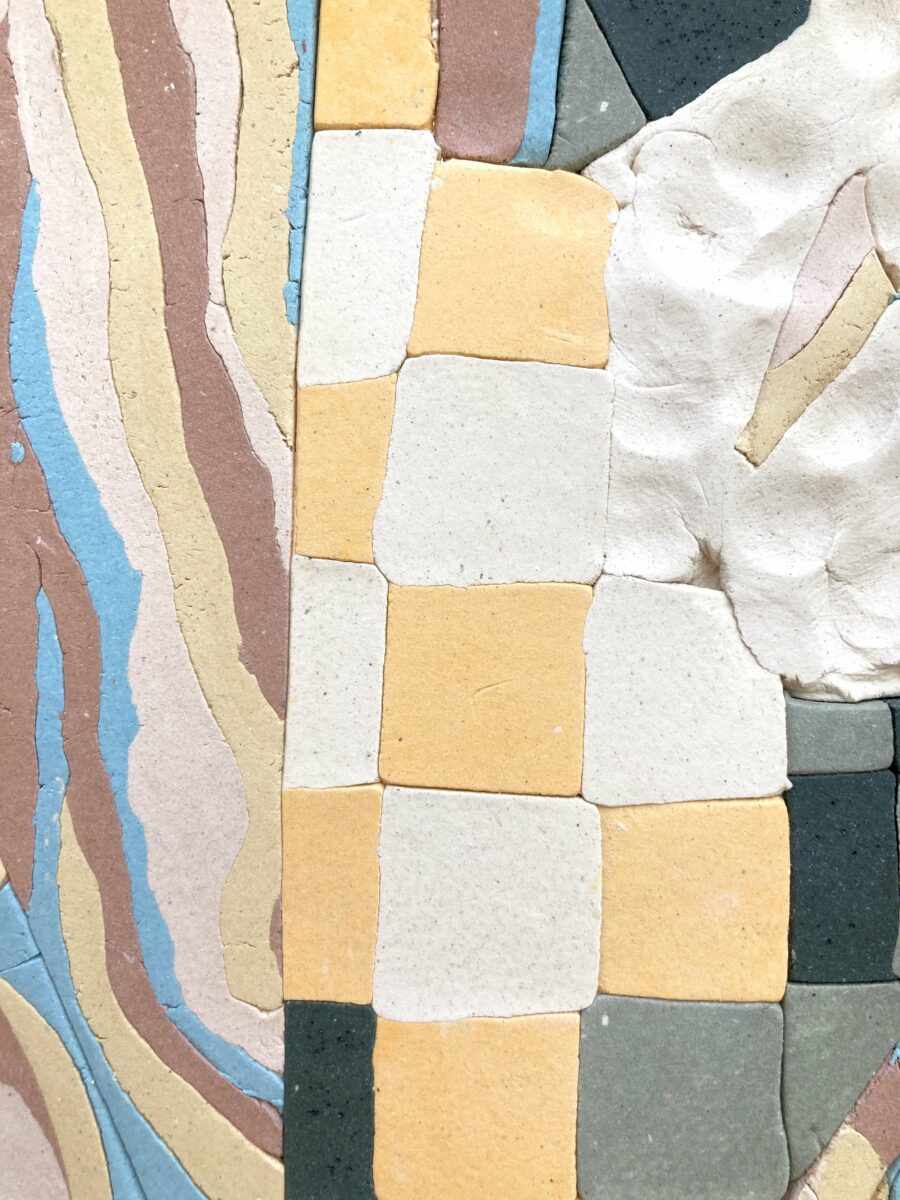
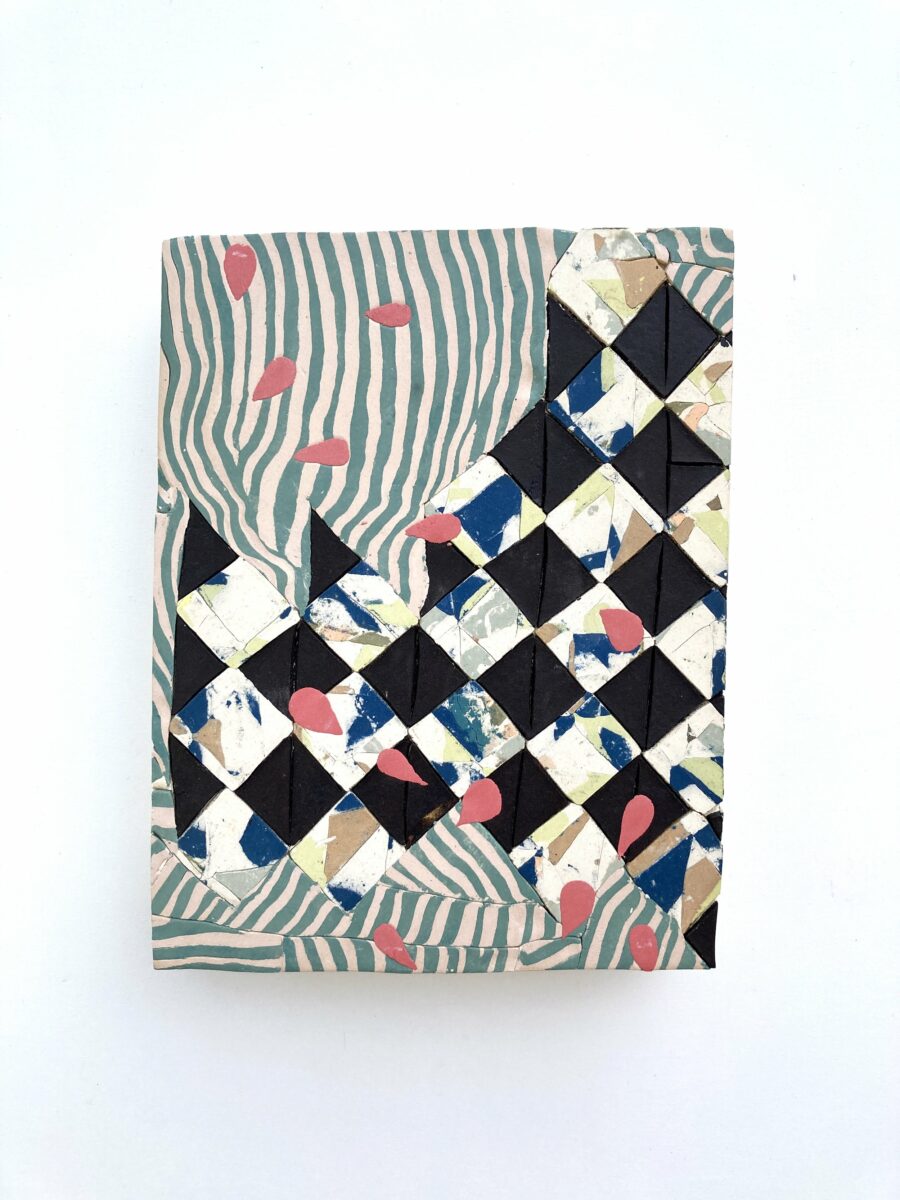
A couple weeks ago, one of my favorite youtubers reached out to say she was using my 9-patch quilt as inspiration for an upcoming video. I LOVE HOW IT CAME OUT and I’m feeling inspired to start tackling my own tile project!
Farm & Folk recently put out a call for testers for this beautiful quilt. This project is so cool – Sara is a farmer and she spent the summer growing and harvesting dye flowers. She designed this quilt and a dye kit to go with it so you can make one too.
Wowwee. The damn algorithm finally got something right and served up these works of art last week.
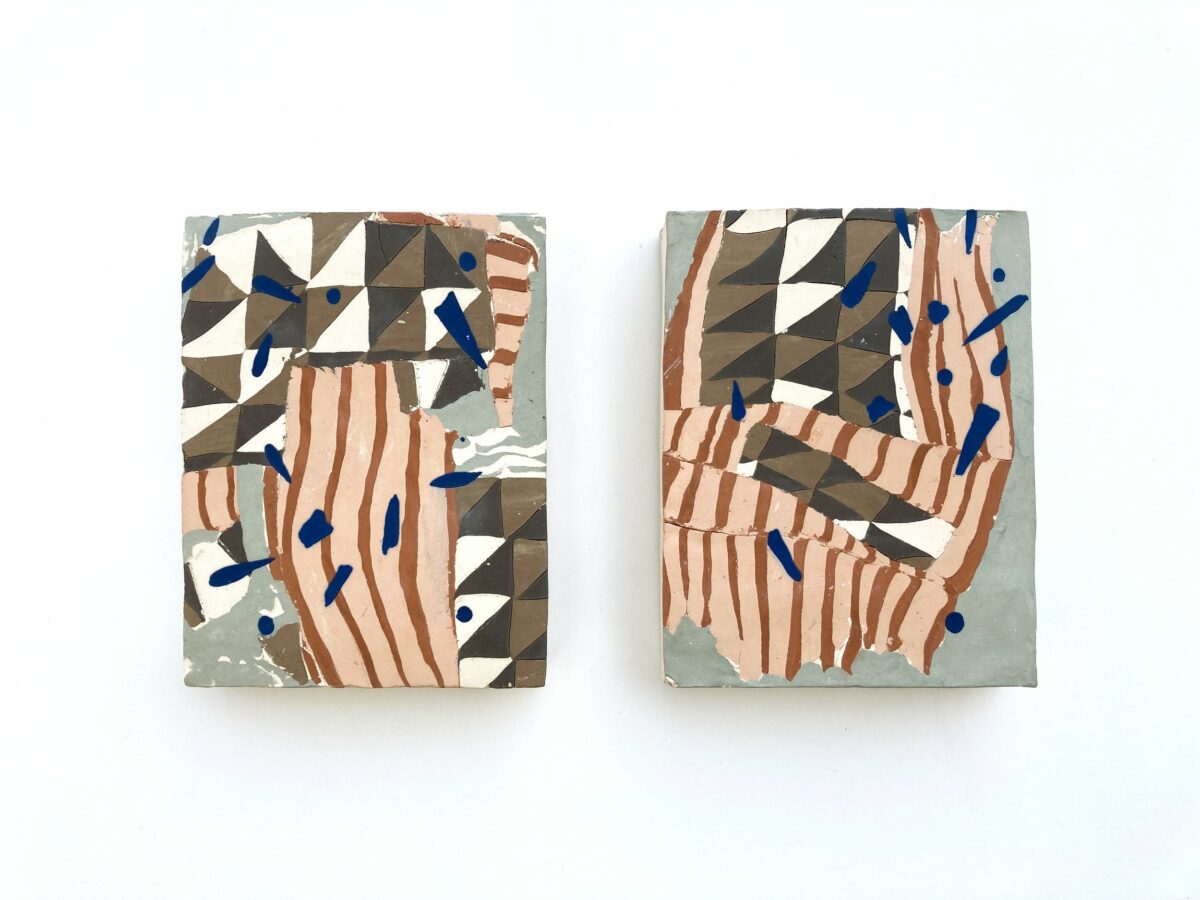
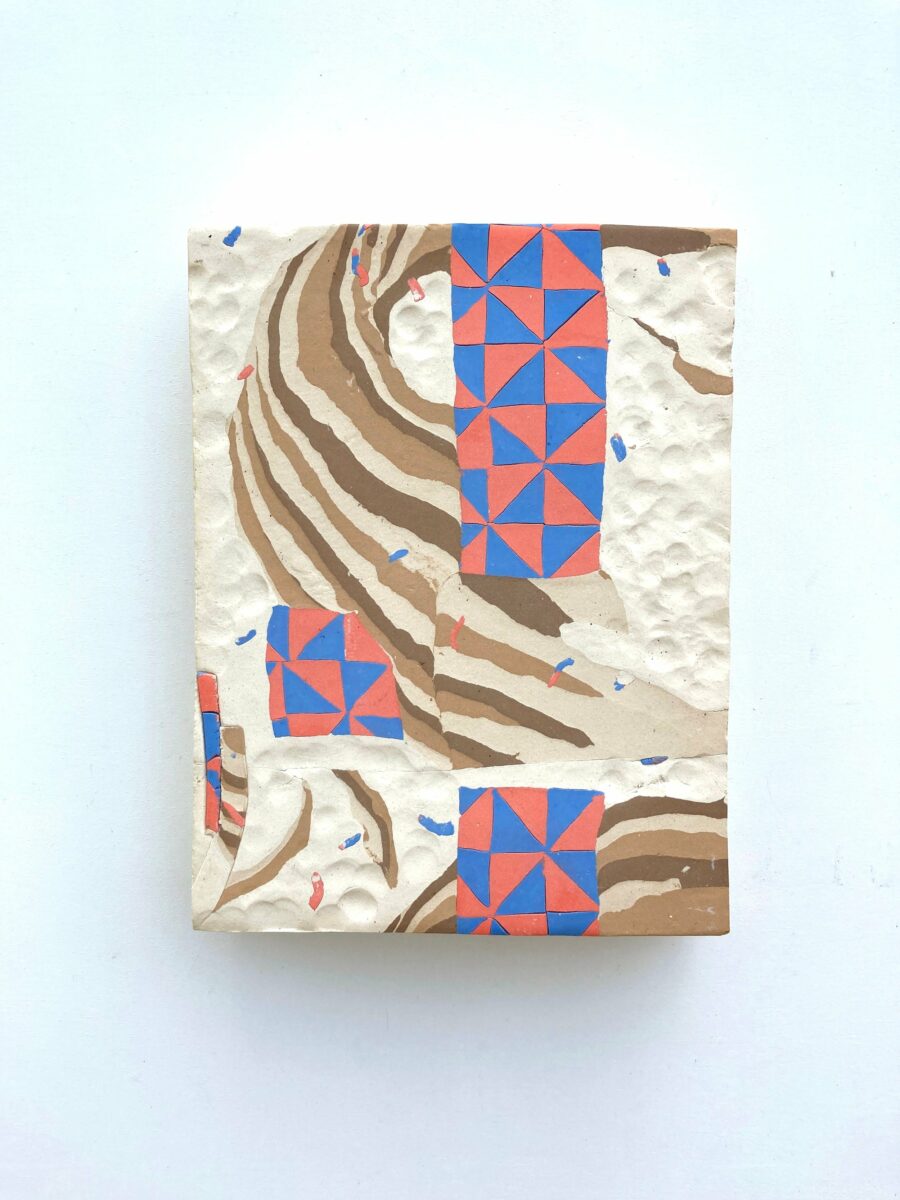
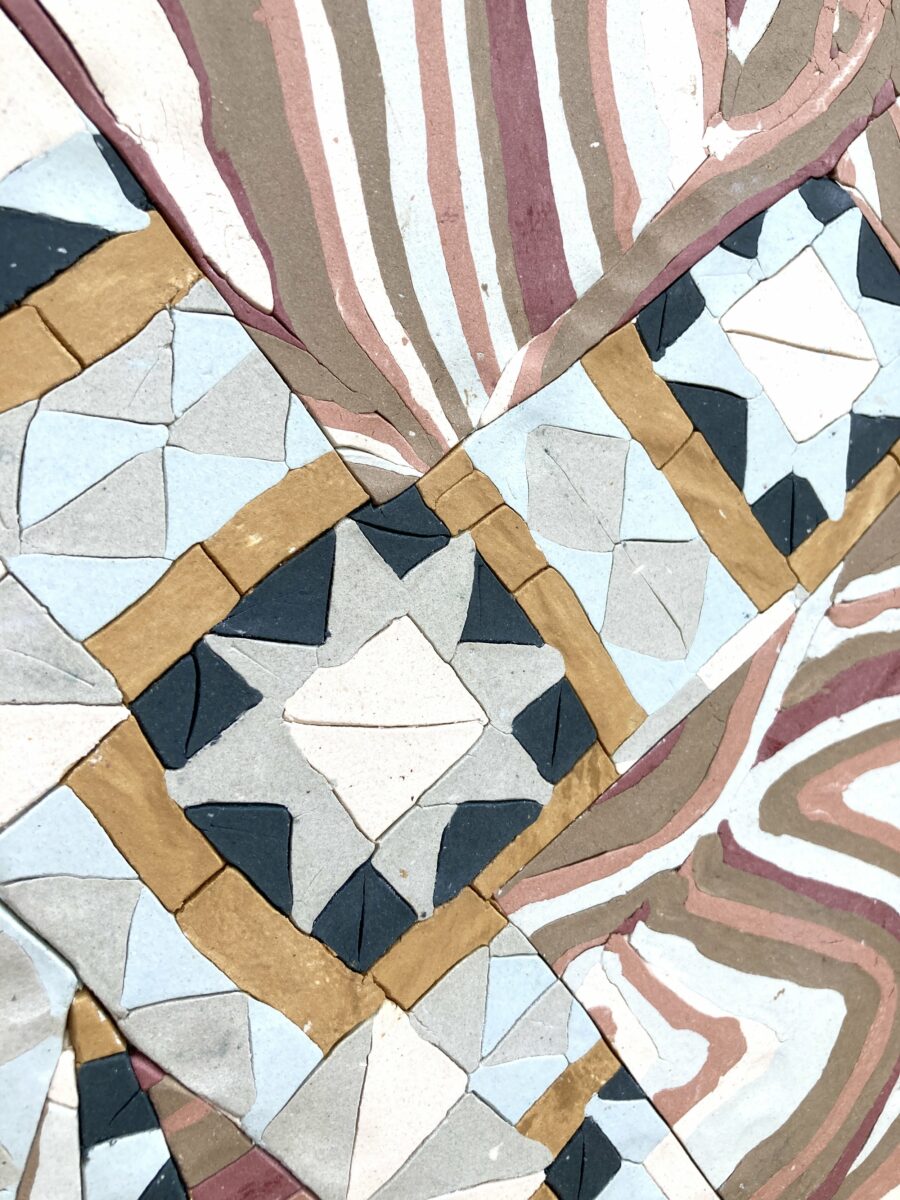
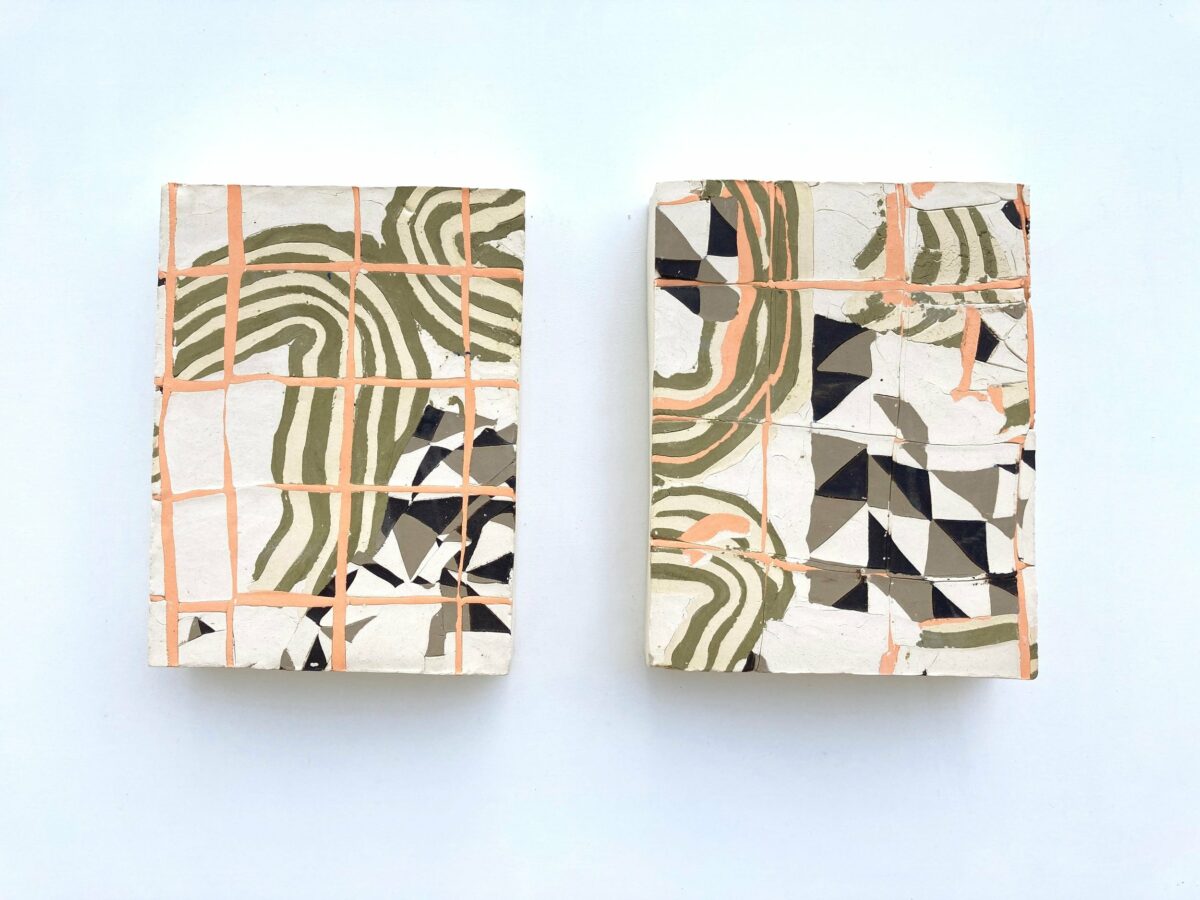
This is an appreciation post for Joanna, who has smooshed together two of my favorite art forms – ceramics and quilts. They are stunning and you should see them and maybe buy one. I did.
Where Billow Meets Billow, 2022Semi-Infinite Clouds, 2022Detail of Hera’s Milk, 2022A Ray of Light Refracted, 2022 (purchased left)Detail of Convergence, 2022Circadian Rhythms on an Empty Bed, 2022
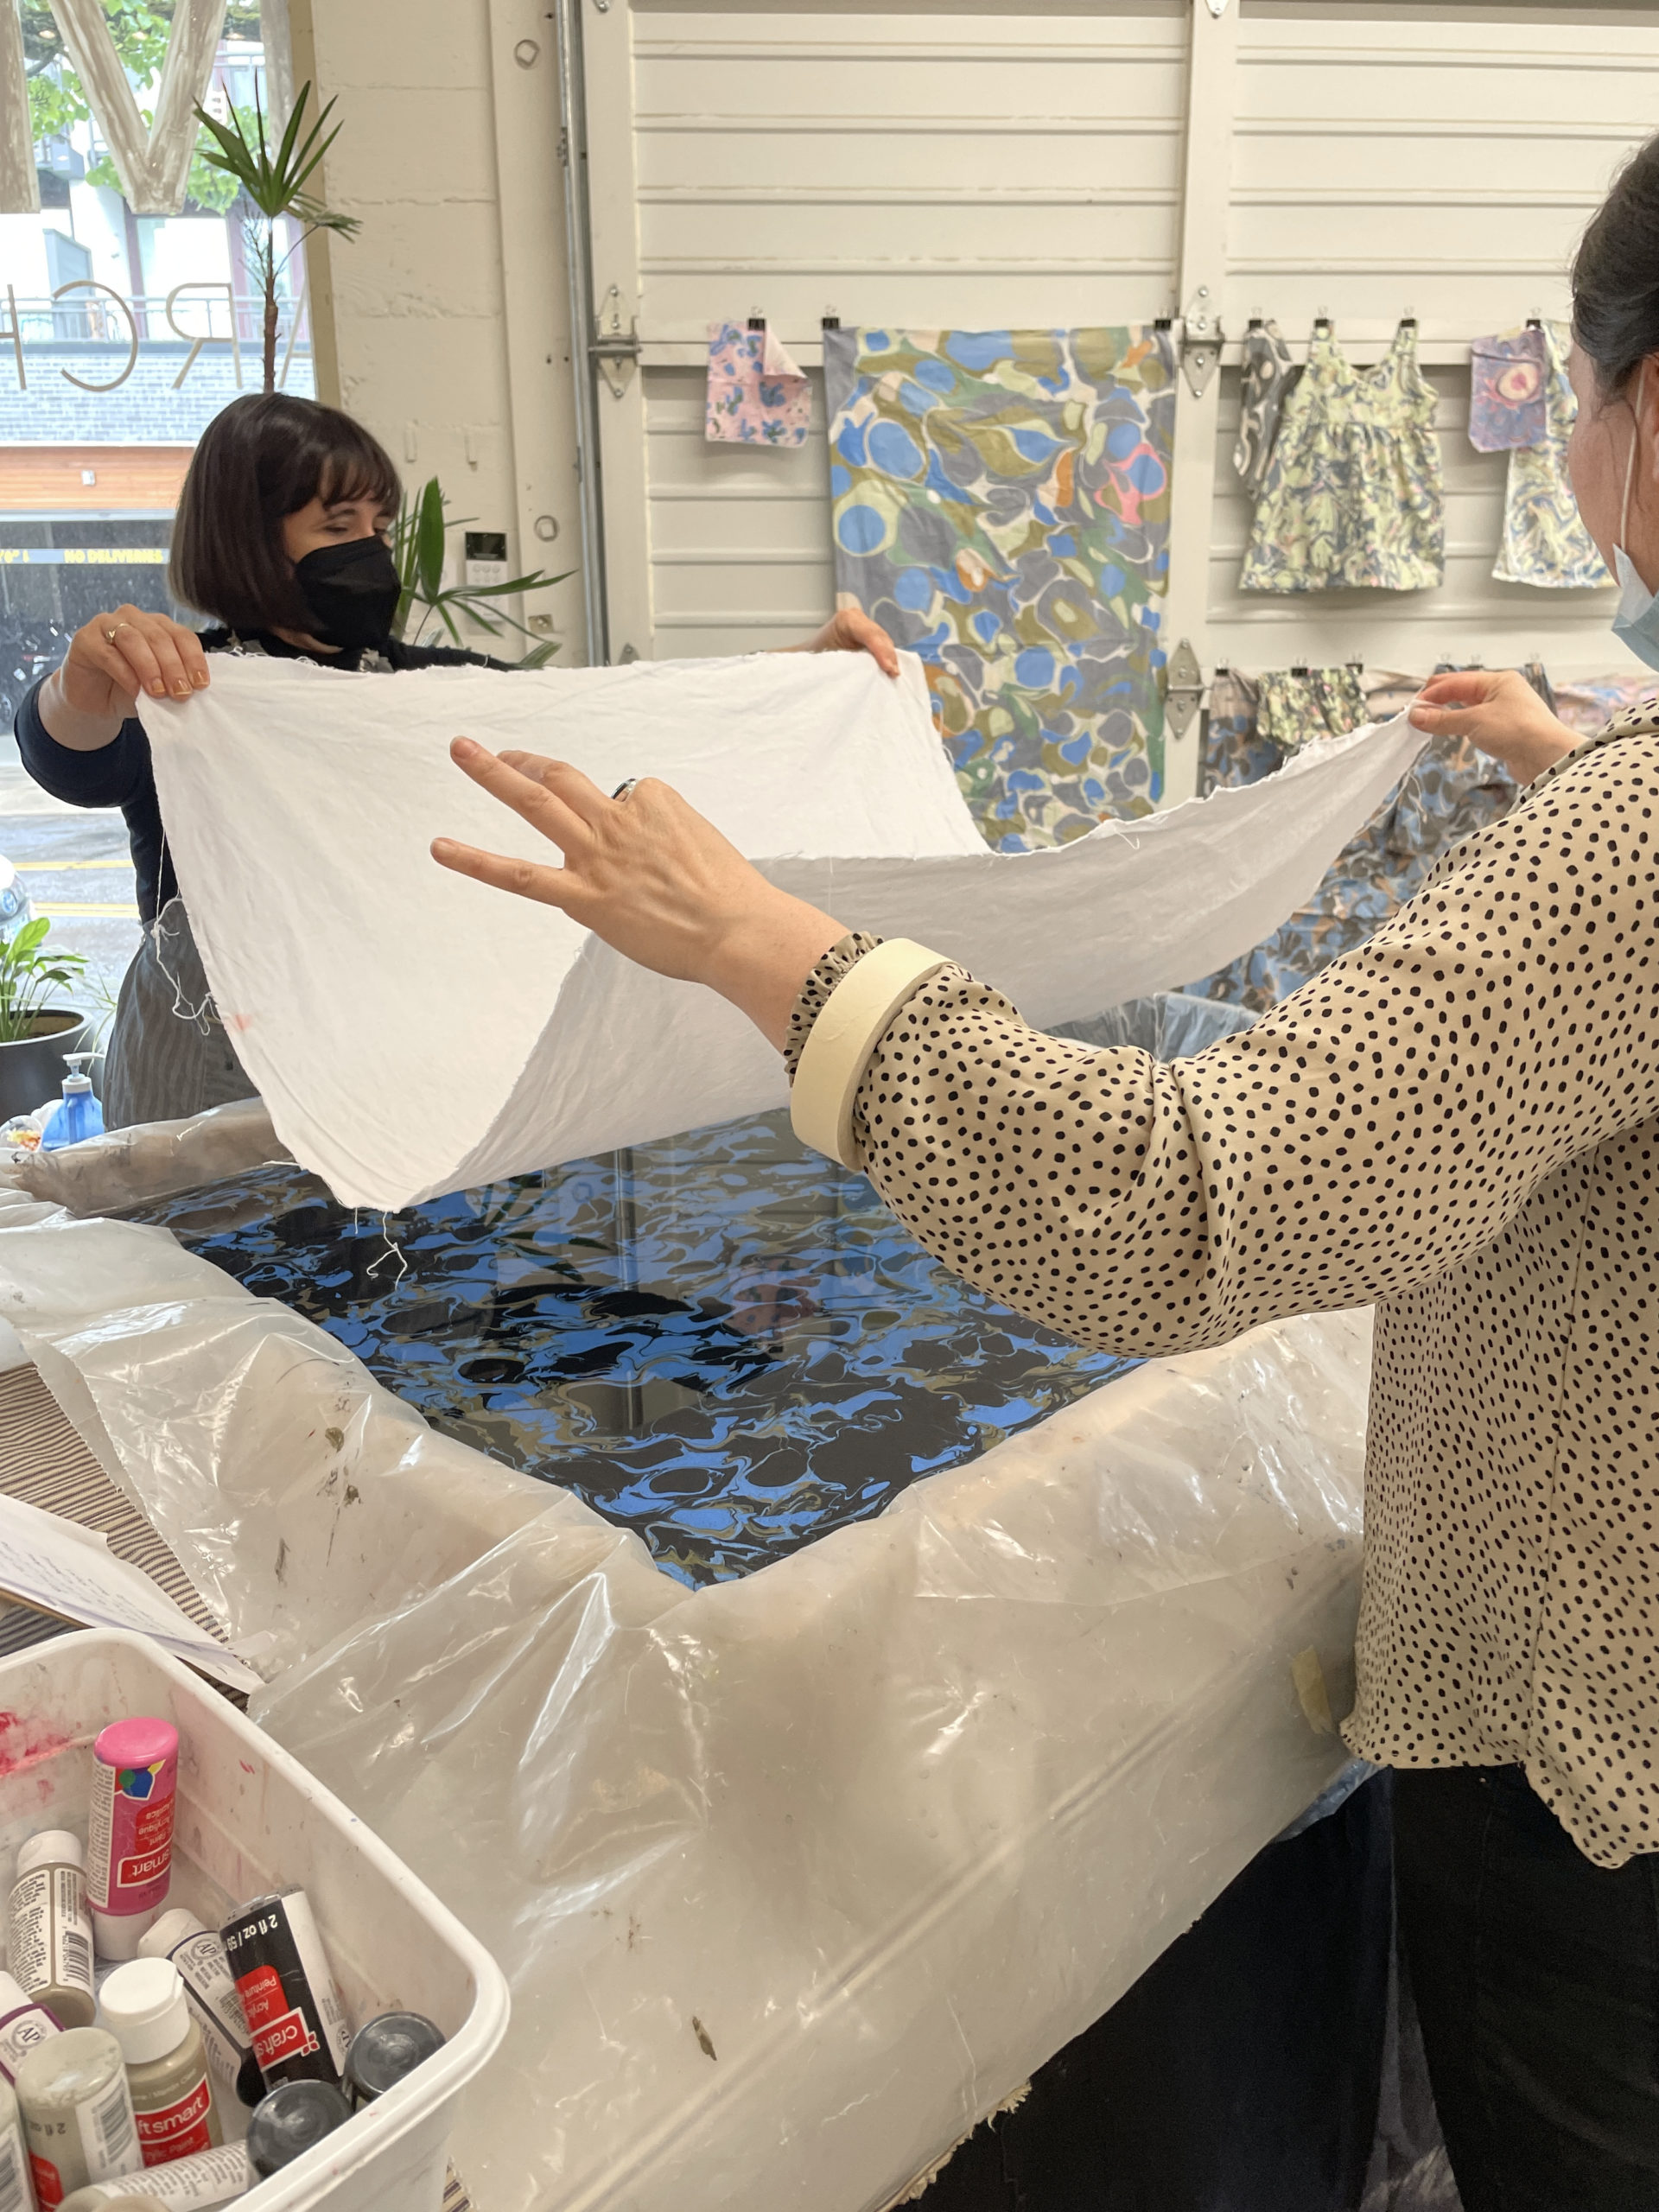
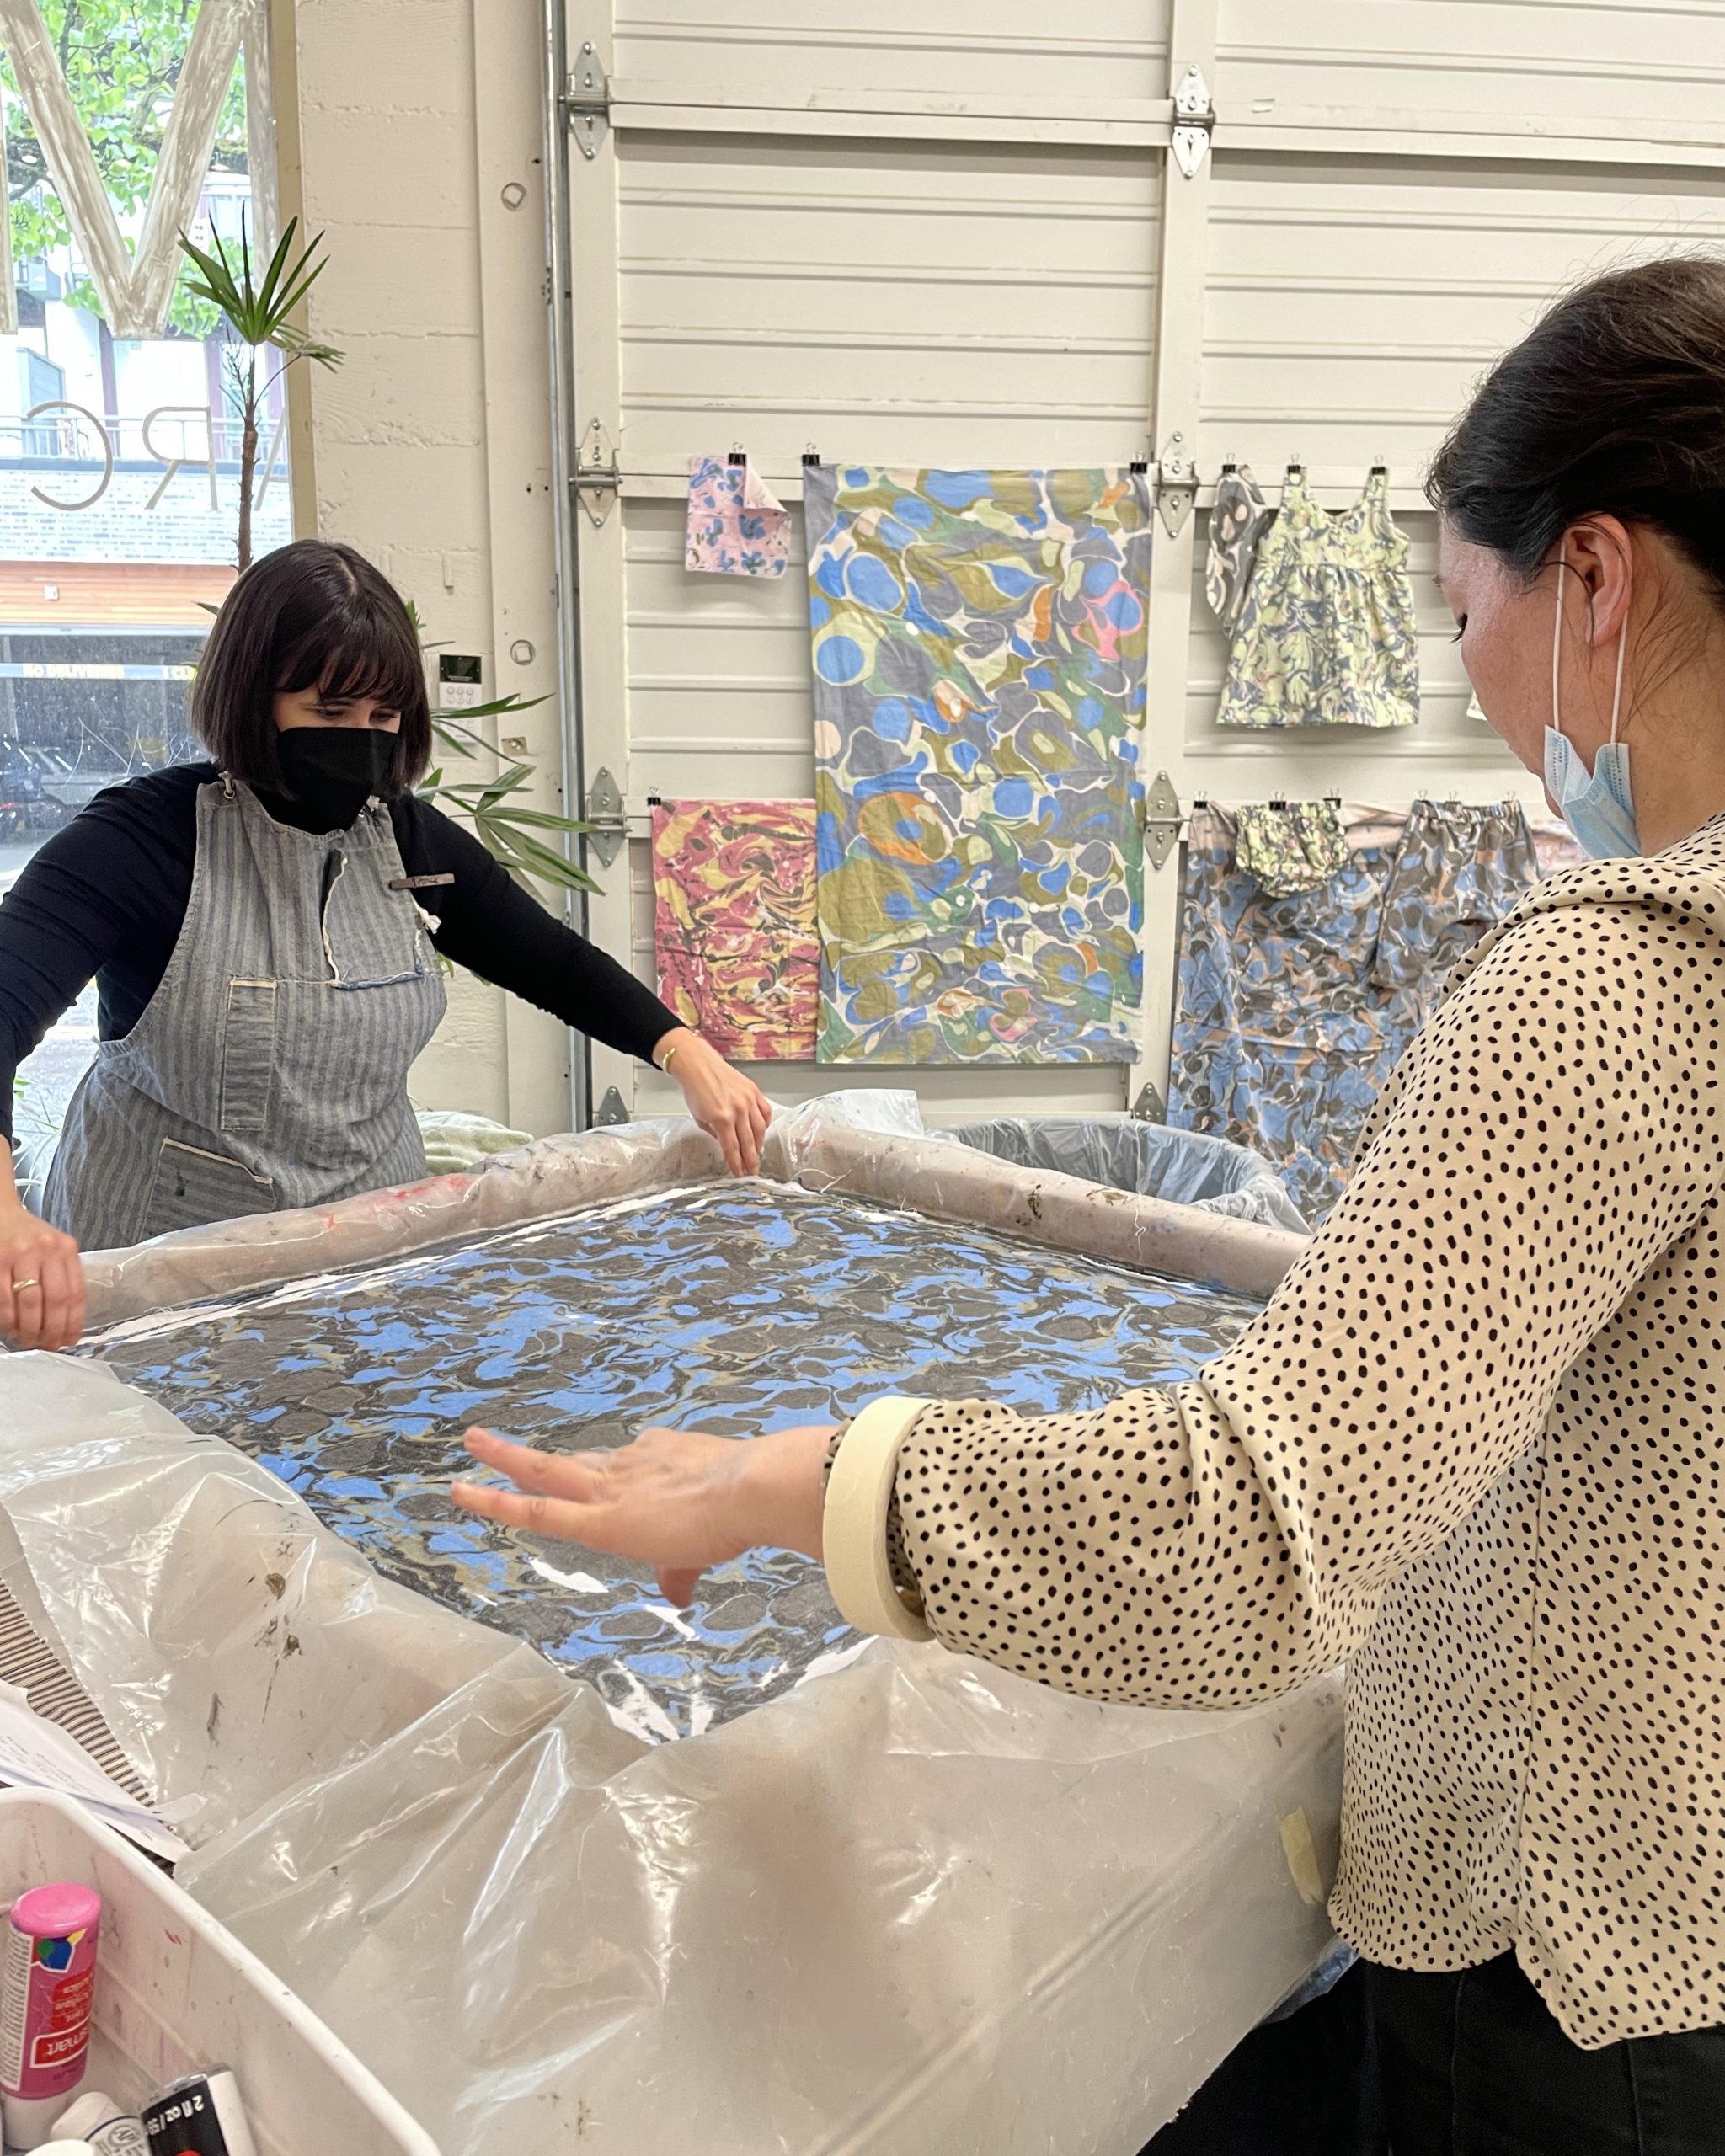
After two years of only going to 100% necessary inside places, I cracked and took an in-person workshop. There were a lot of bare faces, but us masked folk all gravitated to the same table near the open the door. I didn’t realize how much I missed making stuff with other people until the six hours had whizzed by and I felt super energized. Anyway, I’m really hoping we’re all healthy after spending so much time breathing in a room together.
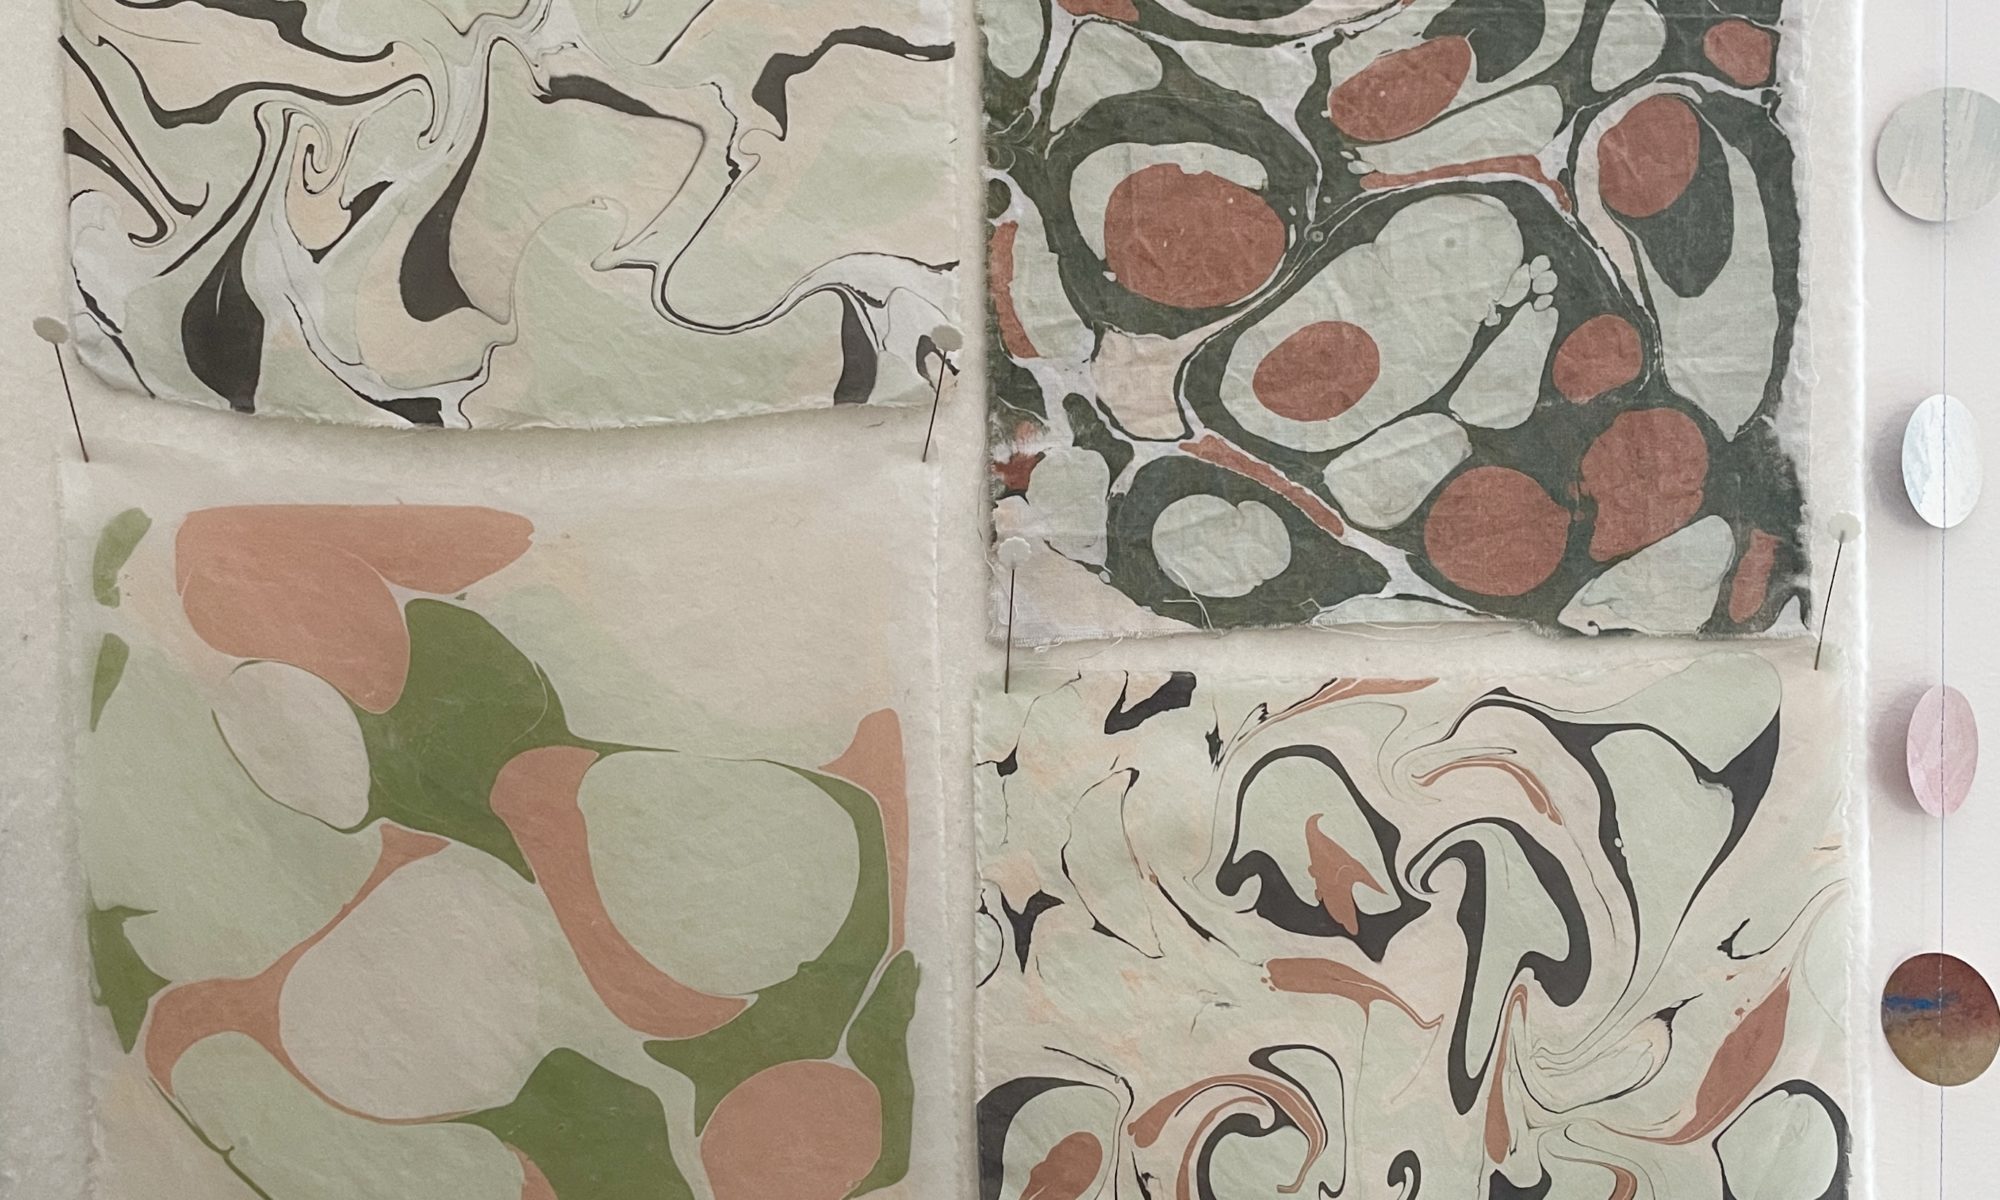
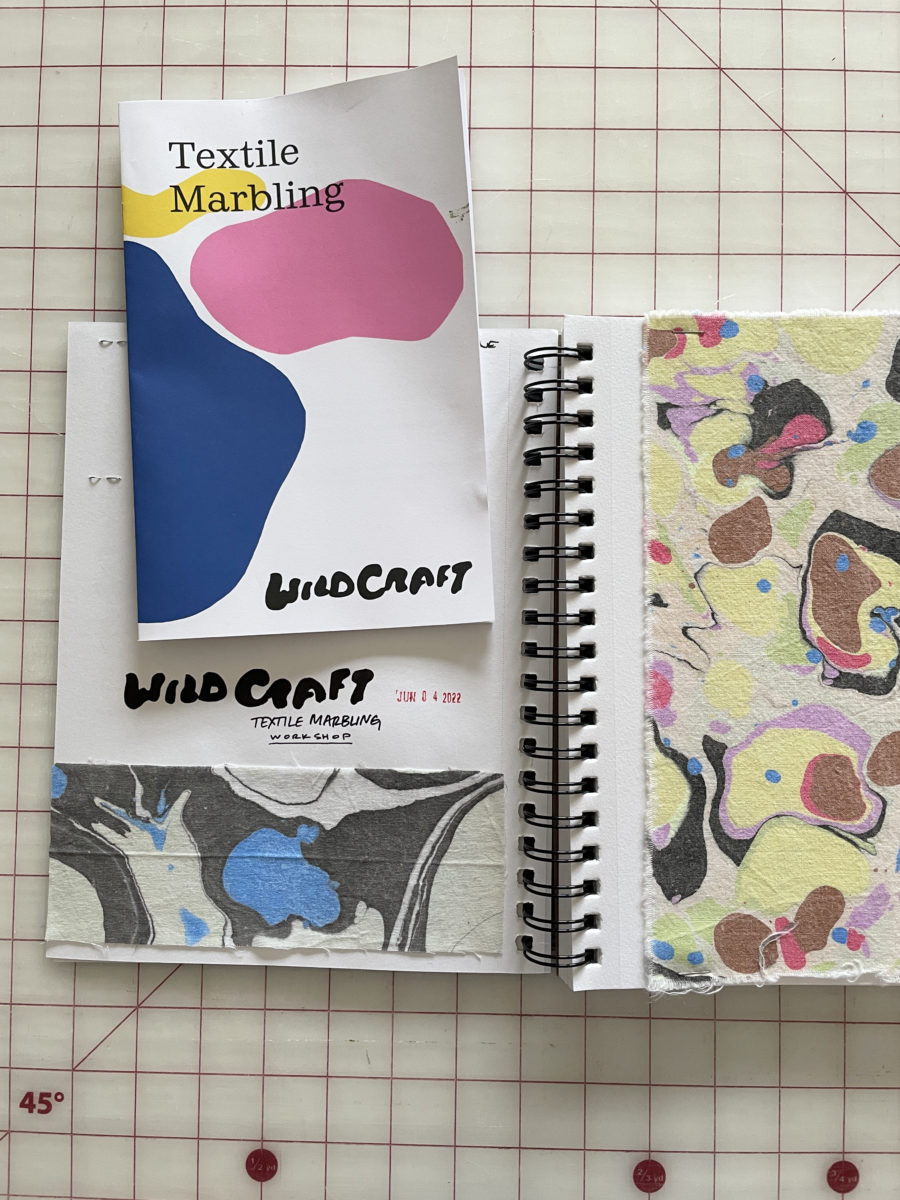
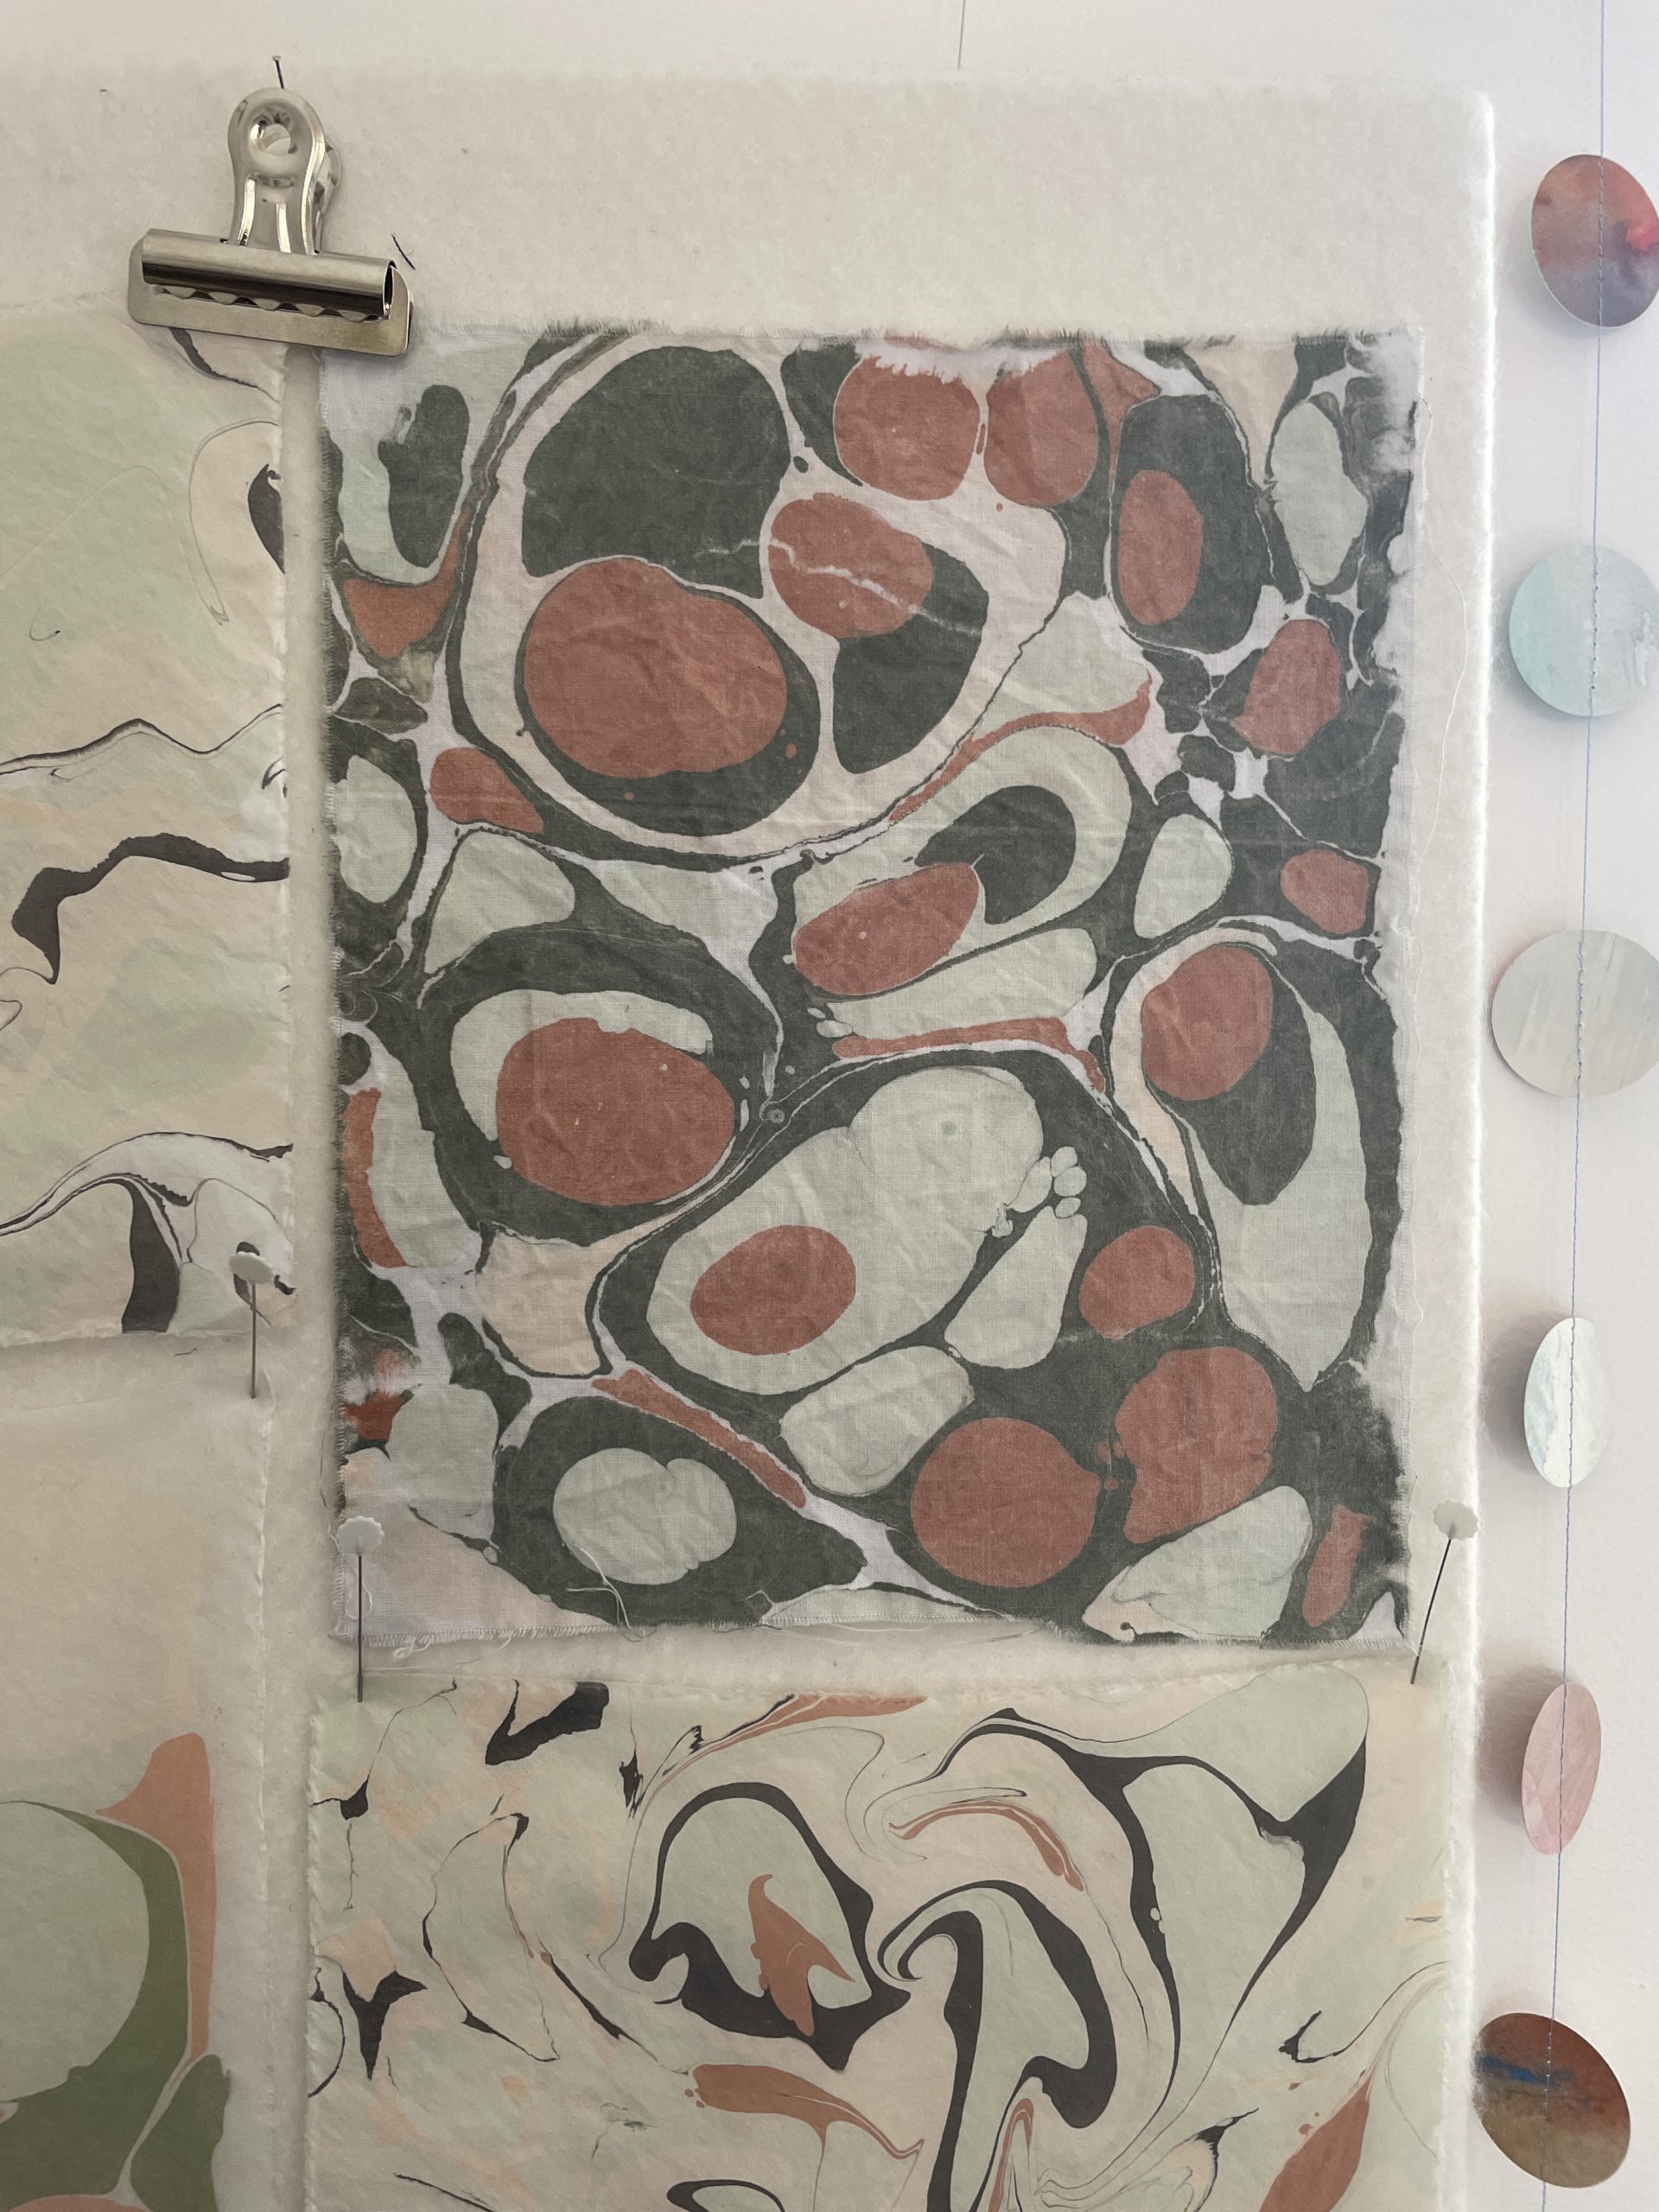
The end product of marbling isn’t really my jam but it’s a fucking fun process. Wildcraft provided a beautiful little booklet with instructions for doing this at home.
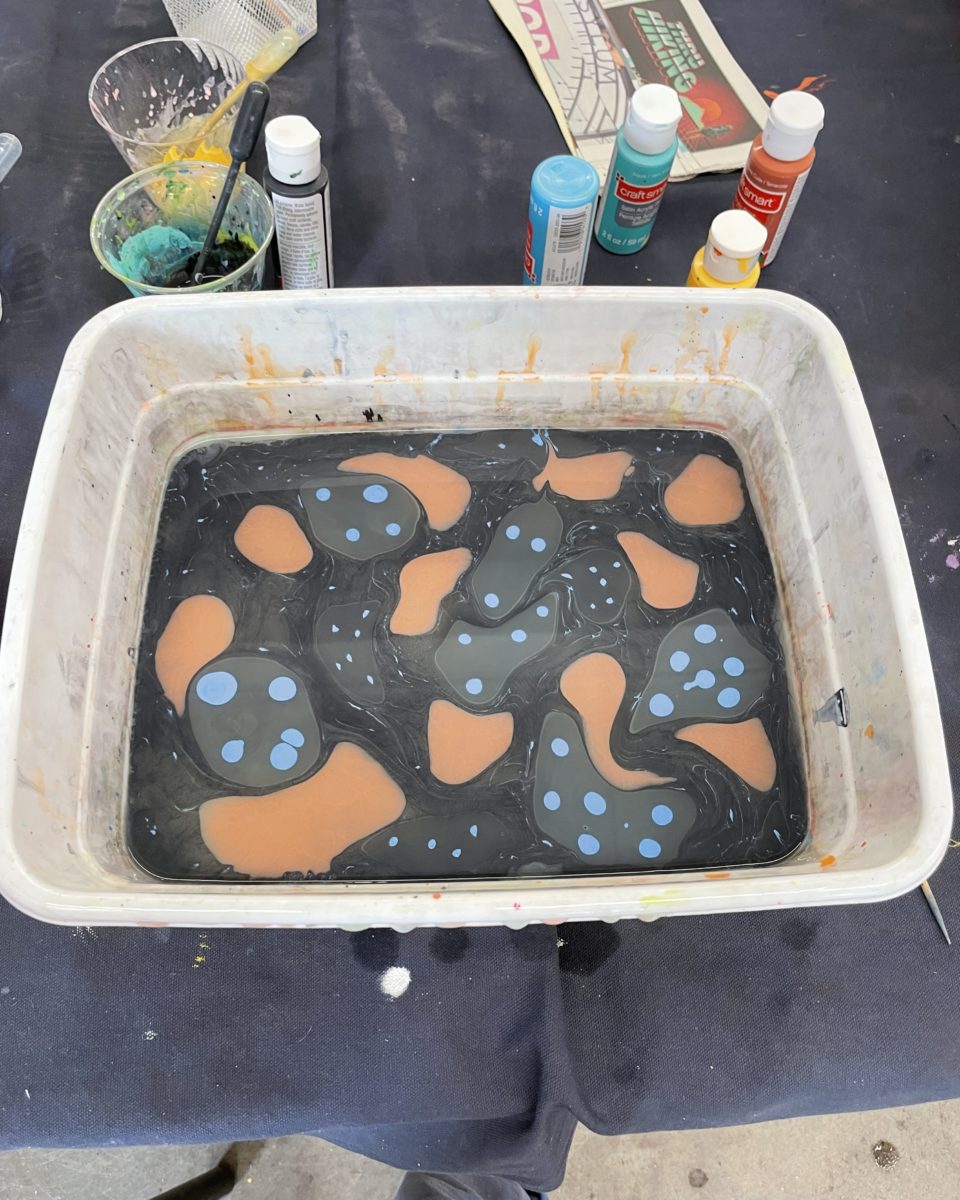
Each participant was given a cut of pre-treated cotton fabric, one cotton bandana, one large piece of silk, and an individual marbling tub. Each table also had a larger basin to share and everyone rotated through doing one large sample in the big tub pictured up above. I had so much fun playing I only took three photos during the workshop so here’s a short video of what the process looks like.
Marbling really forces you to let go – you don’t really know how the paints are going to interact with each other, or which colors are going to actually show up on the fabric. Most of the colors I’m drawn to weren’t very vibrant once transferred to fabric.
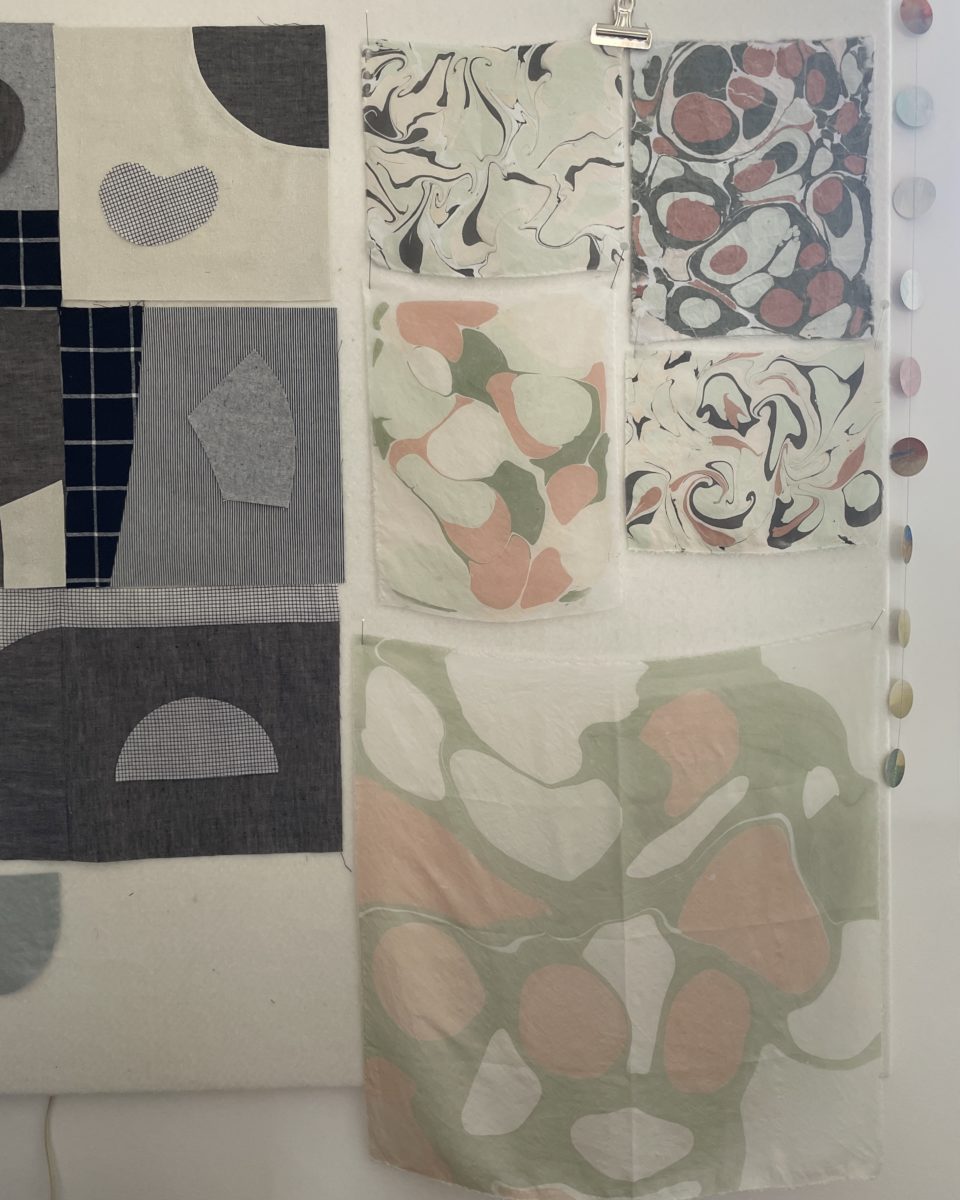
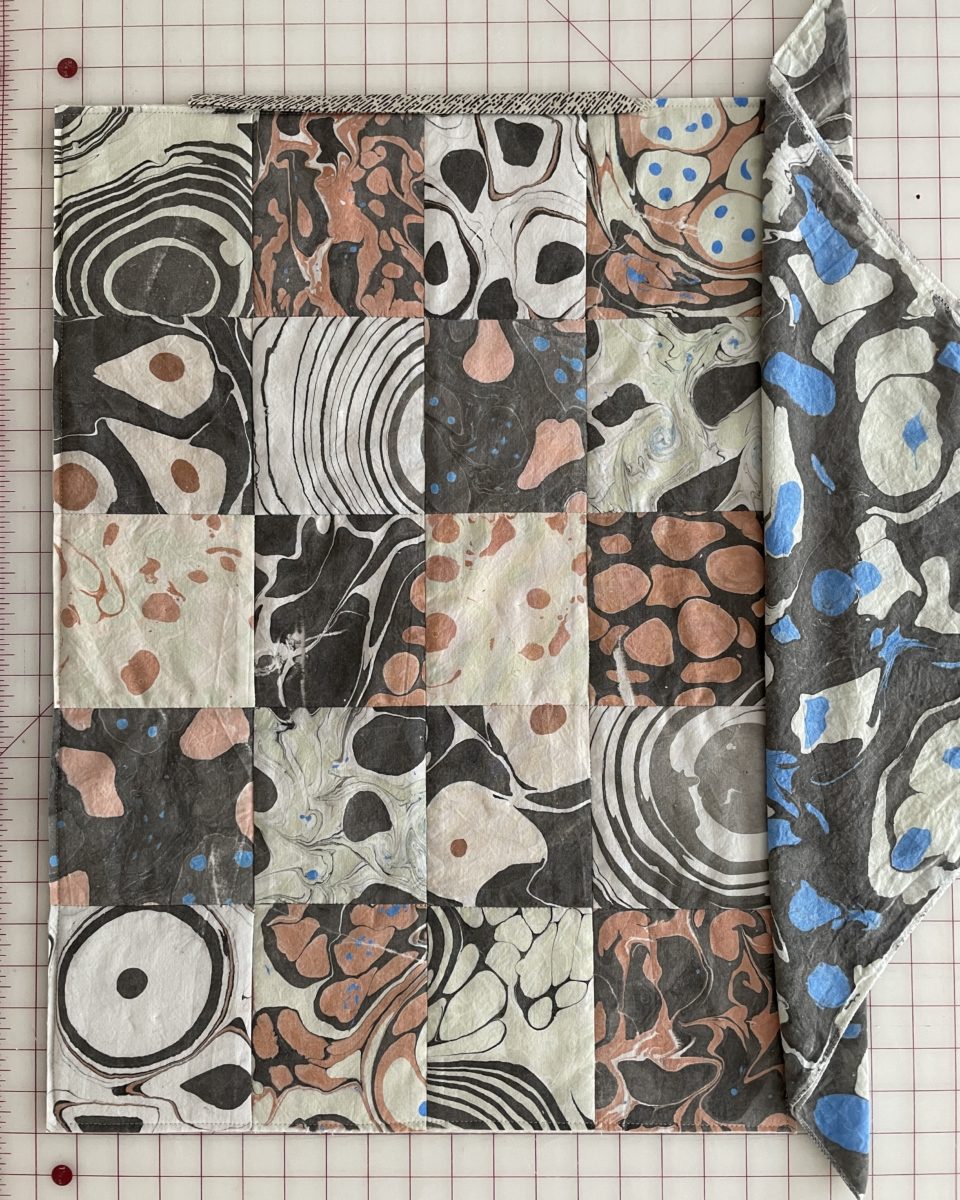
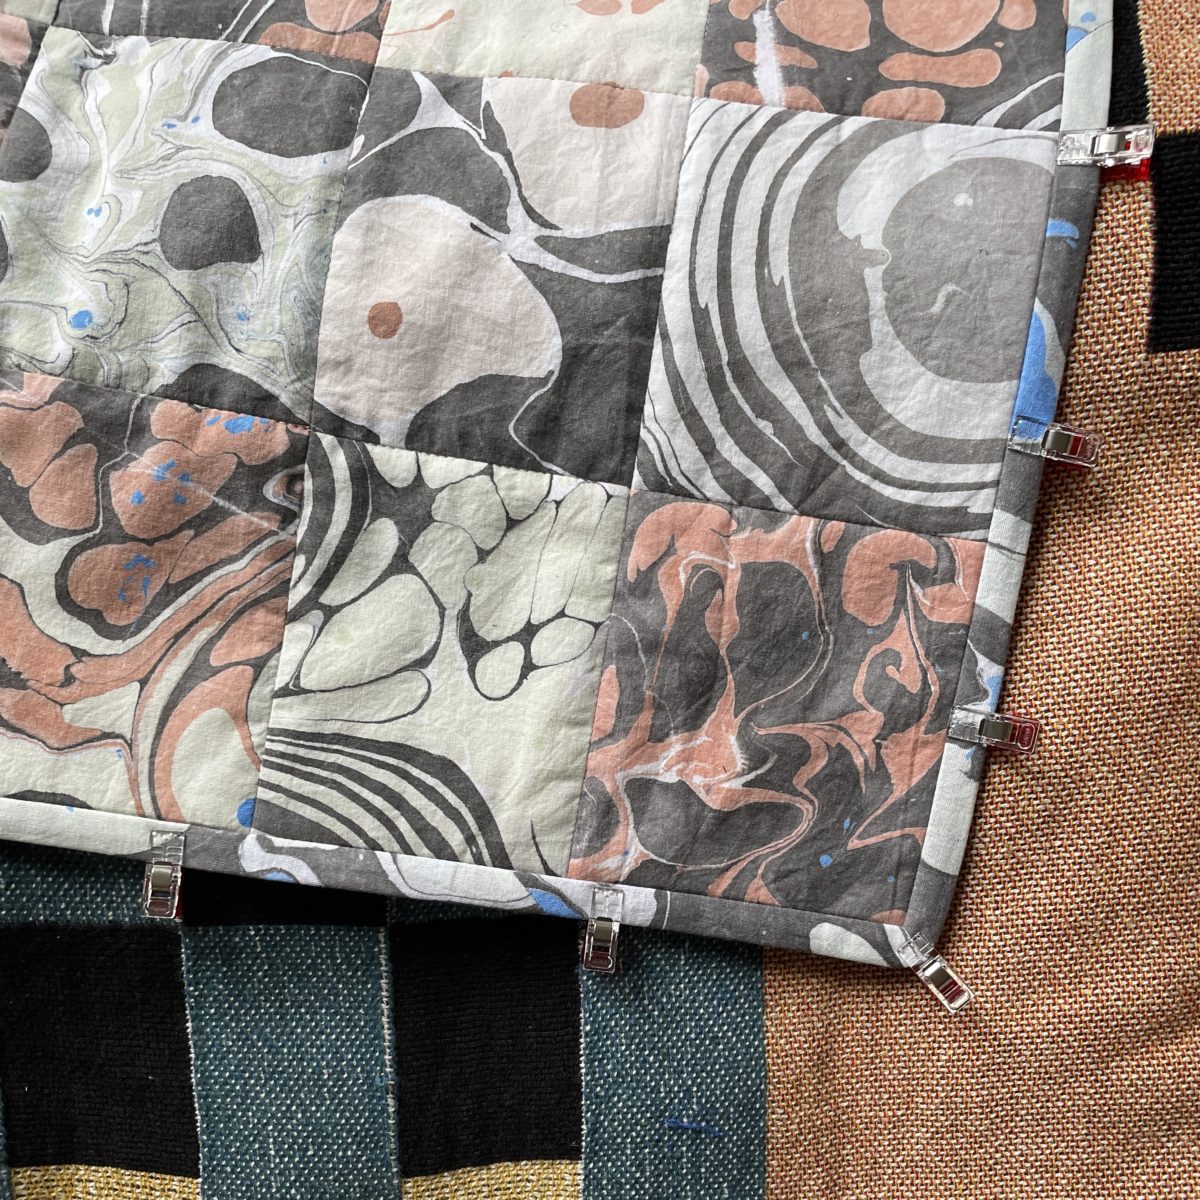
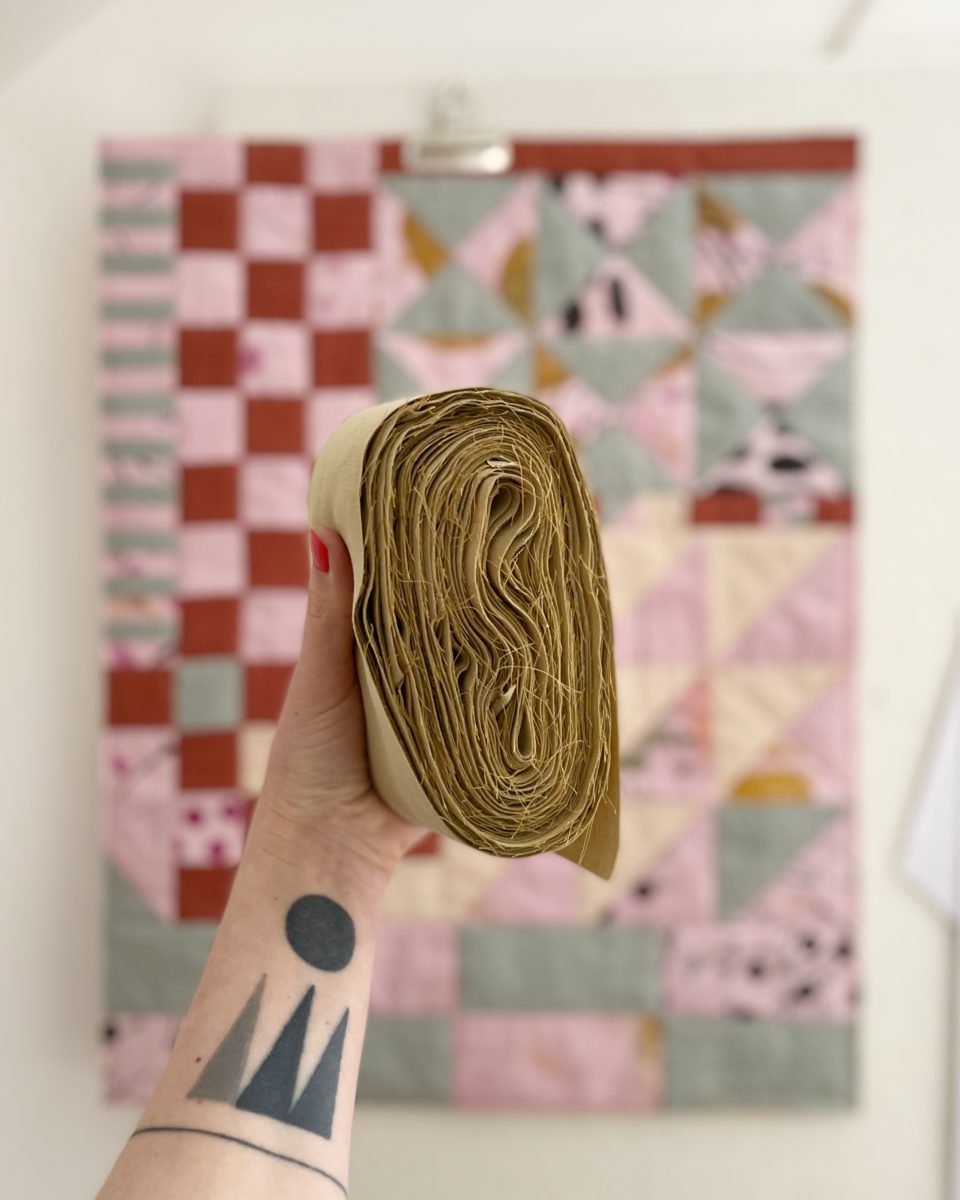
Knowing I was going to have a lot of small cotton samples, I tried to stick with the same colors so they could be used in a mini quilt project, which I started sewing immediately at home.
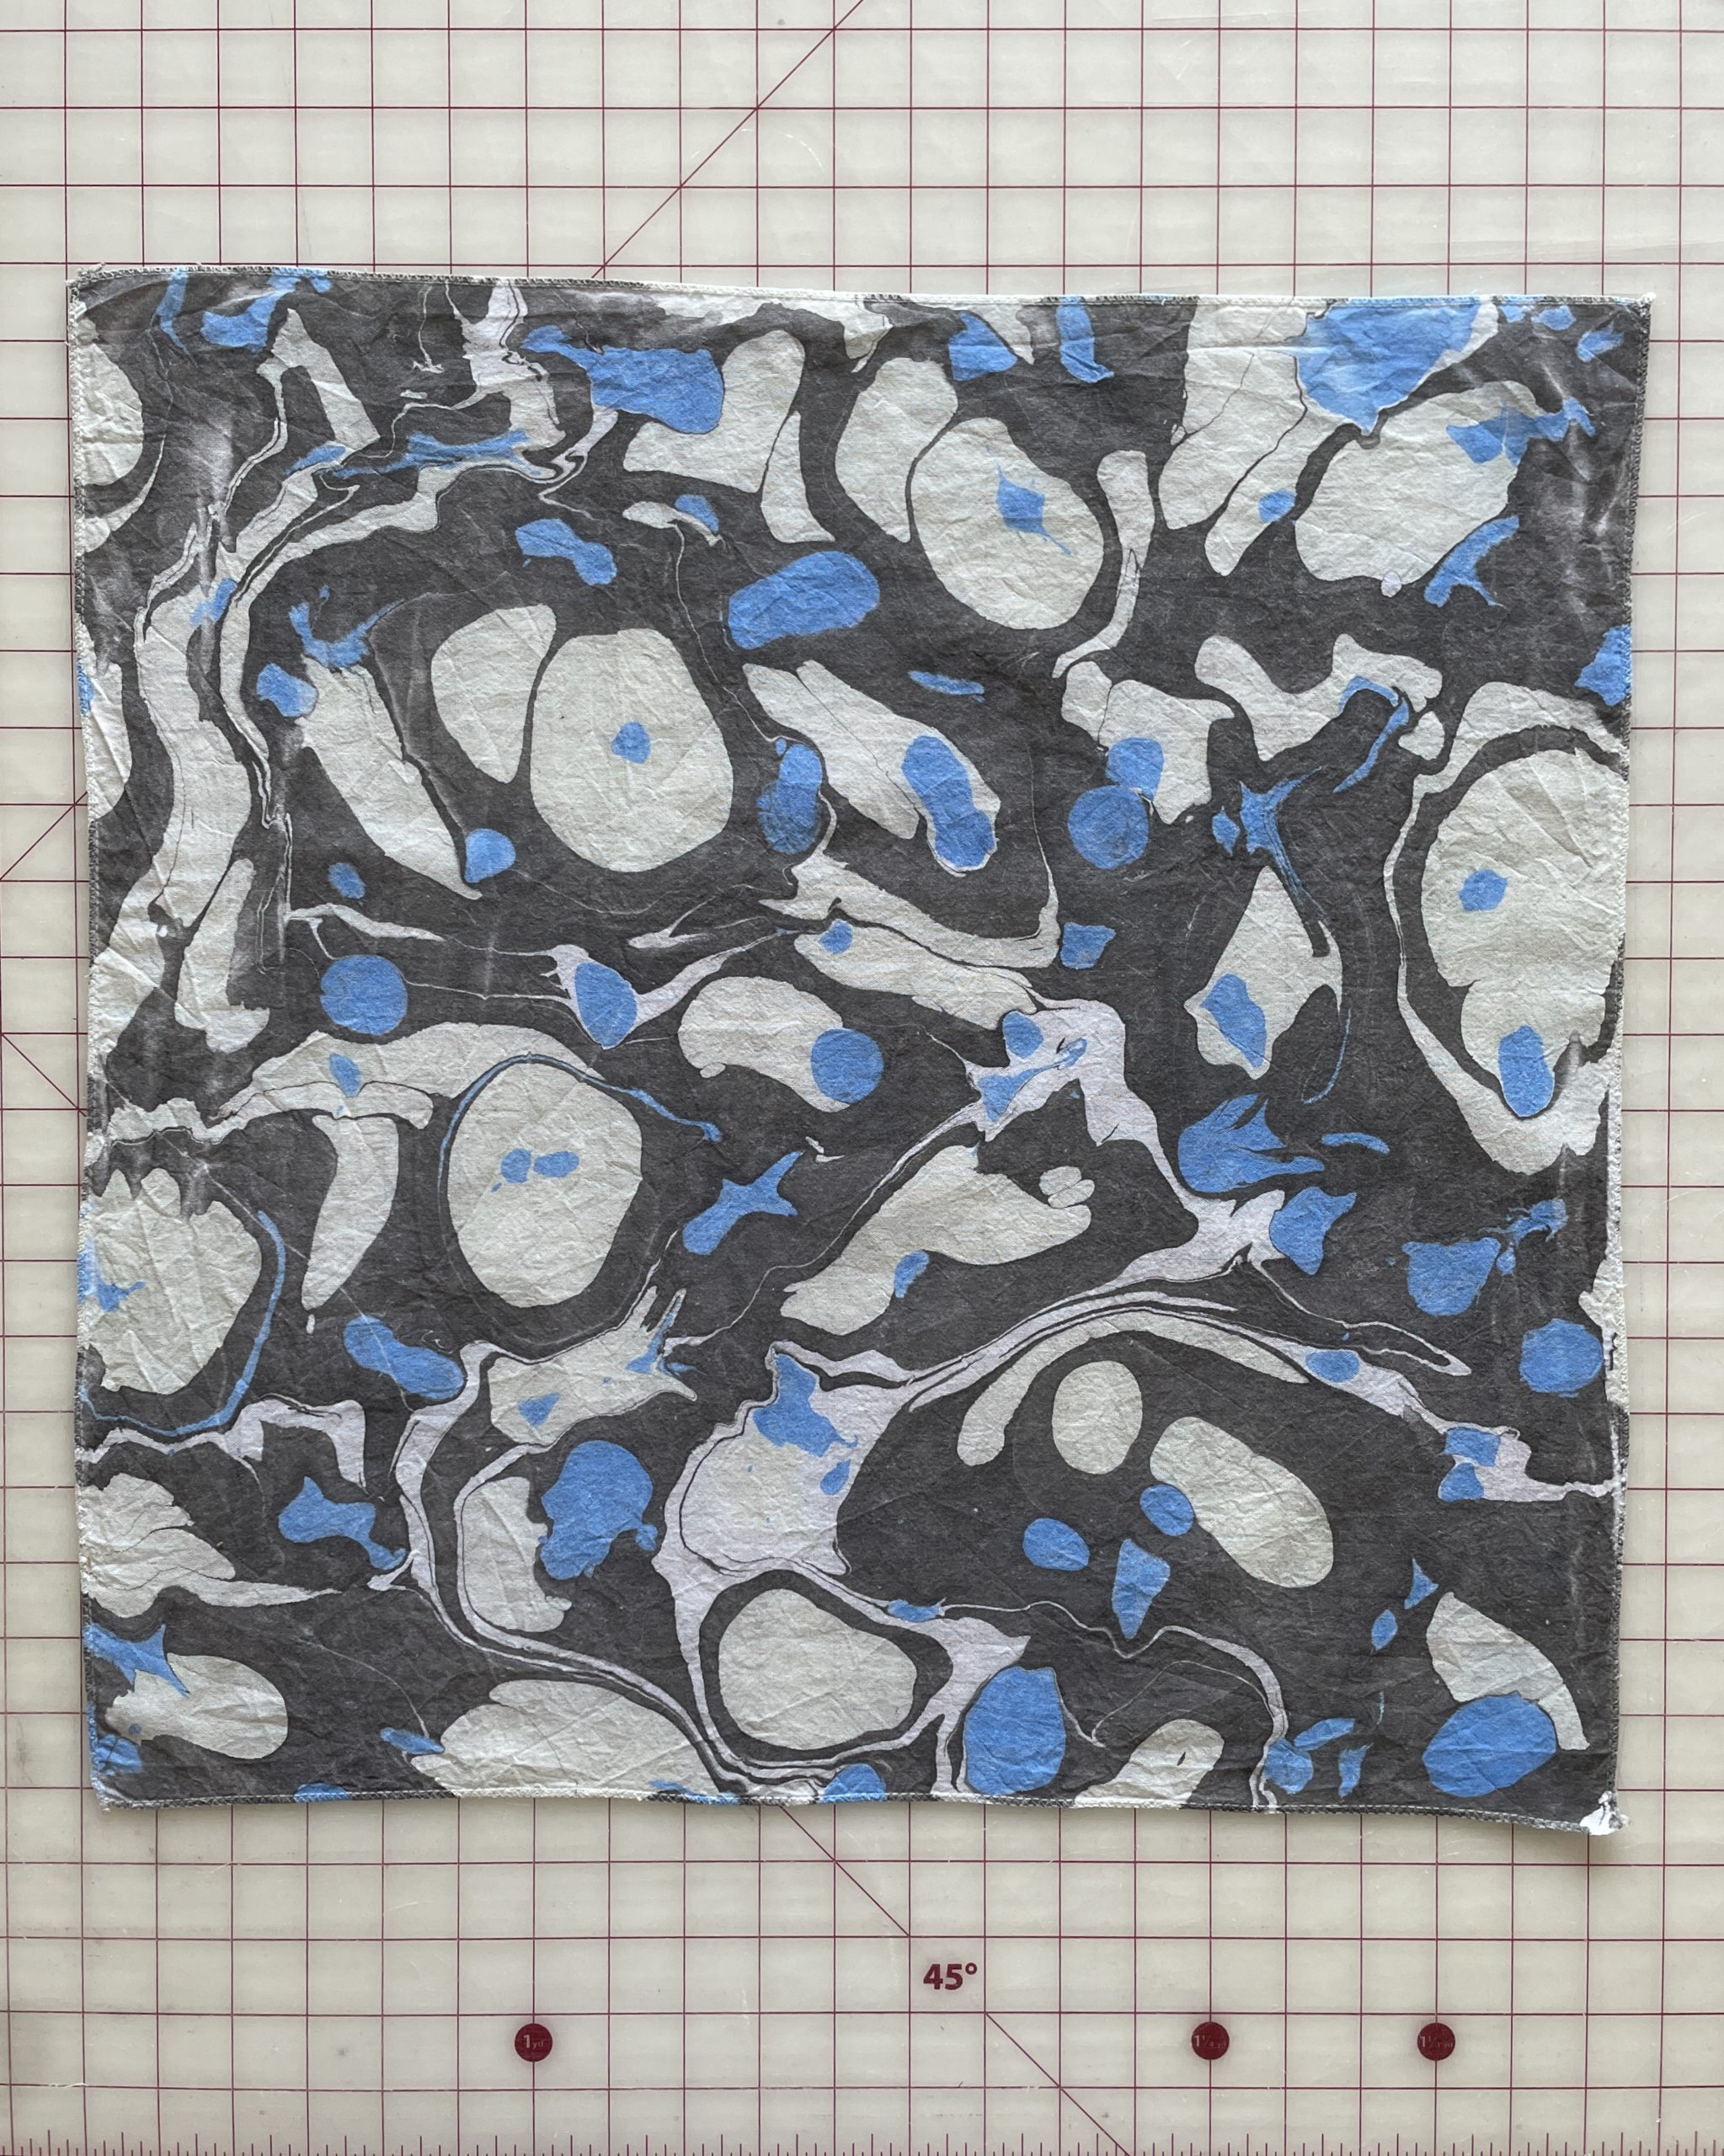
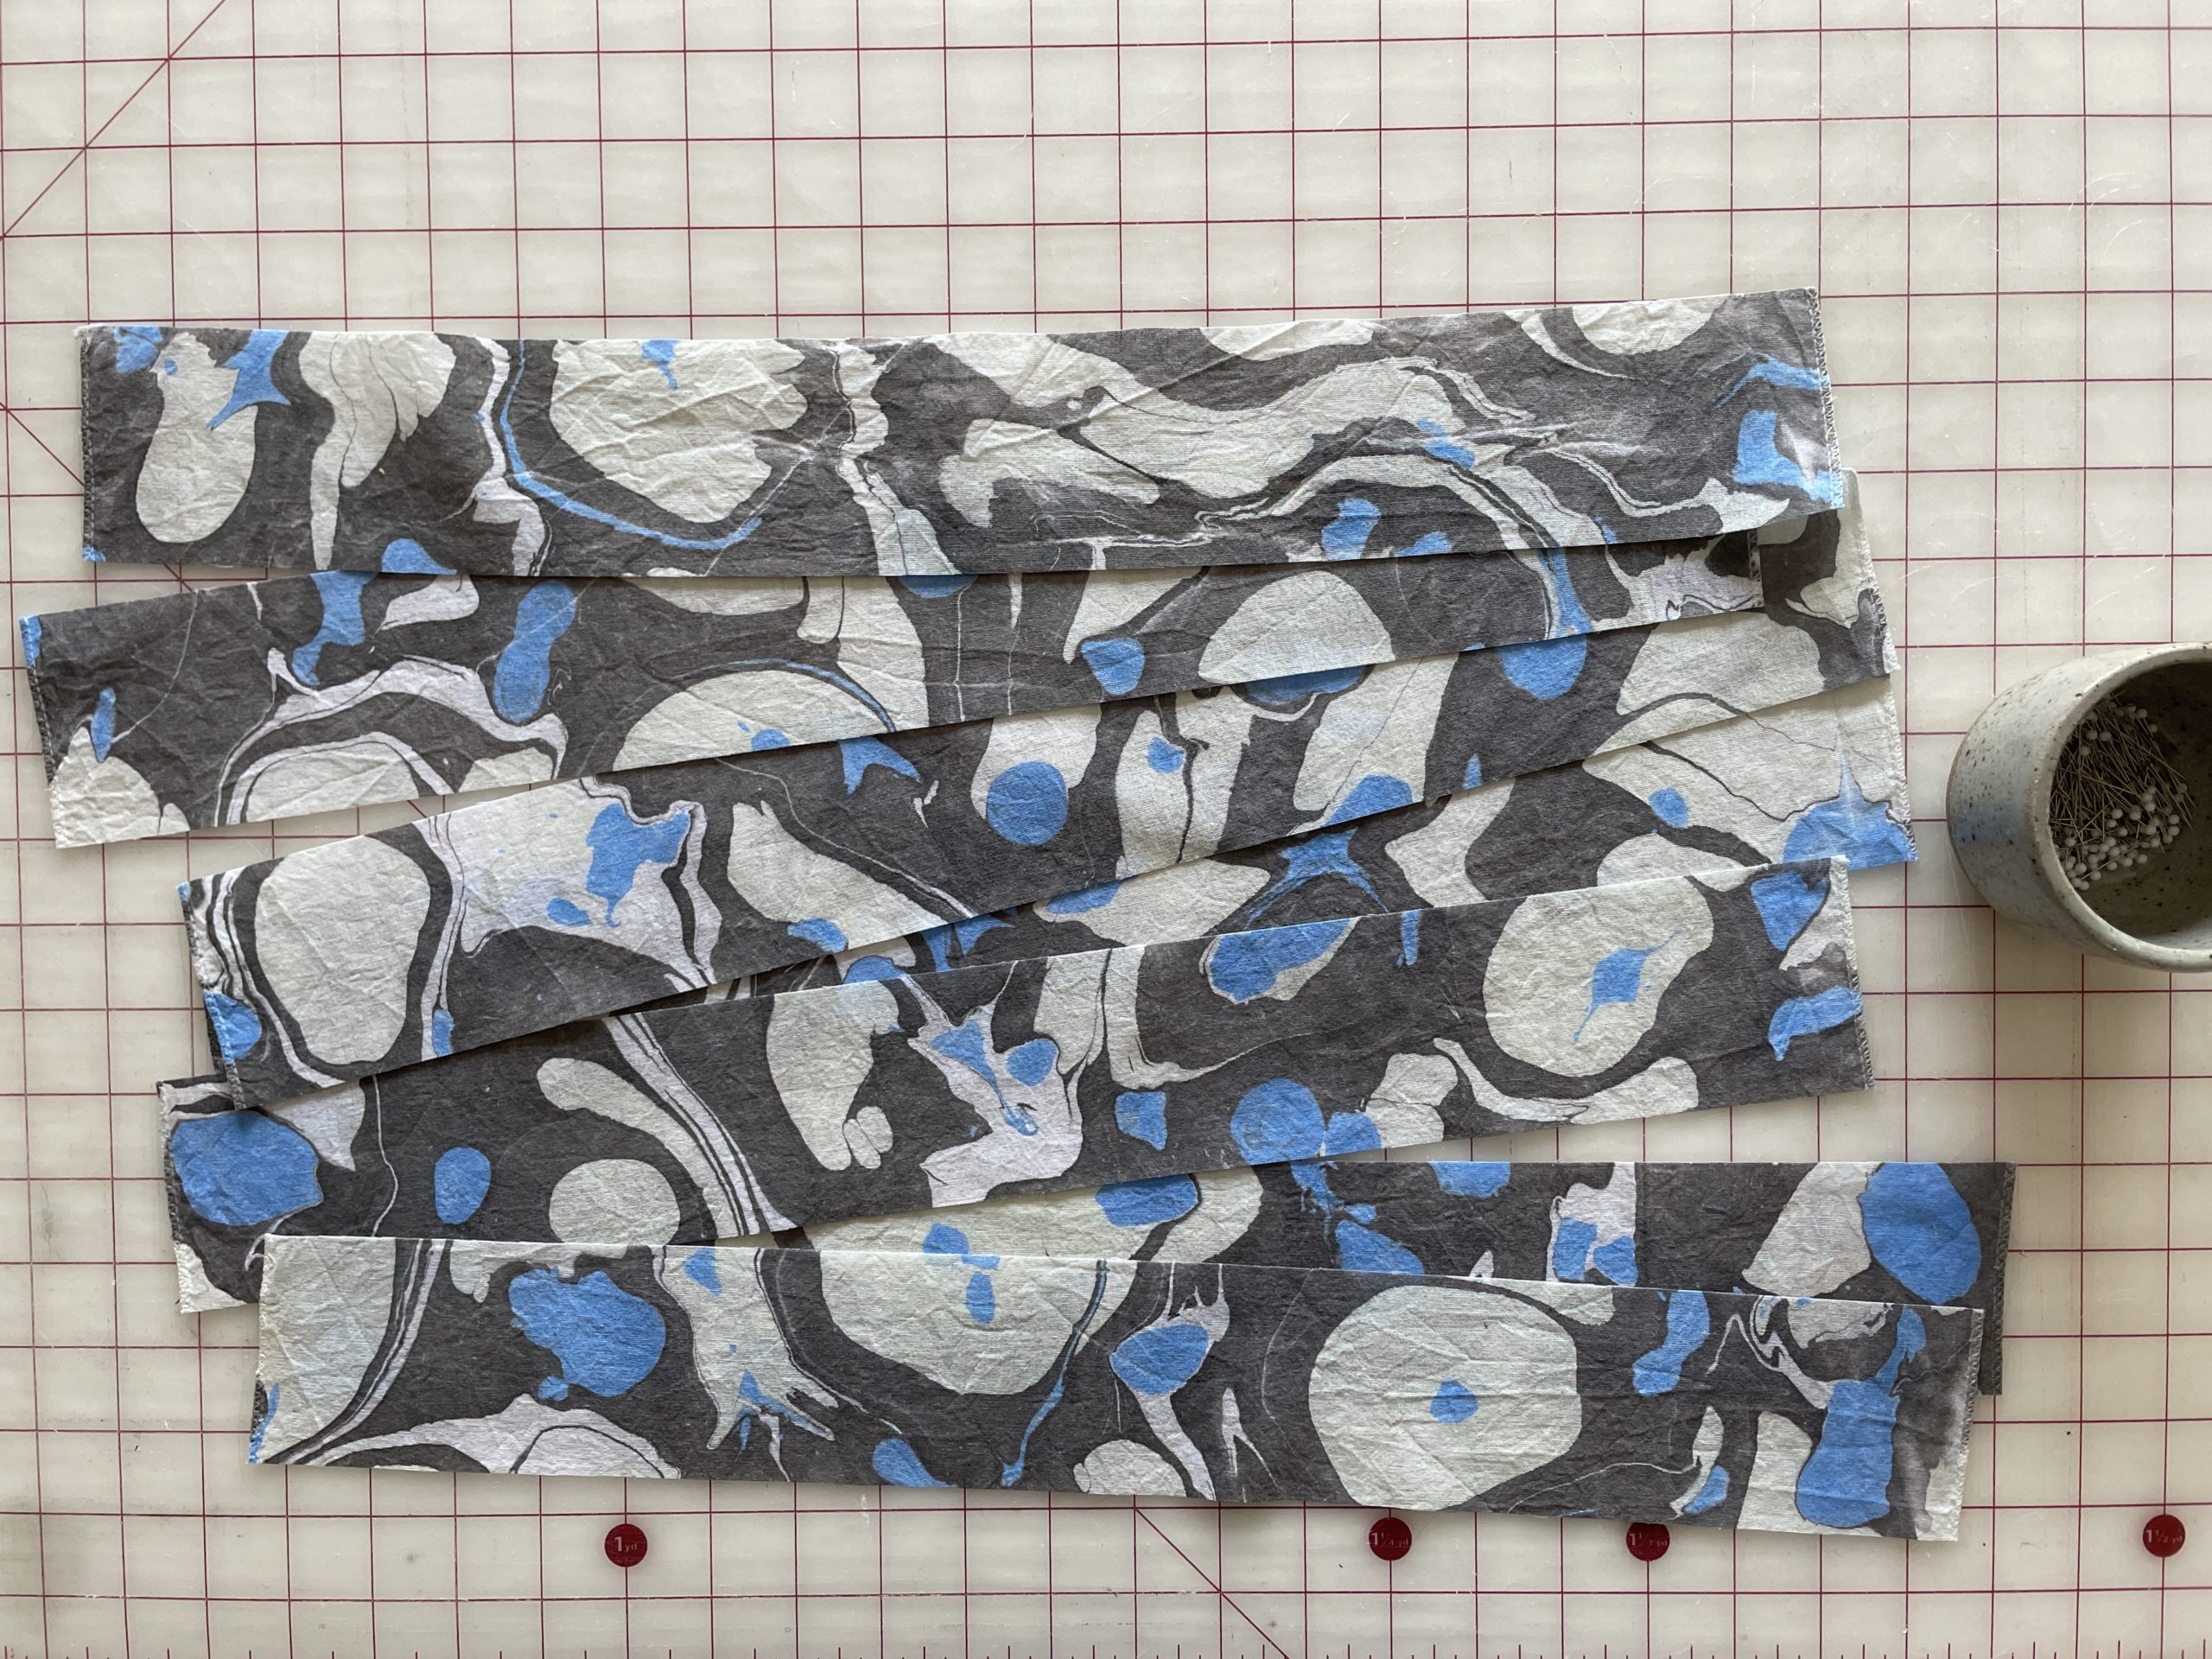
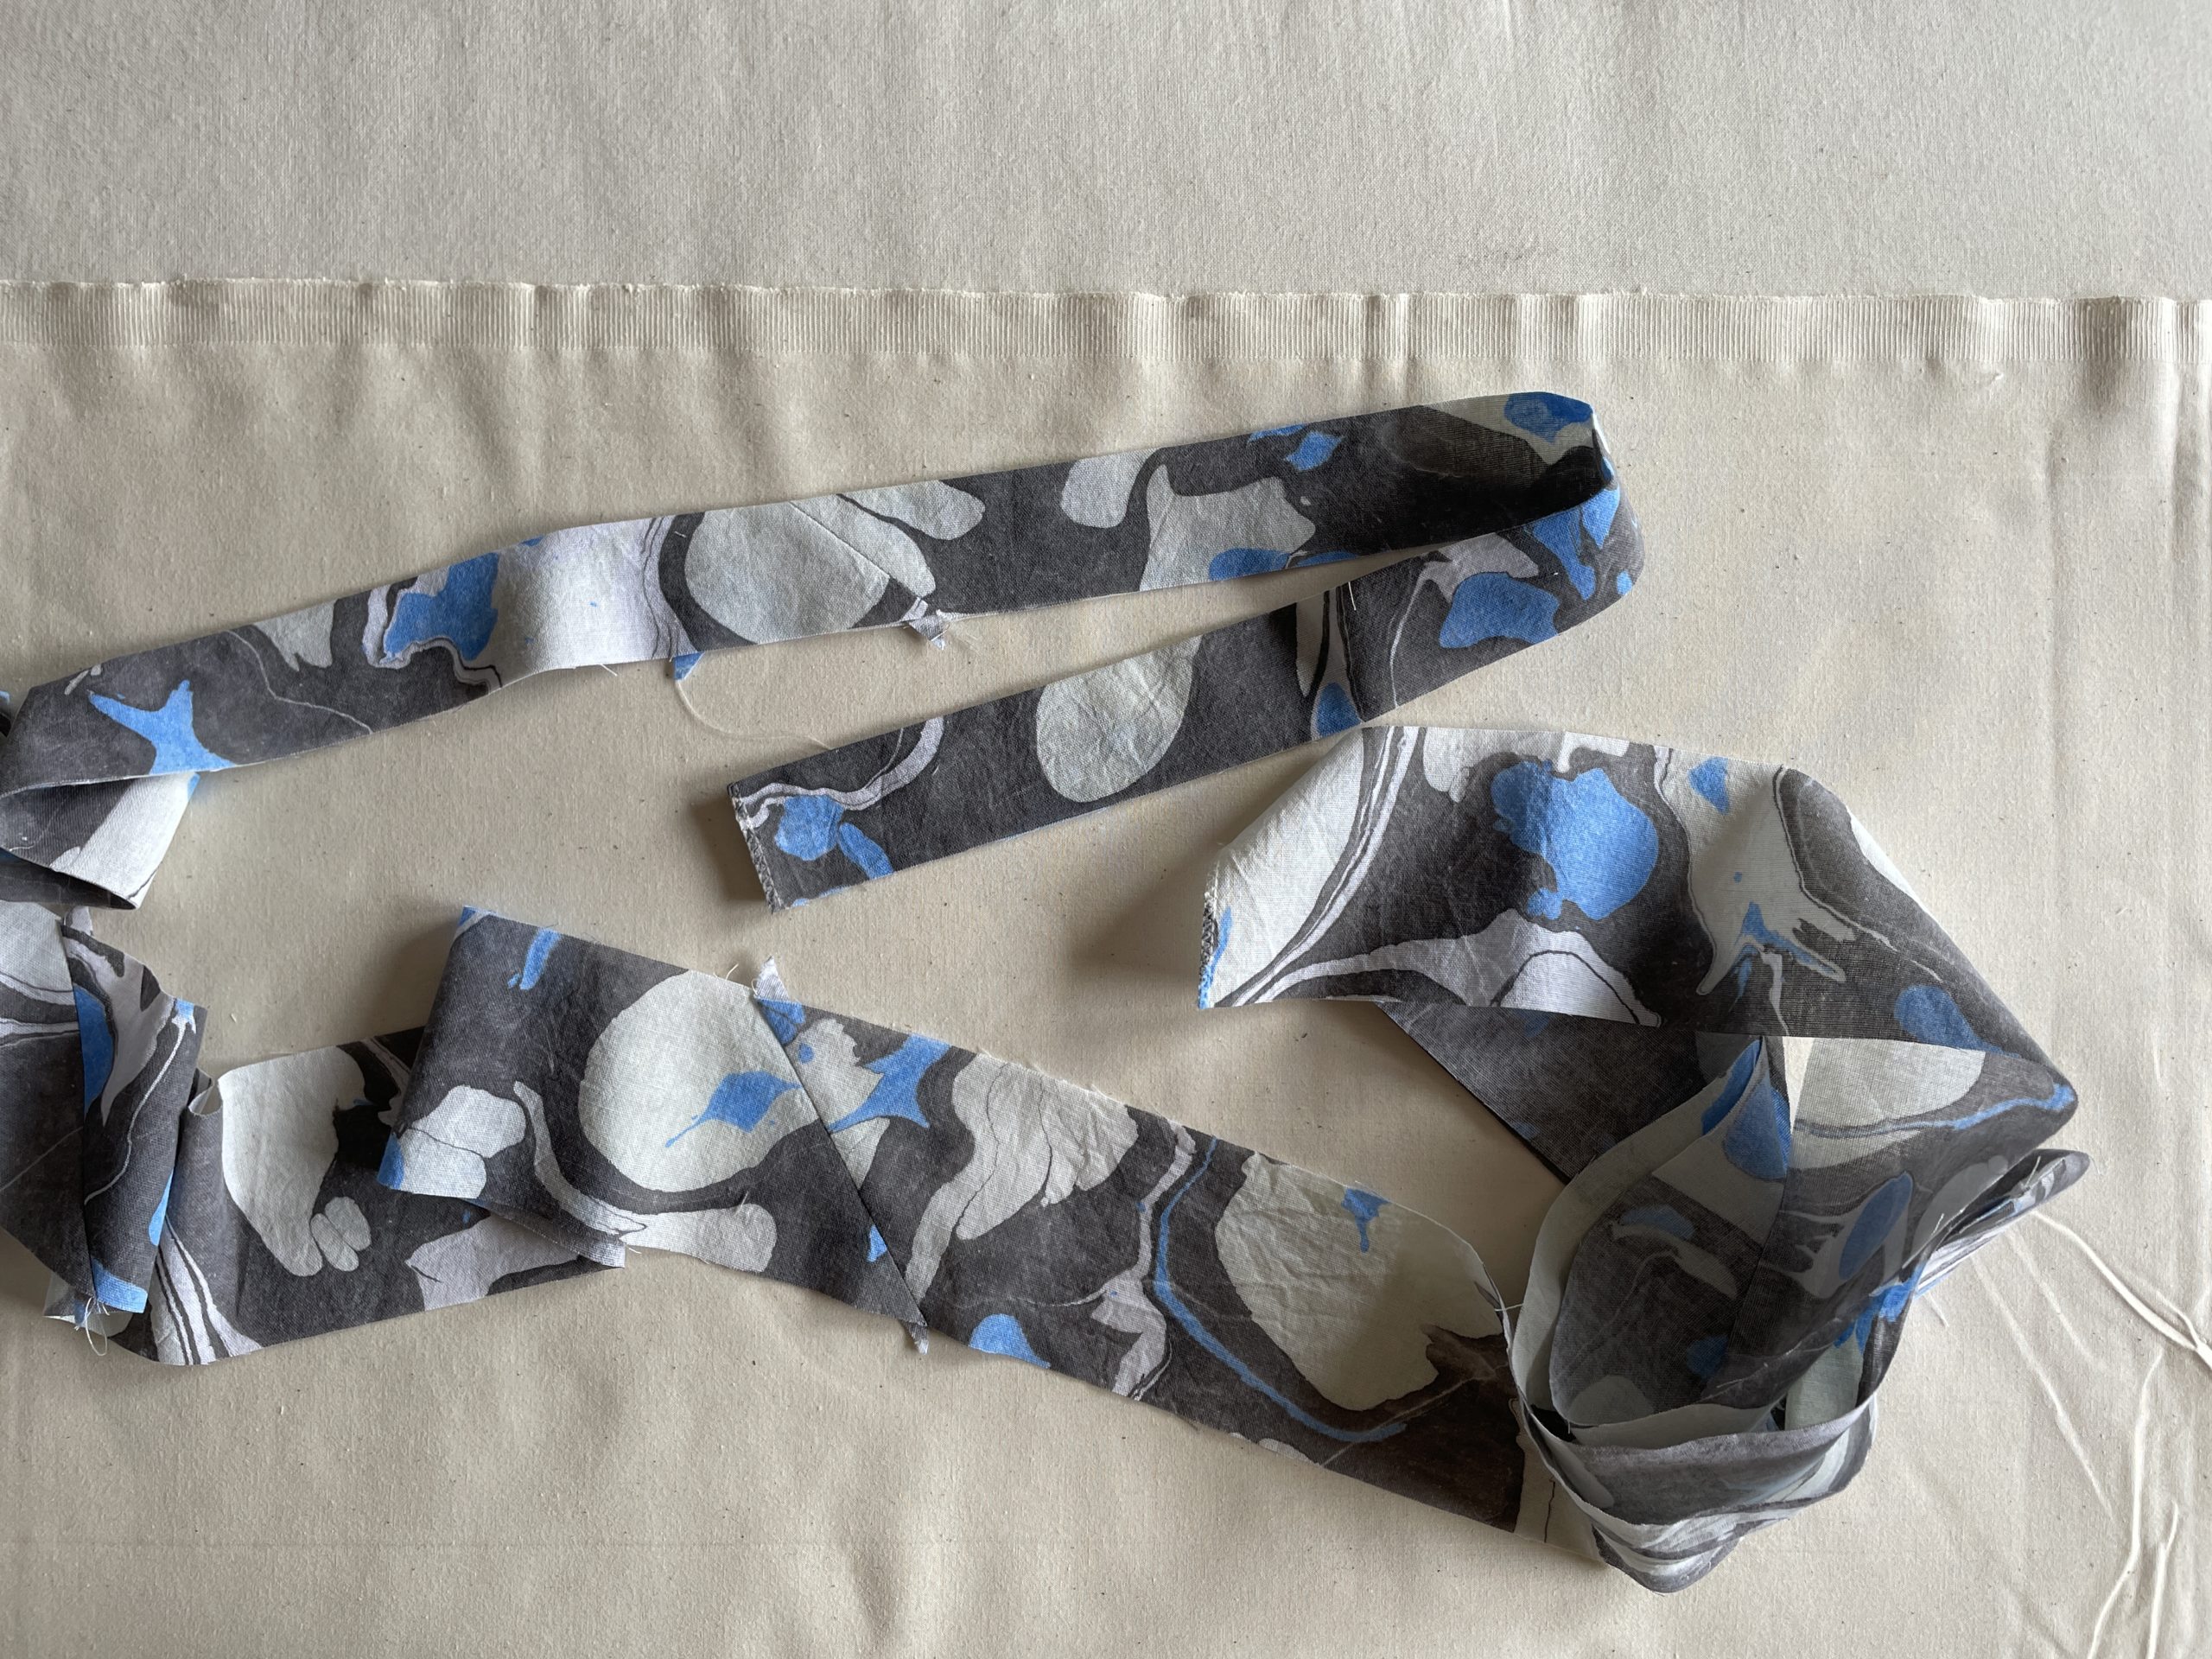
I decided to cut up this blue piece because the fabric wasn’t great quality, I didn’t think I’d ever use it as bandana (its edges were finished), and I needed something to bind the wall hanging with. All of my other scraps didn’t quite work with the marbled fabric.
I just pieced the samples together and did a simple stitch in the ditch quilting pattern. The binding was machine sewn onto the front then folded and pressed to the back for hand-stitching.
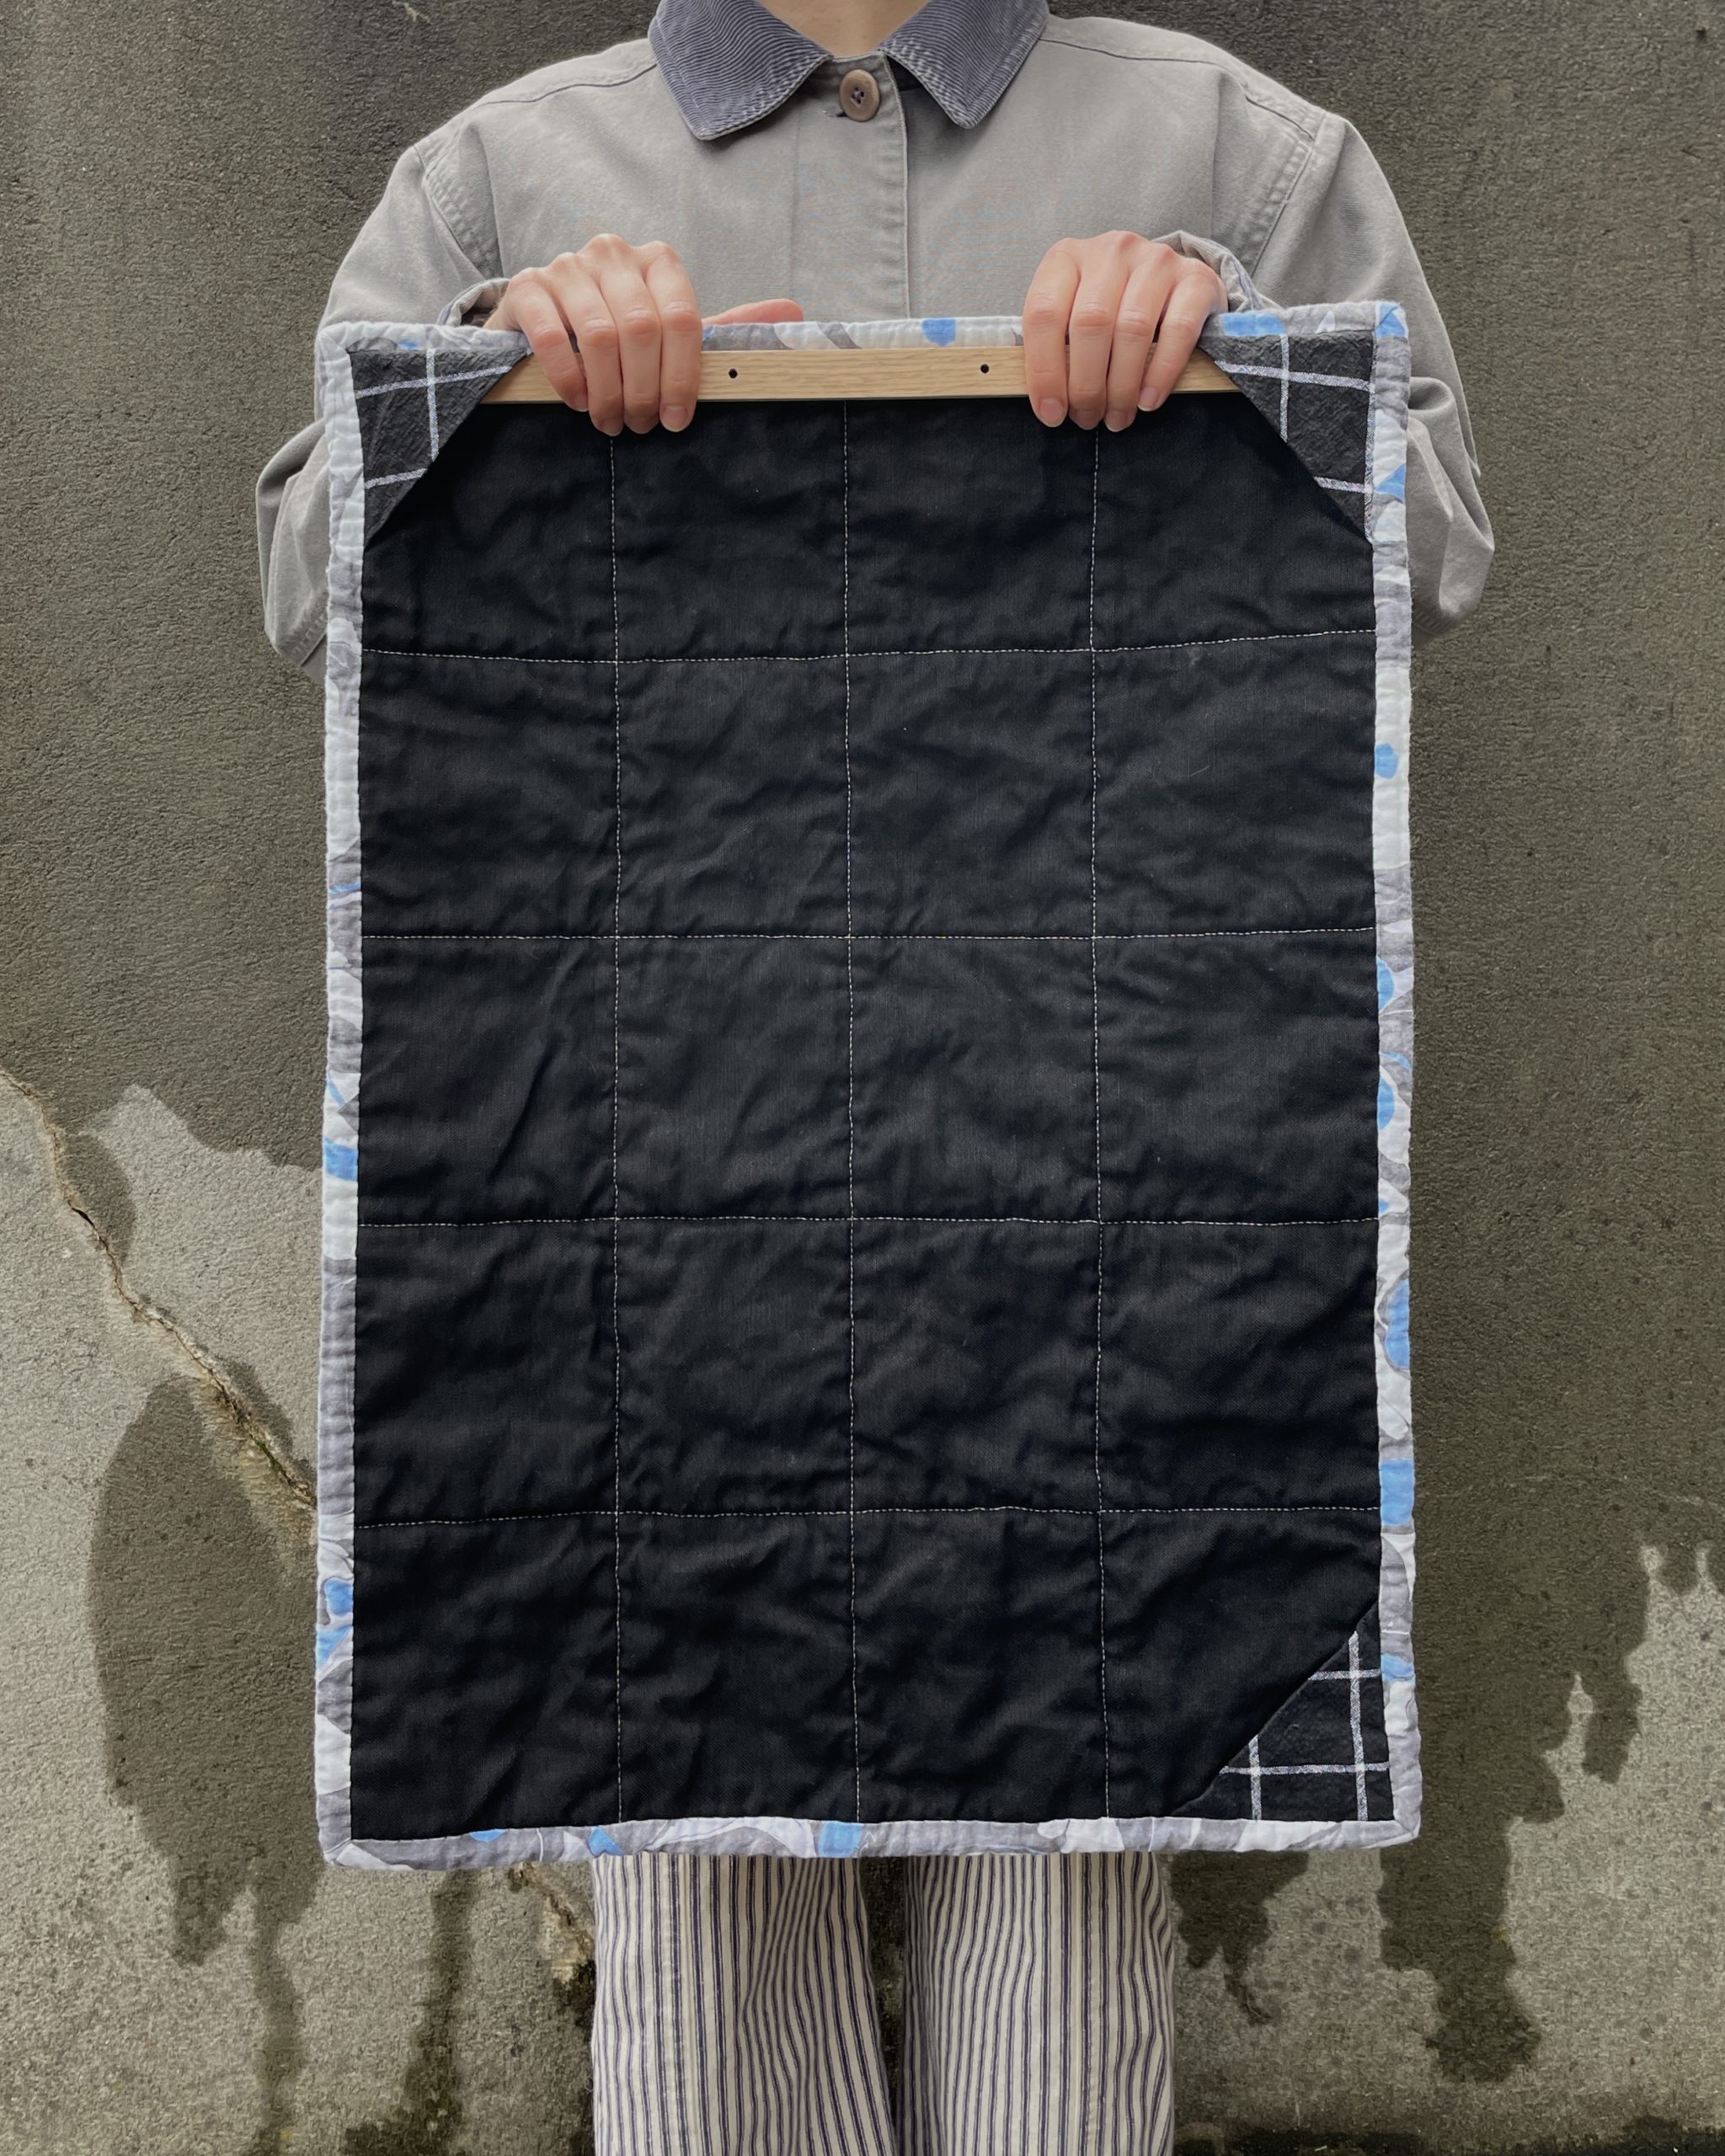
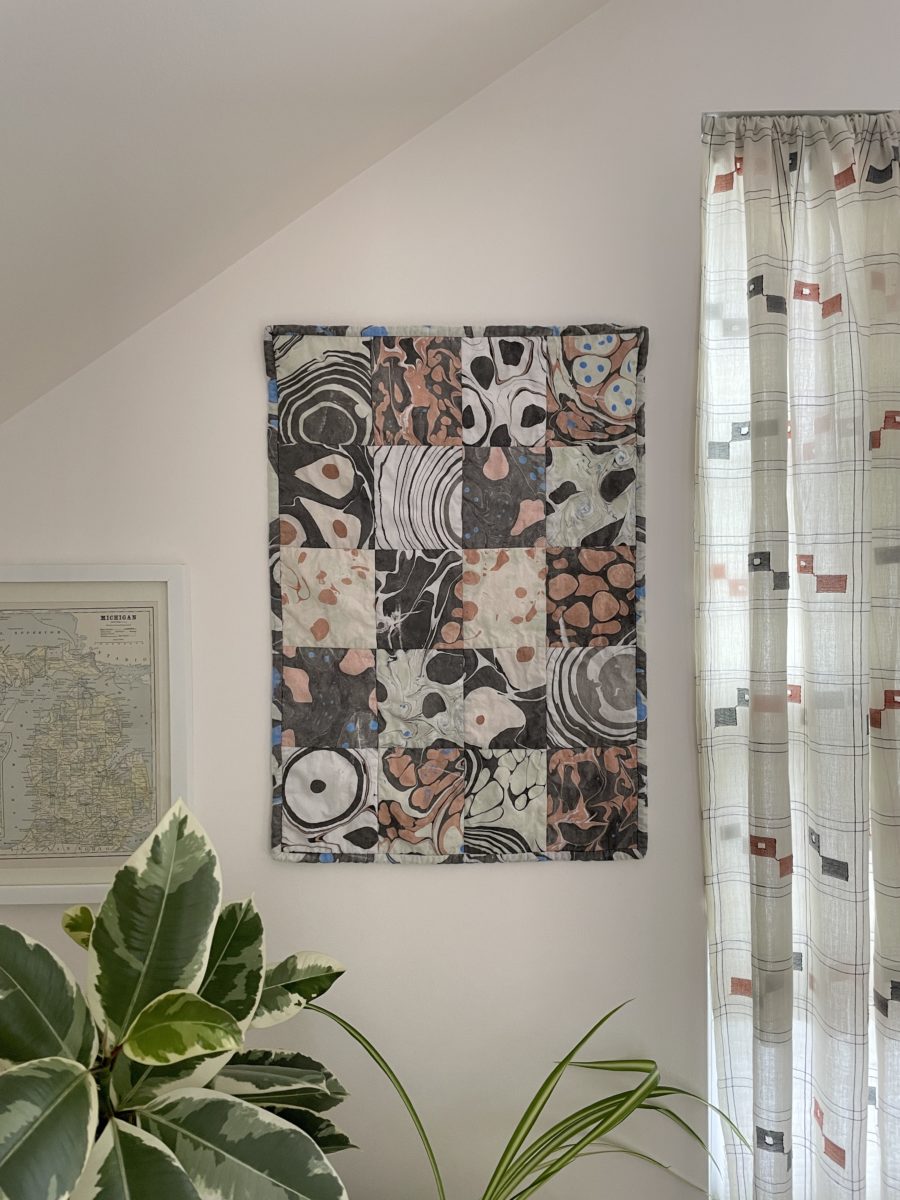
I added little triangles to the corners so it can be hung on the wall and drilled some holes in scrap wood to mount.
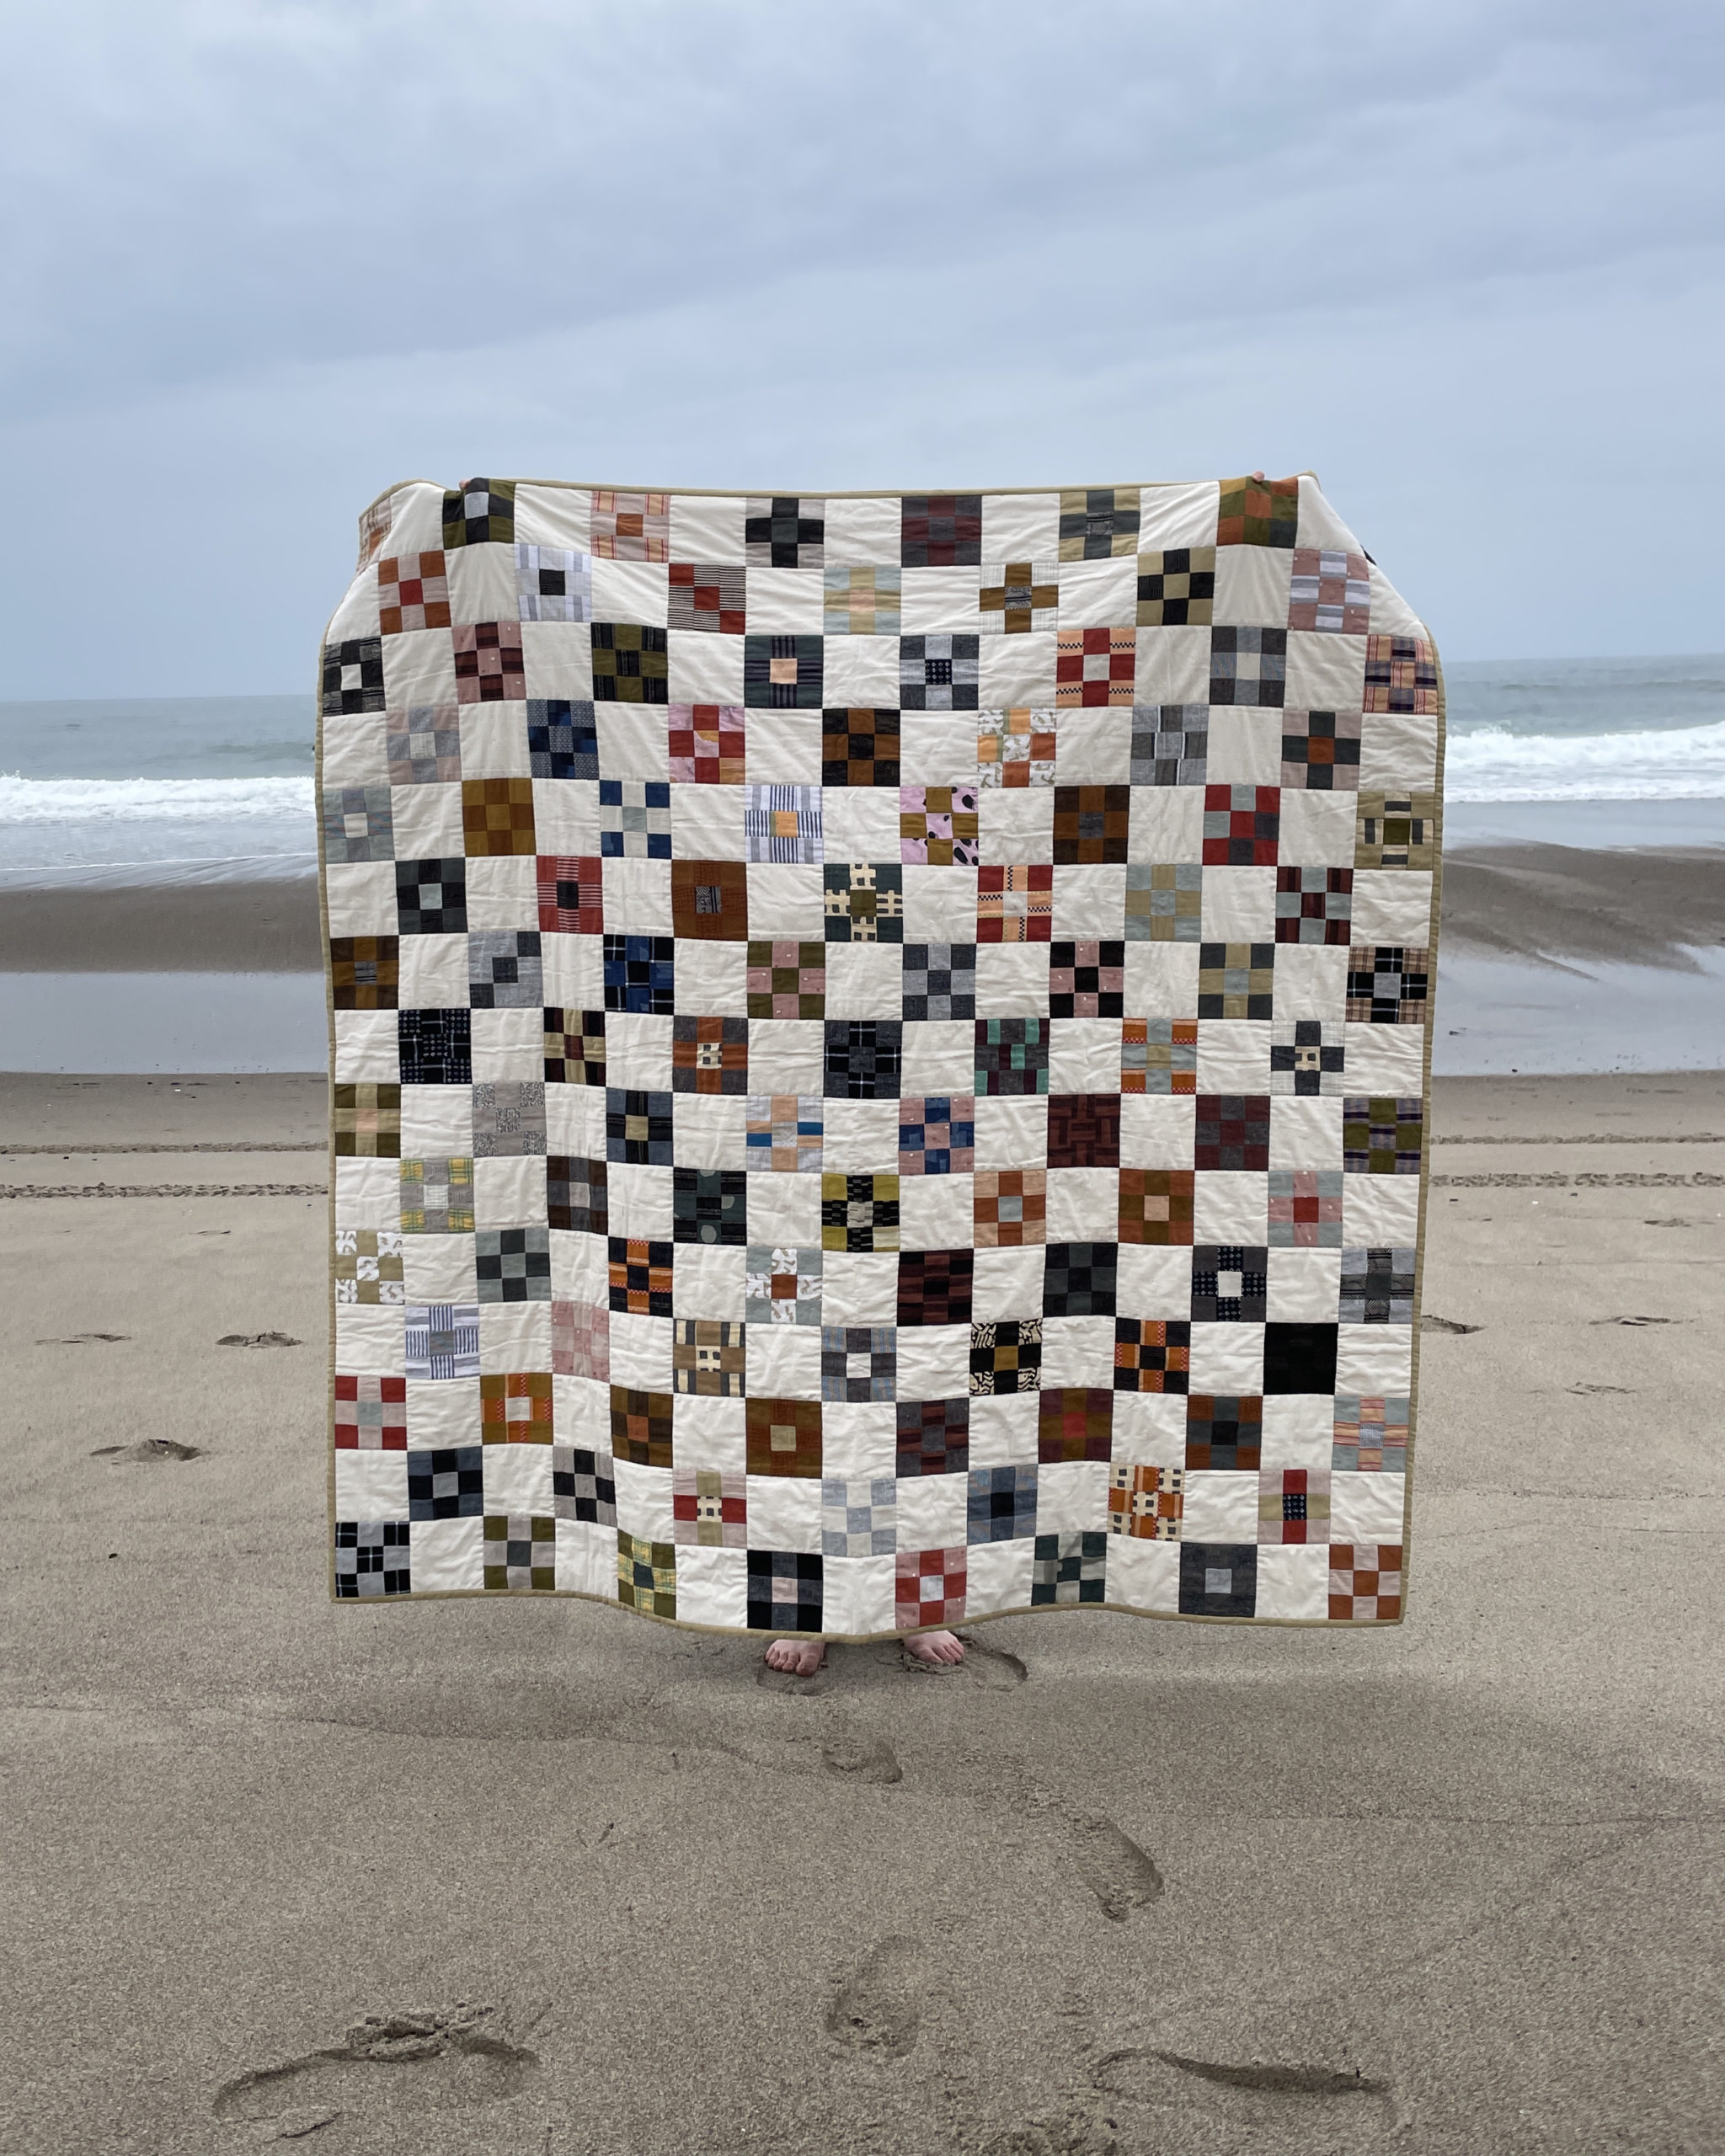
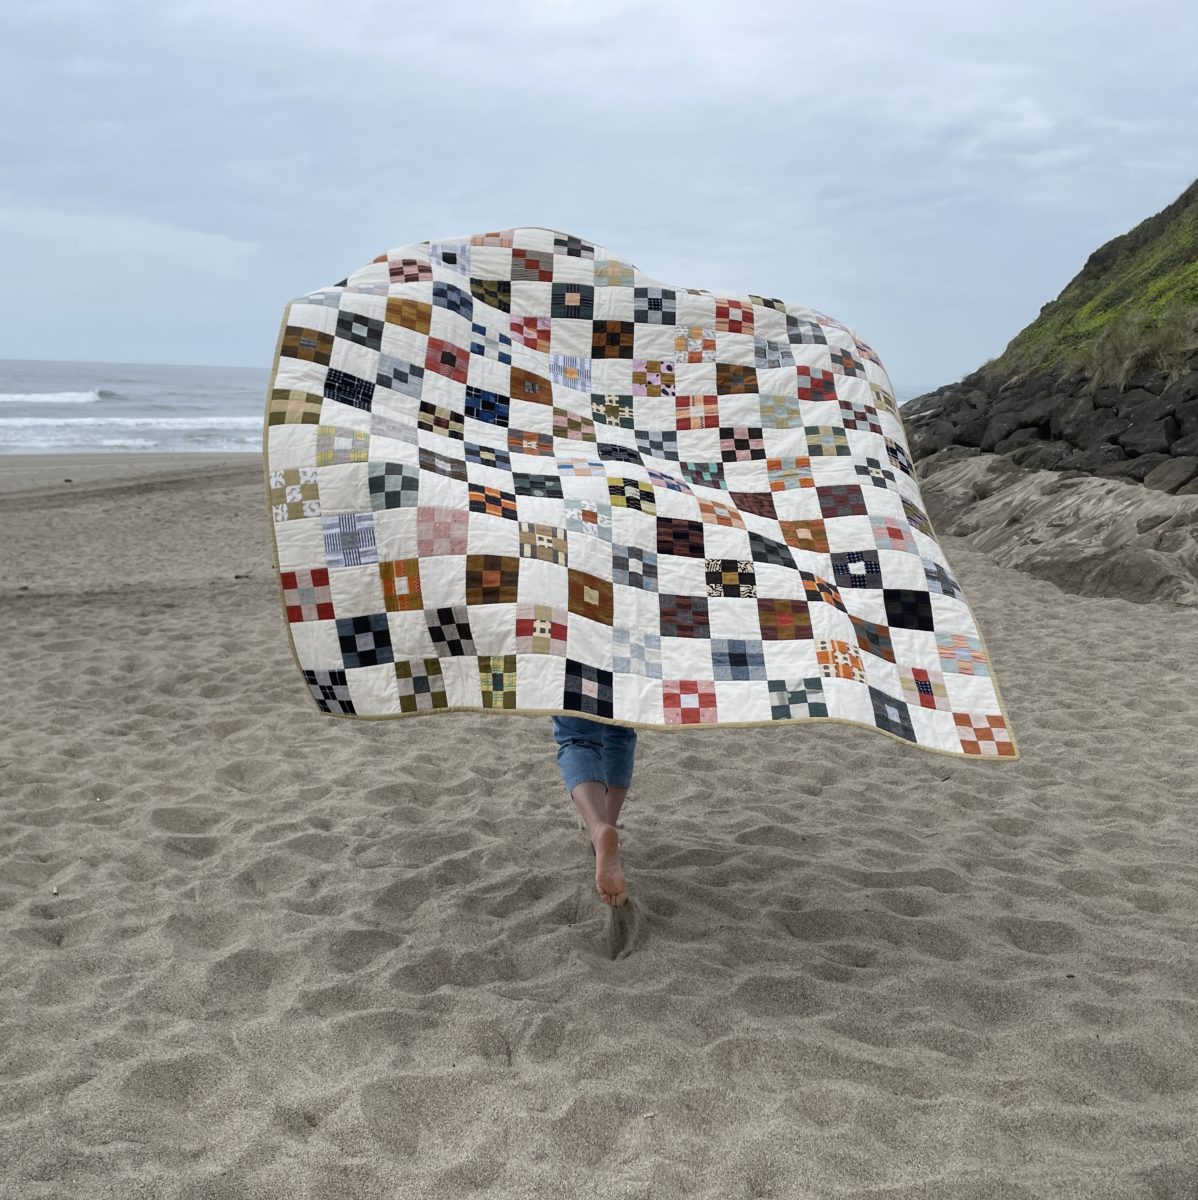
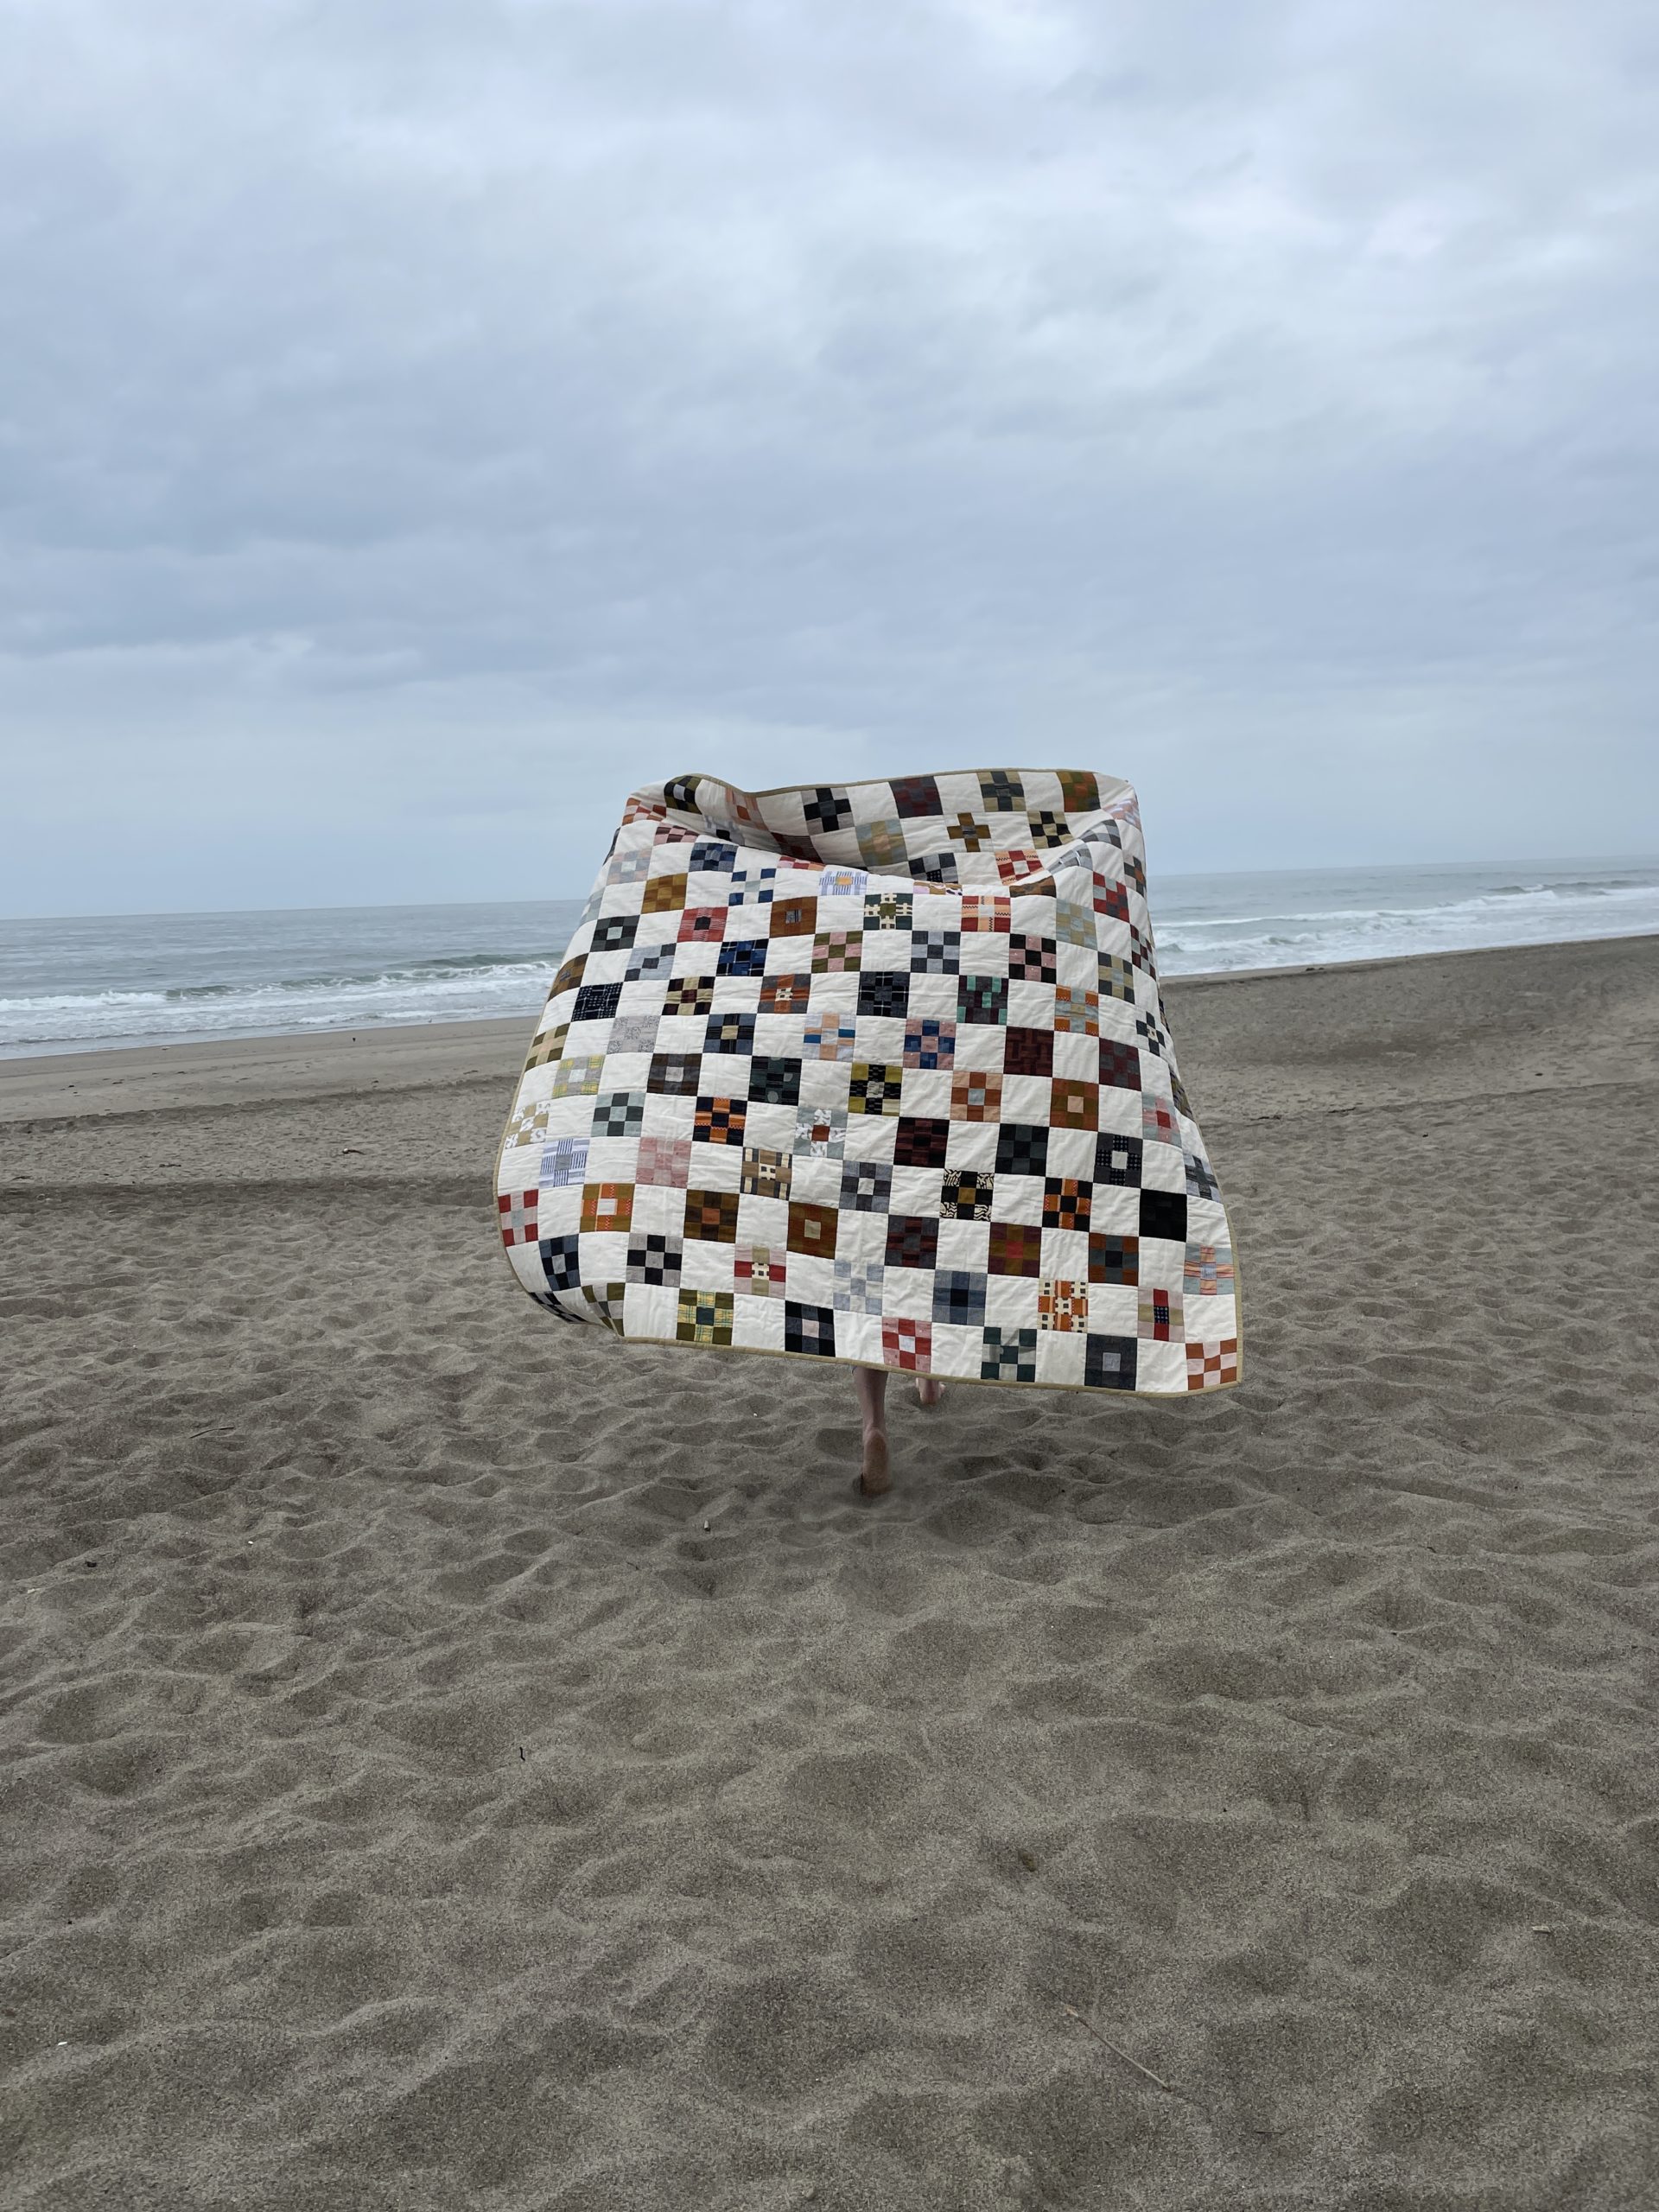
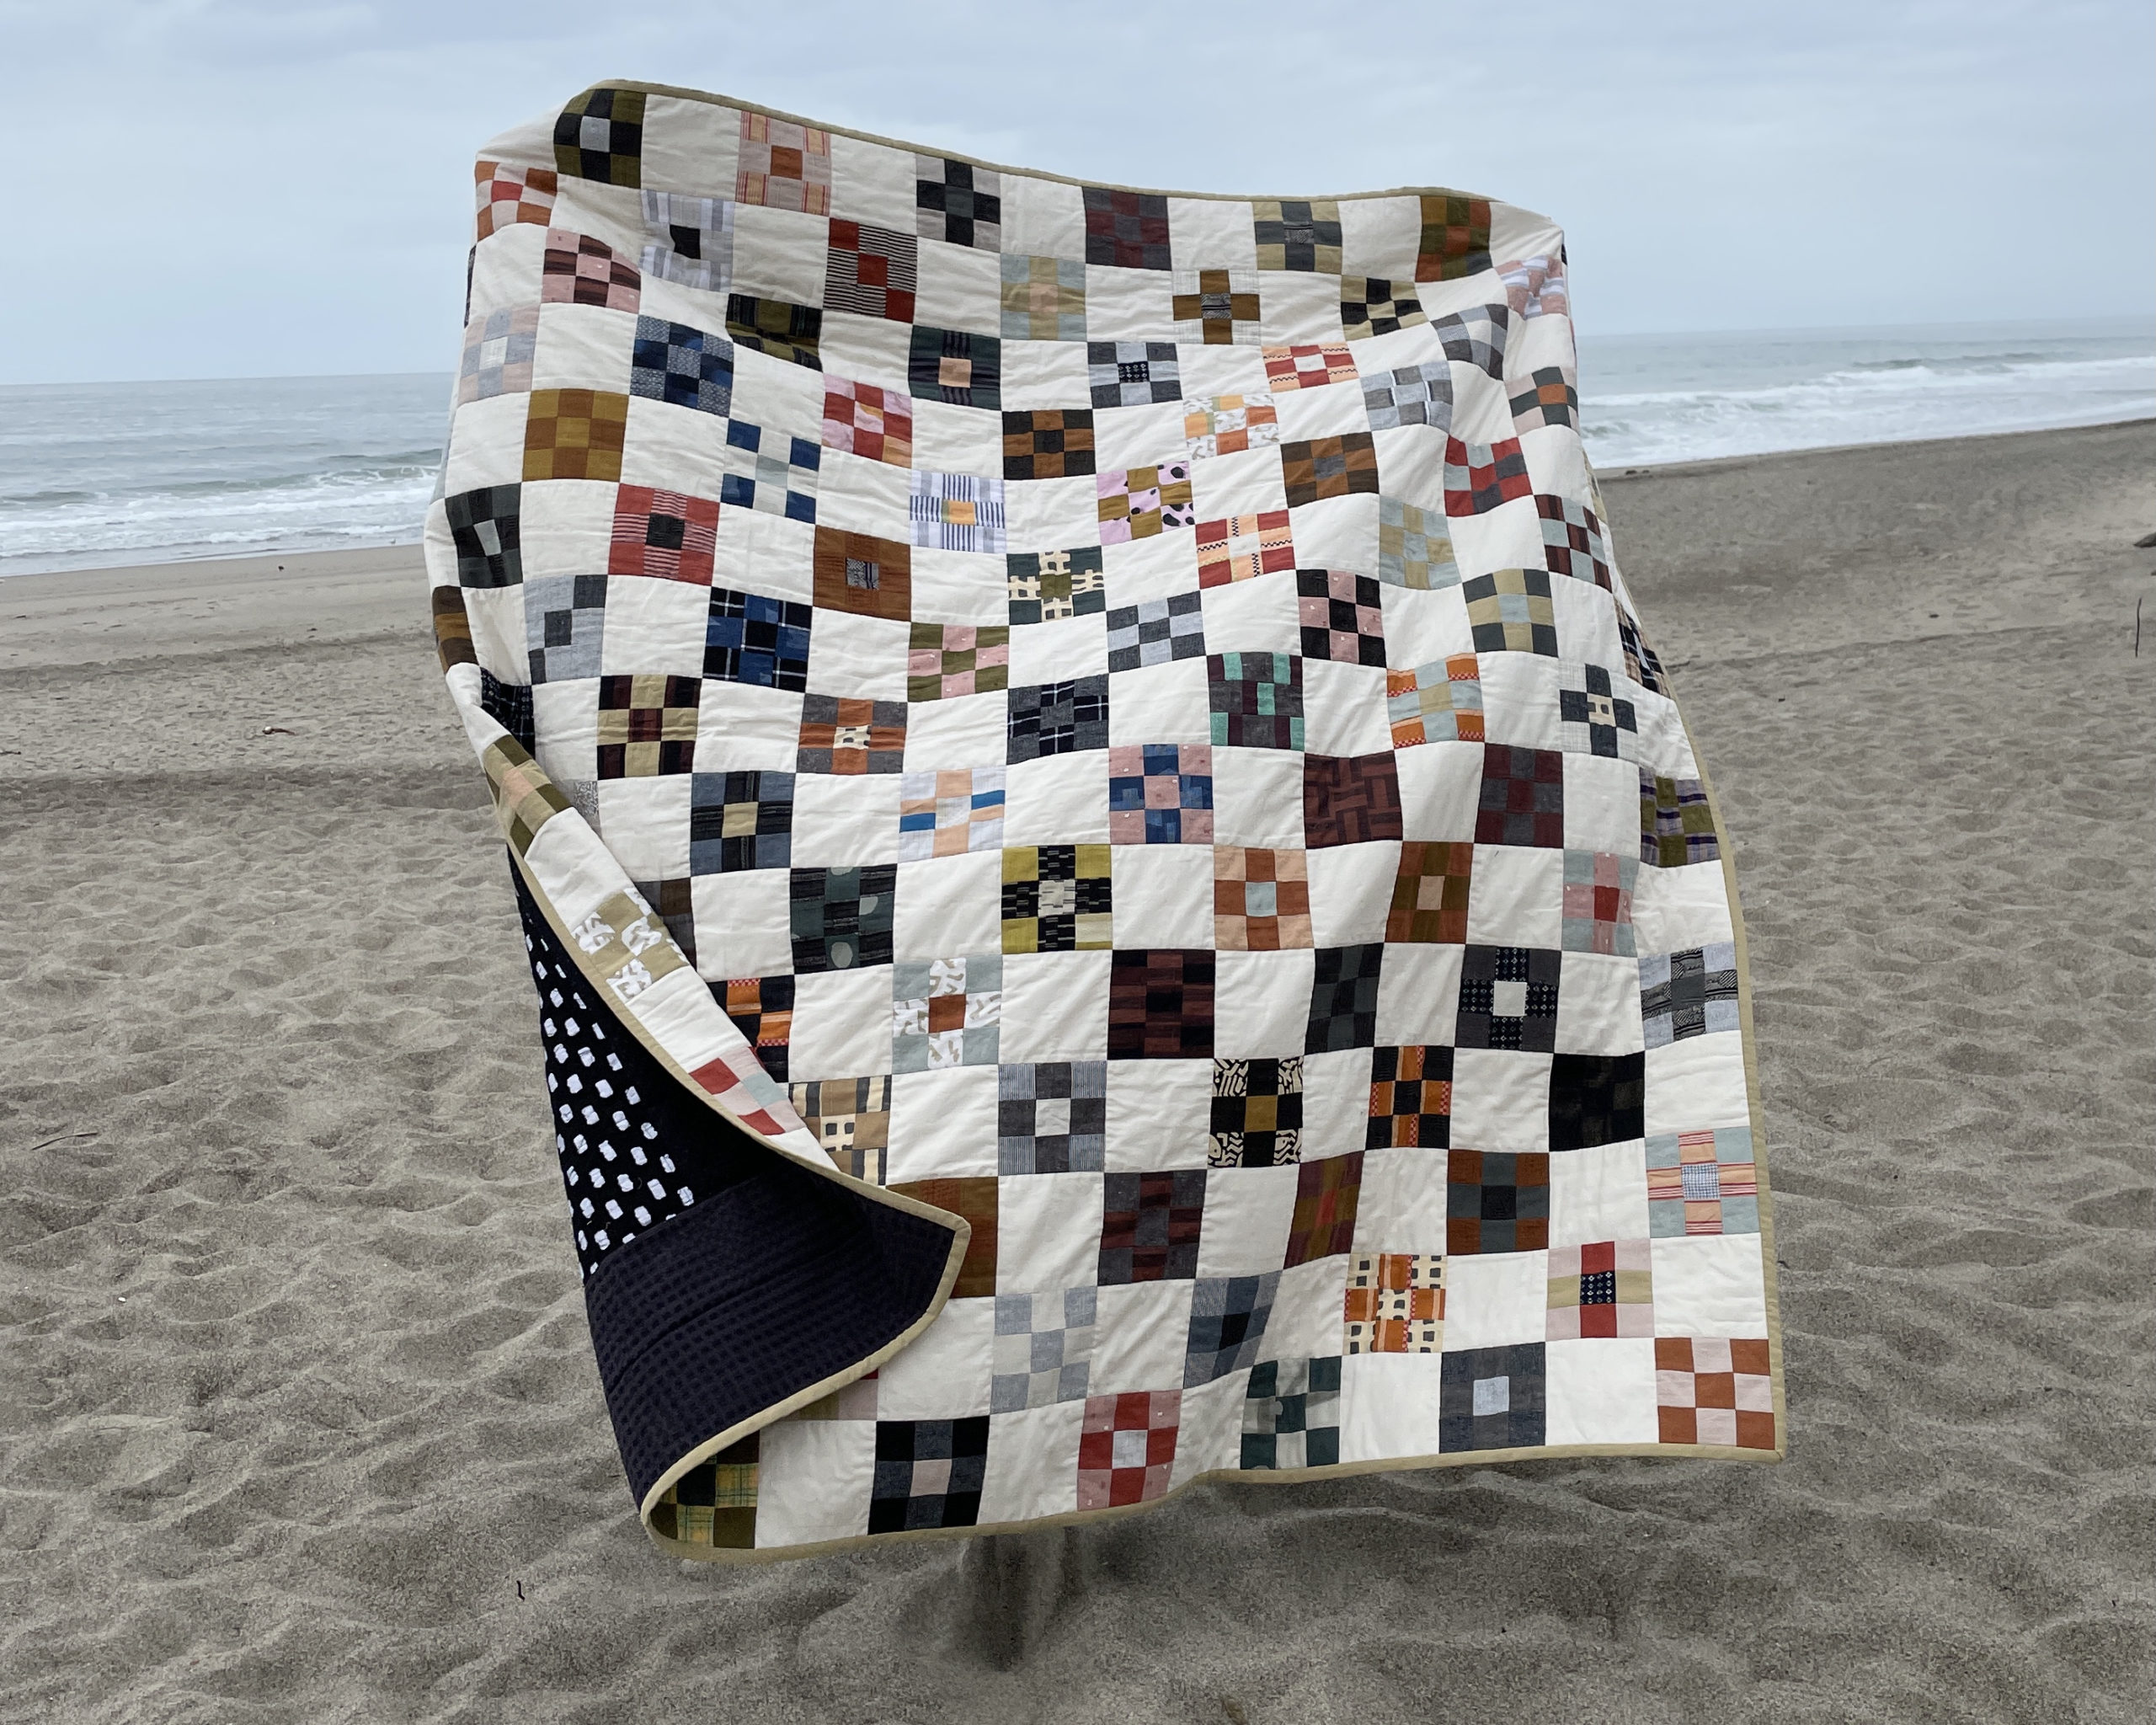
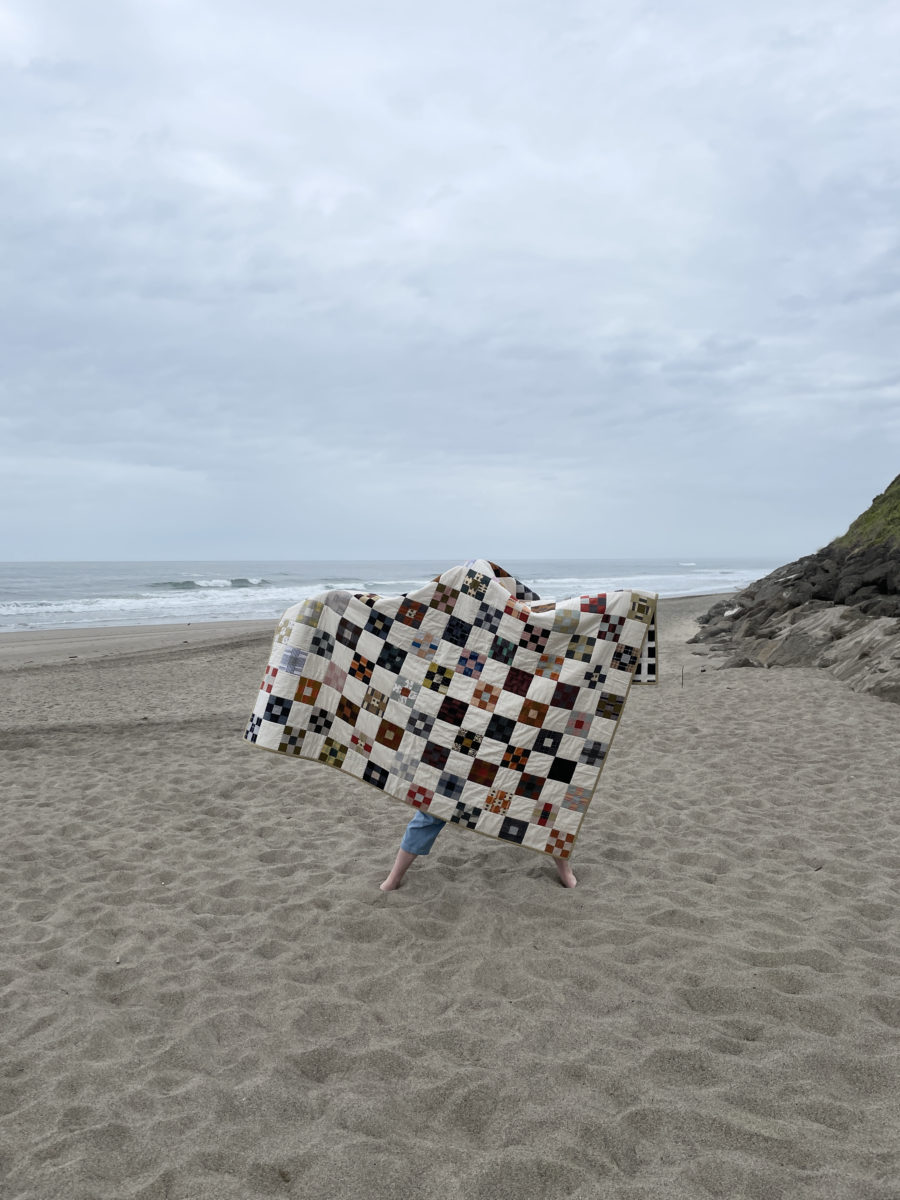
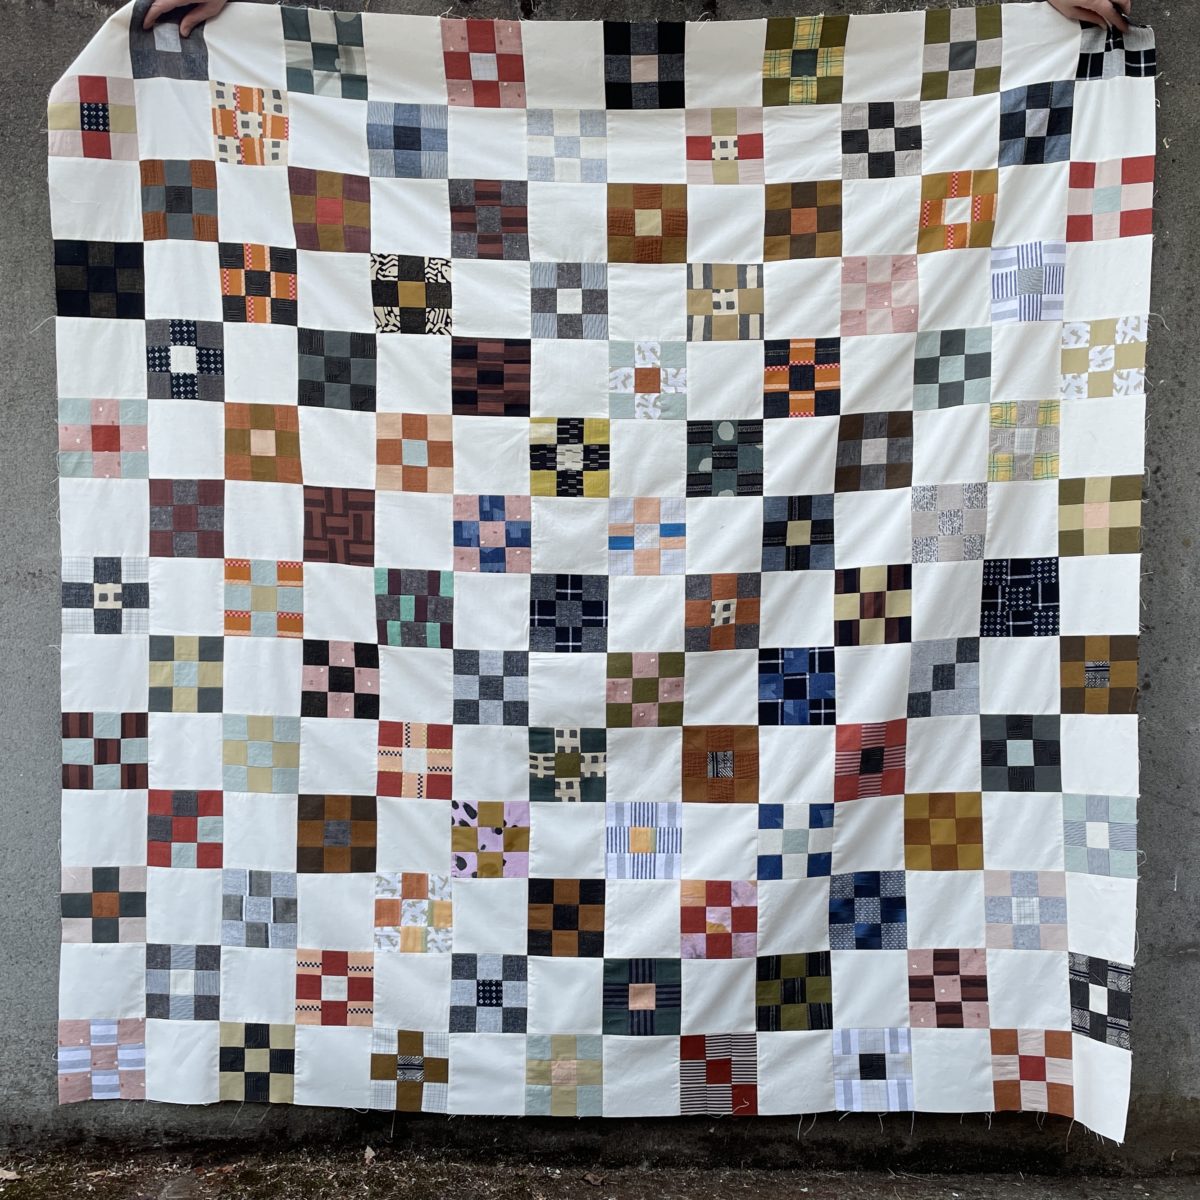
My quilt is done and here’s the post about it! Click here for part 1.
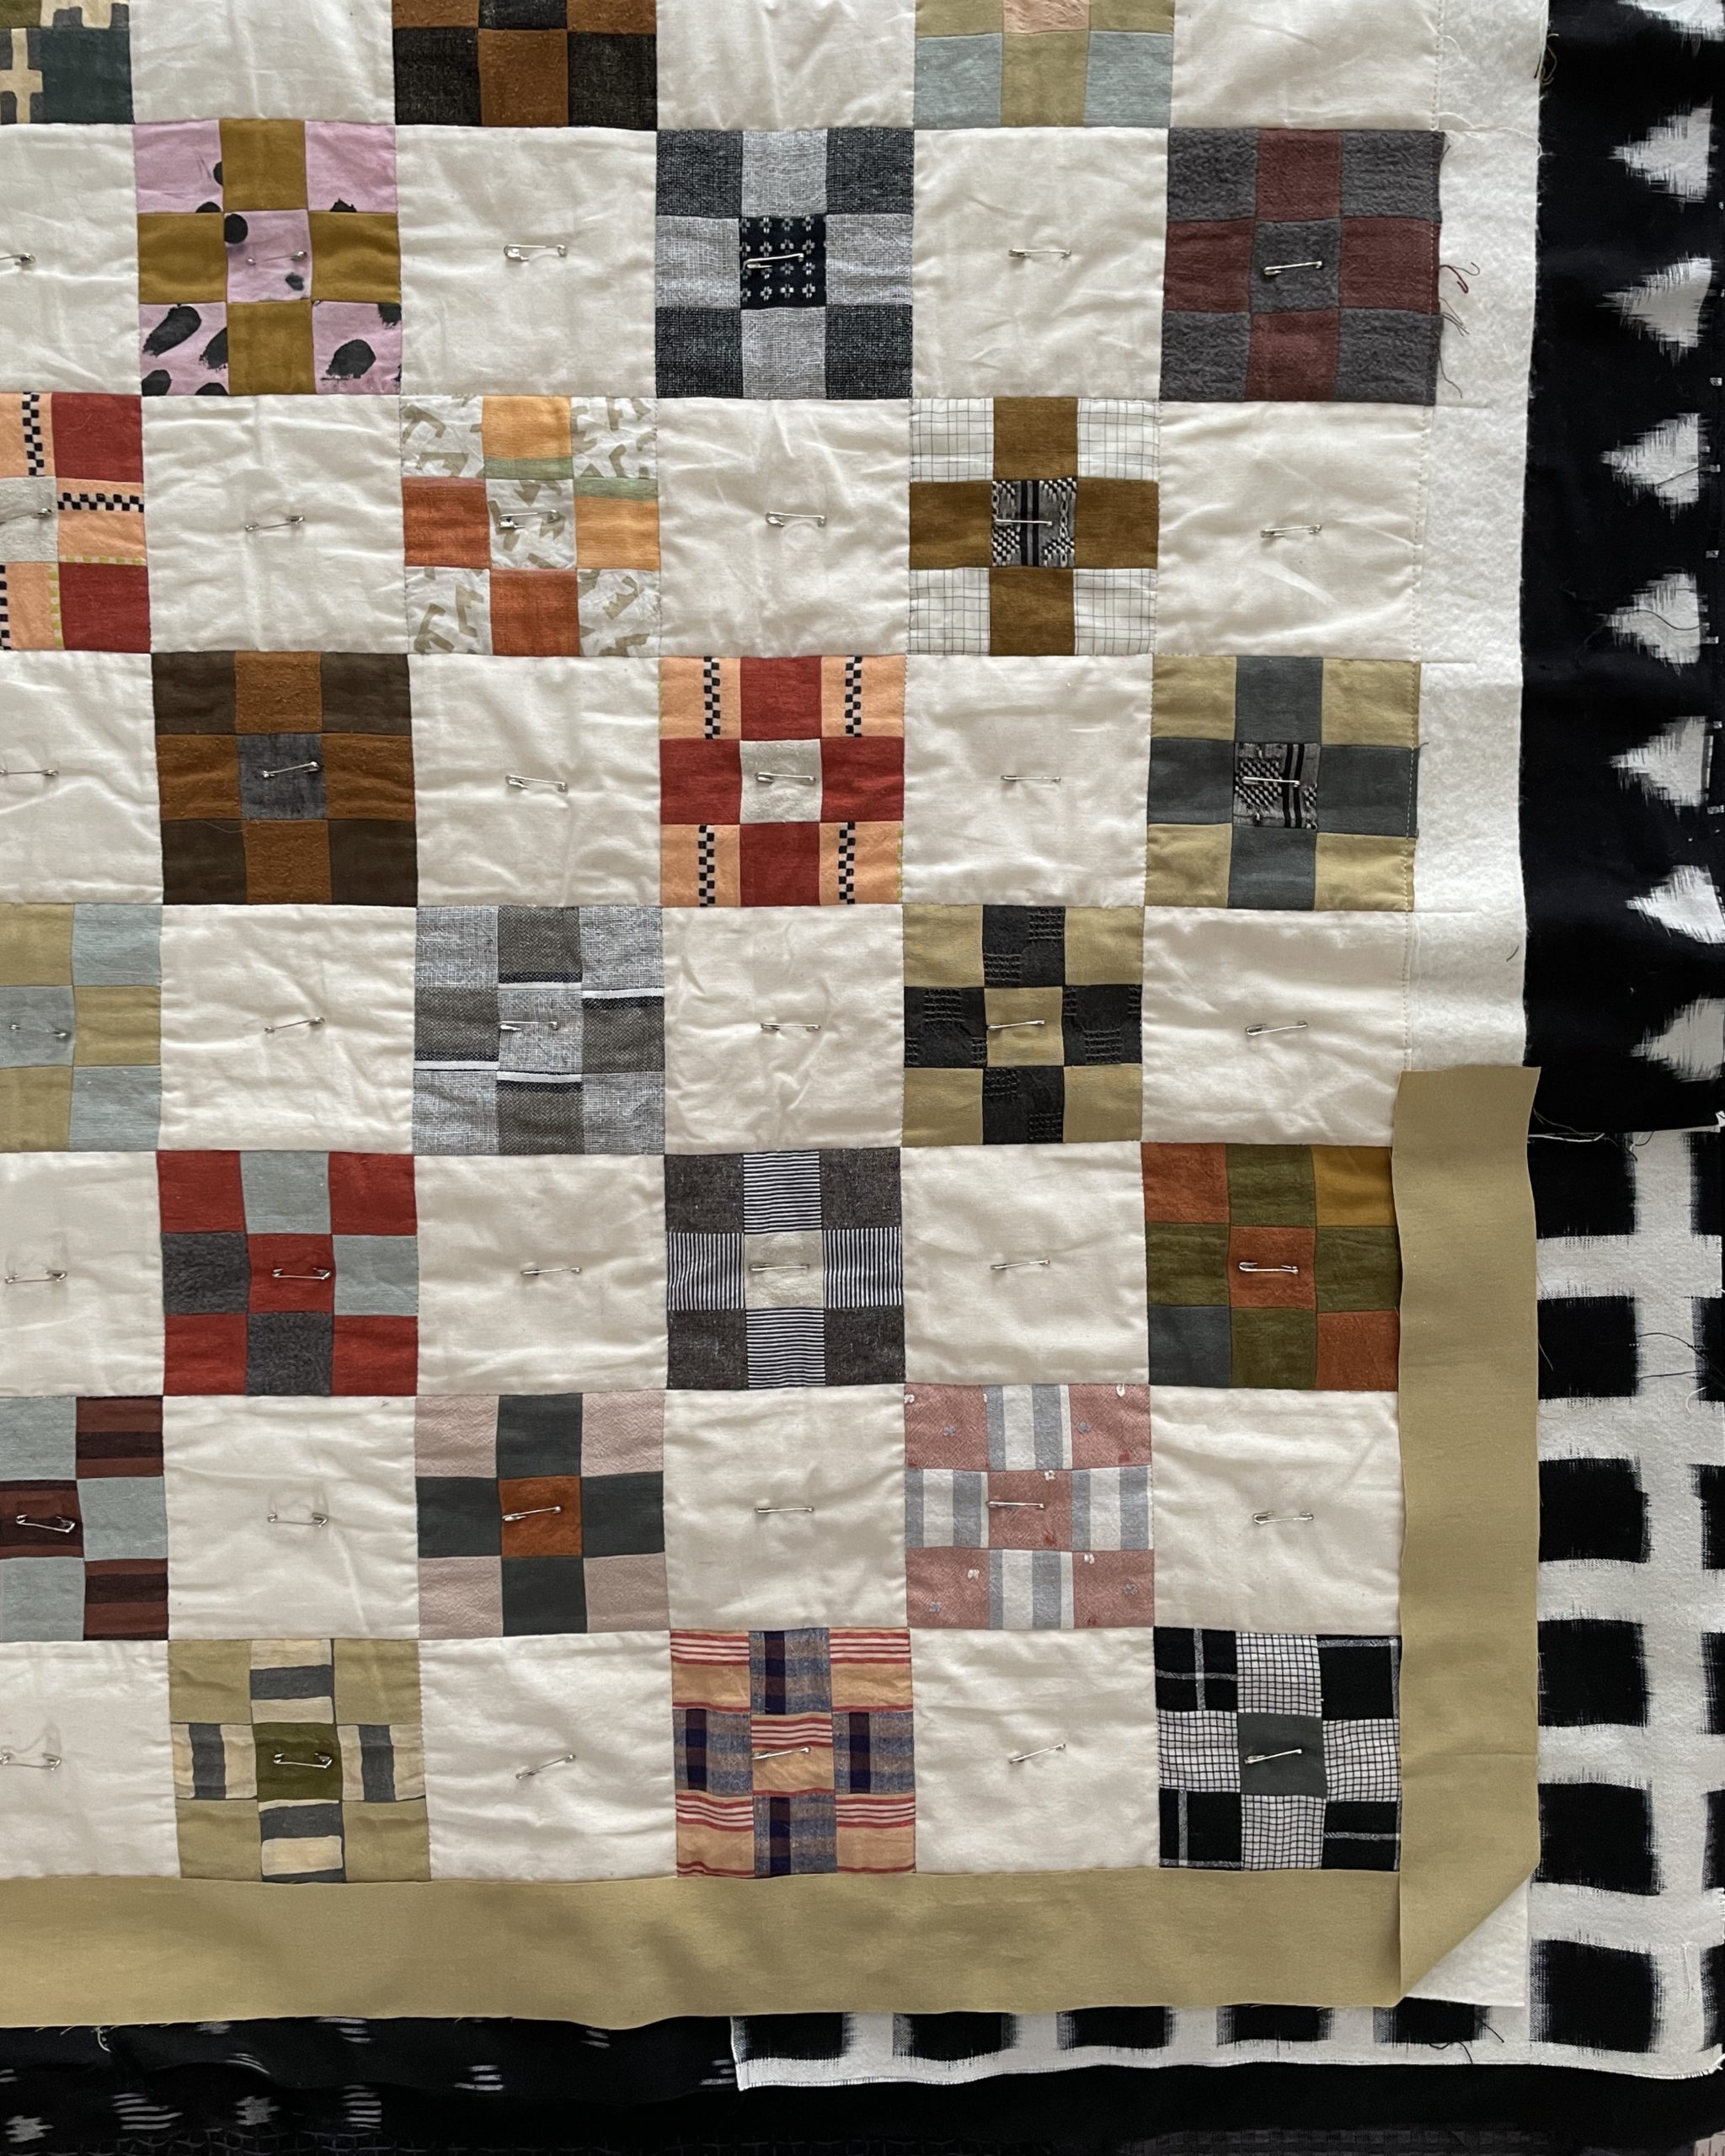
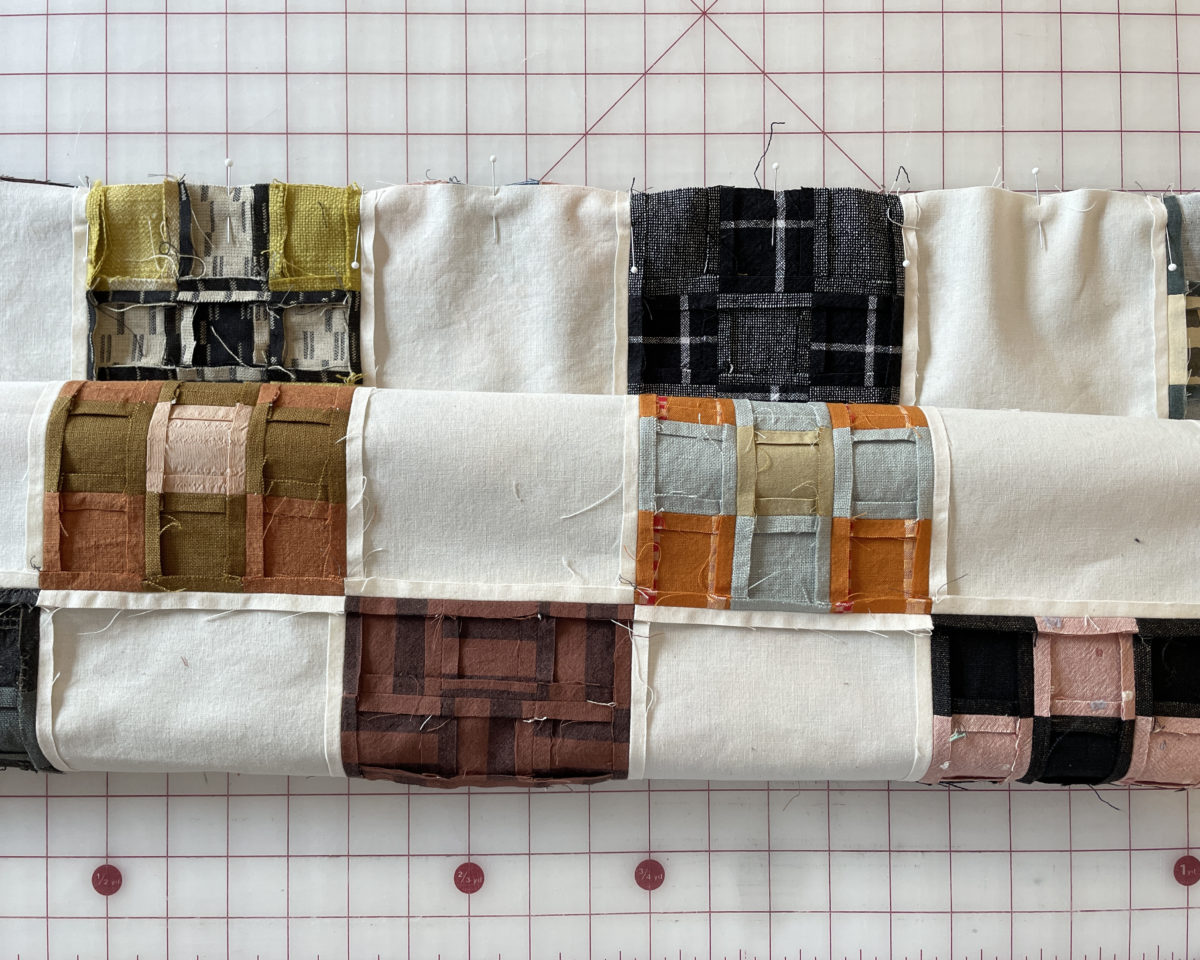
Since the first post, I decided to add another 15 blocks because I wanted all four corners to have a 9 patch block. With 98 blocks and a square throw shape, that pattern wasn’t happening. Plus once the top was all sewn together it was a smidge smaller than I wanted.
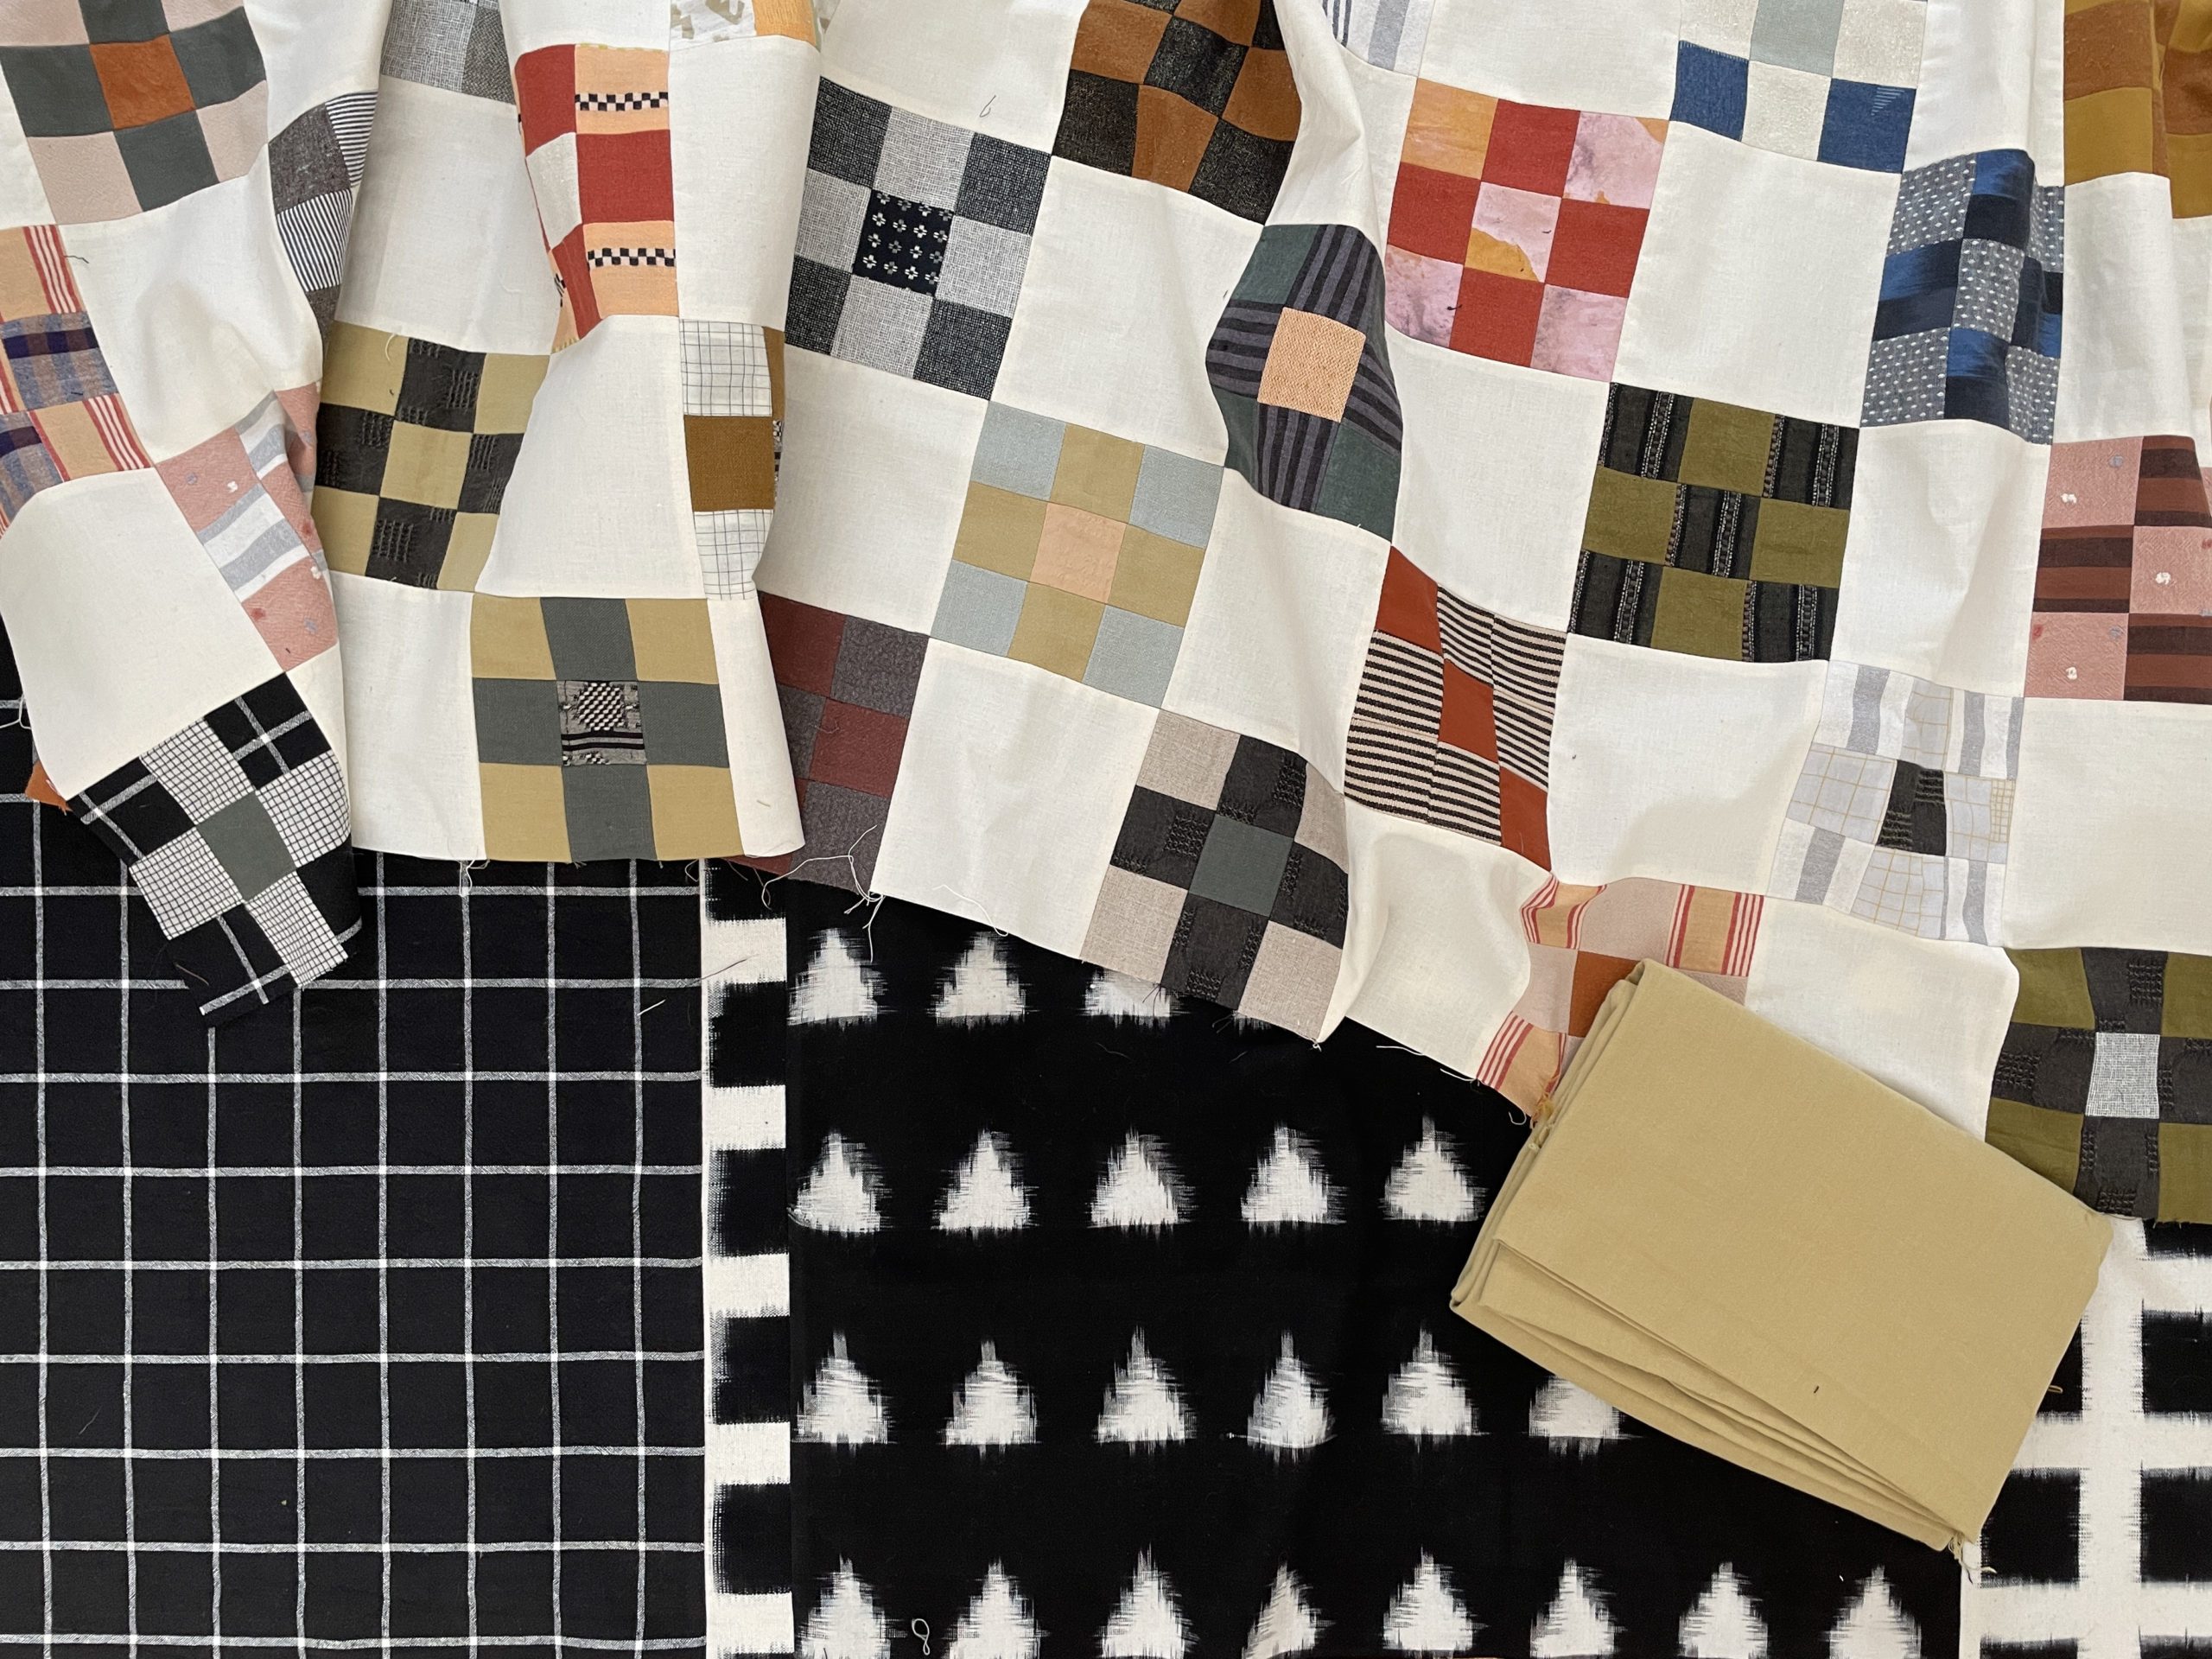
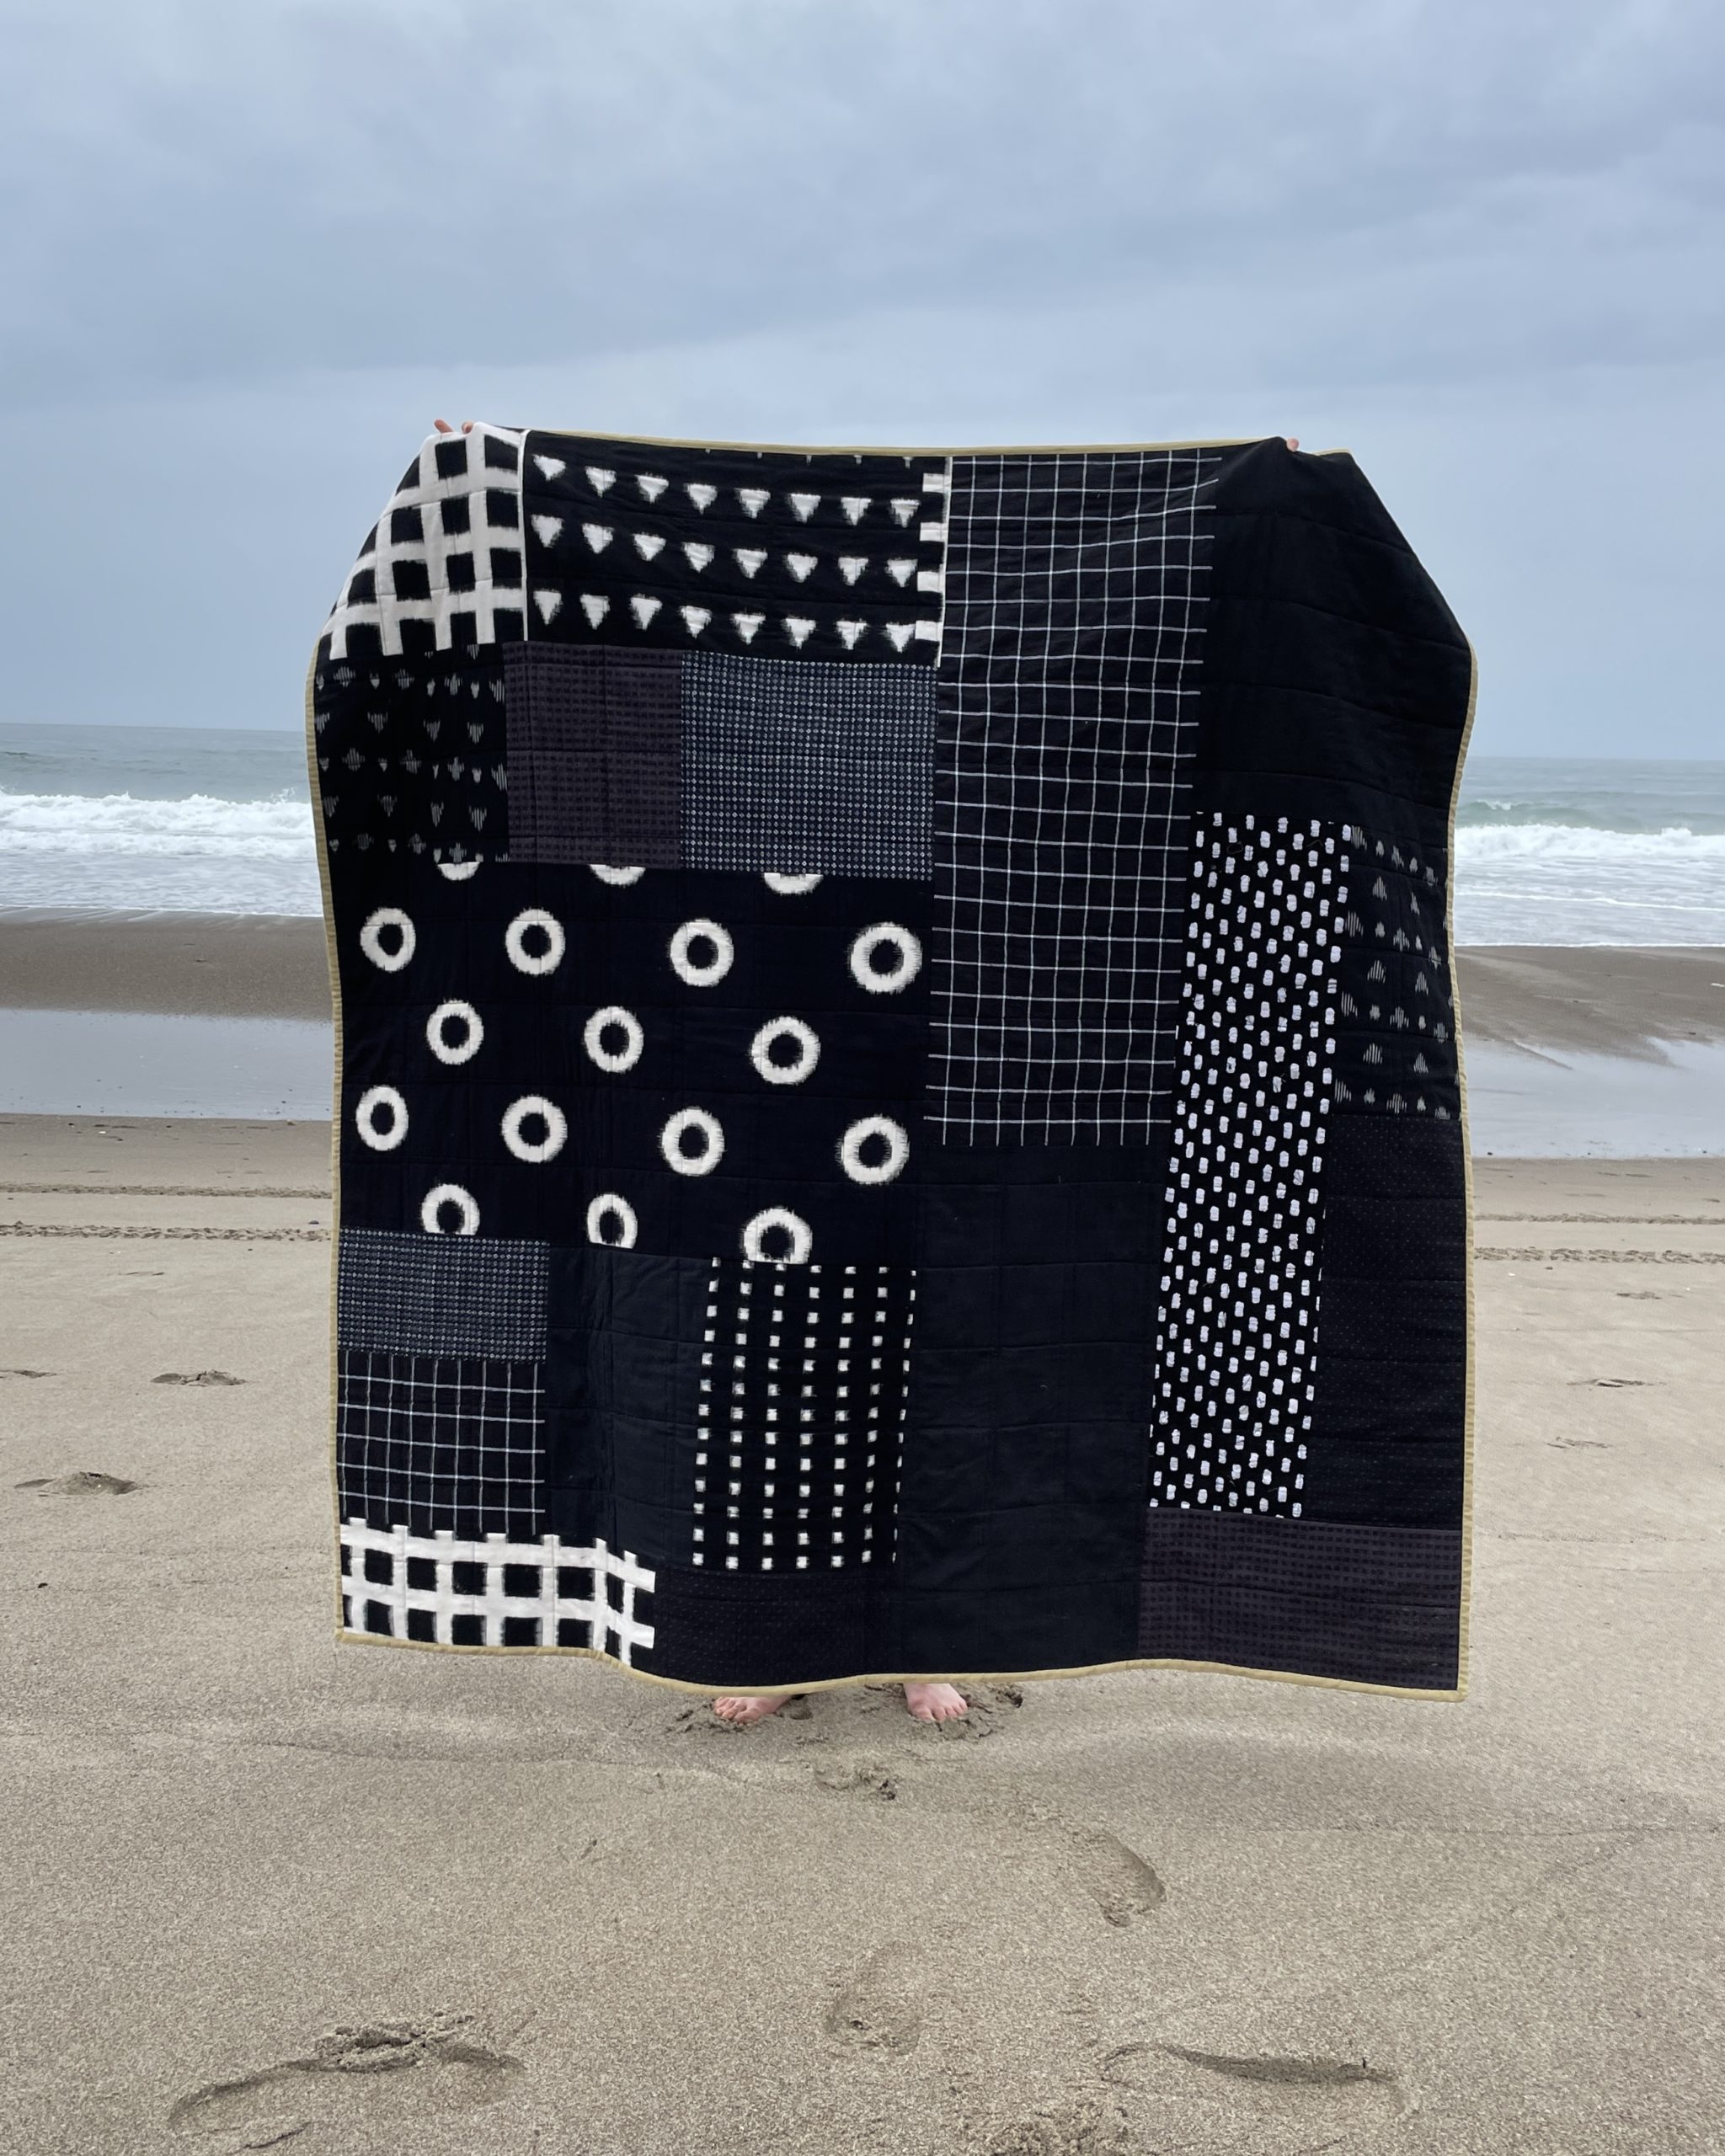
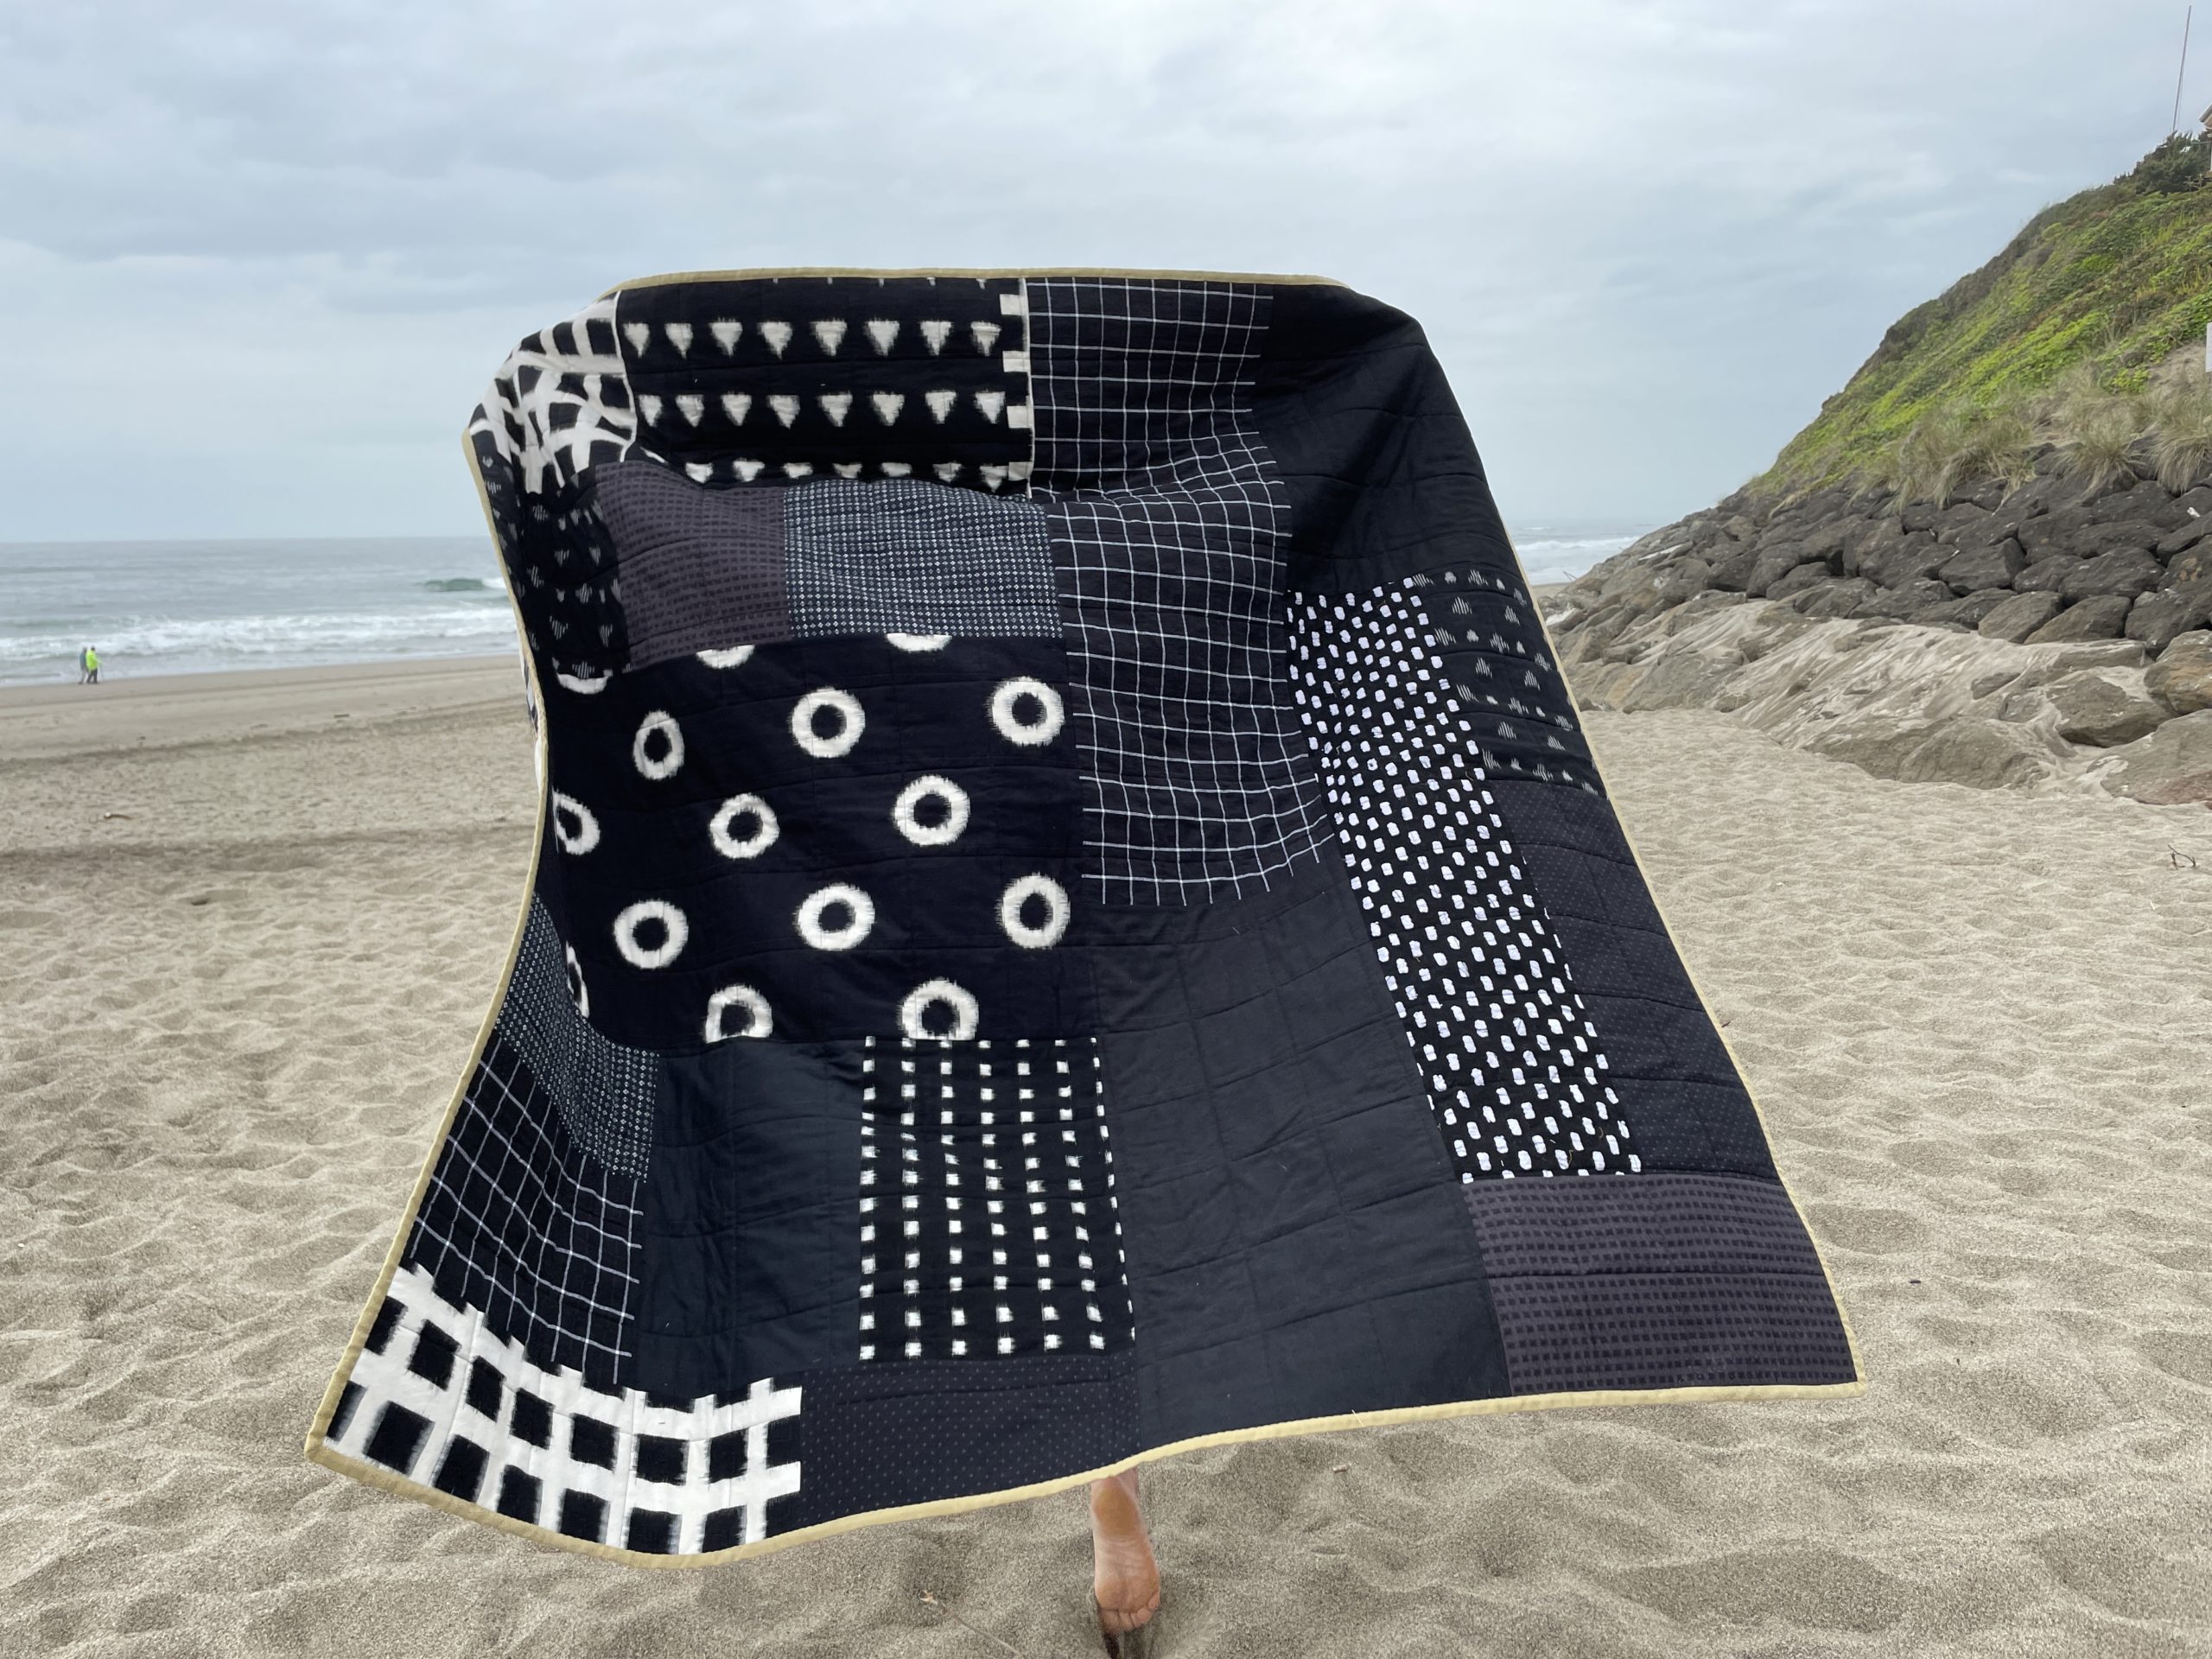
After the top was complete, I combed through my remaining scrap pile and pulled out all of the black and white fabrics since those seemed to be the most plentiful. Some of these ikats are from some of my first ever garment projects, which is pretty fun.
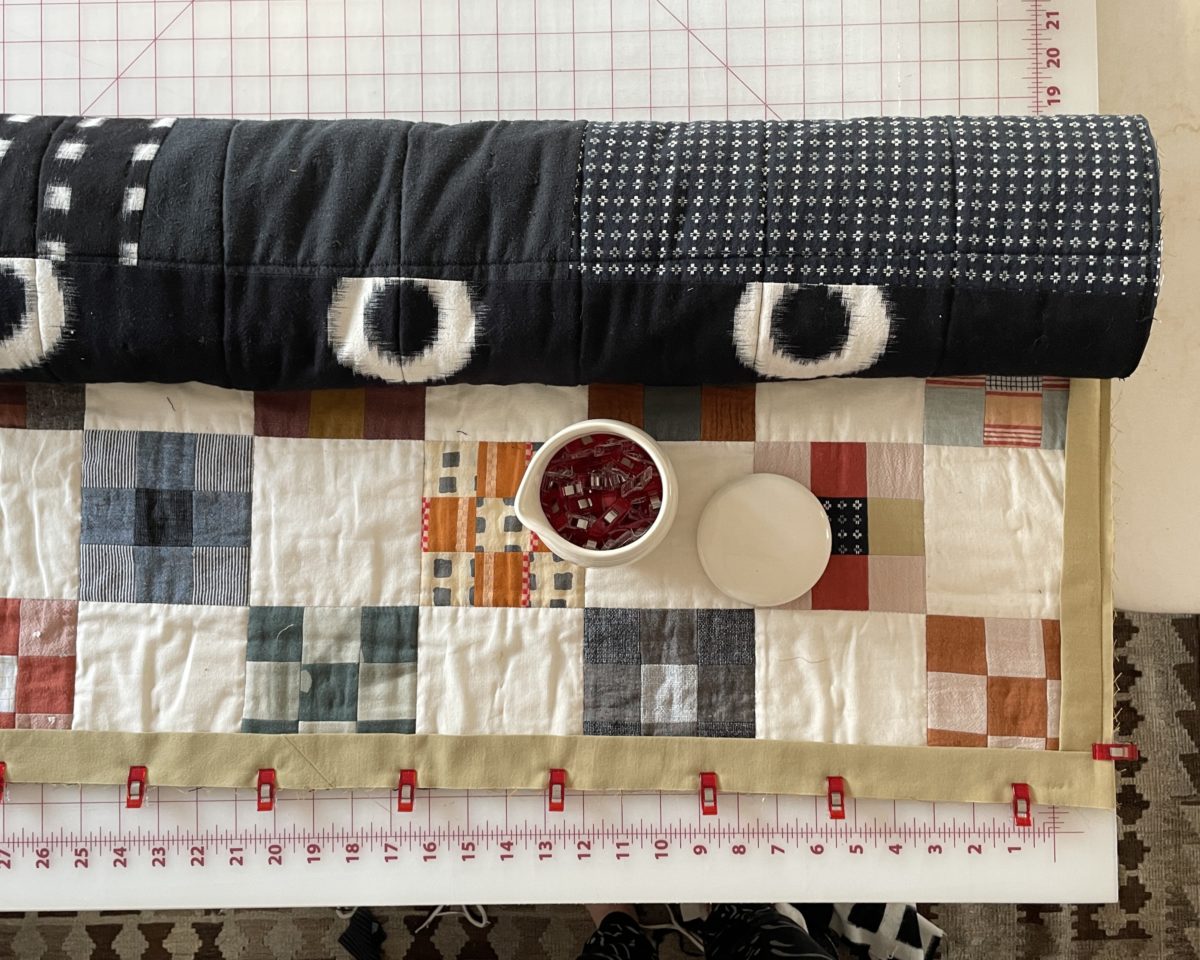
I waffled for a bit on how to bind this quilt. I started with wanting to use the greenish Calvin Klein bed sheet I’d used for my Tamarack jacket. Then I though about using the backing to do mitered corners. There was a brief time where I thought about doing prairie points to use up even more scraps but ultimately I went back to that thrifted bed sheet/traditional binding method.
I cut up the last of the bed sheet into straight of grain strips because there weren’t any curves that’d require a bias cut. I have a lot leftover which I’ll use to bind some small scale quilted projects. I really love this color.
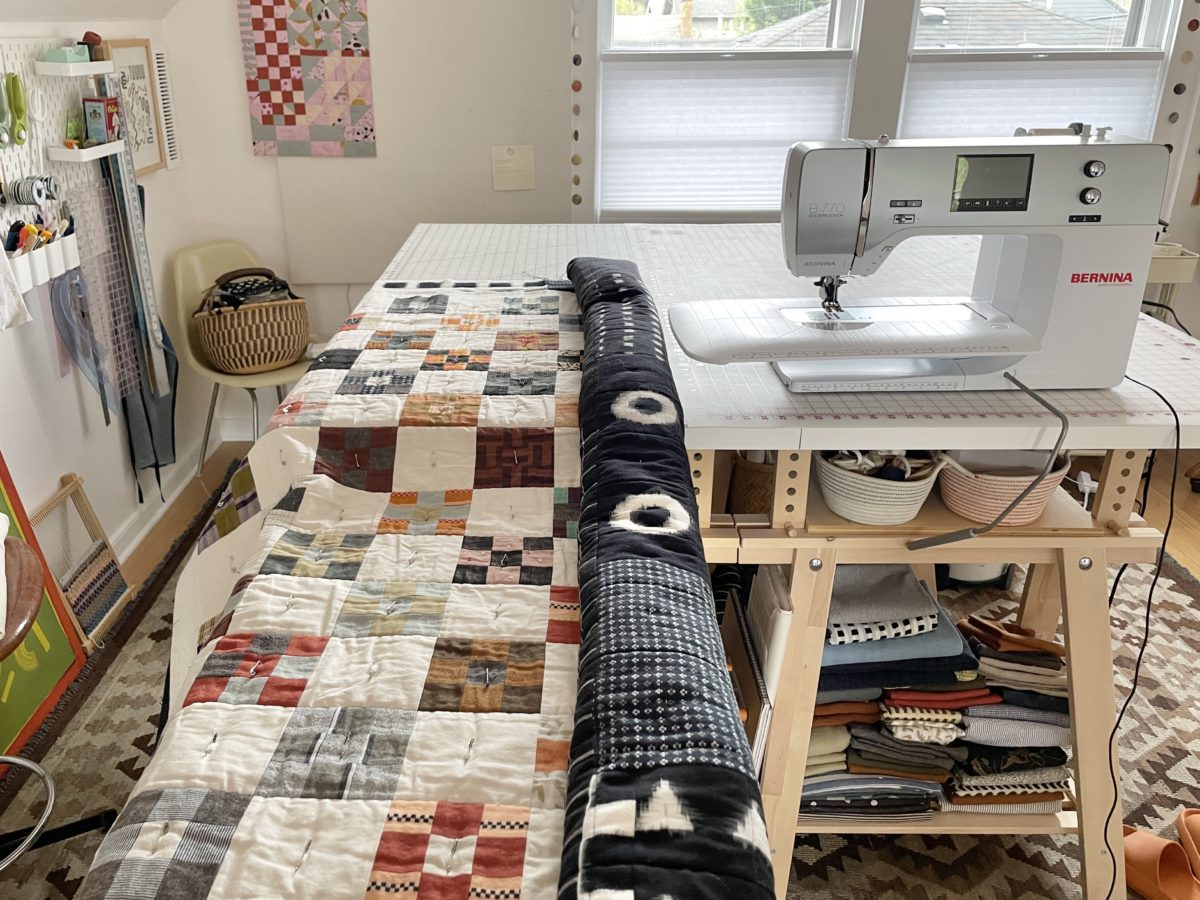
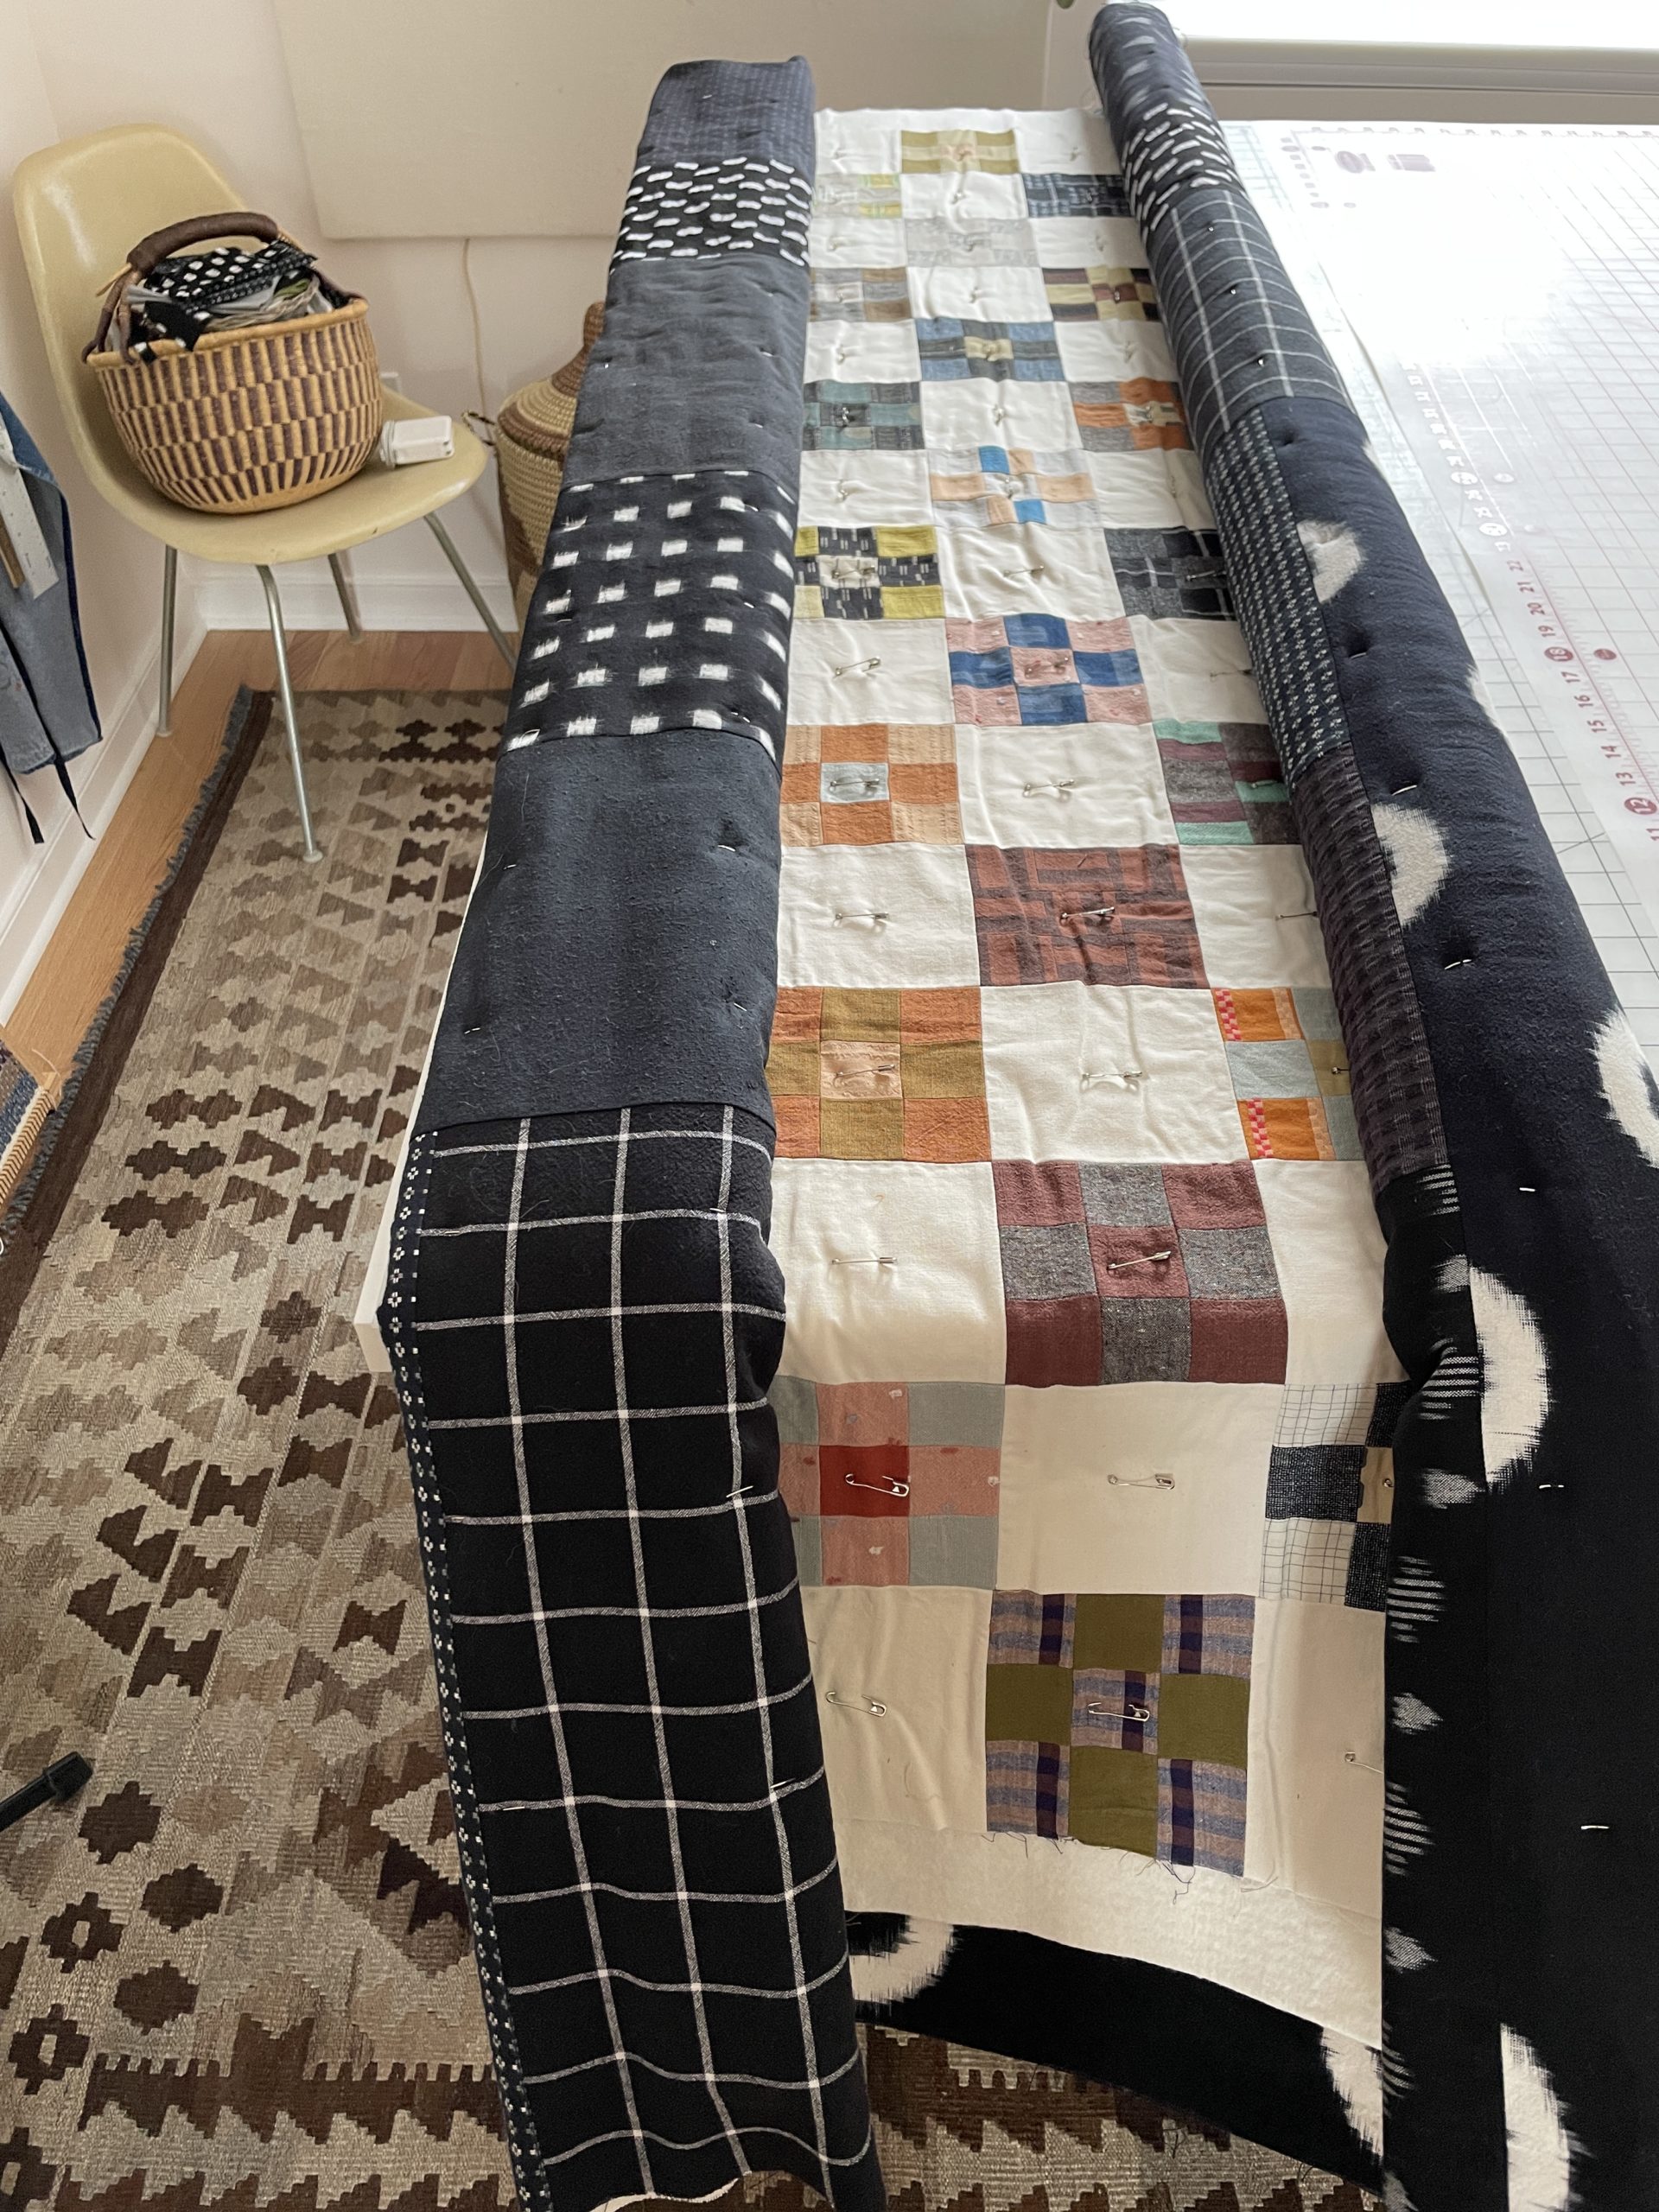
Once the quilt backing was assembled, I realized I didn’t have enough space to baste the layers in my sewing room and would have to do this step in the basement. It took a couple of weeks before I got around to washing the basement floor.
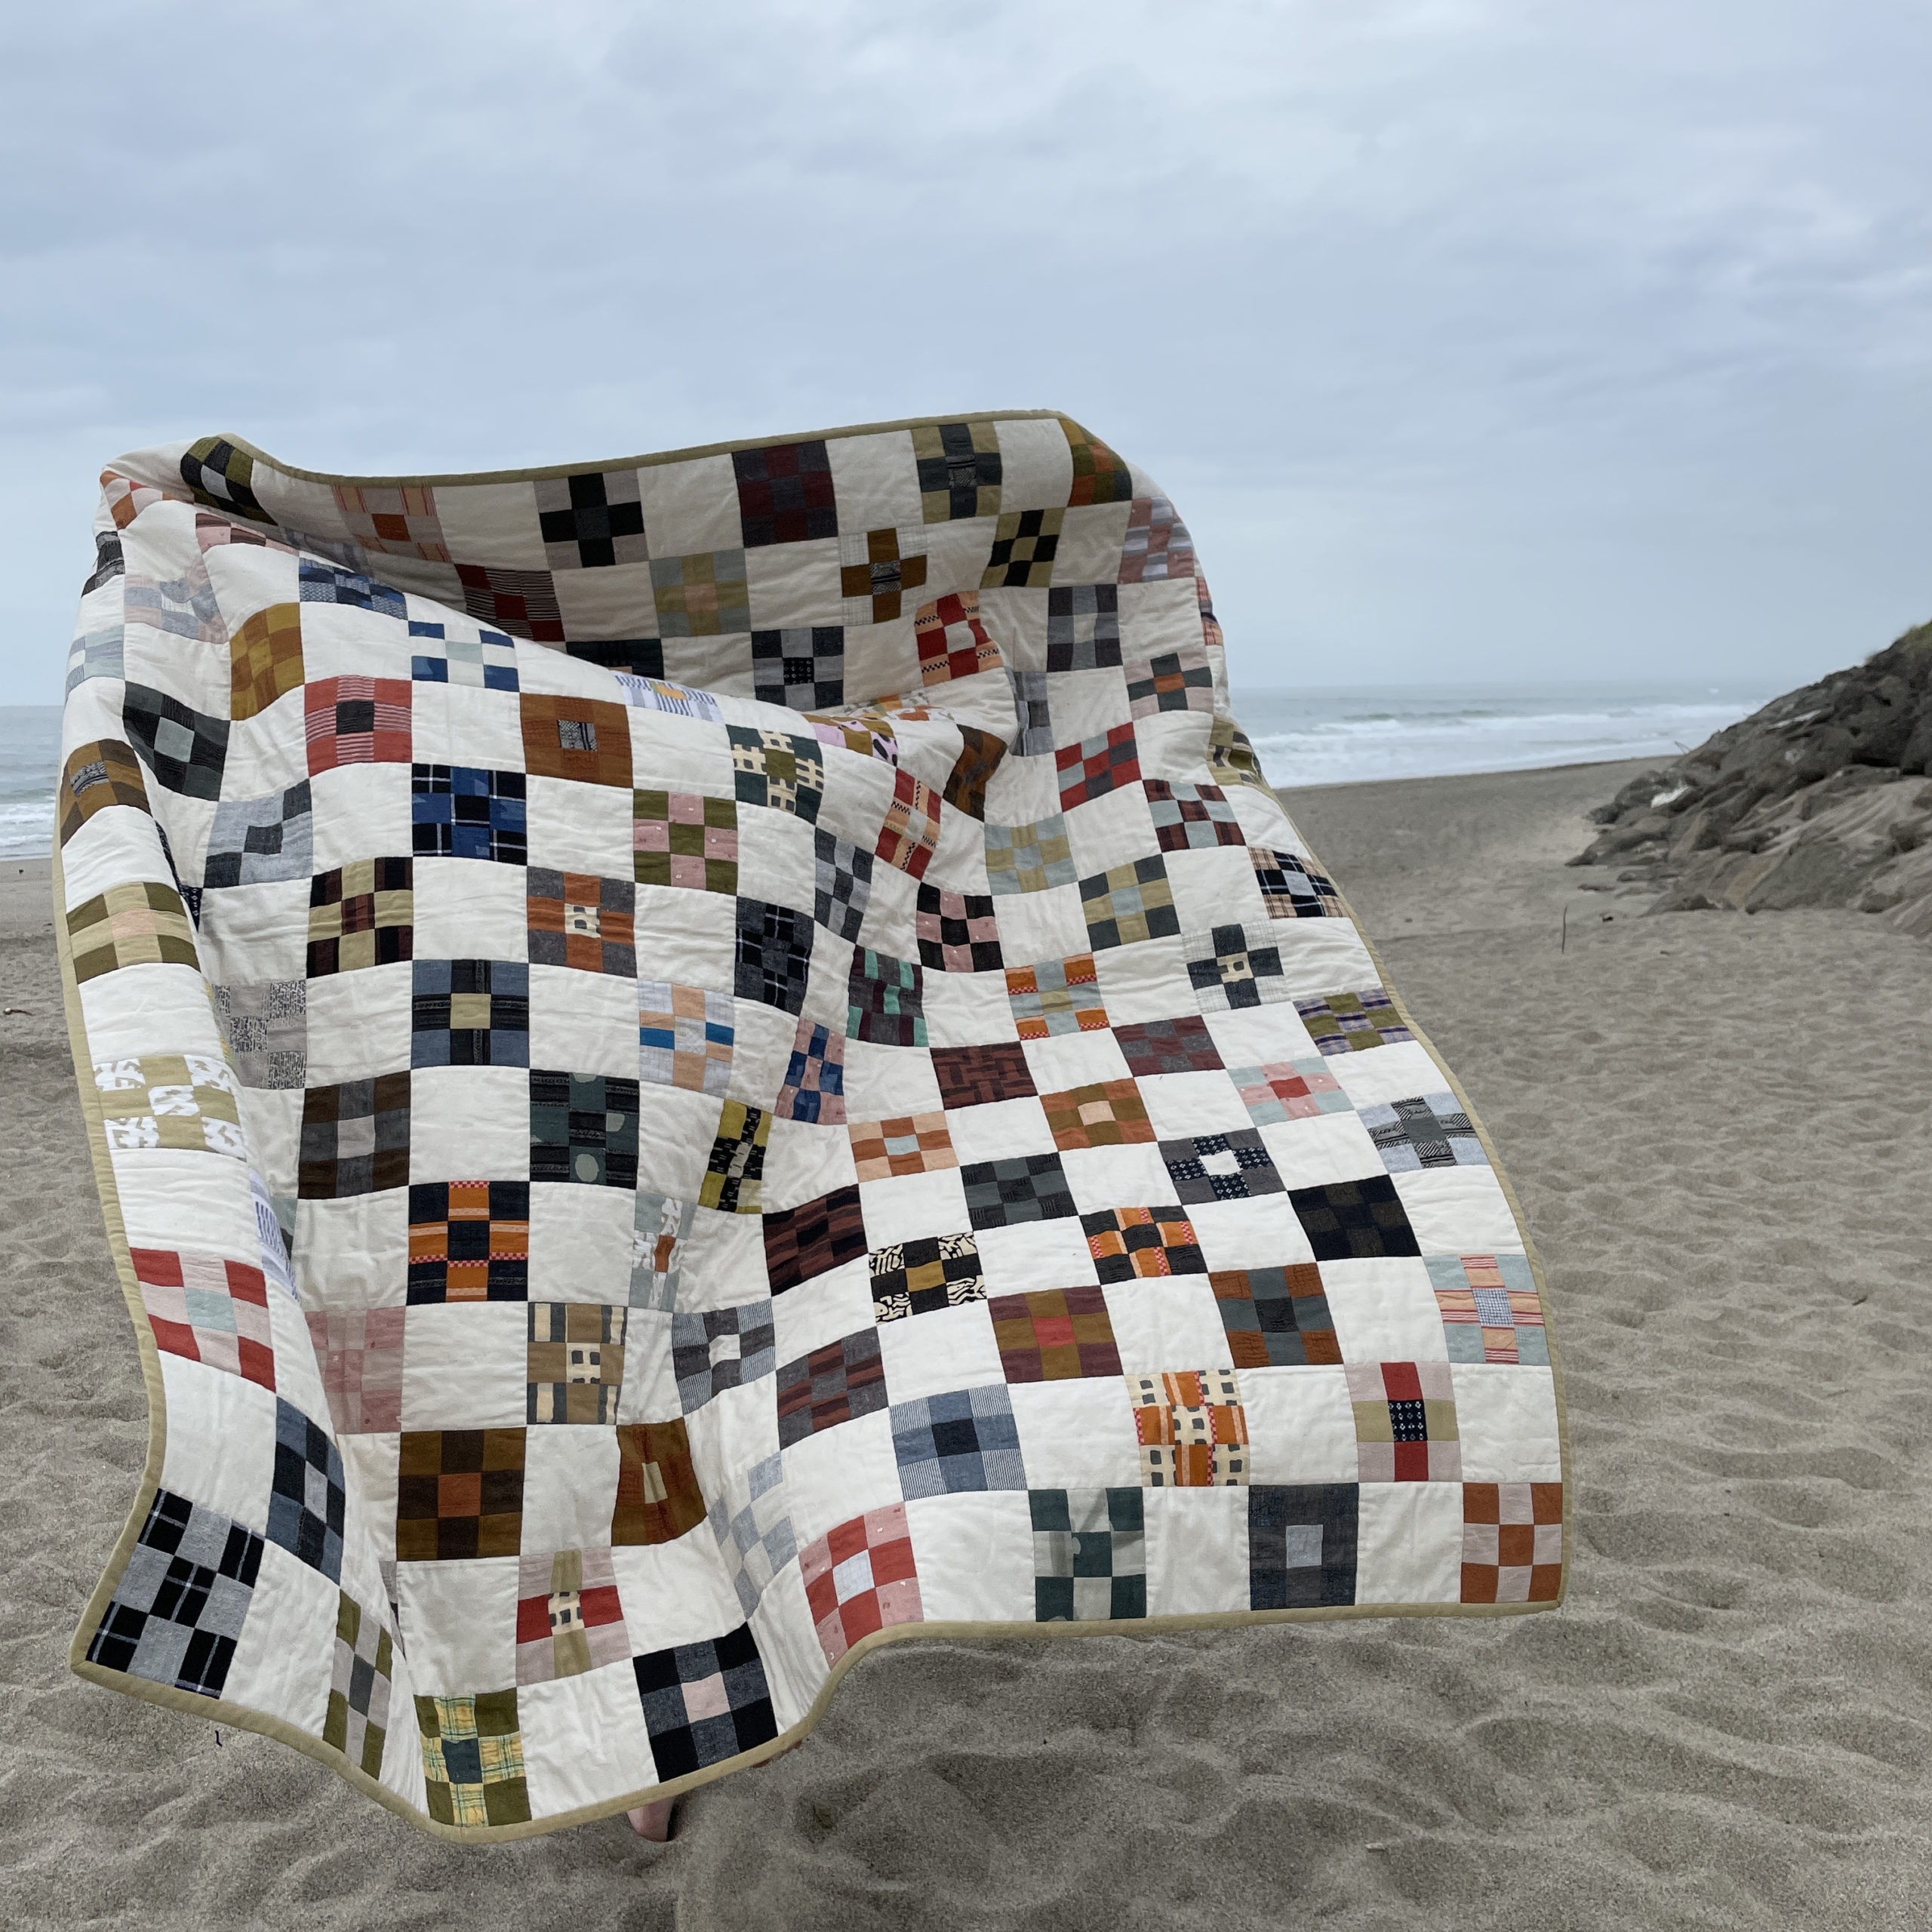
For the quilting pattern, I wanted something that would showcase the blocks. A simple stitched in the ditch grid pattern was done and I love it. I had to move my sewing machine to my cutting table to quilt since my machine is usually up against a wall. It took a couple of days to quilt. I went too hard the first night and my hips were very angry from a long stand up sewing session.
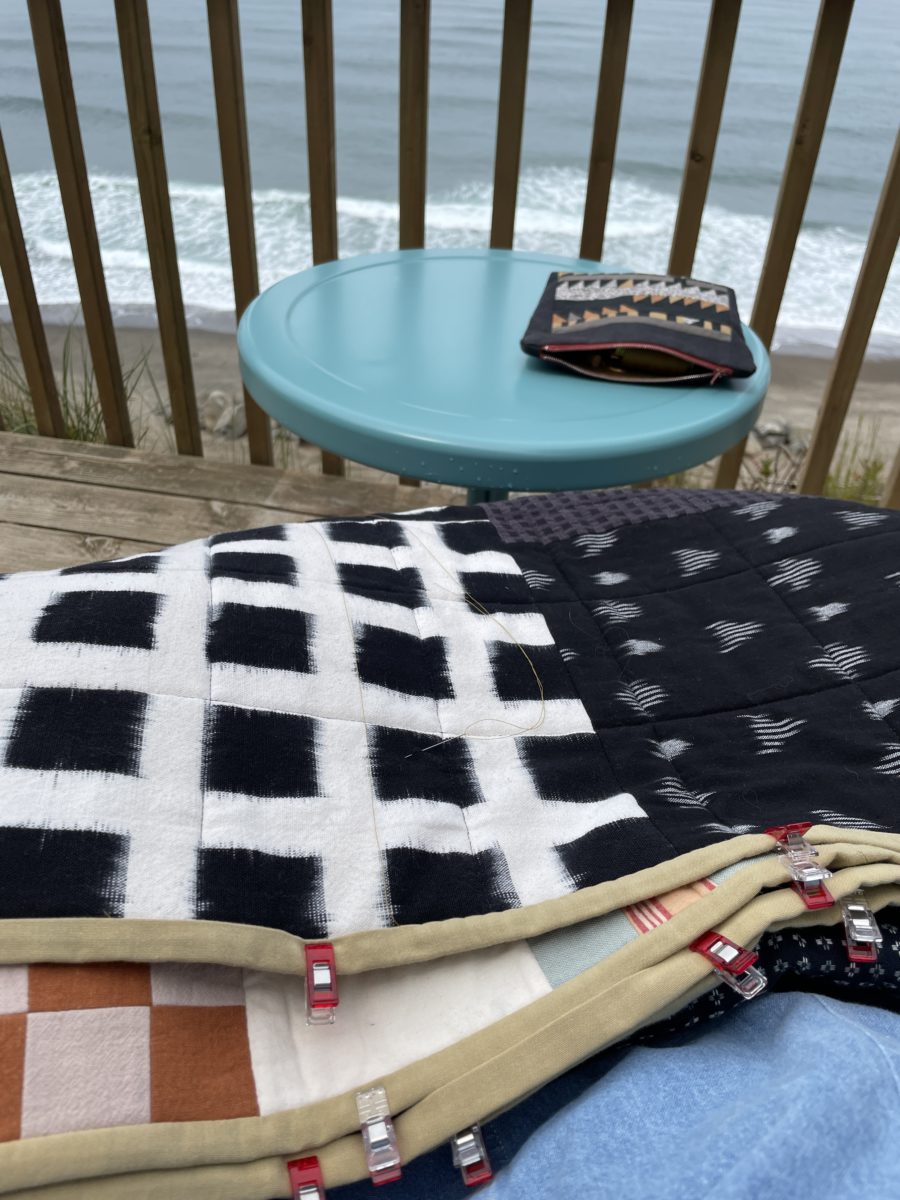
I then machine stitched on the binding to the right side. To finish, I hand-sewed it to the back, which I did at the beach. I’d say this is the best environment for finishing a multi-year quilt project!
And here she is, my fourth quilt (see the others here). I ran around with it on the beach to celebrate.
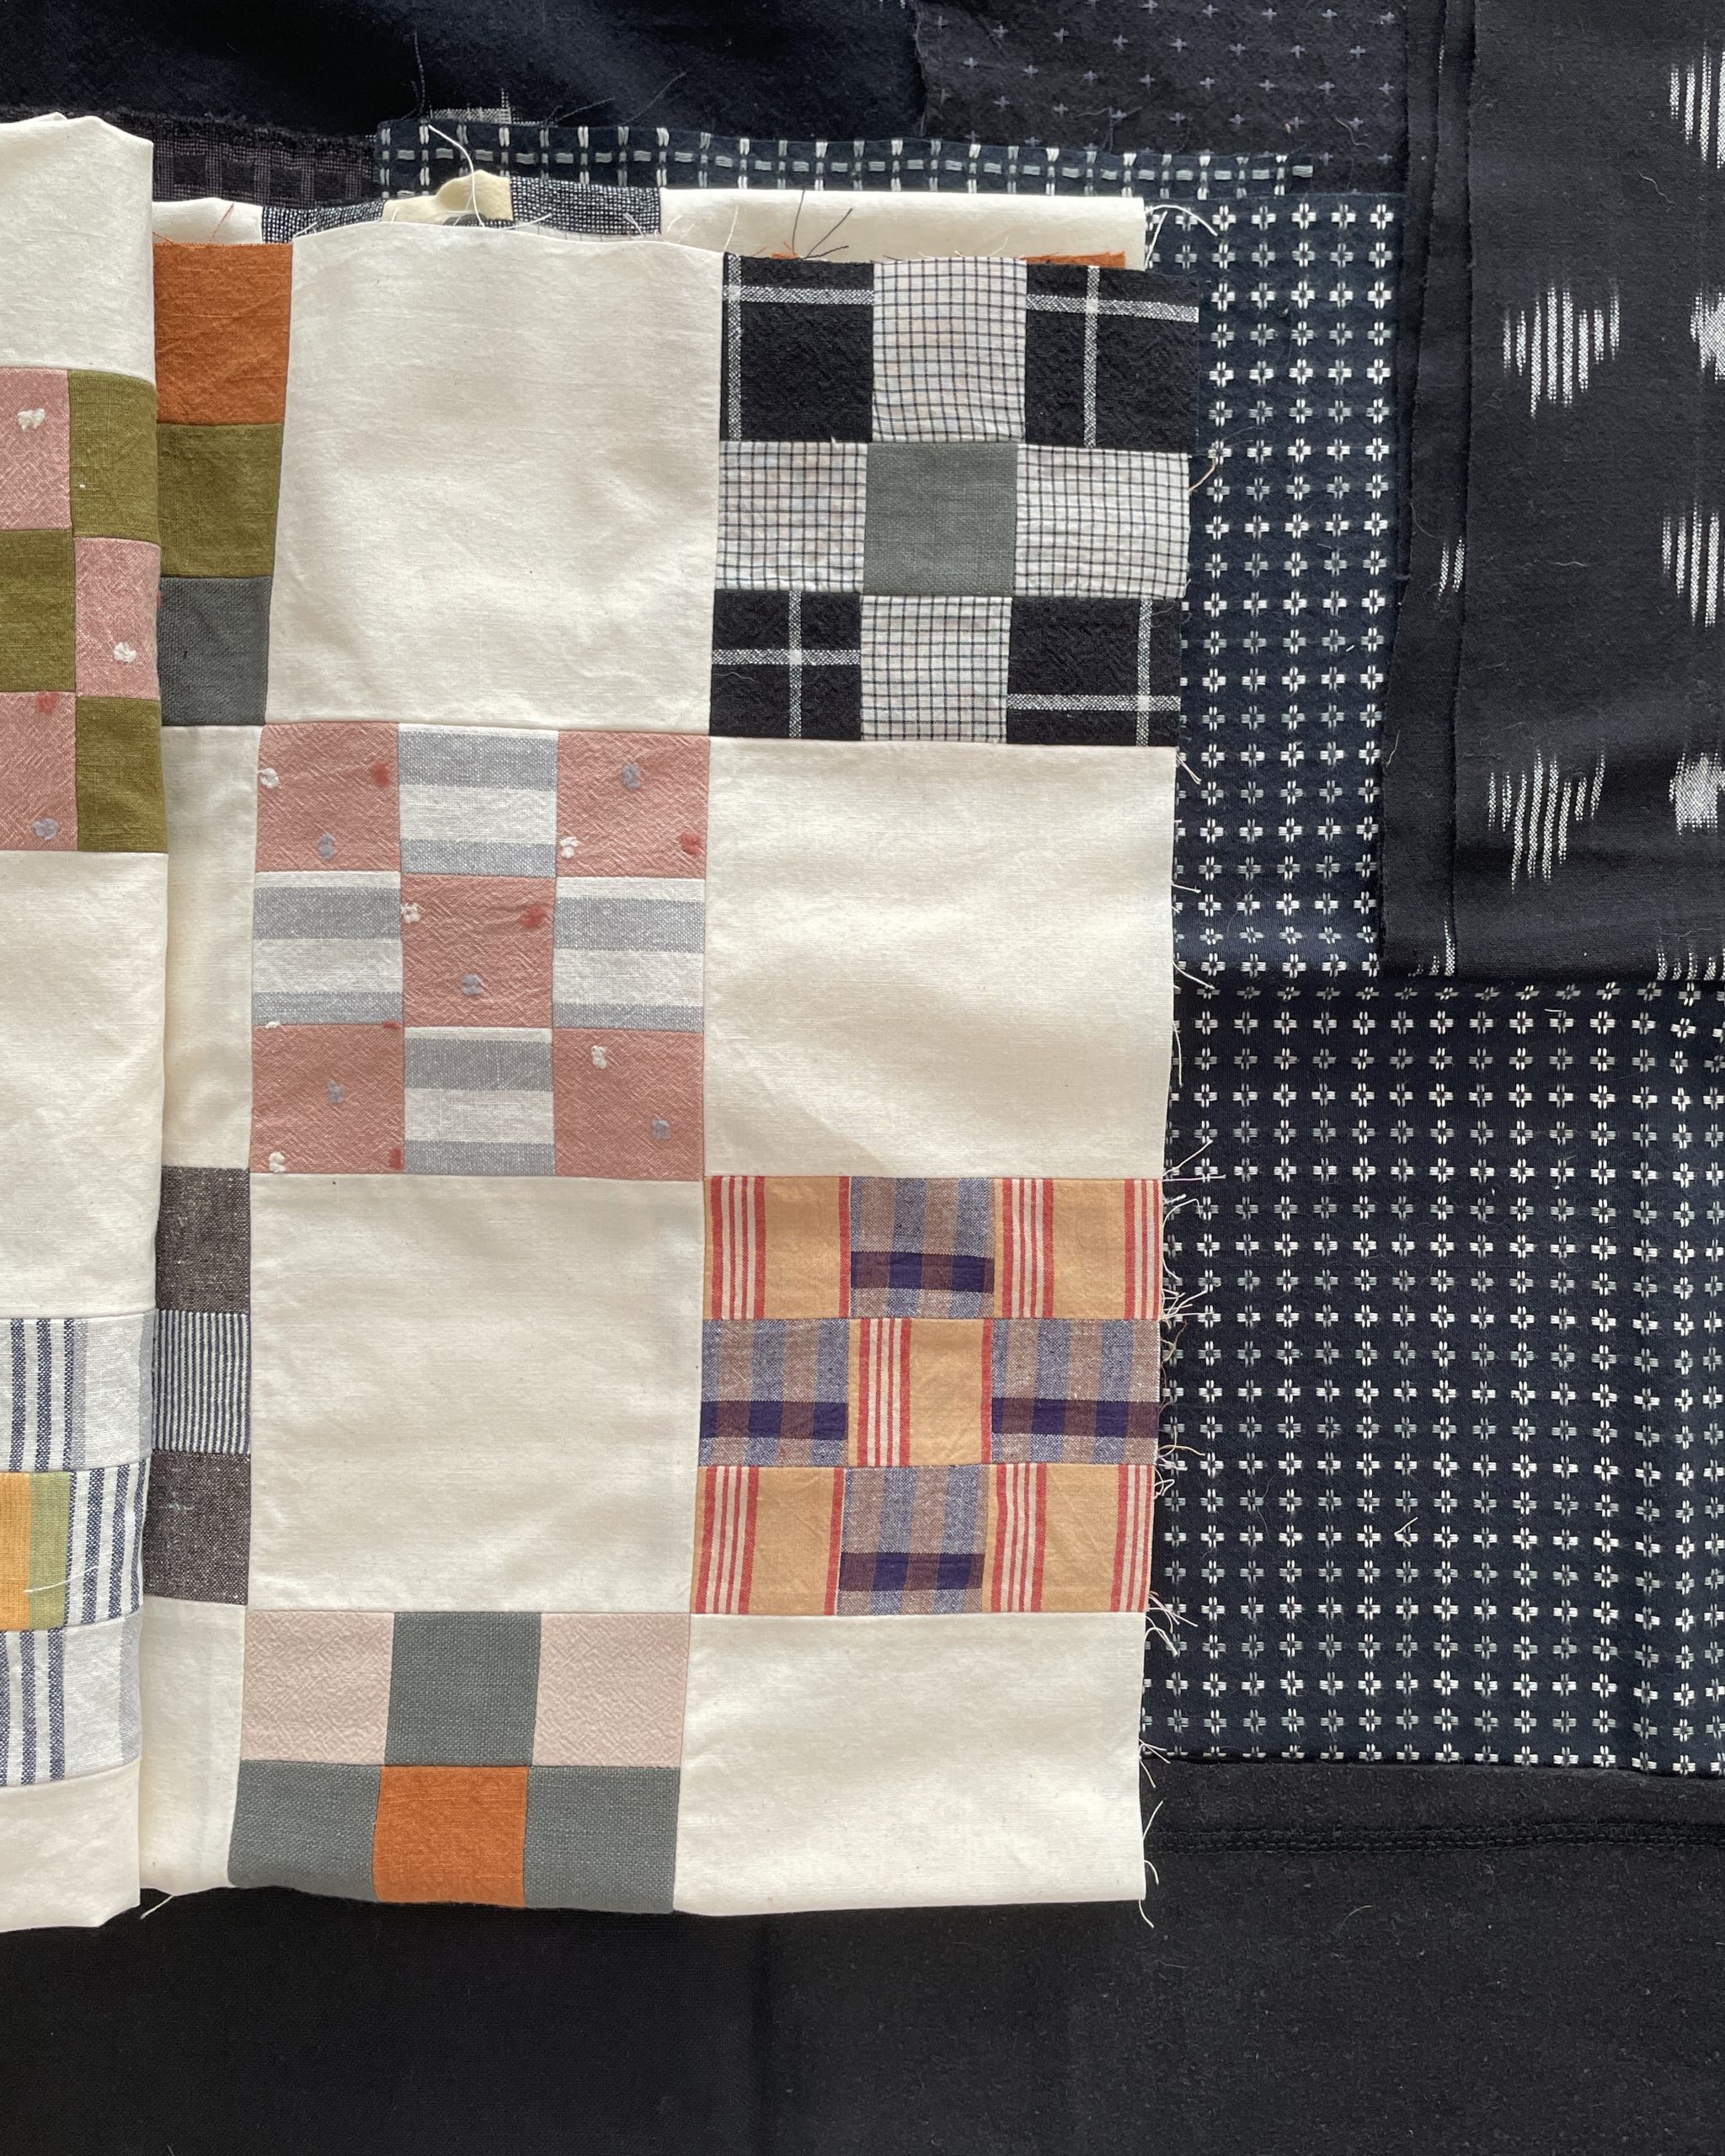
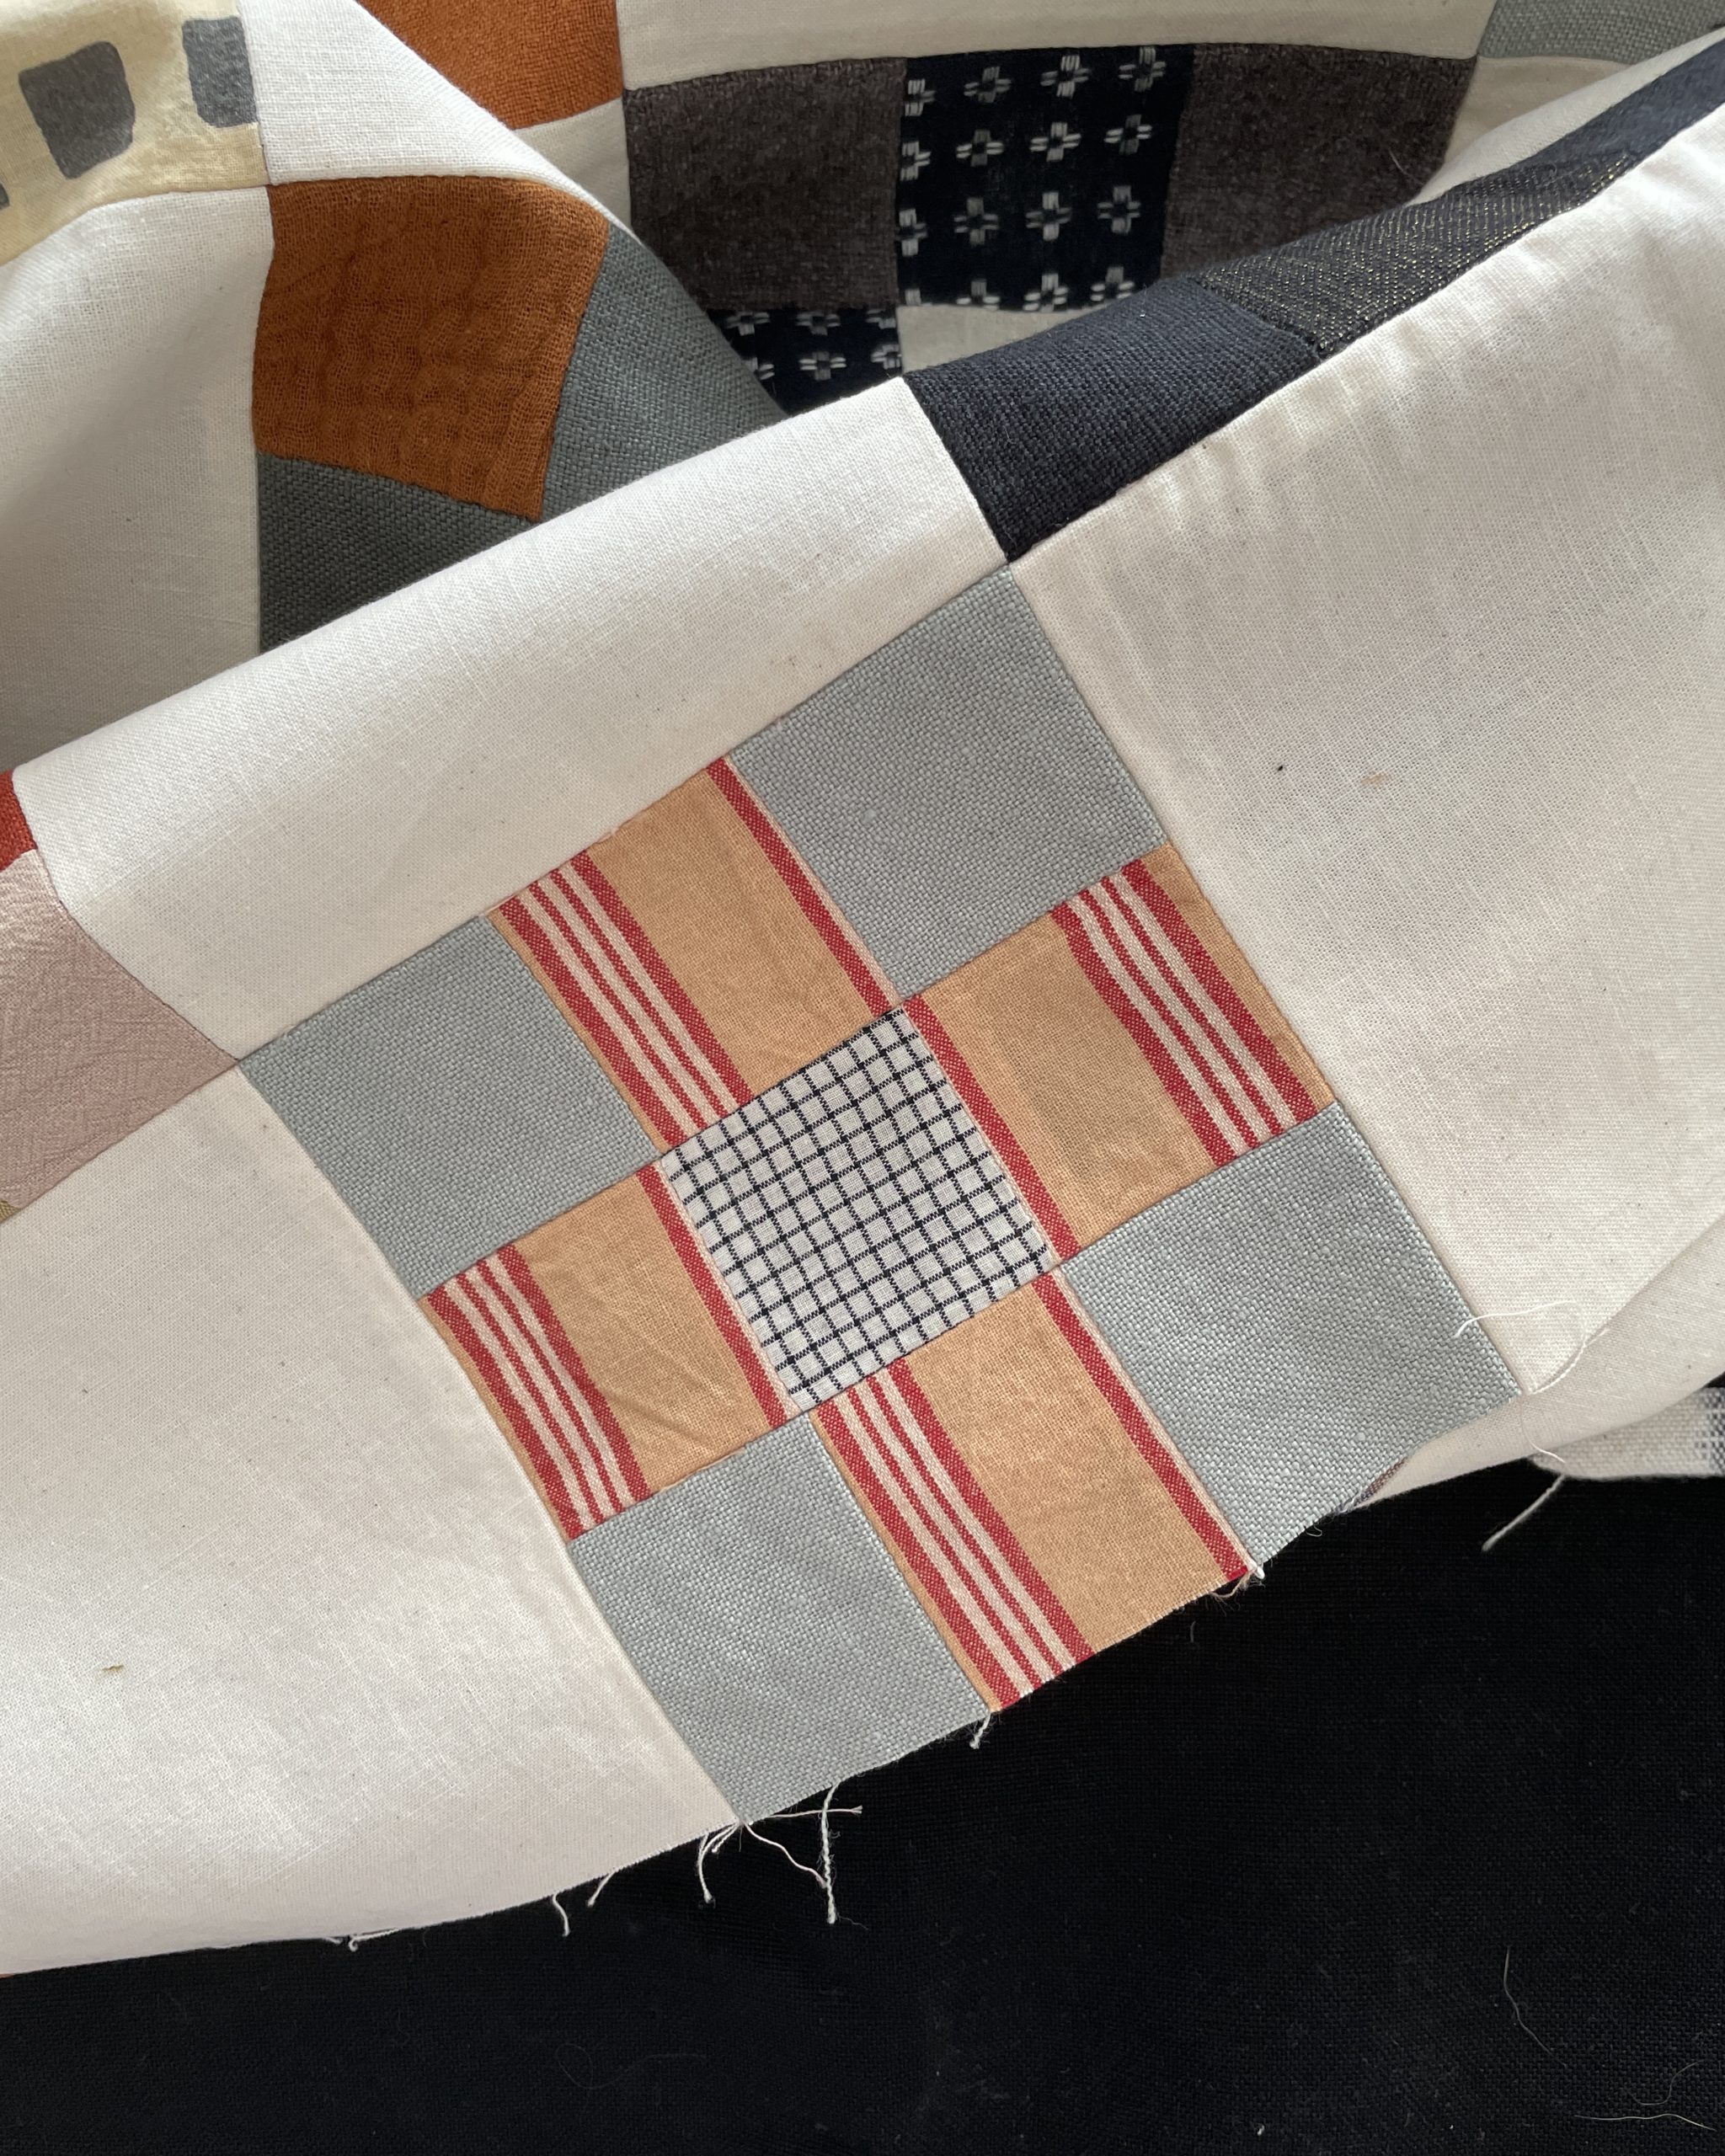
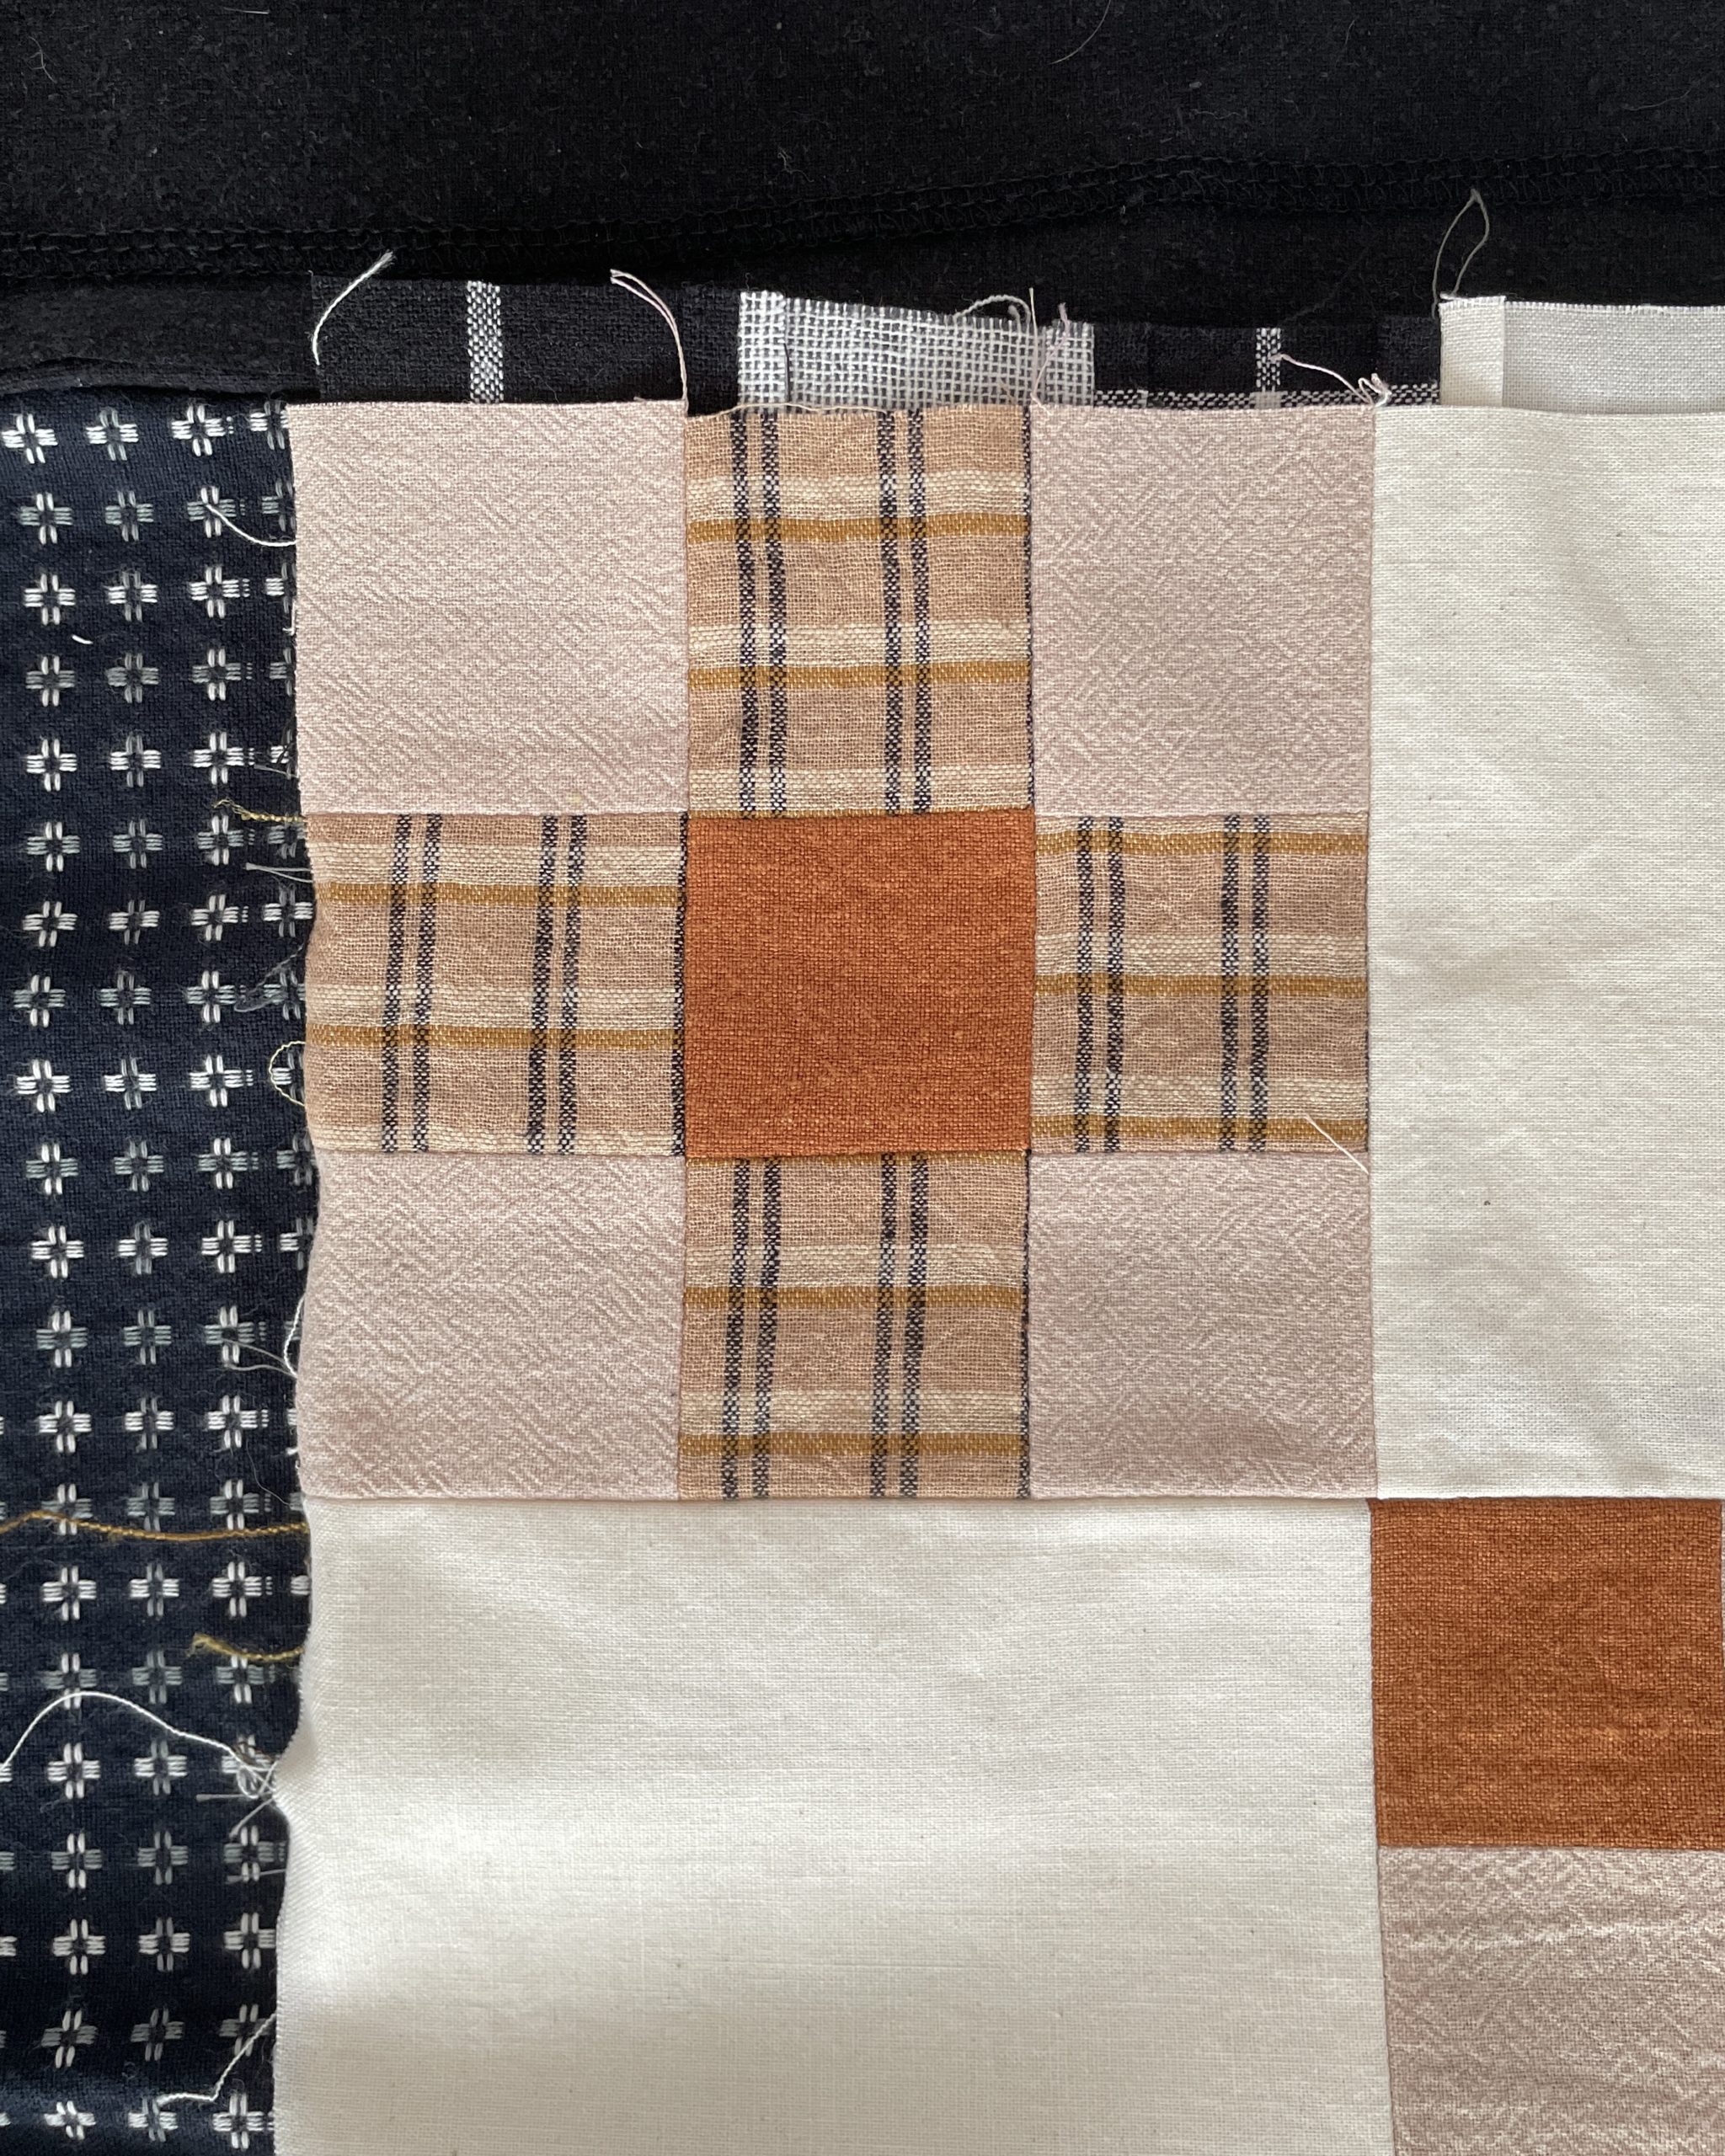
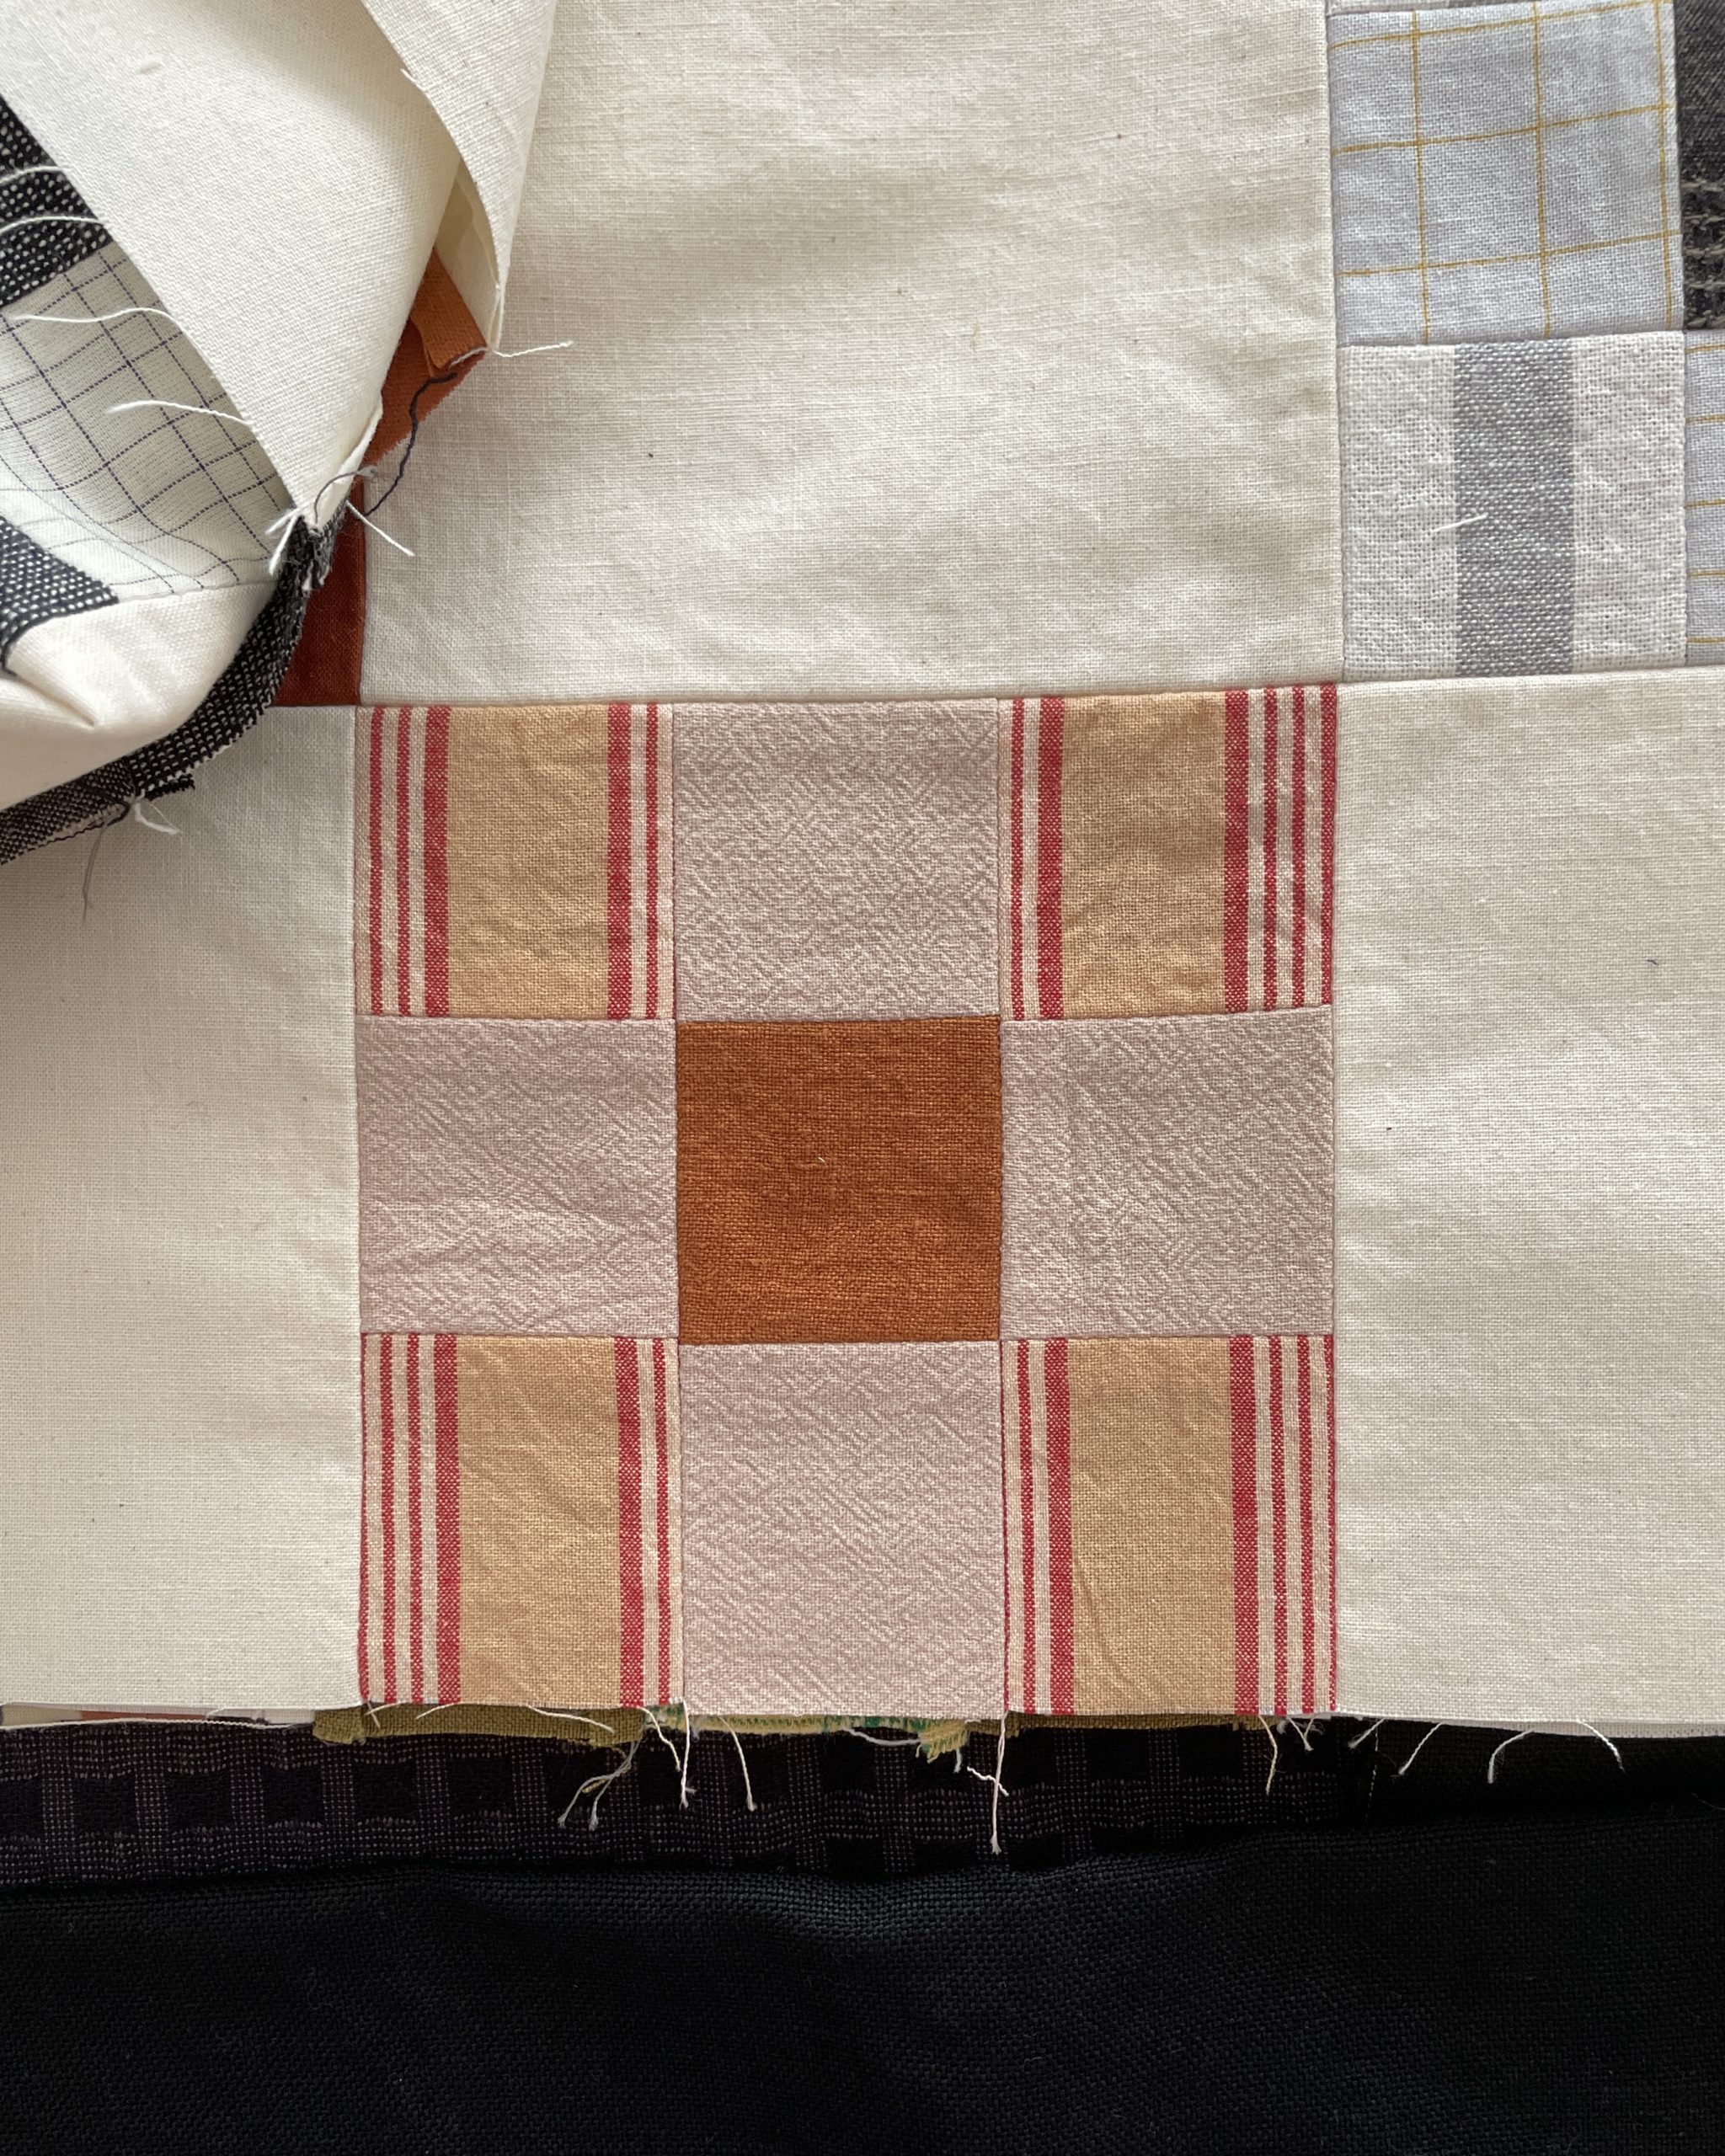
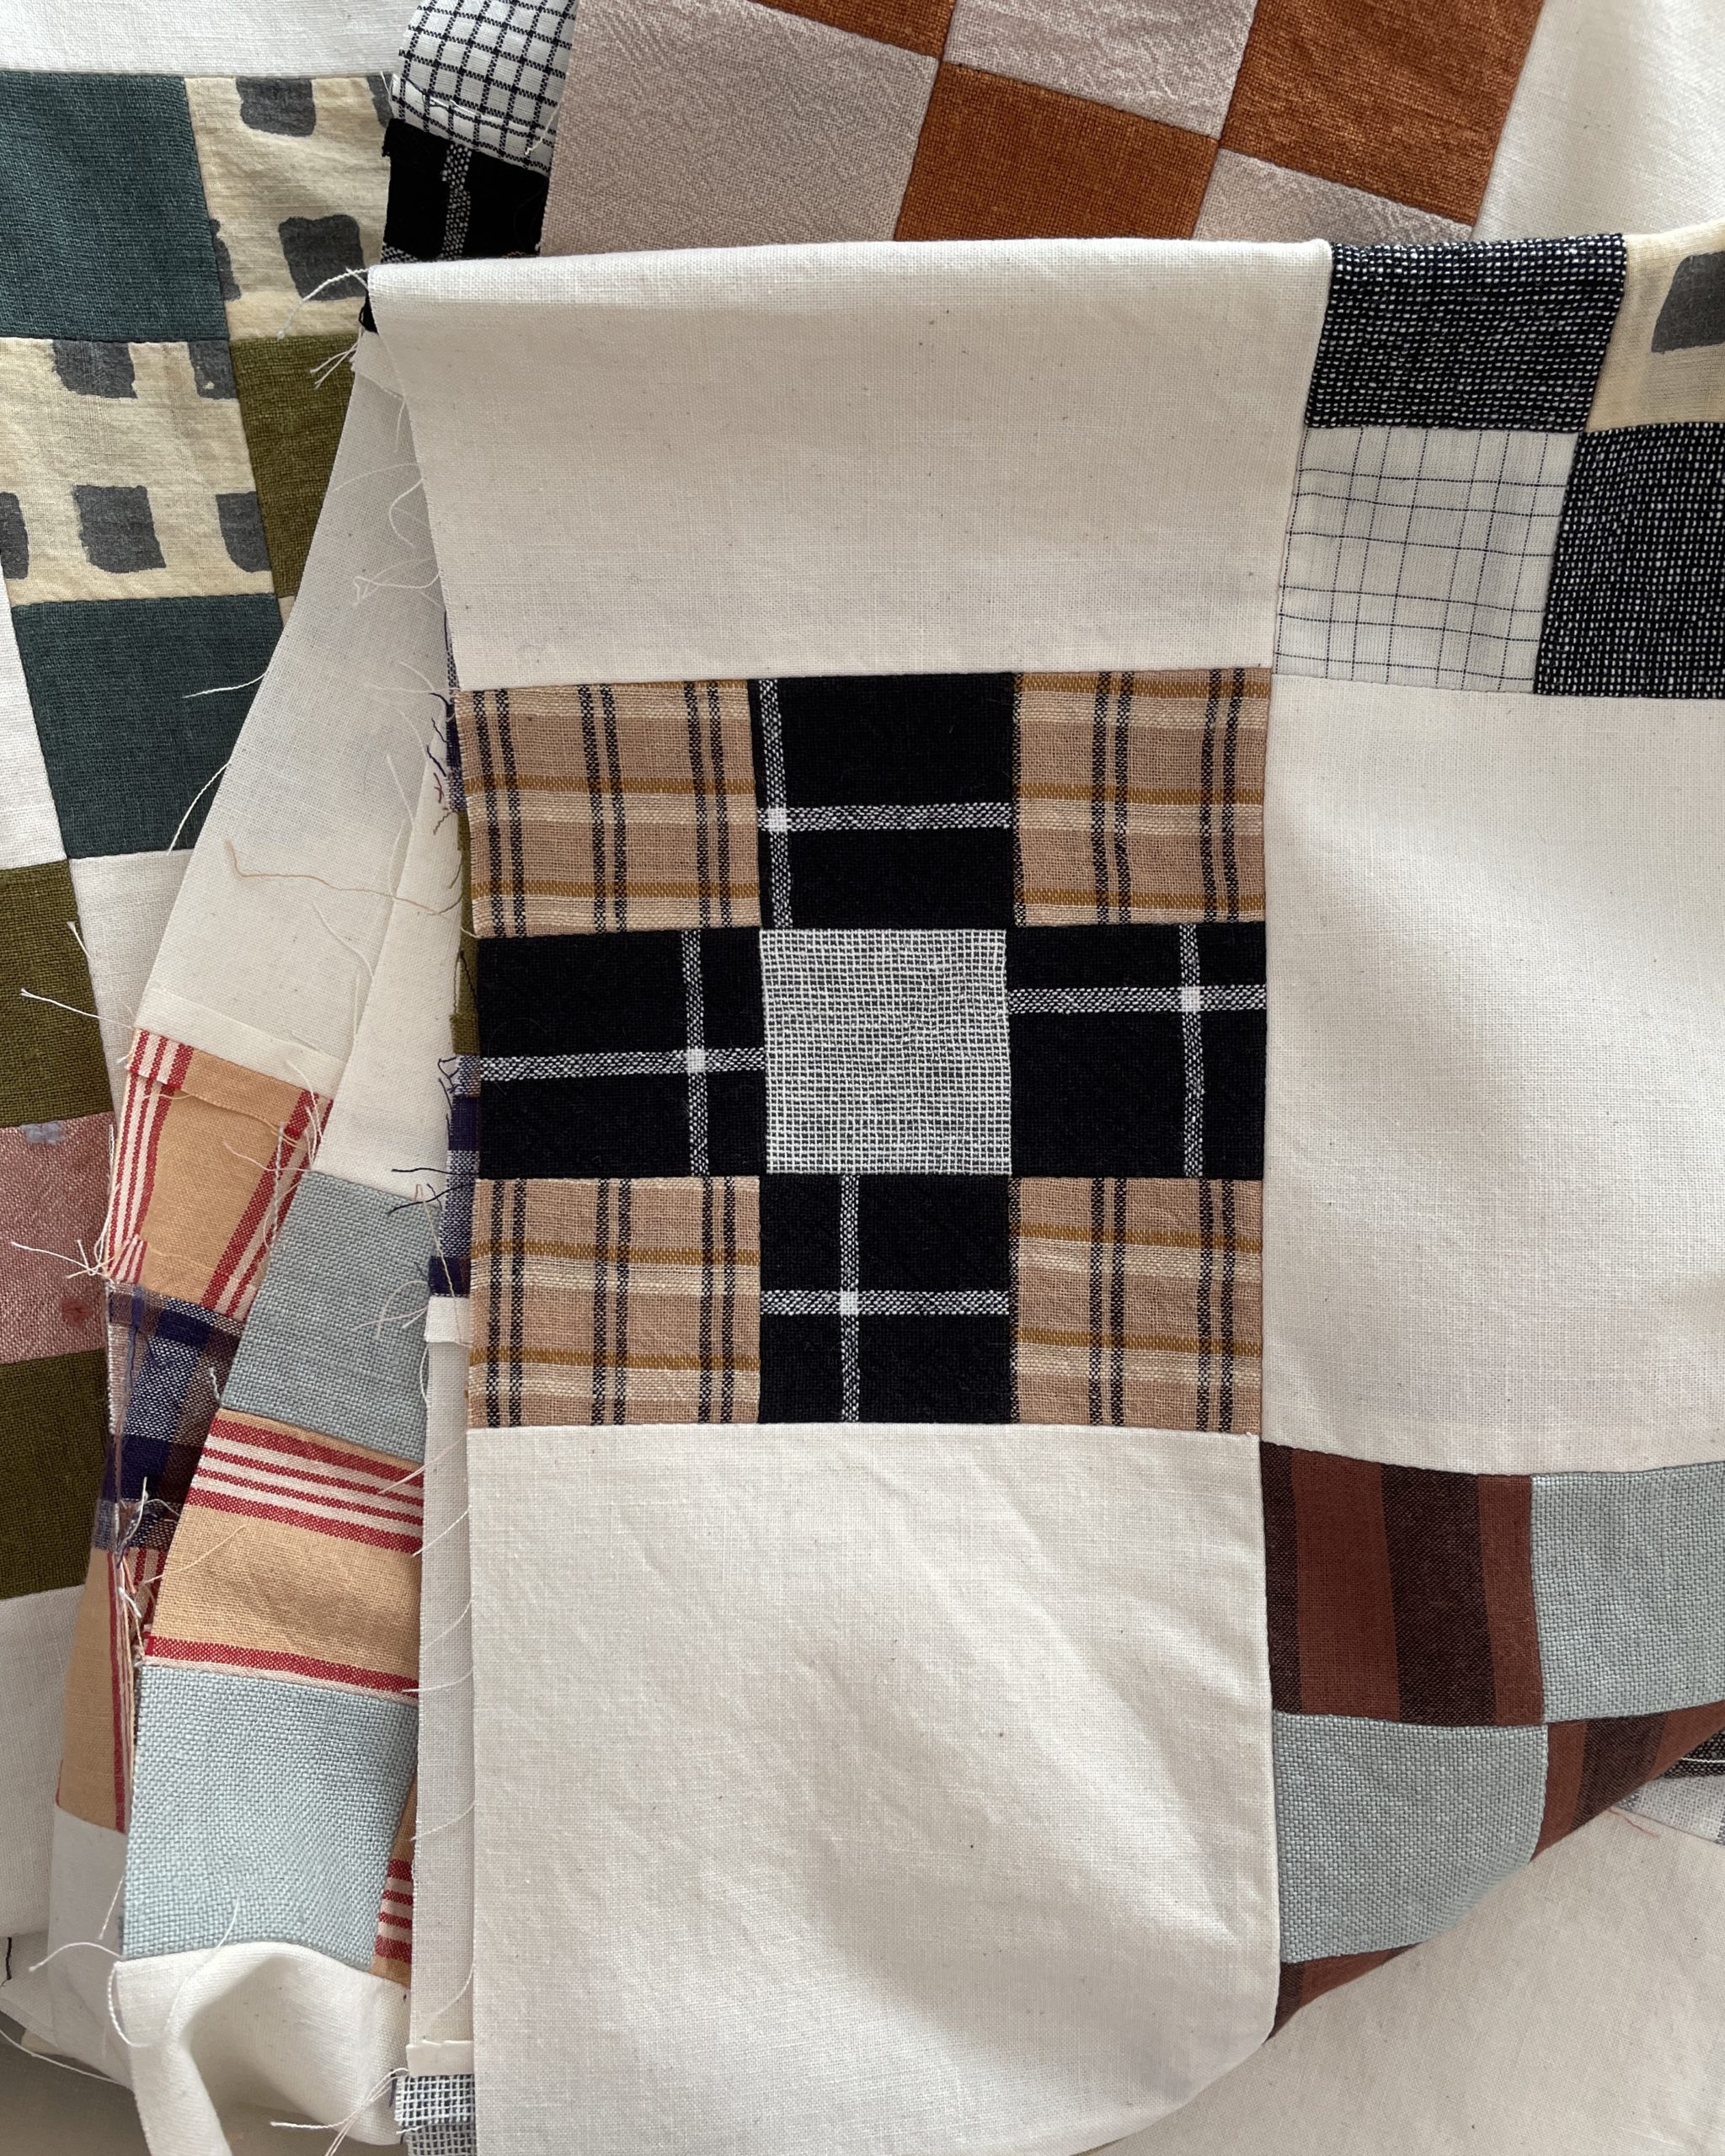
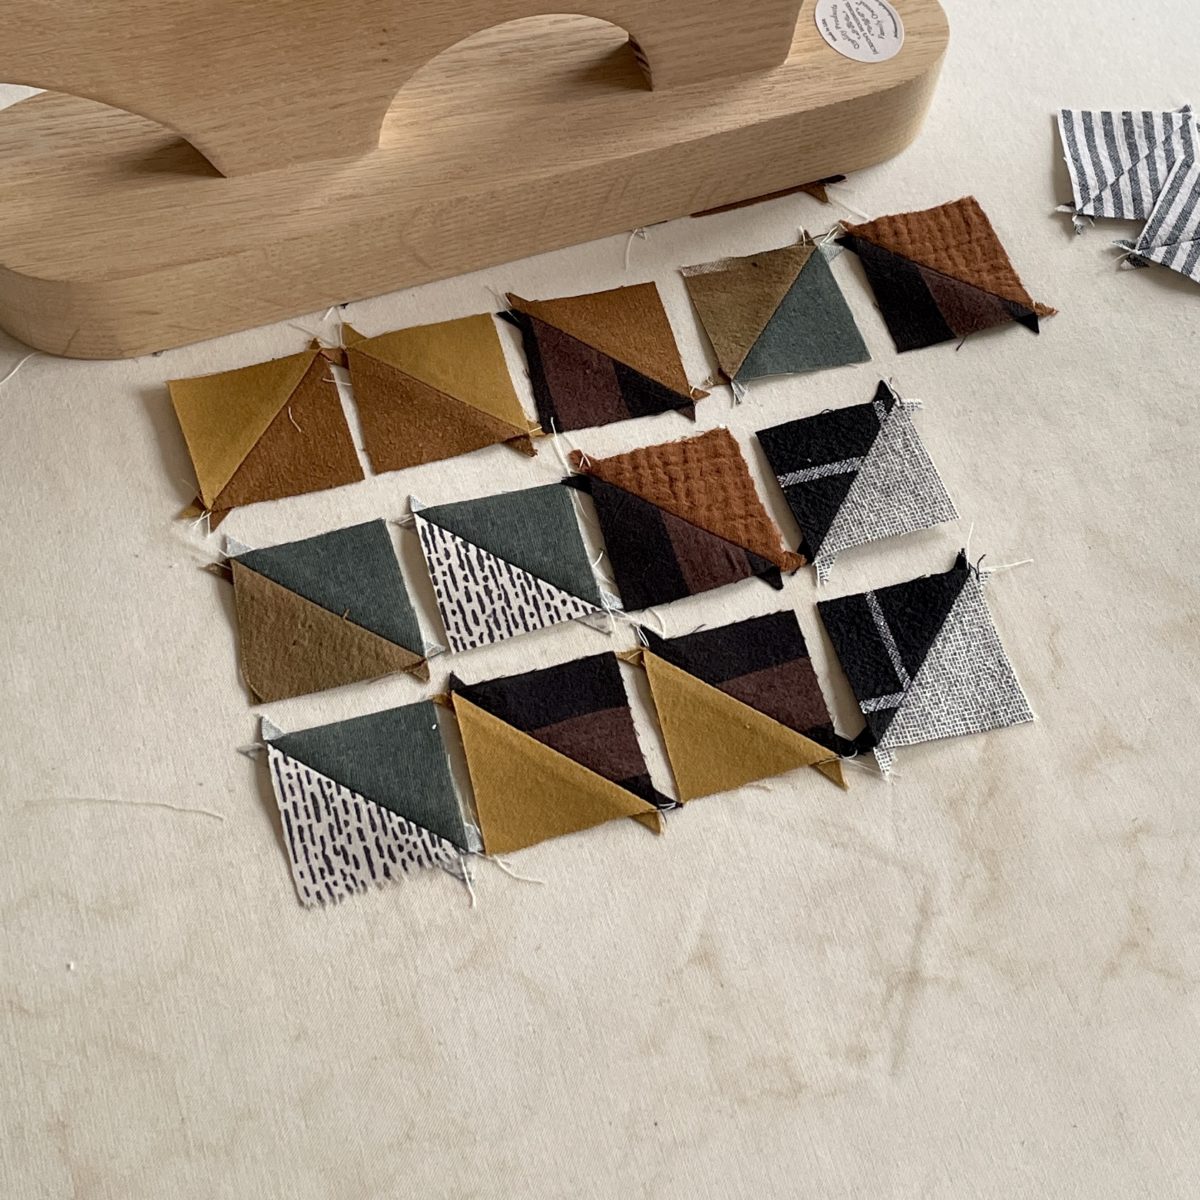
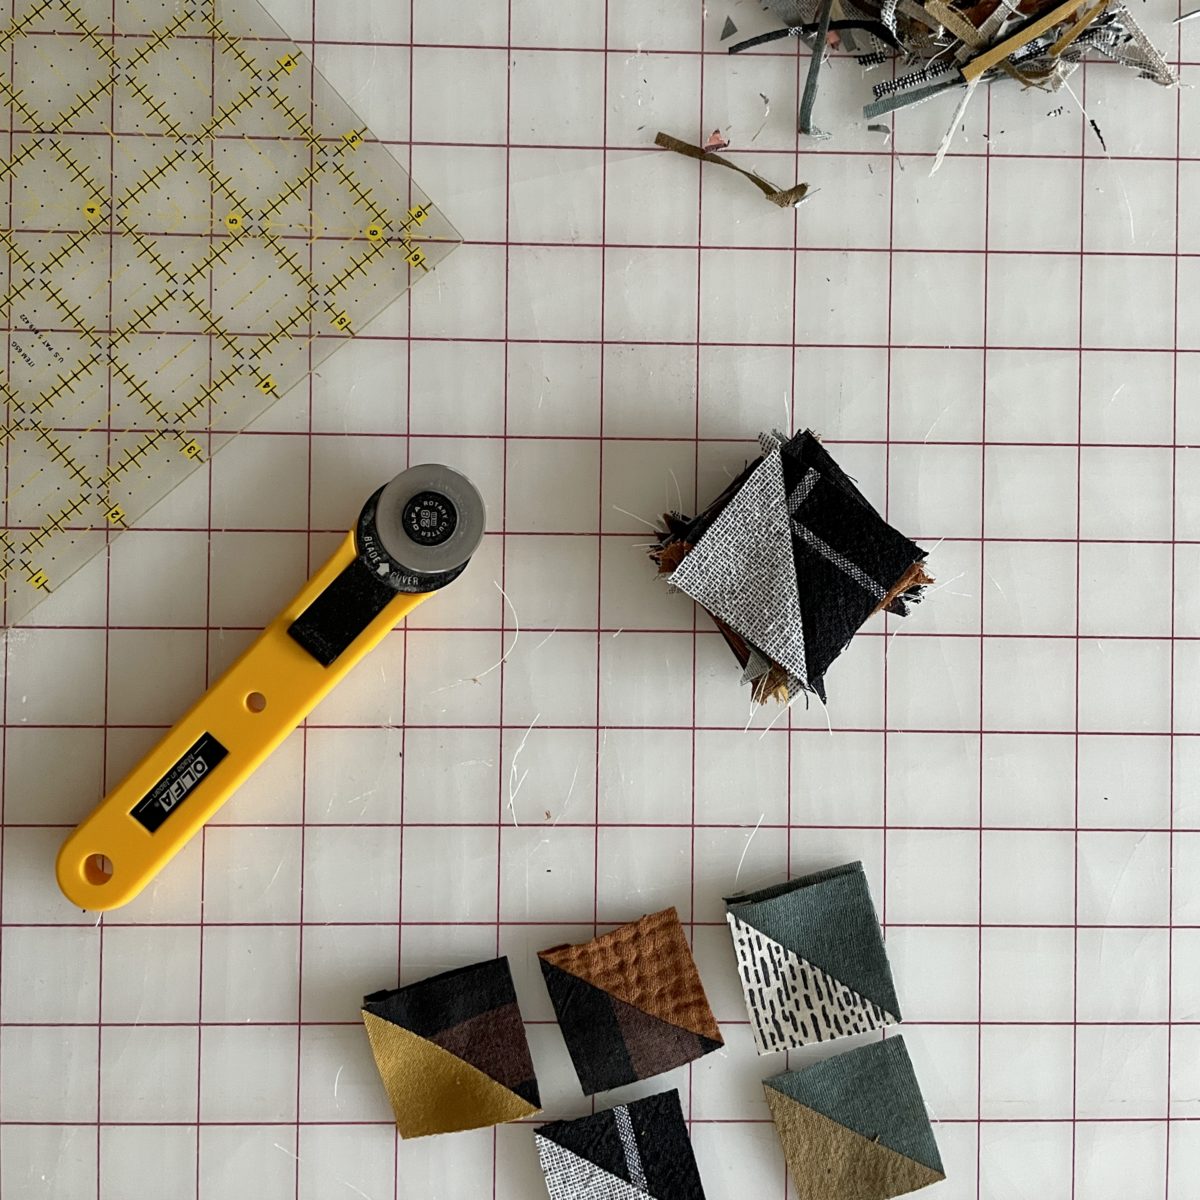
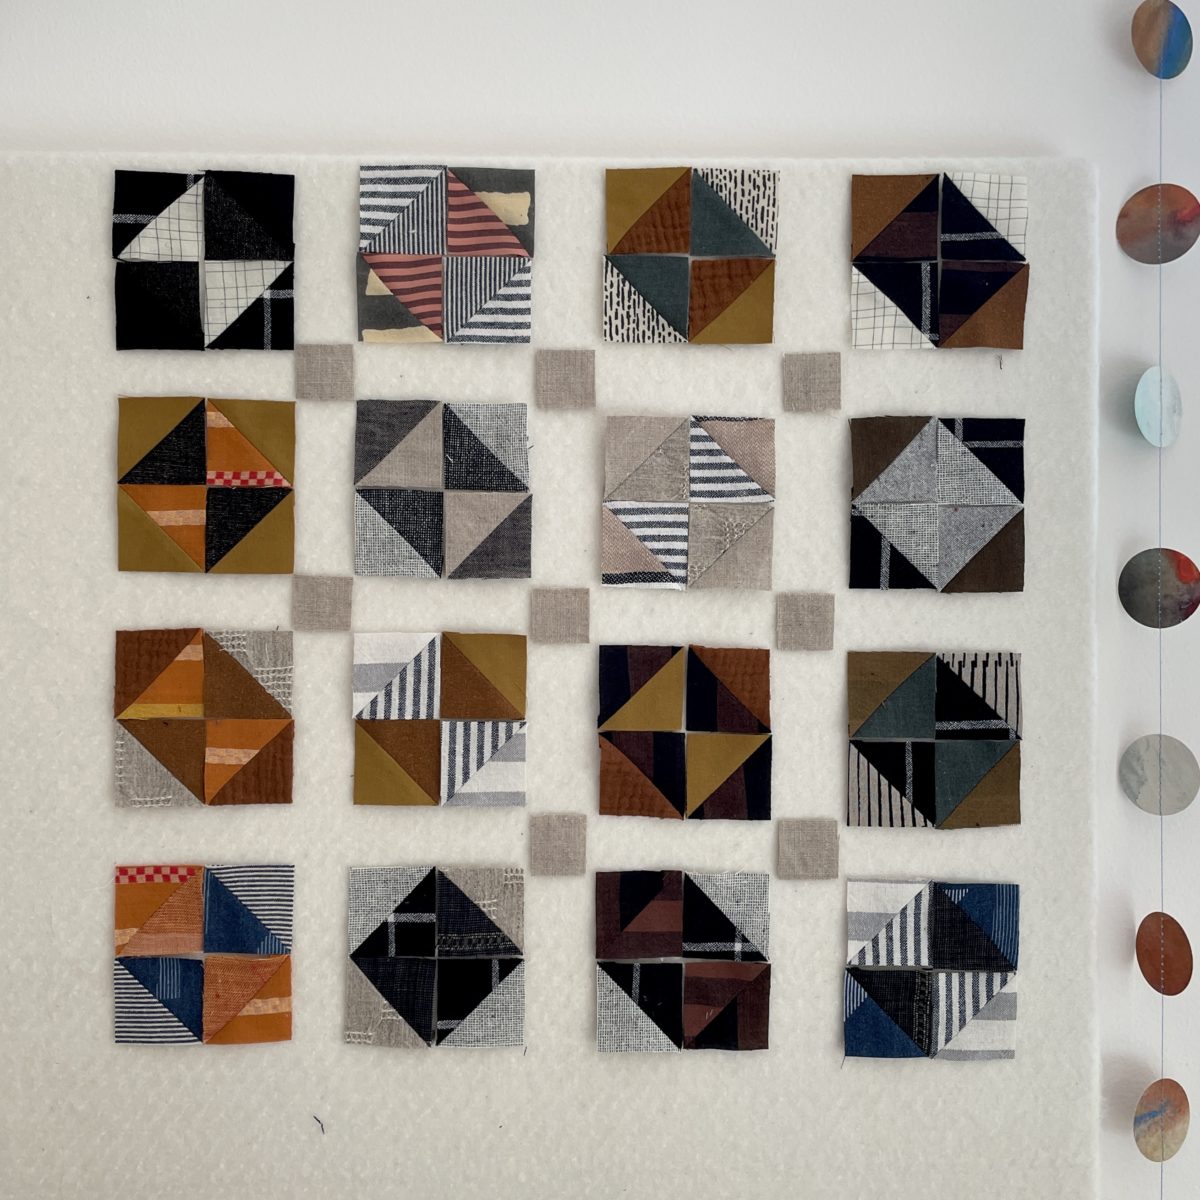
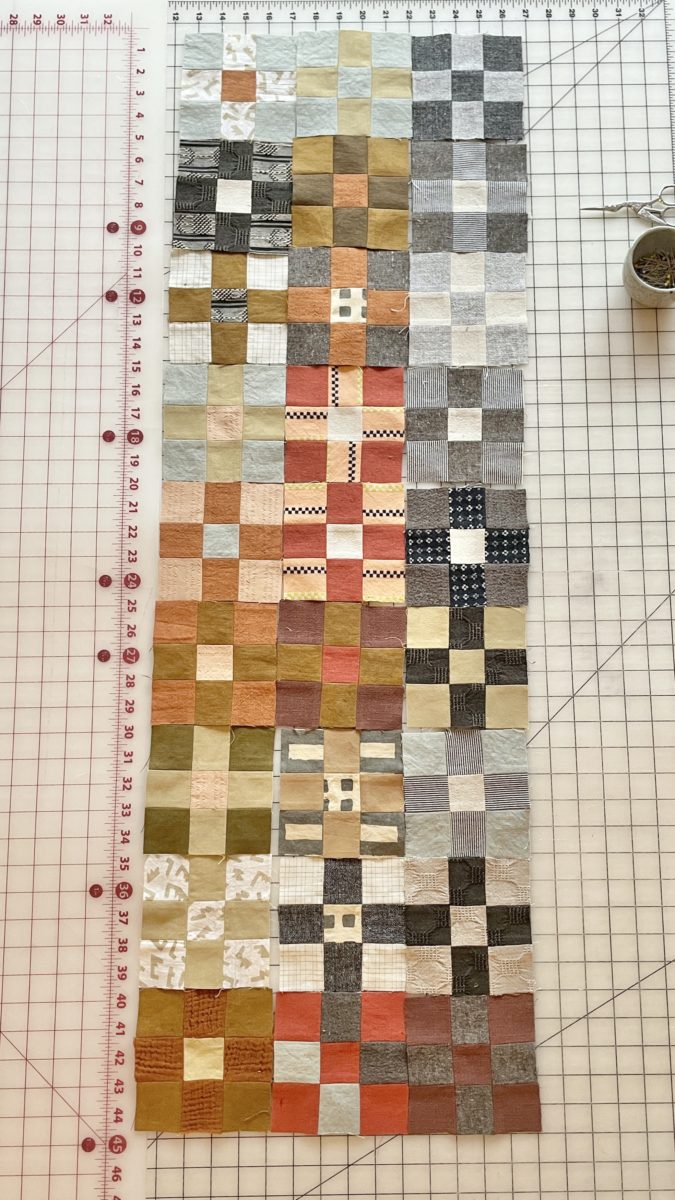
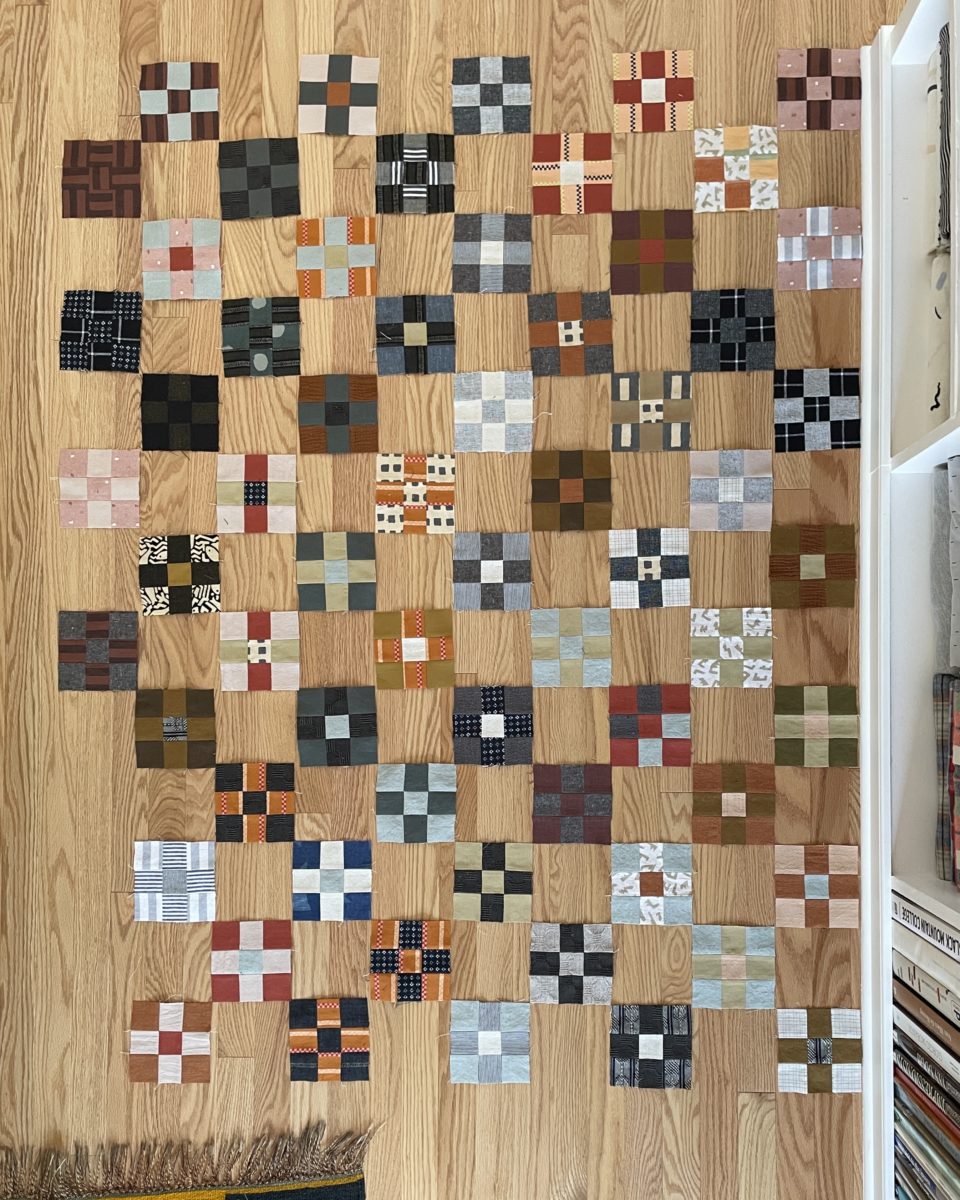
Garment sewing produces waste, sometimes a lot of it. After years of sewing, my woven scrap pile was getting pretty large and I really wanted to turn some of it into a quilt. Then in 2019 Farm & Folk posted this on Instagram and I had a solution: I’d make 100 nine patch blocks using only scraps from previous projects.
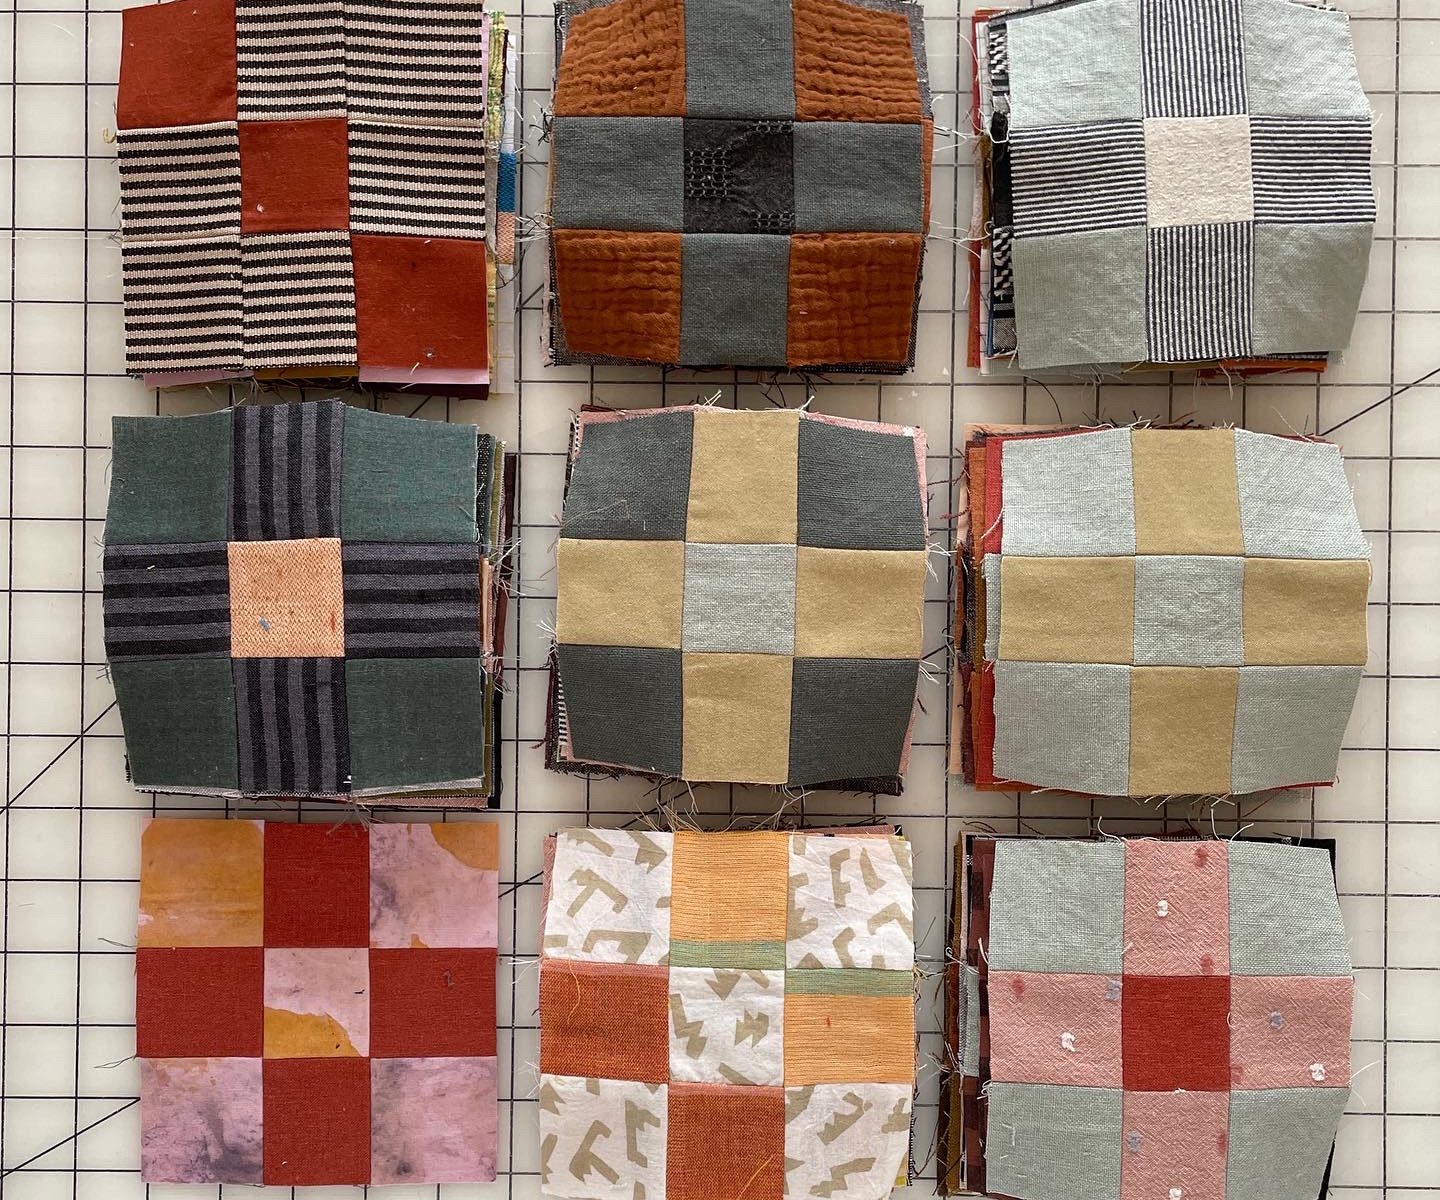
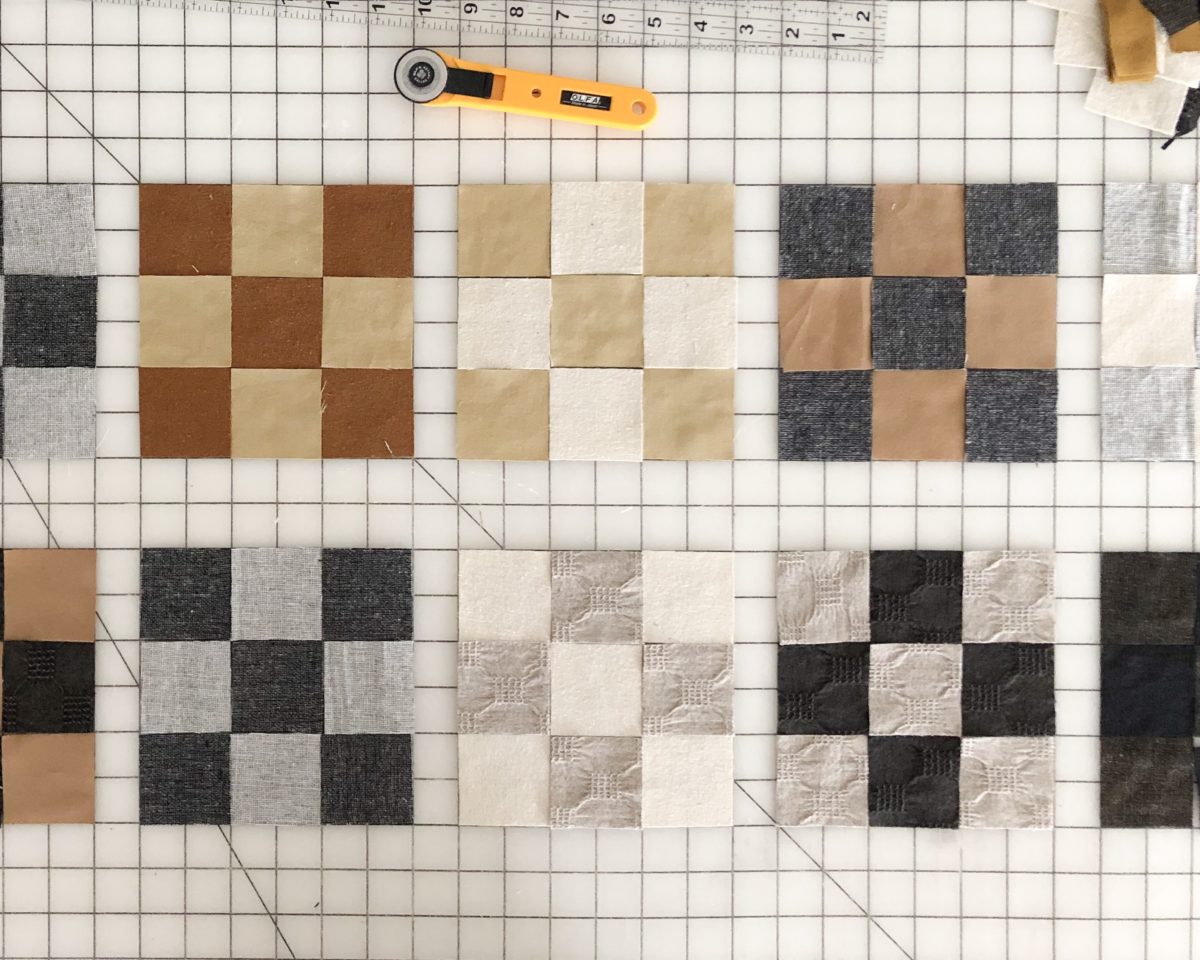
Almost immediately, I started cutting 2″ x 2″ squares and arranging them. It’s pretty amazing how different fabrics and textures can come together and look so cohesive.
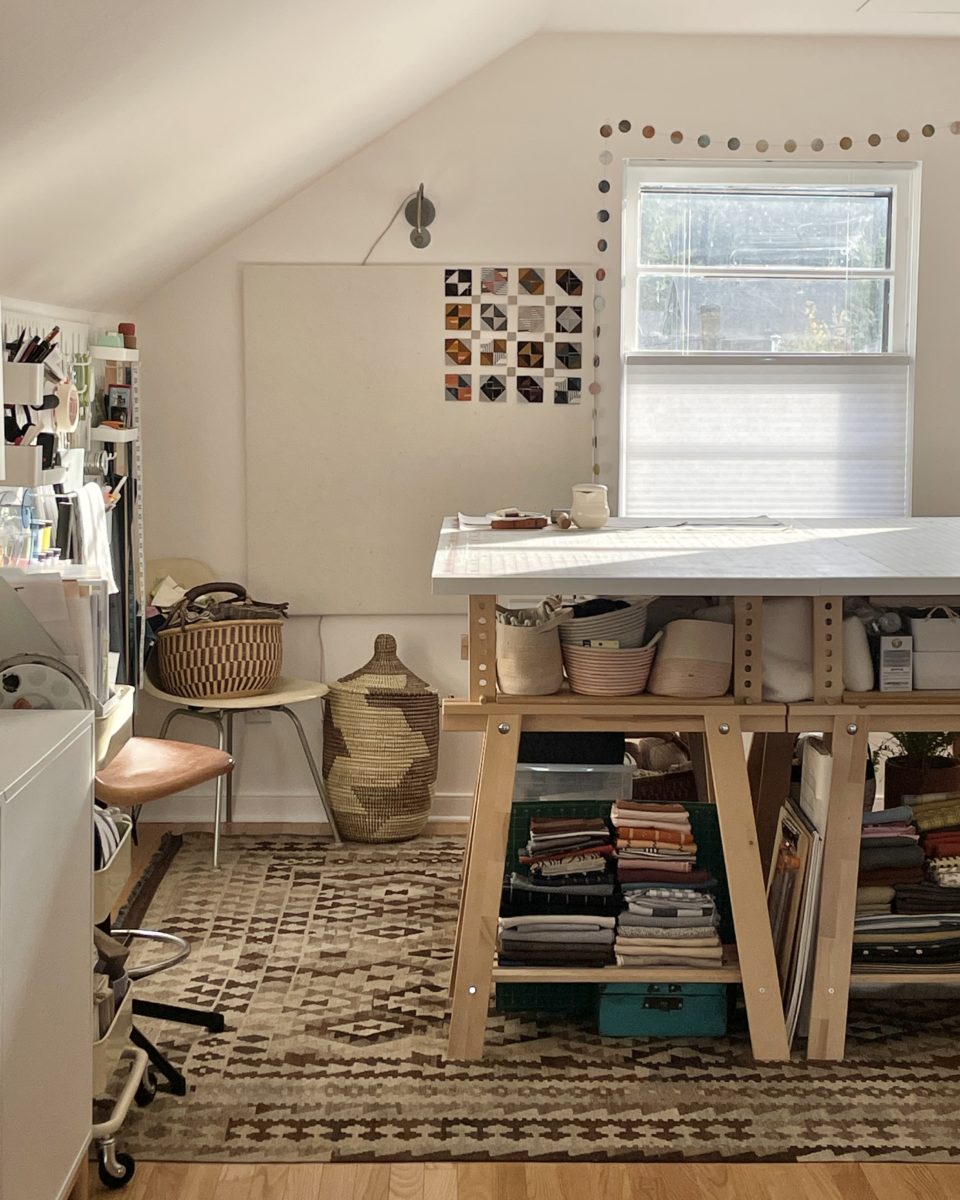
I only made a handful at the start and then set this project aside for a while. Almost a year later, I made a quilt design board out of homasote and canvas and picked this project back up. Briefly I wanted to try out a 100 day project but I didn’t enjoy the pressure and I wanted this process to be fun.
There was also a moment where I thought about making the quilt top entirely out of nine patch squares. After realizing this plan would require almost 200 blocks, I abandoned that idea.
A few months later, I had over 50 blocks and this was the point where I actually calculated how many blocks I’d need for this layout and it was not 100, it was 98.
I decided to make 100 anyway and then I’d have some flexibility if I ended up not liking a couple squares.
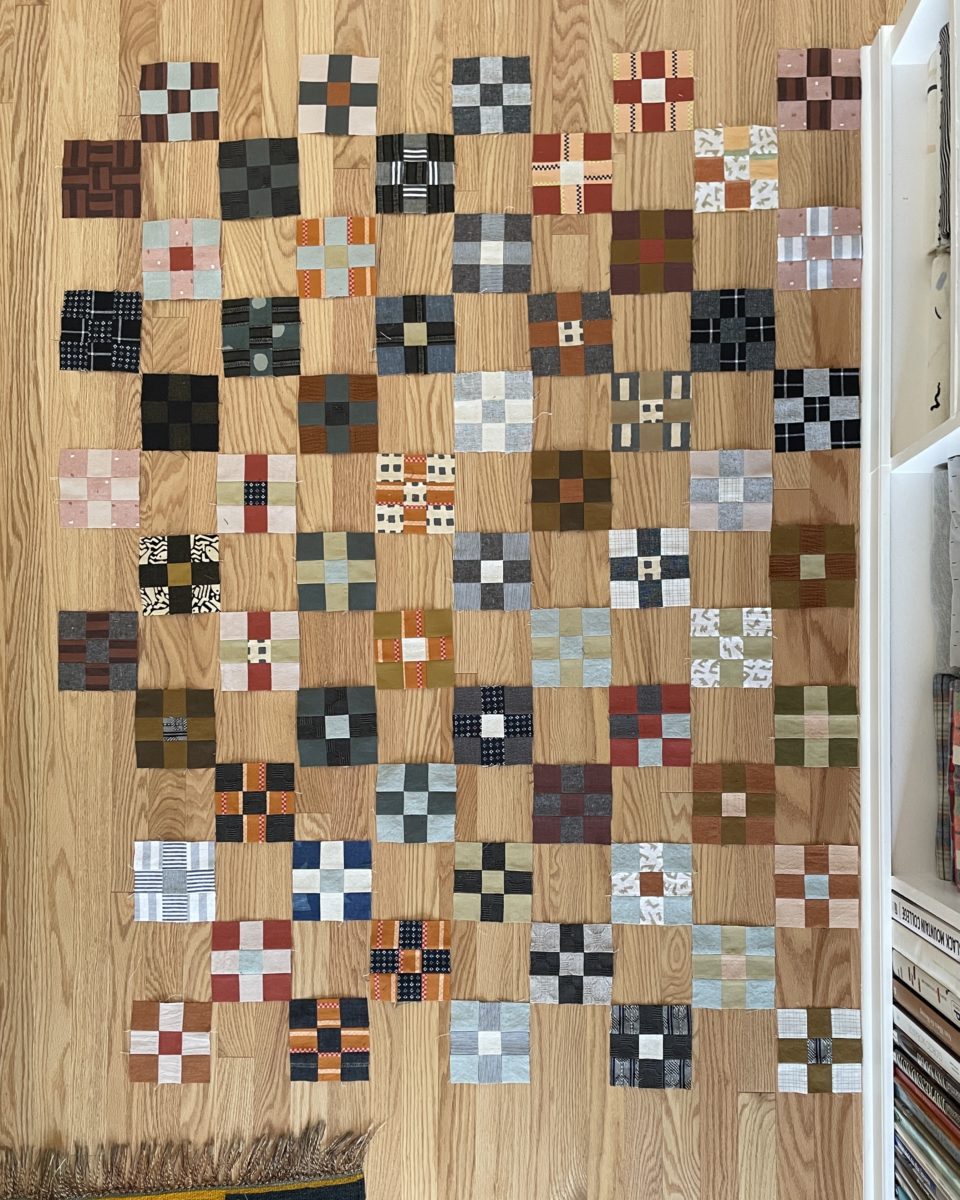
Once I had 100 blocks, I removed the two I didn’t really like (seen on the board above), made seven piles of seven blocks, and laid them out on my table. My table wasn’t large enough so I tucked some foam core underneath the cutting mats. I ended up only moving about three blocks once everything was in place.
This project taught me that sometimes my 1/4″ seam allowances… vary and that using a bunch of different fabrics can really change the size of a block. The blocks that had double gauze were especially wonky. I ended up having to ease some of the blocks together so the corners were aligned. I could have trimmed everything down to match the smallest block but I threw caution to the wind and just forced the blocks to work together.
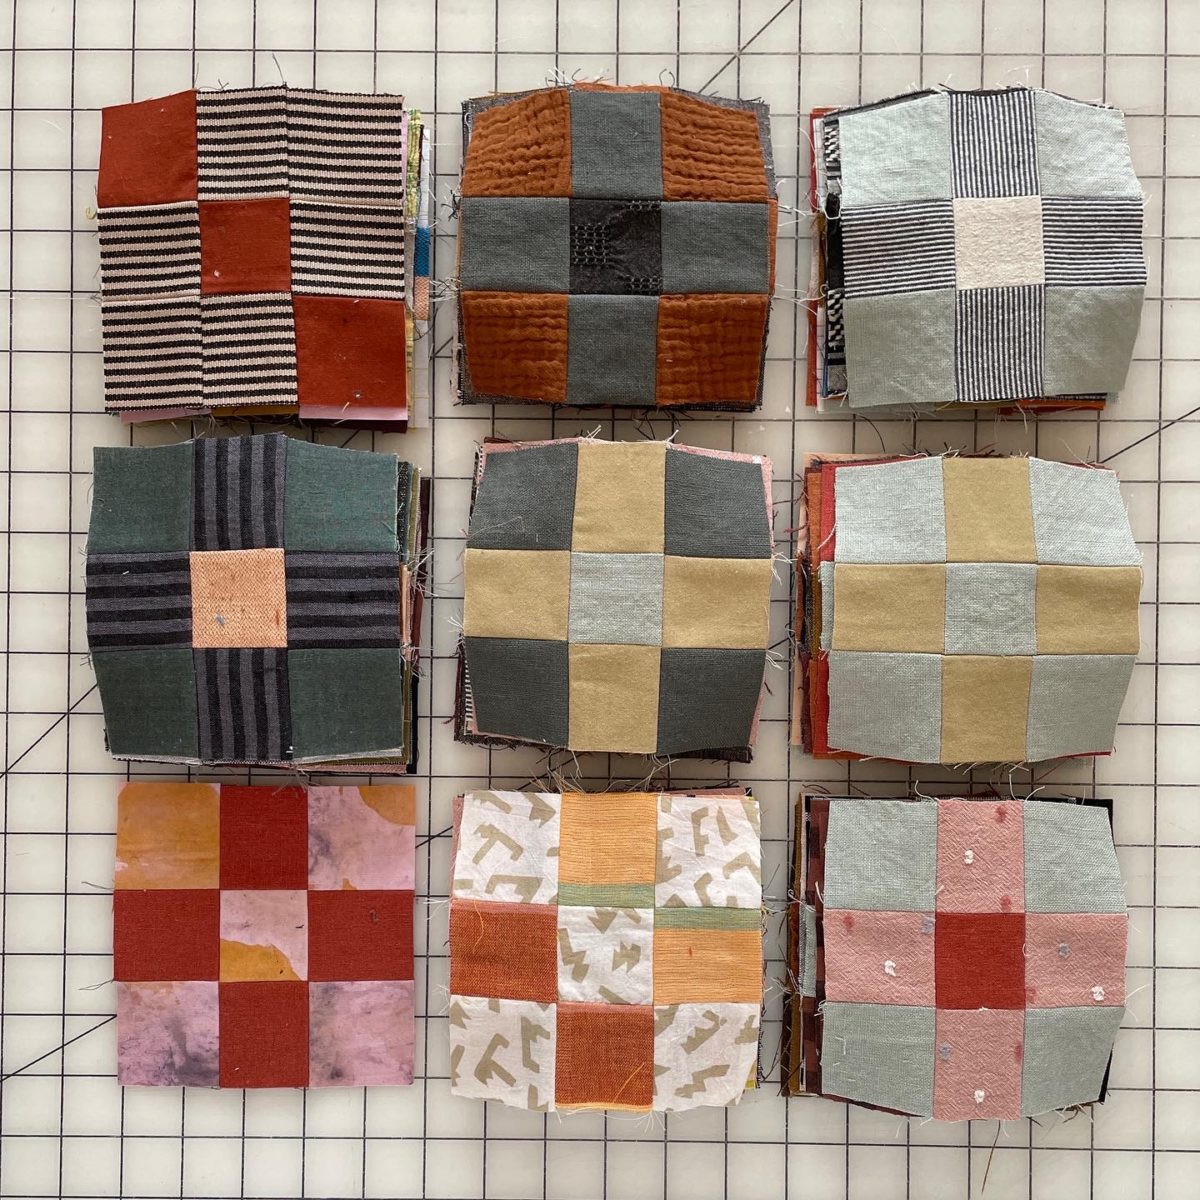
I used Kona cotton in natural for the solid squares. Before I had 100 blocks, I tried using scrap fabric in lighter colors but it made the nine patch blocks disappear. I think the bright solid color really makes the patchwork shine.
Next I’ll make the backing, baste the layers together, quilt, bind, and then wash.
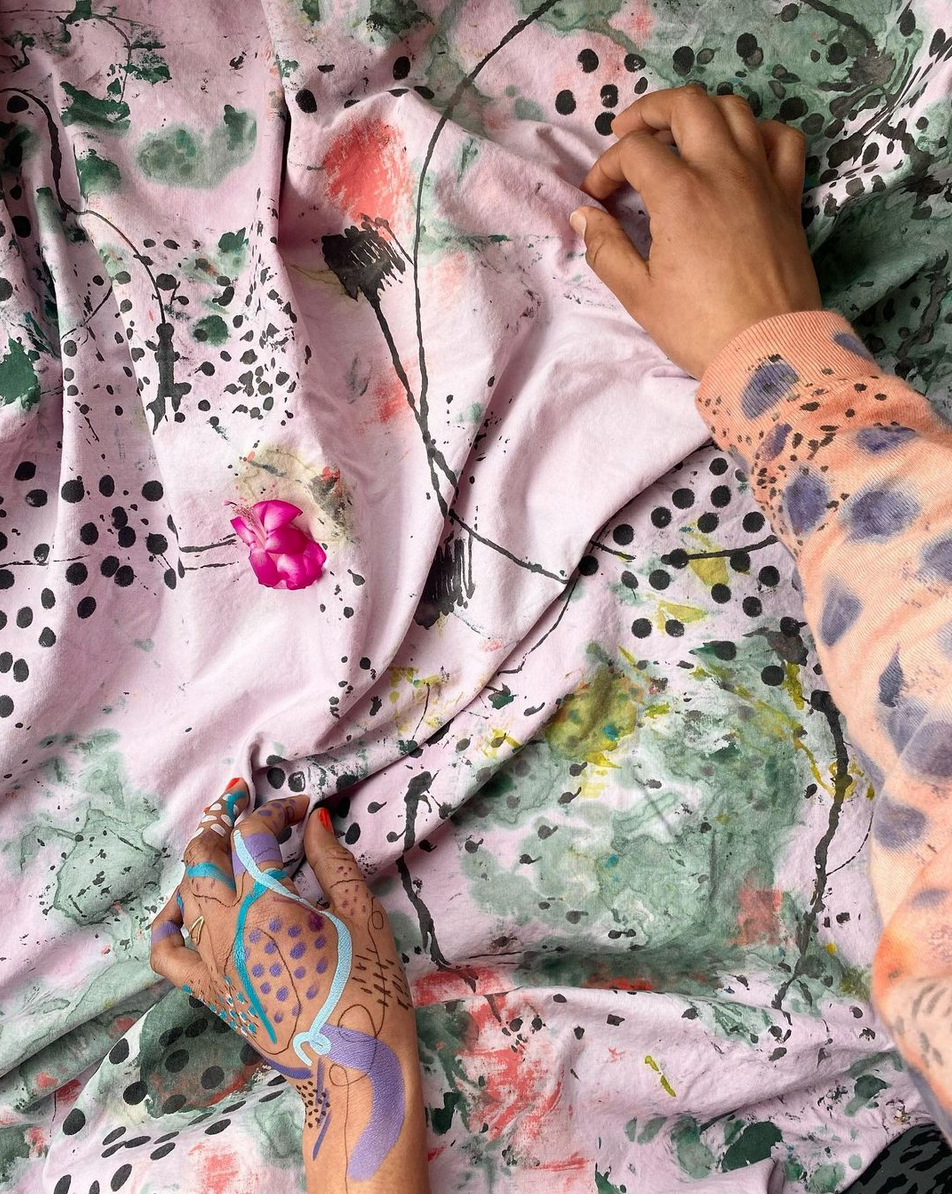
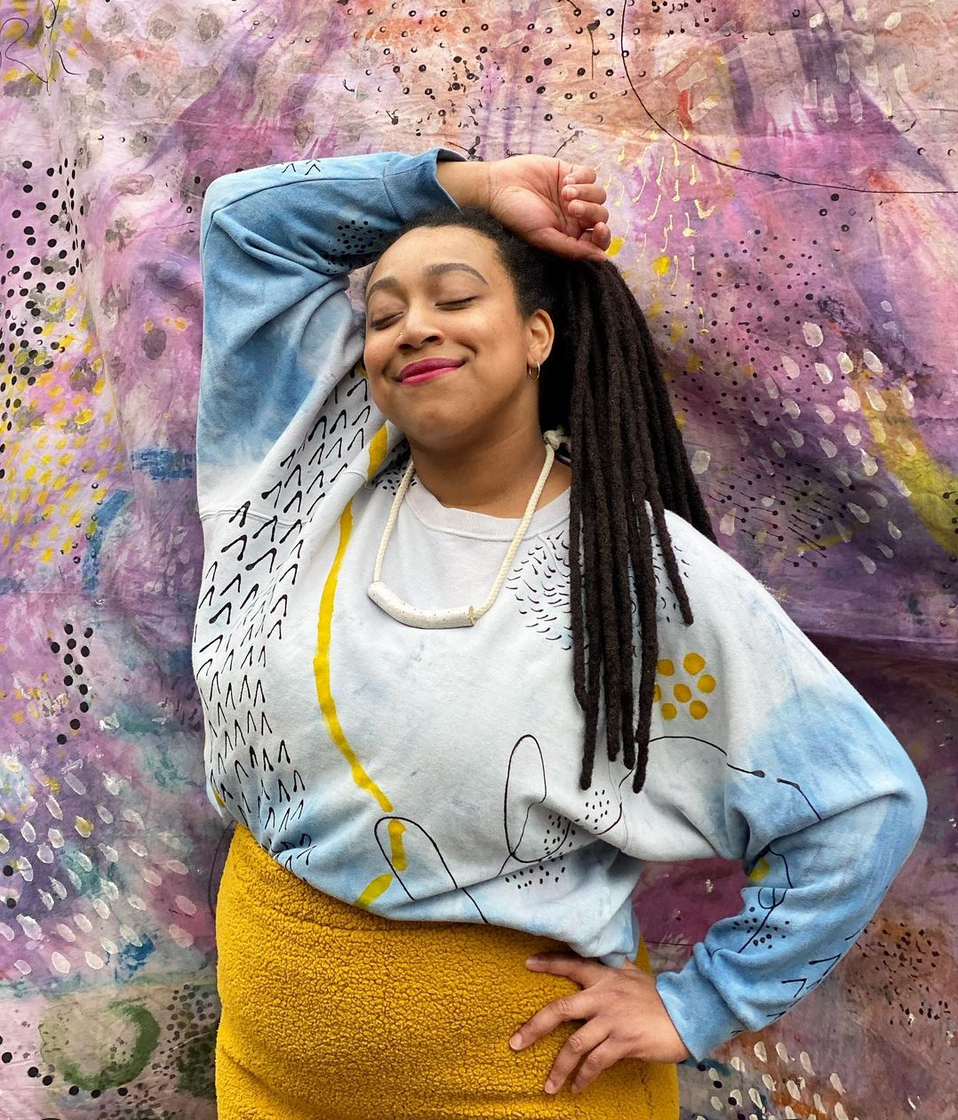
Avery Williamson is doing beautiful things by combining painting and fabric. I’m so excited to cut into some of this goodnes! I’m planning to make a robe. UPDATE: here it is.
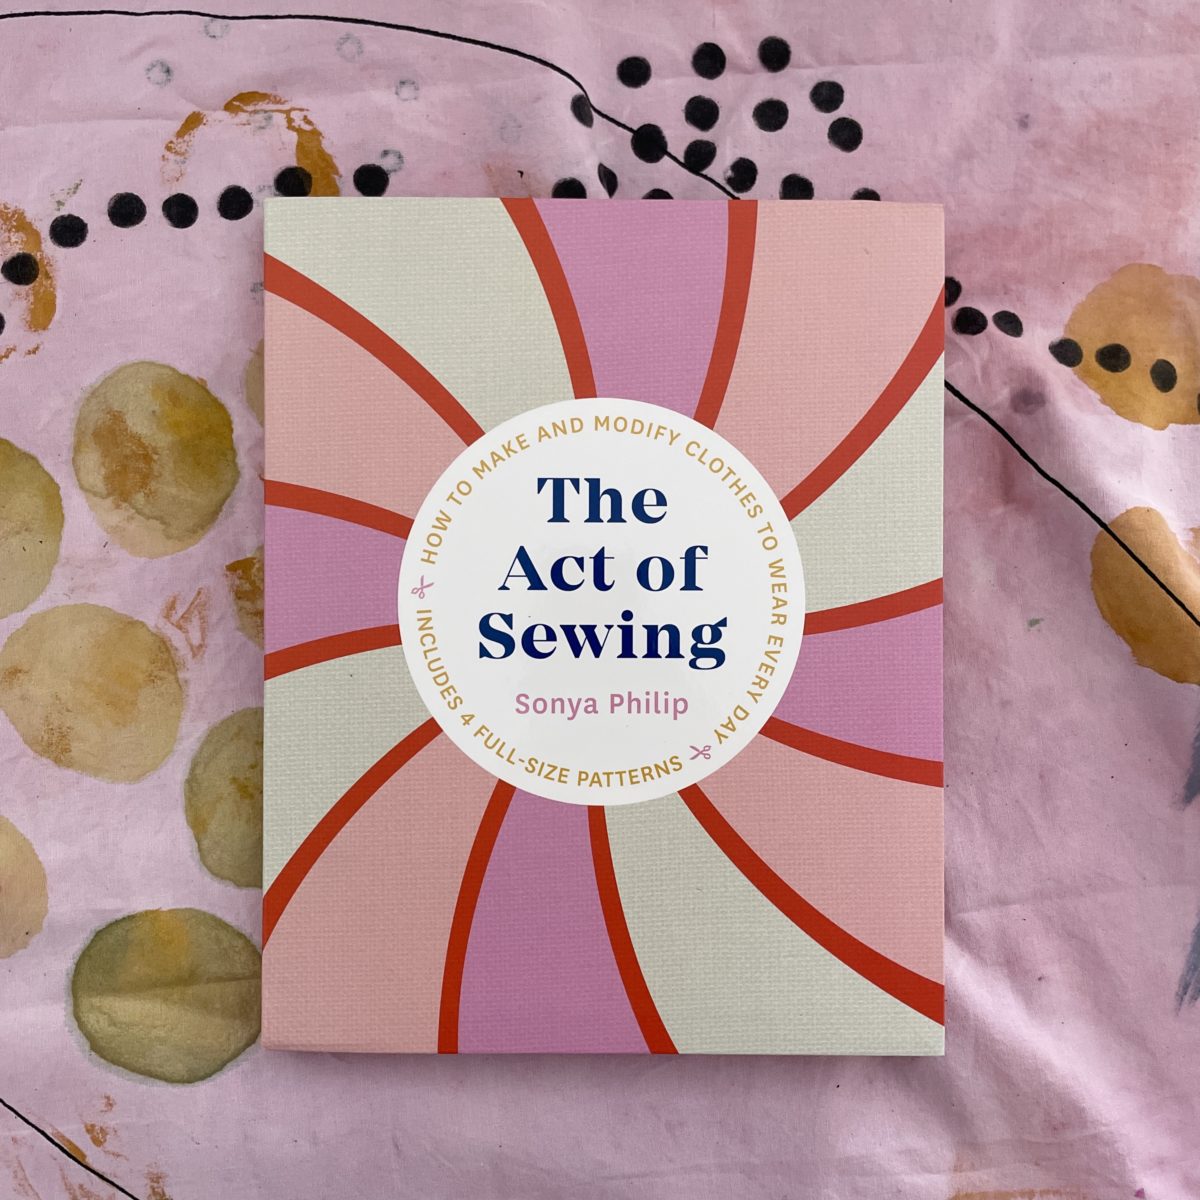
Sonya Philip wrote an amazing book! Sonya was one of the first independent pattern designers I tried and is the reason I had any successes sewing early on. Here’s my advanced copy on top of Avery’s fabric.
Zak Foster has been doing a whole bunch of collabs and chats lately on his Instagram, which is where I learned about Heidi Parkes and her 30-Day Hand Yoga series. I’m going to give it a try!
Made some more progress on my leftovers quilt, though I finally calculated how many blocks I’d actually need for this layout and 100 doesn’t work! Whoops! It’ll either be 98, or more. I’ll see how I feel when I get there.
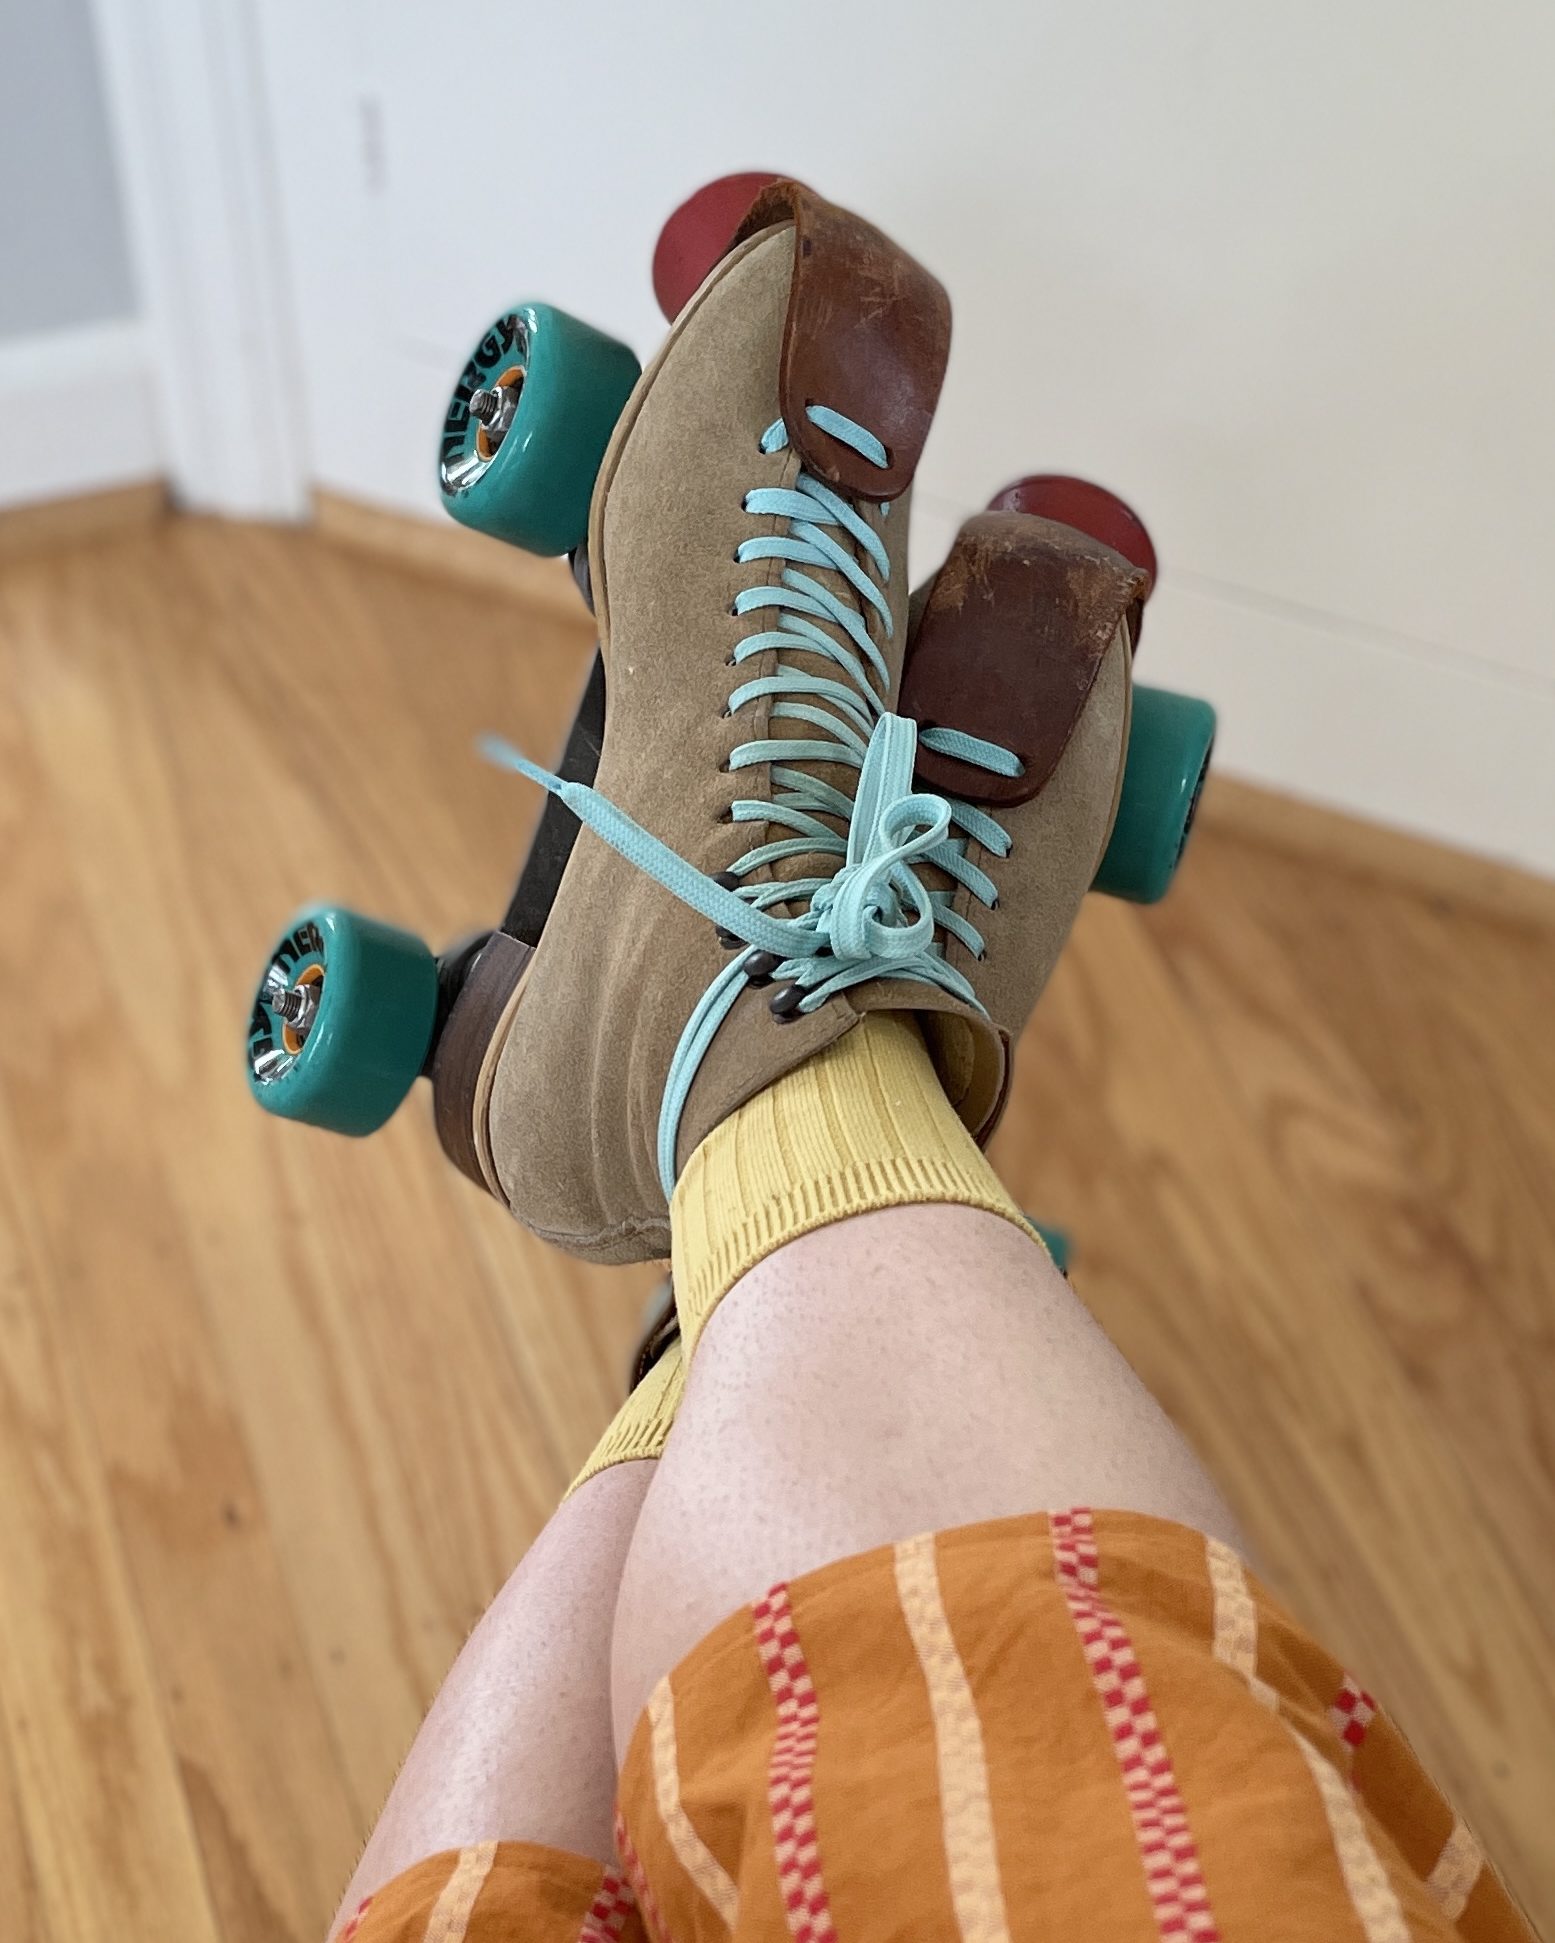
Skating! My skate boots are falling apart on the inside, but I’ve upgraded to new wheels, bearings and laces, discovered the plates didn’t have pivot cups (they’ve since been replaced), and sorta figured out how loose I want my trucks. I’ve been skating more regularly and have unlocked a few moves, which include a very clunky downtown, a rigid snake walk, and some heel-toe spins and manuals. I’m having so much fun!