One full week of summer break has passed and I’ve been trying to power through as much of my Patternmaking & Design class as I can. It’s a self-paced program and my pace for the last year has been not much faster than a snail. I’m picking up speed and the program finally feels like I can draft independently without constantly relying on my wonderful teacher. Maybe I’m at a turtle’s pace now?
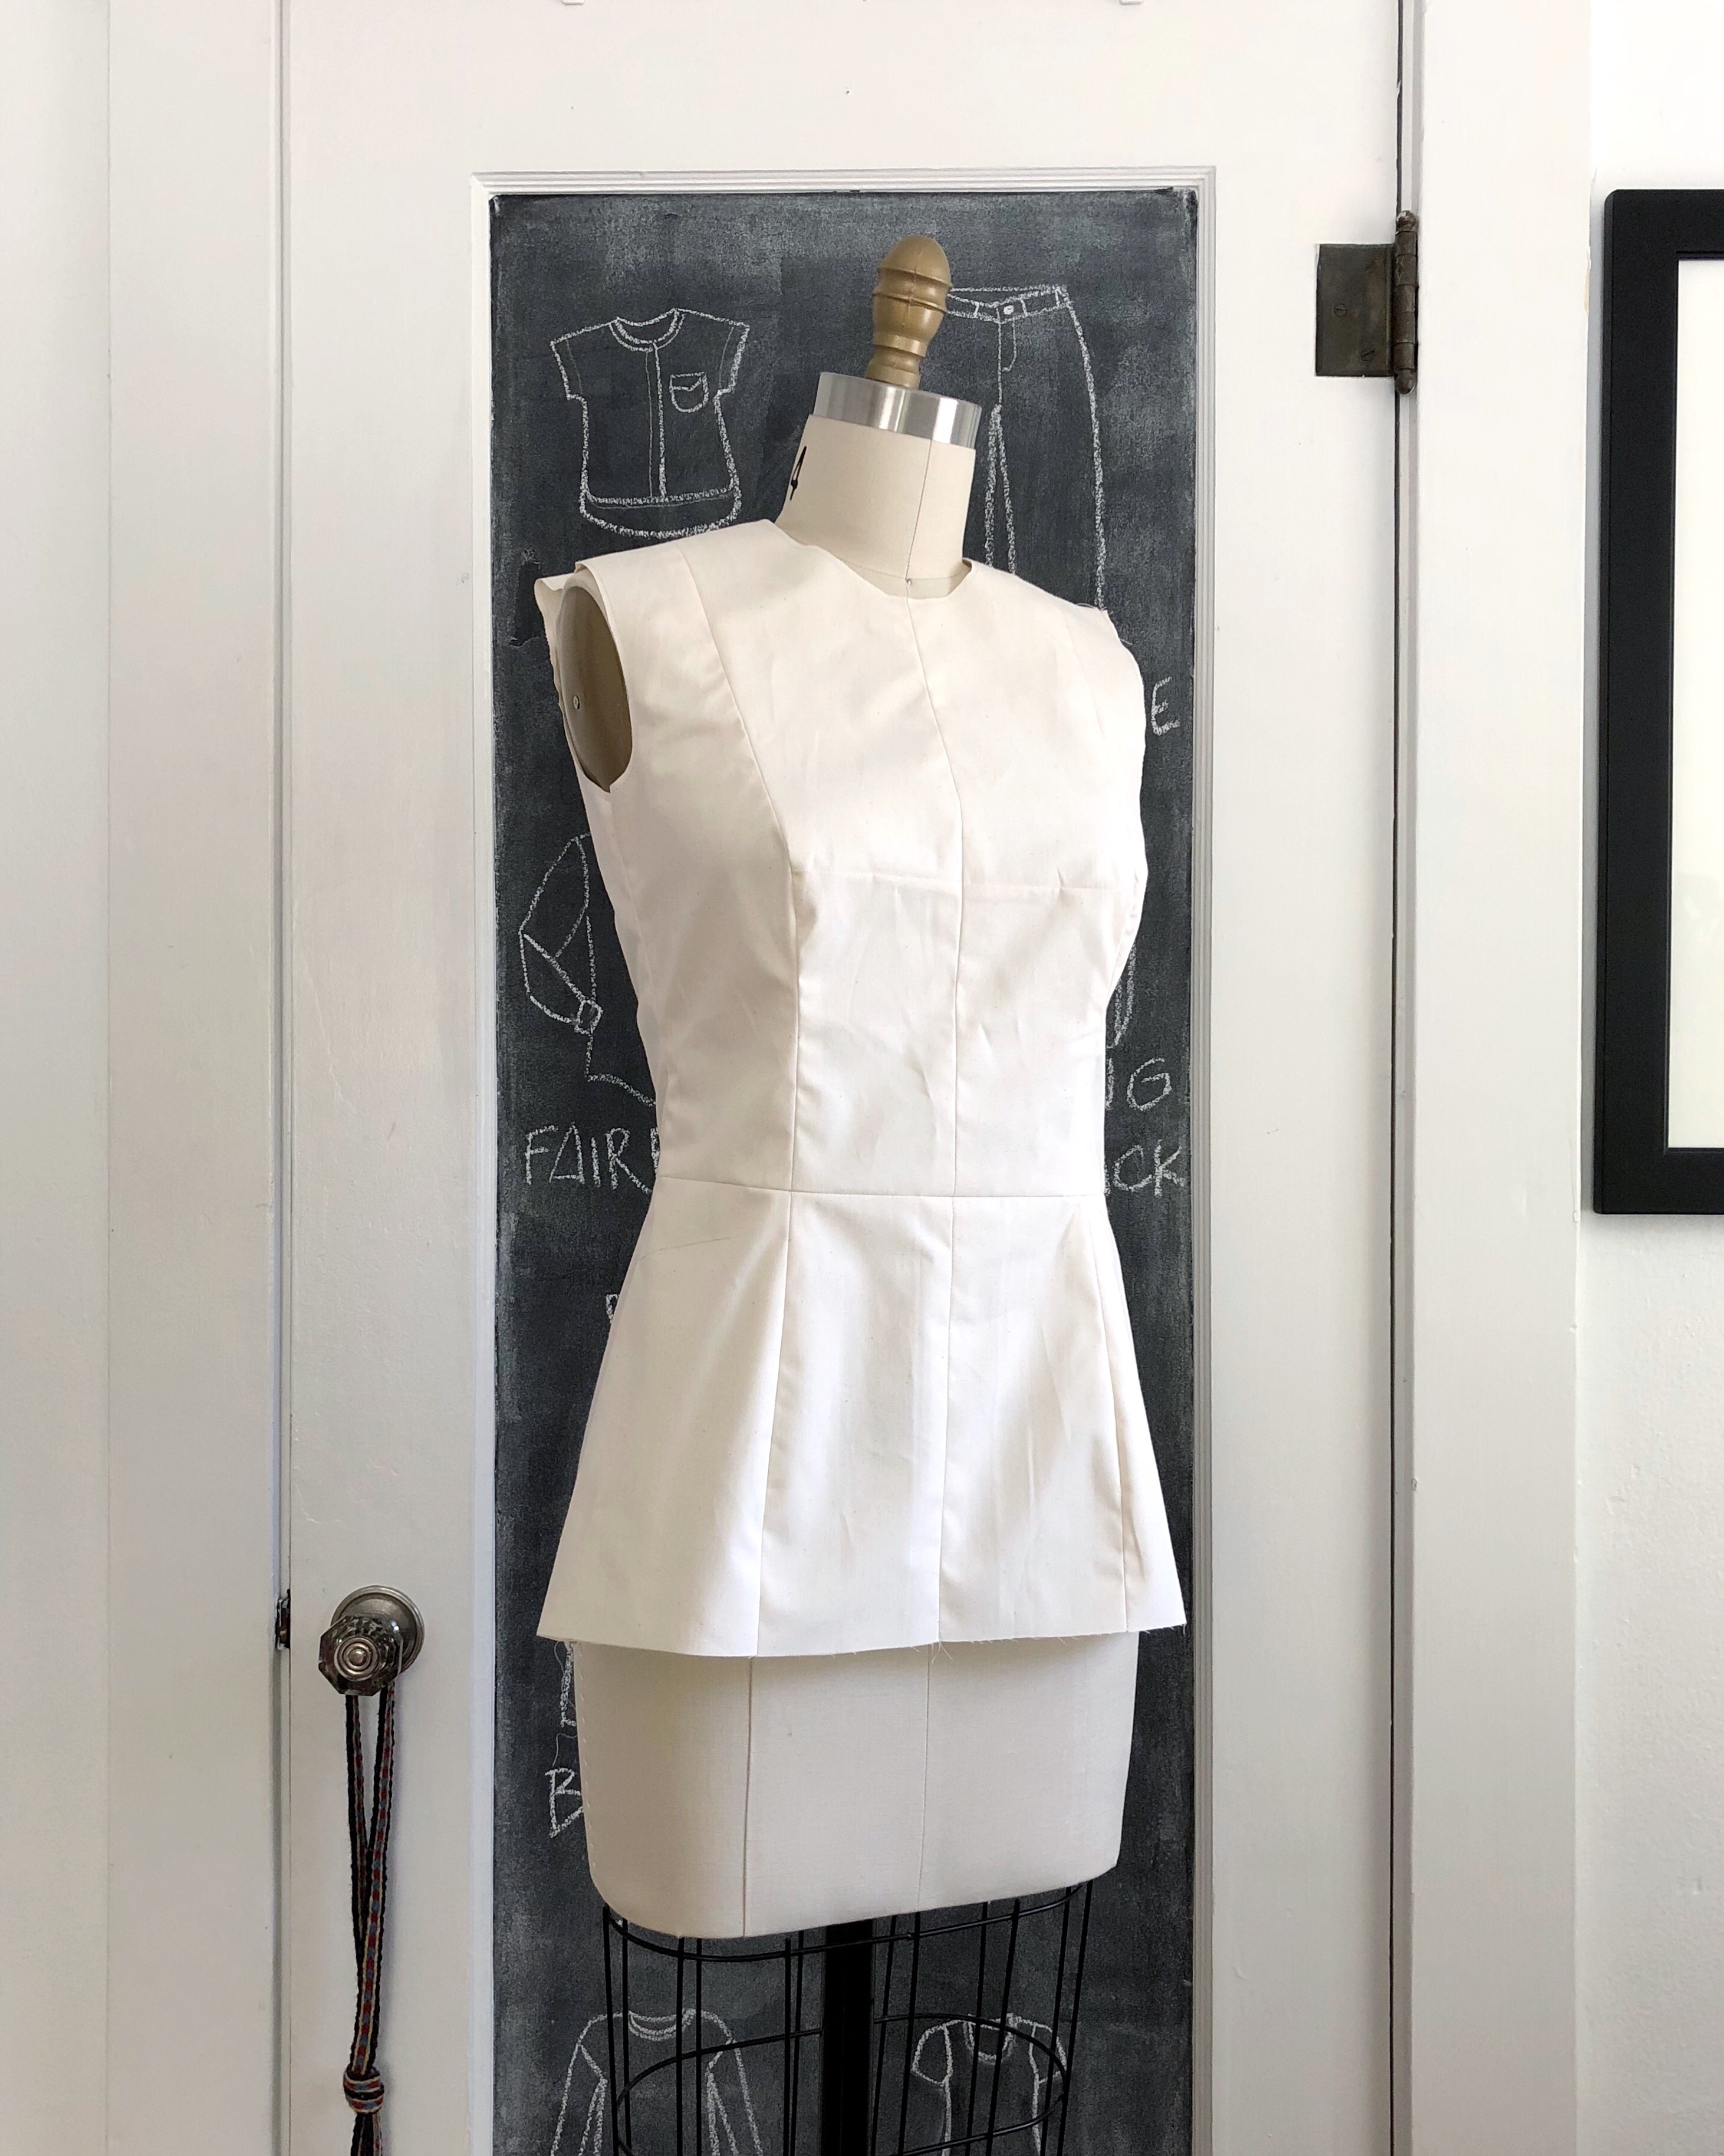
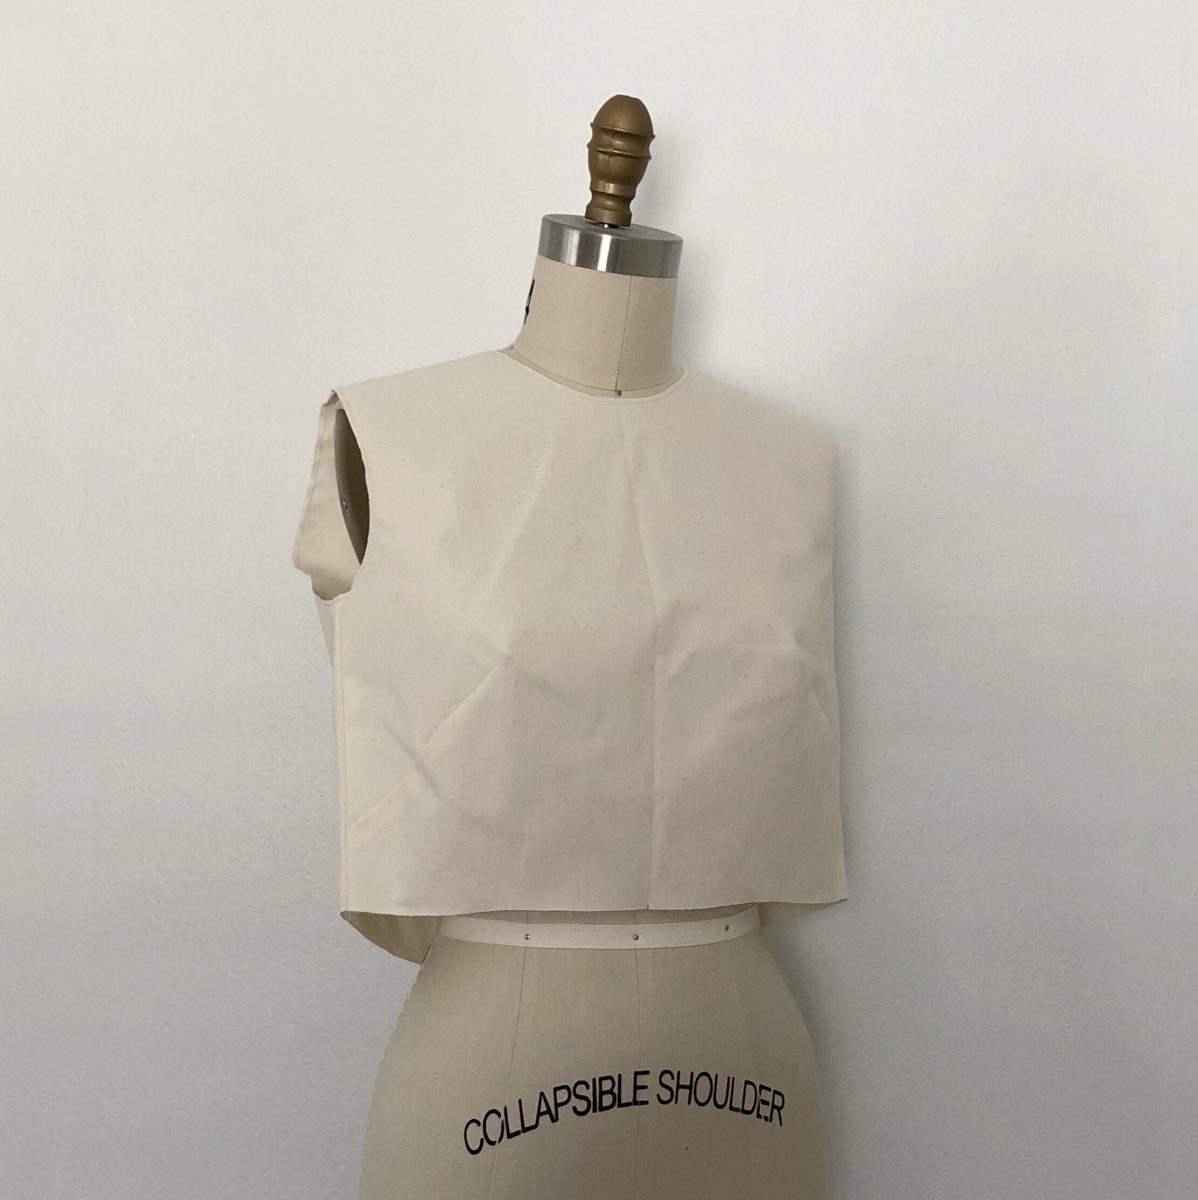
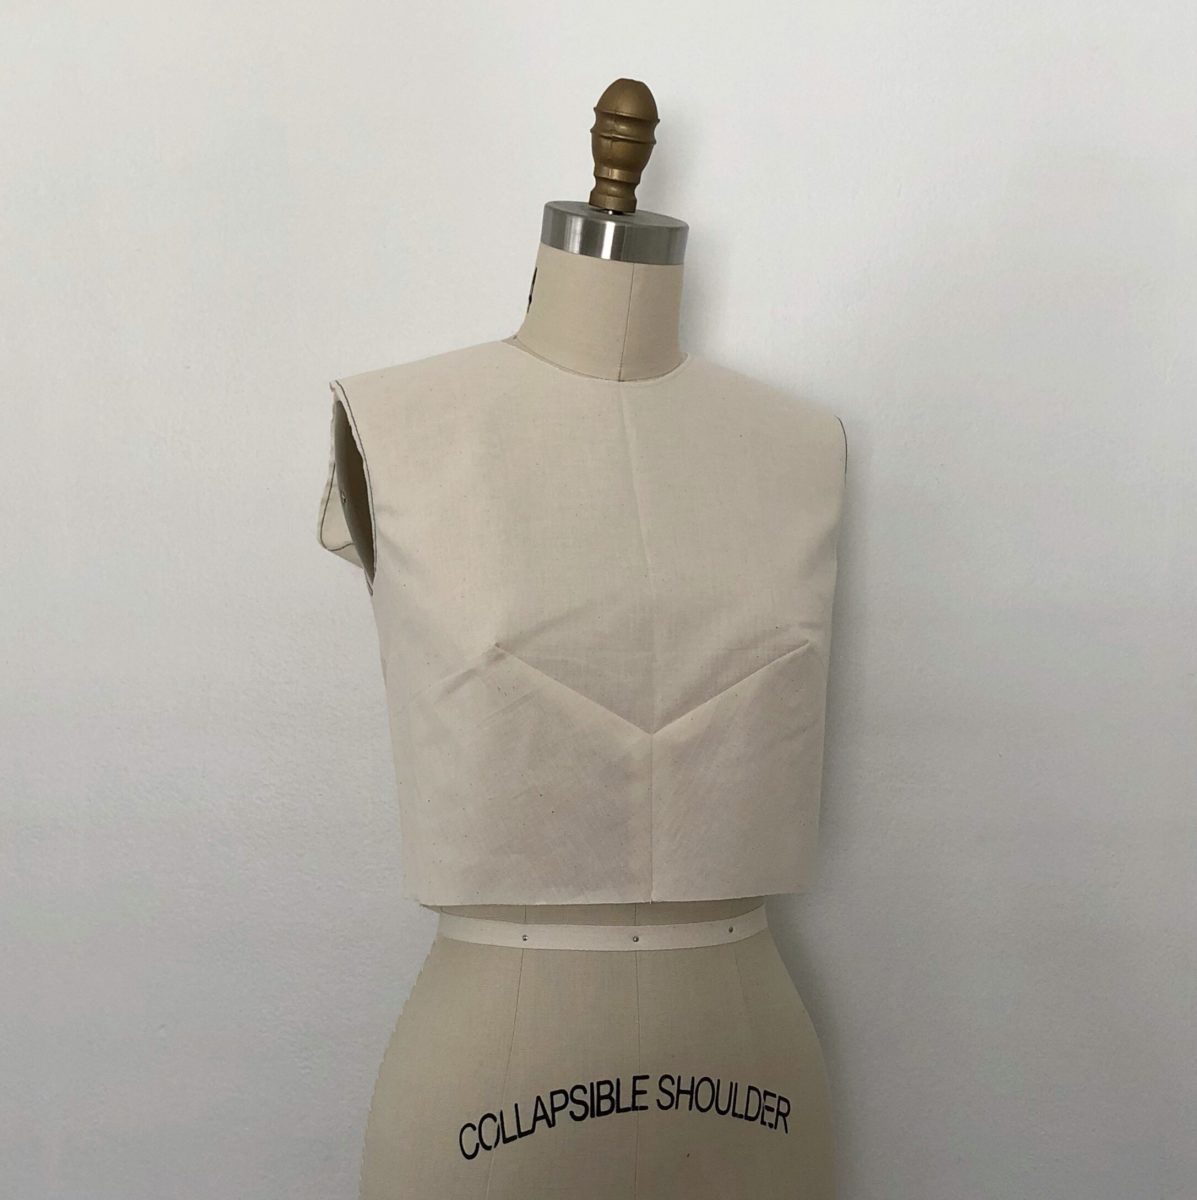
Above is my moulage or “mold” of my measurements which, once it had a perfect fit, I turned into my bodice sloper. The next section of the program is Dart Manipulation. I was able to draft 12 different exercises with 4 different backs in one week and then sewed all of them the following week. I’m pretty excited that I got through a section with the suggested timeline of 4-8 weeks in 2! Ok, I’m not actually done yet. I have to design, draft, and sew two designs of my own, but I’m feeling pretty confident I can do so this week.
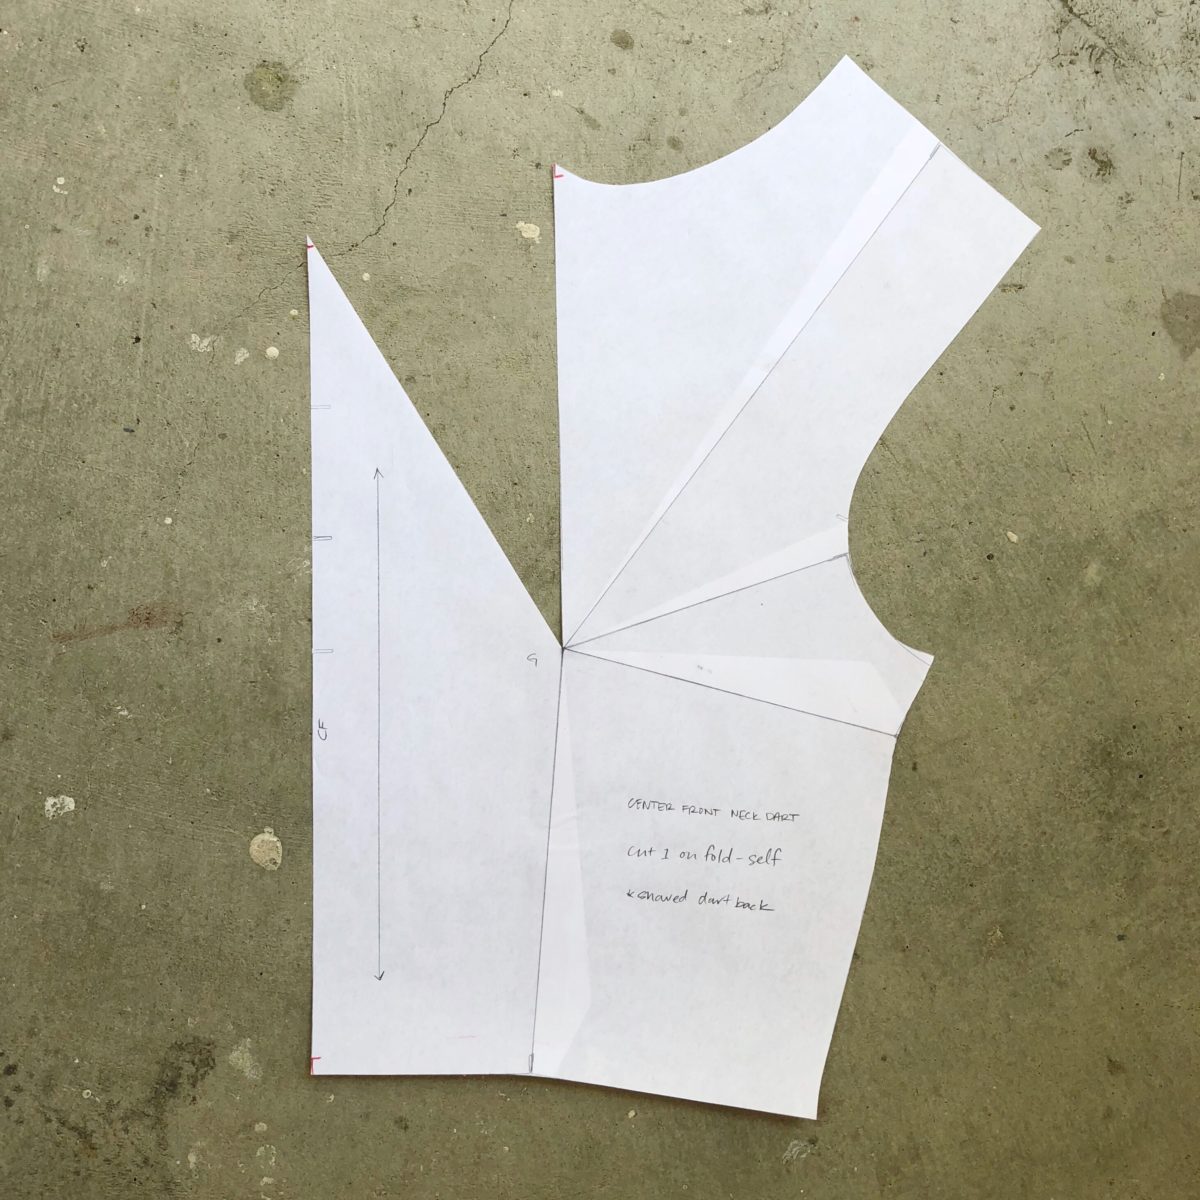
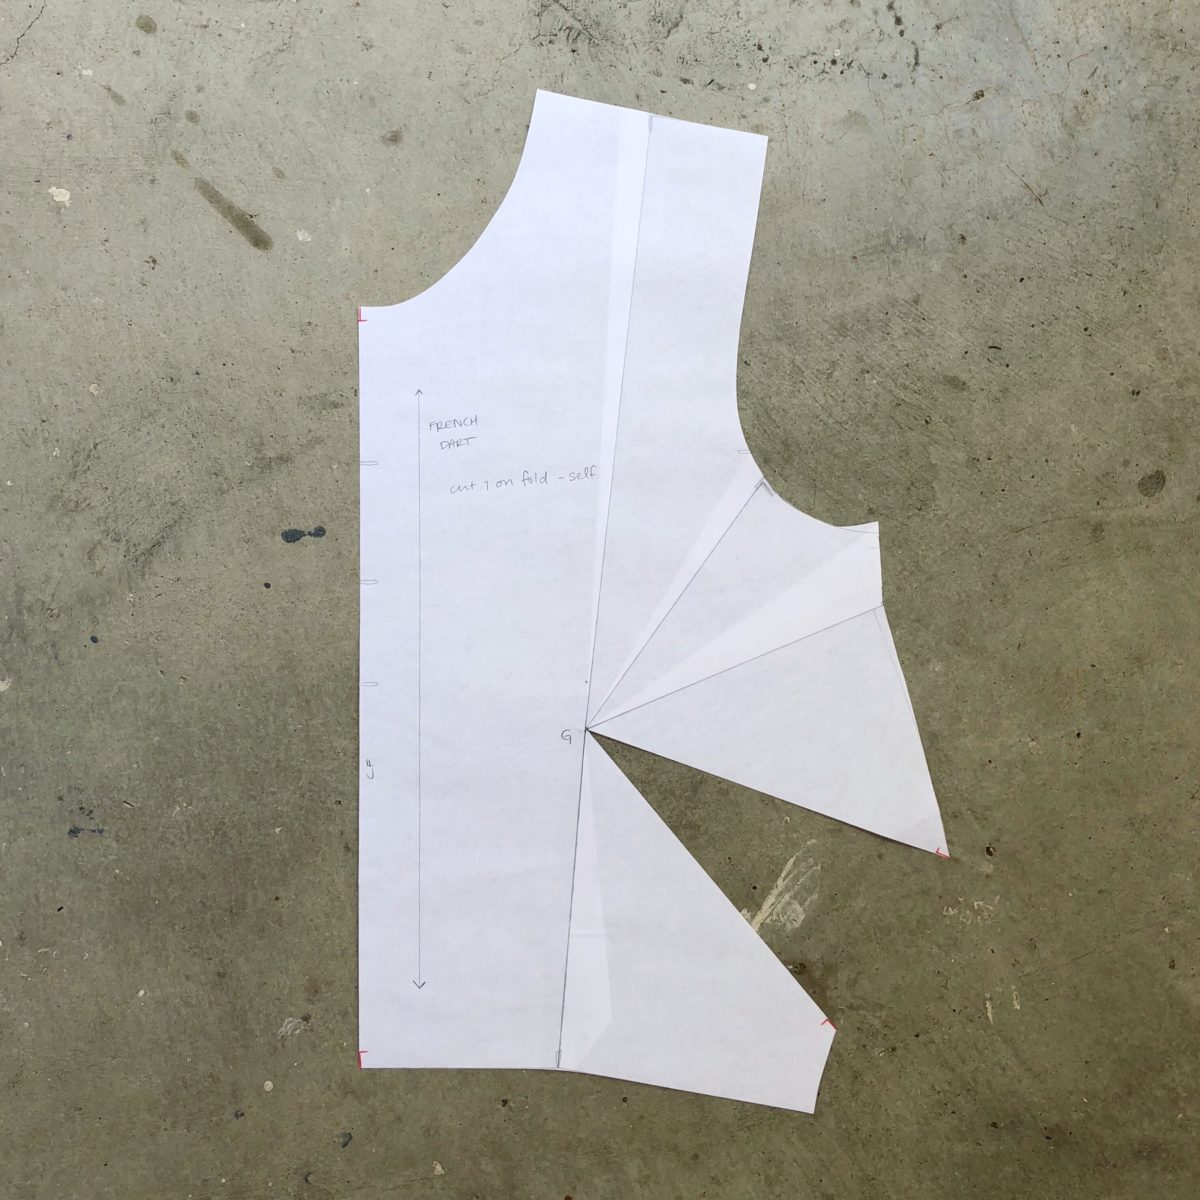
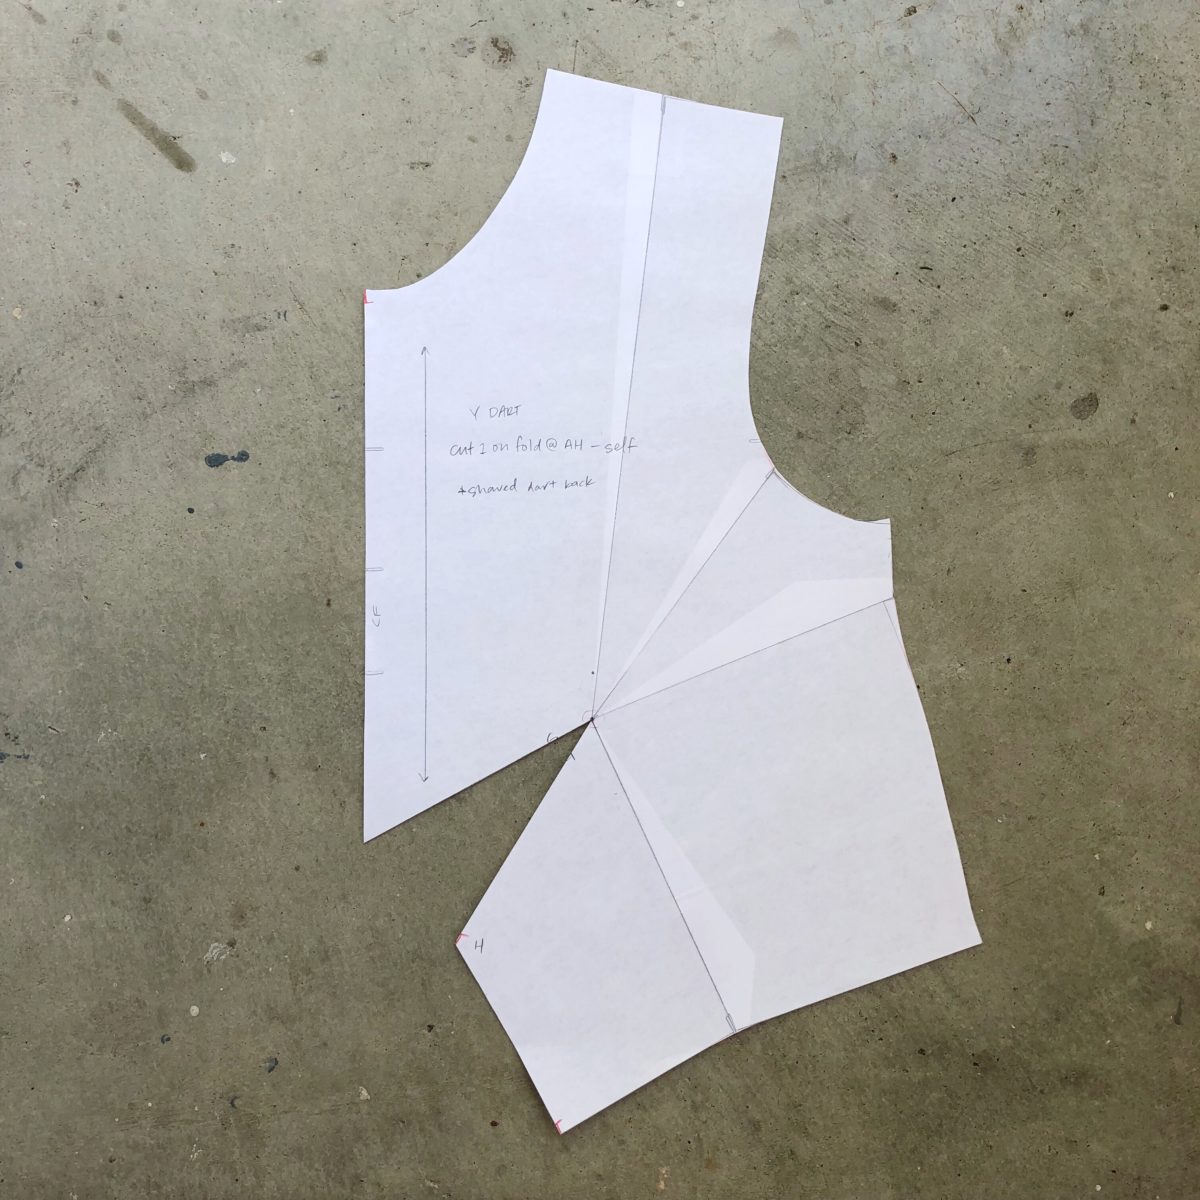
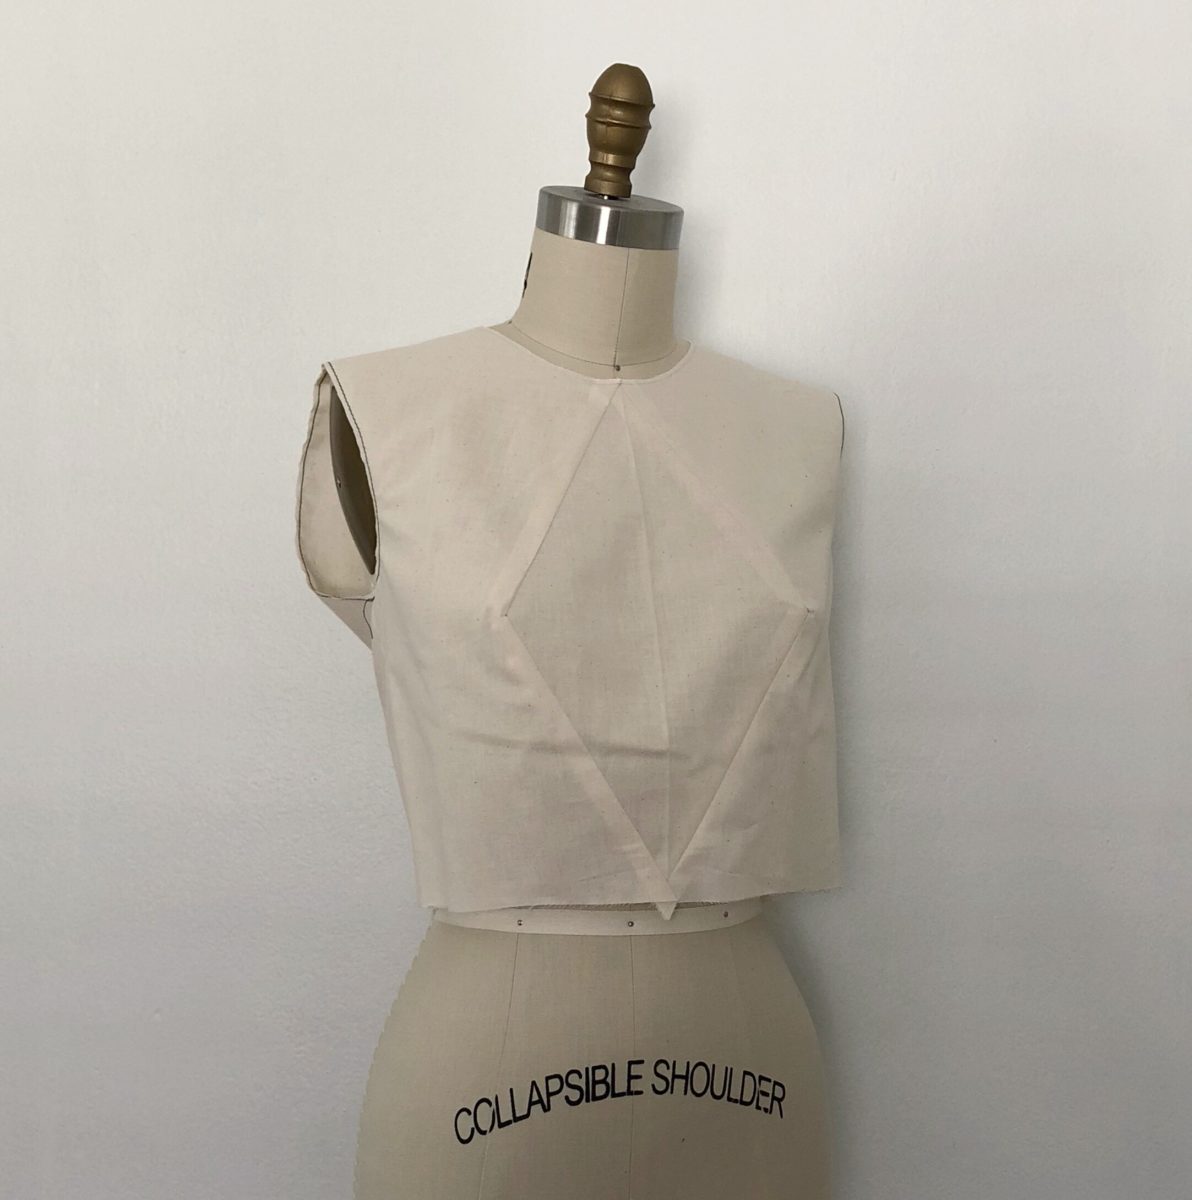
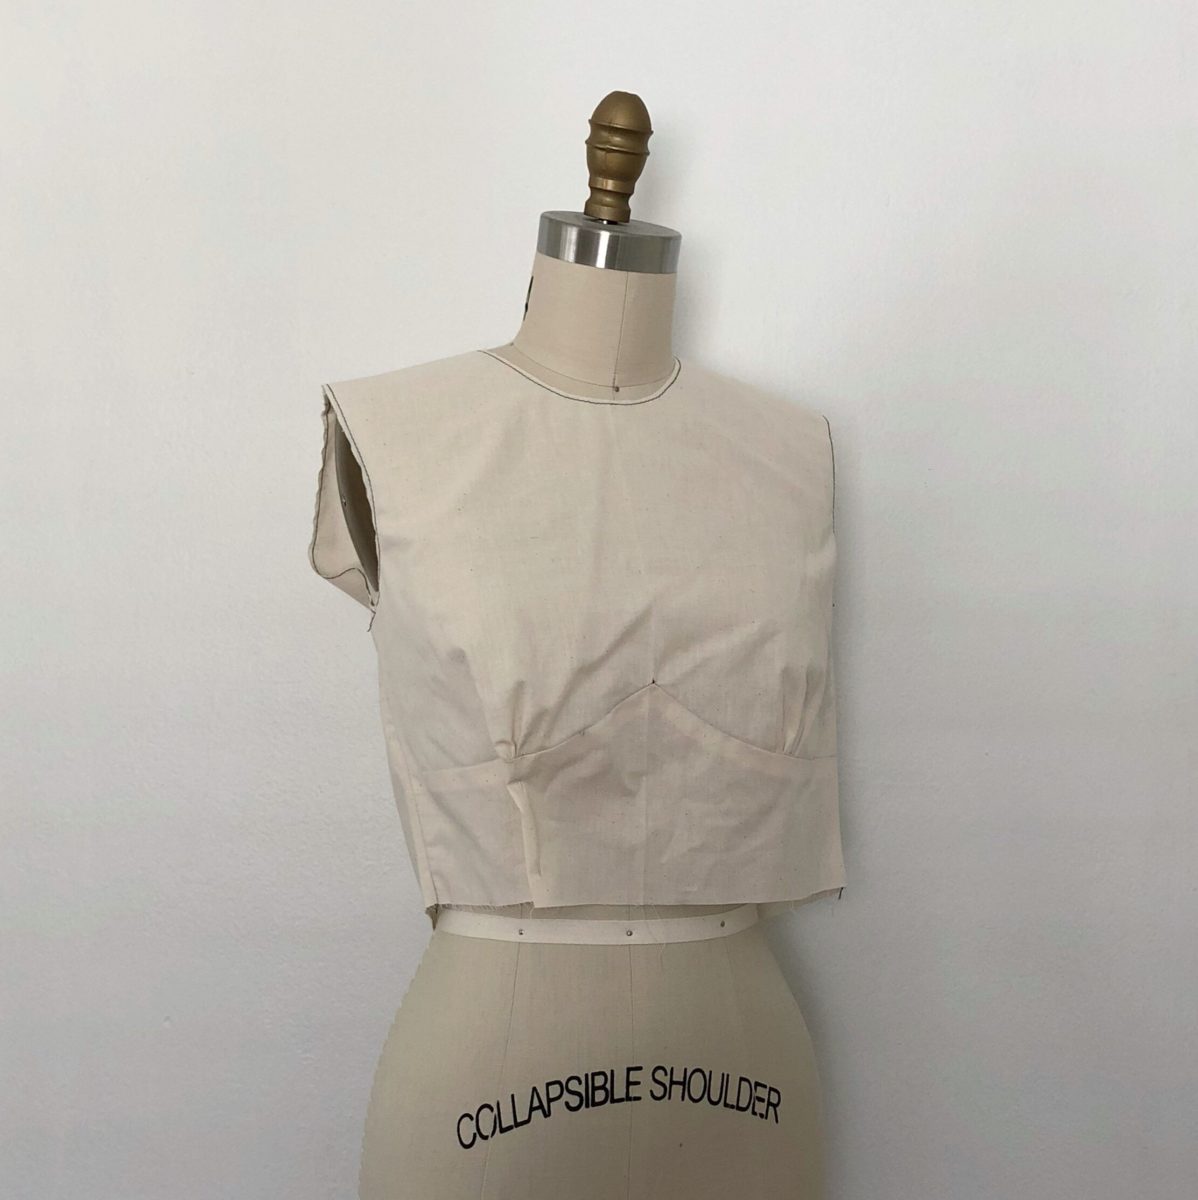
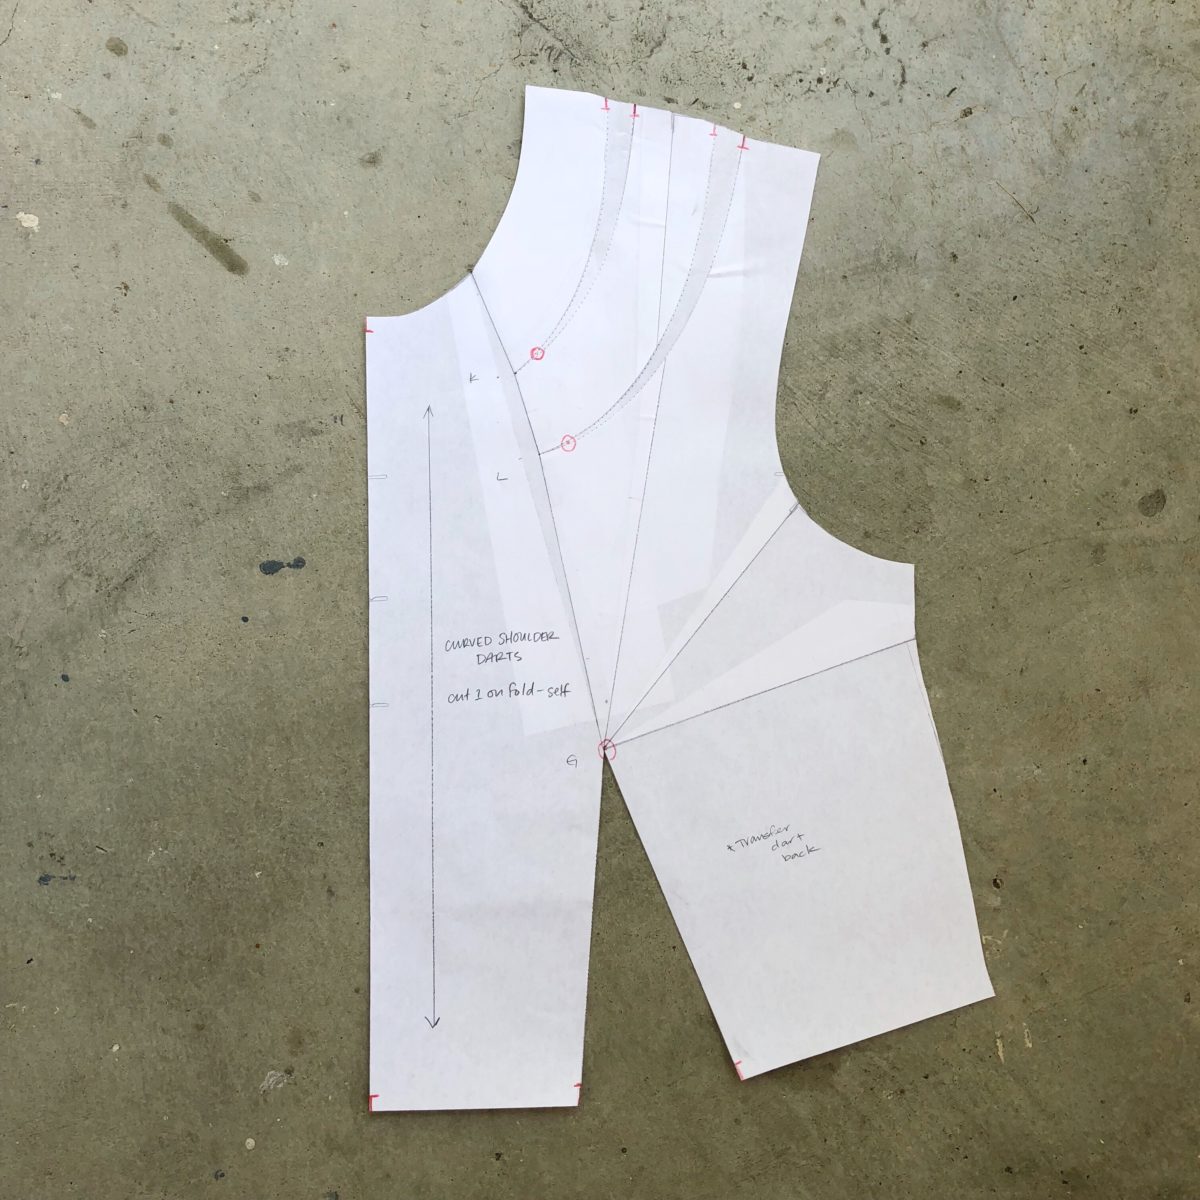
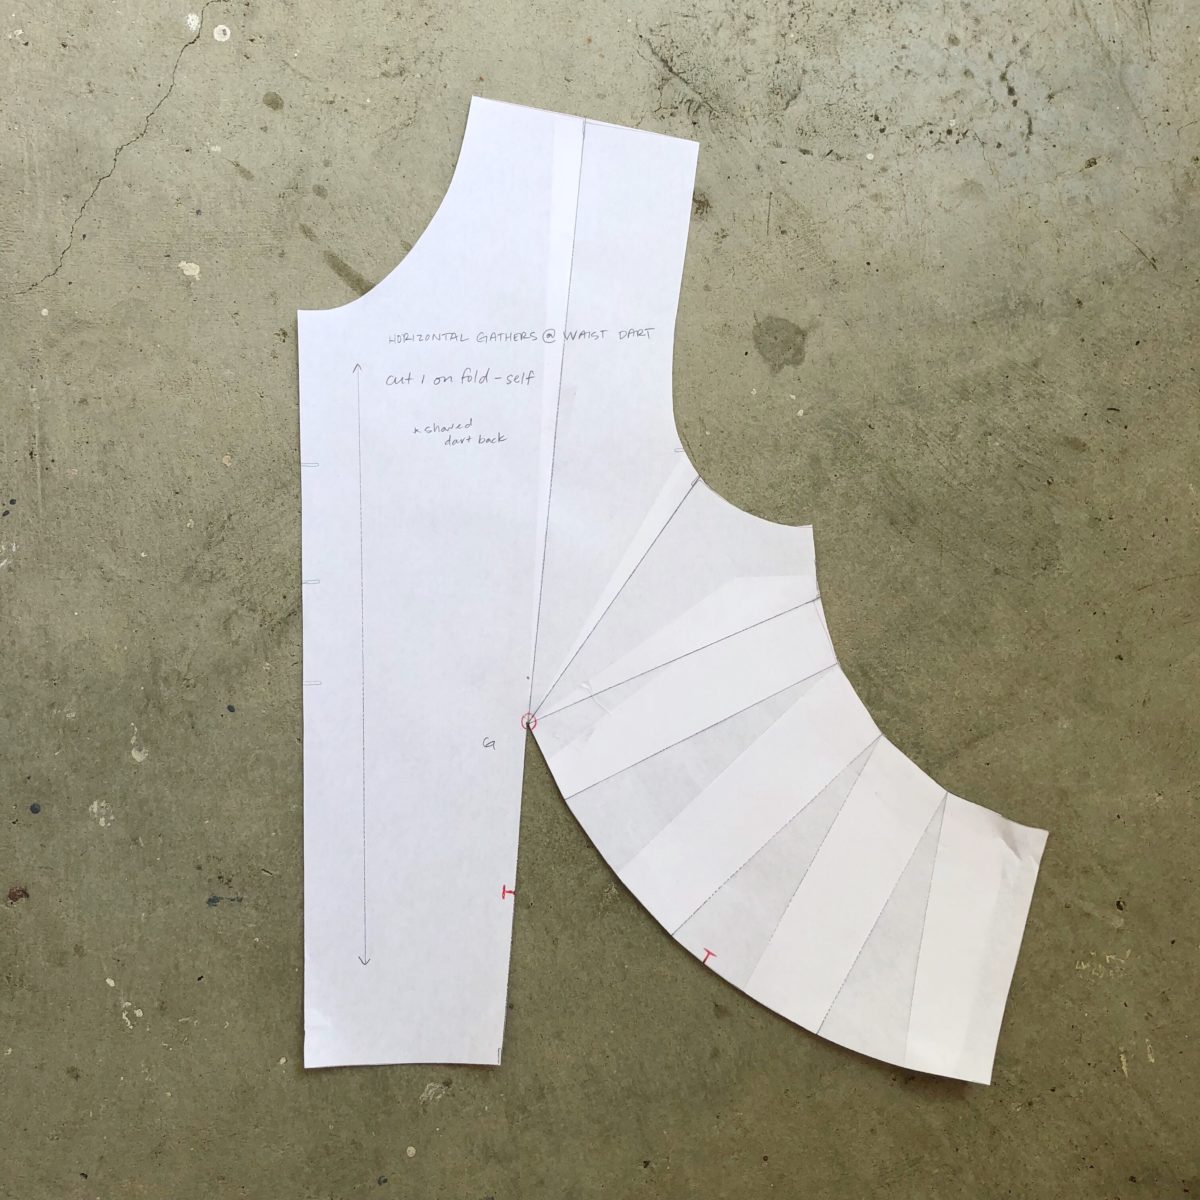
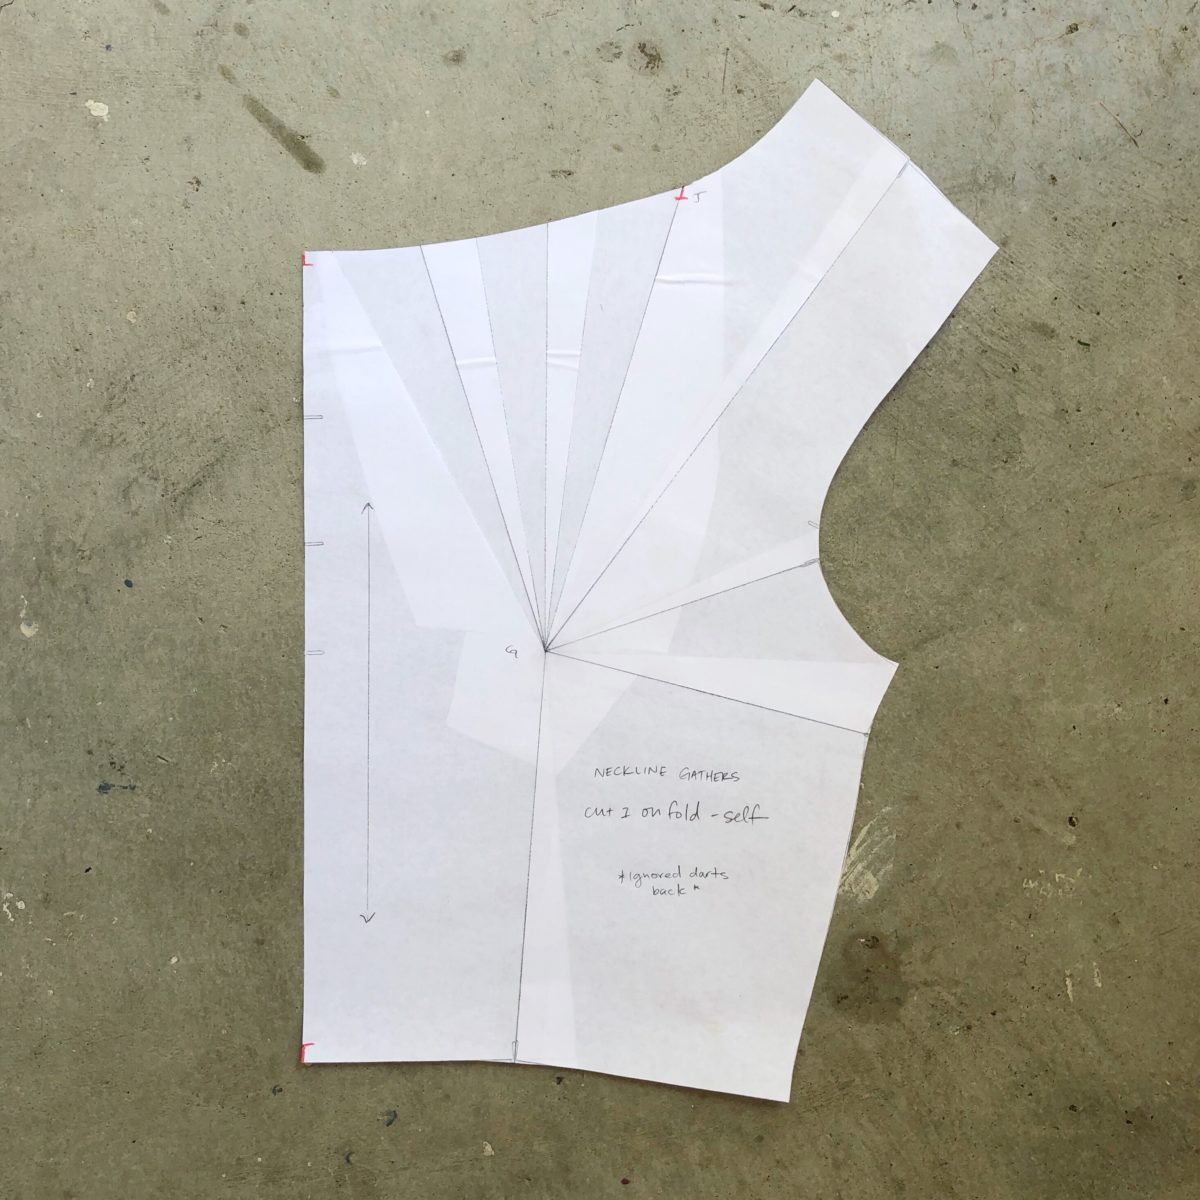
The front sloper has 4 darts that can be manipulated into different designs, the back has two darts. All 12 exercises used this sloper and I’m quite impressed with the variety of styles achieved.
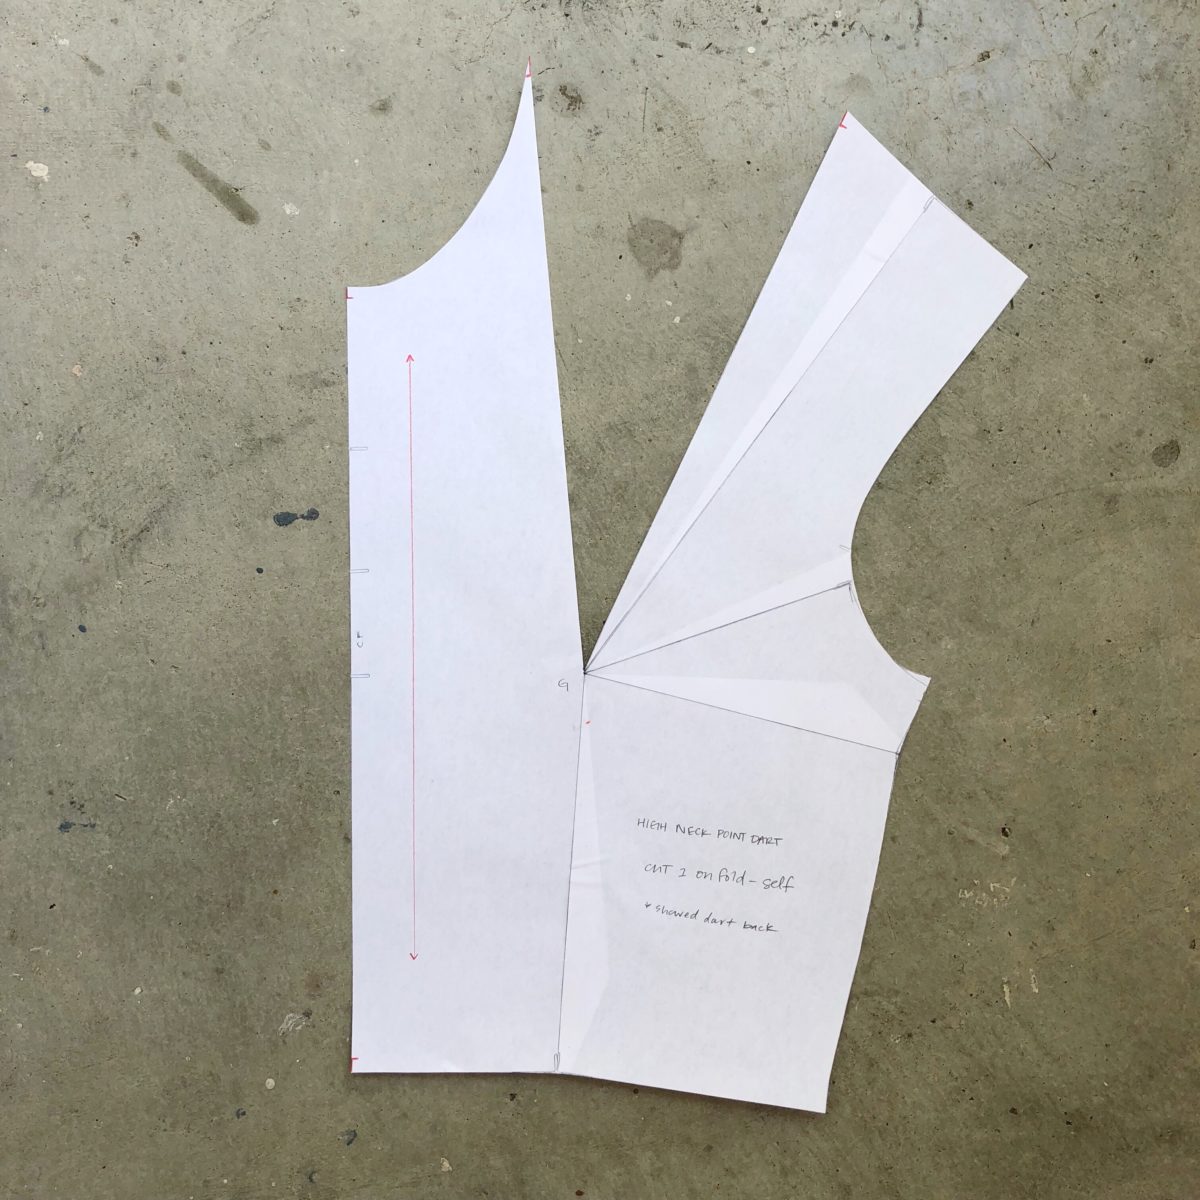
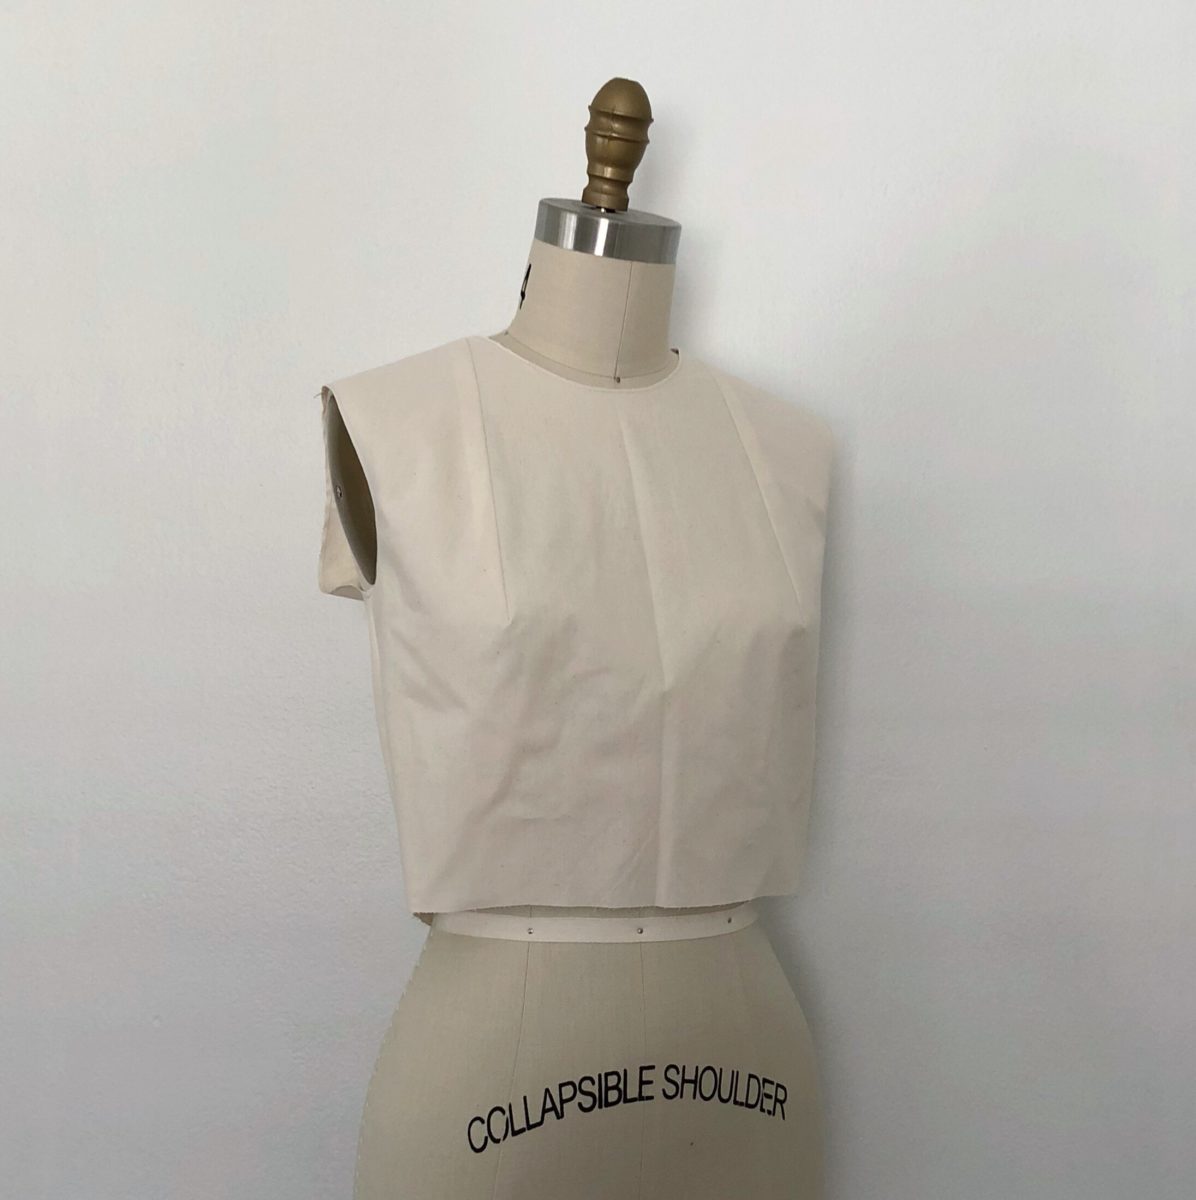
High Neck Point Dart – Slash a line from the high neck point to the high bust point and then fold all other darts into it.
Center Front Neck Dart – Slash a line to the high bust point and fold all other darts into it.
French Dart – Slash a seamline to the low bust point from a position lower than the existing side dart. Fold all other darts into it.
Armhole Dart – Slash a line to the high bust point from any point along the armhole. Fold all other darts into it.
Y Dart – Draw a seamline starting at 3″ – 5″ up along center front to the low bust point. Fold all other darts into it.
Diamond – Draw a line from the center front neck and center front waist to the high bust point. Fold all other darts out.
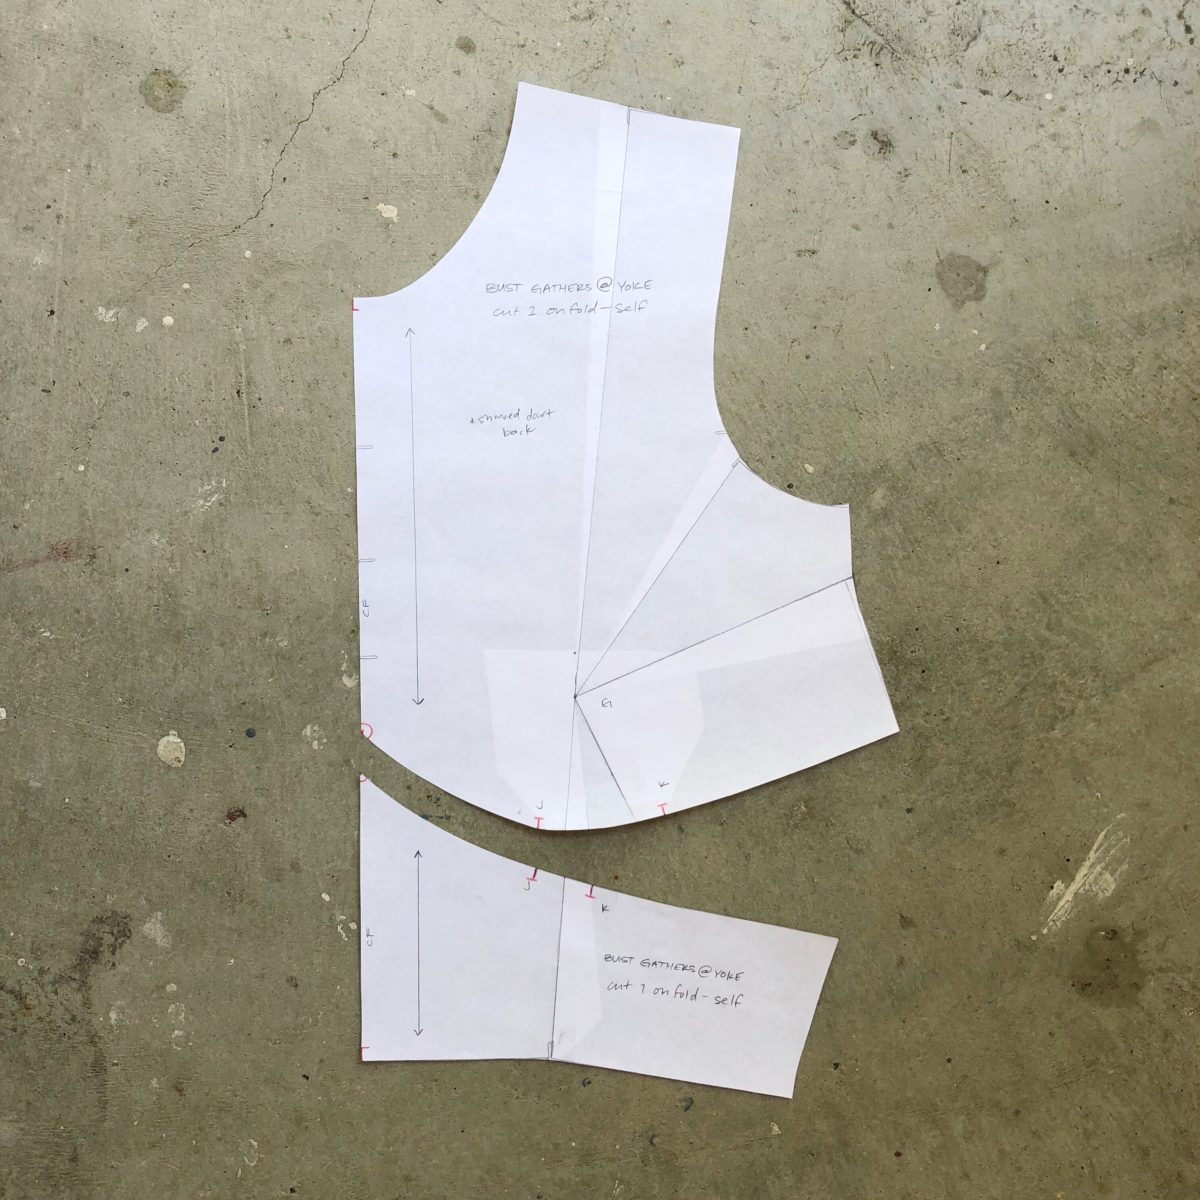
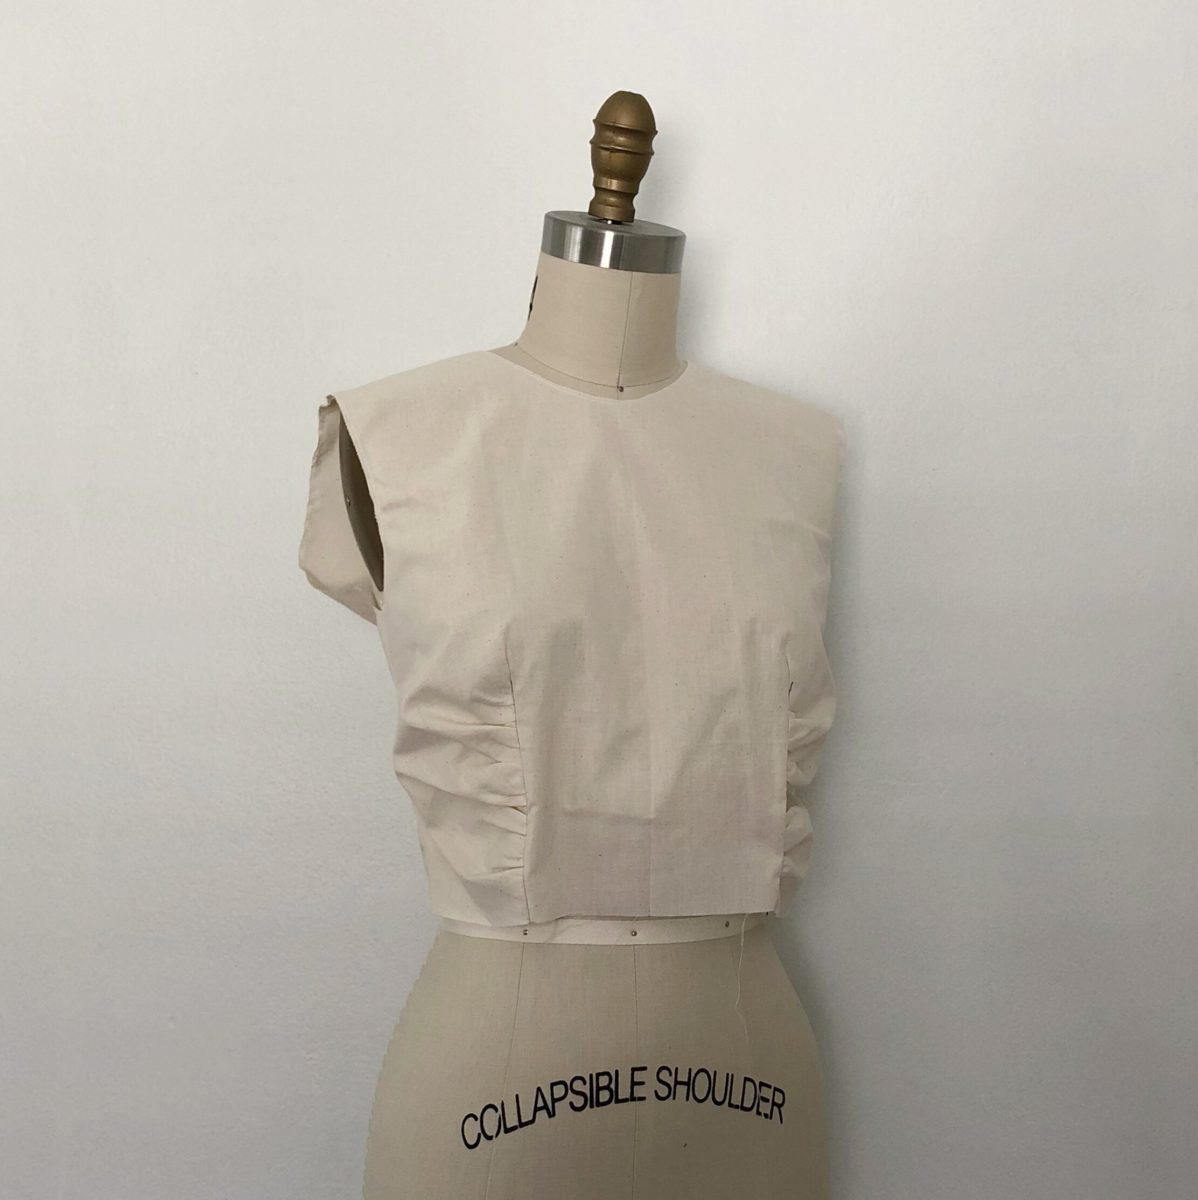
Bust Gathers with Yoke – In my fittings I learned that a lot of the exercises that used the low bust point need some tweaks. You can see on the muslin that on the bottom yoke I pinned out about an inch that would make this pattern more fitted. Gathers also tended to add more volume than anticipated.
Curved Shoulder Darts – Low bust point used.
Horizontal Gathers at Waist Dart – Low bust point used.
Neckline Gathers – High bust point used. Helpful to add finished neck length on to the pattern for gathers.
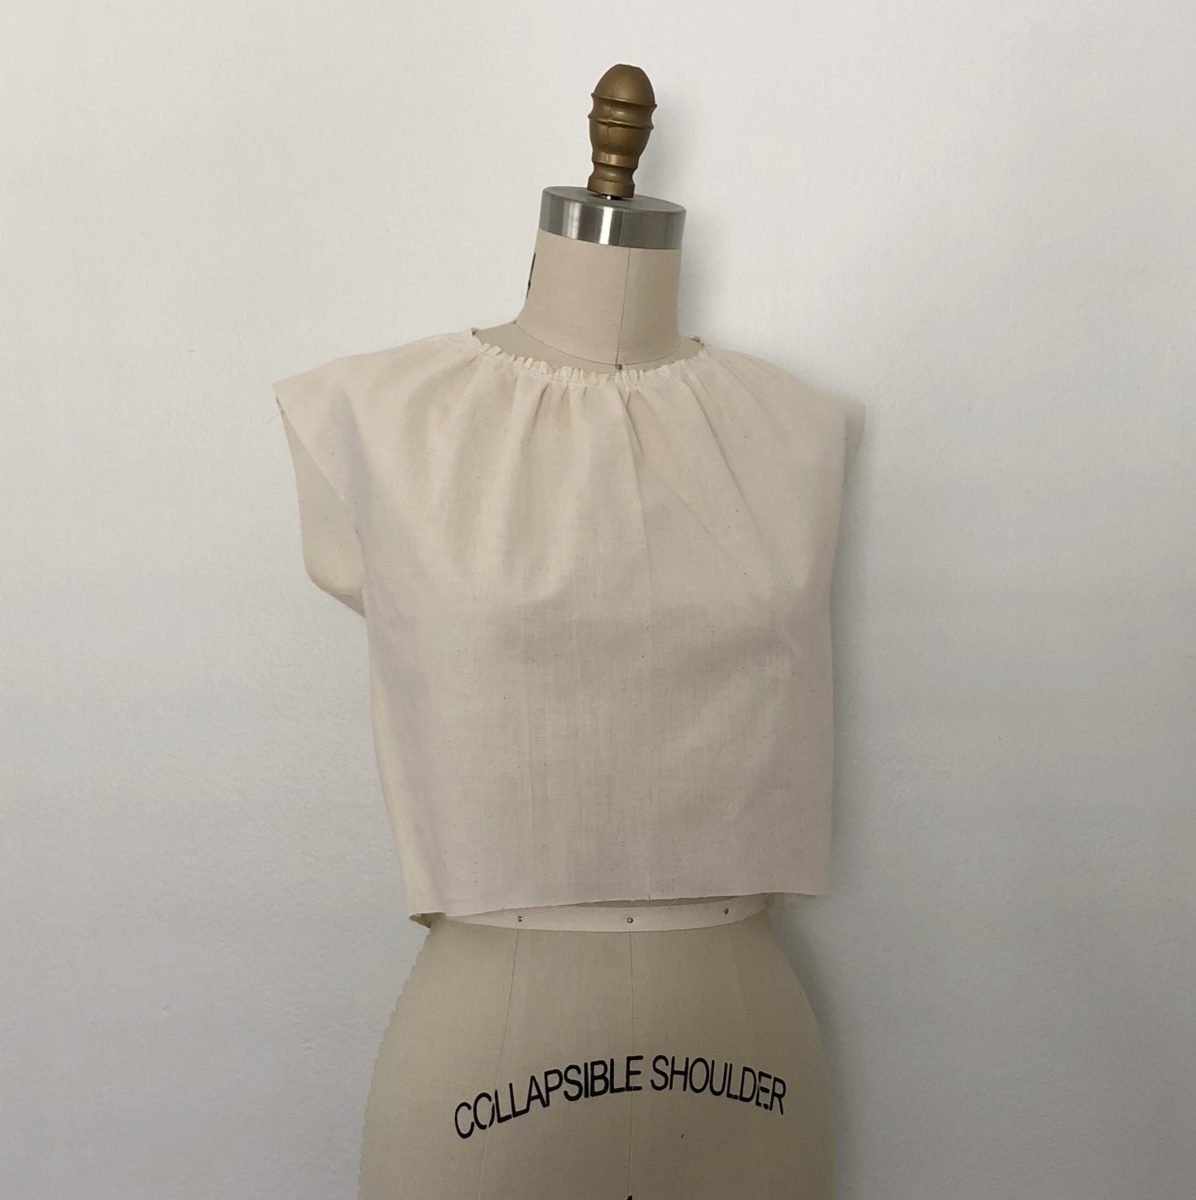
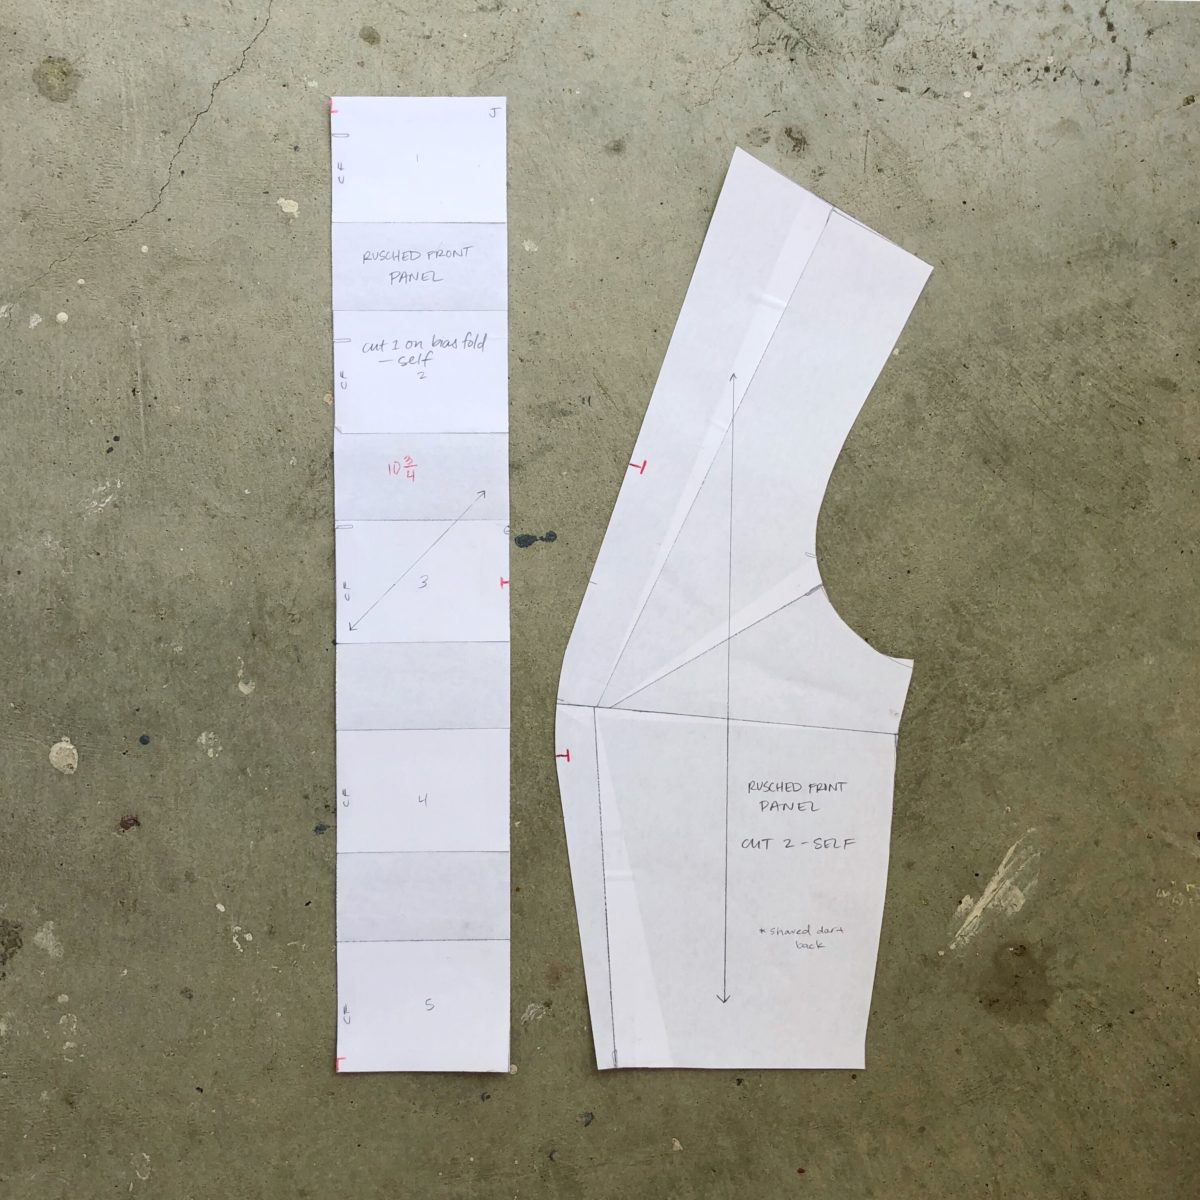
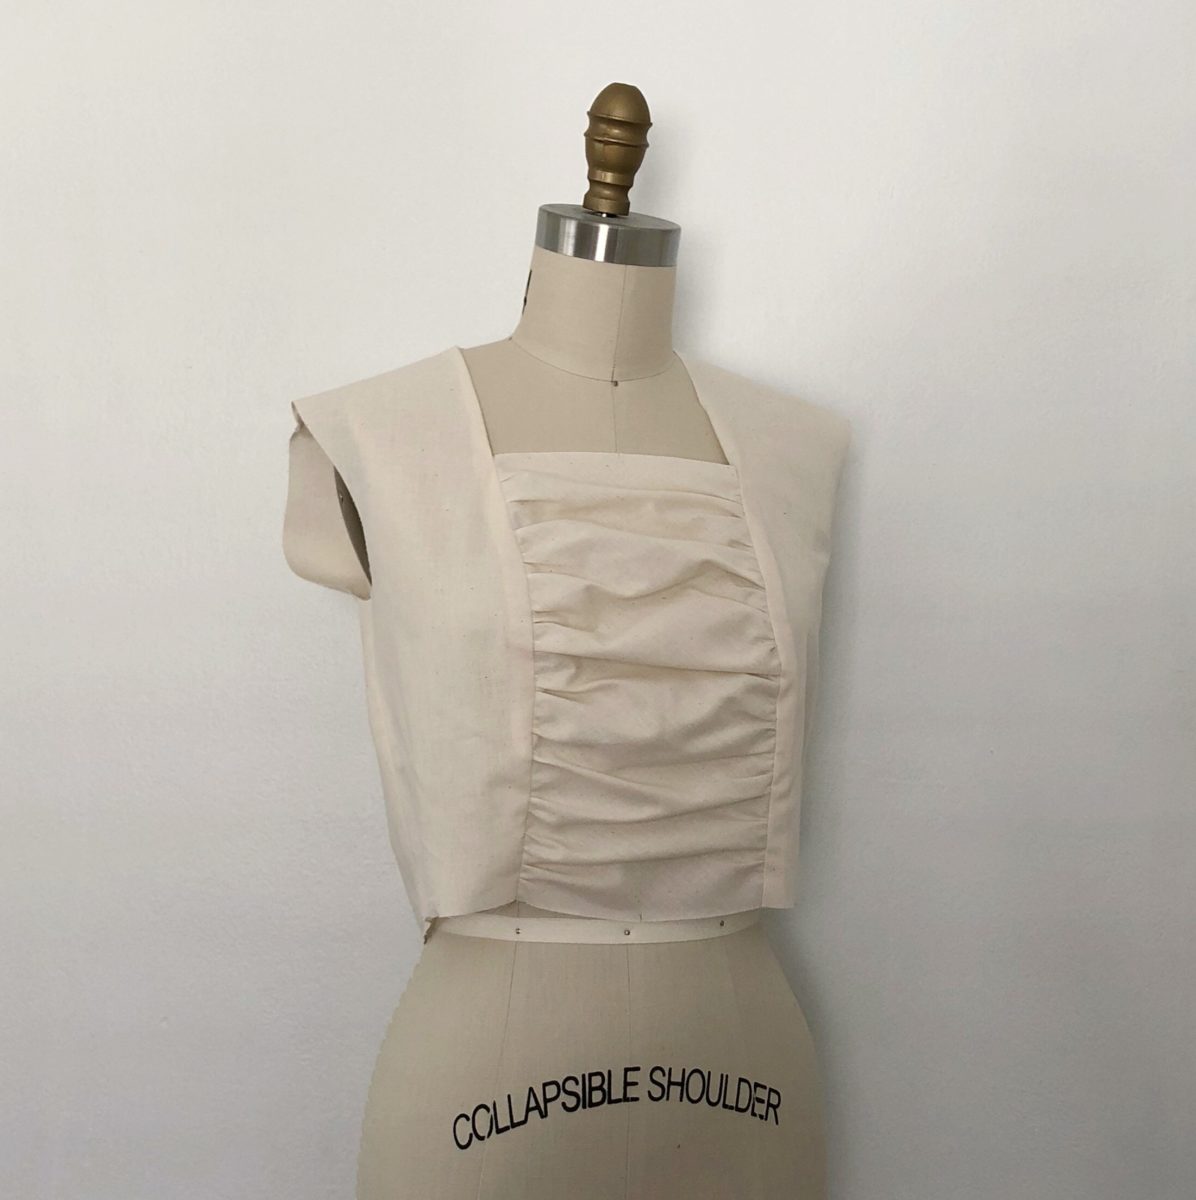
Rusched Front Panel – High bust point used, move toward center front until directly under the high next point.
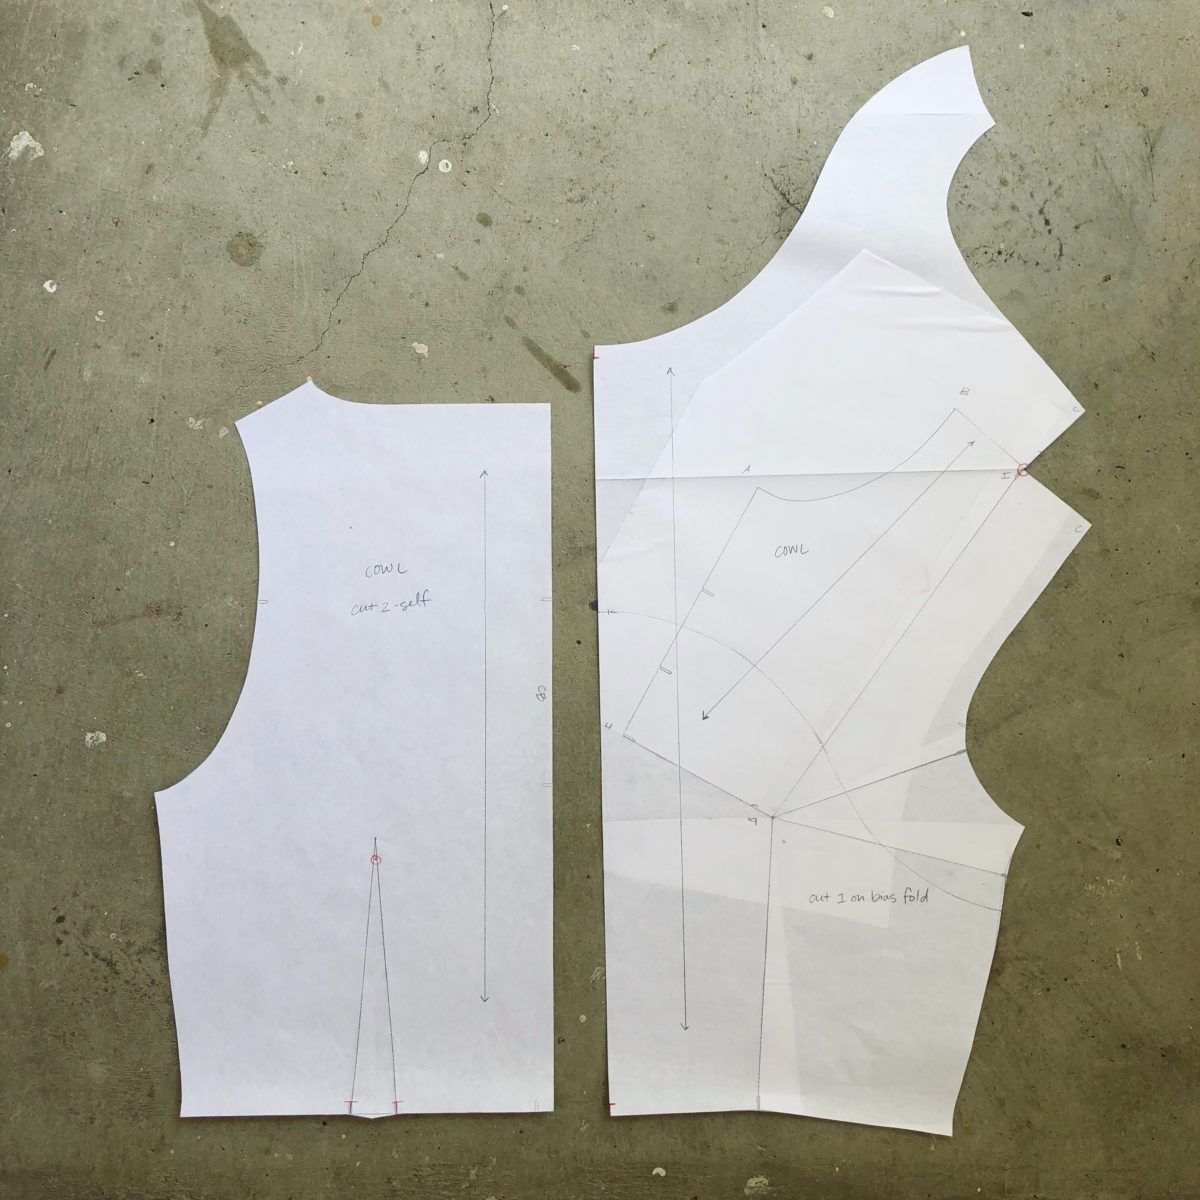
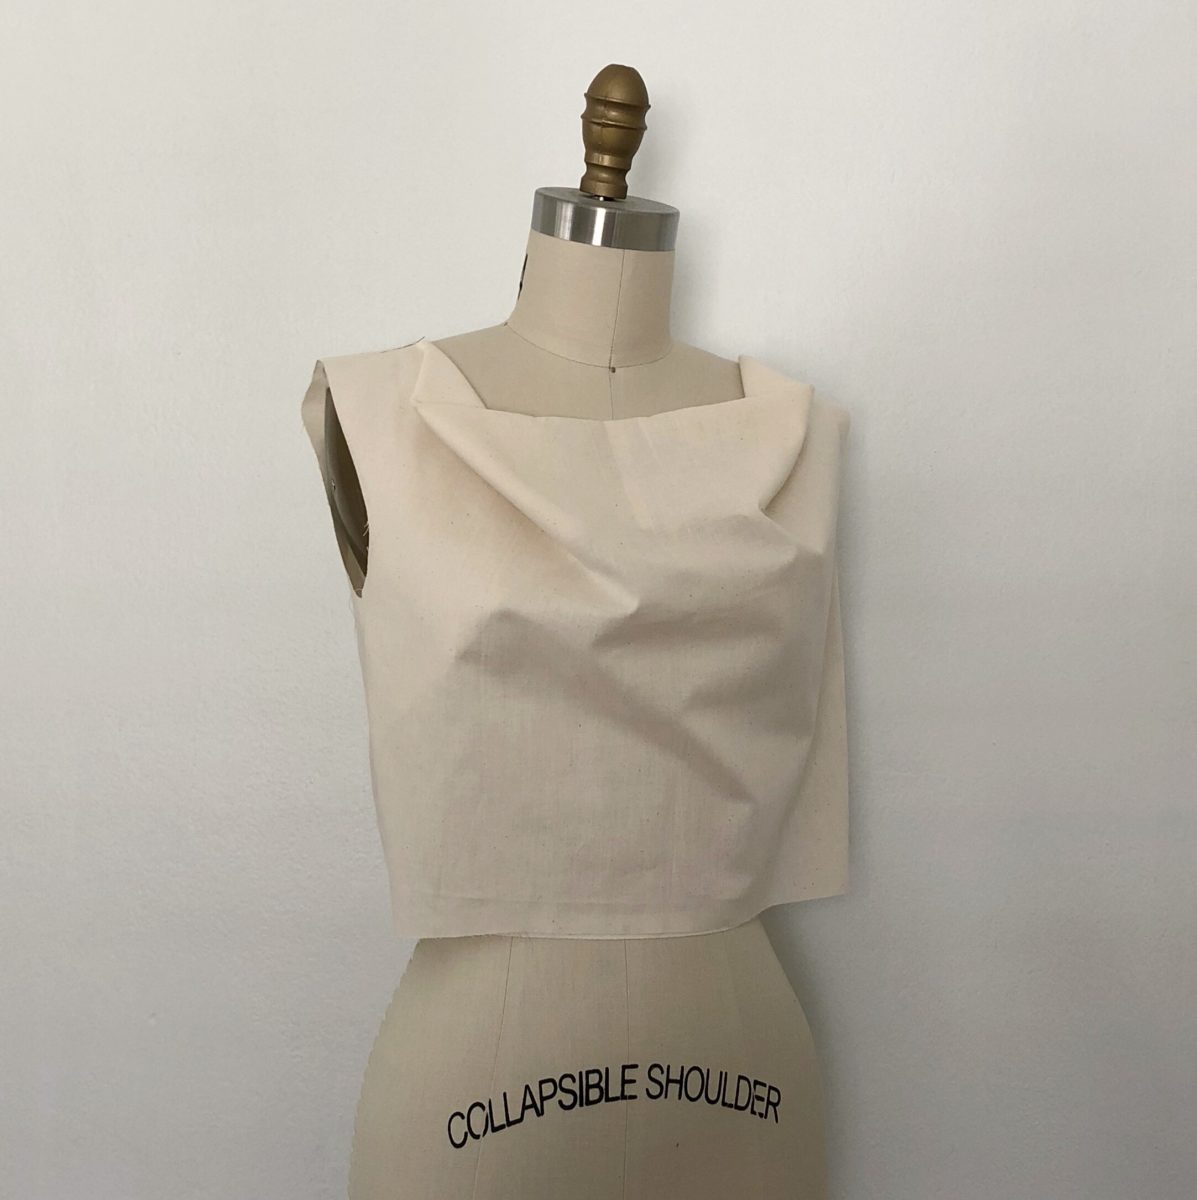
Cowl – This one was the most confusing as far as construction went. It also required its own back to be drafted along with it.
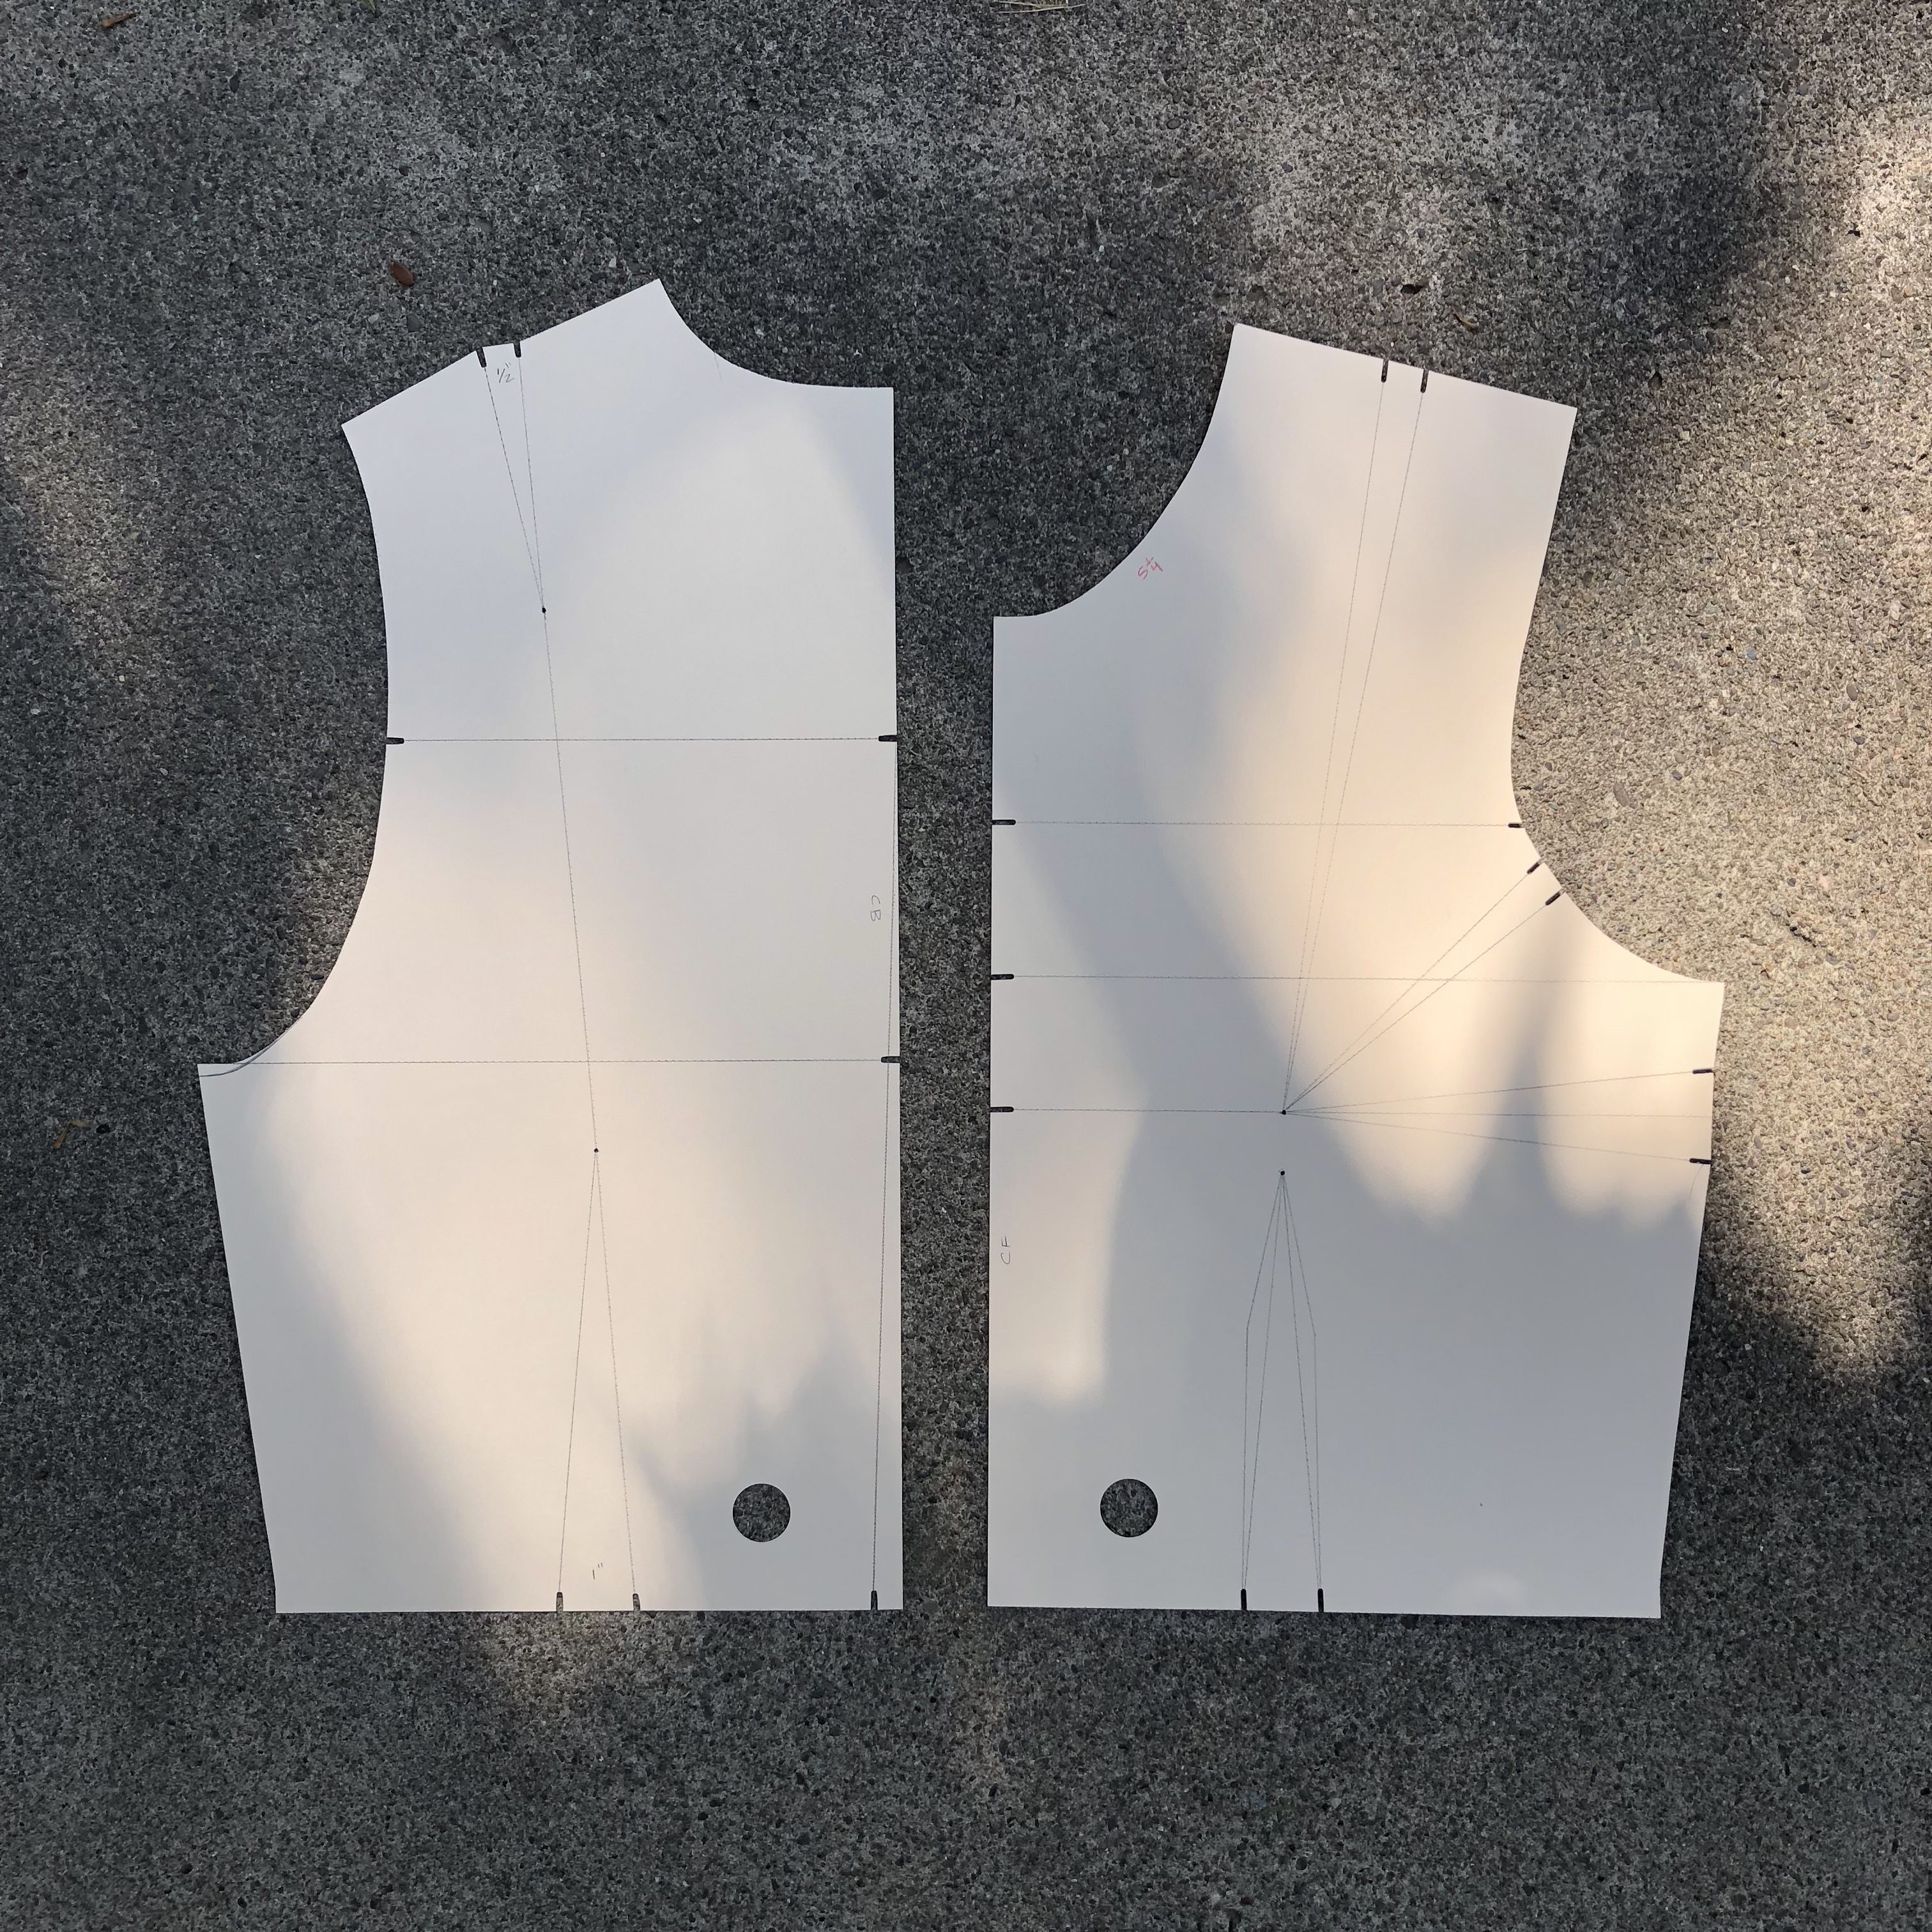
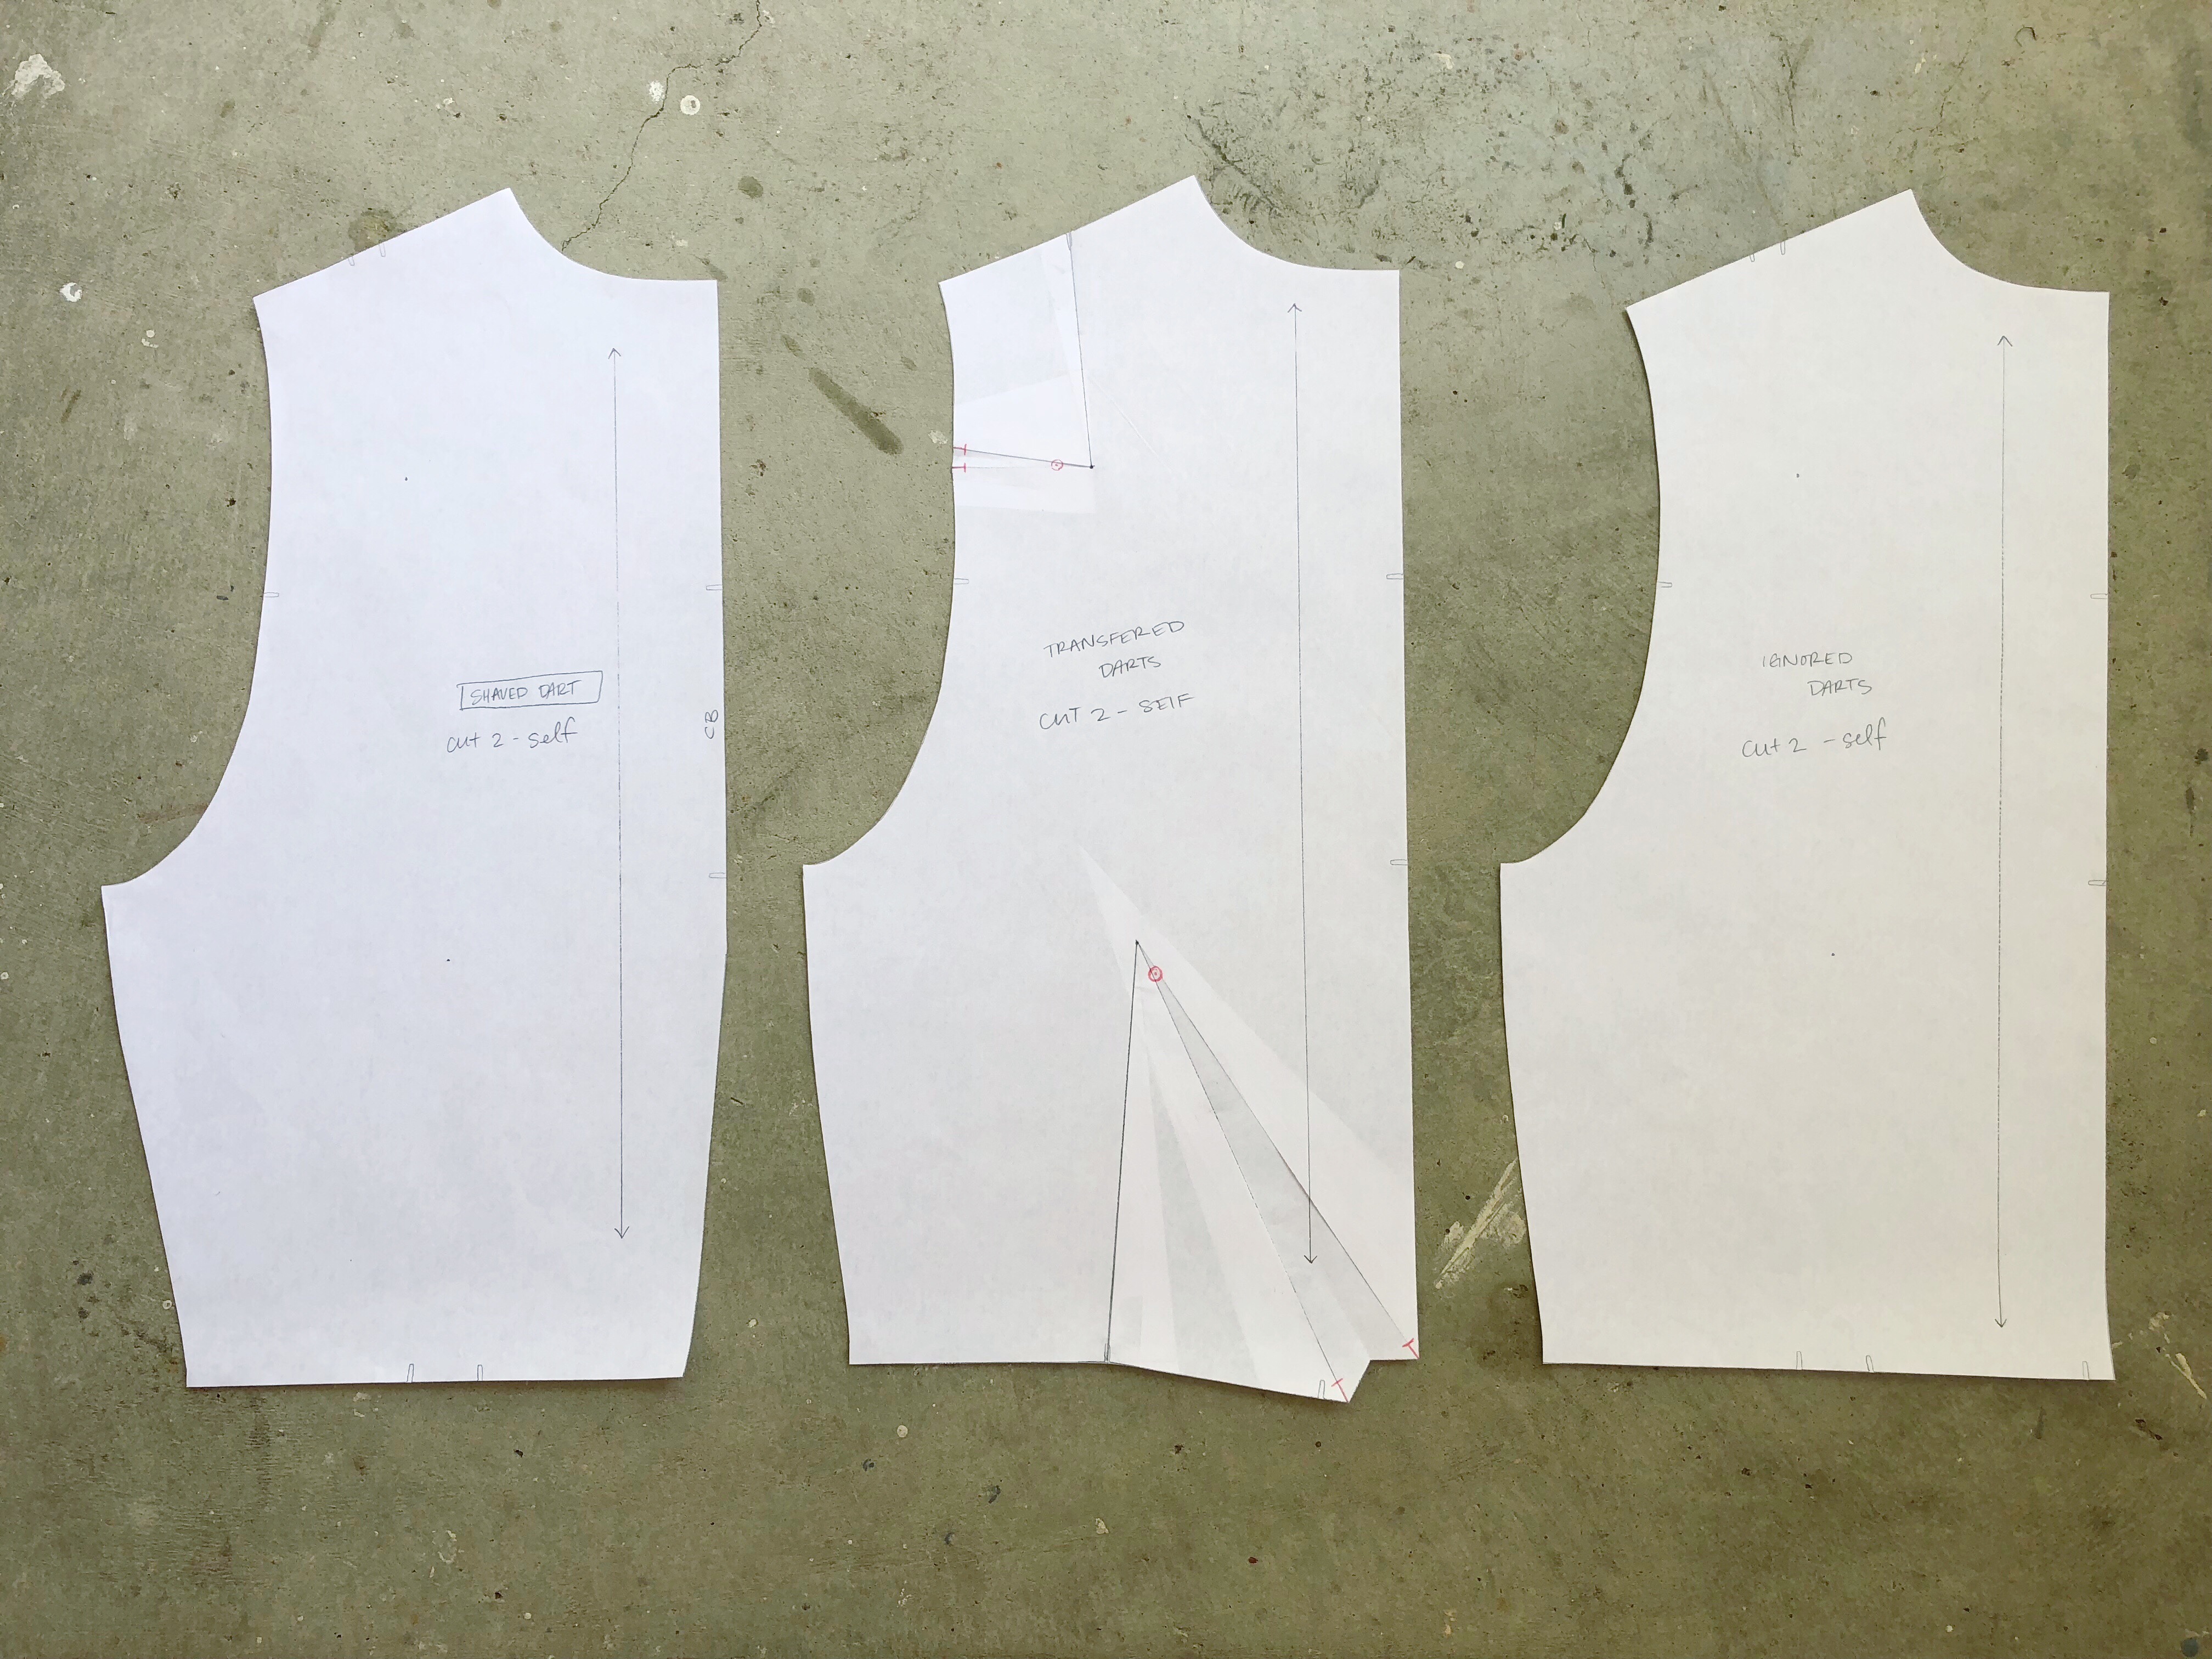
Backs – The Shaved Darts back (left) was used for most of the exercises because they were the easiest to knock out. I paired the Transferred Darts back (middle) with the Curved Should Darts front and I honestly can’t remember which exercise I paired the Ignored Darts back (right) with. The Ignored Darts back has a looser fit and requires easing the back shoulder with the front.
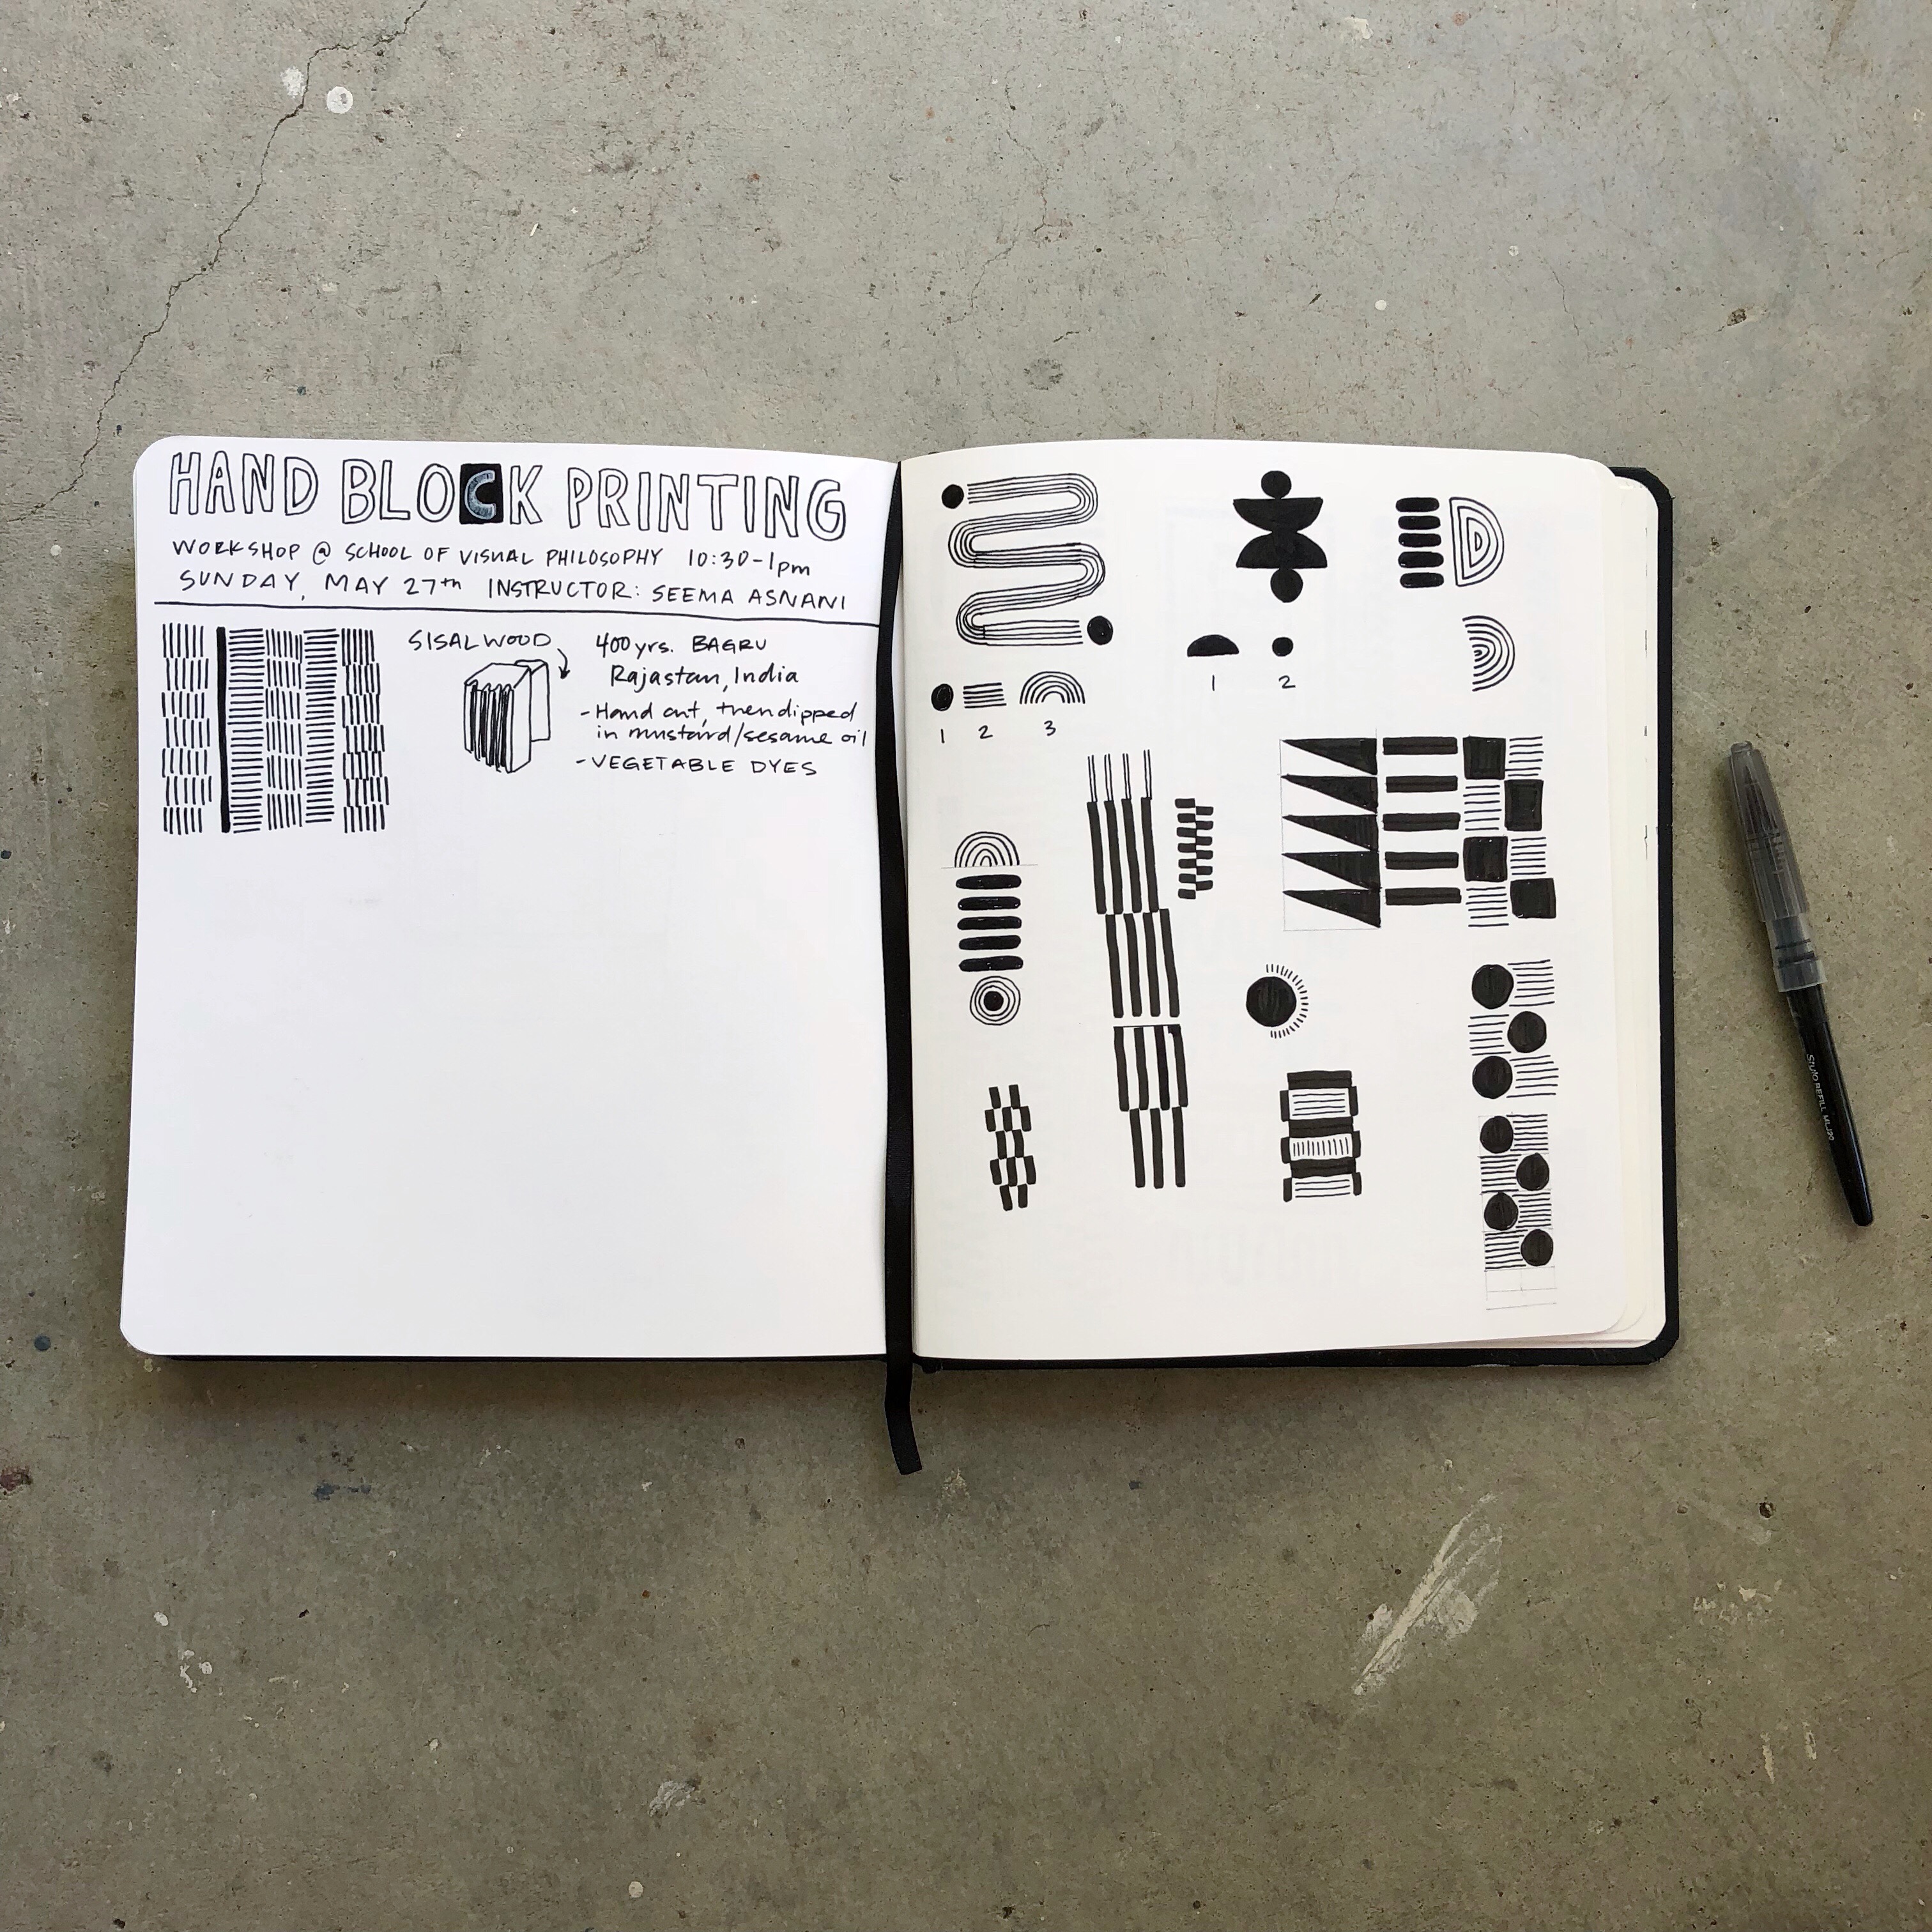
Taking art and making classes has been one of the best things I’ve done as an adult. It’s helped me develop an art practice, meet new people, and chop up the monotony of adulthood. I recently stumbled upon a local community art space & school and on a whim signed up for a block printing class the day before. It wasn’t all I was hoping for, but it was something to do over the three day weekend.
It’s less than a mile from my house, so I chose to walk despite coming down with a cold. A bird pooped on me and I saw a man pooping, but otherwise it was a nice walk.
The community arts space has all sorts of classes and workshops available ranging from welding to drawing. Once the school year ends, I’m going to do some drop in figure drawing sessions and maybe screen printing for fabric.
I channeled Block Shop Textiles to get ideas flowing.
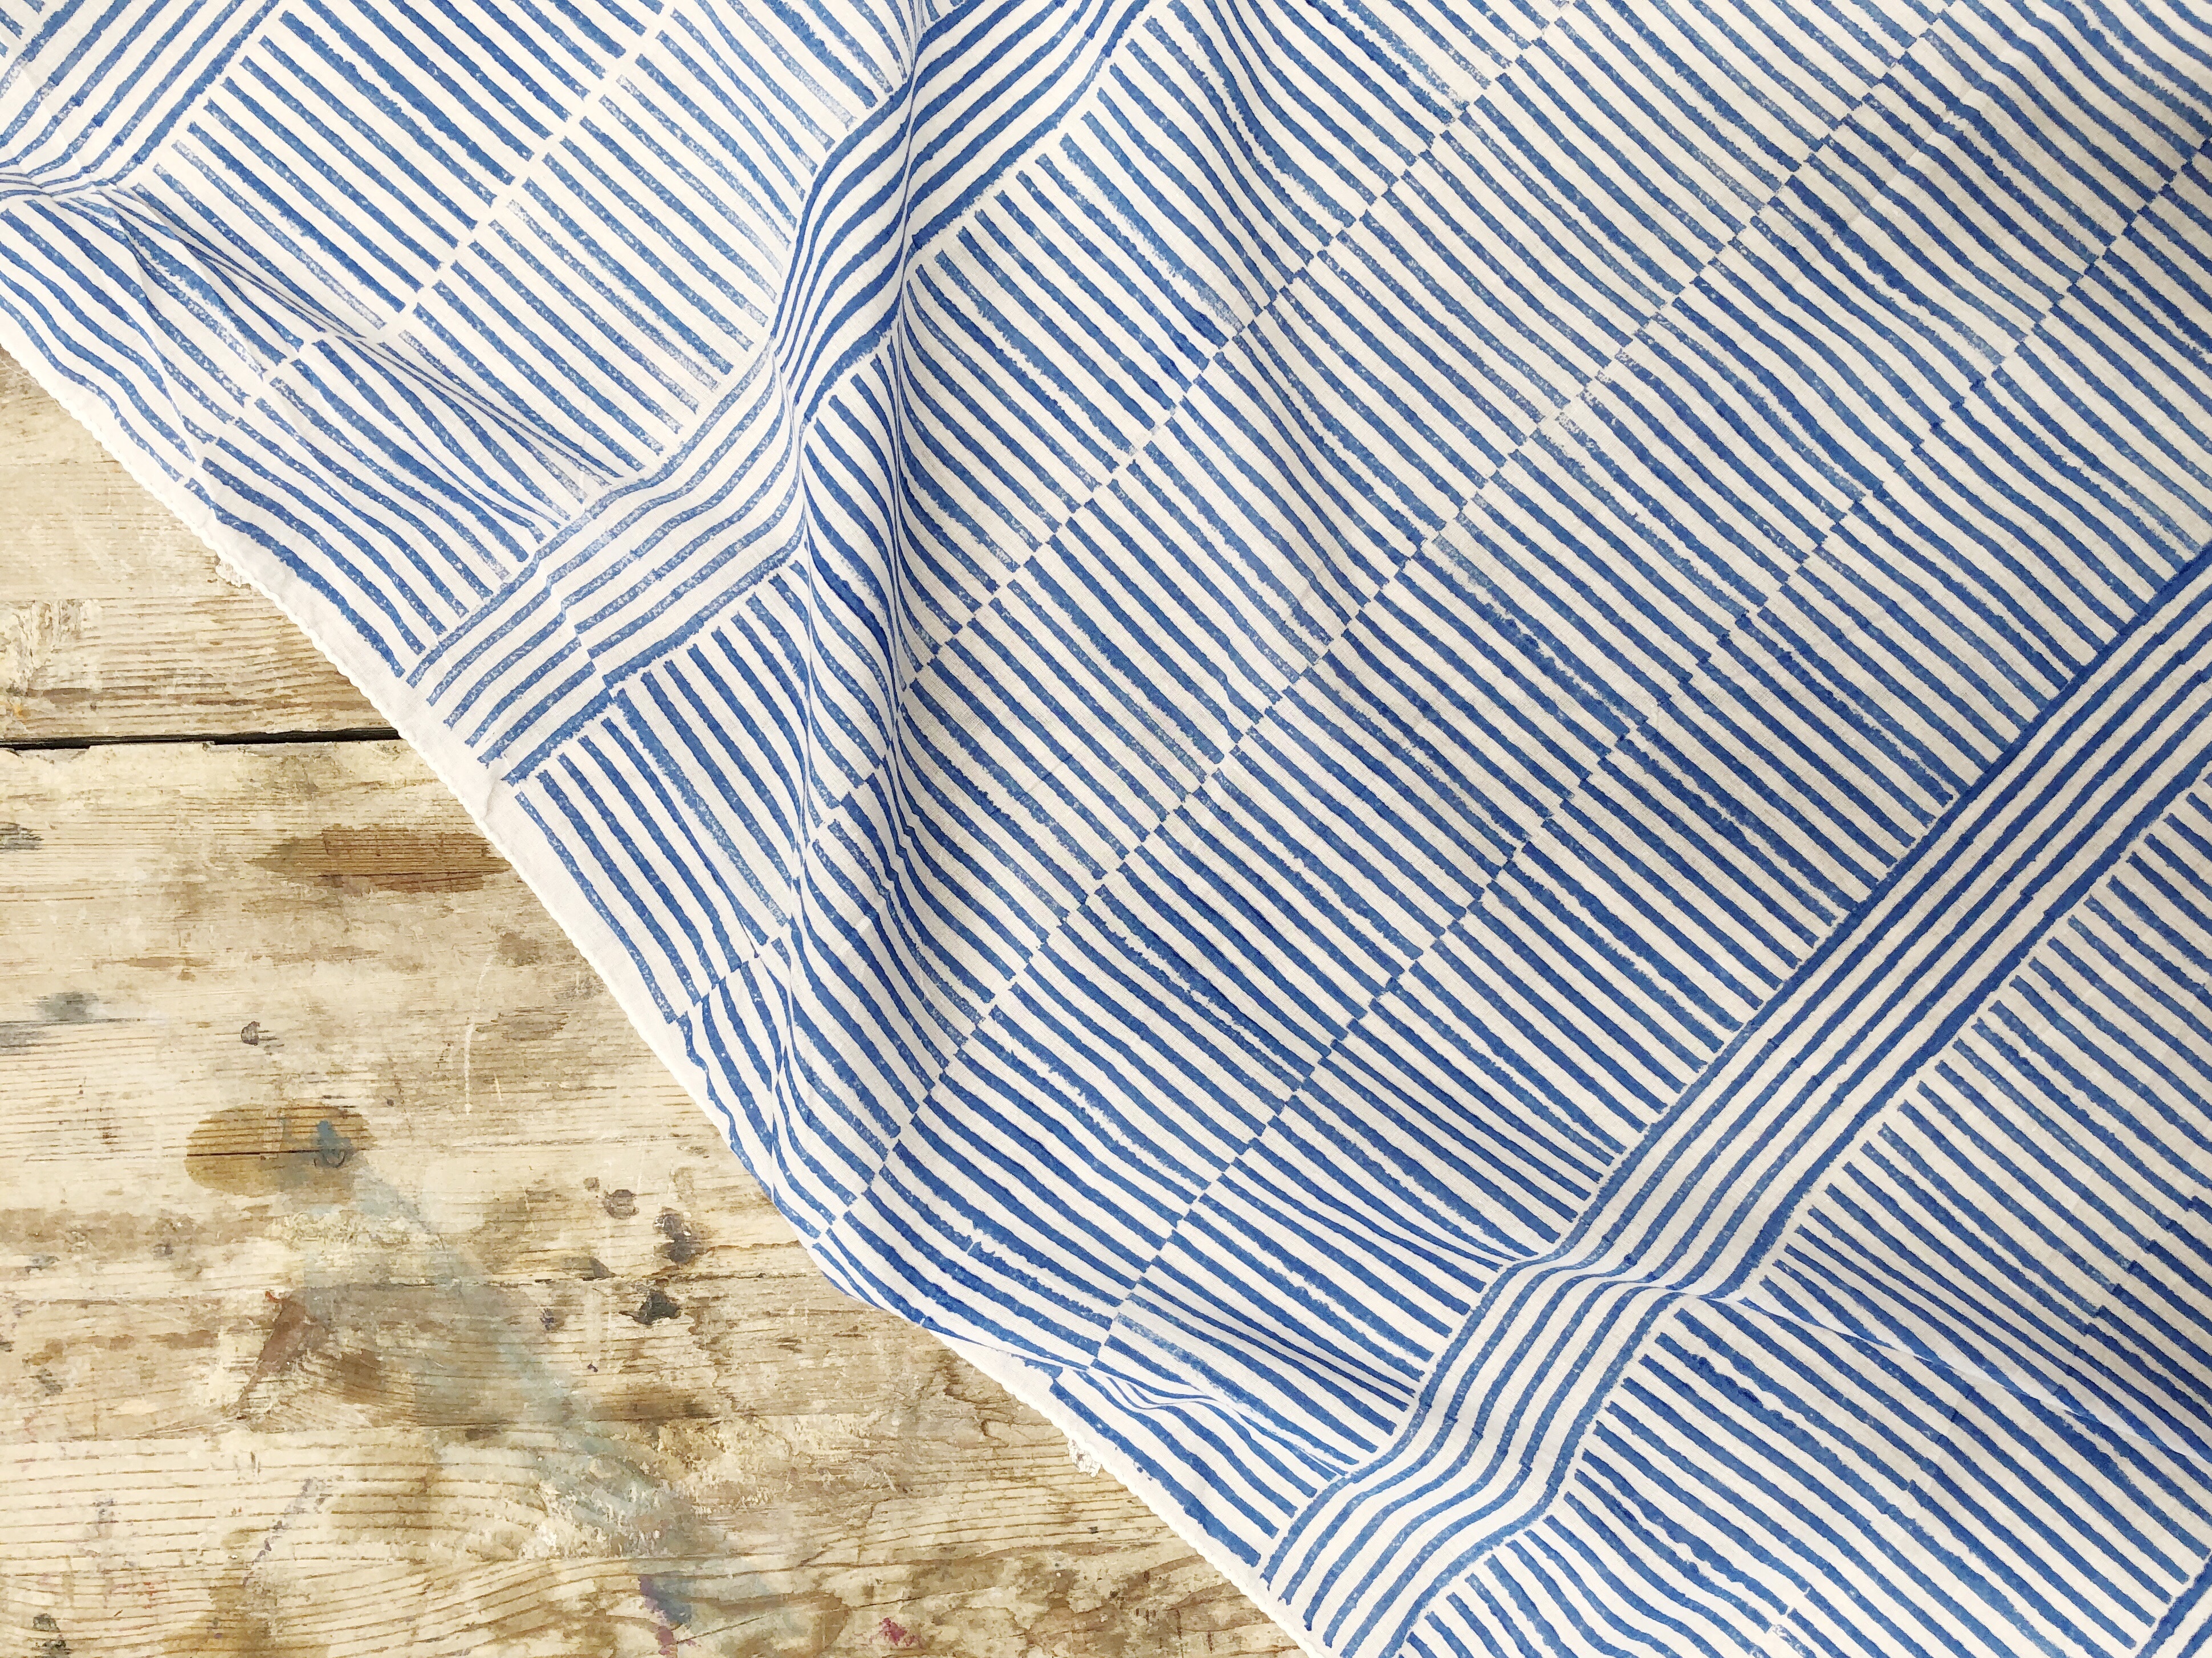
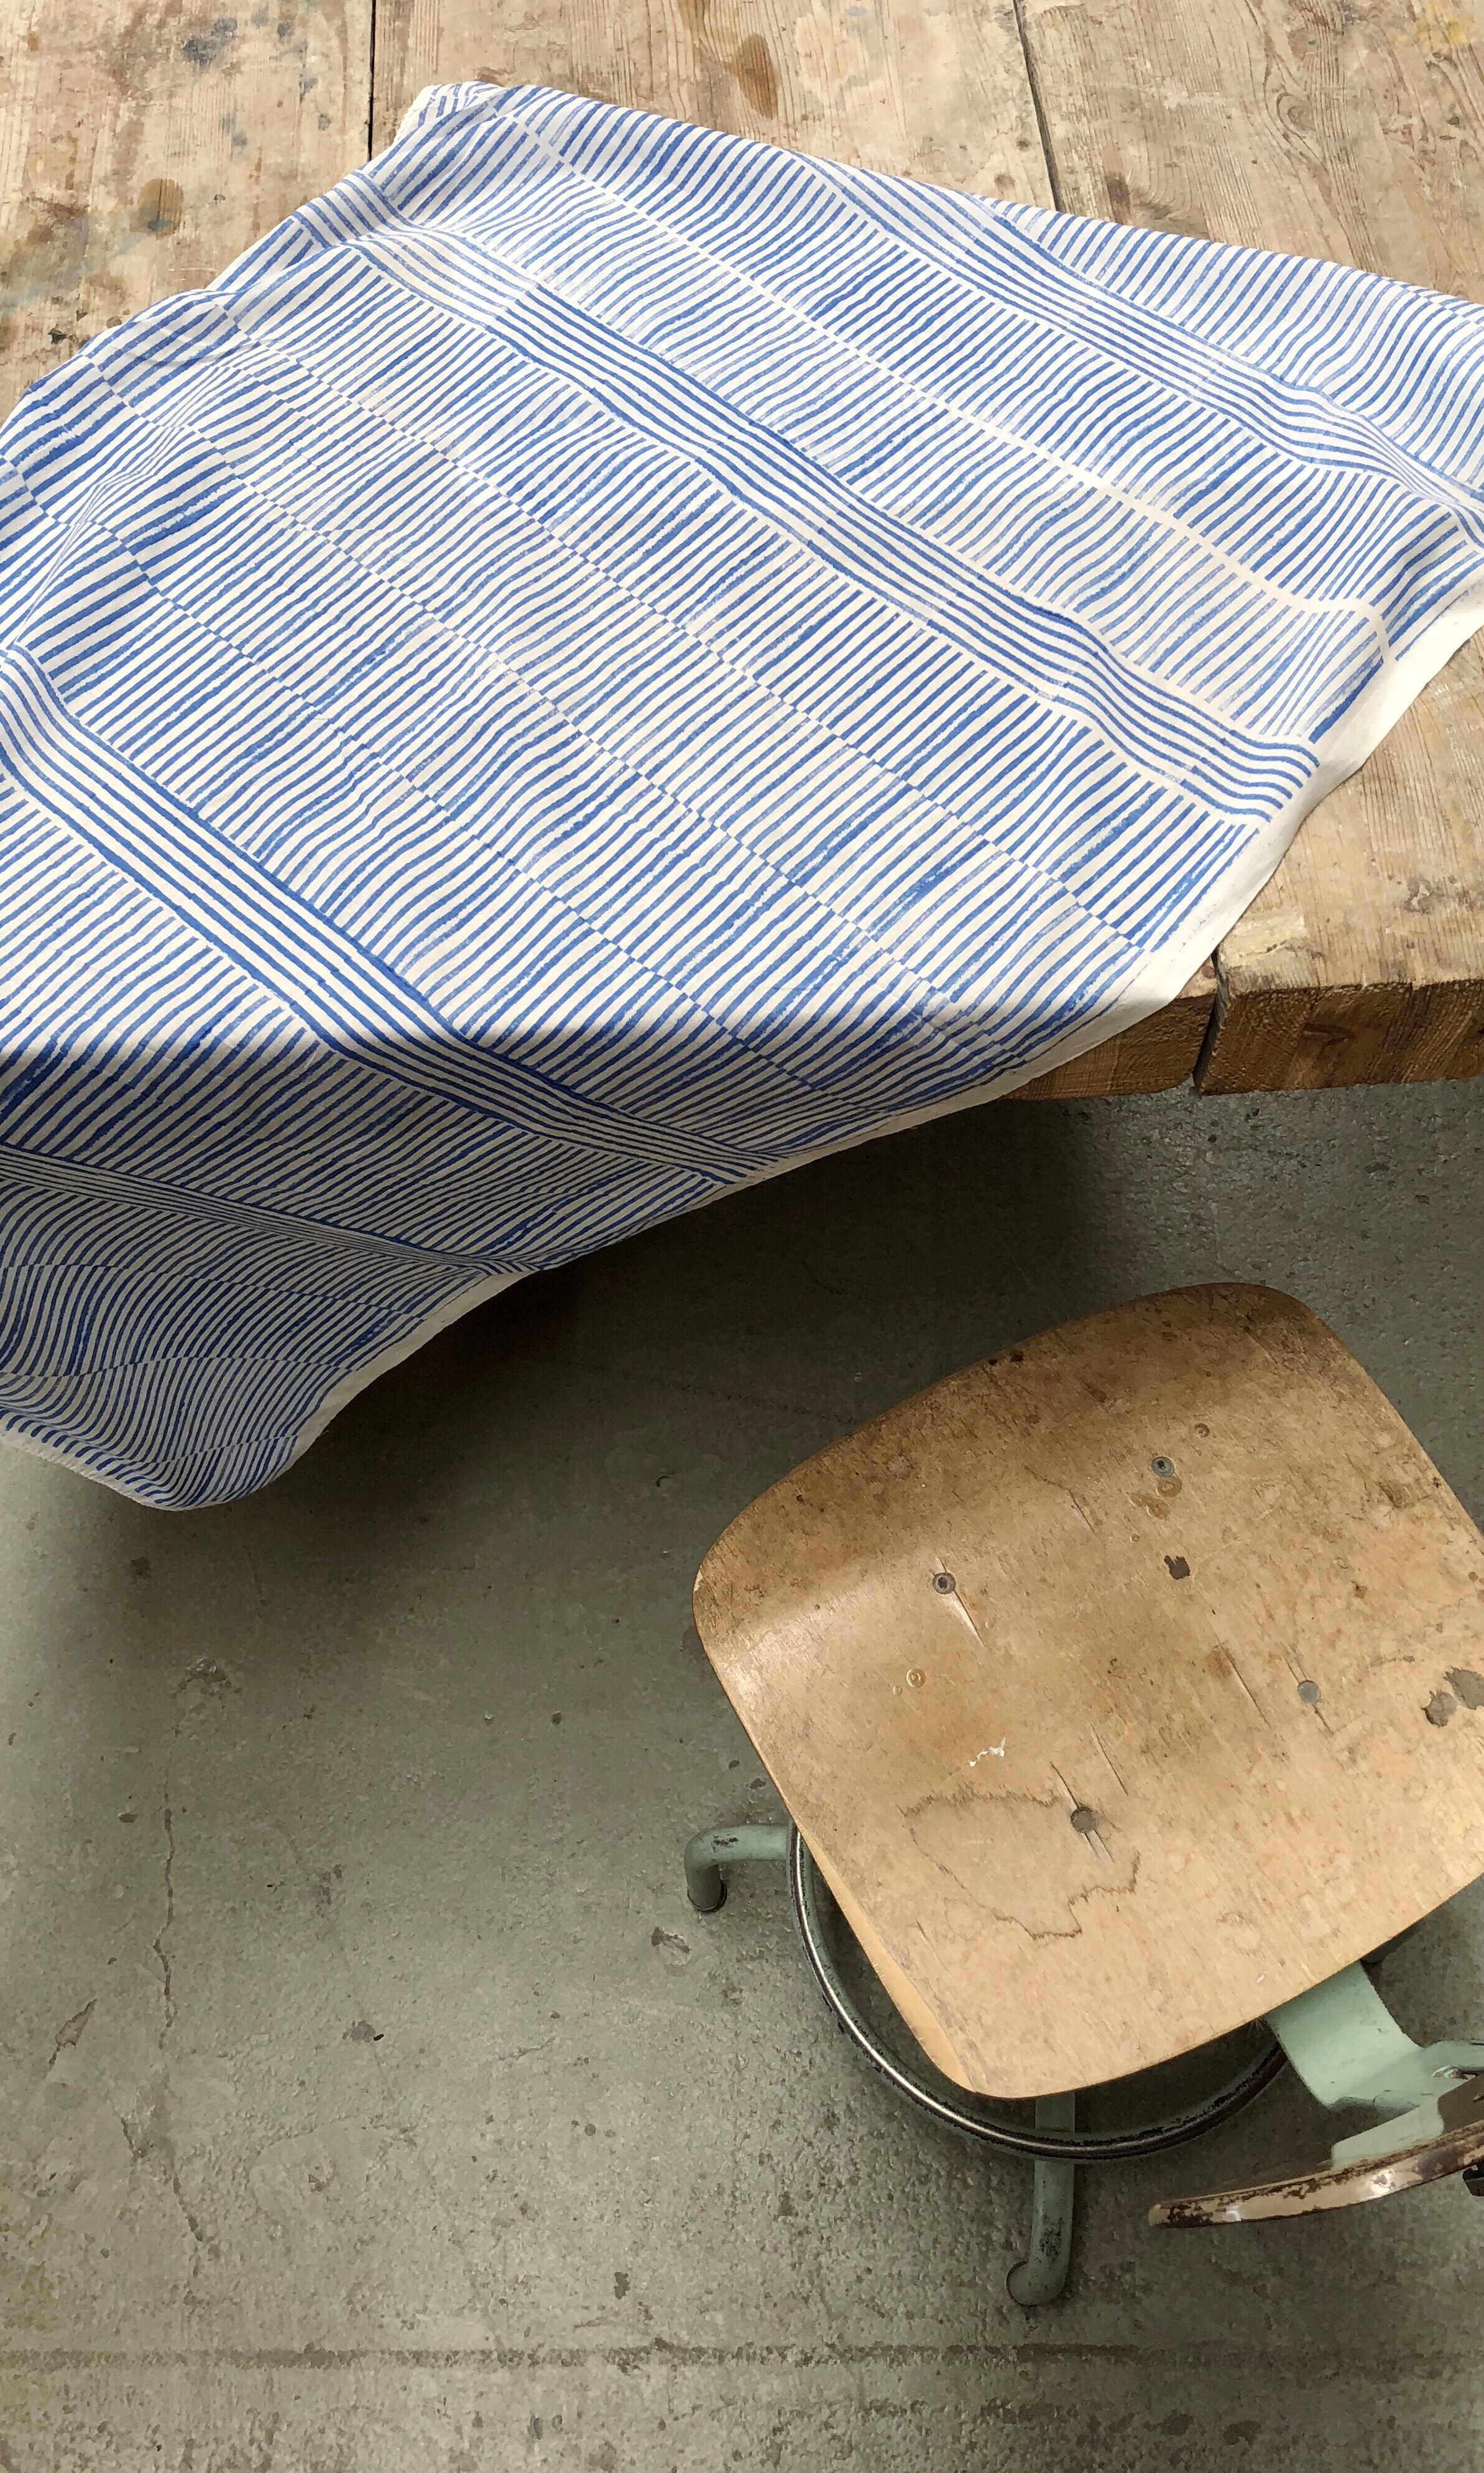
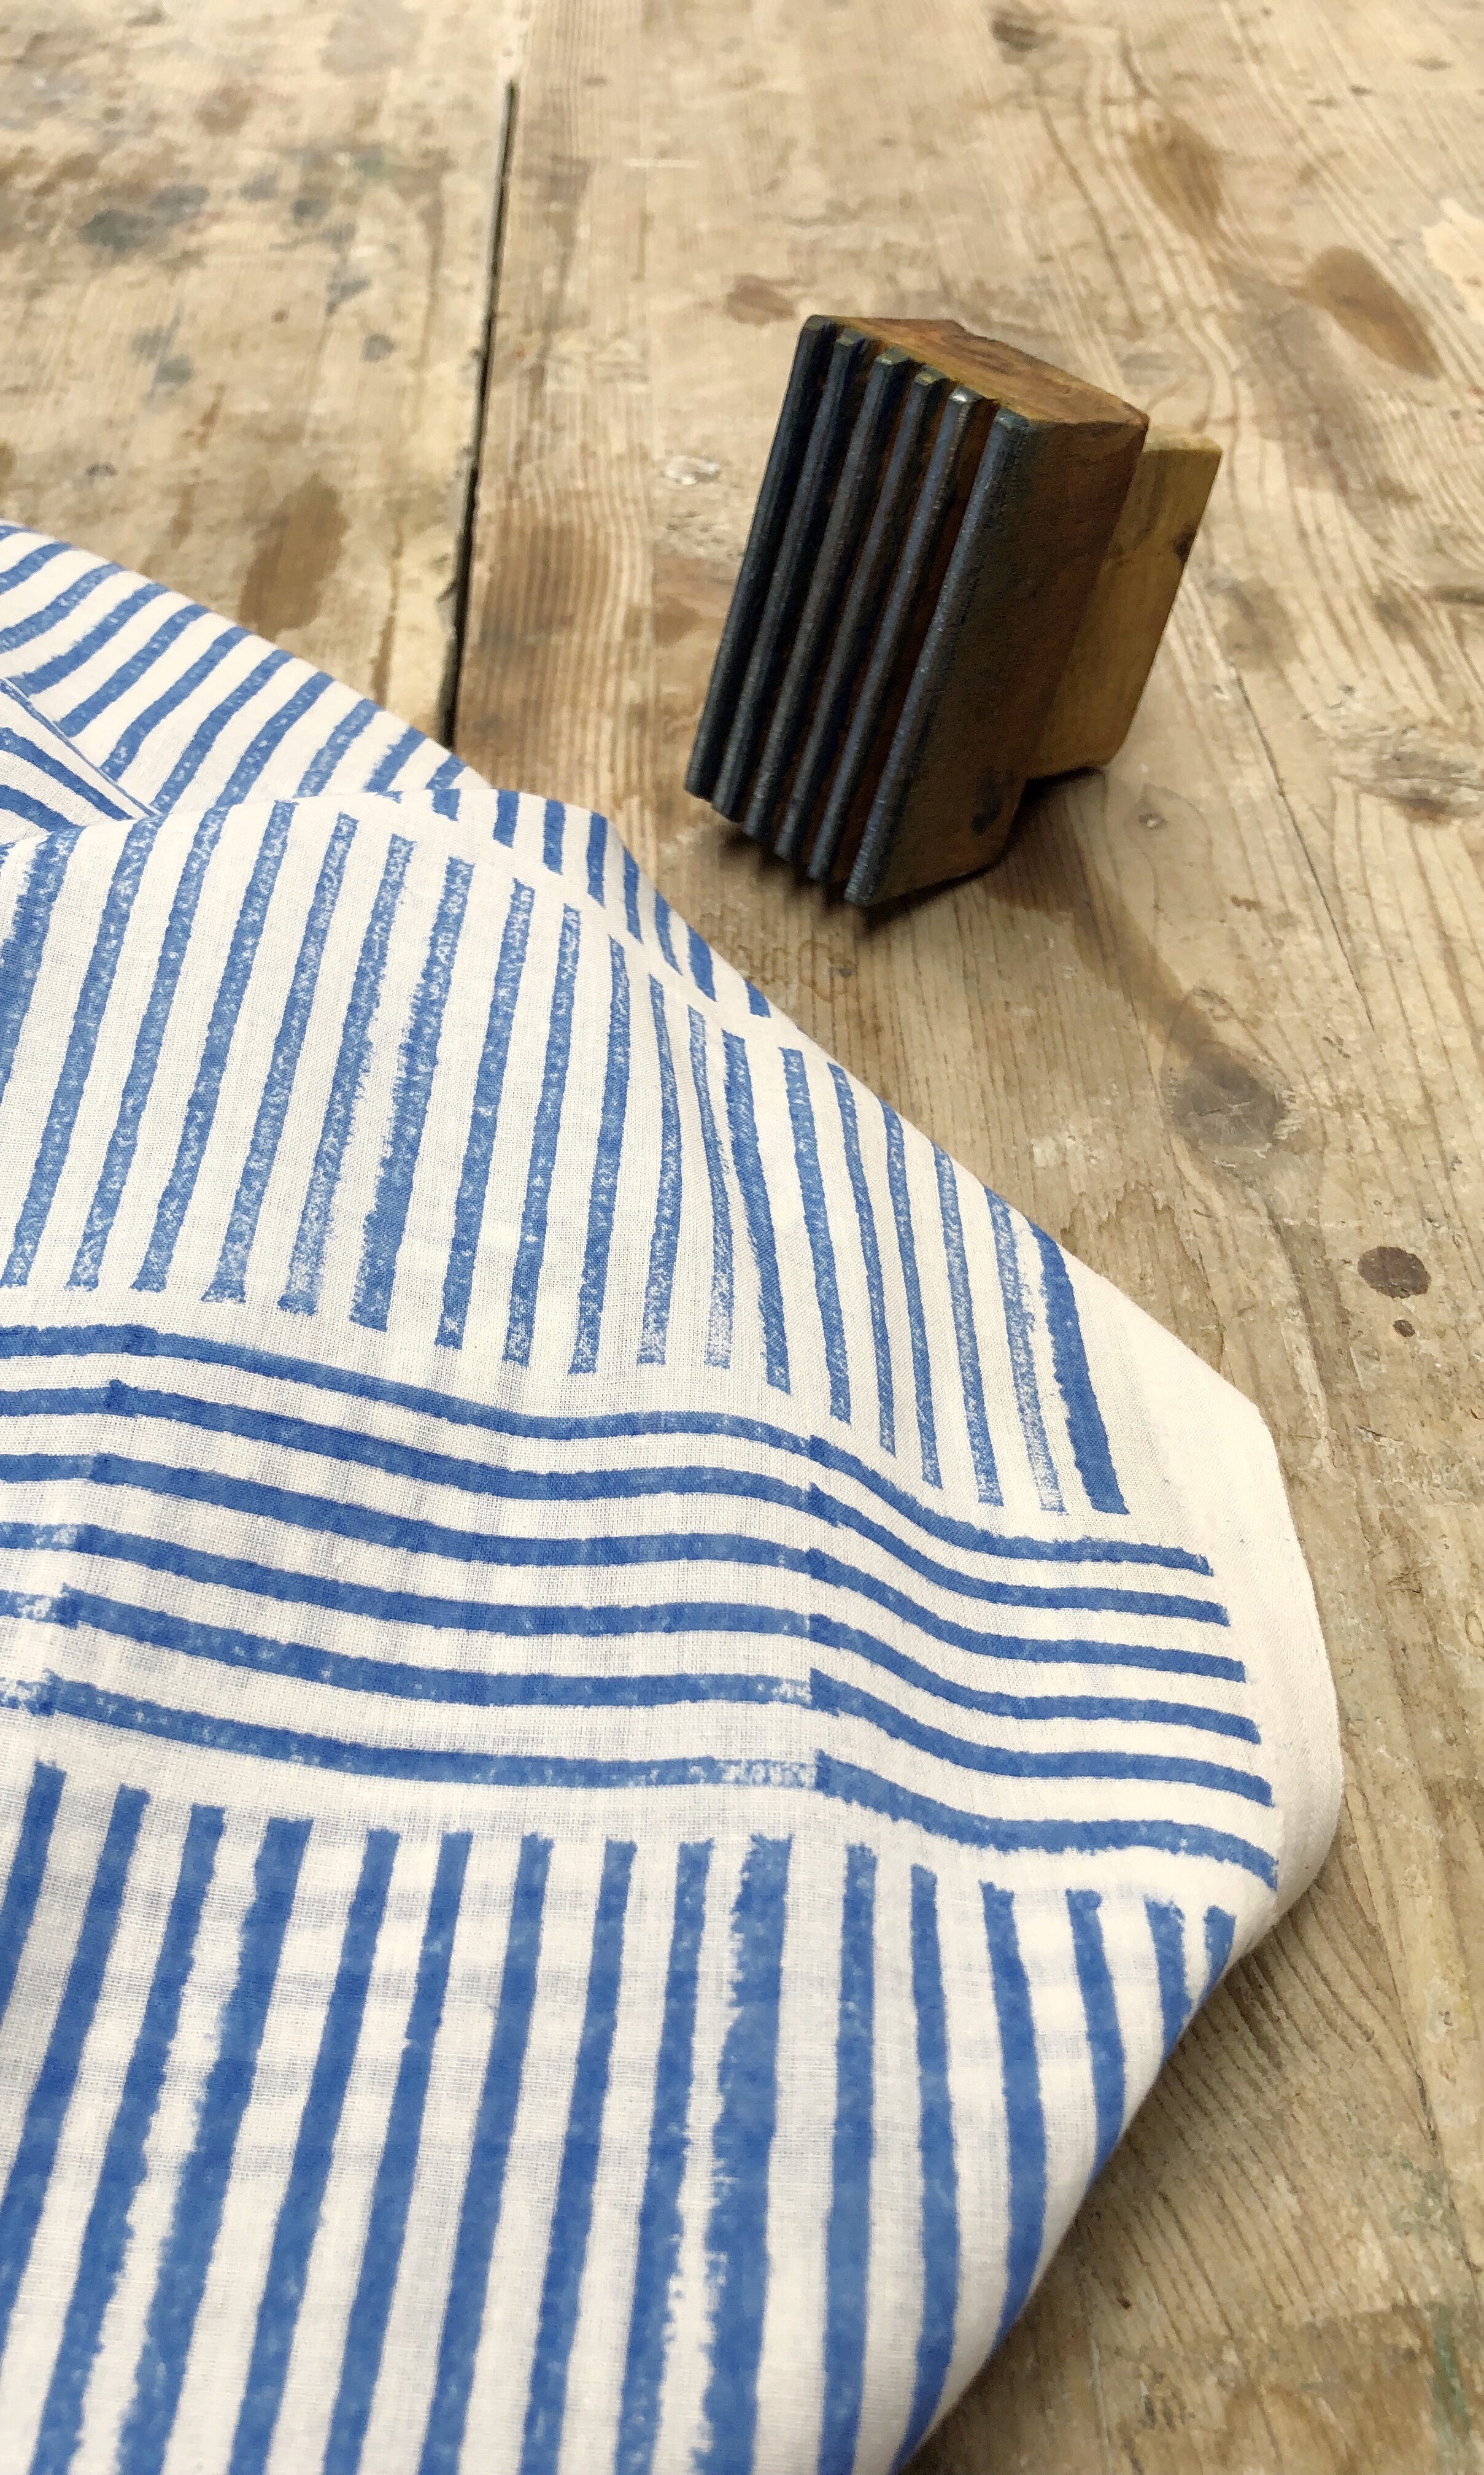
The class description said that you could “design your own scarf” and “unlock your creativity,” but in reality we had to choose from pre-made wood blocks and just two colors of dye. Most of the blocks were intricate floral designs, which are nice, but not my aesthetic. Thankfully I found one “border” block that was sort similar to what I had sketched out before class.
There were only three other workshop participants making things pretty cozy. The instructor gave us a very brief history on the 400 year old craft and her husband brought samosas and lassi. We listened to really old Bollywood movies while we worked.
The other participants chose to create a border and then a dot repeat pattern for their scarves. I chose to fill in the whole scarf and took twice as long.
I will probably end up dying this. The white is a little too white and doesn’t really coordinate with my wardrobe. Maybe indigo?
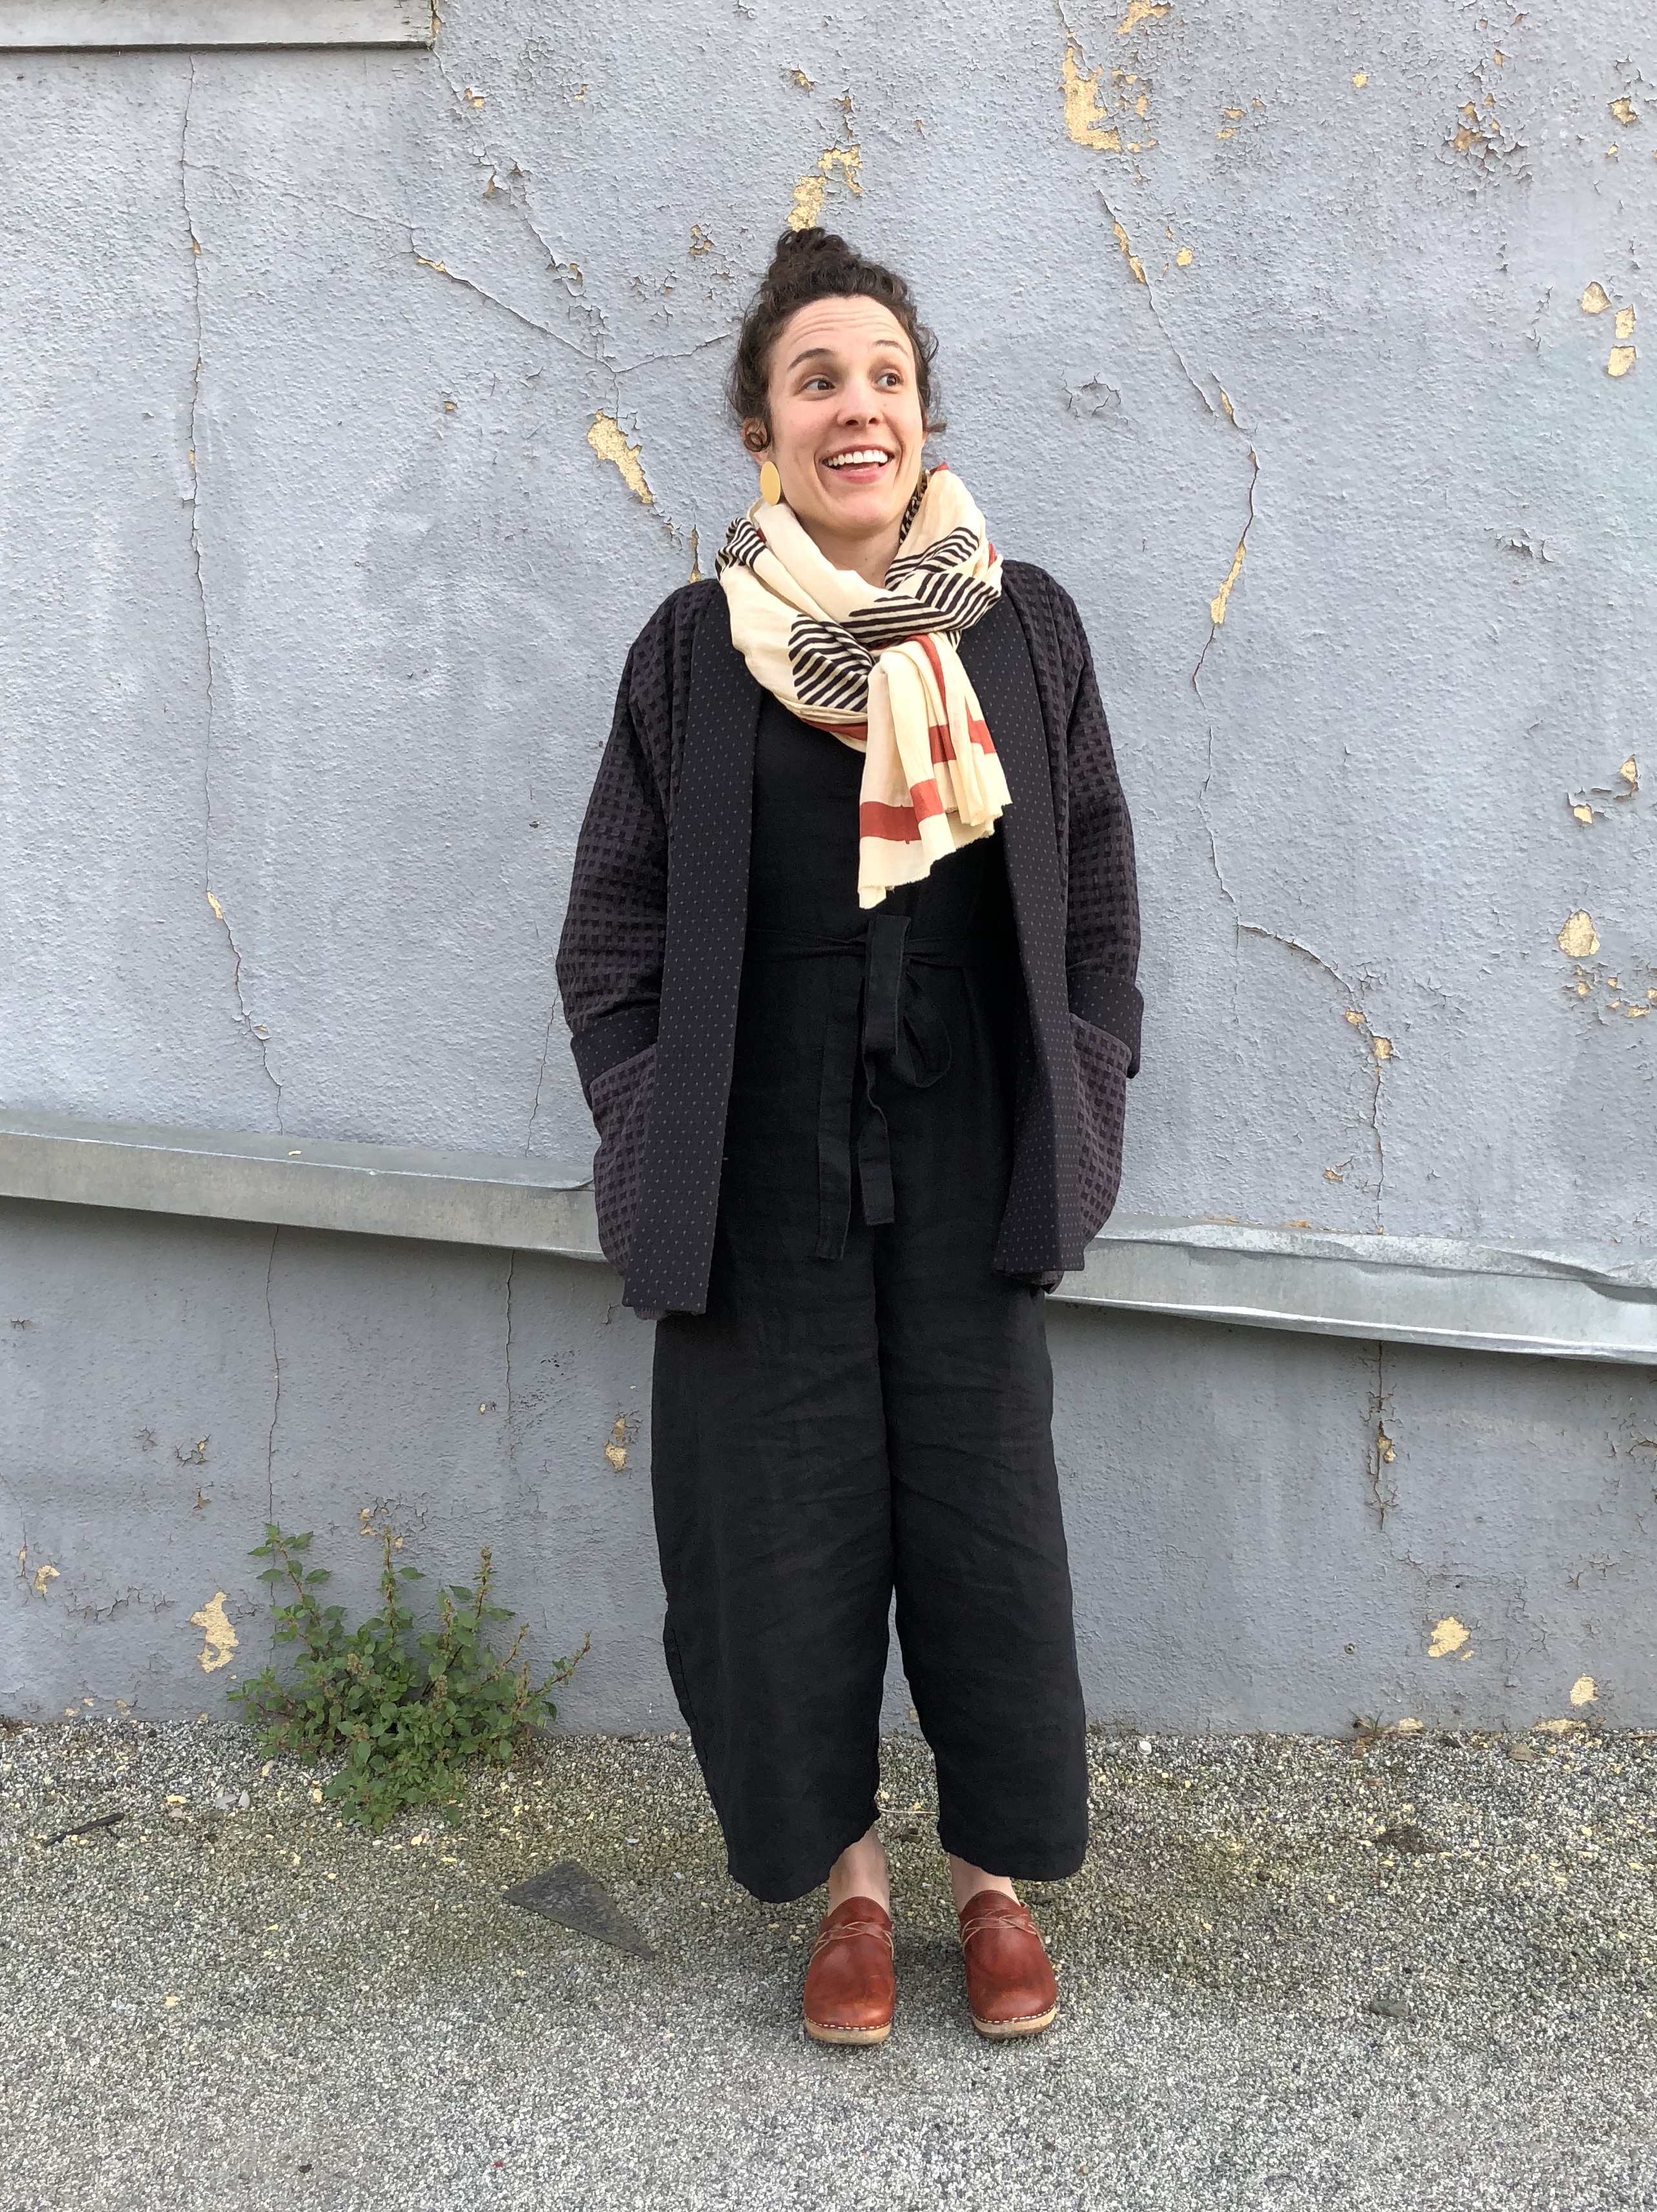
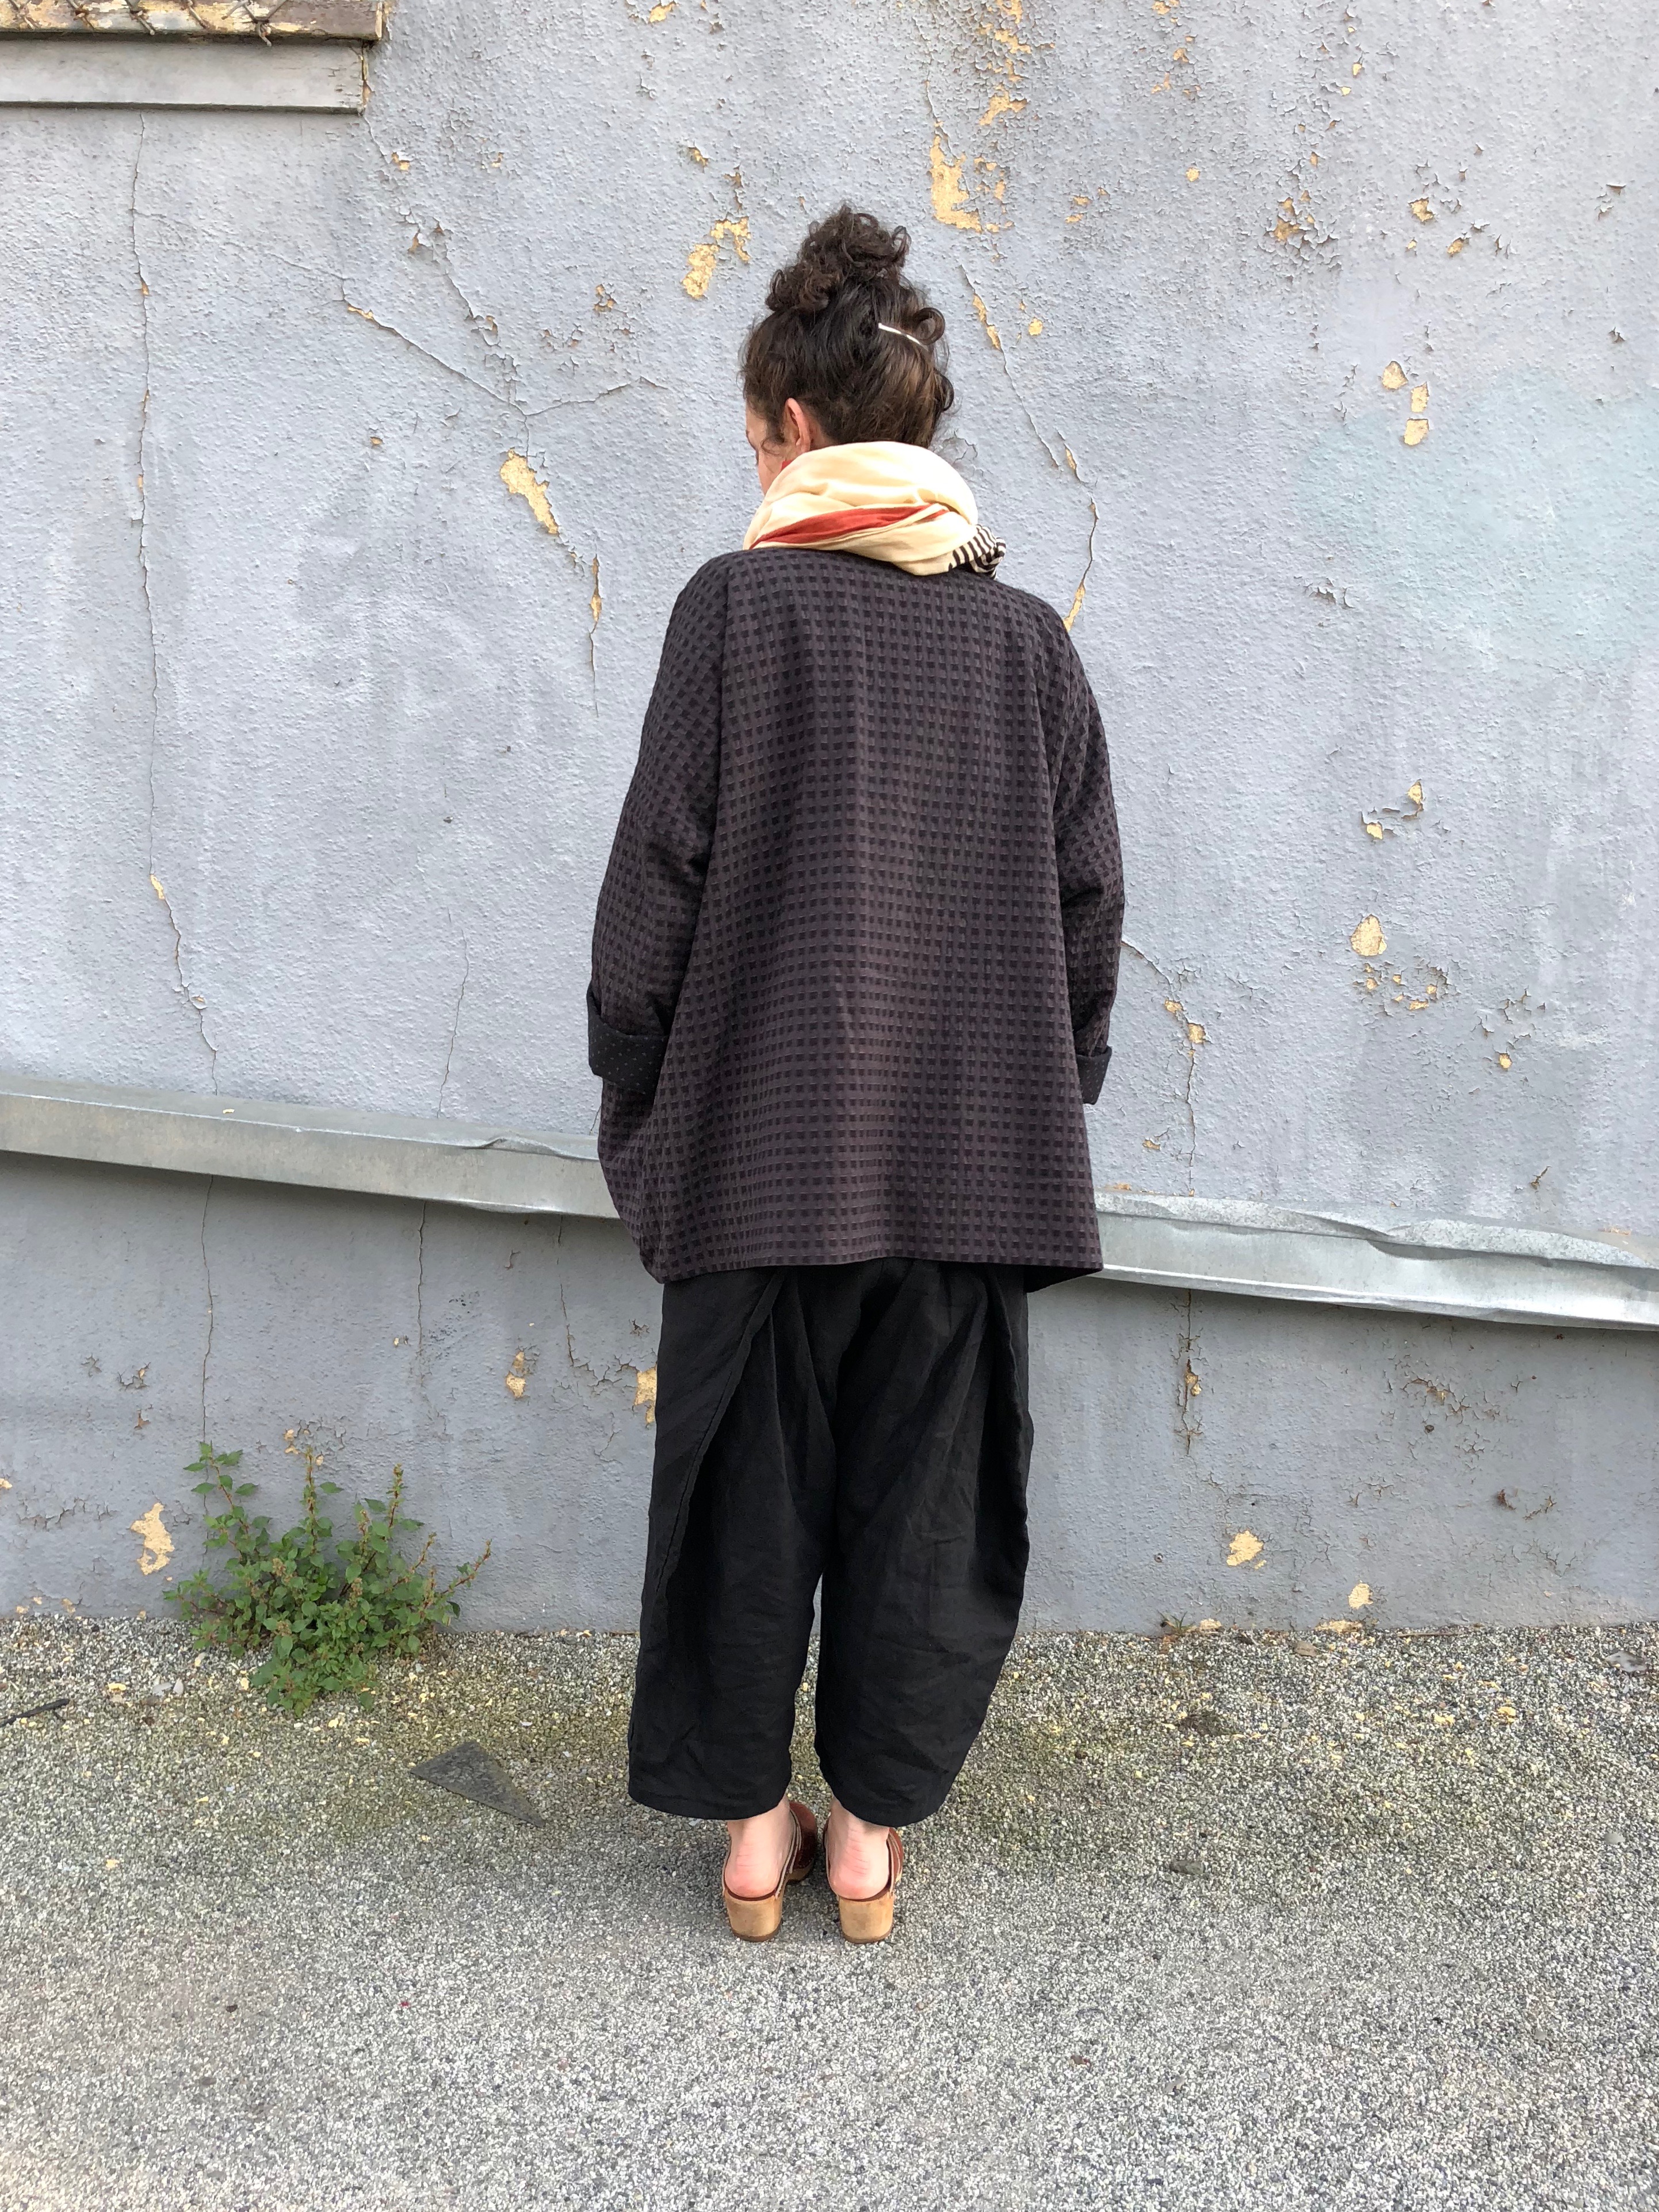
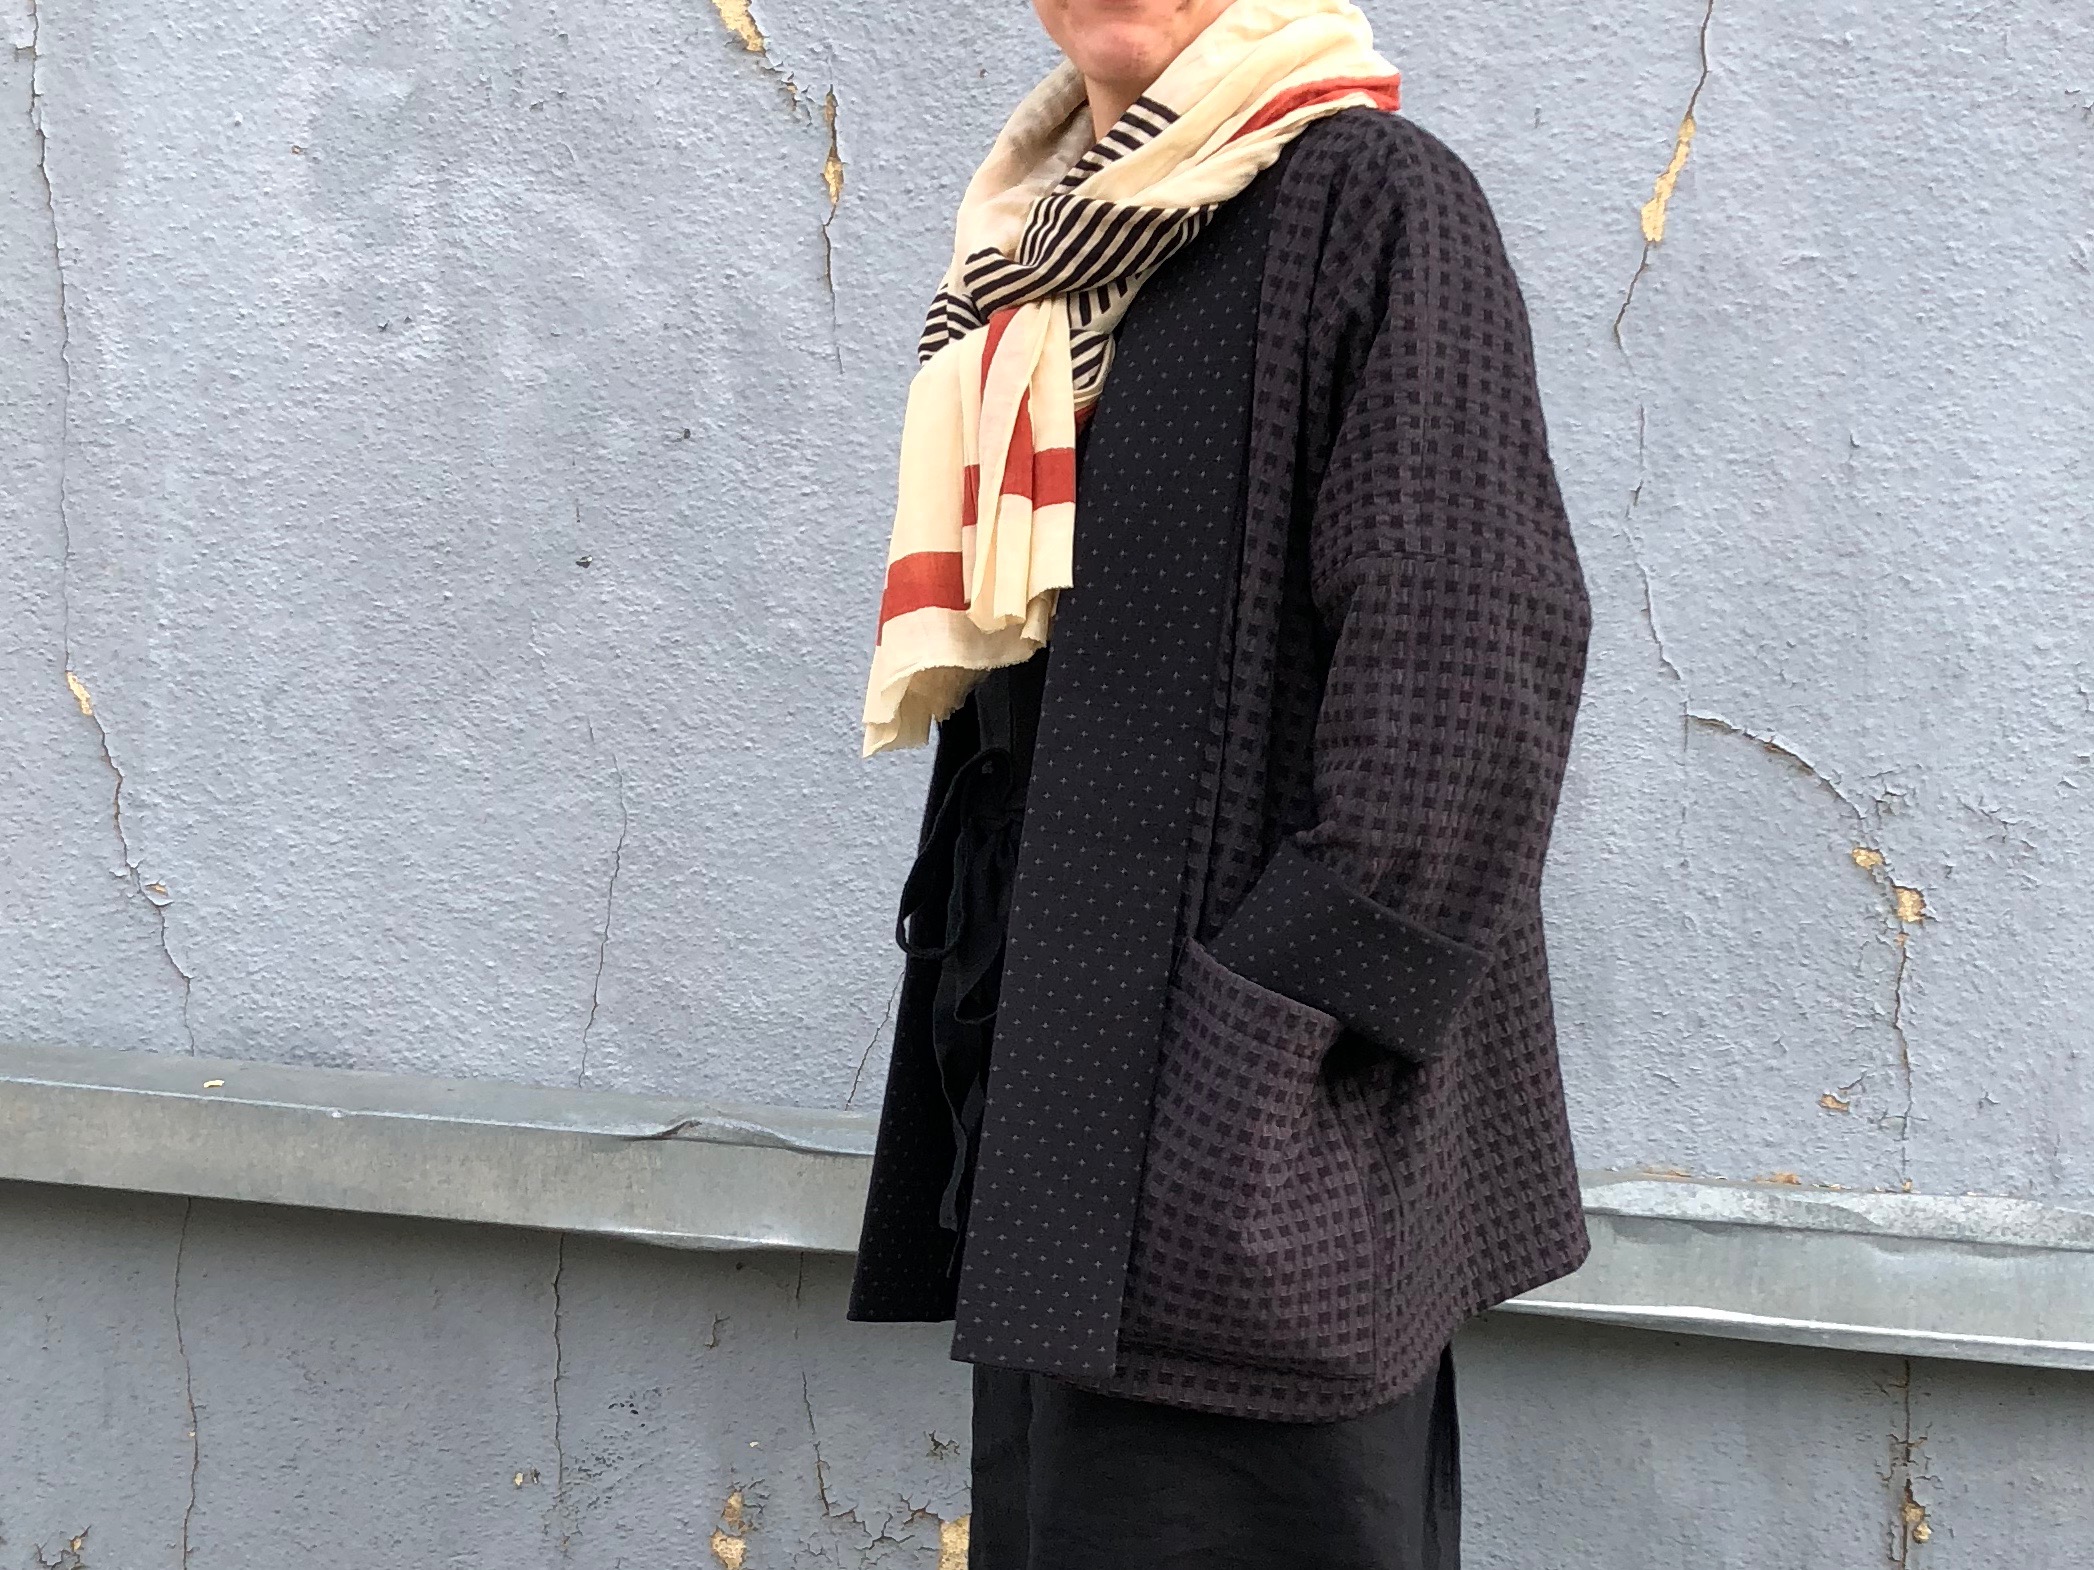
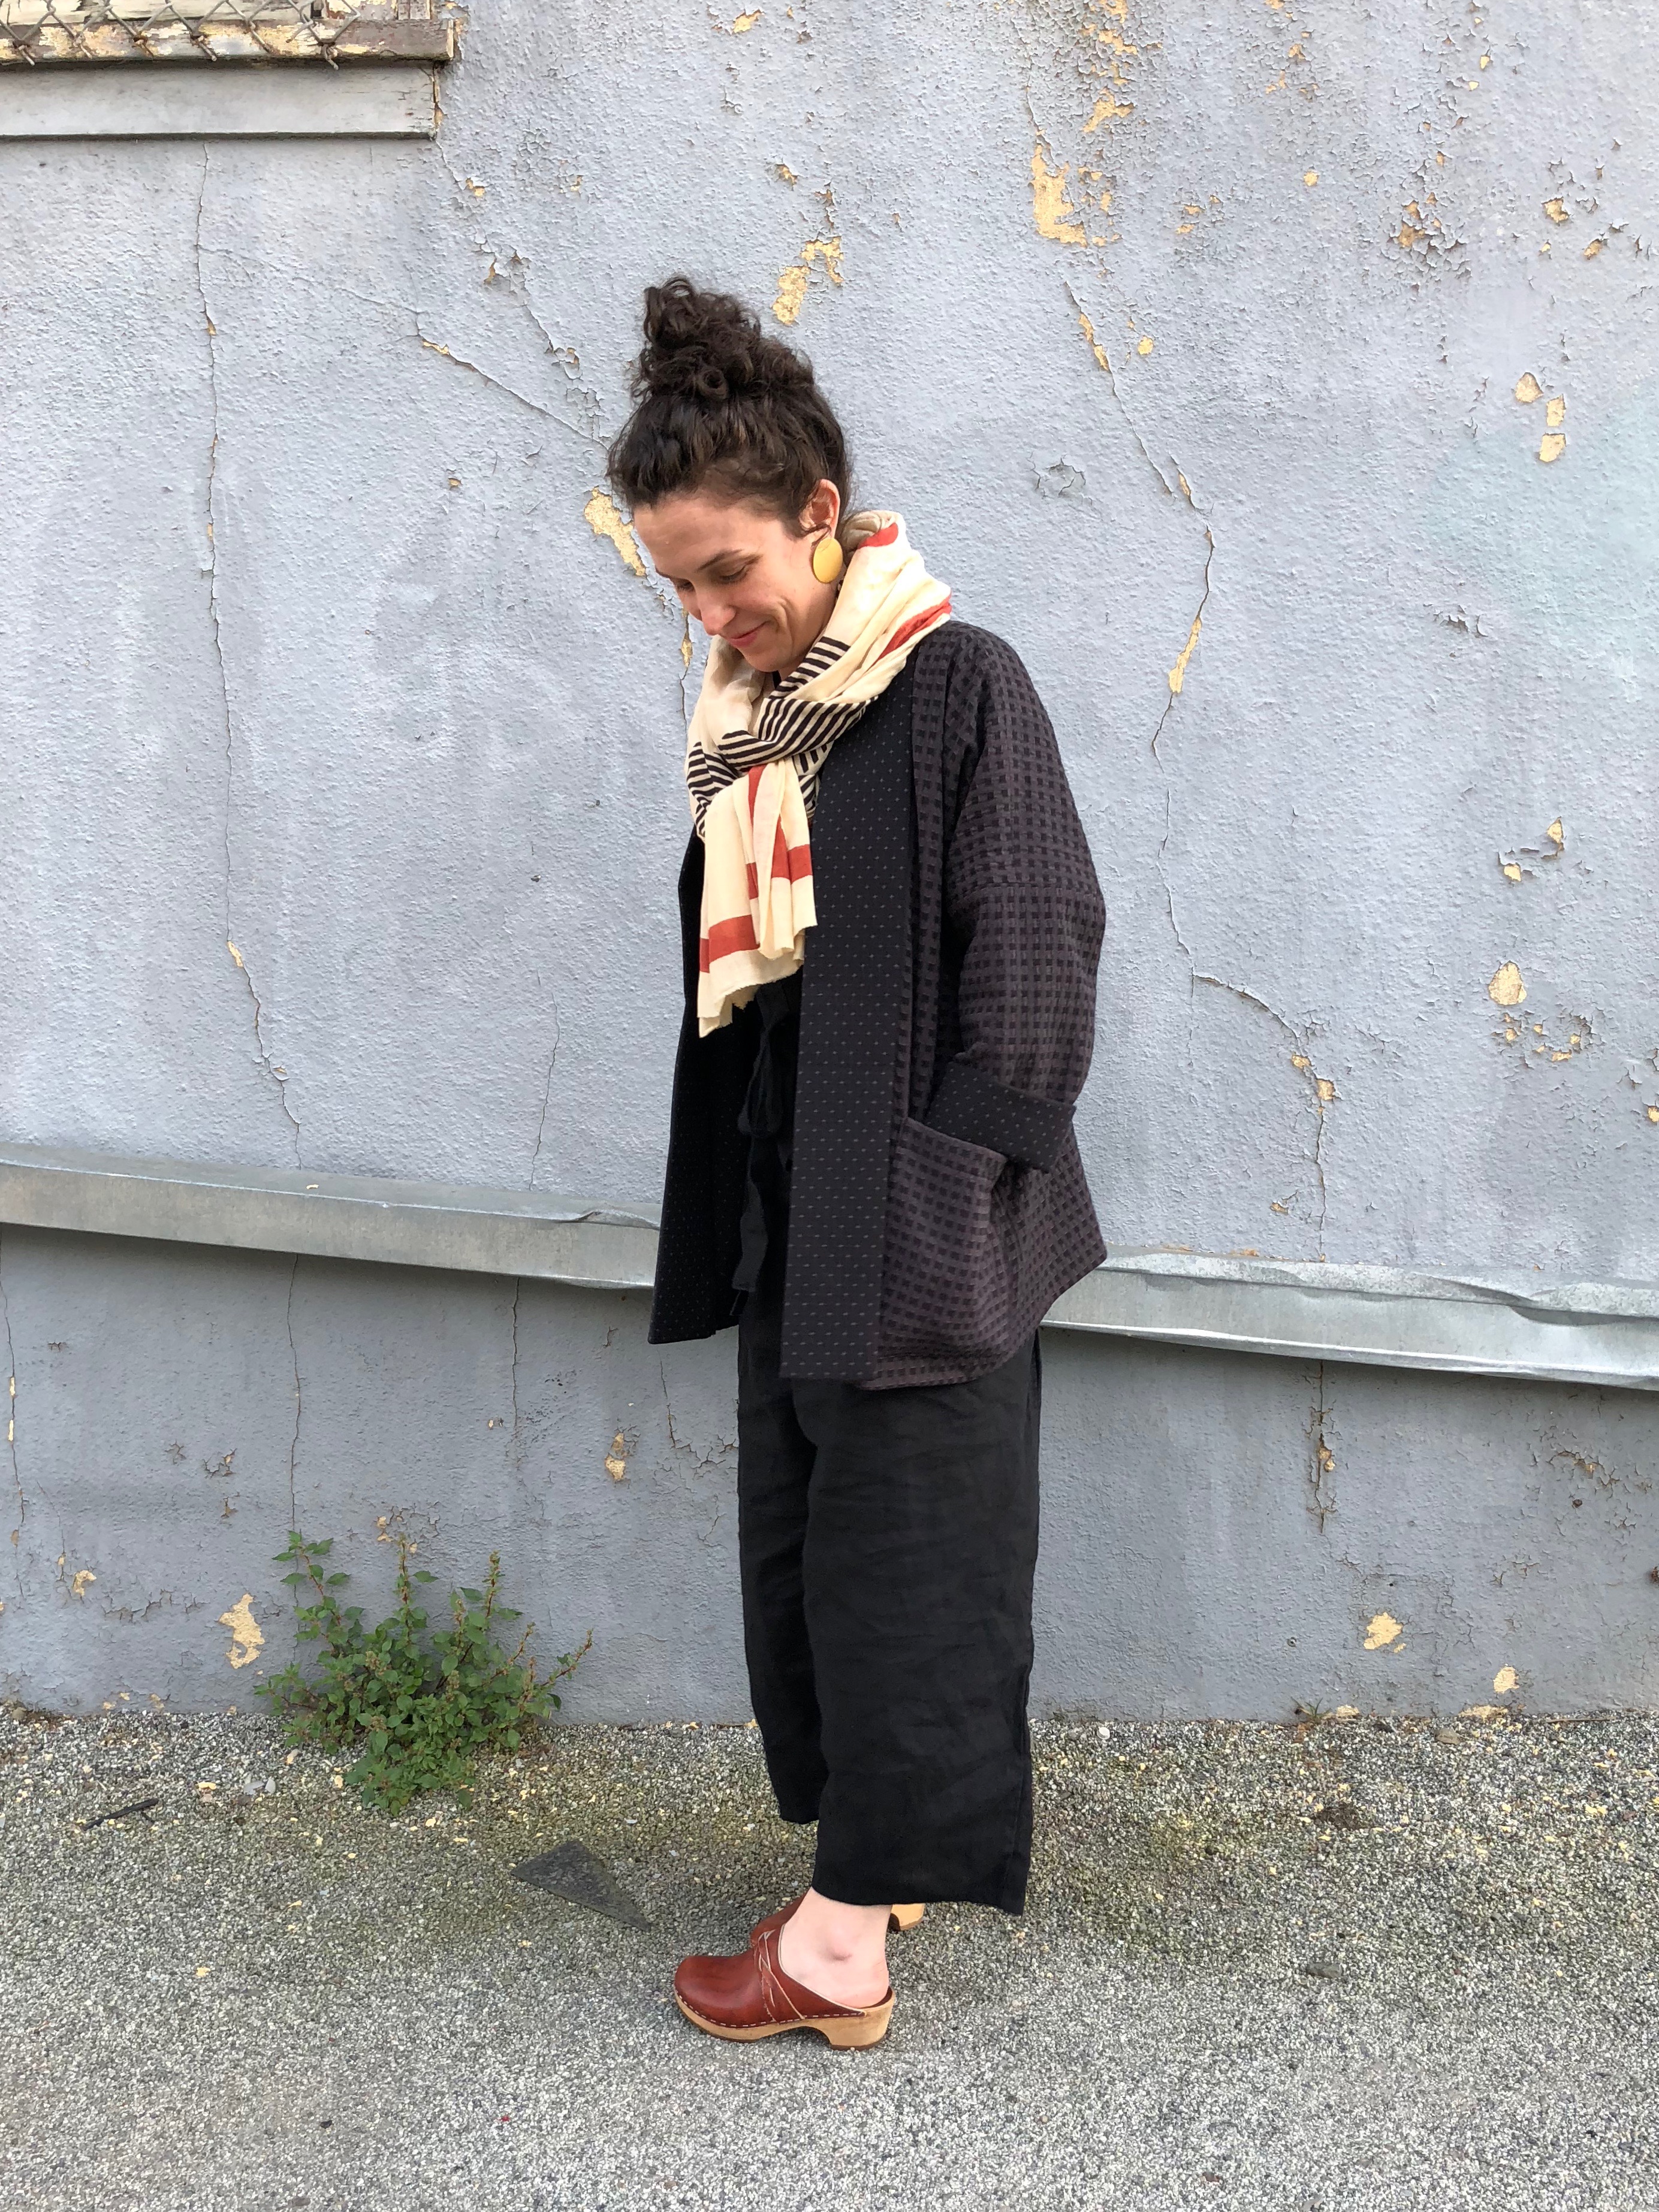
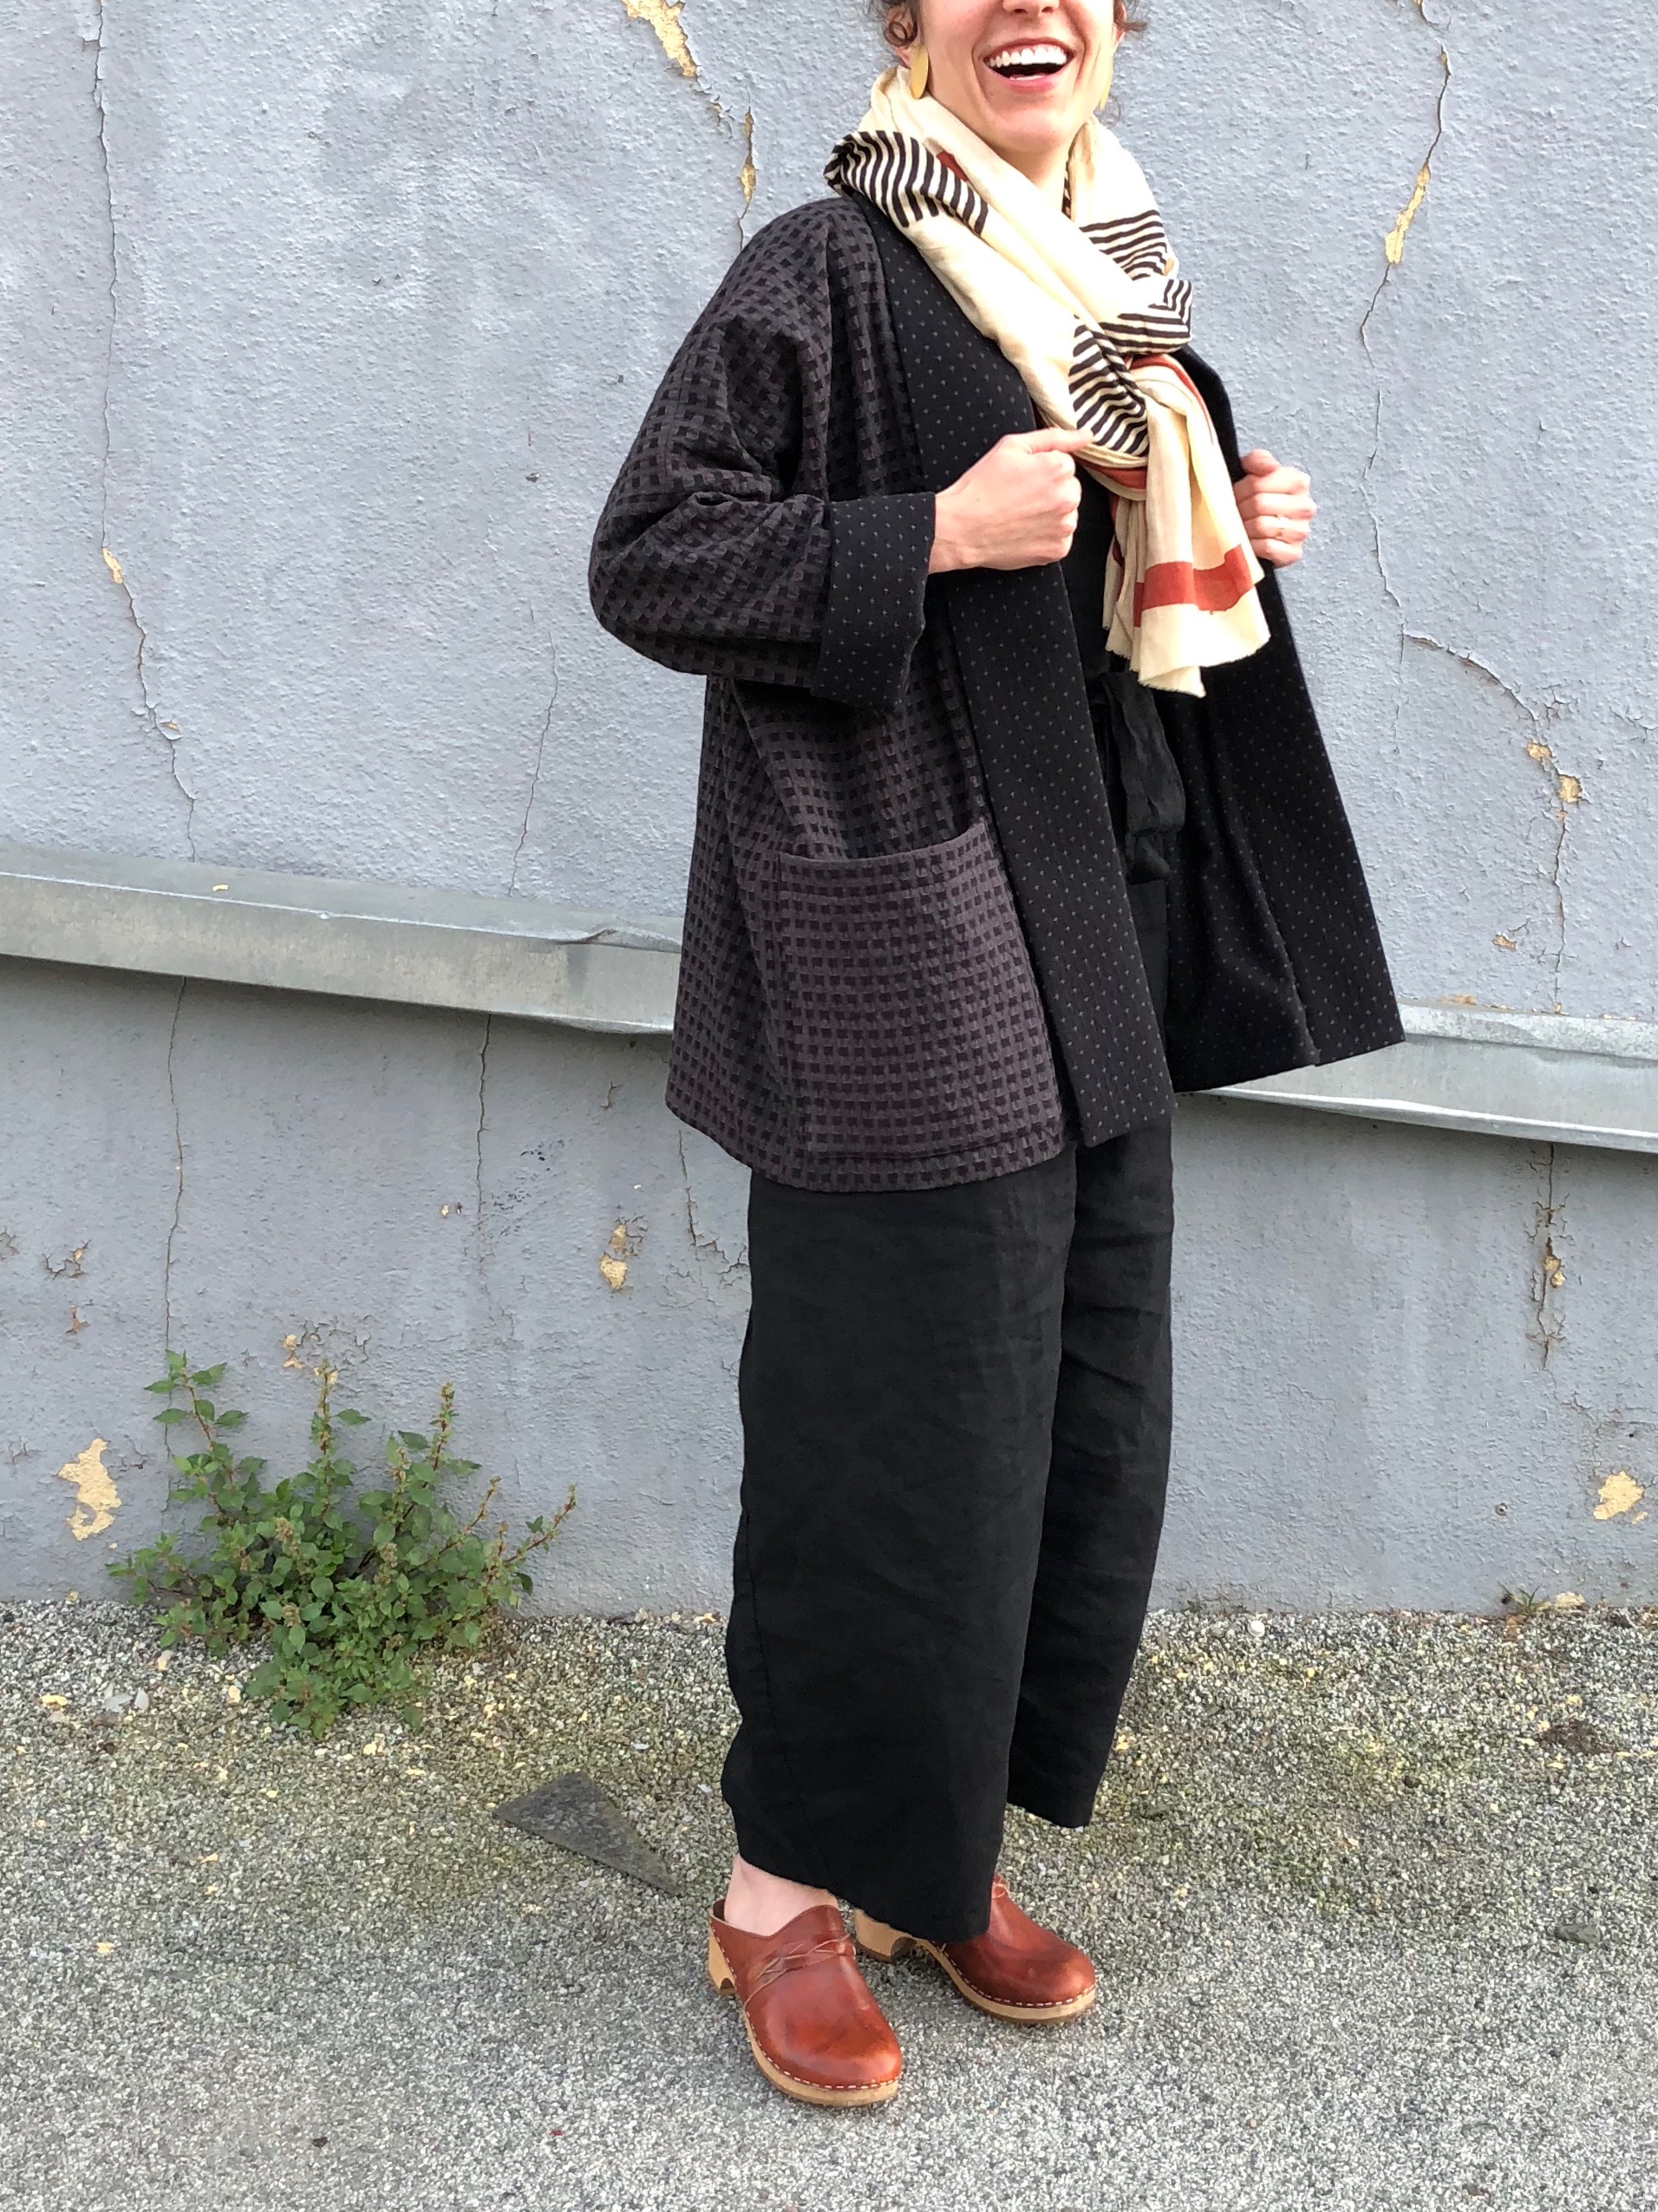
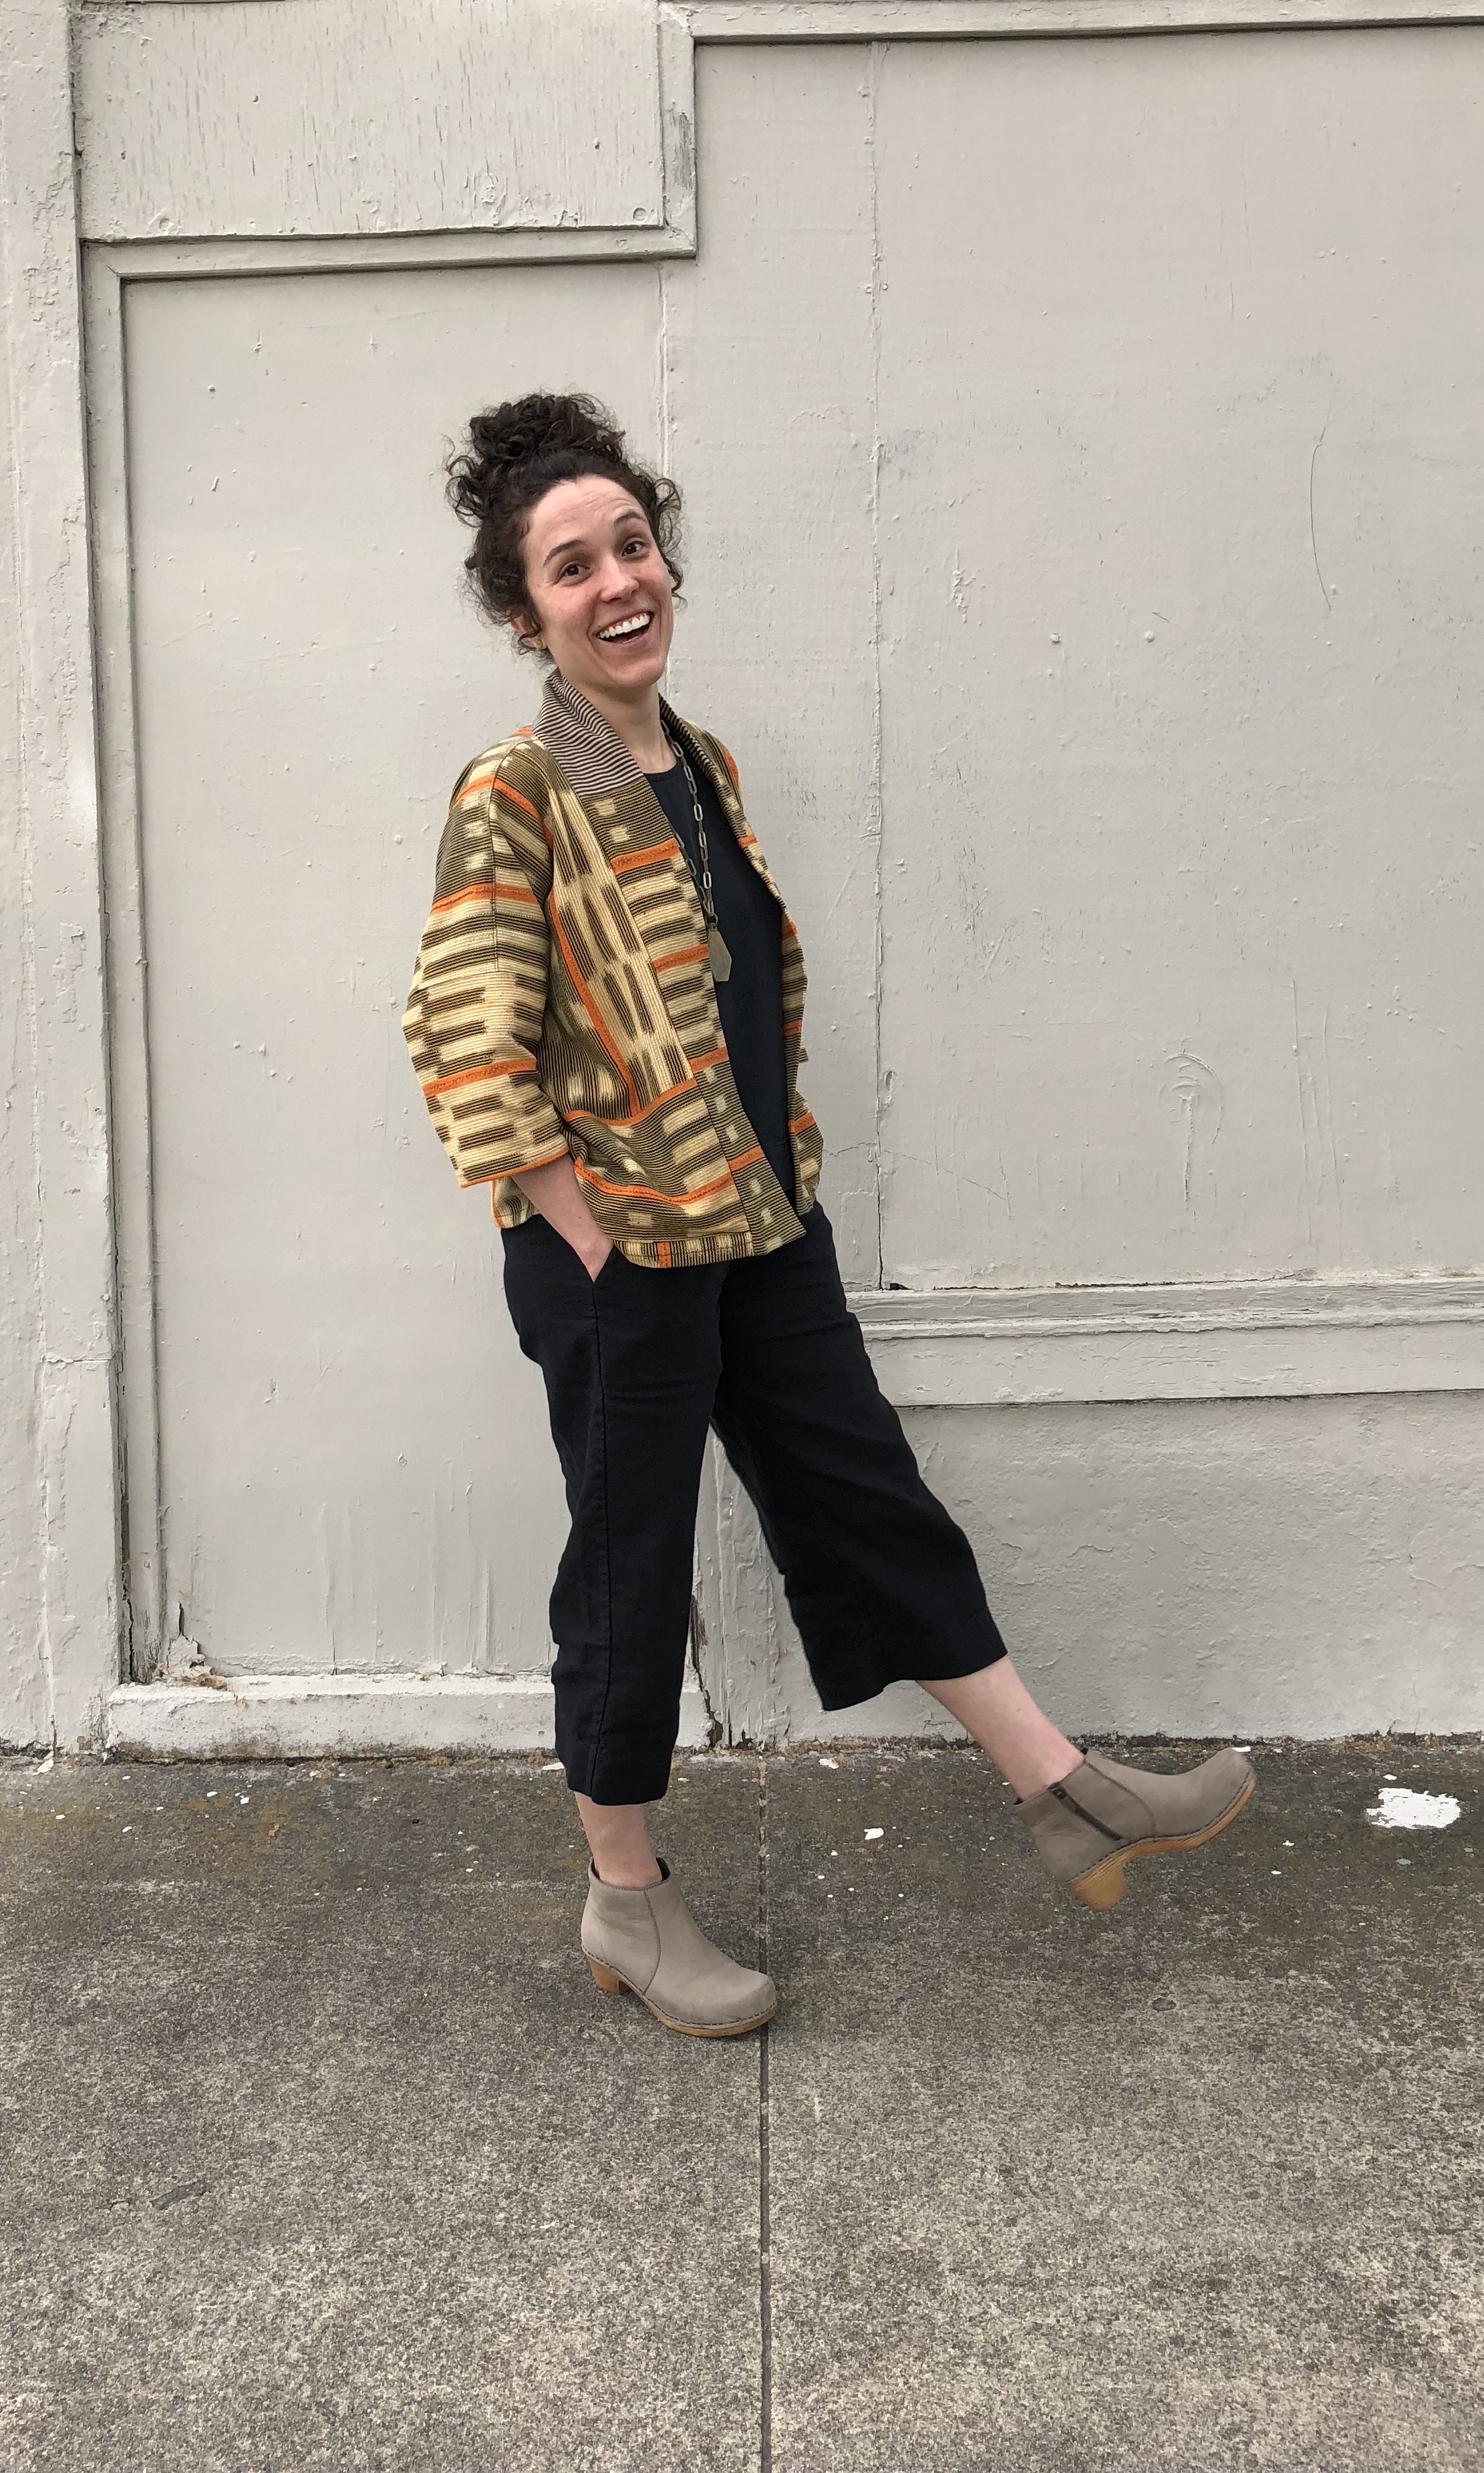
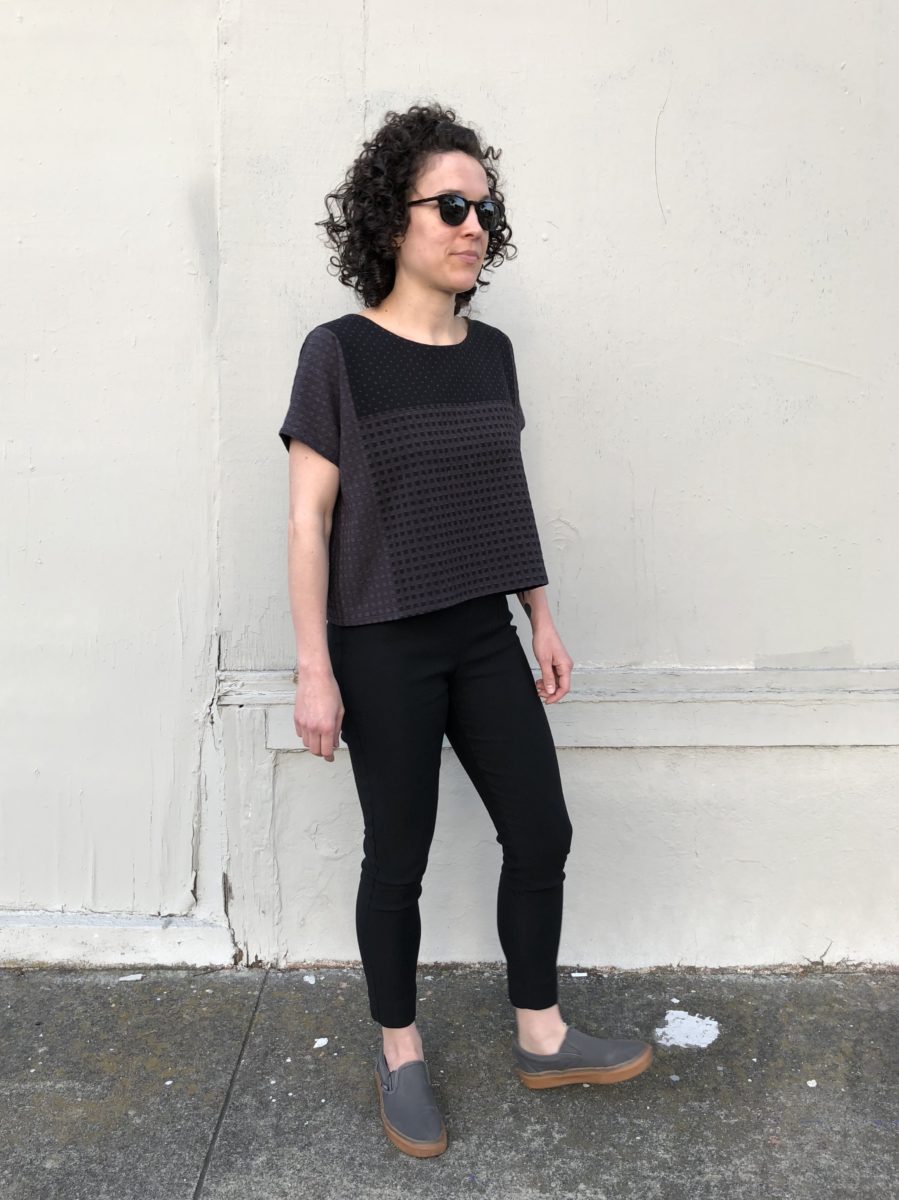
I had the immense pleasure of pattern testing the new Wiksten Unfolding Jacket, which first appeared in Making Magazine No. 4 / Lines. The updated, standalone pattern will be released by Wiksten, hopefully next month.
In the Making version, I made a size XS. The new pattern includes a larger range of sizes and after comparing the pattern pieces, I made a size S here.
The fabric is also from Wiksten and I think it’s a perfect pairing. Because the black square is a kind of squishy weave I had a hell of time getting the patch pockets pattern to line up. They ended up not, but oh well.
I’m glad I was able to add this to my me-made wardrobe as it’s been one of only three outerwear pieces I’ve had for #MMMay18.
Speaking of Me Made Made I haven’t been anywhere near as productive as I was last year. I only just finished a silk noil Hemlock Tee (21 days in to the challenge), which had mostly been made last month and two Kalle shirts have been all cut out and waiting on my ironing board.
Then, after a particularly long commute home, I just auto piloted through this jacket. It’s been unseasonable chilly in the Bay Area and I yearned for another layering piece.
I cut and hacked this together without much of a plan and feel quite relived it worked out. One side even has some magical unplanned pattern matching on the shoulders!
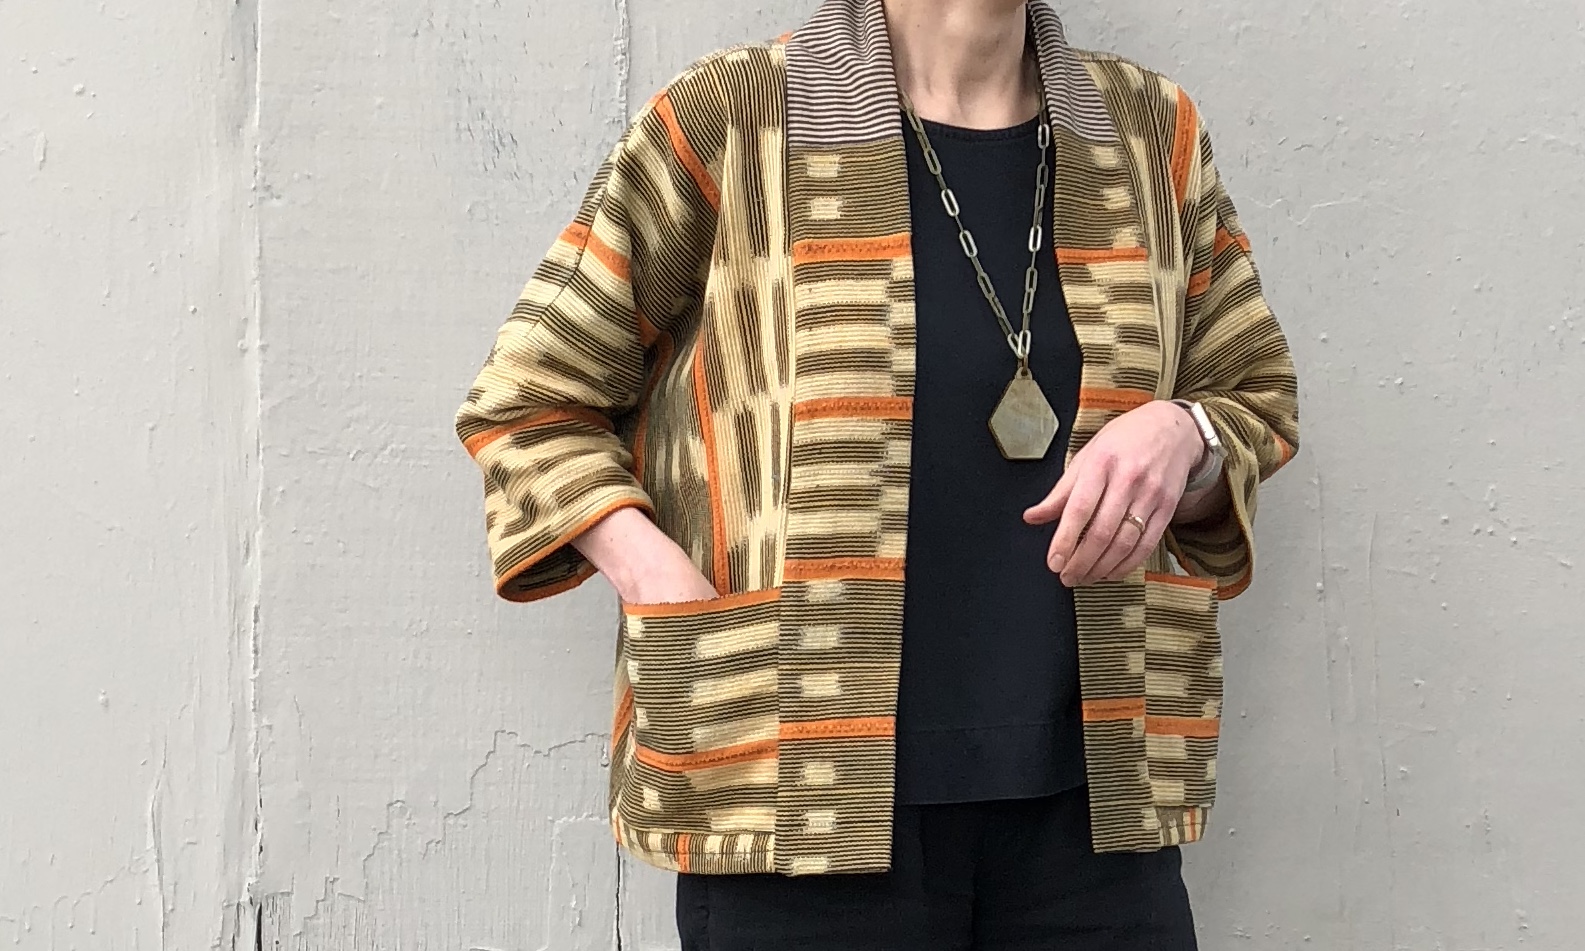
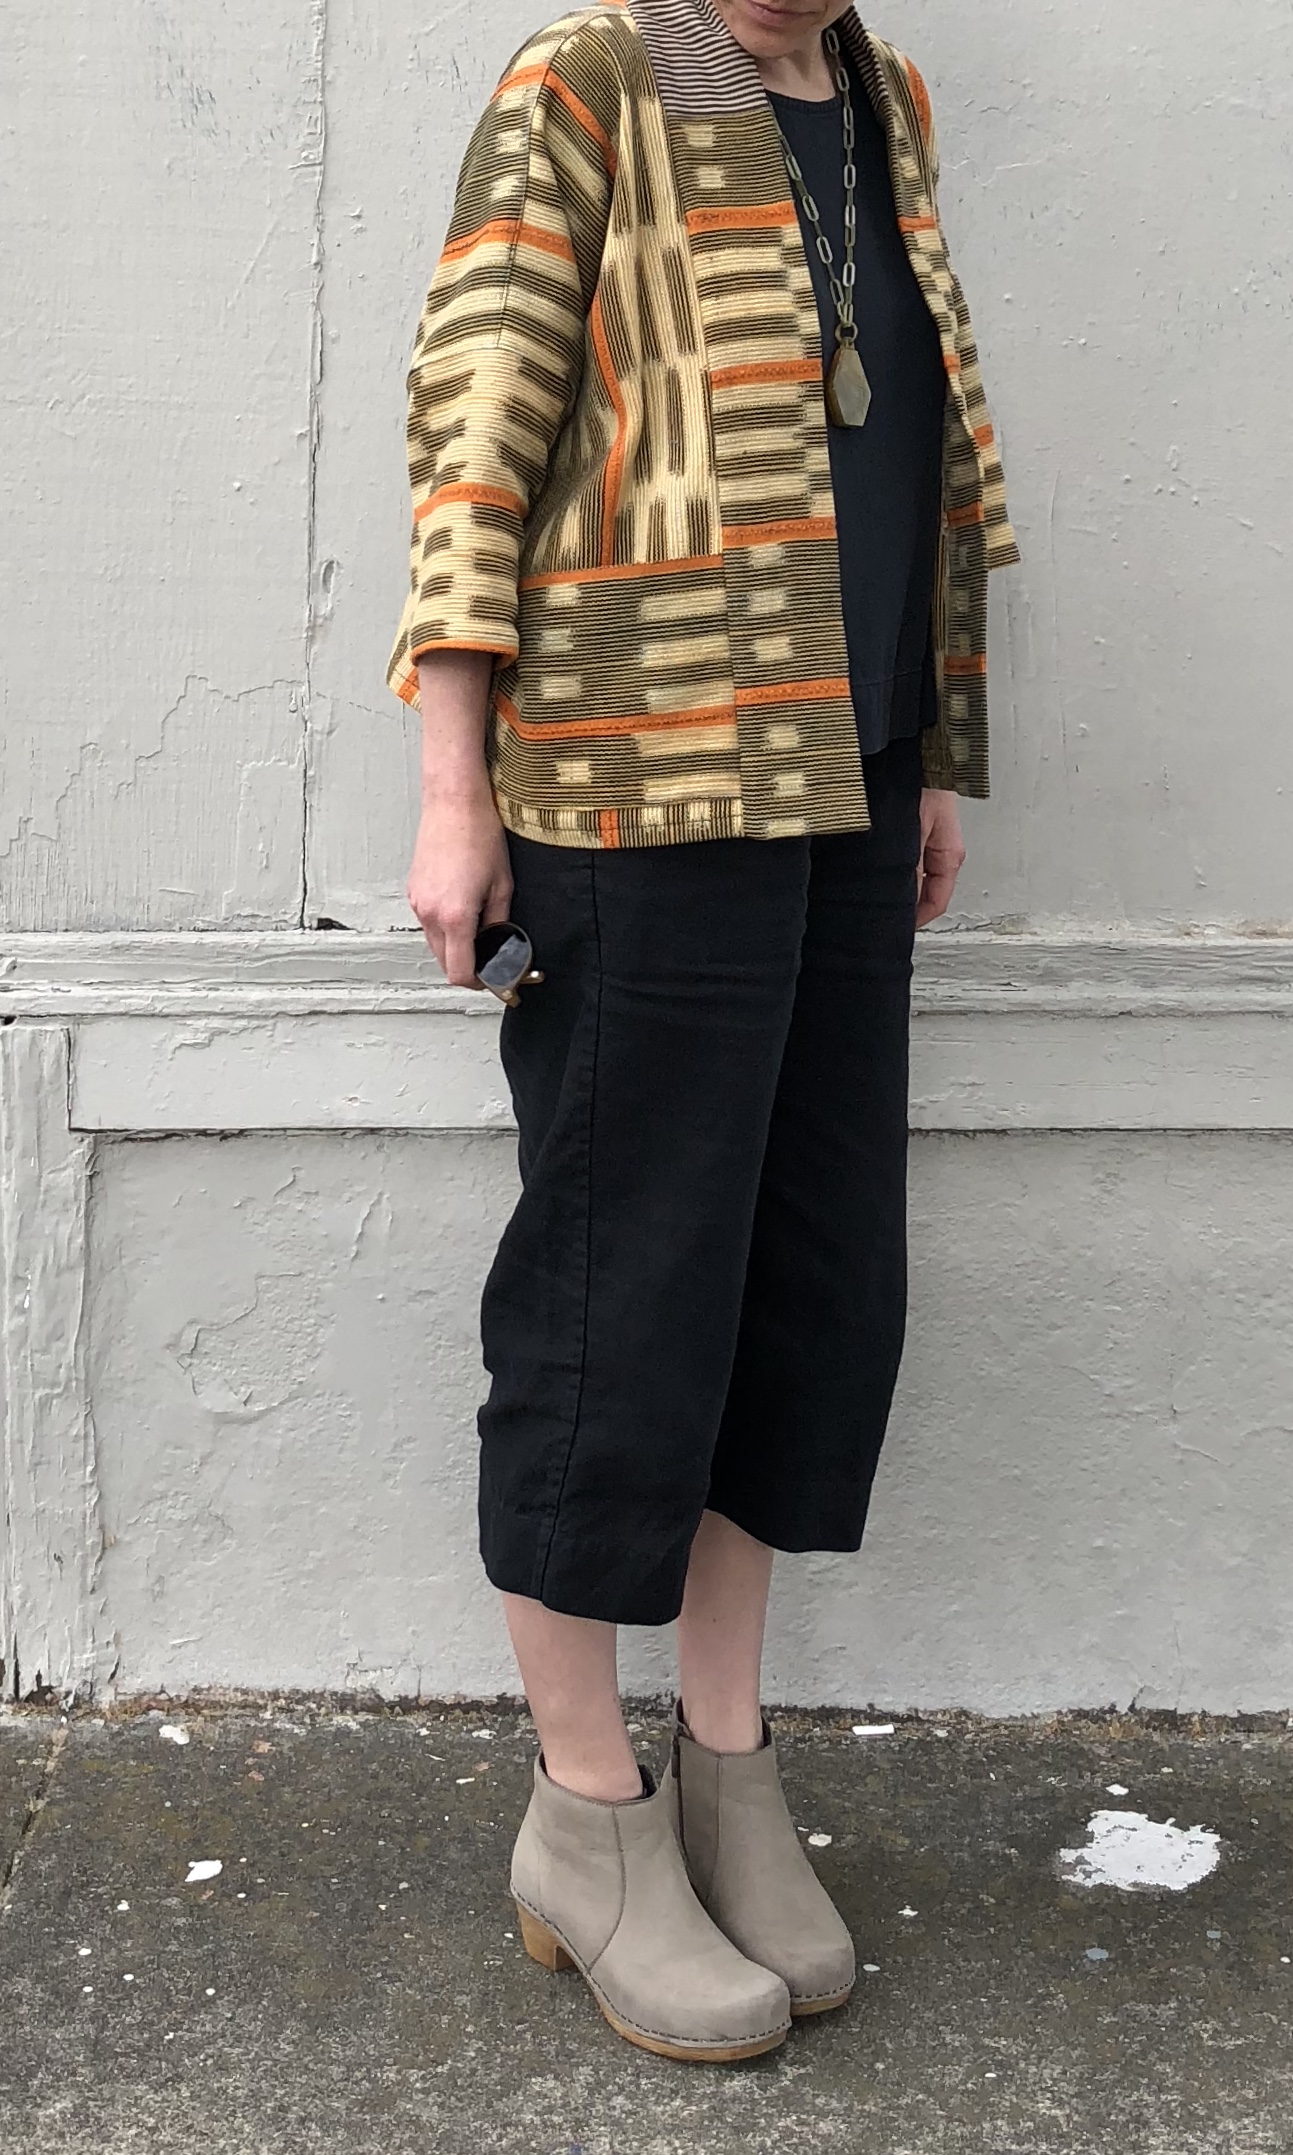
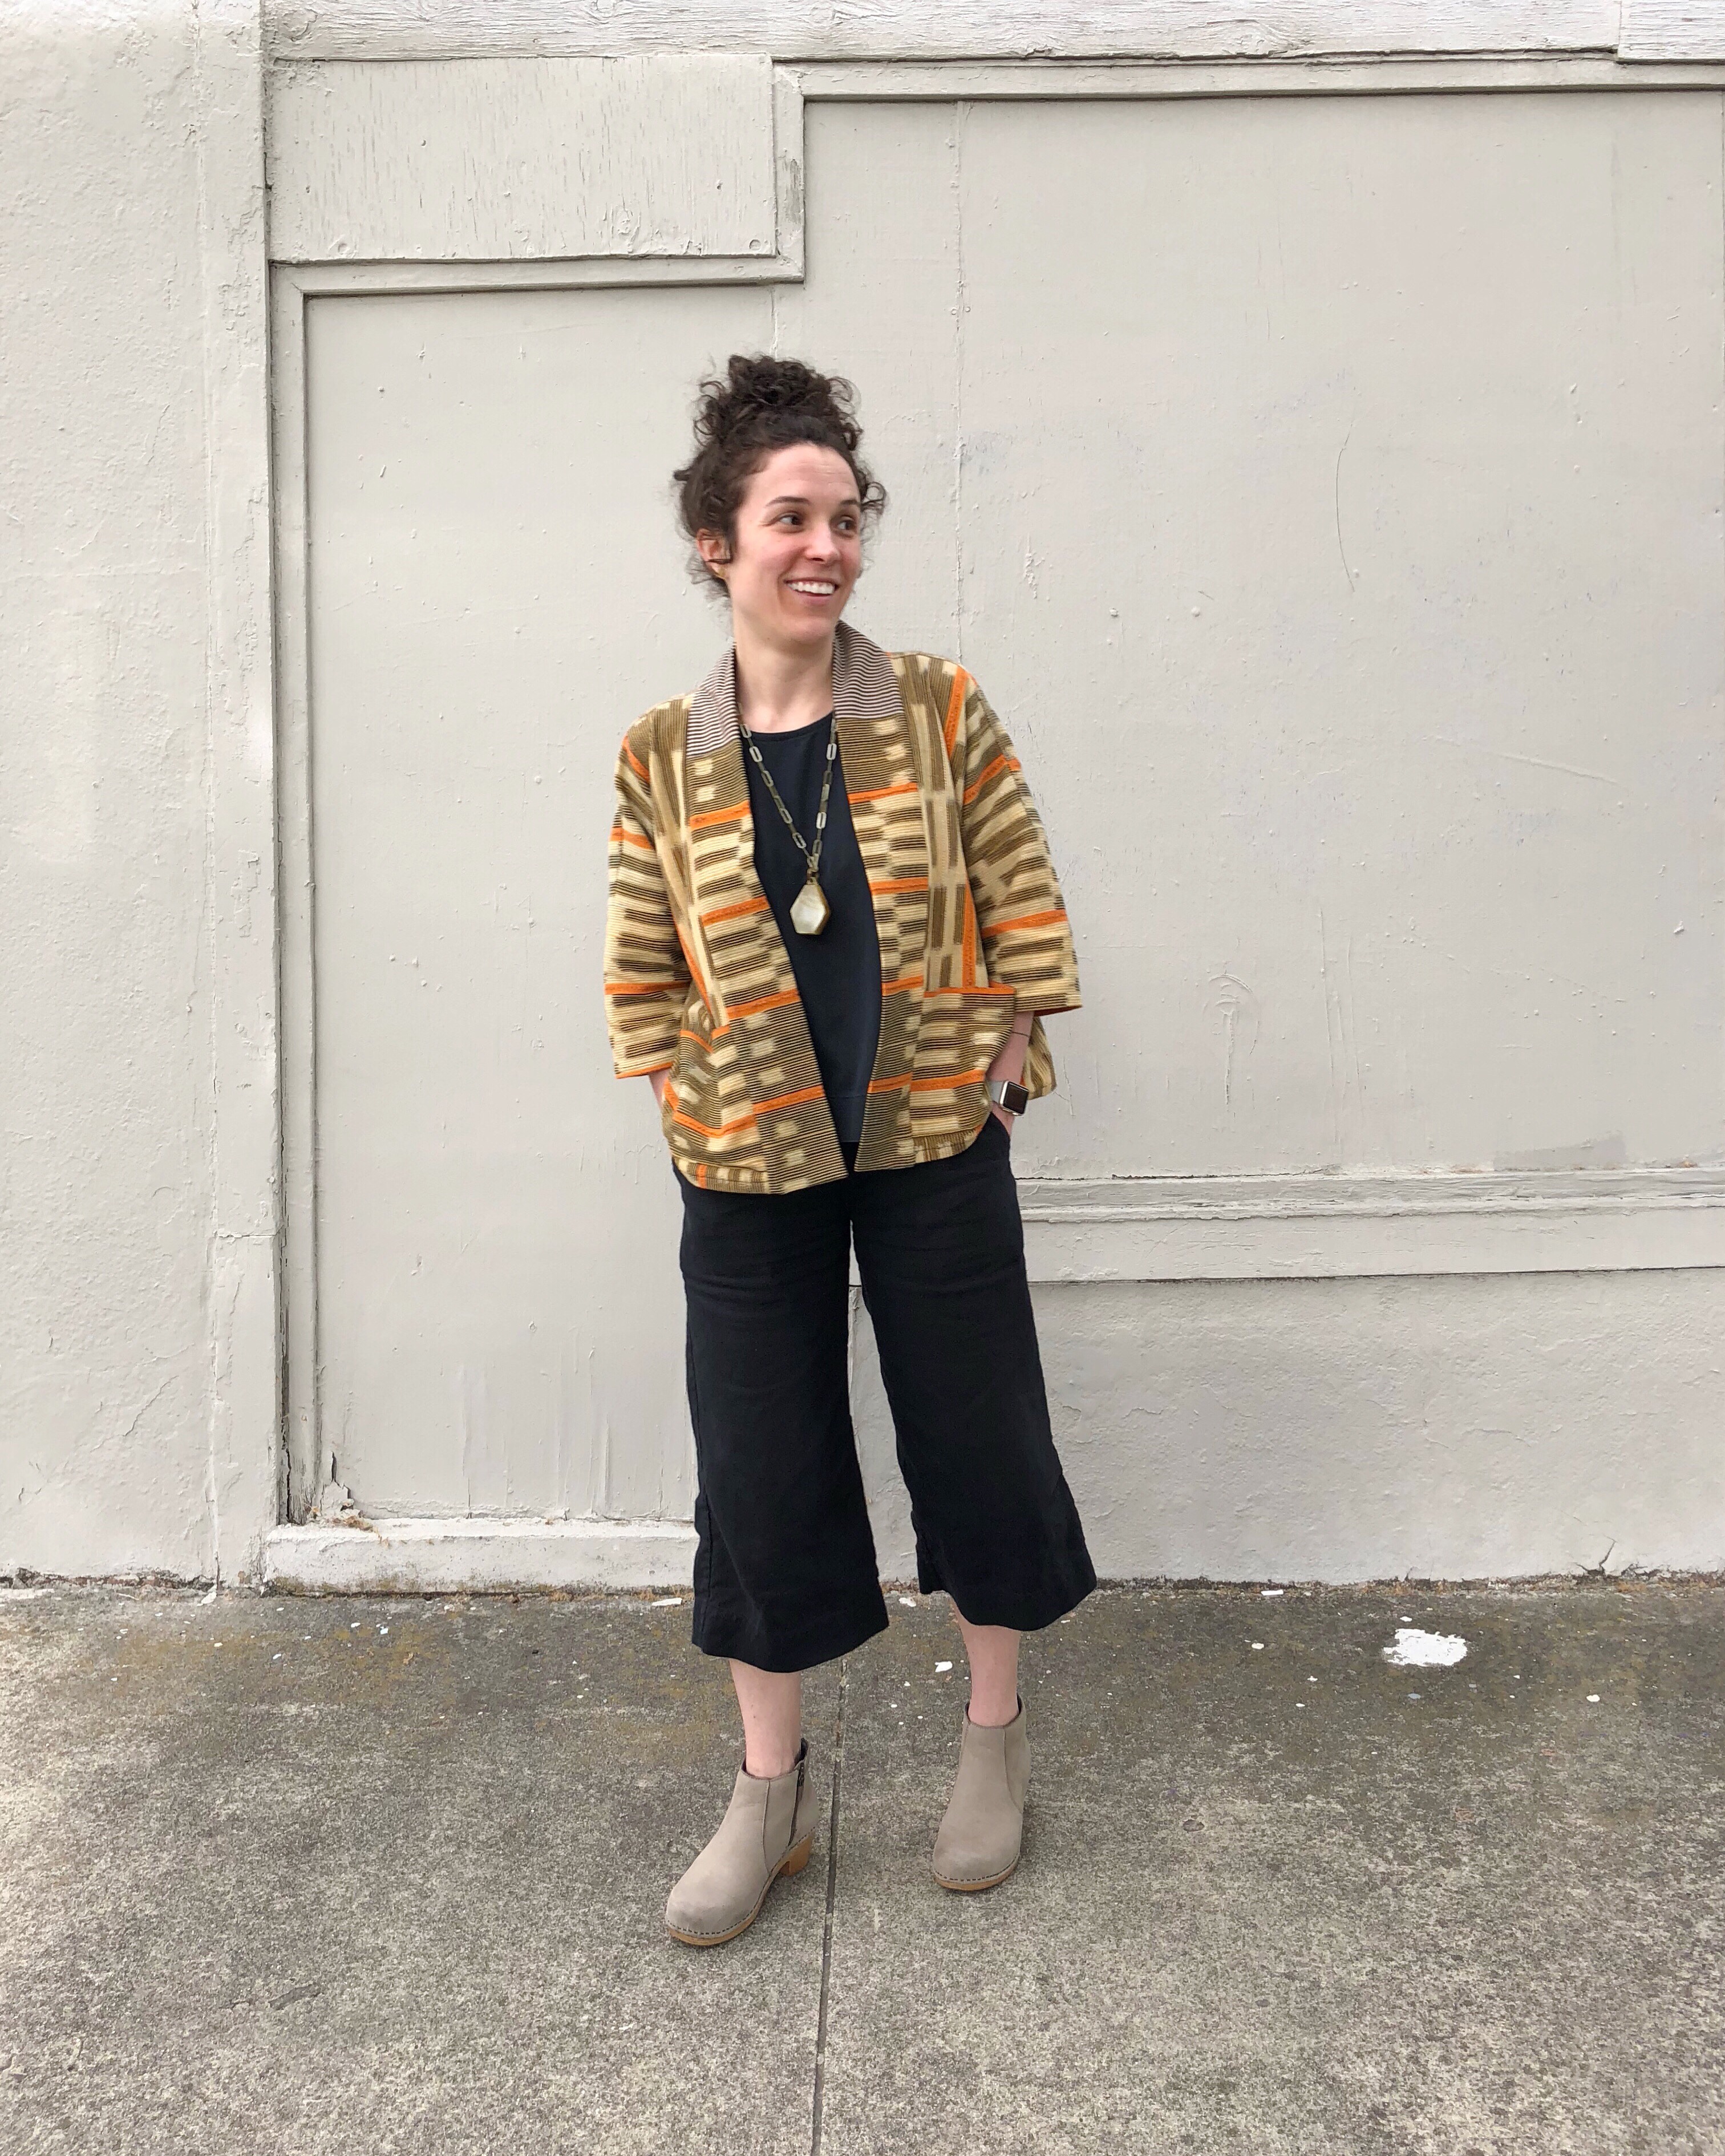
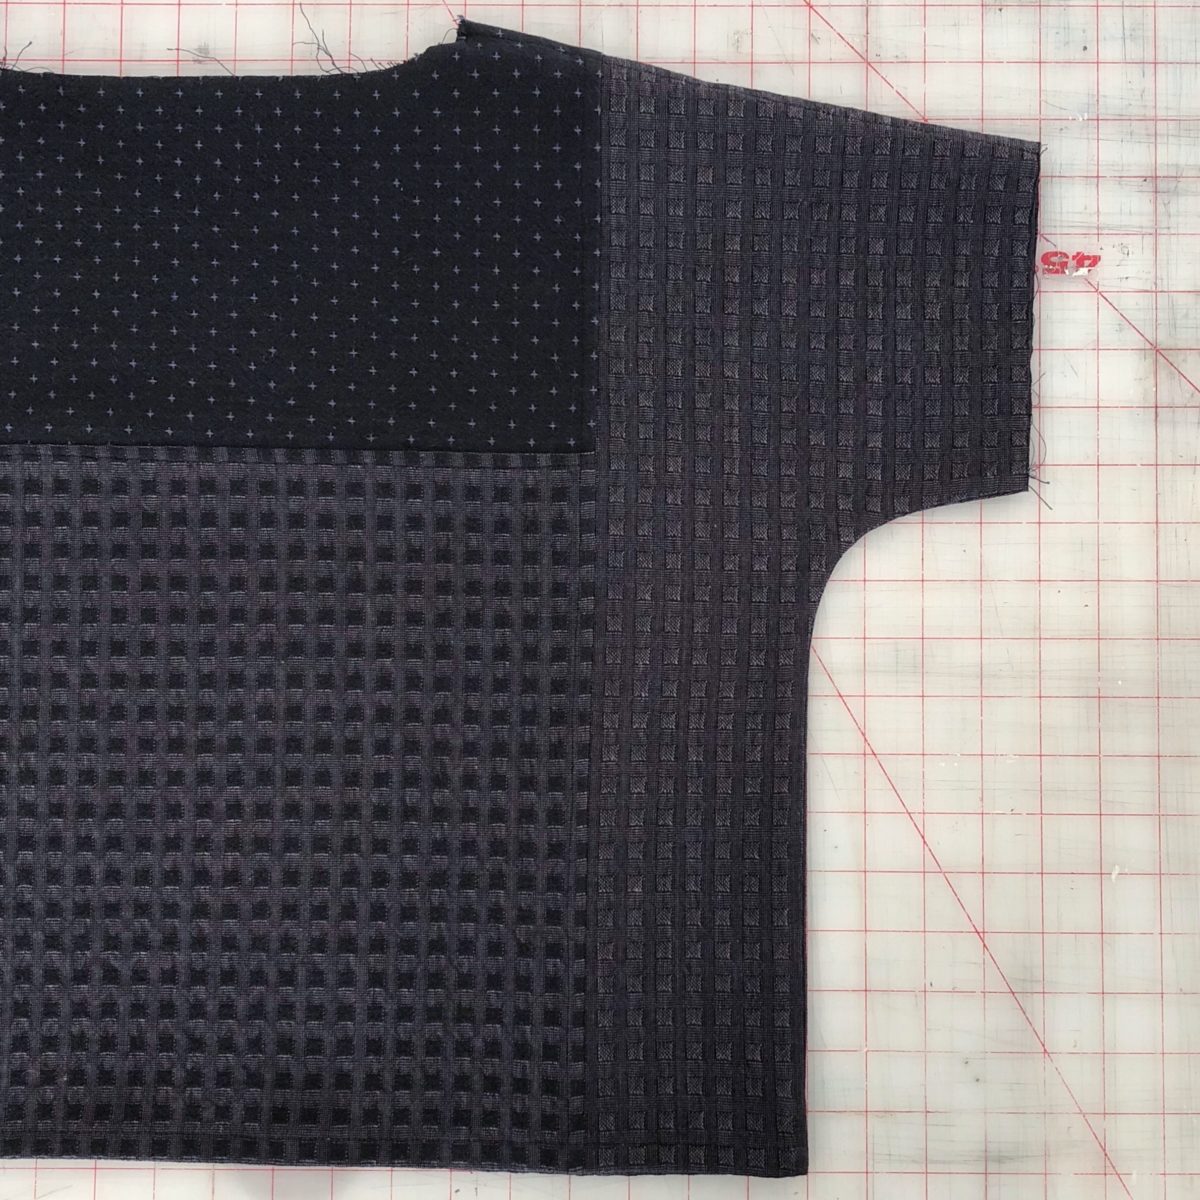
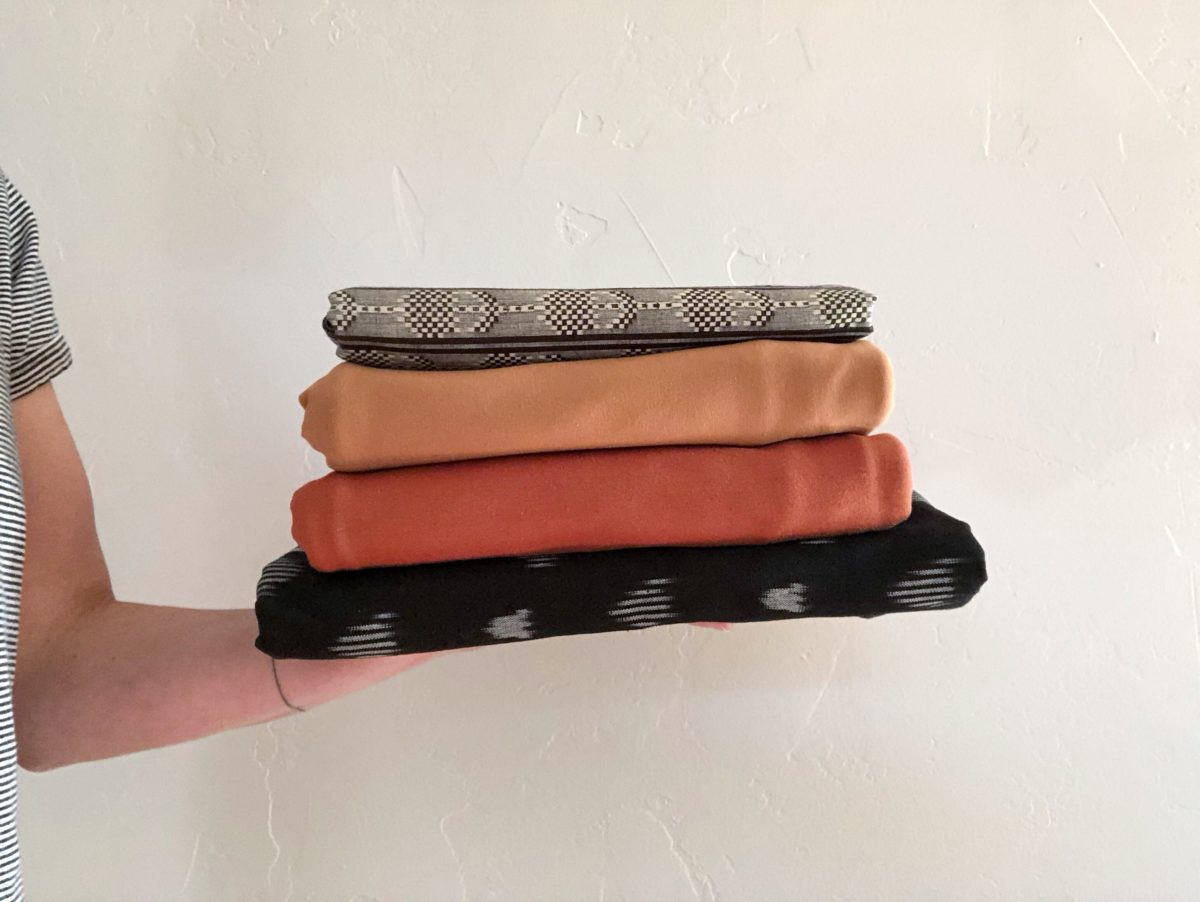
I’ve had this Baule cloth for over a year, all the while knowing it was destined to be an Ace & Jig-esque jacket. I bought it at the Alameda Antiques Fair and discovered a piece of gum mashed into the fringe as I was cutting it up. At least it’s washed gum.
The textile is only about 54 by 36 inches which posed a cutting layout puzzle. I made an XXS, hacked off quite a bit of sleeve to make it fit, made a half collar, and added a coordinating stripe fabric to the collar piece, which I think is my favorite detail. It’s also unlined.
As it’s unlined, I had intended to flat fell / faux French the seams to fully encase all of the raw edges, but the thickness of the fabric and 3/8″ seam allowances made that impossible. Planning would have been helpful here. The shoulder seams are kind of a mess as I worked out this kink in construction and the side seams just ended up being serged. Another last minute decision was to topstitch the shoulder and sleeve seams with my new Bernina edgestitch foot. While I’m super impressed with the foot, the topstitching doesn’t really work well with this woven fabric. The burrito method was used to apply the half collar.
I’ve now made four of these jackets. Too many? Nah.
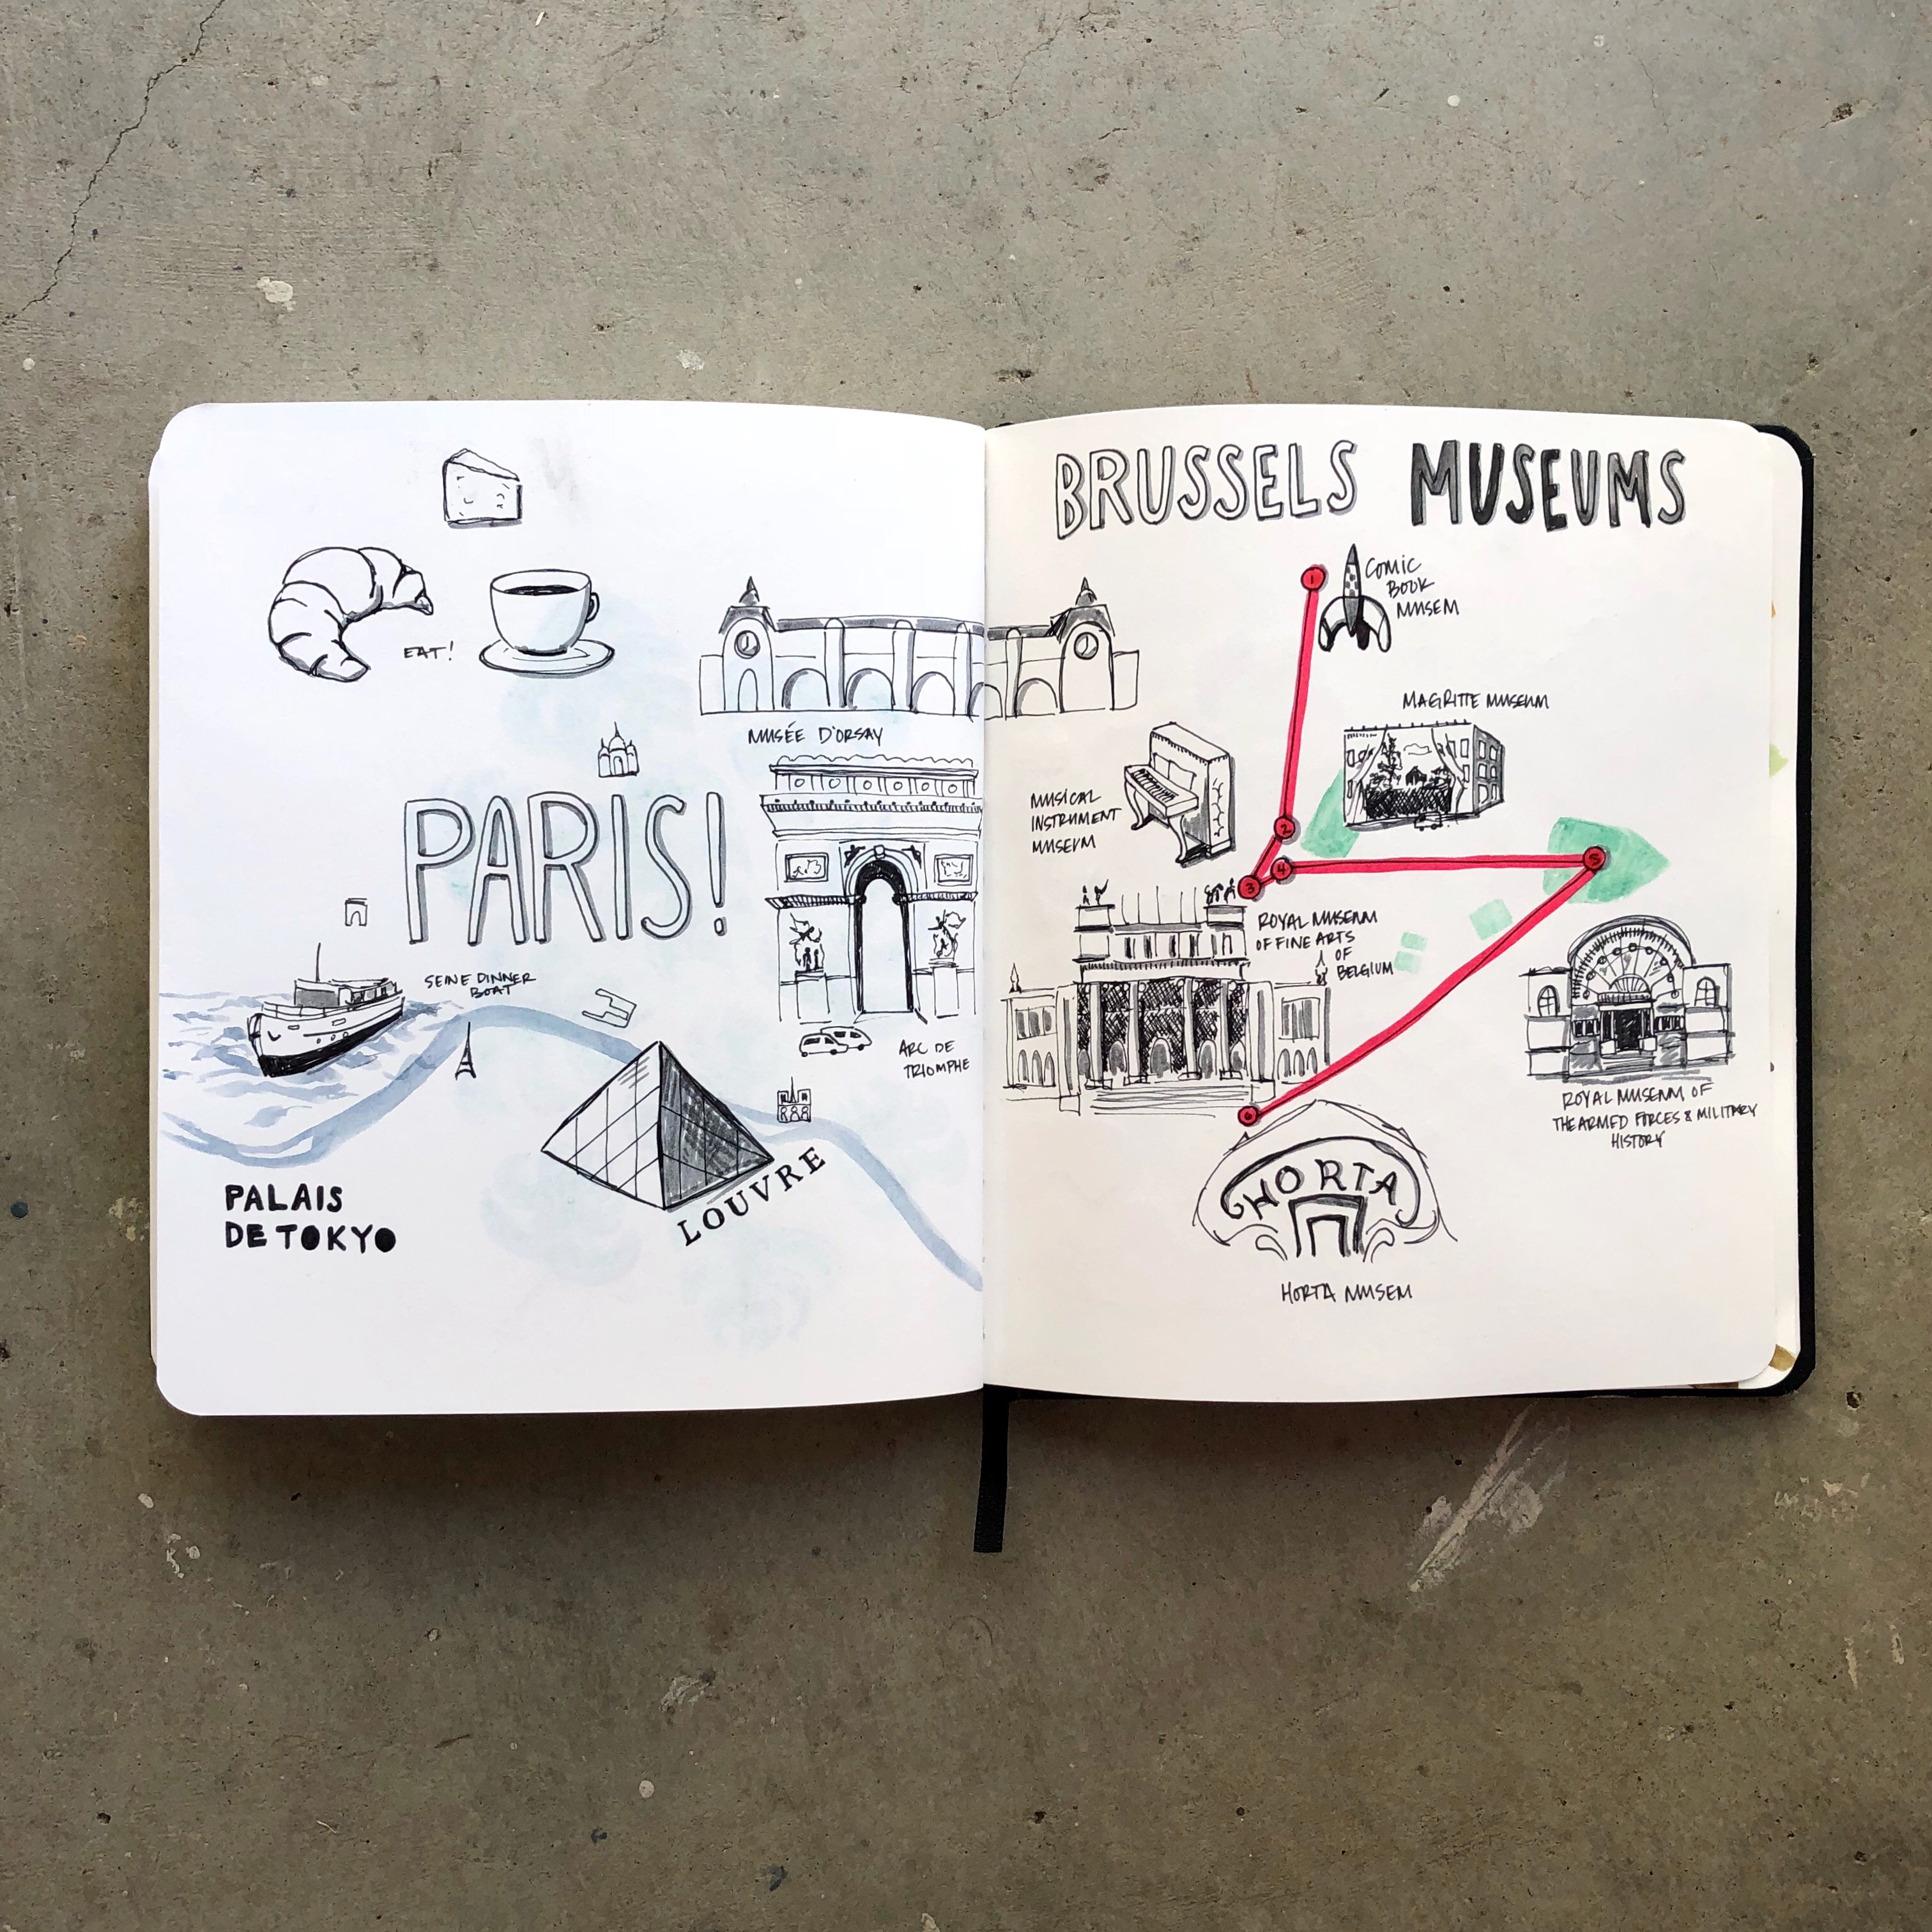
Planning trips in my sketchbook. Please comment with any art, architecture, food (no booze, please), parks, fabric, and thrifting things to do in Paris and Brussels!
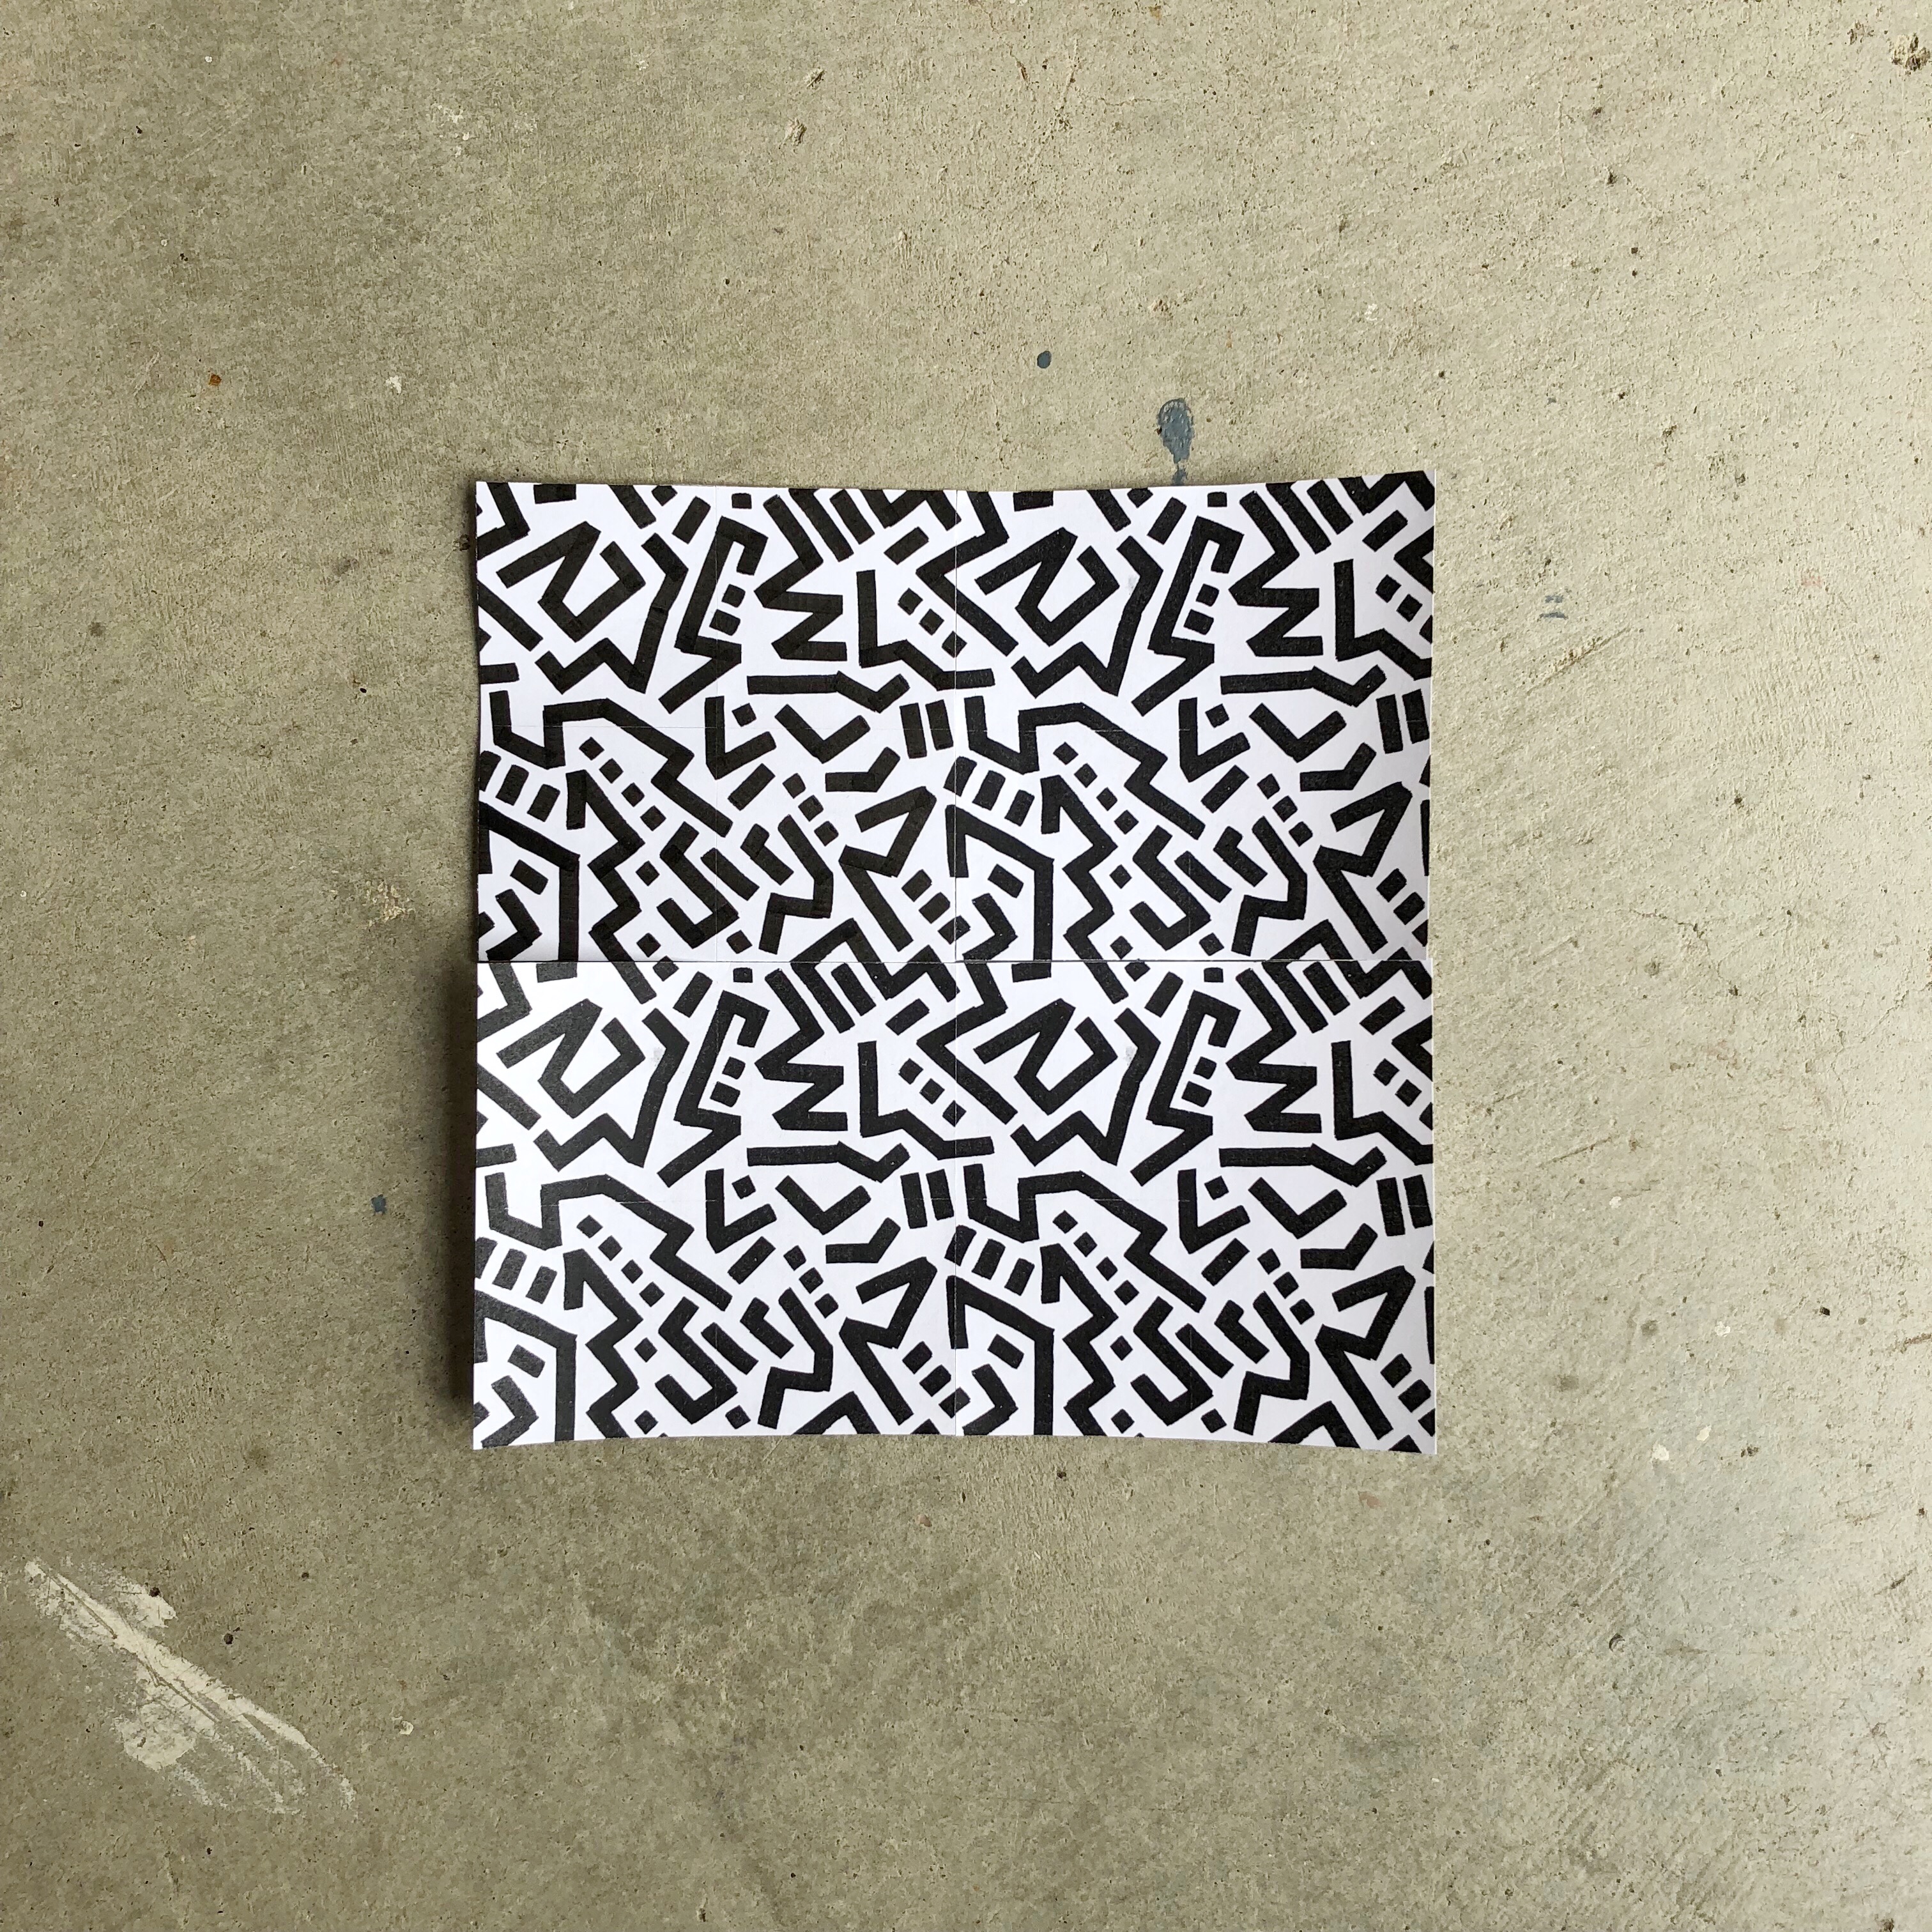
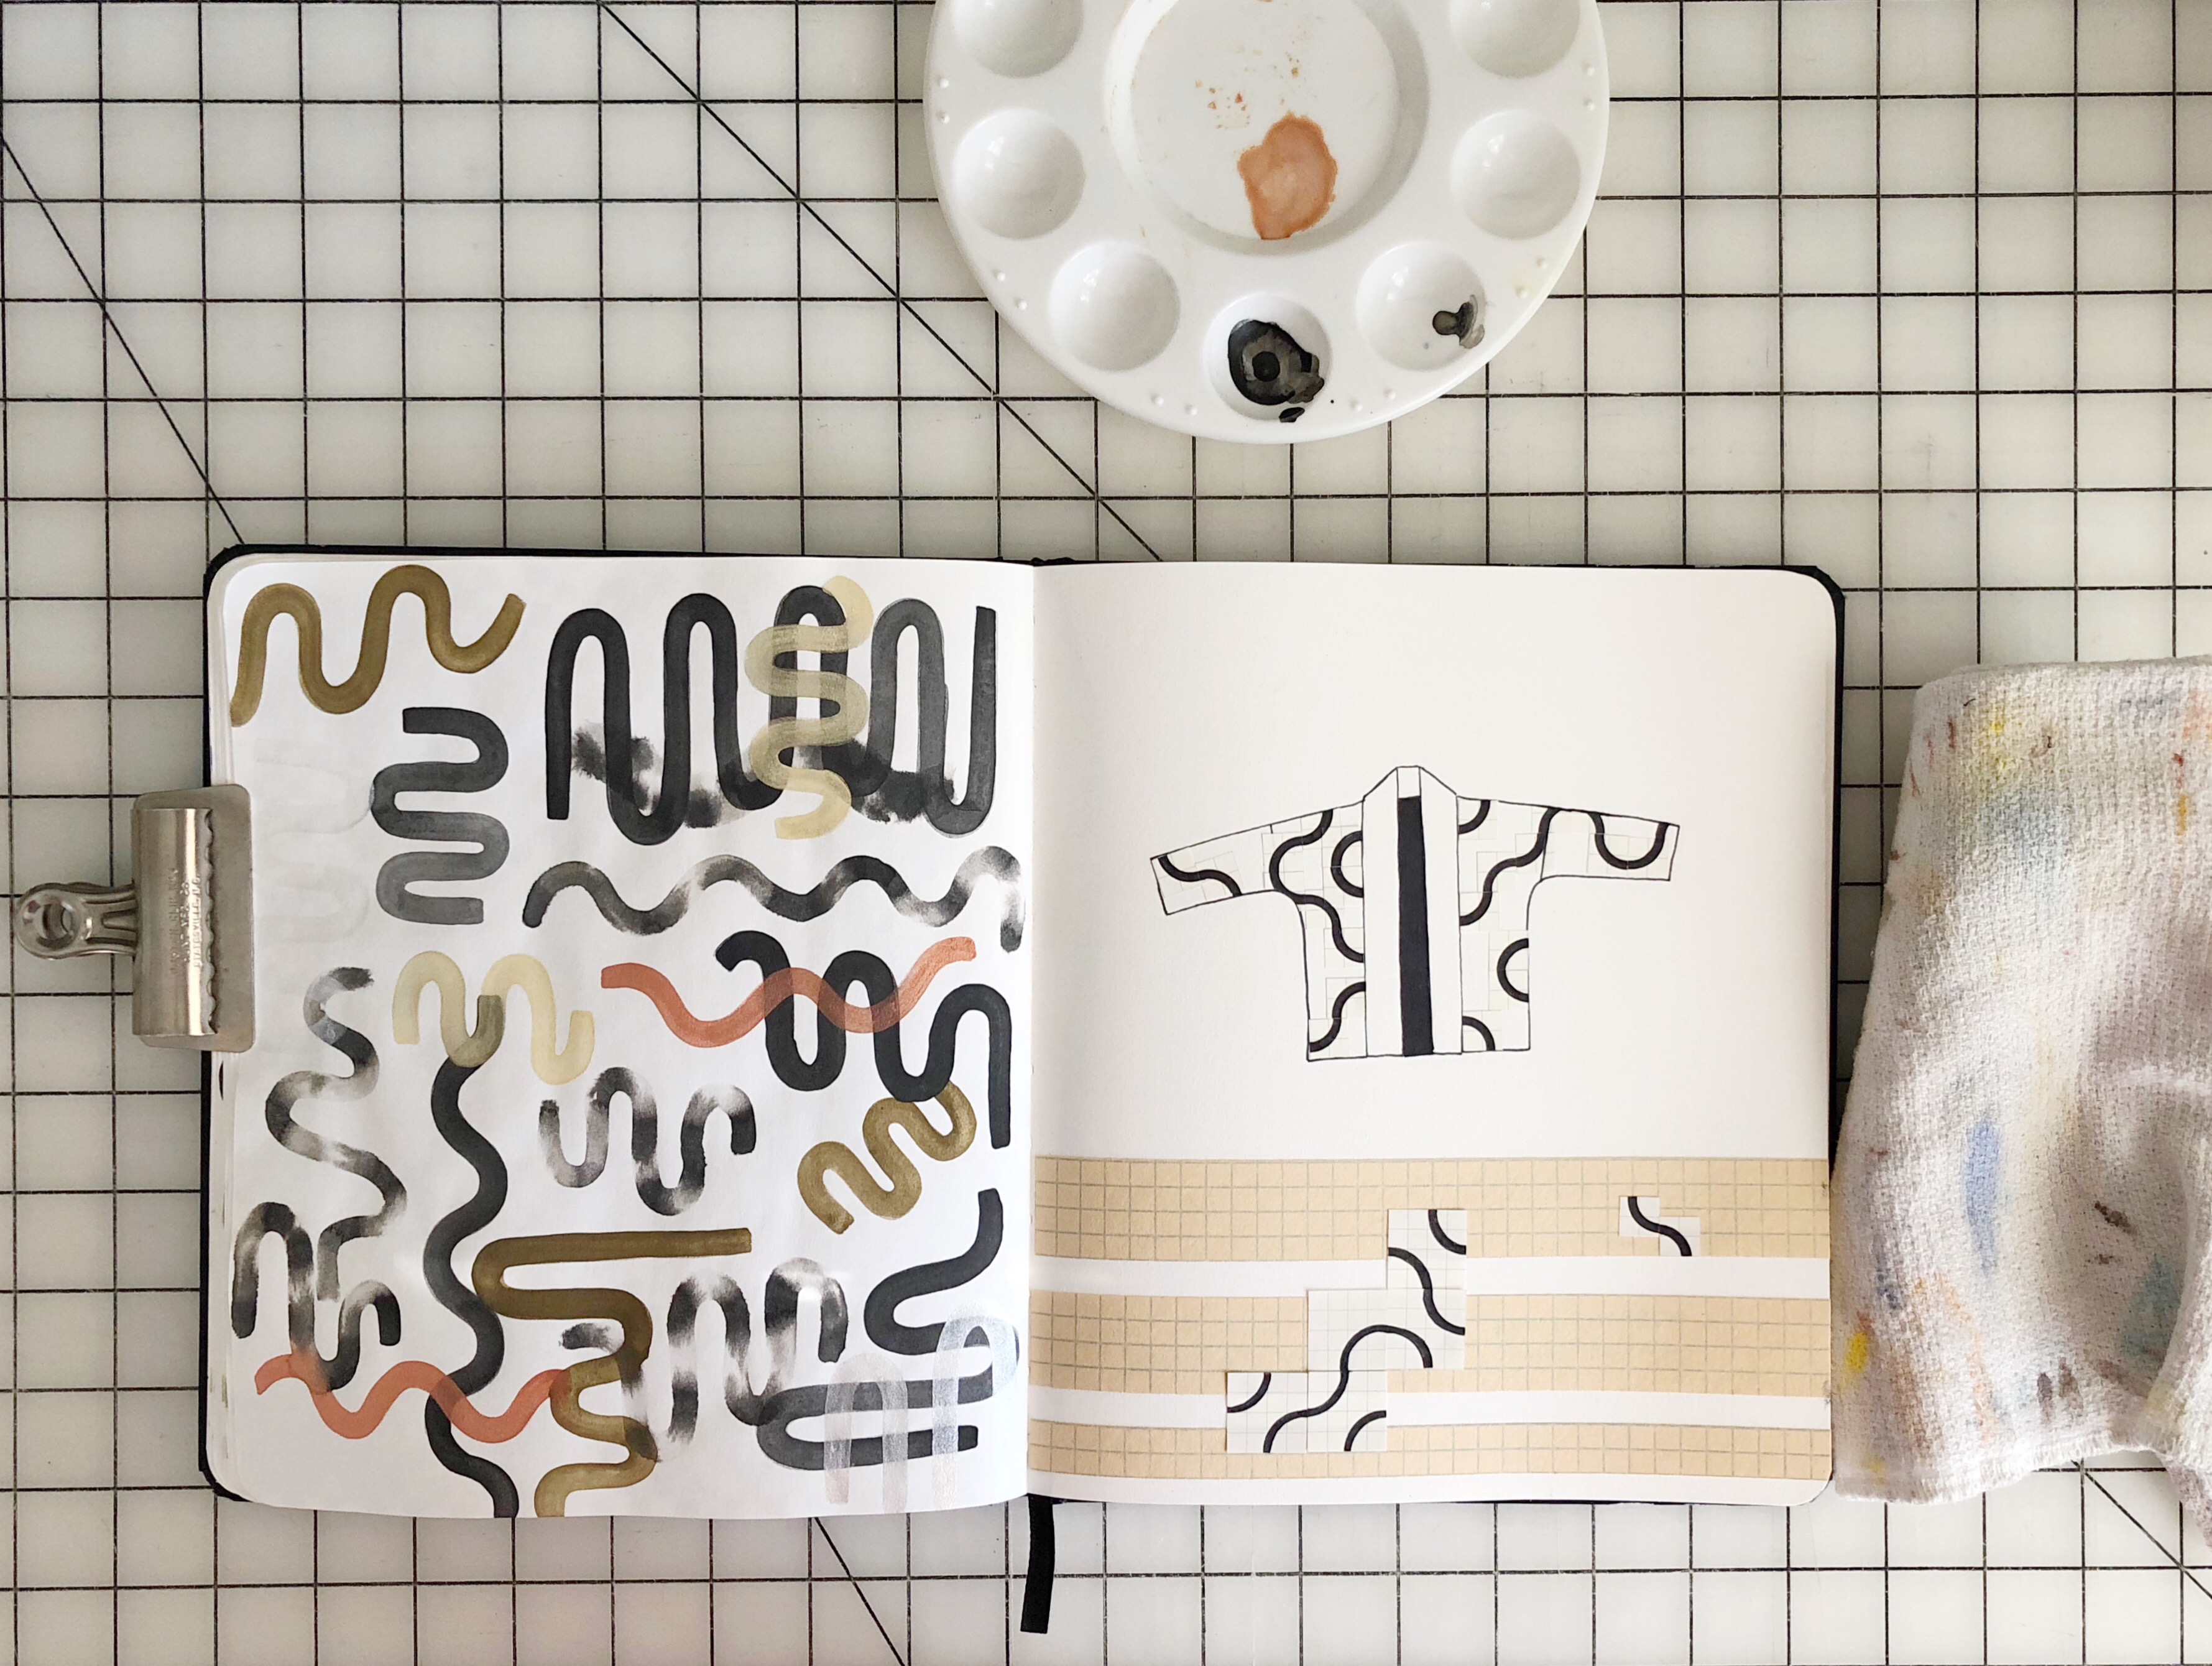
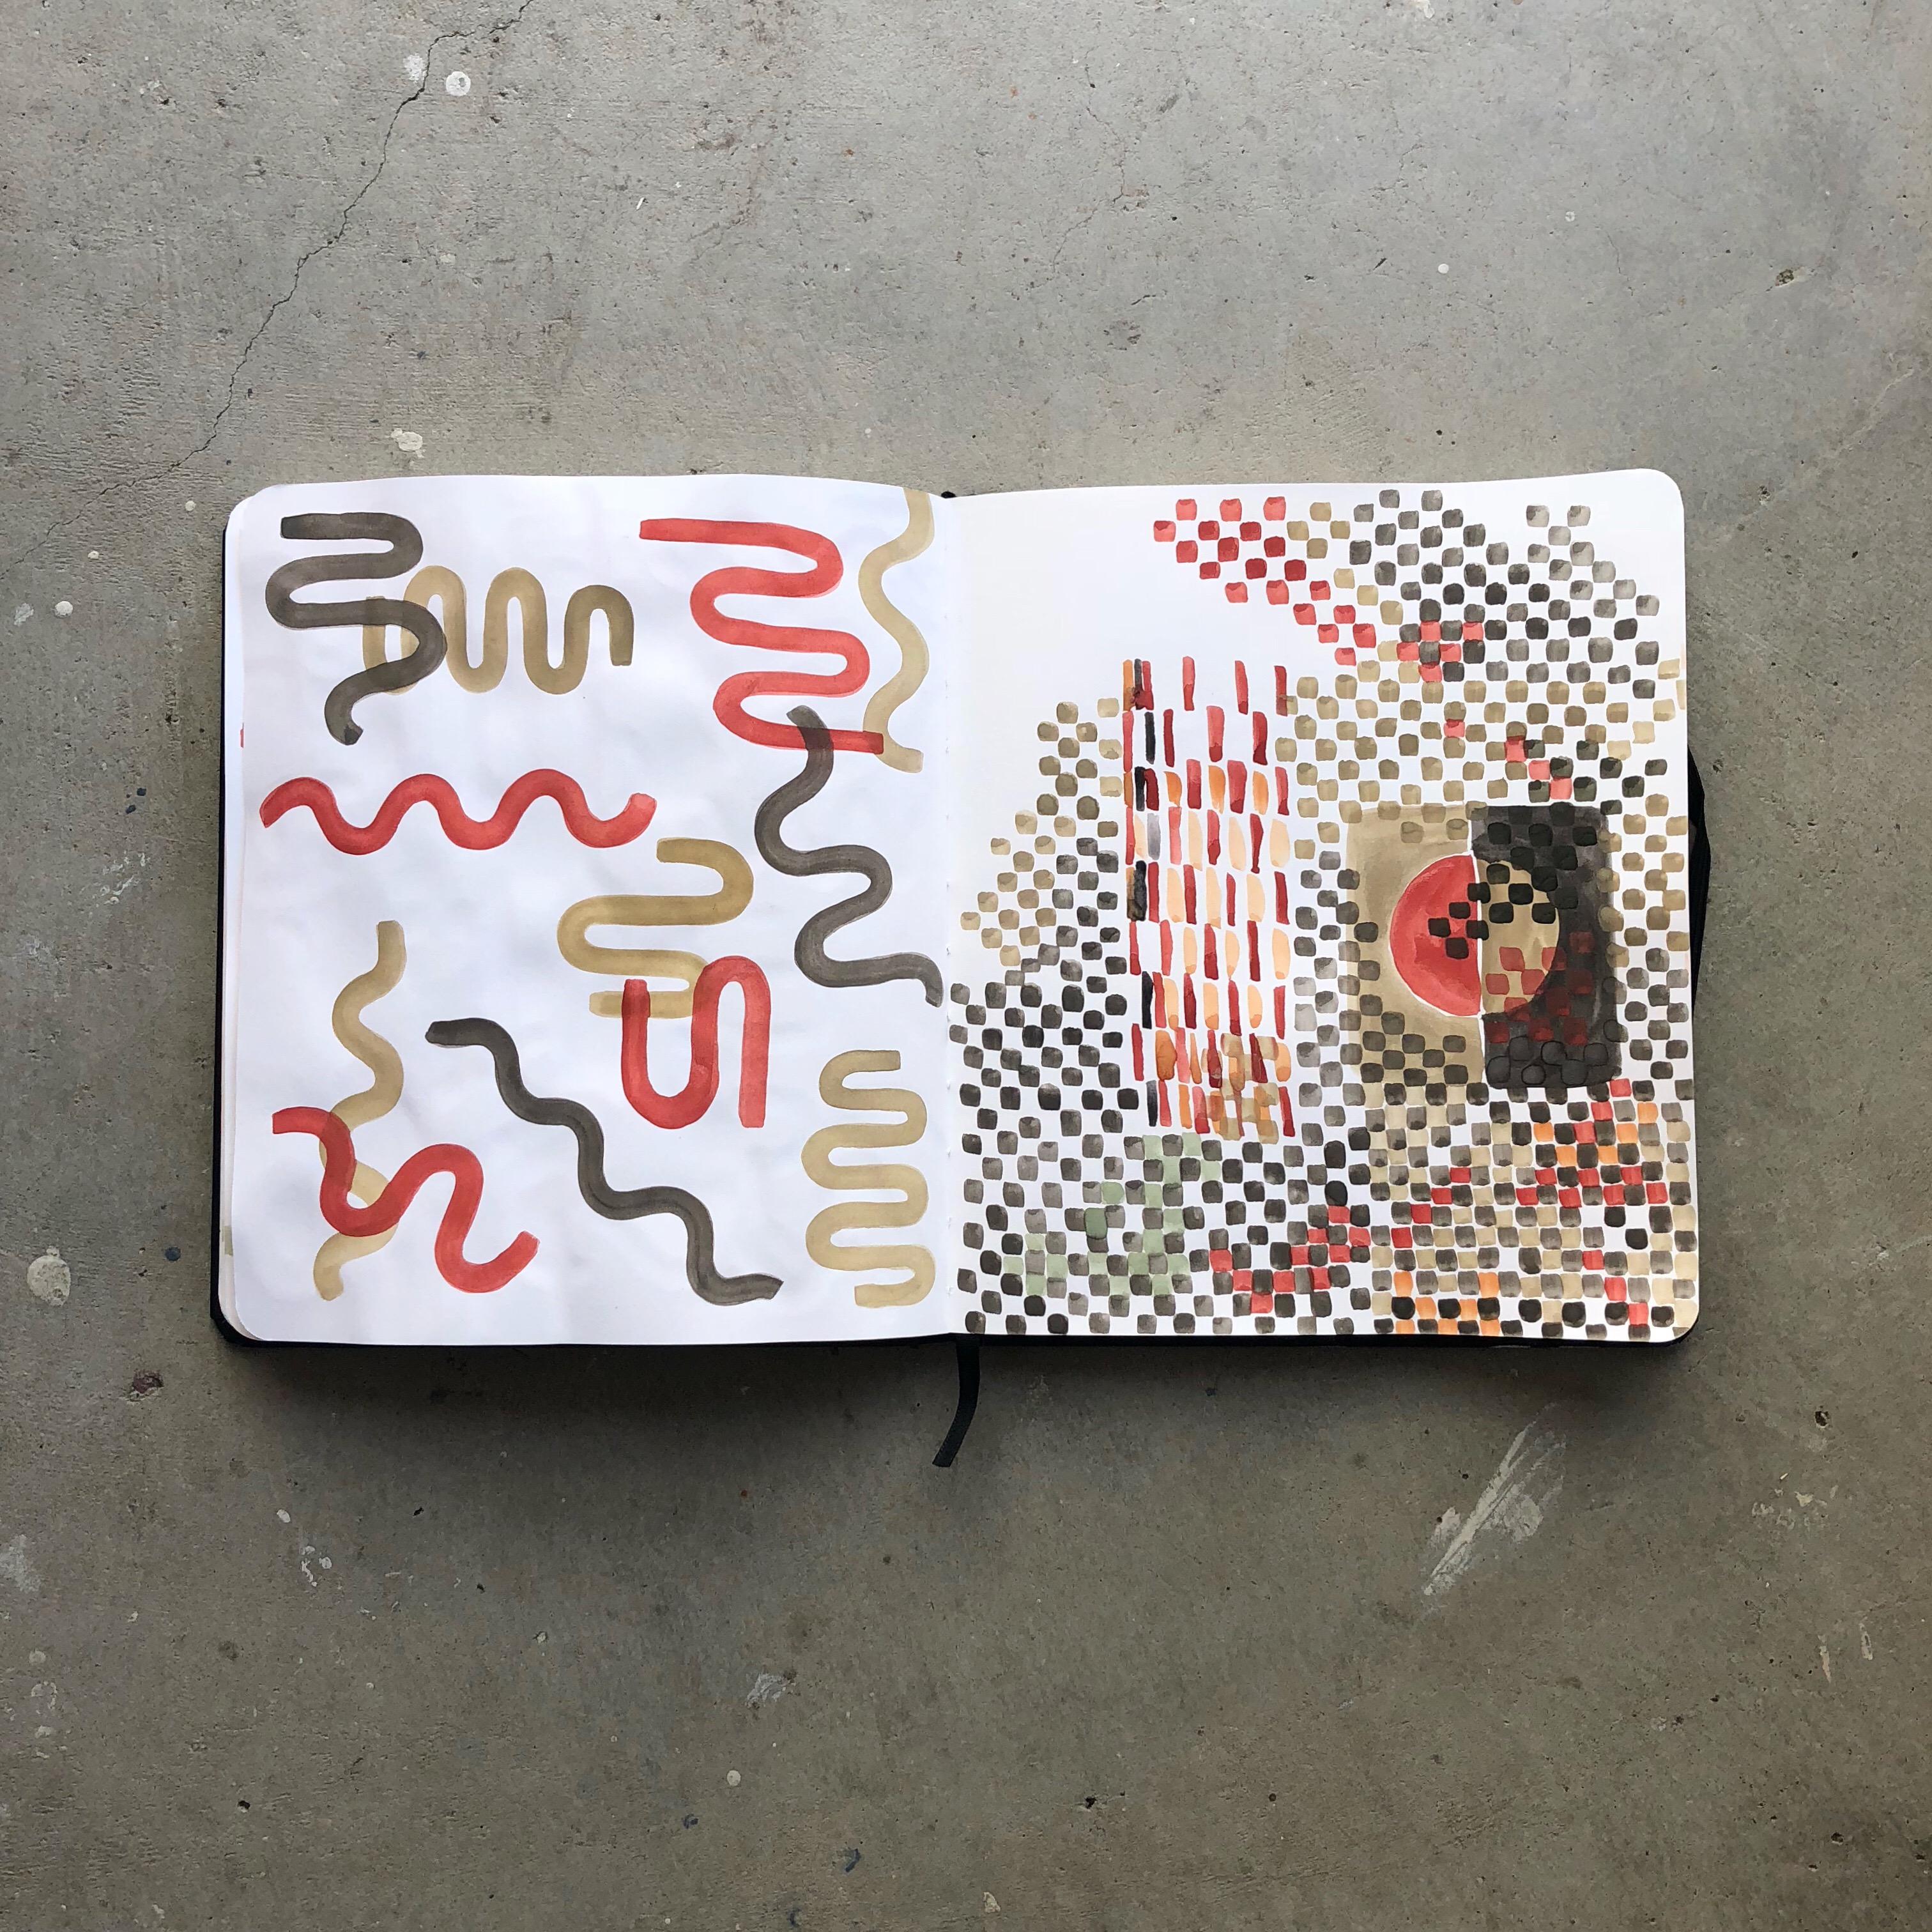
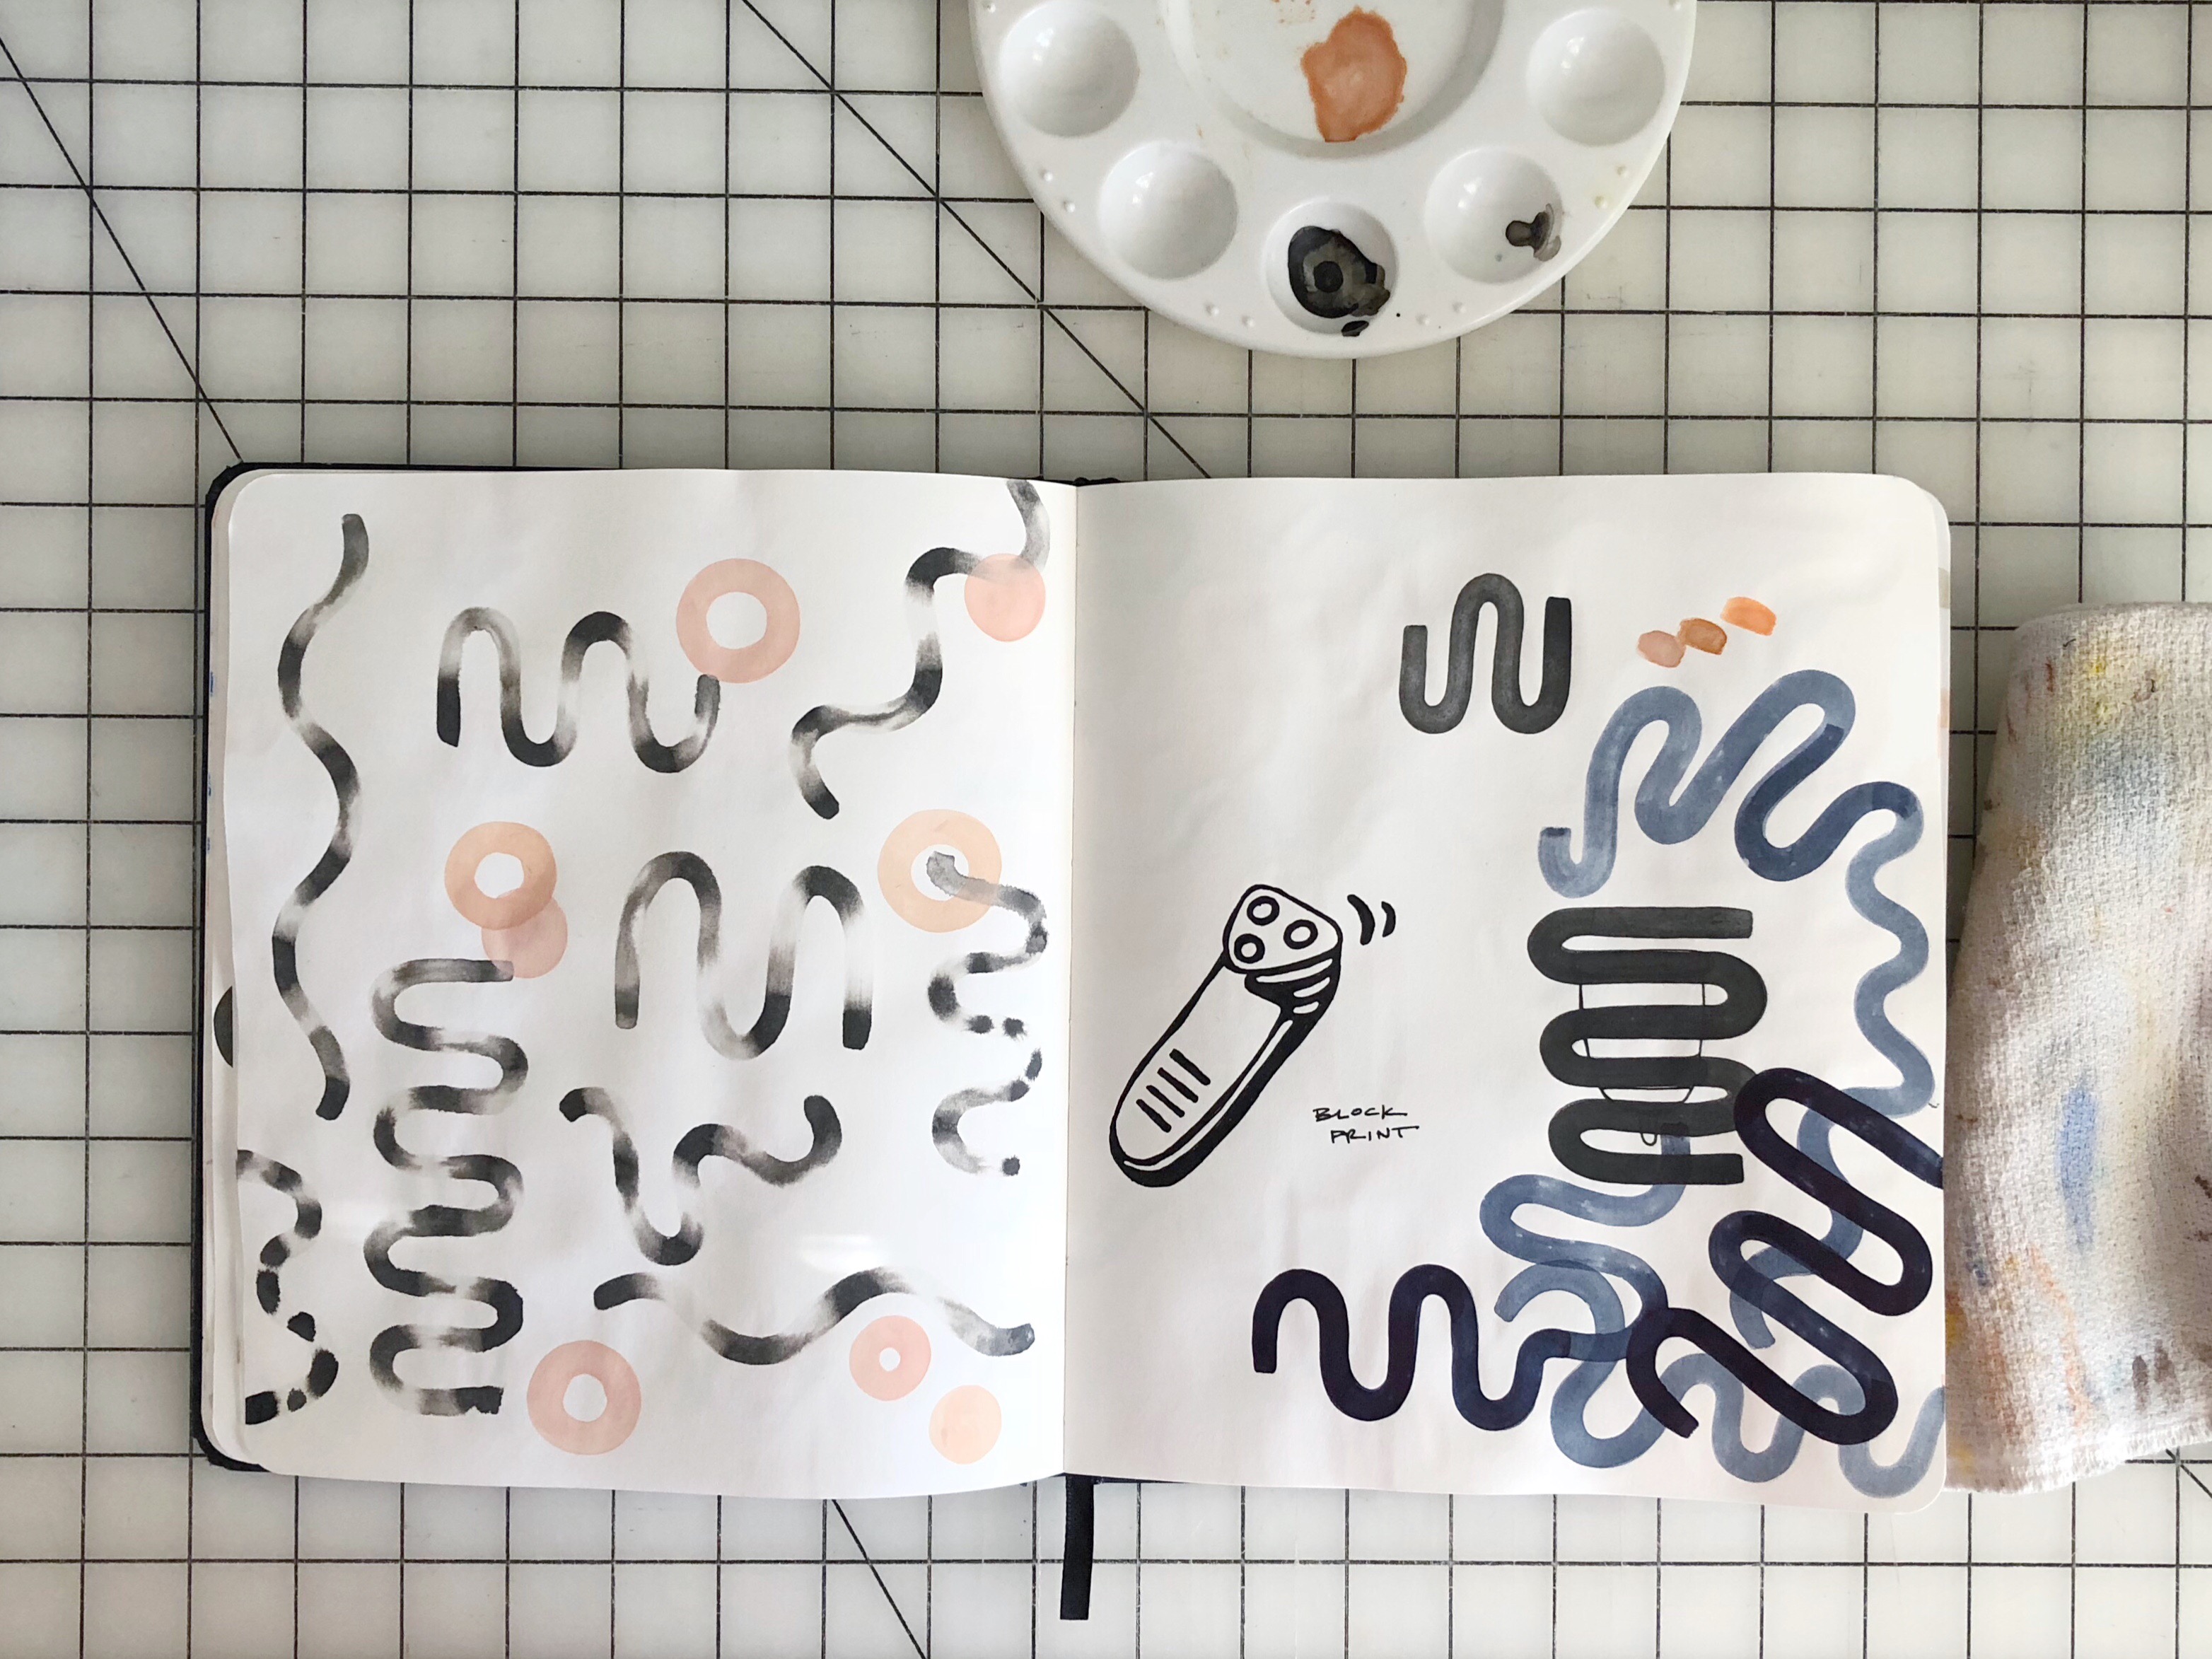
Remember how I said I was obsessed with making repeat patterns? Well, I’ve made 23 in the past two weeks. Here’s a gif I made of all but the most recent one while trying to figure out Photoshop last night. Once the school year ends, I plan to dive into Adobe Creative Suite and upload a lot of these to Spoonflower. I’m excited.
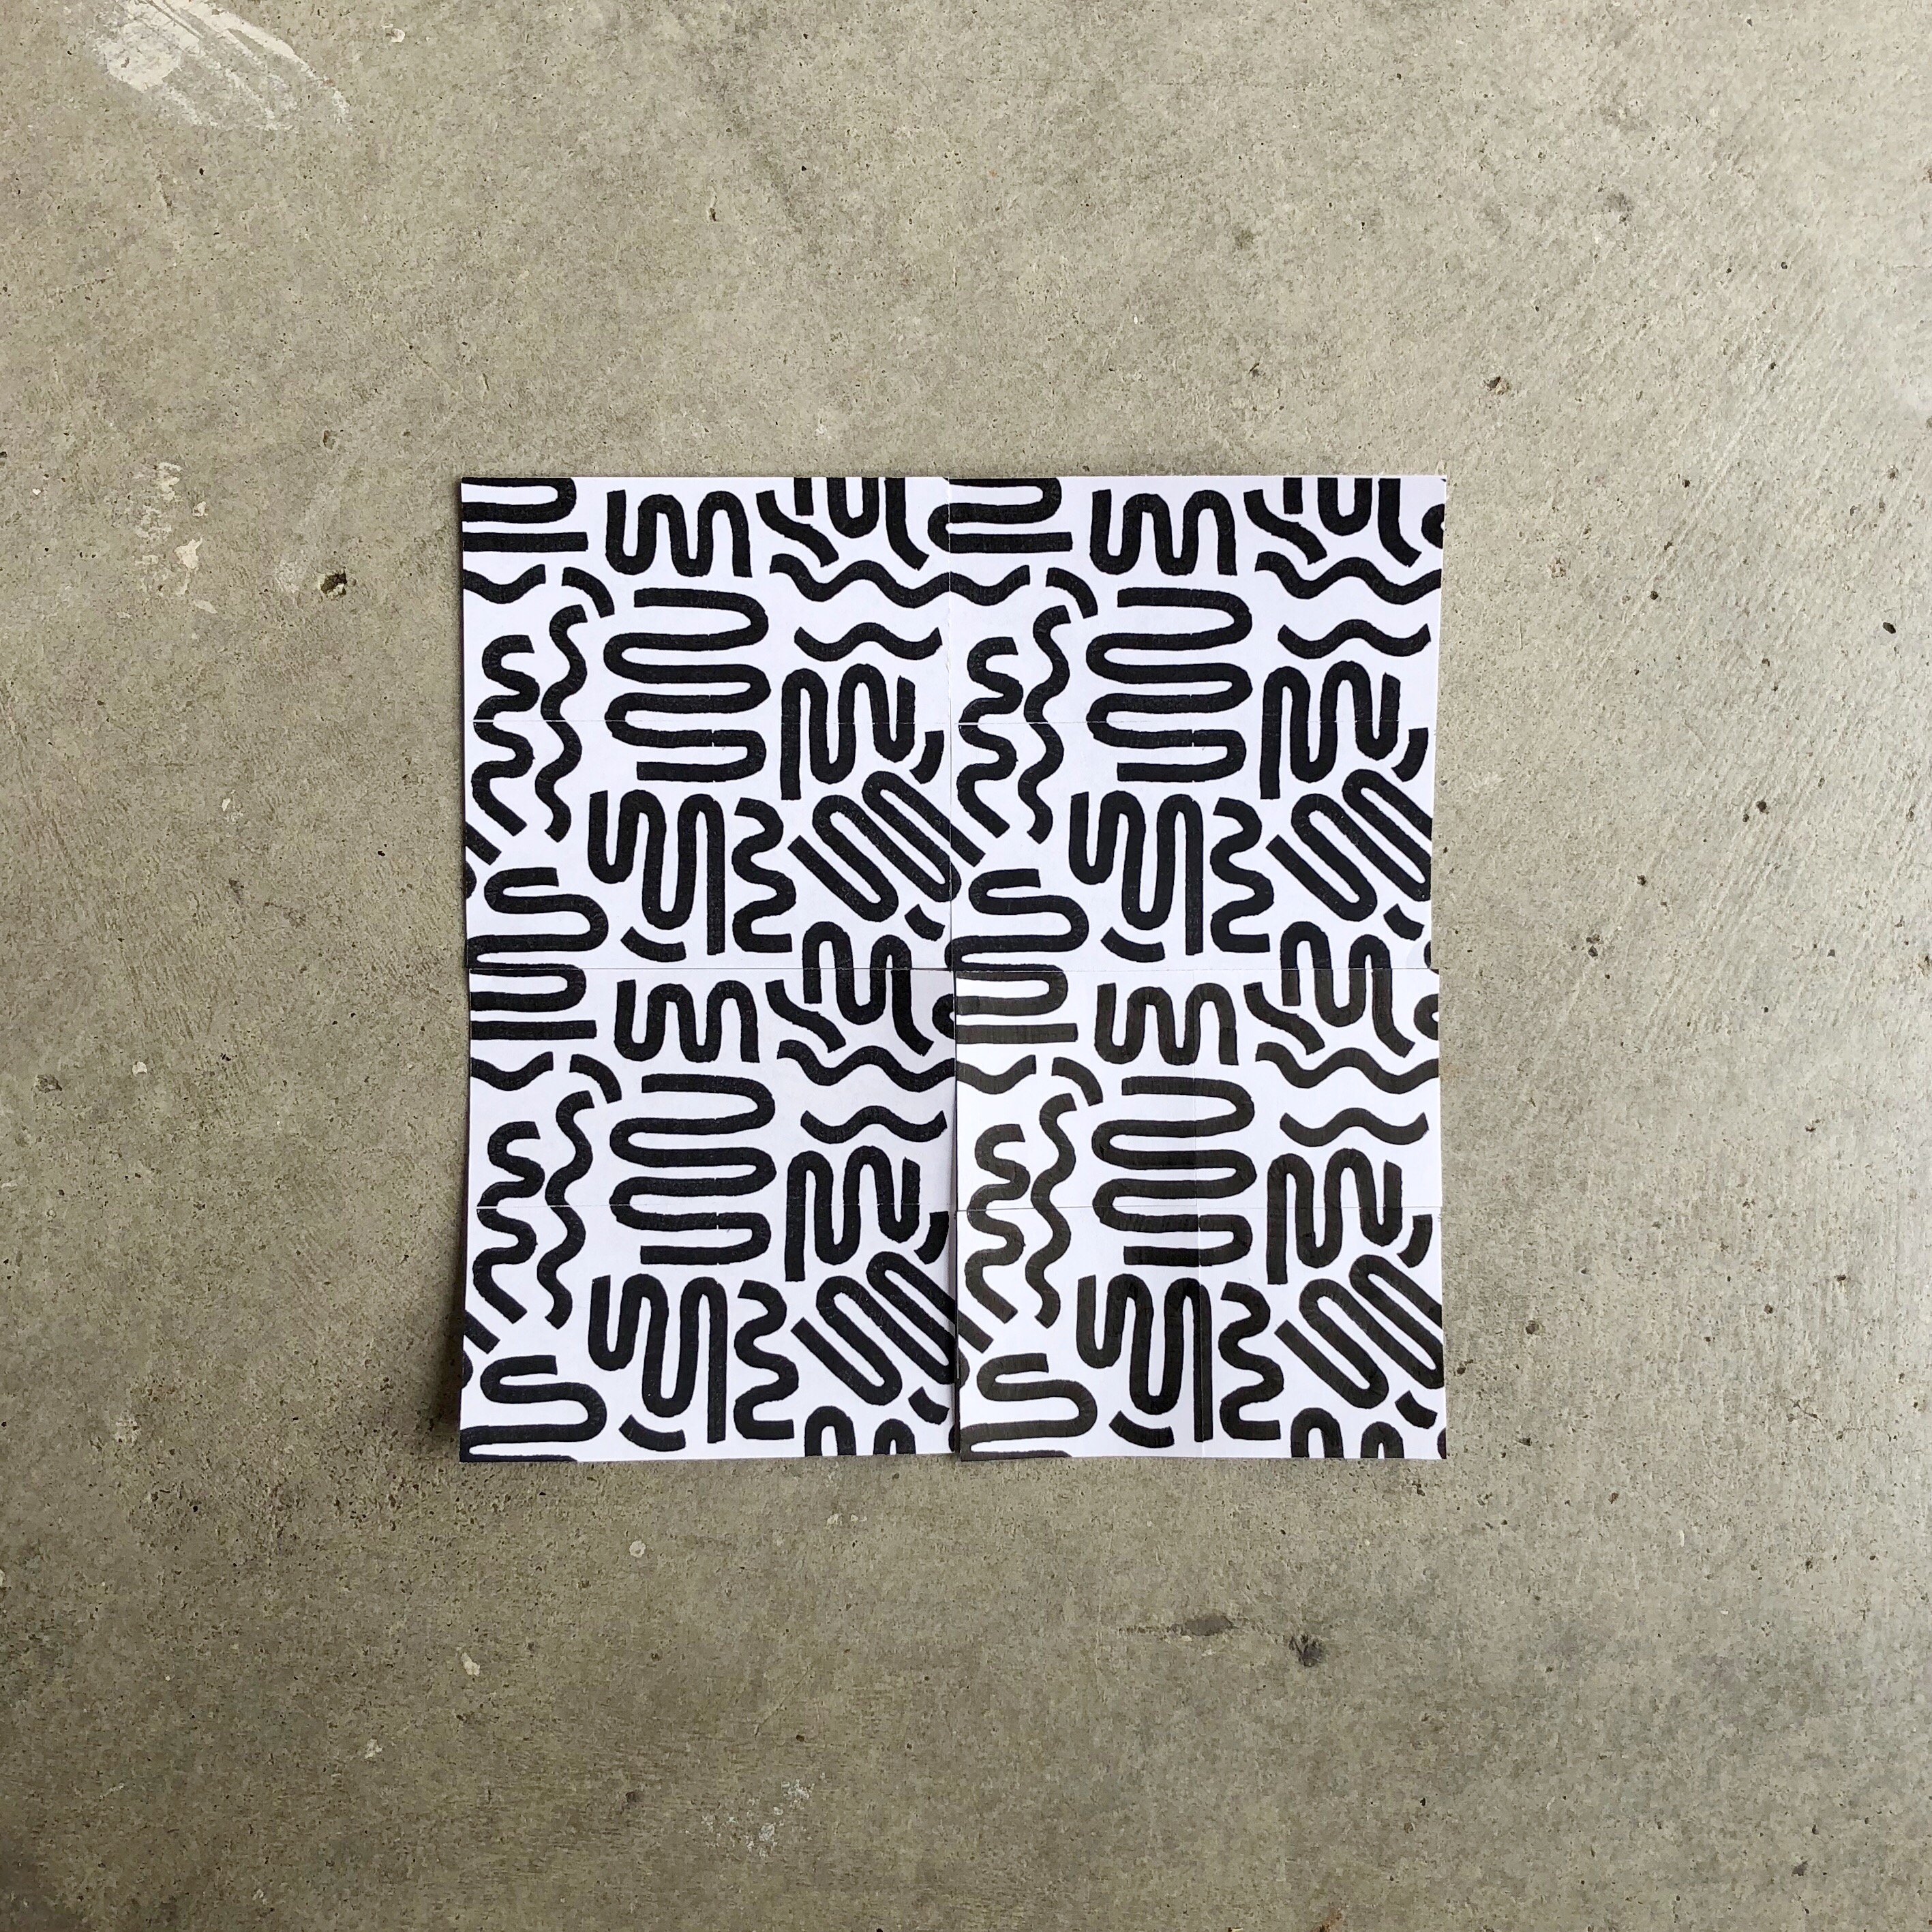
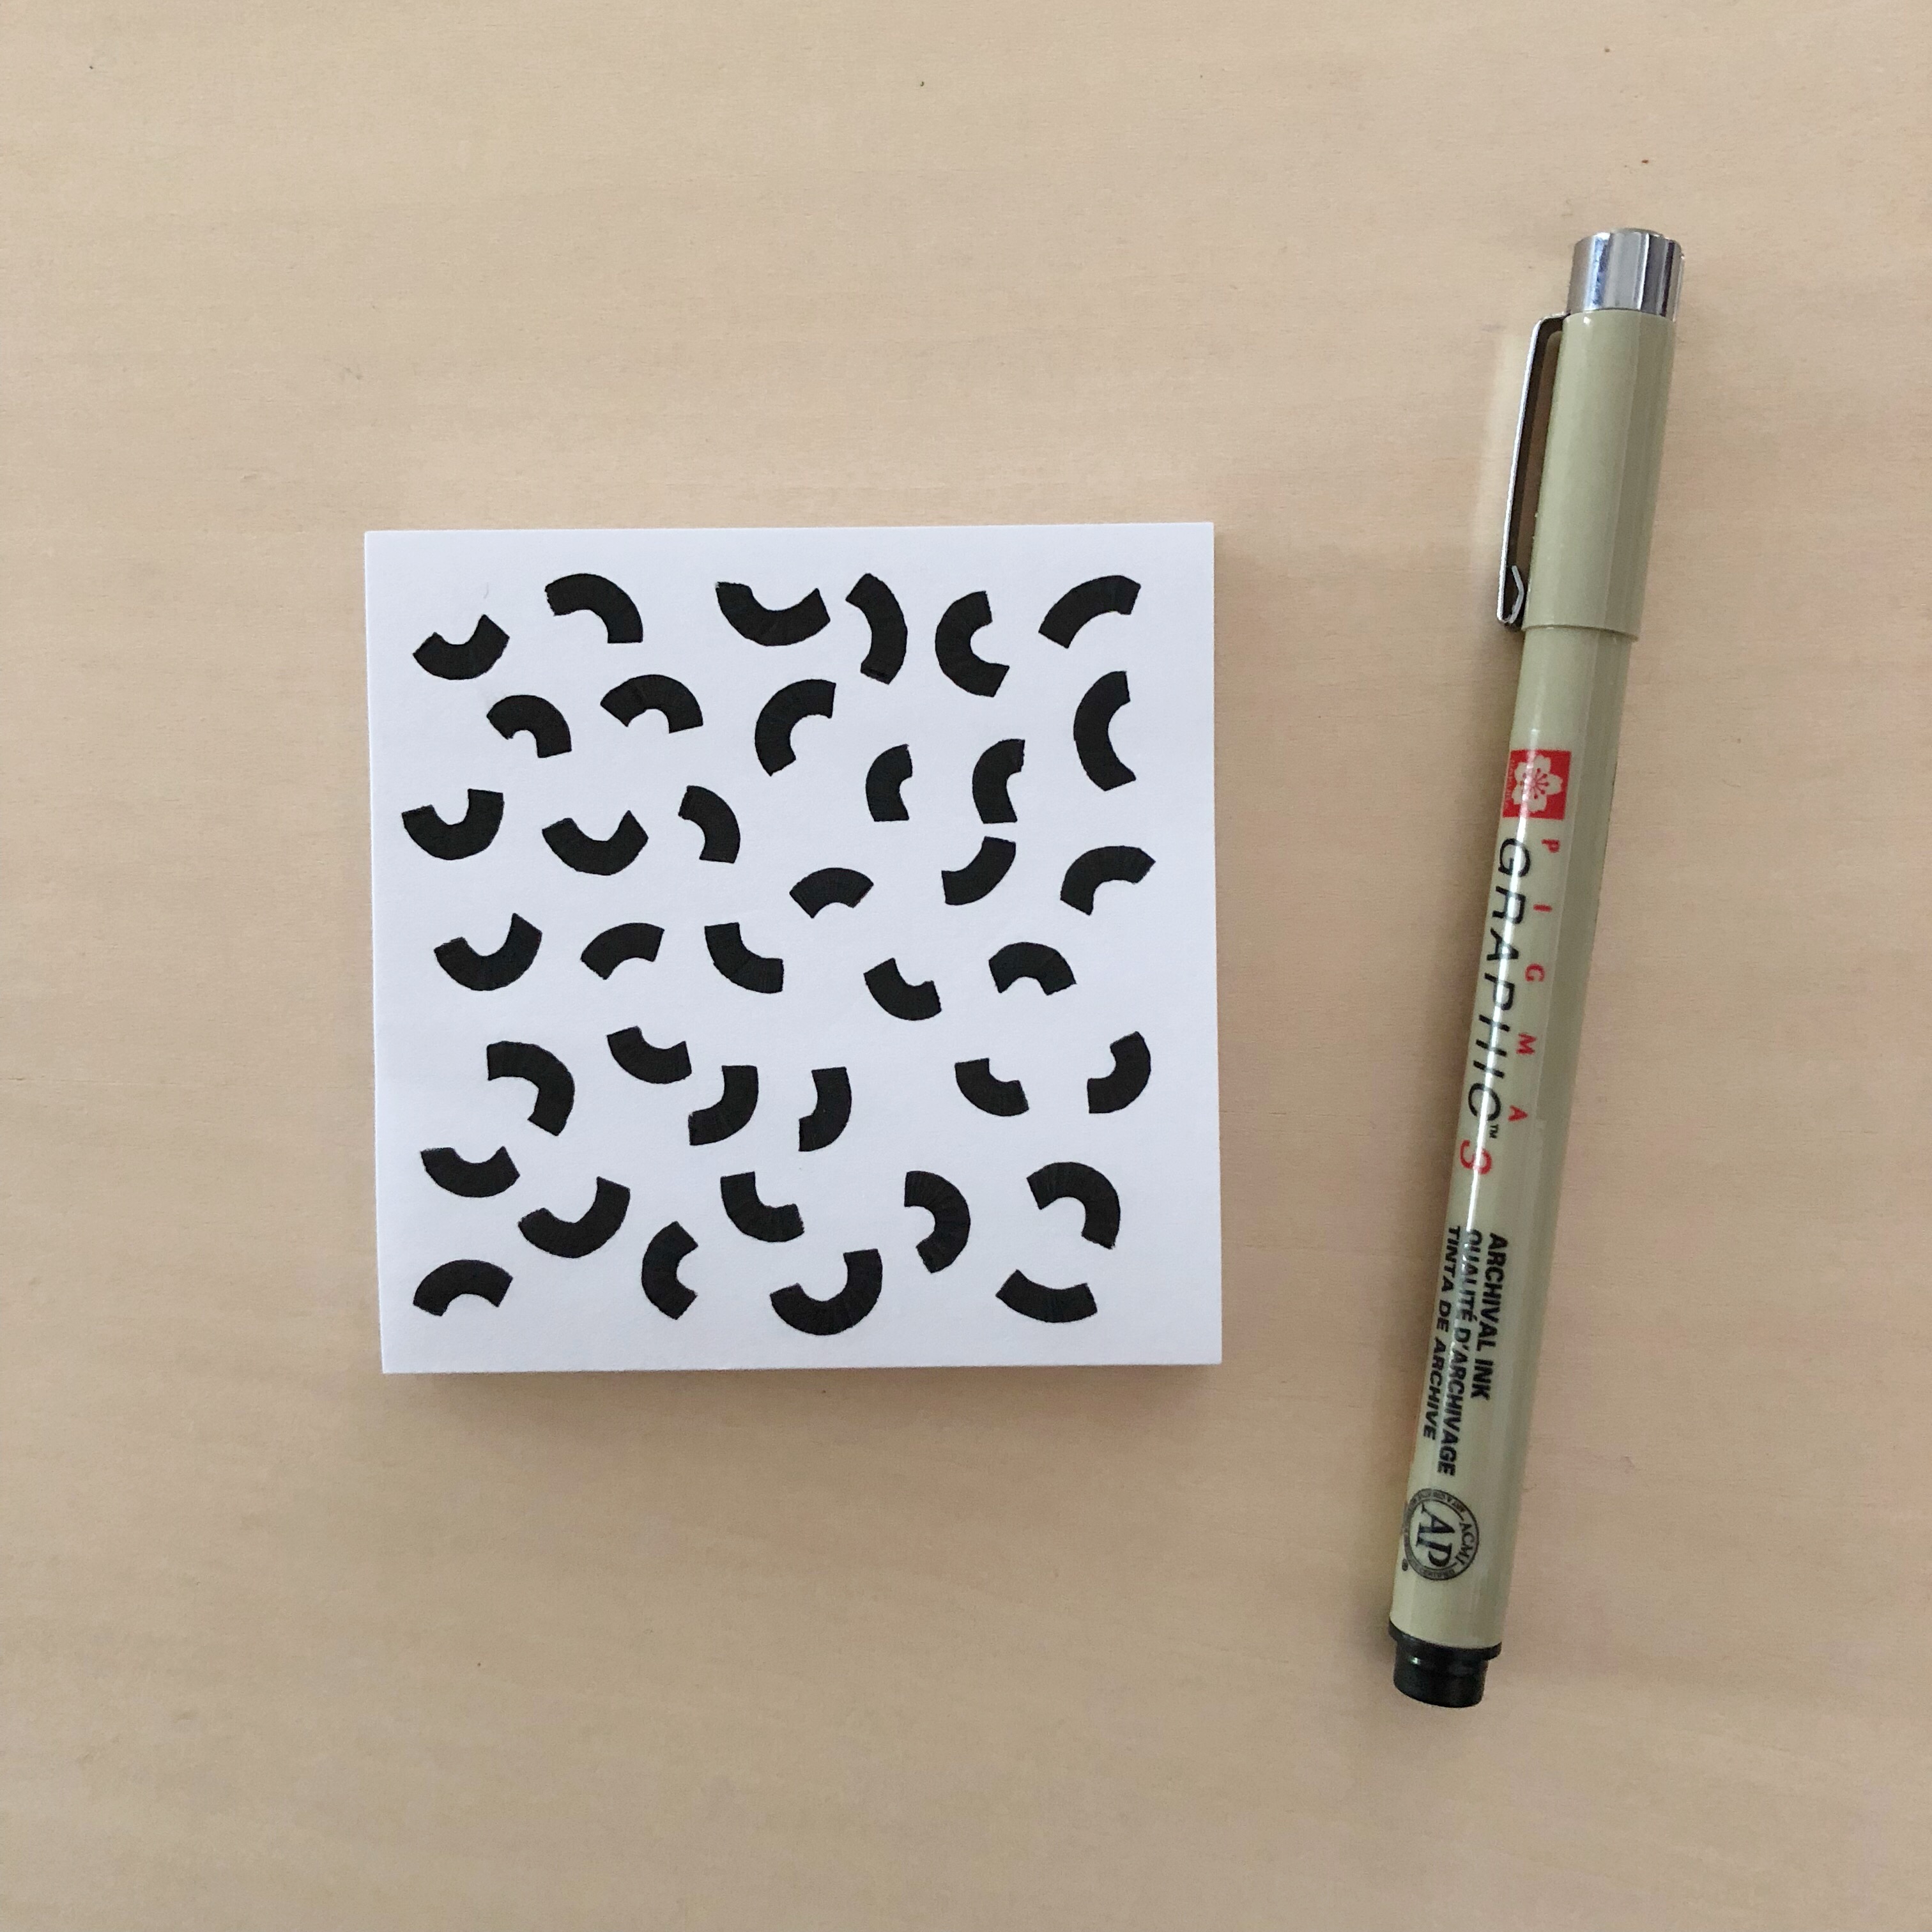
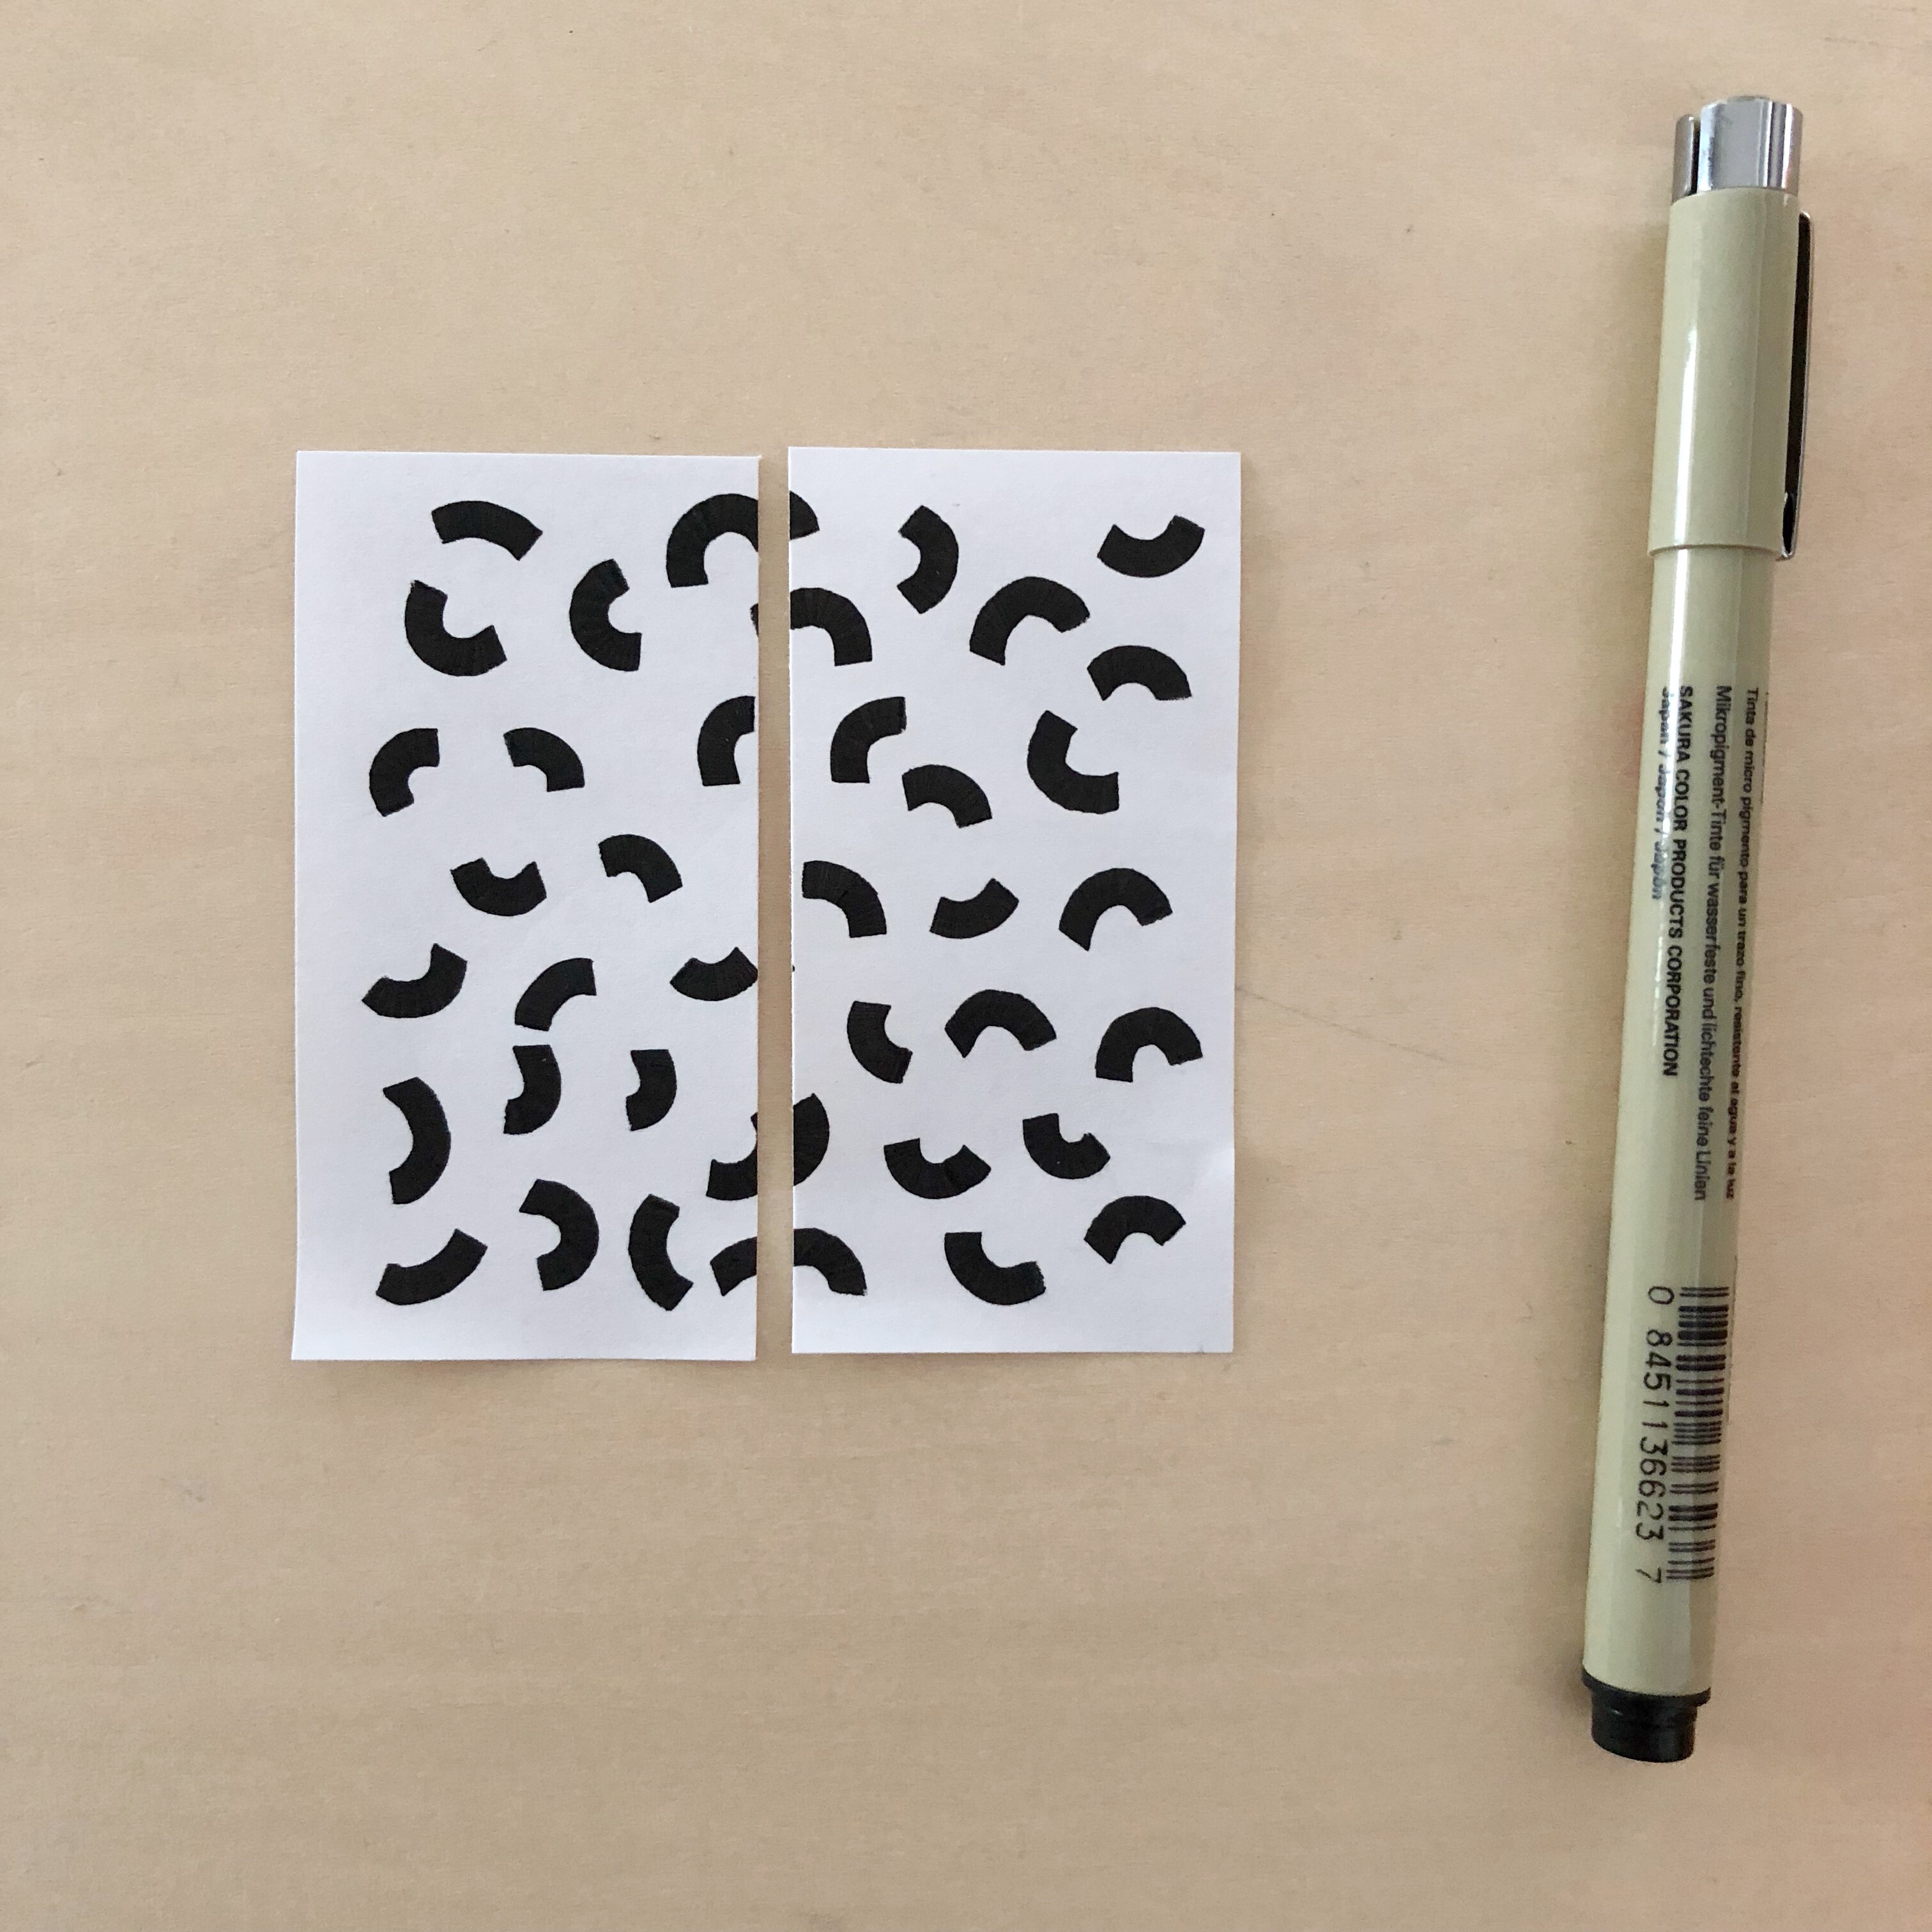
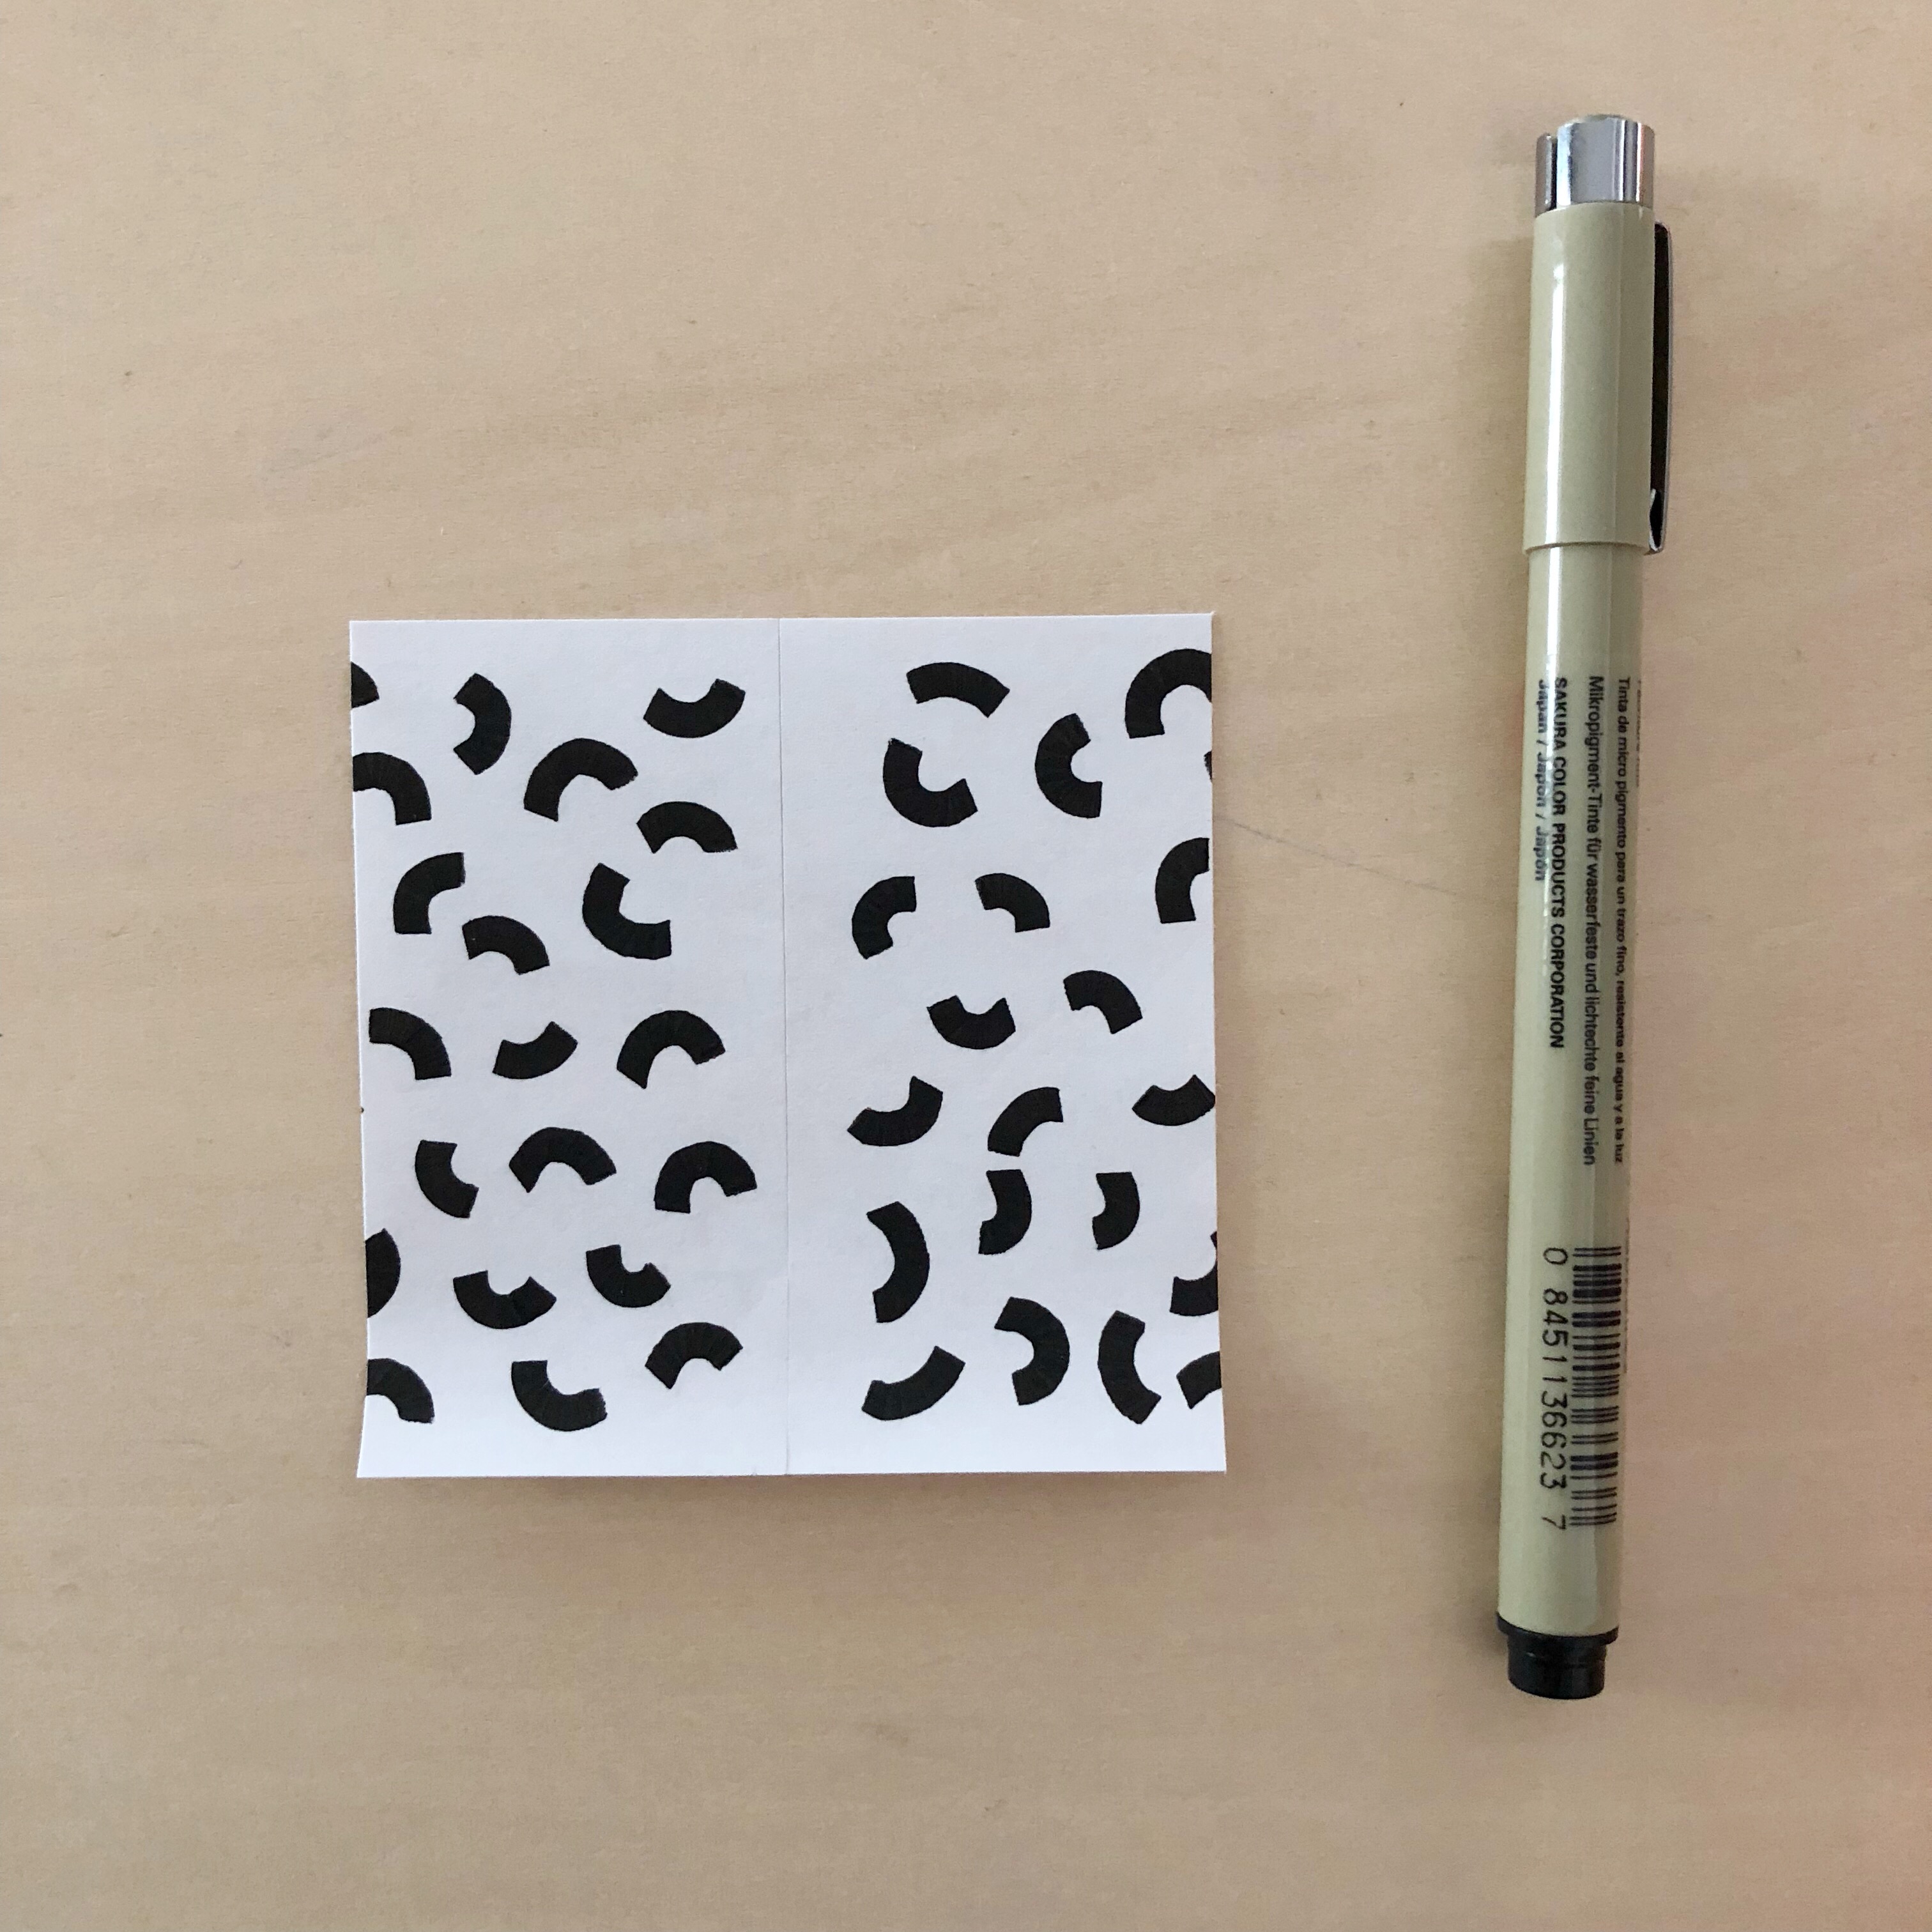
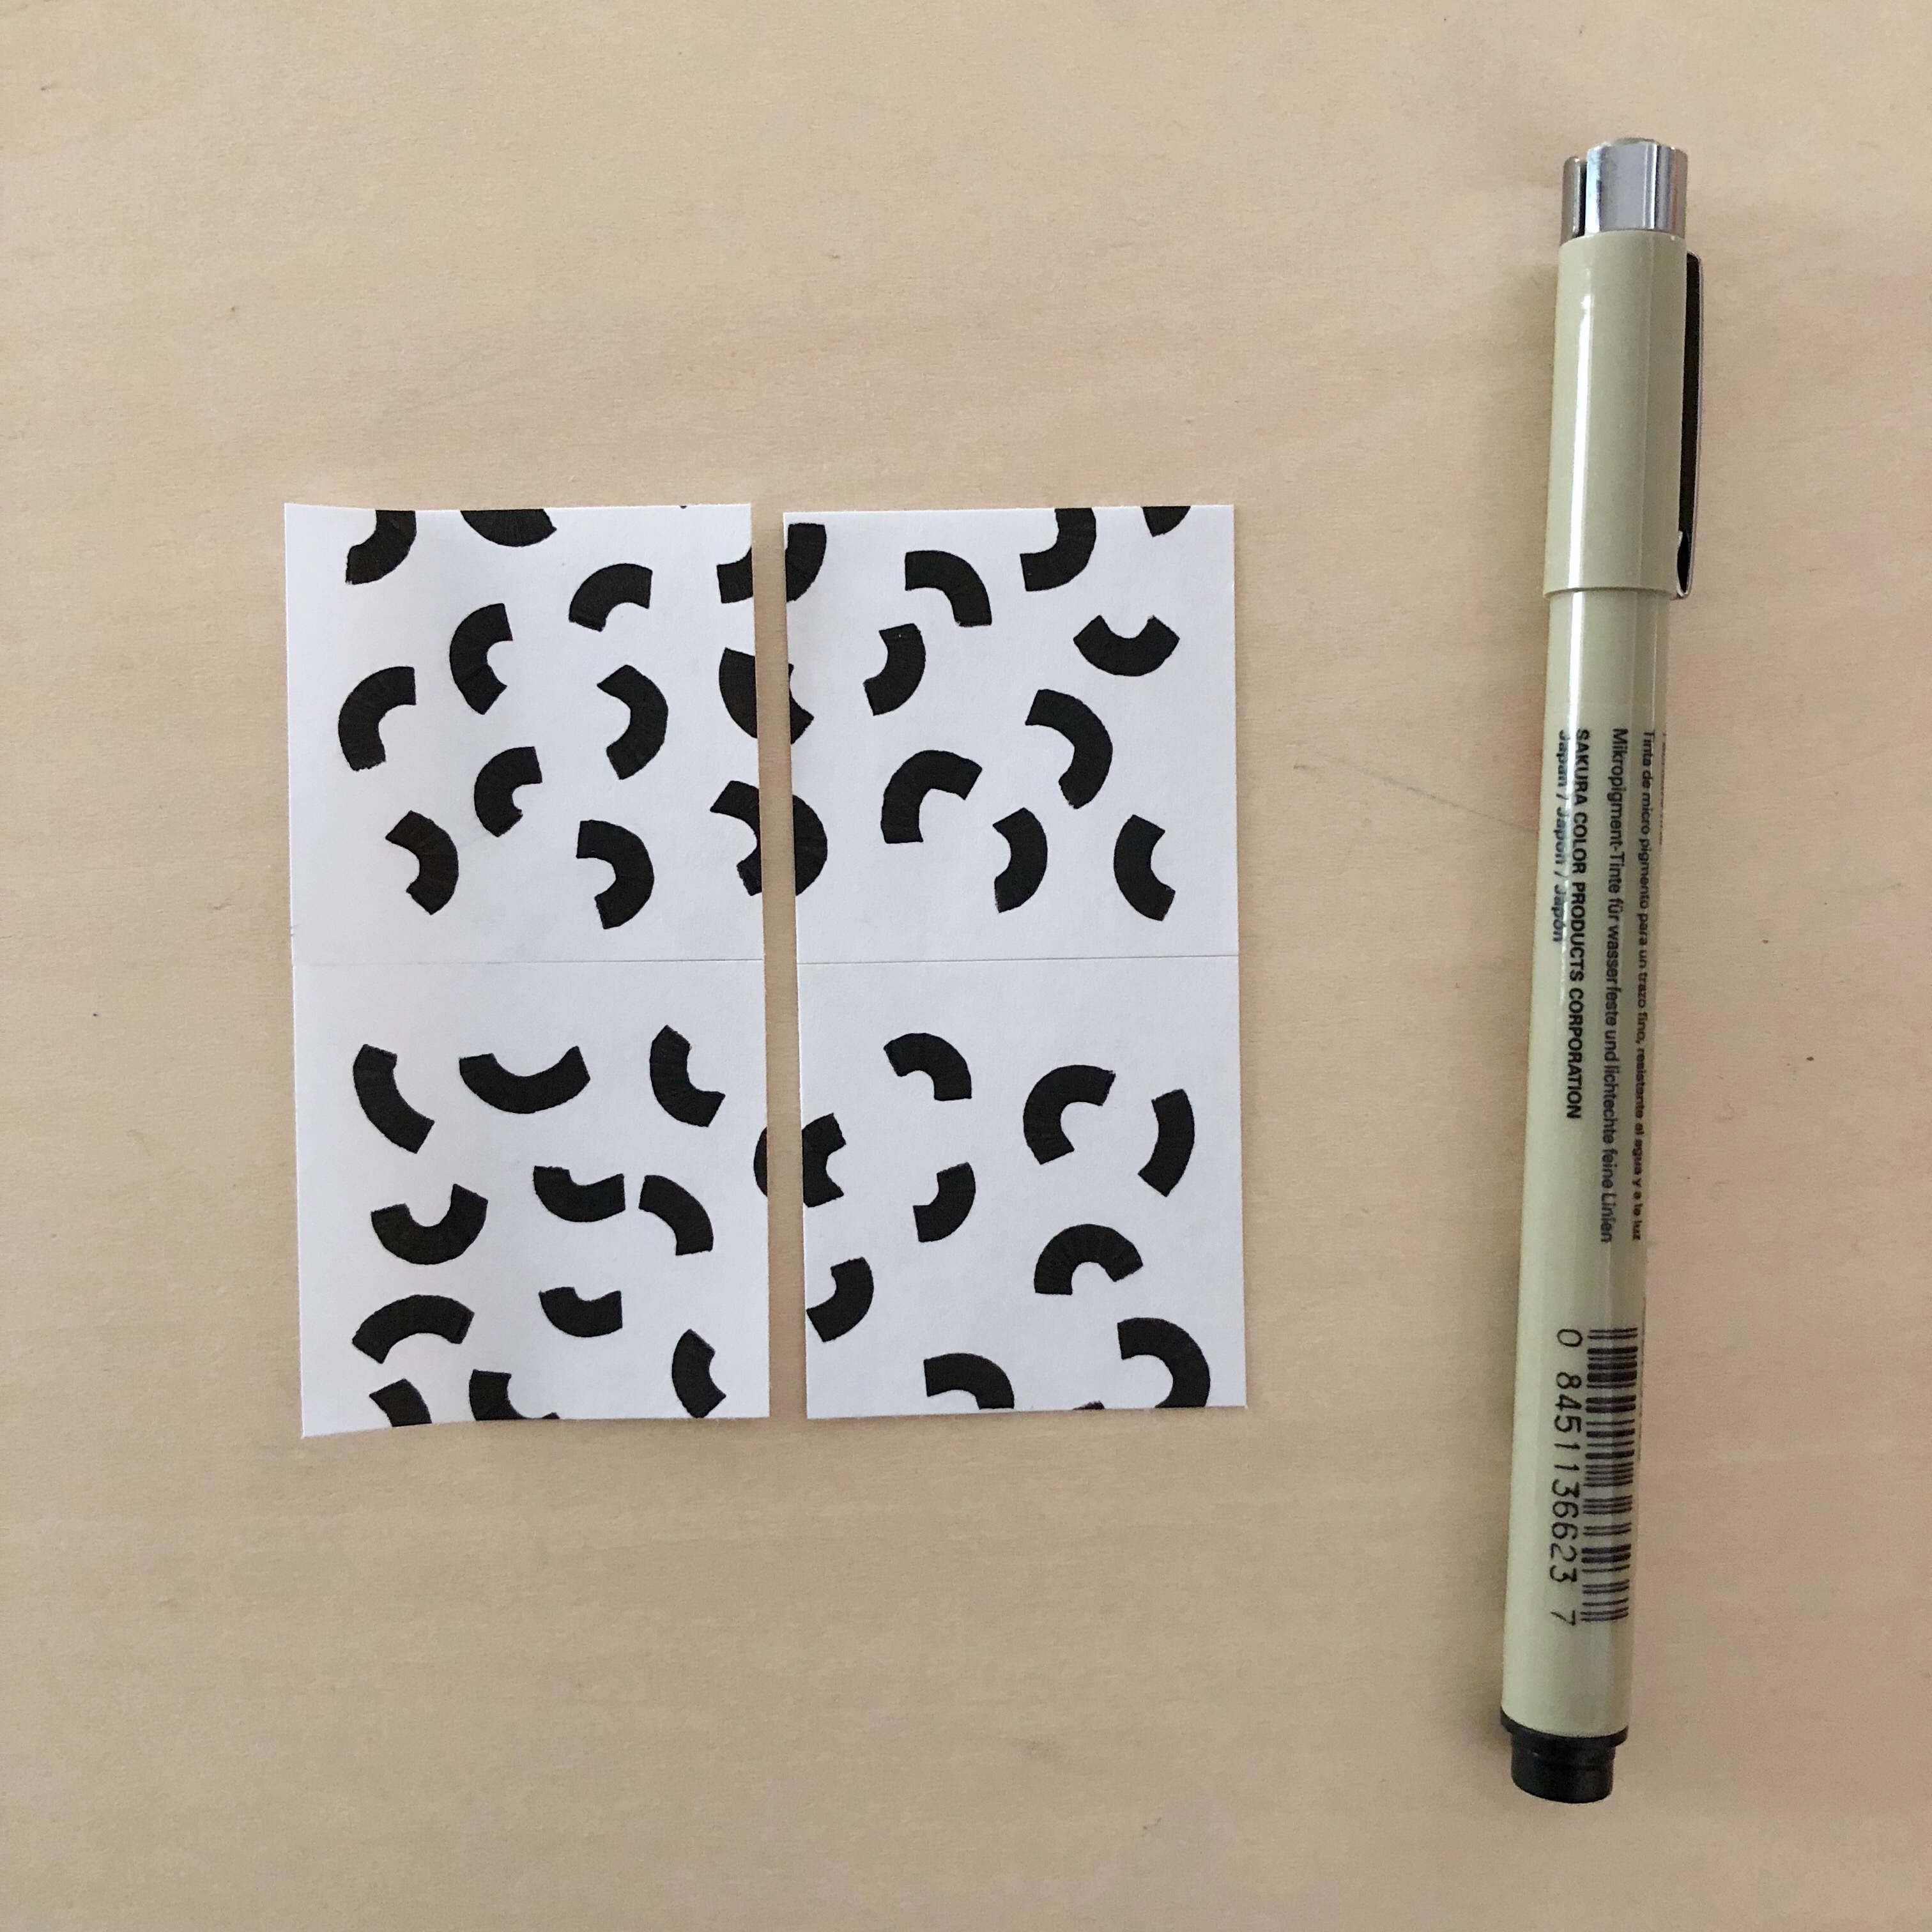
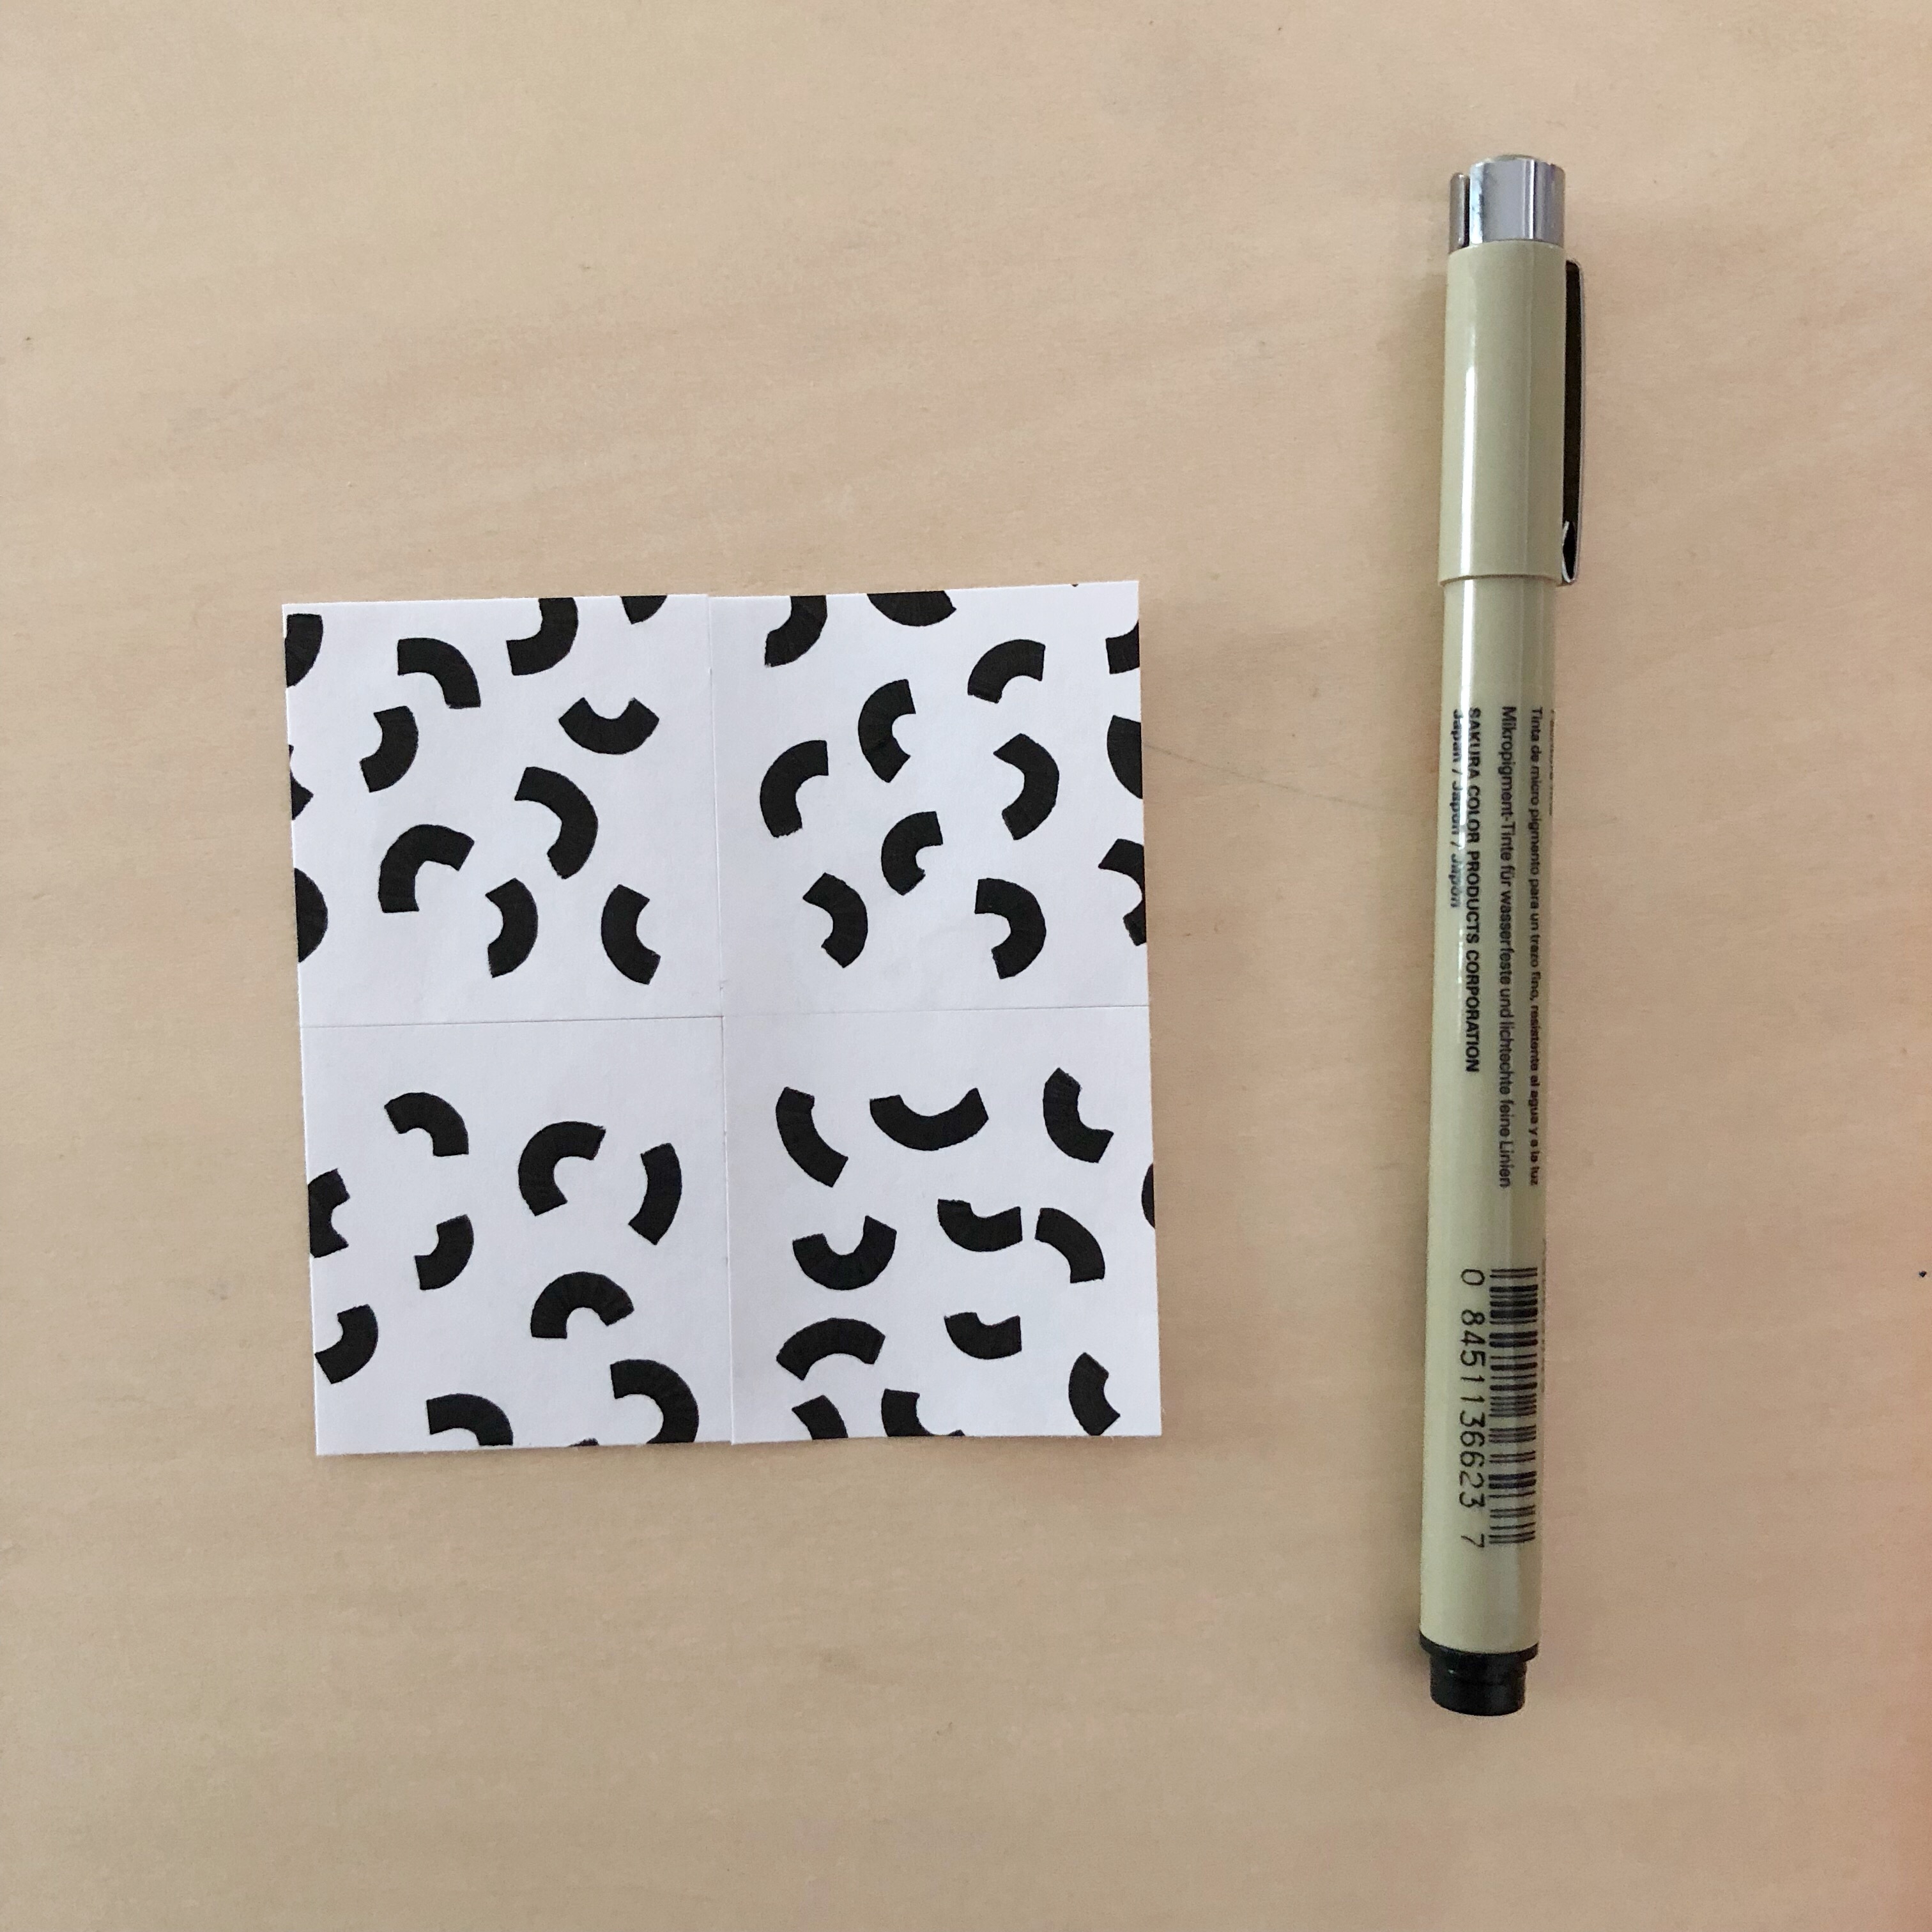
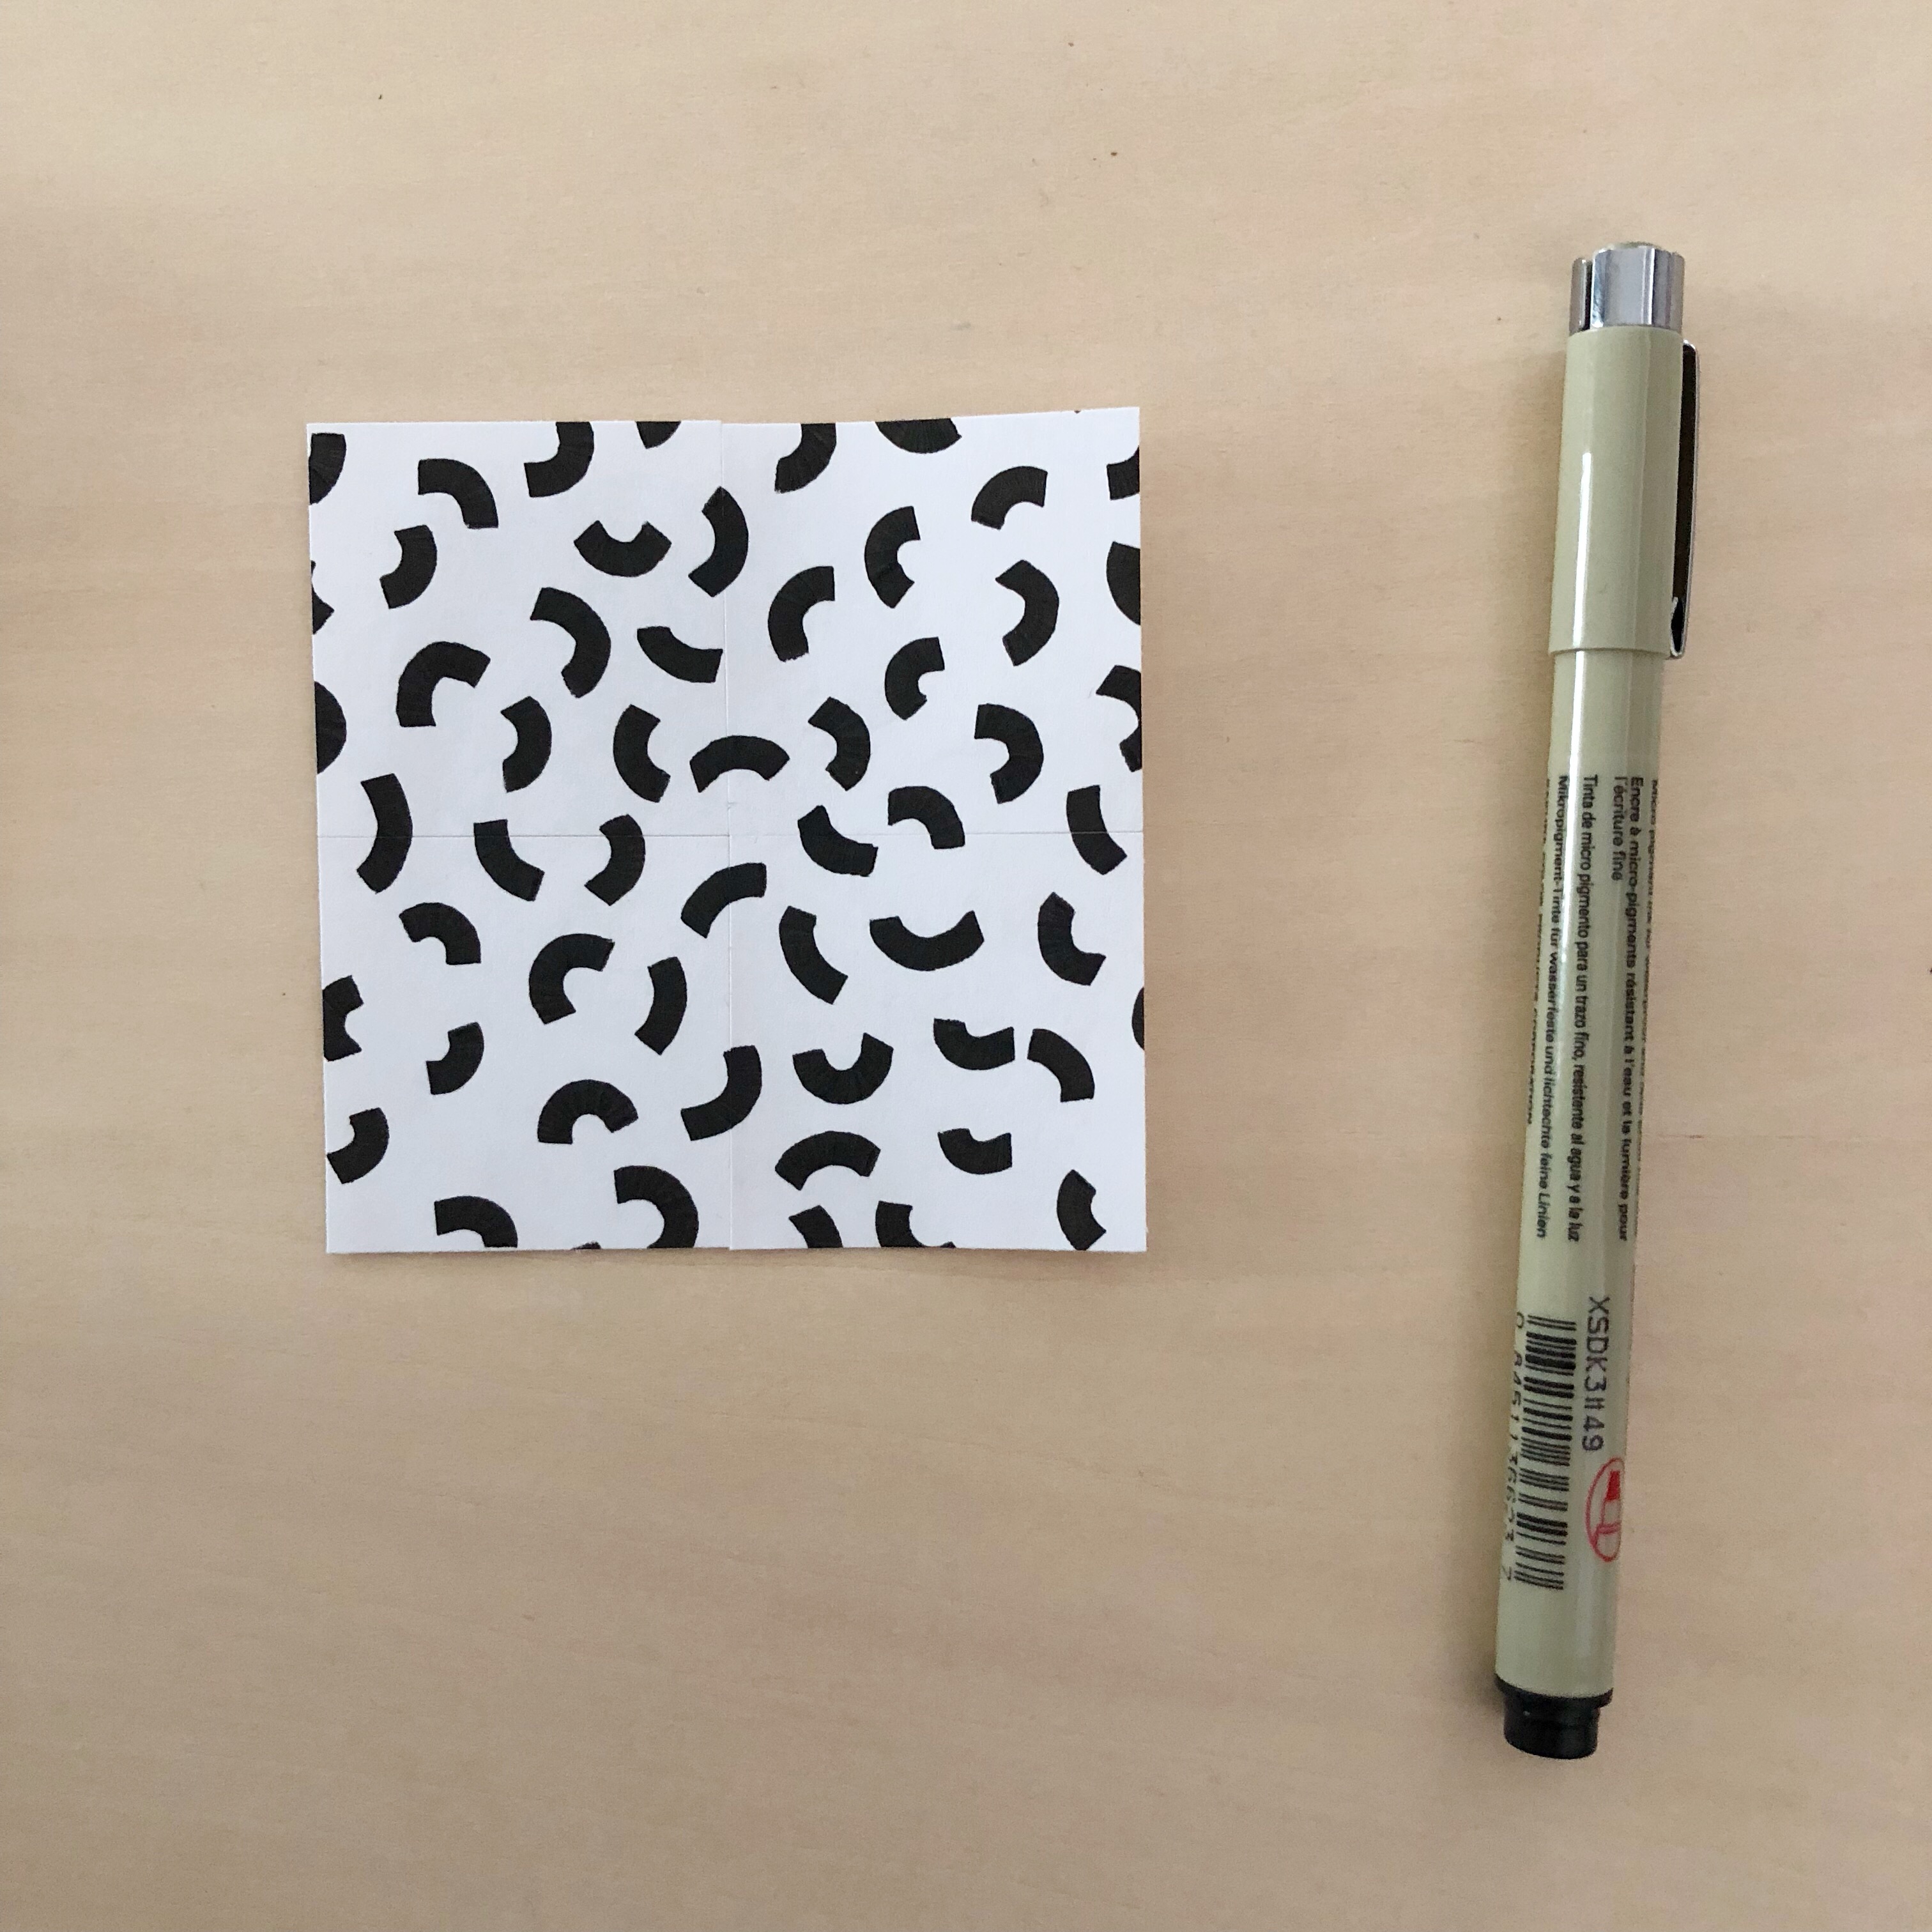
I’ve wanted to try my hand at making repeat patterns for quite some time now. Since I’m lacking in the requisite computer skills and the analog way requires slicing up a drawing, I just kept putting it off. This week I had the idea of making a low-risk tiny drawing just to test the whole process out. I made a little wiggle drawing on a post-it and BAM – a repeat pattern was born. It’s safe to say I’m now obsessed.
Drawing challenges have also been something I’d like to take a stab at, but things like the 100 Day Challenge and even the 30 Day Drawing Challenge have felt too, well, challenging. However, I think I’ve found my introductory challenge project. Tiny repeat patterns take away the hurdle of coming up with a drawing idea each day and the process is really enjoyable.
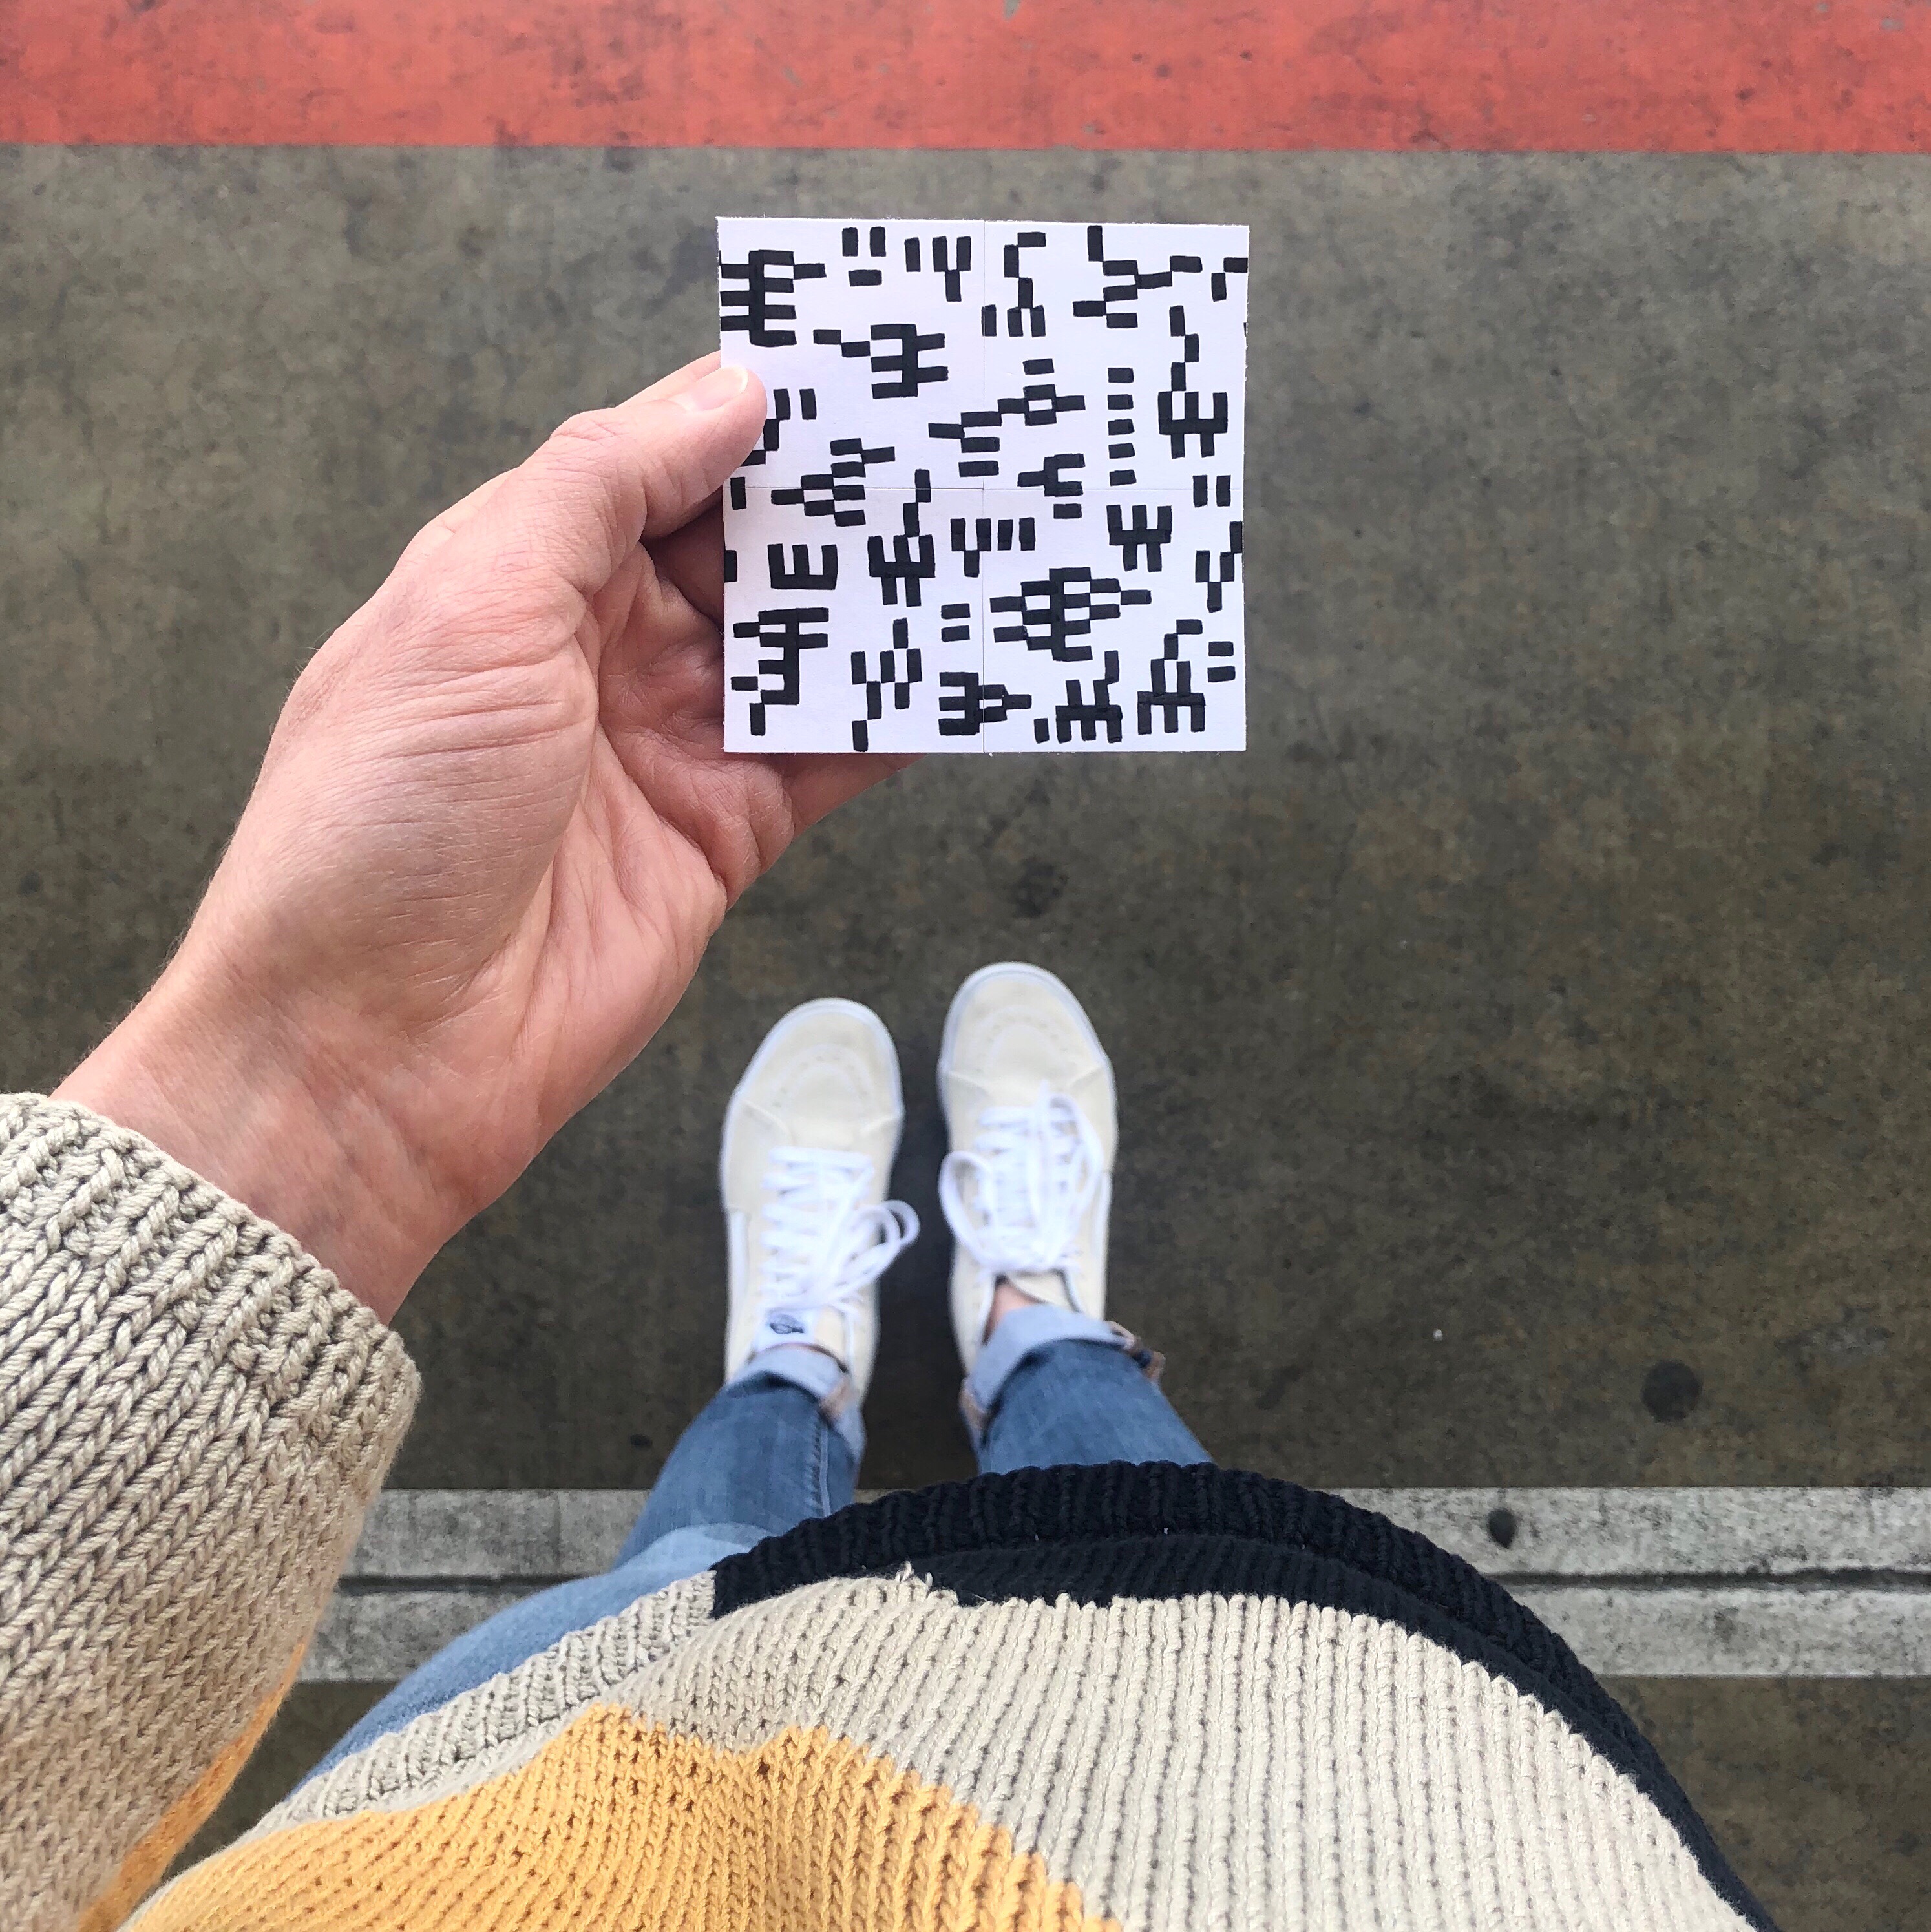
I’m going to challenge myself to make one tiny (3″ x 3″) repeat pattern a day for 30 days. I’m going to share the patterns on Instagram with the hashtag #repeatpatternparty.
In addition to creating a daily drawing habit, I’m hoping this challenge will also motivate me to learn how to use Adobe Illustrator. I’d like to turn some of these repeat patterns into fabric on Spoonflower.
Repeat Pattern Tutorial
STEP 1 – Draw pattern in the middle of post-it (or paper – it doesn’t need to be square either). Pattern or drawing cannot touch the edges of the paper for this to work.
STEP 2 – Cut paper down the center. Accuracy is important here!
STEP 3 – Bring the left side over to the right side and carefully tape together. Make sure your don’t rotate the pattern.
STEP 4 – Rotate the design and cut down the center (second cut should be perpendicular to first cut). Again, accuracy is important here.
STEP 5 – Bring the left side to the right side without rotating the design. You’ve now taken all of the post-its edges and brought them to the center.
STEP 6 – Fill in blank spaces. Be sure to not take any of the new marks to the edge in this last step. I then like to make three copies of my post-it to check that everything worked out.
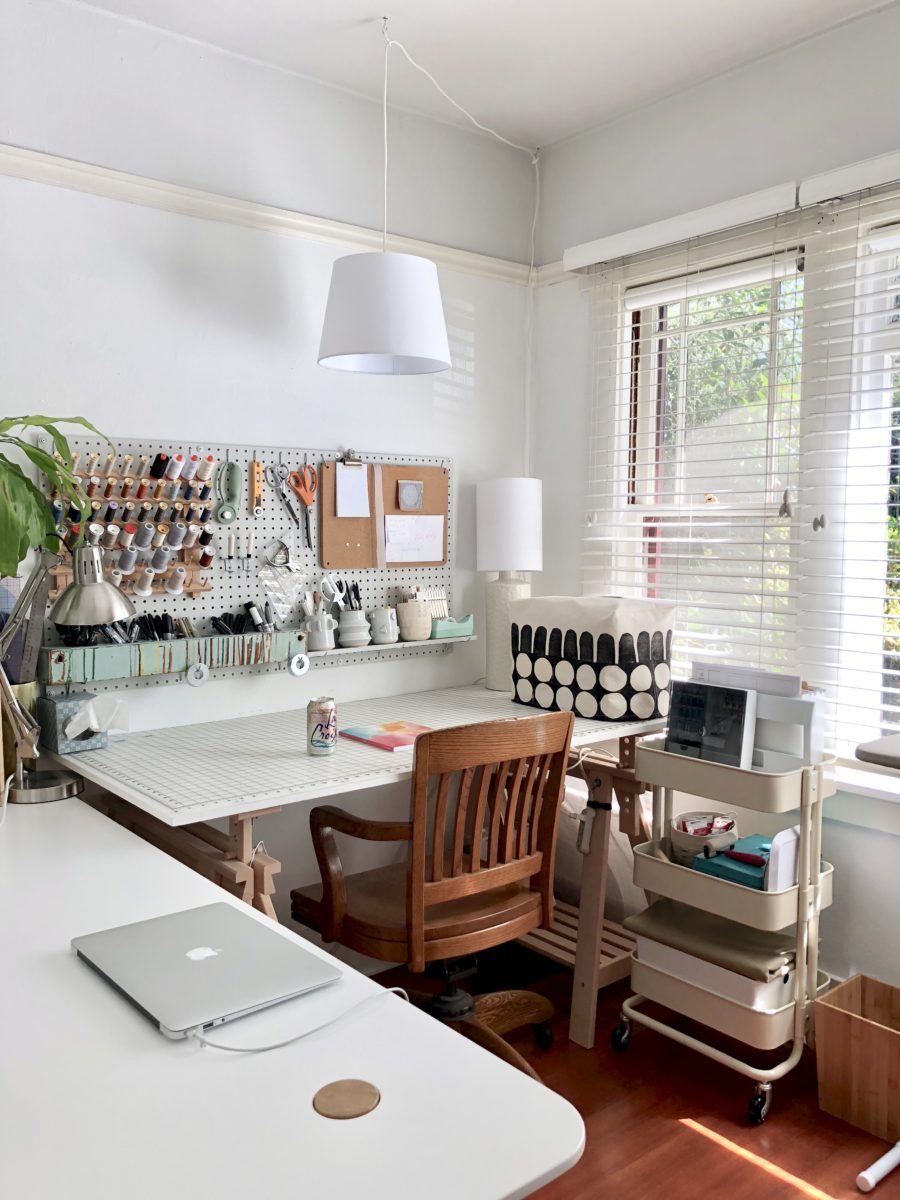
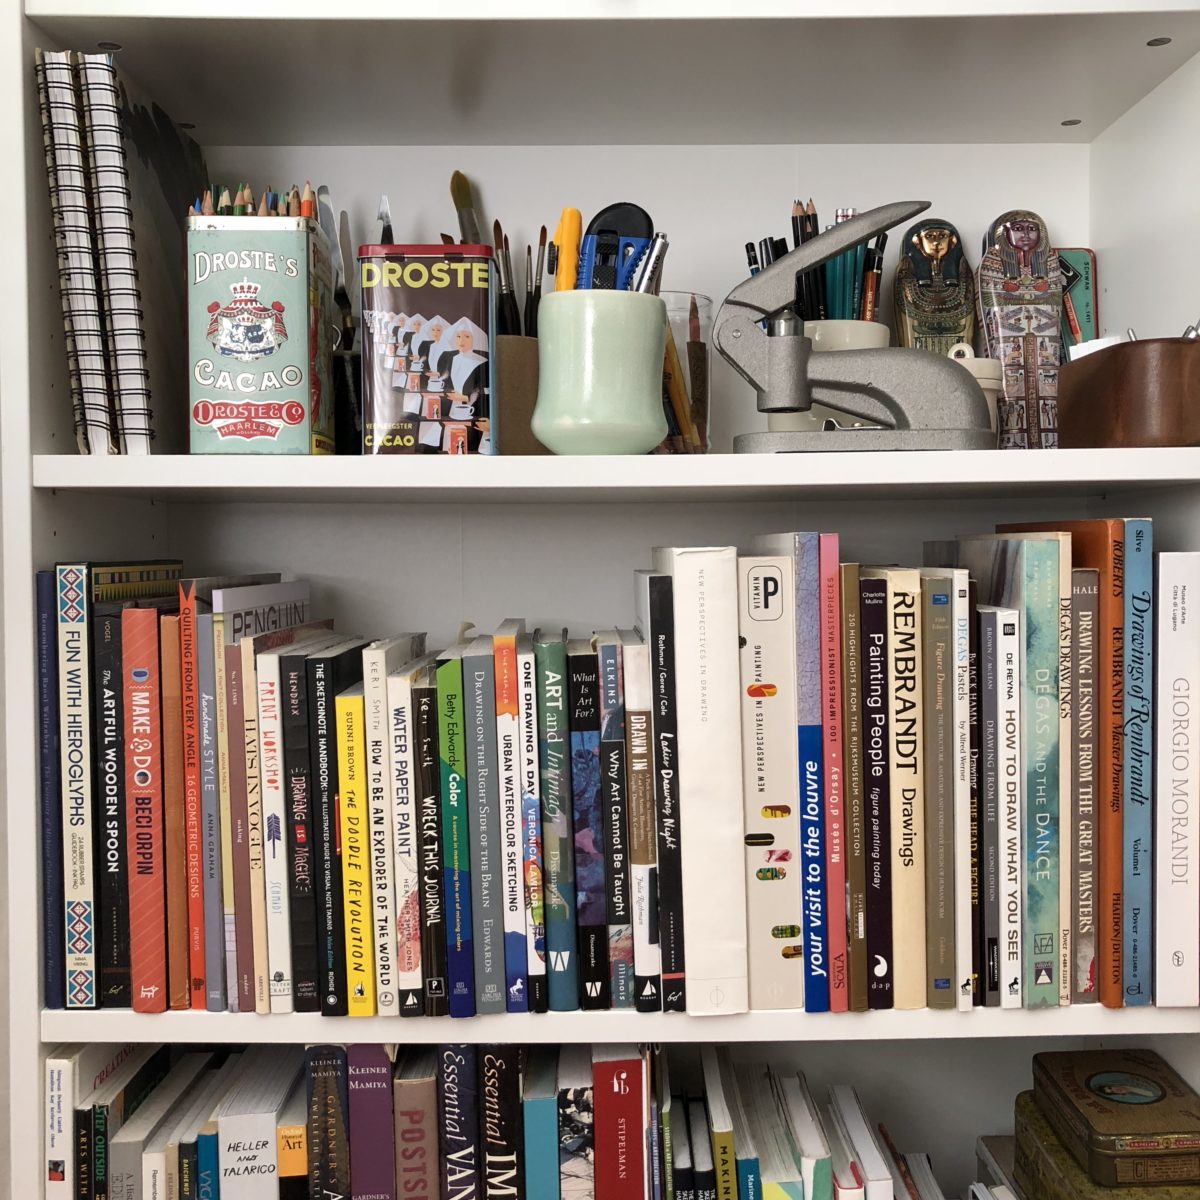
I’m one of those people who moves stuff around a lot. Organizing and rearranging truly brings me joy. I did a little refresh before Spring Break ended, so I thought I’d snap some pics and give a tour. You can see what the room looked like two years ago on our Apartment Therapy home tour here.
I share this room with my husband, but my making definitely takes up the majority of the space. The table I use the most is part IKEA (FINNVARD adjustable height legs), part Home Depot (painted wood table top), part Joann (cutting mat). The table top isn’t ideal – the original IKEA top didn’t allow the table to fit into that space, so I had to return it and improvise. It’s super bouncy, so I can’t use my serger on it, but otherwise it serves its purpose. The cutting mat is awesome and also spends a decent amount of time on the floor when I need to cut out large projects.
The three lamps are 100% necessary. Doing anything with dark fabric at night is rough, and these lamps have made mistakes a thing of the past. I do prefer working when the room filled with sunlight, but most often that just isn’t when I’m able to.
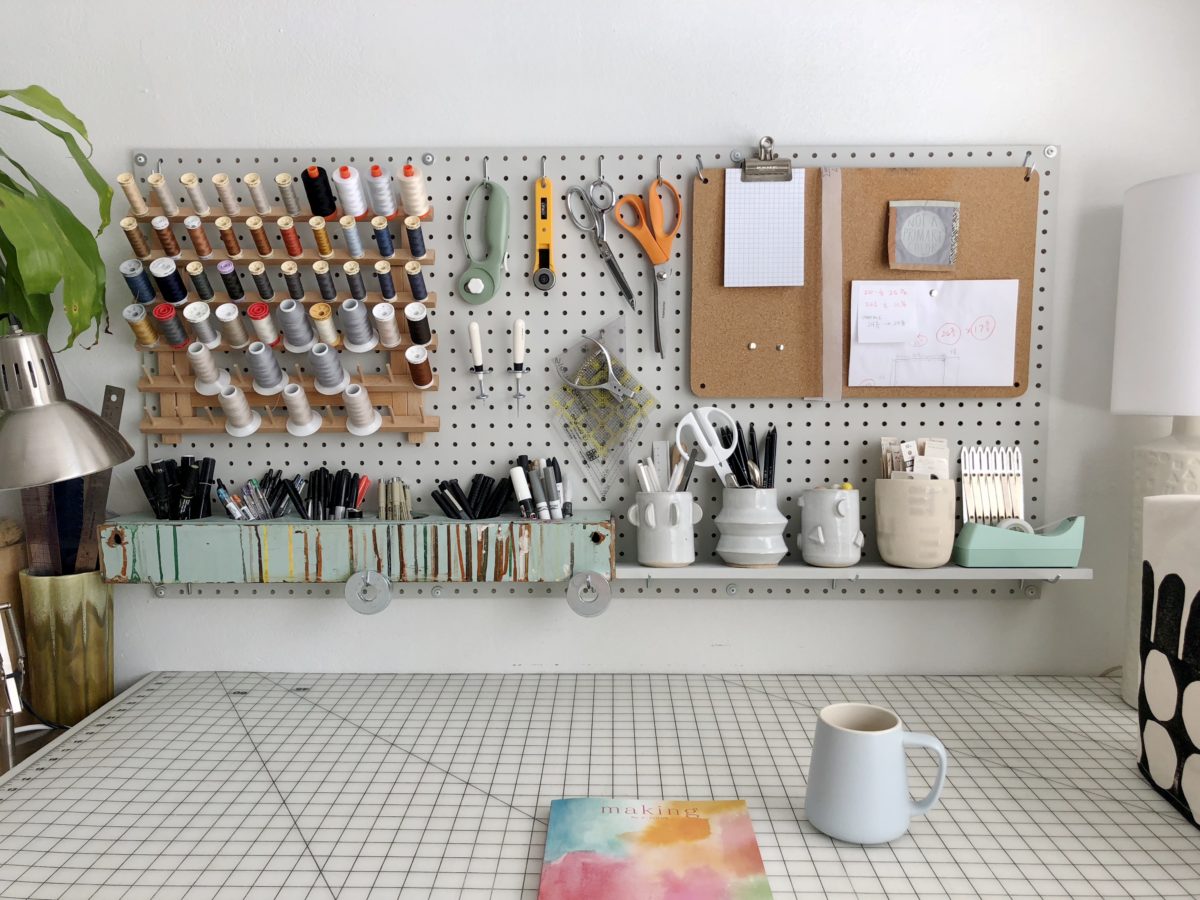
The pegboard is from a local hardware store and the corkboard is from Muji. I spray painted the pegboard a light gray and recently added the little shelf to display my ceramics. This area is ever evolving as things are easily rearranged and I reassess what needs to be super accessible. Having thread and certain tools within arm’s reach has been a total game changer.
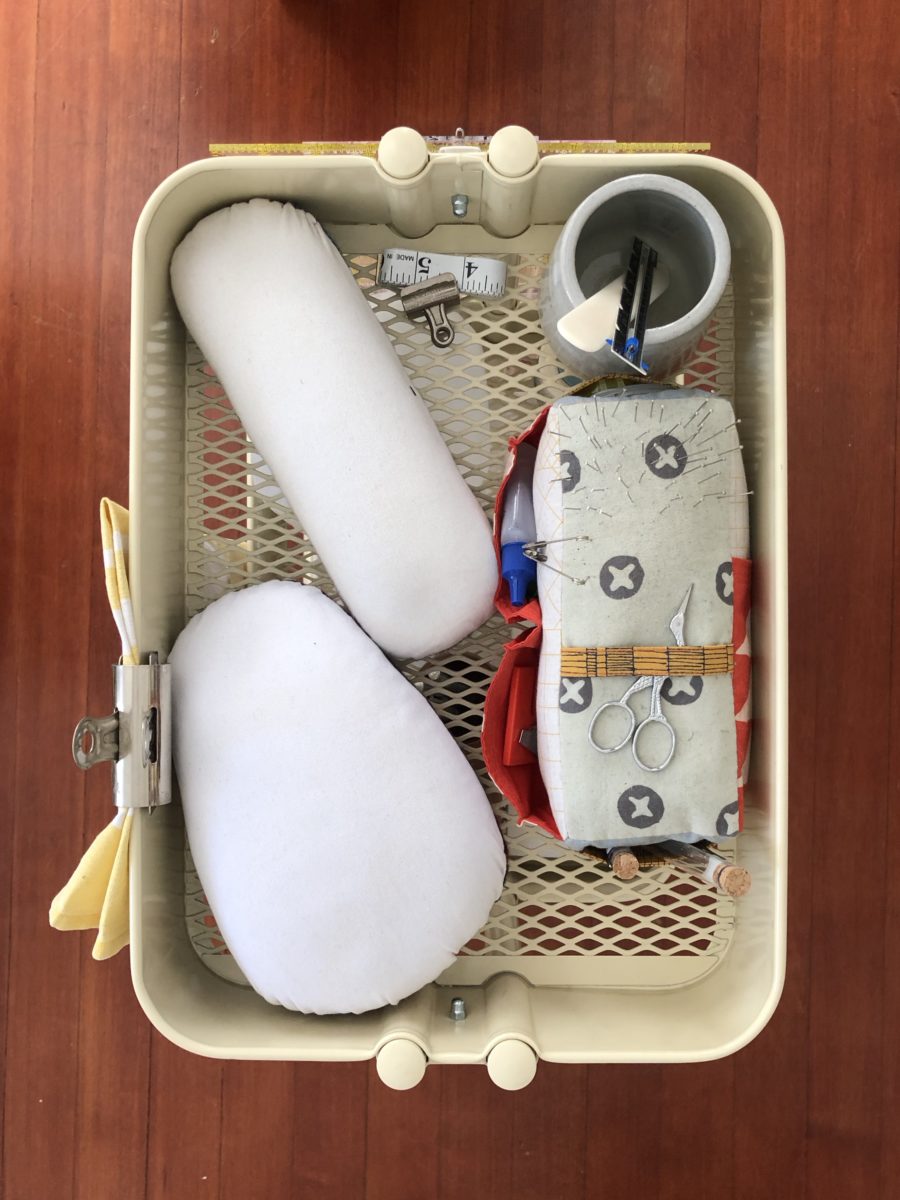
I have two of these RASKOG rolling carts from IKEA. Until recently, both were right next to my table and just crammed with both sewing and painting/drawing/printmaking stuff. I pared things down and now this one is right next to the ironing board. It holds my hams, seam gauge/point turner, distilled water, lint roller, pressing cloth, and some other bits and bobs that are handy to have right next to the iron. The pin cushion pattern is from Noodlehead’s Handmade Style book.
The other cart is adjacent to the table and holds WIPs, printed PDF patterns I haven’t assembled yet, my sewing machine manual and accessories, and block printing supplies.
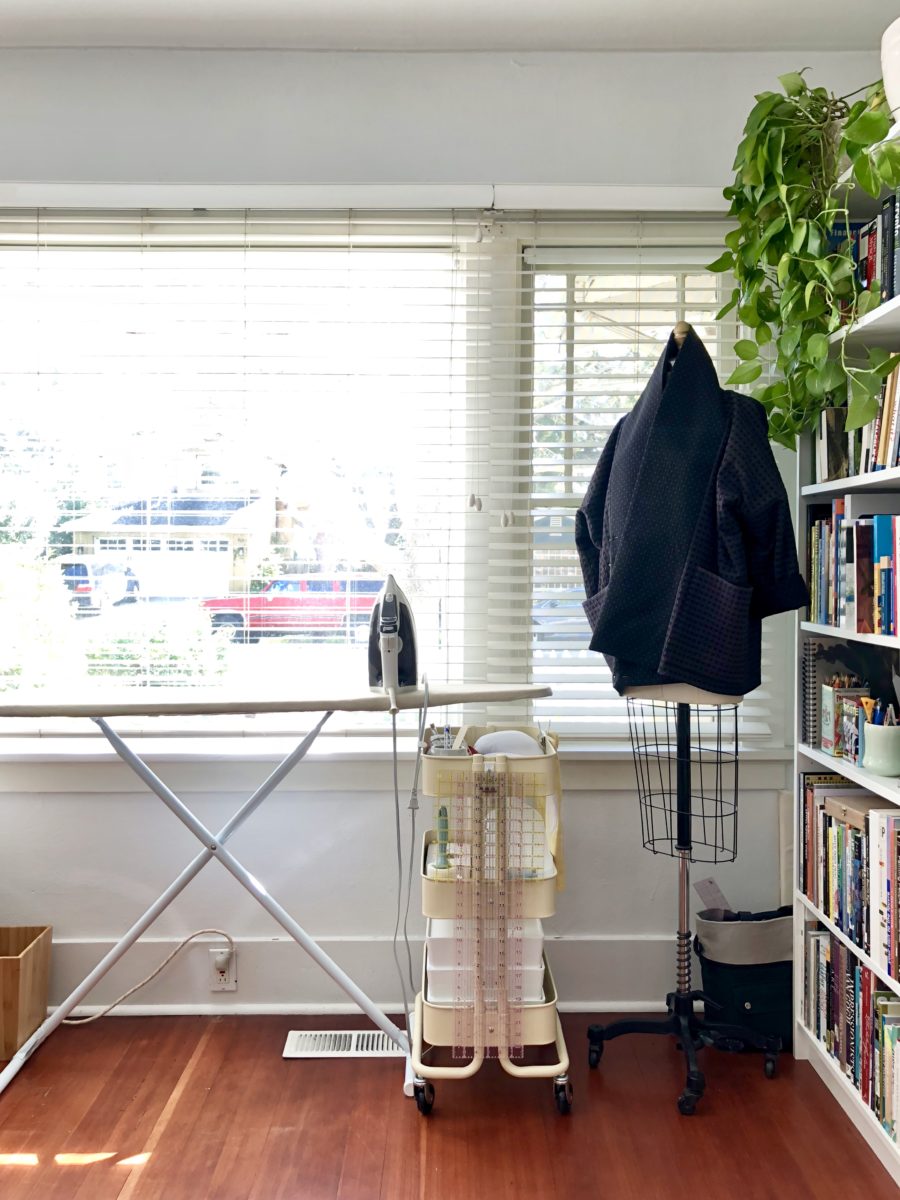
The ironing board was just moved in front of the window. I’m hoping now I’ll be able to roll right to it from the machine, or stare out the window when ironing lots of yardage.
The ironing board used to be right in front of the bookshelves and I’d tuck things like the hams in between books when I was ironing. I think I’m finally at the point where I’m okay with the ironing board being set up all the time. Before I’d hang it up in the closet with all its knick knacks and need to schlep everything out if I wanted to sew.
The dress form is from a brief stint selling vintage and although she’s a bit smaller than my measurements, I like to throw WIPs on her. I’m hoping that once I take a draping class, she’ll prove more useful. I added a 3M hook to the side of my cart to hang my rulers, which once took up a lot of pegboard real estate.
The previous renters painted a few things with chalkboard paint, but we’ve only kept it on this door. I’m trying out having an illustrated ‘To Make’ list on it. The patterns include:
I guess I’ve sort of solidified my Make Nine plans here!
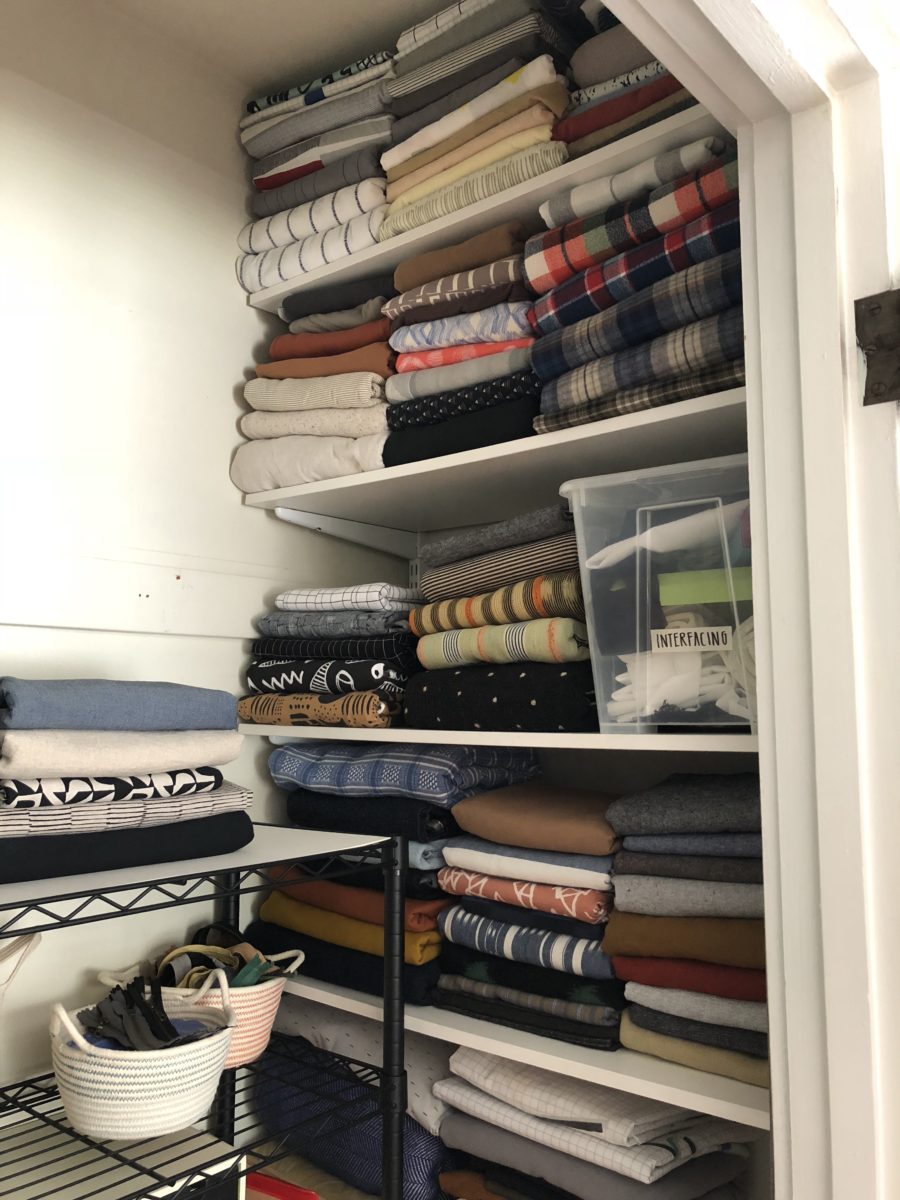
Behind the chalkboard door is a tiny closet. To the left there is a large boxed in vent that makes the only hang bar pretty much useless. I really wish I could hang up my patterns and quickly flick through them to find what I need, but this closet just can’t do that, or I’d have to sacrifice shelving on the opposite side.
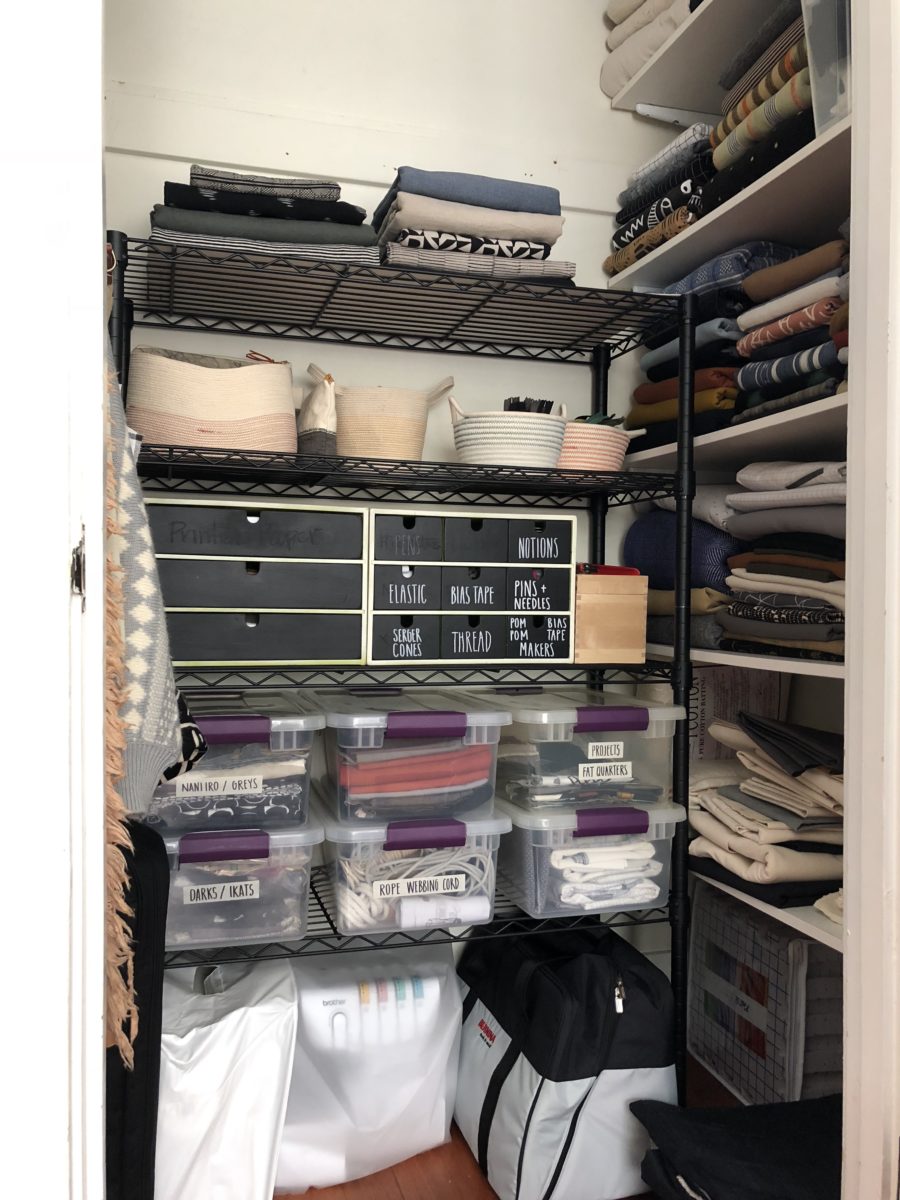
In the closet is my fabric stash, my other machines, and notions/tools I don’t need constantly. The plastic buckets on the black shelf hold leftover fabrics and quilting experiments.
Fabric is mostly contained to the shelves on the right. It’s more or less organized by type and by my overall excitement to use them. The top shelf is thrifted bed sheets for quilts or muslins. The next shelf down in knits for tops and flannels for all those shirts I’ve promised my husband. The third shelf down is knits for bottoms and special fabrics (mud cloth and baoulé) as well as interfacing, which I keep in a bucket. The next shelf down is jeans/bottom weights, linens, and cottons. The bottom shelf is a hodgepodge of canvas for bags, batting, and thrifted sheets that don’t fit on the top shelf.
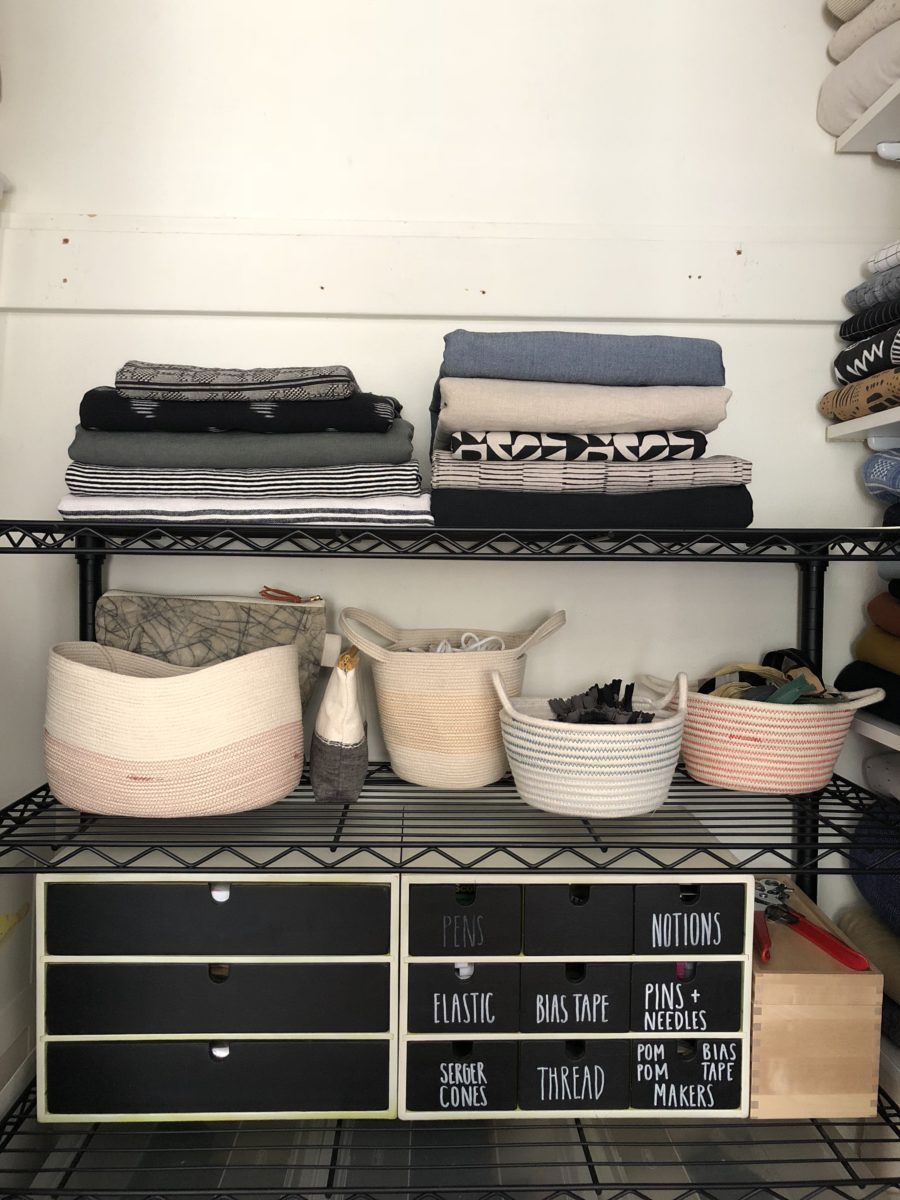
The fabrics on this shelf are my next up projects. The rope baskets hold pattern weights (vintage saucers!), extra pattern hooks, thrifted vintage zippers, and machine parts. The wooden drawers are a catchall and have bias tape makers, printer paper, and jeans making kits among other things. I’ve had these drawers since college and painted them several times (not recommended), which makes them stick. I would like to replace them with something else at some point. Perhaps a bunch of these?
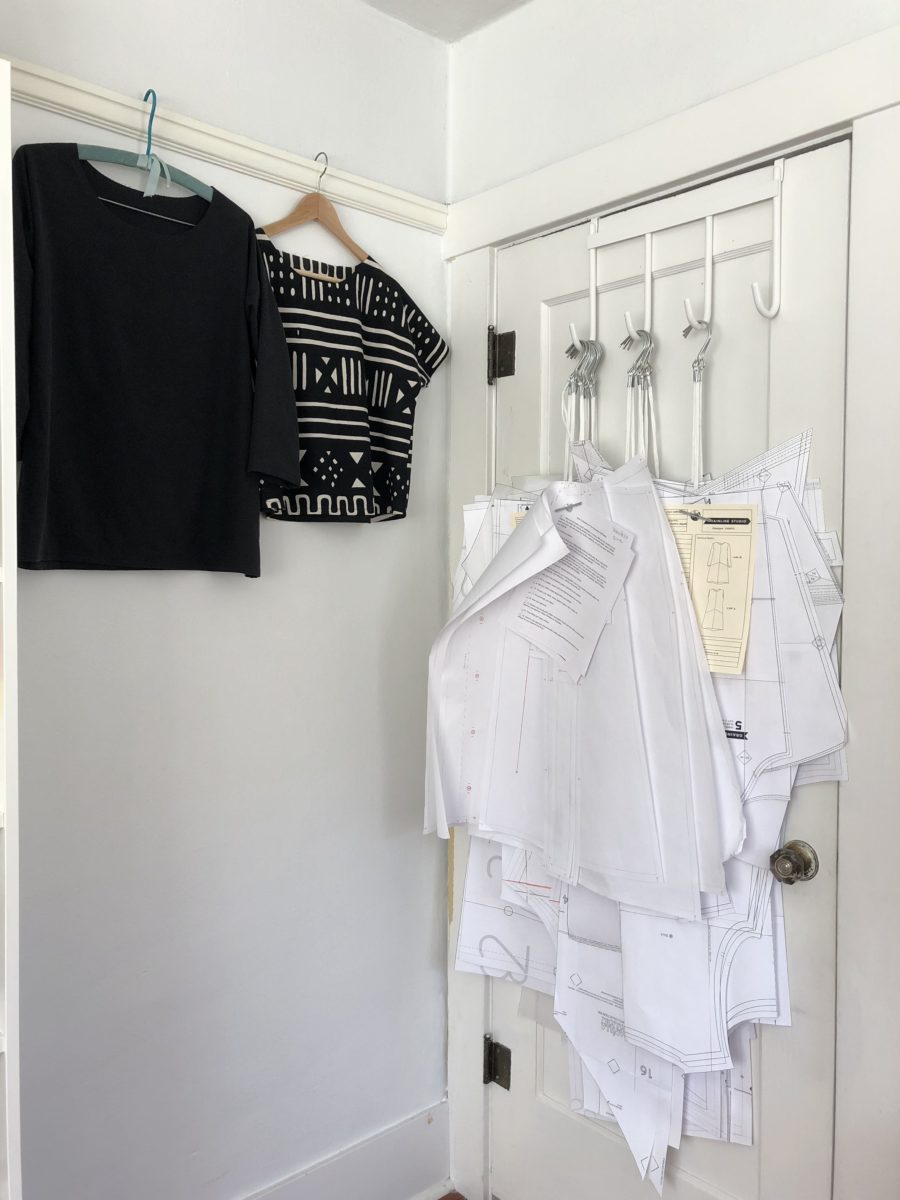
I’ve been really struggling to find the best system for pattern storage. I tried keeping them folded in drawers, rolled up in drawers, hanging on nails, hanging in the closet (until there were too many to fit in the 1′ hang space), and now they’re on hooks on the doors. It’s still challenging to find the pattern I want and they’re not in any sort of order, but it’s better than the drawer system. Some not quite finished makes also hang on the picture rail.
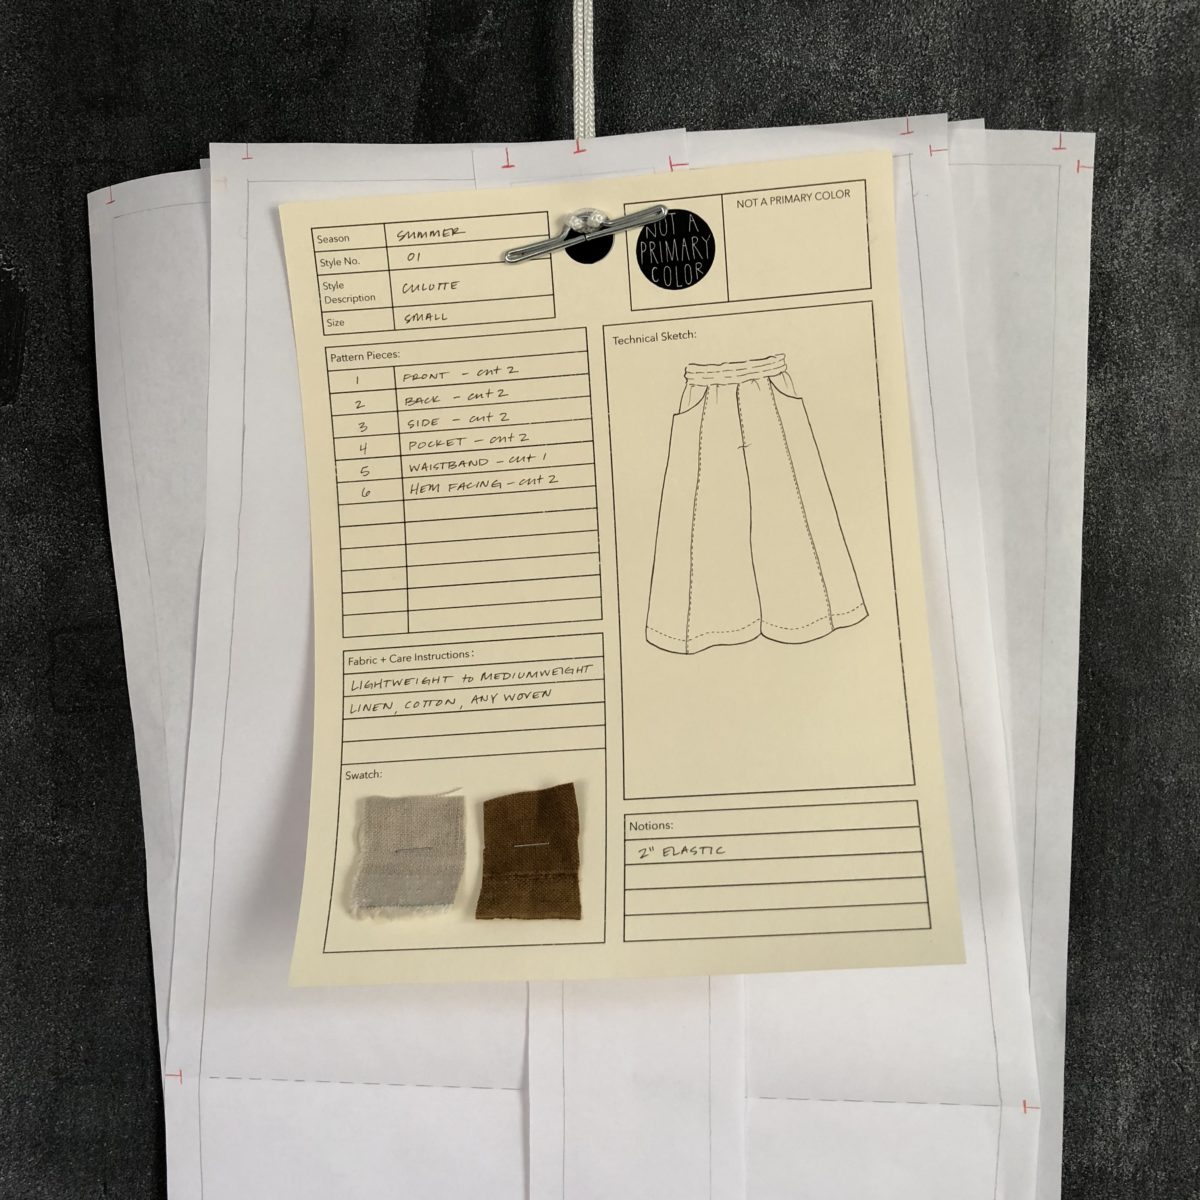
I’m slowly getting to where each pattern also has a pattern card with relevant info and fabric swatches. The one above is my culotte design from my patternmaking course.
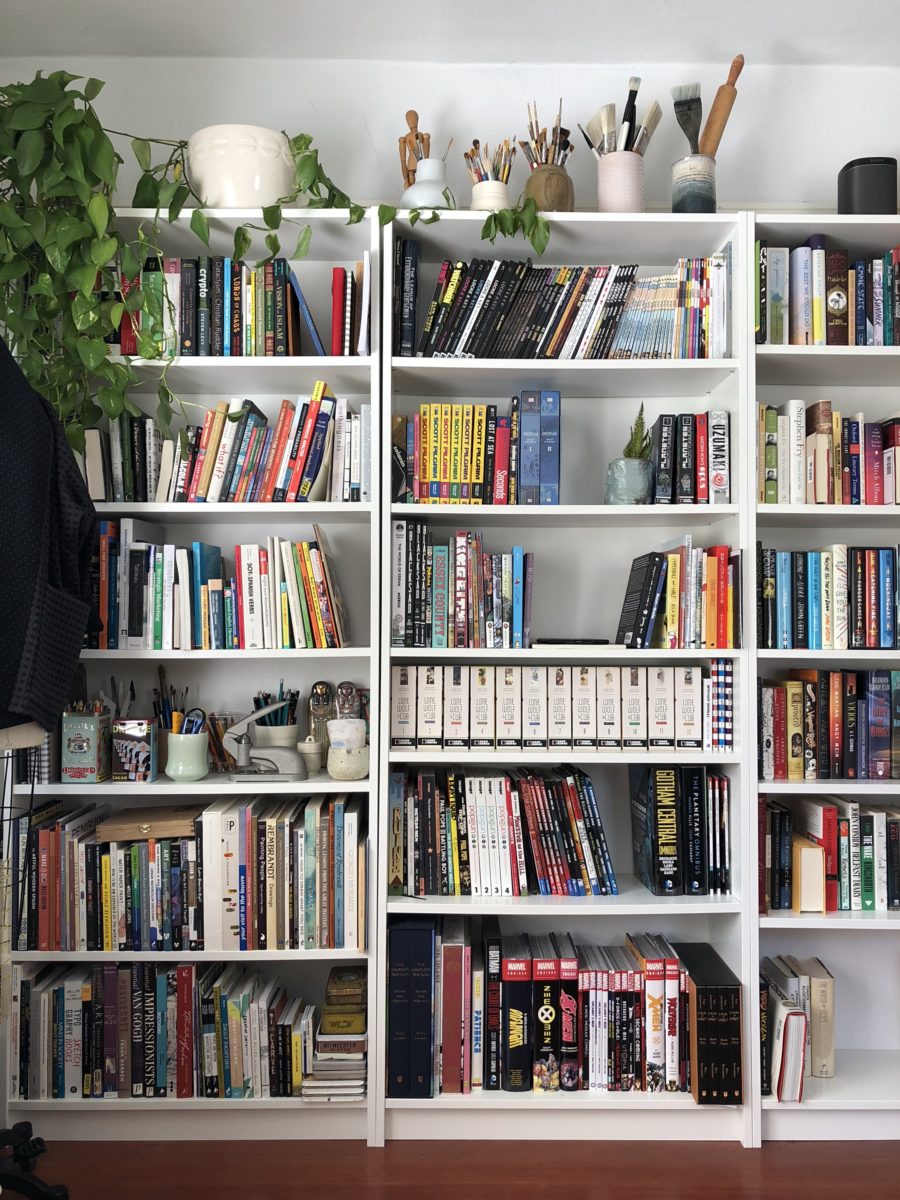
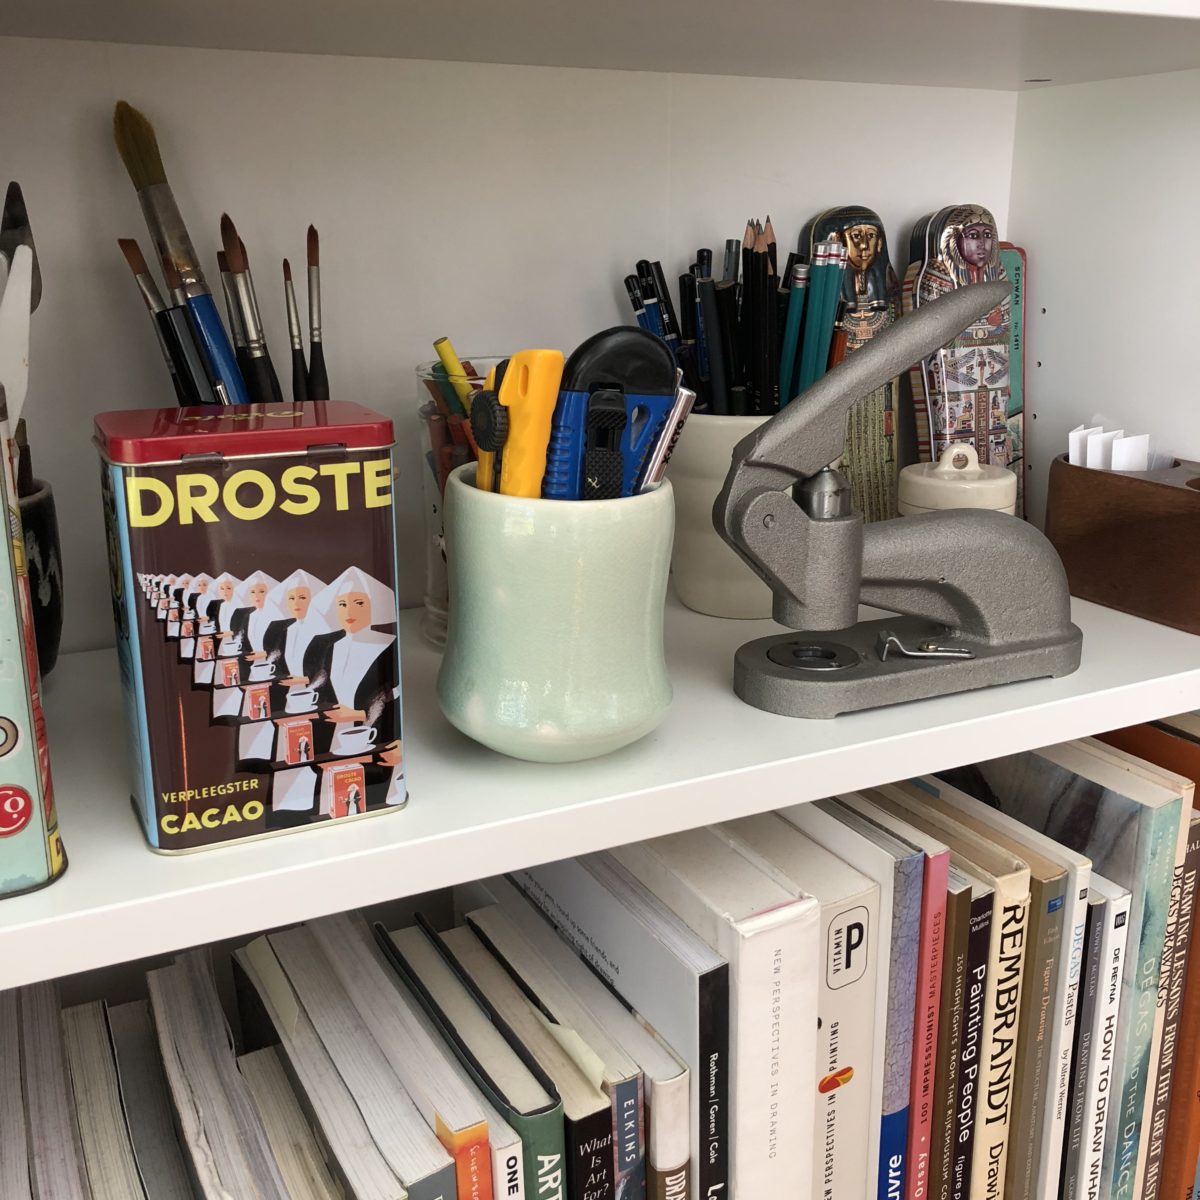
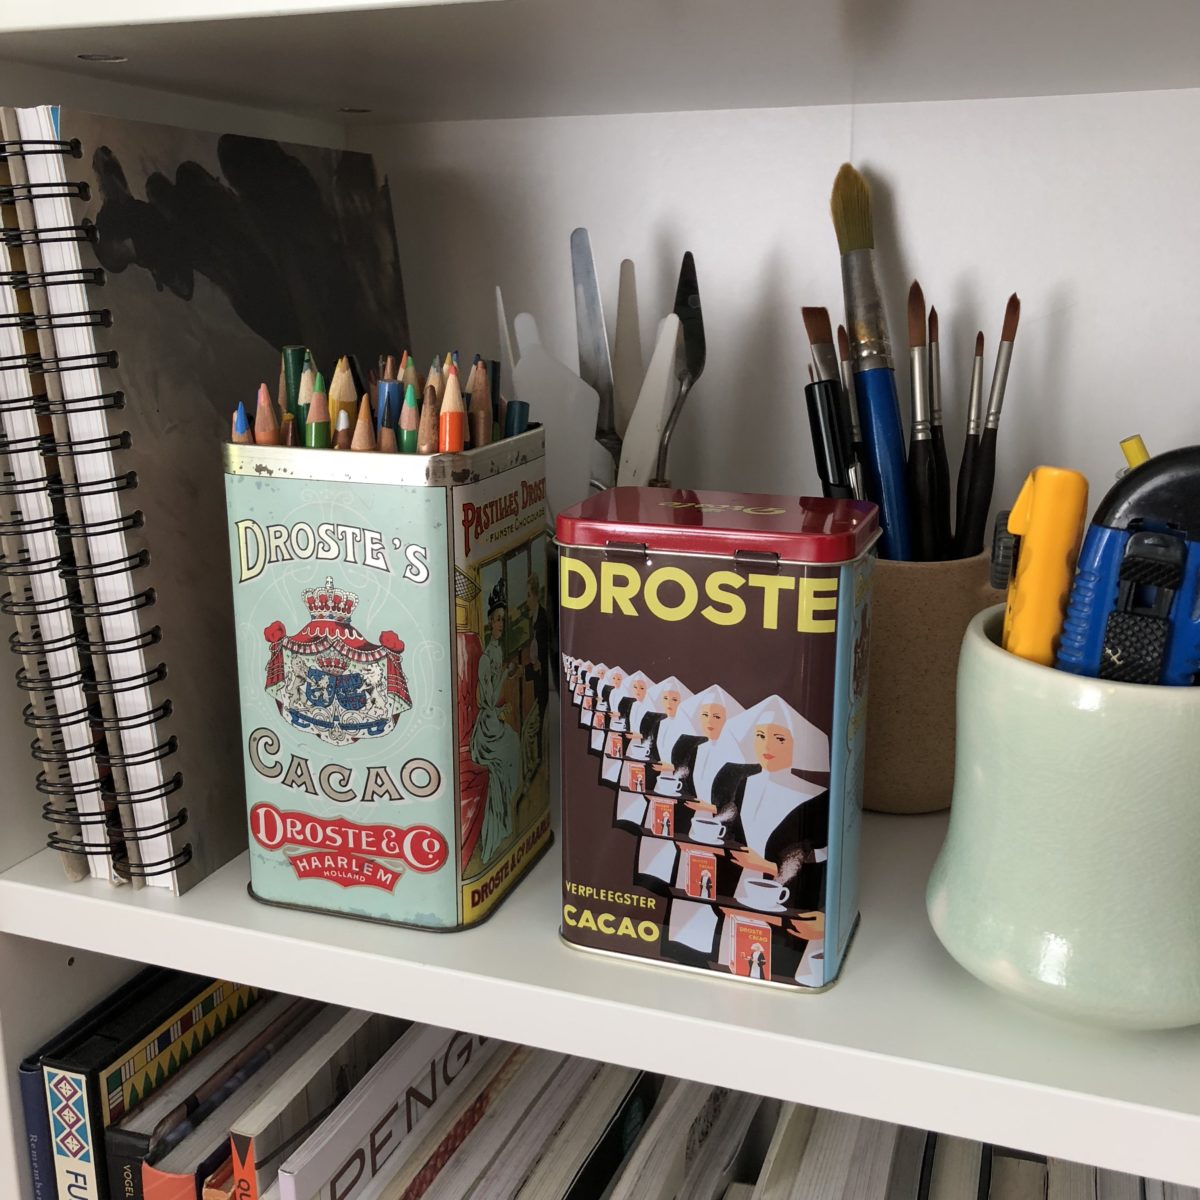
The bookcases are primarily my husband’s but I have three shelves. Most of my art and making books live here. The top shelf now houses a lot of the drawing/painting/printmaking supplies that used to be in one of the rolling carts.
I’m liking that these items are now a little more visible on the shelves.
There are definitely things I’d like to change and I’m constantly fantasizing about designing a studio in a house we own… BUT I’m really grateful to have to have this space. For my fantasy studio, check out my Pinterest board: Making Space.
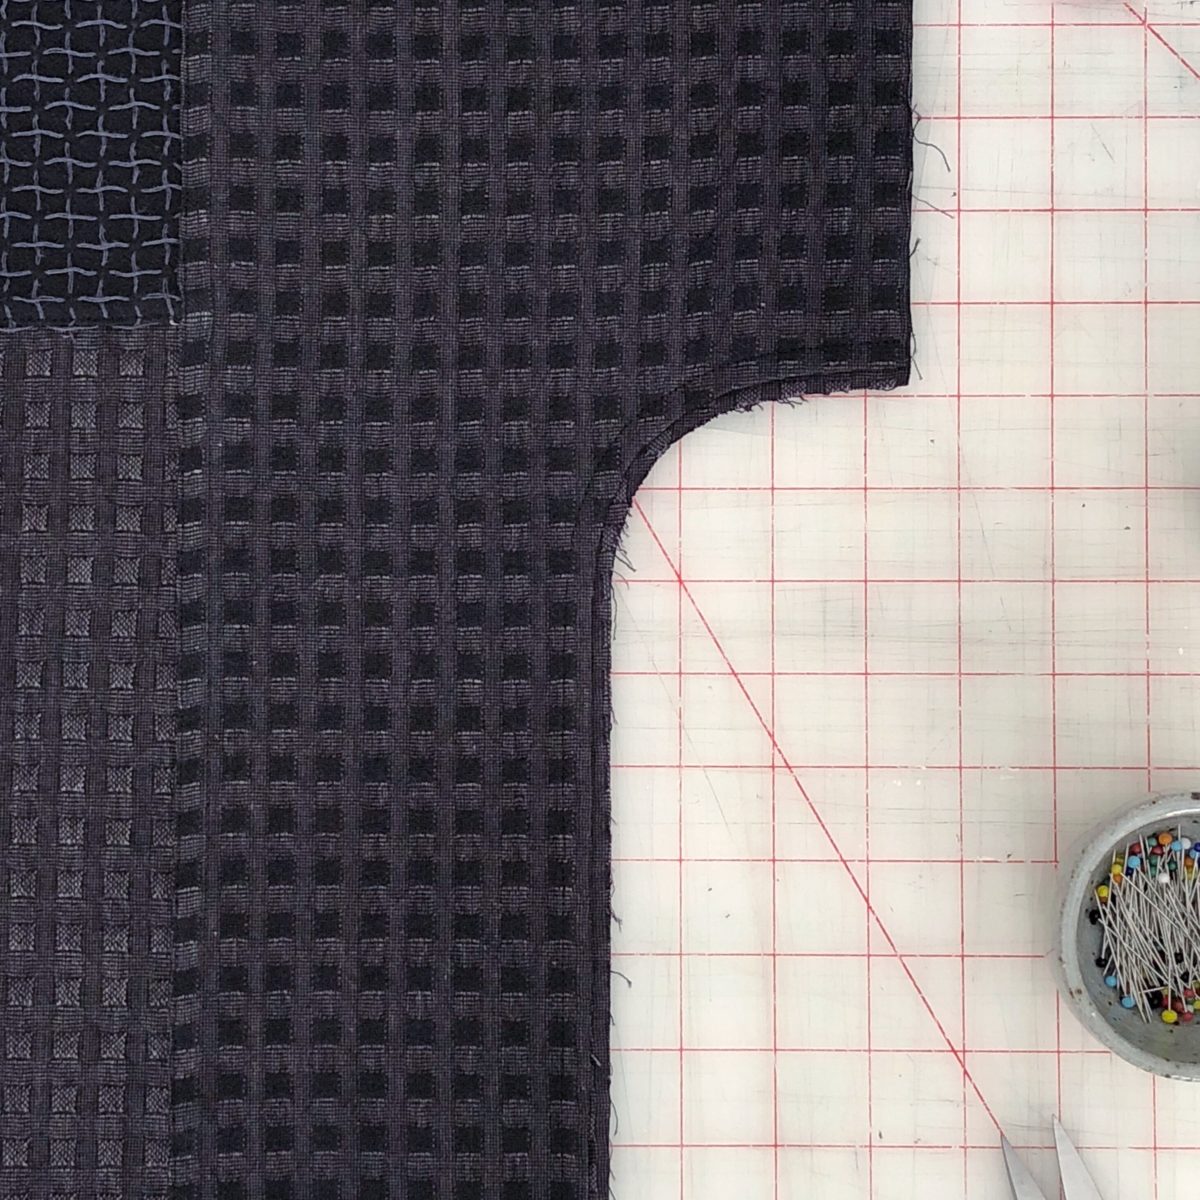
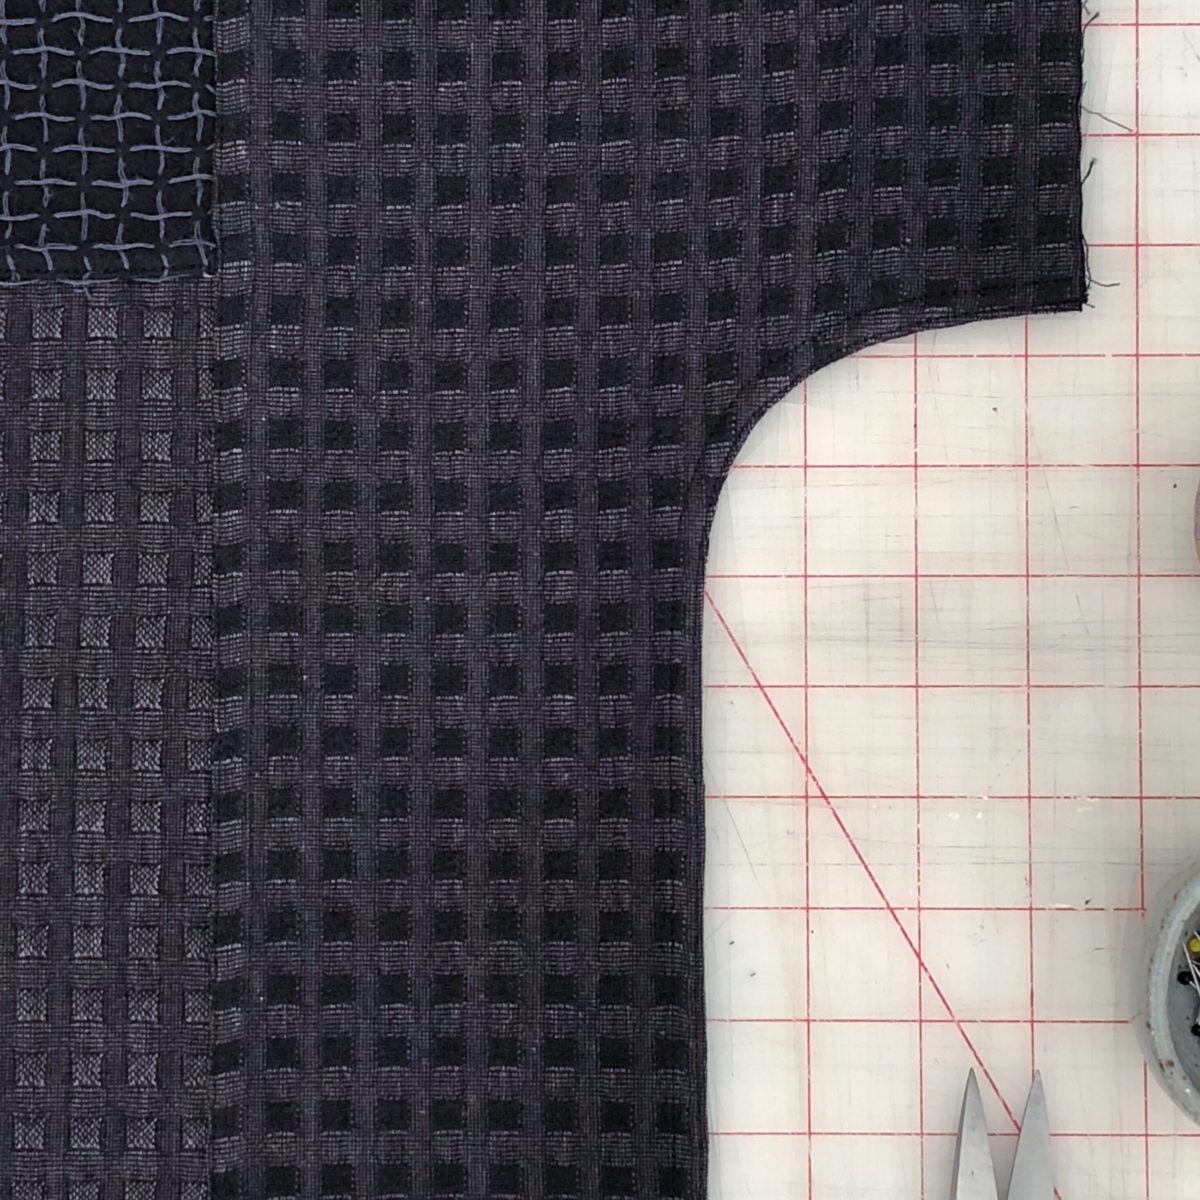
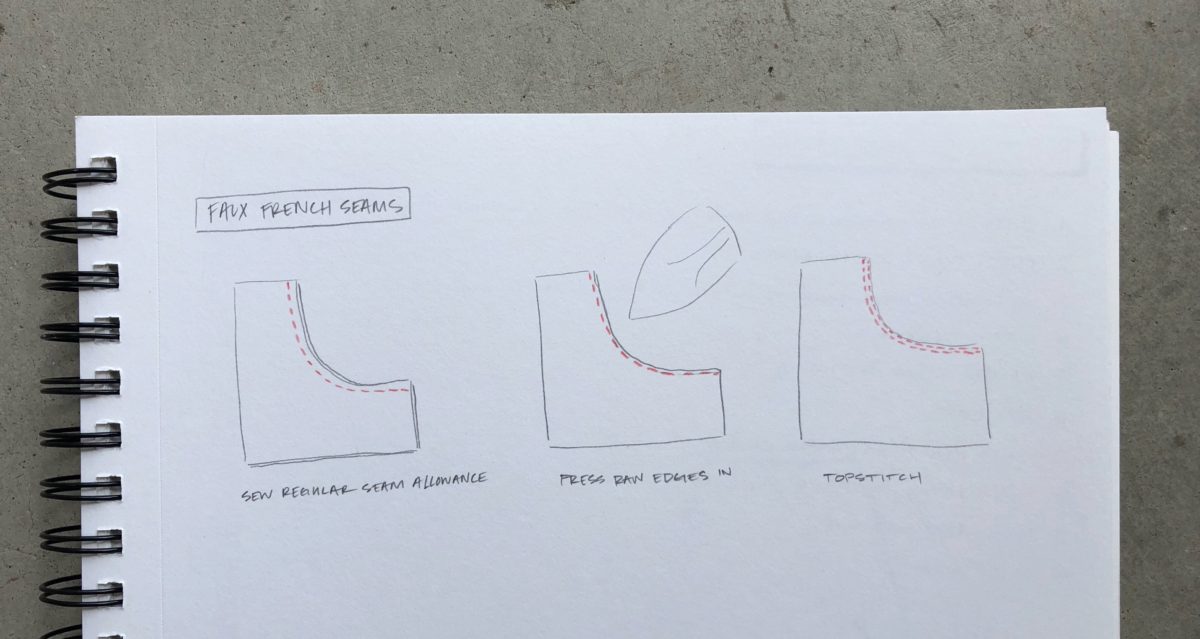
I love a French seam. I’ll French any seam I can. Even curves. But, French seams don’t really work well with curves. They look great on the inside but are bunchy as heck when you turn the garment right side out. Enter the Faux-French seam!
Step 1 Sew a regular seam (right sides together).
Step 2 Press raw edges in. Above shows one side pressed.
Step 4 Topstitch as close to the edge as you can.
Voila! Encased edges without the bunching! Here’s the top right side out and it’s almost perfectly smooth.
Here are the steps in drawn form since the black fabric makes it a little hard to see what’s going on.
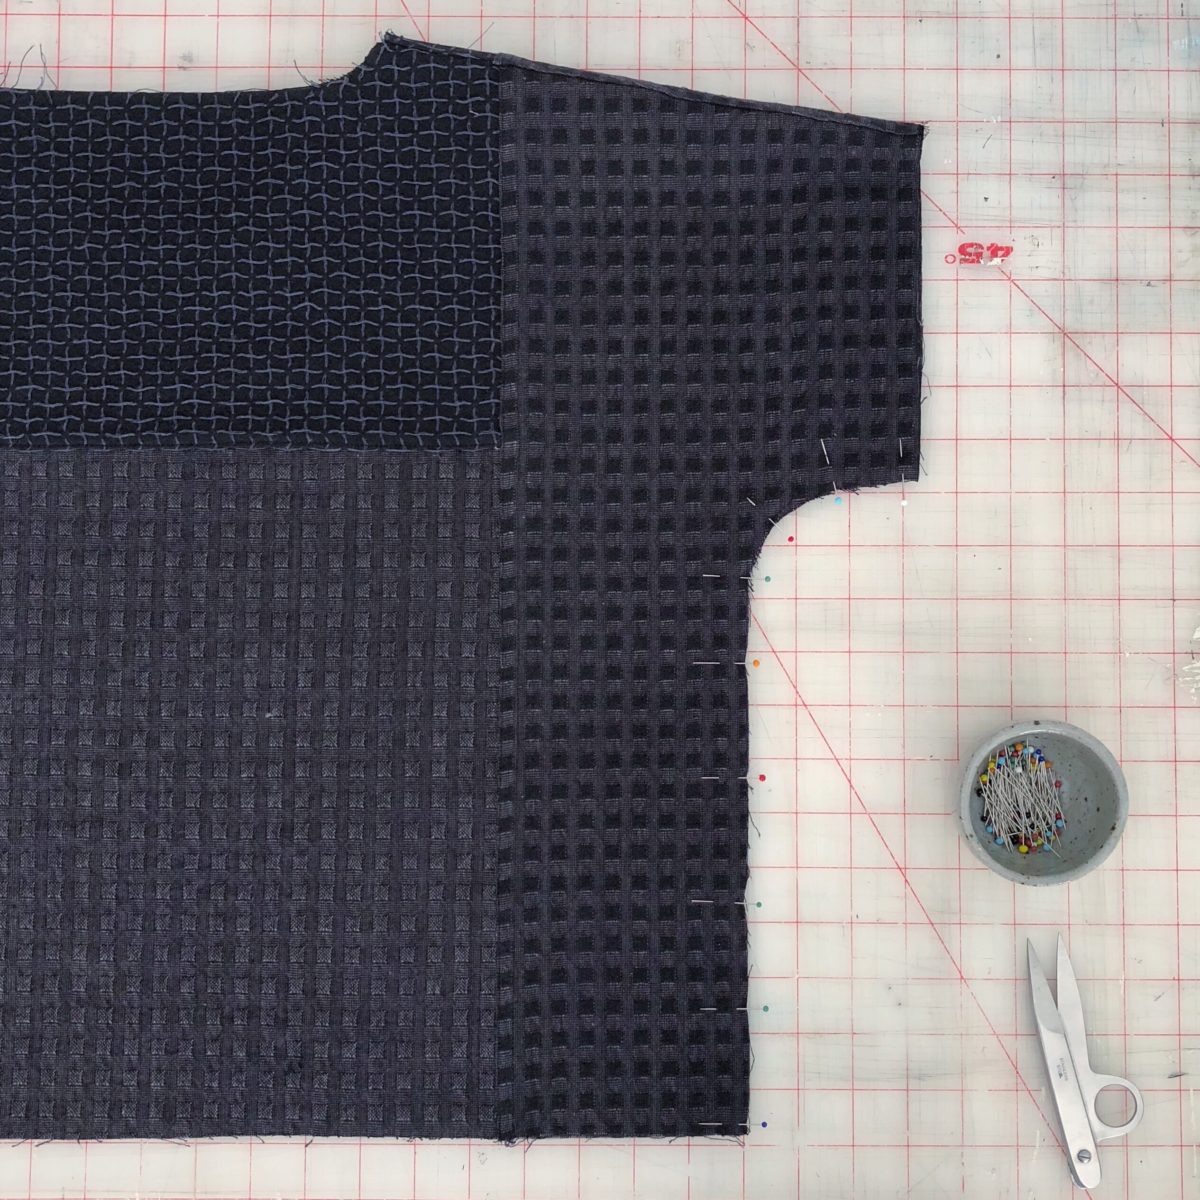
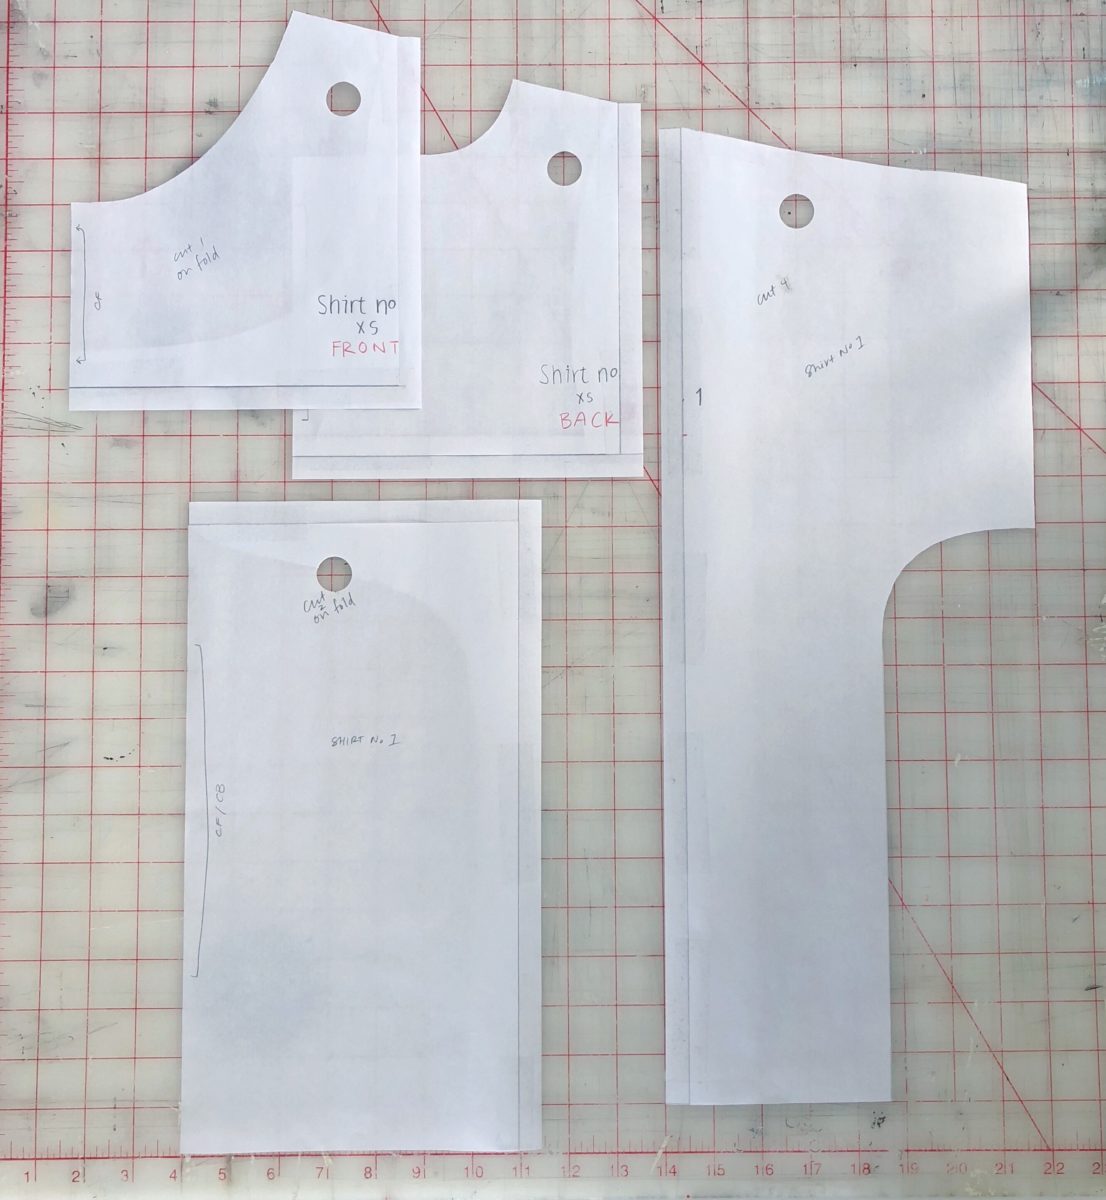
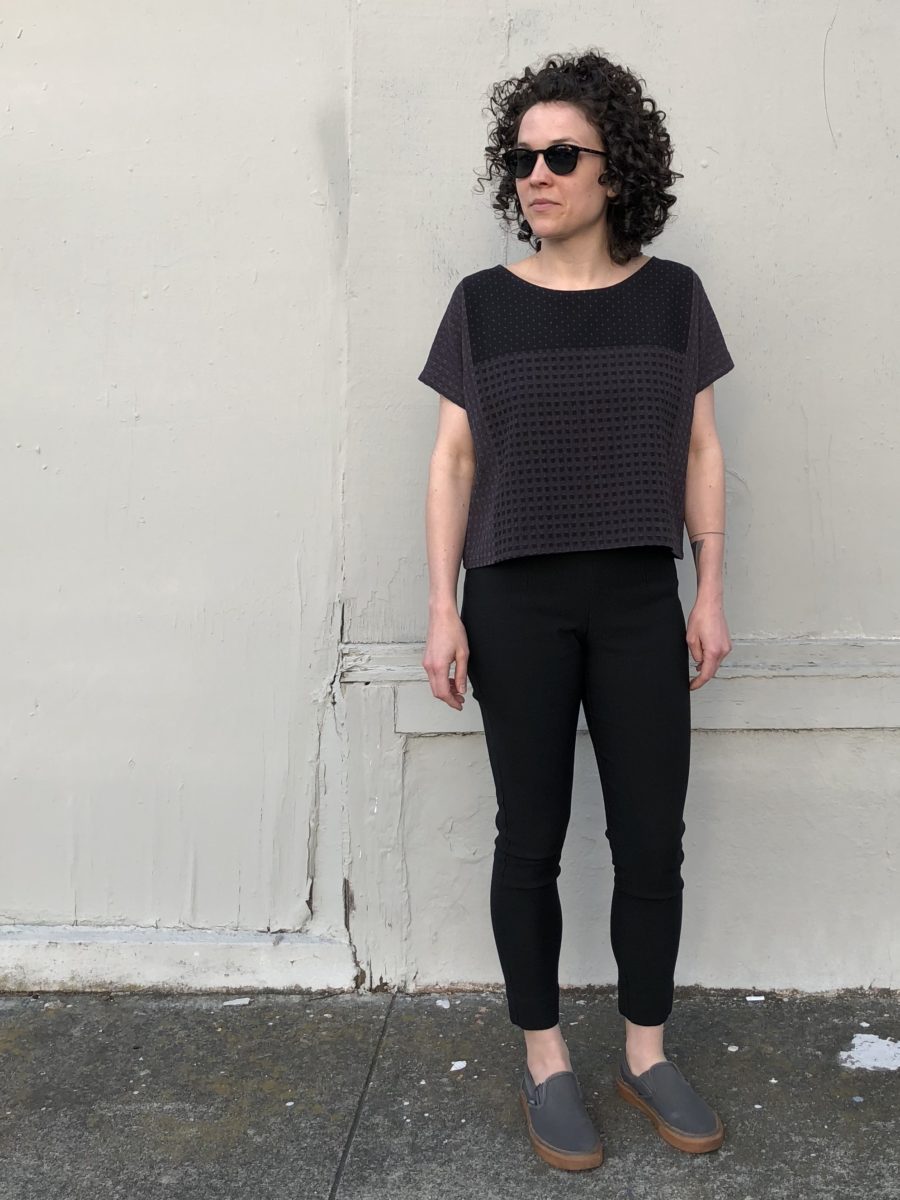
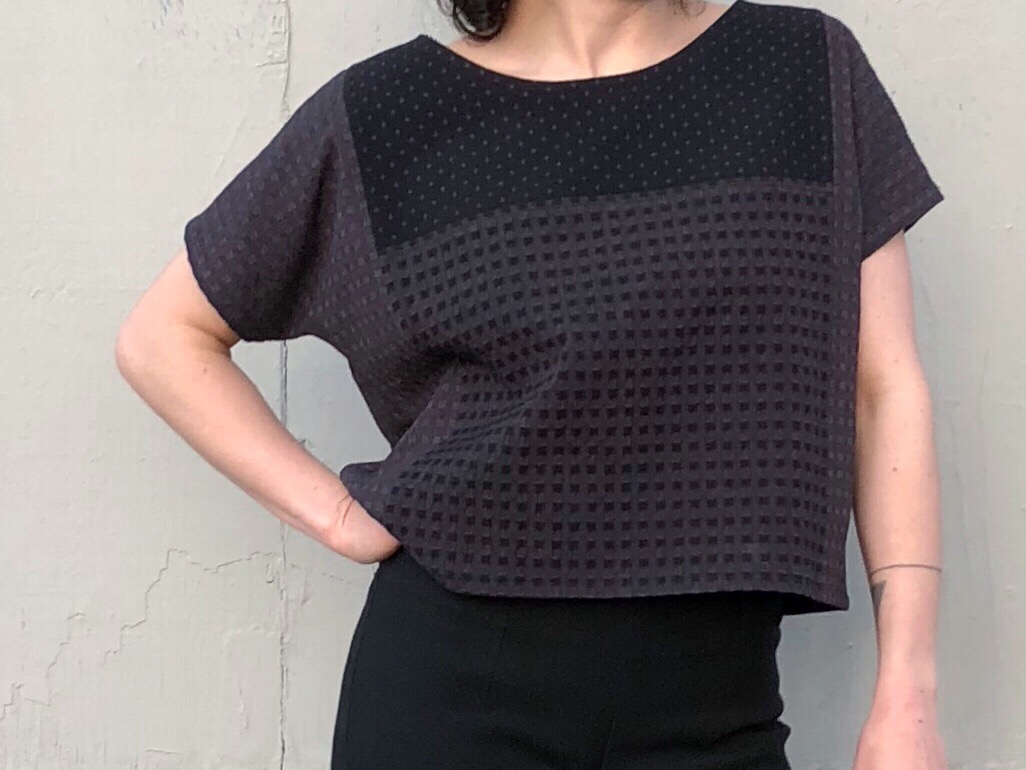
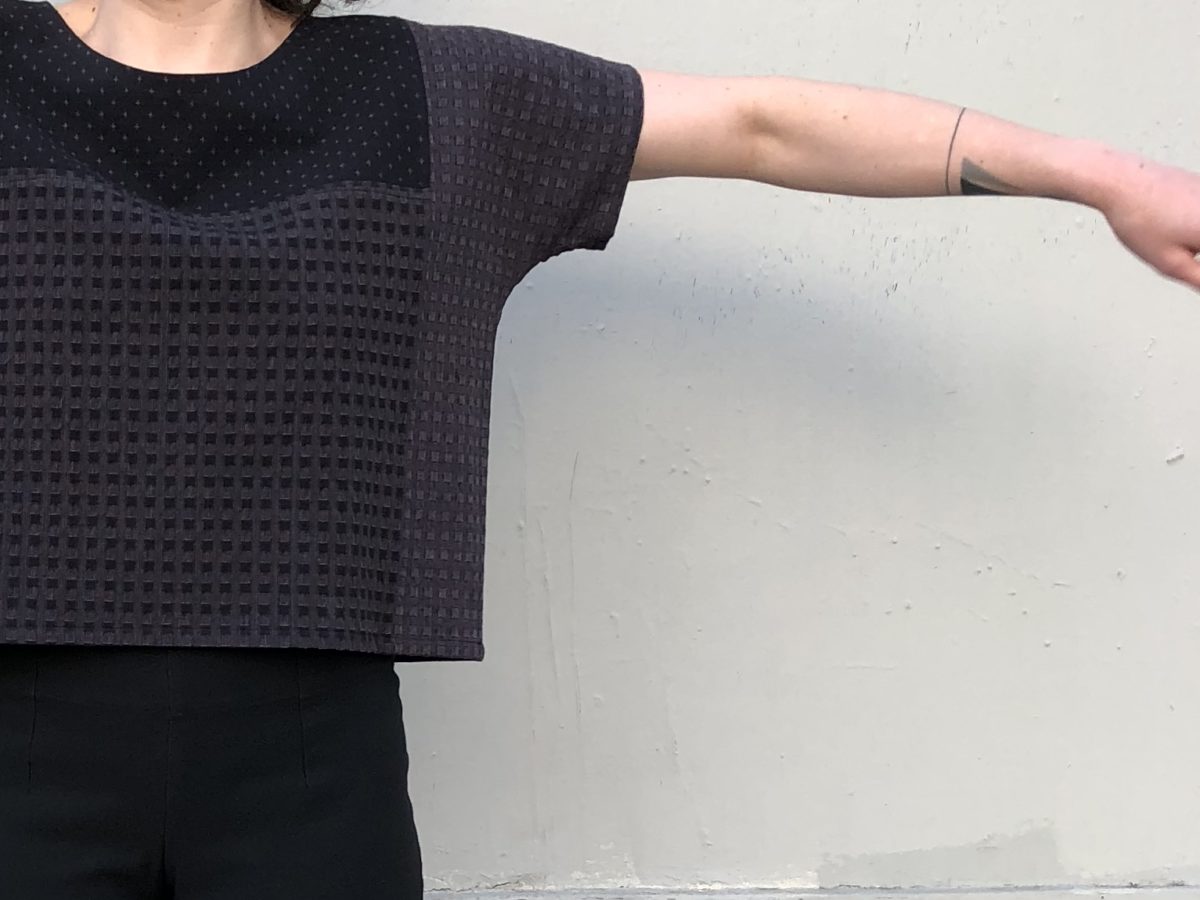
Shirt No 1 Hack I’ve been on a big Shirt No. 1 kick. It’s a simple sew and lends itself to so many fabrics. After making two (one solid, one in a print), I knew it would be the perfect pattern to achieve all of my Ace & Jig desires. This hack is a great option if you have a bunch of smaller fabric pieces.
First draw in the desired seam lines and cut. Add seam allowance where the pieces will join together (any side you cut along will need added seam allowance). I taped additional paper directly onto the pattern pieces so that I could use my rotary cutter and reuse this pattern again later. Square the seam allowance if pieces join on a diagonal line like it did along the shoulder seam. Squaring will help the pieces come together without extra fabric sticking out. I also squared off the hem and side seams. That’s pretty much it!
It was really starting to feel like Spring Break would never get here. Last Friday felt like five days. And I’m definitely not counting, but there are 8 weeks left of school. Eight. 8. E. I. G. H. T. This middle school teacher really needed some time off.
I’m trying to be gentle with myself this break. I have a tendency to over estimate what can be accomplished during a small amount of time off and despite usually getting a lot done, it never feels like enough.
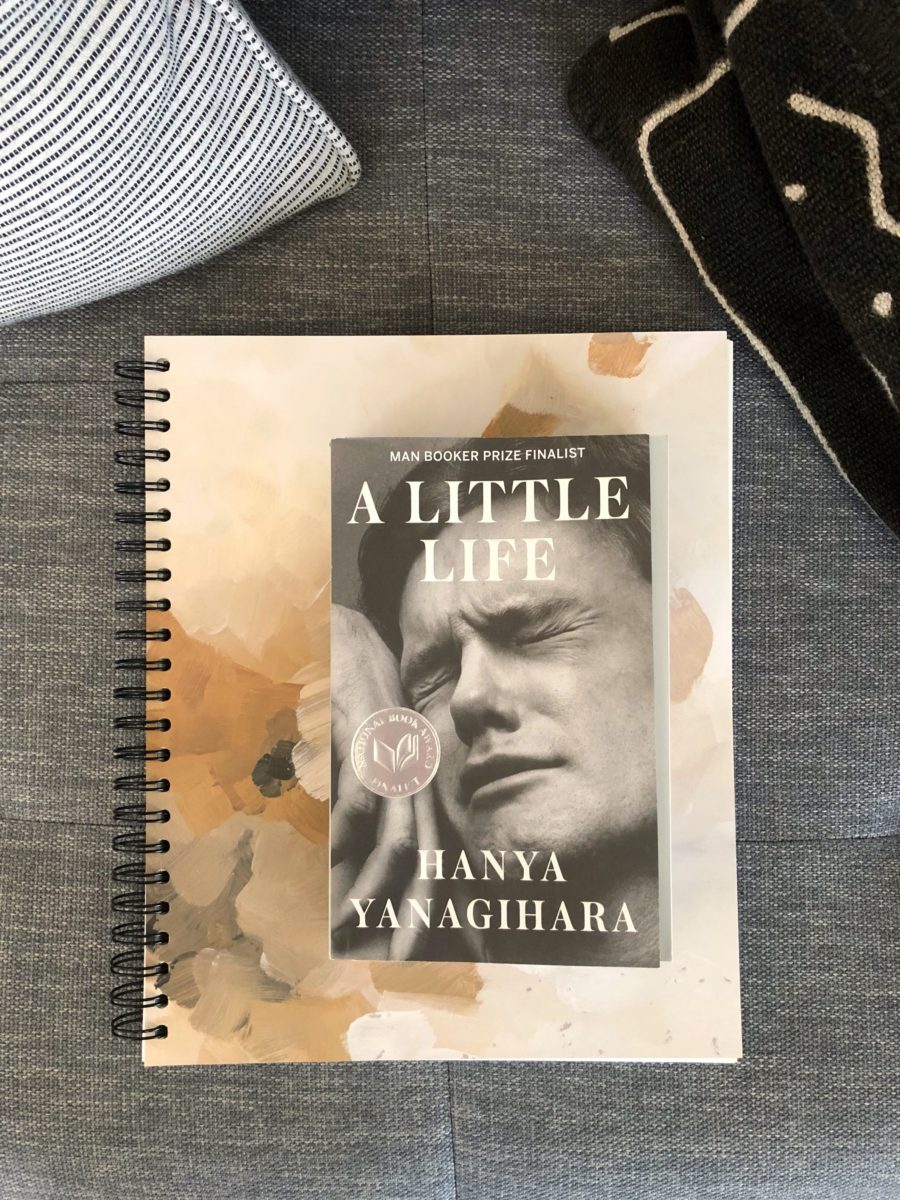
So aside from one project and my PM&D homework, I’m taking it easy. Going to read this book, probably clean some areas of the house, and visit some fabric/thrift stores.