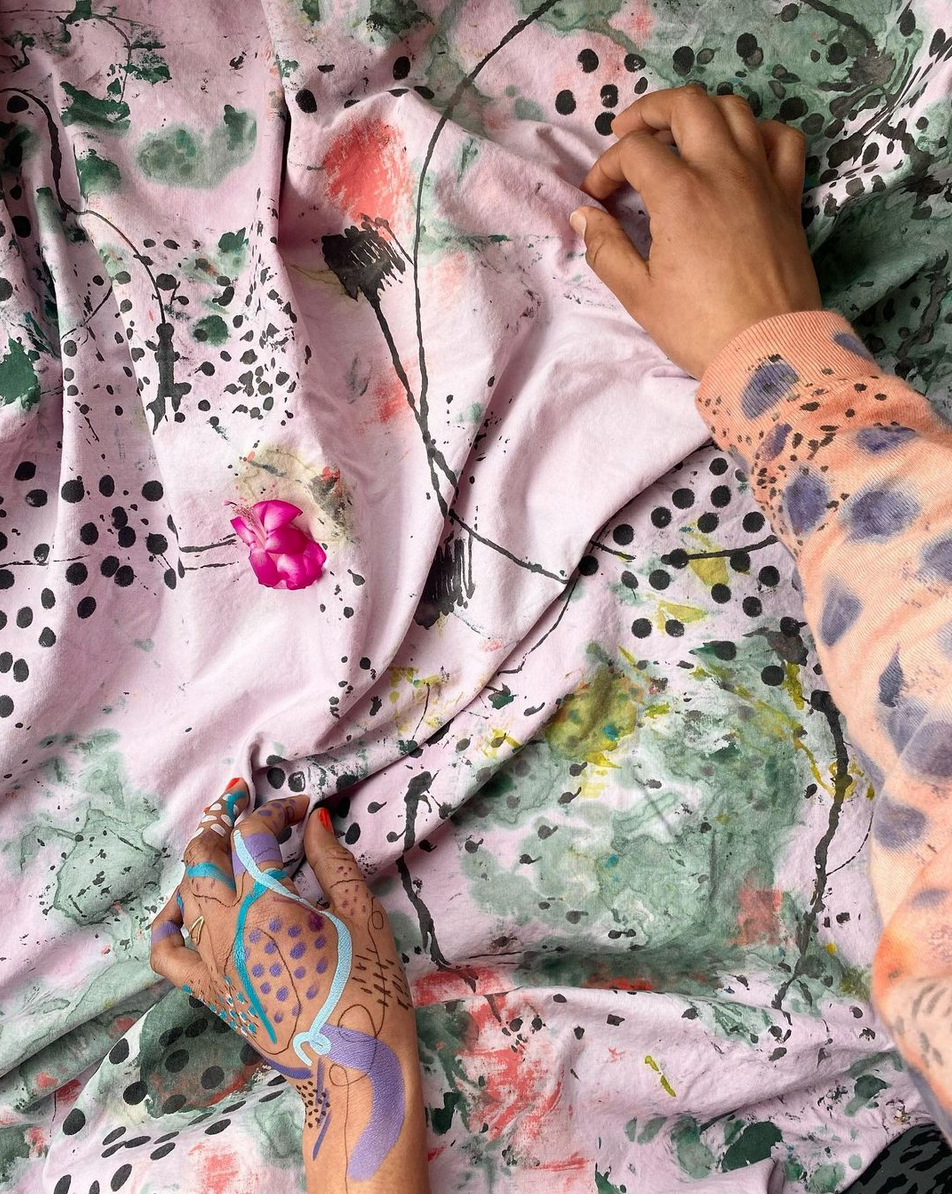
Avery Williamson is doing beautiful things by combining painting and fabric. I’m so excited to cut into some of this goodnes! I’m planning to make a robe. UPDATE: here it is.
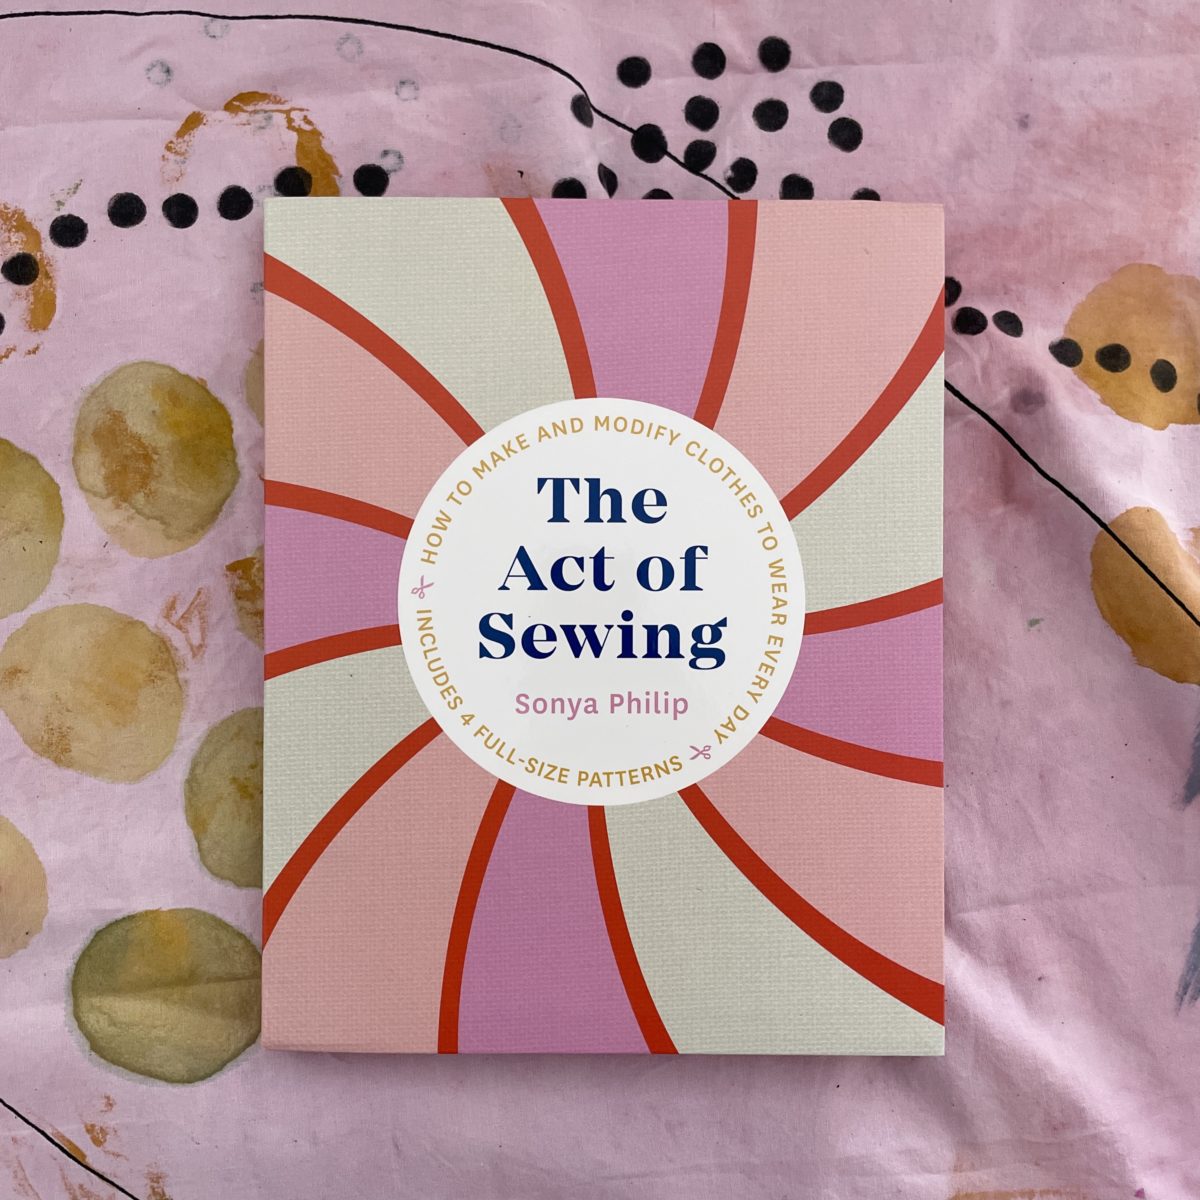
Sonya Philip wrote an amazing book! Sonya was one of the first independent pattern designers I tried and is the reason I had any successes sewing early on. Here’s my advanced copy on top of Avery’s fabric.
Zak Foster has been doing a whole bunch of collabs and chats lately on his Instagram, which is where I learned about Heidi Parkes and her 30-Day Hand Yoga series. I’m going to give it a try!
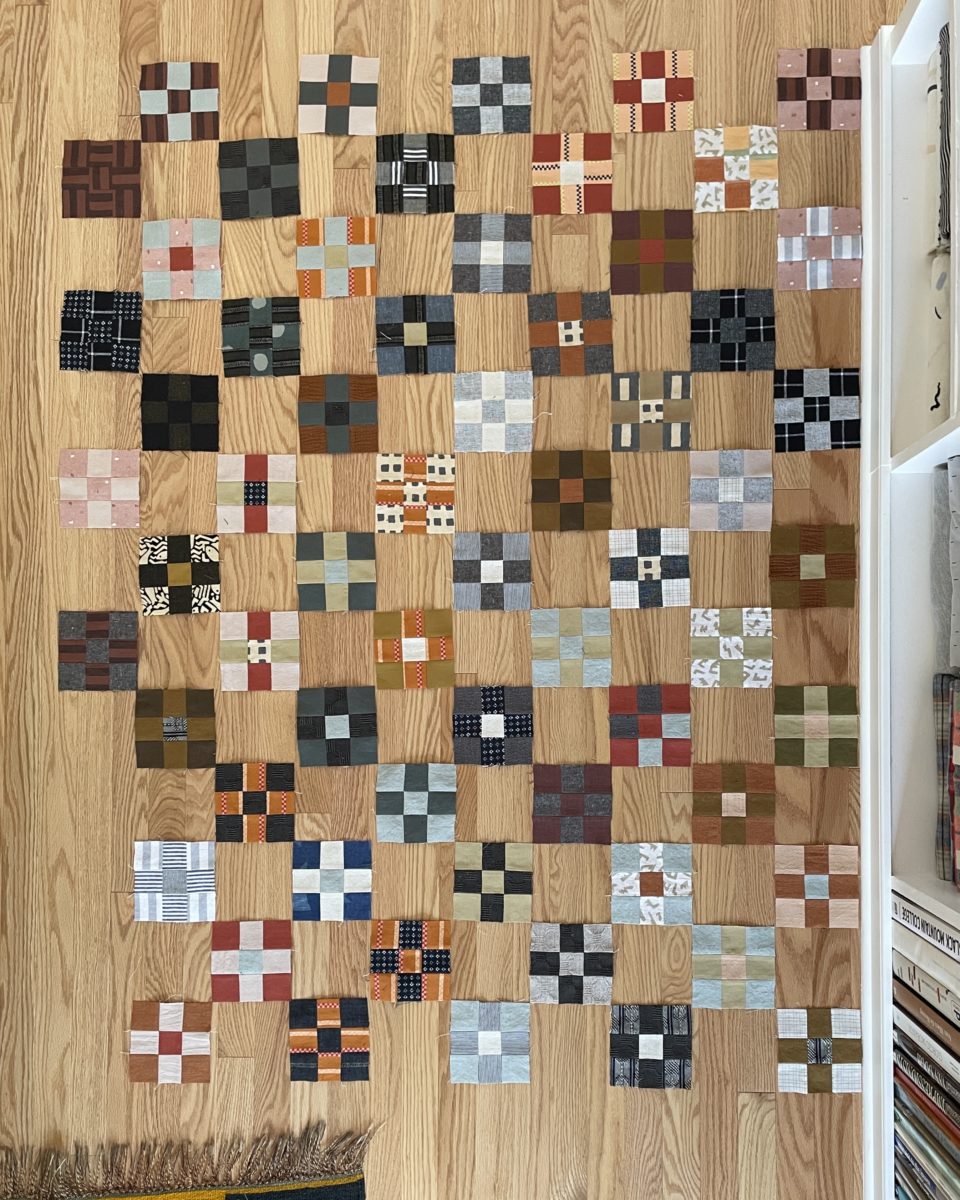
Made some more progress on my leftovers quilt, though I finally calculated how many blocks I’d actually need for this layout and 100 doesn’t work! Whoops! It’ll either be 98, or more. I’ll see how I feel when I get there.
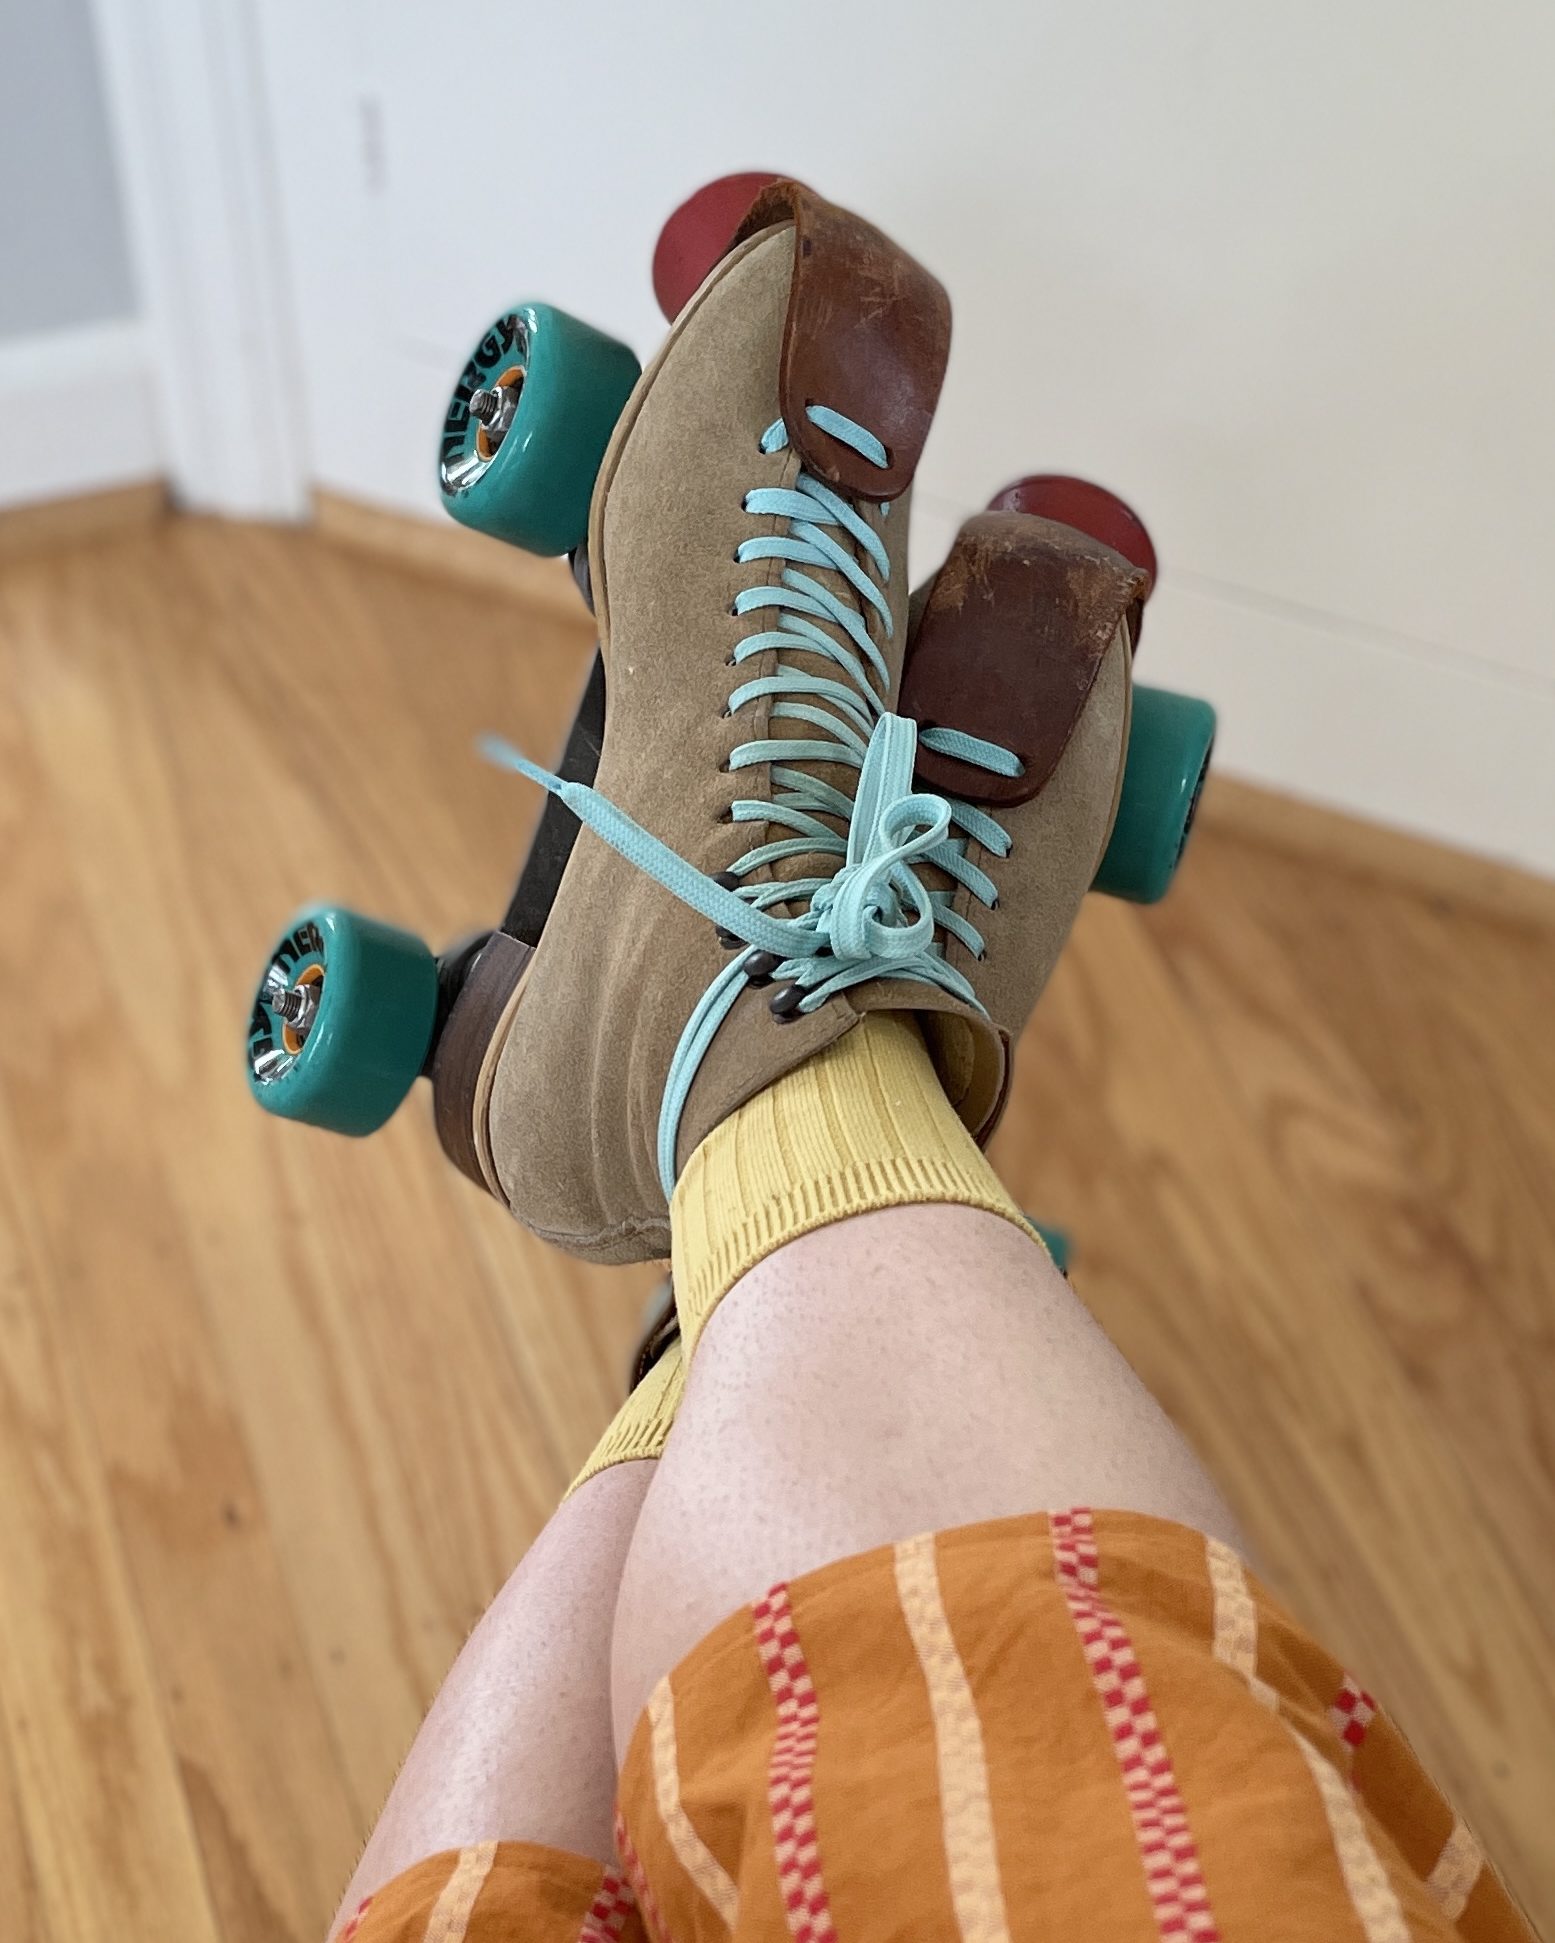
Skating! My skate boots are falling apart on the inside, but I’ve upgraded to new wheels, bearings and laces, discovered the plates didn’t have pivot cups (they’ve since been replaced), and sorta figured out how loose I want my trucks. I’ve been skating more regularly and have unlocked a few moves, which include a very clunky downtown, a rigid snake walk, and some heel-toe spins and manuals. I’m having so much fun!
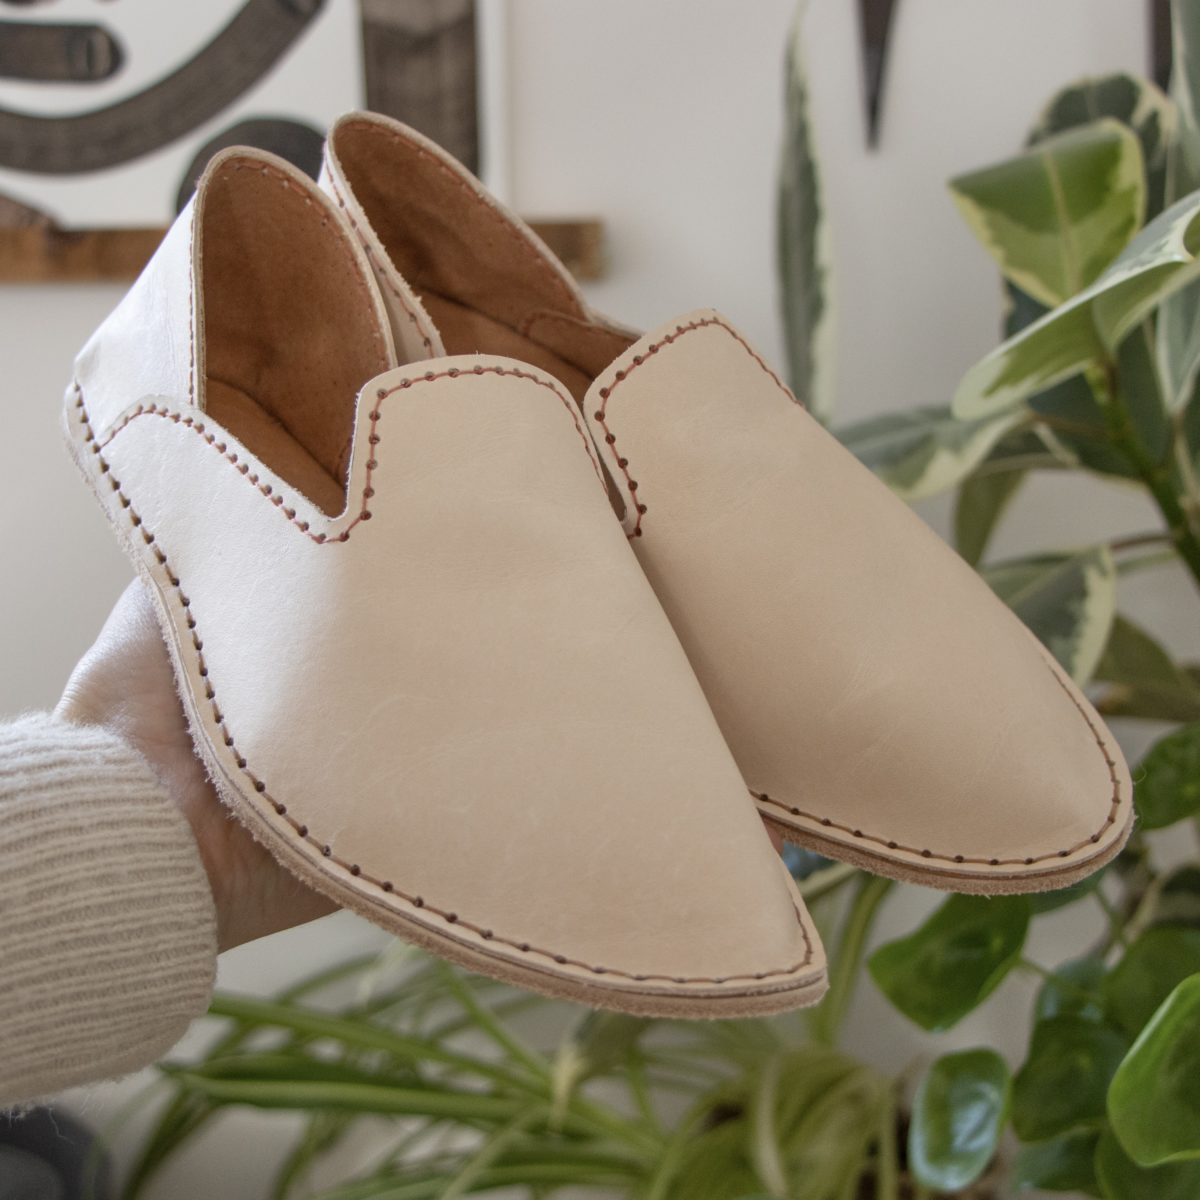
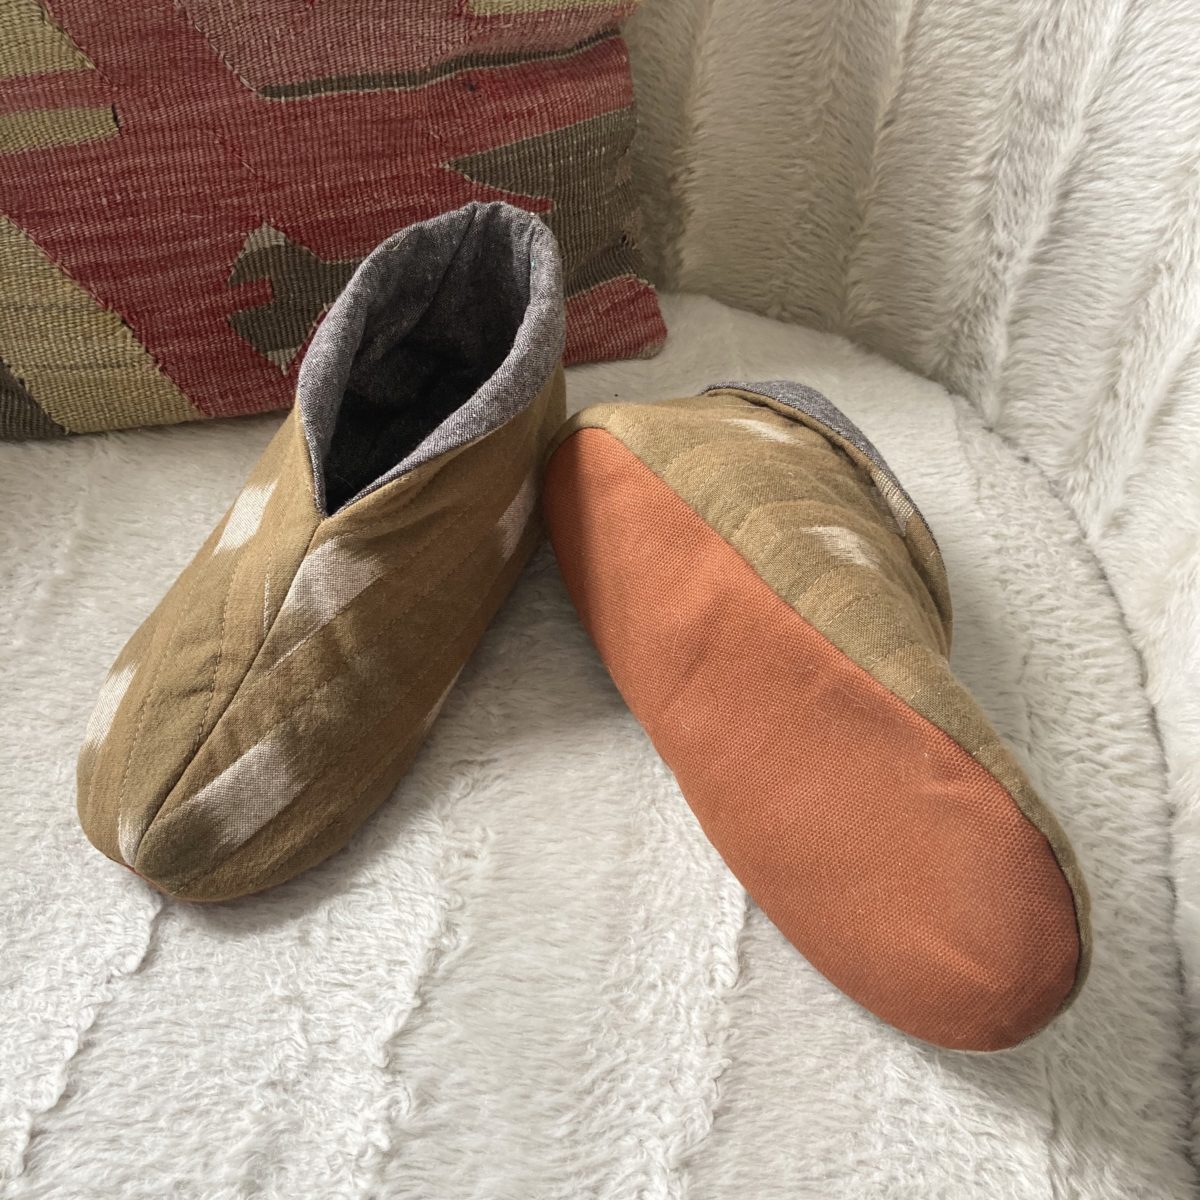
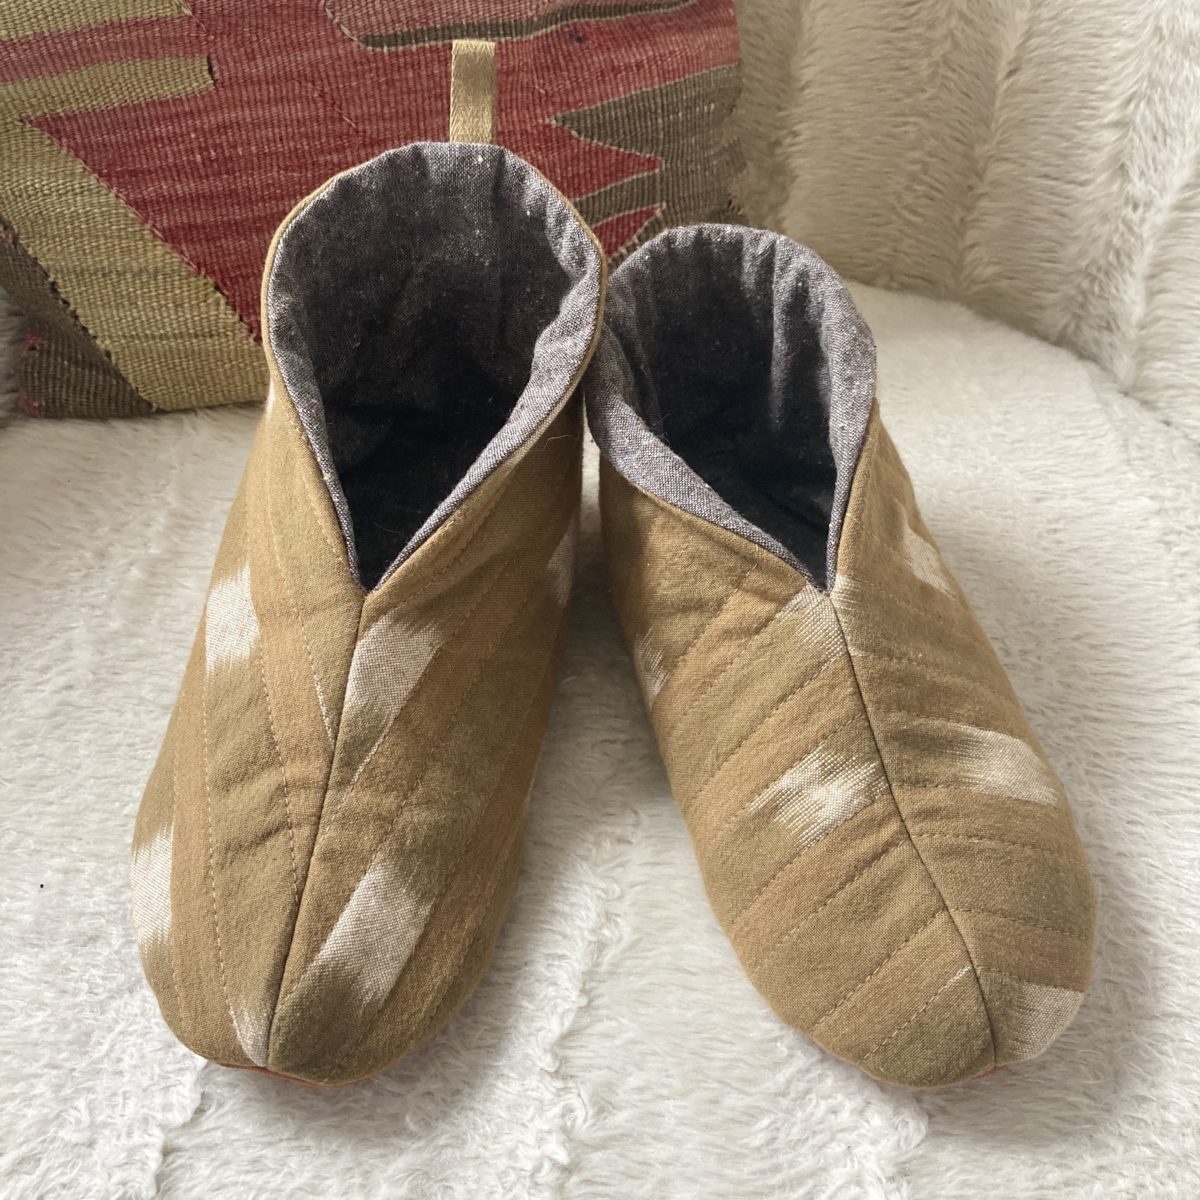
I made this pair of ‘sewing slippers’ for work at the end of February and I can’t stop wearing them – they’re the perfect house shoe! Check out the Seamwork article here and watch my project diary video below:
I made a size 6 (regular shoe size) and they fit perfectly. The veg tanned leather is going to get that perfect leather patina too.
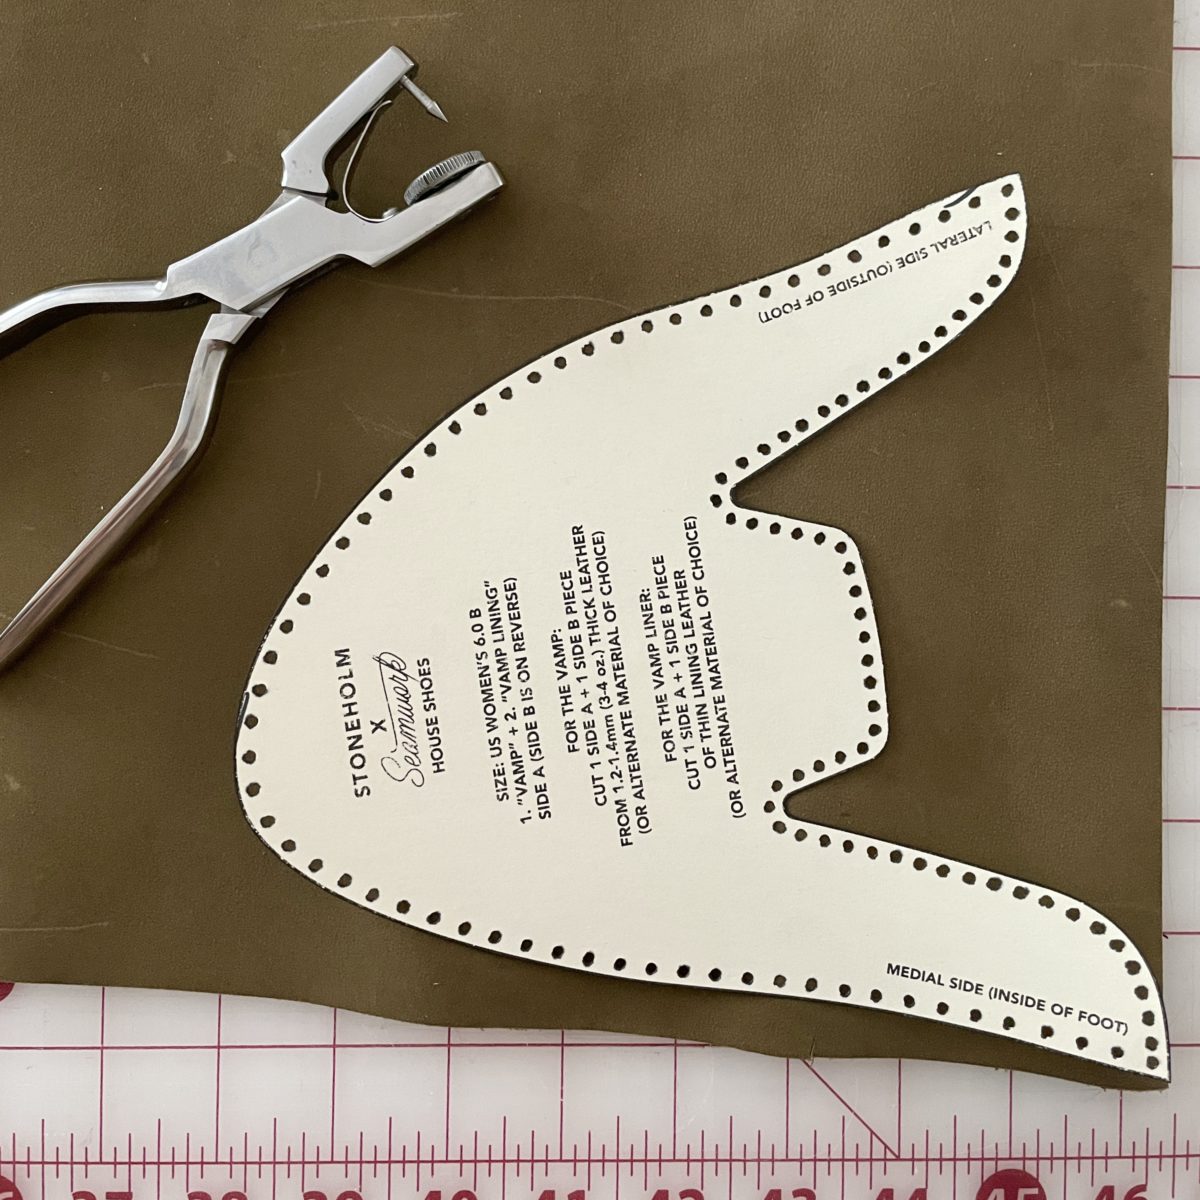
I have some olive green leather in my stash that I might have enough of to make another pair and I now have the recommended leather punch (pictured below).
You can make great things on a simple, inexpensive sewing machine. I started sewing on a Brother CS6000i and it took me through my first four years of me-made items. I made a lot in those first four years, including my wedding outfit, first few quilts, and many, many bags. You do not need an expensive machine to have a rewarding sewing practice. However, if your sewing practice is one that sticks, you feel like you’ve outgrown your intro machine, and you can budget for an upgrade, go for it!
Once I knew sewing was something I’d do for the rest of my life and fixing things on my Brother machine was costing more than its purchase price, I began researching brands and saving. I decided to go with Bernina because its known for its stitch quality, longevity, and several folks in the sewing community endorsed them.
Berninas are expensive. It’s a big deal to fork over several thousand for one machine. After a lot of consideration and saving, I bought my first Bernina from a dealer in the Bay Area. One thing to note is that your local Bernina dealer probably sells at a lower price than what is listed on the official Bernina website. I’ve now purchased three machines at dealers that were $500 – $1000 lower than the MSRP.
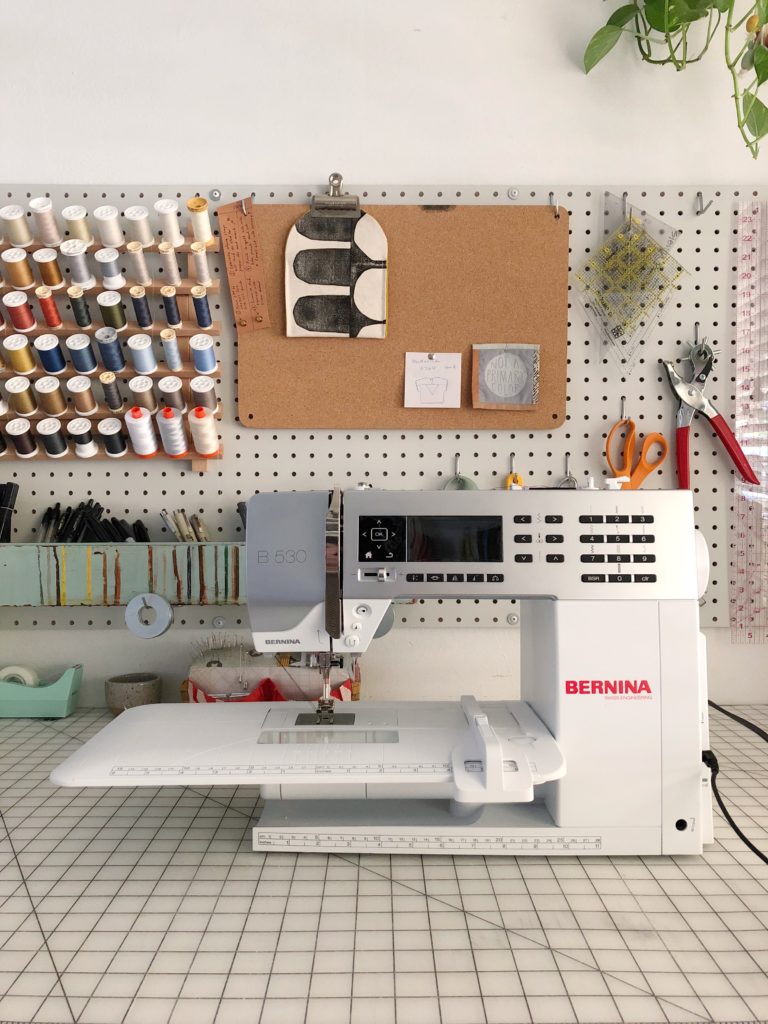
Bernina 530 Sewing Machine
Photo from 2017
The quality difference between the B 530 and my Brother was immediately noticeable and my sewing practice really exploded. Everything was so much easier to do. Tension issues were non-existent or easily resolved, buttonholes were BEAUTIFUL and easy, and the edgestitch foot? Holy shit, I love that foot! On my new 530 I could adjust the presser foot pressure, needle positions, sew on buttons, and it could handle thicker projects.
The 530 really sold me on Bernina machines overall, so several years after its purchase, I was able to buy a Bernina serger to replace my temperamental Brother 1034D.
Bernina L 460 Serger
I purchased my L 460 on sale because Bernina was gearing up to release the 800 series several months later. I would absolutely love to own the 890, but that’s a cost my budget and I can’t get behind. I’m also a little wary of combo machines and air threading, but I’m not speaking from personal experience.
The dealer I purchased my L 460 from also includes free classes for it, forever! I was able to take one class before COVID hit and it really helped me understand all of its features and how to thread it. I’m using this online video series to periodically refresh my knowledge. It’s for the L 450, but they’re very similar. Bernina also has workbooks to help you understand just how much these machines can do.
I really love this serger. I feel like when I sit down to use it, I know exactly what’s going to happen and how to control it. With my 1034D it was always a gamble!
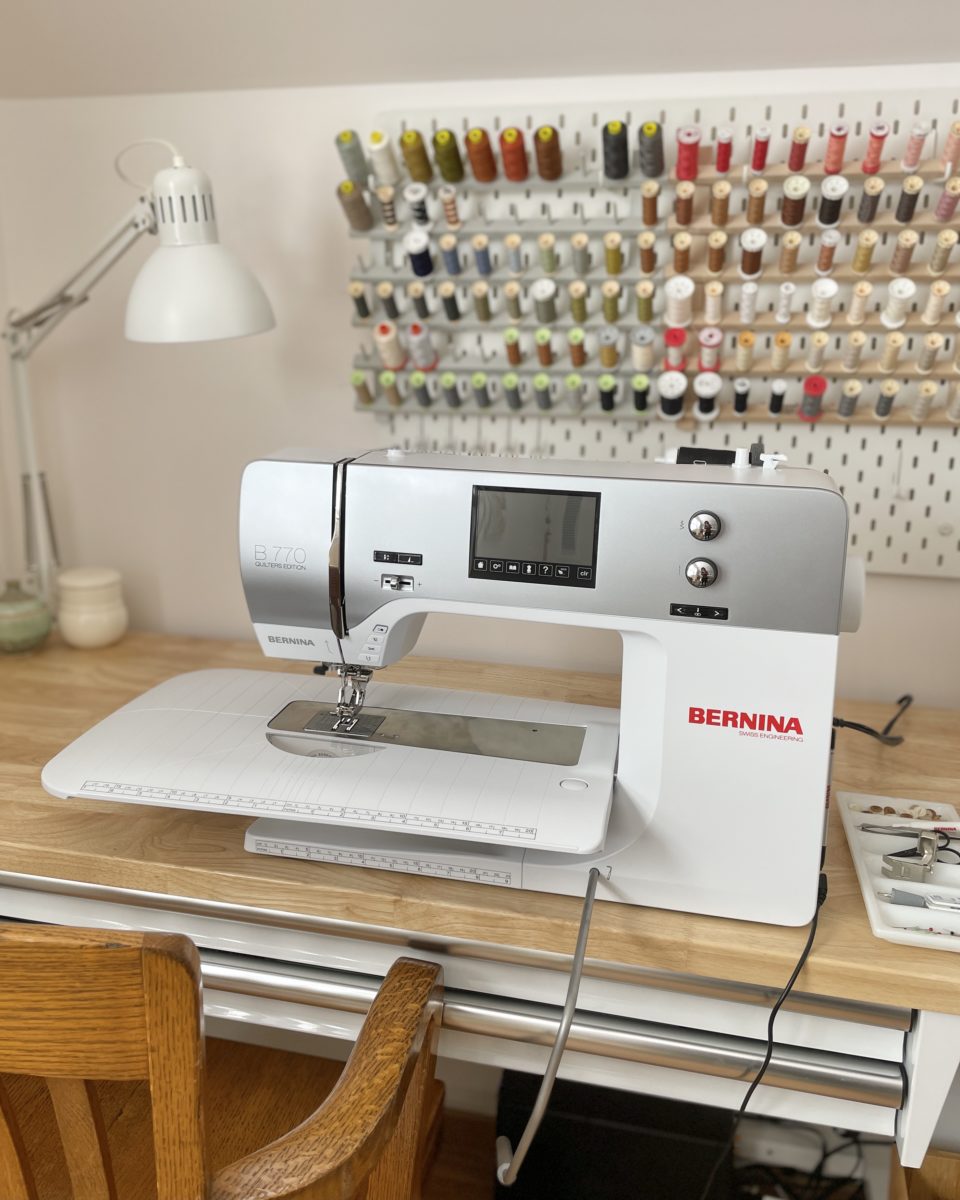
Bernina 770 QE Sewing Machine
At work, I get to sew on a B 475 QE and it made me wish my 530 had some of the newer features like the automatic thread cutter, the jumbo bobbin, and the touch screen. So, I decided to upgrade to the B 770 QE. There was a deal to purchase this machine and get either the L 460 or the embroidery module for free. Since I already had the L 460, I went with the embroidery module.
I’m pretty miffed the embroidery module requires $2,500 design software that only works on Windows. Since it was a free add-on, I didn’t really look into it. Should have done more research! I haven’t played with the free embroidery designs yet – I’m sure I’ll hate them – so that’s a topic for a later post. But HEY, Bernina! Create a web-based design software and I’ll embroider all the things!
I chose the 7 series over the newer 5 series for a couple reasons. The first was cost, the 590 was several grand more, and the 7 series has a 10 inch workspace – I wanted that extra space for quilting and bag making. And lastly, that freebie deal totally swayed me. I need to make an embroidery learning plan so I actually end up using it. If anyone knows how to turn Adobe Illustrator files into something the 770 can read, please let me know!
I still have the 530 and I plan to keep it for when I’m sewing something with topstitching (a two machine set up is the BEST), when and if I’m using the embroidery module on the 770 and need to sew, and I plan to stagger services so I’m never without a machine. Or I might sell it… I’m not sure!
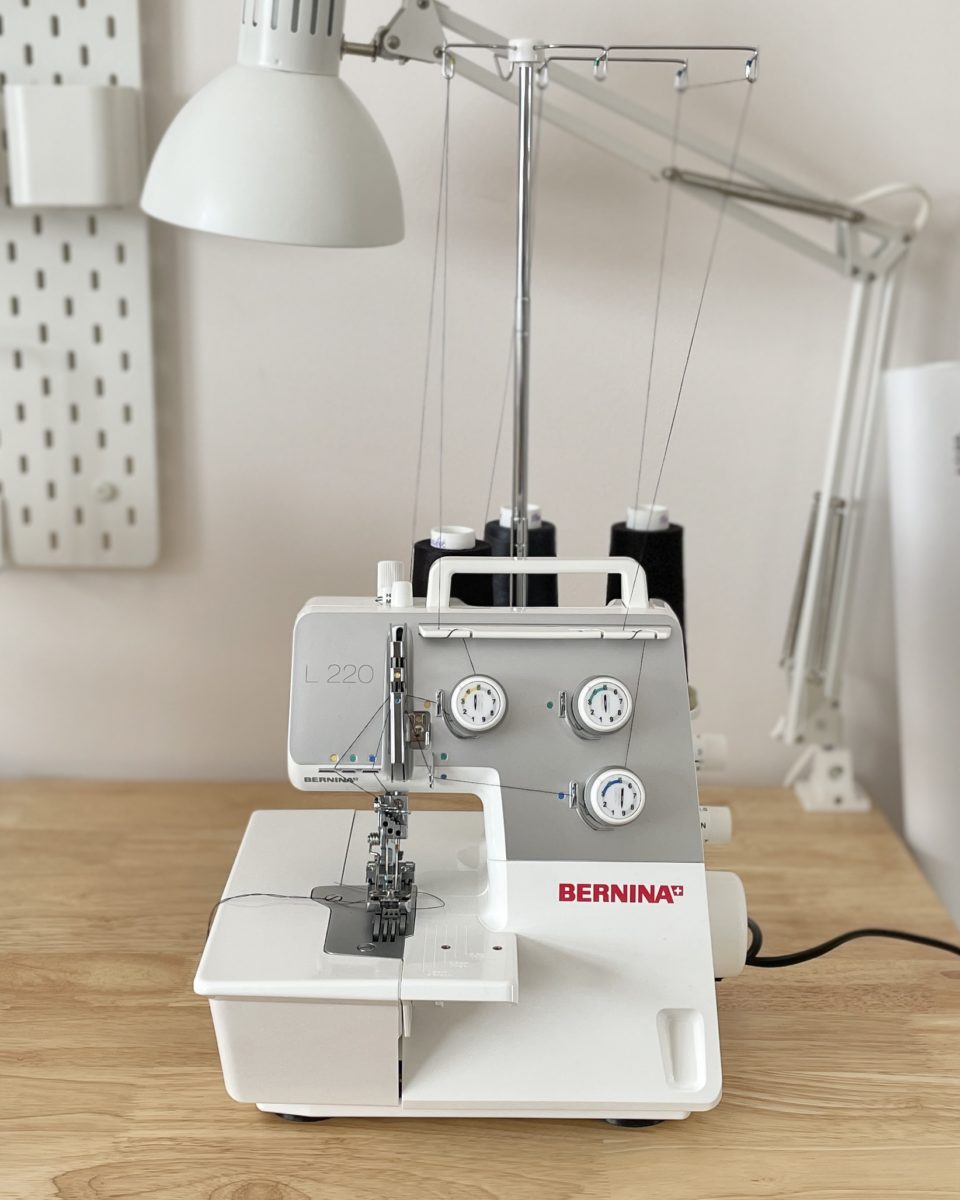
Bernina L 220 Coverstitch
The year of working from home and never ending loungewear made me decide to buy a coverstitch machine. I found this used Bernina L 220 on eBay. I was super nervous about buying a second hand machine that I wasn’t able to test out, but the seller seemed to only offer sewing stuff, had a high rating, answered my many questions, and offered a 30-day return policy, which also covered the cost of shipping it back.
When I first posted about my ‘new’ coverstitch on Instagram, I got a lot of panicked comments and DMs from folks asking if they should buy a coverstitch machine instead of a serger. They do different things! I wanted a coverstitch machine for hemming knits, flat joining seams on athletic wear, and inserting elastic on swimwear. I have my serger (aka overlocker) for finishing woven seams and constructing knit garments. It has a lot of other applications, but that’s what I use it for the most. Basically, a coverstitch machine is not a necessary machine, but in my opinion, it works and looks a whole lot better than a twin needle.
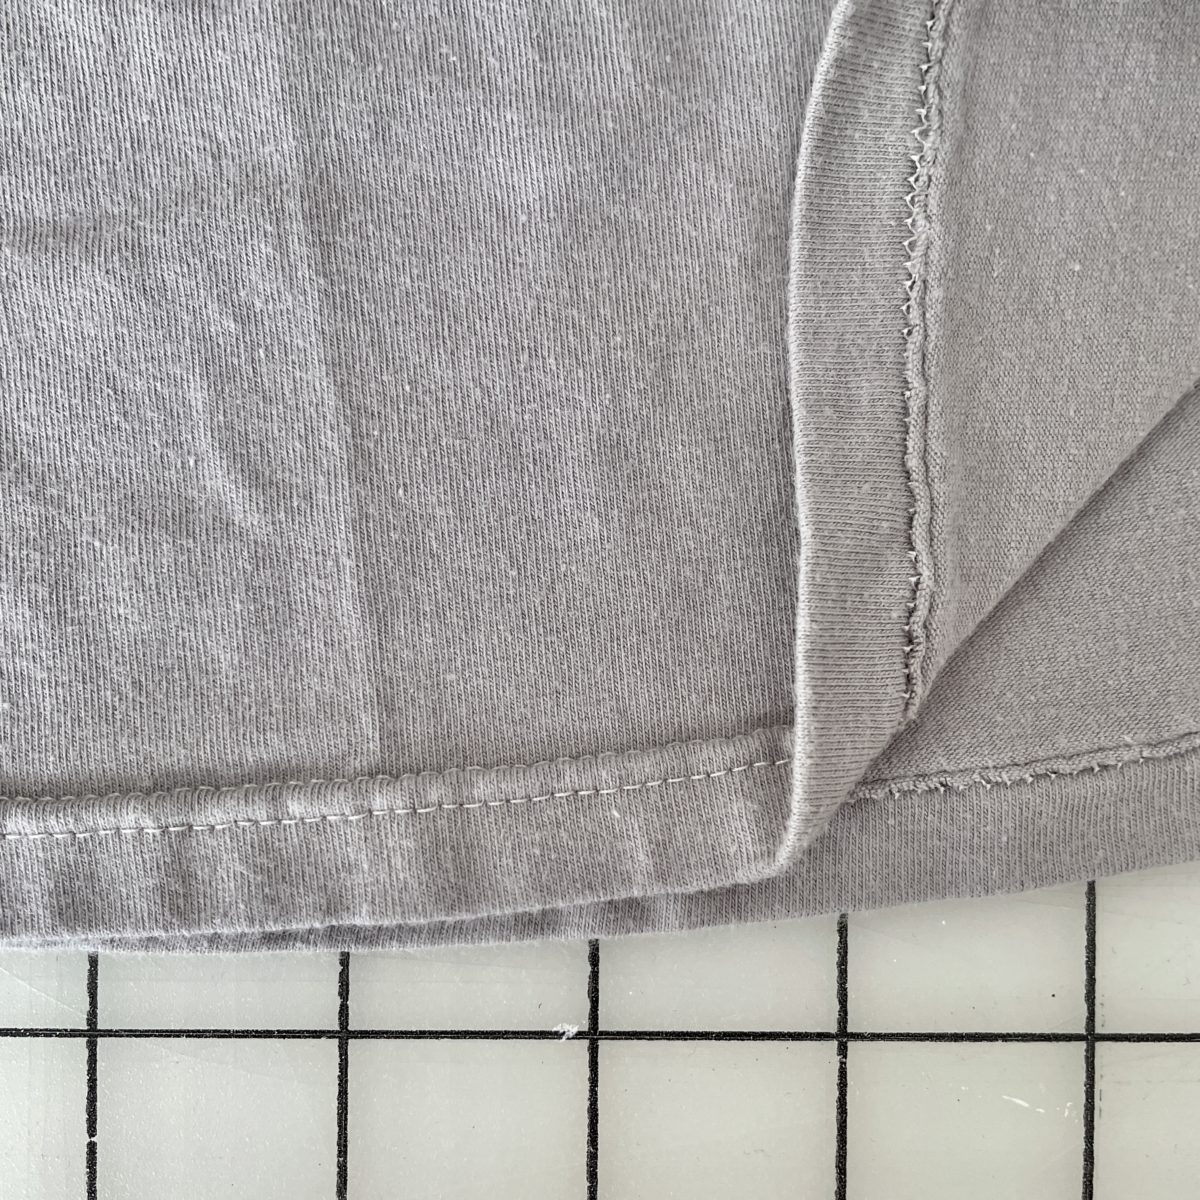
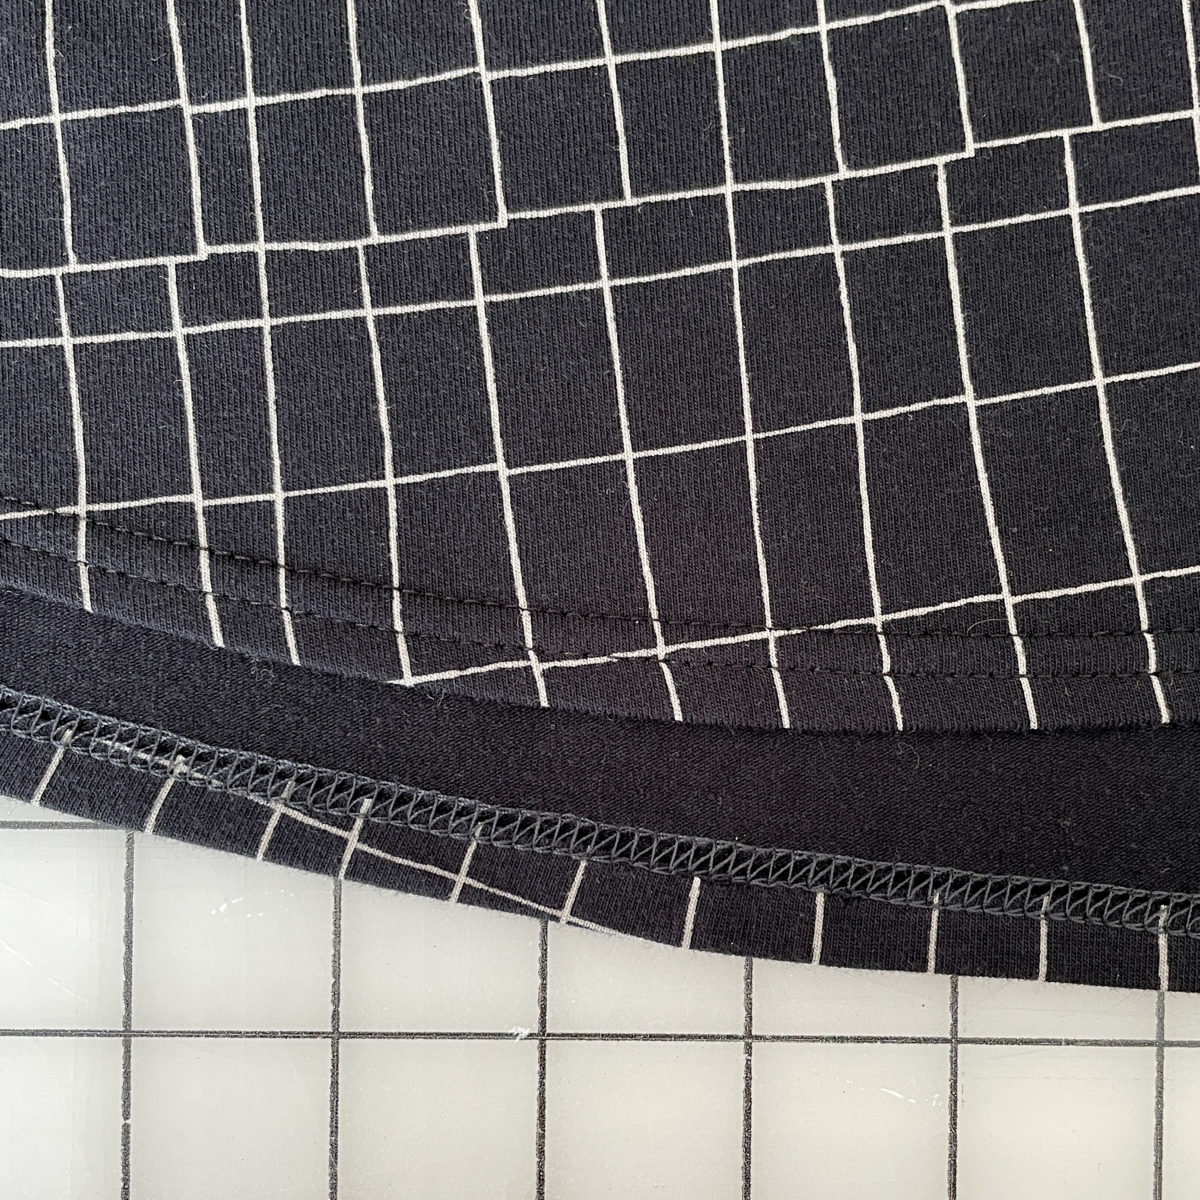
Twin needle hem (left). Two needle wide coverstitch hem (right)
I’m so impressed with this machine! It handles everything both like a boss and I can’t believe how flat the fabric is in between the stitch lines. I always get so much tunneling and weirdness with a twin needle. It can do a single needle chainstitch, wide and narrow double needle, and a three needle stitch. So far, the only thing I wish it had is the free hand system.
I’ve read that the Juki MCS-1500 and MCS-1700QVP (only available at a dealer) is essentially the same coverstitch machine as the Bernina L 220, which is sadly no longer in production, if you’re in the market for a coverstitch.
While I don’t keep 100% of my sewing waste out of the landfill, I try to use up leftover fabric in fun ways. Here are a few of my favorite scrap busting projects.
Quilted Blankets & Garments
I sew with a lot of wovens, so naturally piecing together fabric is a great way to use even the smallest scraps. I am currently making a 9-patch quilt using 2″ x 2″ squares. Every time I cut out a new woven garment project, I also cut out as many squares as I can from the leftovers. I’ll save really large pieces for other projects, but I can really get a lot of squares out of those weird leftover pieces. I’m not sure what size this quilt will be, but my goal is to make at least 100 blocks and then assess. So far, I’ve made about 50.
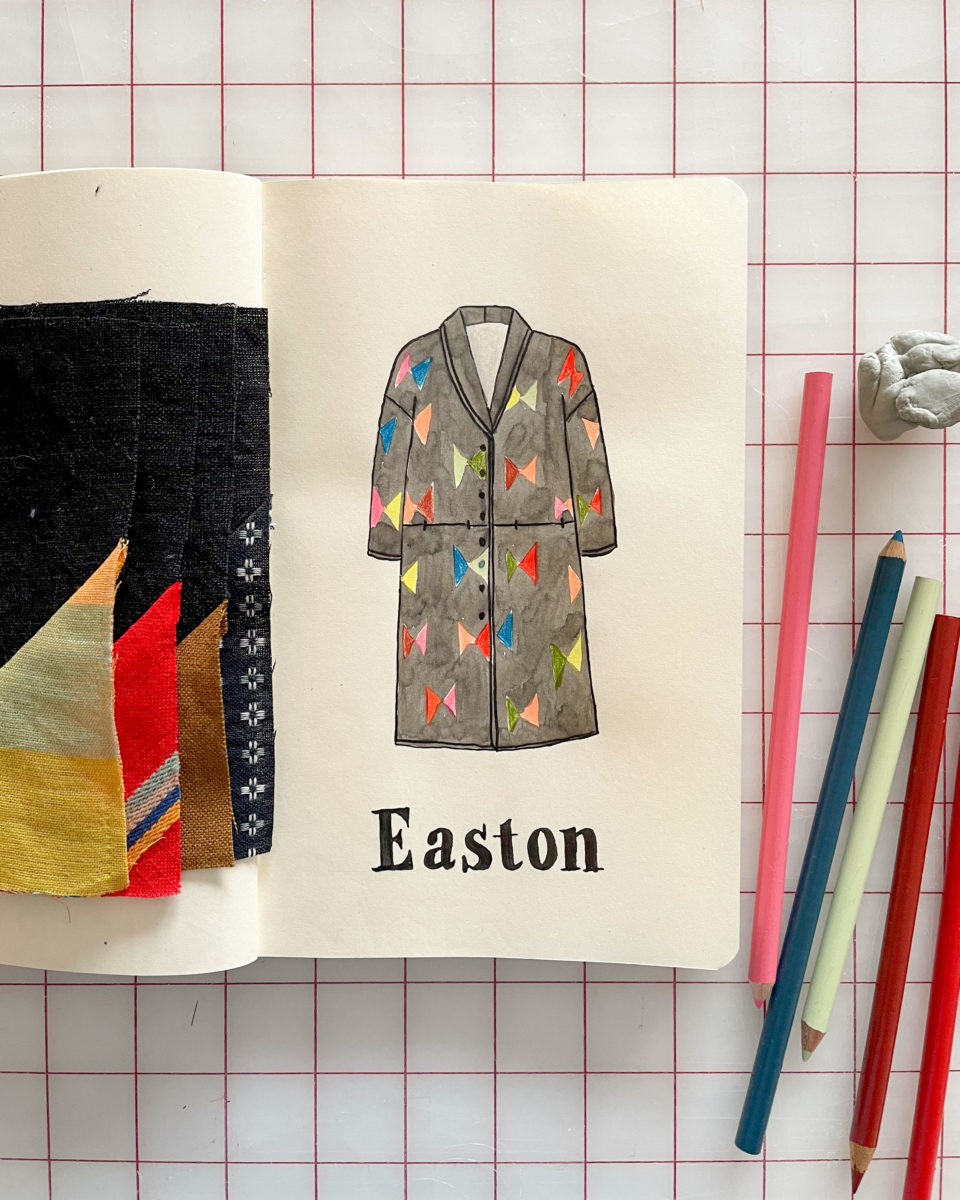
I’m also making a quilted coat. I’m unifying all of the different textures and colors of scrap fabric with black and a consistent block pattern. I modified the Seamwork Easton pattern to be longer and to have hidden pockets.
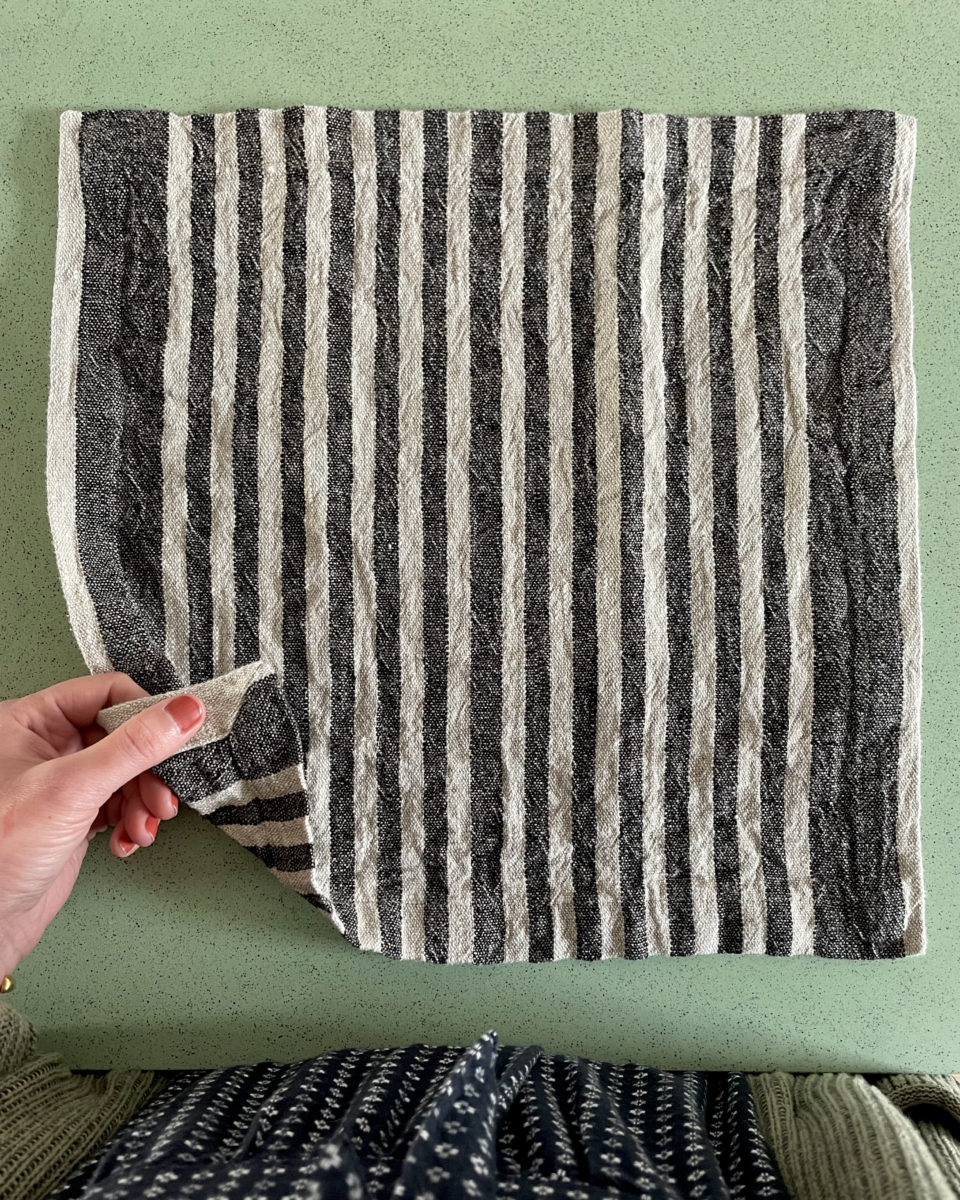
Napkins & Bandanas
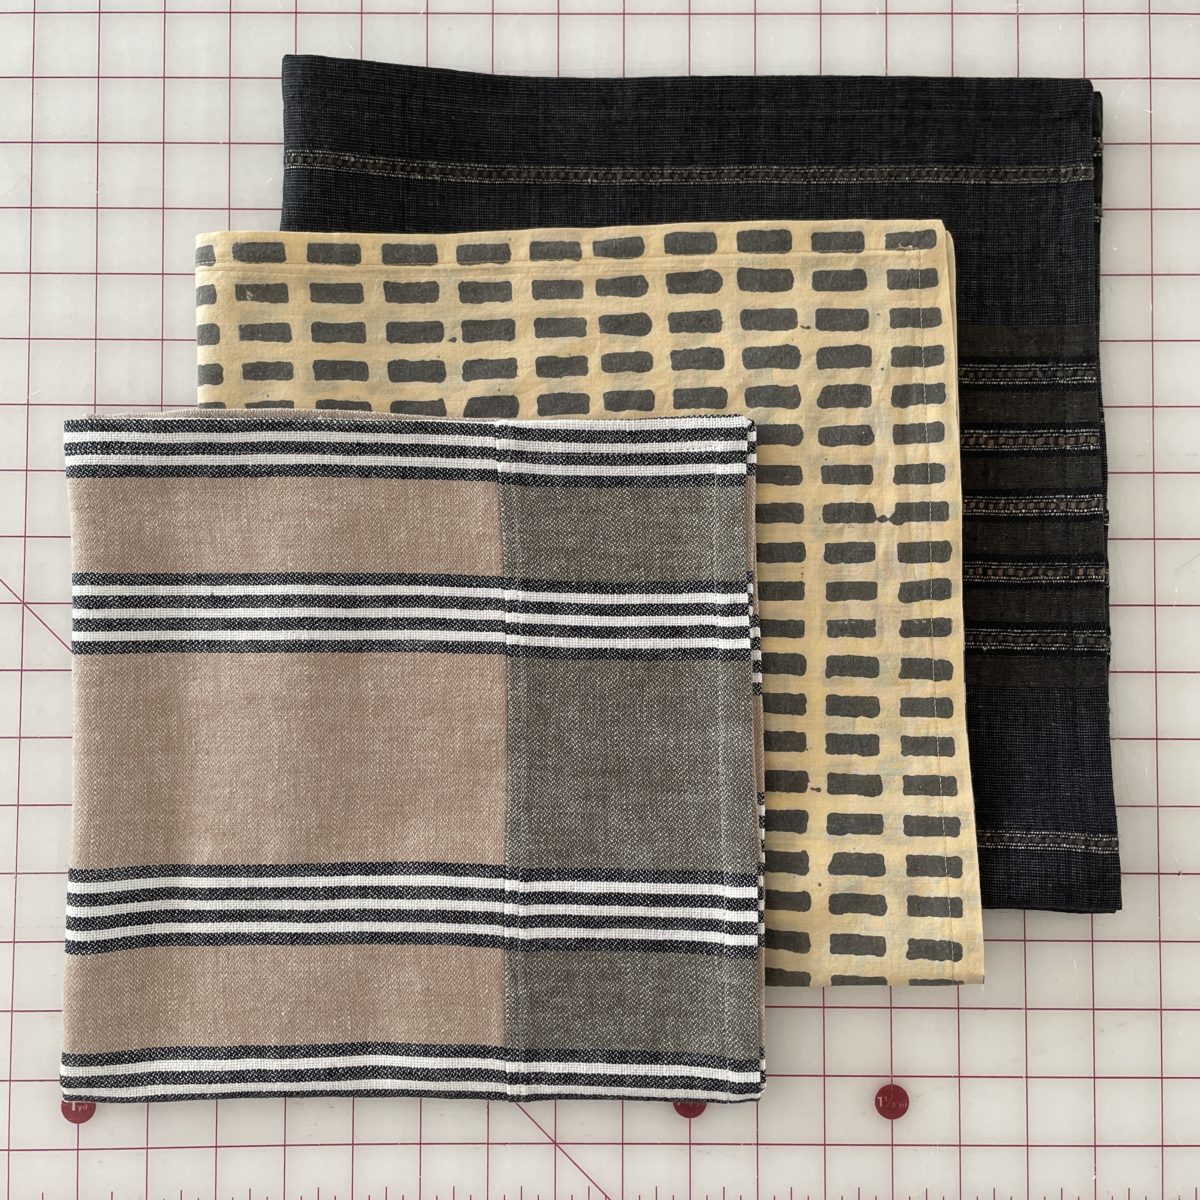
If I have a decent amount fabric leftover and I really love the fabric, I’ll make a bandana / square scarf. If the fabric feels pretty absorbent, napkins and tea towels are great options too. Each of the bandanas pictured (right) has a flat felled seam somewhere on it to make it big enough. Both the napkins and bandanas are finished with mitered corners. For napkins or tea towels, I try to make them 12″ x 12″ to 16″ x 16″. For bandana scarves, at least 20″ by 20″ and above.
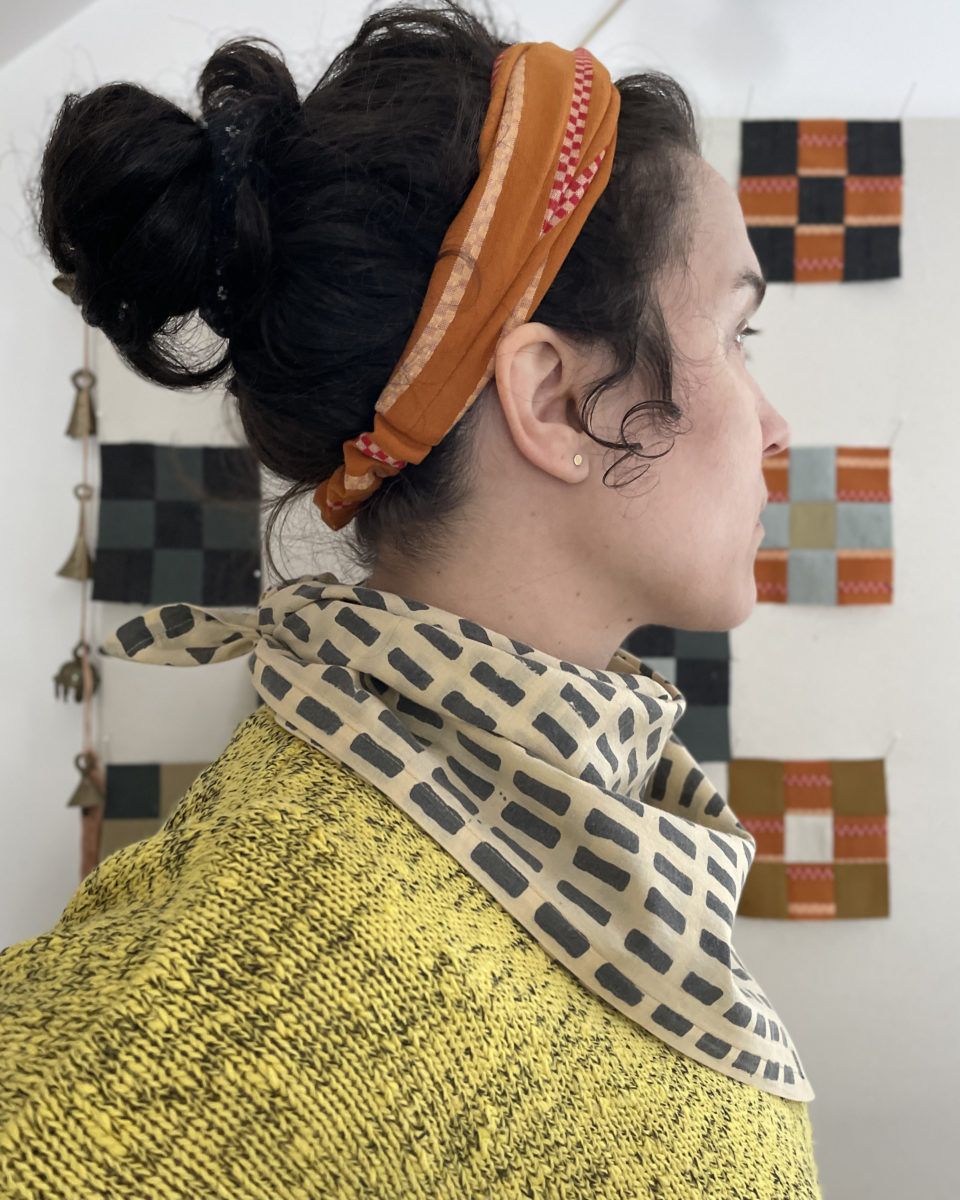
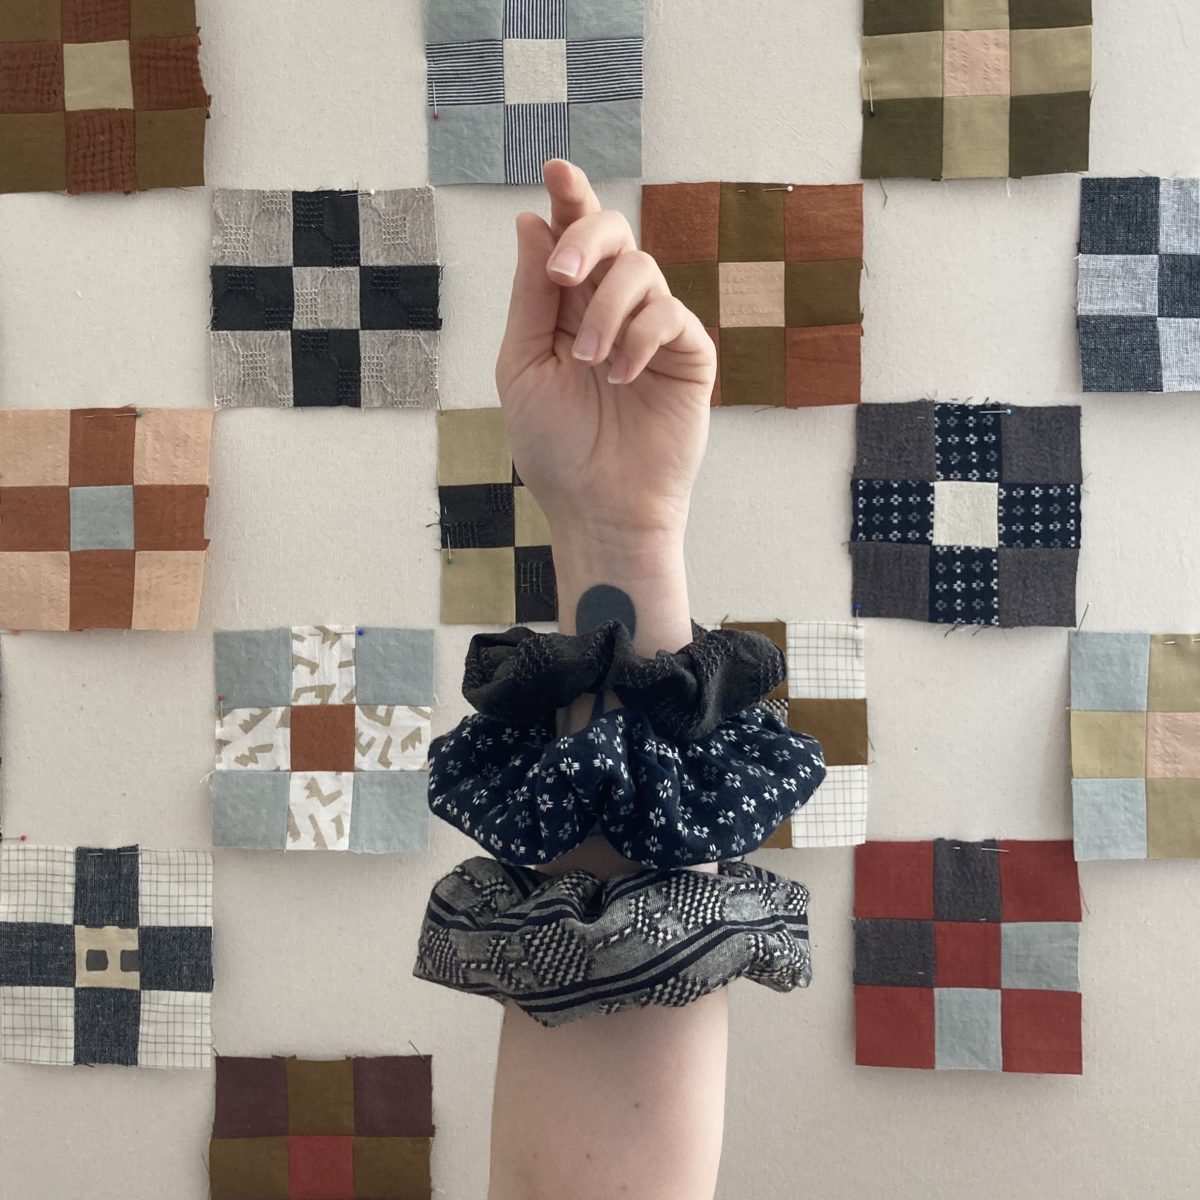
Headbands & Scrunchies
Hair things are super fun to make and they’re helping me feel better about my quarantine hair. I love the Seamwork Drew headband, which can be made out of knits or wovens. When making a woven Drew, I’ll finish all of the edges with my serger before starting construction. For scrunchies I follow this tutorial.
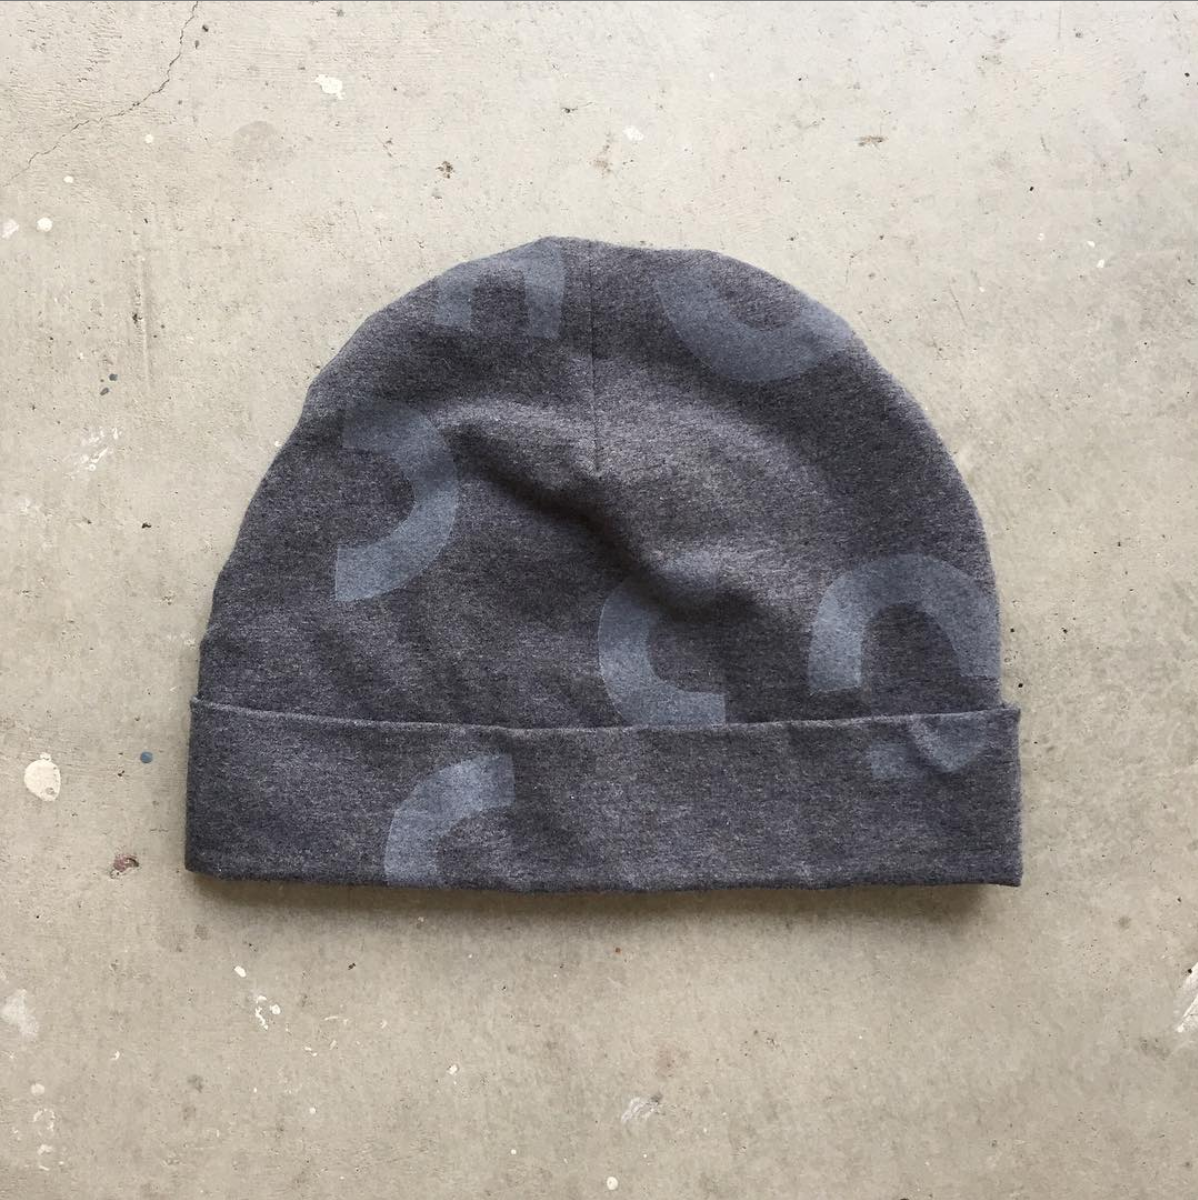
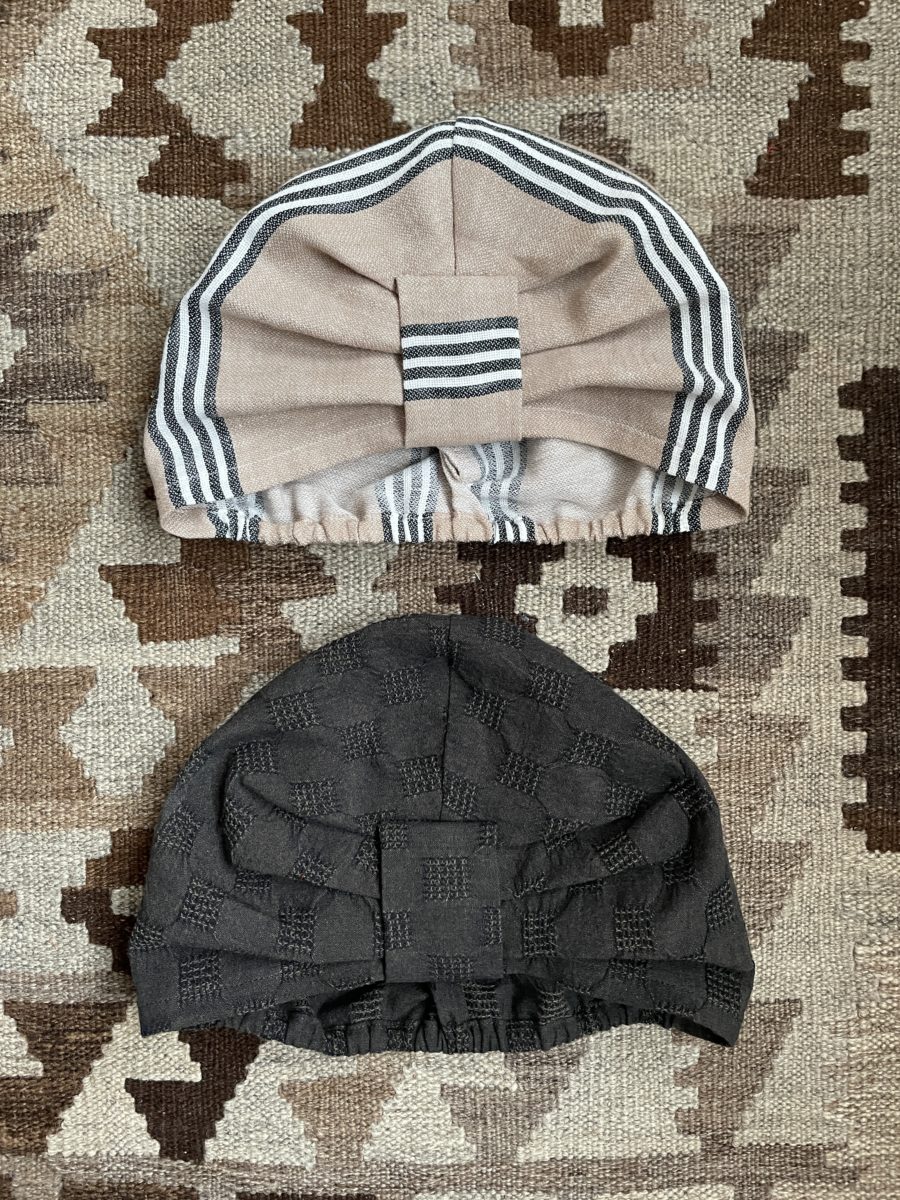
Beanies & Head Wraps
Both of these patterns require very little fabric. I block printed the knit fabric of the hat on the left. I used a free pattern for it, but can’t remember its name. The Mahogany Turban (right) is a new pattern by Fibr & Cloth Studio. It can be unlined or lined and it’s a really quick sew!
Small Bags & Cases
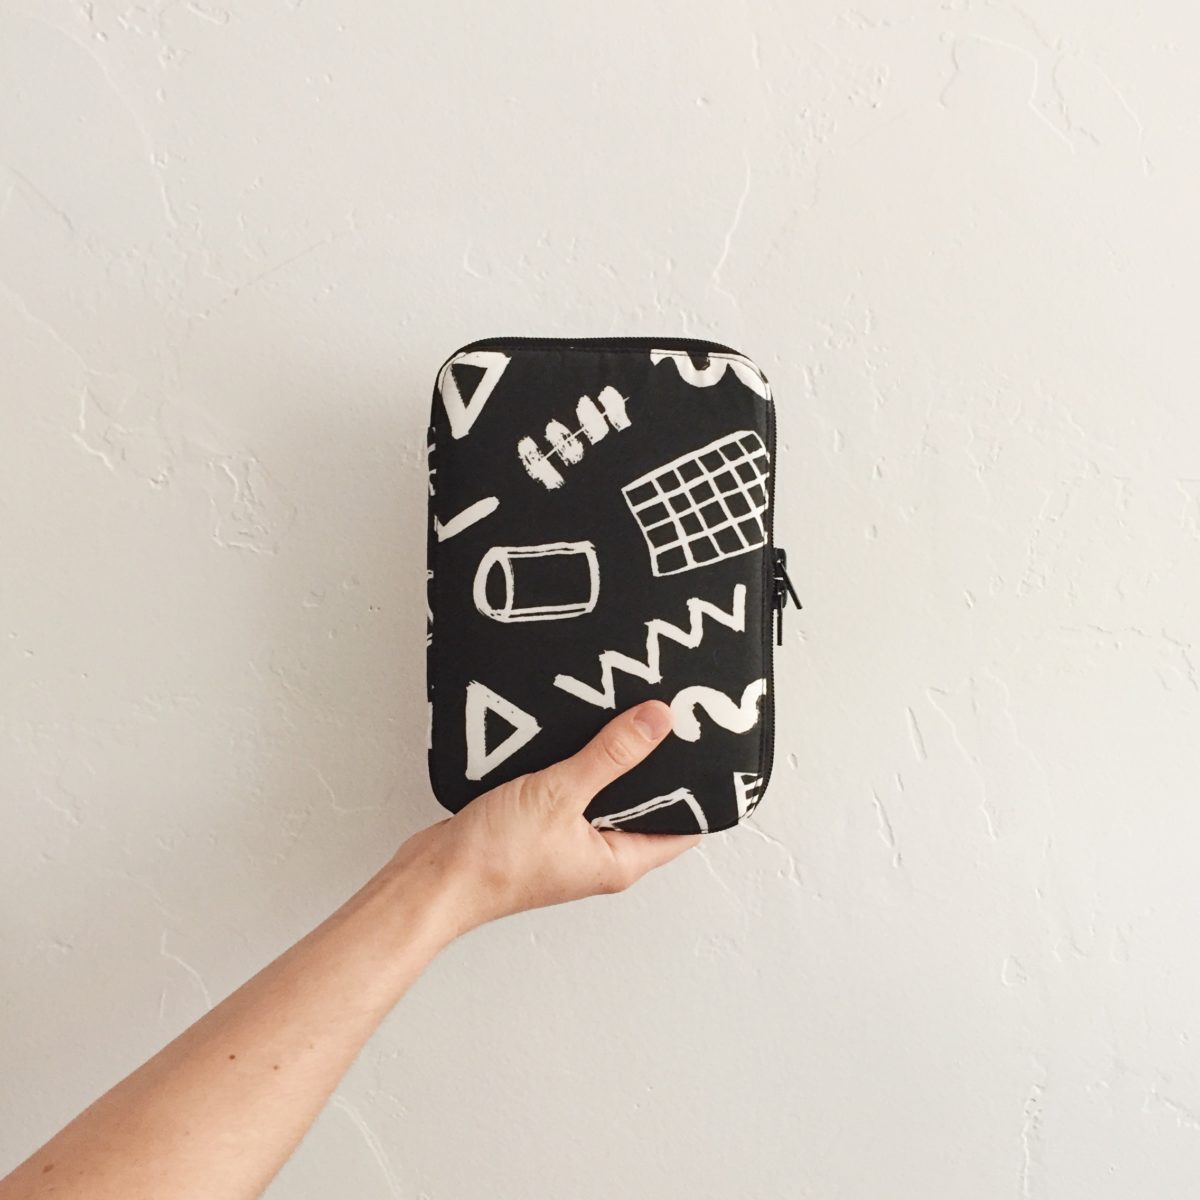
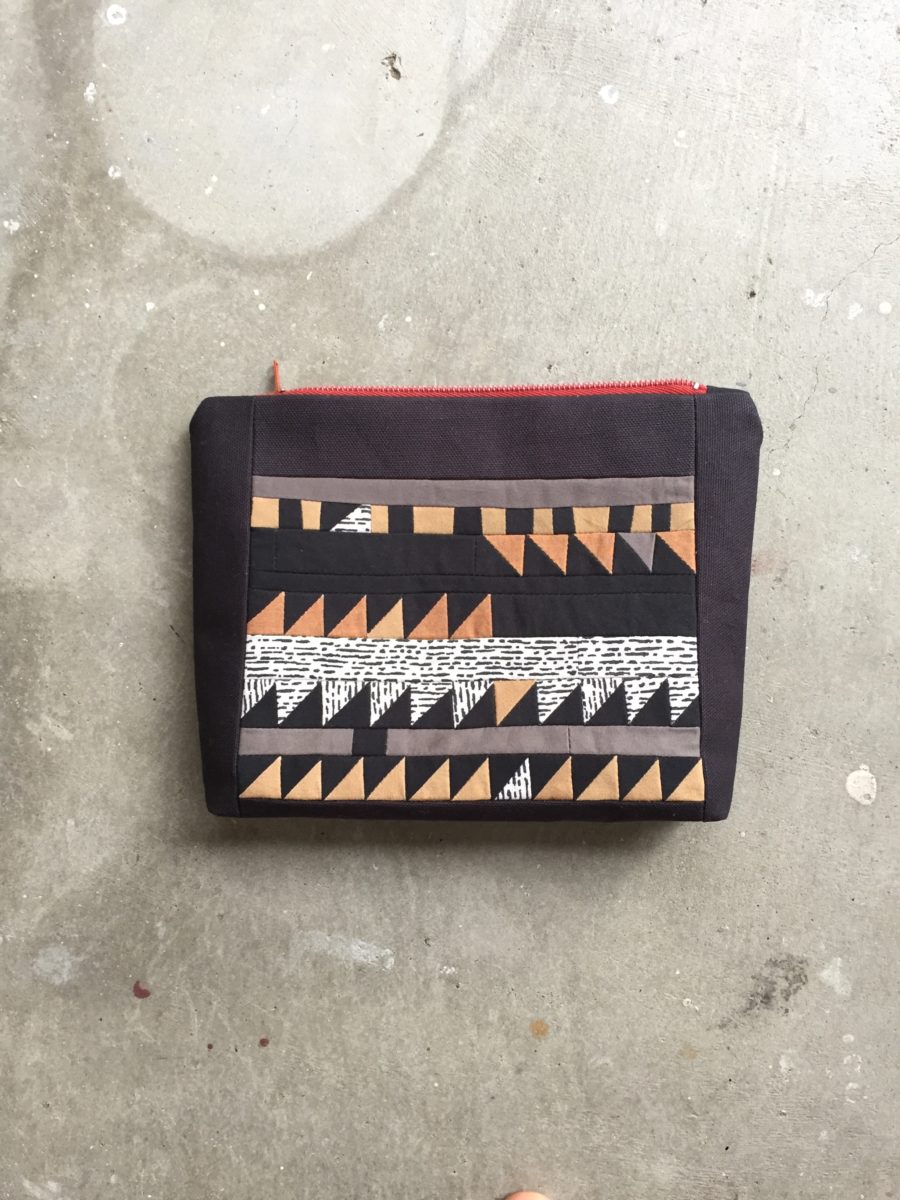
I really love the Creative Maker Supply Case and it uses a really small amount of fabric. Each panel could be a different fabric. The scrappy zippered bag (right) is made out of some improv piecing and I really love it. The fabric was teeny tiny too!
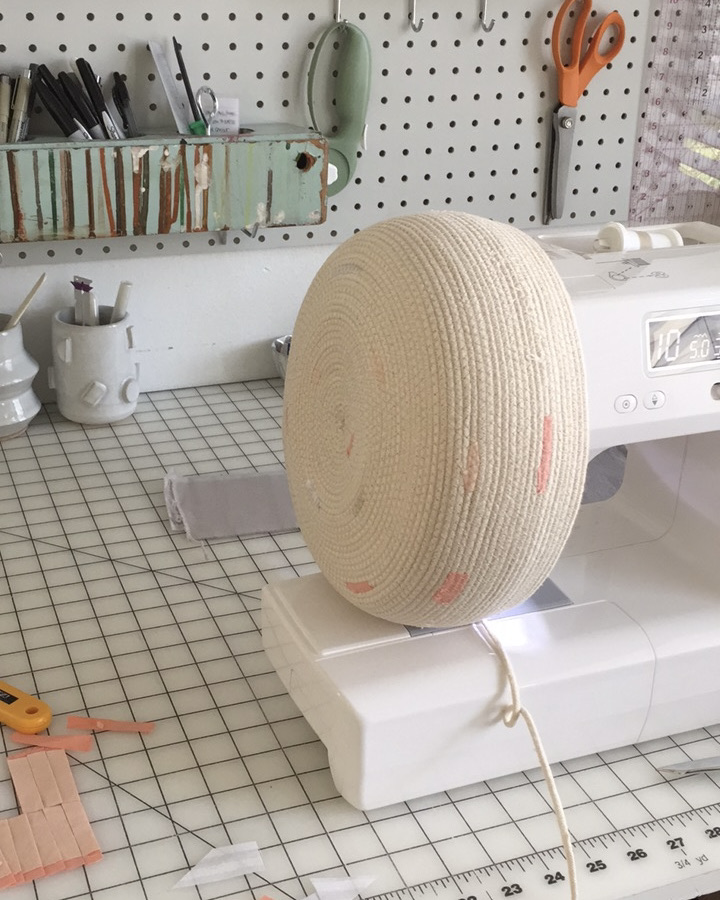
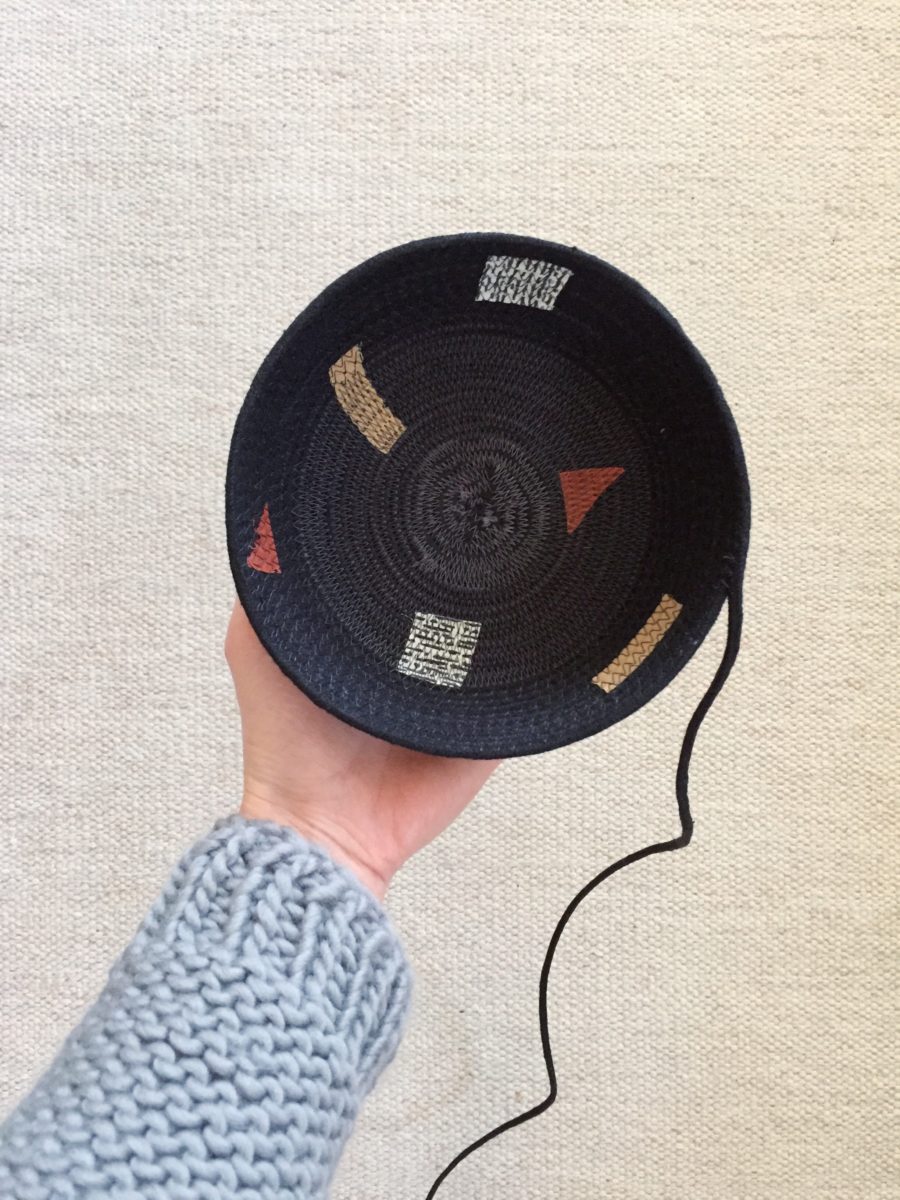
Rope Bowl Pizzazz
I love throwing some fabric scraps on a rope bowl. I think this is a super fun way to use the tiniest bits of fabric.
Quilted Slippers & Pillow Covers
Sew DIY’s Quilted Slippers is a great scrap busting project. I used three different fabrics in my scrap stash to make the lining, sole, and the exterior. They’re a surprisingly fast sew too and make a great gifts!
I’ve made three quilted pillow covers now and I’m not gonna stop!
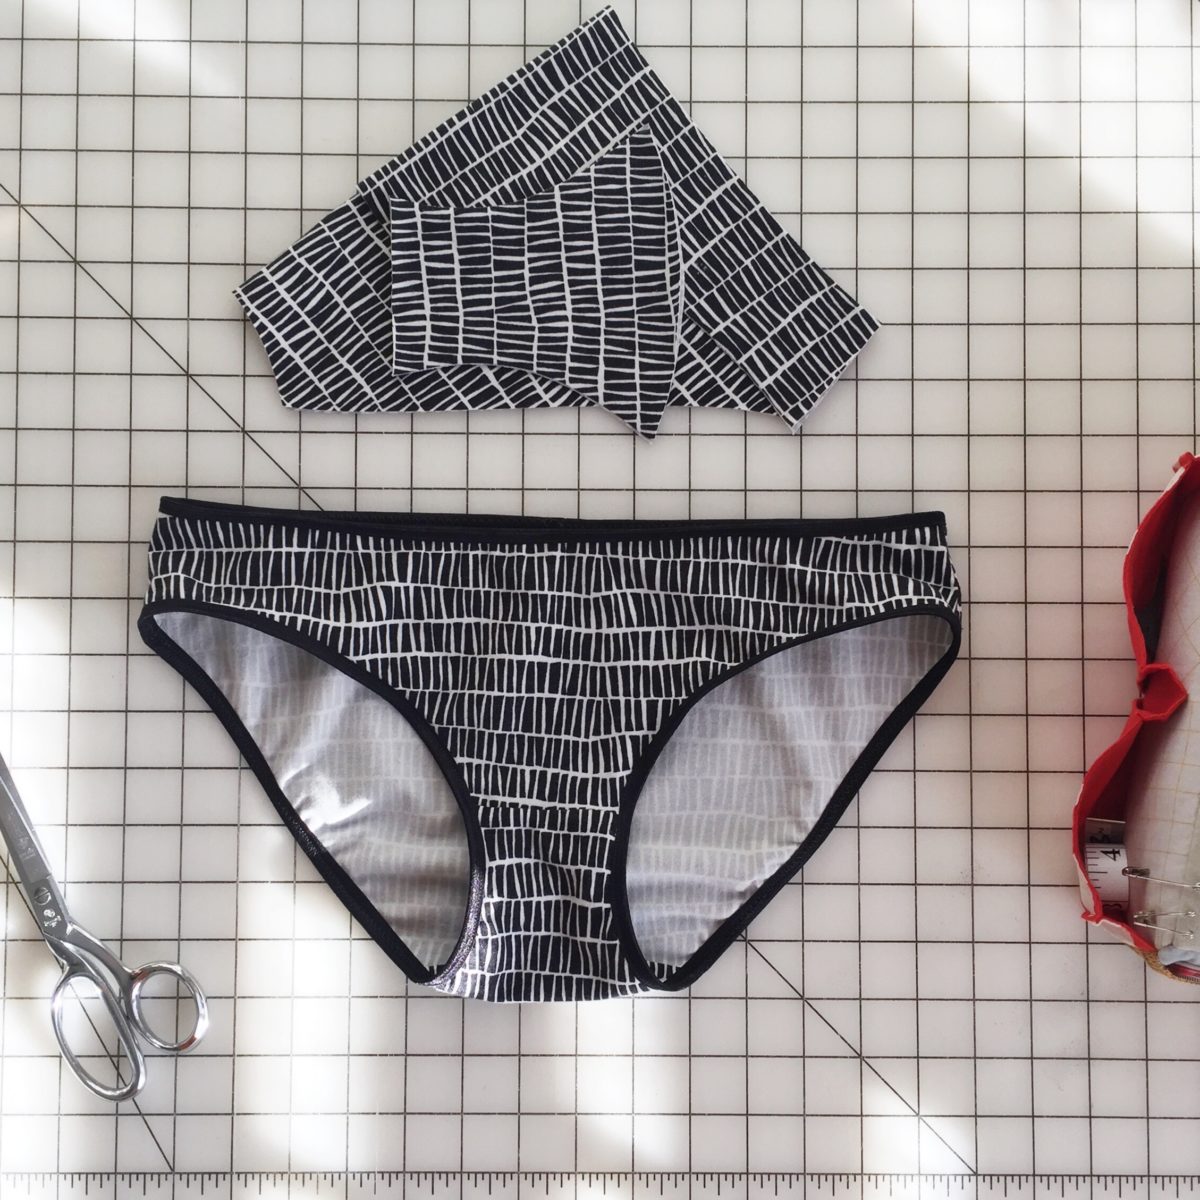
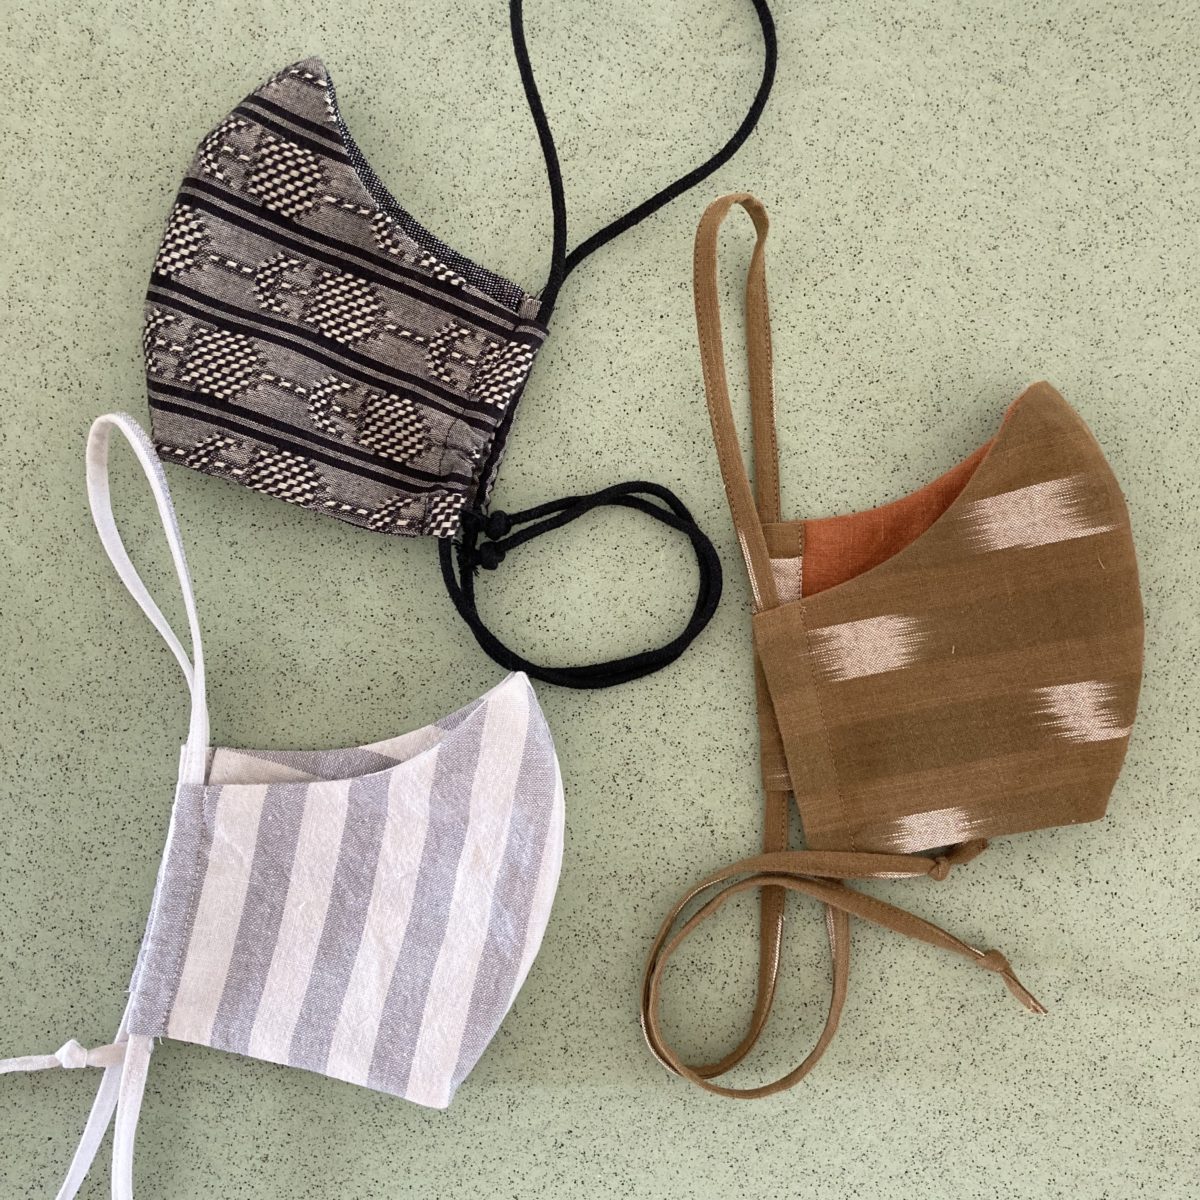
Underthings & Outerthings
I can’t wait for the time when one of these things is unnecessary. Anyway, I love using leftover jersey knits for underpants and bras. I actually hate this mask pattern, it’s the only photo I’ve taken of masks. I prefer a 3D mask with a big loop of elastic to go around my head.
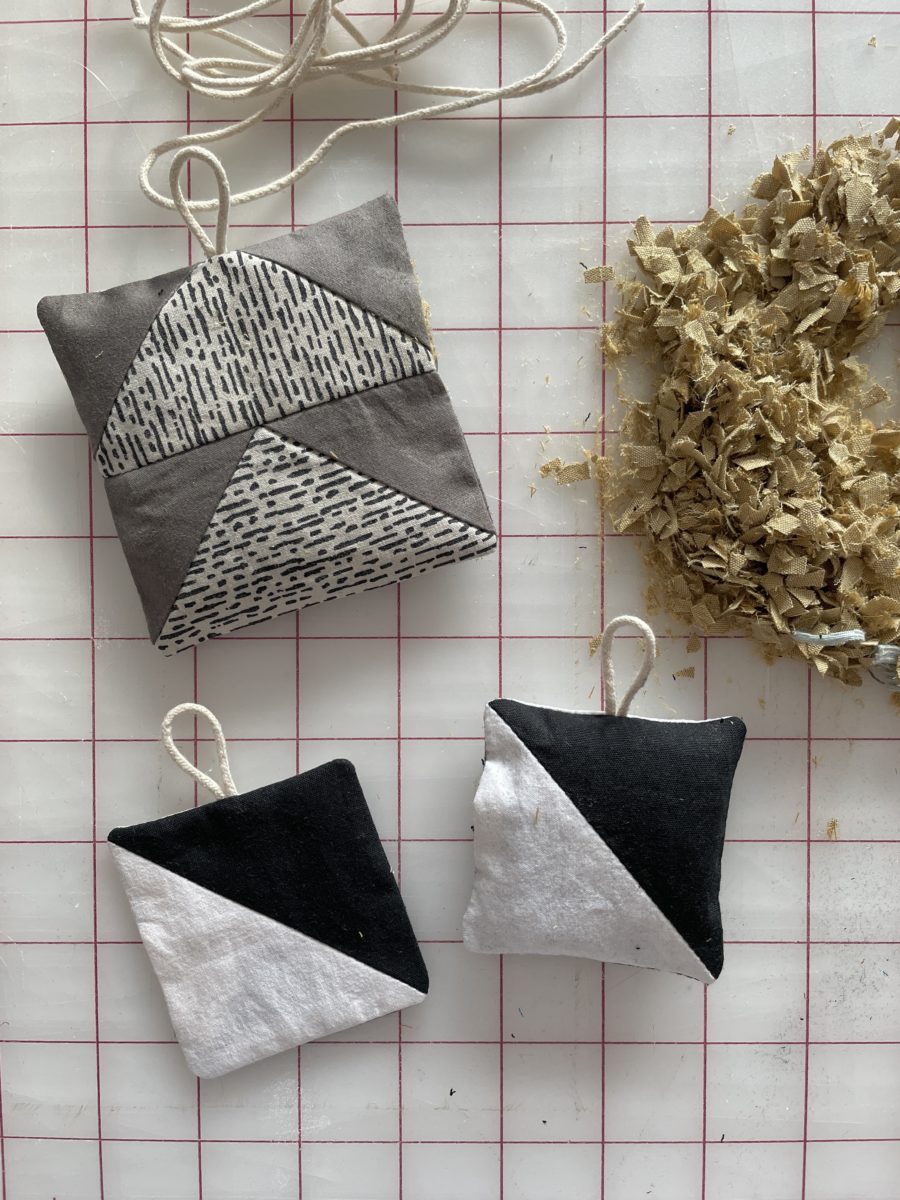
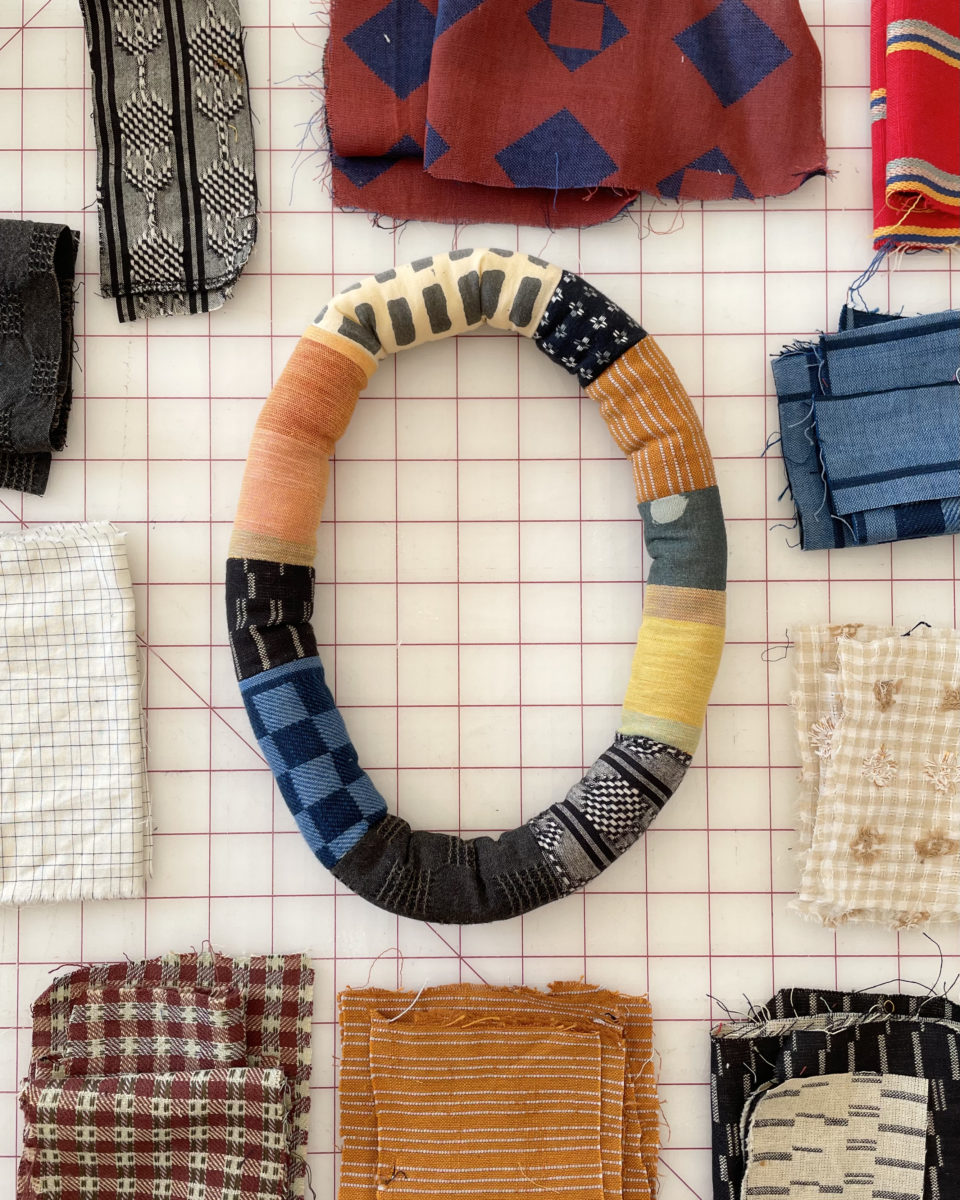
Ornaments & Wall Art
The square ornaments are stuffed with fabric mulch (left) and the circular vinyl ornaments use serger off cuts and scrap yarn.
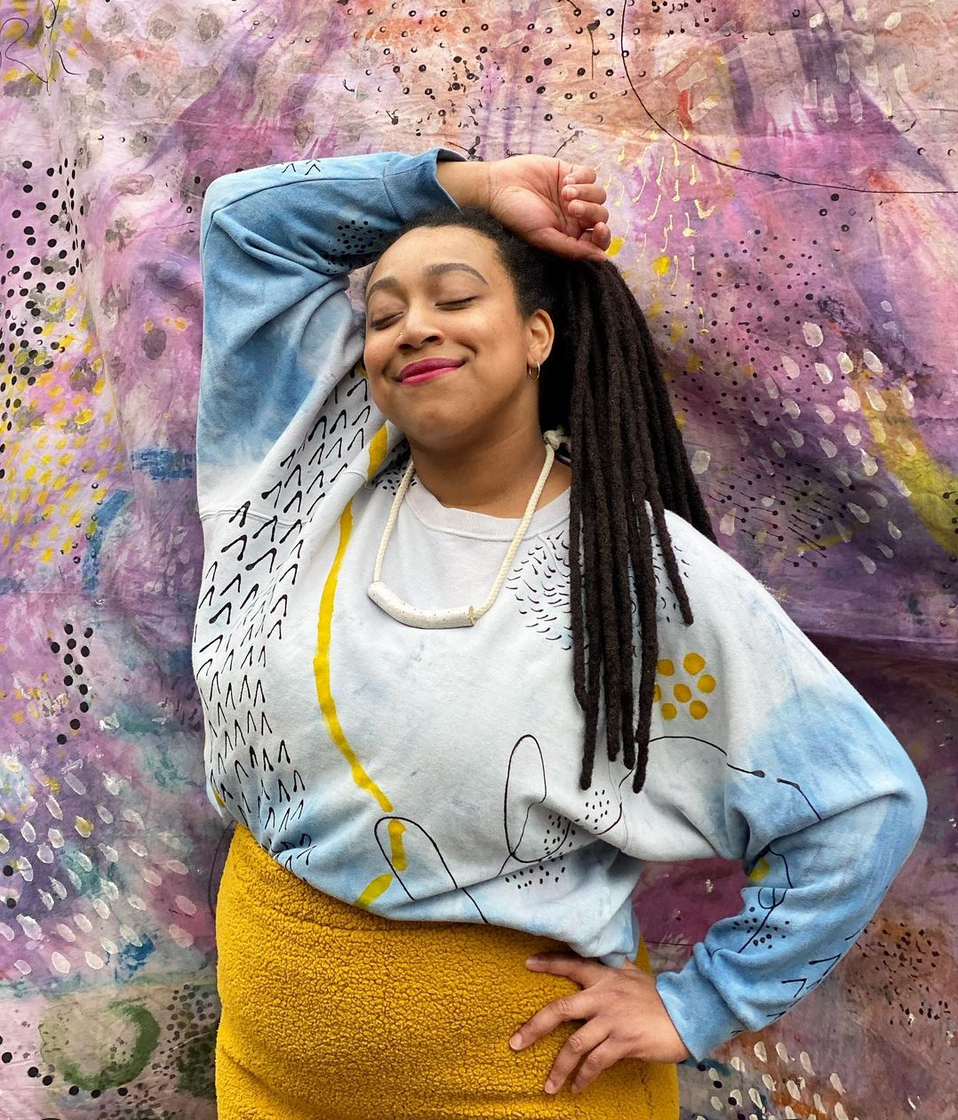
This squishy statement necklace is made exactly like a scrunchie, but instead of inserting elastic, it’s stuffed with polyfill. I think it’s a fun way to turn those precious scraps into something wearable.
December is usually the time of year I get to see my parents. I skipped the trip home in 2019 because I had recently flown home to attend a funeral and had just moved. In hindsight, I sure wish I’d gone home.
I’m not usually a handmade gift giver, but 2020 felt very different, so I decided to make some small gifts for my parents, brother, and husband.
For my dad, I made a pair of Sew DIY Quilted Slippers. I used leftover Big Sur canvas for the sole, IKEA fabric for the exterior, and some leftover sorta quilted fabric for the lining.
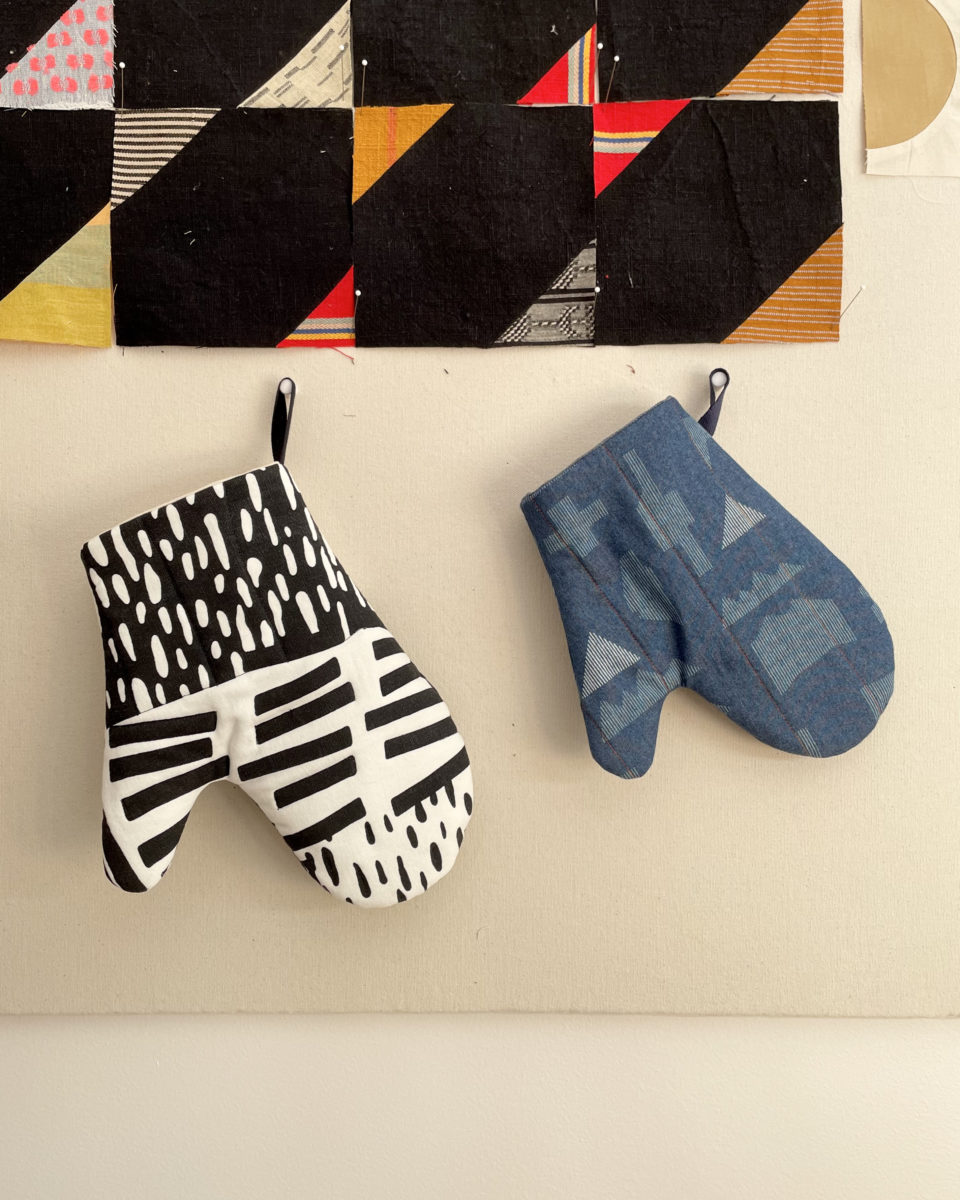
I also made him an oven mitt. After a very small first attempt, I re-printed the pattern at 115% and made a second one. I had hoped to send a blue pair, but I didn’t have anymore fabric, so he’s getting one black and white mitt. My cousin has claimed the mini mitt.
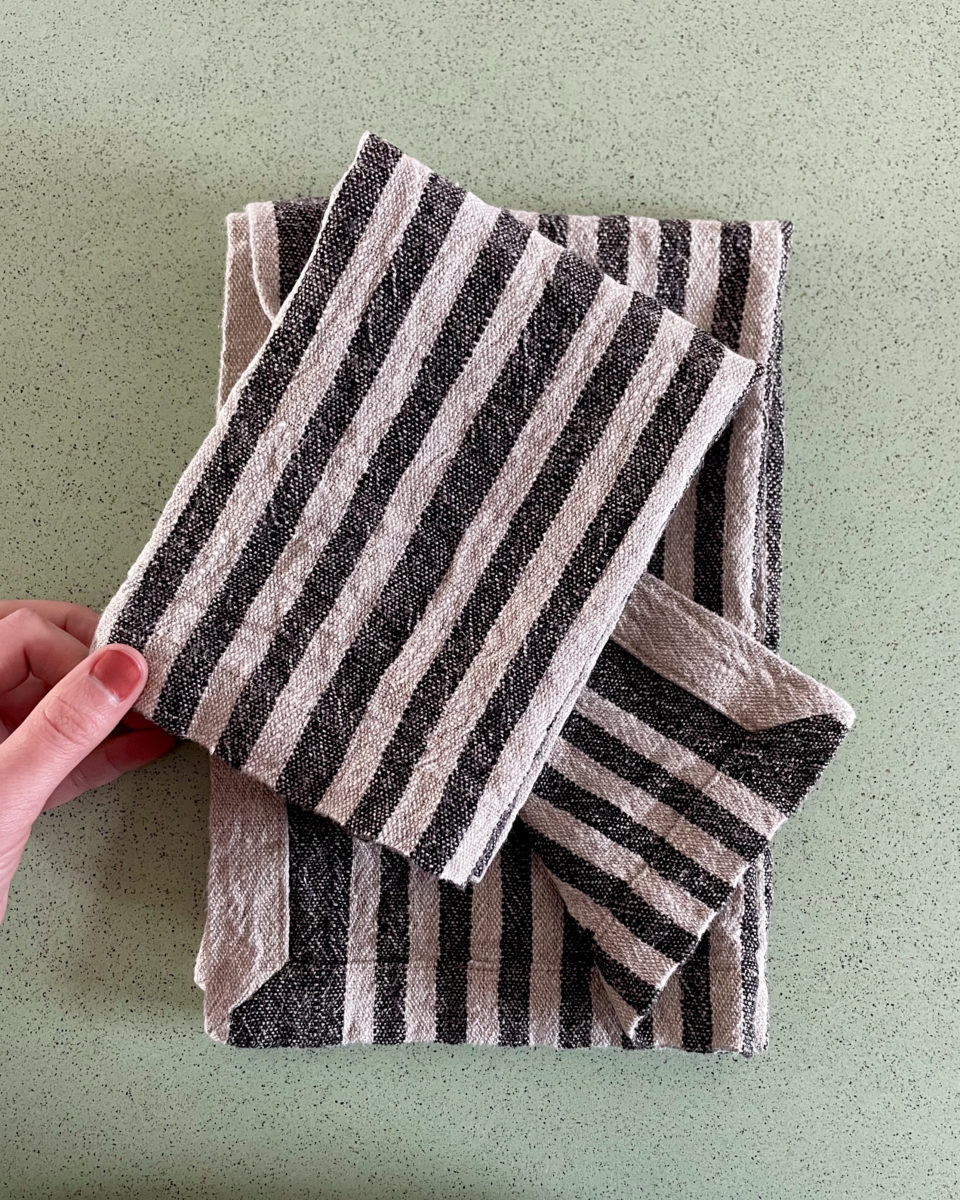
My brother is a hard person to shop for, so I made him two napkins and one tea towel. This fabric is… interesting. Even after washing, there was quite a smell when ironed. I soaked them overnight in some white vinegar water, which helped. I’m hoping it softens with use because they are a bit crunchy.
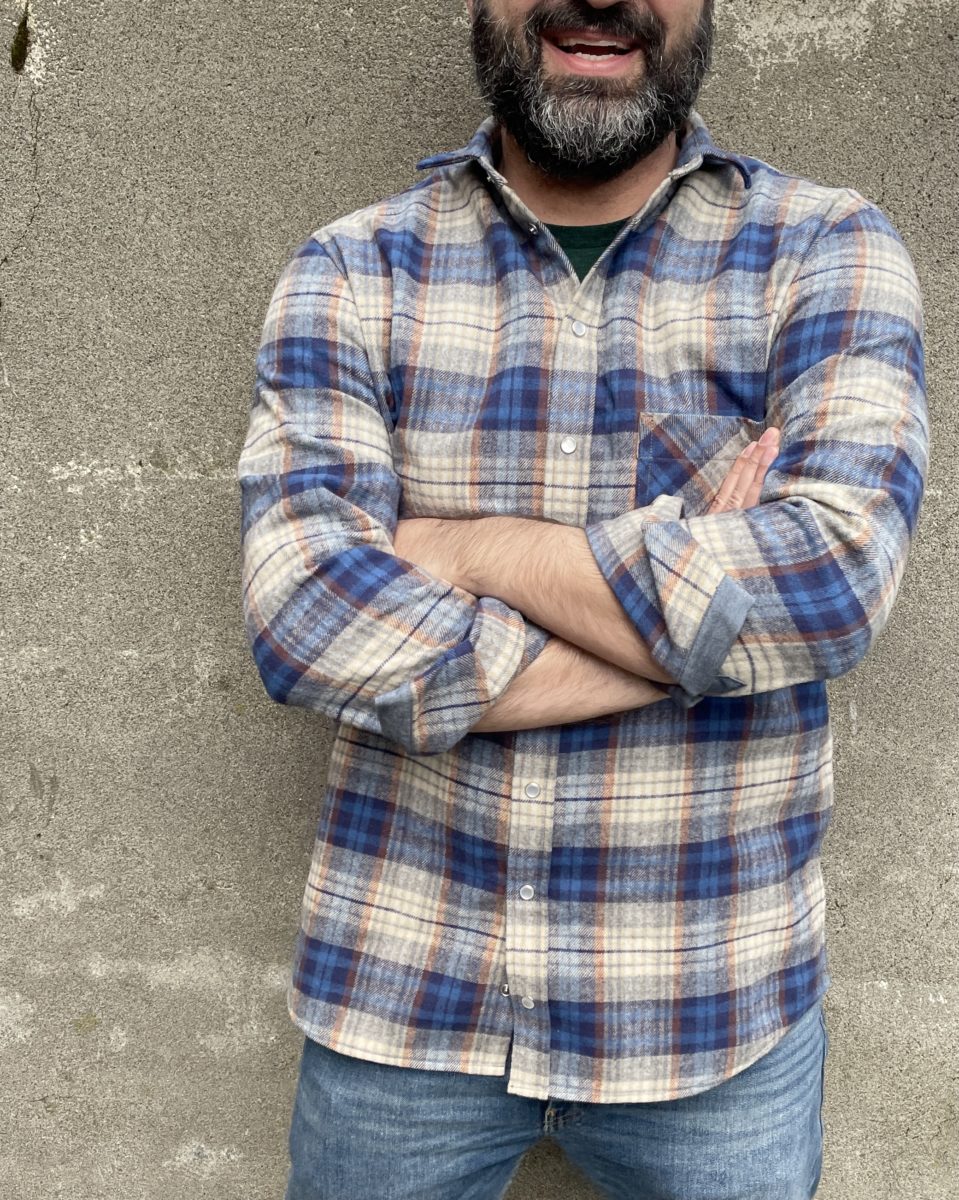
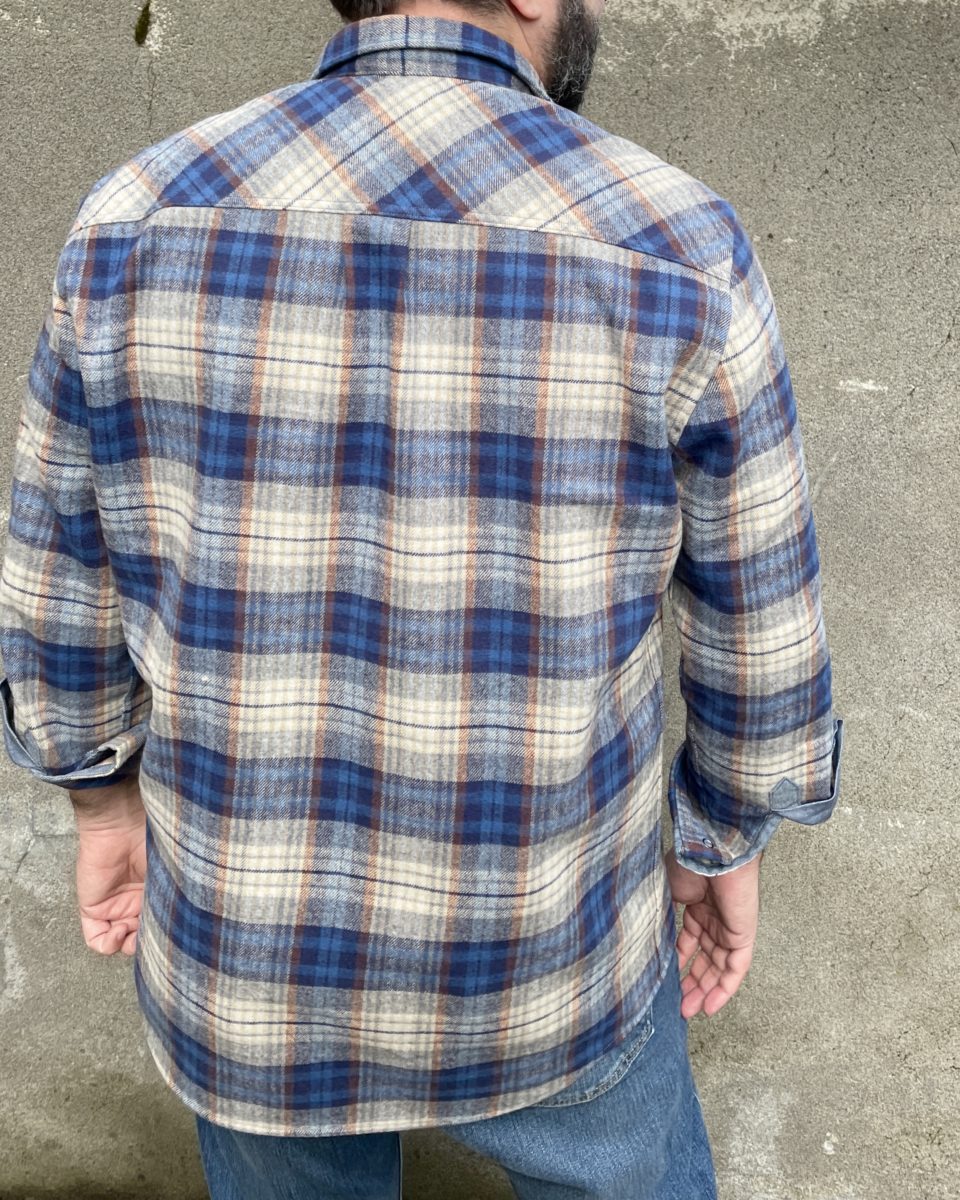
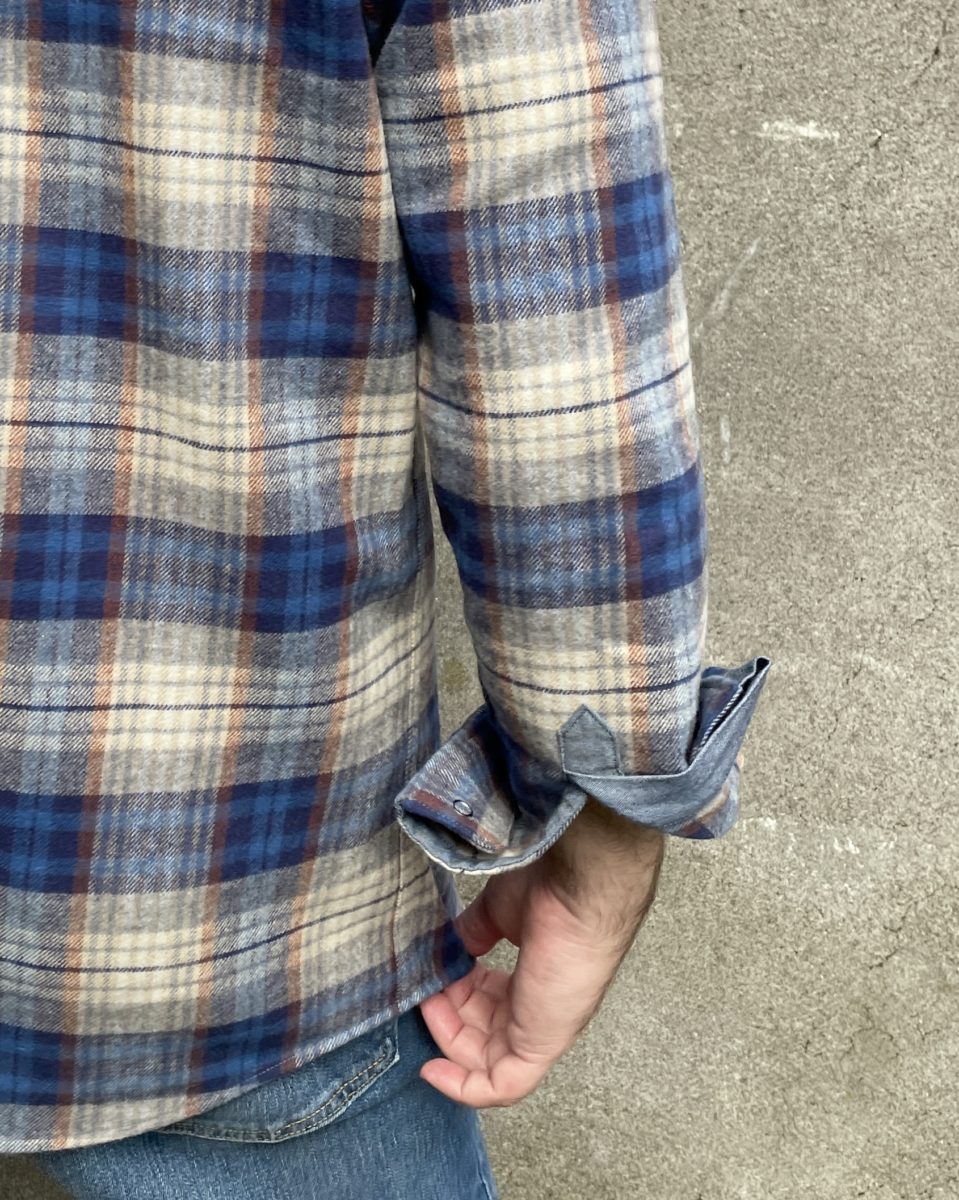
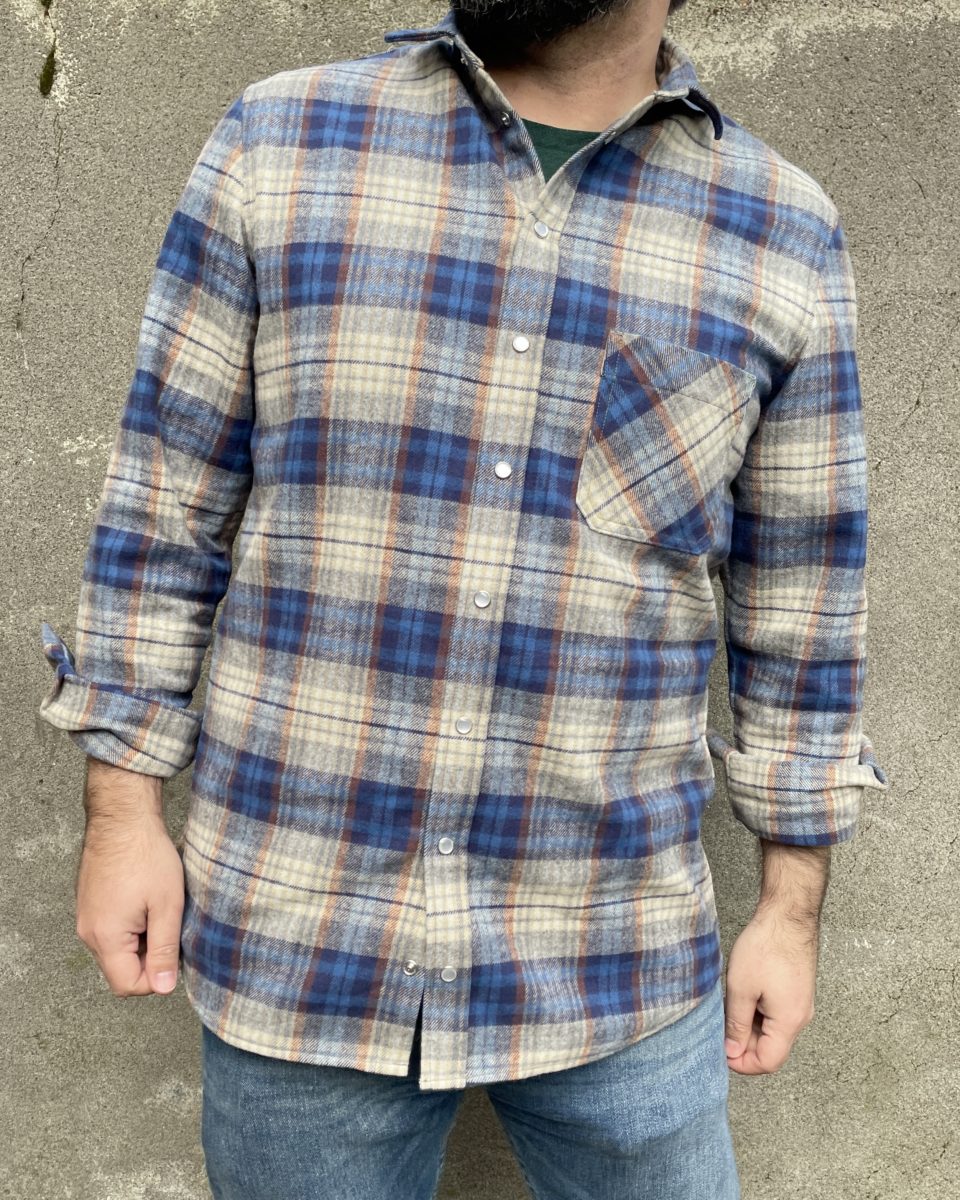
I made a Fairfield button-up for my husband. I waited until the absolute last minute to start this project and it took a very long time to complete. I also bought the wrong snap setting tool, so he got the shirt xmas afternoon and the snaps as a “bonus gift” December 30th.
I’m really proud of the plaid matching!
I made my mom a Seamwork Drew headband. I didn’t snap a pic of the one I made her before wrapping it, but here’s one I made for myself. It’s a great, quick pattern and I plan to make more.
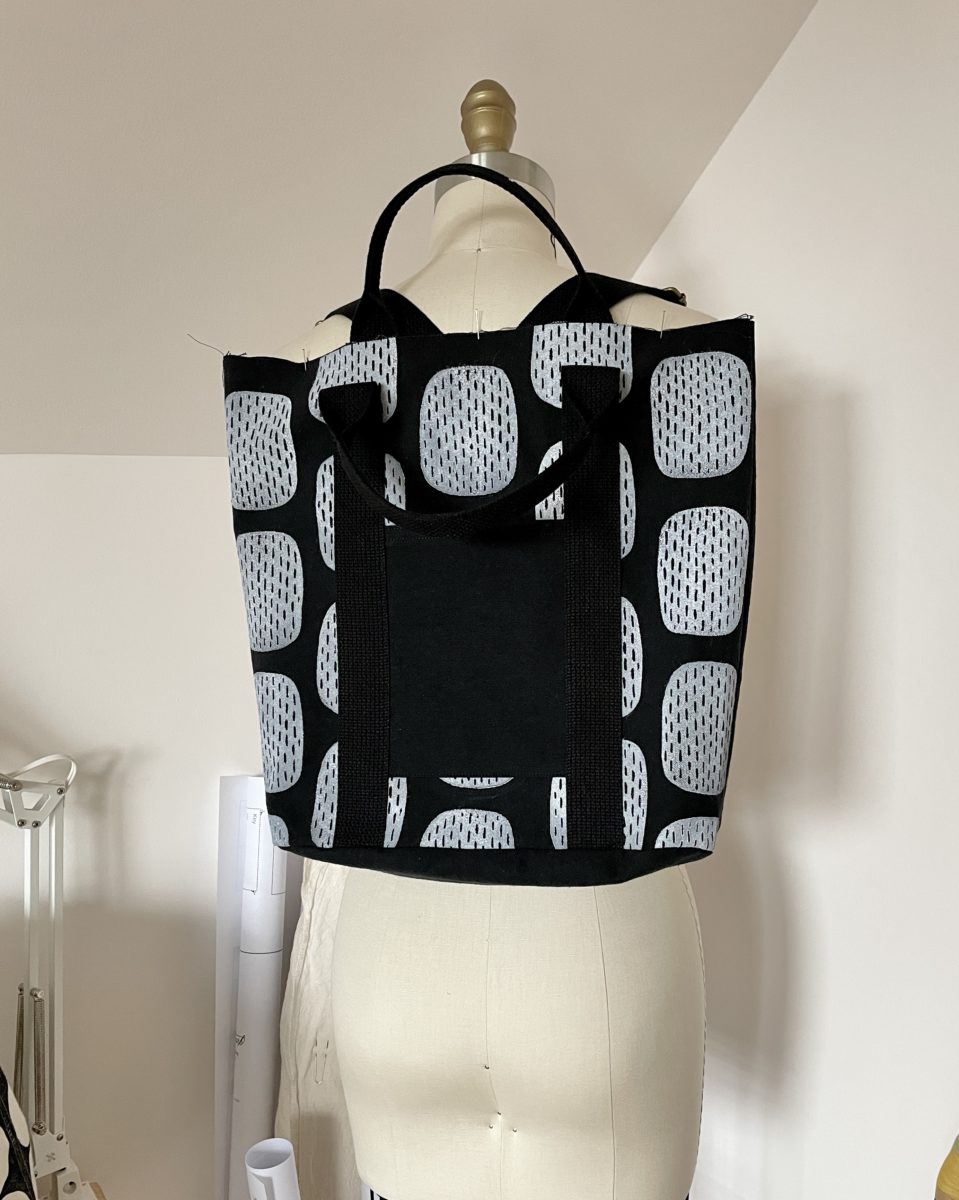
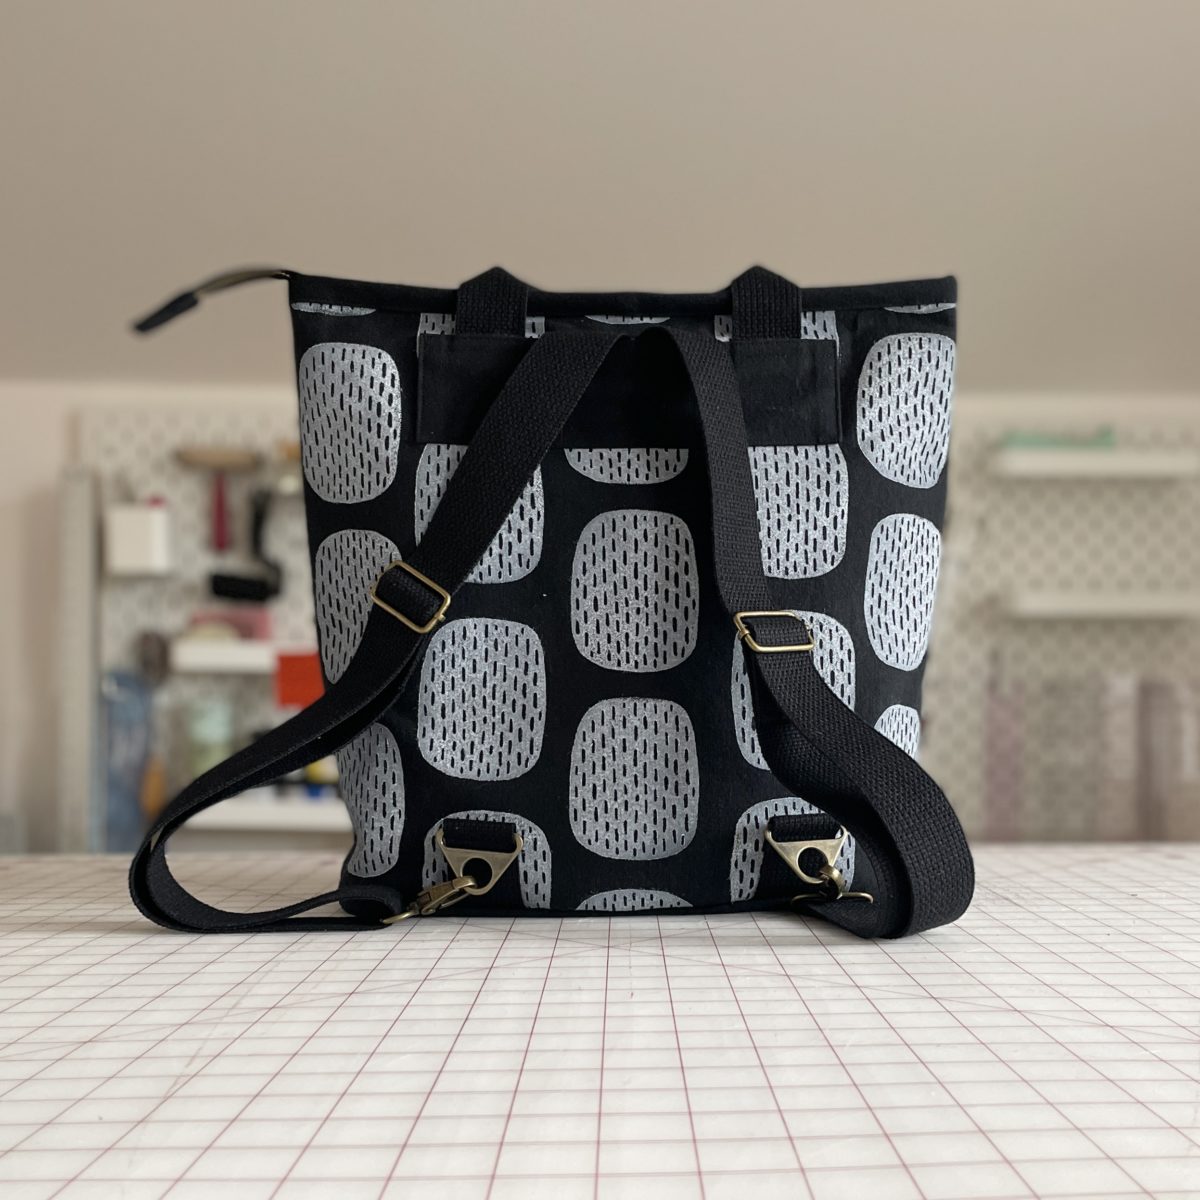
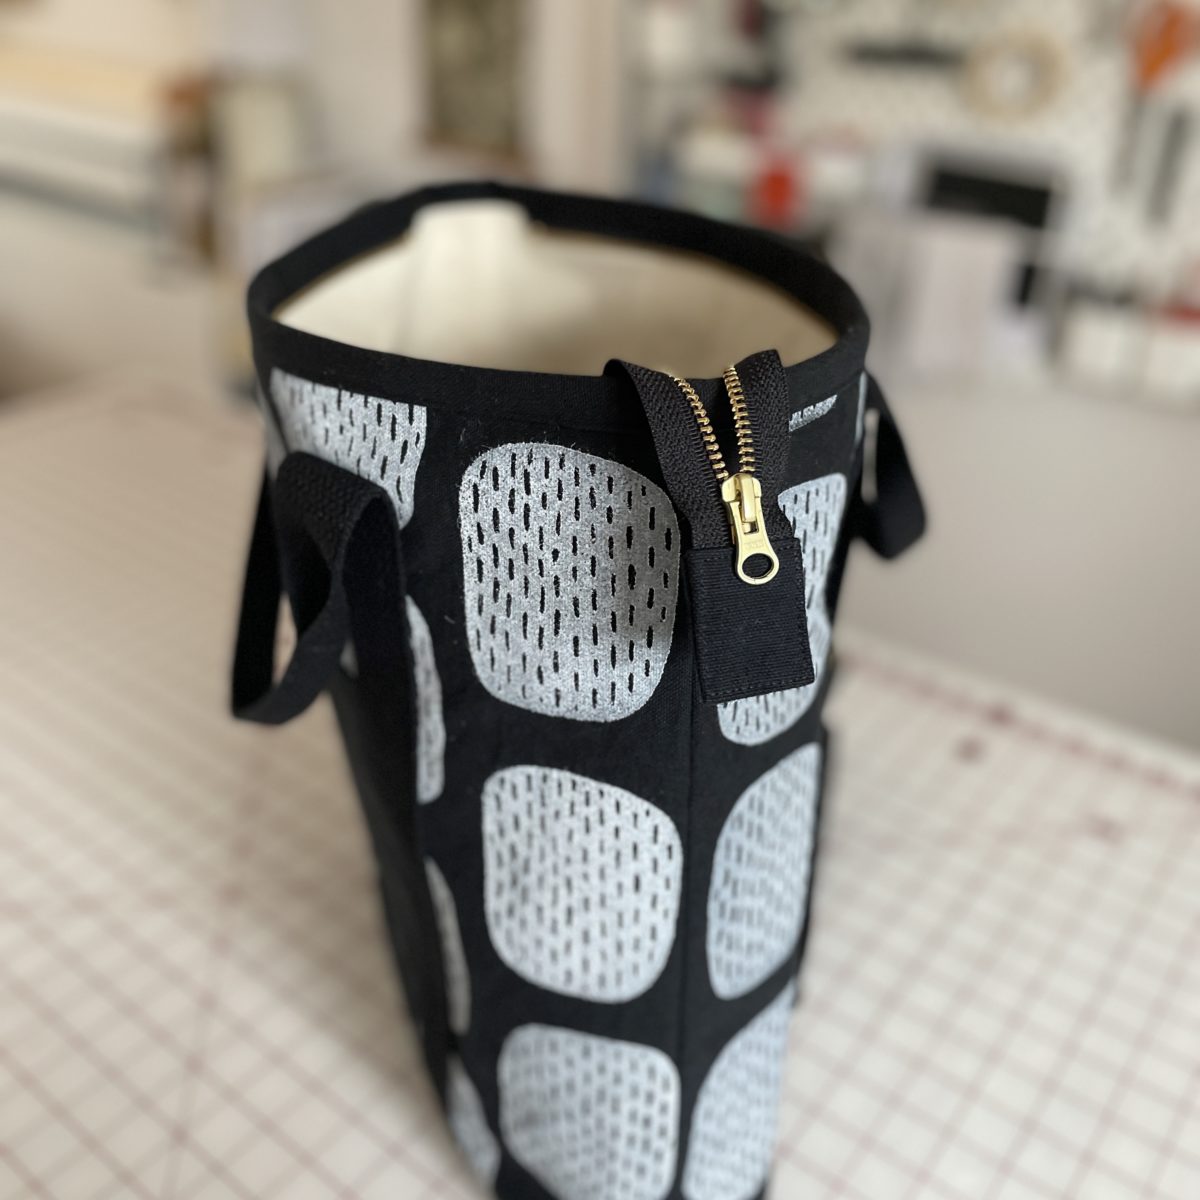
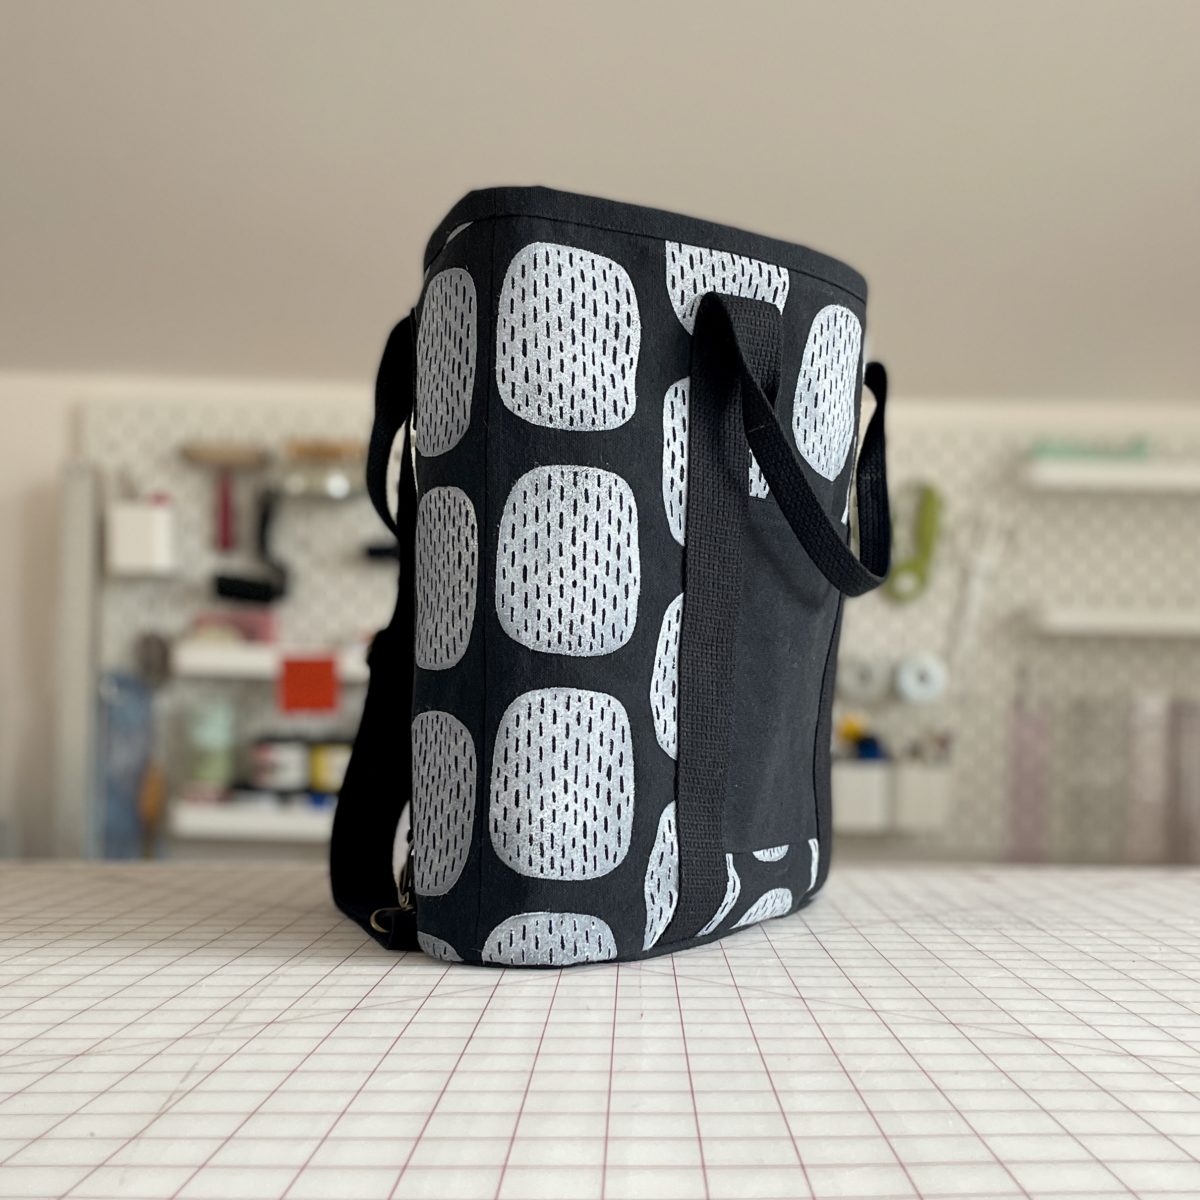
I’m also making her the Buckthorn backpack. Here it is in progress because I just started it last night. Yes, I started this 2020 gift in February of 2021.
In progress exterior. Needs lining and zipper.
I’m super curious if I’ll want to make handmade gifts next December, or if I’ll be able to get them done one time, or if travel will even be possible. I plan to cut out my husband’s gifts soon so they’re ready to go!
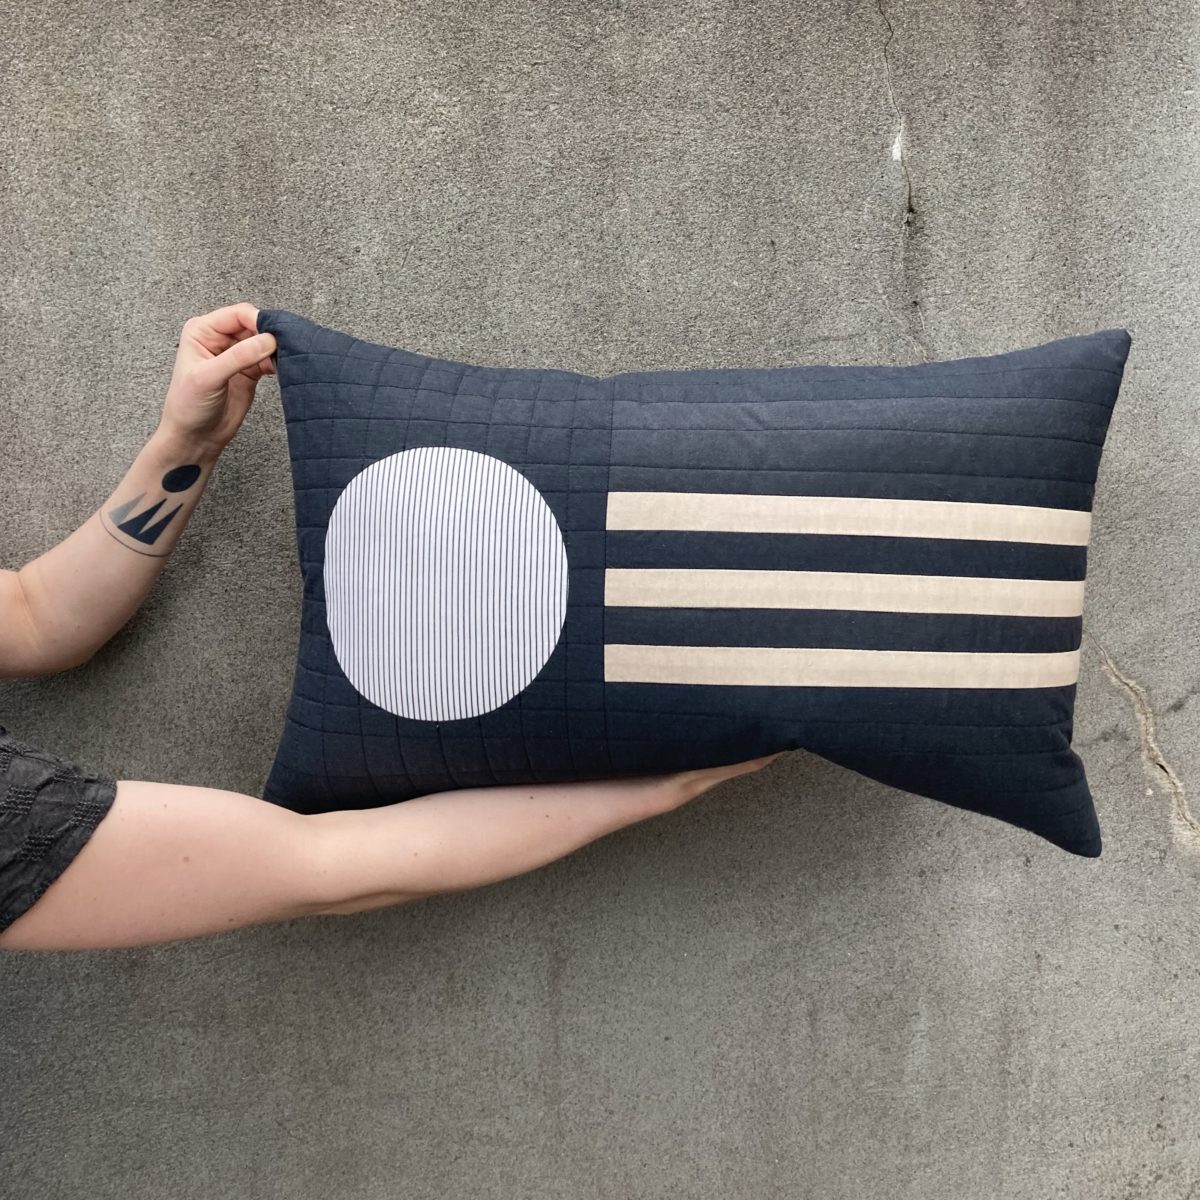
My motivation and creative practice was all over the place at the beginning of the pandemic, but I found a lot of comfort in piecing together shapes. It’s repetitive, which allows me to zone out, but also provides some fun opportunities to problem solve.
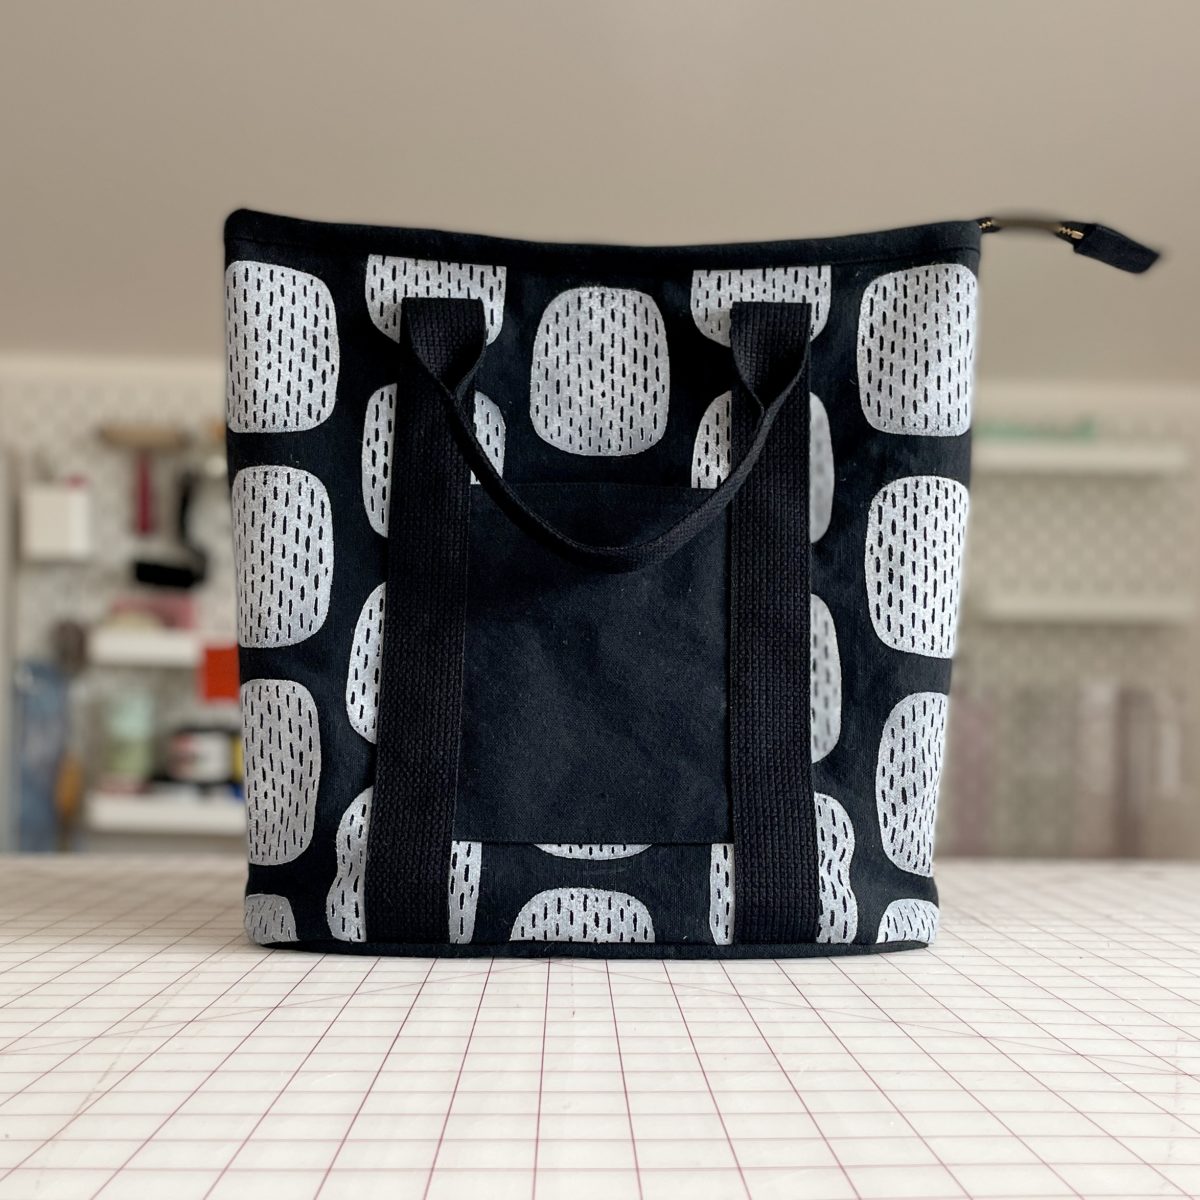
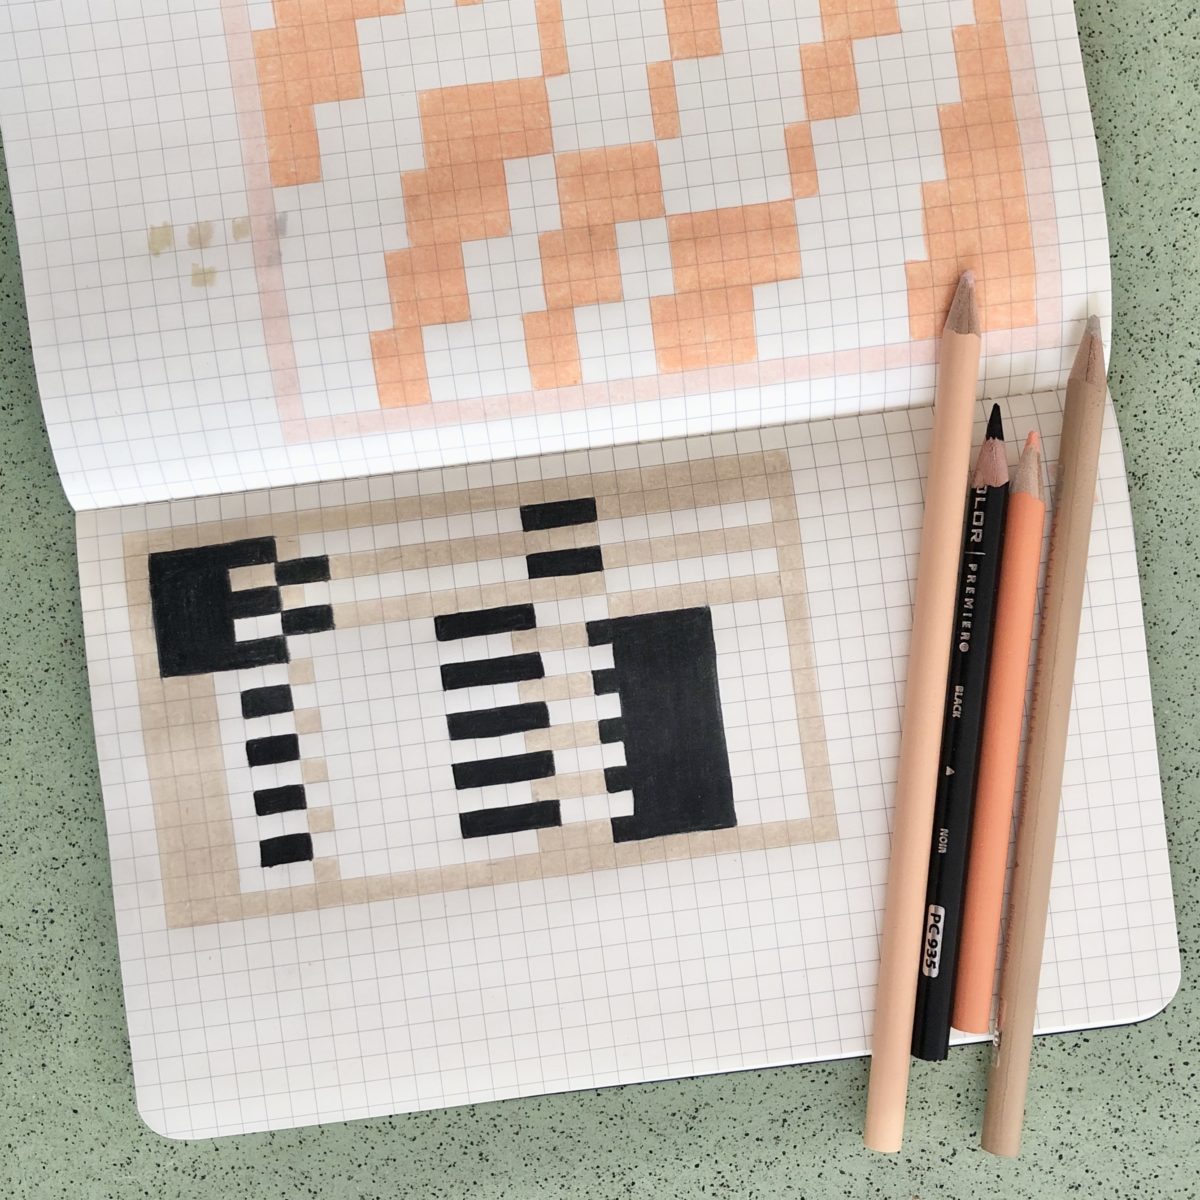
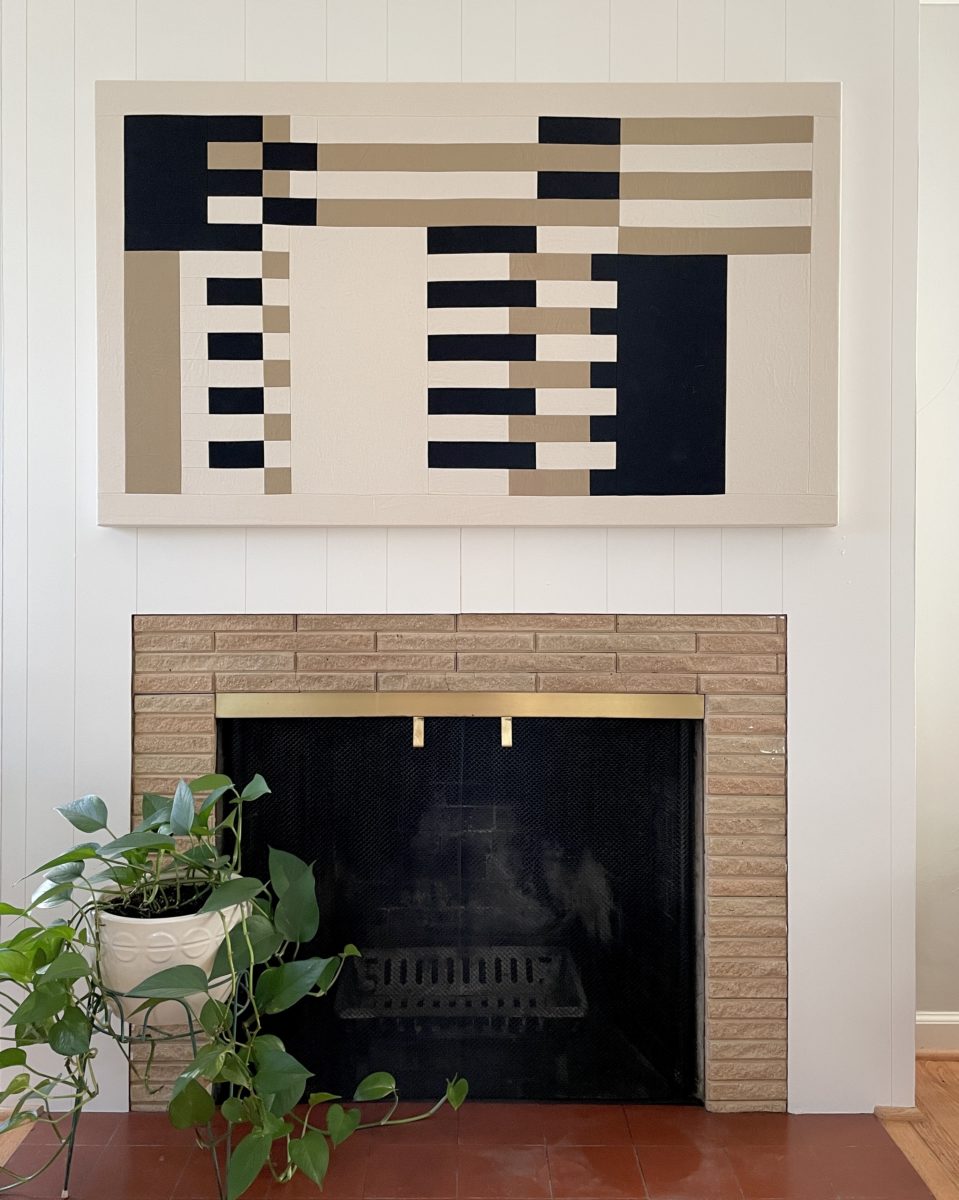
For this project, I copied an Anni Albers design. I believe there’s a difference between knocking off for personal use and copying for profit. I think that when it’s for personal use, the act of replicating can be an incredible learning process and a means to improving your skills. Copying encourages you to assess construction and puzzle out how things come together.
I used 10oz cotton duck in Natural, Black, and Khaki. I need to find a new canvas supplier because the company I got these from had blue lives matter bullshit in one of its recent newsletters.
I had a lot of fun figuring out the blocks for this. There is one section that I would do a different way, if I were to do it all over again, but whatever!
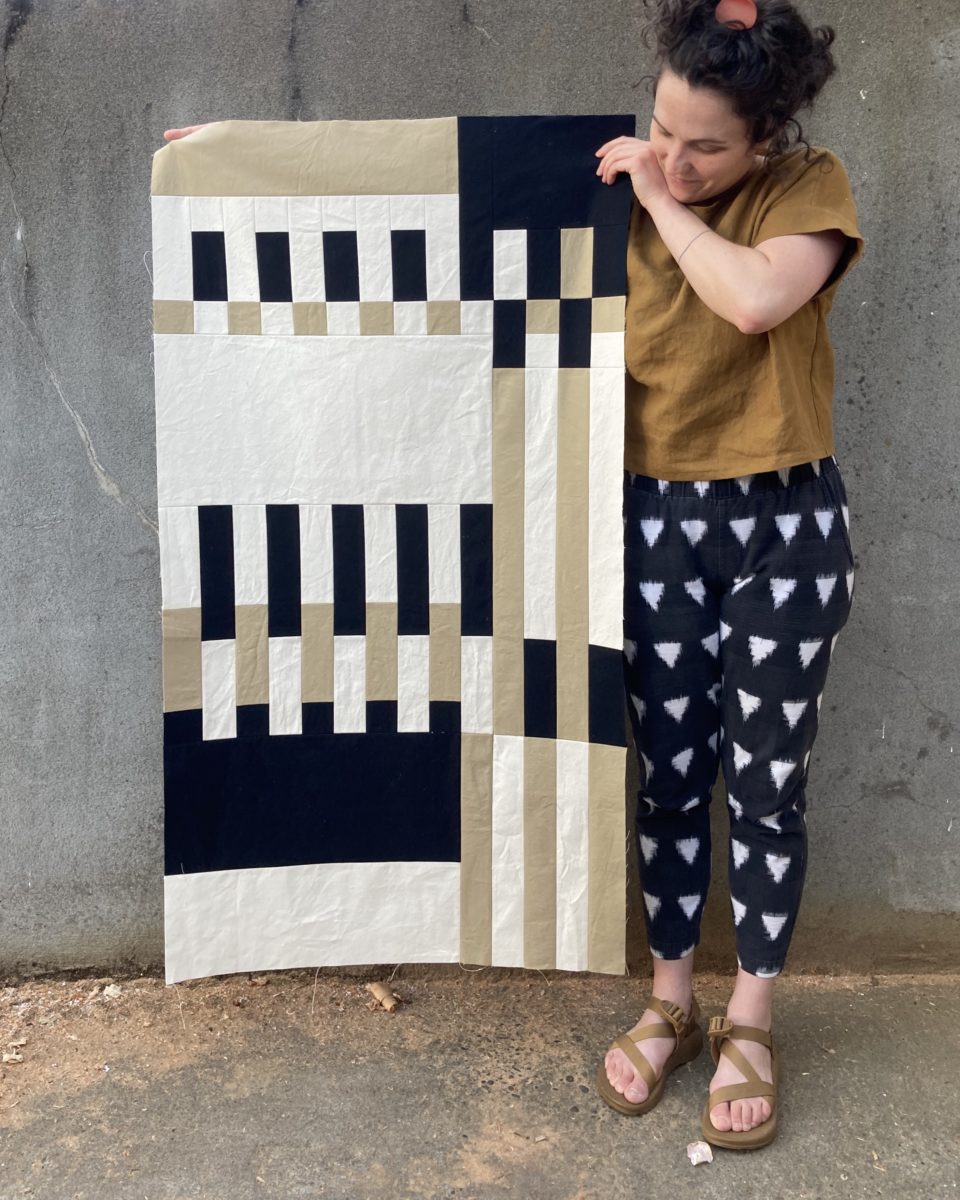
Initially I had planned to use the khaki canvas for the border but must have used it in another project. I’m actually quite pleased with how the natural color border turned out. This color definitely made the stretching process a little easier – the wonkiness from stretching is somewhat hidden.
Some day we’re going to rip out this terrible 70s “update” and make the fireplace a focal point instead of an eyesore.
Scrap Quilt
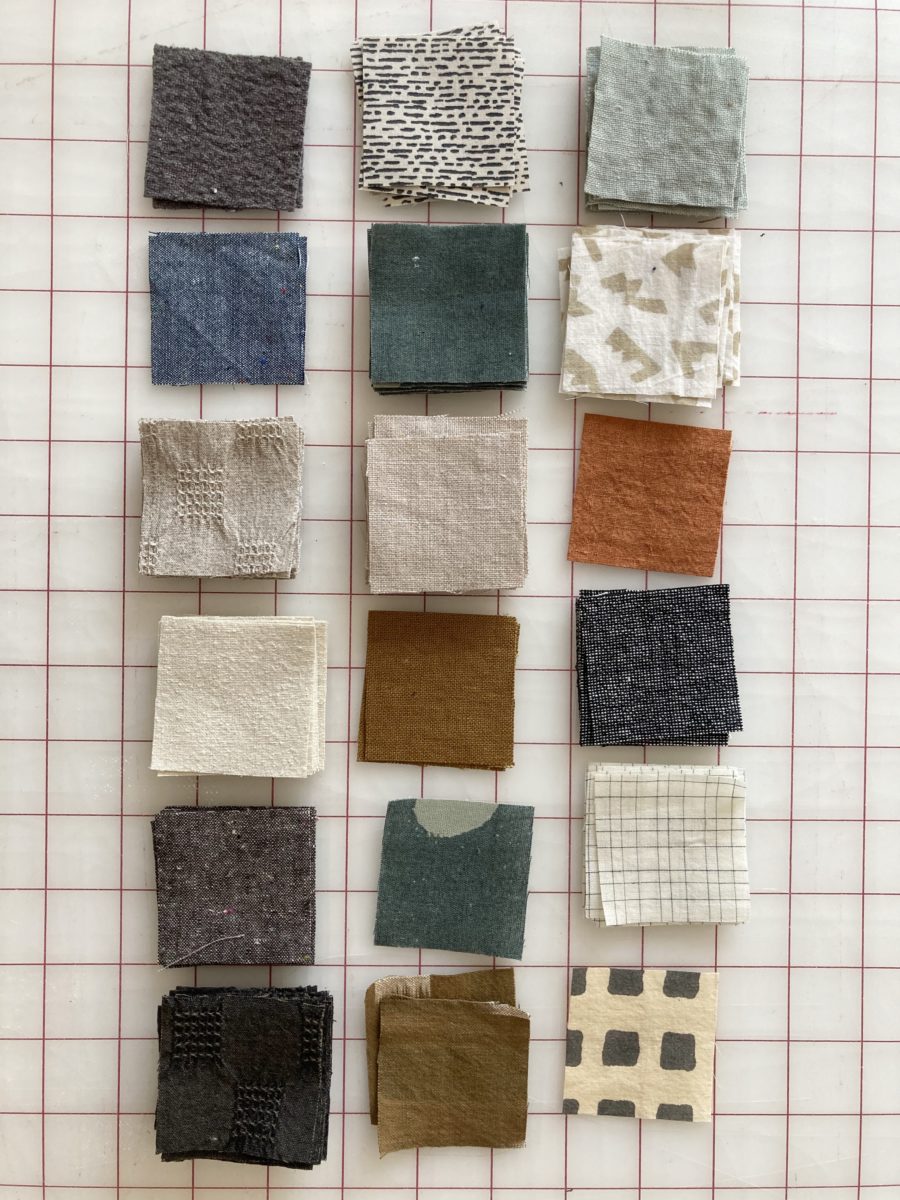
Another piecing project I’m slowly working on is a scrap quilt. Whenever I cut out a woven garment project, I’ll cut 2″ x 2″ squares out of the leftovers. As a chronic over-buyer of fabric/project switcher, it’s making me feel better about the waste that comes with each garment project.
I recently made a small design wall for quilting projects. It’s just a 48″ x 48″ piece of homasote that I stretched cotton canvas over. It’s not as sticky as a traditional design wall, plus it’s right next to a vent, so stuff needs to be pinned to it.
If you’d like a tutorial for this, Farm & Folk has an excellent one.
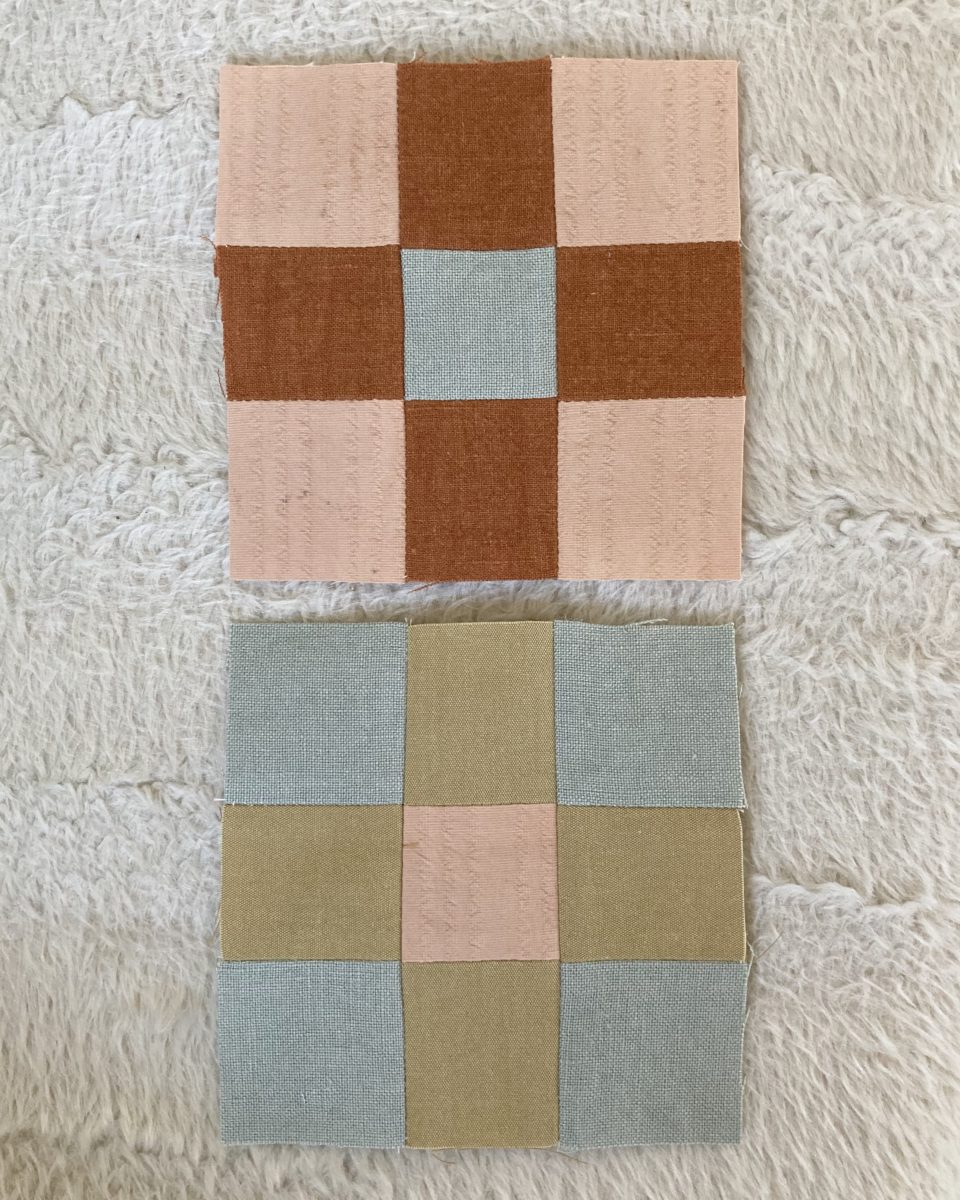
Anyway, I started this project back in early September of 2019. It’s a nice long-term project that I can pick up and leave whenever feels right. However, my goal is to make 100 blocks and document them in my IG stories.
Initially I wanted to do 100 consecutive days, but I completely forgot about one day, then another… and then I felt silly about it. So now I’m just gonna call it a “100 Blocks” projects that will be completed in the time frame that feels good to me. I’m especially fond of these blocks. The pink seersucker is my first attempt at using natural dyes.
Quilted Jacket
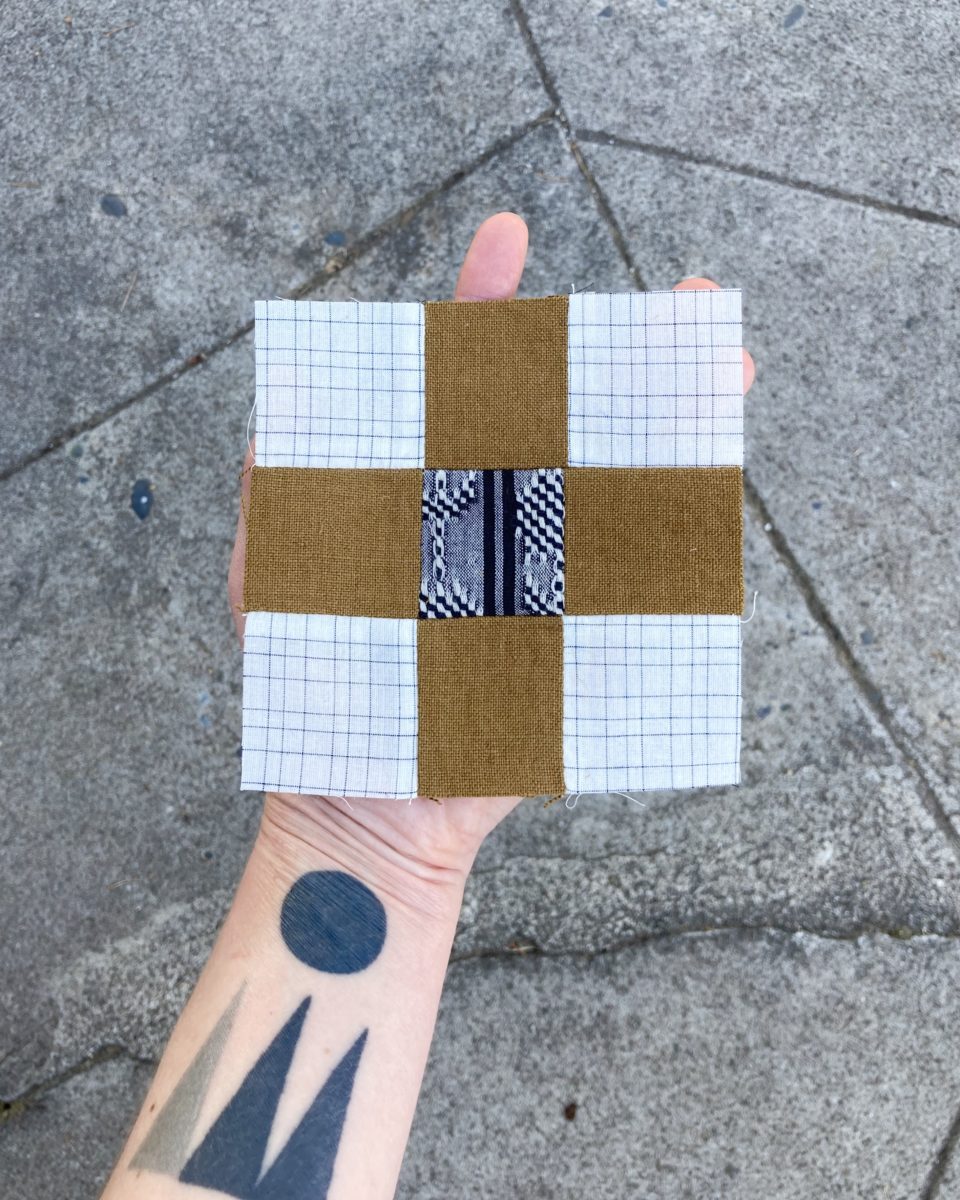
The third pieced project I’m working on is a quilted jacket. I’m lengthening the Seamwork Easton jacket and adding hidden pockets.
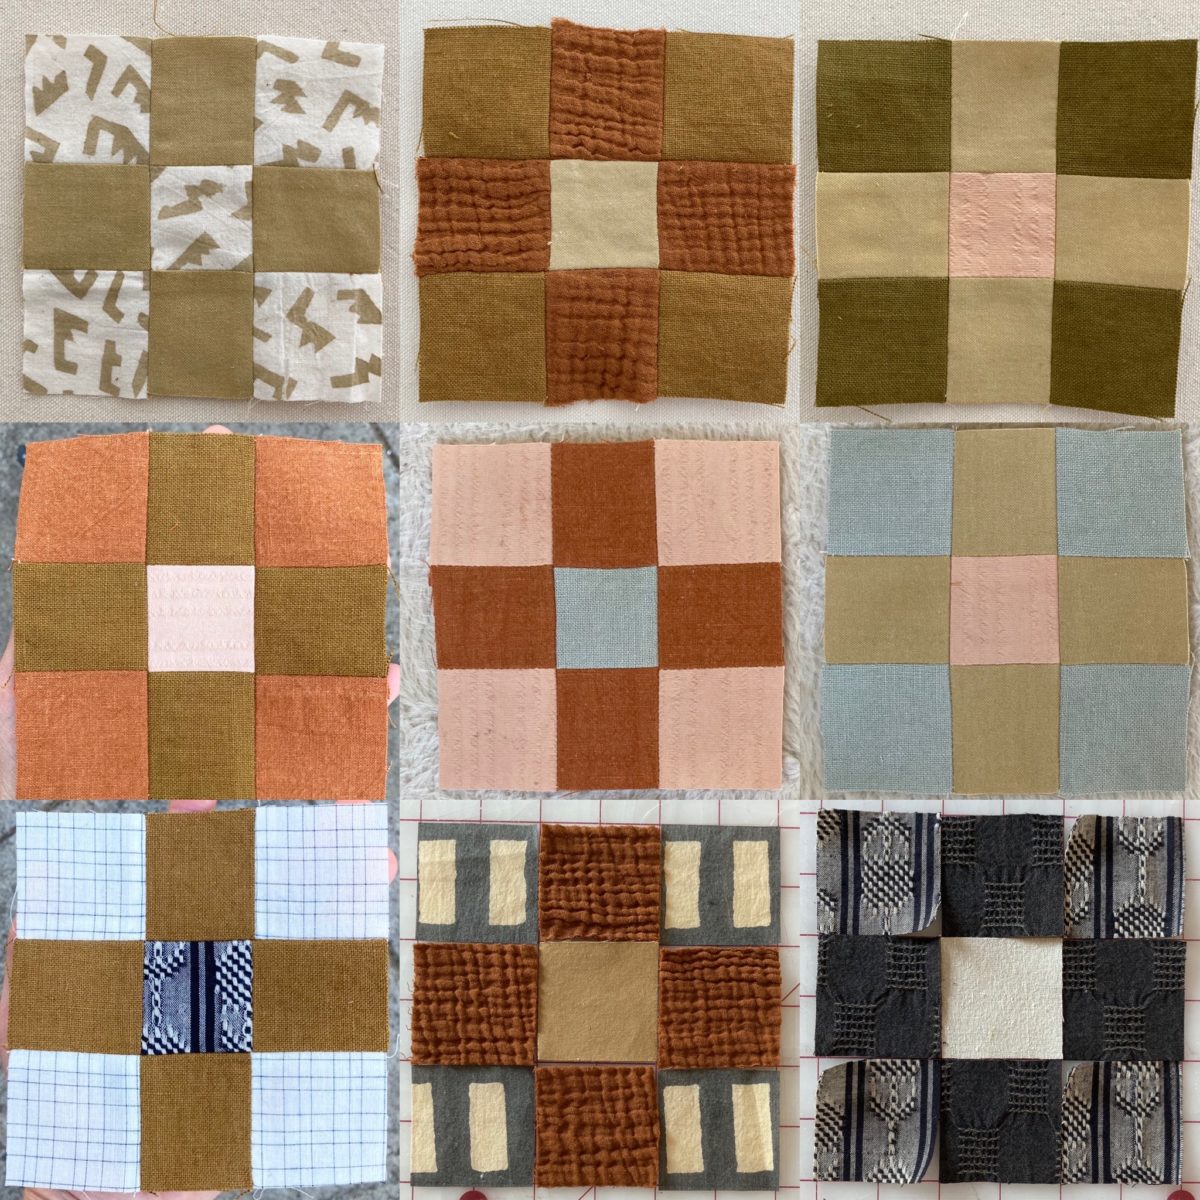
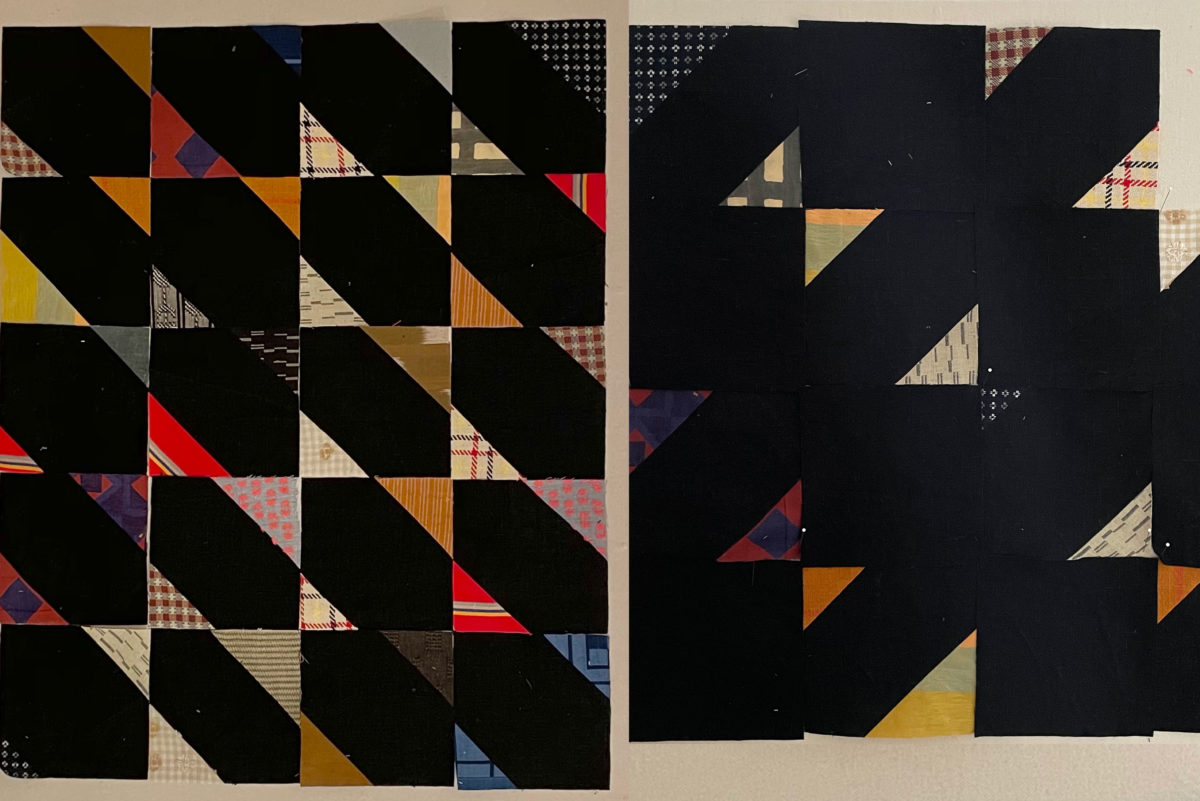
Here’s what a single block looks like (above). I am using leftover wovens, plus Ace & Jig scraps with a black linen. I like how this project will be a reminder of past garment projects.
I’m leaning toward using the composition on the right. Maybe this jacket will be ready by next winter!
11.5 months later, I’m back with part 2 of my studio update! If you saw part 1, you’ll notice quite a few changes. The main update is, like a lot of people, home is now where I work. And my work involves a lot of filming equipment. Equipment that takes up a lot of physical space… and mental space. Anyway, all of the extra stuff and well, *gestures broadly at everything* I just didn’t feel inspired to share. But I want to now!
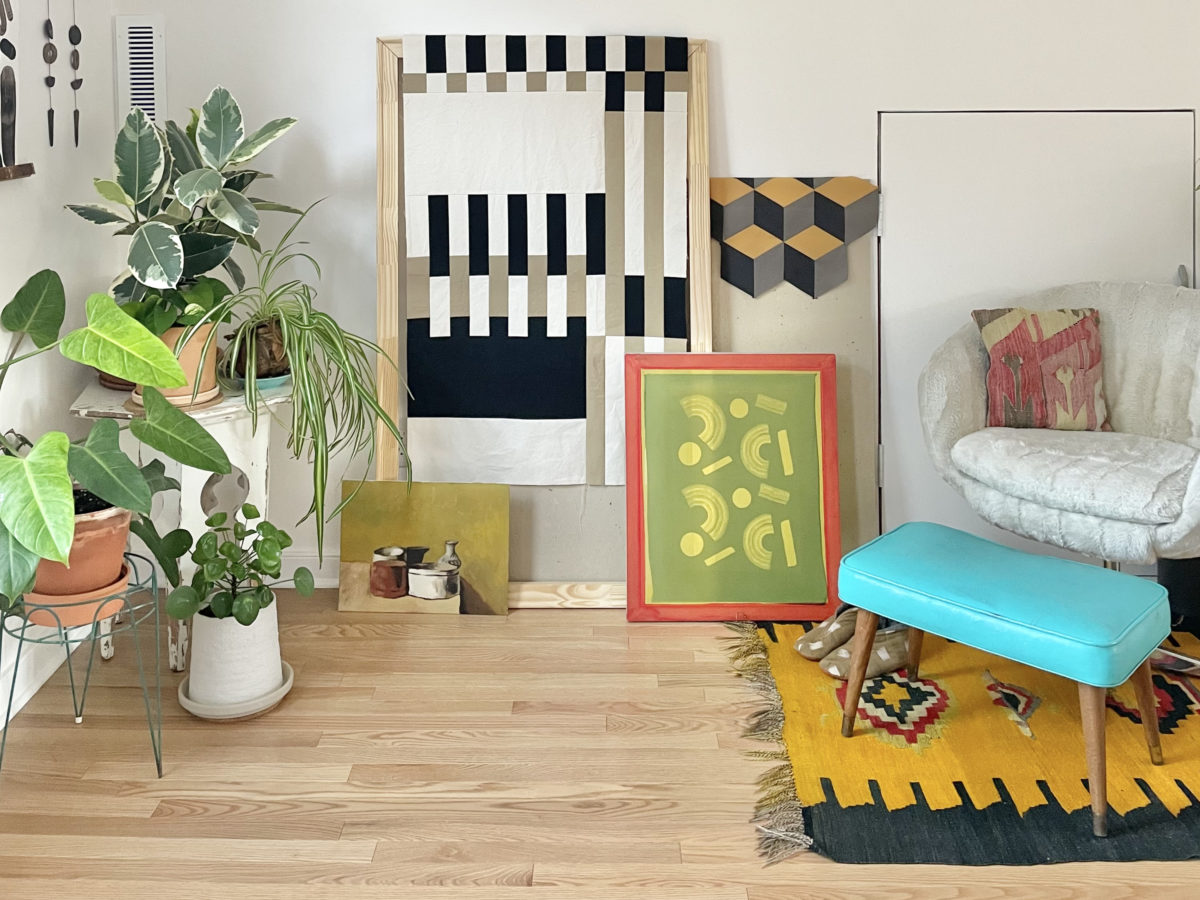
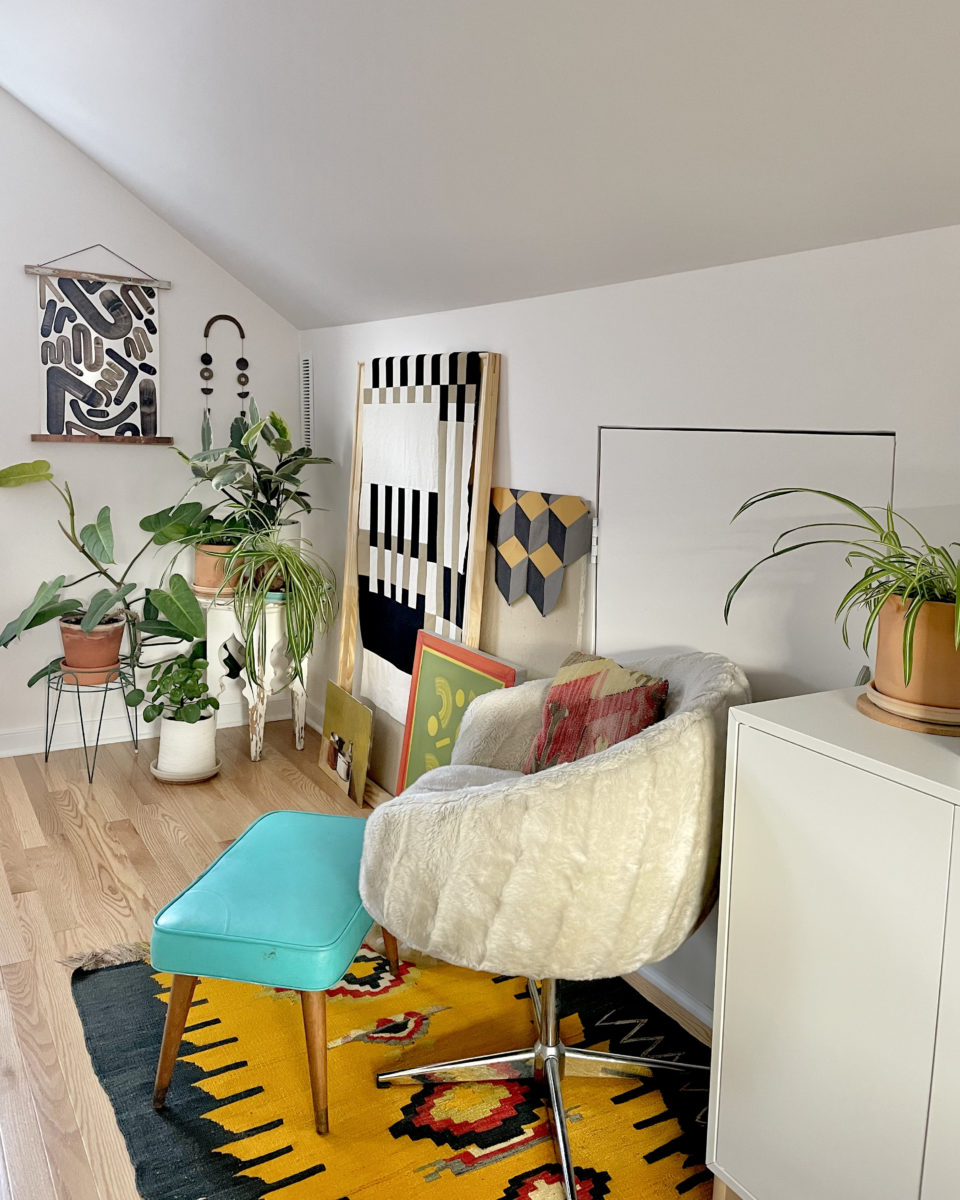
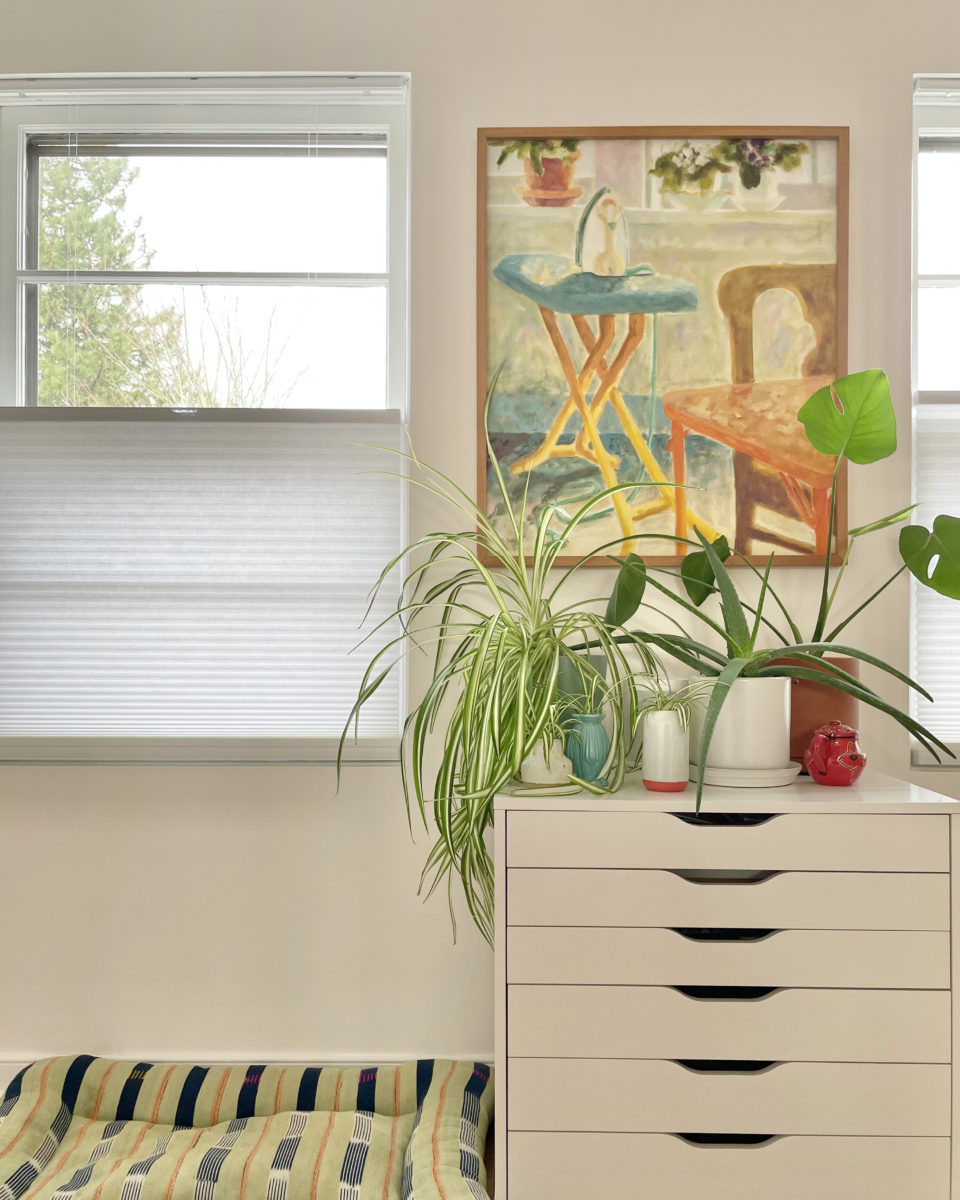
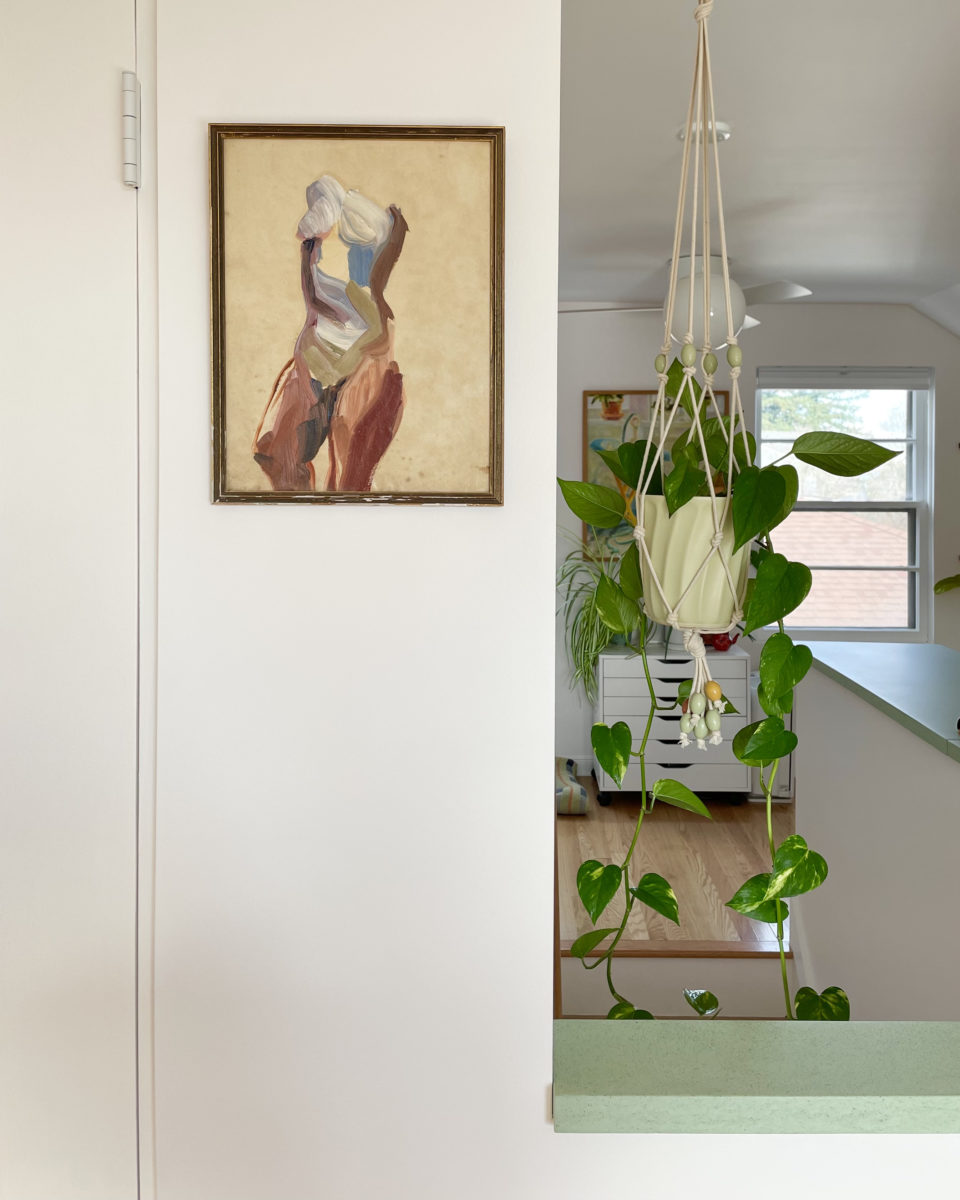
This corner is no longer home to my horrible exercise bike, but instead a bunch of plants, UFOs, and occasionally a yoga mat.
Artwork (upper left corner) by Avery Williamson.Artwork by my mom!
I’ve wanted to sew curtains inspired by this artist for ages, but decided to purchase some simple shades. I’ll eventually finish those curtains, but flashing my neighbors was getting old and I was having to tape paper over the windows to film.
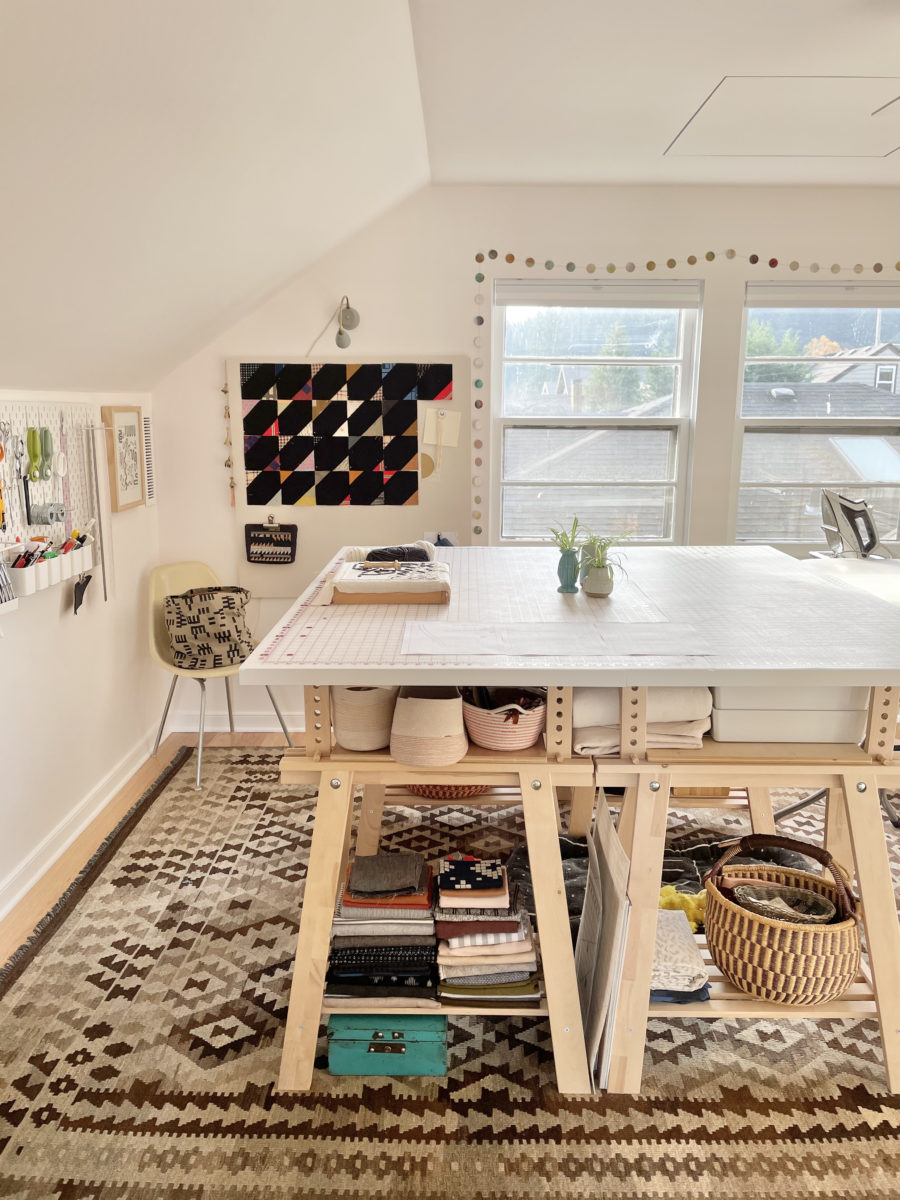
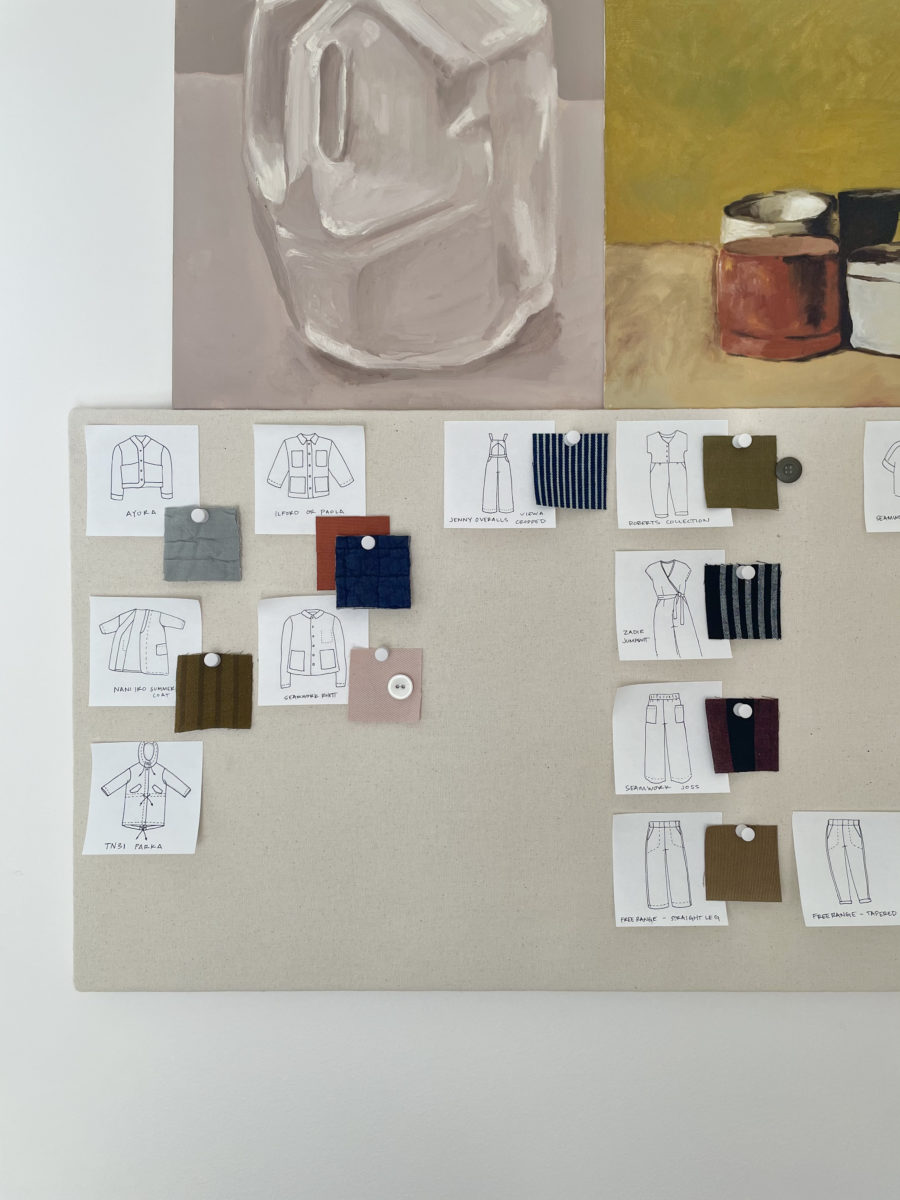
There’s a lot more stuff on the walls now too. I hung IKEA pegboards, art, and made two bulletin boards out of homasote and canvas. The board pictured here is holding a project that will one day be a quilted jacket. The top shelf of my cutting table stores a bunch of tripods and lights (hidden by other stuff), batting, yarn, and fabric scraps.
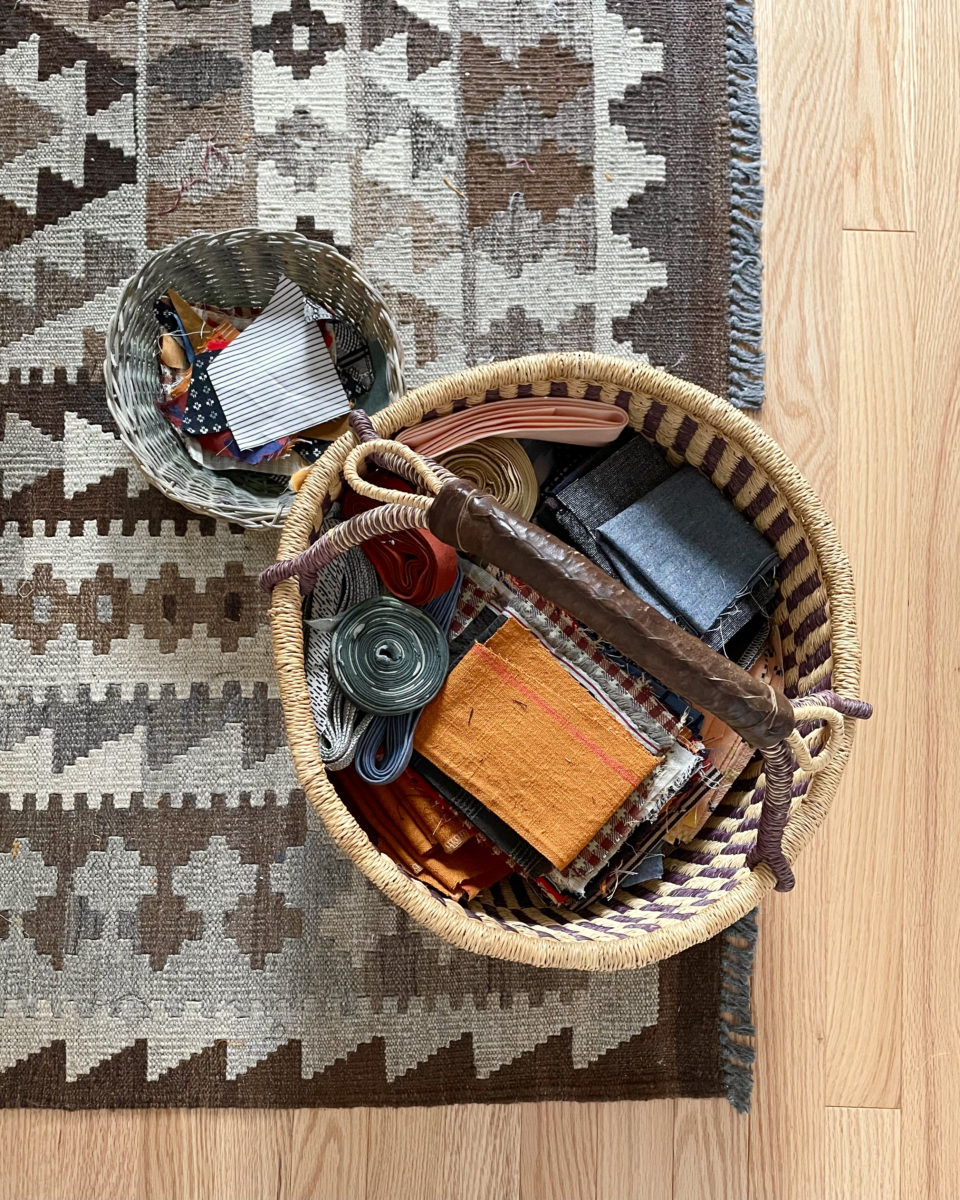
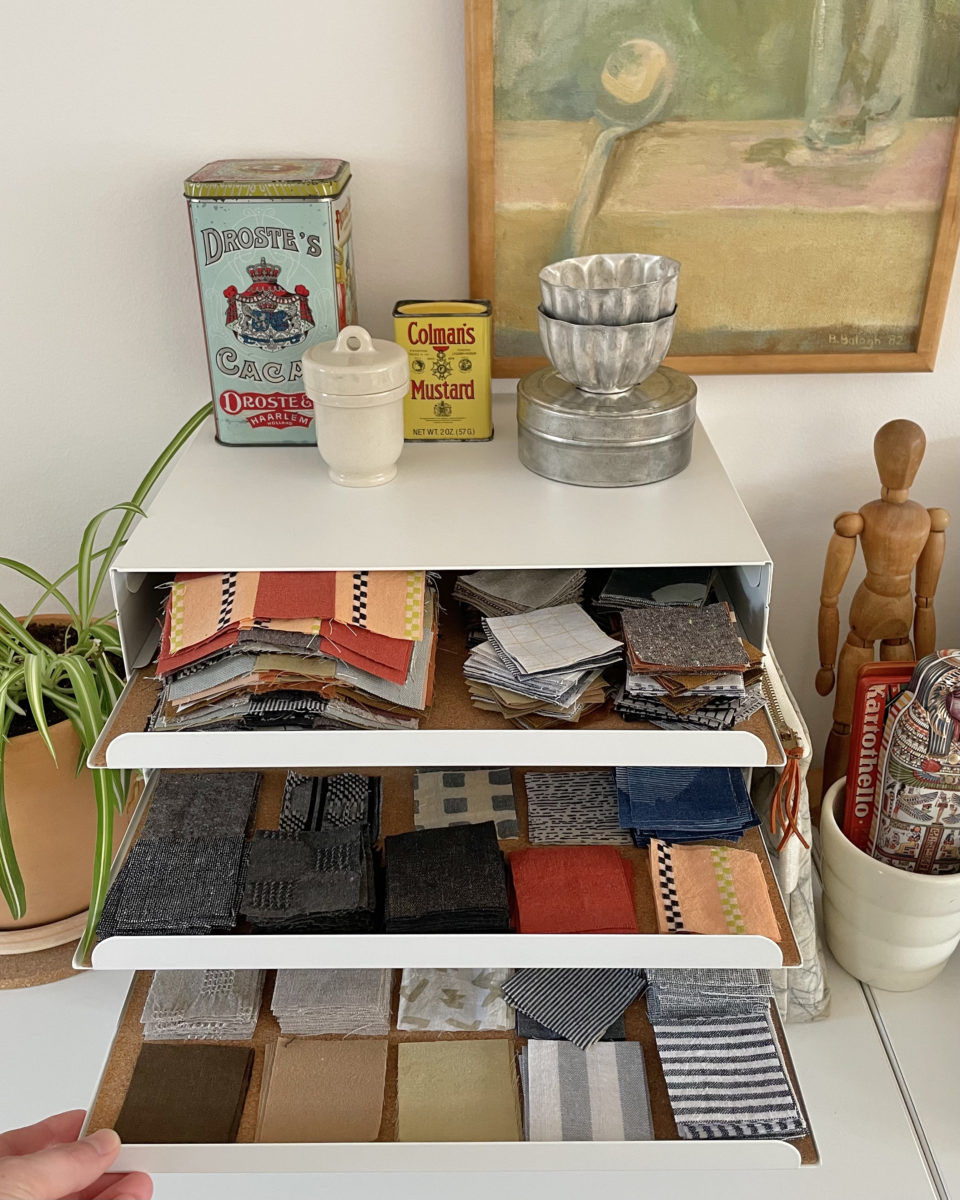
Large woven scraps are folded and stored on one of the open desk shelves and the small pieces live in these baskets. I can easily pull them out when I’m working on one of my two long-term quilt projects. You can see how I store my fabric stash in this blog post.
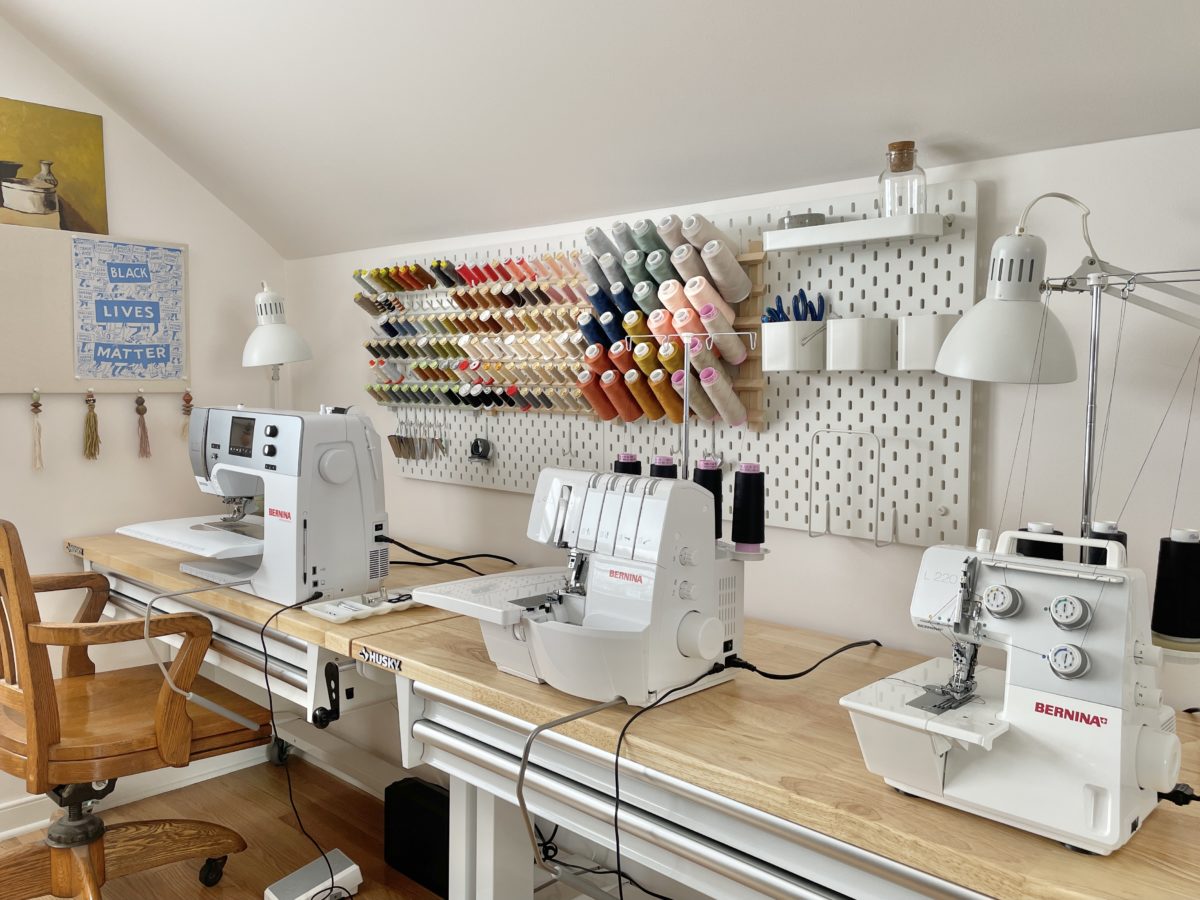
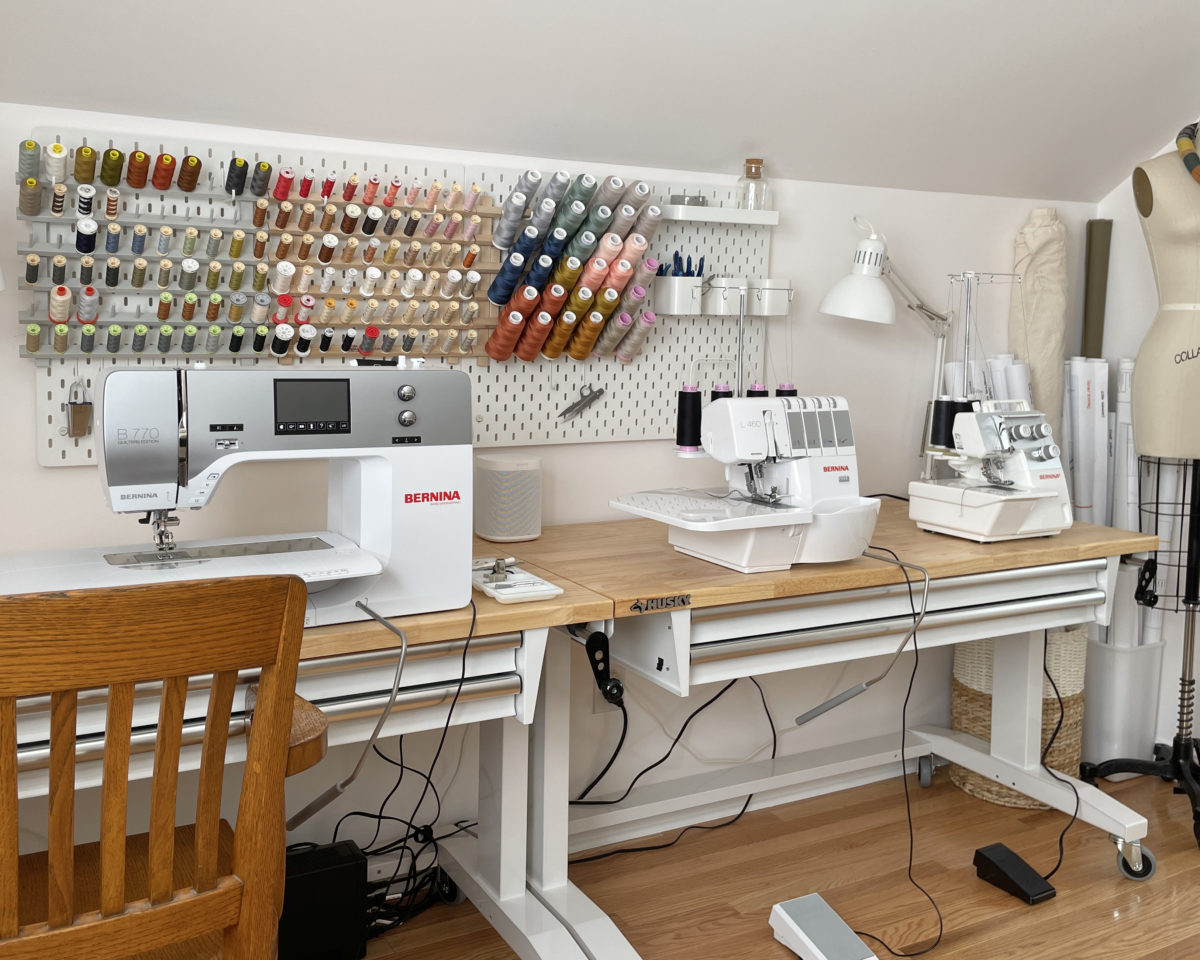
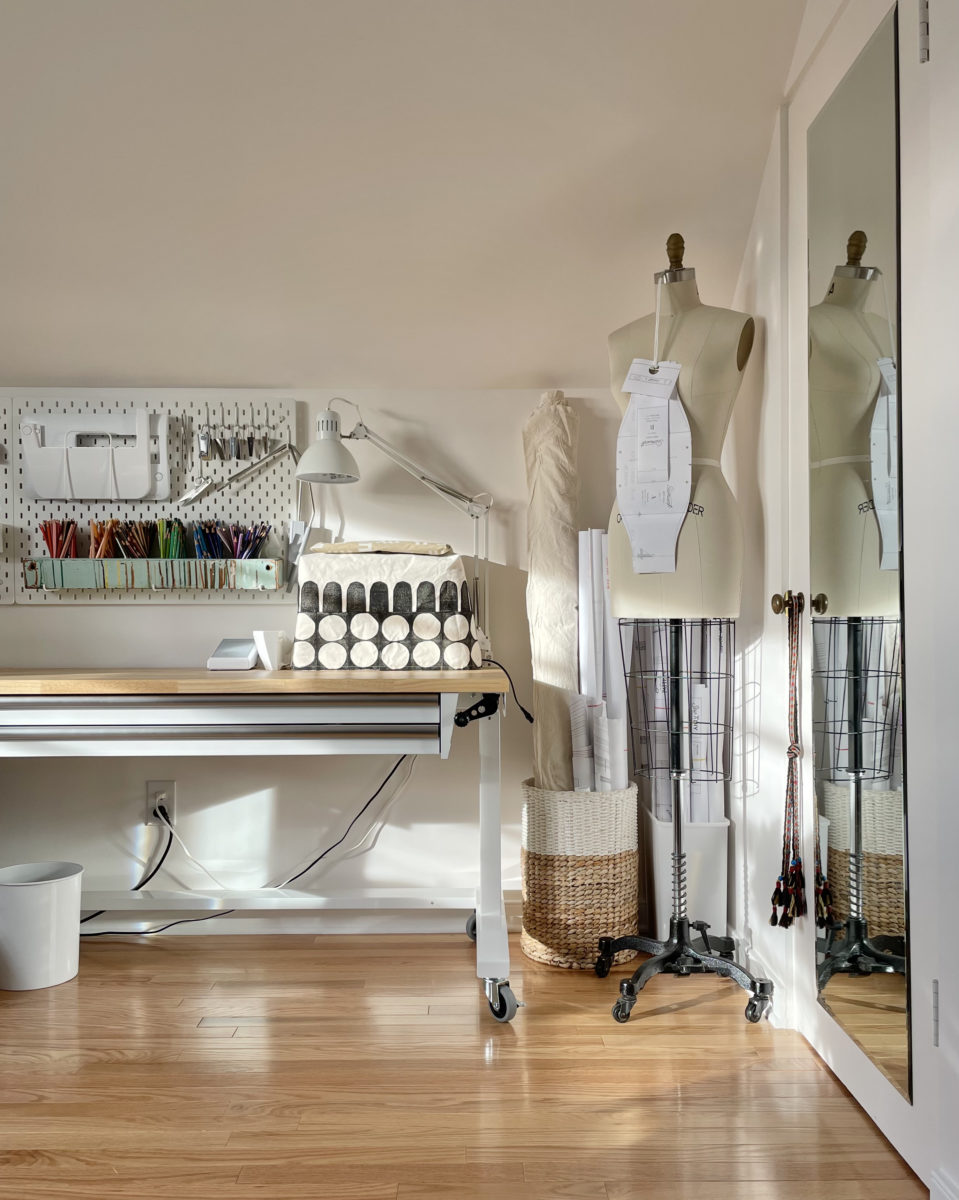
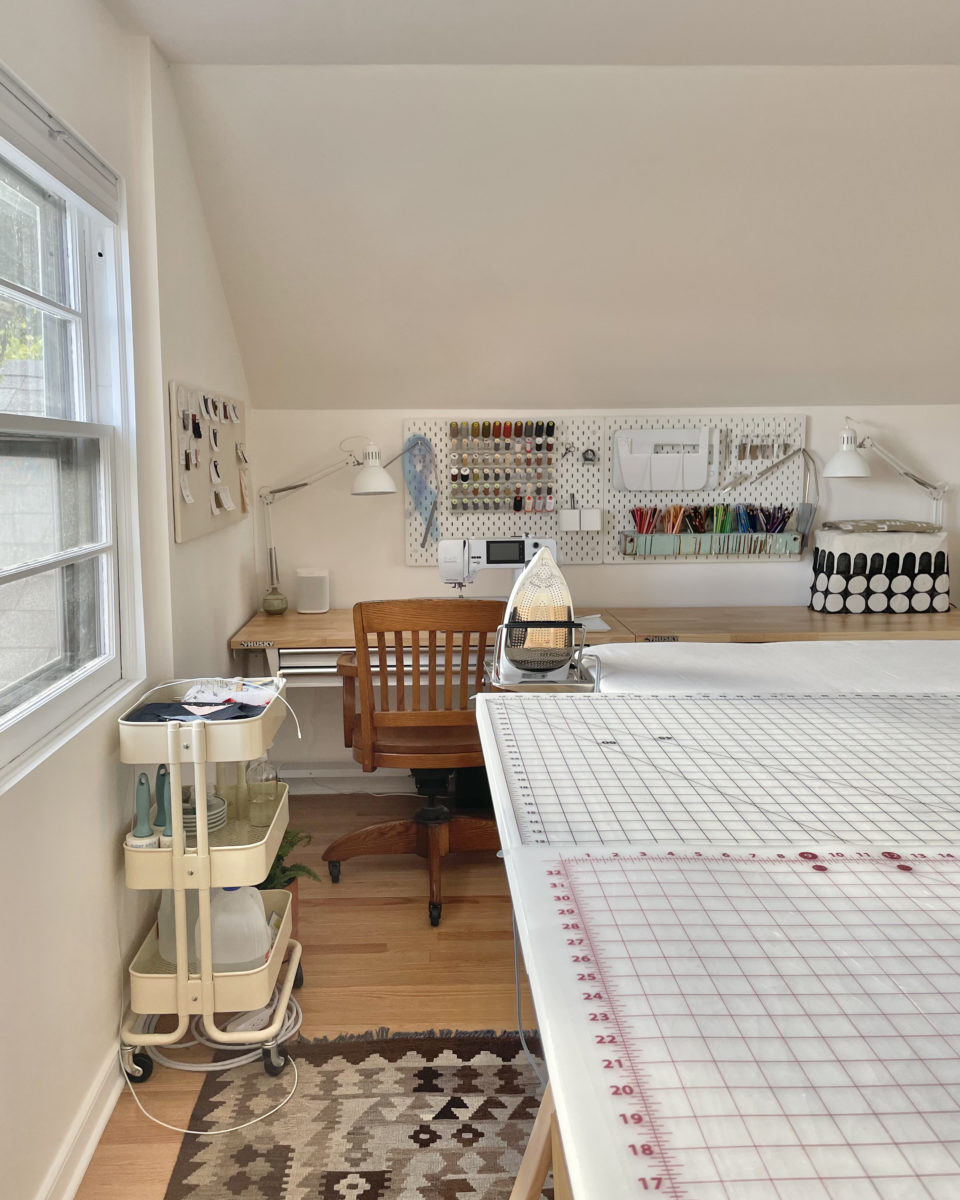
This dress form is from my vintage selling days. She’s definitely not my size, but it’s fun to hang an in-progress project on her. The baskets hold printed patterns and fabric on rolls. I went with Husky workbenches to hold my sewing machines. They’re really sturdy, easy to move around, height adjustable, and have two drawers for storage. I didn’t really think through the drawers and the free hand system of my machines, but whatever.
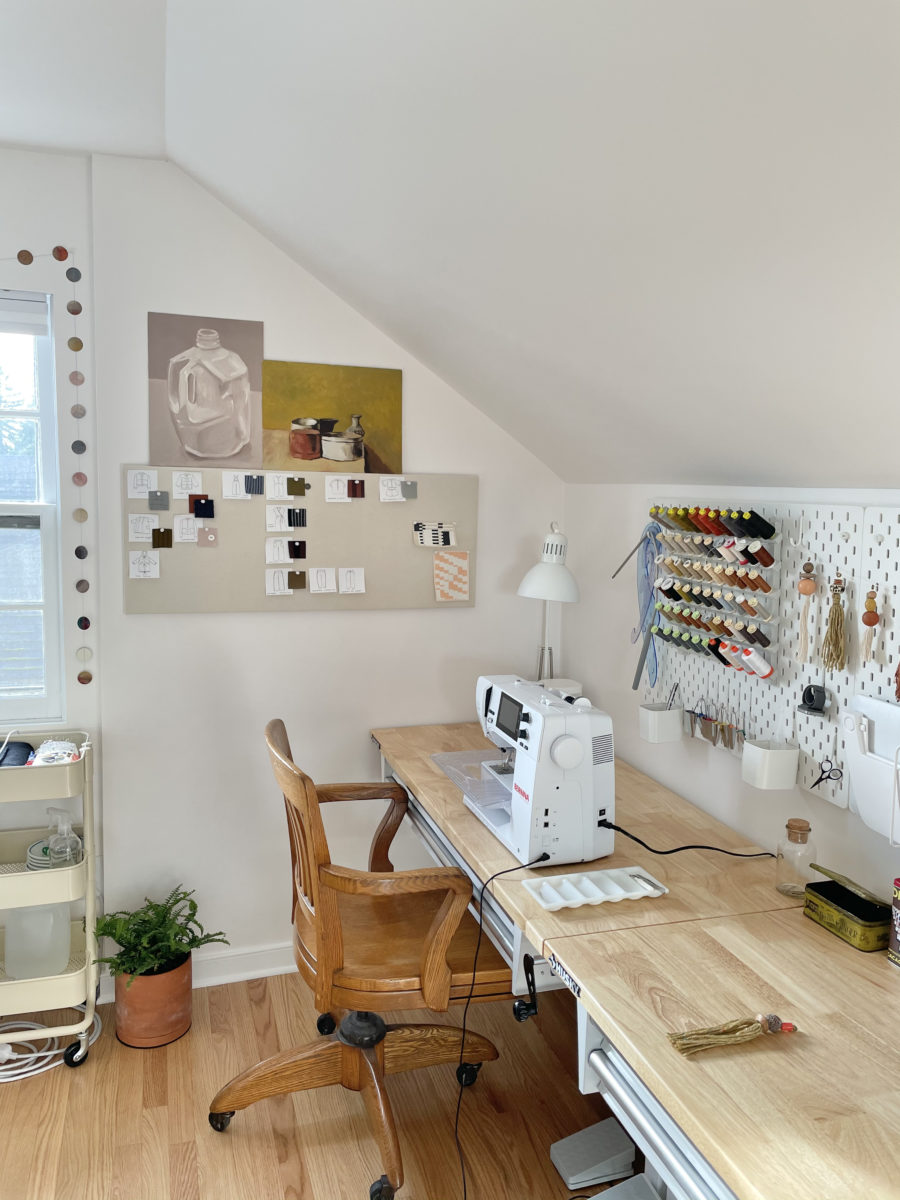
I love this old banker’s chair. I thrifted it for a cool $15 in Tulsa, OK and it’s the best for rolling back and forth between my sewing machine and serger. The machine pictured here is a Bernina 475 and it’s from work. My personal sewing machine is a Bernina 770 QE (hasn’t arrived yet, upgrading from a B 530) and my serger is a Bernina L 460 (currently getting serviced), which is why they aren’t pictured.
Oil paintings are from my graduate program. I’m hoping if they’re in my face, I’ll pick painting back up.
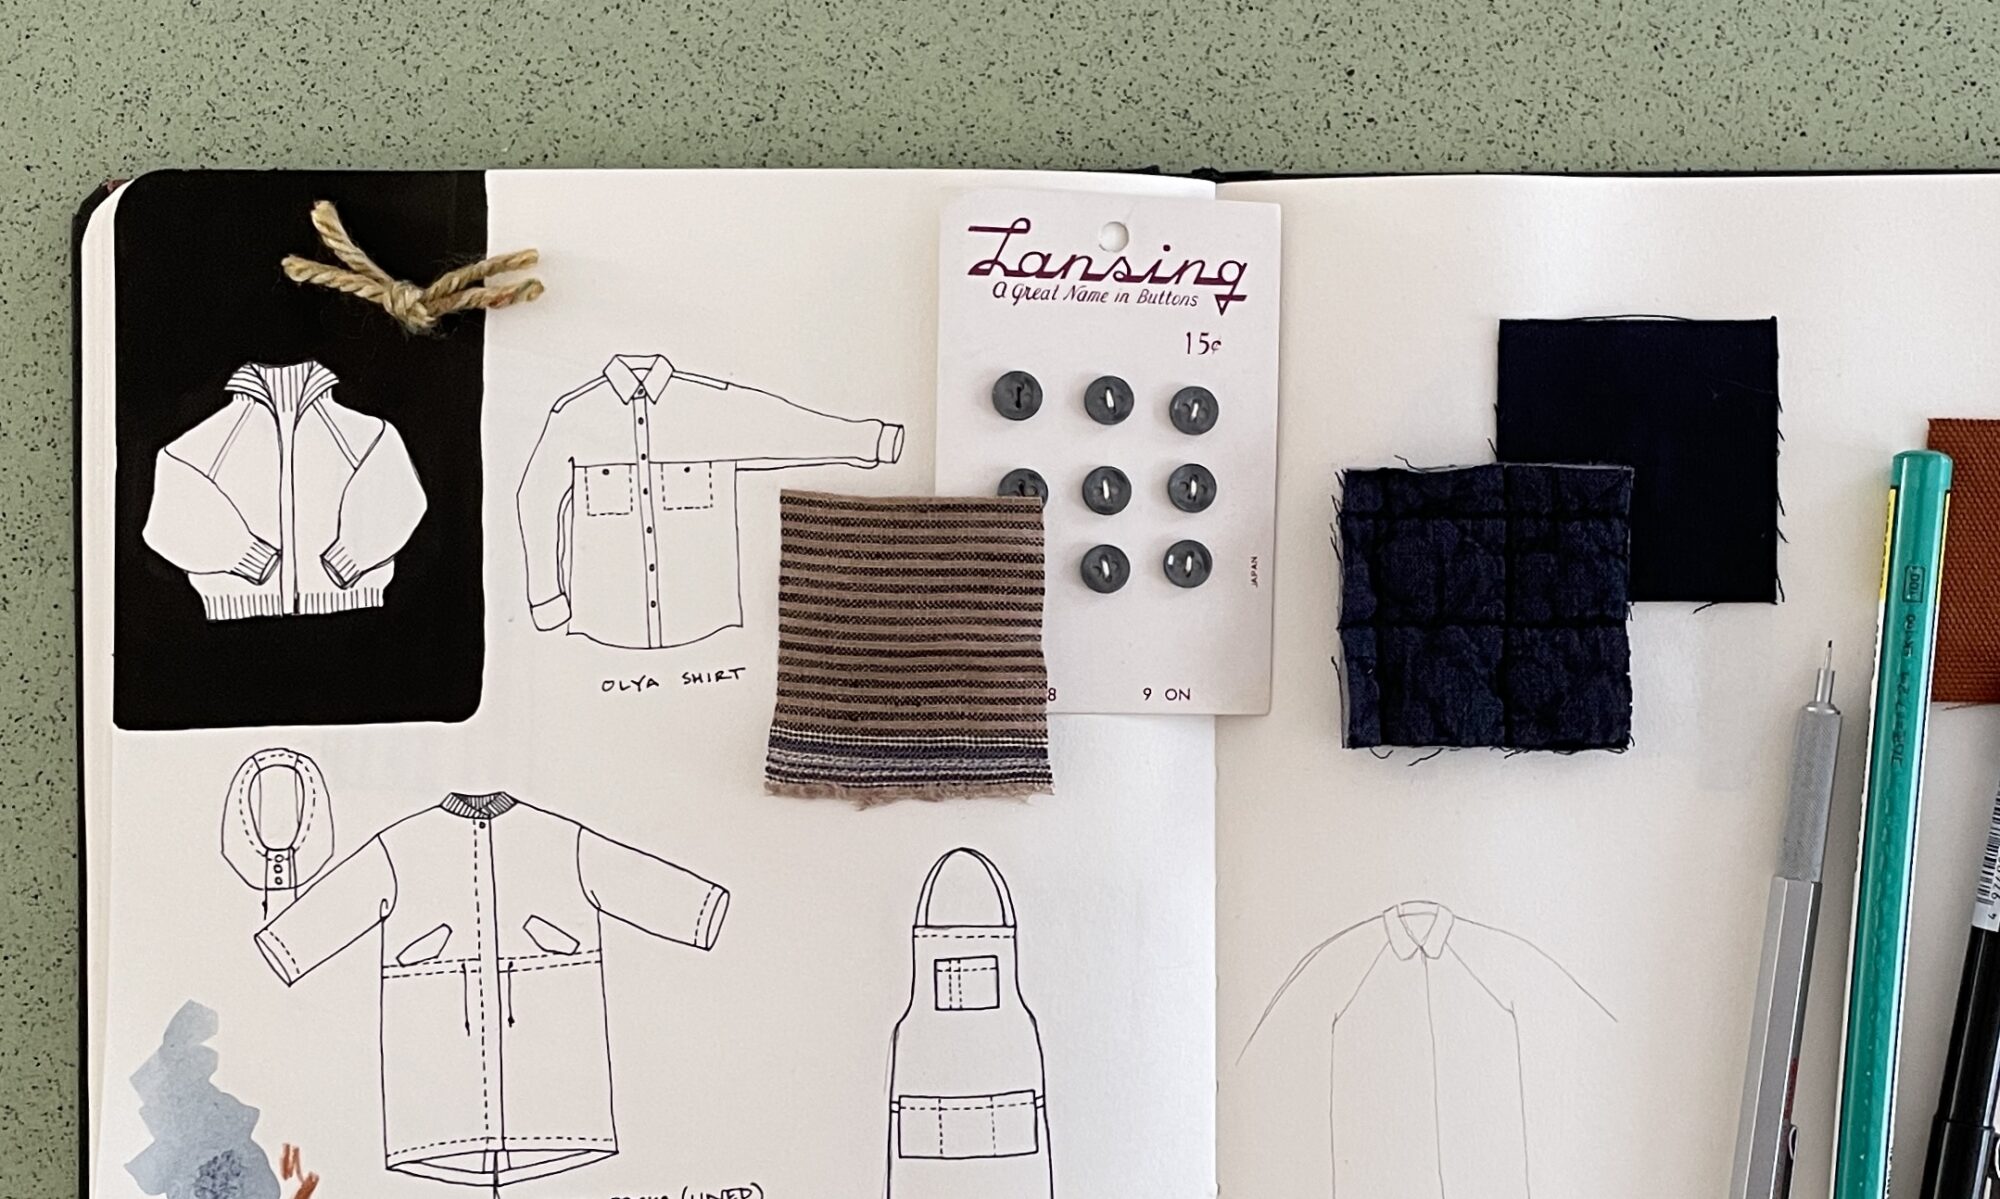
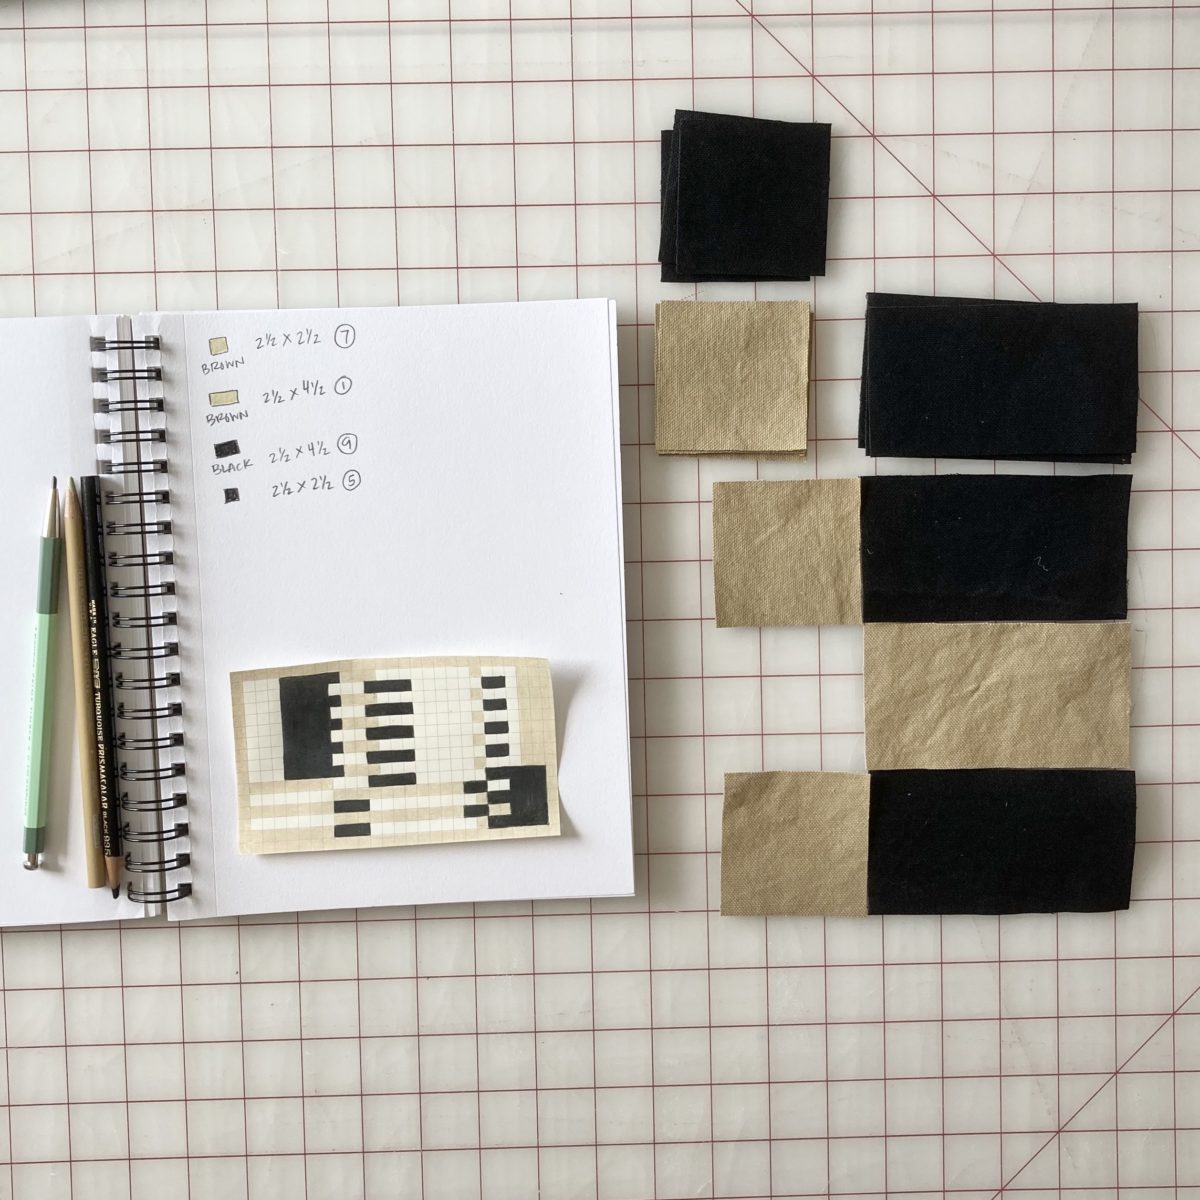
This board is the second homasote and canvas board and I’m using it to plan projects. Once a project is finished, I’ve been trying to add both the drawing and swatch to a notebook with a few notes about it. More plans can be found here.
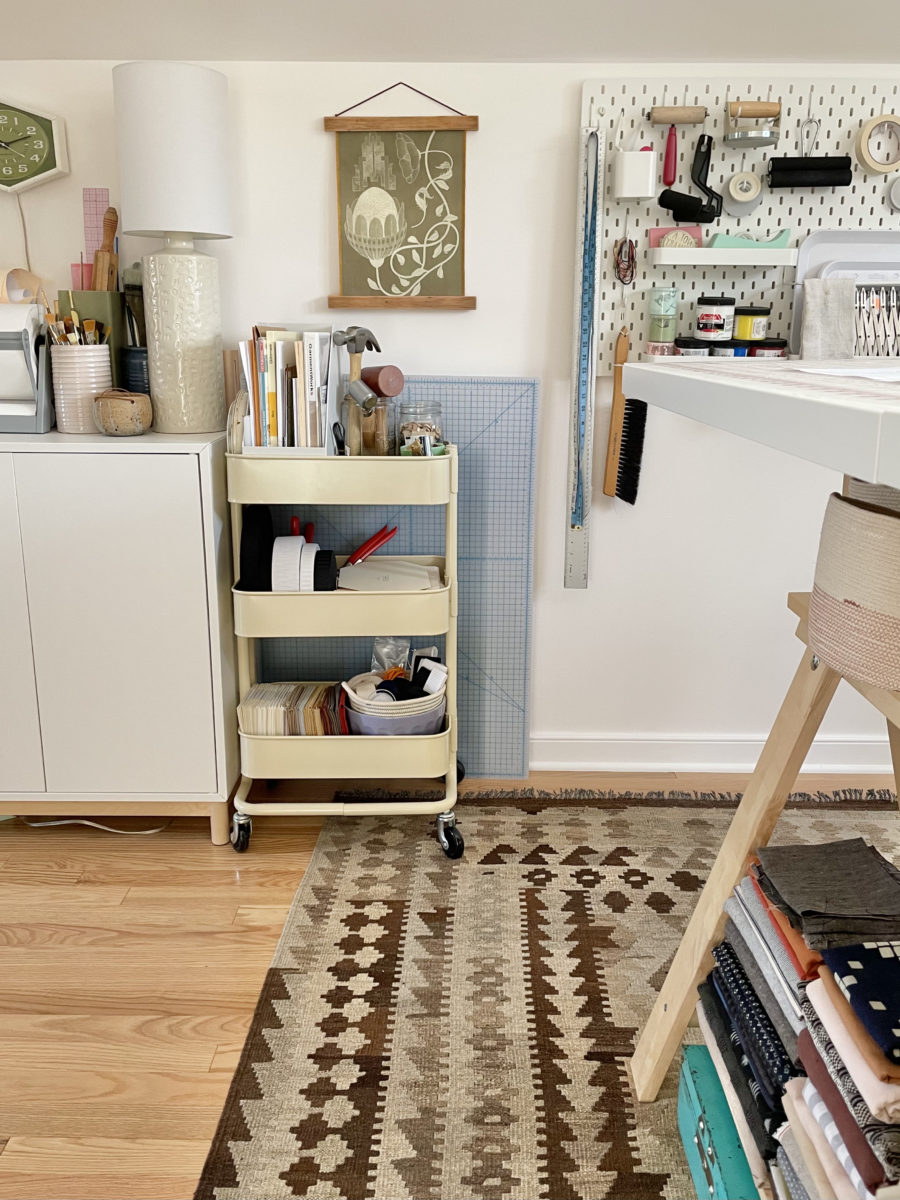
The IKEA cart holds distilled water for my iron, spray bottle, lint rollers, a handful of Pyrex saucers I sometimes use as pattern weights, hand sewing supplies, and supplies for the quilted jacket project.
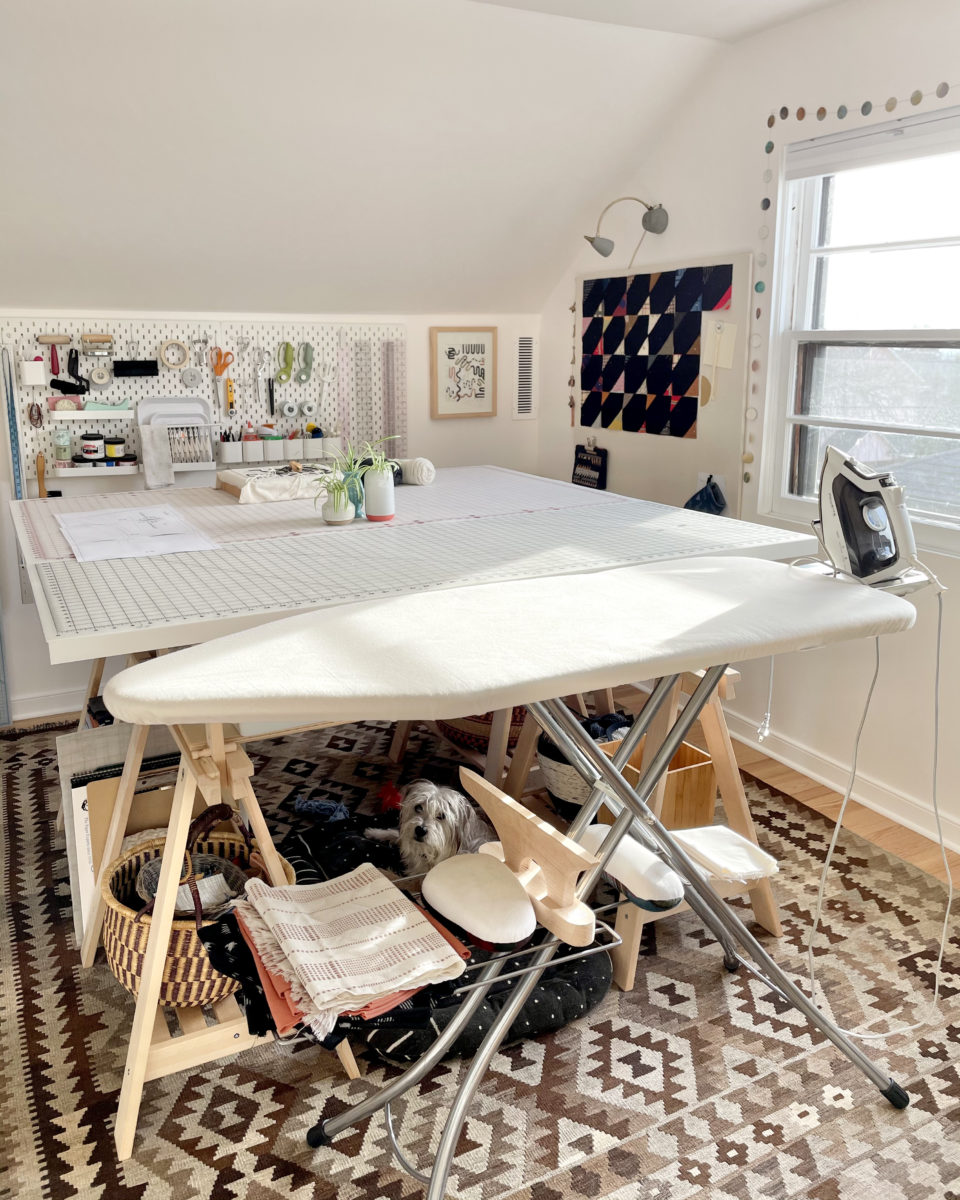
I recently bought this ironing board. I had to upgrade because the one I bought from Target 12 years ago was completely rusted and started staining anything I pressed. Really happy with this upgrade! It’s wider, has a special place for my iron, and a handy shelf, which I’m using to hold WIPs and pressing tools. Can you spot Otis?
Here’s a closer look at the big board. The little light and Herman Miller chair used to be my grandfather’s. The block printed bag holds scraps that are too tiny to be turned into anything and are destined for the trash.
This IKEA cart holds a bunch of stuff. Top shelf has tools, a Gutermann thread chart (highly recommend getting a thread chart during quarantine), an RK Kona cotton swatch book, my classwork from GarmentWorks, and my button stash. Middle shelf has rolls of elastic, muslin scraps, and mask making supplies. Bottom shelf has fat quarters for that previously mentioned curtain project, more elastic, and a bowl of Petoskey stones! This section of pegboard is home to my block printing supplies. The closed cabinets hide a mess of random stuff and more filming equipment.
Artwork by my mom!
This is another quilt project and it lives in this IKEA drawer thing. Whenever I cut out a woven garment project, I also cut out as many 2 x 2 inch squares as I can to reduce waste. Here’s an idea of what it’ll look like once it’s assembled.
Thrifted artwork.
I love this space and I’m super grateful to have it. Anything else you want to see? Have any questions? Let me know in the comments!
Elizabeth Suzann was my introduction to ethical fashion. On the ES blog Liz Pape, the owner, would talk openly about pricing and consumption, business practices, environmental impact, and many other important topics. In addition to its unique business practices, ES had so many beautiful and functional designs.
This incredibly sad announcement also came with the promise of eventually making the patterns available (and free) to the public. Bittersweet news for the sewing community.
Favorites like Clyde, Georgia, Harper, and Florence are available through this newsletter. The Dropbox link (the only thing you’ll be sent through the newsletter) will be updated with patterns until Liz Pape is able and ready to release them herself.
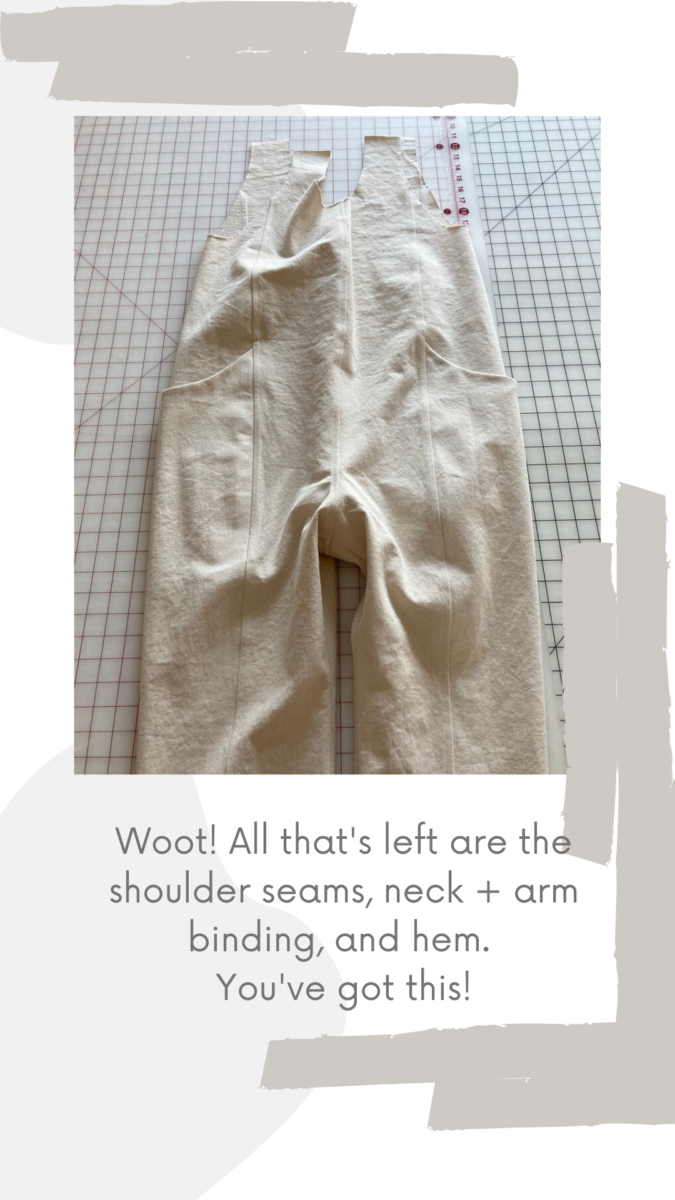
Currently, it’s just the patterns, no instructions, but many makers have already posted mini sewalongs on Instagram. Tutorials can be found via #ESMadeByMe. I’ve also shared how I constructed this in an IG highlight, but you can also view it at the end of this post.
Now for the most important part, donations. As these patterns are open source/free, we’ve been encouraged to donation to Black-led social justice organizations. Since I’ve downloaded the Clyde jumpsuit and work pants, as well as the Harper tunic, I’ve donated $15 to each of the organizations listed in the newsletter, and will continue to donate that amount per pattern download.
UPDATE: due to the overwhelming response to the newsletter, it has since been shut down. It became too large of a project for our community members to manage. Liz Pape will be making them available sometime in the future, so hang tight. I will not email out the patterns I’ve downloaded, so please don’t ask.
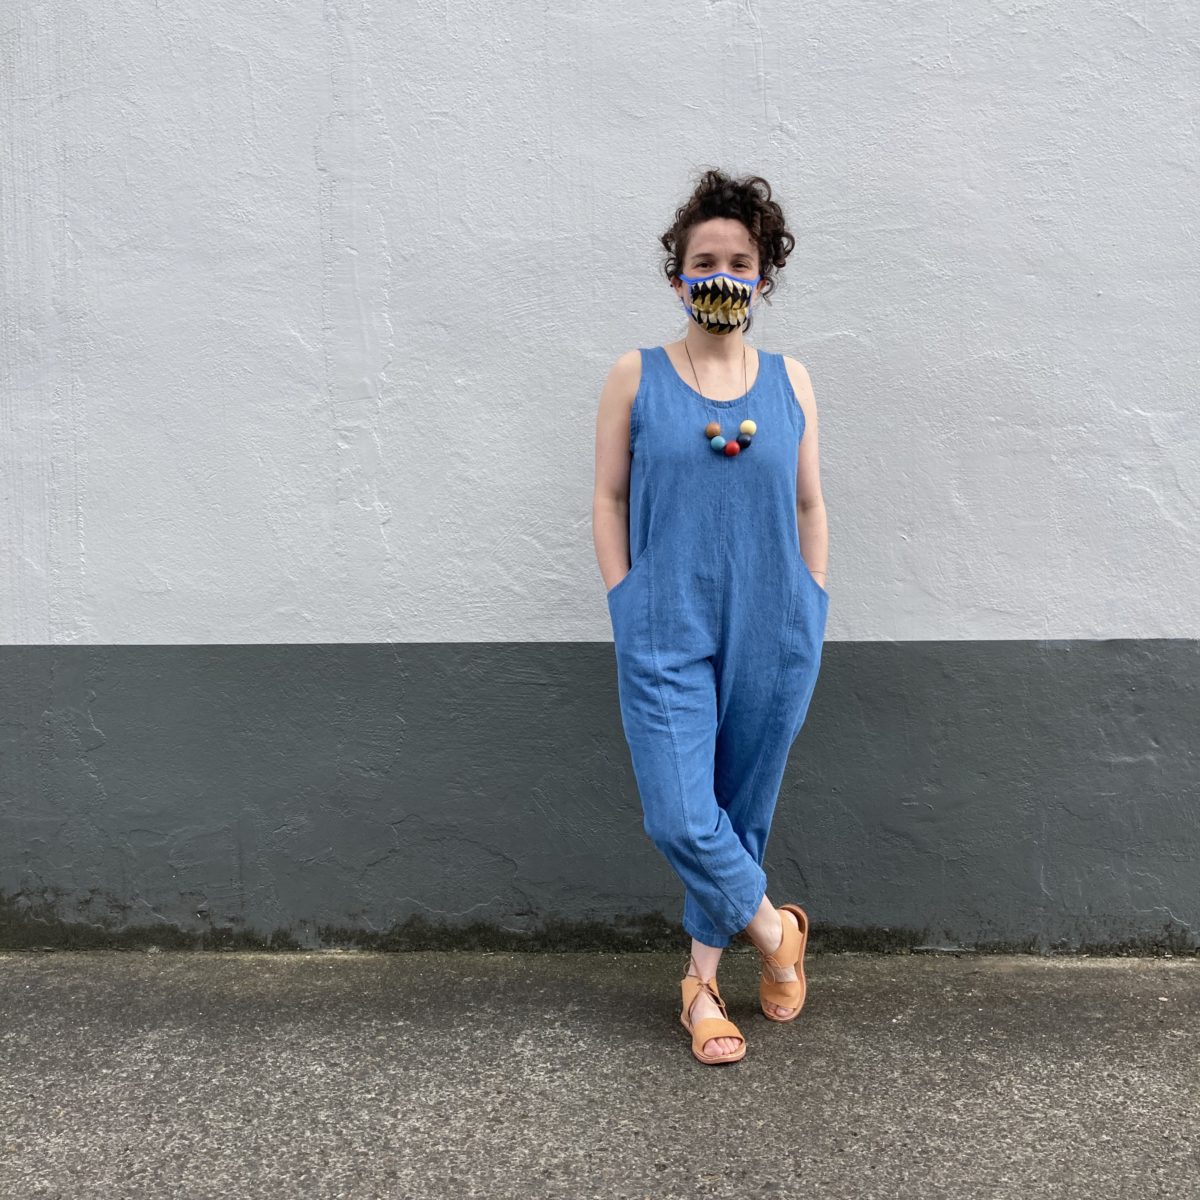
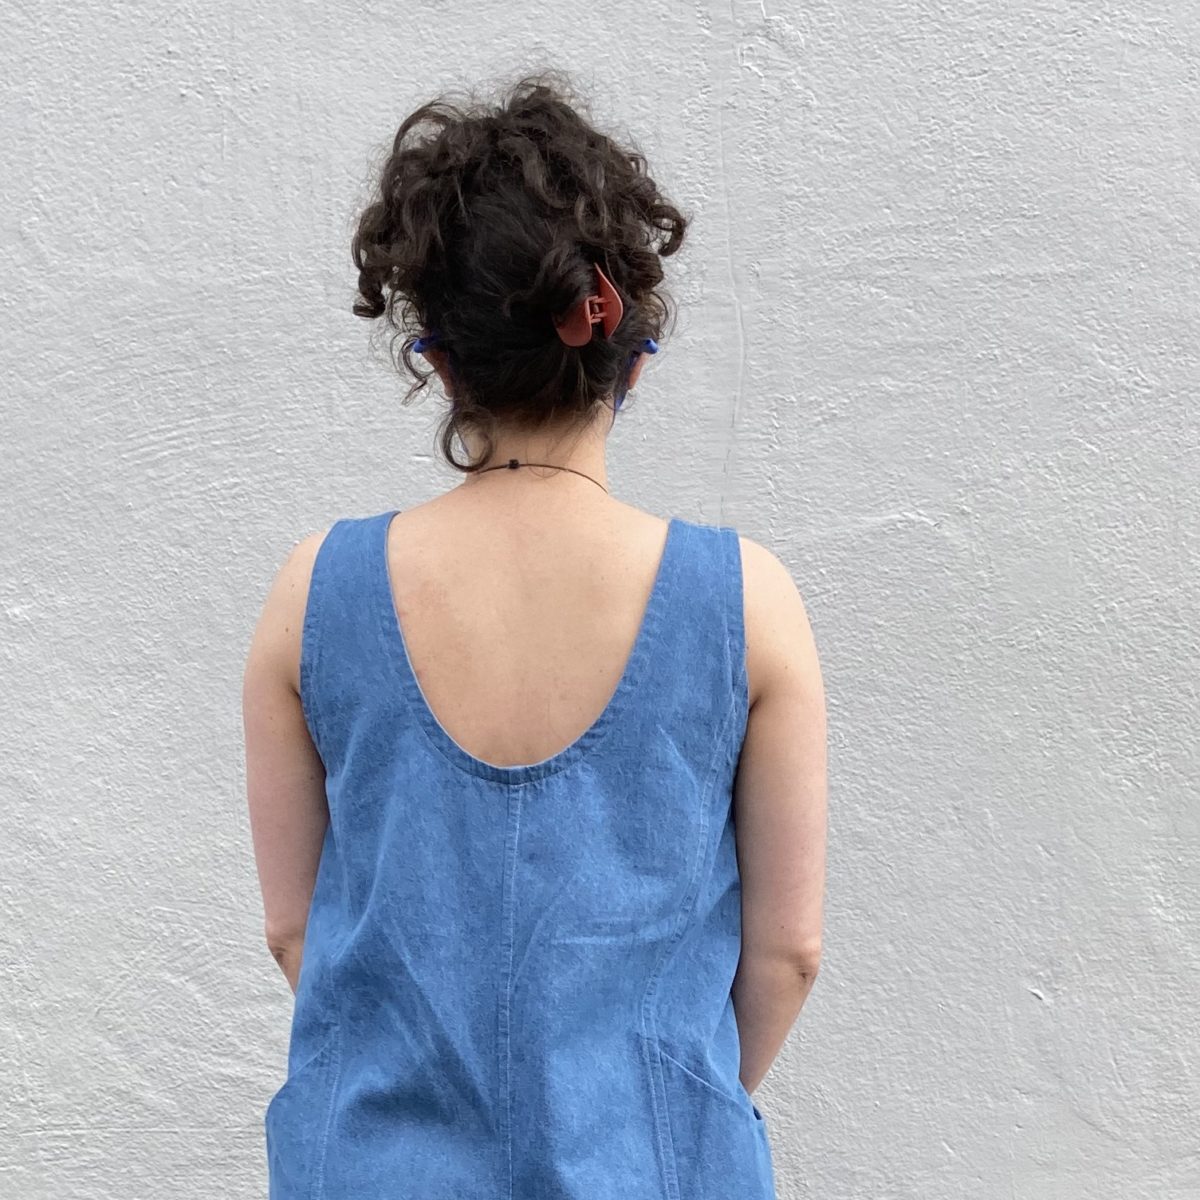
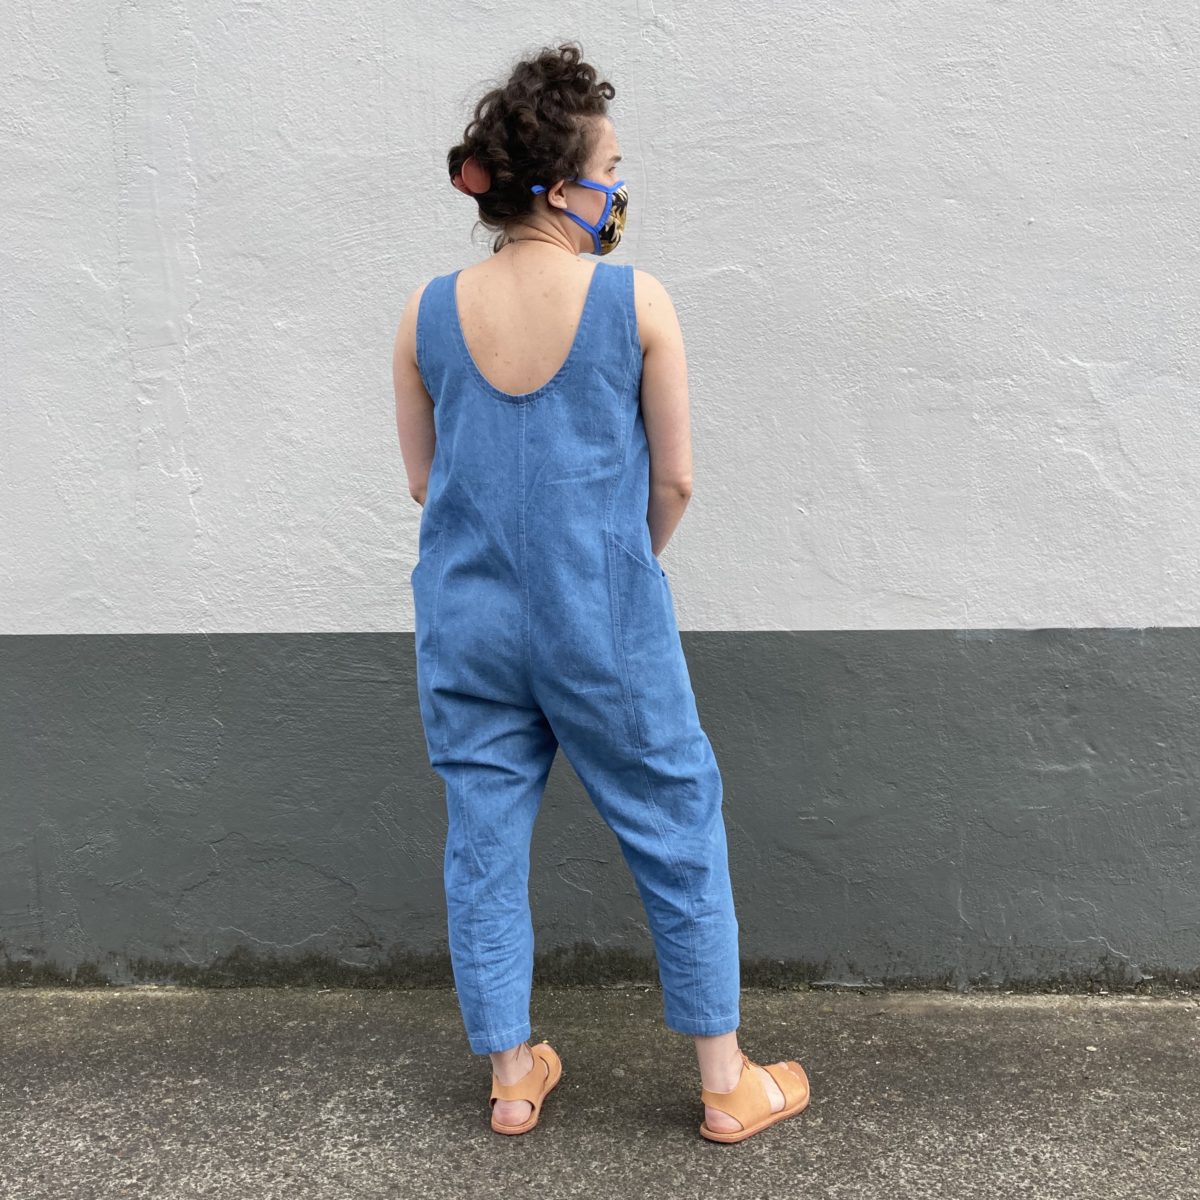
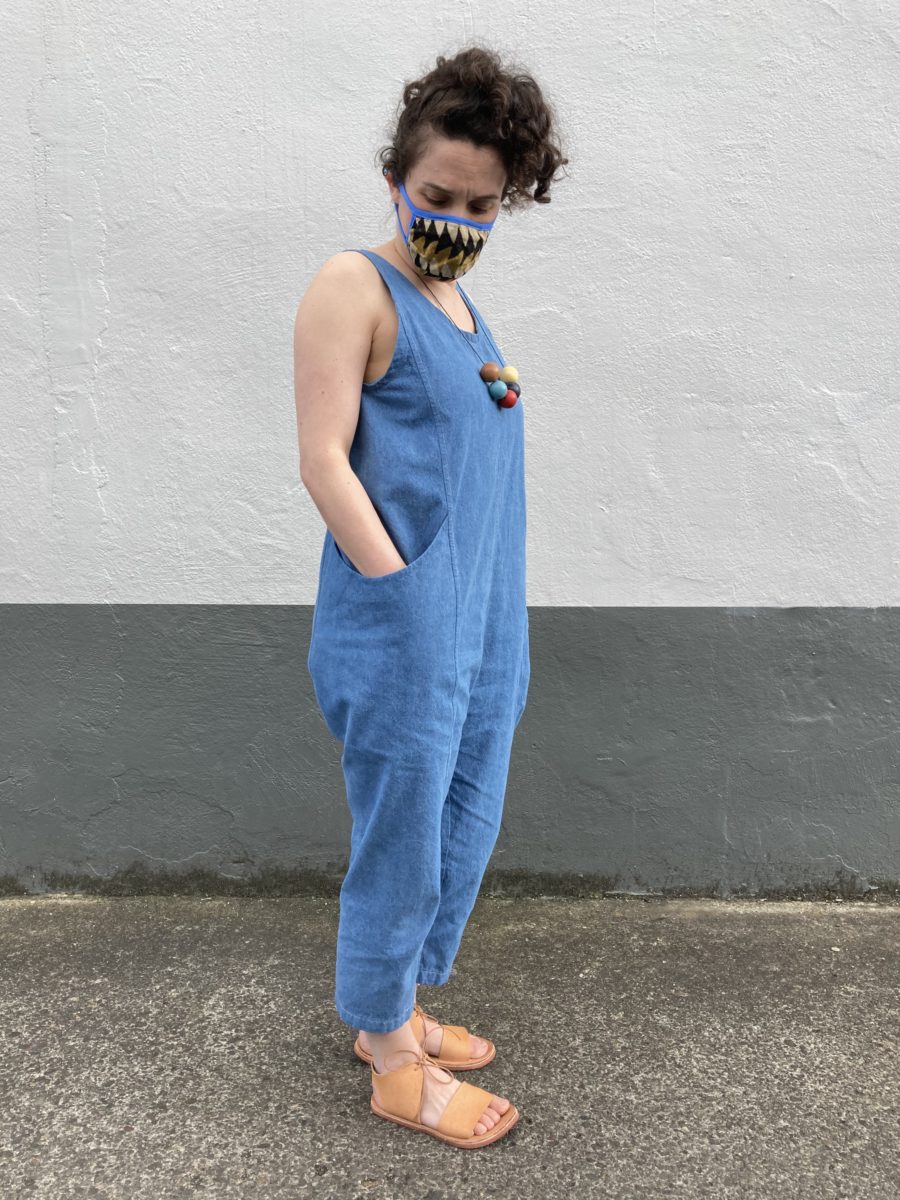
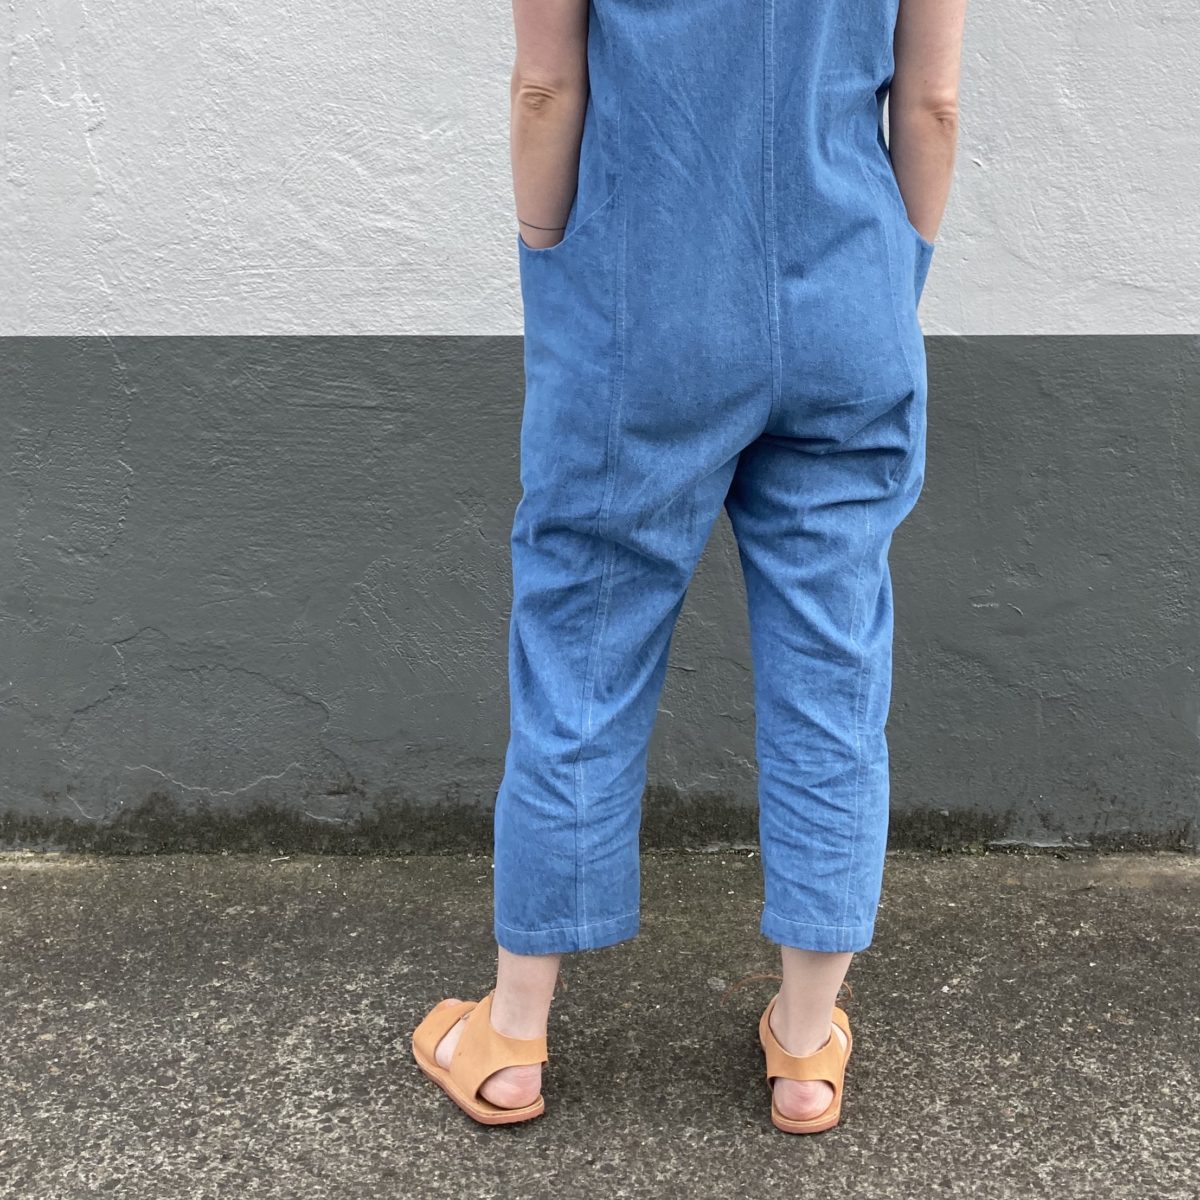
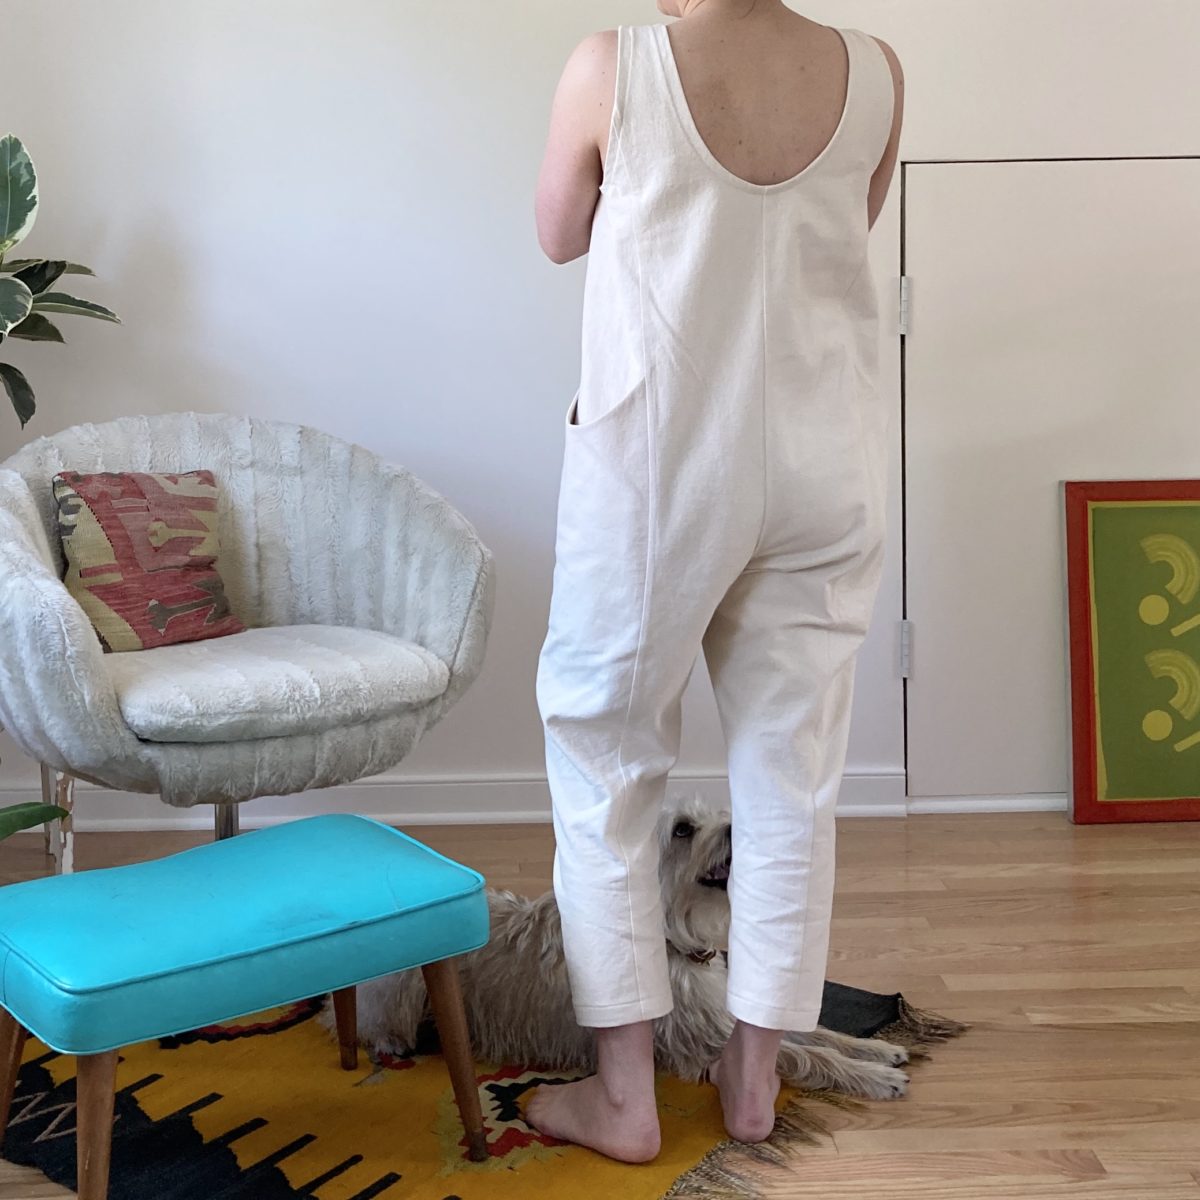
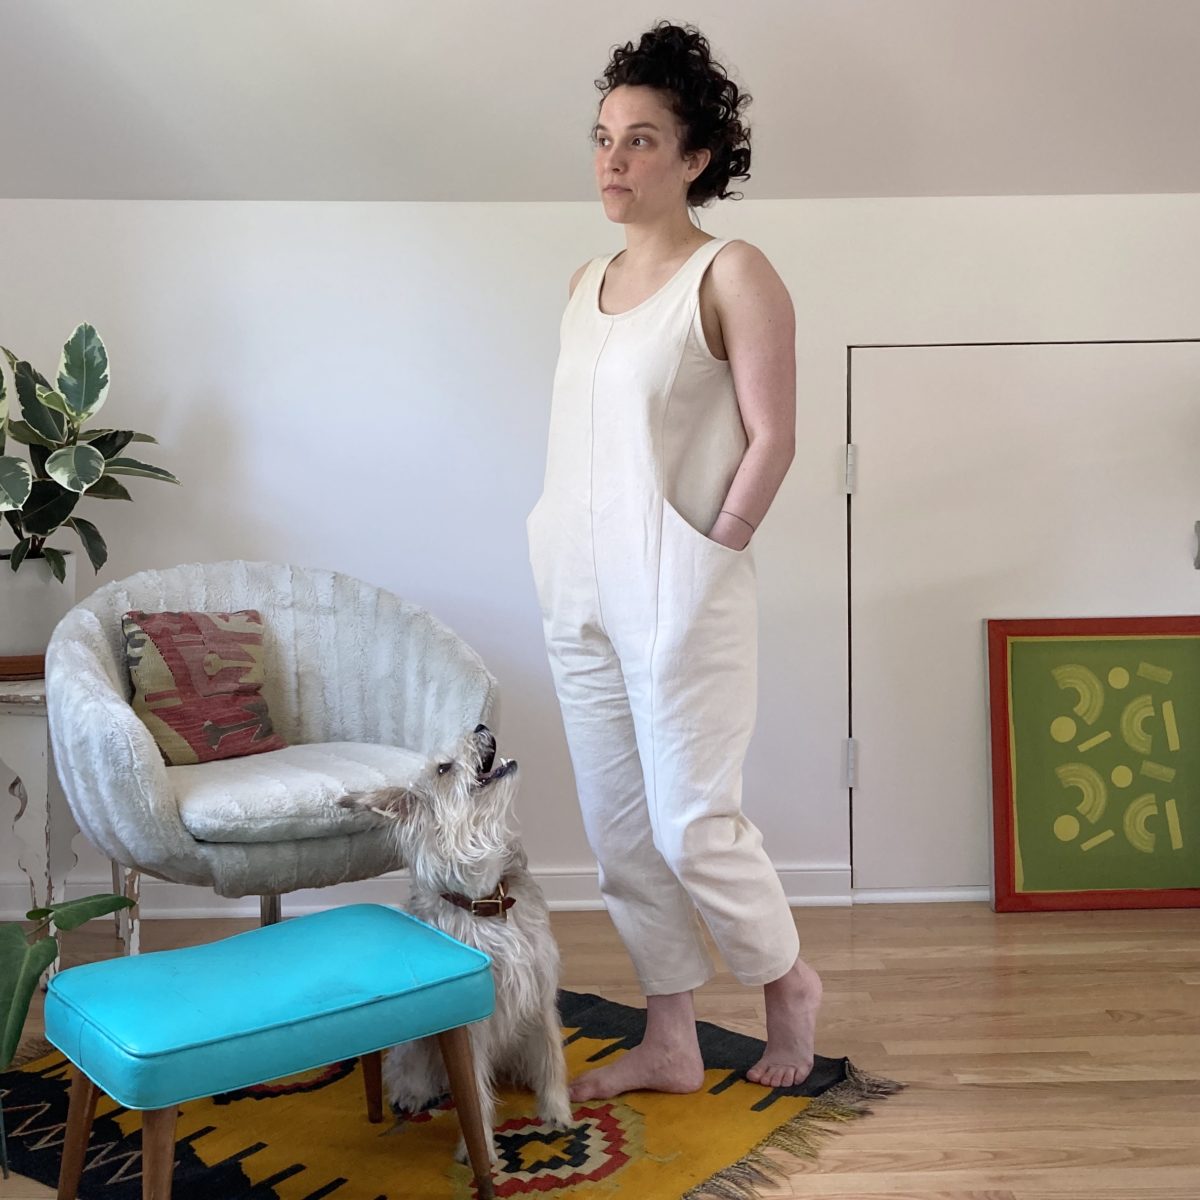
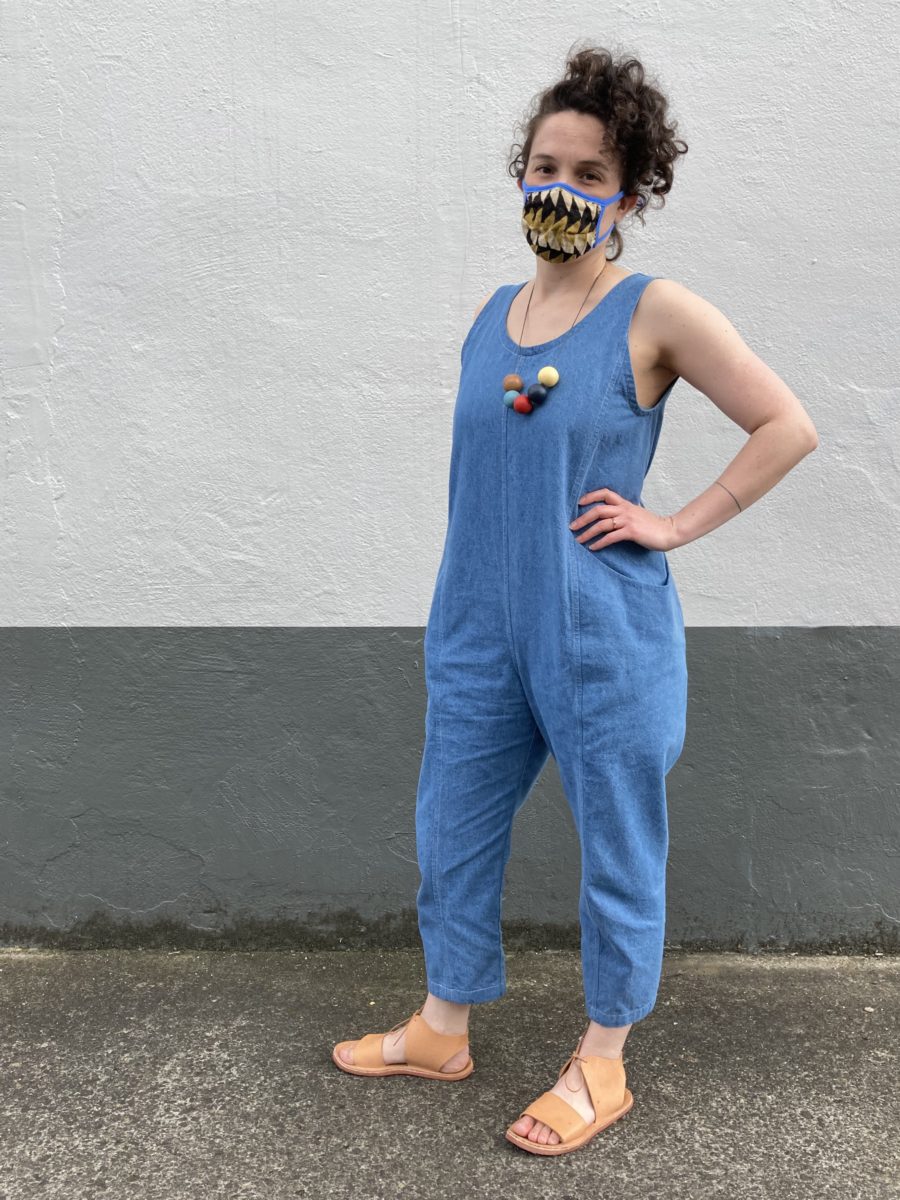
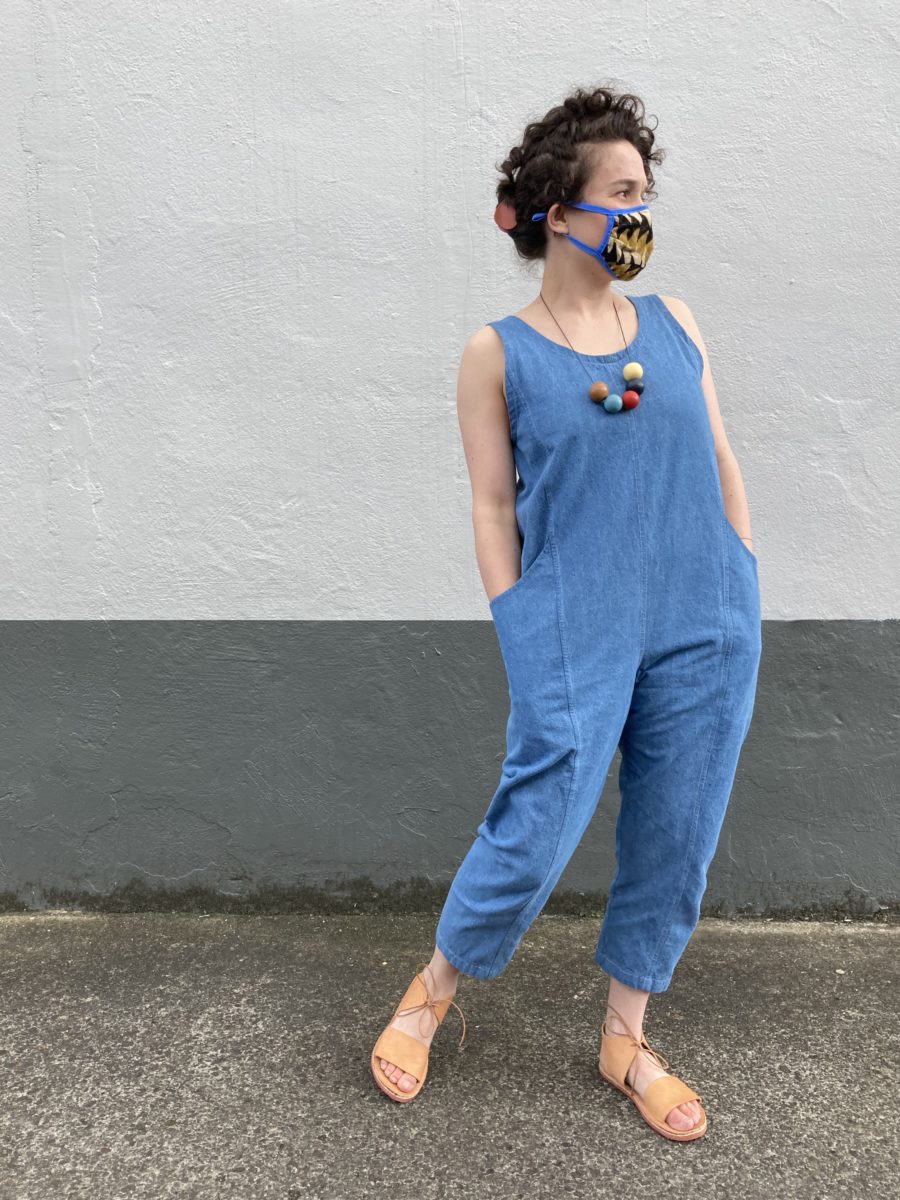
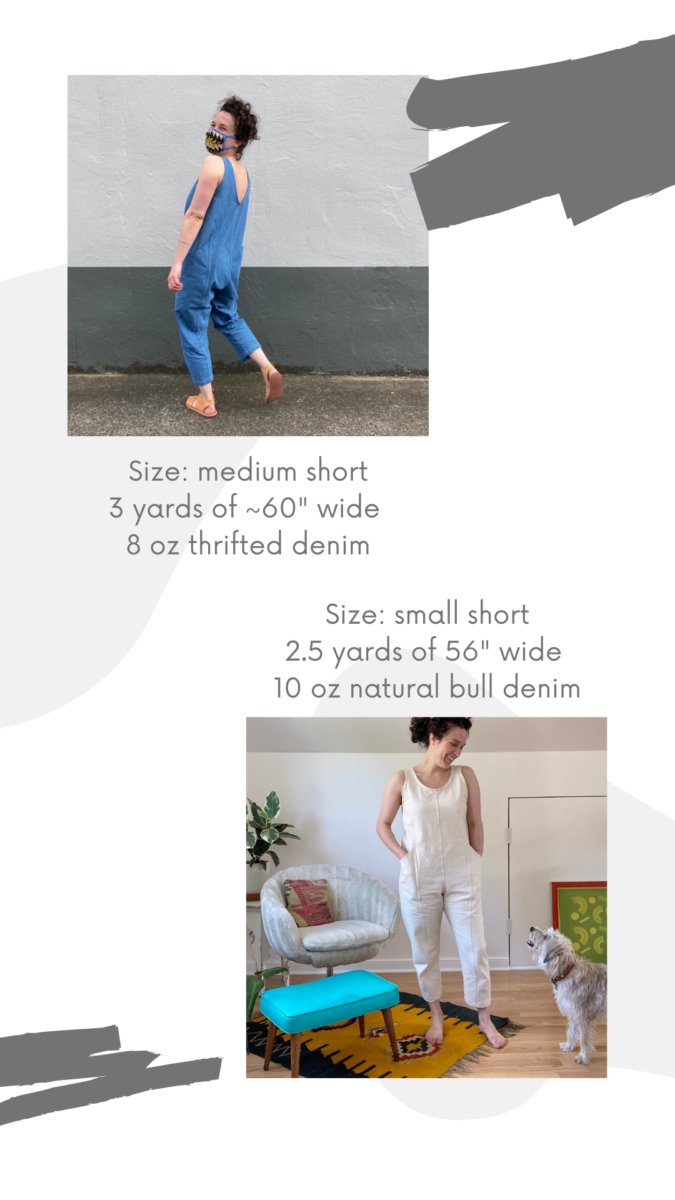
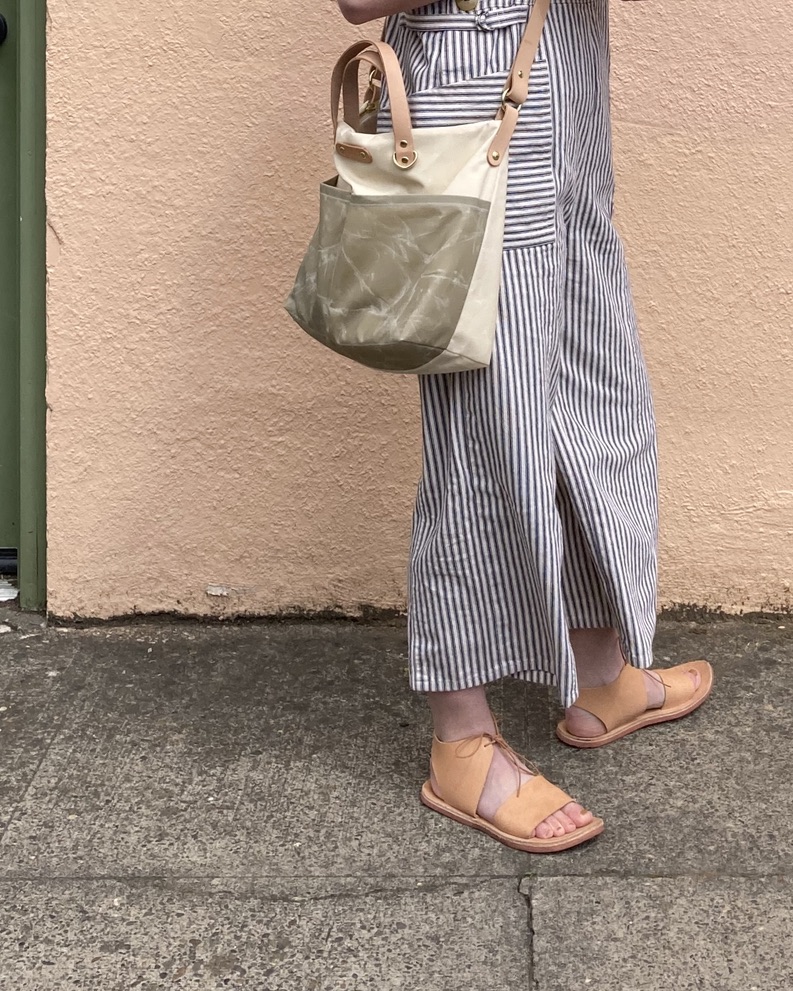
I really love these jumpsuits. There aren’t any closures; the neckline should be wide enough to fit over your hips. The design is part of the ES signature collection and can be worn any season. The armholes can accommodate a sweater in cooler weather, or a t-shirt / on its own in warmer weather.
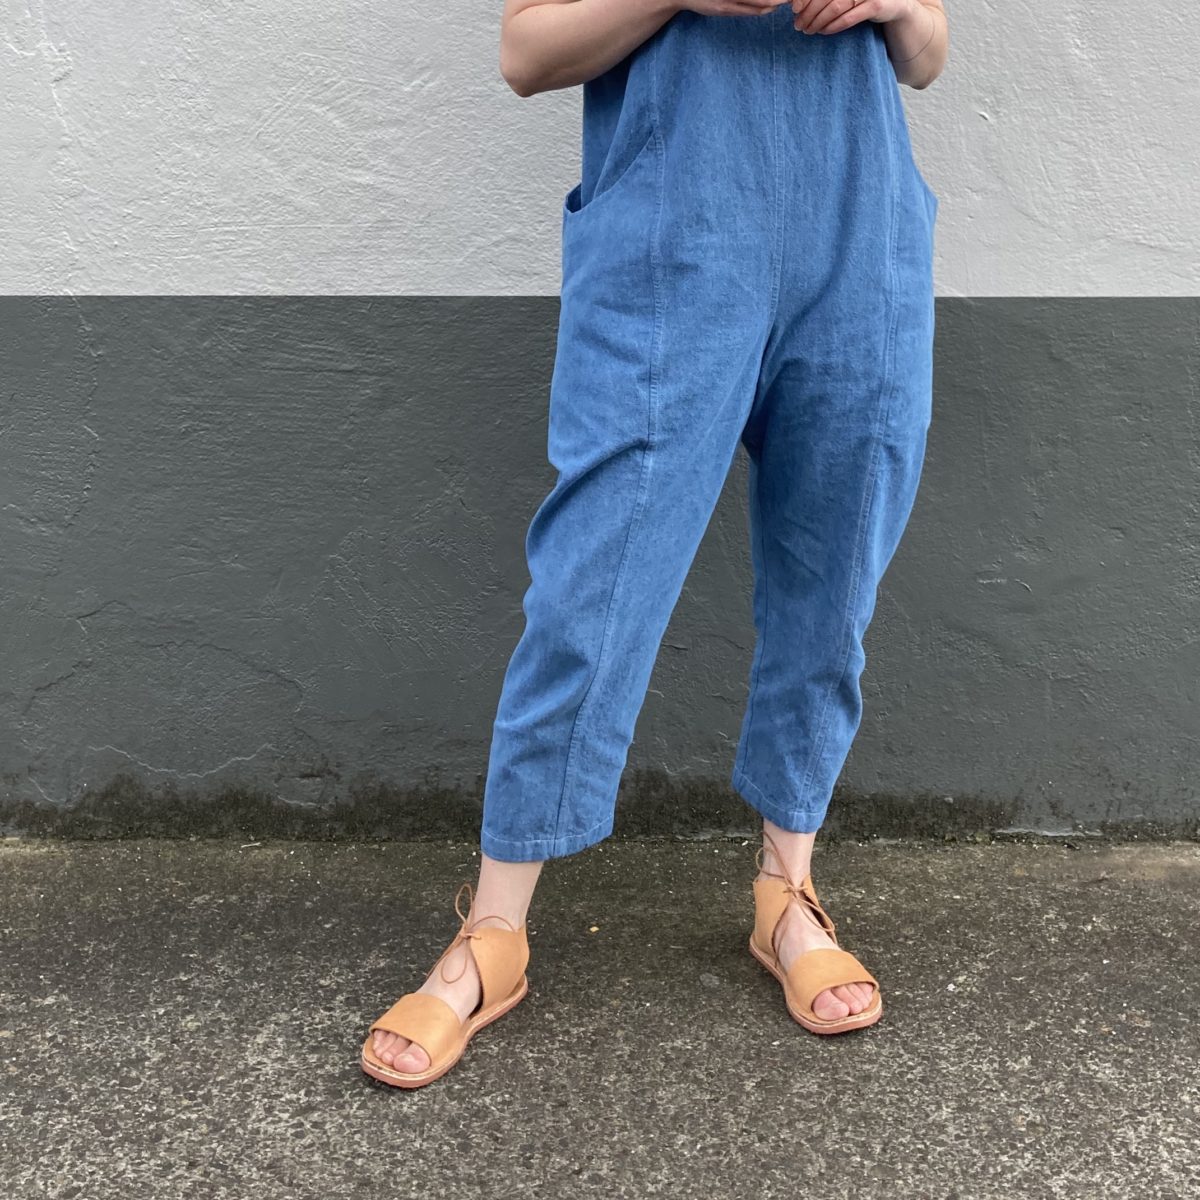
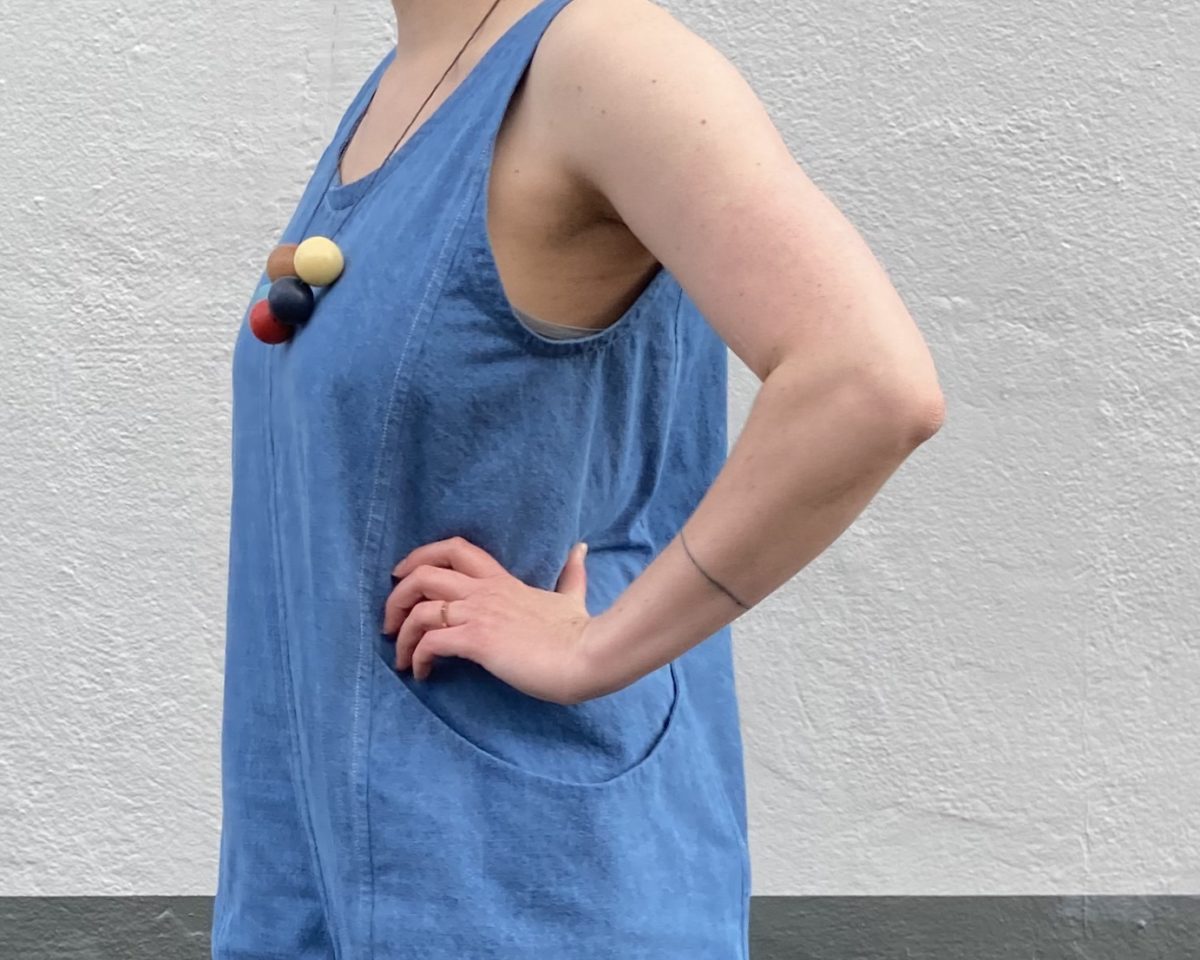
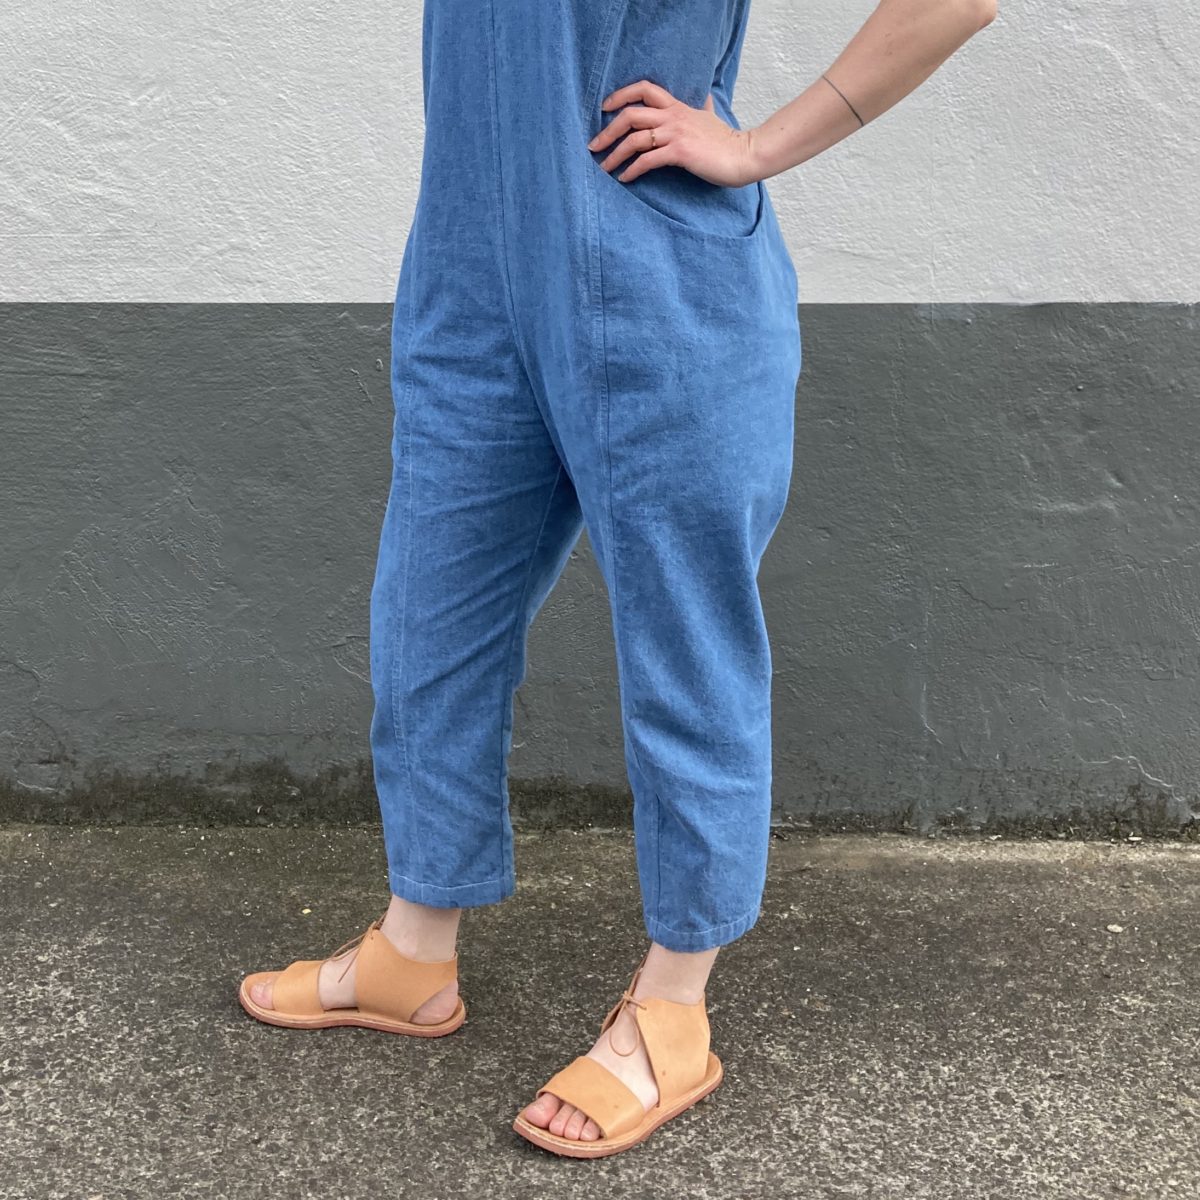
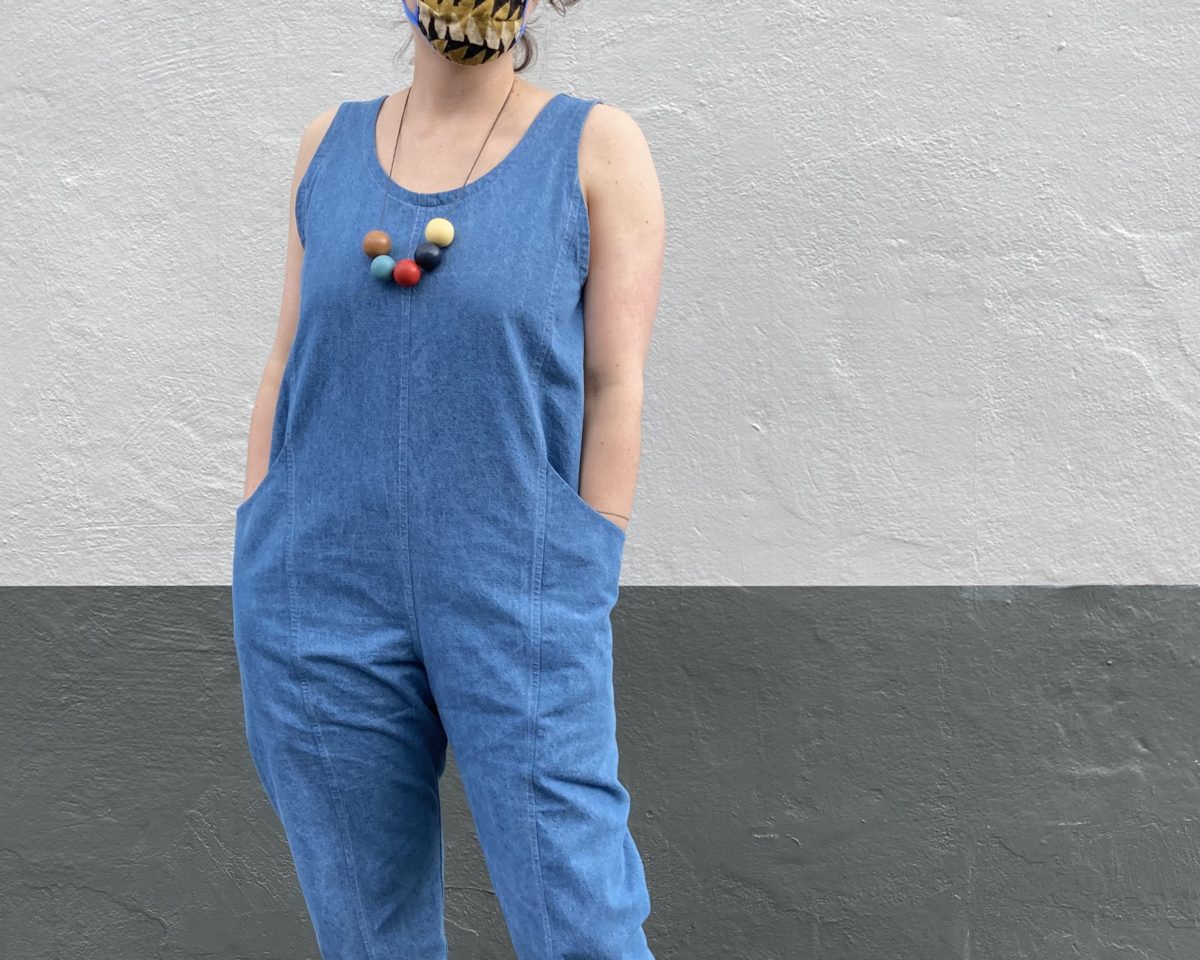
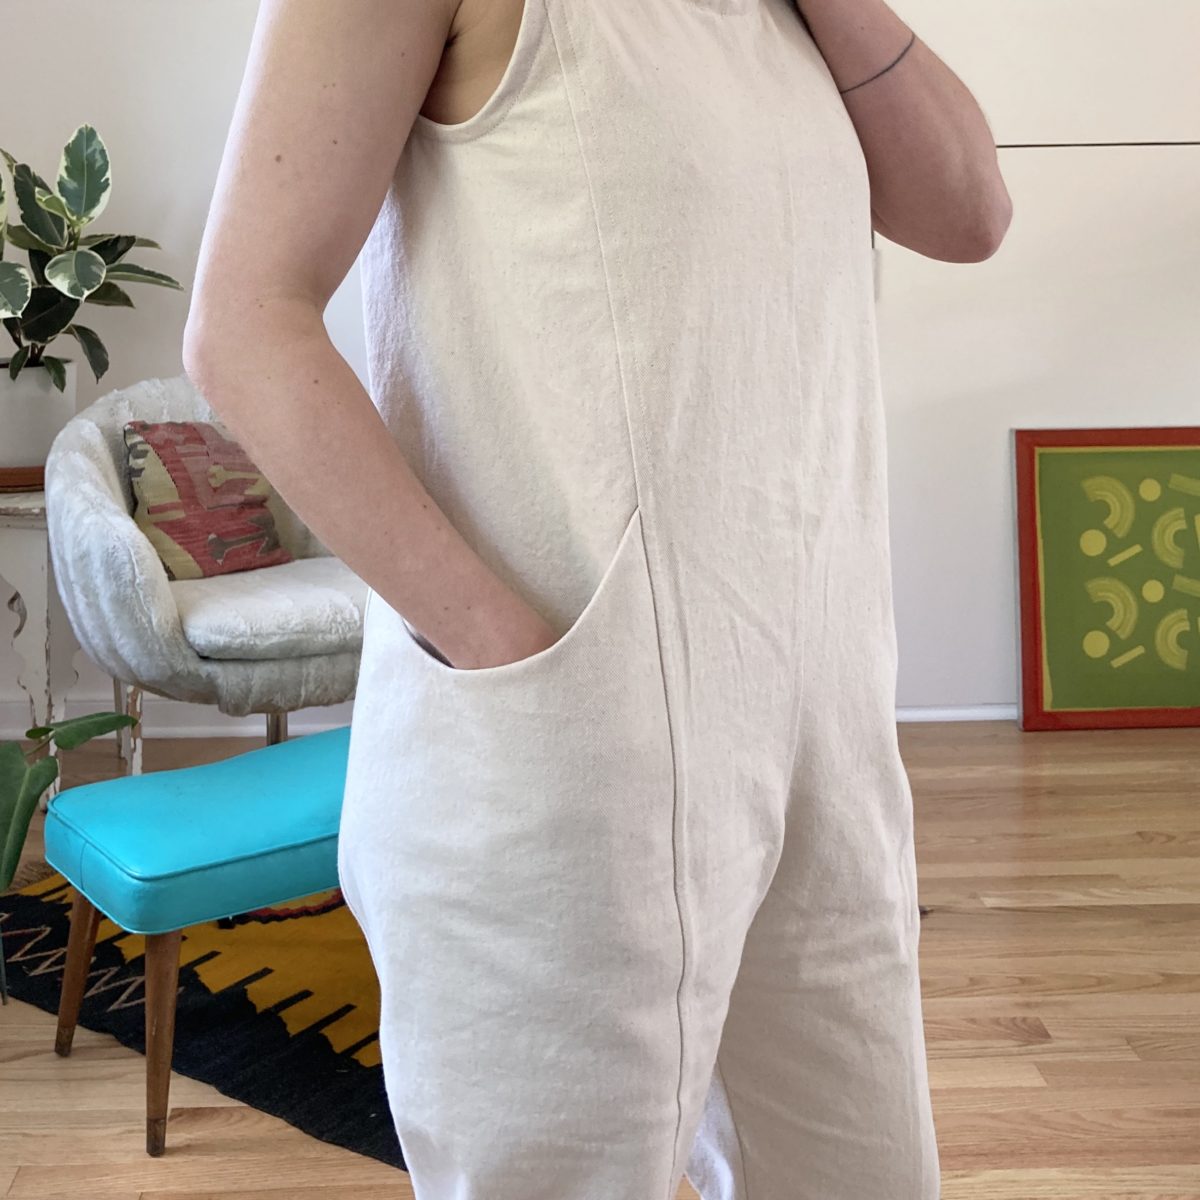
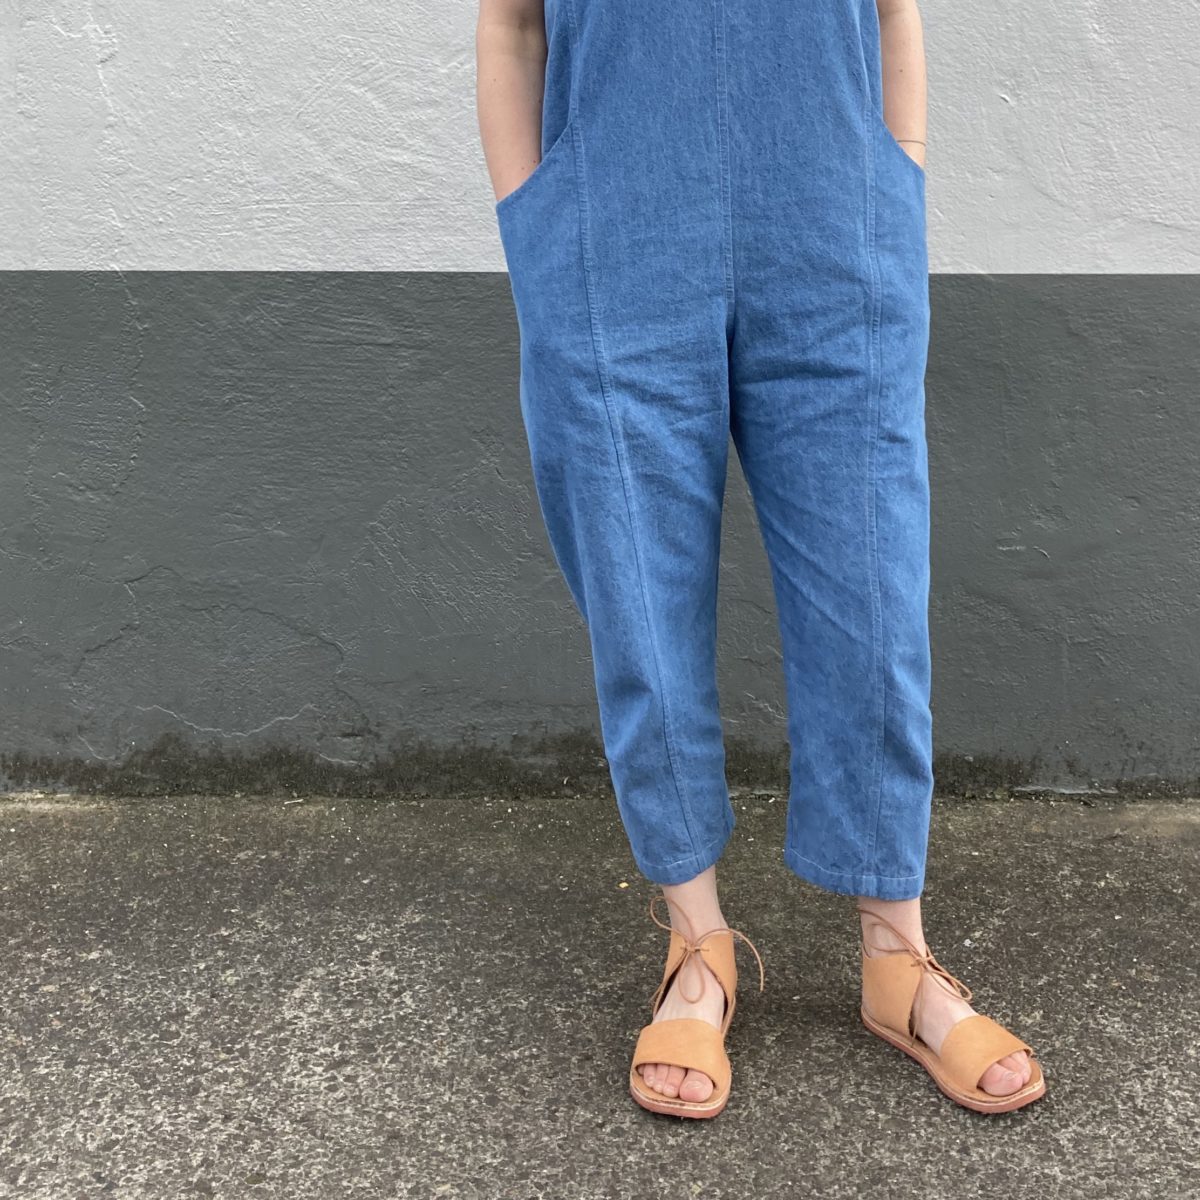
The iconic pockets are deep and sit slightly away from your body. They pretty much remove the need to carry a purse.
If you’re unsure about sizing, there are a lot of measurement available on the ES website. If after checking the size charts you’re still unsure, make a muslin.
UPDATE: recently learned all made-to-order ES products were washed after being sewn. The ES team did a lot of research into shrinkage rates for their fabrics, so I would not suggest you do the same. Prewash your fabric in the same way you will wash the finished garment, measure using the stitch lines on the pattern pieces to gauge if certain areas will fit you well, and make a muslin!
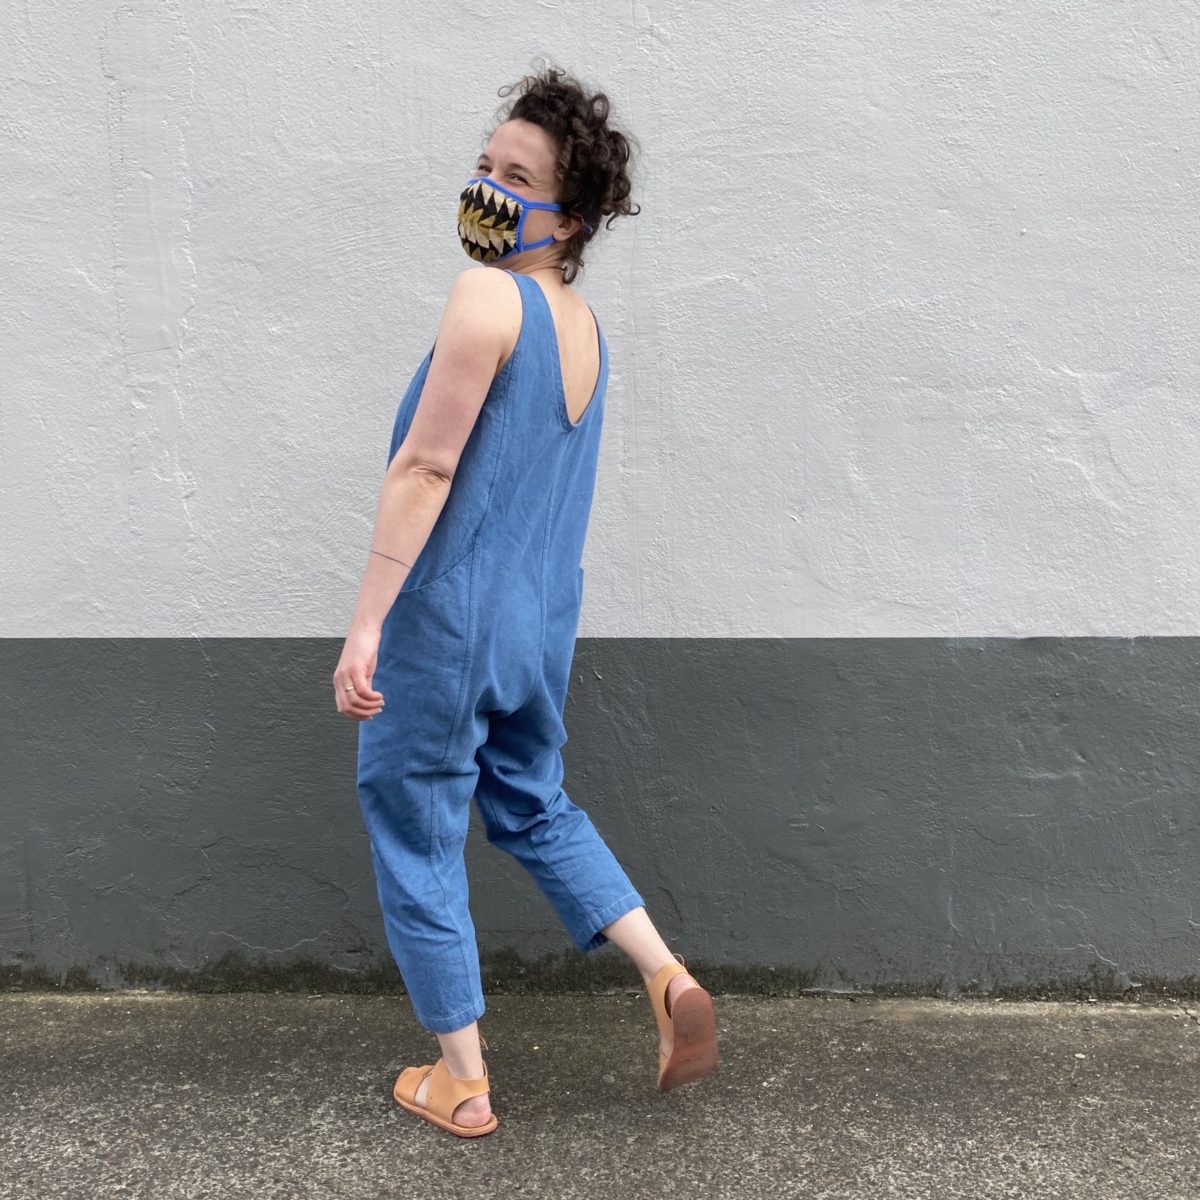
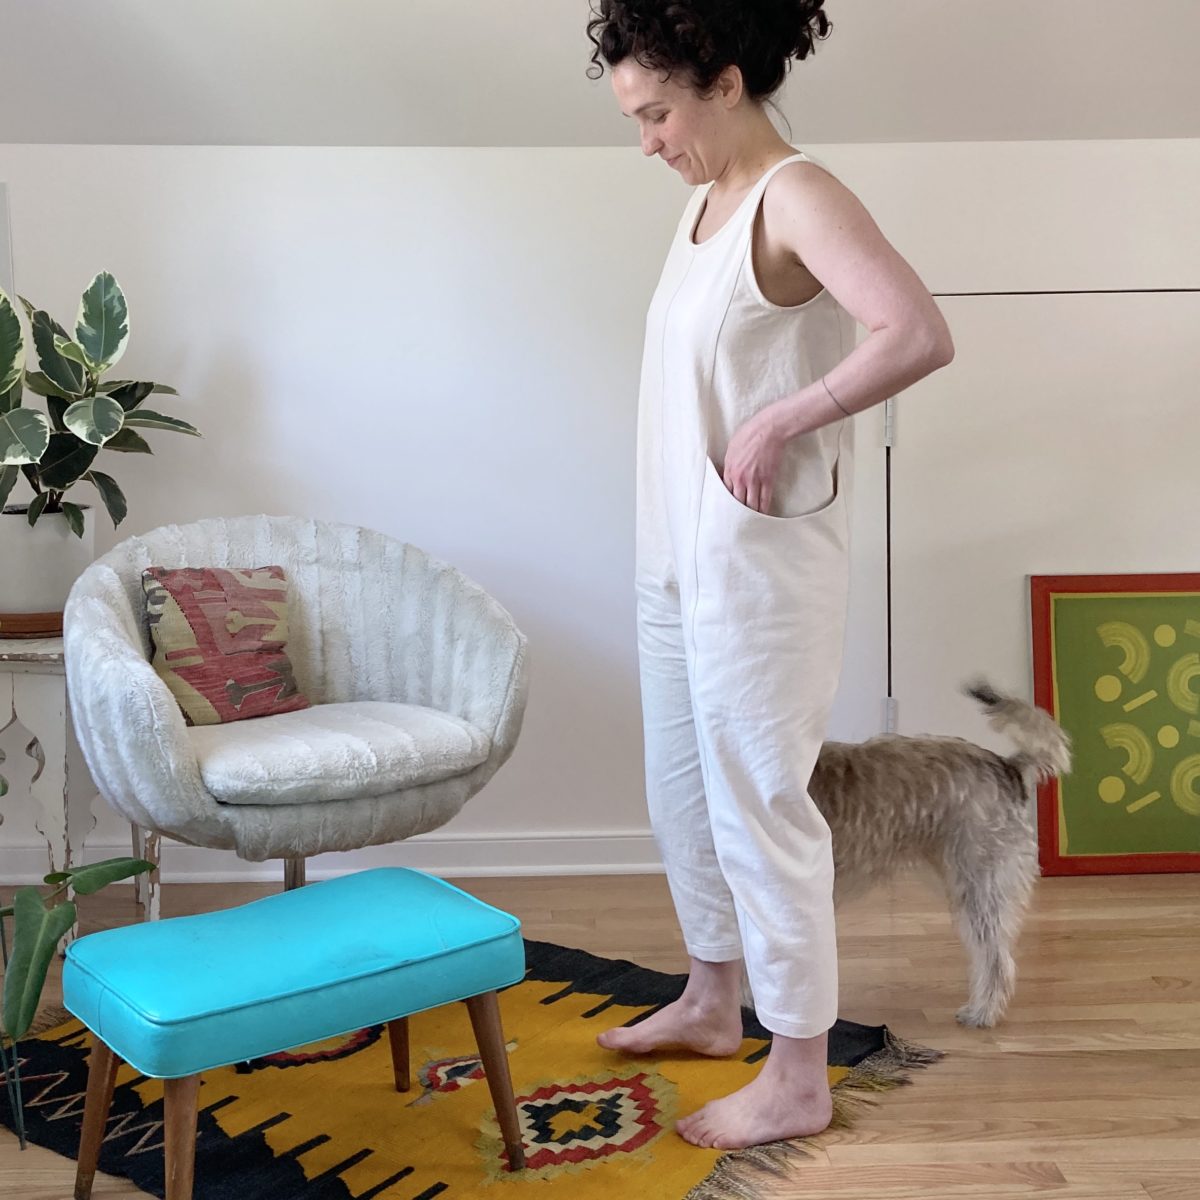
UPDATE: after wearing the small several days in a row, I think I will add 1/2″ – 1″ to the torso length. I still need to compare the finished “rise” on the medium to determine what additional length is needed to be able to bend comfortably in the small.
I will probably make two more jumpsuits. I’m imaging one in black linen and another in a brown linen. But before I make those, I’m off to make a Harper tunic.
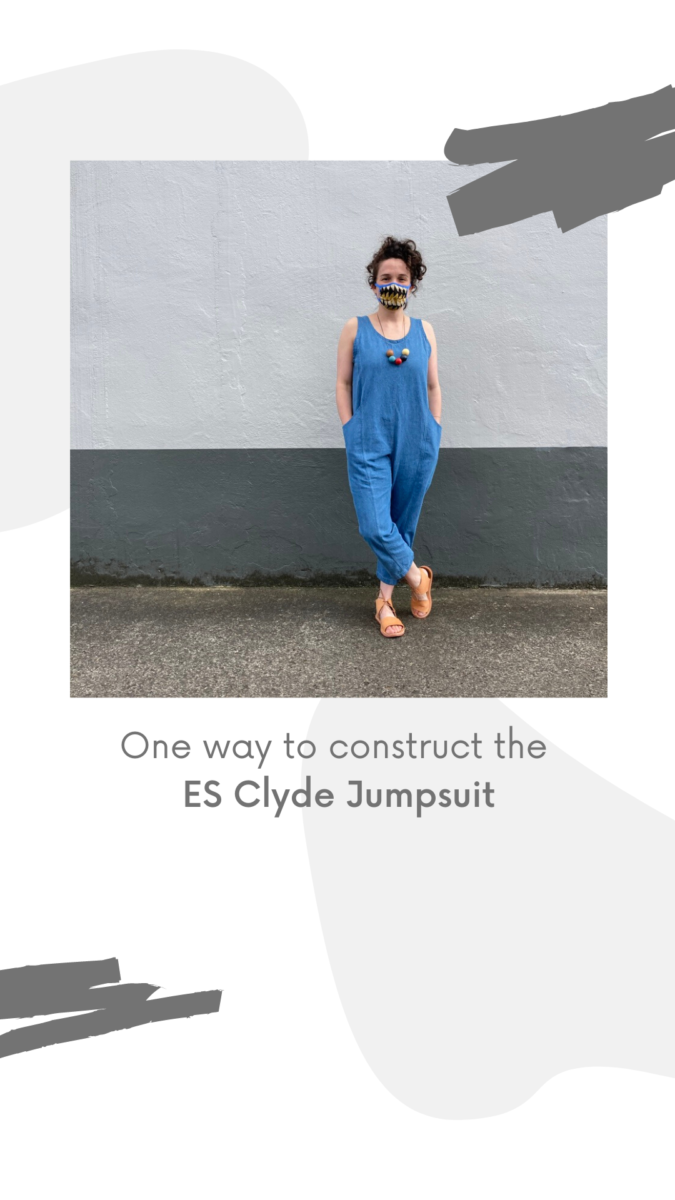
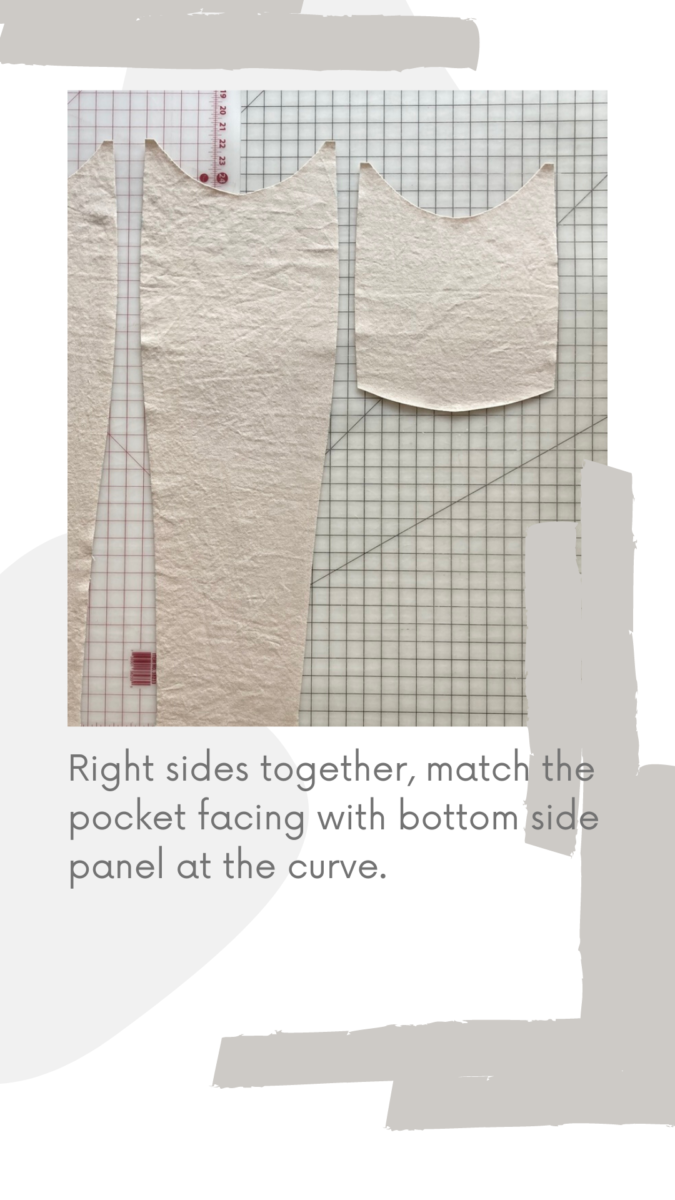
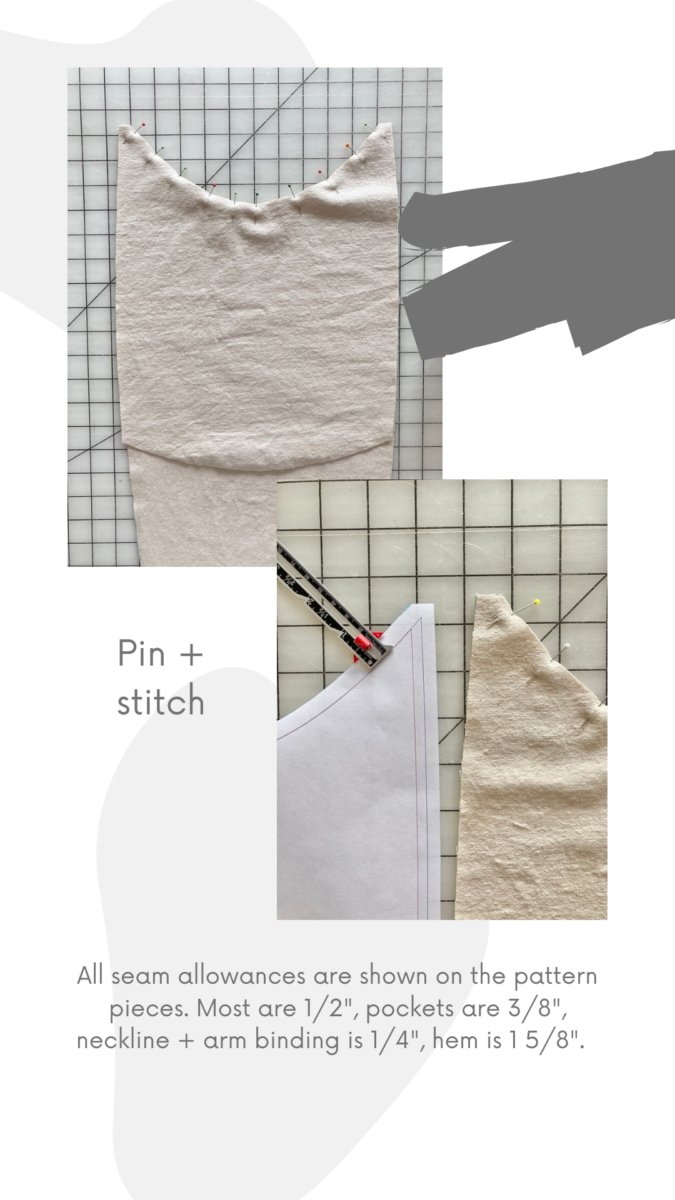
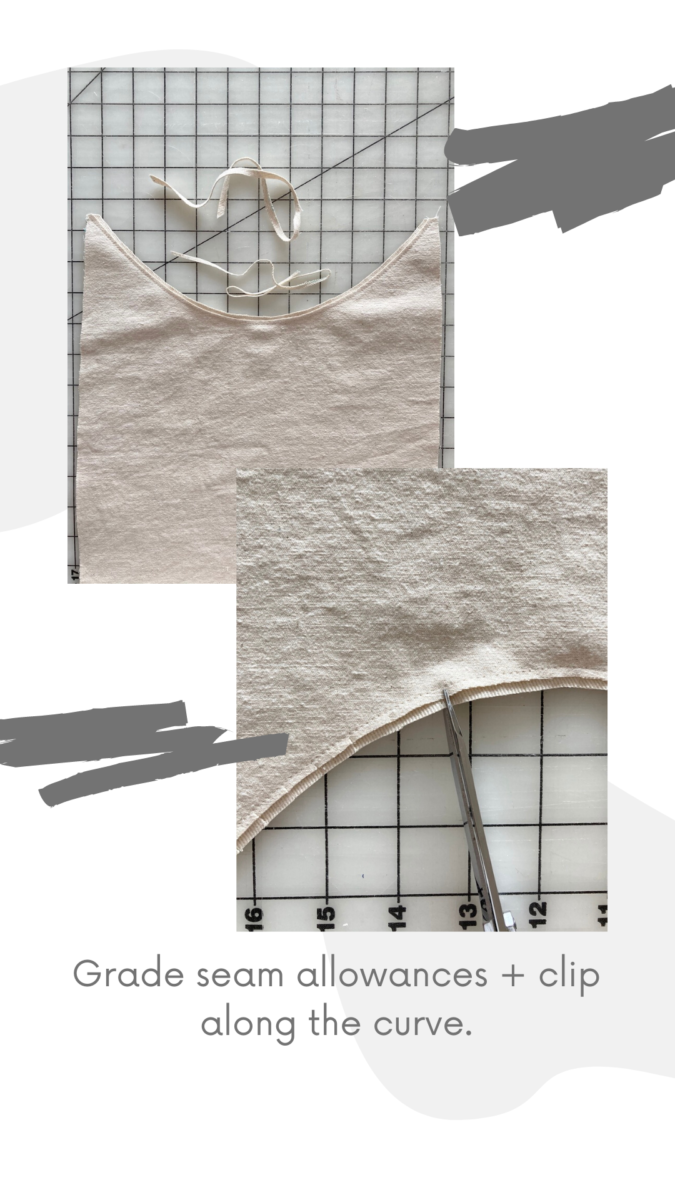
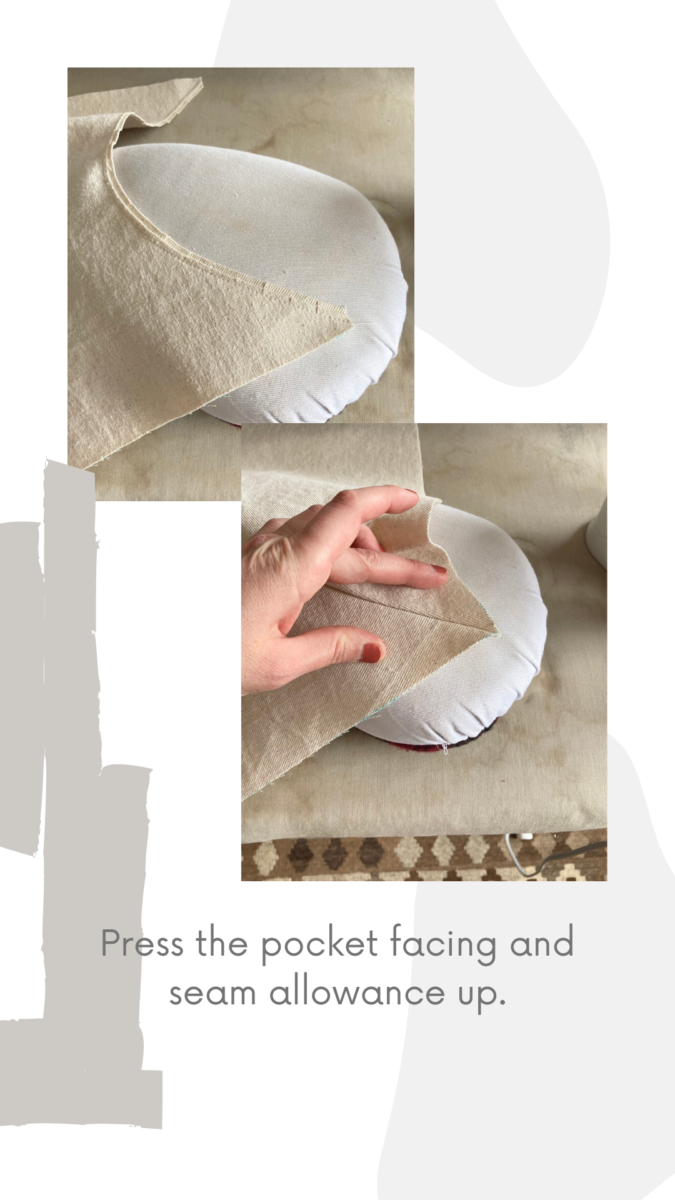
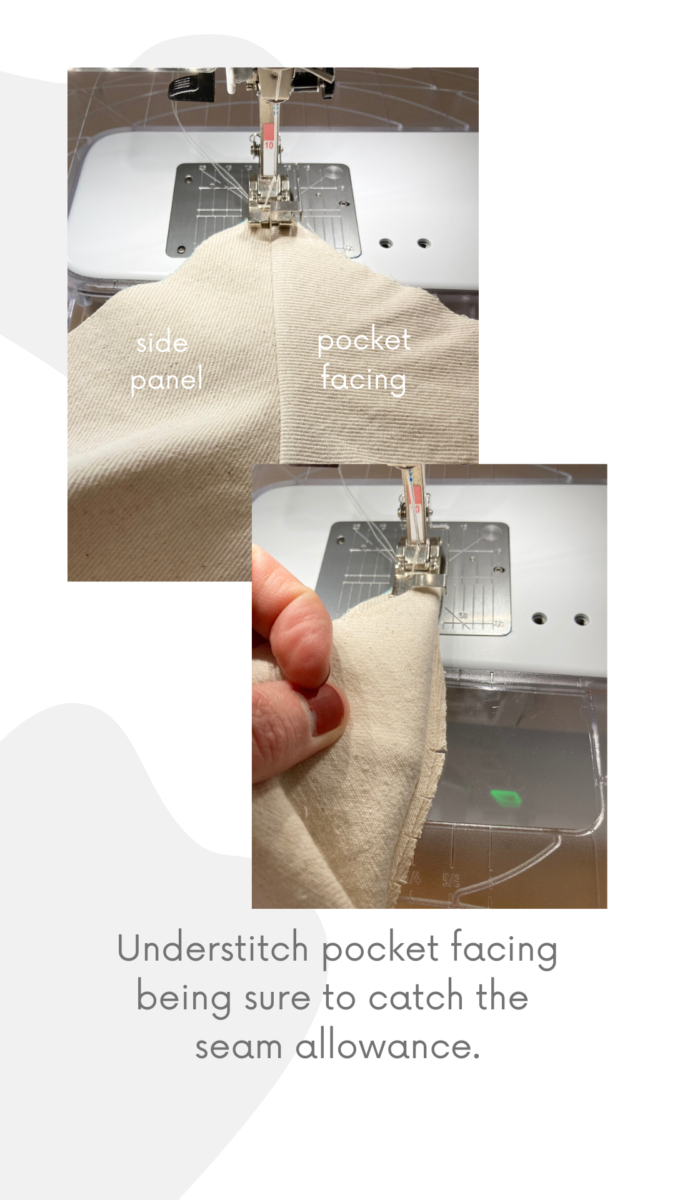
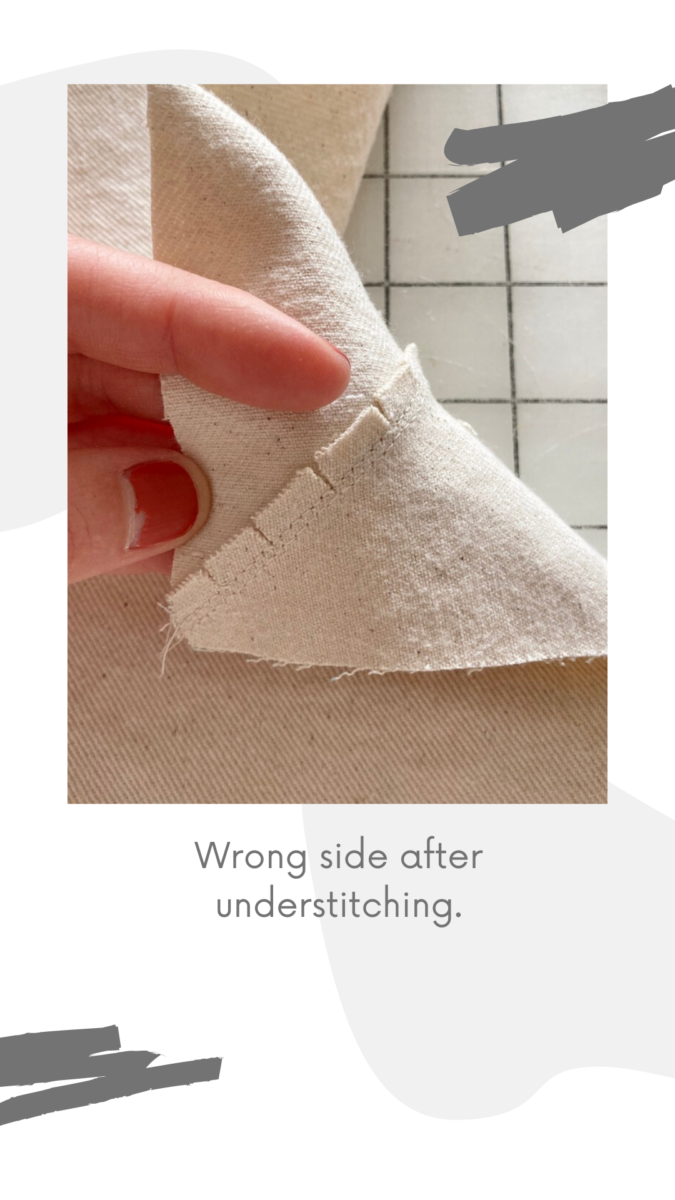
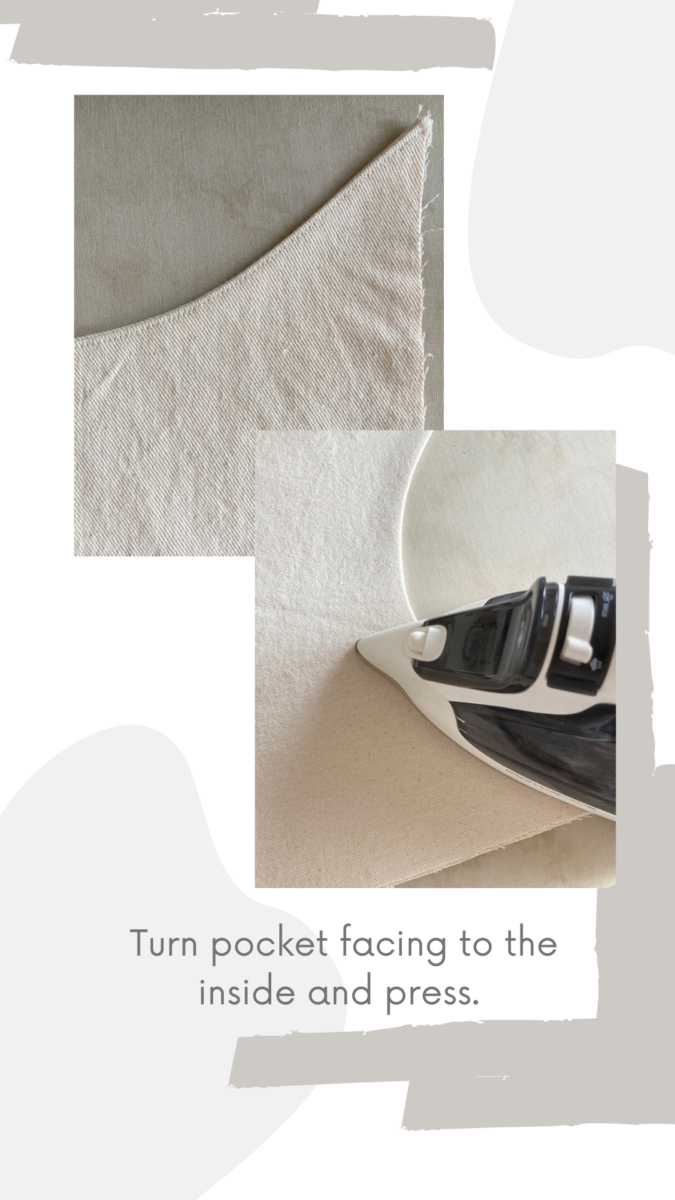
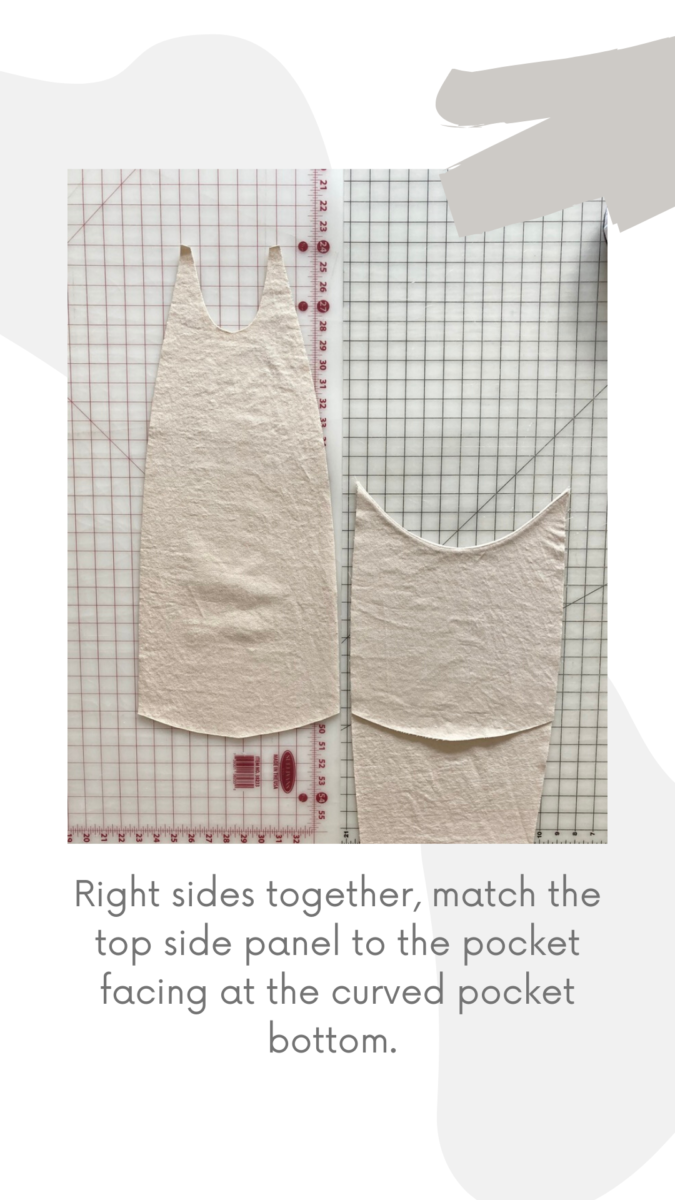
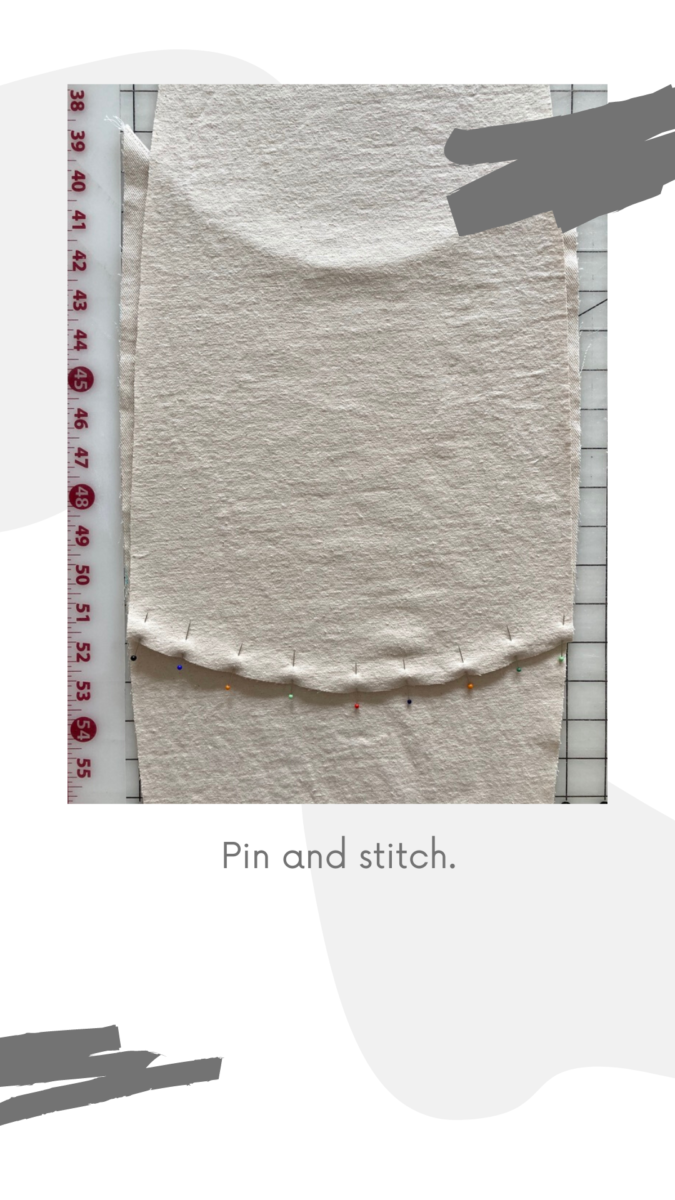
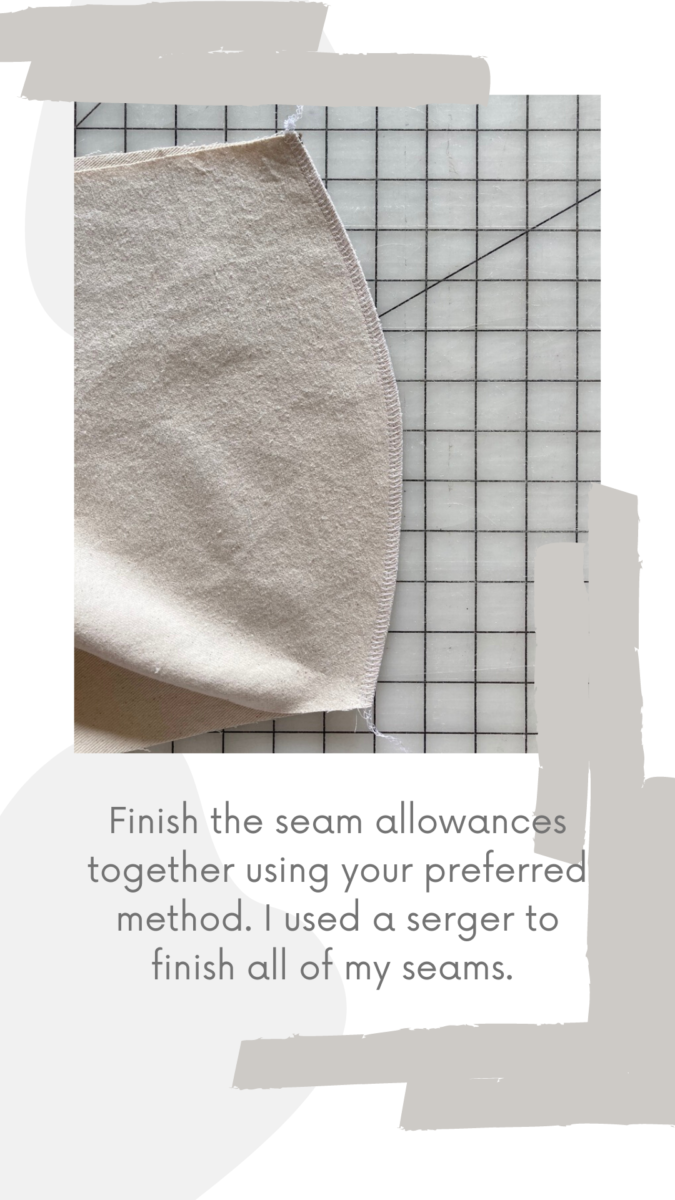
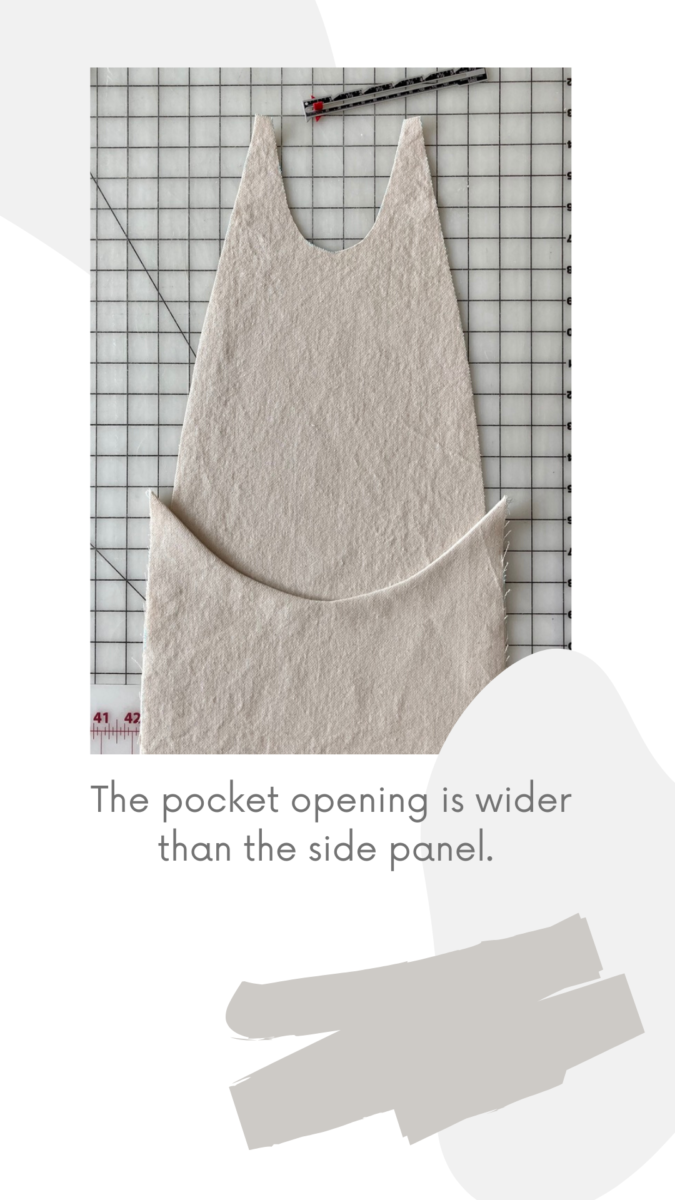
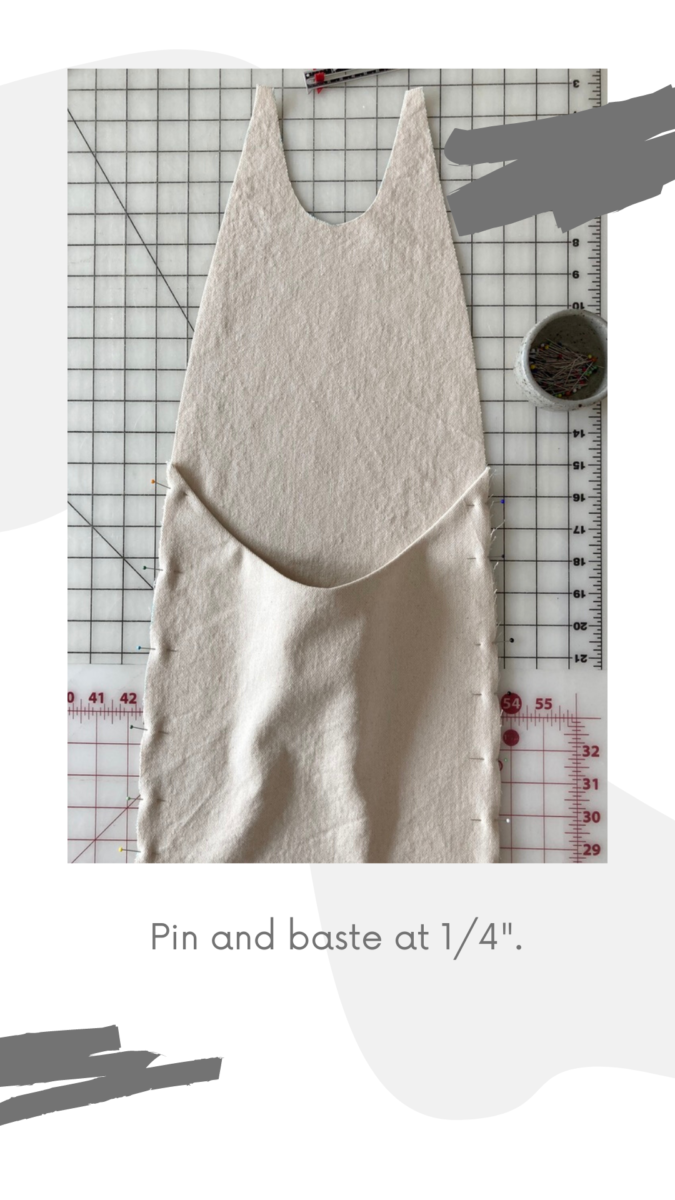
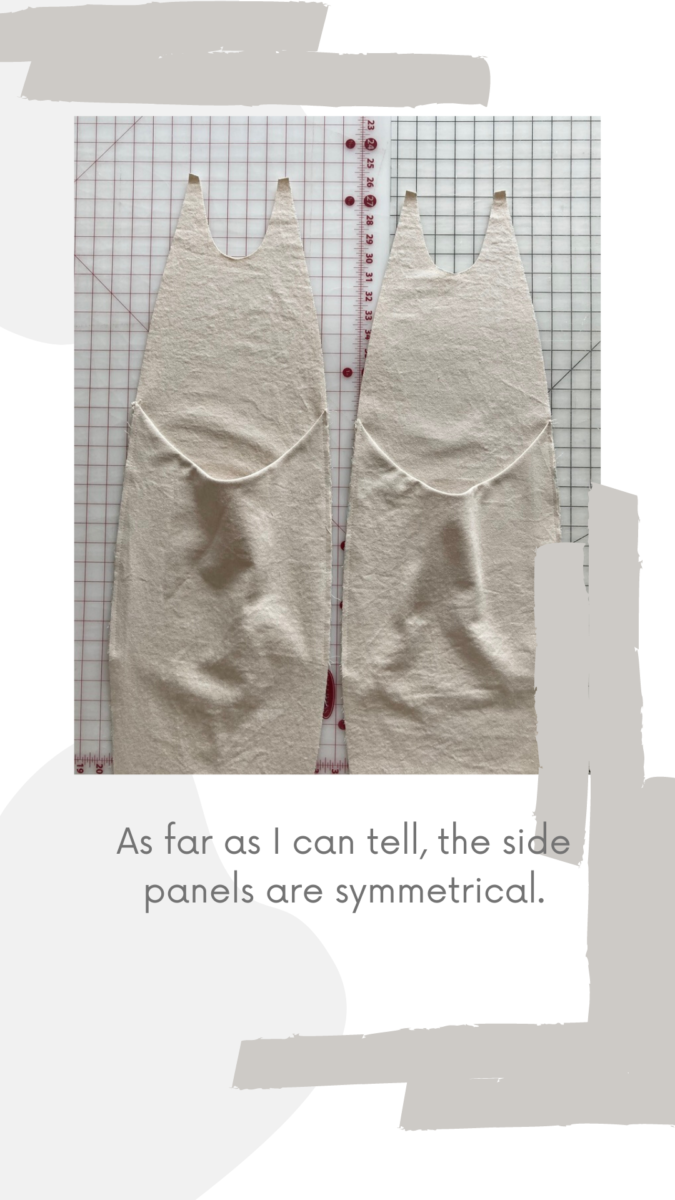
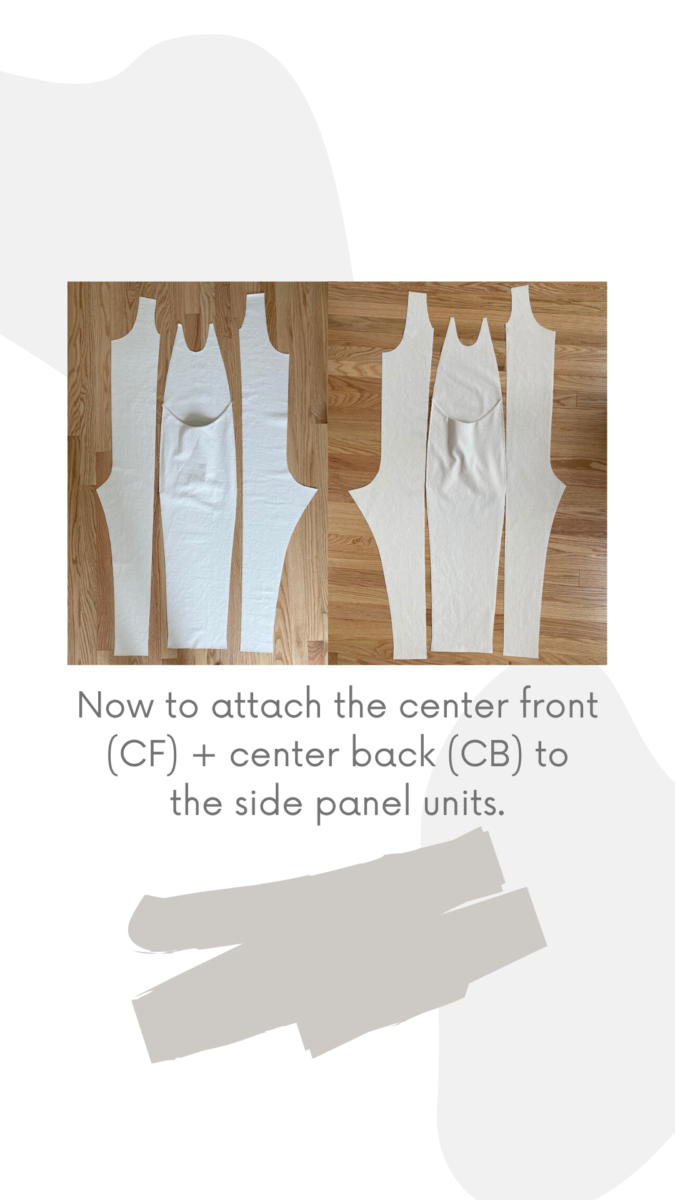
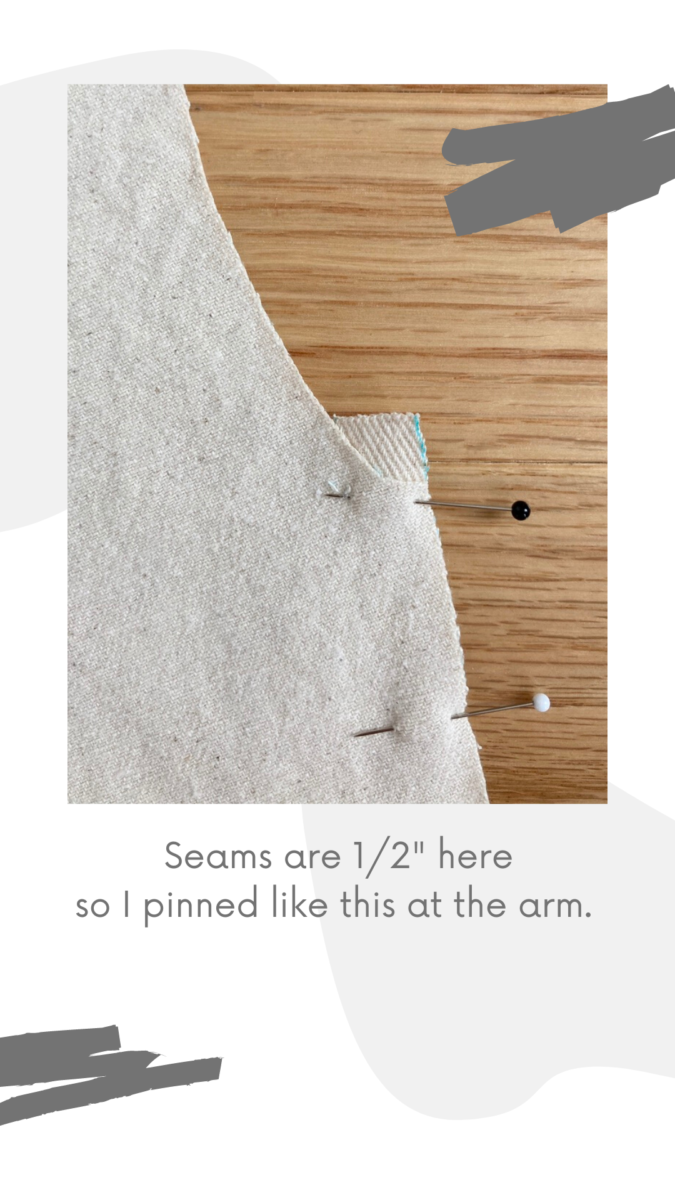
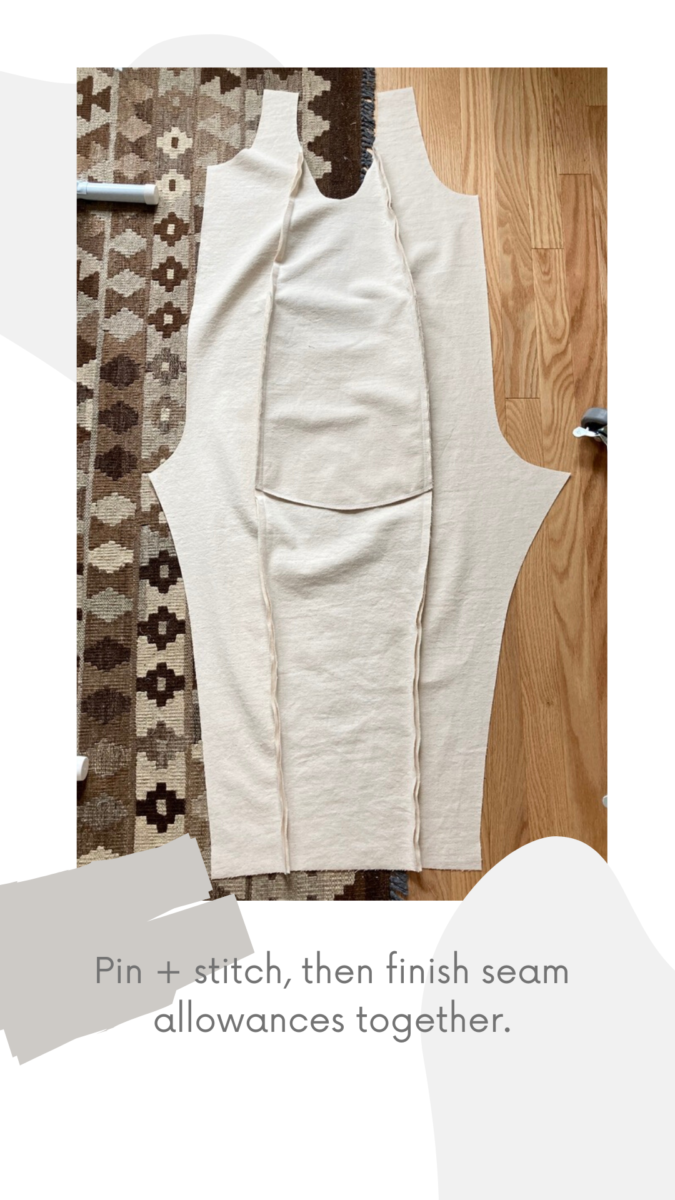
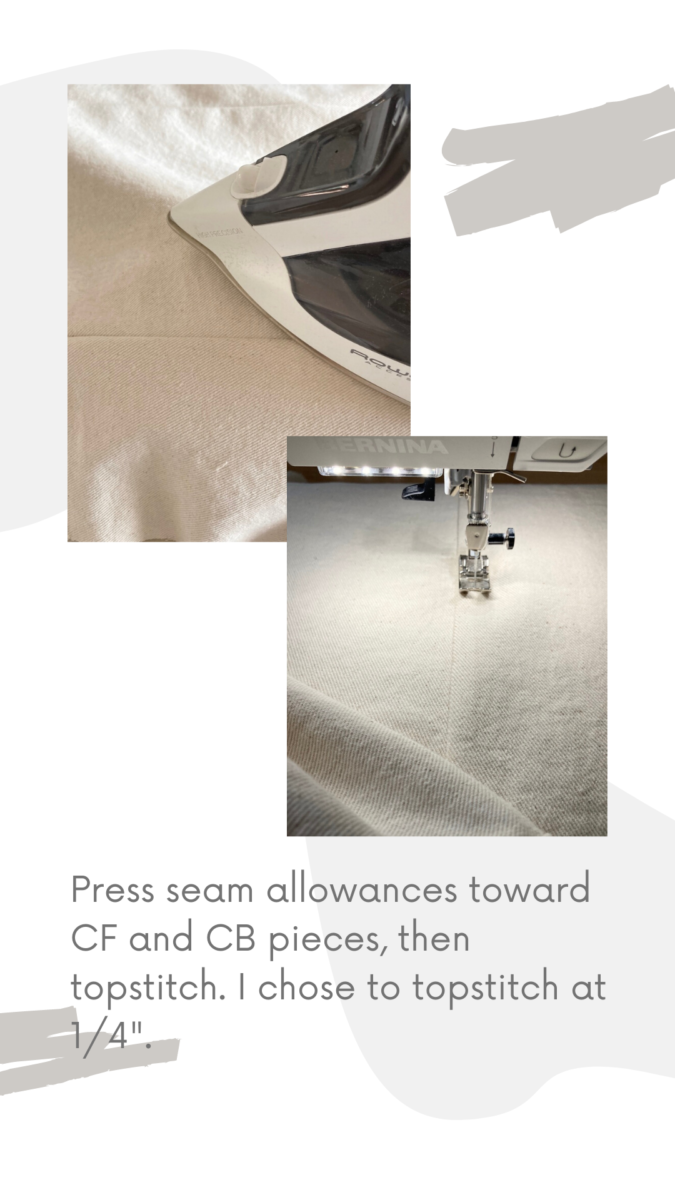
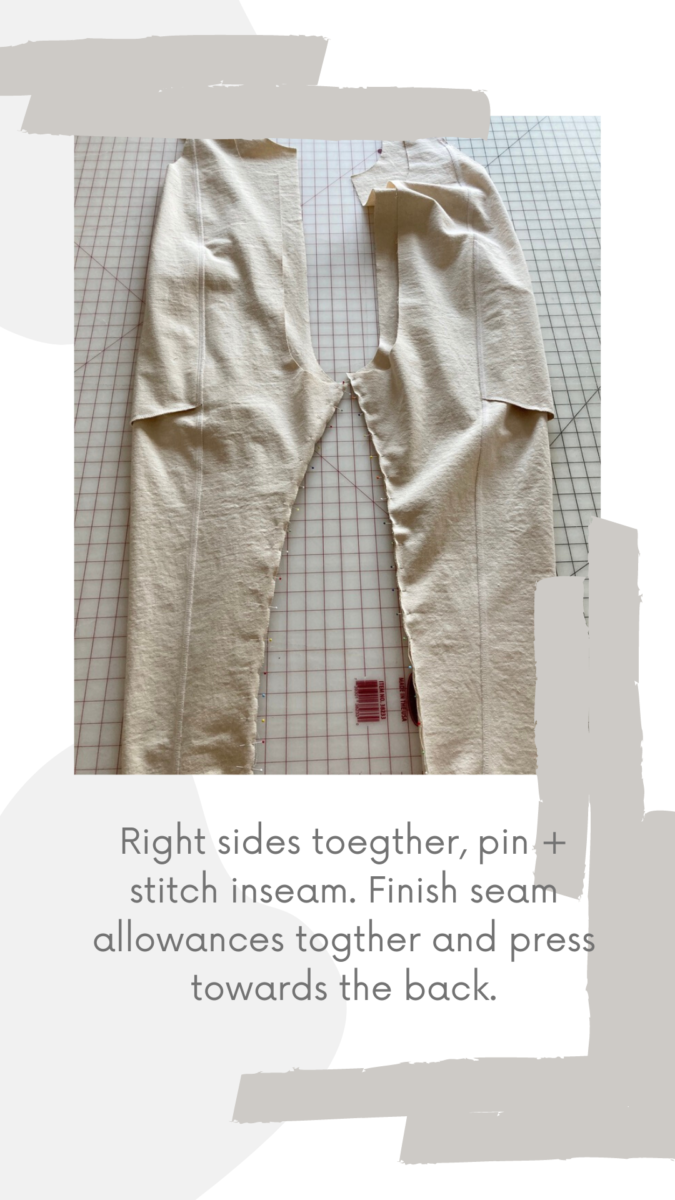
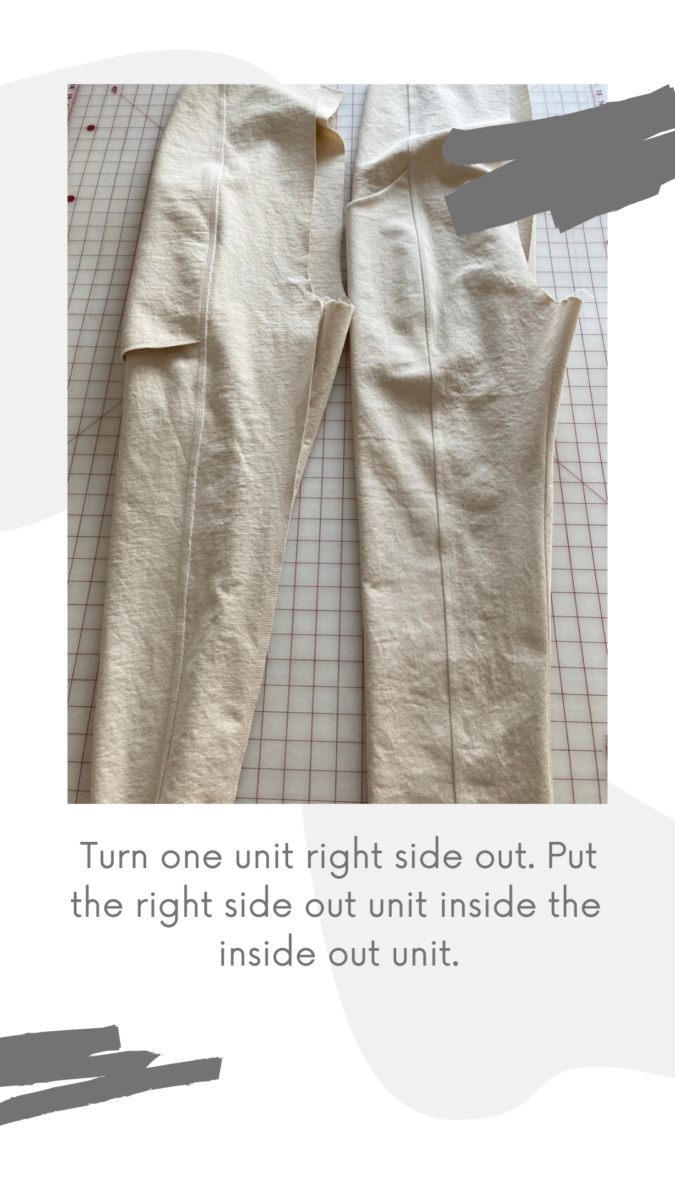
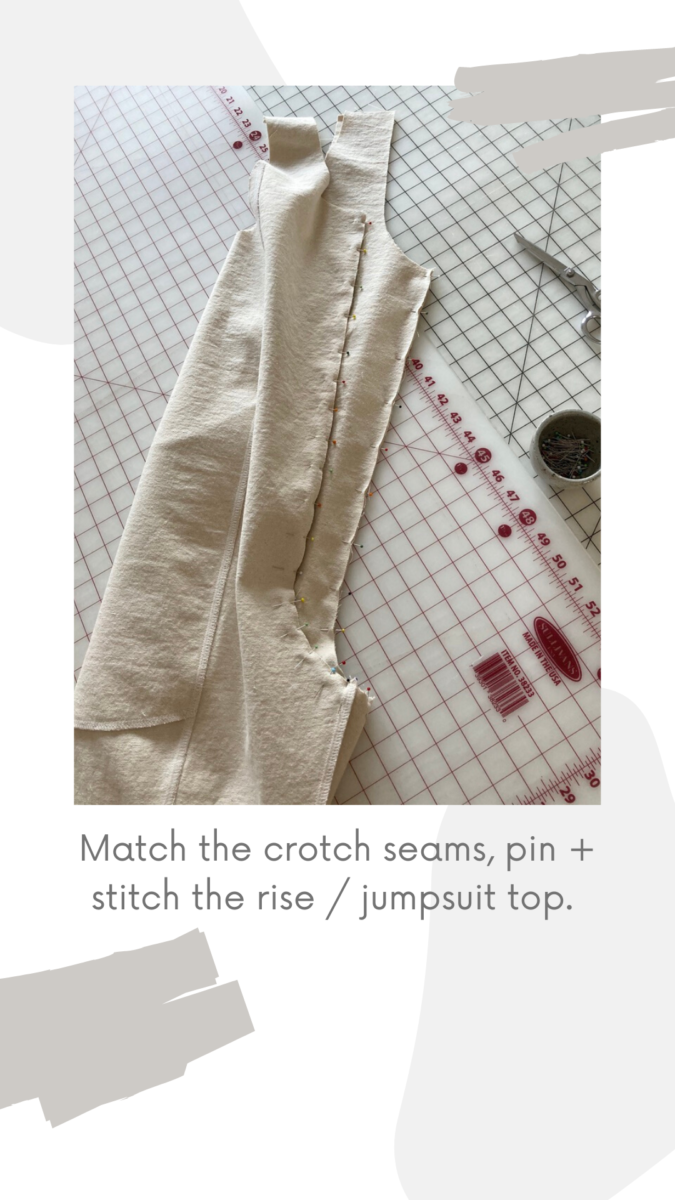
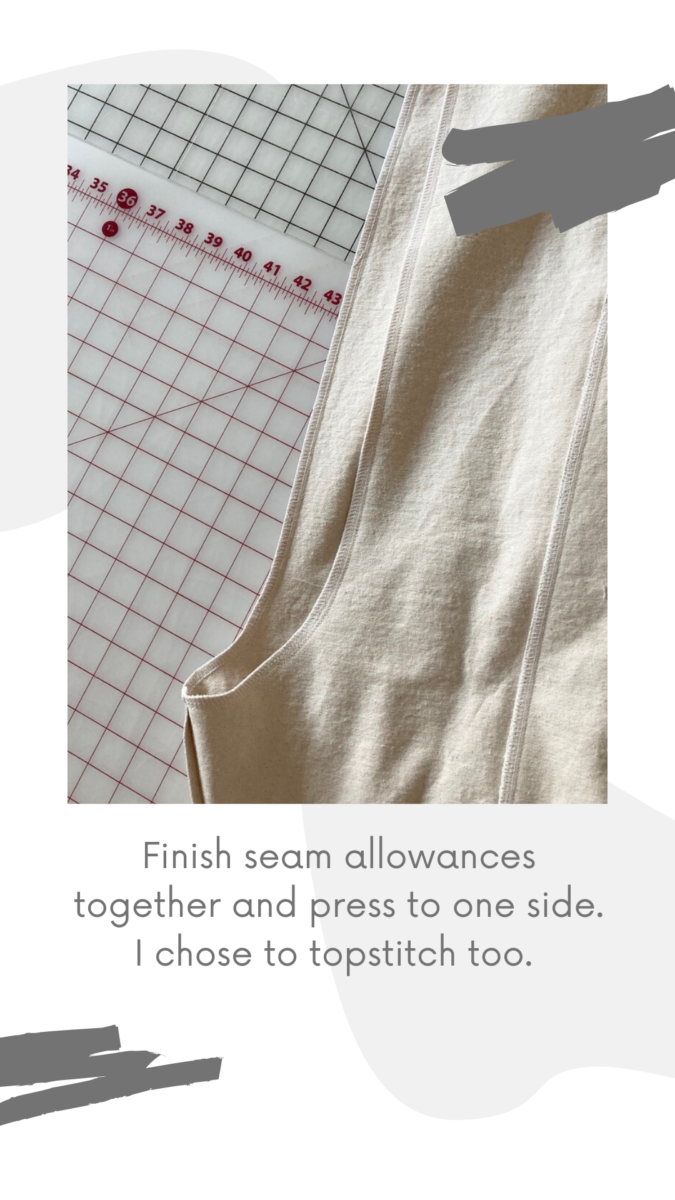
This slideshow shares my method for sewing up the Clyde jumpsuit.
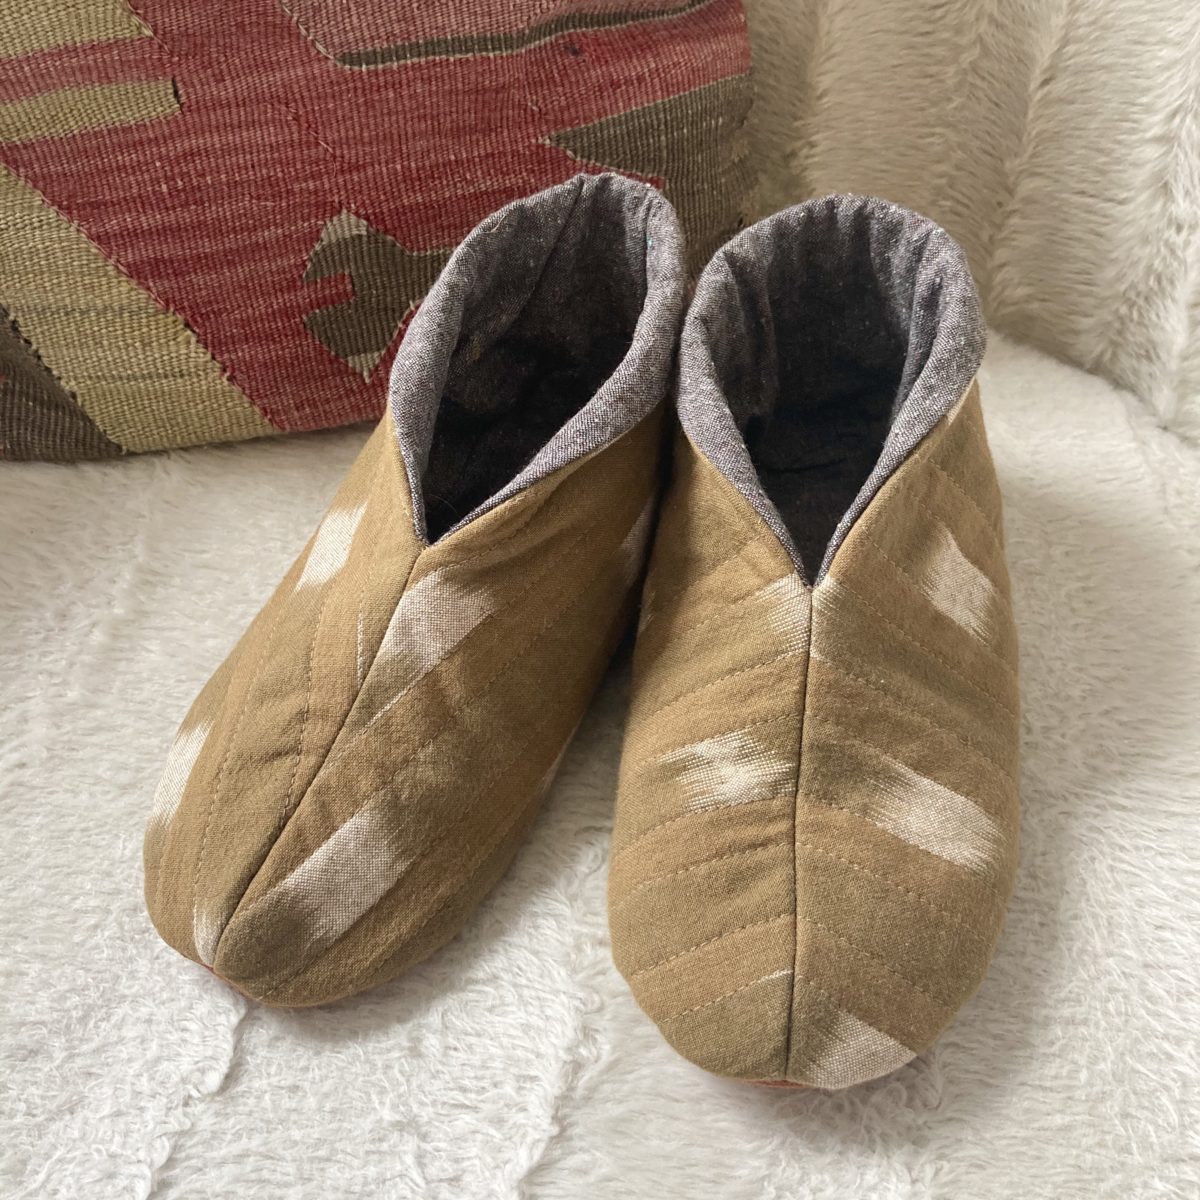
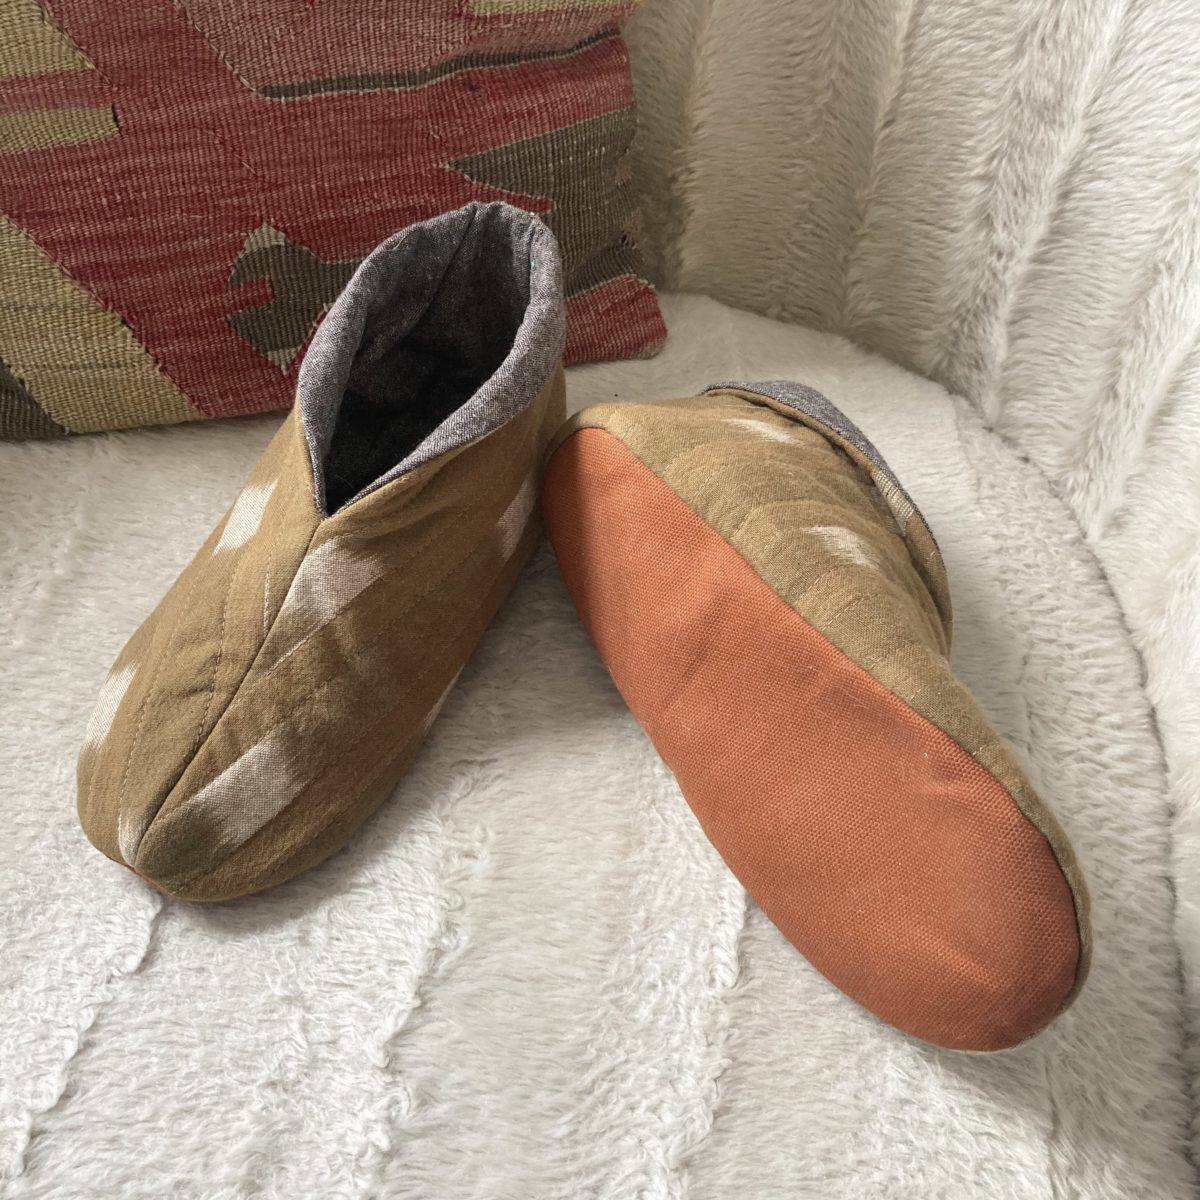
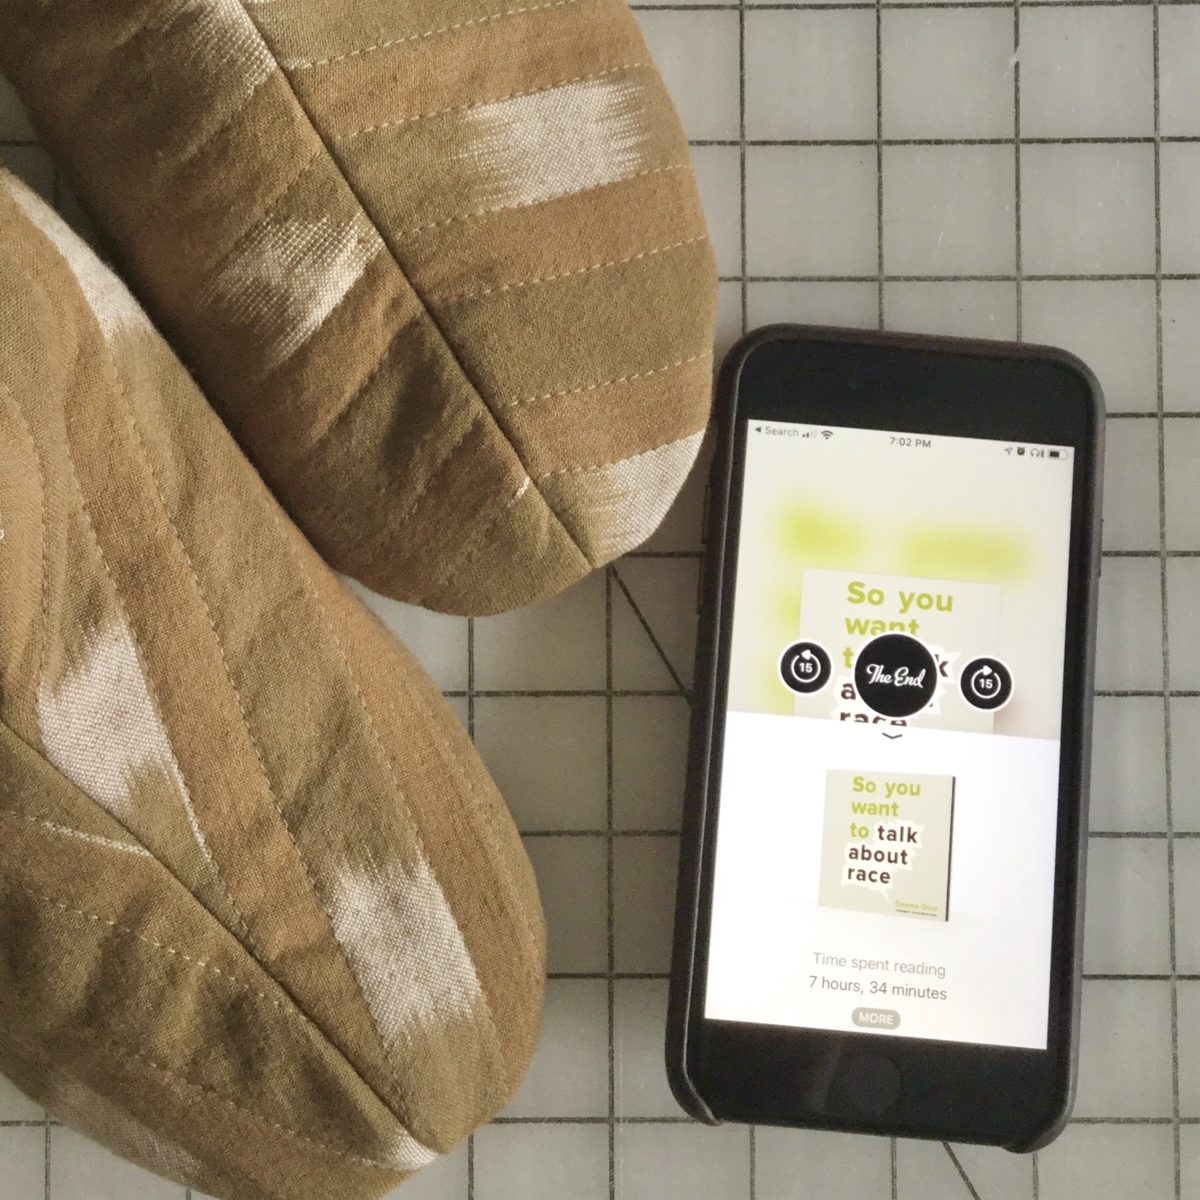
If you regularly have cold feet and you’re looking for a scrap busting project, make these. For a quilting project, they sewed up pretty quickly and would make great gifts.
FABRIC: boro stripe in flax (main), speckled linen cotton blend (lining), Big Sur Canvas (sole), leftover batting
SIZE: B – I wear US women’s size 6 shoe but used the finished measurements chart to select size
MODS: made the opening about an 1″ wider. I did this for two reasons; it was a little challenging to get my foot in and I couldn’t attach the lining and exterior together because it wouldn’t fit around the arm of my machine.
Listened to ‘So you want to talk about race’ by Ijeoma Oluo while making these.
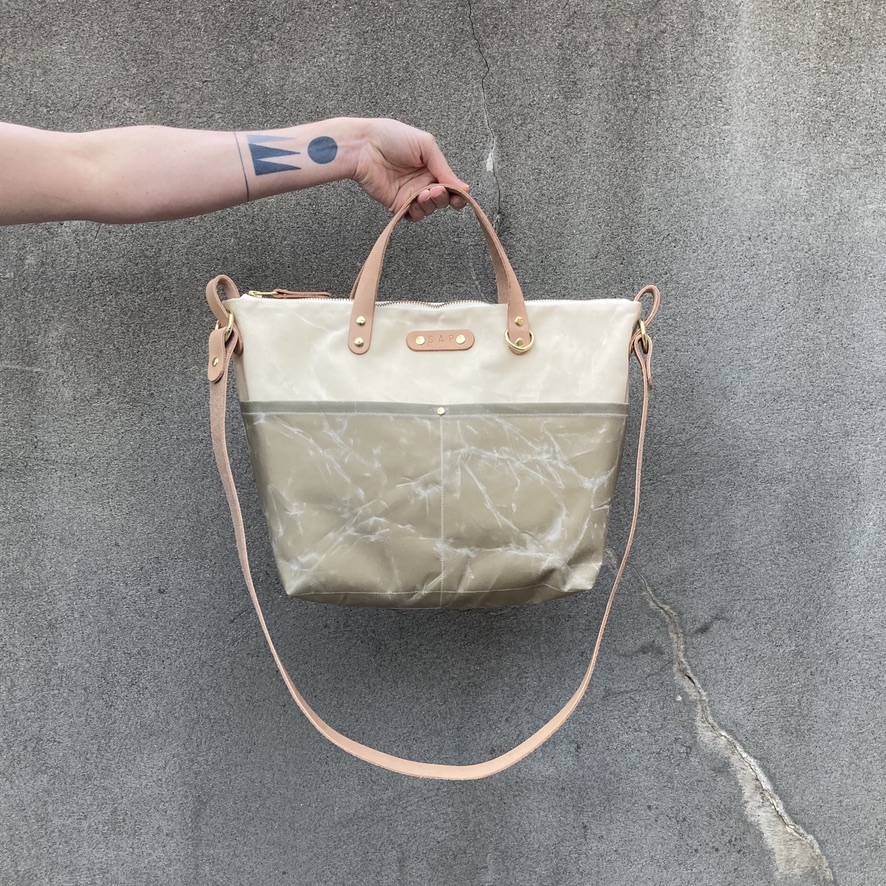
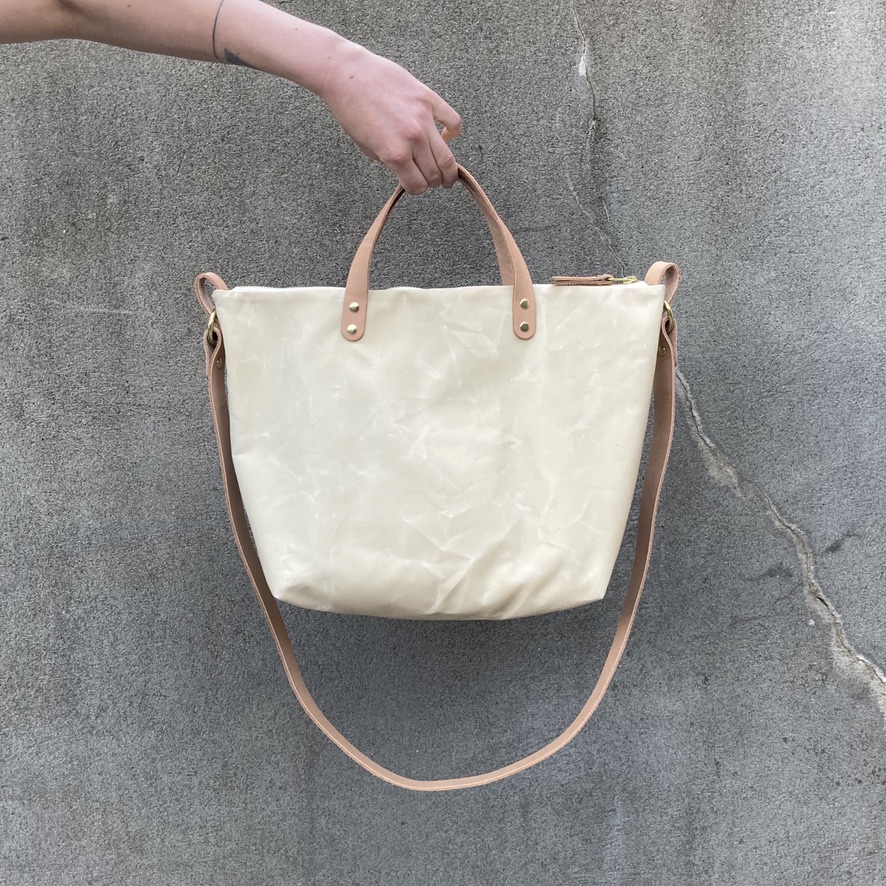
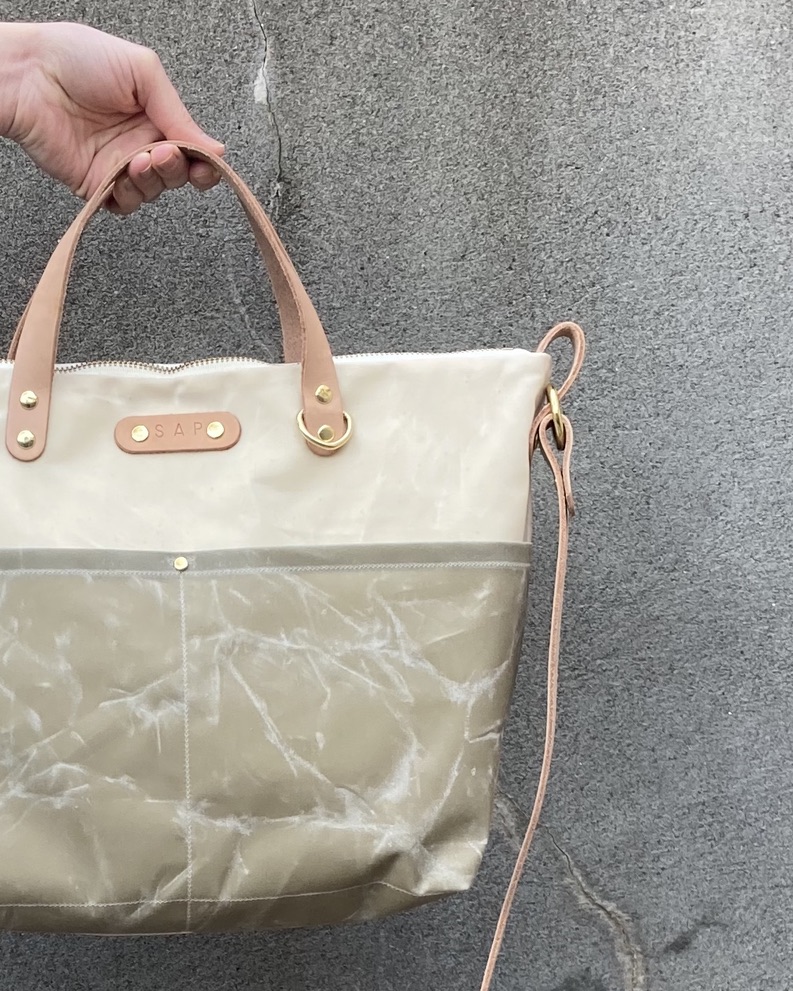
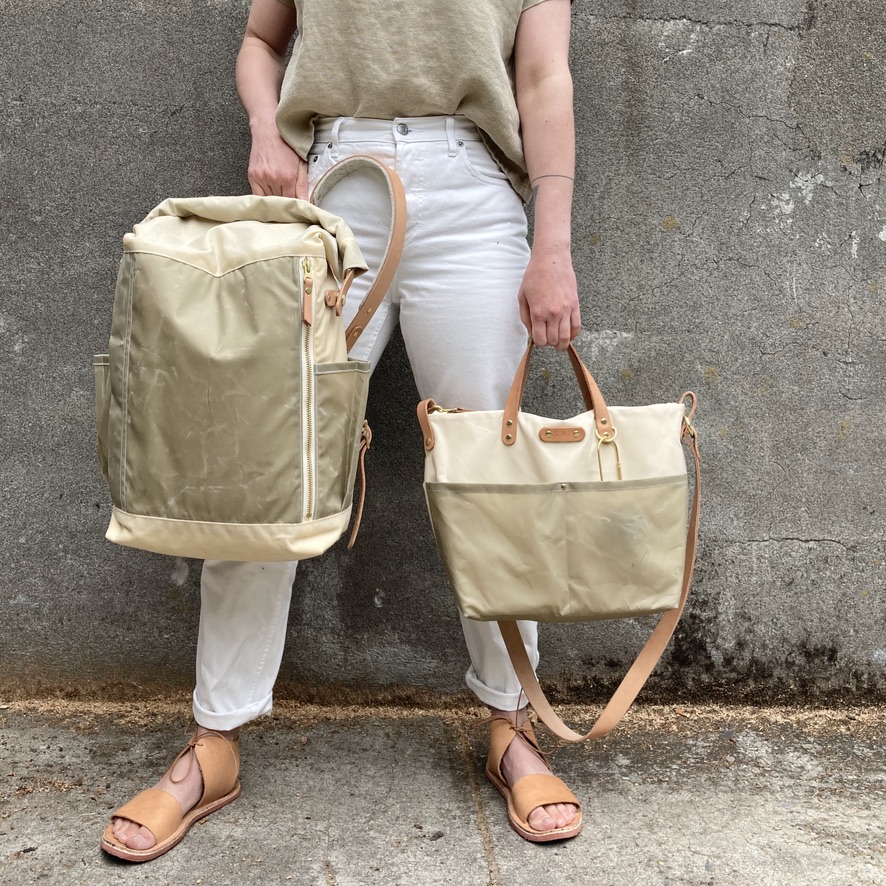
This post had to start off with my color inspiration for my Slabtown, which was another Klum House bag. I finished this Fremont Tote in early May and it’s the perfect day bag.
It has two exterior pockets that are perfect for my phone and a mask, plus a d-ring to clip my keys to. It has a small interior pocket for my wallet and sanitizing wipes, and a spacious main compartment for other essentials. Enough room for a book, sketchbook, planner, snacks, sunglasses, etc. – it’s really the perfect size.
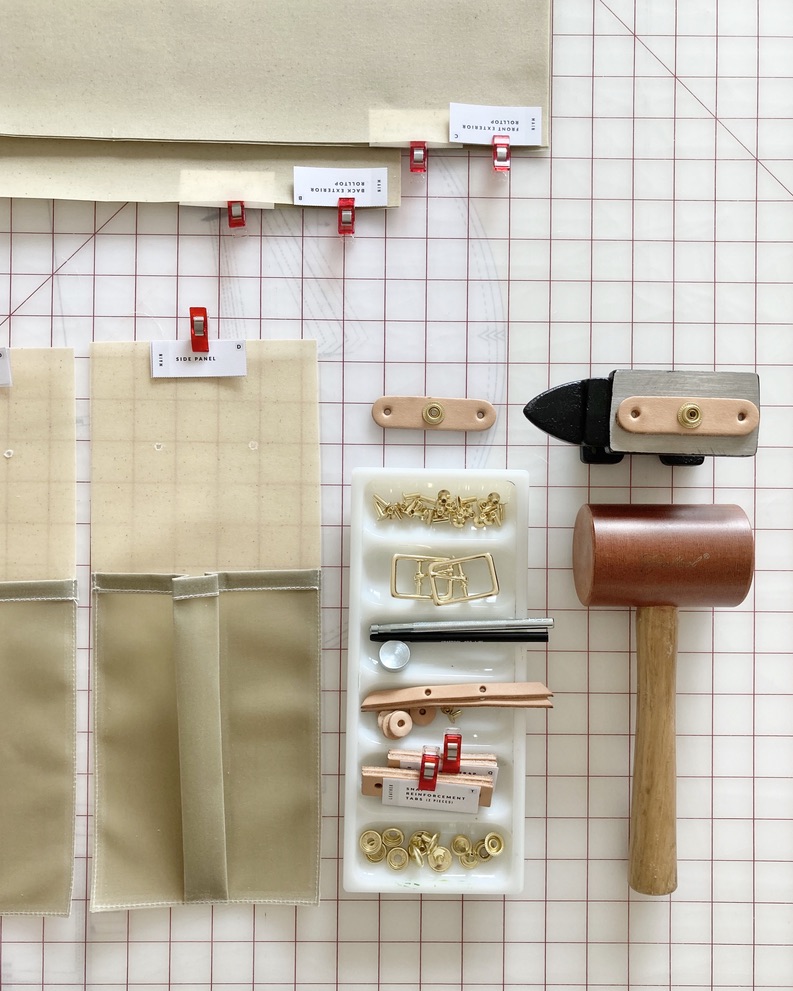
I purchased the Fremont Full Maker Kit, which included all of the hardware (brass), pre-cut and marked waxed canvas and lining (natural), and pre-cut and punched leather (tan).
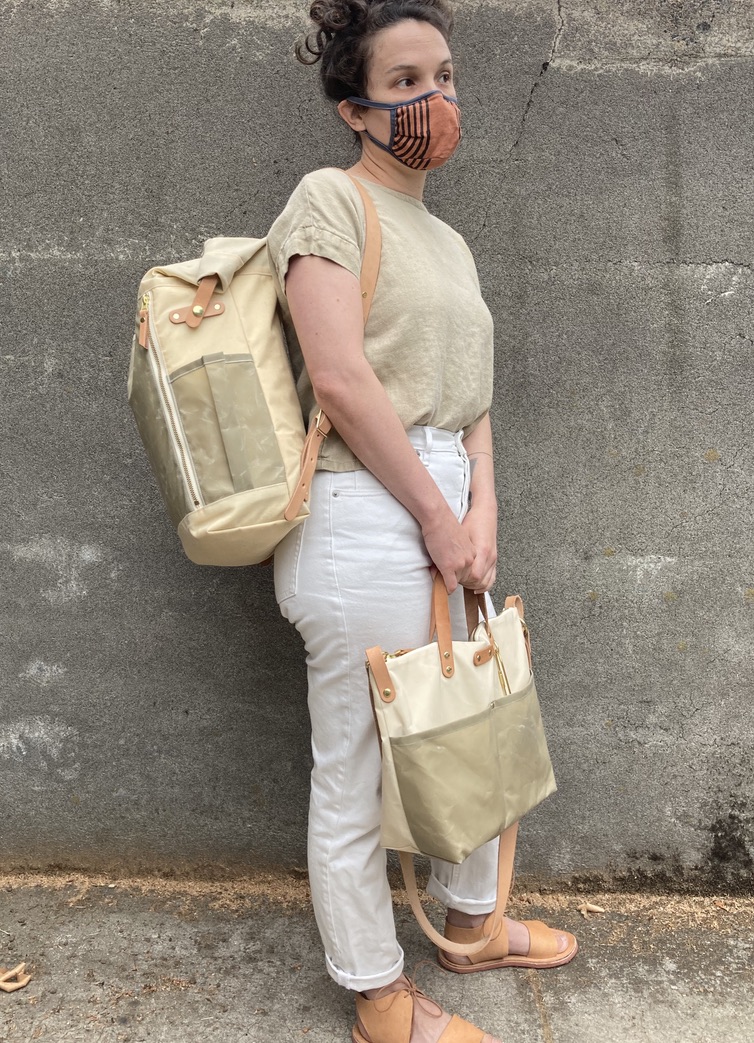
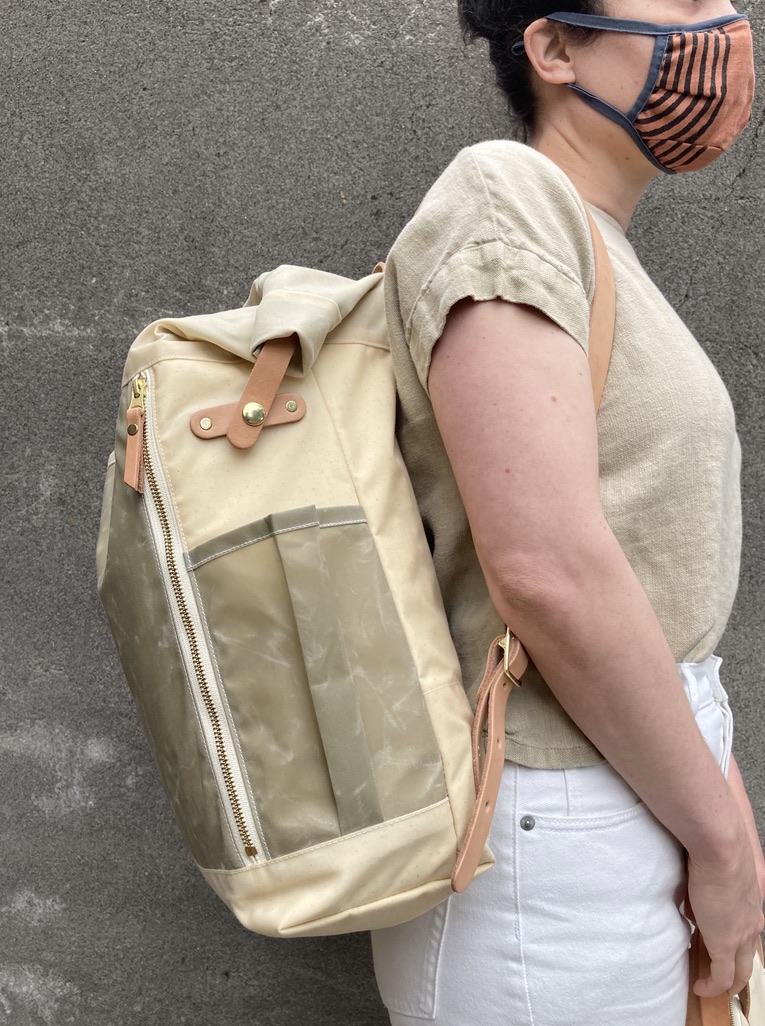
This greenish gray waxed canvas has been in my stash for years, I honestly don’t remember what I bought it for, but it felt like the perfect accent fabric. Once Klum House reached out to see if I’d be up for making the Slabtown (duh), I knew I would have to make a matching backpack. The pair will be a great travel set in the future (I hope… please wear a mask).
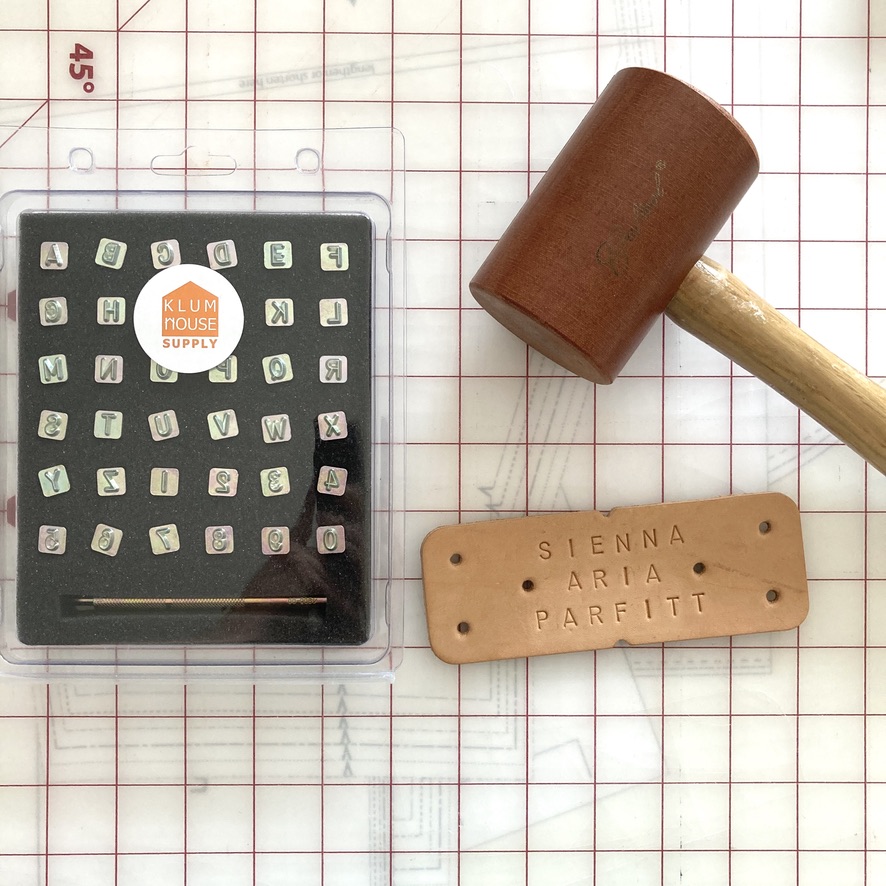
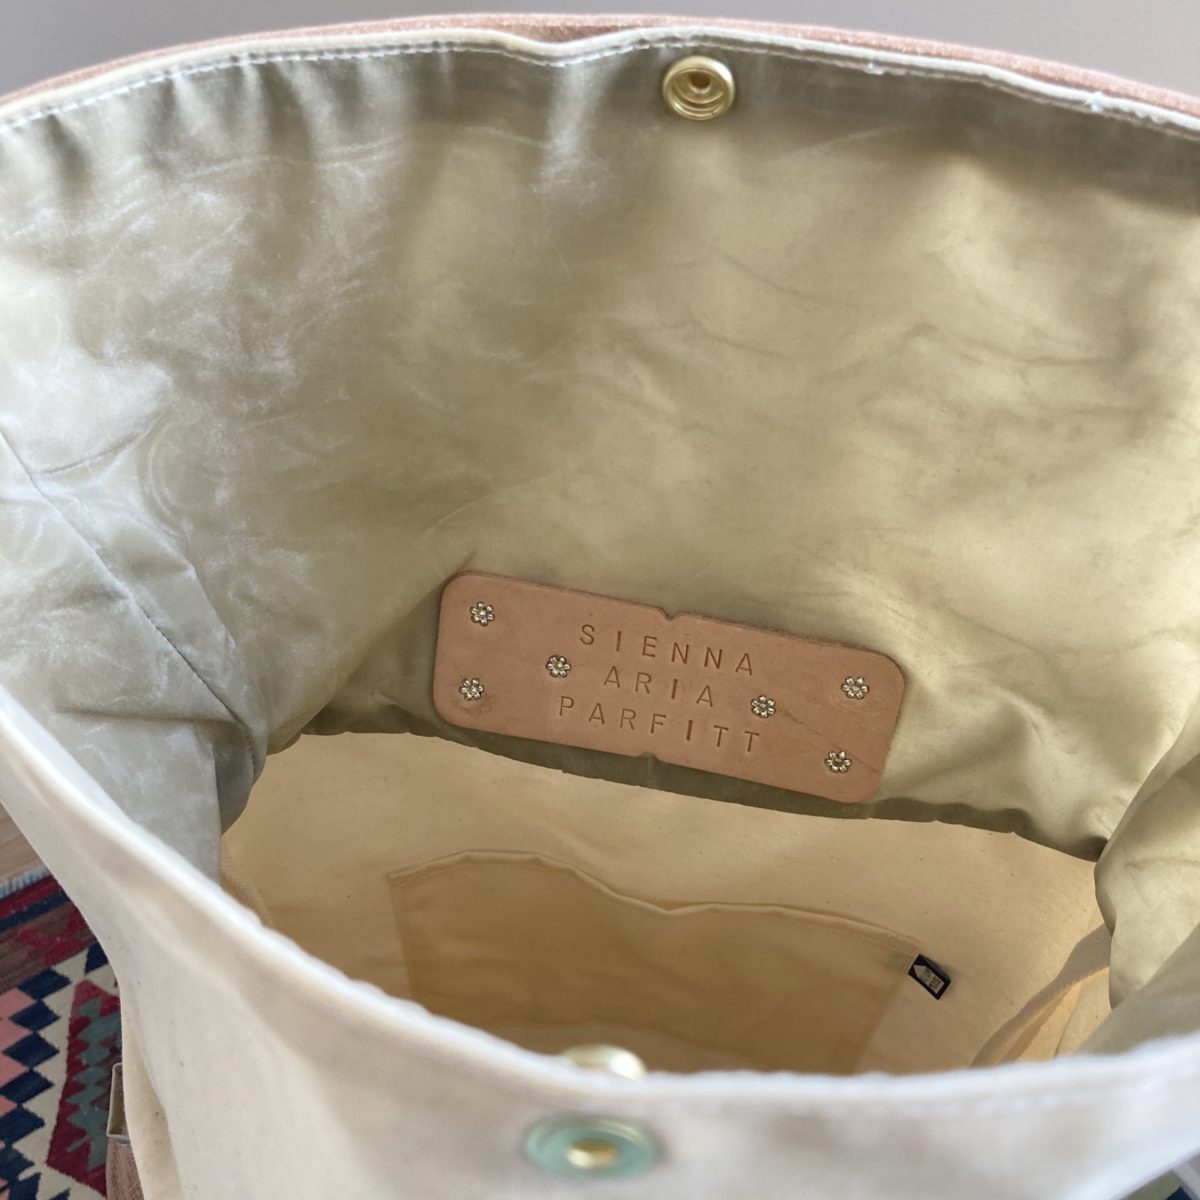
I also decided to add a monogram leather tab to play with my Leather Stamps Kit.
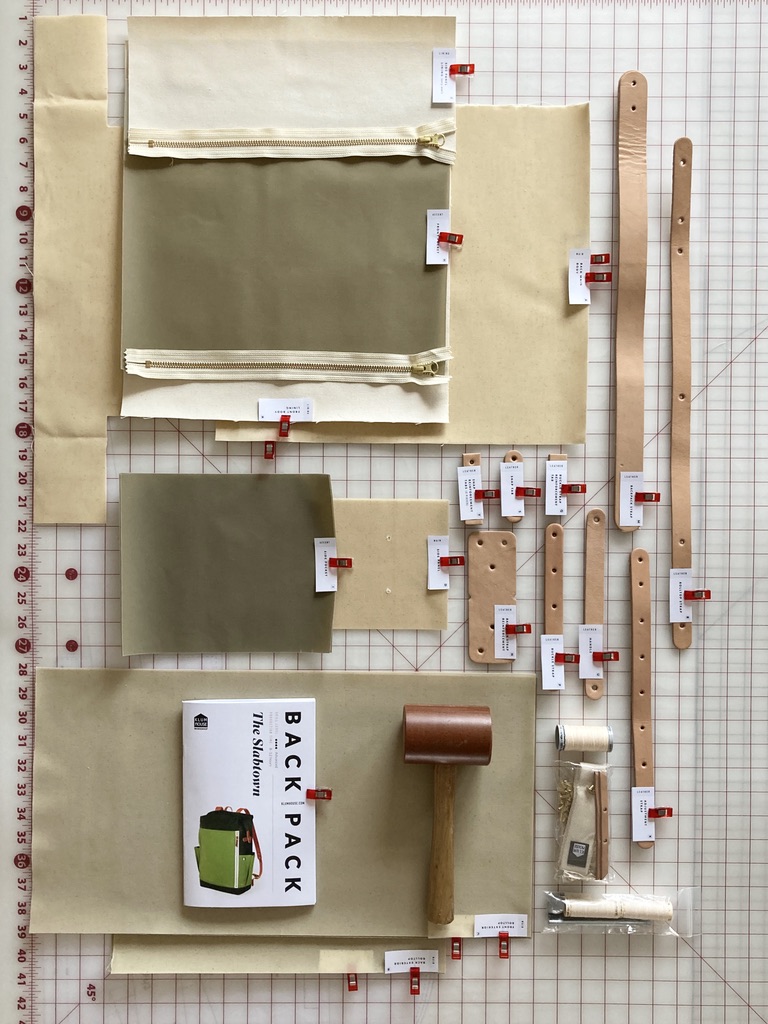
KH Full Maker Kits are so good. They include EVERYTHING and you can also purchase the necessary tools. I’m not sure if the full maker kit comes with the pattern, but I received it since the lovely KH folx knew I needed to cut my accent. The instruction booklet also comes with labels so you can keep track of everything.
Decided the tag would look better on the inside of the bag.
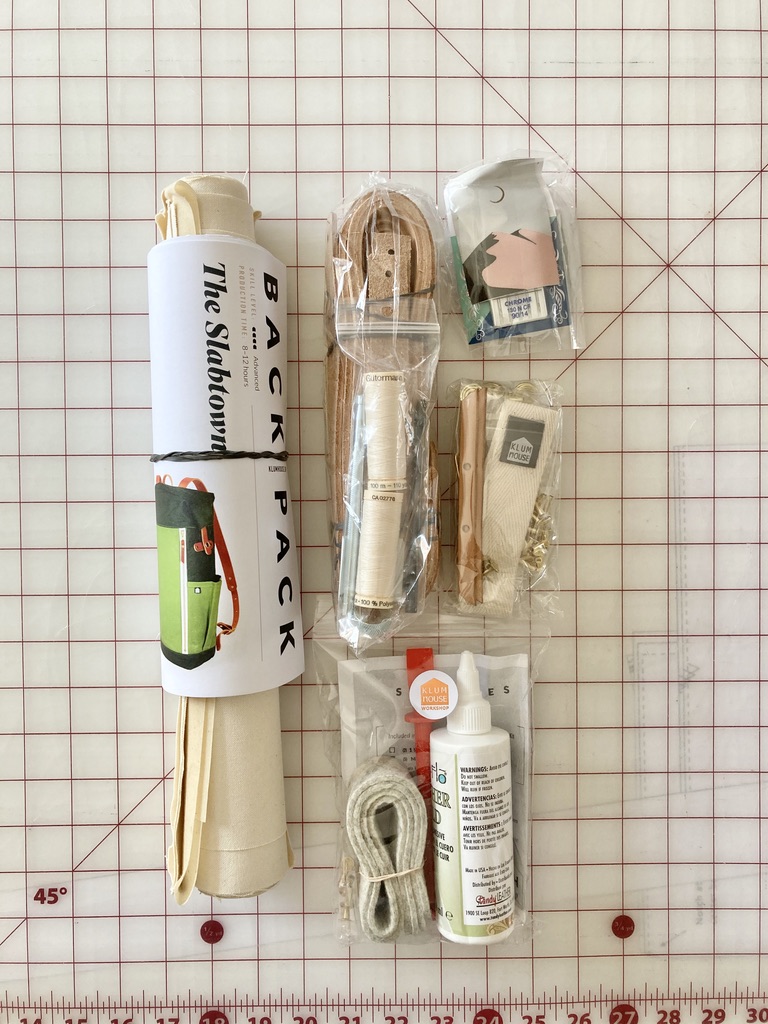
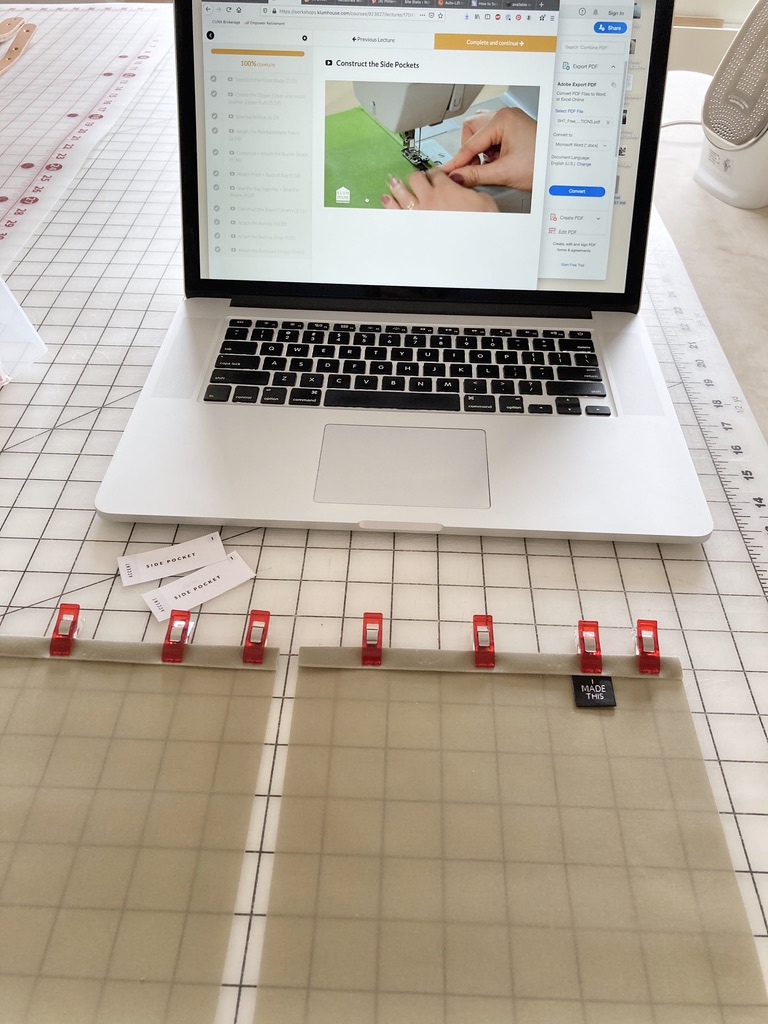
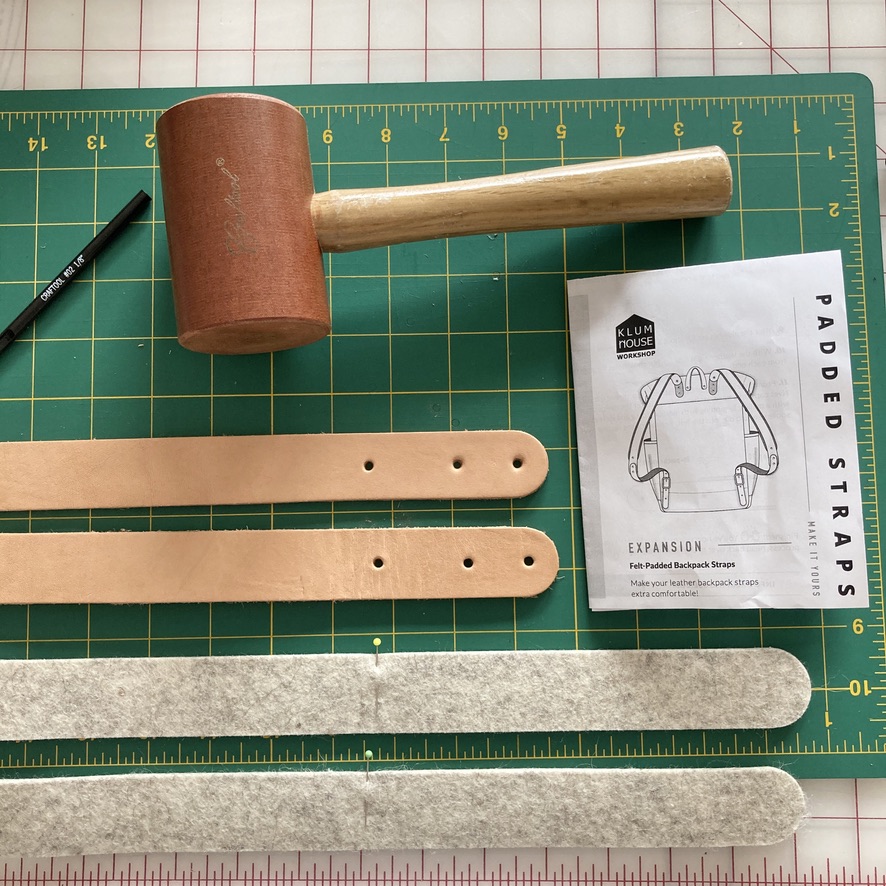
It’s really easy to agonize over the color combinations available. Klum House even released a few new colors (hi, field tan) with the Slabtown release. But I stuck to my matching set plan and was gifted the Slabtown Full Maker Kit, the felt strap expansion pack, and class in mid-May.
I gained access to the class before my kit arrived and watched the whole thing that same evening. It’s comprehensive, digestible, and Ellie is delightful. It makes the whole experience really approachable and fun.
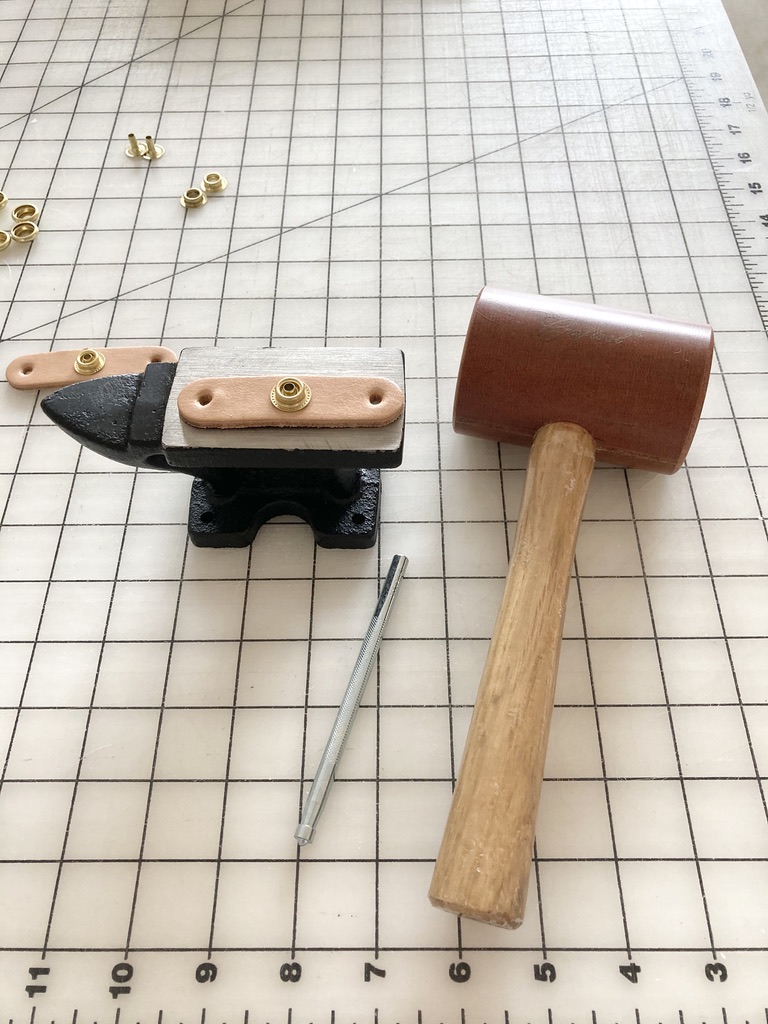
I’m really happy I bought the Bakelite Mallet from Klum House and this Mini Anvil from Blackbird fabrics. They’re great for setting rivets, snaps, and jeans buttons.
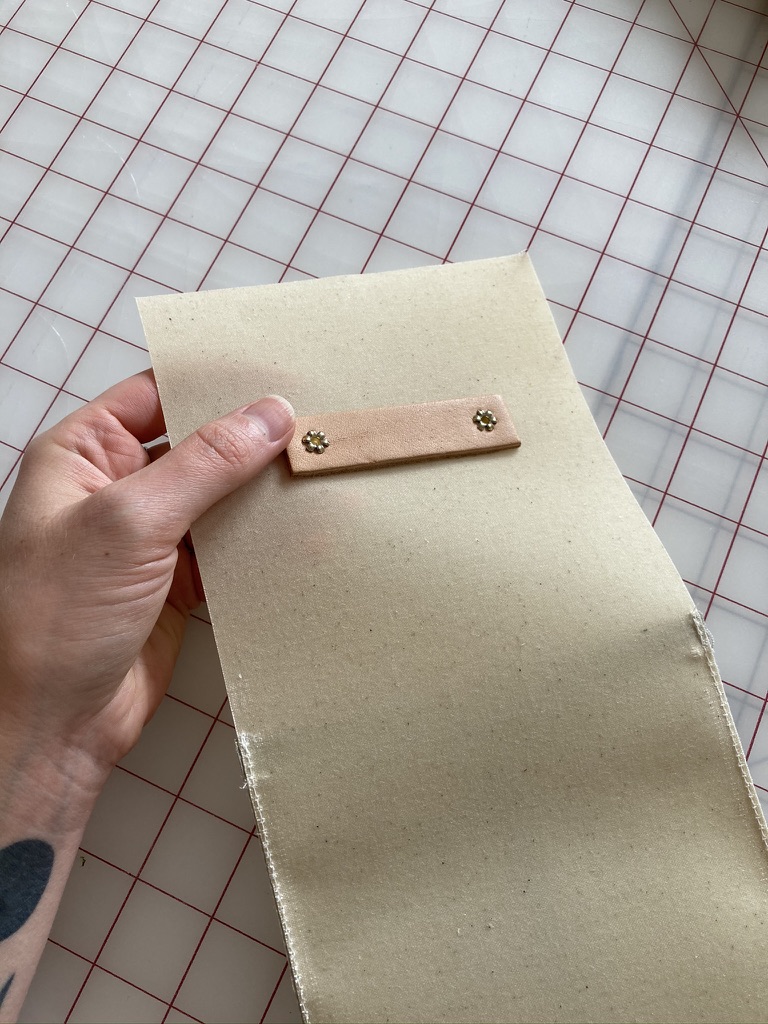
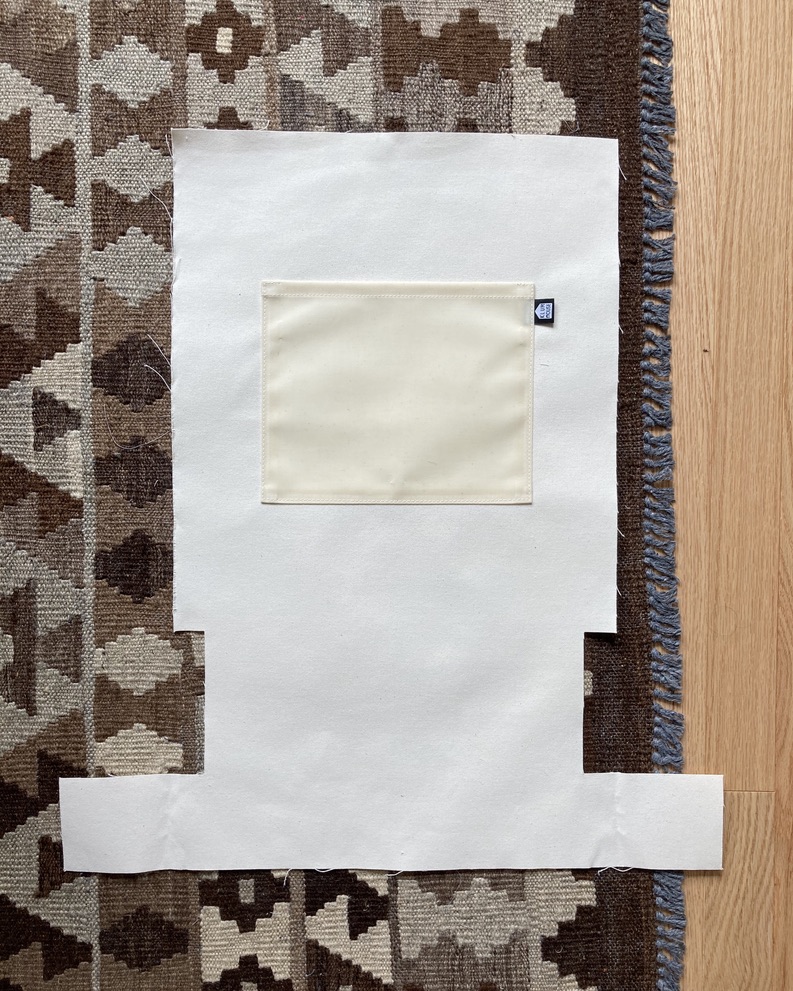
Side panels constructed and ready for hardware. What the backside of tubular rivets look like.
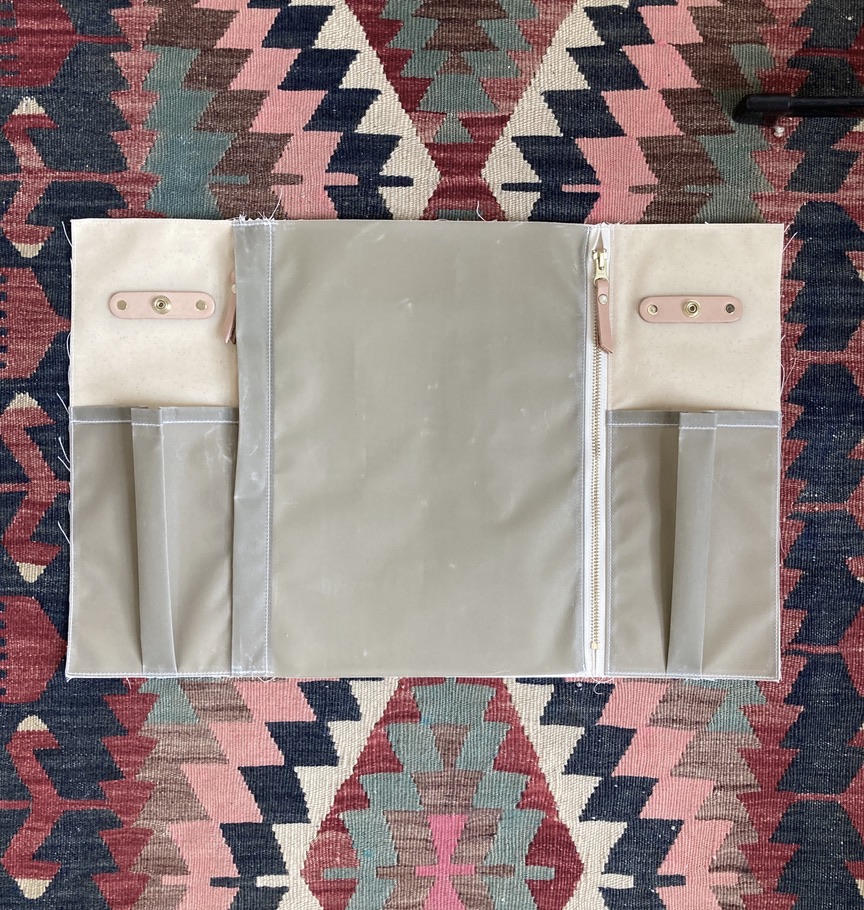
Each step in this project is so rewarding. Here’s my fully constructed front. I ended up adding another line of topstitching on the hidden pocket zipper because there was about an 1/8″ of raw edges peeking into my front pocket. My accent fabric was surprisingly stretchy.
I used the interior pocket from my Fremont kit. It was leftover because I ended up using the greenish gray waxed canvas. I guessed at its placement and it worked out great!
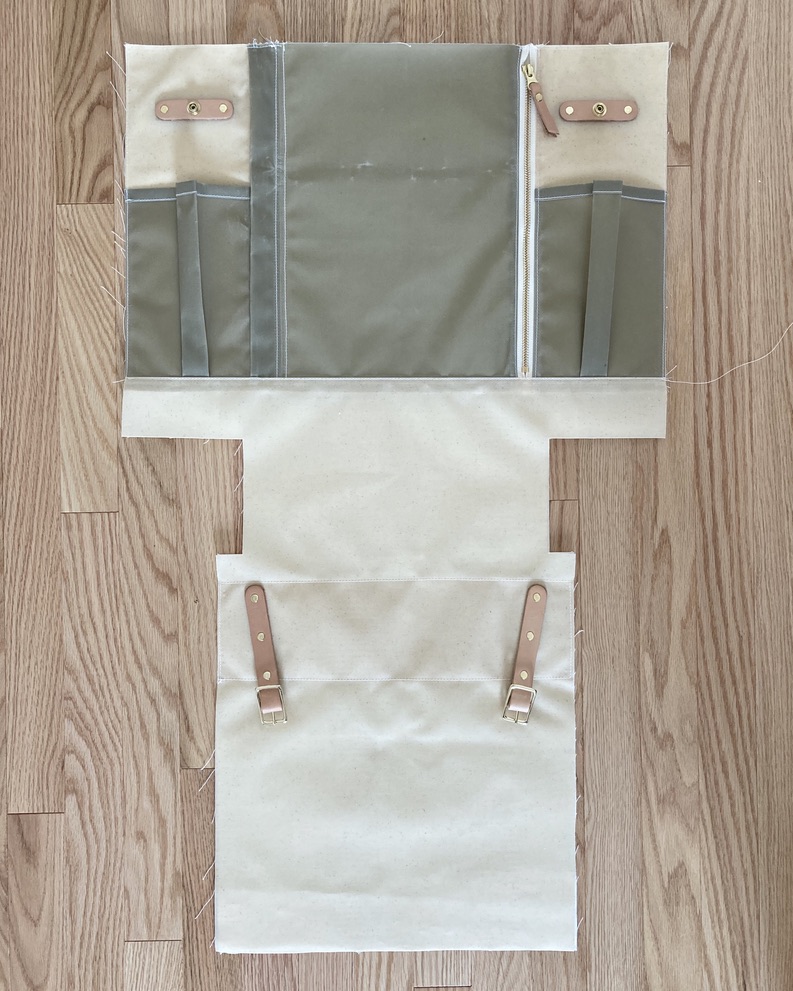
Front and back become one, then on to boxed corners! The seams are finished with twill tape and once again Klum House shares some extremely helpful construction tips.
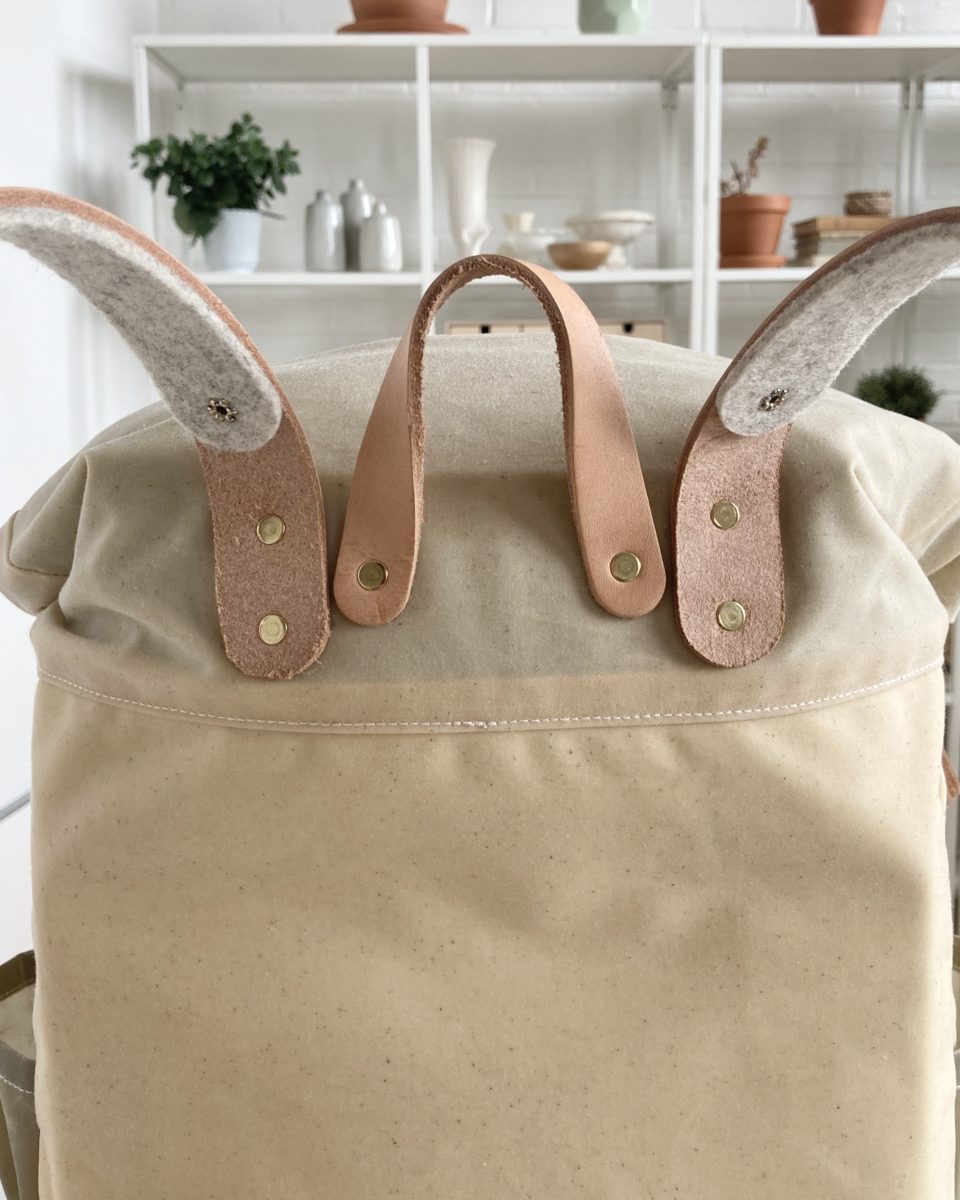
Once the rolltop is on, the last step is adding the straps!
The strap reinforcement leather is the perfect place to personalize with stamps.
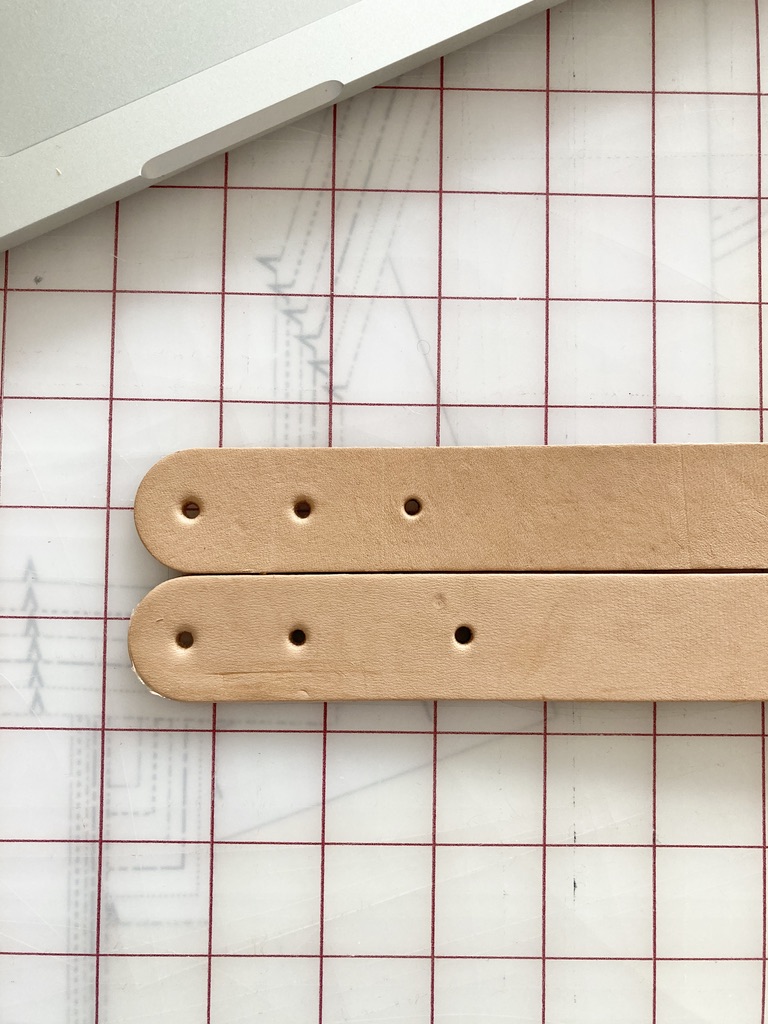
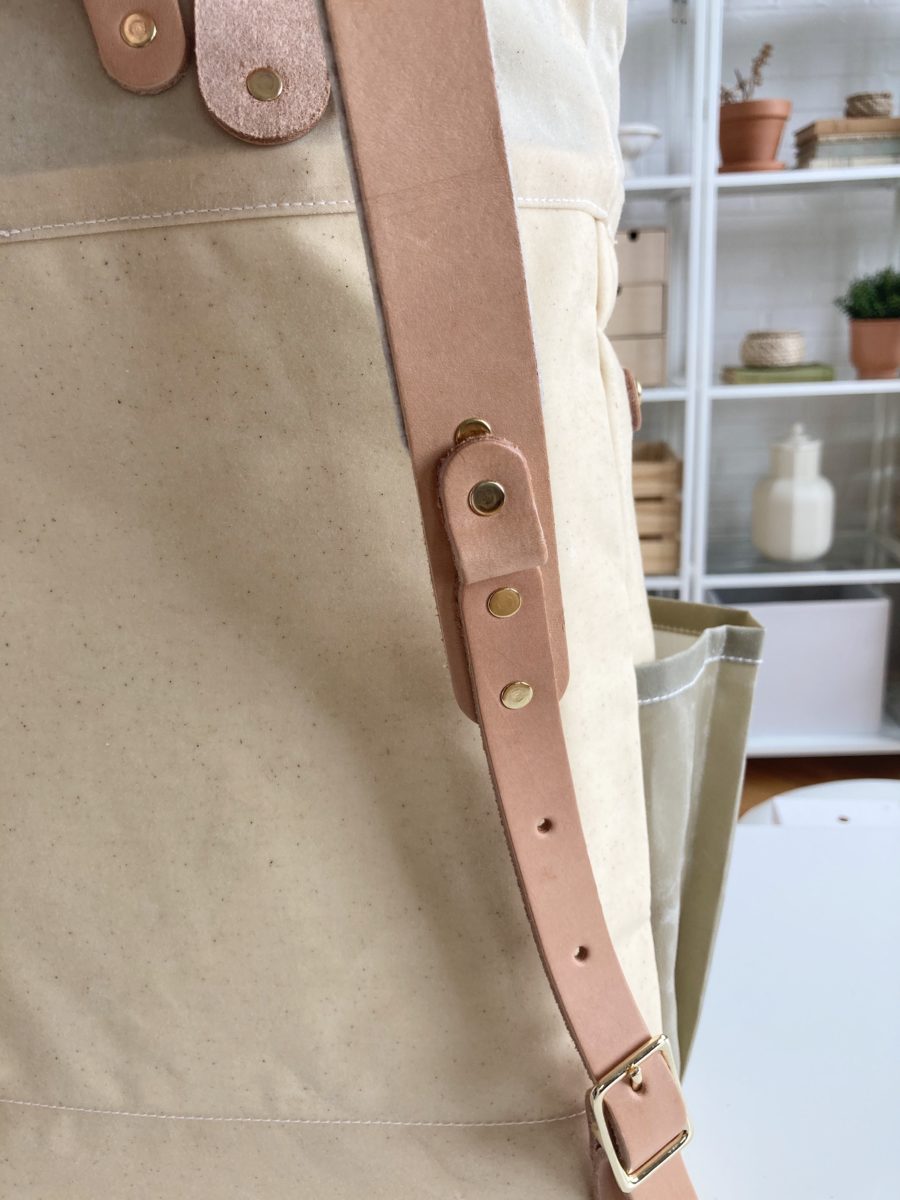
Although there are other parts of my Slabtown that aren’t perfect, the way I messed up the straps is super disappointing. All of the leather is pre-punched for you, but if you get the felt expansion pack you’ll need to punch four holes in your straps. And I punched one of them 1/2″ off. GAH.
My solution was to add this silly little leather loop. I will eventually add a brass key ring so I can clip my keys to it. I guess it’s better than a random hole?
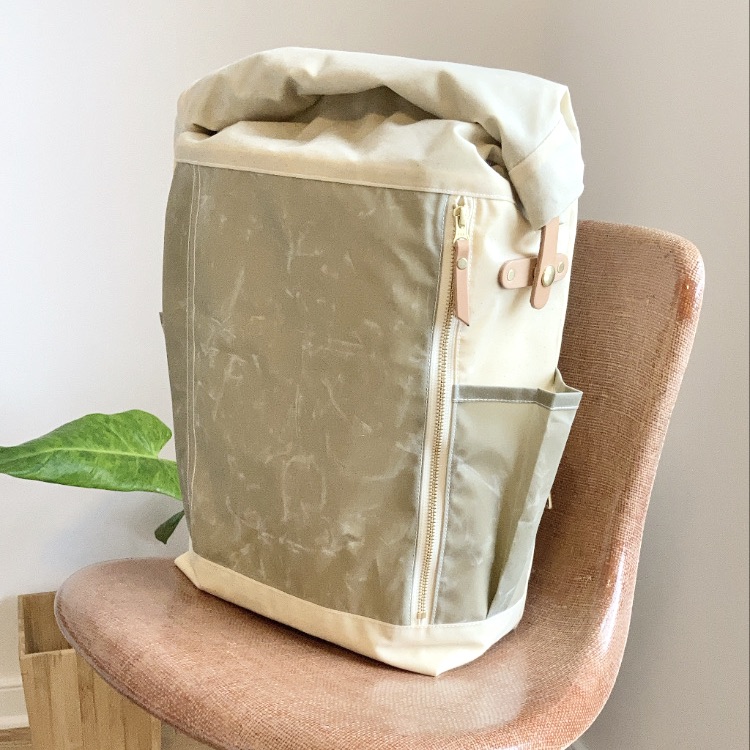
I’m so happy with these bags. Klum House provides you with the most complete and caring experience with their kits. I cannot recommend their patterns and products enough. It blows my mind that I made these. Here’s a 10% off coupon for any Klum House goods.