I have not been making it into the pottery studio very much this month. It might be because I’ve been sewing a little more… and because of my big plate disappointments. These were doomed even before the bisque, but I still fired them anyway. Maybe one day I’ll rent a tile saw and cut them into coasters?
Wall Art
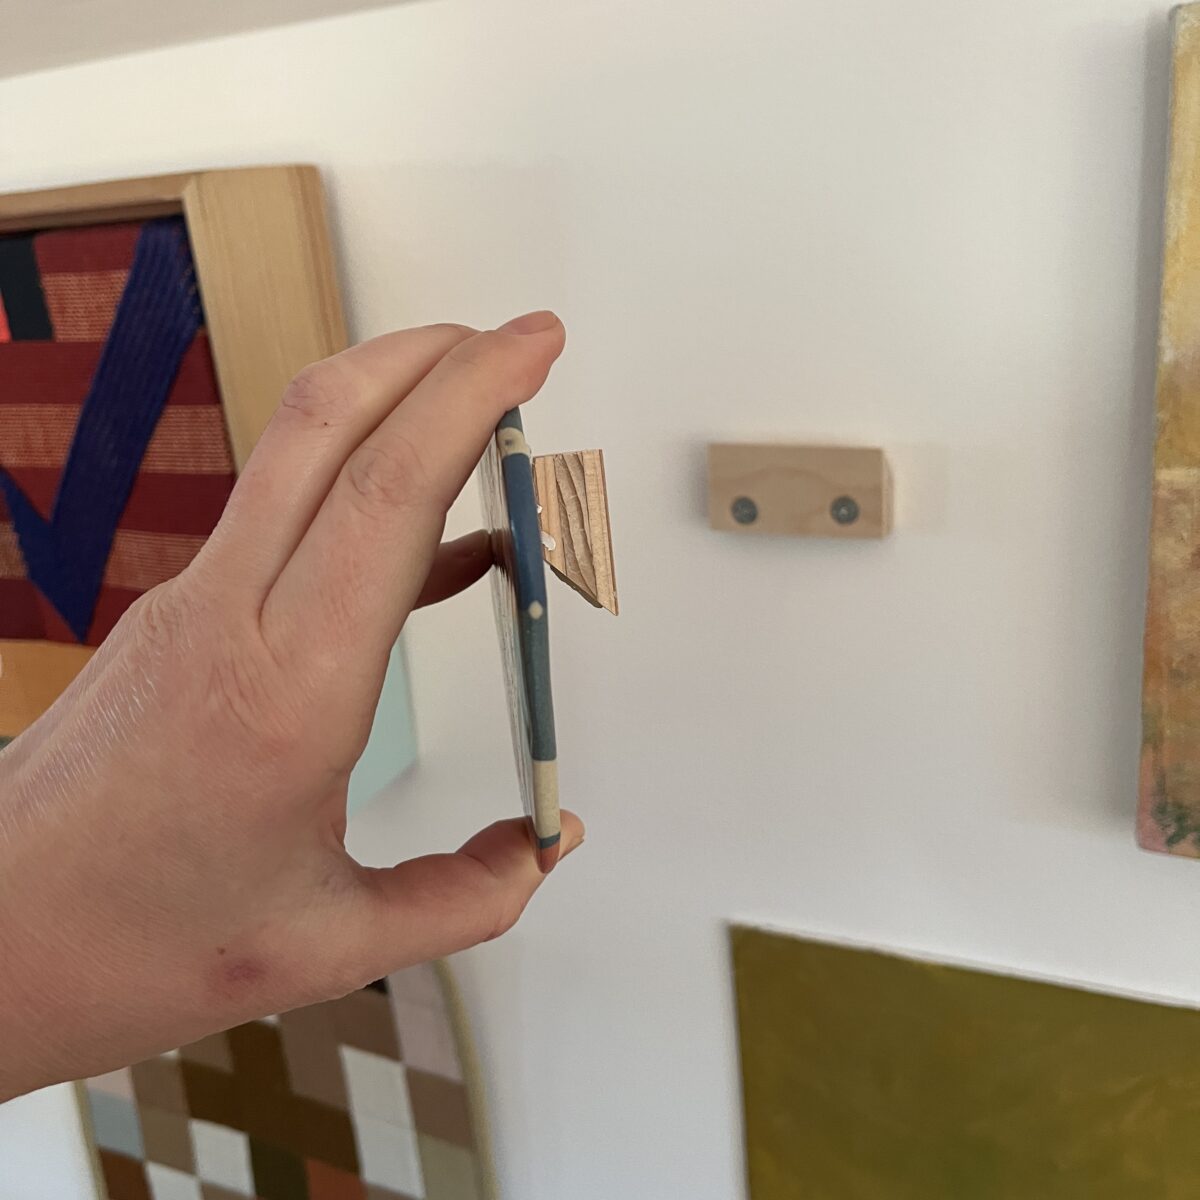
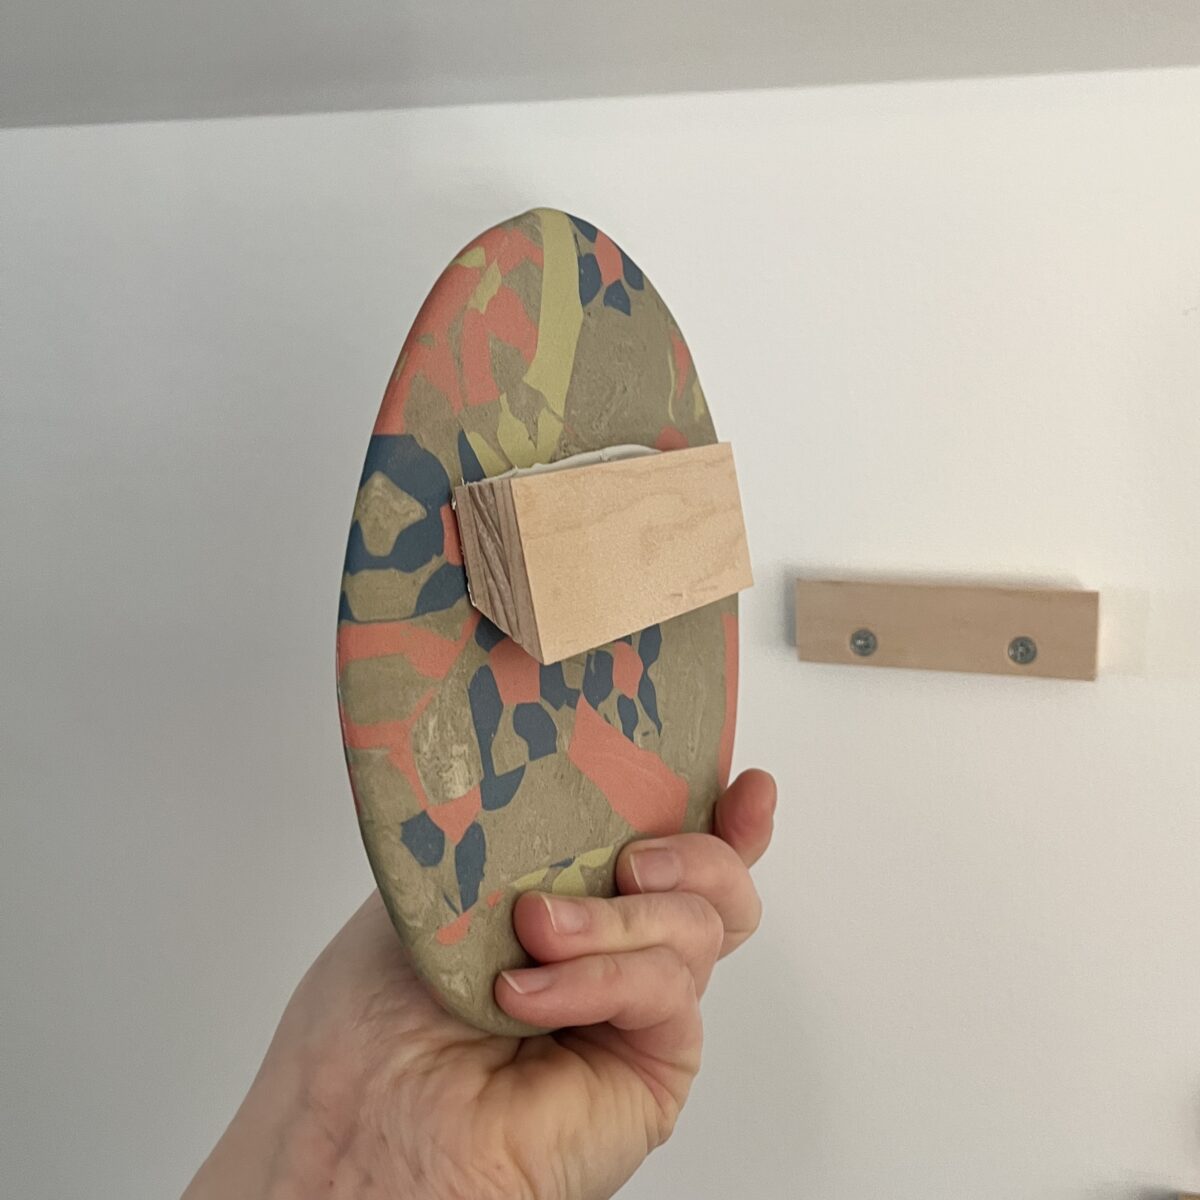
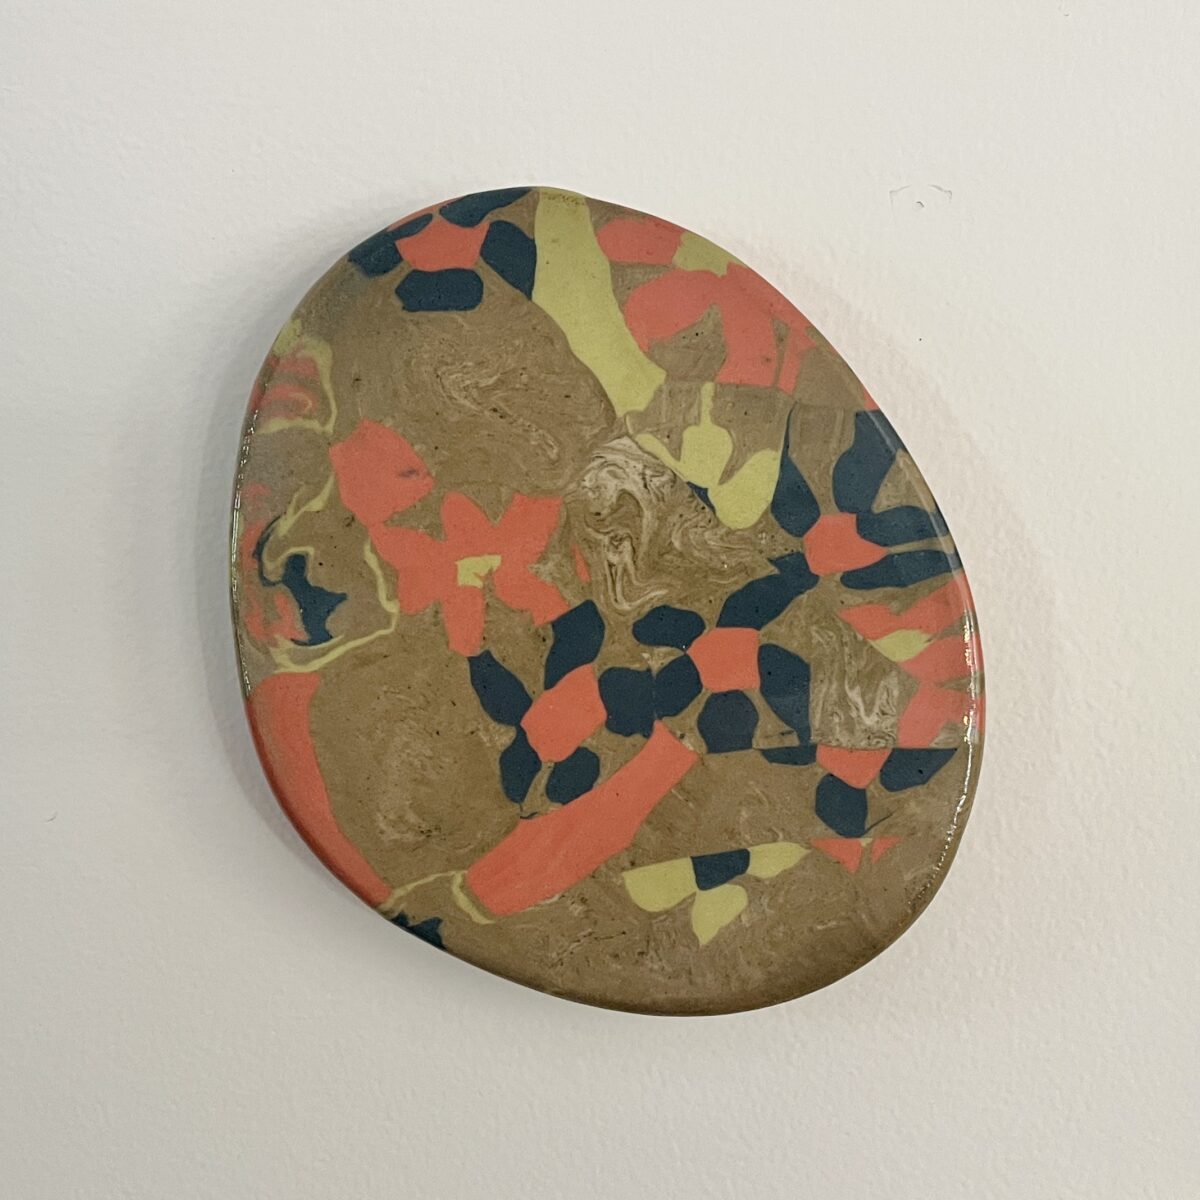
These are some older pieces that I finally got around to hanging with French cleats. The amount and method for spreading the epoxy needs some work, but I’ll get there.
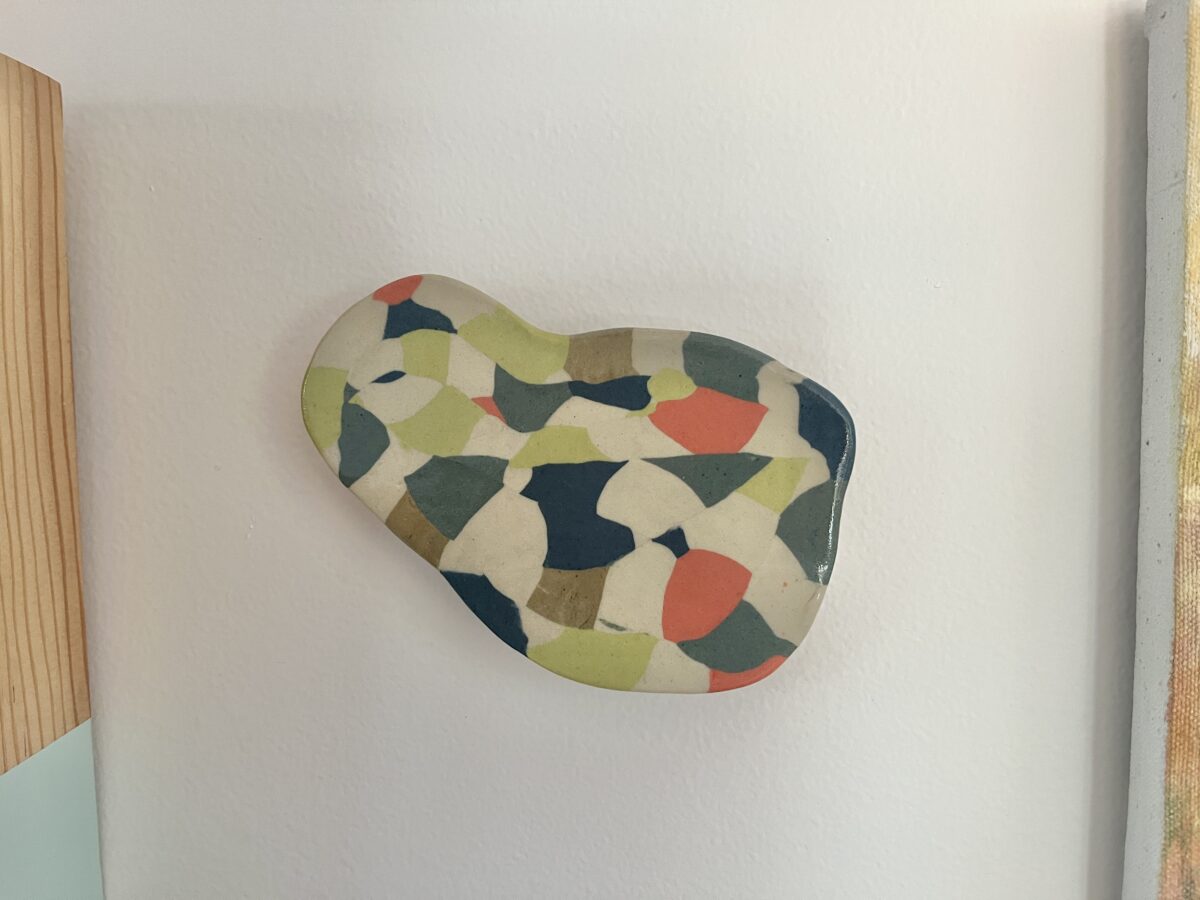
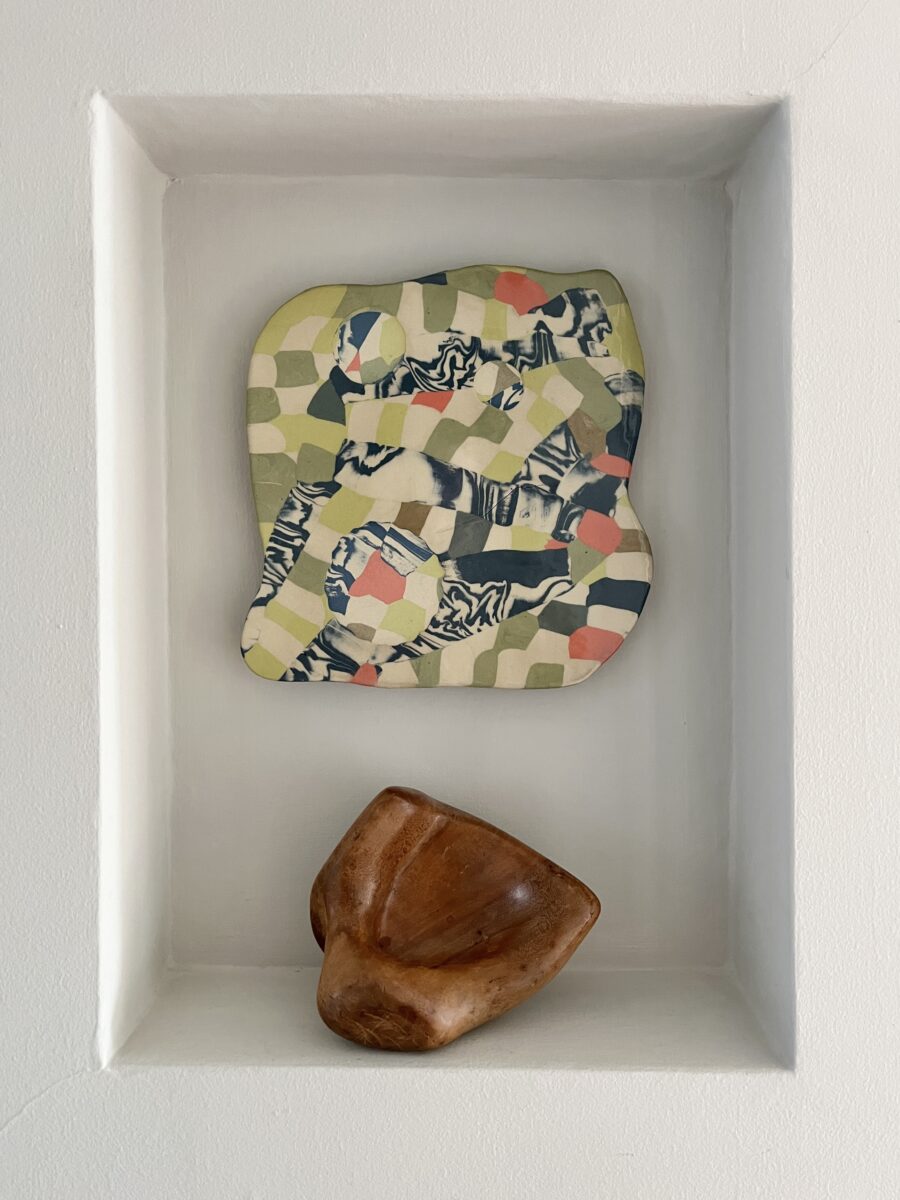
This guy cracked too but it totally looks great in this empty phone niche in our hallway.
And another disappointment. I bought some walnut wood that I’m going to set it into so that it can be hung on the wall making the cracks “intentional.”
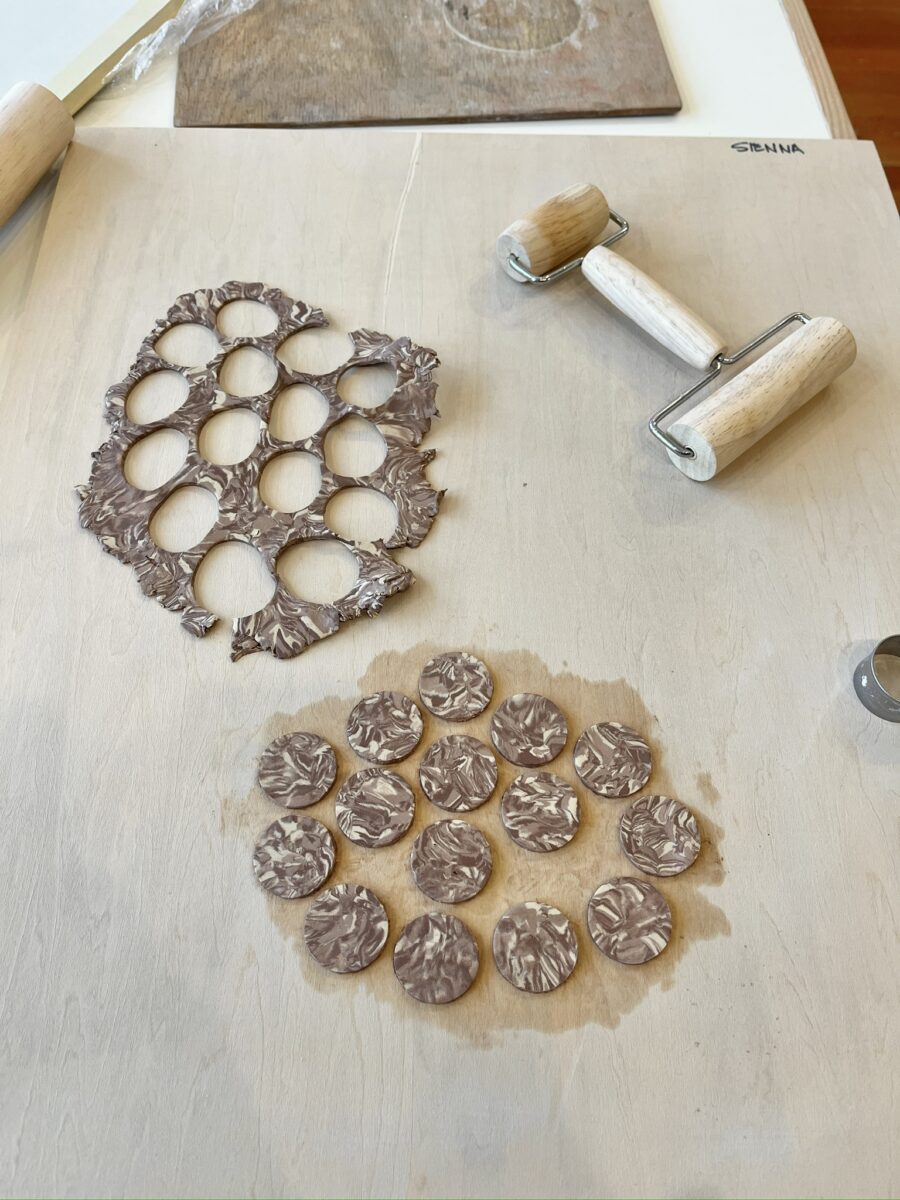
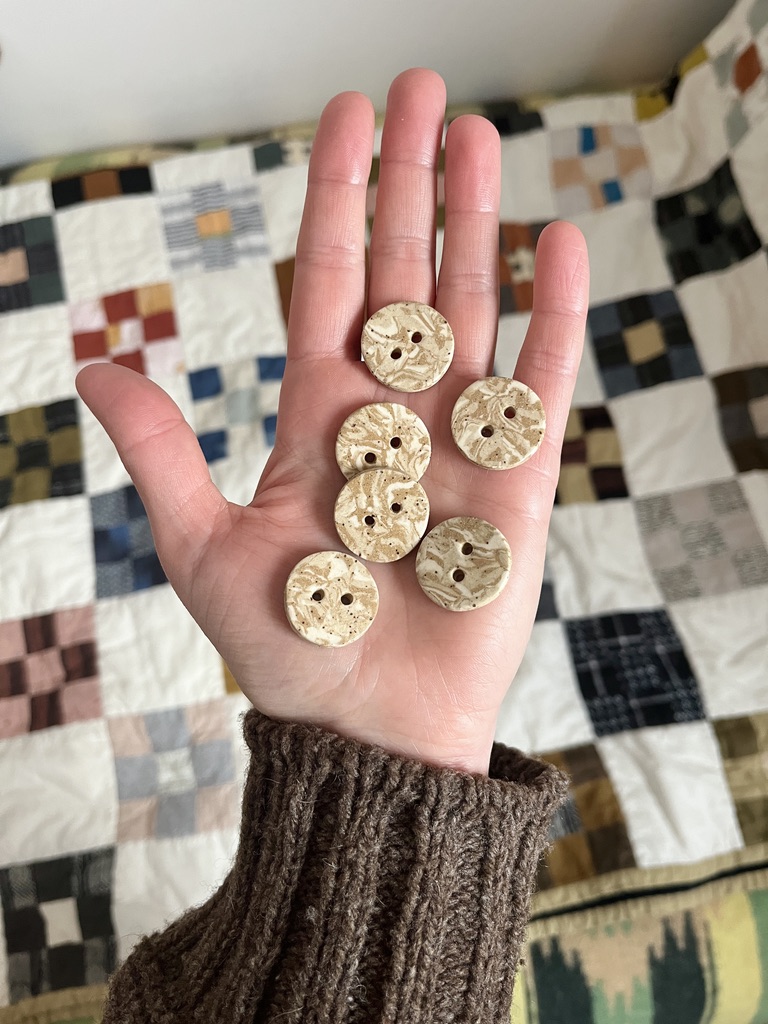
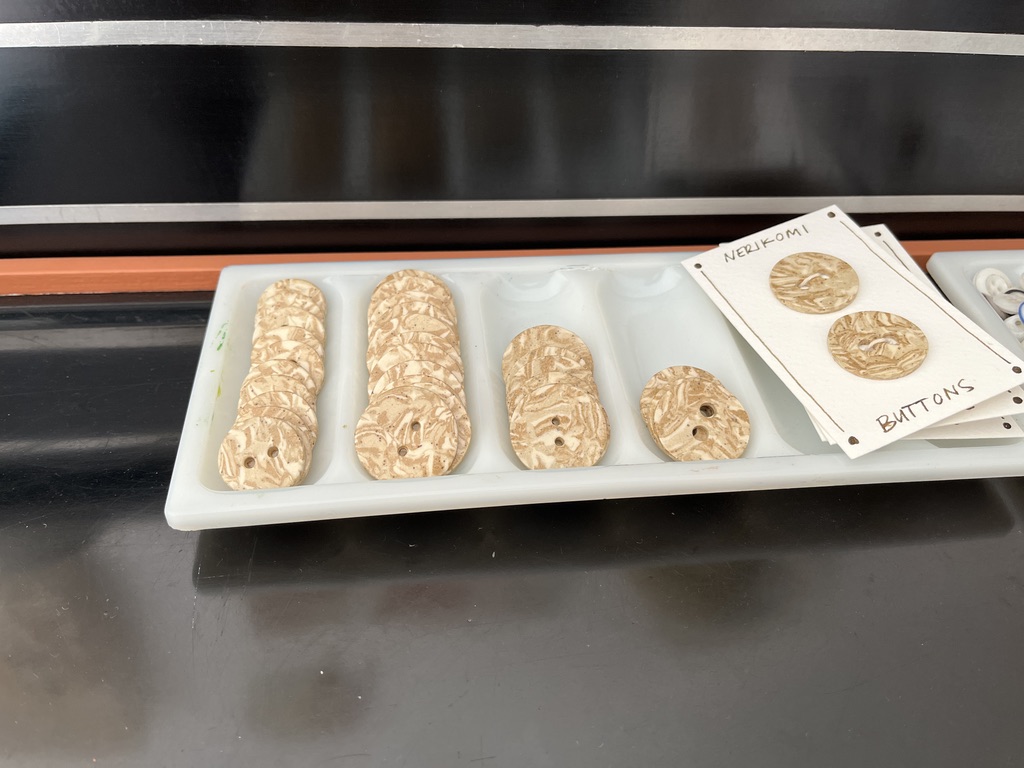
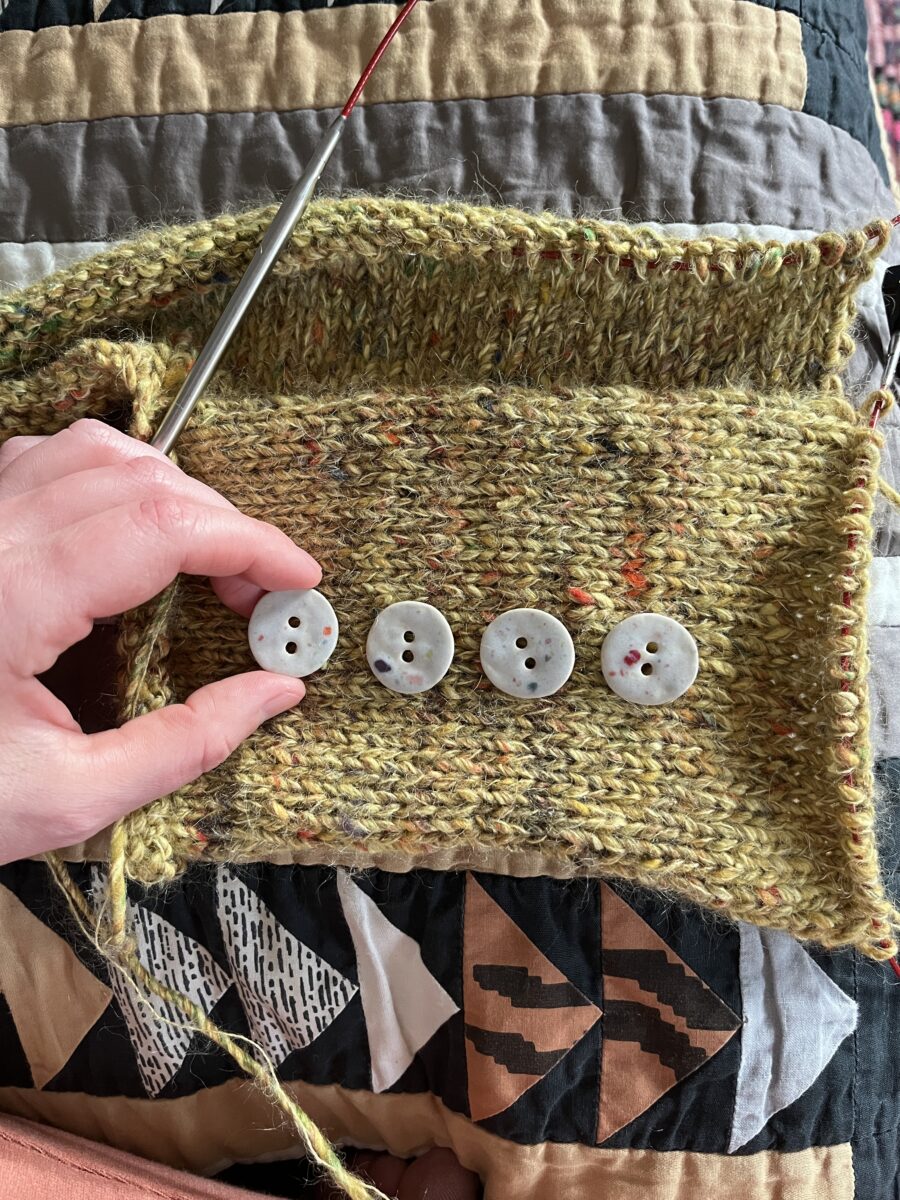
Buttons
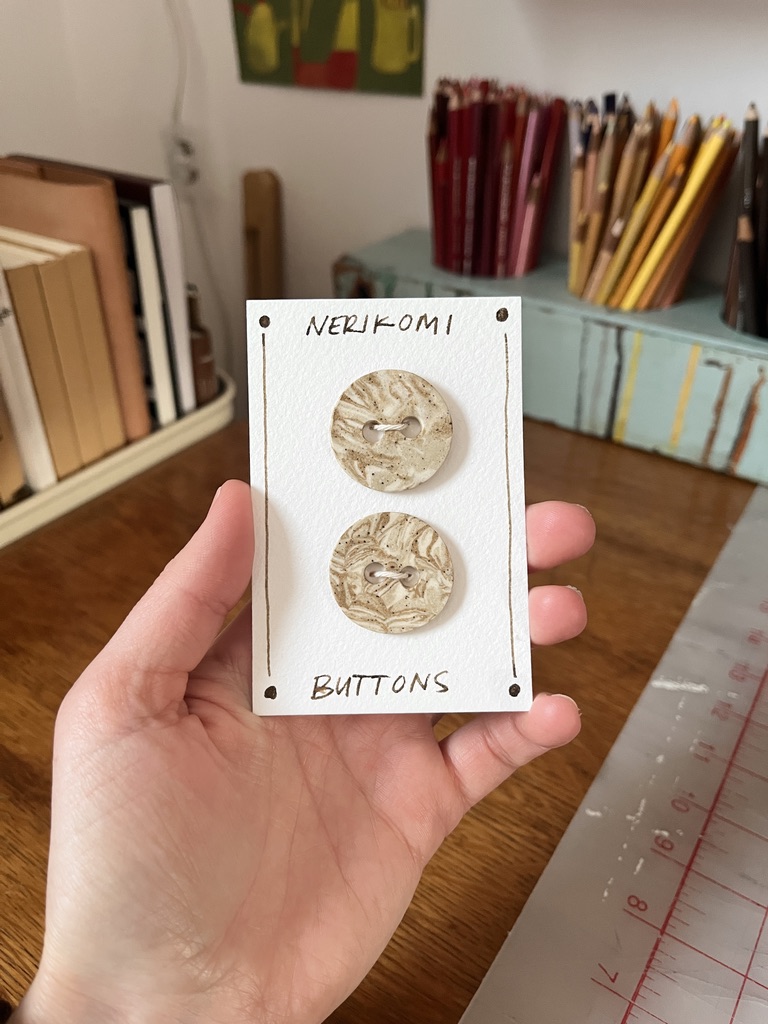
I used trimmings from nerikomi projects to make buttons!
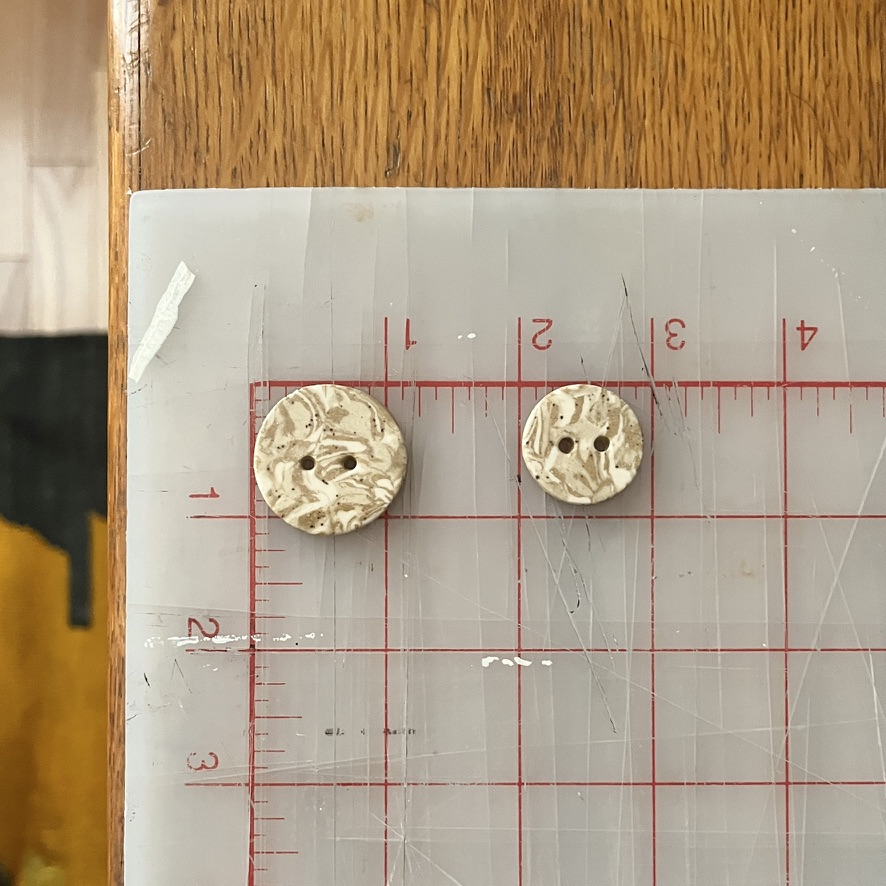
There are two sizes and I think they’d be great for hand knitted cardigans.
I plan to sell some sets in the Fine Things storefront.
More functional things
I made two mugs like this but one suffered a crack in the base that glaze did not fill.
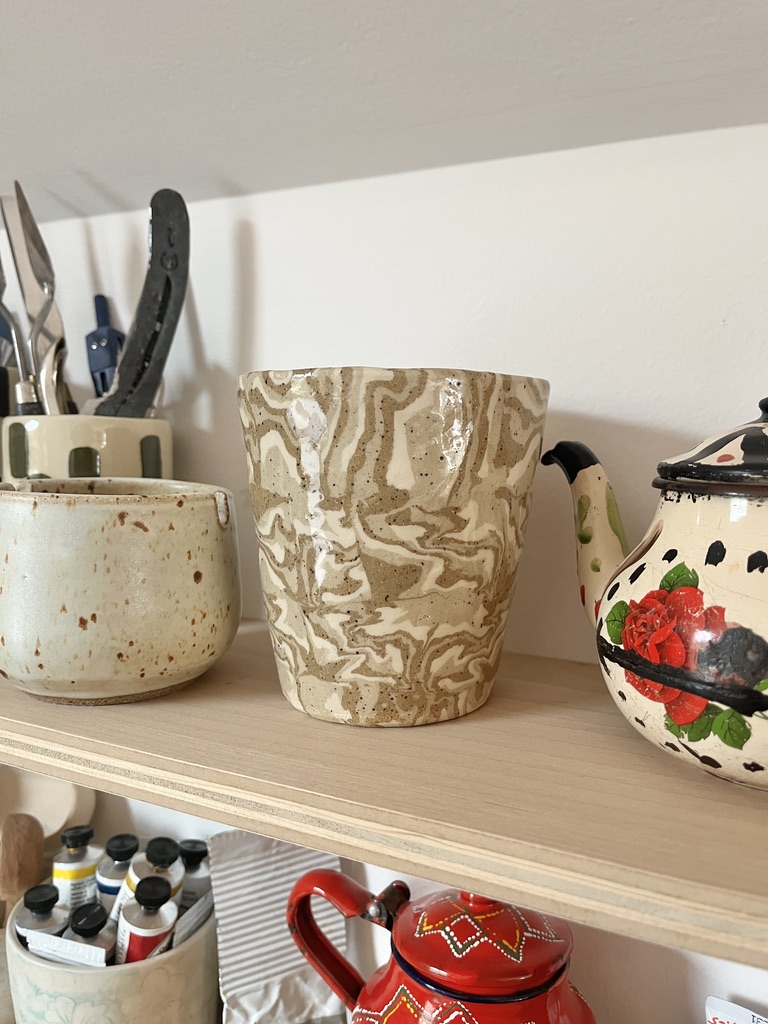
On this mug, I tried burnishing the exterior. It worked sorta well but the cheap spoon I was using deposited a lot of marks onto the white clay that didn’t completely burn off. The manganese bits also burst through the smooth surface making this guy pretty rough.
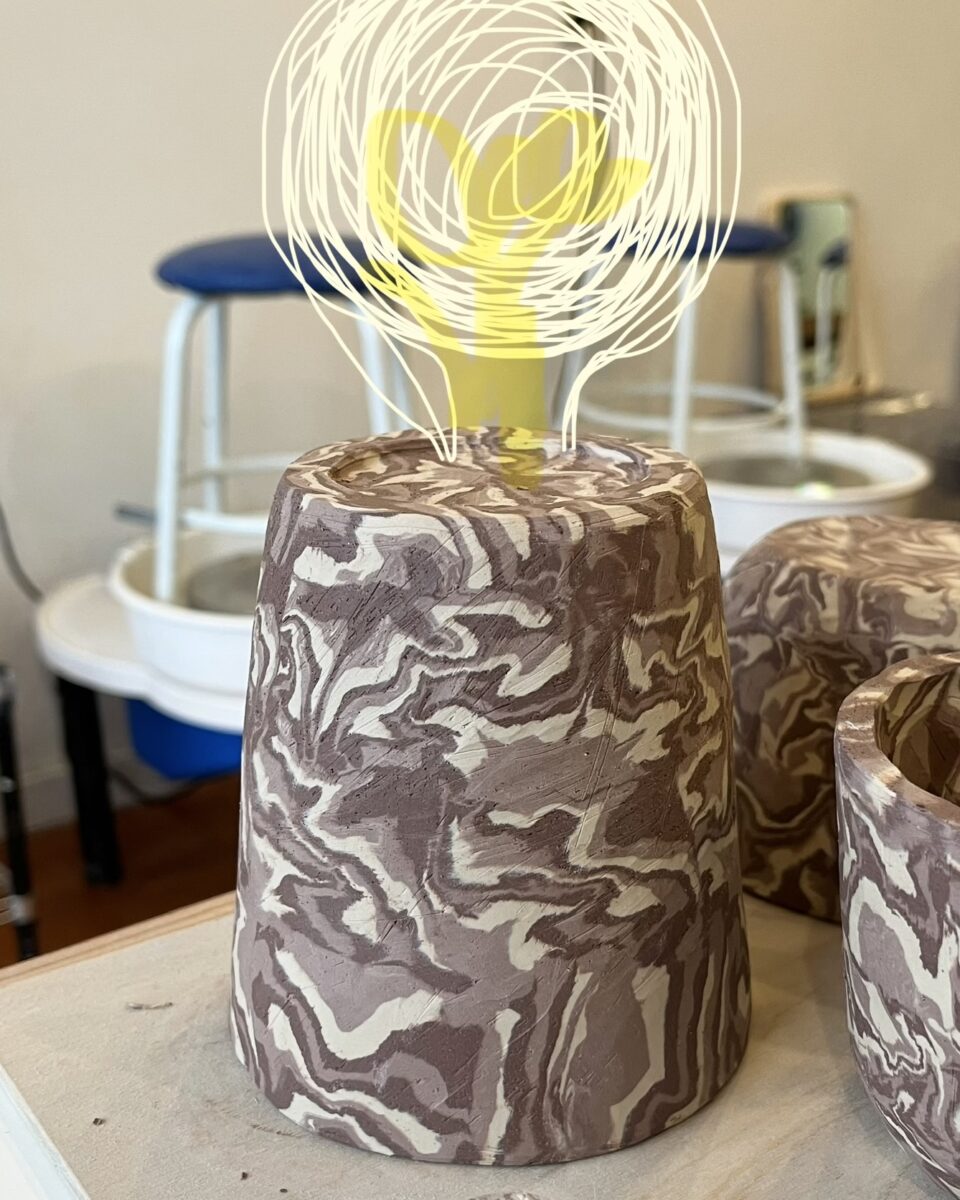
And this… awkward vase? While making it, I had the idea to eventually make a lamp like this but taller. I have the lighting kit all ready to go, but I’m completely out of clay.
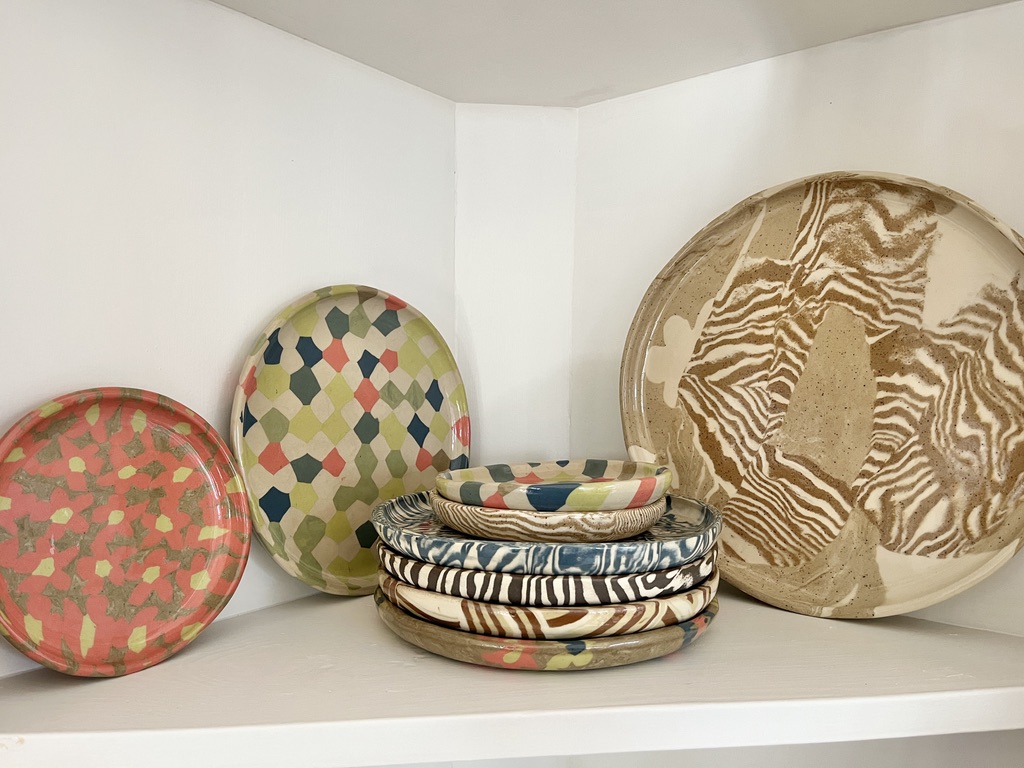
And an update on replacing my IKEA dishes. There are now five medium plates, three little plates, and one large plate. I’ve sold / am selling some small and medium plates at the shop that either varied in thickness or I just didn’t love. I’m aiming for at least six of each size.
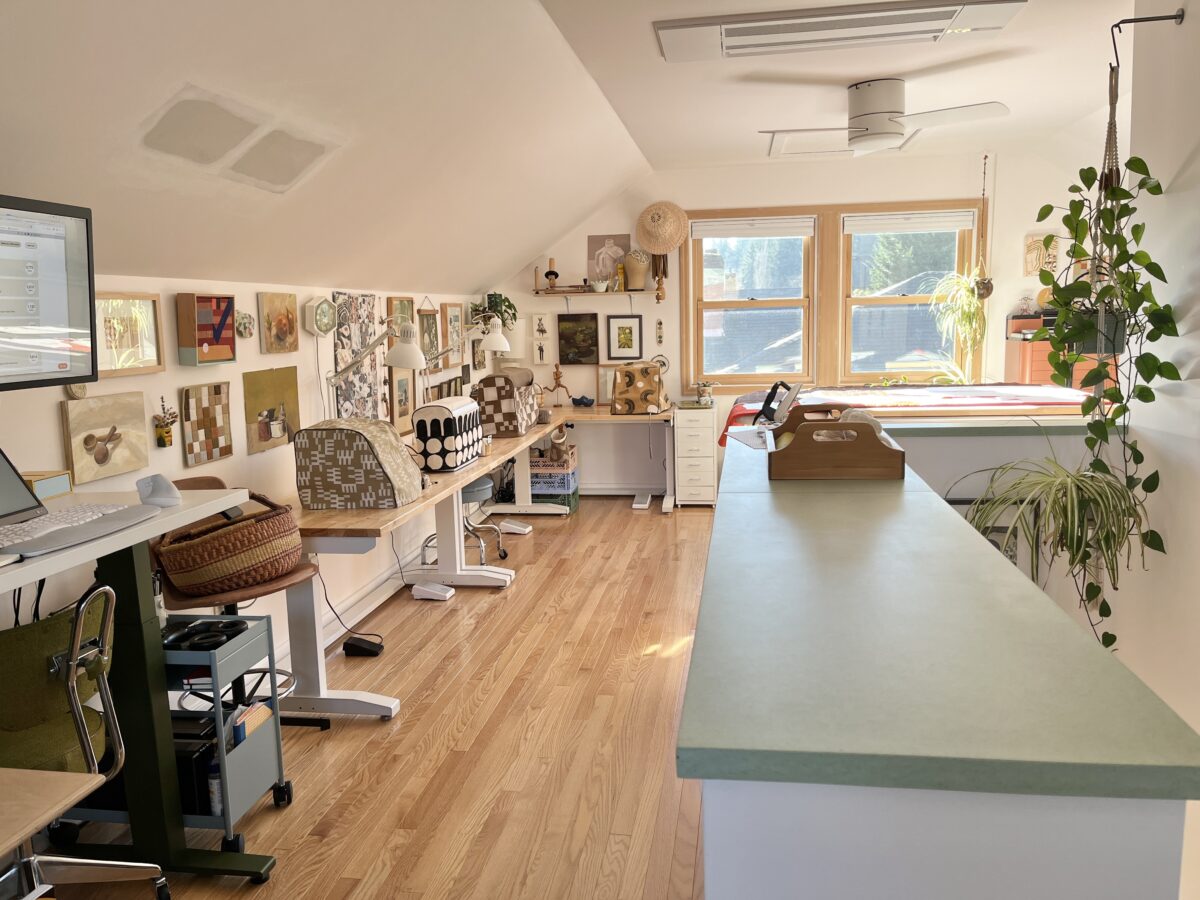
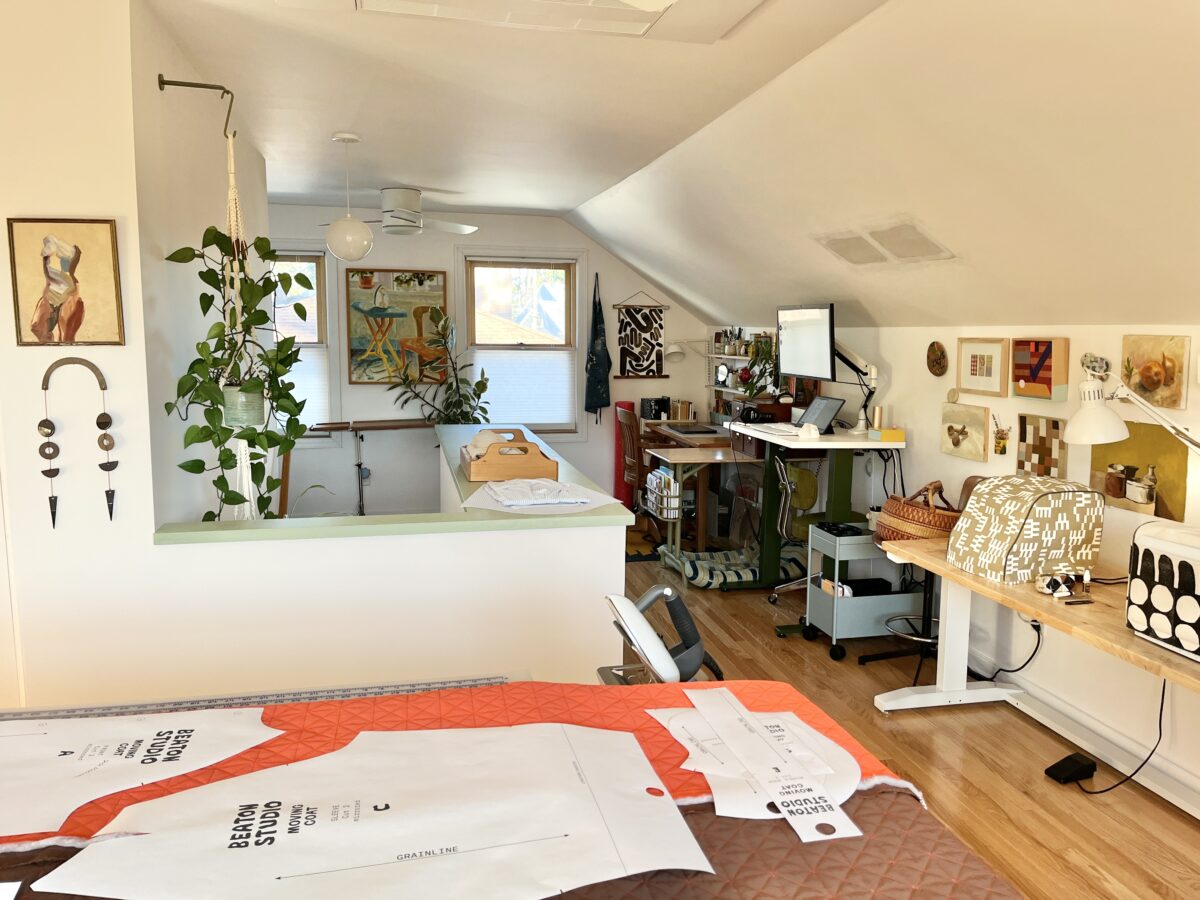
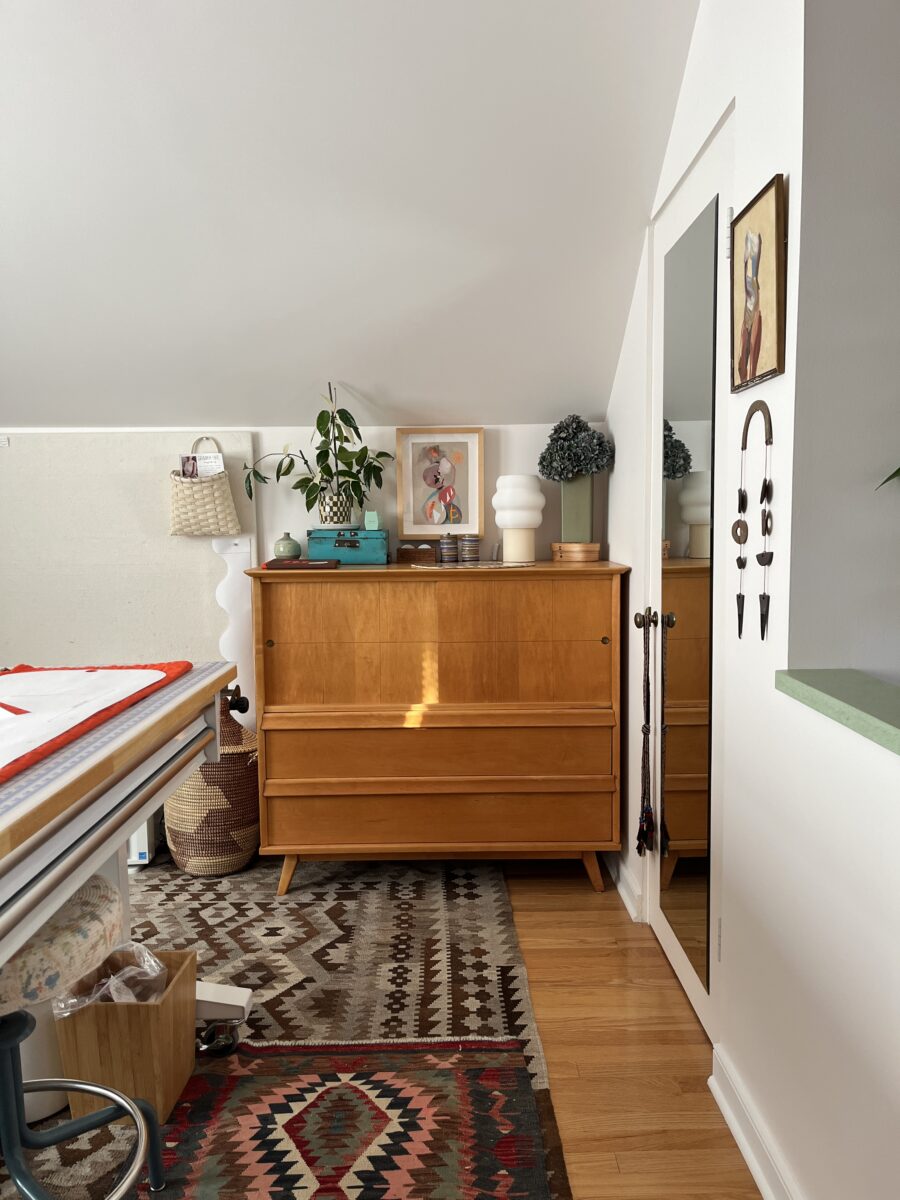
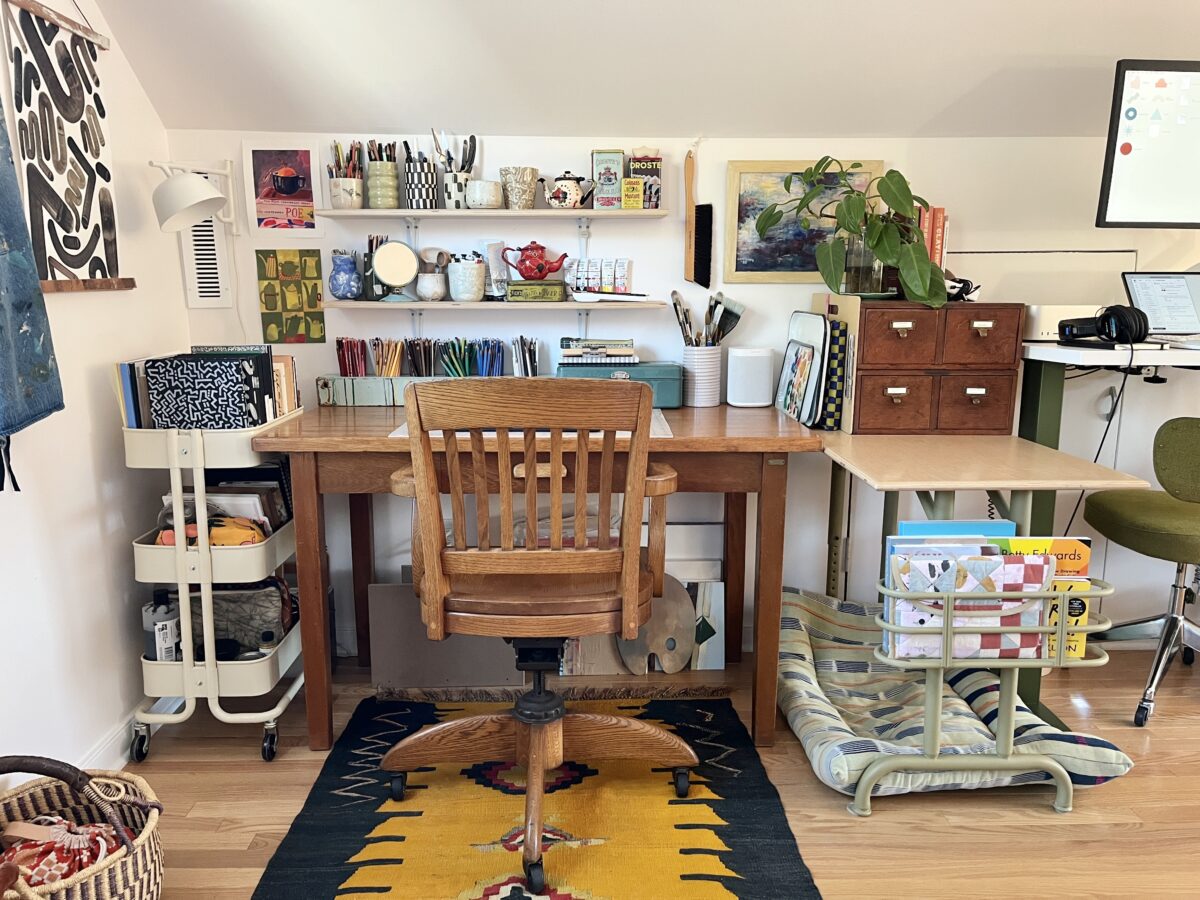
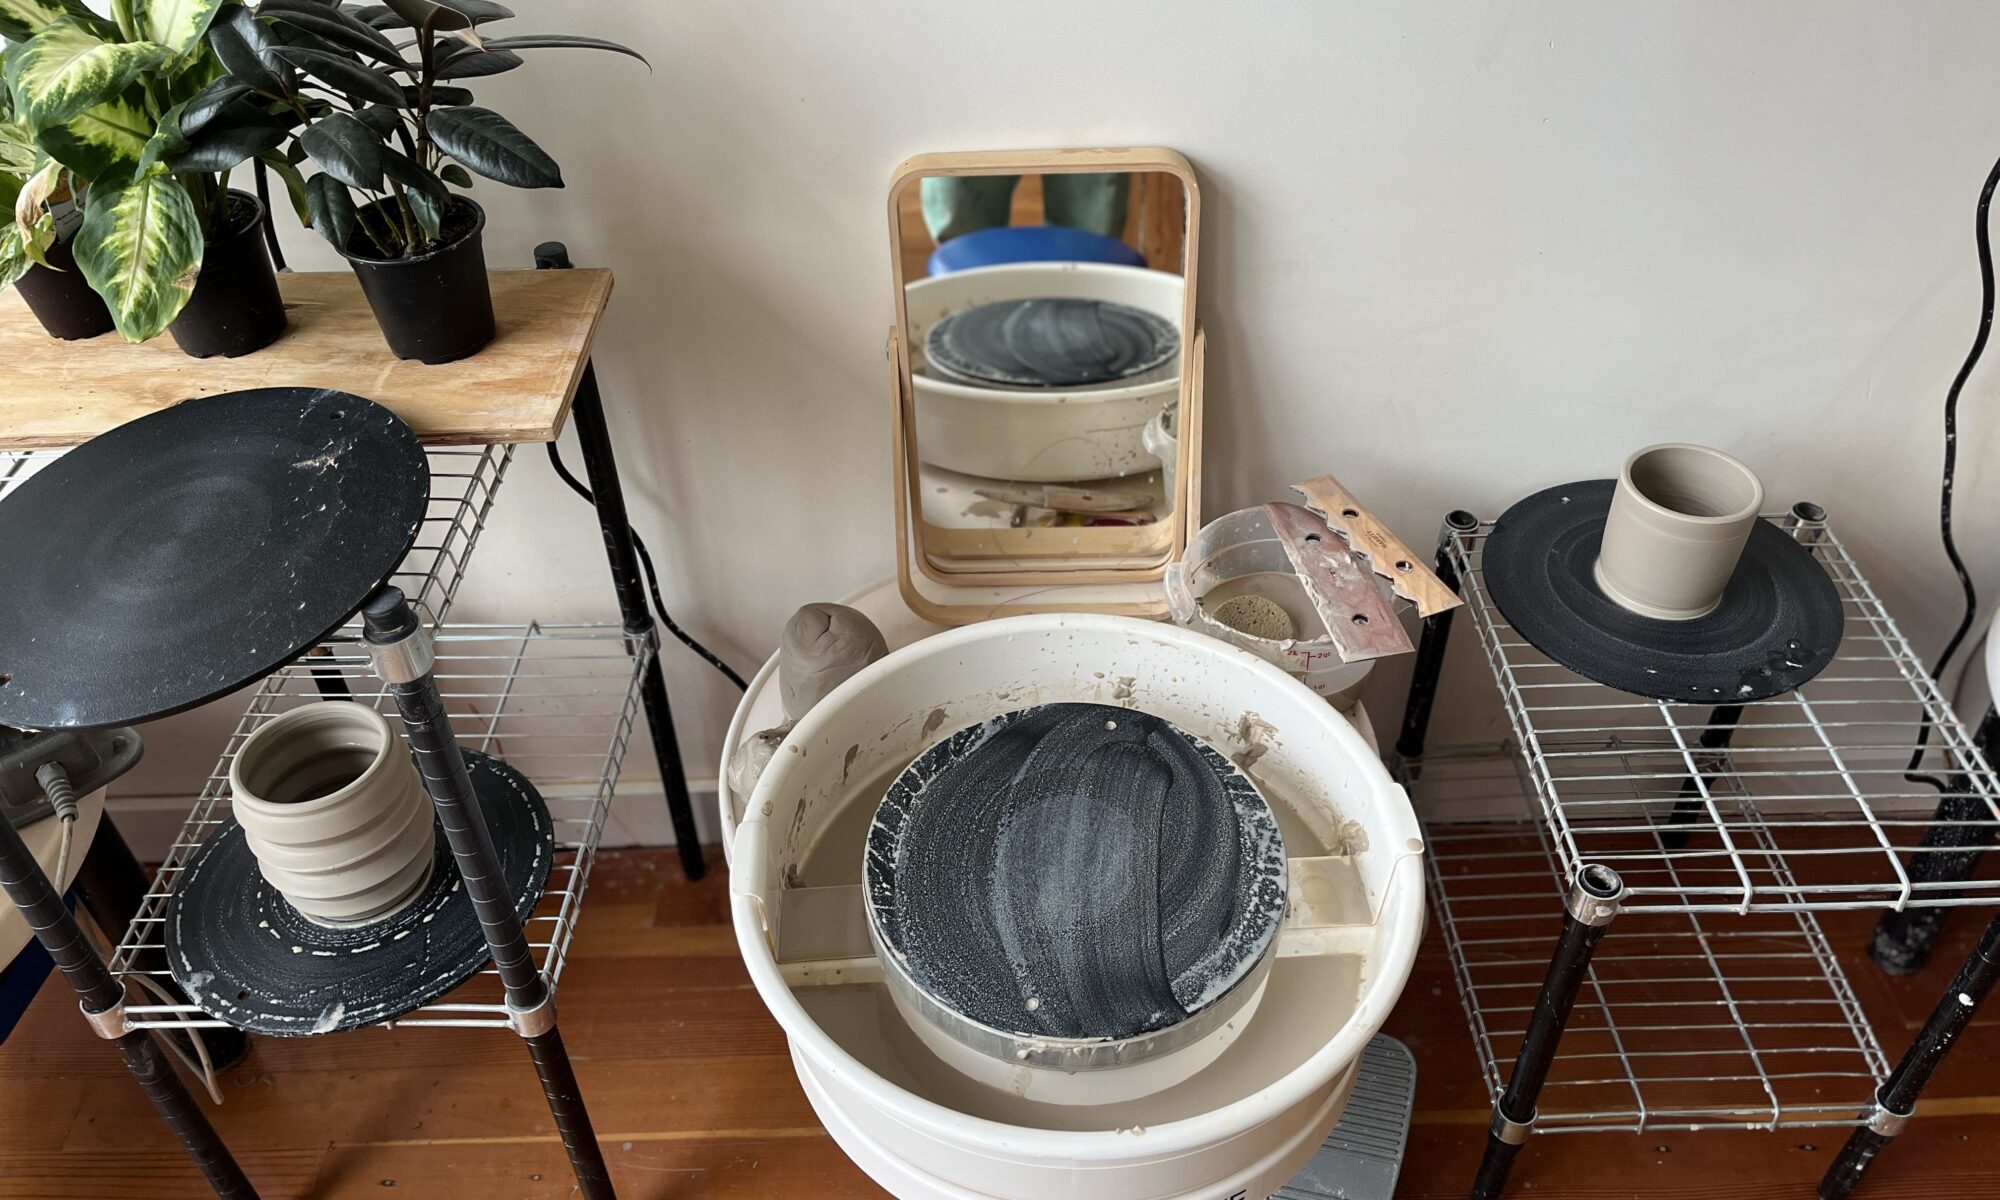
I haven’t done a full studio tour in a while, I think the last one was shortly after finishing the gentleman’s cabinet. Not a lot has changed, but I did feel inspired to do a deep clean after taking photos of my recent knitted FOs. As you can see, I had an unsightly cord mess, which is what inspired the cleaning.
As I’ve mentioned before, I am super lucky to have the whole upstairs. Managing the climate up here has been a struggle until we installed this ceiling mini split. I need to paint over the failed heating/cooling attempt in the sloped ceiling, but I’m not quite ready for how much of a pain that will be as I also need to paint all of the window trim. It’s essentially painting the whole space again and I just can’t.
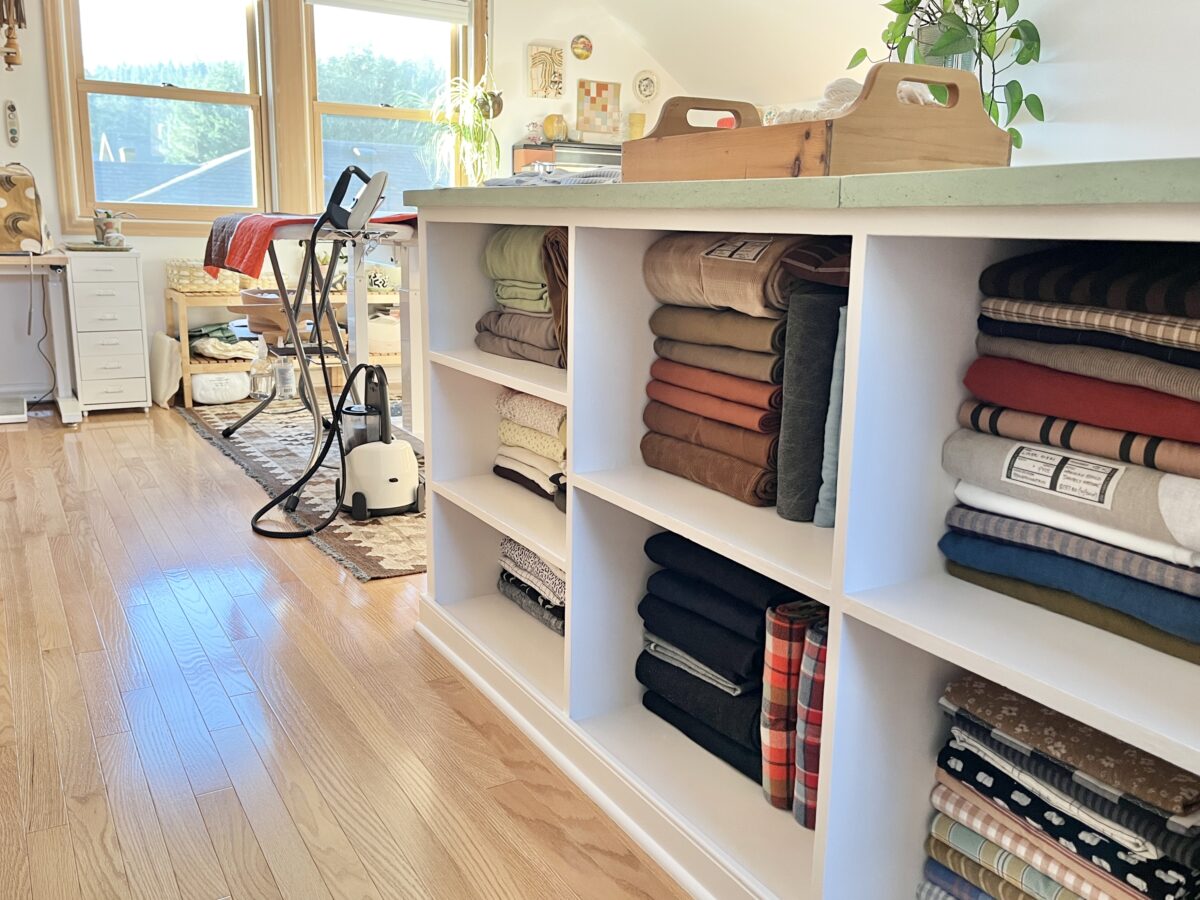
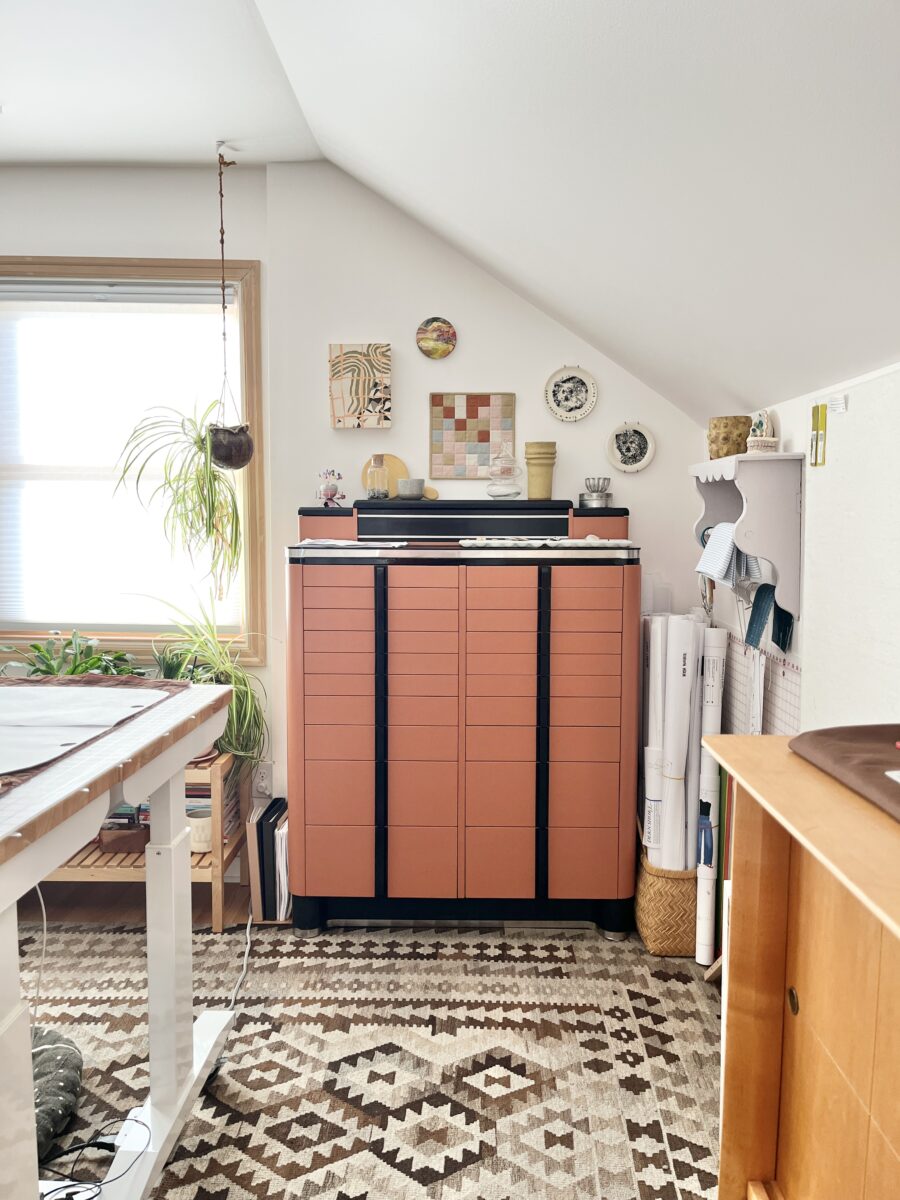
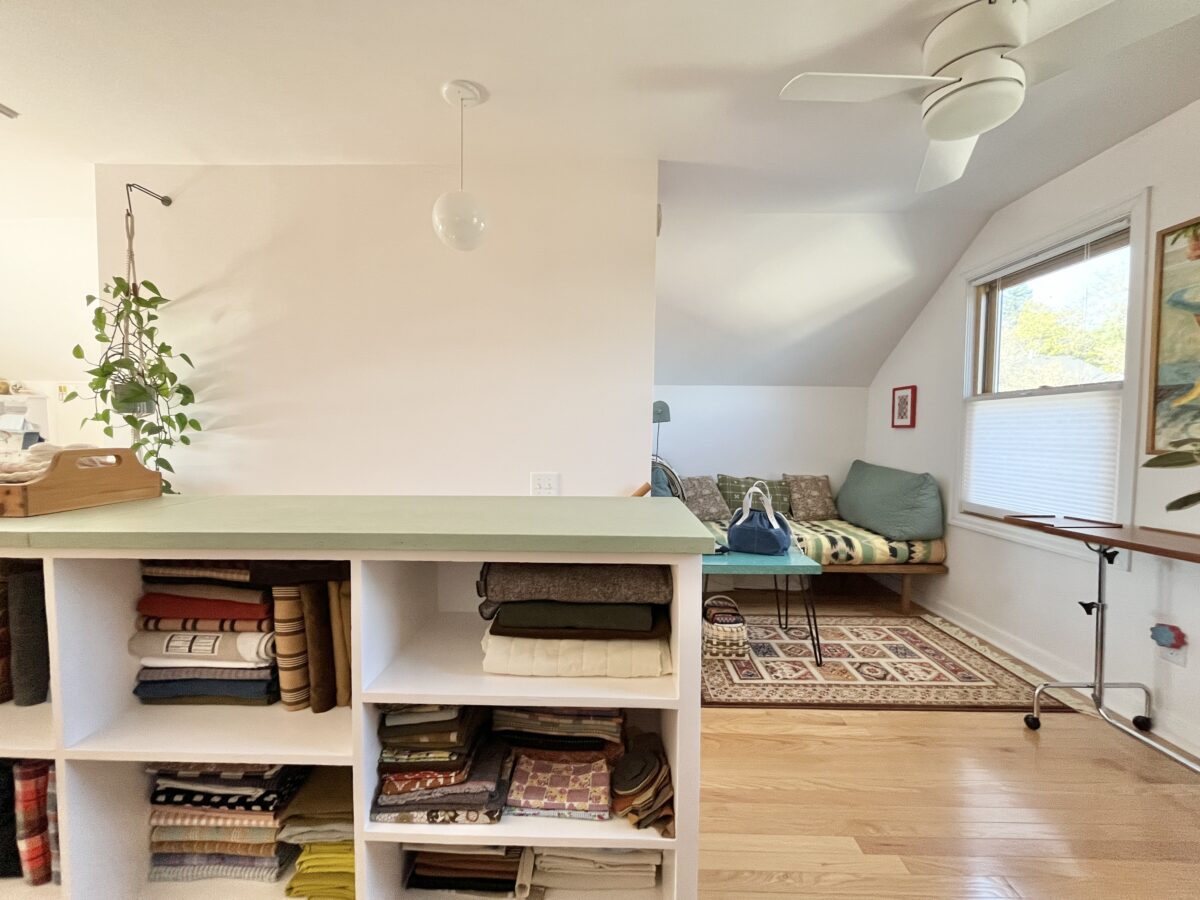
Fabric storage is still in the built-in shelves, but now my stash is fully contained here (I used to have a stack of fabric underneath one of the sewing tables). Over the past year, I’ve really been trying to use up some oldies and only purchase fabric when I have a project in mind and the desire to make it immediately.
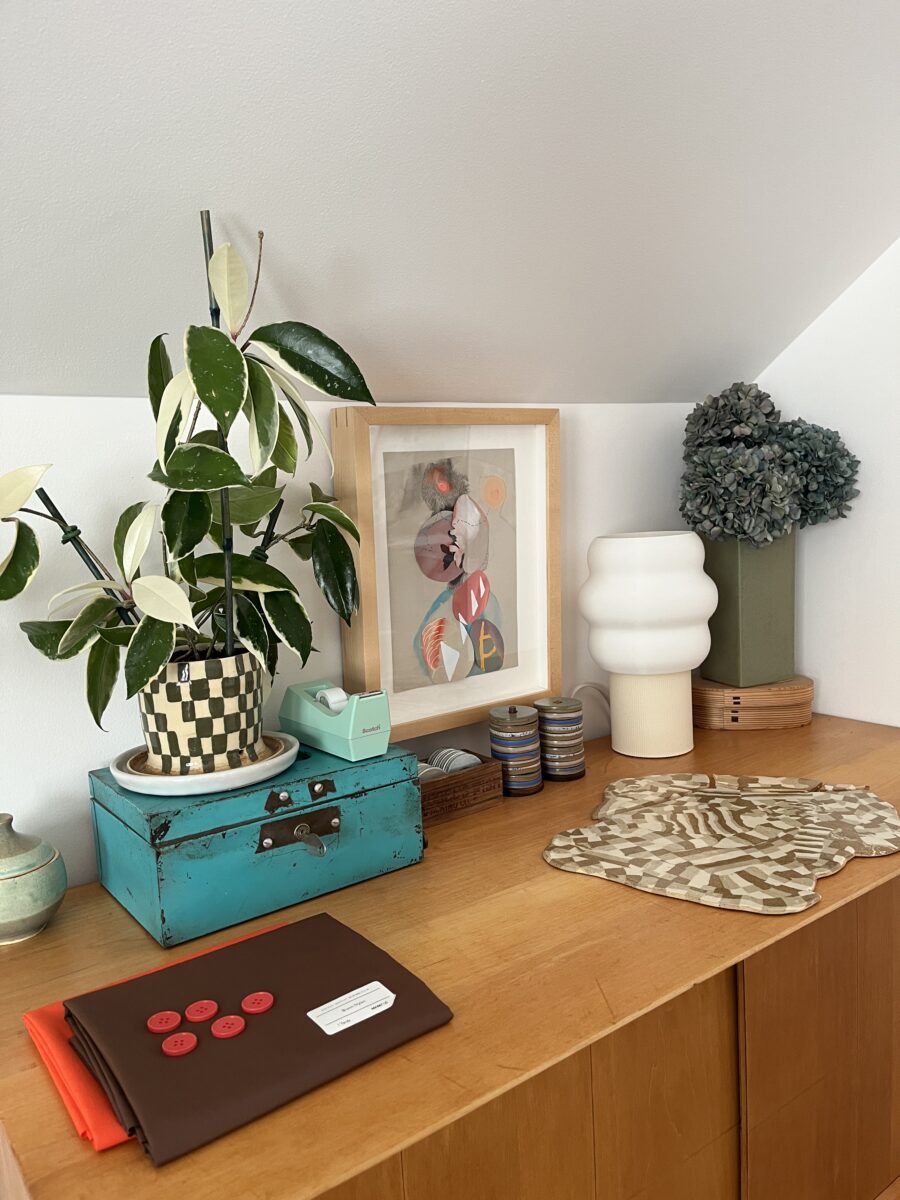
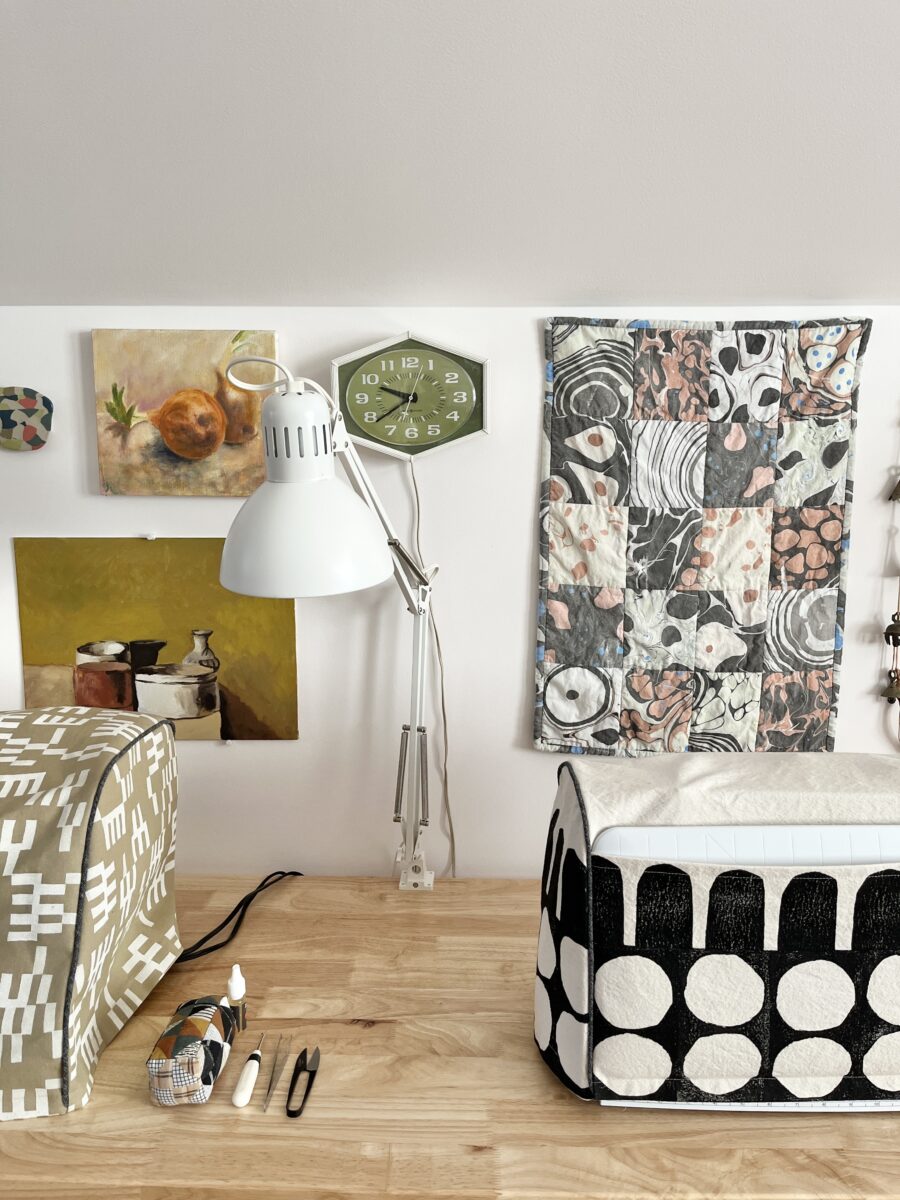
My birthday gift from my husband was this long coveted piece by Sarah Sullivan Sherrod. I rearranged this whole section of artworks so that I could see it from my work computer.
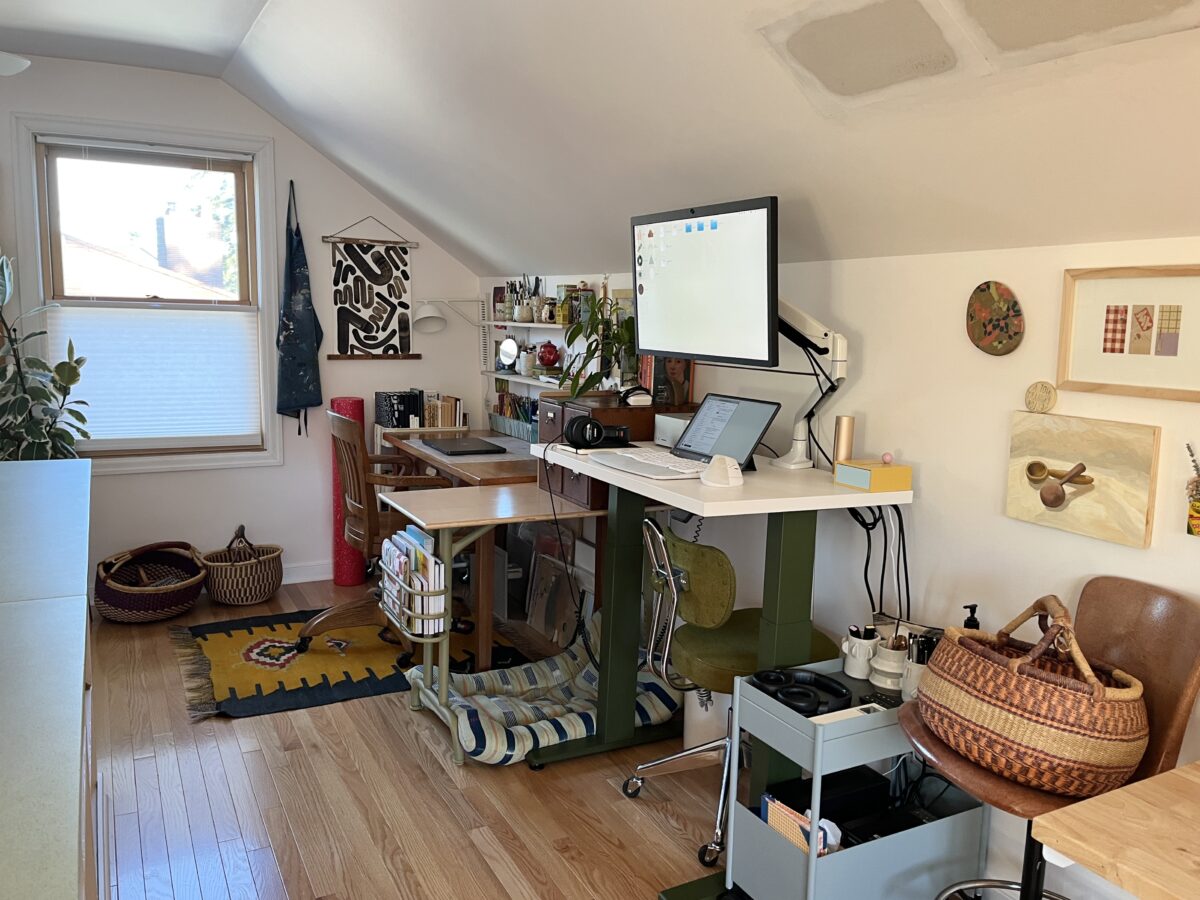
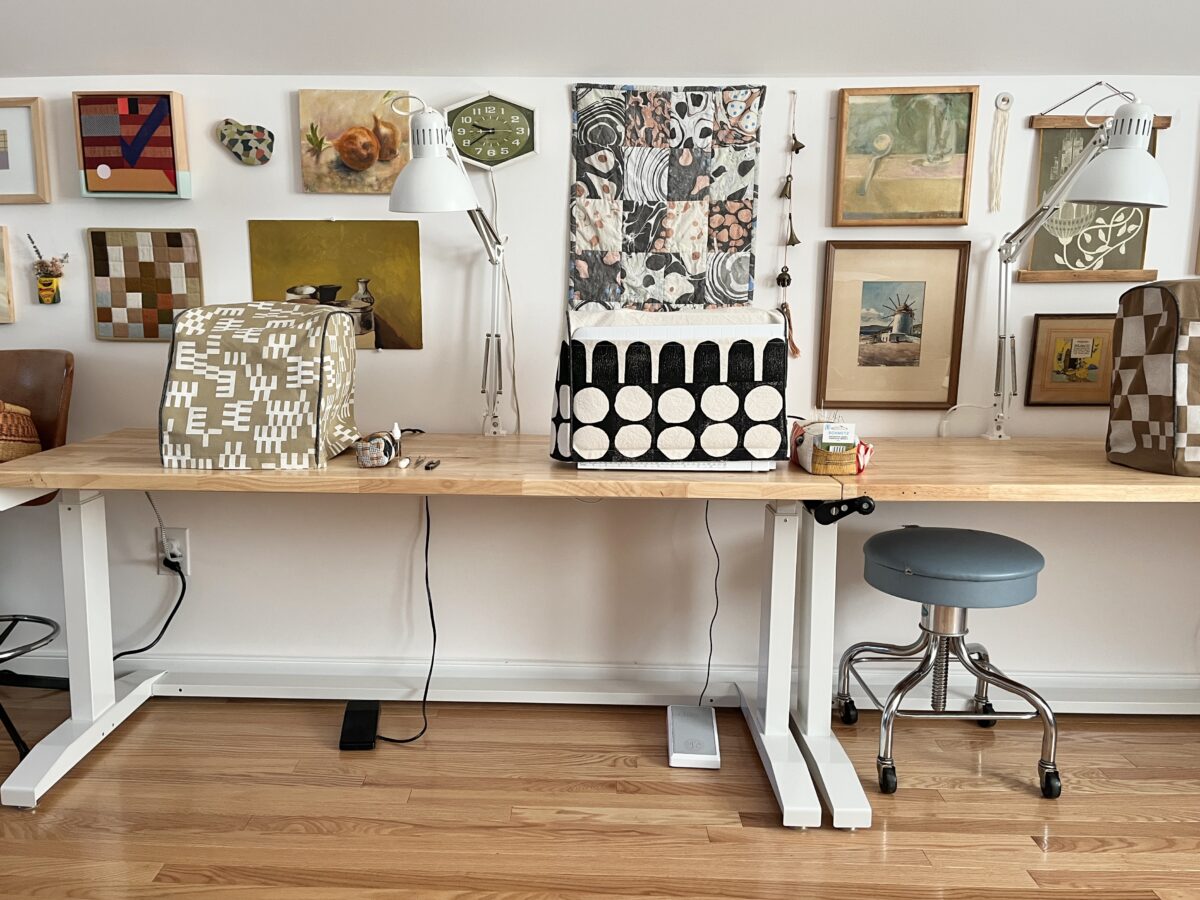
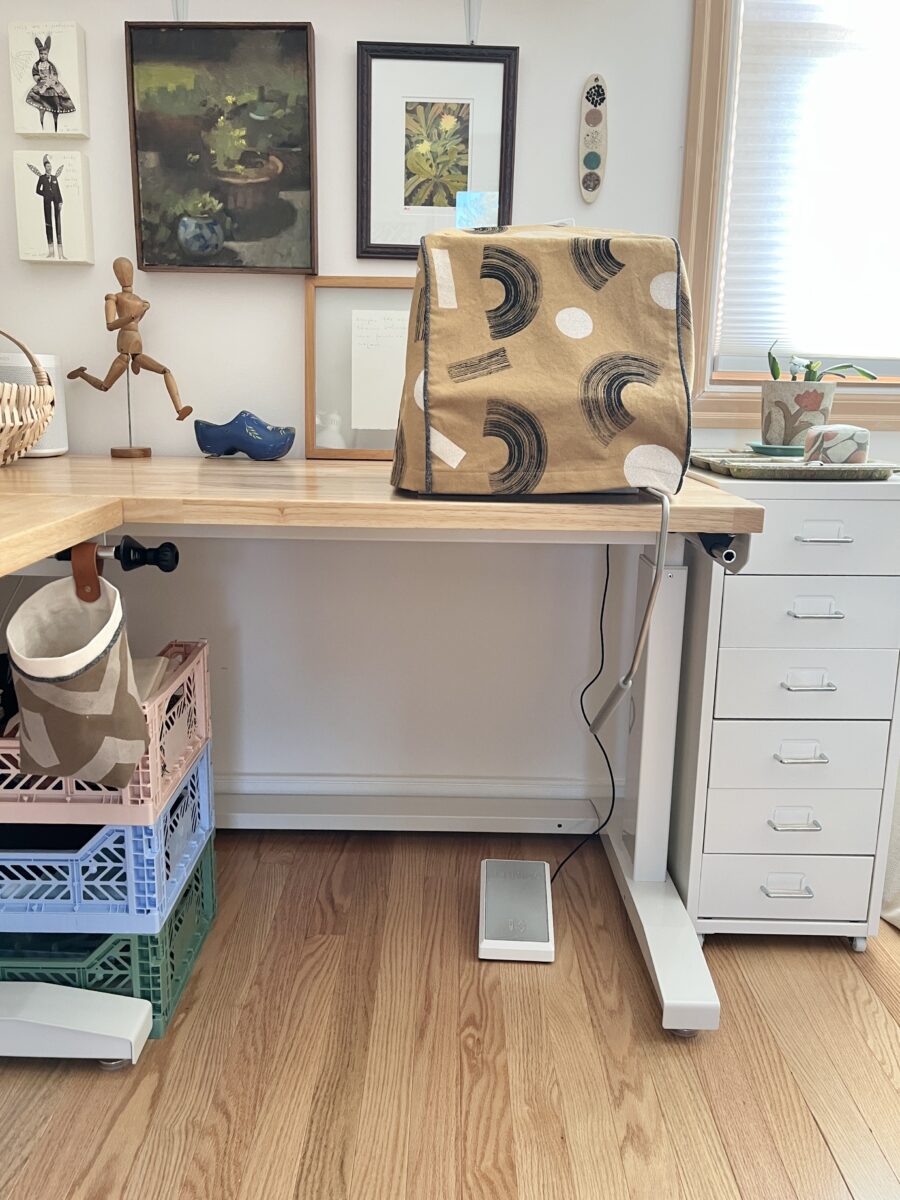
And the work from home space. Not an exciting view, but I did work on the cord management here too. I’m thinking about knitting a fun and colorful sleeve for the cords since they’re still so visible.
Tidying up the sewing machine cords feels so great! I also realized that my table depth is shallow enough to allow the foot pedal cords to run through the back.
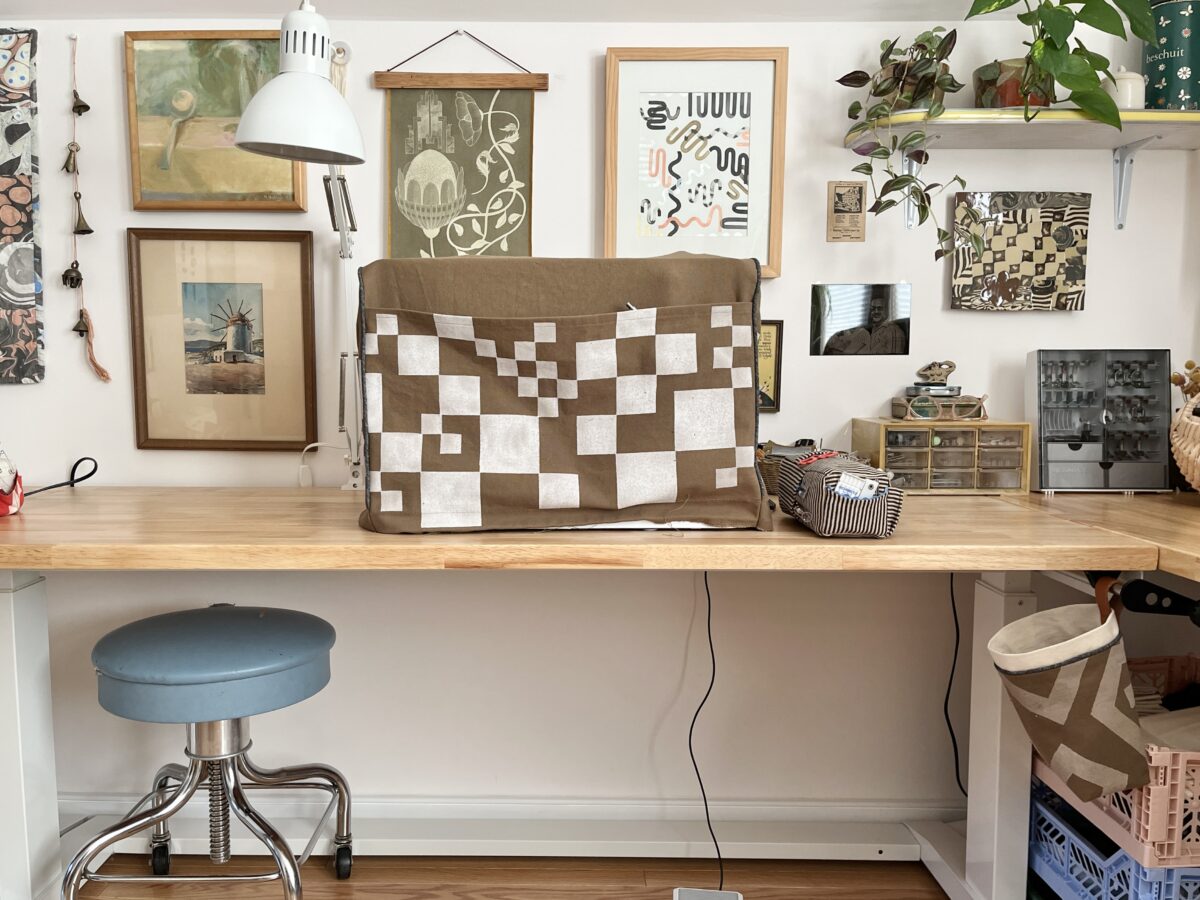
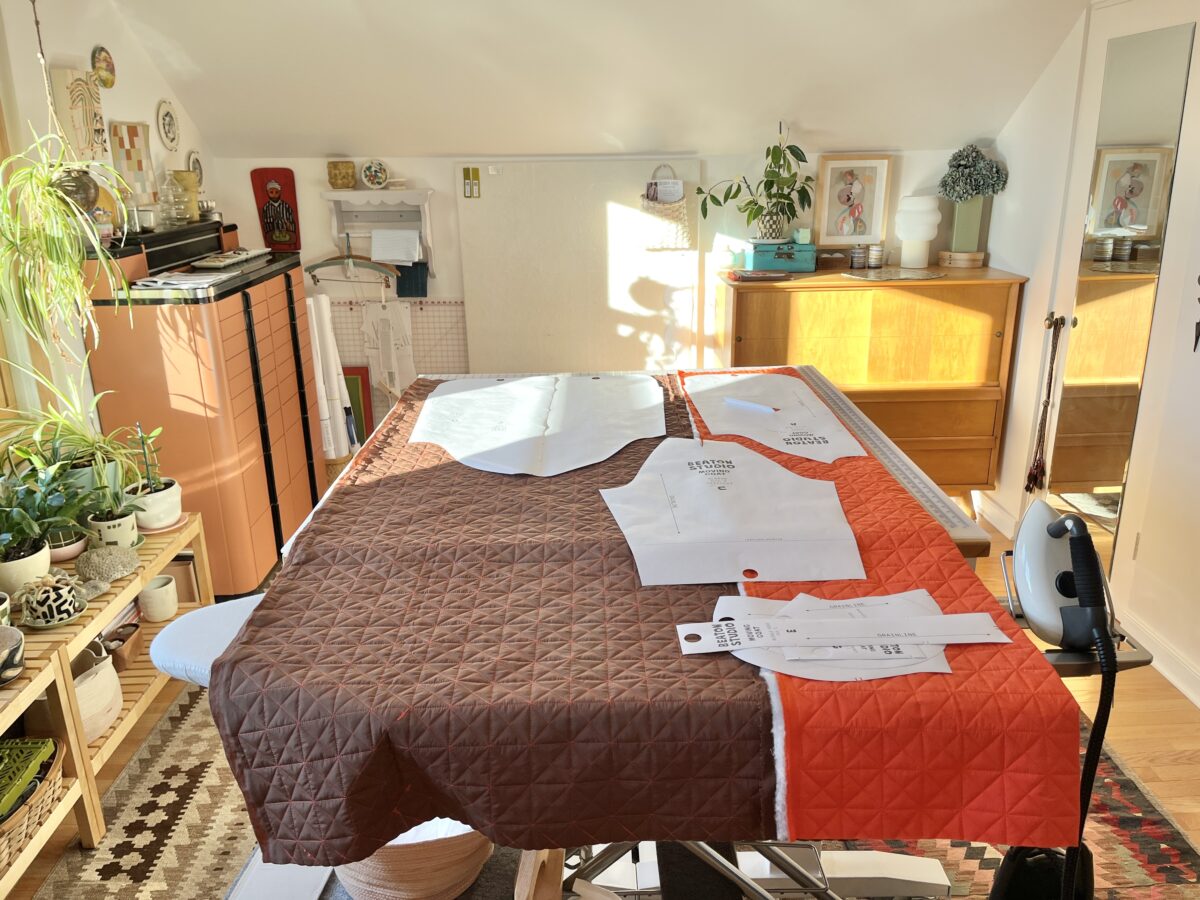
I recently bought this vintage medical stool for sewing and definitely prefer it to the old green chair I’d been using. It can be pushed right under the table and there’s no longer a risk of bashing a seat back into my machines’ free arm systems. The top of the stool is torn, so I signed up for a local upholstery class – very excited to learn from a professional.
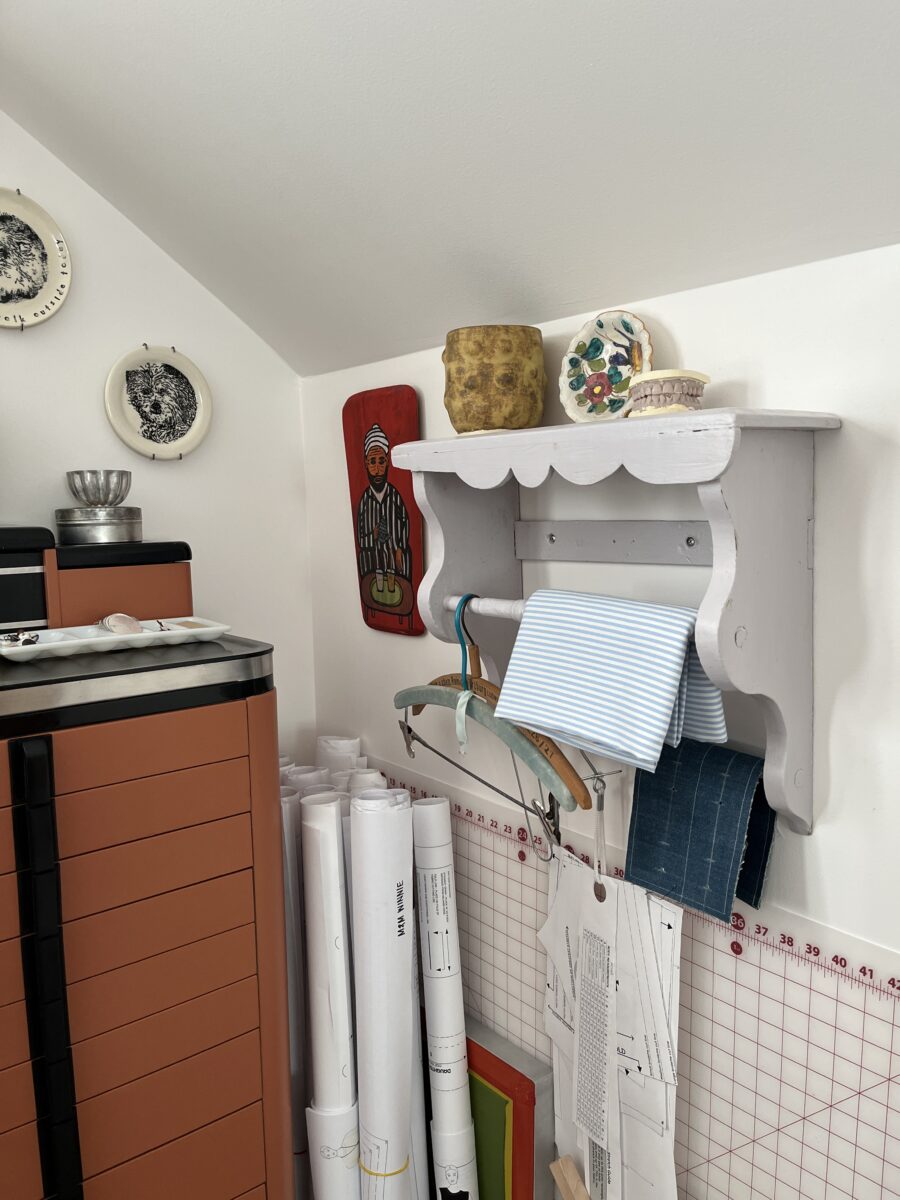
And now we’re over by the cutting table.
Slowly replacing IKEA furniture and fixtures (usually from my former classroom) with old, solid, and well-made pieces has really transformed the space. Both of these cabinets were refinished and restored by me and I am still very, very proud of how they came out. Not having all my thread and notions on display frees up the space for artwork, which I definitely prefer.
I am keeping my eye out for a low bookcase to sit underneath the window since these IKEA benches aren’t great for storing books. My husband and I might design and build something ourselves though. I have some ideas percolating.
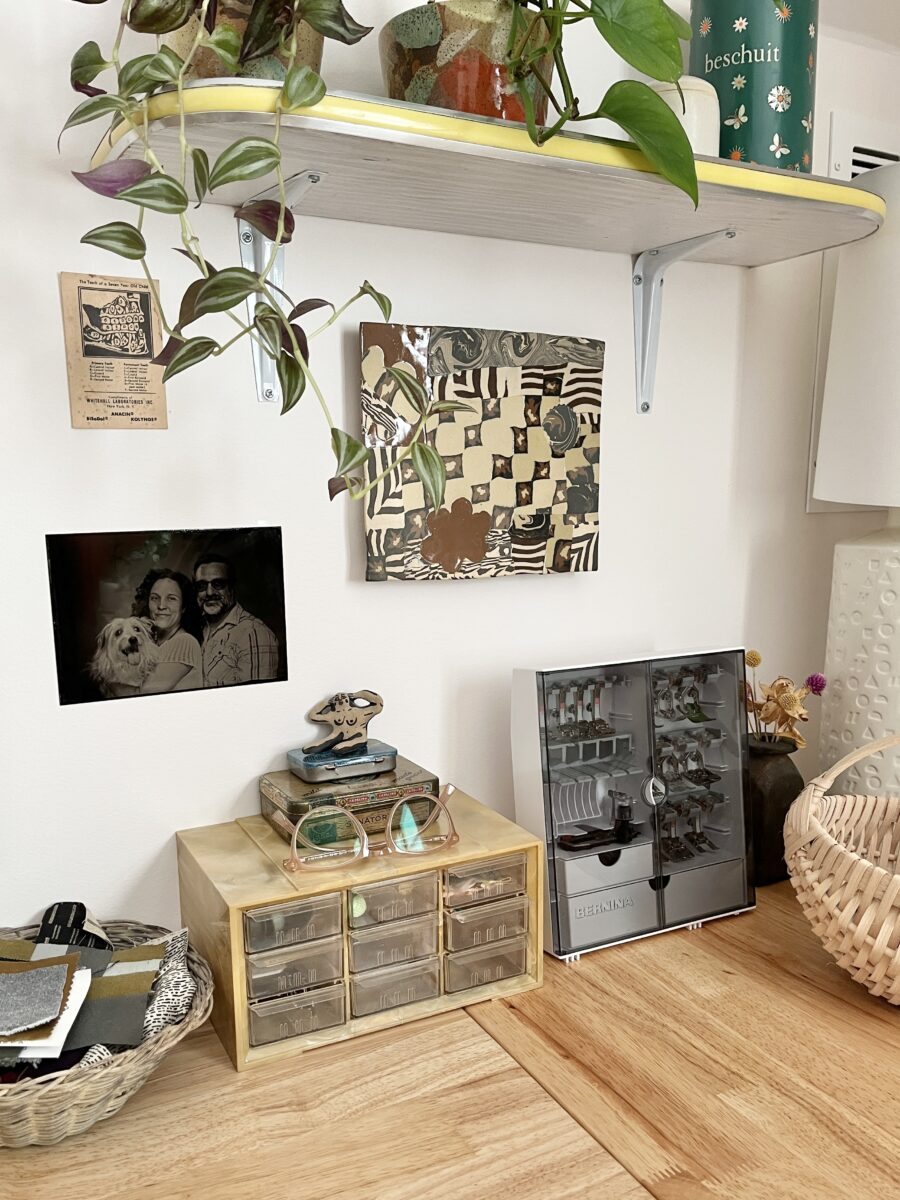
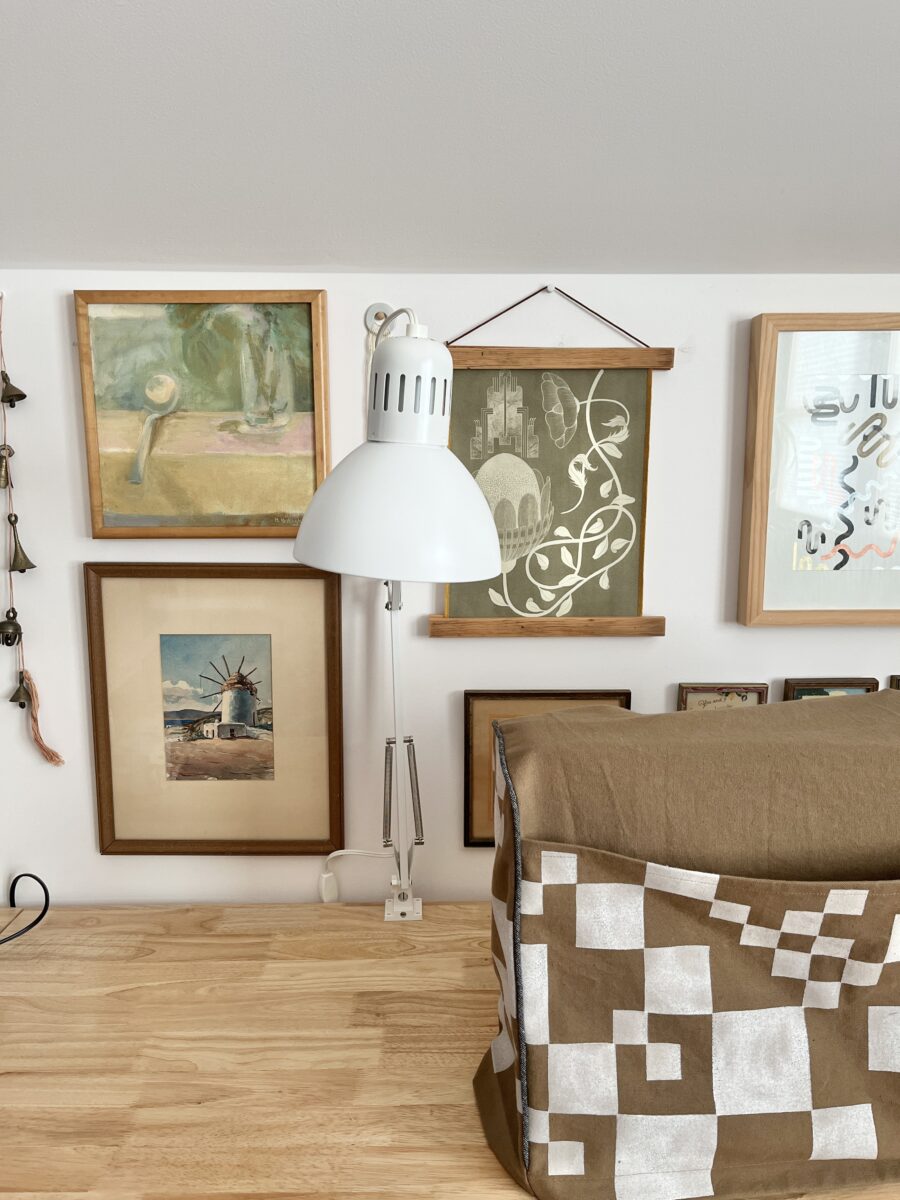
And here are some some vignettes from around the room.
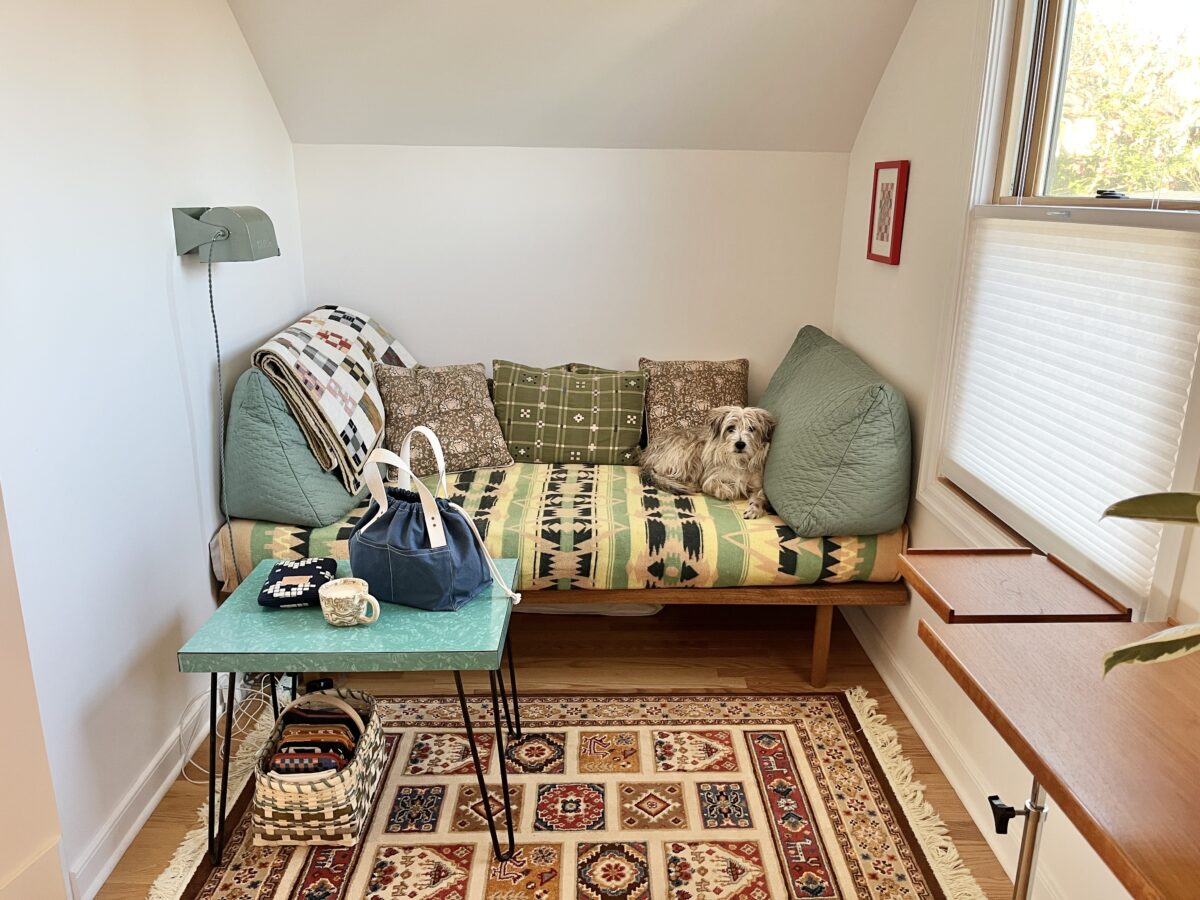
And back over to other side of the space, I have my somewhat neglected art table and the knitting nook. This art practice is one of my greatest achievements and I’m really trying to get back into the habit. It’s such a challenge to make time for all my creative hobbies.
My husband built this incredible daybed last year. This little nook is about 2″ shorter than a standard bed or couch so I wasn’t going to find anything secondhand. It’s so cozy over here now.
Since this space also doubles as a guest room, I want to create a curtain a la Adam Pogue for some privacy. It’ll cut the window off at weird place, but I think it’ll be okay. Other plans for this area are to:
Paint it a cozy color to further differentiate it from the rest of room. Ugh more painting.
Build some under bed storage for guests.
Maybe find another rug to better match the space.
Add more art.
Make a little shelf with hooks. Possibly a ceramic and wood collab.
Sew a wall quilt for the big white wall.
I so enjoy seeing other people’s creative spaces. It’s also fun for me to look back on the iterations of this space.
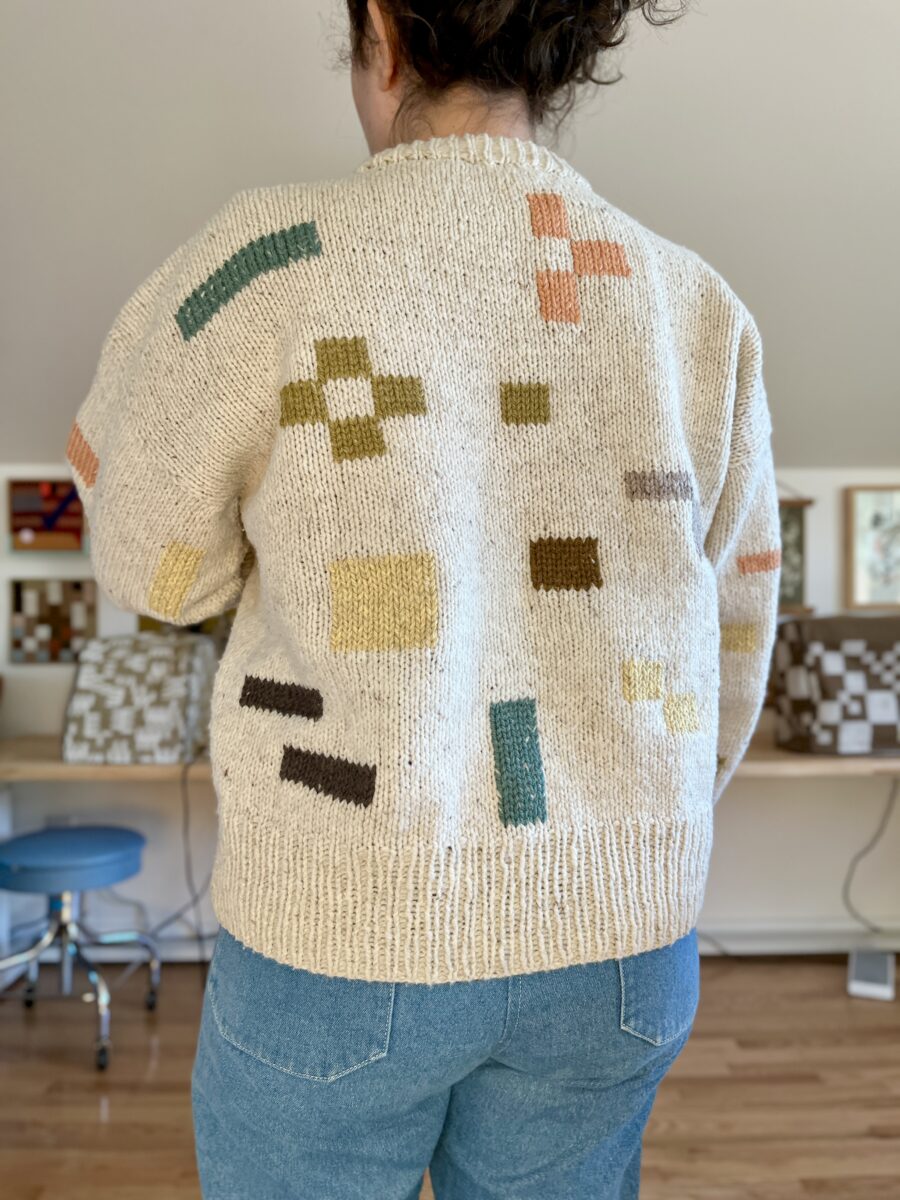
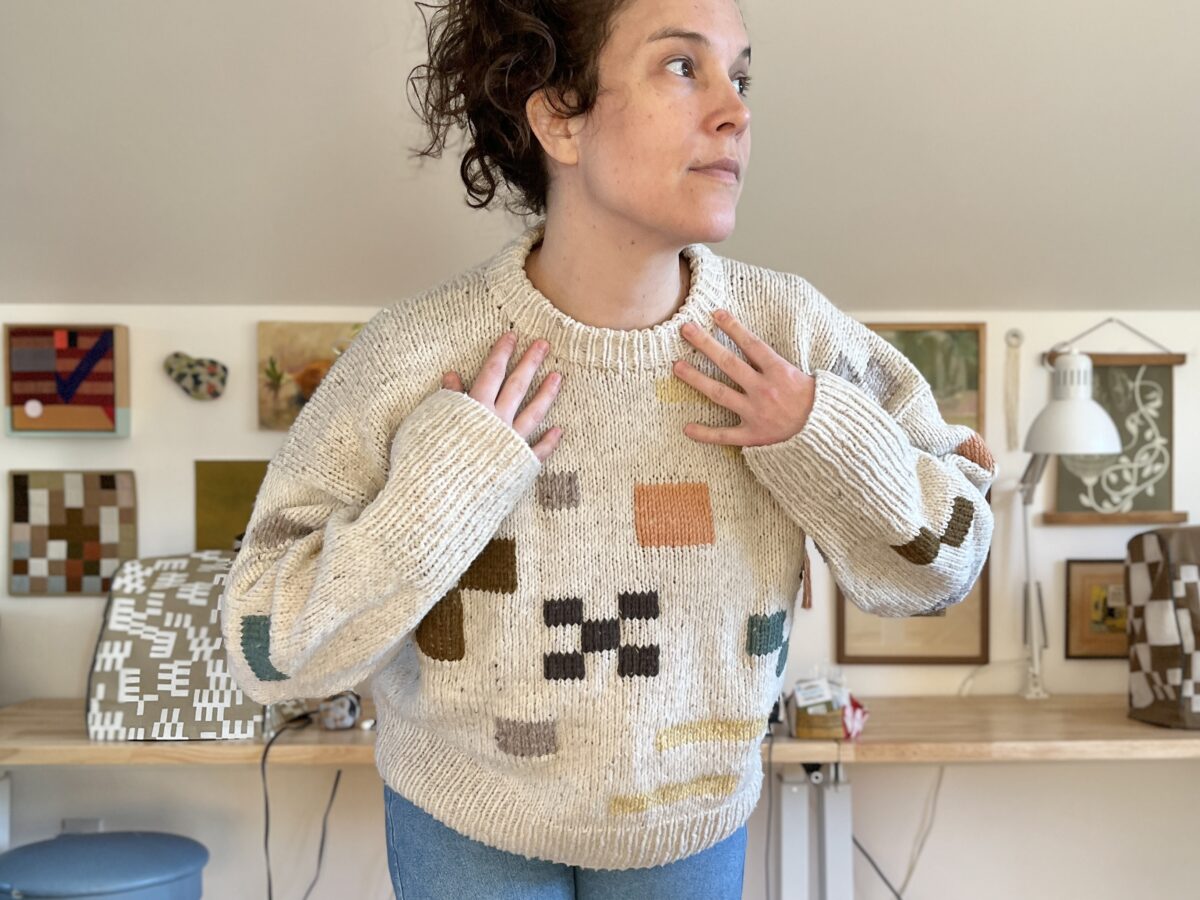
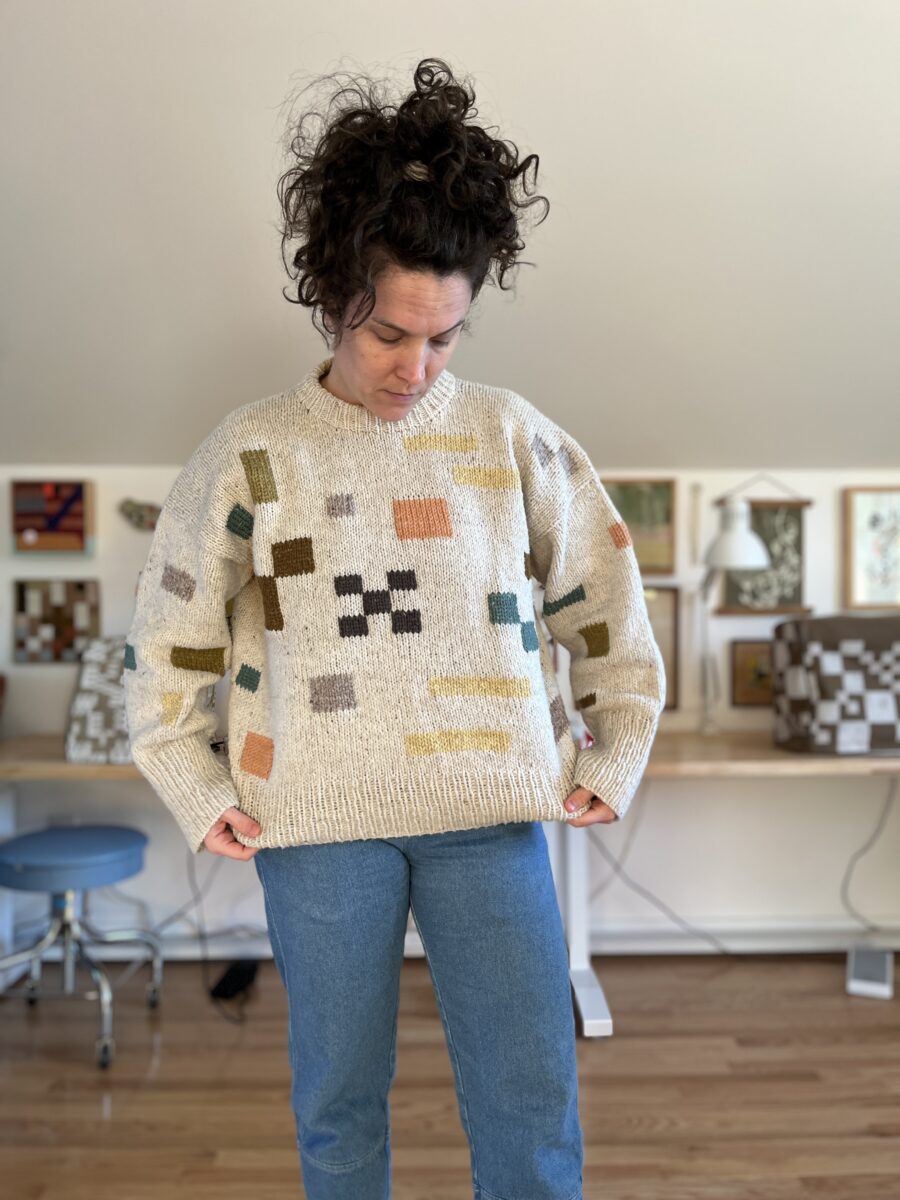
This was my first worsted weight sweater and it was rustic. I knit the whole thing continental and my loose purls caused a lot of rowing out. There were some noticeable color differences in the skeins despite being from the same dye lot. The collar was also just terrible (too high and lumpy).
So with loads of leftover yarn, I slowly started adding some duplicate stitch shapes to see if it would hide the base color shifts, my unintentional row stripes, and make it something I’d actually reach for. I think it worked!
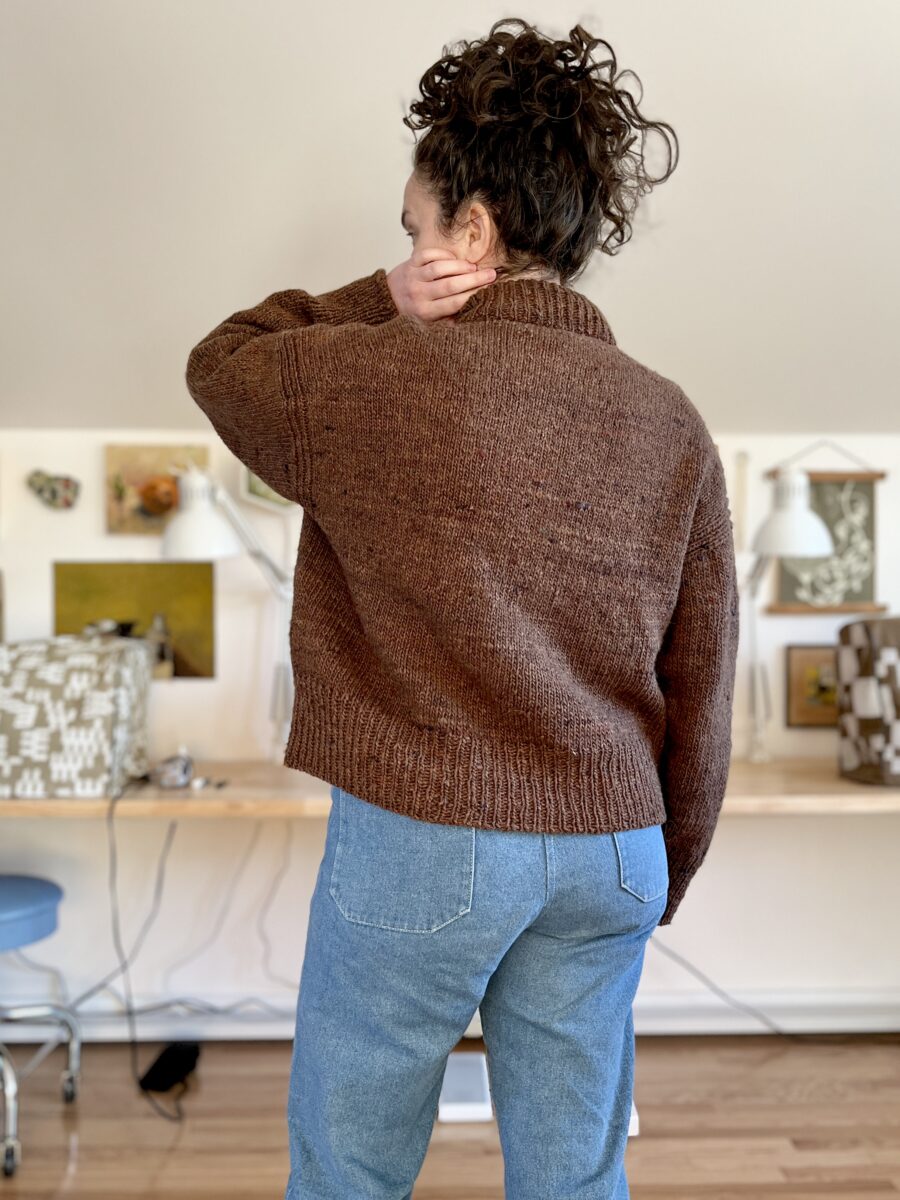
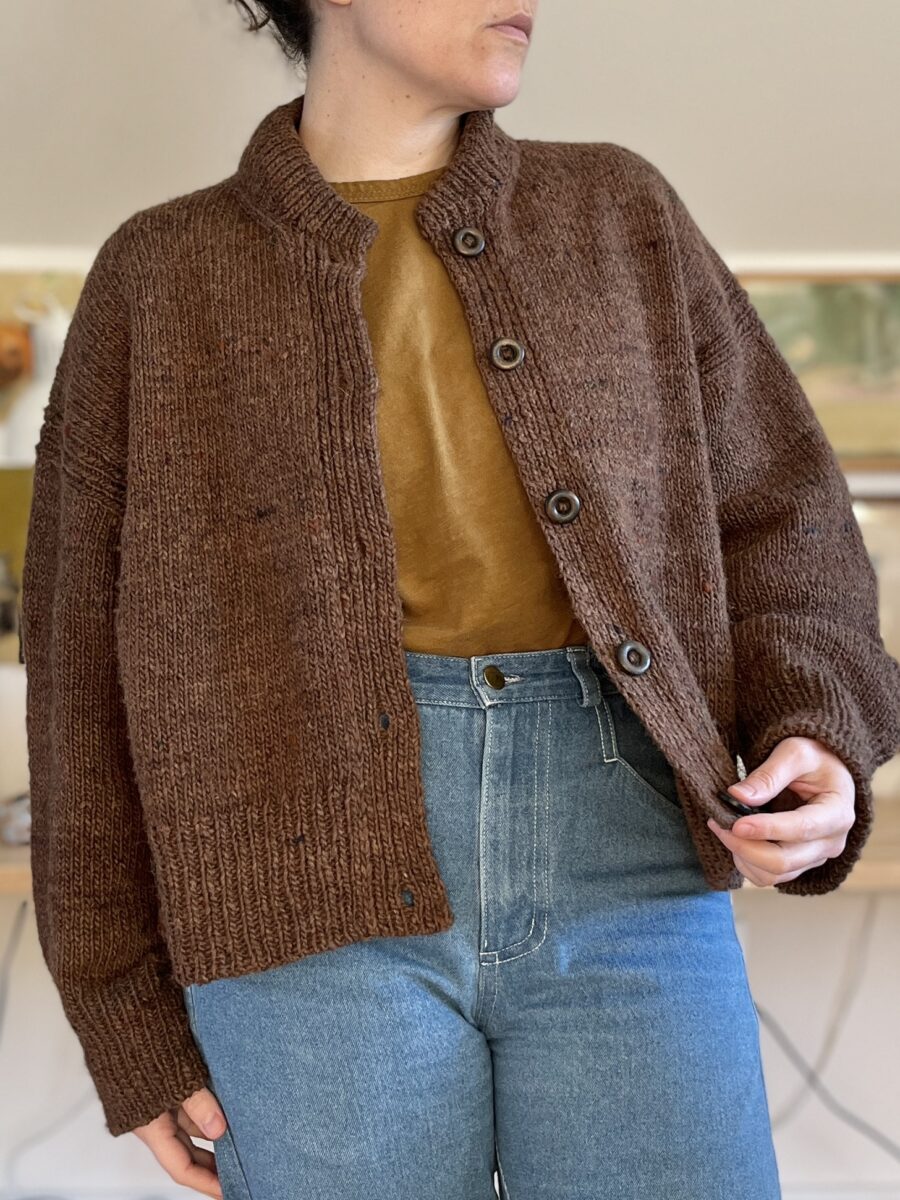
Port Jacket | Ozetta
I had a relatively low knitting year in 2025, but I managed to make two much needed cardigans. I’d had my eye on Nora Madara yarn since I first saw the Sake colorway in a LYS, but then I found the brown and it was a done deal. This is definitely one of my most worn sweaters.
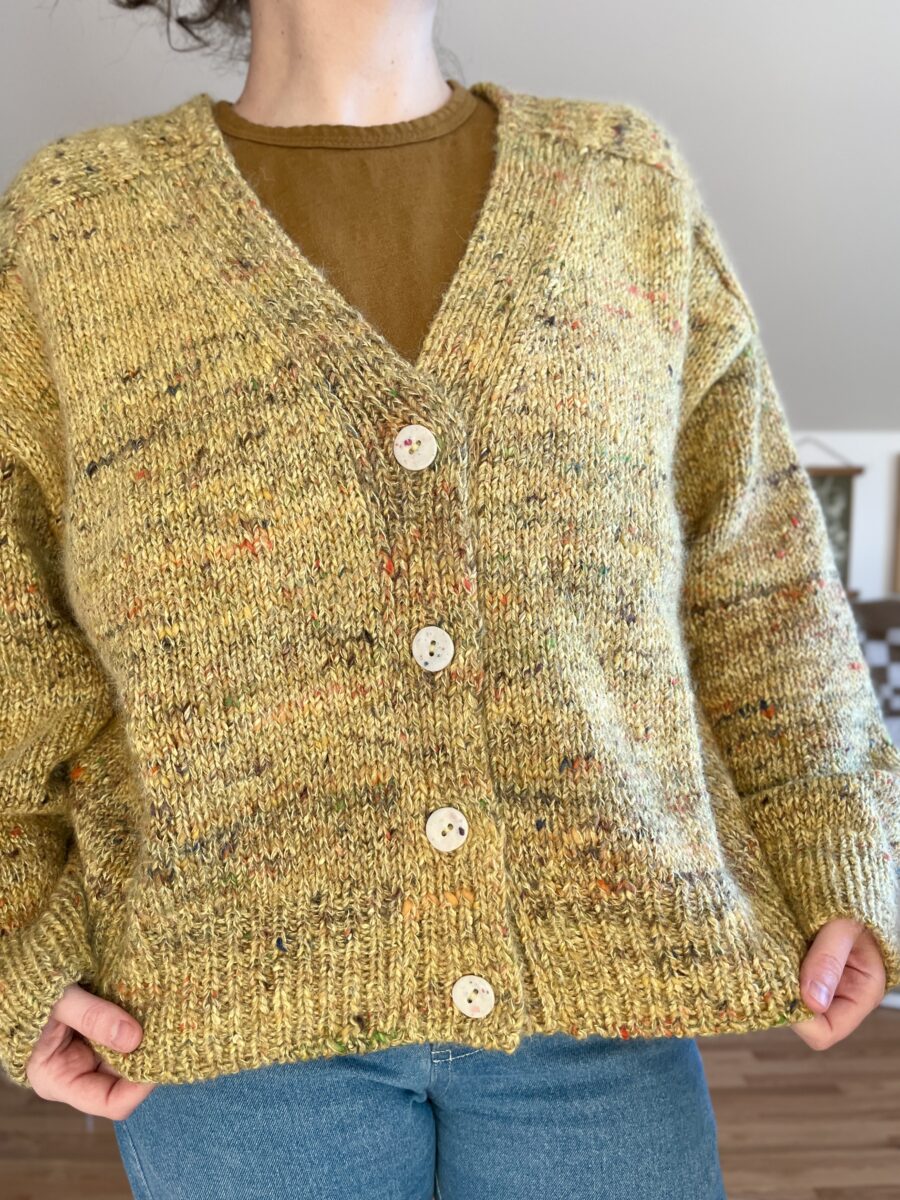
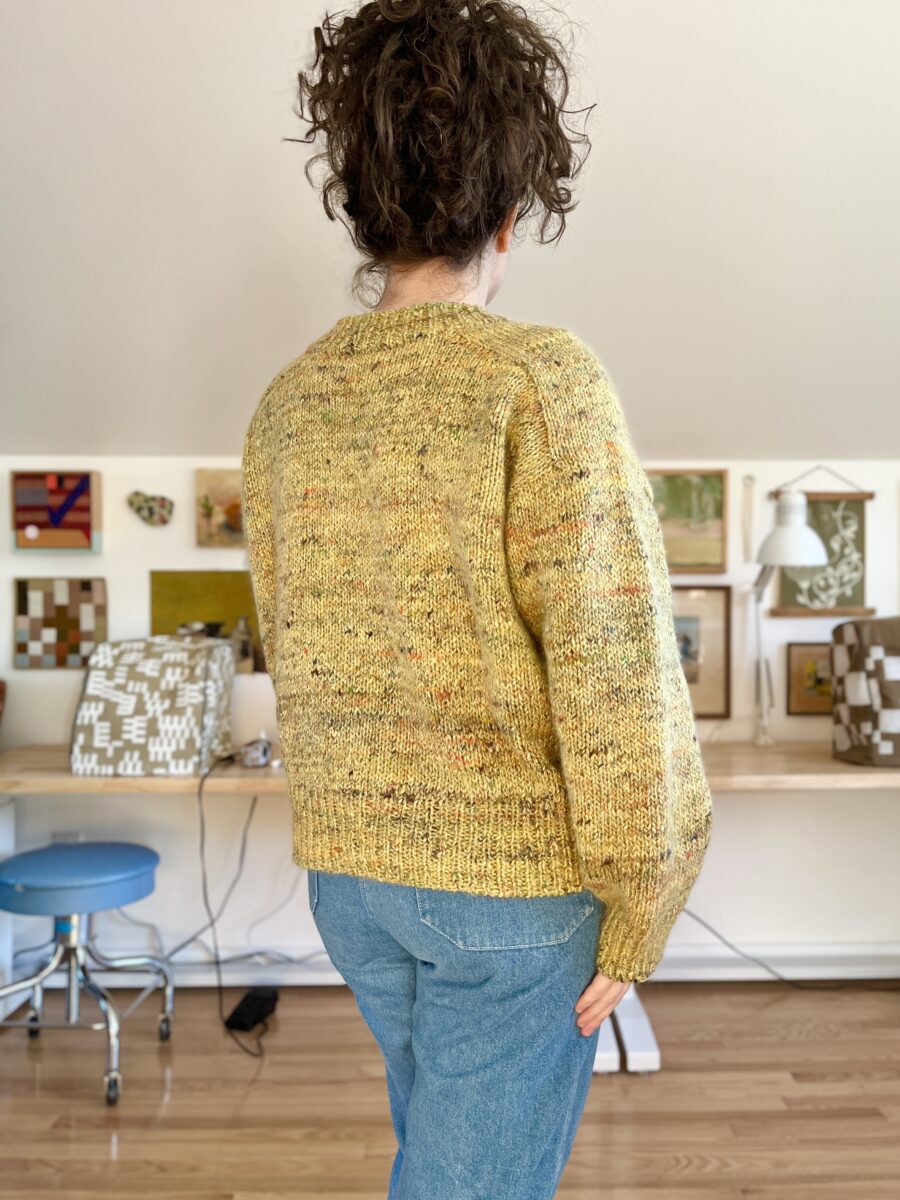
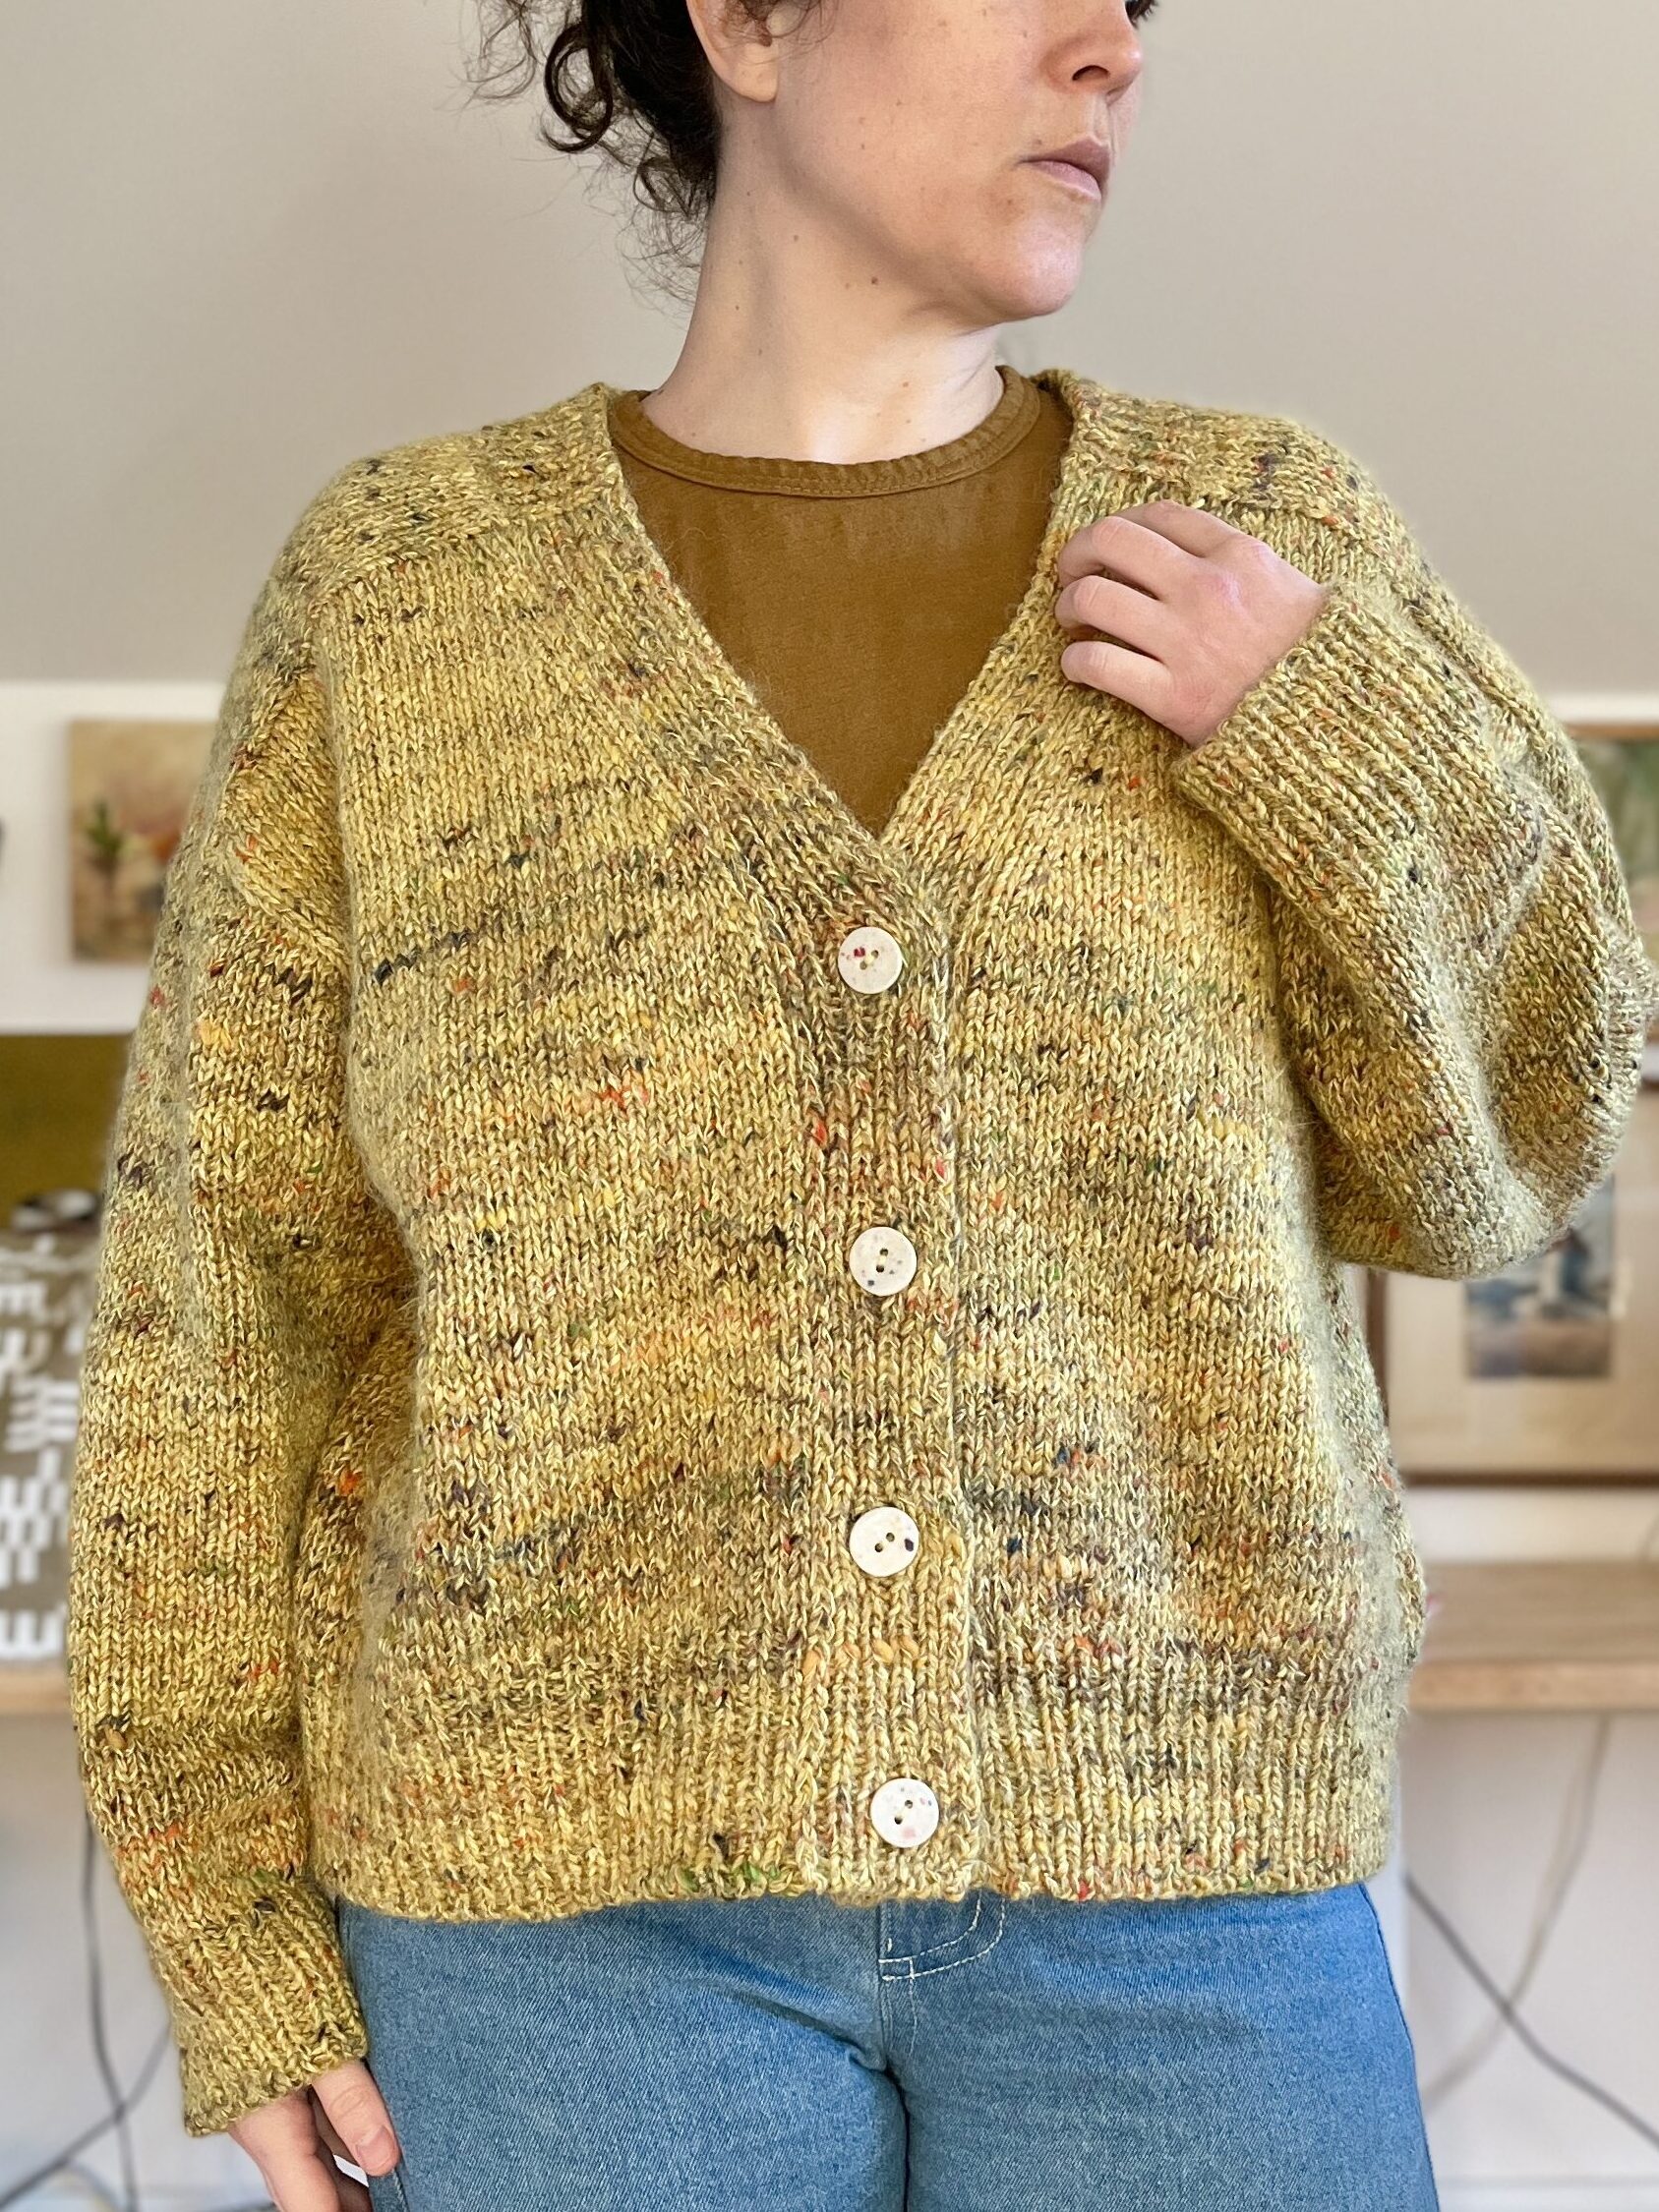
Lakes Cardigan | Ozetta
And here’s the second cardigan I finished last year, last day of the year. It’s also Noro Madara because I couldn’t help myself. Overall, I’m pleased with this sweater, but the deep v-neck makes it always kinda feel like it’s about to slide off my shoulders. Otherwise it’s perfectly oversized.
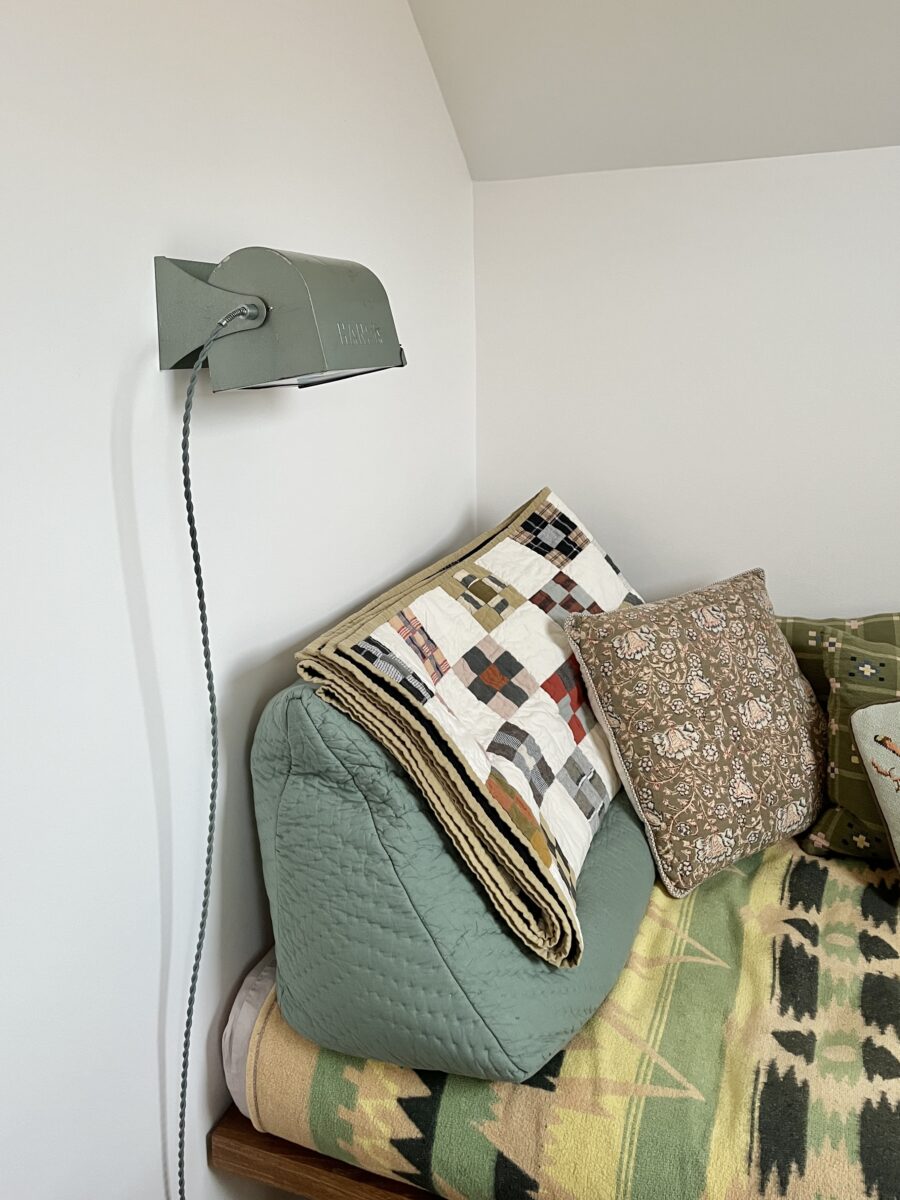
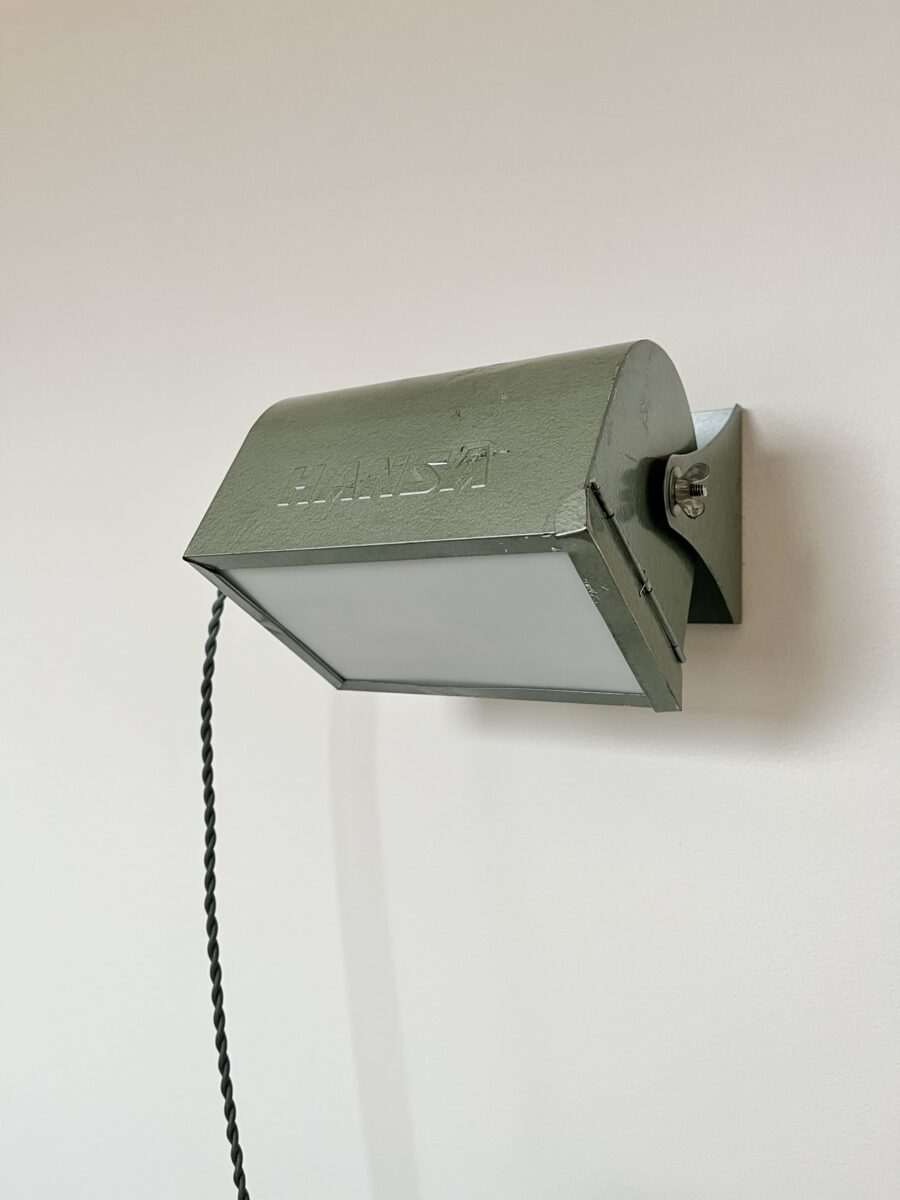
I have been on the hunt for fun lighting for, honestly, years. I wanted something that could be mounted to the wall, was semi adjustable, and looked cool.
Vintage lighting is so hard to find. If it’s already been rewired, it’s a million dollars. If it’s cool looking, it’s a million dollars. If it’s close to garbage, it’s a million dollars.
I finally found this vintage Hansa darkroom safe light at an antique shop for not a million dollars ($46), but still kinda too much money. The tag said it worked, but the the cord was only 3′ long/gross, and it was missing the glass.
I took it home, removed the wiring, cleaned it with WD-40 and then began searching for a new wire ($22.10). Since it was going to be exposed, I figured a cloth covered wire would look the best. I also wanted to use a dimmable bulb. Next, I went to TAP Plastics and bought some mystery scrap for the screen ($2.50).
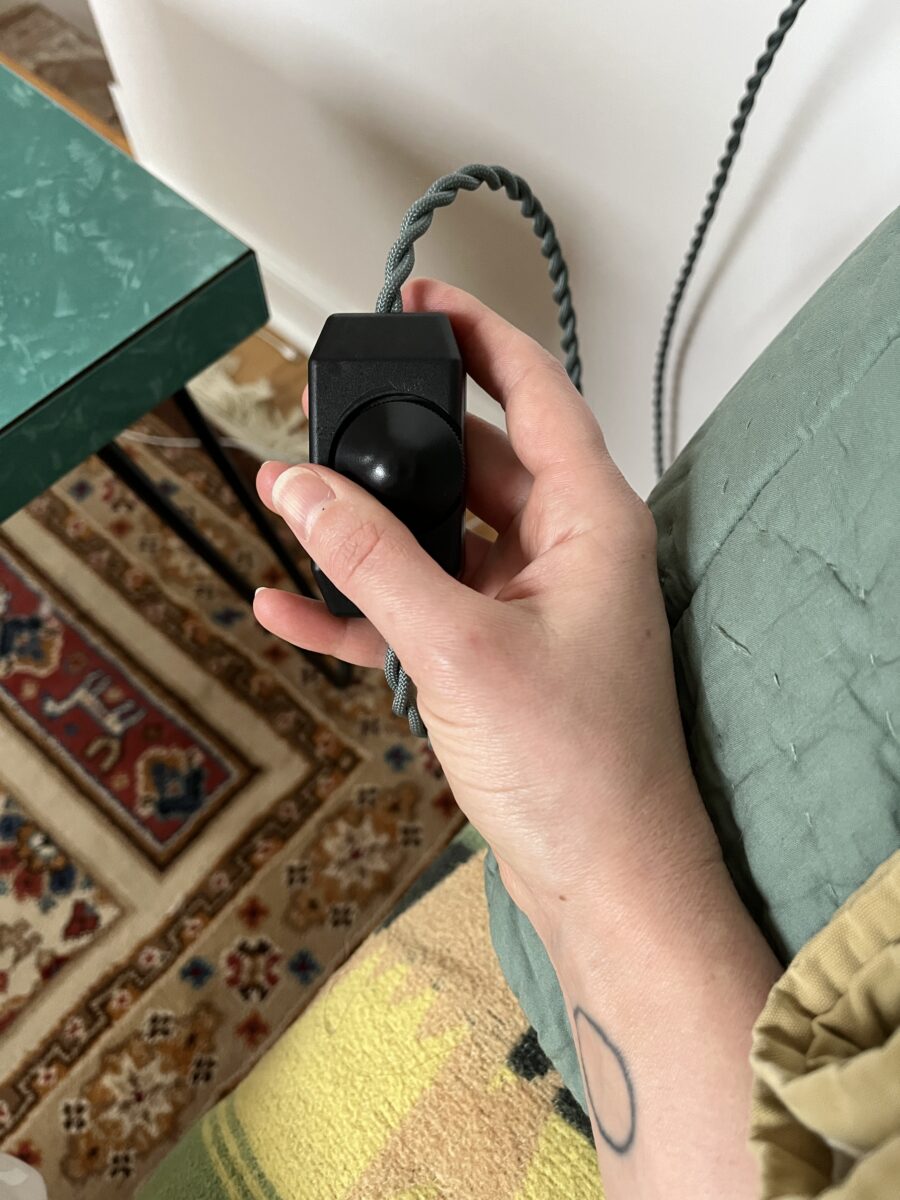
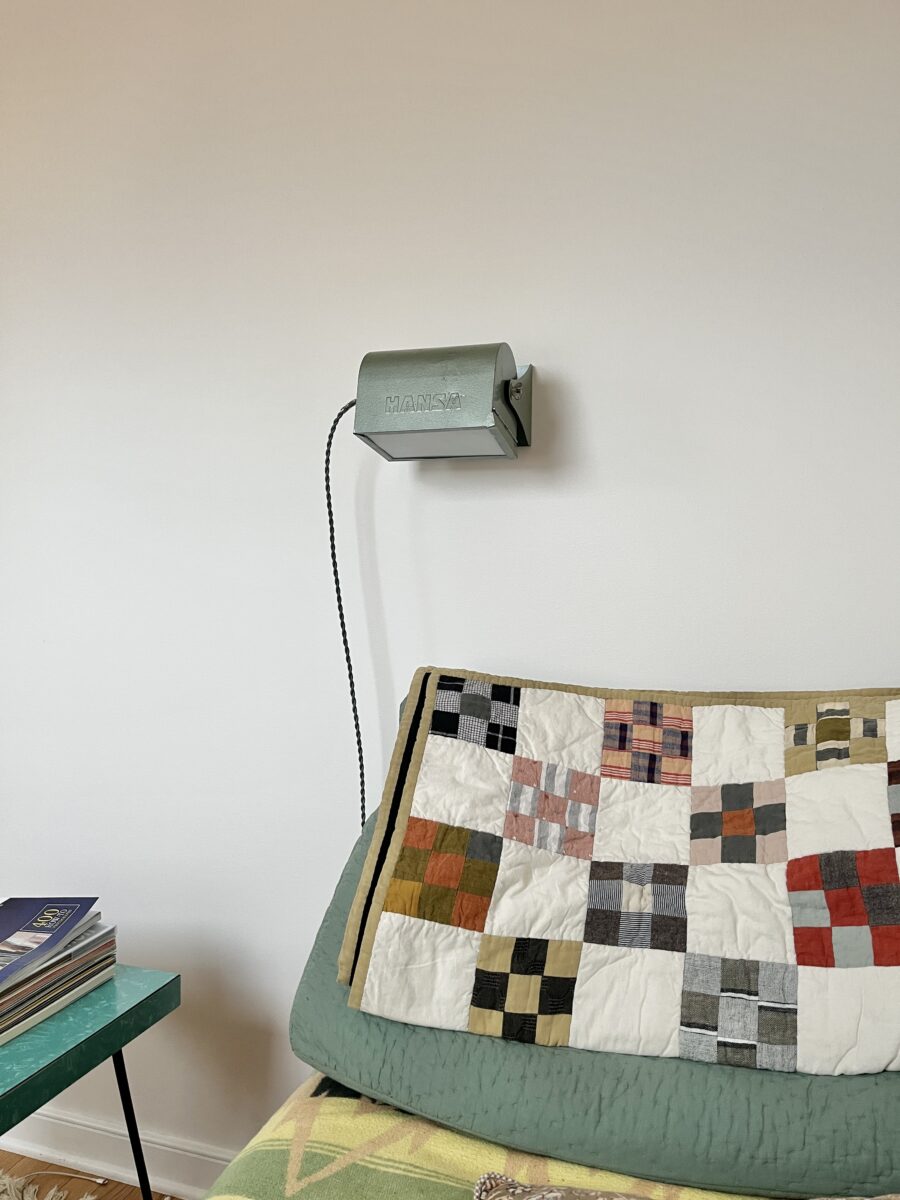
Rewiring this was HARD. The twisted cloth wire was much stiffer than the original, so I really had to muscle it into the housing. I wish the dimmer switch was closer to the light instead of the plug, but it’s fine. I am so pleased with this $70-ish light! It’s a good reminder to wait to find cool old things. I think it’s suits the knitting nook perfectly.
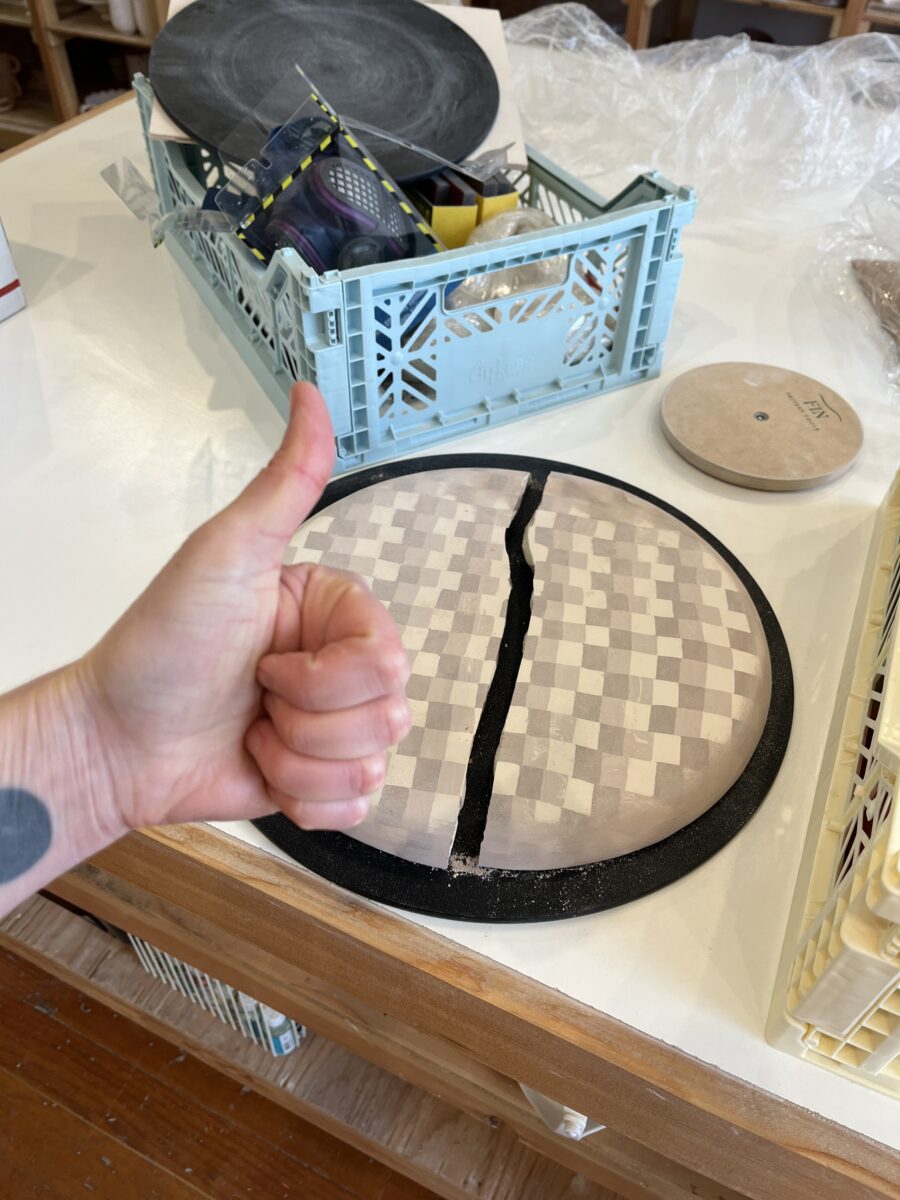
After posting yesterday, I went to the studio and almost immediately broke this plate. I’m 1 for 3 big nerikomi plates, so I think I’m done trying to makes these happen for a while.
How is November already over? Anyway, here’s some stuff I’ve been making.
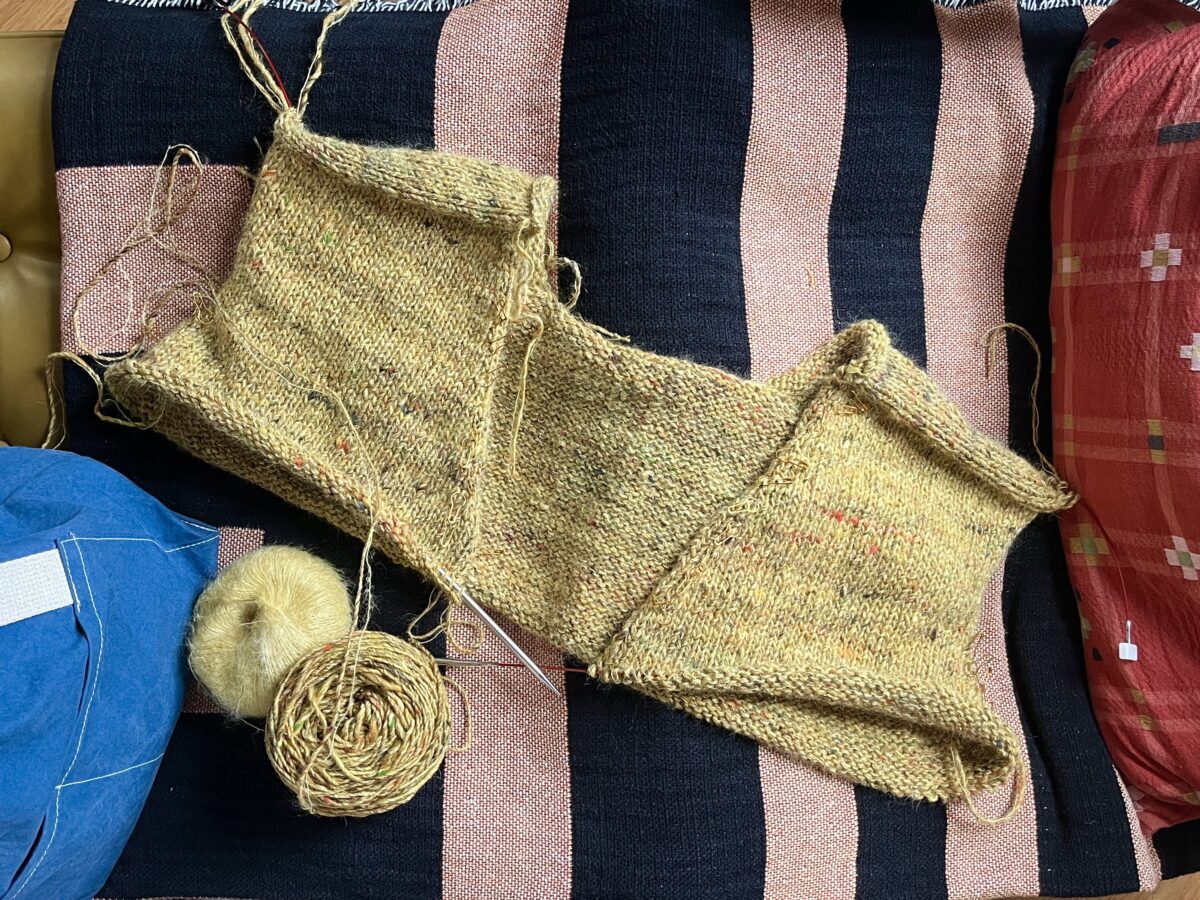
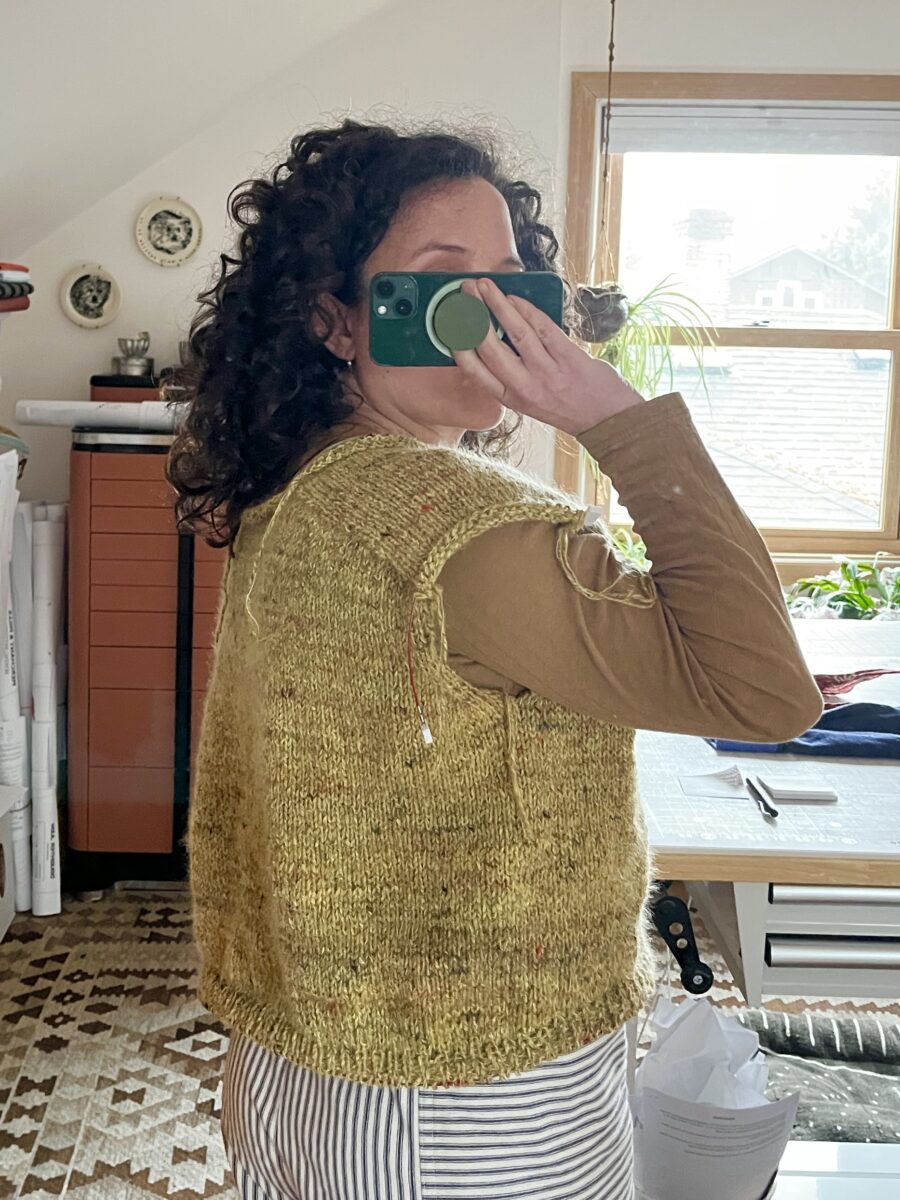
Another Yellow Lakes
I started the Lakes Cardigan a couple weeks ago and it’s knitting up pretty quickly. I’m making a size M (the size I always make for Ozetta patterns) and using Noro Madera yarn in the color Shogi #30. Here’s the yellow Lakes Pullover I made in 2023.
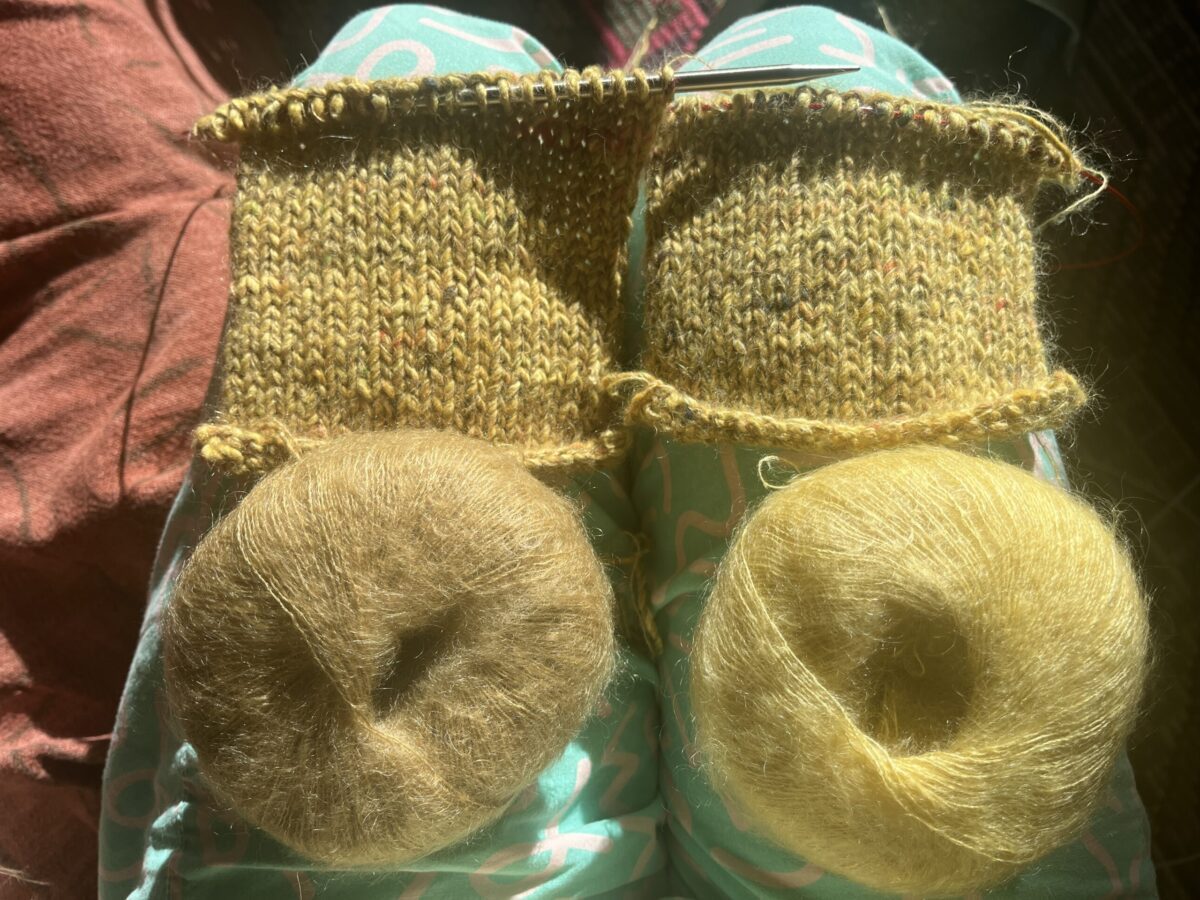
Initially I planned to use leftover mohair from this sweater, which created an interesting marled effect, but it really muddied the yellow. I then thought about not using mohair at all, but ultimately decided to since my last Noro Madera project didn’t.
So I ordered two skeins of Knitting For Olive soft silk mohair – one in ‘dusty honey’ and my wildcard color ‘quince’. I ended up going with quince, even though the swatches looked almost identical. I made so many swatches, yet didn’t block a single one ¯\_(ツ)_/¯
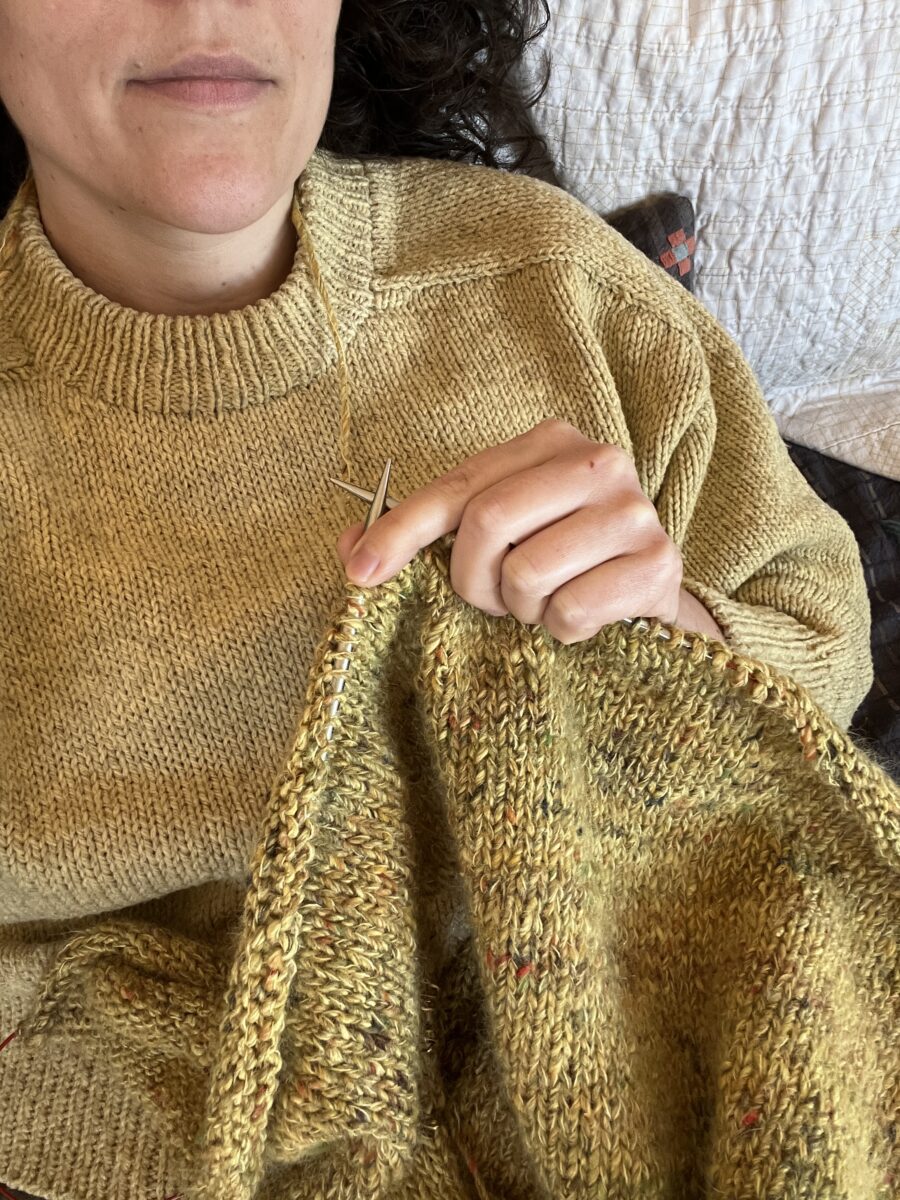
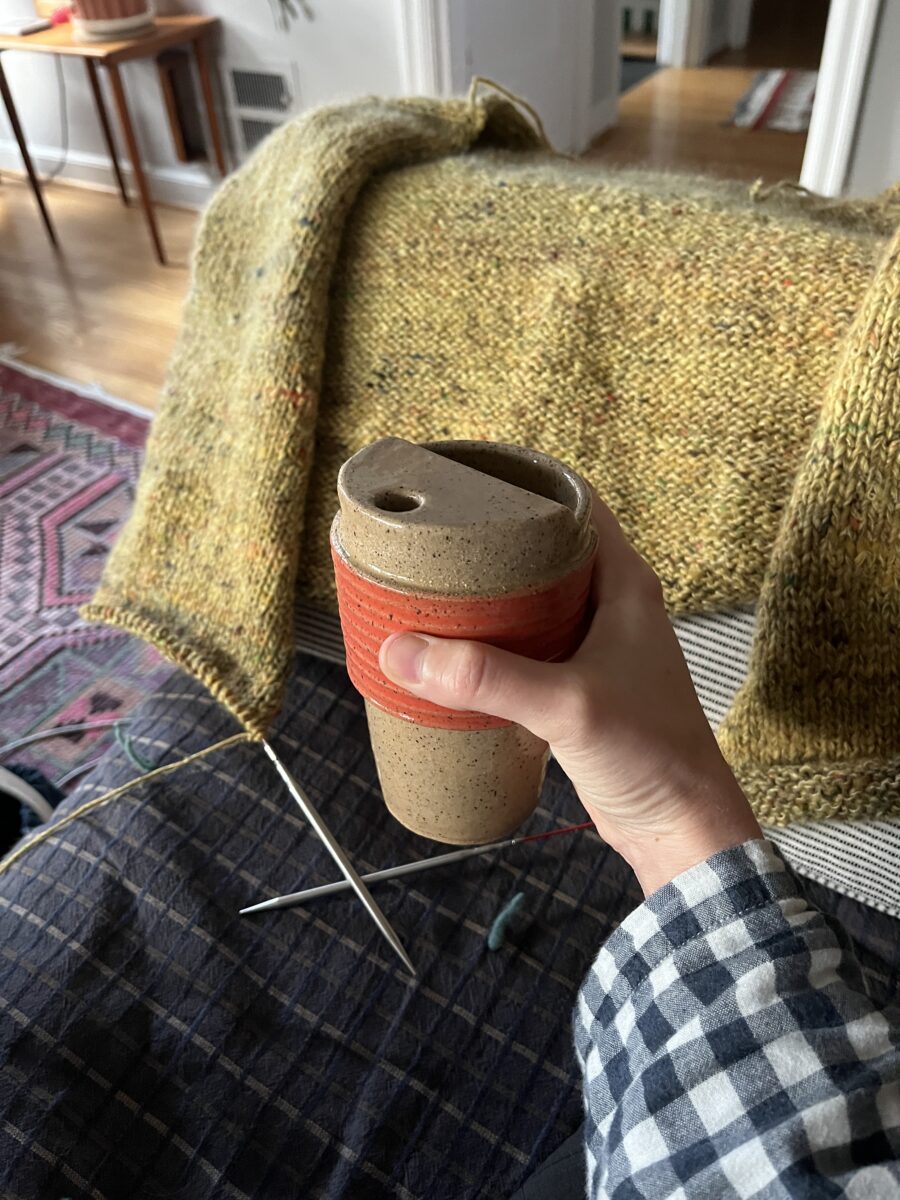
I planned to use these ceramic buttons on another cardigan, but they look so good with this yarn! They’re made by my studio buddy, Animated Earth. Also my travel mugs made it through the glaze firing! I’m keeping this ‘pumpkin’ one, gifting the ‘blue jeans’ one, and trashing the one I accidentally glazed with a non-food safe glaze. I’m excited to make more.
I am using US 9 needles for the body, US 8 for the ribbing, and did include the short rows on the back hem. I purchased 6 skeins of Noro and 6 skeins of mohair – I think I will have a decent amount leftover… Hoping I can finish it in December!
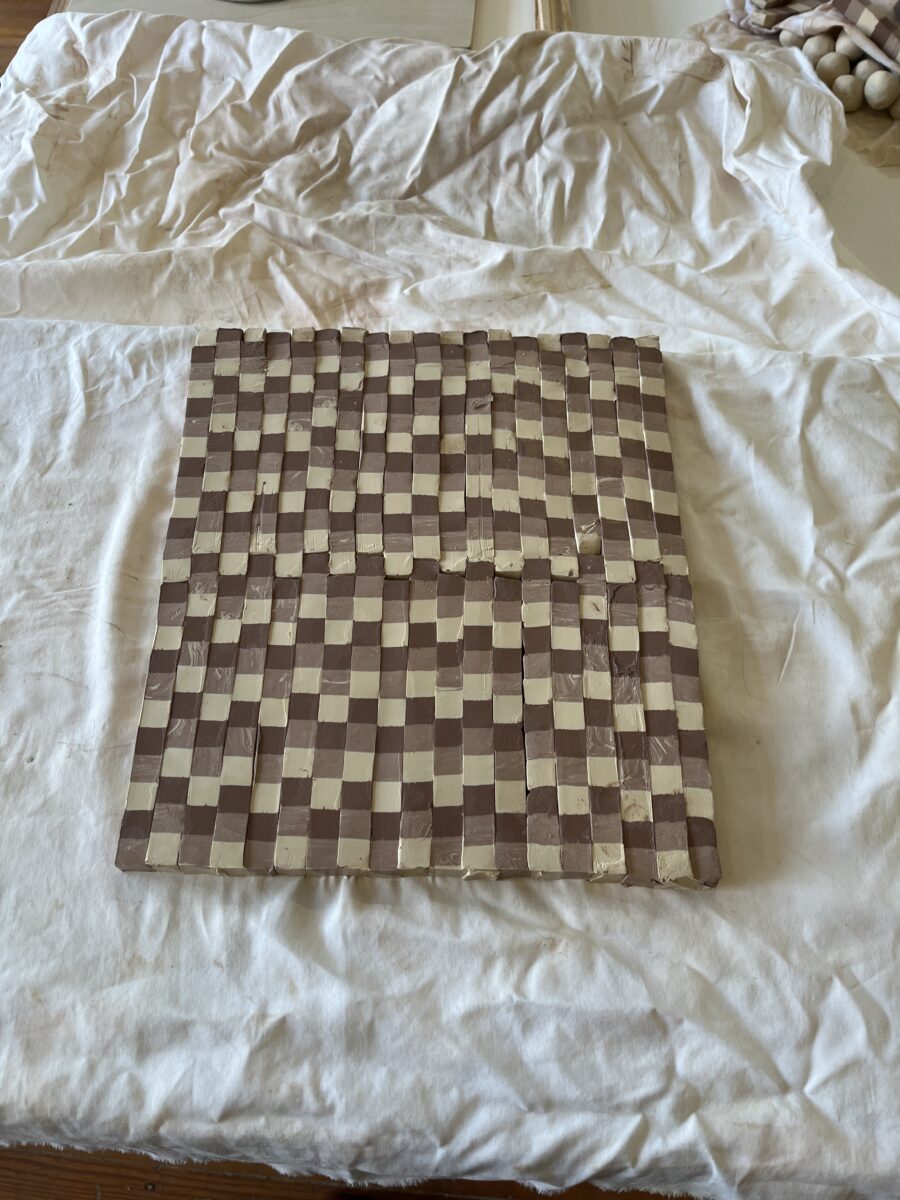
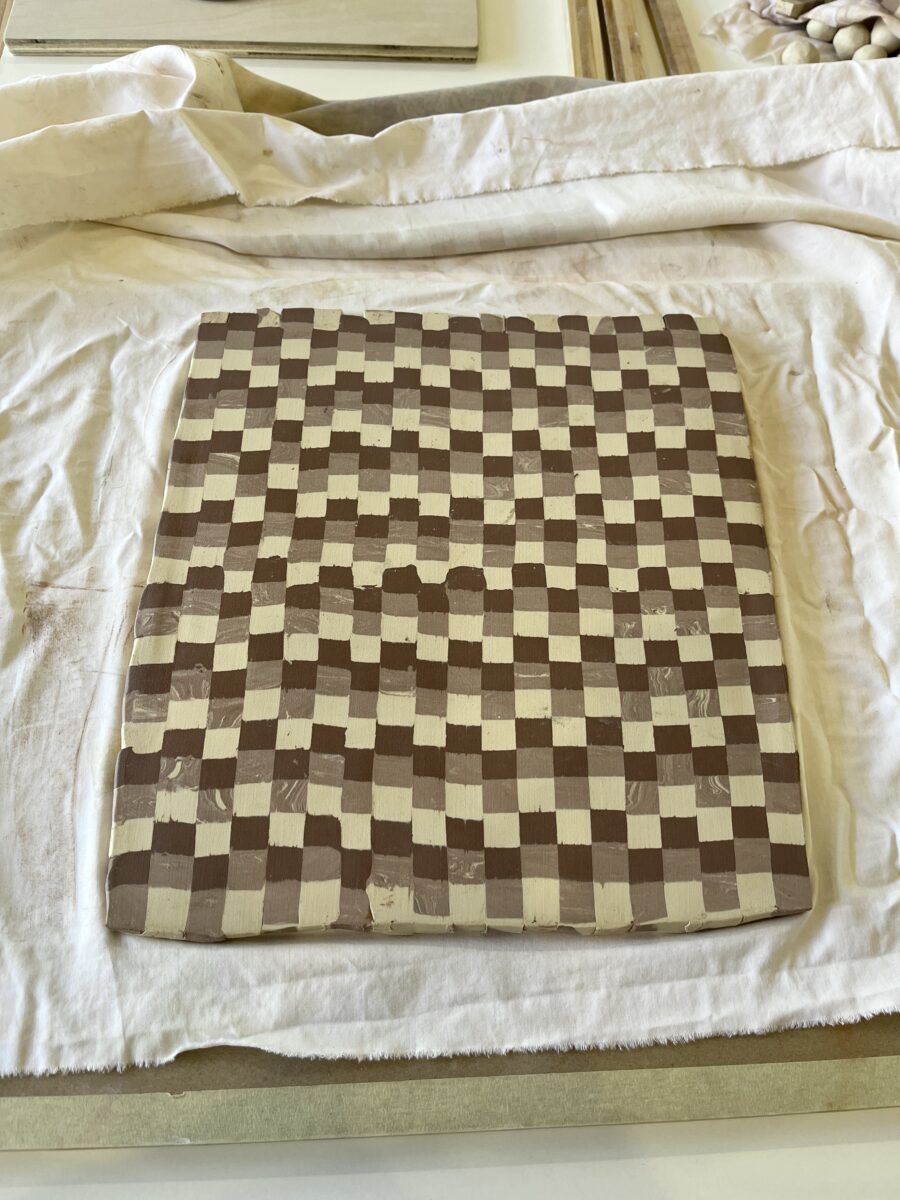
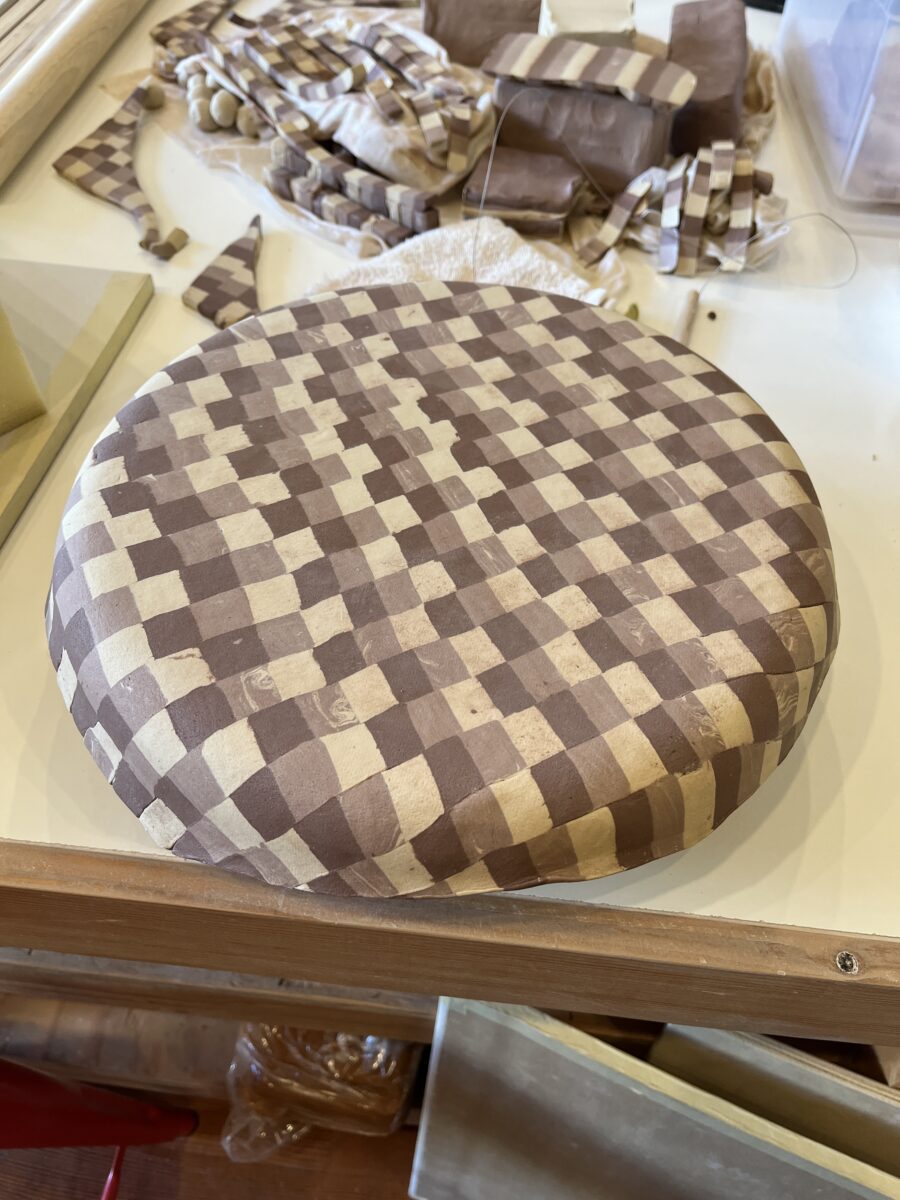
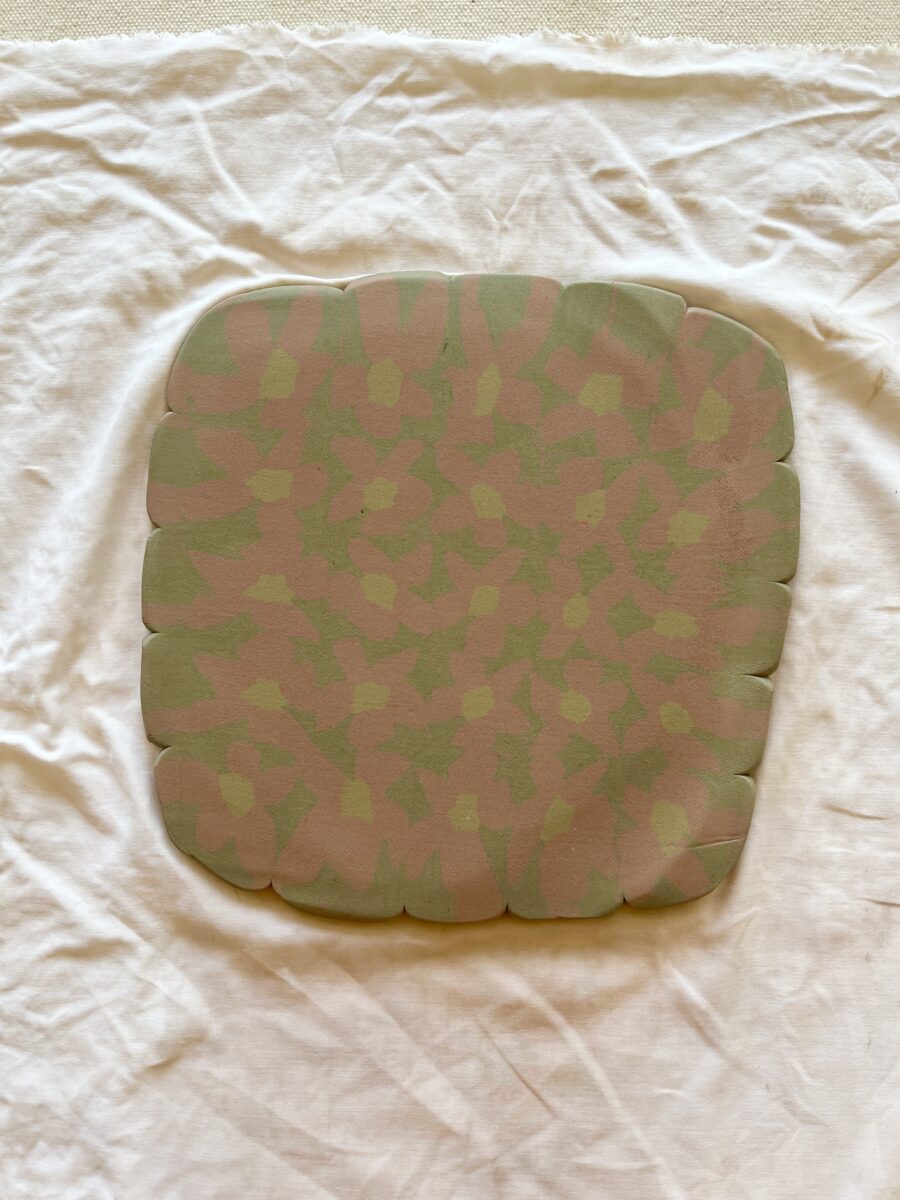
Big Plate
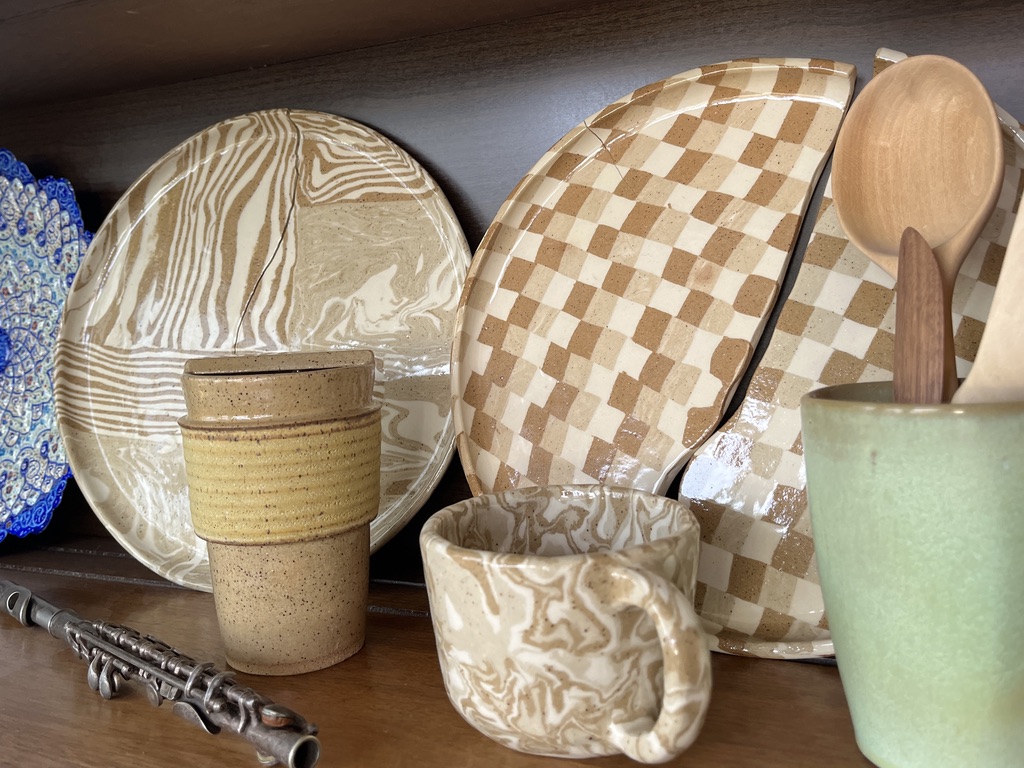
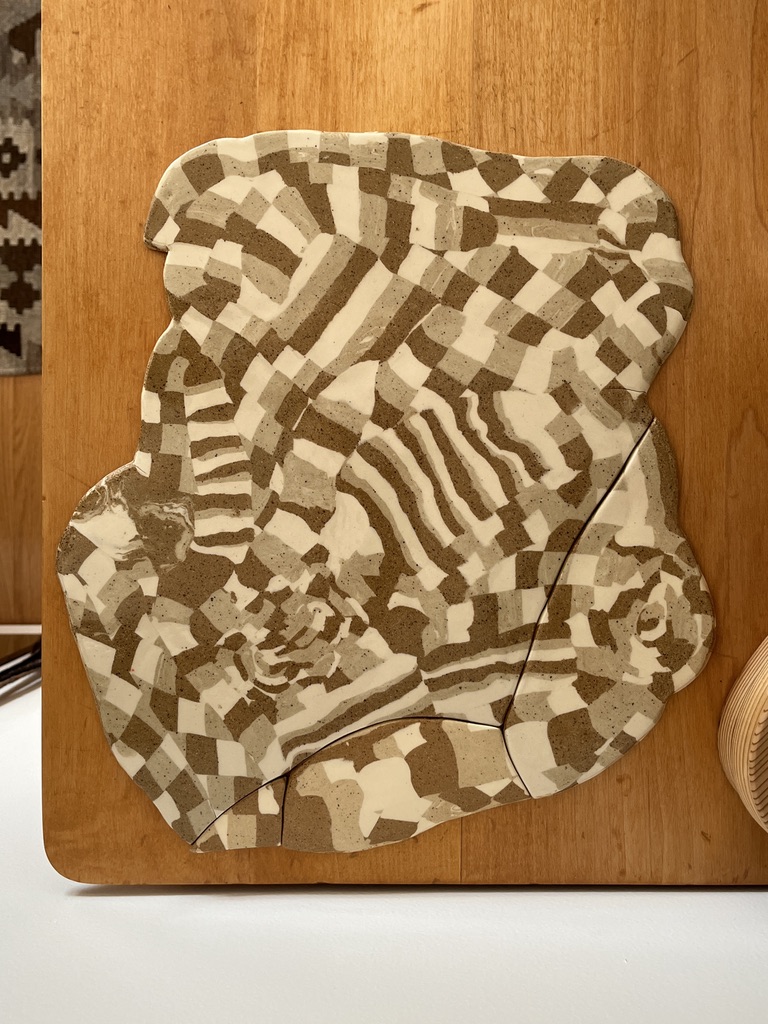
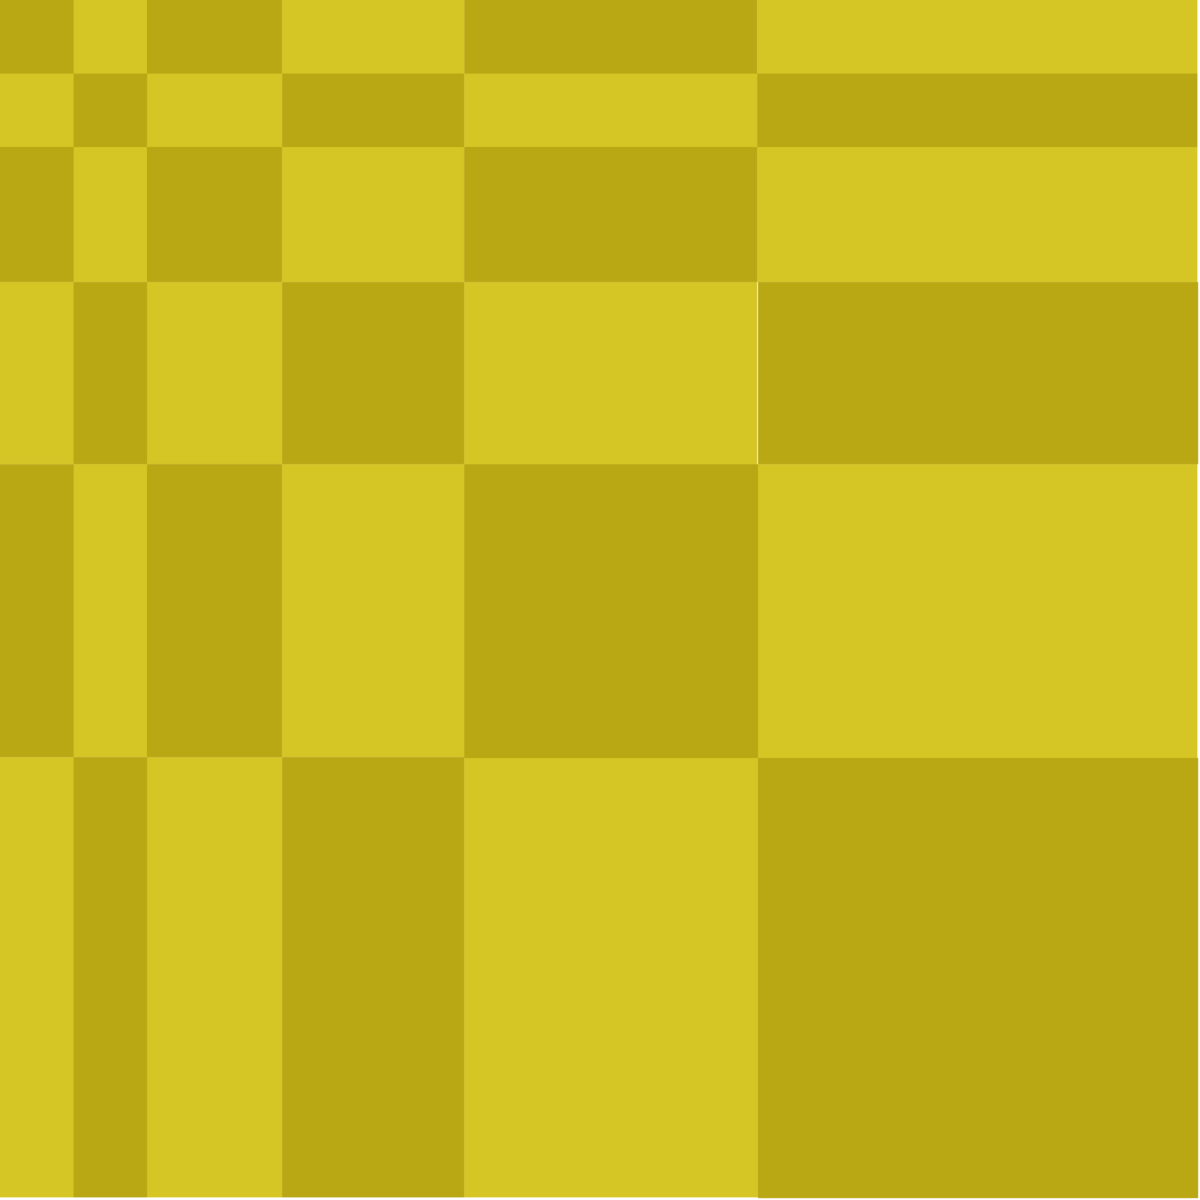
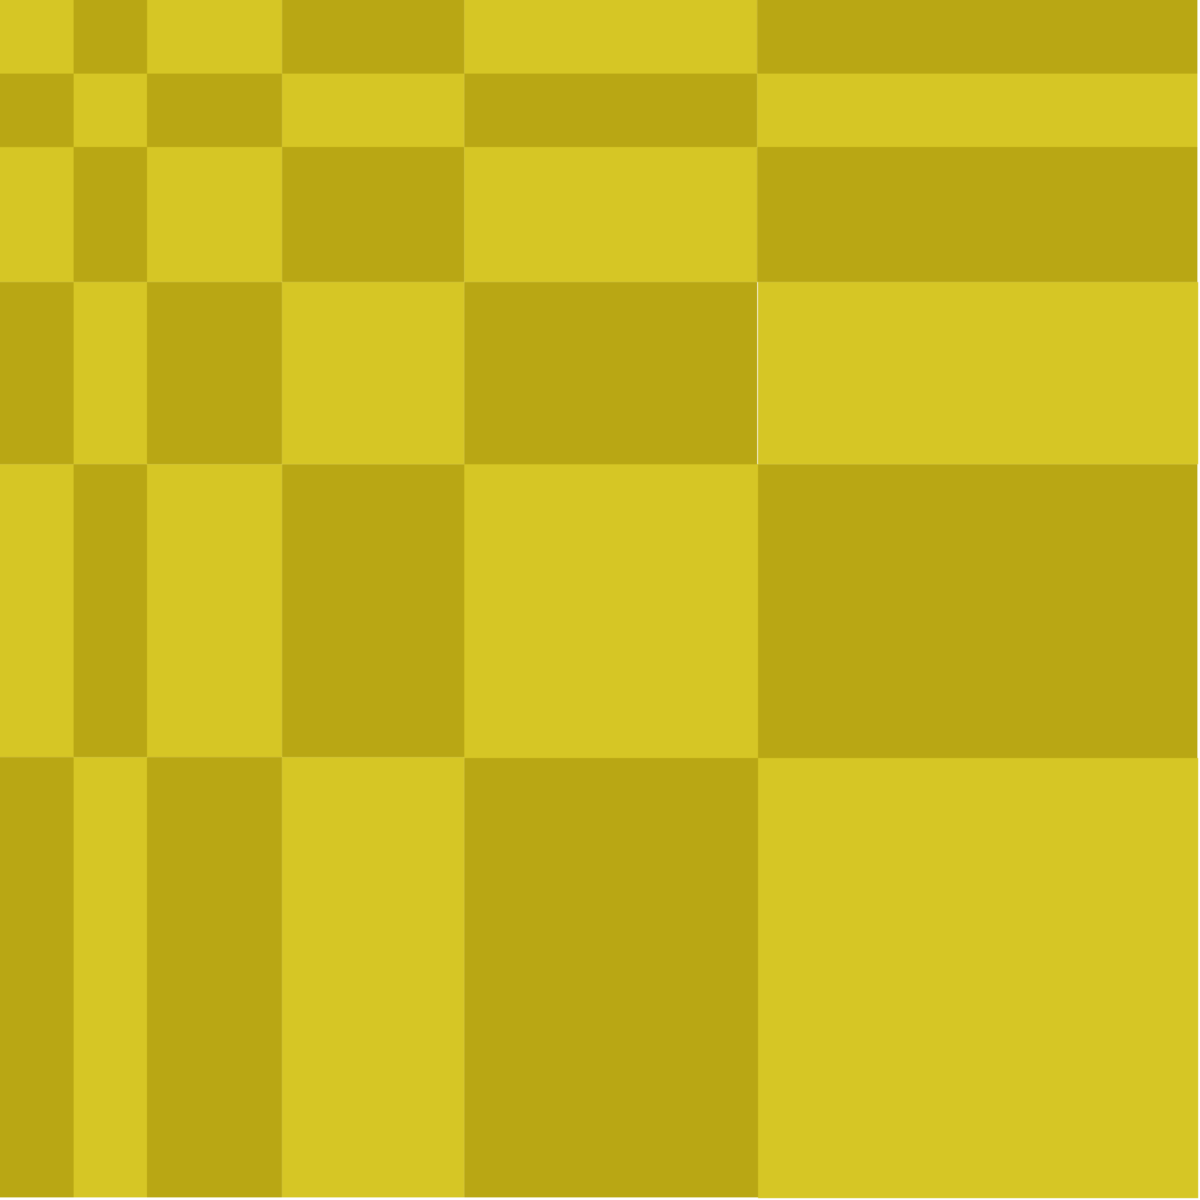
It has been a challenge to make big nerikomi plates. One so far has made it through all the stages and one has a sizeable crack. I made this checkerboard plate a few weeks ago, but it’s been too wet outside to sand, so it’s sitting on the shelf at the studio. Wishing for a break in the rain so I can have two big plates at home.
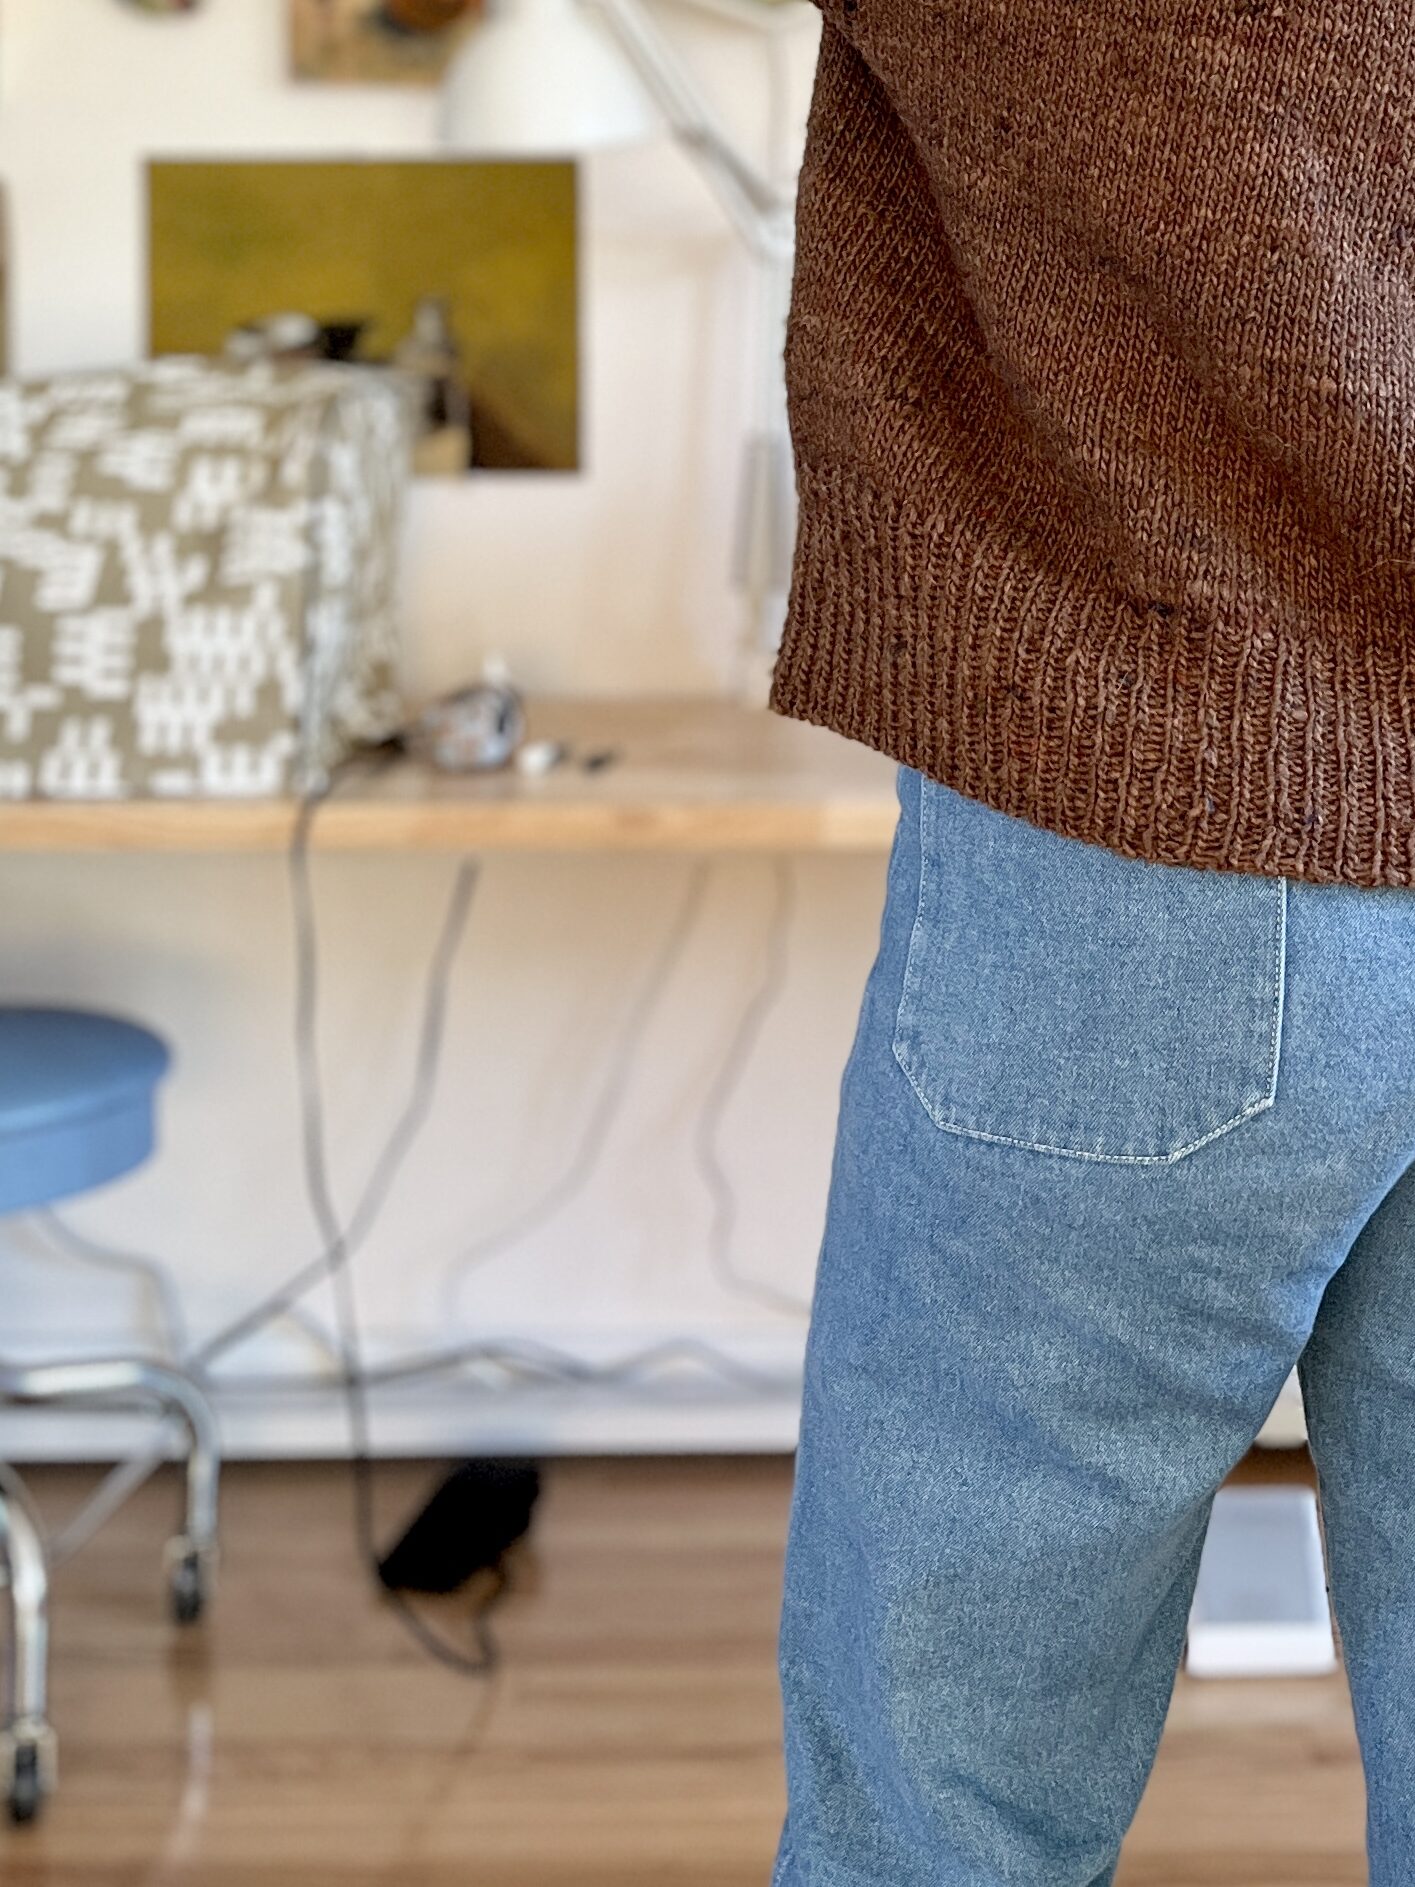
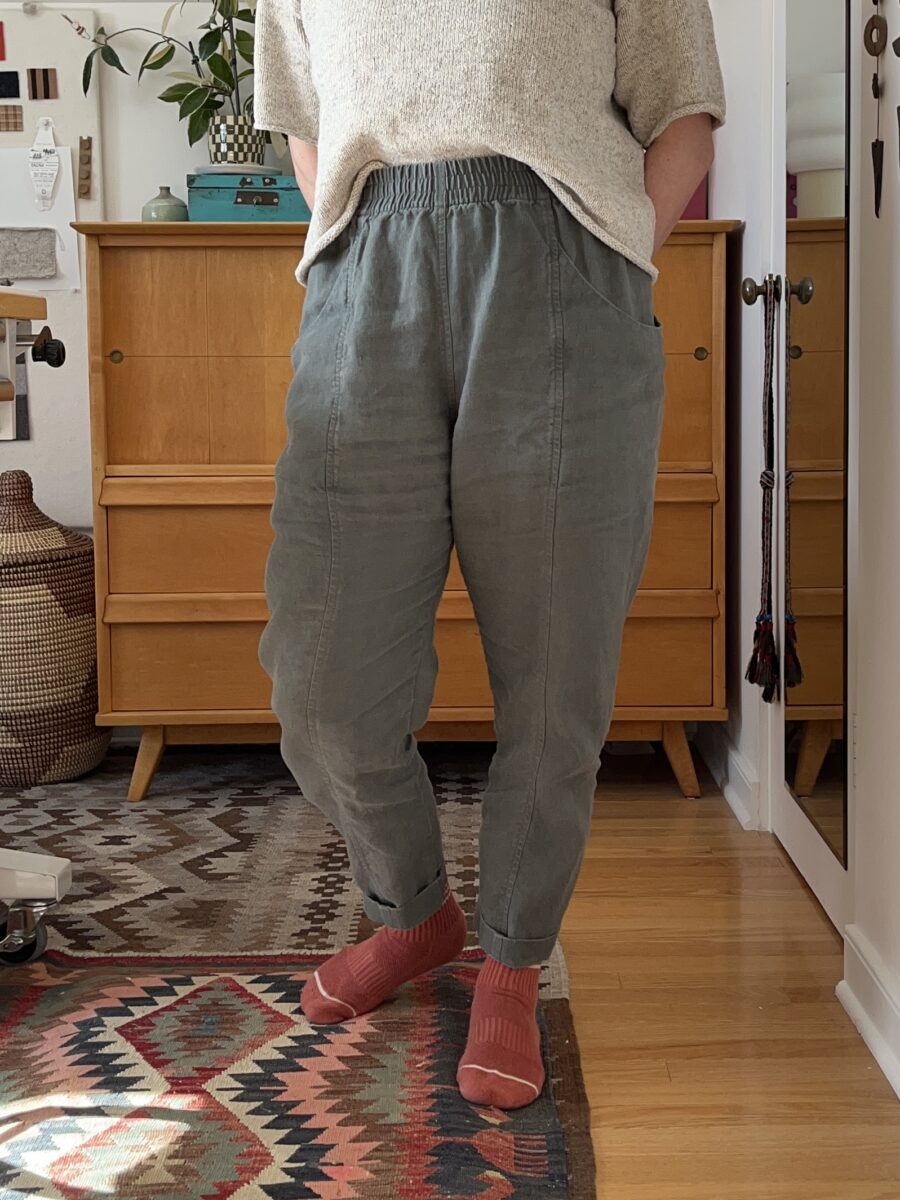
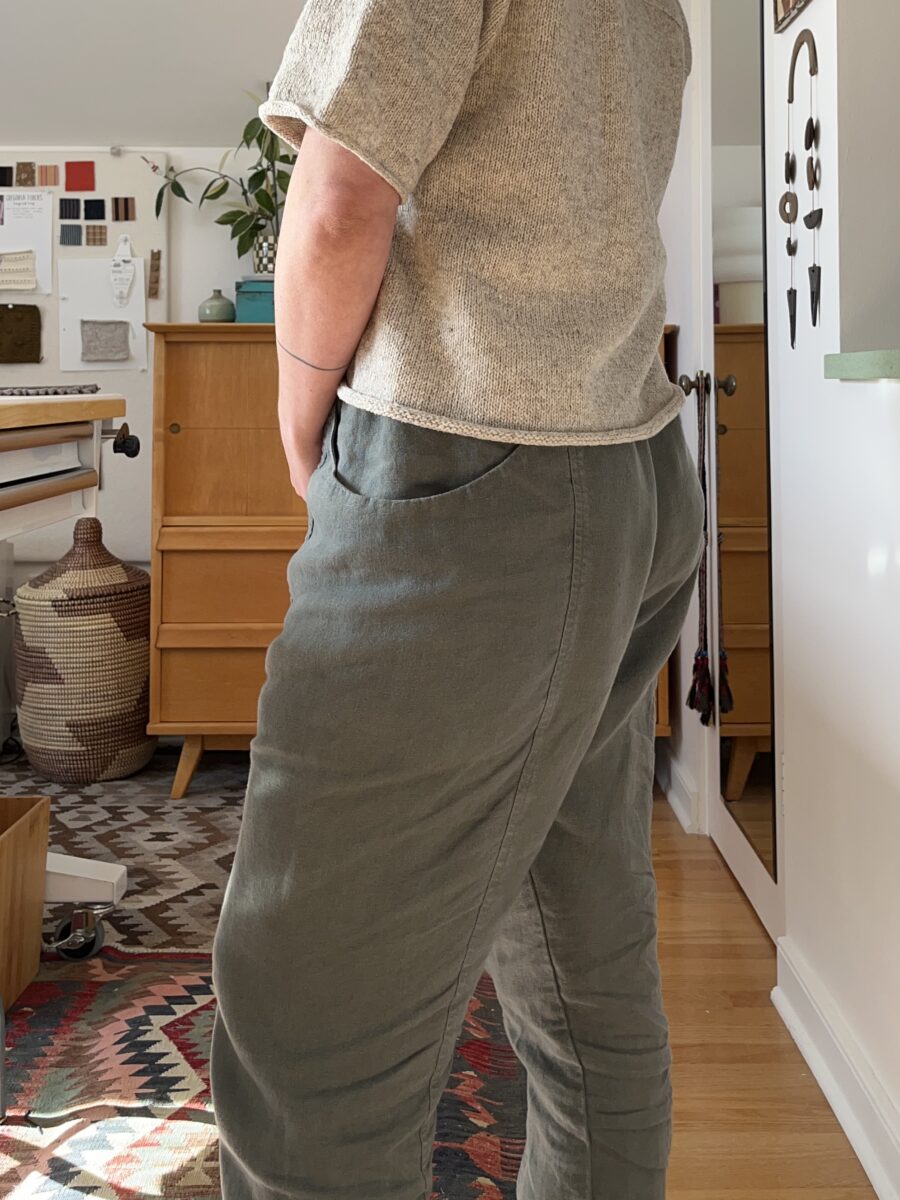
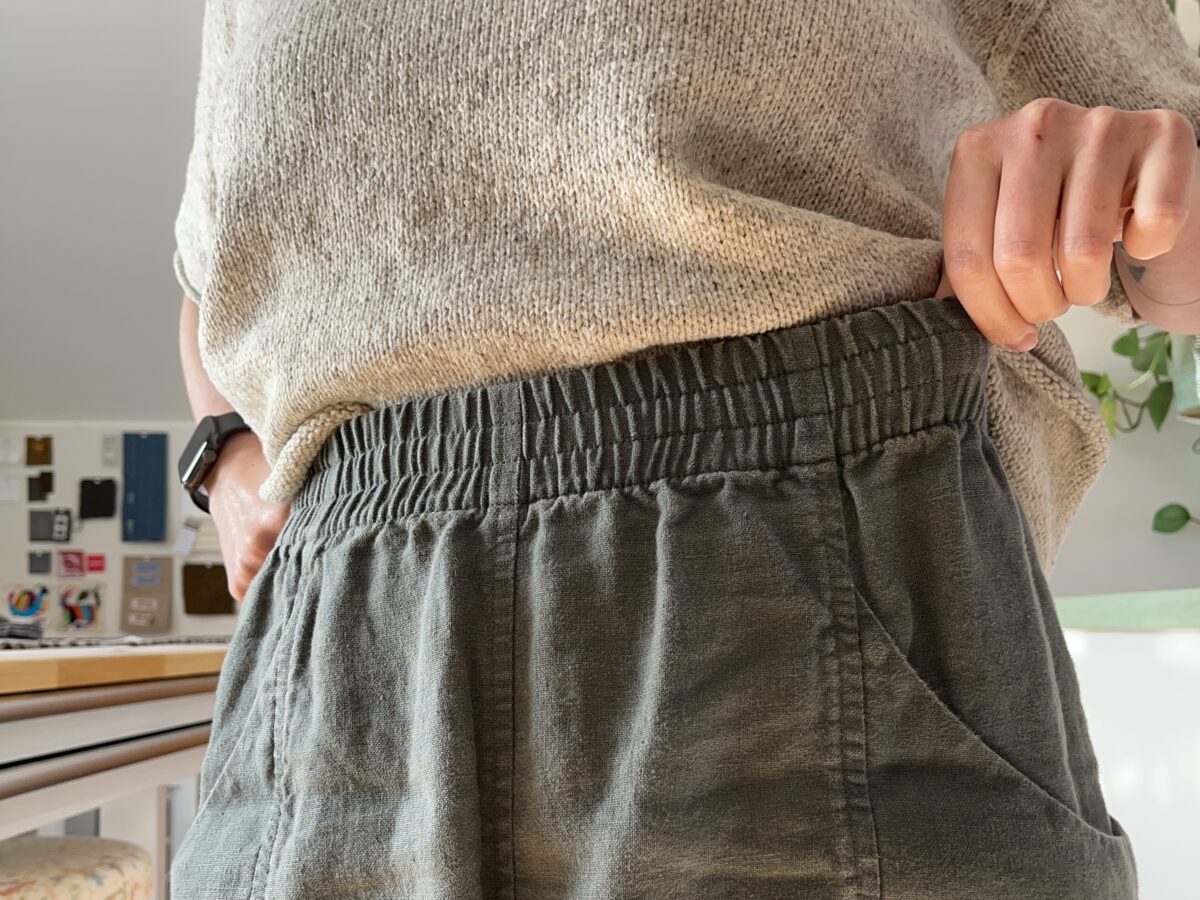
Stretchy Pants and a Knit Tee
I have been trying to work through my fabric stash and finally sewed up this lovely linen I bought ages ago from Stonemountain. I have no idea if they carry it anymore, or what it is, but it’s very nice!
I made the Elizabeth Suzann Clyde Work Pants in size 10. I just love how the waistband looks. After one wash, it was already perfectly worn in.
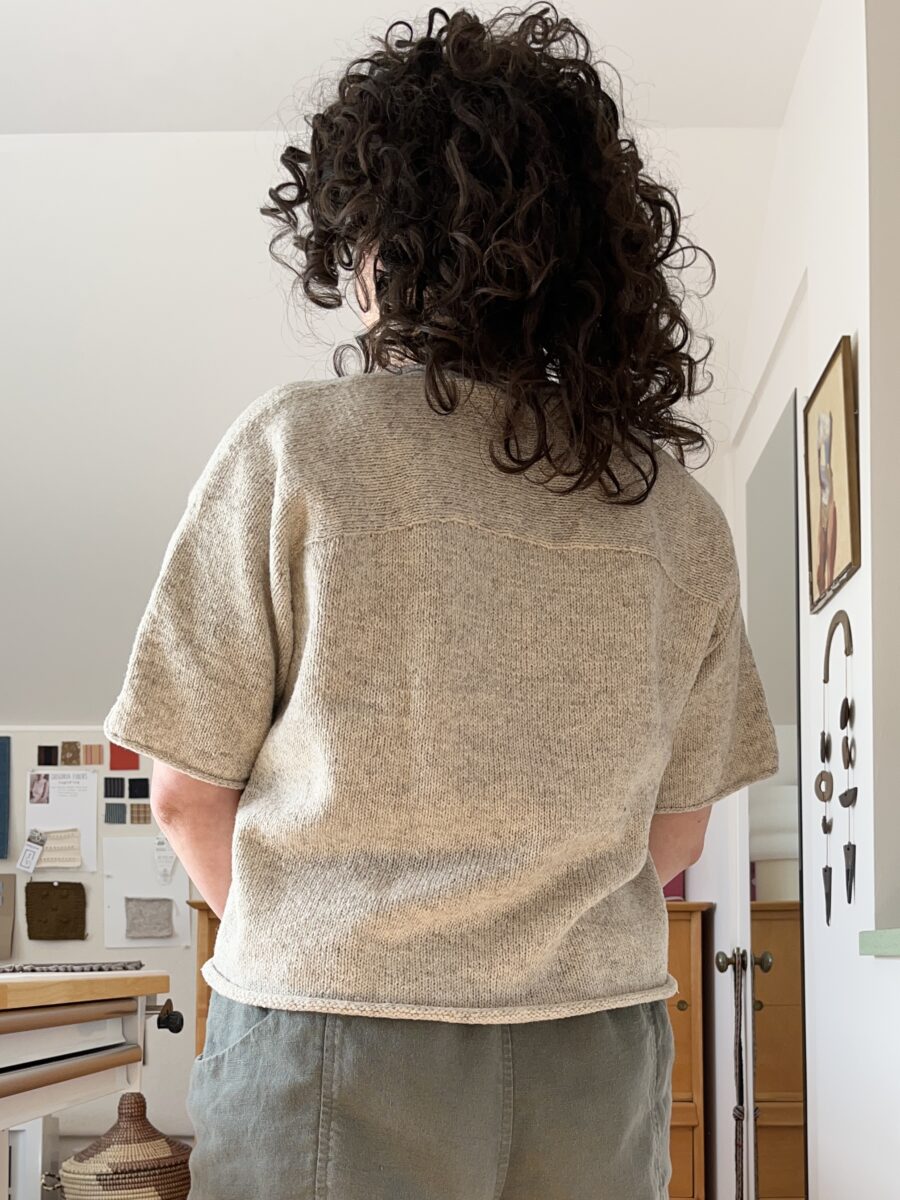
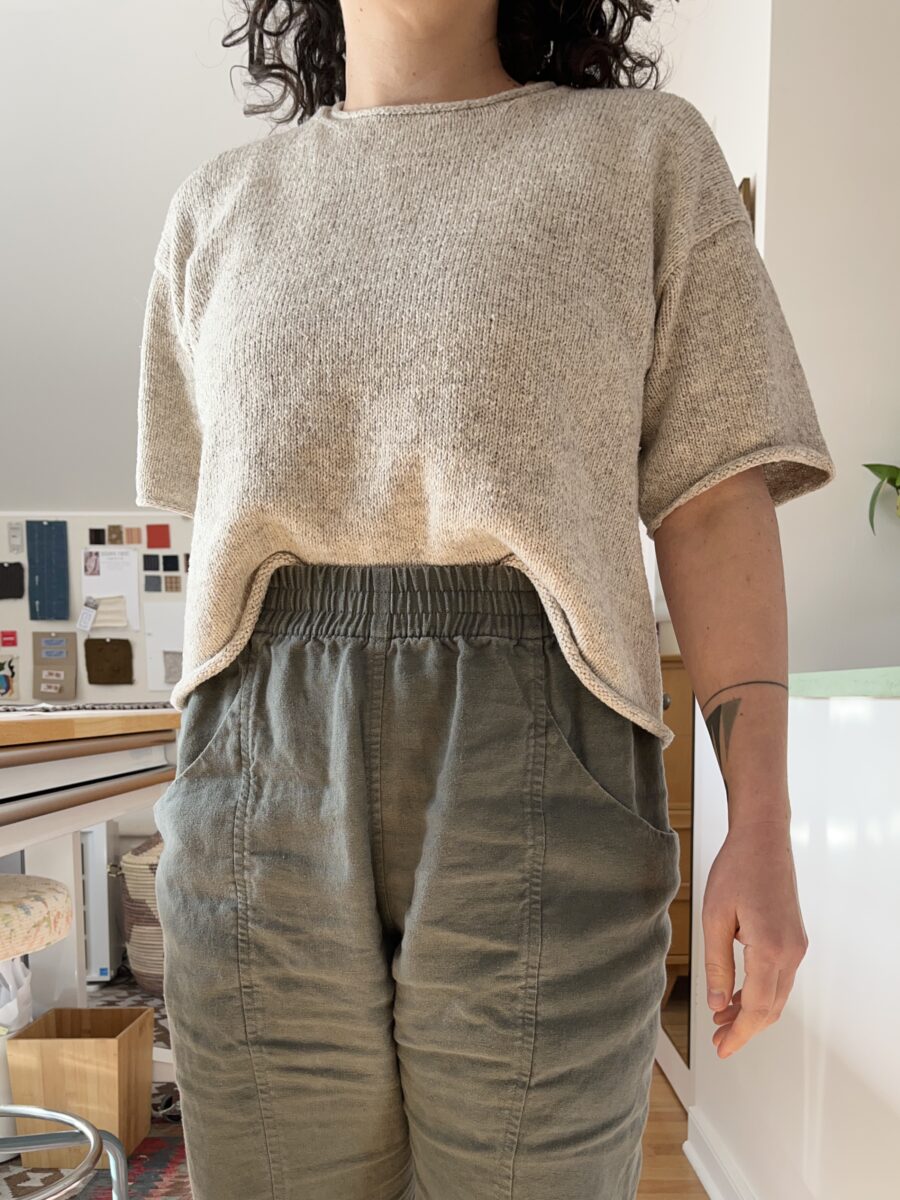
And I finished my summer knitting project last month. It’s totally fine, I think it’ll be much too warm to wear in the summer anyway.
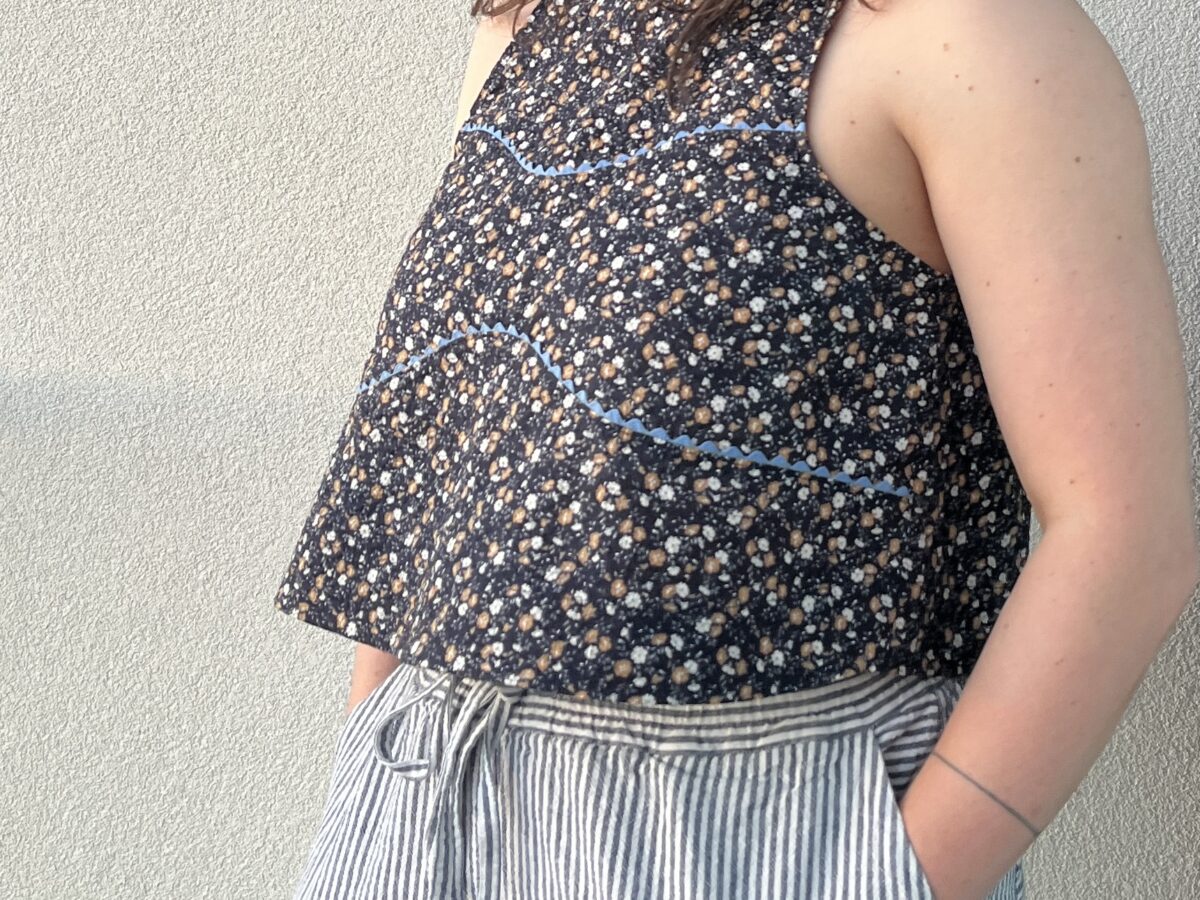
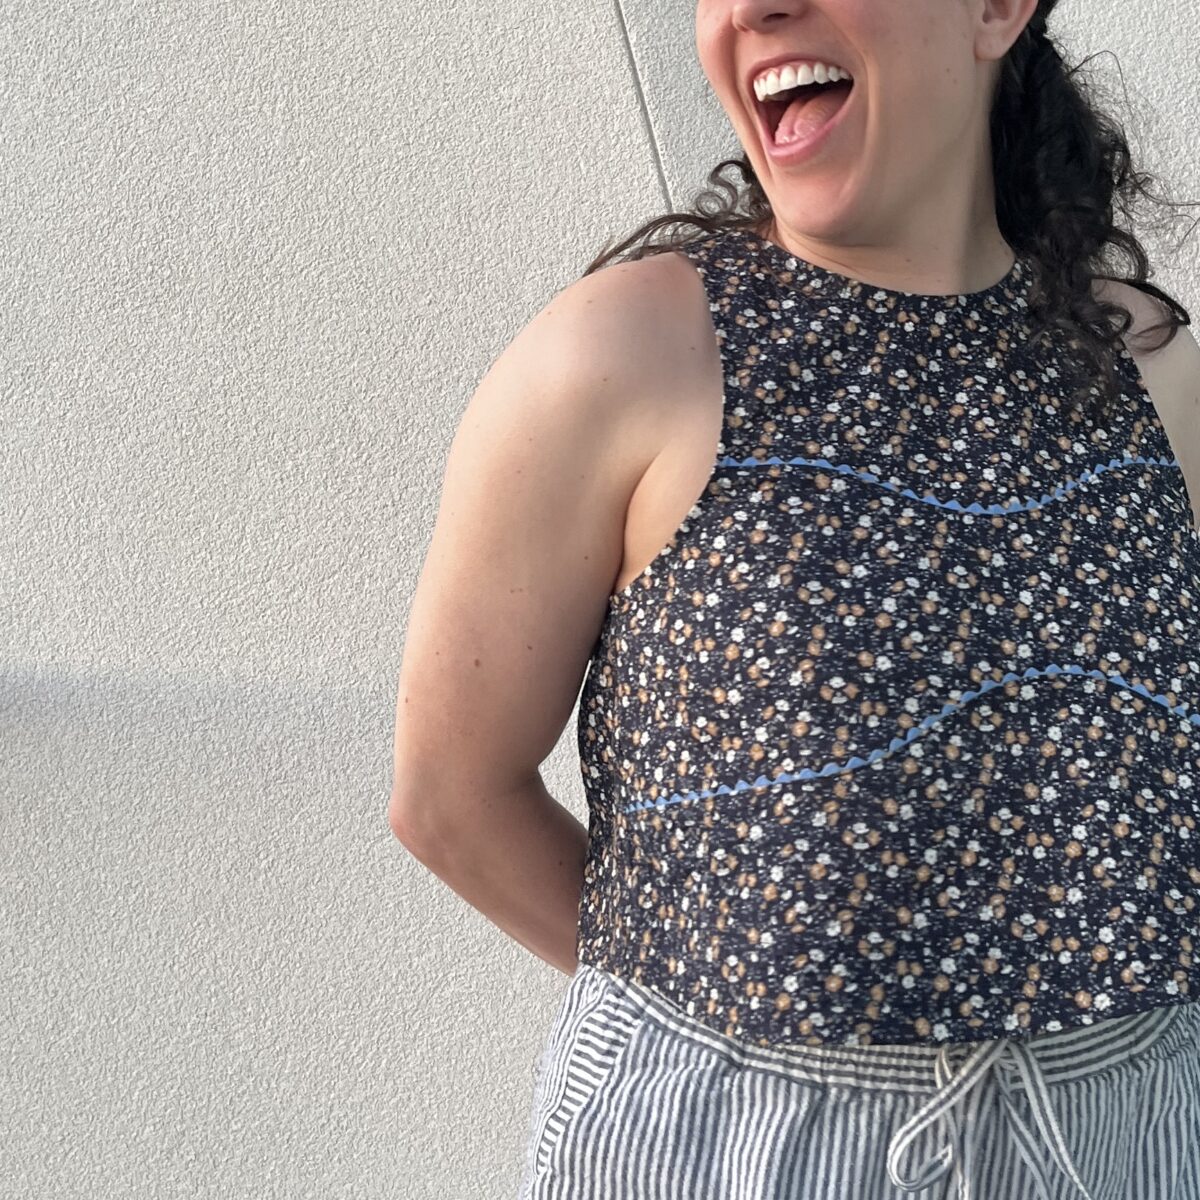
I love that Sadie was inspired by those trashy bikini t-shirts when designing this top. The style lines add so much interest to an otherwise simple sleeveless top.
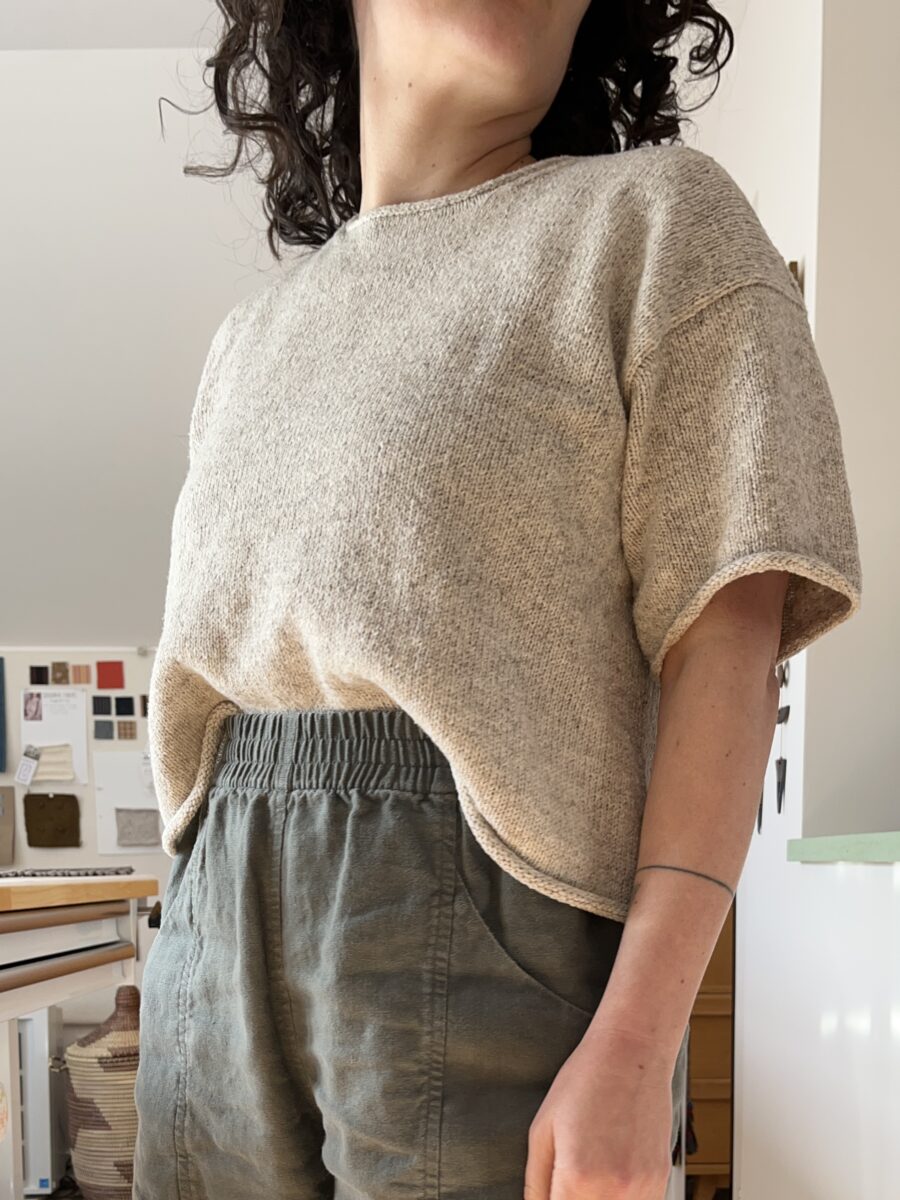
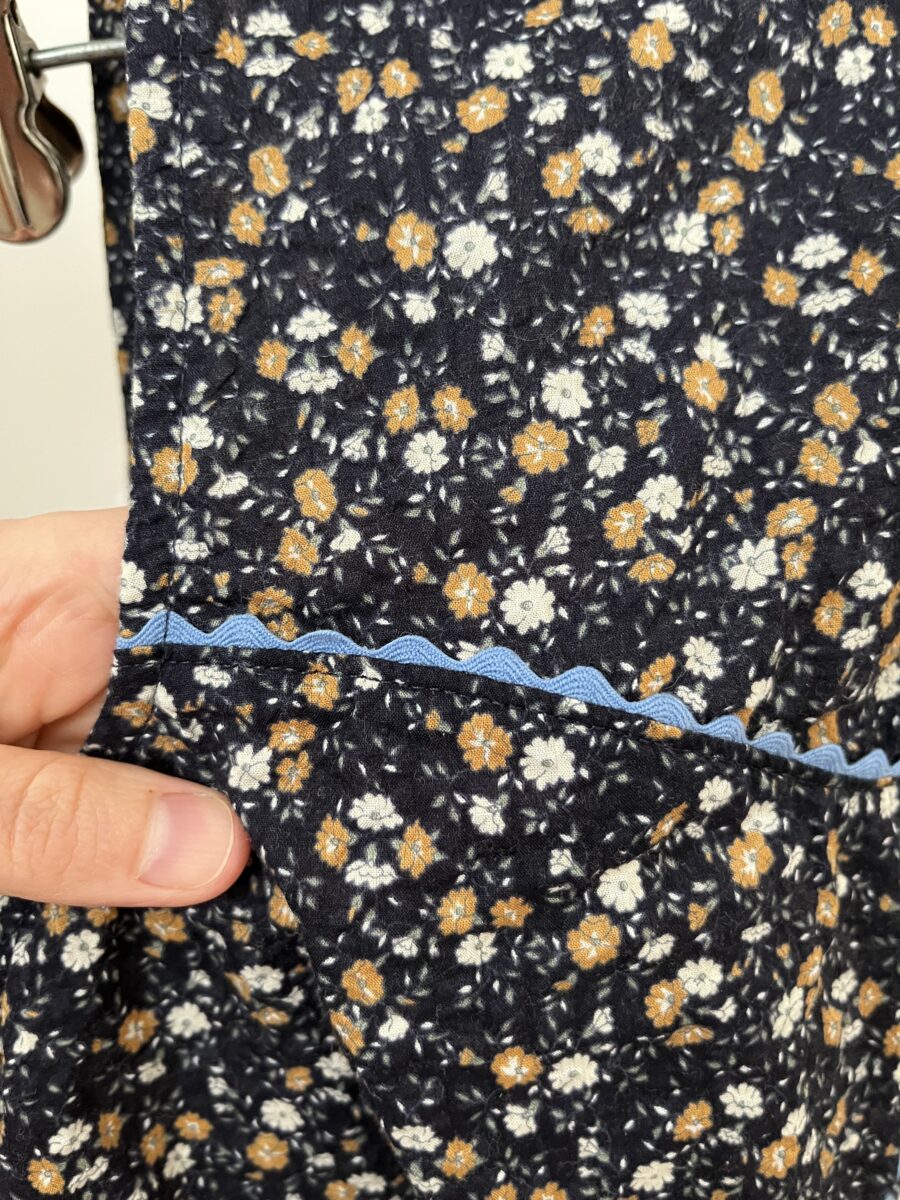
This version confirmed I’d chosen the right size, so I’m definitely planning to make a classic striped version next out of more precious fabric. For this one, I used crinkle cotton and applied rickrack to show off the style lines.
Basting the rickrack stretched out the fabric a bit, so the opposite curves of the shirt needed to be eased together than what’s instructed. I found the armhole and neckline bias pieces to be a little too wide for this fabric and trimmed them down about ⅜”.
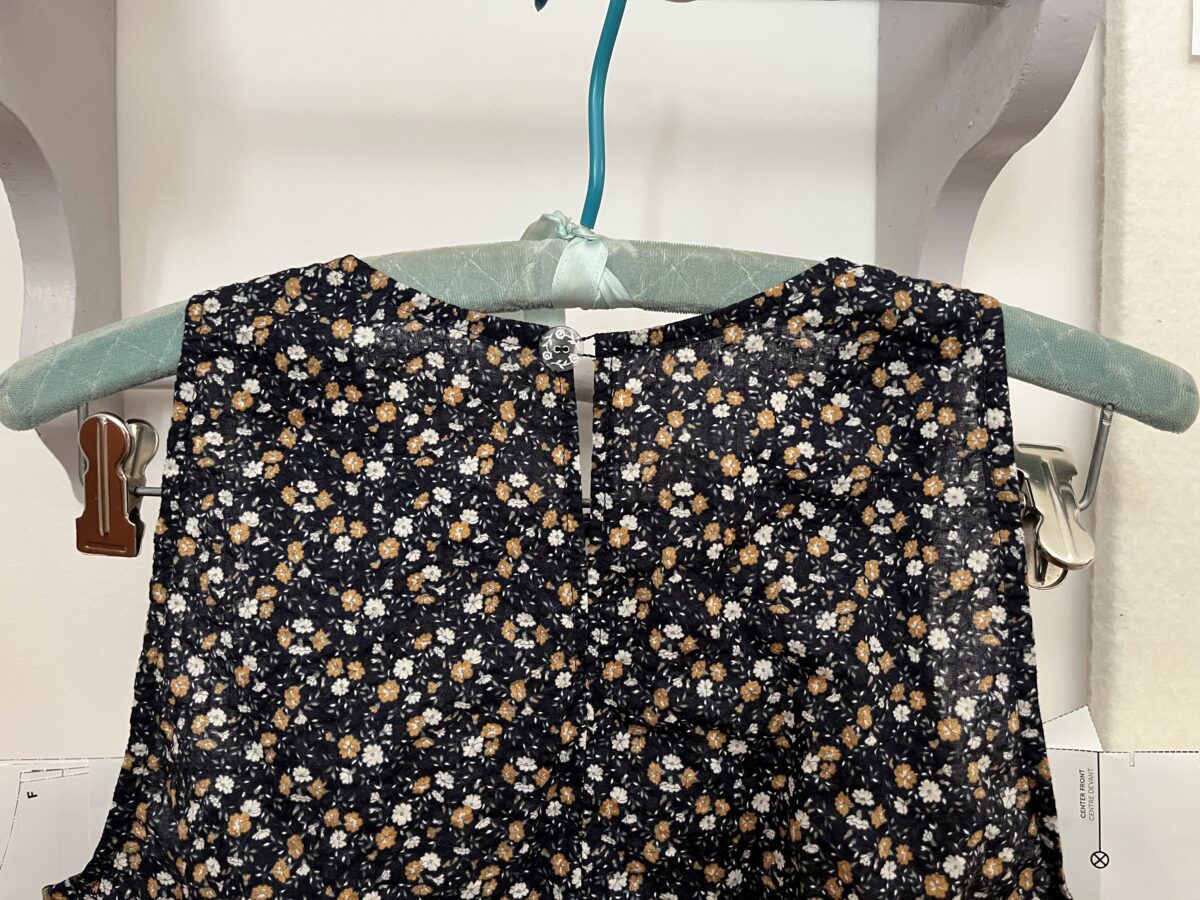
Blomma + Honeygirl
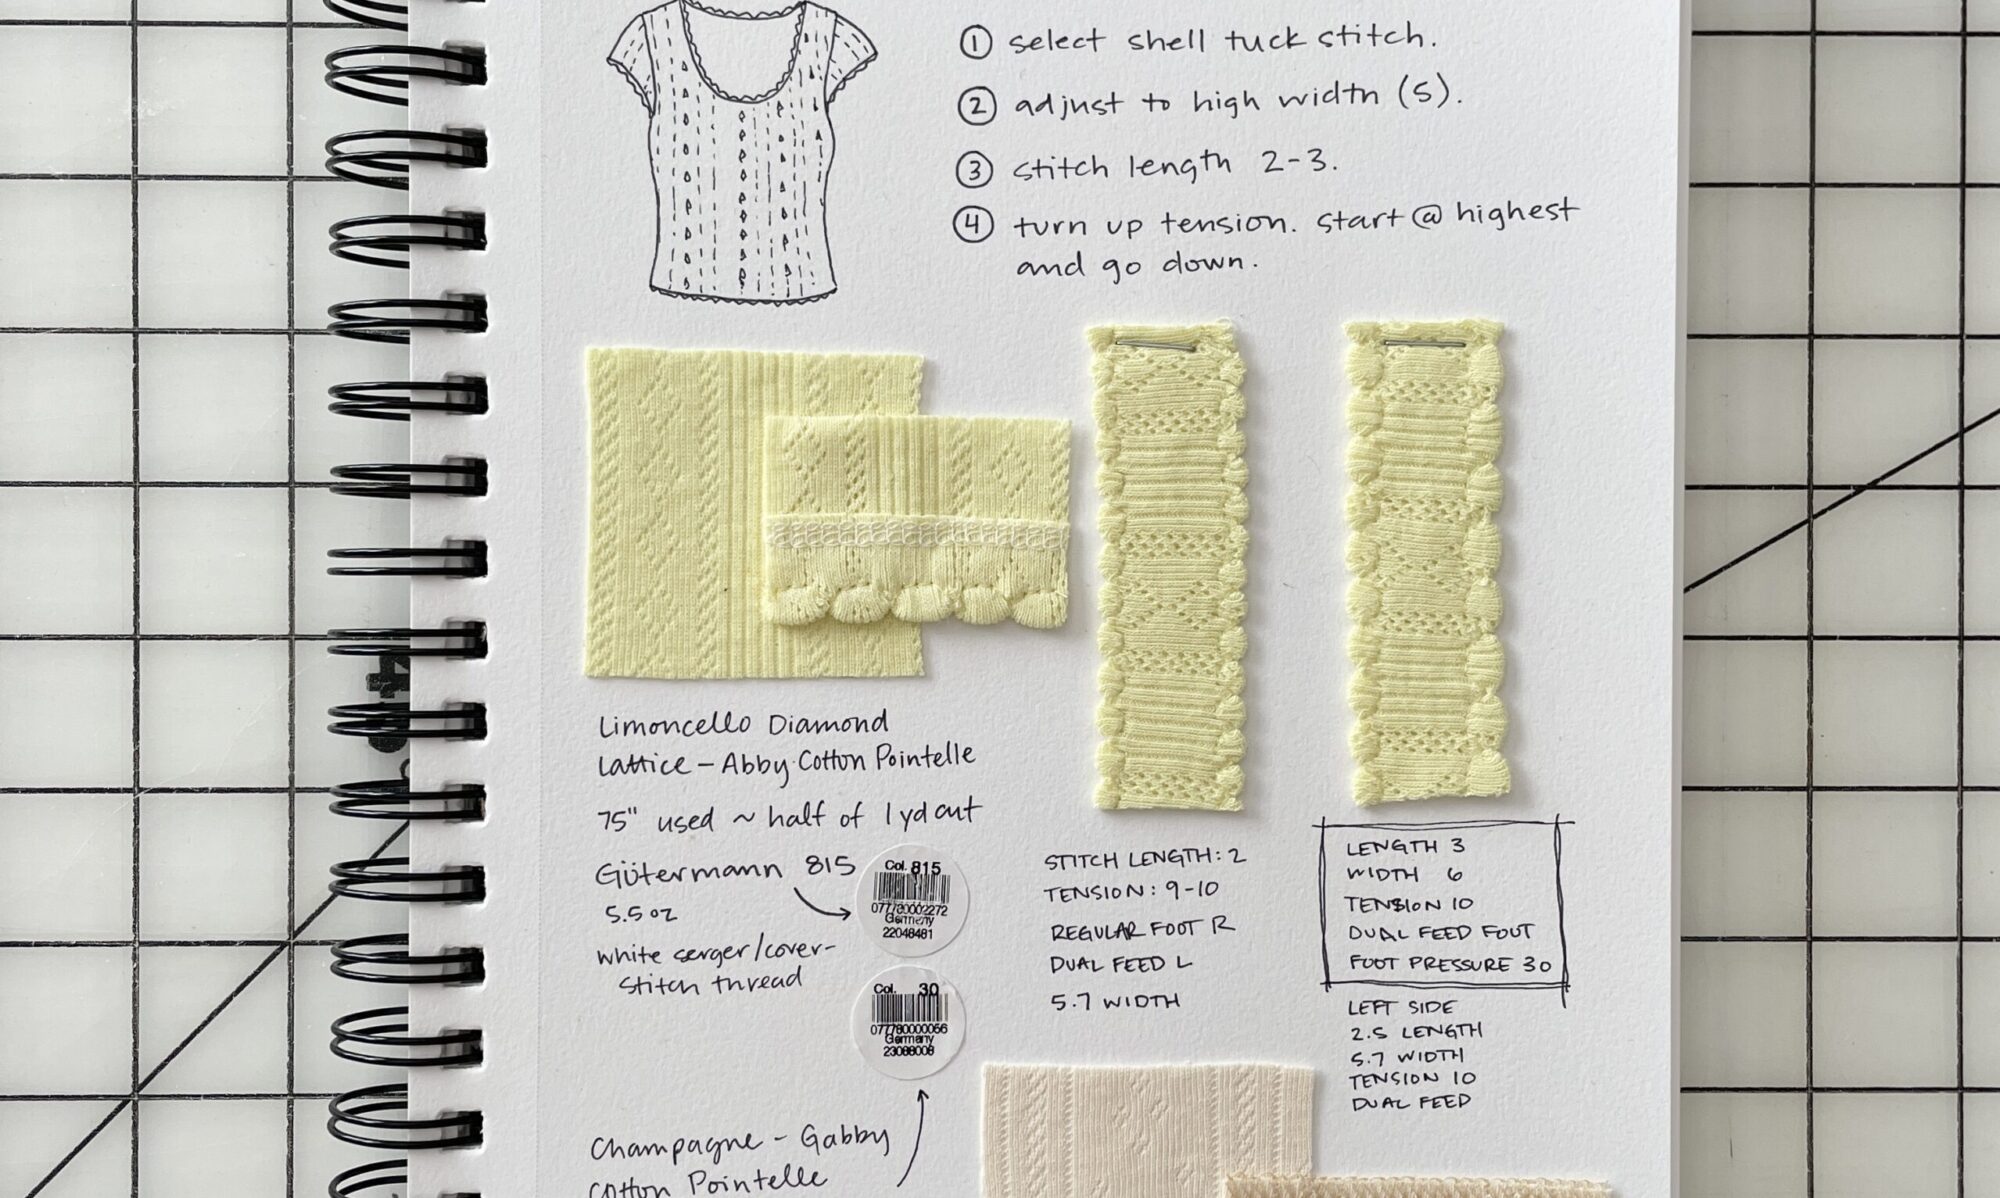
The Honeygirl is my favorite shirt pattern. The neckline finish, the overall fit, and its recommended fabric are all the best. So when Paradise Patterns released the Honeygirl Cardigan, I knew I’d be making at least one.
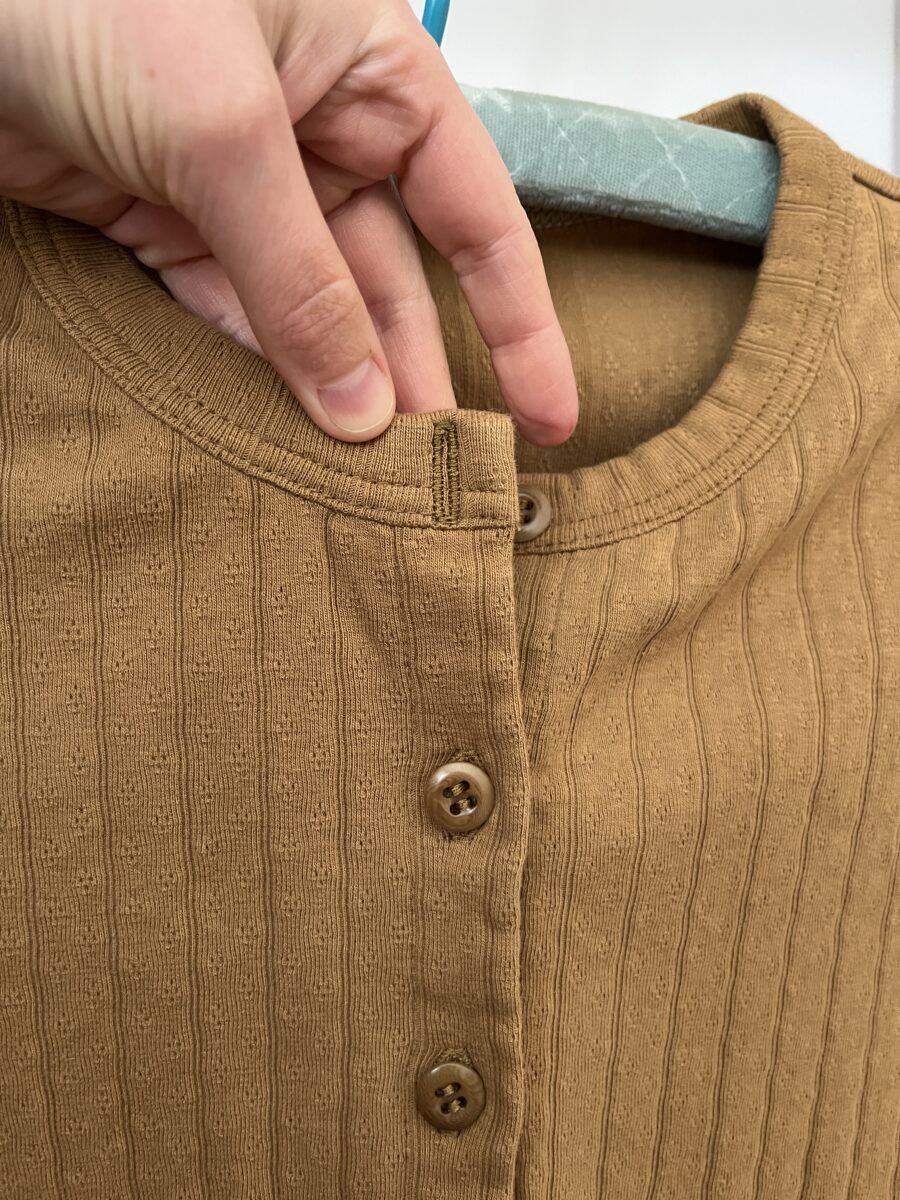
This Lyrical pointelle was perfect for this pattern. It’s substantial enough for the button placket and is the perfect weight for a lighter layer. I also had perfectly matching buttons in my stash.
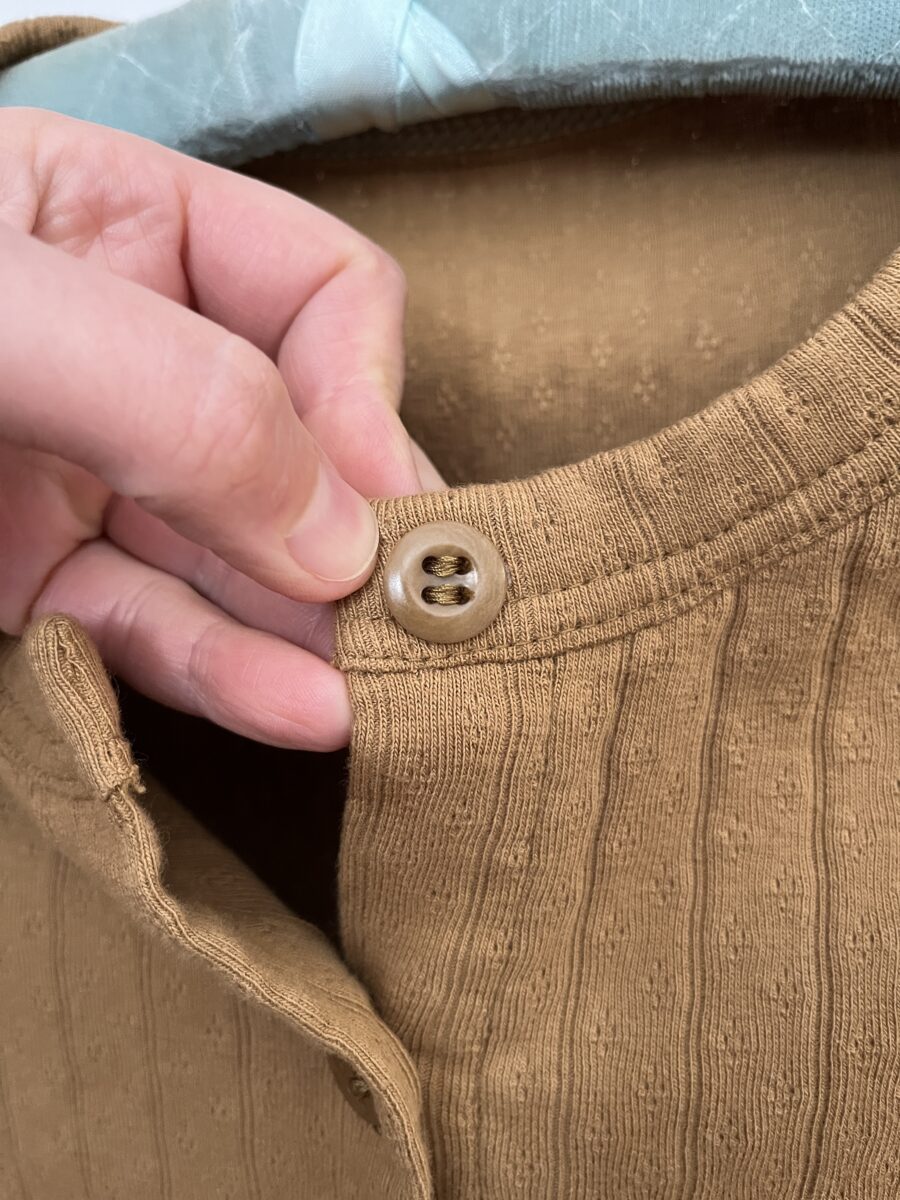
The hem and neckband were attached by coverstitch and I am curious to see how the stitches at center front will hold up over time. I knotted the threads and added a dab of FrayCheck just in case.
The top buttonhole isn’t cut open – for some reason I thought centering the buttonhole on the neckband would look better than what was instructed and it does not. It warped the neckband and is so close to the edge I was worried cutting it open would cause more issues.
And I really don’t know why I’ve waited so long to make the Blomma. It’s the tank equivalent of my favorite t-shirt. I had just enough leftover pointelle from the cardigan to make it.
I wasn’t sure if these would work as a set because the necklines are so similar, but I’ve worn them together a few times and I like it!
And finally, here’s my contribution to an upcoming fabric swap. I’ve had some of these in my stash for years and it feels great to set them free.
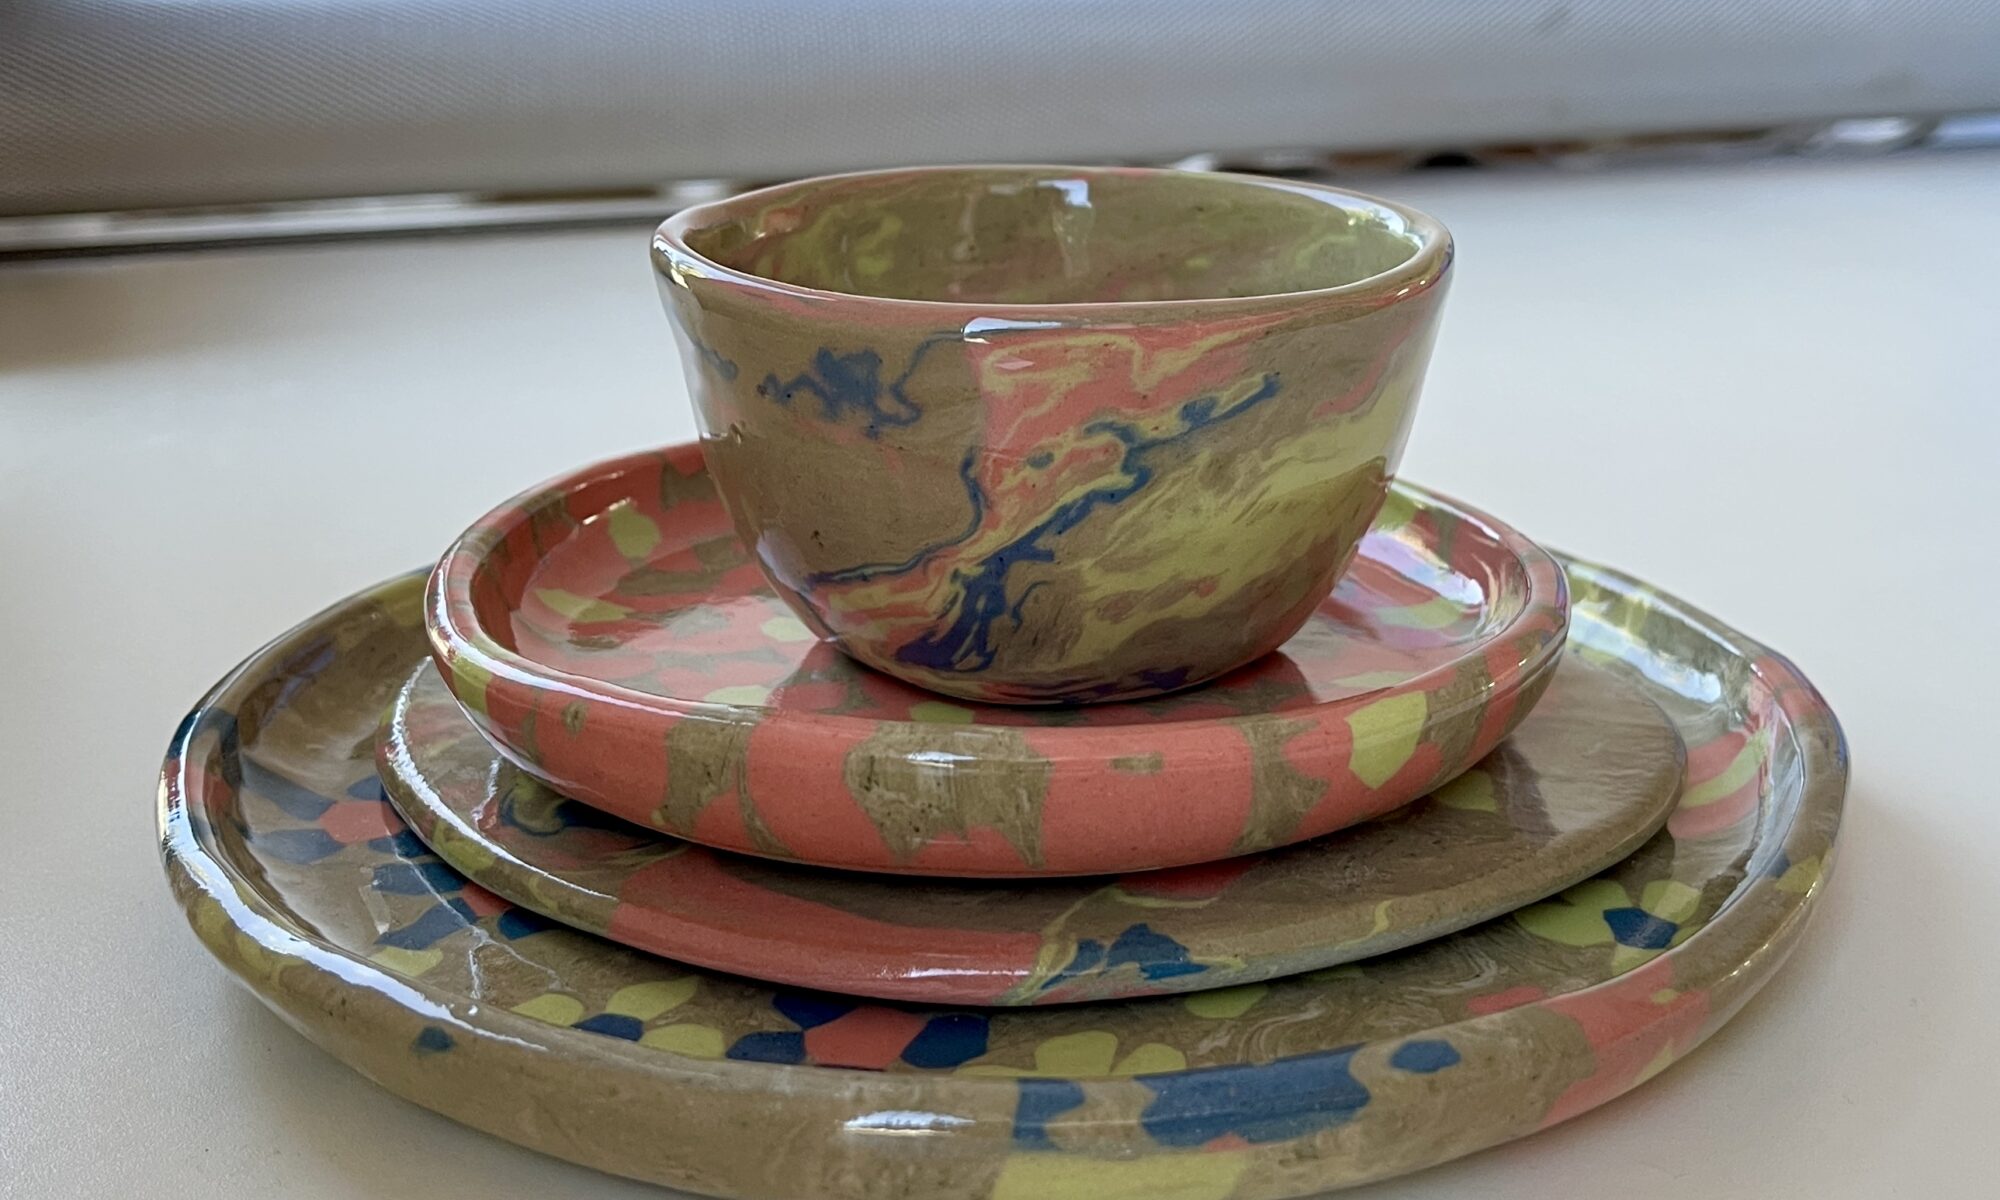
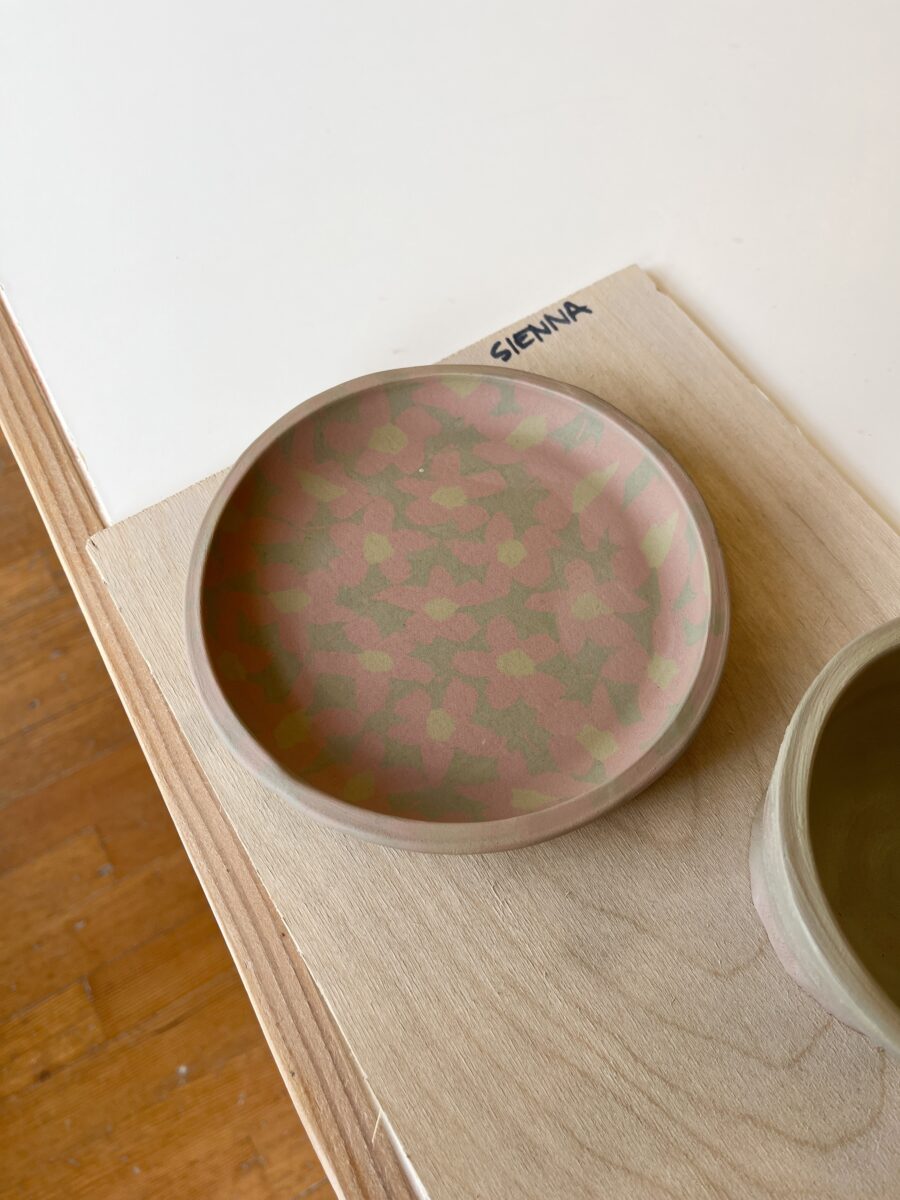
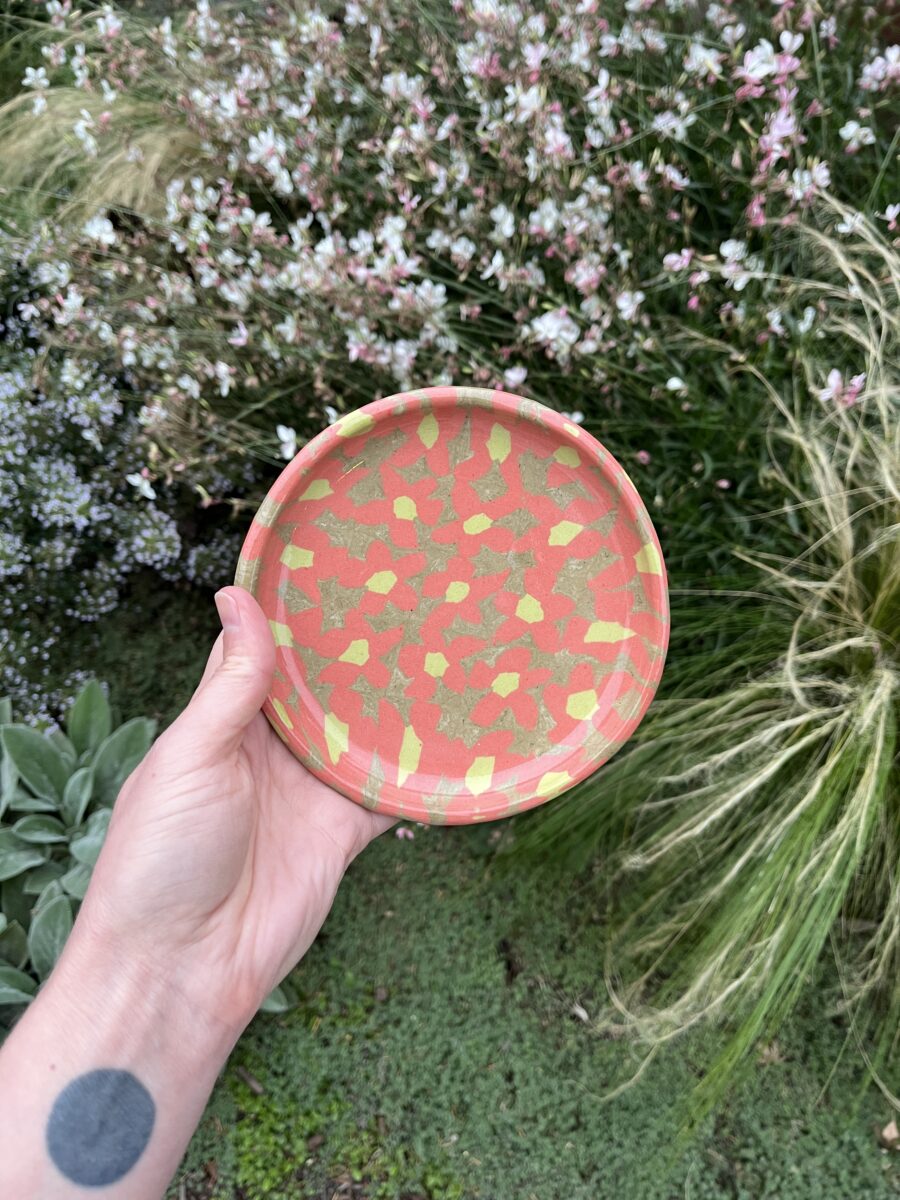
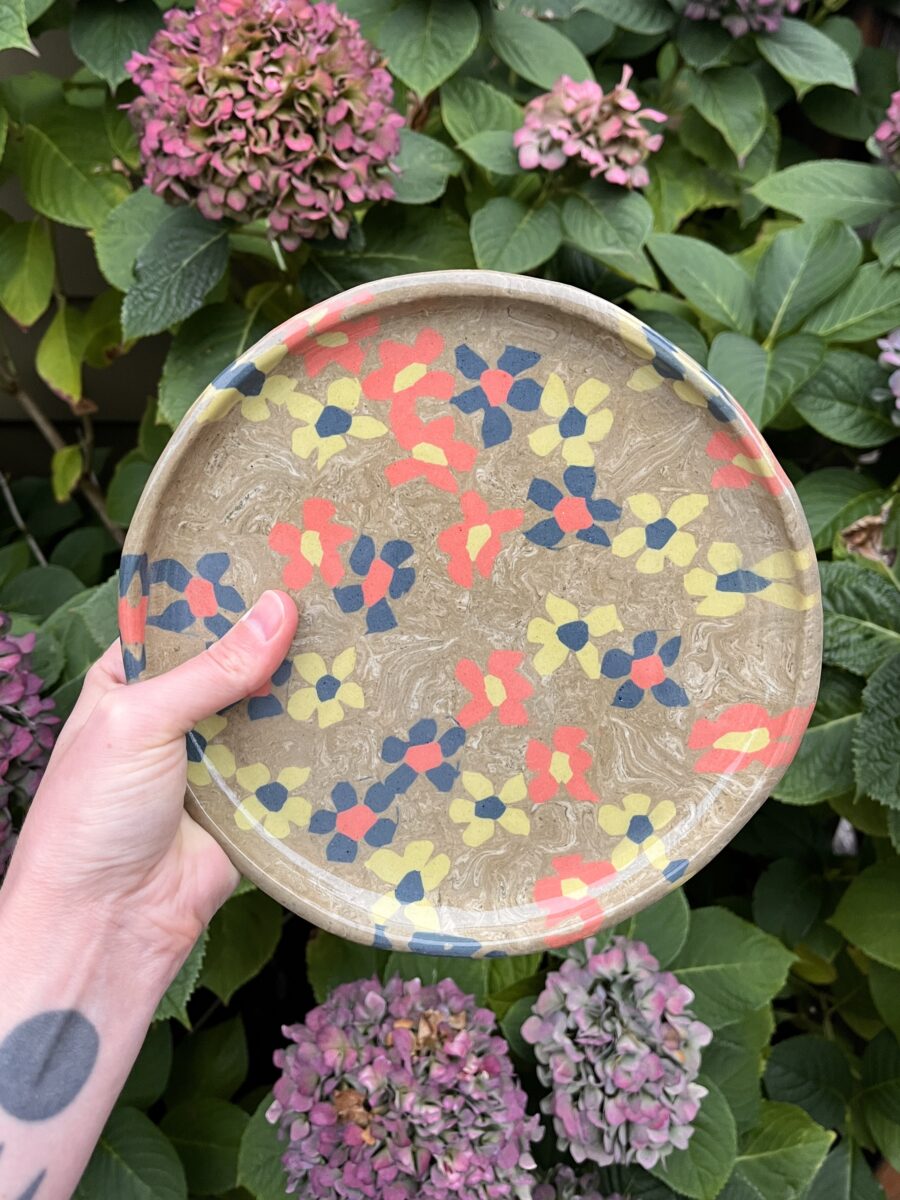
So pleased with this little flower plate. The background color is Avocado 5%, the petals are Lobster 10%, and the centers are Chartreuse 10%.
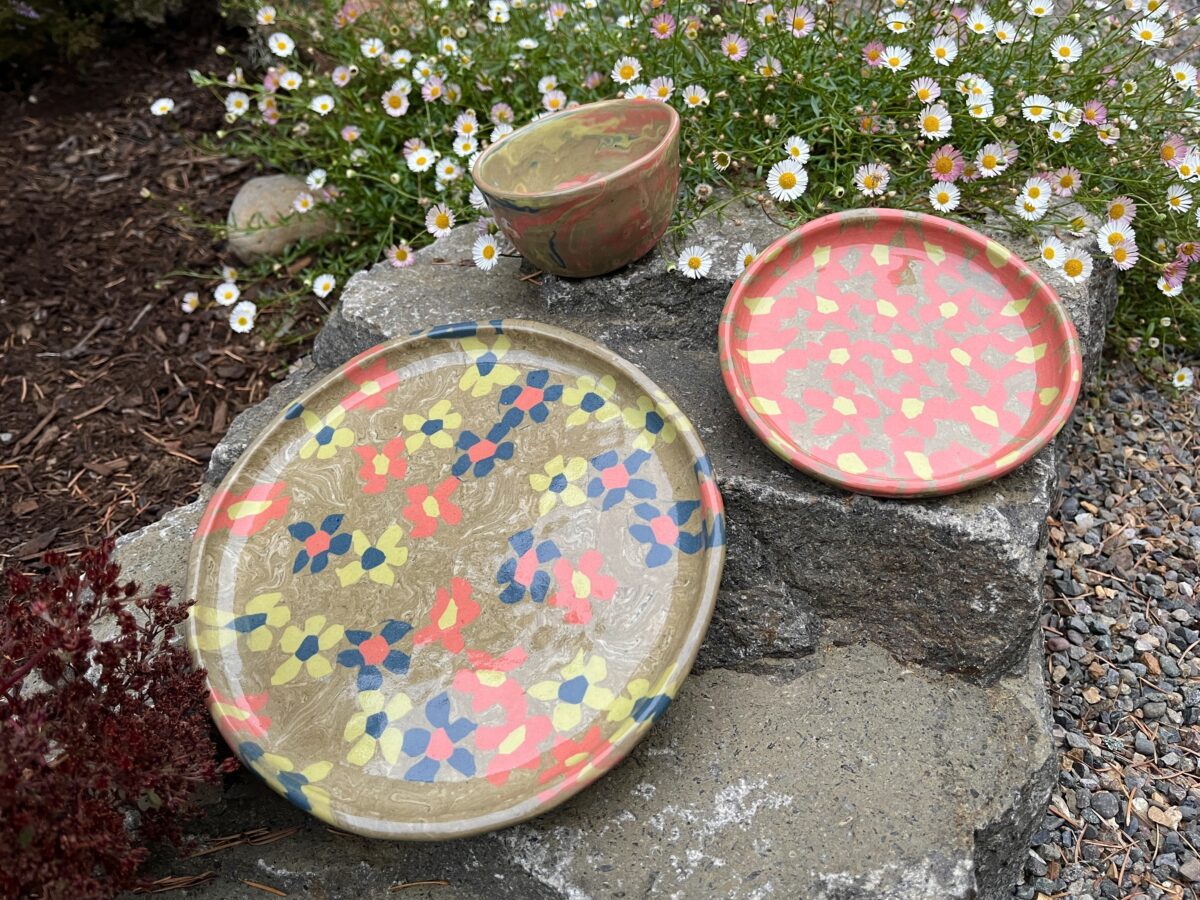
Also very pleased with this bigger guy. It features the same colors as above, but with the addition of Peacock 10%. I’m pretty sure the Avocado background was the last bit of colored clay I made this round and I clearly was done wedging because the stain was not fully incorporated.
And I made a little pinch bowl out of leftovers. The bottom is my favorite.
I recently decided to make a quilt inspired by this pillow. I found a tutorial that makes two blocks from two different colors of 14” x 14” squares that look like this:
I played around with some color combos before settling on Kona cotton “wasabi” and “pickle”.
While waiting for fabric to arrive, I pulled out the only solid scraps in my stash to test it out.
I haven’t calculated how many blocks I’ll need, but I’m excited to start a new quilt project.
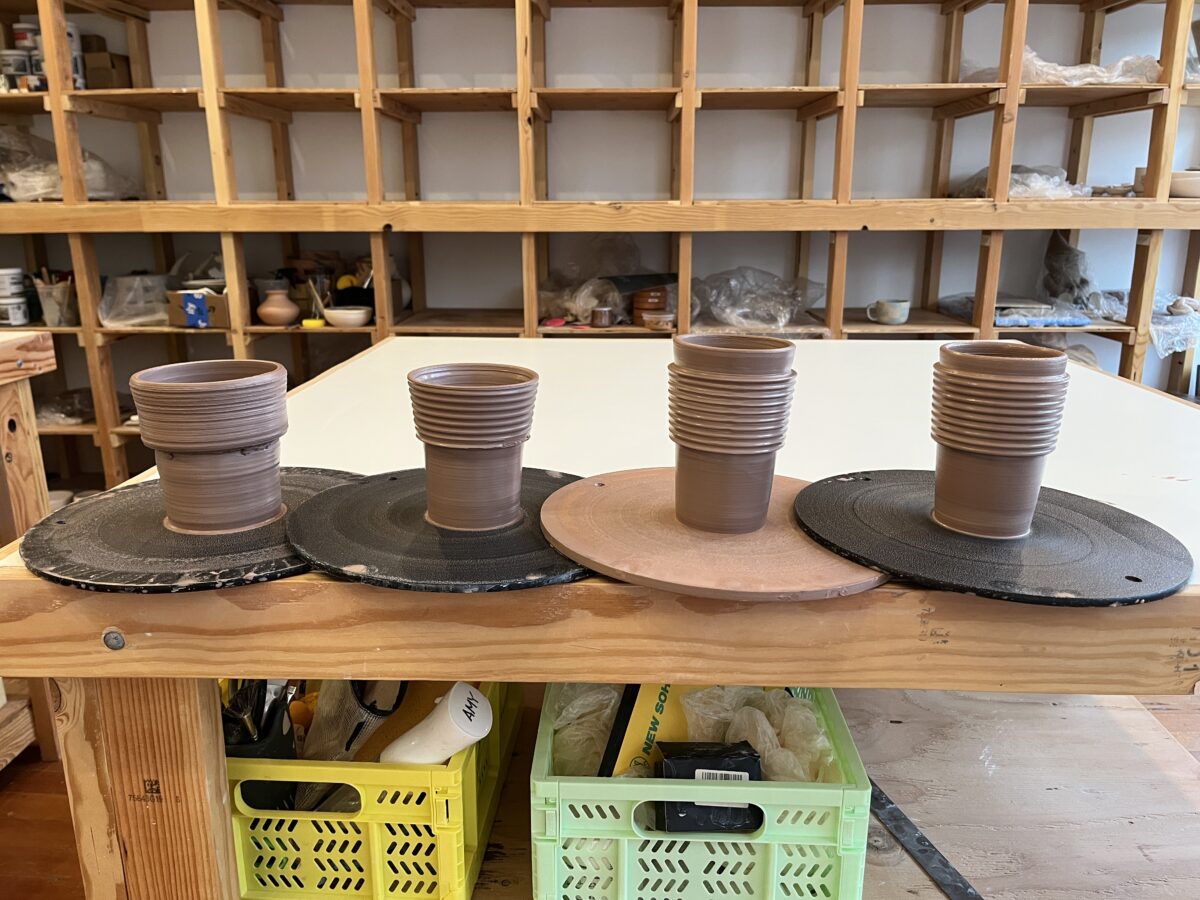
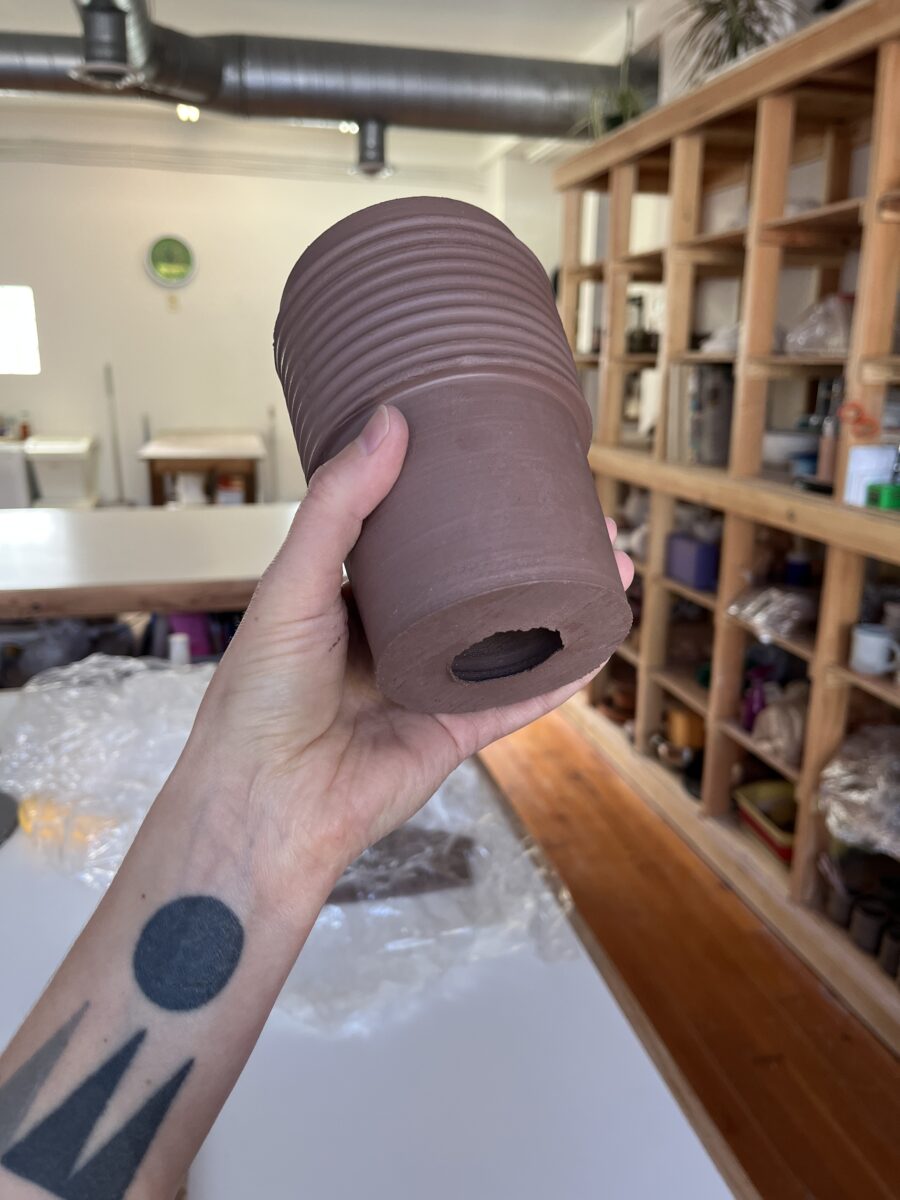
I bought this rib from Garrity with the goal of making some portable hot drink containers.
It took about three attempts before I started to get it. Ideally, I should have documented how much clay I used here, but I honestly didn’t think I’d make anything useable this first round.
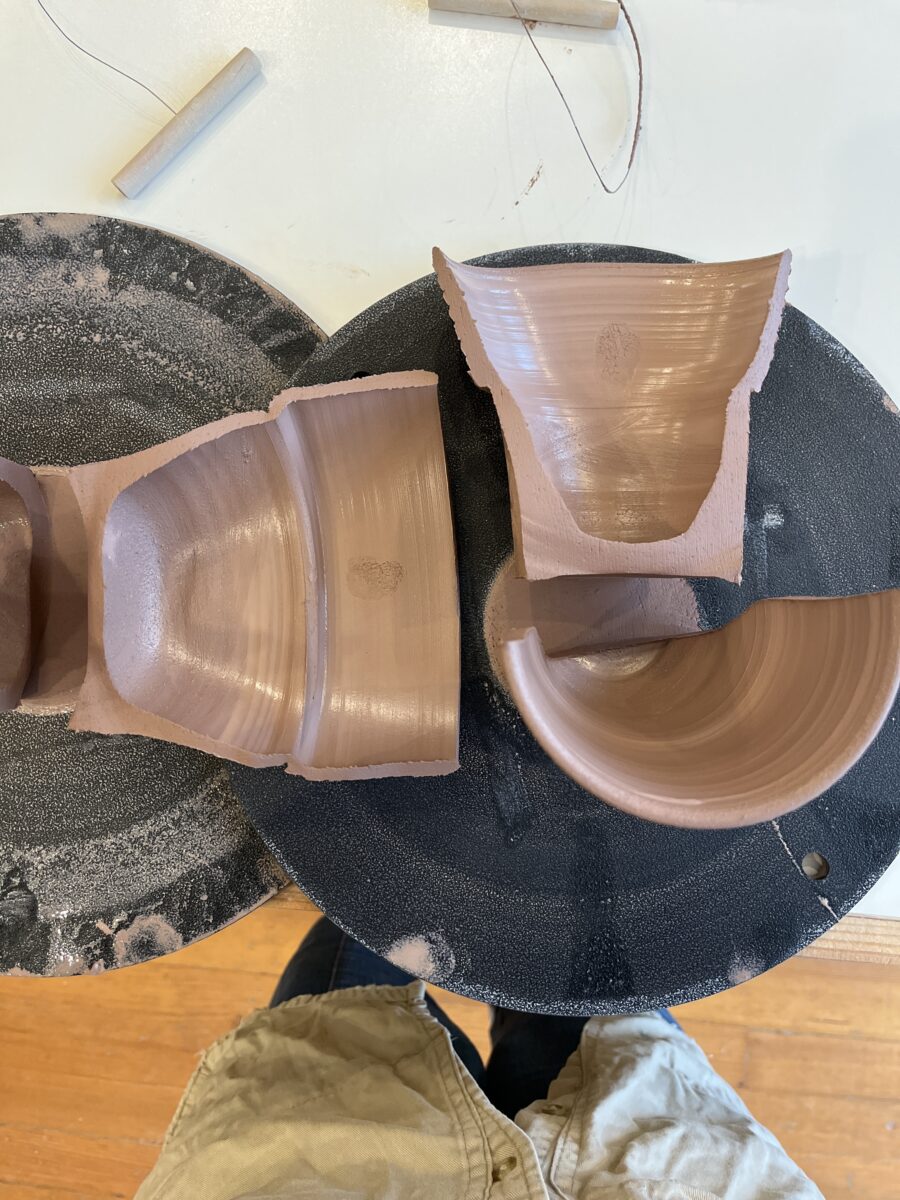
I haven’t thrown in a few months, so naturally there were some casualties.
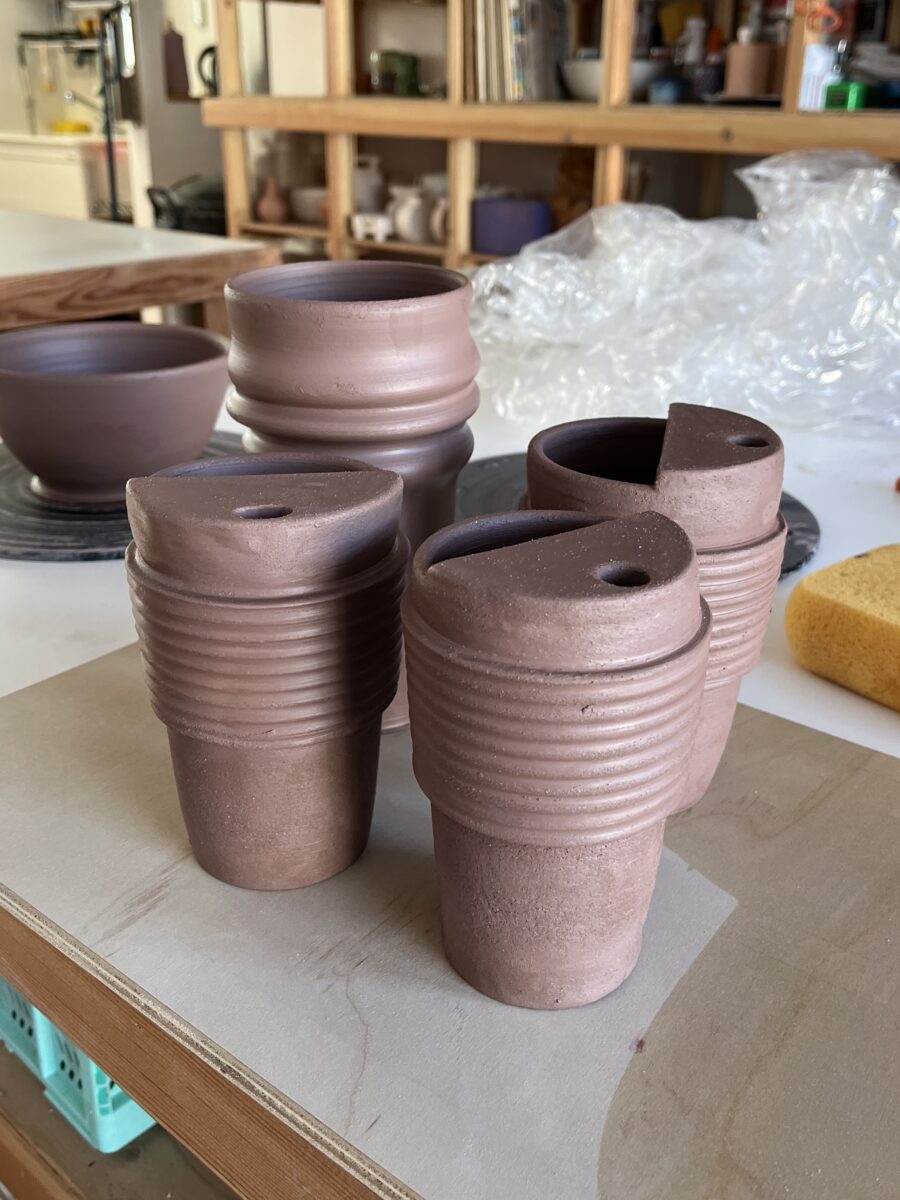
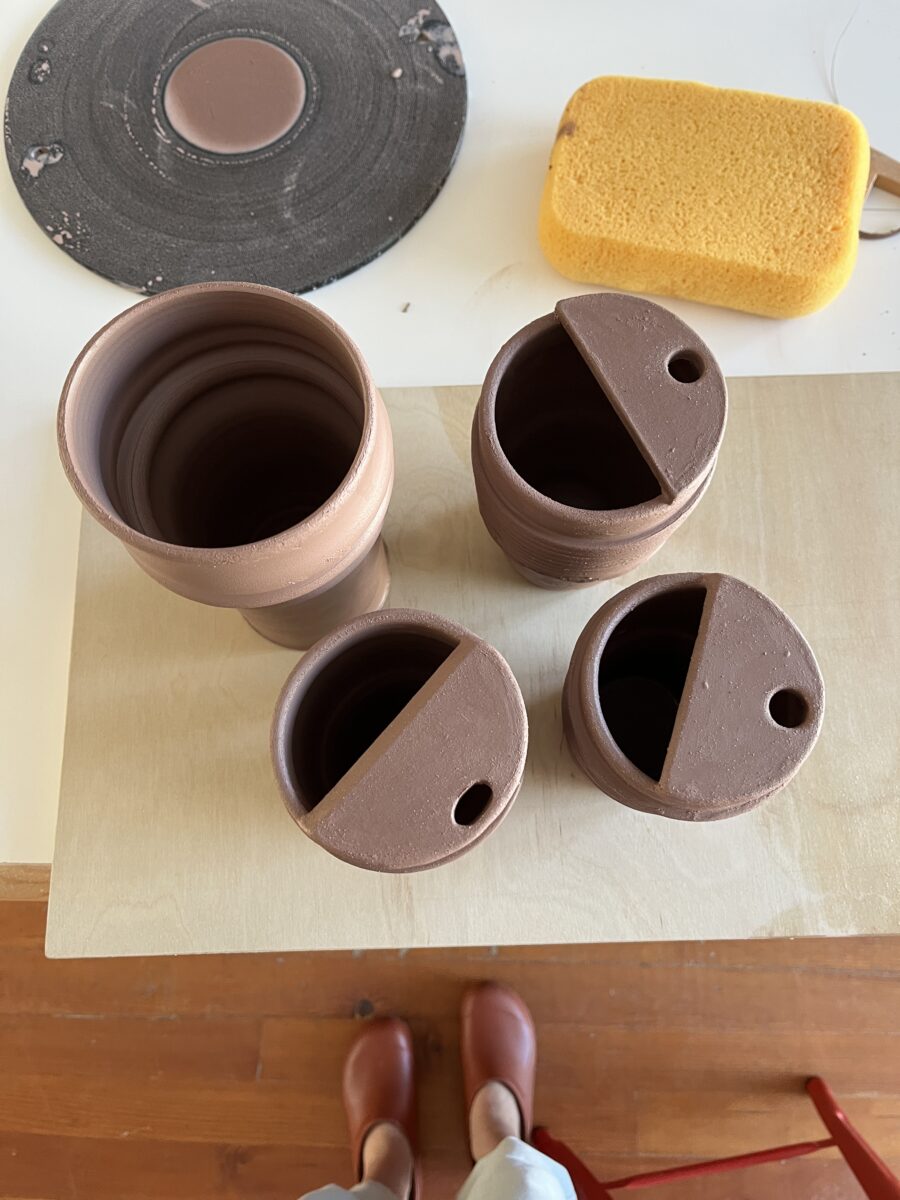
I rolled out slabs for the tops the same day I threw the mugs and then didn’t get back in the studio for a while. The slabs were much dryer when I finally got around the attaching them, so hopefully they actually adhere to each other.